How to Build a Backyard Beach
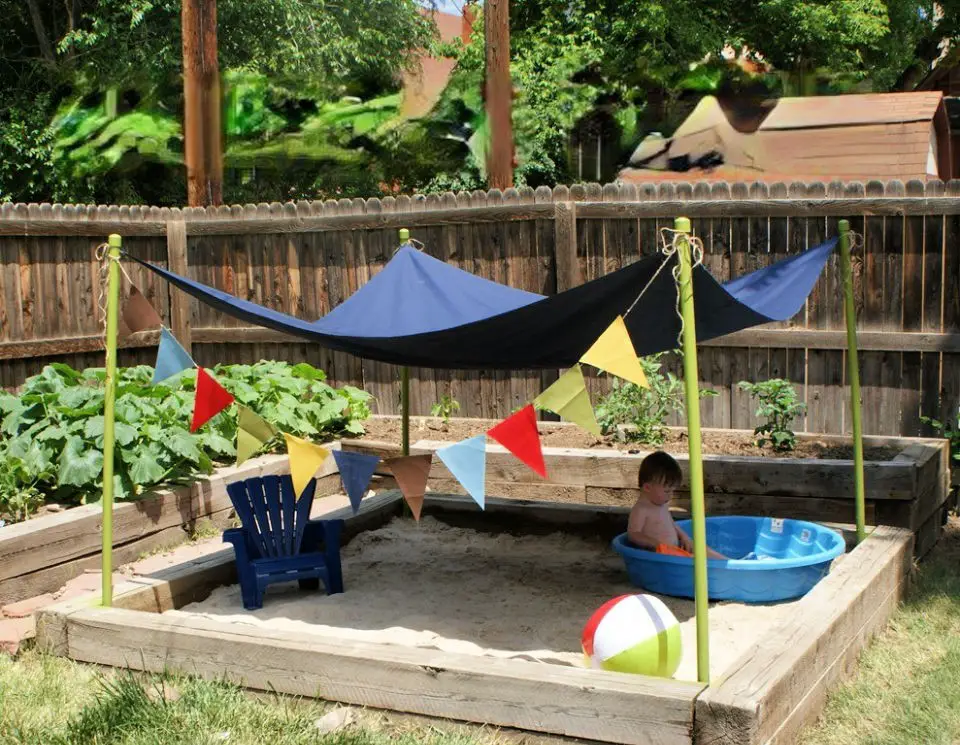
Transform your backyard into a haven of fun with a one-of-a-kind homemade sandbox! Starting from scratch, you can create an enchanting play area using a 7ft by 7ft space, some elbow grease, and a few simple materials like PVC pipe, landscaping fabric, and sand. The process is surprisingly straightforward: begin by clearing the area, then dig holes for the PVC pipes, spread and secure the landscaping fabric, and finally pour in the sand. To add an extra touch of whimsy, give those PVC pipes a splash of color with some paint, and fashion a stylish awning from duck cloth to complete the look. The result? A delightful backyard oasis that’s perfect for lounging, reading, or even doubling as a mini pool! And don’t worry about sand tracked inside – just give your little ones a quick hose-down before they head back in. With this charming DIY play area, you’ll be creating memories that will last a lifetime.
Make a 5 Minute Backyard Teepee
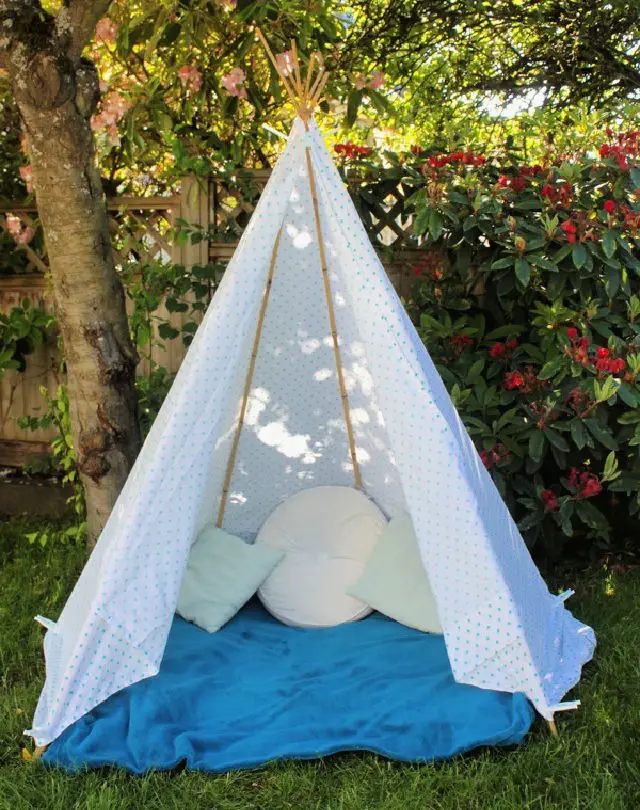
Transport your children to a whimsical world by crafting a DIY backyard teepee that’s sure to become a treasured summertime tradition. This enchanting structure is built using 6-foot bamboo stakes, a king-sized sheet, jute twine, and clothespins. The straightforward construction process only adds to its charm.
To create this magical hideaway, simply drive the stakes into the ground, tie them together at the top with the jute, and wrap the structure with the sheet, securing it with clothespins. Add a cozy touch with a blanket and a few cushions, and let your child’s imagination shape the teepee’s unique character with each use.
This backyard teepee serves as not only an imaginative escape for your kids but also a celebration of childhood’s fleeting magic. They’ll adore their secret hideaway, perfect for reading books, working on puzzles, or simply basking in the warmth of the summer air. The easy setup and takedown process means this magical garden addition can be enjoyed again and again.
DIY Construction Site Gravel Pit
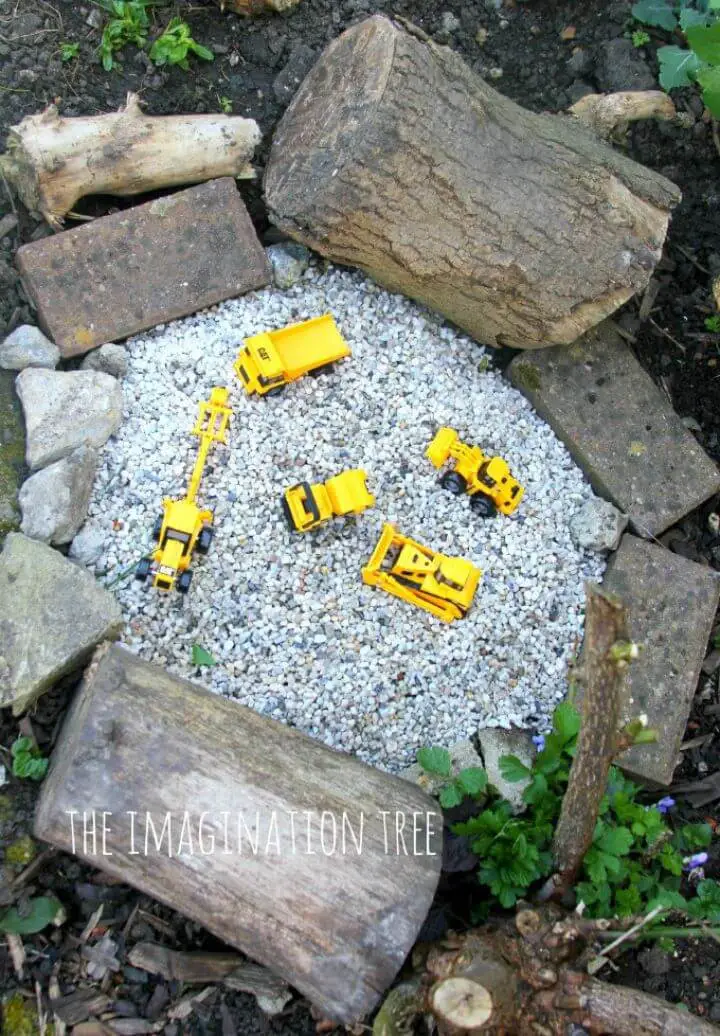
Transform a small lawn patch into an immersive construction site with a DIY gravel pit, sparking imagination and storytelling in your kids. Combine logs, rocks, bricks, and aquarium gravel to create a compact yet vibrant play area. Add toy construction vehicles and pebbles to bring the scene to life! The gravel pit offers a range of activities, including digging, scooping, transferring materials, and climbing ‘mountains’ constructed from rocks and logs. Incorporating figurines enhances imaginative play, allowing kids to delve into creative storytelling. Pairing their playtime with construction-themed picture books elevates the experience even further. After playtime, simply cover the area with a tarp or plastic sheeting to ensure cleanliness and keep animals out. This gravel pit not only promotes creativity and physical activity but also serves as an excellent sensory play space, making it a fun and educational way to engage your kids in imaginative outdoor adventures.
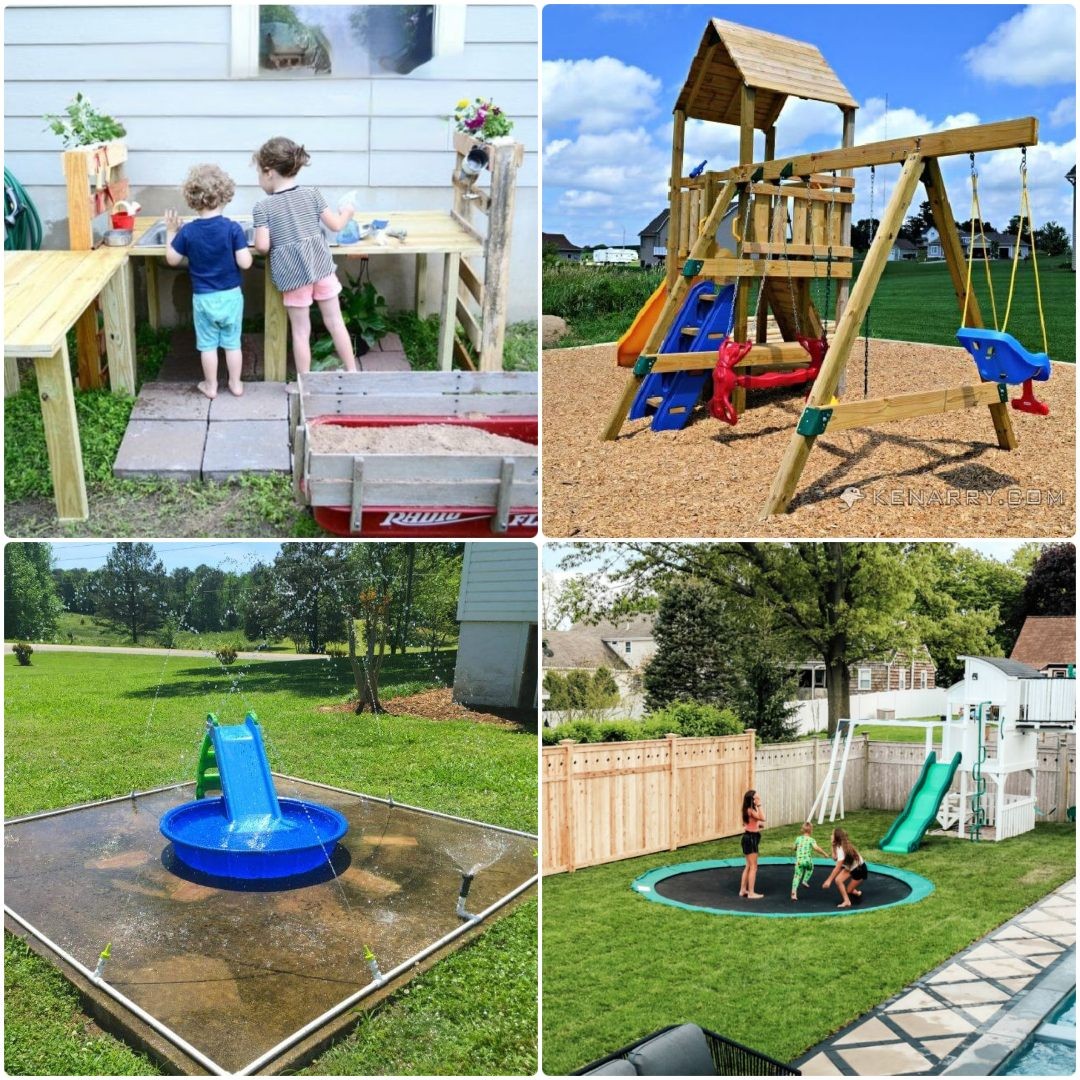
Make Your Own Splash Pad

Transform your backyard into a kids’ paradise with these DIY playground ideas! This summer, bring the excitement of a mini water park right to your doorstep. With a budget-friendly price tag of just $40, you can create a splashing good time for your little ones. Simply gather PVC pipes, pipe couplings, elbow fittings, a slip tee, and a ball valve from your local hardware store, and you’re ready to get started. The setup process is quick and easy, taking no more than 20 minutes to complete. Plus, the adjustable water patterns and spray heights mean kids can customize their play experience by moving the PVC joints or adjusting the water spigot. This innovative project not only brings the joy of water play right to your backyard, but also finds a new use for an often underutilized space. Your family will be thrilled to have this cool summer hotspot at their fingertips.
How to Make a Tire Swing
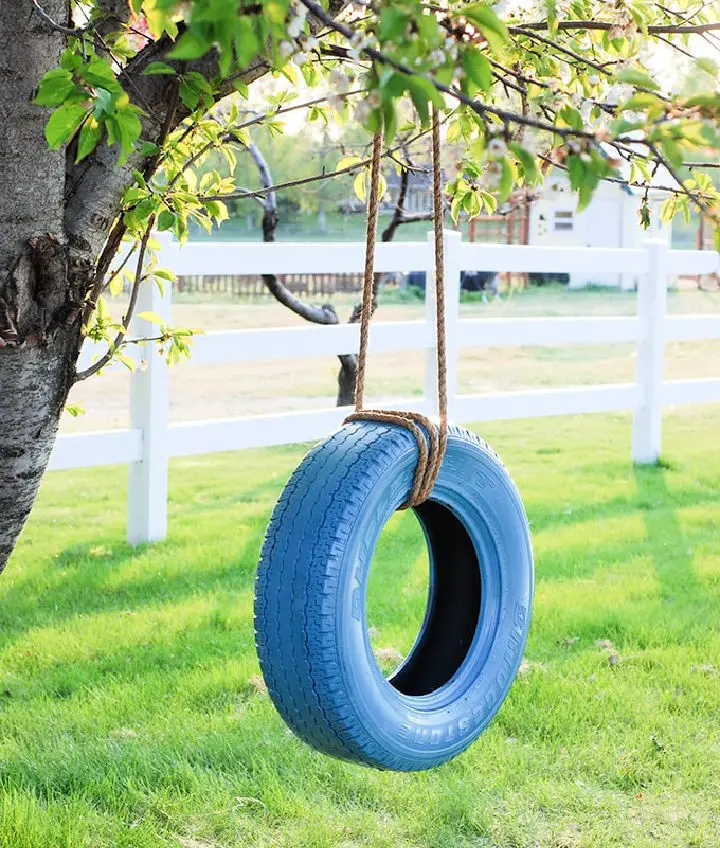
Transform an old tire into a vibrant DIY tire swing that’s perfect for lazy summer evenings! Start by sourcing a used tire from your local tire store or recycling center. Give it a good cleaning with a dry rag to remove any dirt or debris. Next, add some color to the tire using outdoor spray paint. For this project, two coats of a bright aqua blue were applied, providing a fun and lively contrast to any garden. Once the paint is dry, attach the tire to a sturdy branch using a clove hitch knot. This eco-friendly DIY project not only adds a pop of color to your outdoor space but also promotes recycling and repurposing. It’s the perfect way to bring some fun and excitement into your summer, while also teaching kids about sustainability.
Homemade Pallet Mud Kitchen
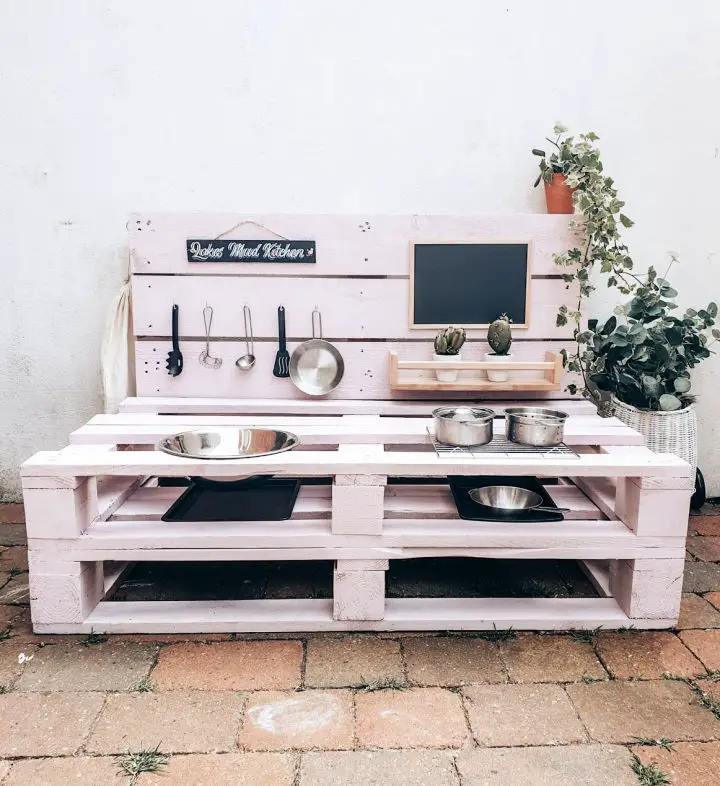
Transform your backyard into an immersive culinary experience for your little one with this easy-to-assemble DIY mud kitchen. With just three pallets, a washing-up bowl, 10cm screws, sandpaper or a sander, and some budget-friendly store finds like oven trays and utensils, you can create this magical play space in under a few hours. This project is perfect for parents looking to strike the ideal balance between fun and frugality. As your child drills, sands, and paints their new outdoor kitchen, they’ll be whipping up a culinary storm that’s as delightful as it is educational. The sheer joy and sense of accomplishment you’ll witness will make this low-cost creative venture an unforgettable experience for years to come.
DIY Backyard Playground for Kids
Transform your backyard into an adventure playground with our creative DIY ideas. Spark imagination and encourage outdoor play with a unique and customizable space that’s tailored to your kids’ preferences and your yard’s aesthetic. Start by envisioning a simple sandbox idea and let it evolve into a complete playground featuring a sturdy playset and ample sand area. With pressure-treated lumber ensuring durability, regular maintenance like weeding and refreshing wood chips keeping the playground safe, and endless opportunities for customization, this project is an accessible and rewarding endeavor for every family looking to elevate their outdoor leisure time. The end result is a private park for your children right in your own backyard, where they can play and explore for years to come.
Creative Rainbow Paver Hopscotch
Transform your backyard into a vibrant playground with this DIY paver hopscotch project. Utilizing those garden pavers you’ve been collecting, this endeavour combines aesthetic appeal with practicality, ensuring a sturdy and dry surface in areas like the side yard that often become soggy. The classic hopscotch design is reimagined with a rainbow colour scheme, adding an extra layer of whimsy to your outdoor space. To get started, lay down a protective sheet and spray-paint the pavers with bright colours. Add numbers using leftover latex paint and a foam brush for a charming finishing touch. Once dry, arrange the pavers into the hopscotch pattern and voila! You’ll have a delightful feature that will captivate both children and adults alike. This project is an easy, affordable, and joyful way to inject colour and functionality into your yard. All you need are basic supplies, creativity, and about 30 minutes of your time. Bring happiness to your home with this delightful DIY hopscotch project!
Build Your Own Treehouse
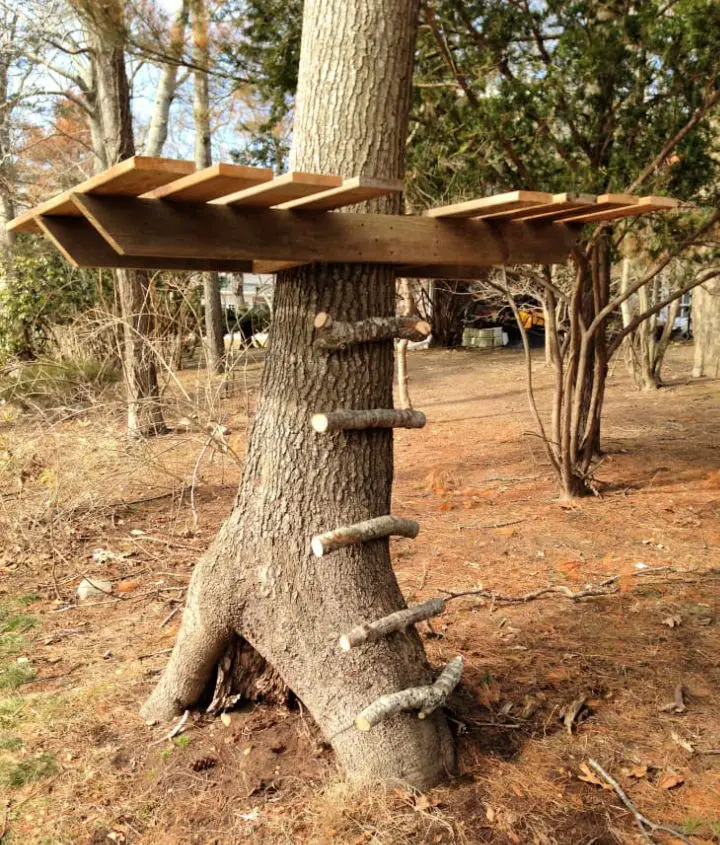
Transforming your backyard into an immersive playground is only a DIY project away. Our top ideas will keep your kids entertained for hours, and with a little creativity, you can create a magical space that sparks imagination and adventure. Take the easy route with our scrap wood treehouse design, which requires only basic hardware tools to bring it to life. The sturdy frame, leveled deck, and natural wooden staircase provide a unique play area that’s as safe as it is fun. Customize it to fit your child’s creativity, and watch their imagination soar. Plus, why settle for just a play space when you can add a home zip-line too? Unleash your inner craftsman and let the memories roll in as you create a backyard haven that will be treasured for years to come.
Making a Tetherball Using Old Tire

Transform your backyard into a haven of nostalgia and joy by creating a DIY tetherball set! This budget-friendly project combines the simplicity of childhood play with the creativity of upcycling old materials. With just an old tire, two bags of concrete mix, a steel fence post, a tetherball with string, large rocks, and a sheet of plywood or cardboard, you can create a unique source of family entertainment that’s perfect for bonding sessions. Start by securing the fence post in the tire using rocks and concrete, then follow the simple steps to assemble your set. The finished product will add a charming touch to your outdoor space, making it adaptable to your changing backyard layout. This timeless game not only provides endless hours of amusement but also teaches valuable lessons about resilience and perseverance, proving that creativity can be a powerful tool for building lasting memories.
Handmade Outdoor Playhouse for Toddlers
Transform your outdoor space into an enchanting playground for your toddler by embarking on a DIY adventure. This comprehensive guide will walk you through the process of building a sturdy, easy-to-assemble playhouse using readily available materials and common tools. With 4×4 posts, pine boards, plywood, paint, and a few basic power tools like a circular saw and drill, you’ll create a one-of-a-kind play area that fosters imagination and creativity in your child. As an added bonus, this project will give you a sense of accomplishment and provide a safe haven for your little one to explore and have fun.
DIY In Ground Trampoline
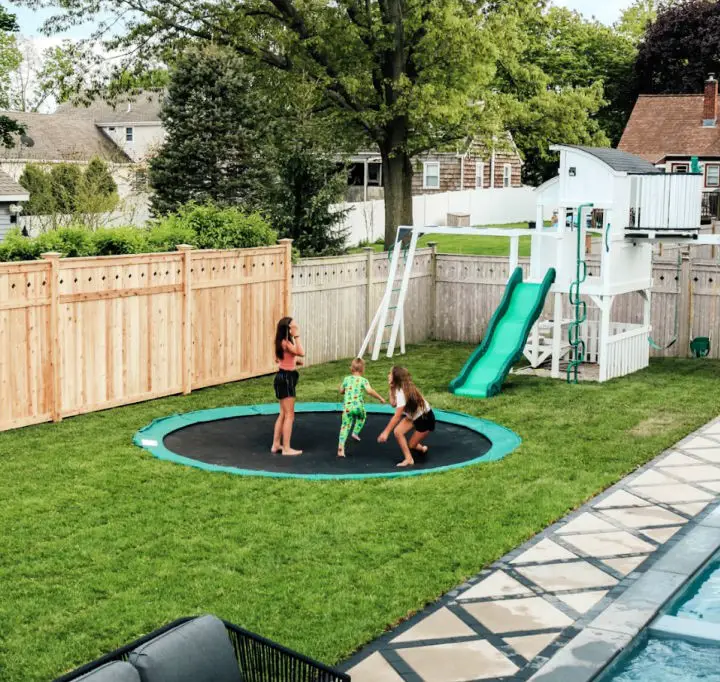
Transform your backyard into a thriving playground oasis without breaking the bank! By incorporating DIY playground ideas and an in-ground trampoline, you’ll create a haven that’s not only visually stunning but also accessible and safe for constant use. The process requires careful planning and execution, but the end result justifies the effort. To get started, follow these key steps: digging a hole to accommodate the trampoline, reinforcing it with treated lumber, and building a sturdy retaining wall to withstand natural elements. By repurposing materials like pavers and gravel, you’ll keep costs in check. With the right tools and determination, you can turn your backyard trampoline into an immersive bounce experience that fosters healthier, more enjoyable outdoor activities for you and your loved ones. Imagine the joy of watching your children have a blast on their revamped trampoline, making priceless family memories in your upgraded backyard.
DIY Outdoor Play Roads for Kids
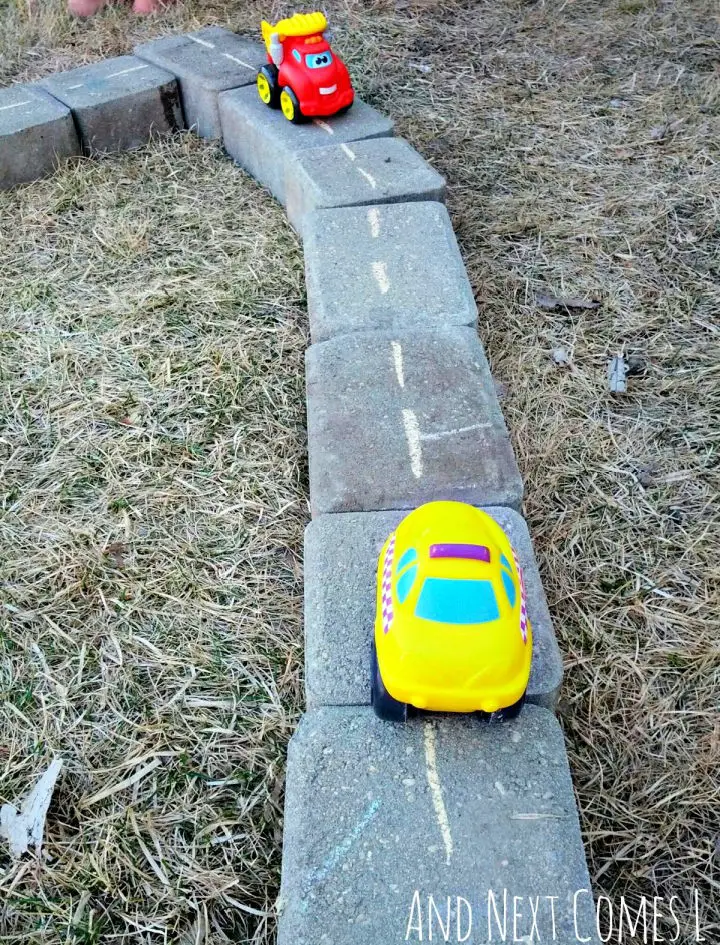
Transform your backyard into an ultimate playground with our creative DIY ideas, where safety meets excitement. Kick-start imaginative play for toddlers and preschoolers with a quick and engaging outdoor play road. Simply arrange materials like sidewalk chalk, paving stones, wood, or cardboard scraps to create a toy car roadway. Add a touch of realism by drawing dotted lines down the center with yellow chalk.
This easy activity encourages children’s imagination and keeps them occupied, giving you some well-deserved downtime. So why wait? Construct your play road today and unleash the fun!
Climbing Wall and Cargo Net
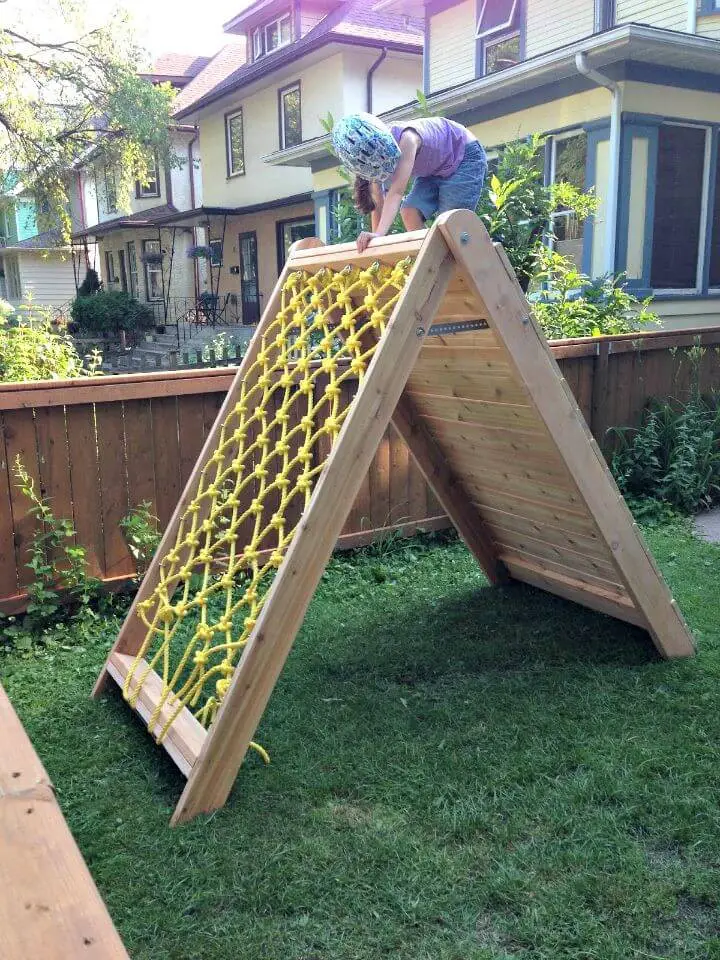
Transform your backyard into a vibrant playground that nurtures your child’s physical and mental growth without breaking the bank. Create an interactive haven with a DIY climbing play structure featuring a rock wall and cargo net, perfect for a fun and healthy playtime within limited space constraints. The best part? It collapses for easy winter storage.
Crafted from solid cedar 2x6s, this innovative A-frame design boasts a unique folding mechanism that allows the structure to lay flat when not in use. The rock wall side features 1×6 cedar boards with climbing holds, while the other side presents a cargo net woven through eyebolt anchors in the frame.
In an era of expensive plastic playsets, take a creative and cost-effective approach by building this sturdy, engaging play structure for under $400 CDN. It’s sure to be a hit with your little ones!
Easy DIY Tree Swing for Kids
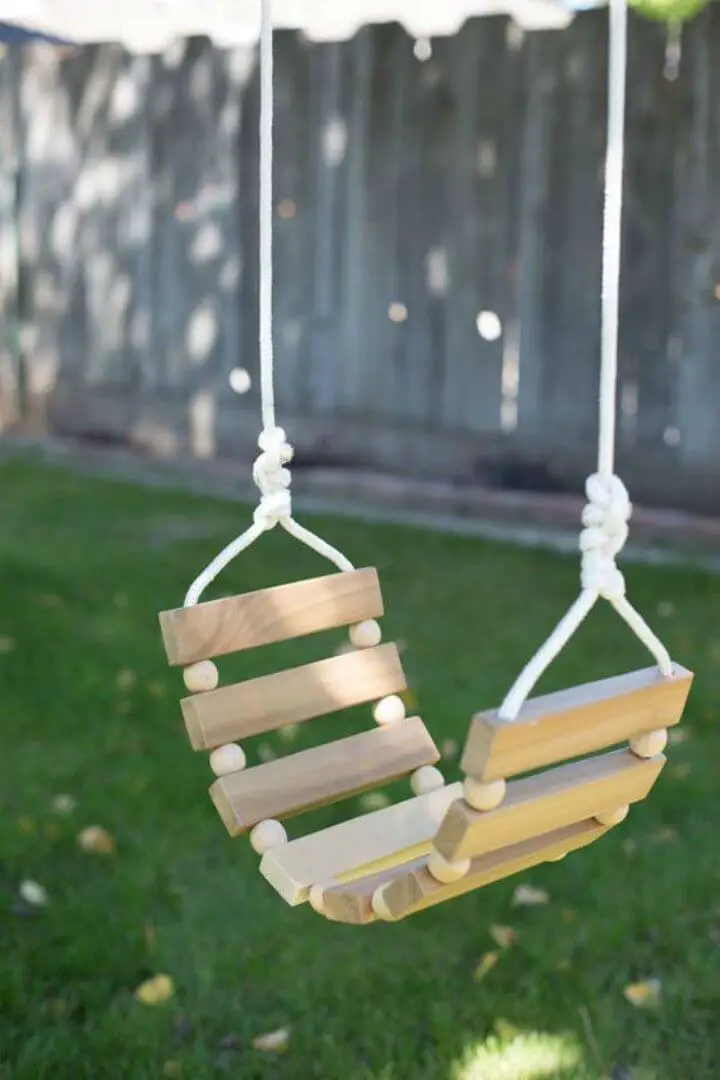
Transform your backyard into a haven of relaxation by creating a one-of-a-kind DIY tree swing. This easy-to-make project utilizes simple materials, such as wooden planks and nylon rope, to craft a sturdy and enjoyable swing that’s perfect for adults and kids alike. With minimal equipment, including a drill, sandpaper, and some basic hardware, you can create a charming addition to your outdoor space that’s designed to withstand up to 200 pounds. Follow this step-by-step guide to ensure each knot is securely tied and every piece is properly installed for safety. As you work through the process, remember that this project isn’t just about creating a fun activity – it’s also an opportunity to create lasting memories with your loved ones. Start building today and enjoy the fruits of your labor as you swing into the sunset with family and friends.
How to Make a Color Block Sandbox
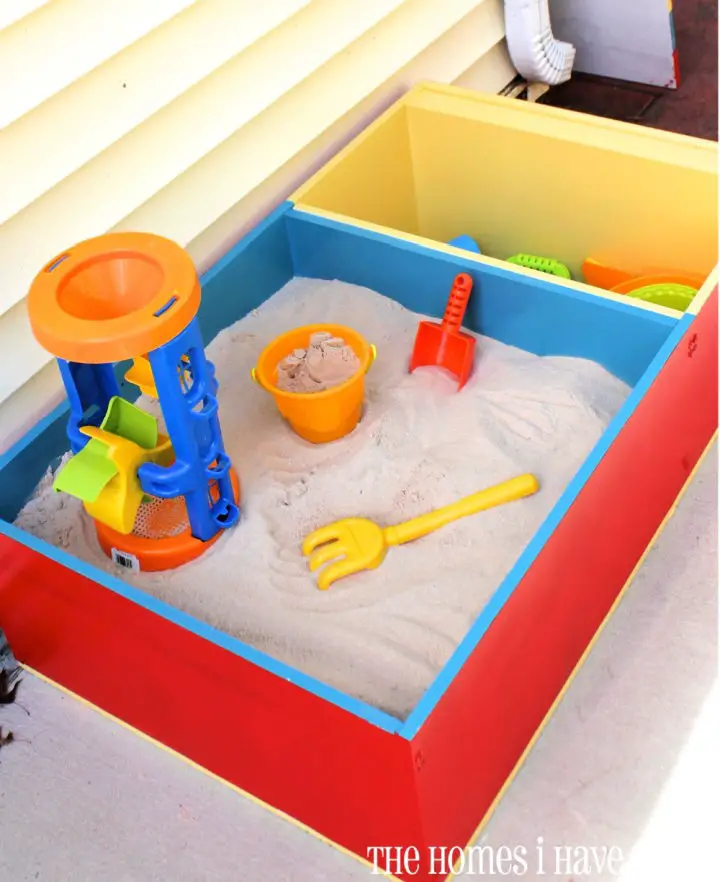
Transform your outdoor space into a vibrant playground with this ingenious DIY project. What was initially a Furinno 3-Tier Bookcase has been transformed through creative makeover, resulting in a stunning color-block sandbox that combines aesthetics and fun. By repurposing the bookcase, you can create a unique play area for your child, complete with two compartments – one for sand and another for toys. To bring this vision to life, gather materials including the bookcase, oil-based primer, outdoor spray paint in red, yellow, and blue, a 4-inch roller, plywood for added reinforcement, a lid, and a drill for drainage holes. The design’s crowning glory is an attractive lid adorned with a cheerful sandcastle silhouette and matching stripes, ensuring the sandbox remains protected when not in use. This visually stunning, fun-filled color-block sandbox is sure to become your child’s go-to play spot.
DIY Mud Kitchen In One Weekend
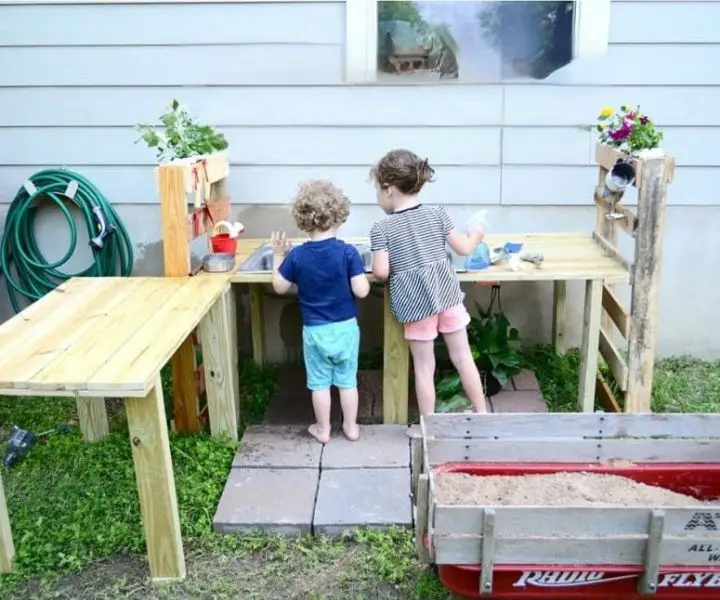
Transform your backyard into an immersive sensory experience for your little ones with a DIY mud kitchen, a weekend project that sparks imagination and fosters connection with nature. By acknowledging toddlers’ and preschoolers’ natural inclination towards messy play, this creative endeavor provides a designated outdoor space for exploration and discovery. It nurtures fine motor skills development, interactive play, and sensory awareness. Crafted from budget-friendly materials like wood, pallets, pavers, and a sink and drain filter, this unique kitchen is a feast for the eyes and a haven for curious minds. Add some vibrant blooms to create a whimsical atmosphere that can be effortlessly relocated for a fresh perspective. Beyond being a mud kitchen, this project offers an endless supply of learning opportunities and joyful moments as your little ones tend to their seedlings alongside their mud creations.
Make Sandpit With Integrated Bench Seats
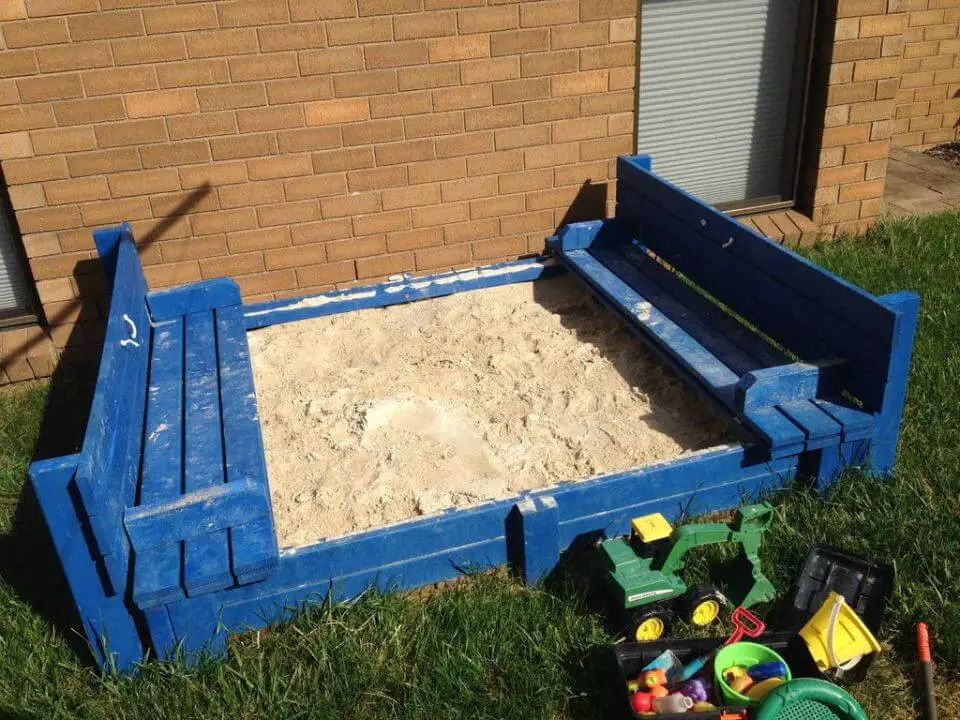
Transform outdoor playtime into an unforgettable experience by creating a unique DIY sandpit that combines fun with functionality. This innovative structure features built-in bench seats, making it an ideal addition to any backyard or garden. Not only will it provide endless entertainment for kids, but it’ll also serve as a comfortable seating area when not in use.
The sandbox’s sturdy and weather-resistant construction is crafted from treated timber, ensuring it withstands the elements. A removable lid protects the sand from unwanted critters or rain, while a weed mat lining keeps the sand in place while allowing for proper drainage.
While the building process may require some time and effort, working with timber is surprisingly straightforward. Simply cut, paint, and assemble the pieces to create a one-of-a-kind sandbox that’s ready for action once filled with washed river sand. With this DIY project, you’ll be creating a timeless play area that your kids will treasure for years to come.
DIY Children’s Arbor Bench

Transform ordinary wood into extraordinary furniture with this charming DIY bench project. As you follow our easy-to-follow building plan, you’ll not only create a functional piece, but also experience the joy of crafting with your own hands. The end result is a stunning bench adorned with beautiful fabric from Quilter’s Haven that can elevate any living space to new heights.
This project is more than just a fun DIY activity – it’s an opportunity to engage your little helpers and teach them valuable skills, fostering a sense of accomplishment as they learn the step-by-step process for achieving a perfect arch cut. And with our introduction to a Williams Sonoma-inspired outdoor bench design, you’ll be inspired to take on even more creative projects.
So why not give DIY furniture crafting a try? With this project, you can experience the bliss of creating something truly special and unique – all while having fun and making memories that will last a lifetime.
How to Make Your Own Balance Beam
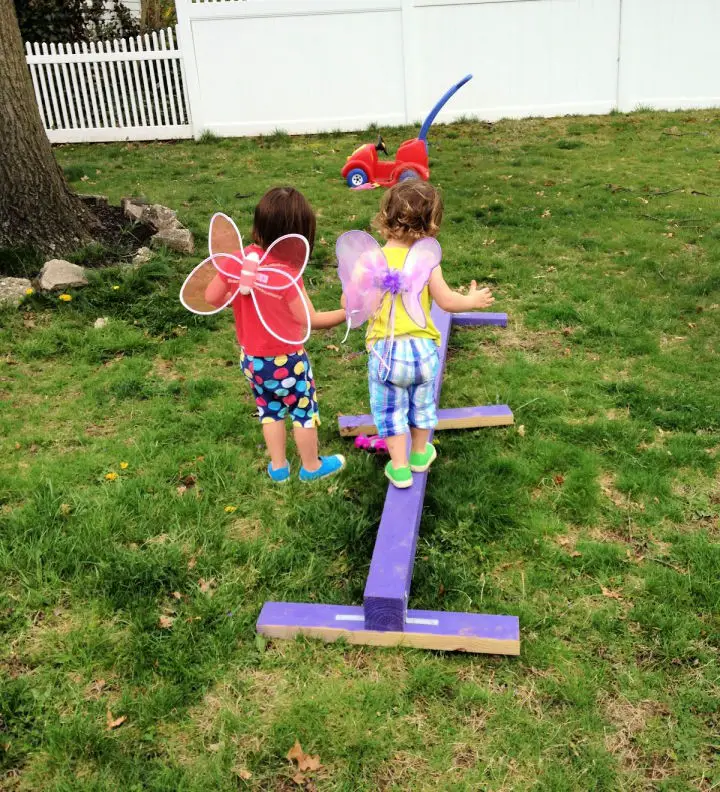
Transform your backyard into an exciting playground with a DIY balance beam that will captivate your kids for hours on end. This budget-friendly project, estimated at just $15, combines robust materials such as 4”x4” wood and L brackets to create a sturdy structure elevated from the ground. With four equal lengths of 2”x4” wood, screws, and a touch of paint, you’ll be able to follow straightforward steps to assemble this vibrant, kid-friendly gem. This backyard attraction will not only promote physical activity and balance skills in young ones but also invite a world of imaginative play. Start this easy project today and watch your backyard transform into a fun-filled space that’s sure to delight!
DIY Playset Step-by-Step Instructions
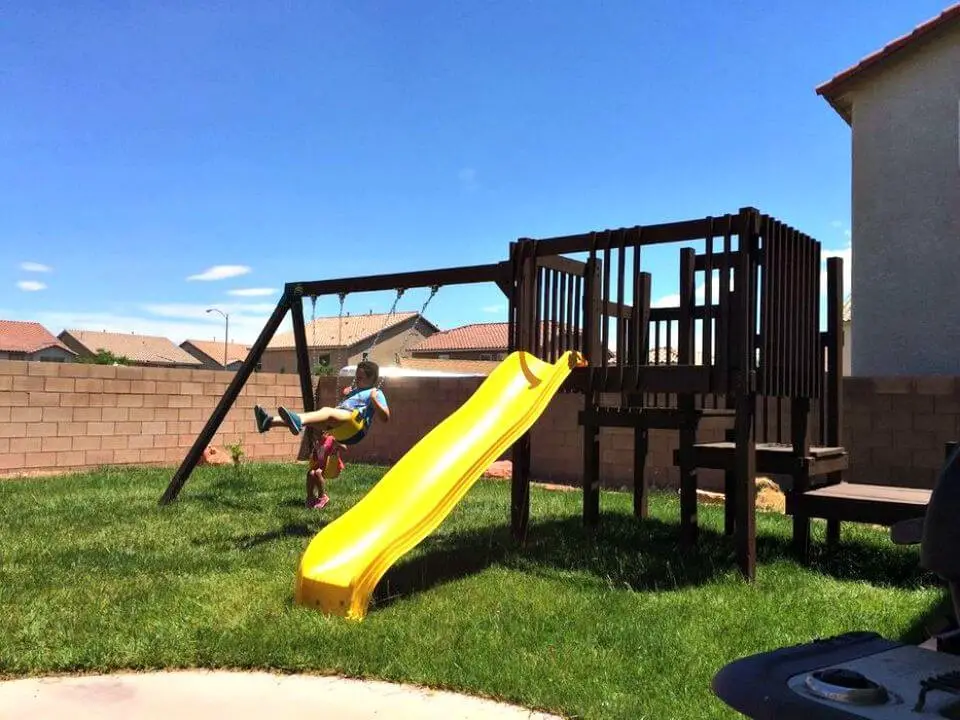
Embrace the simplicity of creating a custom backyard playground with a DIY project that prioritizes safety and durability. The foundation is built upon sturdy 4×6 posts secured with concrete and a base frame composed of 2×6 planks bolted to the posts, ensuring a solid structure for years to come.
Bring joy and excitement to your kids with a playset featuring a 2×4 deck, thrilling slide, and exhilarating swing set. With a total material cost of just over $1000, which includes high-quality lumber and UV-protected slide, you can create an engaging outdoor space without breaking the bank.
The best part? This DIY playground is designed to evolve with your children, accommodating their growth and development as they mature. Start building, watch laughter fill the air, and forge lasting memories with a homemade playset that will remain a treasured family legacy.
Homemade Tire Teeter Totter
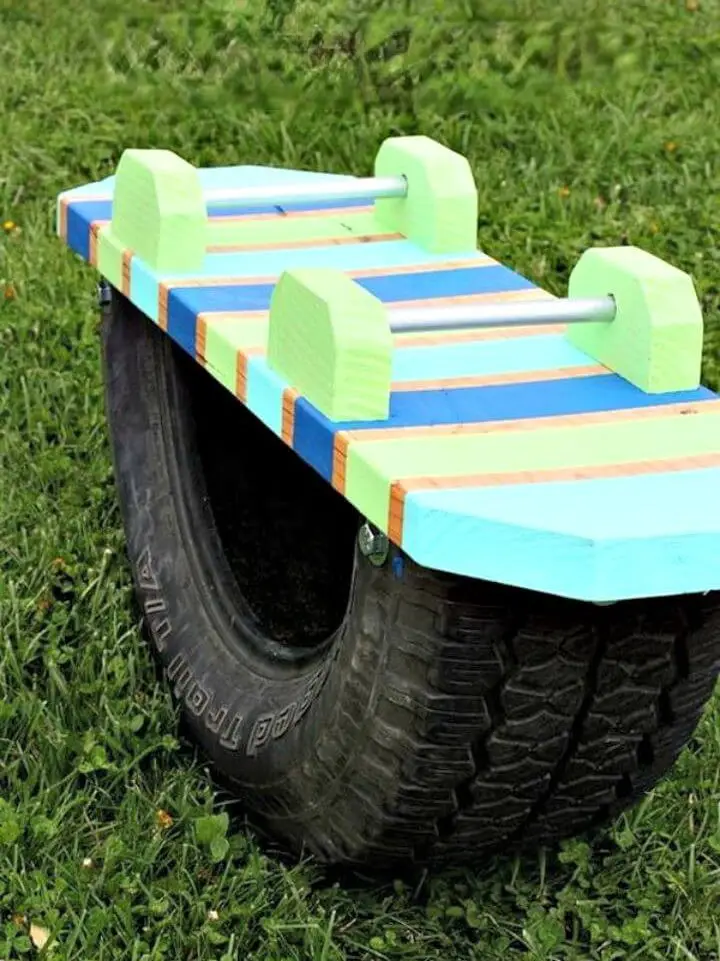
Transform an old tire into a thrilling DIY project – a teeter-totter that’s perfect for bringing outdoor playtime to life! By repurposing everyday items like scrap wood, an electrical conduit pipe, and six bolts, you can create a fun and engaging playground equipment that’s not only eco-friendly but also promotes recycling and sustainability. Start by cutting the tire in half, preparing the wood pieces, and assembling everything. Add some personal flair with paint stripes or your favorite design on the seat. The result is an unique outdoor play equipment that’s sure to bring joyous laughter to your backyard as your kids enjoy the thrill of playing on their new teeter-totter.
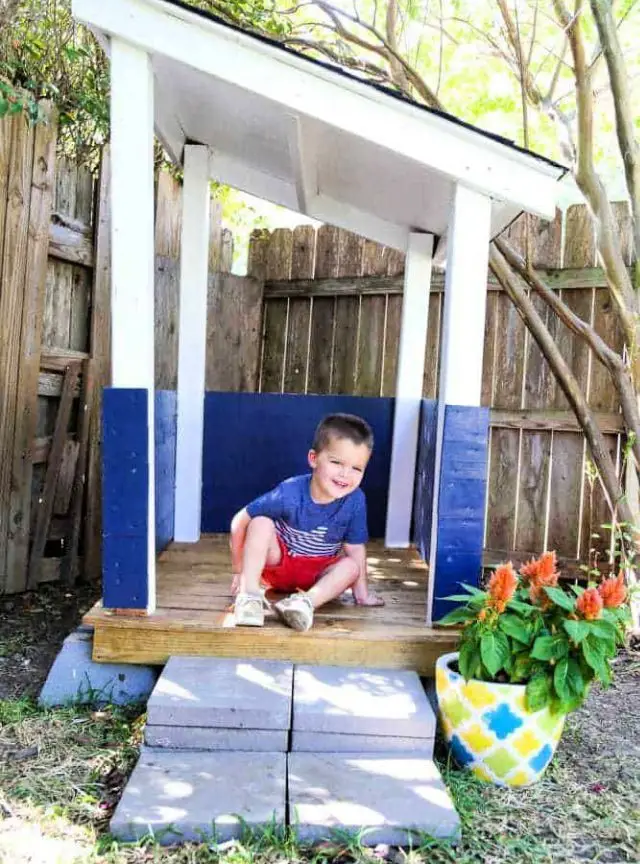
Customizable Clubhouse for Kids
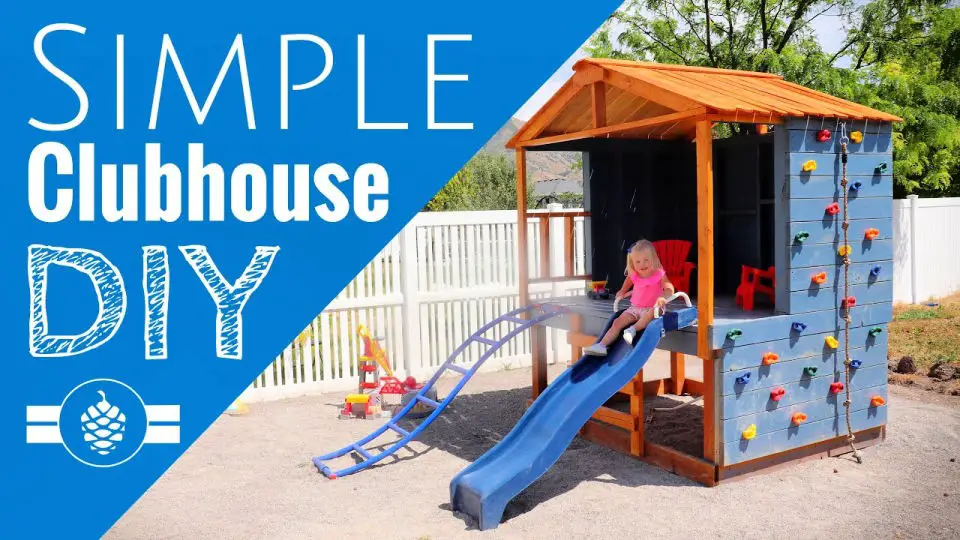
Transform your outdoor space into an immersive adventure zone by unleashing your creativity with these DIY playground ideas. Take the first step towards creating a unique hideaway for your kids with a customizable clubhouse, built around a sturdy platform. This versatile design allows you to tailor the space to your children’s individual personalities and preferences, making it a long-lasting feature in your backyard that fosters endless fun and excitement. While this isn’t a rigid guide, it serves as a starting point to ignite your imagination! Let the possibilities inspire you to build a magical haven for your little ones, where they can create unforgettable memories.
How to Build a Sandpit With Wickes
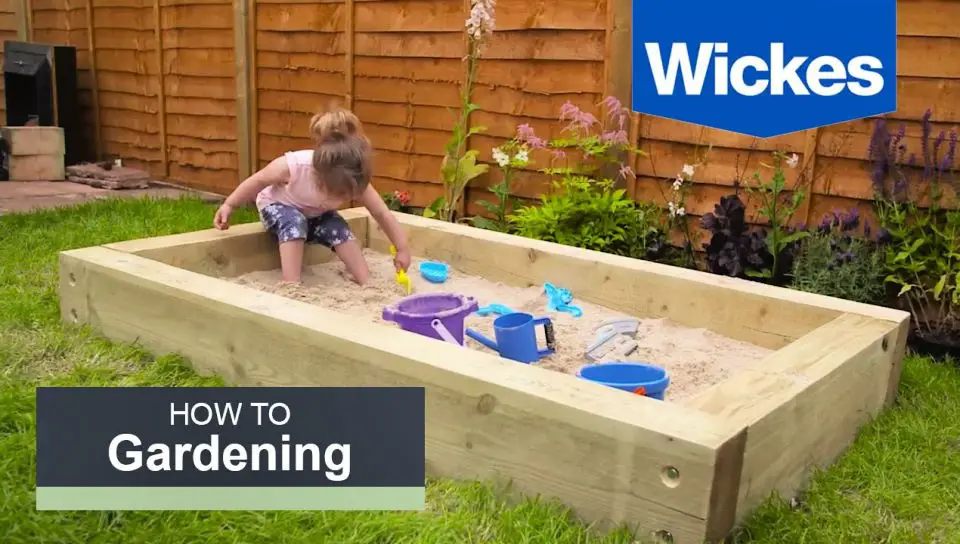
Create an unforgettable outdoor haven for your loved ones by constructing a DIY sandpit. This comprehensive guide will walk you through every step of building a low-maintenance sandpit that brings joy to all ages. Begin by selecting the perfect garden spot, balancing sunlight and shade, before gathering necessary materials like three large sleepers and measuring with precision. The tutorial delves into the process of carefully cutting, sealing, and positioning each sleeper while ensuring the ground is level. A crucial aspect is preparing a weed fabric base for drainage and to prevent unwanted weeds from growing. Finally, add finishing touches by sanding down sharp edges and filling with sand, making the sandpit safe and ready for play. With this detailed guide, you’ll be able to craft a sandpit that fosters endless hours of entertainment and strengthens family bonds.
Backyard Jungle Gym Bar Without Concrete
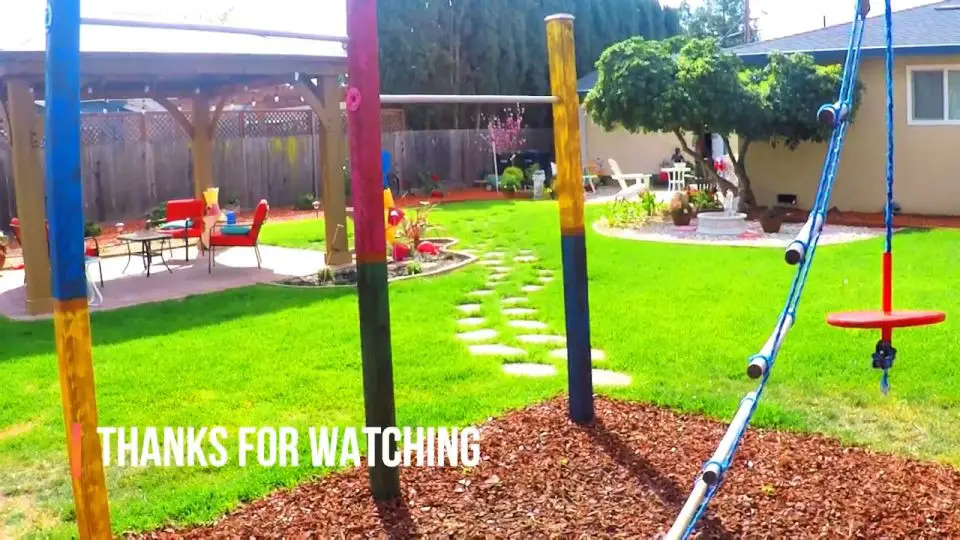
Create a vibrant backyard jungle gym bar without breaking the bank or requiring specialized tools. This DIY masterpiece is designed for kids to engage in thrilling gymnastics routines, develop their motor skills, and get some exercise while having a blast. The clever design features rotatable bars, ensuring hours of fun for youngsters of all ages. What’s more? You won’t need any concrete or hefty equipment investments to bring this playground excitement to your backyard. This innovative project is an affordable way to promote physical fitness, imaginative play, and outdoor exploration in the comfort of your own home.
Conclusion:
Ultimately, the 25 innovative DIY playground ideas presented here provide a wealth of options for creating interactive and engaging outdoor spaces in your own backyard. By combining creativity with practicality, these DIY projects cater to diverse interests and skill levels, allowing families to bond over shared experiences and nurture their children’s natural curiosity. Whether you’re building a whimsical treehouse or crafting a customizable clubhouse, these homemade playground ideas offer endless possibilities for transforming your outdoor area into a vibrant play space that sparks imagination and fosters connection.
