How to Sew a Teddy Bear: A Guide to the Best Patterns and Tips
Teddy bears have captured the hearts of people worldwide, serving as comforting companions for children and adults alike. Their endearing nature and softness make them irresistible. But what if you could create your own unique teddy bear at home? With a few simple supplies and basic sewing skills, you can craft a one-of-a-kind companion that reflects your personal style. Not only is this project fun, but it also allows you to customize the appearance of your teddy bear according to your preferences. Your creation can serve as a treasured keepsake, a meaningful gift, or even a decorative piece for your home.If you’re intrigued by the idea of sewing your own teddy bear, you’re in luck! We’ve compiled 22 free and downloadable teddy bear patterns that cater to various skill levels, from beginners to experienced sewists. Our collection also includes helpful tips and tricks to guide you through the process. With these resources at your disposal, you’ll be well-equipped to create a cuddly companion that brings joy to yourself or someone special.
Choosing a Teddy Bear Sewing Pattern
To create your own teddy bear, start by selecting a pattern from our collection of 22 free designs. This will ensure you find one that matches your skill level and personal style, whether you’re a beginner or an experienced crafter. For those just starting out, we recommend opting for a simple pattern with fewer pieces to build confidence and develop sewing skills. As you become more proficient, you can move on to more complex designs featuring intricate details.Before you begin, print out your chosen pattern and verify that you have all the necessary materials at hand. This will include fabric, stuffing, thread, scissors, a needle, and a sewing machine. If you don’t possess a sewing machine, it’s still possible to complete the project by hand-sewing the bear. However, this approach will undoubtedly require more time and effort.
Tips and Tricks for Sewing a Teddy Bear
Sewing a teddy bear is an enjoyable and relatively straightforward project when armed with some fundamental tips and tricks. The key to success lies in selecting the right fabric, using sharp scissors, marking pattern pieces accurately, and taking the time to sew slowly and carefully. Here’s how it works:Firstly, choose a fabric that suits your teddy bear’s personality and durability requirements. Cotton, linen, wool felt, fleece, velvet, corduroy, faux fur, or minky are all excellent options. Avoid materials that are too thin, stretchy, slippery, or prone to fraying.Next, invest in sharp scissors capable of cutting through multiple layers of fabric without tearing or snagging them. A rotary cutter and cutting mat can also prove invaluable for achieving precise cuts.Before cutting out the pattern pieces from your chosen fabric, mark each one clearly with a fabric marker or chalk. Note the seam allowances, notches, darts, and any other markings indicated on the pattern.Once you’ve cut out your pattern pieces, pin them together with the right sides facing each other. Ensure that the edges and notches align properly, and the pins are perpendicular to the edge. This will help prevent the fabric from shifting or puckering as you sew.When sewing the pieces together, use a small stitch length (approximately 2 mm) and a matching thread color. Sew slowly and carefully along the marked seam line, removing the pins as you go. Be sure to backstitch at the start and end of each seam to secure it.After sewing all the pieces together, turn your teddy bear right side out through an opening left unstitched. Use a chopstick or pencil to push out the corners and curves. Fill the bear with polyester fiberfill or your preferred stuffing material, ensuring even and firm filling but not too tight. Close the opening by hand using a ladder stitch or whip stitch.To give your teddy bear some personality, attach eyes and a nose. You can use buttons, beads, safety eyes, felt pieces, or embroidery. Position them symmetrically and securely on the bear’s face. Consider adding mouth or cheek details with embroidery or fabric paint if desired.Finally, add some accessories to make your teddy bear even more charming. These might include a bow tie, scarf, hat, collar, vest, or embellishments such as buttons or ribbons. You can also personalize your teddy bear by adding a name tag or label.
Enjoy Your New Teddy Bear!
As the creative process comes to an end, take a moment to revel in the joy of having crafted something truly special – a one-of-a-kind teddy bear that reflects your child’s unique personality and creativity. Take hold of your newly made bear and give it a warm embrace, sharing with it all the reasons why you love it so much. The bond between you, your child, and this cuddly companion is sure to grow stronger over time, making it a treasured keepsake for years to come.
Free Teddy Bear Patterns
Get creative and bring your own cuddly friend to life with these 22 free teddy bear patterns and downloadable printable templates in PDF format. Whether you’re a seasoned crafter or just starting out, these resources will help you create a one-of-a-kind plush toy that’s sure to delight. From simple to complex designs, each pattern is carefully crafted to provide hours of entertainment and fulfillment.
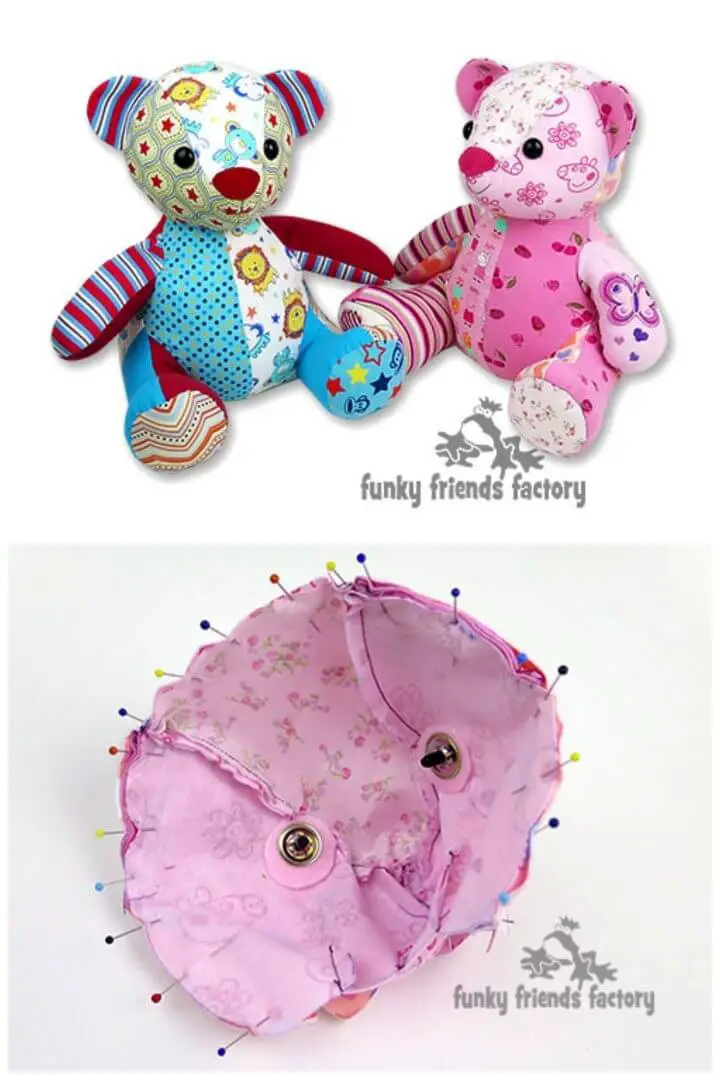
Stuffed Teddy Bear Gift Pattern
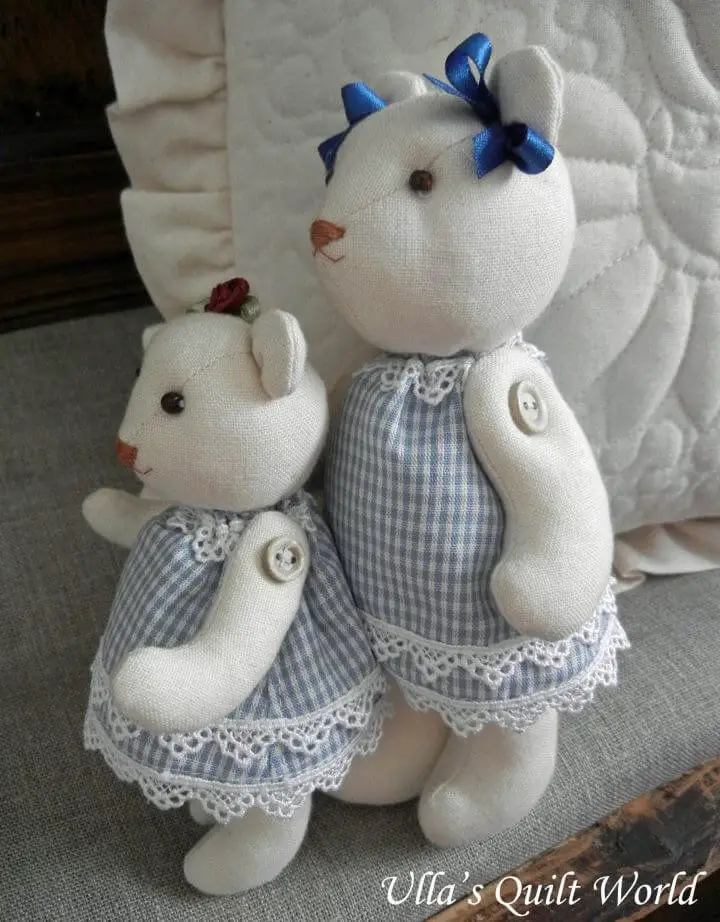
For the ultimate gift-giving experience, consider crafting an adorable pair of stuffed teddy bears tailored to your twins – one for each little bundle of joy! When there’s a boy and a girl in the mix, this precious duo becomes an exceptional present. The sweet combination of pink for the girl and brown for the boy will surely bring smiles to their faces. For those interested in learning more about creating this delightful pair, head over to our tutorial, where we’ll guide you through every step of the process.
Teddy Bear Tutorial and Pattern
With their endearing charm, teddy bears have won over the hearts of children everywhere. And now, with just a few simple steps, you can create a one-of-a-kind DIY teddy bear to bring joy to the little ones in your life. Whether you’re attending a birthday party or baby shower, this adorable gift is sure to be a hit. To get started, simply follow the instructions outlined below and watch as your child’s face lights up with delight.
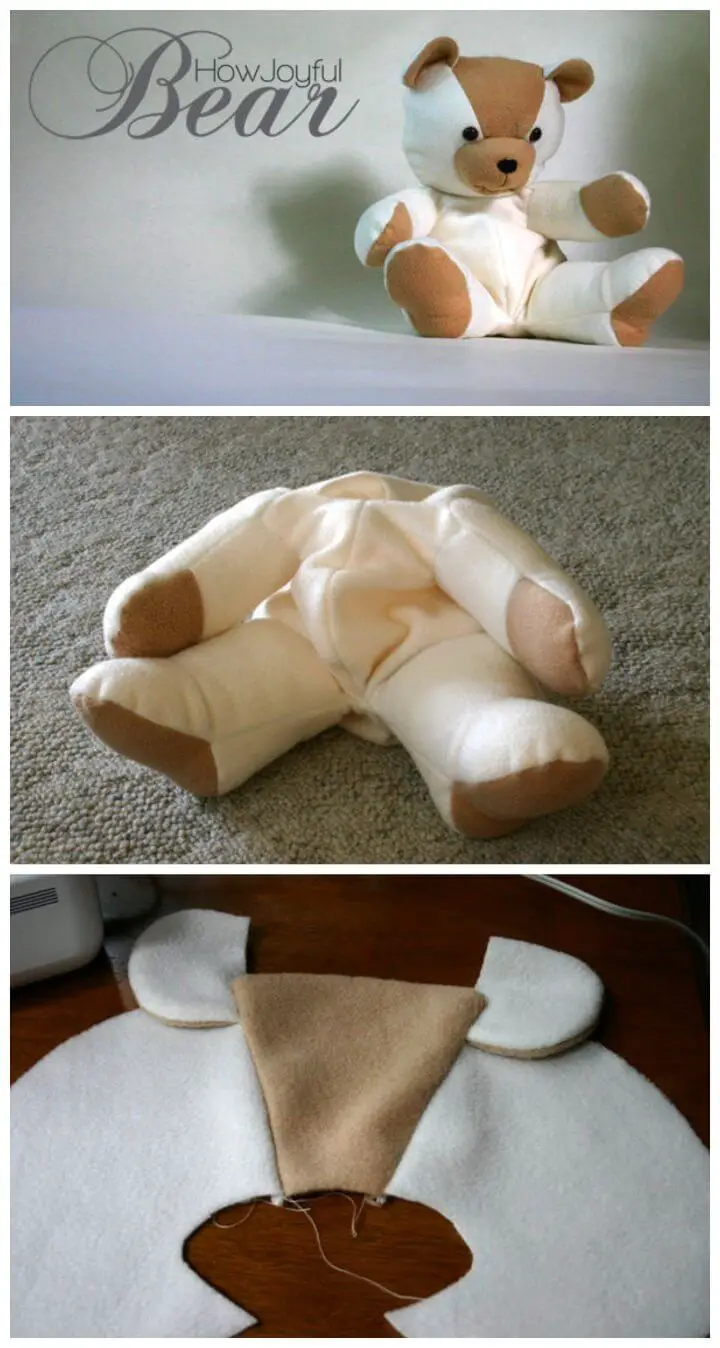
How to Sew A Memory Toy Keepsake Teddy Bear
We cherish the adorable baby garments we’ve purchased or lovingly crafted, unwilling to part with them due to the sentimental value attached. One ingenious way to repurpose these cherished items is by creating a memory-filled teddy bear keepsake. This cuddly companion will not only become a treasured toy for your little ones but also serve as a heartwarming reminder of special moments and milestones.
DIY Teddy Bear

Instead of breaking the bank on store-bought teddies, you can create adorable and cuddly ones for your kids with minimal effort and expense. Here’s a simple and enjoyable DIY project that will bring joy to your little ones’ faces. With this easy-to-follow guide, you’ll be able to craft a charming and soft teddy bear that your children will treasure.
Memory Teddy Bear – Free Pattern

Transforming sentimental value into a tangible keepsake, one of the most creative ways to repurpose your loved ones’ old clothing is by crafting adorable DIY memory teddy bears. These cuddly creations are fashioned from vintage sweaters and other wool garments, making them an irresistible treat for kids. By upcycling cherished items, you’ll not only be creating a unique and lovable companion but also honoring the memories attached to those garments.
Baby Clothes Memory Bear Pattern
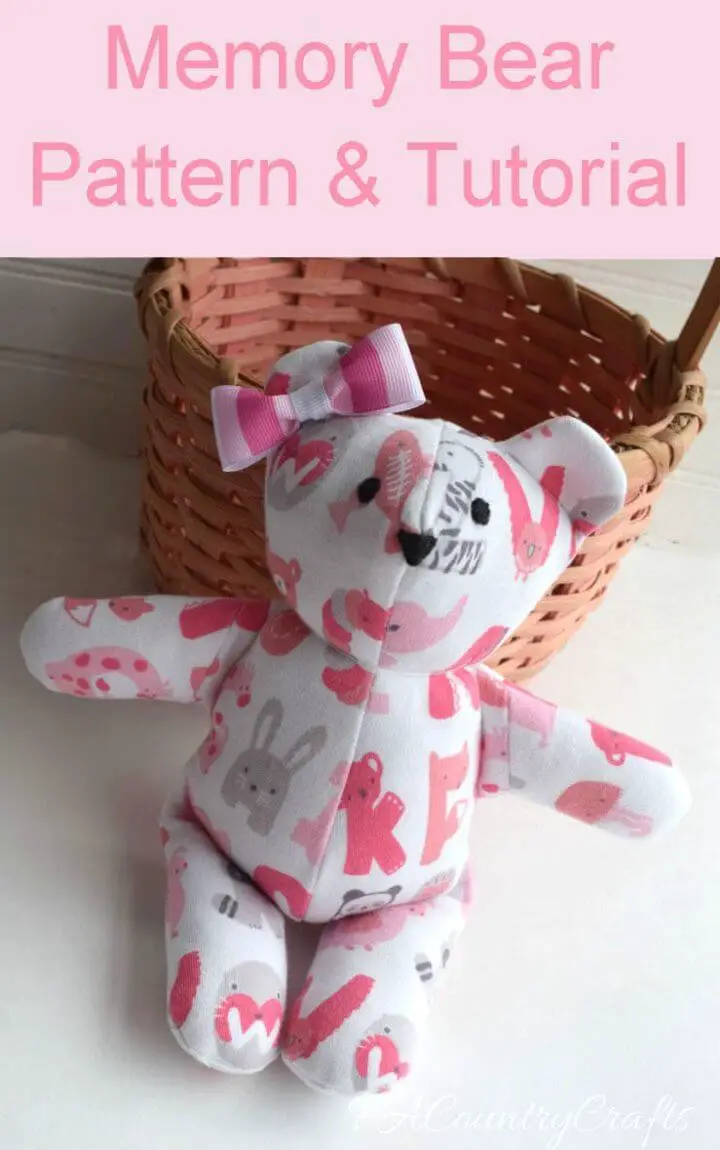
The nostalgia surrounding early childhood is undeniable, leaving us longing to relive those precious moments forever. For parents who have been fortunate enough to experience this journey, it’s only natural to want to hold onto those memories. One way to do just that is by creating a sentimental memory bear using your child’s outgrown clothing. This endearing teddy, adorned with a charming bow on the left side, embodies the perfect blend of adorability and sophistication. For more information, please visit pacountrycrafts.
Warren The Charity Bear – Free Teddy Bear Pattern
There’s something uniquely special about donating handcrafted teddy bears that bring joy to children’s faces. Hospitals and other institutions often receive teddy bears, which are a delightful way to brighten up young patients’ days. The best part? These cuddly friends can be easily created in various colors and handmade with love, making each one a treasured gift.
DIY Wool + Liberty Teddy Bear
Instead of settling for a store-bought teddy bear, why not create one that’s uniquely yours? You can make a fluffy and adorable teddy bear using plain and patchy fabric, bringing an element of whimsy to your little ones’ playtime. The best part is, it’s entirely DIY-able, with a tutorial available to guide you through the process. With this handmade creation, you’ll be able to customize every detail, from the texture and color palette to the overall charm. It’s an opportunity to add a personal touch to your child’s toy collection and create lasting memories. So why not get creative and make some cuddly magic happen? A simple and fun project that will surely delight both kids and adults alike.
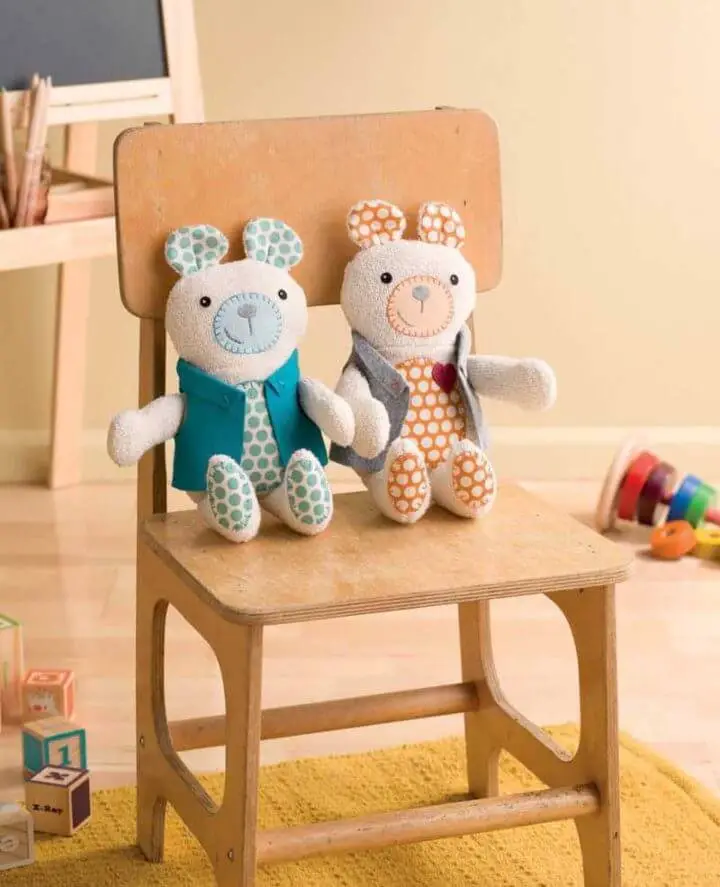
Easy Teddy Bear Sewing Pattern
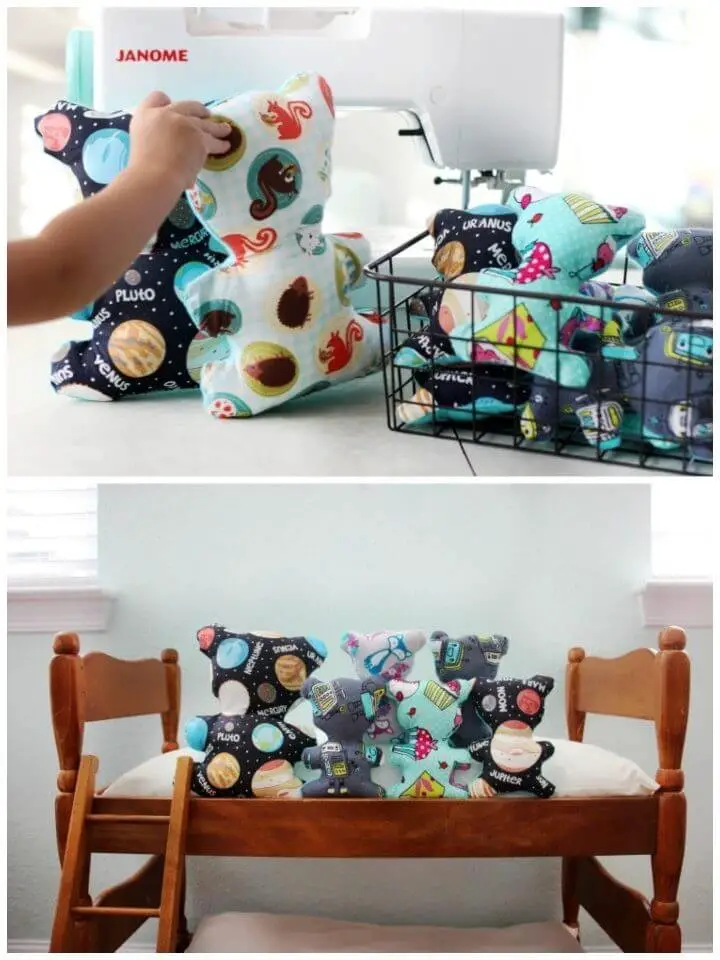
When it comes to gifting children, few options are as endearing as a cuddly teddy bear. And now, with the right materials, you can craft an entire collection of miniature teddies that are not only adorable but also made from kid-friendly printed fabrics. These diminutive creatures are perfect for gifting to multiple youngsters, and their unique charm lies in their fabric composition. With a few simple tools and some creative flair, you can whip up a batch of these lovable little friends and spread the joy to all the kids on your list.
Teddy Bear Sewing Pattern
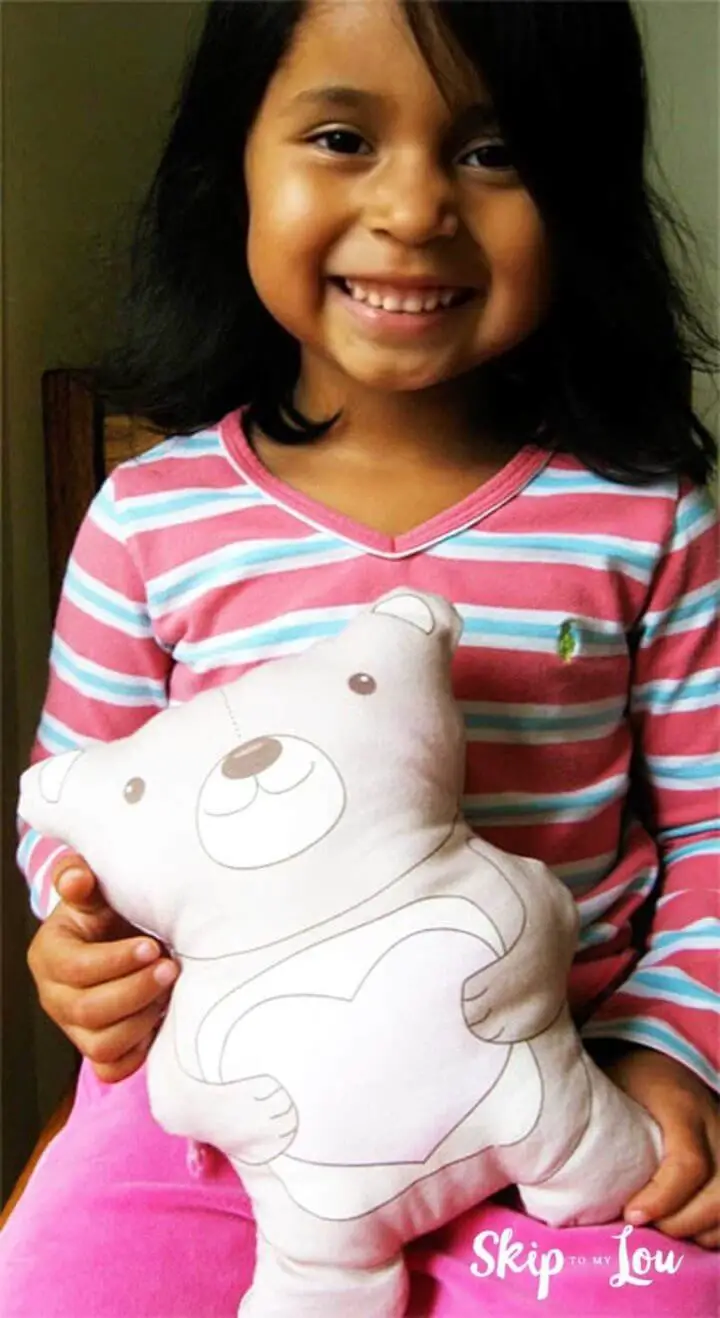
A beloved teddy bear is not just a plaything for children, but also their trusted companion, often spending hours cuddled up together. With your own fabric, you can create a one-of-a-kind cuddly friend that’s uniquely special. By using a teddy template on muslin, sewing the pieces together, and then carefully stuffing it to give it shape, you can turn this DIY project into a thoughtful gift that will be treasured by kids and parents alike.
Valentine Teddy Bear Pattern
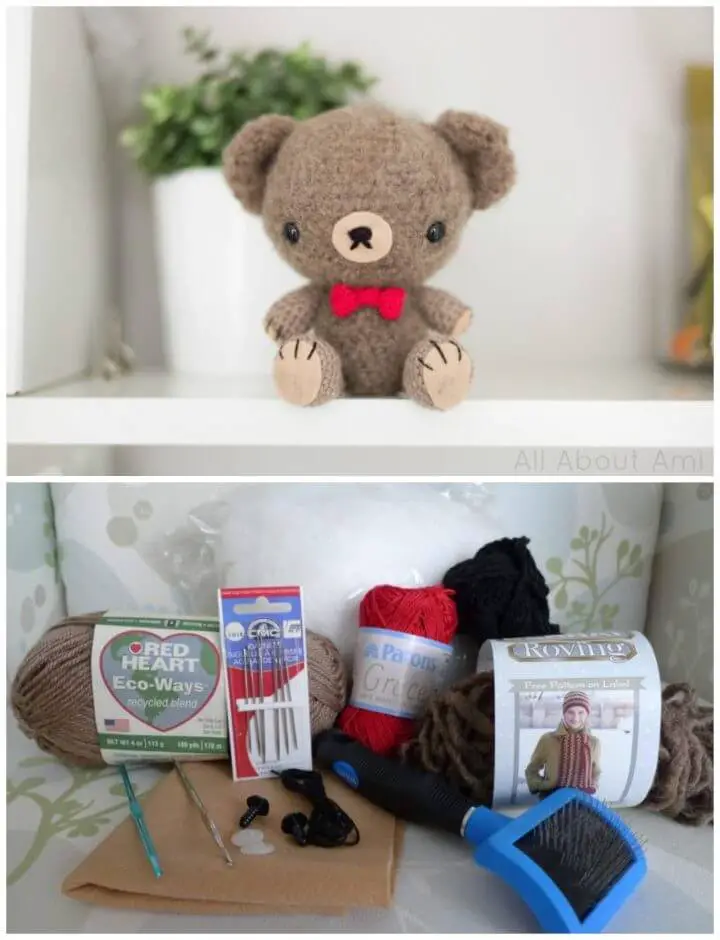
Capture the hearts of your loved ones this Valentine’s Day with a thoughtful, handmade gift that exudes love and care. The perfect recipient for such a present is anyone who holds a special place in your heart – be it a romantic partner, family member, or close friend. One such idea is creating a customized teddy bear that embodies the warmth and tenderness of the season. Crafted with love, this little brown teddy bear features an adorable red bow tie around its neck, making it the perfect symbol of affection. To make this special gift even more memorable, you can get the free pattern to replicate the process and add a personal touch.
Gift Card Teddy Bear
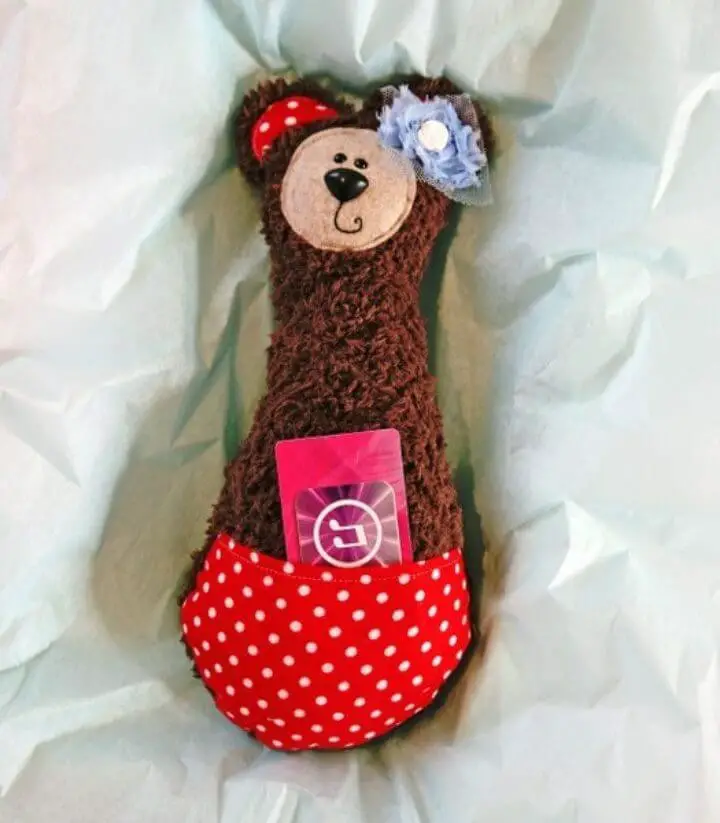
As the festive season approaches, exchanging gifts and greetings is a time-honored tradition. A thoughtful twist on this ritual is to substitute traditional envelopes with adorable teddy bear-shaped holders for your gift cards. The joy of receiving a gift card is amplified when it’s presented in such a unique and whimsical way, making it a delightful surprise for the recipient.
Cuddly Teddy Bear
In no time at all, these plush toys earn a special place in the hearts of children, who grow attached to them just as if they were old friends with names. Imagine the joy on your child’s face when you present them with a brand new cuddly companion – it’s an experience that will be cherished for years to come. Not only do stuffed animals provide comfort and companionship, but they also encourage imaginative play and role-playing. With a little creativity, you can create your own unique plush toys that become treasured possessions for your kids.
DIY Pom Poms Teddy Bear
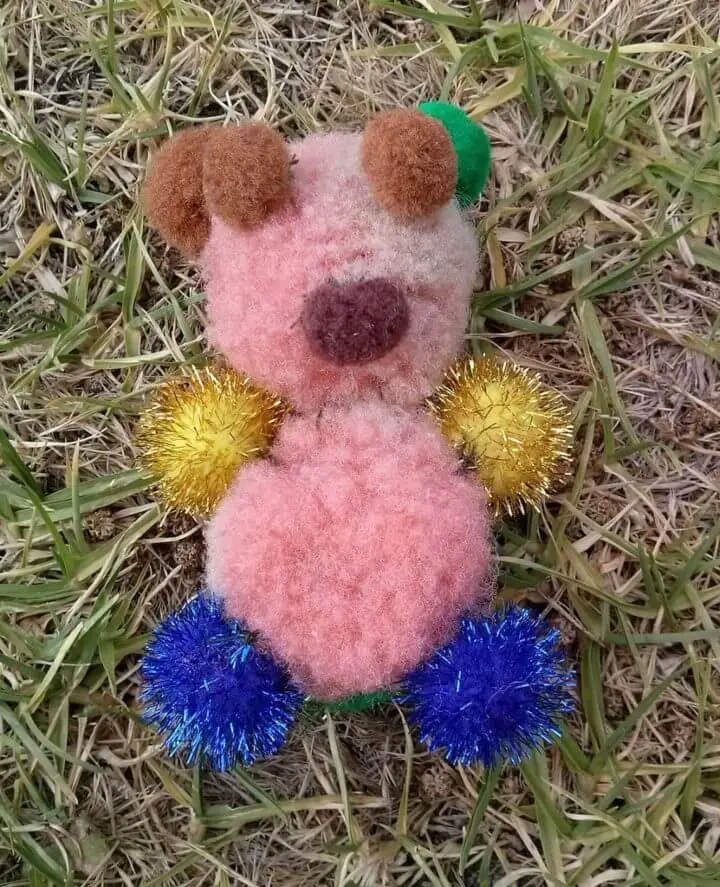
Crafting your own teddy bear using pom-poms can be an incredibly fulfilling experience. With this unique approach, you’ll create a soft and cuddly companion by combining a range of colorful pom-poms. The larger ones will form the body and head, while smaller pom-poms become the ears, legs, and nose. Follow our easy-to-follow guide to bring your new friend to life.
Cuddle Buddy Bear Pattern
Once kids have grown attached to their cuddly companions, it’s only natural that they require a constant presence even at night. To satisfy this need, you can create a soft and endearing cuddle buddy bear for them to snuggle up with. By using brown fabric featuring colorful dots, you can craft a charming teddy that exudes warmth and cuteness. With its appealing design, it’s the perfect companion for little ones to sleep soundly and feel secure.
DIY Tagalong Teddy Bear
The Tagalong teddy bears are another delightful version that is sure to capture the hearts of children. The addition of patchy fabric details at the nose, belly, and paws adds a playful touch, while the adorable jackets bring an extra layer of charm. These lovable companions will undoubtedly become the kids’ new best friends.
Quilted Teddy Bears Pattern
There’s something undeniably charming about quilted toys, and a pair of adorable quilted teddy bears is the perfect way to bring joy to your kids. But why stop at just a few cuddly friends? You can actually create an entire quilted world for them, filled with soft, snuggly characters that will capture their imagination. And the best part? It’s a fun and rewarding project you can work on together.
DIY Backpack Teddy Bear
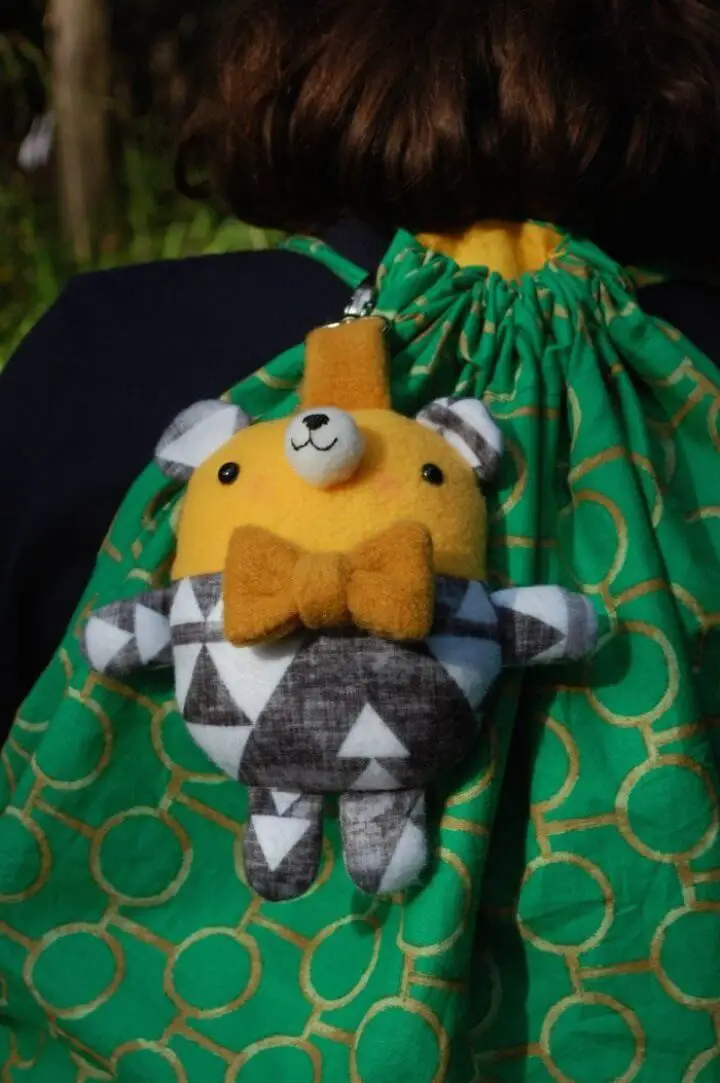
Imagine gifting your little ones something that combines the joy of cuddling with the practicality of having a stylish backpack to carry their essentials. A DIY backpack teddy bear is just that, offering an unparalleled level of cuteness. Envision your kids beaming with excitement as they tote around their favorite stuffed animal and gear. This thoughtful gift idea is perfect for nieces and daughters alike, making it a great way to show you care. Learn more about how to create this delightful duo.
Make Softie Teddy Bears
While it’s true that a toy collection may seem dull without an assortment of exciting toys, particularly adorable teddy bears, there’s no need to break the bank in order to bring some joy into a child’s life. In fact, making your own softie teddy bear can be a fun and budget-friendly way to add some personality to their toy box. With just a few simple materials and a bit of creativity, you can create a one-of-a-kind cuddly companion that will surely delight any youngster.
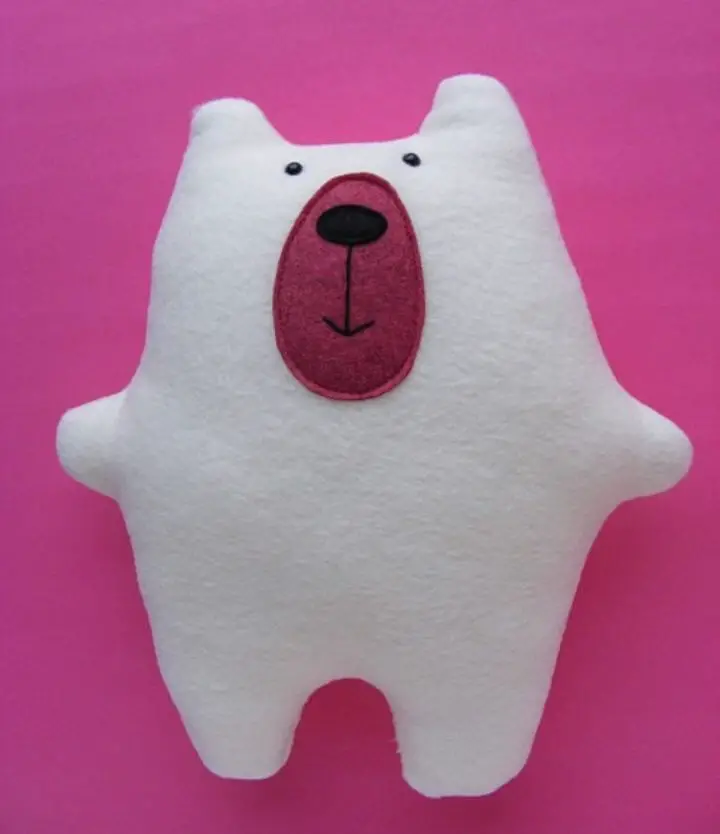
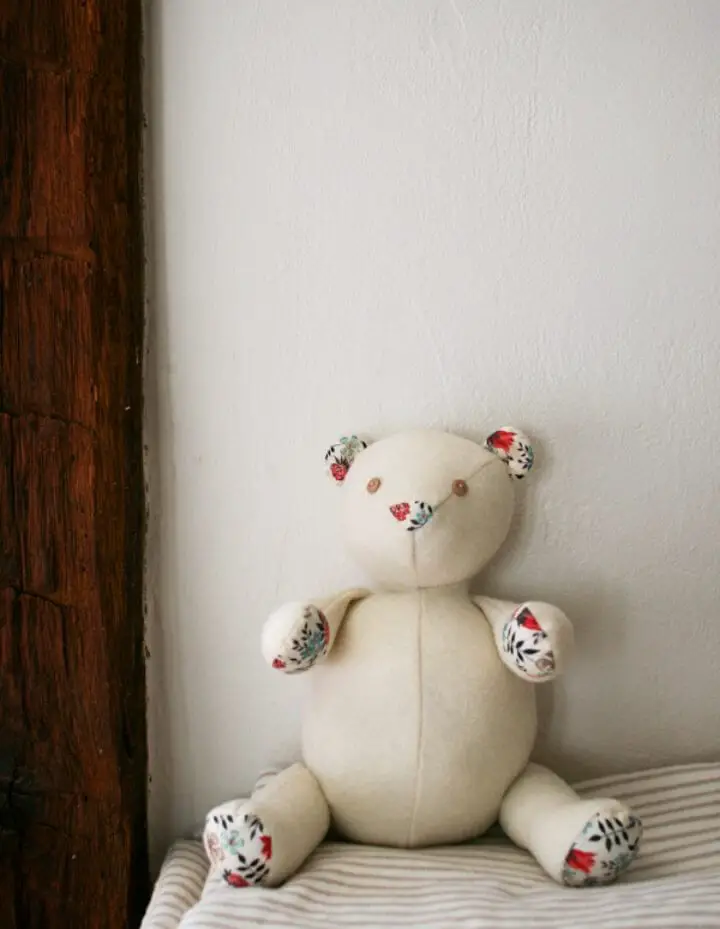
Sew A Cute Little Soft Baby Teddy Bear
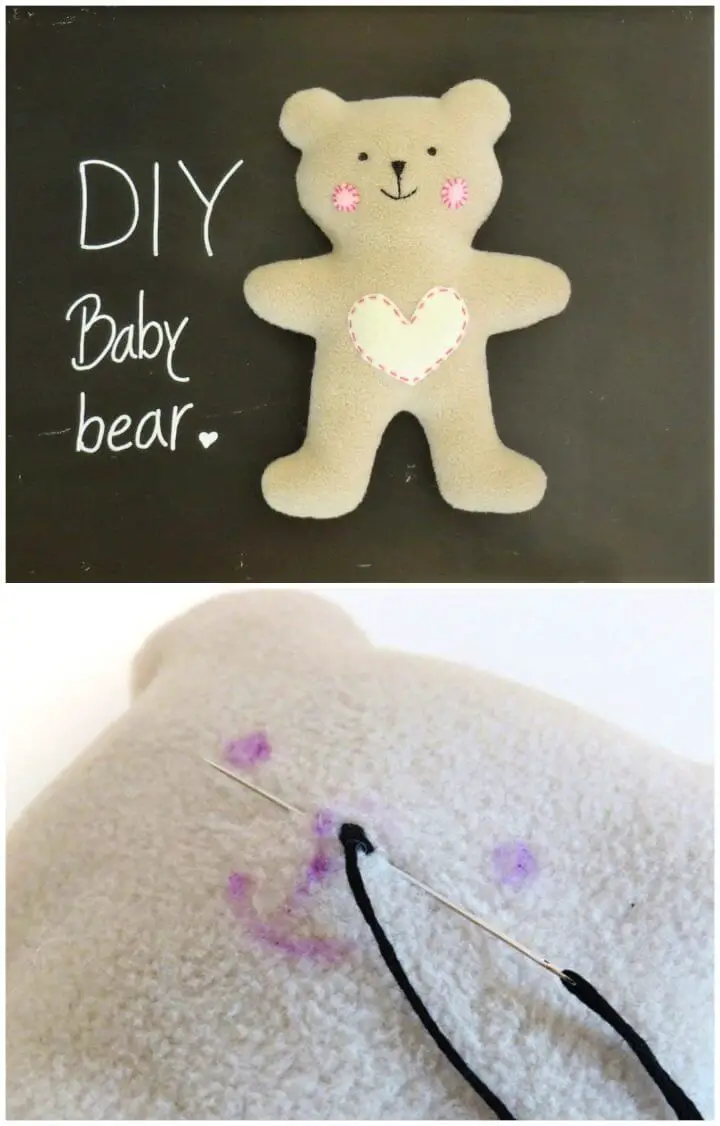
For many children, losing a beloved stuffed animal can be a traumatic experience. That’s why we’ve created a DIY guide to making a soft and cuddly baby teddy bear that’s sure to bring a smile back to your little one’s face. This adorable toy features creamy white fur, blush-colored cheeks, and a heart-shaped appliqué that adds an extra touch of sweetness. With these easy steps, you can recreate this delightful companion and bring joy back to your child.
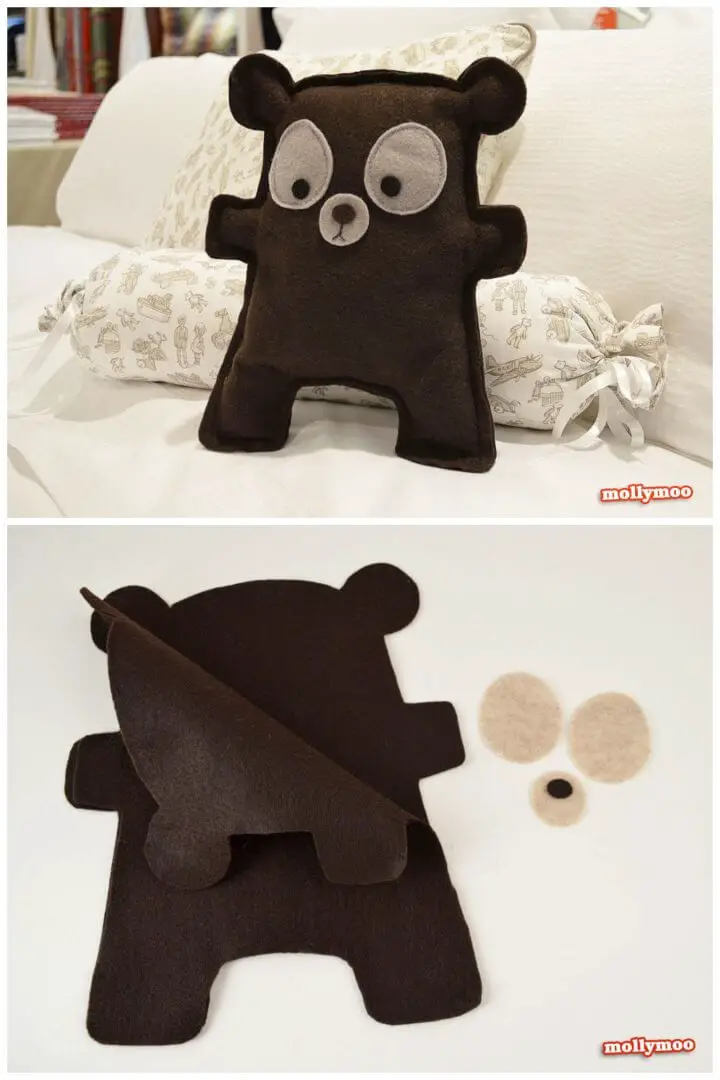
DIY Felt Dress-up Bear
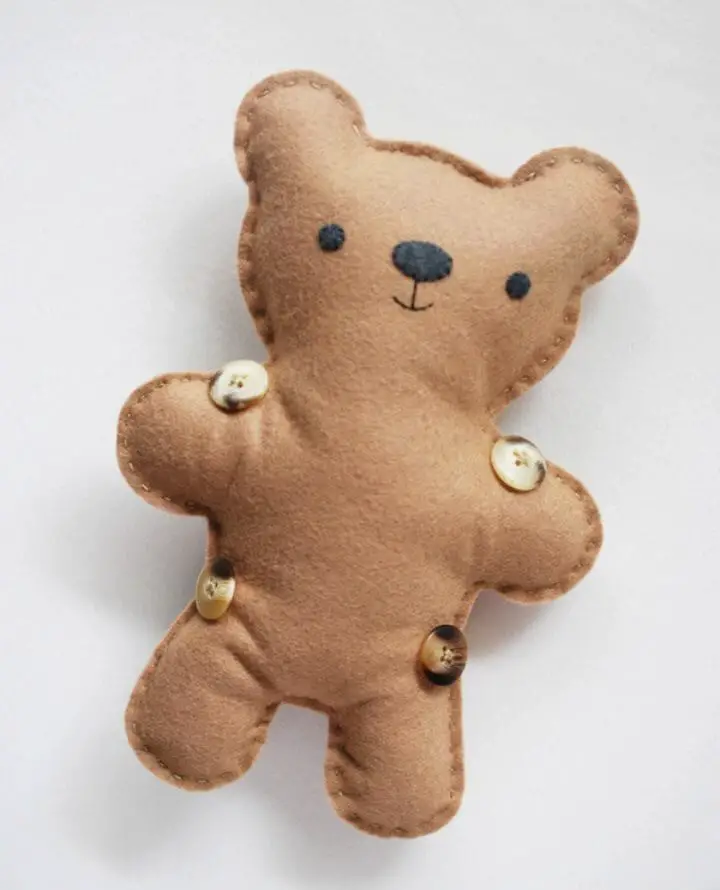
When it comes to toys for kids, the more the merrier is a fitting phrase – especially when it comes to cute and colorful playthings. One simple and budget-friendly DIY project that’s sure to delight your little ones is creating a felt dress-up bear at home. To get started, gather some brown felt, stuffing material, and buttons, then let your creativity shine as you shape this adorable toy by hand.
How to Make a Teddy Bear
The allure of teddy bears is undeniable – even those who claim to be teddy bear collectors already possessing a plethora can’t resist the charm of adding another to their collection. This project aims to create a lovable teddy bear using nude-hued stiff fabric, ensuring it will remain a beloved companion for your children over the years. The details that make this teddy so special are as follows:
How to Care for Your Teddy Bear
When it comes to the cherished companionship of a teddy bear, it’s only natural that you’d want to ensure its cleanliness and durability. To achieve this, learning proper washing, drying, and storage techniques is crucial. By adopting these simple habits, you’ll be able to keep your beloved teddy bear in pristine condition, preserving its softness and overall aesthetic appeal.
Washing:
Before giving your teddy bear a bath, take a moment to review the care label for any specific washing instructions or precautions. It’s possible that some cuddly companions may require special handling due to their material composition or construction. If you’re unsure about the best approach, it’s generally recommended to opt for a gentle, by-hand wash using mild soap and lukewarm water. To minimize risk of damage or matting, avoid wringing or twisting the bear’s fabric as you gently squeeze out excess moisture. For added TLC, consider using a soft-bristled brush to delicately remove any dirt or stains from the fur.
Drying:
To restore your teddy bear’s plushness, you can either rely on air circulation or utilize a gentle drying cycle. When opting for air drying, carefully lay the bear flat on a towel in a well-ventilated area, shielded from direct sunlight and heat sources. Regularly fluff out the fur to prevent matting, ensuring it remains smooth and soft. If you prefer to use a dryer, set it to a low heat setting and tumble dry with a few clean towels. Monitor the bear’s progress regularly, removing it when it reaches an almost-dry state. It’s crucial not to over-dry or overheat the bear, as this may compromise its fur or internal stuffing.
Storing:
When it comes to storing your treasured teddy bear, you have several options available. You can choose to display it on a shelf, bed, or mantle, but make sure it’s protected from dust, moisture, insects, and pets. To add an extra layer of protection, consider draping it with a soft cloth or plastic bag to shield it from fading or staining. Alternatively, you can store your teddy bear in a clean and dry box or bag. To further safeguard against mold and moths, try incorporating natural deterrents like lavender sachets or cedar chips. Lastly, steer clear of storing your teddy bear in damp or hot environments, as this can lead to mildew or deterioration. By following these guidelines, you’ll be able to maintain the integrity of your beloved teddy bear and continue to enjoy its company for years to come.
How to Repair Your Teddy Bear
With time, accidents, and mishaps, your beloved teddy bear may incur damage that seems irreparable. However, before considering a replacement, you can breathe new life into it by employing simple sewing techniques or patches. To guide you through the process, here’s a step-by-step approach to repairing your teddy bear:
Assess the damage:
To embark on the teddy bear repair journey, begin by thoroughly inspecting the plush companion’s condition. Identify the nature and scope of the damage – is it a tear, hole, loose or missing part? Take note of its size and location. If necessary, turn your teddy bear inside out to gain a clear view of the affected area. Additionally, you may need to carefully remove some stuffing to access the damaged section, allowing for a more accurate assessment.
Gather the materials:
When it comes to mending your beloved teddy bear, the type of materials needed depends on the extent of the damage. A starter kit might include essentials like needle and thread, scissors, pins, fabric glue, and patches. For more intricate repairs, you may need to draw upon a wider range of supplies, such as fabric scraps, buttons, beads, safety eyes, felt pieces, or embroidery floss. If you’re comfortable with the process, a sewing machine can also be a valuable asset in your teddy bear repair arsenal.
Sew the tear or hole:
When repairing a teddy bear with a tear or hole, sewing the opening shut can be a straightforward task. The choice of thread color depends on personal preference – you can opt for a matching shade or something contrasting to add visual interest. Additionally, applying fabric glue along the seam can provide extra reinforcement. To complete the repair, you can use one of three stitches: Ladder, Whip, or Blanket.
The Ladder stitch creates an invisible seam by inserting the needle from inside the tear or hole and bringing it out on one side of the edge. Then, you’ll insert the needle on the opposite side of the edge and bring it out on the same side as before. Repeat this process until the tear or hole is closed.
The Whip stitch is a simple and effective option that wraps around the edge of the tear or hole. To use this stitch, start by inserting the needle from inside the tear or hole and bringing it out on one side of the edge. Then, wrap the thread around the edge before re-inserting the needle on the same side as before. Continue this process until the tear or hole is sealed.
The Blanket stitch adds a decorative touch by creating a border around the edge of the tear or hole. To use this stitch, start by inserting the needle from inside the tear or hole and bringing it out on one side of the edge. Then, insert the needle on the opposite side of the edge and bring it out on the same side as before. Before pulling the thread tight, loop it around the needle and then pull it tight. Repeat this process until the tear or hole is closed.
Attach a patch:
When your teddy bear’s fabric is compromised by a large tear or hole, you have two primary options for repair: sewing and gluing. For either method, start by selecting a suitable patch – it can be a matching scrap of fabric from the teddy bear’s original material, a contrasting piece that adds visual interest, or even a pre-made patch with a cute design or message. To prepare the patch, cut out a slightly larger piece than needed to cover the damage and shape it into a circle or oval, depending on the area you’re covering. Place the patch over the damaged section and secure it in place using pins. Then, choose your preferred attachment method: sewing the edges and corners with one of several stitches available, or applying fabric glue to hold everything together. Regardless of which approach you take, make sure all edges are fully covered for a strong and durable repair.
Fix or replace a loose or missing part:
When a beloved teddy bear’s part comes loose or goes missing, the first instinct is often to panic. However, there’s no need to stress – with some basic sewing skills and a little creativity, you can easily fix or replace the offending piece. To mend a loose part, simply use a needle and thread to sew it back in place. You can opt for matching or contrasting threads, depending on your personal preference. Additionally, fabric glue can be used to add extra reinforcement to the attachment. For those who are new to sewing, this is a great opportunity to practice and hone their skills.If the missing part is more significant, you’ll need to find a suitable replacement that complements or contrasts with the teddy bear’s fur. This could involve using buttons, beads, safety eyes, felt pieces, fabric scraps, patches, or embroidery floss. Alternatively, you can get creative and craft your own replacement by cutting out a piece of fabric and sewing it into shape. Once complete, attach it to the teddy bear using a needle, thread, or fabric glue.By following these simple steps, you’ll be able to repair your teddy bear and restore it to its former glory.
How to Upcycle Your Teddy Bear
If you’re holding onto an old or unwanted teddy bear, don’t toss it just yet. Instead, consider giving it a creative makeover through the process of upcycling. This innovative approach transforms something without value into something entirely new and functional. For instance, here are some practical ideas on how to breathe new life into your beloved but no-longer-needed cuddly companion.
Pillow:
Transform your beloved teddy bear into a plush pillow that’s both functional and sentimental. To start, gently remove some of the filling from the bear’s body and head, then sew them together to create a unique pillow shape. Consider adding a zipper or button closure for easy maintenance and customization. But that’s not all – you can also give your new pillow some extra flair by adorning it with ribbons, buttons, or intricate embroidery. The result is a one-of-a-kind home decor piece that combines the comfort of a pillow with the nostalgia of a treasured childhood companion.
Bag:
Transform your teddy bear into a charming tote or pouch for yourself or your little one. To create the handle, simply sever the arms and legs from the bear and sew them together. For added functionality, consider adding a zipper or button closure to the bear’s body, allowing it to open into a pouch. Feel free to embellish the bag with decorative elements like beads, sequins, or patches, giving it a unique and personalized touch.
Puppet:
Transform your teddy bear into a delightful puppet that can bring joy to both children and adults alike. To get started, carefully cut off the back of the head, allowing you to insert your hand inside. Next, add some functionality to the mouth by attaching velcro or snaps, enabling it to open and close. Finally, personalize your puppet with accessories such as glasses, hats, or scarves, giving it a unique character that’s sure to entertain.
Cushion:
Transform your beloved teddy bear into a unique and cozy seat cushion by repurposing its soft insides. Simply extract some of the stuffing from the bear’s body, then sew the opening shut. To add an extra touch of personality, embellish the front with buttons or intricate embroidery. For added visual interest, consider using distinct fabrics or colors for the front and back of the cushion, allowing you to create a truly one-of-a-kind piece that reflects your personal style.
Pin cushion:
Transform your beloved teddy bear into a functional pin cushion for your sewing endeavors by giving it a creative makeover. Begin by removing the head of the teddy bear and replenishing its stuffing to achieve the desired shape and size. Next, adorn the neck area with a ribbon or lace trim to add a touch of elegance. For an extra flair, experiment with various types of pins or needles to create unique patterns or designs on the pin cushion. By upcycling your teddy bear in this manner, you’ll not only breathe new life into an old favorite but also reduce waste and promote sustainability.
Frequently Asked Questions:
How much fabric do I need for a teddy bear?
When crafting a teddy bear, the amount of fabric needed depends on the size and complexity of the design. A standard-sized teddy bear typically requires around 1 yard of fabric, while larger or more intricate bears may necessitate additional fabric for features such as bows, buttons, or other embellishments. To ensure you have enough material to work with, it’s essential to factor in some extra fabric for any potential mistakes or creative liberties taken during the construction process.
How do you cut a teddy bear pattern?
To create a teddy bear pattern, you’ll need to prepare templates of each component. These must be transferred onto fabric using tracing methods or rotary cutters. When combining disparate pieces, secure them with pins to ensure accurate placement. For curved seams, employ a curved needle to facilitate smooth stitching. Prior to completing the final seam, fill your bear’s body with fiberfill for optimal plumpness.
What material should I use to make a teddy bear?
To bring a cuddly teddy bear to life, you’ll need to start with the right materials. Soft fabrics like mohair or short-pile fur provide the perfect foundation for your creation. For the stuffing, polyester fiberfill is an excellent choice, as it allows for a soft and cuddly interior. Small pieces of cardboard can be used to shape the bear’s nose and eyes, giving them a sweet and endearing appearance. Additionally, thread and needles are essential tools for sewing all the parts together seamlessly. Finally, safety eyes and a nose can be added to give your teddy bear its finishing touches and a dash of personality.
Where can I download a free teddy bear pattern?
At DIYCraftsy, we’re proud to offer a vast collection of complimentary teddy bear patterns for crafty enthusiasts to enjoy. Among our extensive library of free printable designs, you’ll discover dozens of adorable and easy-to-follow templates. To ensure a successful crafting experience, be sure to thoroughly review the instructions and verify that you have all the necessary materials before commencing your sewing project.
How do you make a teddy bear step by step?
To create a cuddly teddy bear, start by cutting two matching fabric pieces for the front and back of the bear’s body. Next, sew these two pieces together, leaving a small opening for stuffing the plush material inside. Once you’ve filled the bear with fluff, close the opening with a few stitches. The next step is to add the limbs and facial features using felt or embroidery thread – eyes, nose, and mouth are all fair game! Finally, attach the head and limbs to the body with some careful stitching, and your very own teddy bear is ready for snuggles!
How to make teddy bear clothes at home?
Creating bespoke attire for your beloved teddy bears is a delightful DIY project that requires minimal skills. Begin by taking precise measurements of your cuddly companion, then proceed to cut out the fabric according to these dimensions. Next, sew around the edges, leaving a small opening for inserting cotton or alternative filling materials. Once you’ve stuffed the garment to perfection, seal the gap with either hand-stitched or machine-sewn seams. Finally, dress your teddy bear in its unique new outfit and bask in the joy of having created something special together! The sense of accomplishment and the adorable result will surely bring a smile to your face.
Conclusion:
Start your teddy bear crafting journey with these 22 free and beginner-friendly patterns that can be downloaded instantly as PDFs. With no upfront costs to worry about, the possibilities are endless – create as many cuddly companions as you like and enjoy the process of bringing them to life.
