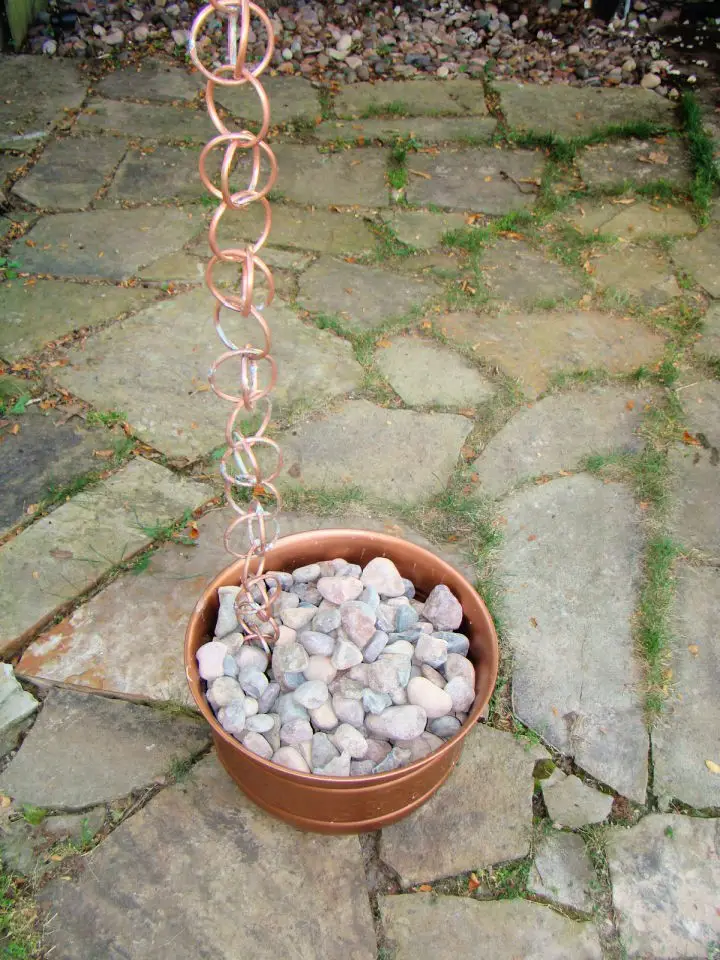
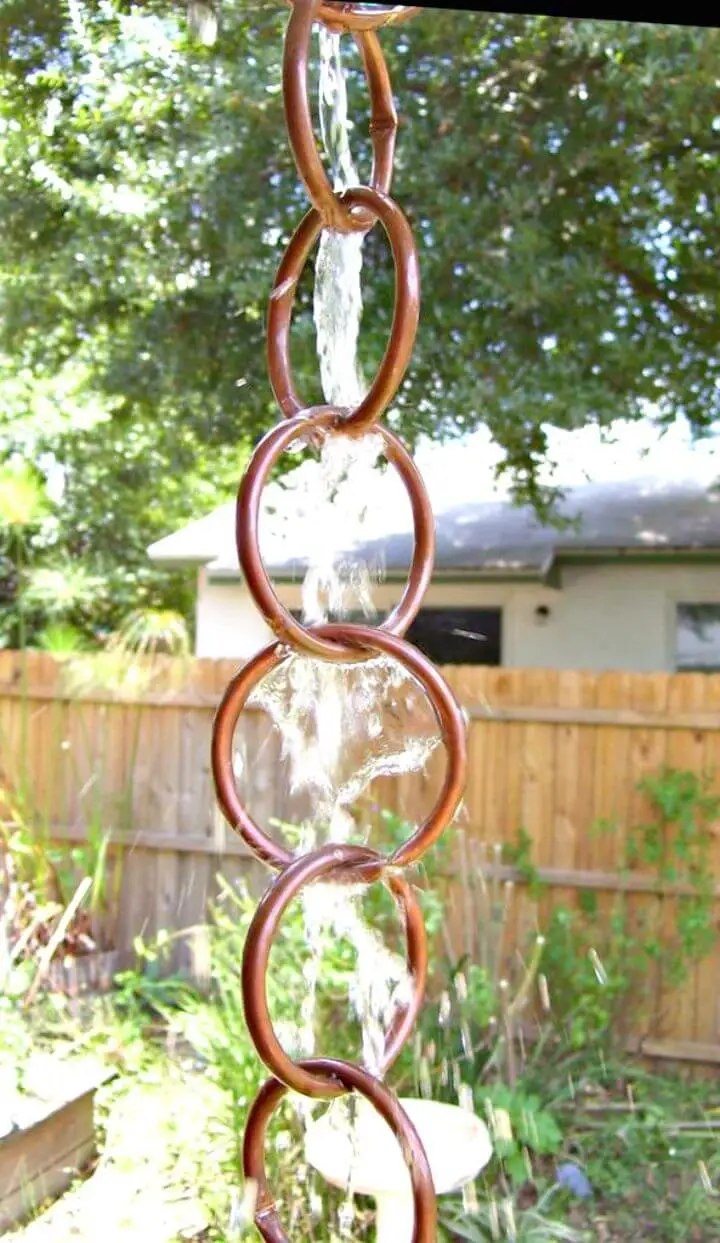
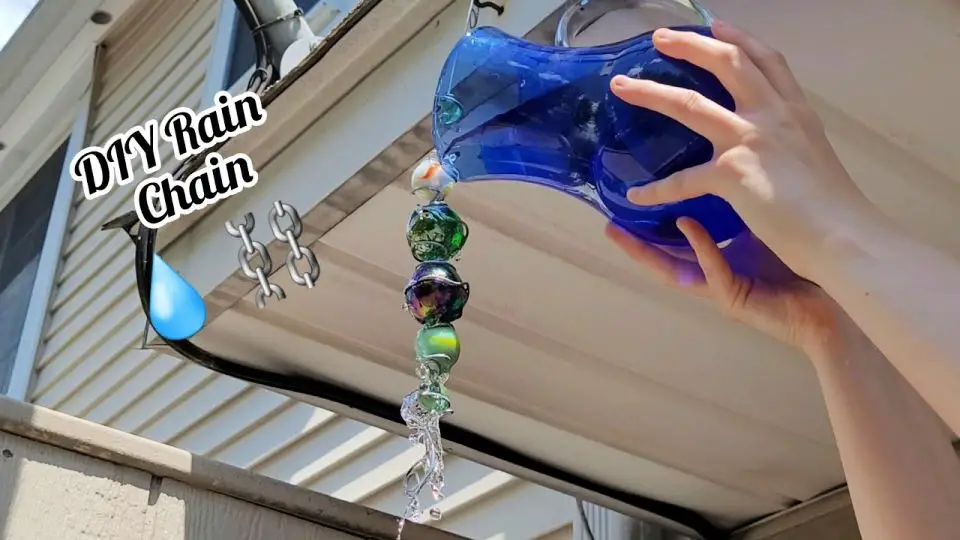
Cheap and Easy Copper Rain Chain
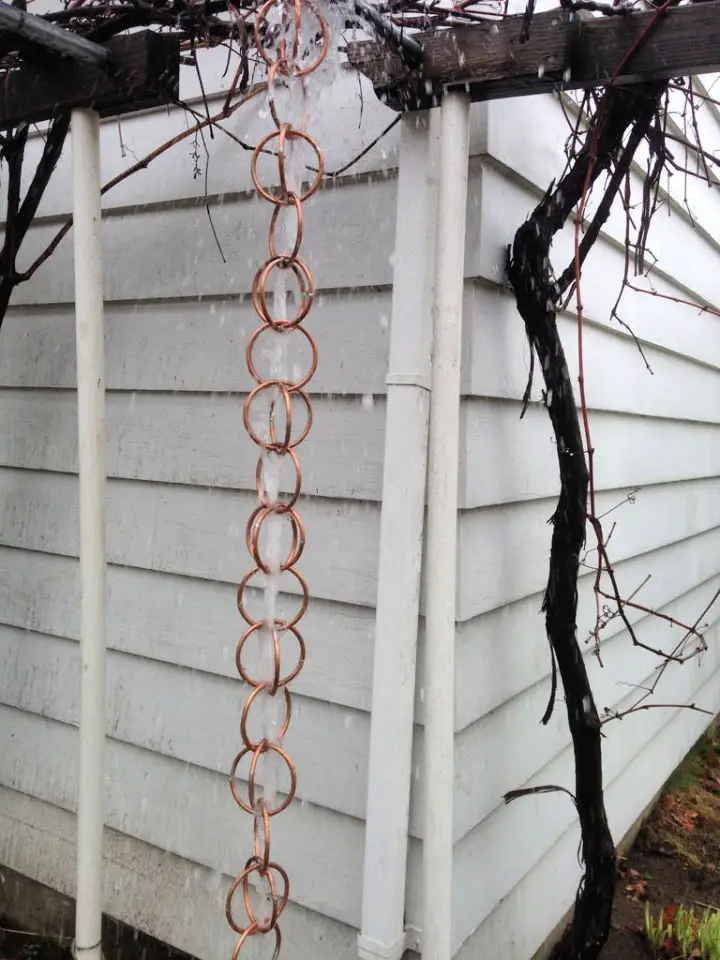
Transform your outdoor space with a one-of-a-kind copper rain chain, crafted using affordable and easily accessible materials. To begin, prepare a selection of tools, including PVC pipe, copper wire, solder, flux, pliers, cutter, hammer, and cable ties. Next, create the foundation of your project by notching one end of the PVC pipe with a saw, then shaping it into a spiral form using your fingers. Secure the spiral tightly with cable ties to prevent unraveling. Once you’ve achieved the desired shape, cut rings from the tube using a cutter or hacksaw blade, and join them together using solder to form links in the chain. Finally, assemble each link to create an eye-catching rain chain that will beautifully complement any garden or patio setting.
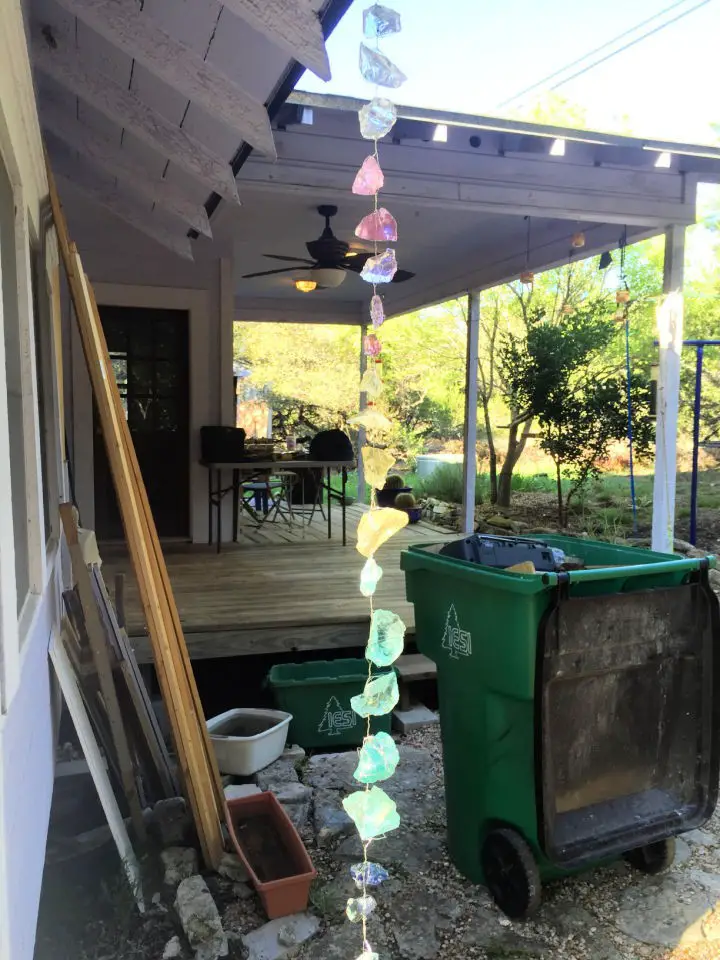
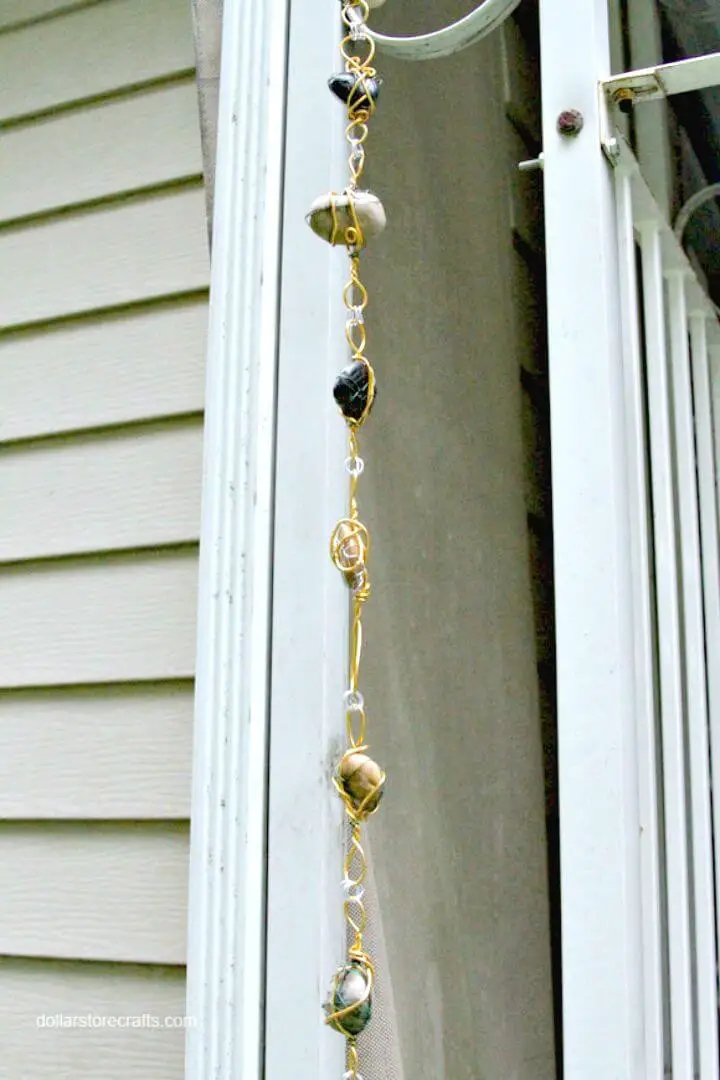
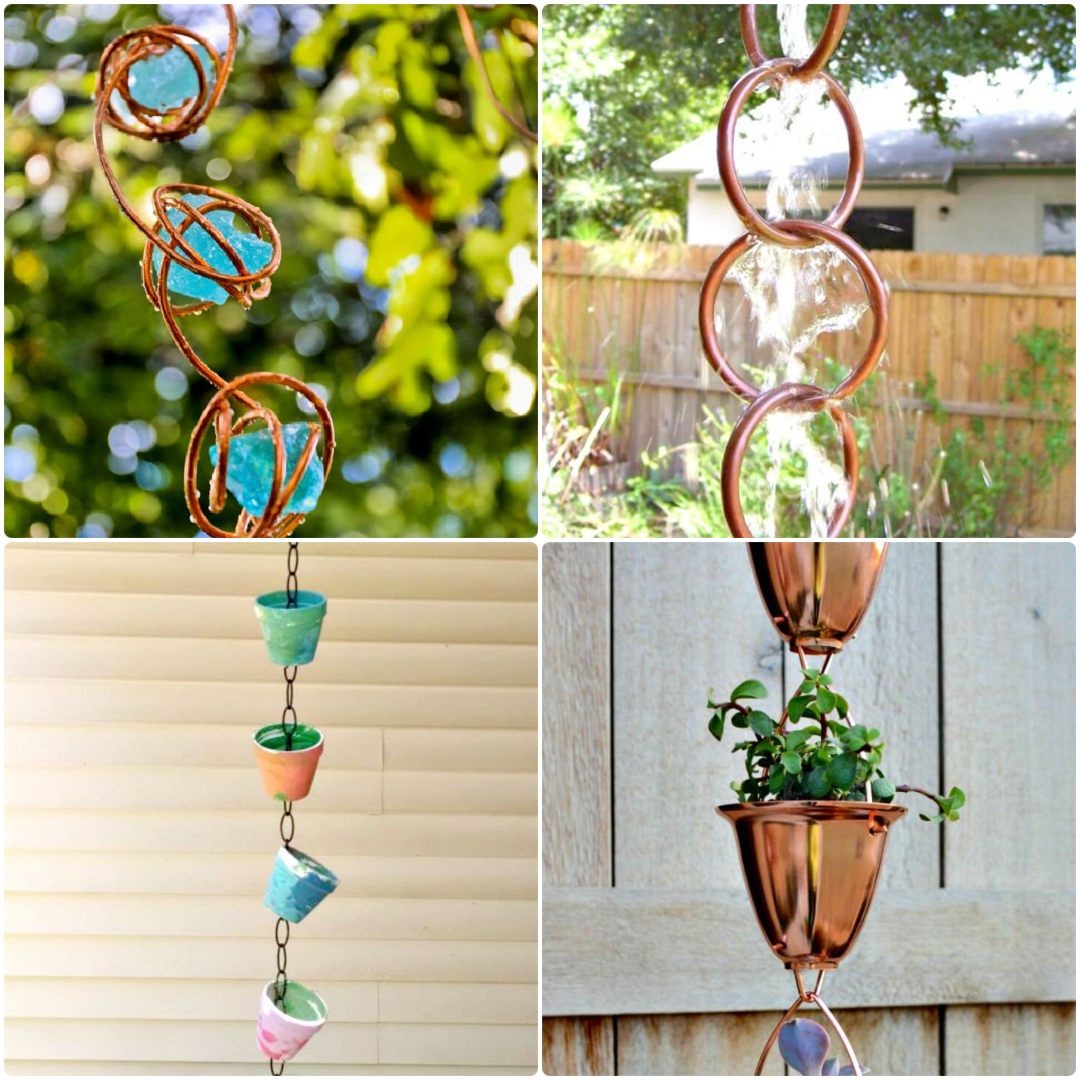
Make a Rain Chain With Copper Wire and Glass Chunks

Transform your outdoor decor with a one-of-a-kind rain chain created using copper wire, recycled glass chunks, and rocks. This accessible DIY project is ideal for crafters of all skill levels seeking to add a touch of elegance to their patio or garden. To get started, gather basic tools like wire cutters and an assortment of colorful glass fragments or medium-sized stones – the creative possibilities are limitless! With this project, you can tailor your design according to color scheme, size, or texture, ultimately reaping the rewards of your imagination.
How to Make Rain Chains at Home
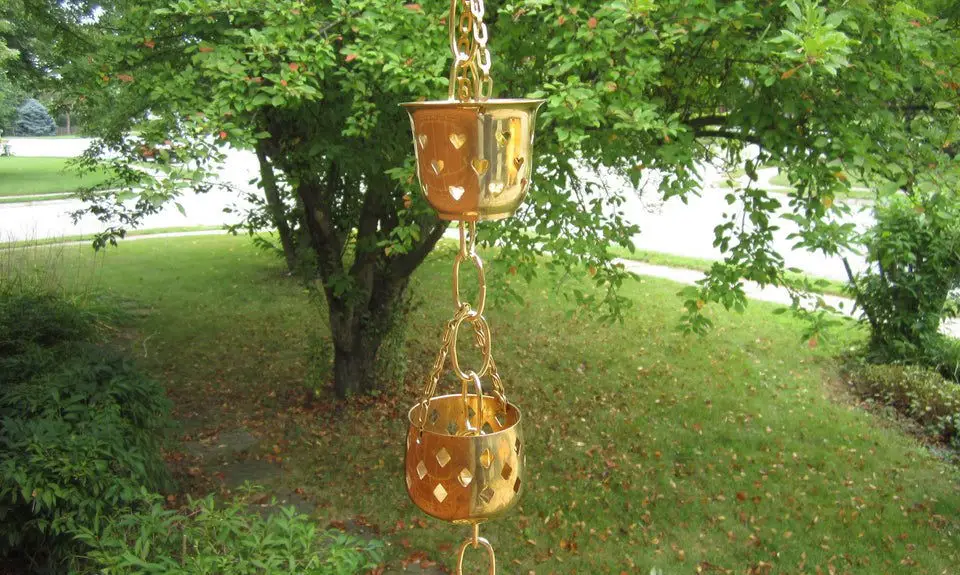
To create a beautiful and functional rain chain, you’ll need the following materials: brass plumber’s chain, decorative cups or candle holders, clear sealer, safety glasses, bolt cutters, tape measure, drill and bit set, hole saws, and an optional Dremel rotary tool. Before you begin, take a moment to measure the length of your rain chain to ensure it fits perfectly in its intended space. Using bolt cutters, carefully trim the chain to the desired length, taking care to protect yourself with safety glasses during the process. Next, drill holes along the entire length of each cup or holder to accommodate the chain’s full extent. For circular-shaped cups/holders, a hole saw will be sufficient, while other shapes may require the use of a Dremel tool. To prevent rust from forming on exposed metal parts over time, apply clear sealer as needed and hang your finished rain chain with pride!
Making a Rain Chain With Yogurt Jar
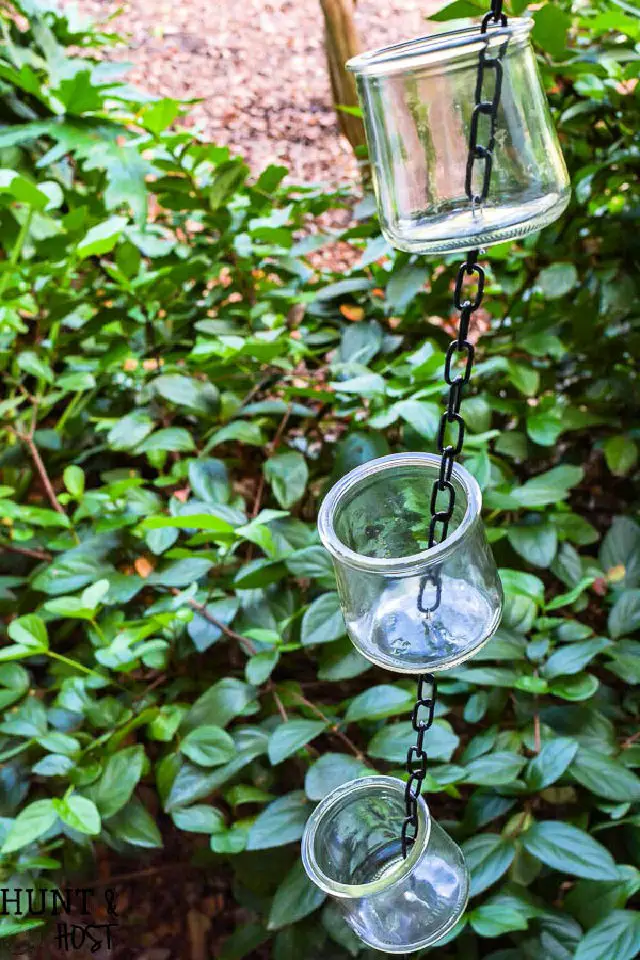
Elevate your outdoor space with a unique fusion of traditional Japanese design and modern elements. Repurpose Oui yogurt jars into an exquisite rain chain, offering endless creative possibilities. To get started, employ a glass drill bit to create evenly spaced holes along the sides of the jars. Next, thread the chain through each aperture until all the jars are connected by it. For a secure finish, utilize wire and cutters to anchor the bottom end of the chain to a designated point on your house, ensuring it remains in place. This captivating project not only adds an air of elegance but also helps mitigate water runoff during heavy rainfall.
Make a Rain Chain With PVC Pipe
Transform your outdoor space with a unique and captivating feature: a DIY rain chain crafted from PVC pipe. To create this eye-catching installation, gather the following materials: 2-inch wide PVC pipe, marker, drill with a 1/4-inch bit, spray paint, 4-inch landscape pins, 1/2-inch split metal rings, small scrap wood pieces, and screws.
Begin by marking eight 3-inch diameter circles on each side of the pipe using a marker. Then, use pliers and wire cutters to drill holes in each circle after painting the pipe with spray paint.
/nNext, connect all the pieces together using the split metal rings. Finally, secure them to the ground with landscape pins and screw them into the wood for added support. As rainwater flows through your newly created rain chain, you’ll be treated to a mesmerizing display that will leave you wondering why you ever settled for plain old gutters.
Make Your Own Ceramic Rain Chain
To create a unique ceramic rain chain, start by gathering your materials: 20 blue ceramic bowls, 10 meters of galvanized steel wire, pliers with a wire cutter, an angle grinder equipped with a ceramic/glass cutting blade, an electric drill featuring a concrete bit and a wood/plastic bit, personal protective equipment such as gloves, paper, a wooden board to provide support during the sculpting process, approximately 20 nails of varying sizes to secure the rope in place while shaping the clay, scissors, a pencil, ruler, and a hammer. With these tools at your disposal, you’ll be well on your way to crafting an impressive piece that you can take pride in.
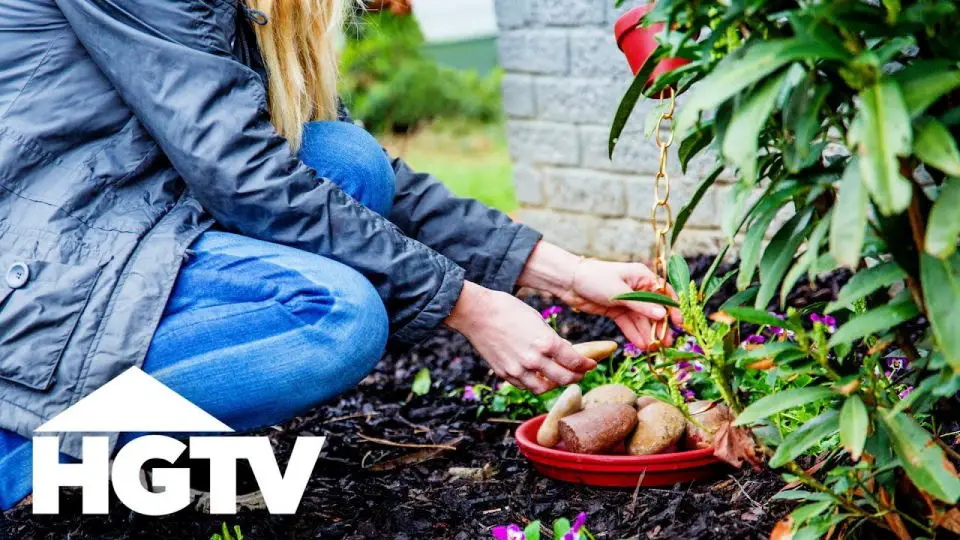
How to Install a Rain Chain
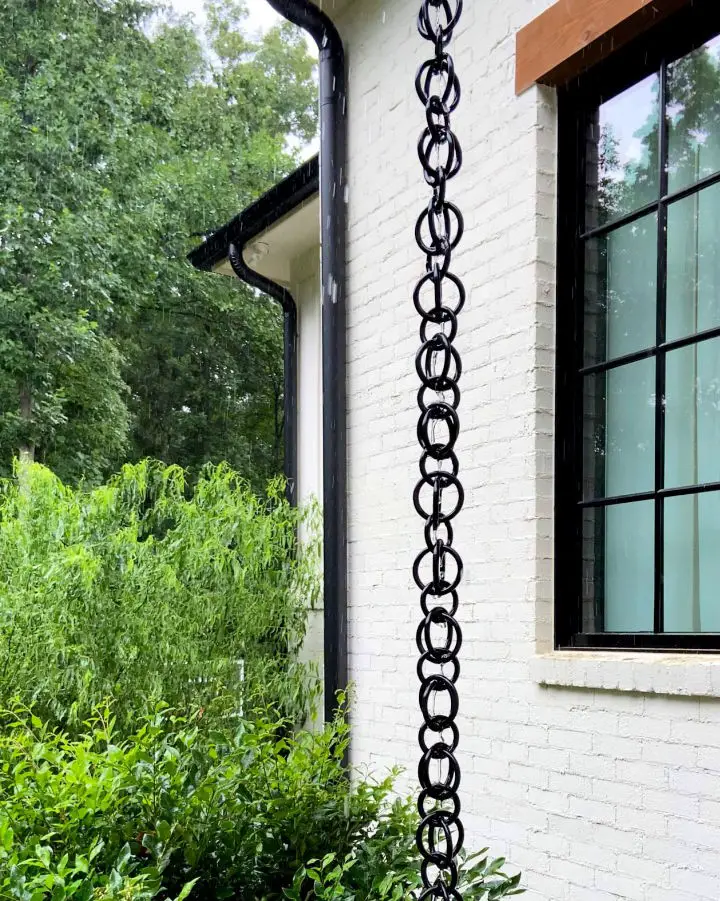
Transforming your outdoor space into a serene oasis is easier than ever with the installation of a rain chain. To get started, begin by creating an opening in the gutter where the outlet will reside. Next, insert the outlet into the gutter, allowing it to collect rainwater flowing from above. Once the foundation is set, hang your chosen rain chain, accompanied by decorative accessories such as cups or rings, if desired. Finally, secure the bottom of the chain with an anchor stake, not only ensuring its stability but also directing excess water away from property structures and foundations. With these straightforward steps, you can turn rainy days into breathtakingly beautiful experiences.
Gorgeous Rain Chain Using Binder Rings
Transform your garden or backyard into an idyllic retreat with a visually striking rain chain crafted from binder rings. This DIY endeavor is not only quick and easy but also budget-friendly, requiring merely a few basic materials: binder clips and spray paint. Begin by giving the clips a copper makeover using indoor/outdoor spray paint, then creatively link them together in a pattern that resonates with your personal style. Finally, secure the chain to a shepherd’s hook or downspout, and behold your outdoor space transformed into a breathtaking haven.
Handmade Mini Bucket Rain Chain
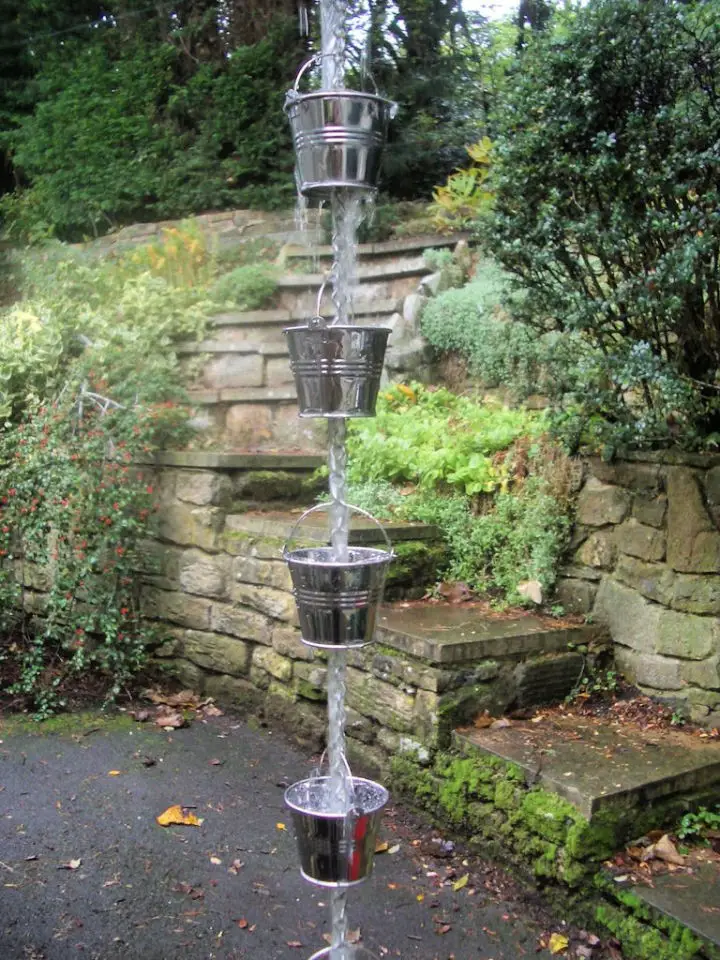
Elevate your backyard’s ambiance by transforming traditional downspouts into stunning rain chains, perfect for making a statement in your outdoor design. Handcrafted mini bucket rain chains offer an unparalleled blend of aesthetics and functionality.
Each meticulously crafted piece is the result of careful consideration: selecting the ideal bucket and chain length, drilling precise holes for the link chain, suspending it at a height that showcases its beauty, and then finally attaching each individual bucket to create a one-of-a-kind masterpiece.
Ready for installation, this exquisite handmade rain chain will be a crowning glory for your home’s exterior decor. Bring a touch of elegance to your outdoor space with our bespoke creation.
Homemade Rain Chain Using Slag Glass
Transform your outdoor space into a unique oasis by crafting a one-of-a-kind rain chain using slag glass. This DIY project is surprisingly straightforward, requiring only basic supplies such as various sizes and colors of slag glass, 20 gauge wire, needle nose pliers, gloves, safety goggles, and an old bath towel. With these essential items, you can create a breathtaking rain chain featuring colorful links that will mesmerize onlookers. As the rainfall pours down, this homemade art form will become an eye-catching focal point in your garden or backyard, elevating your outdoor space to new heights of beauty.
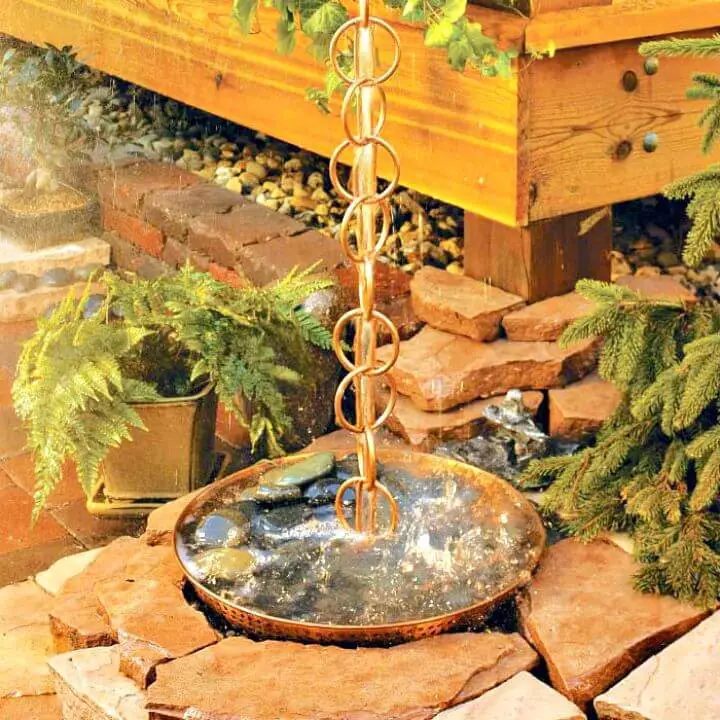
Adorable Copper Pipe Rain Chain
Transform your home’s exterior with the whimsical charm of an adorable copper pipe rain chain. To create this unique feature, begin by cutting the coil into parallel sections for seamless soldering later. Once prepared, join the links together while pointing the hole away from the house. Fill the resulting channel with landscape rock to add a touch of elegance and sophistication. As time passes, the copper pipe will naturally develop a lovely green patina. For an extra layer of uniqueness, experiment with acid treatments to achieve distinct patinas, ultimately creating a truly one-of-a-kind work of art.
DIY Copper Rain Chain Succulent Planter
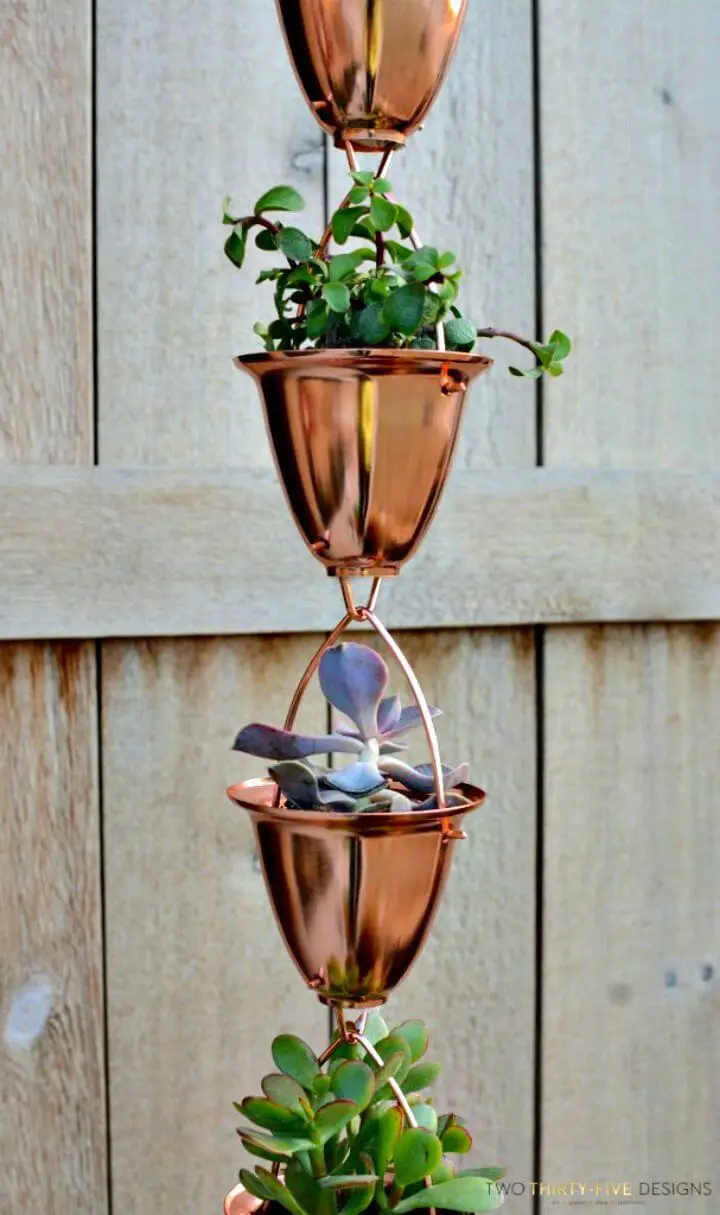
Transform your outdoor space into a stunning oasis by upcycling a copper rain chain into a unique succulent planter. With just a few simple materials, including the rain chain, cheesecloth, potting soil, and a garden hook or similar hanging device, you’ll be able to create a visually striking arrangement that’s sure to draw admiration. Simply hang the copper links from your chosen anchor point, fill each one with succulents and soil, and enjoy the beauty of your handcrafted planter.
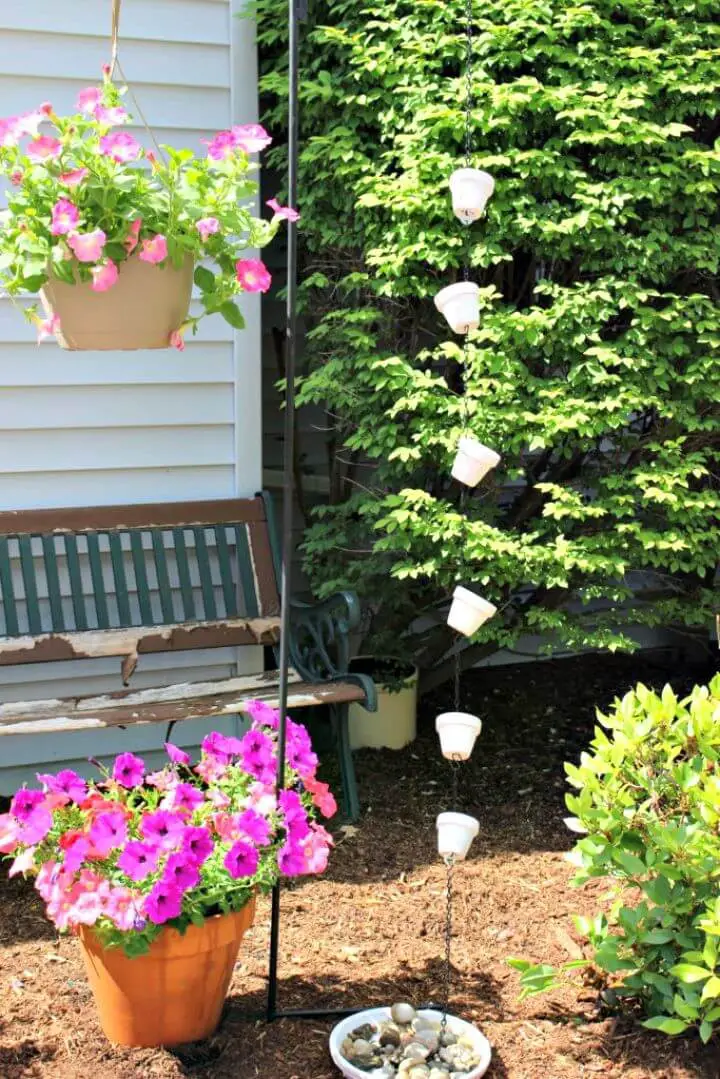
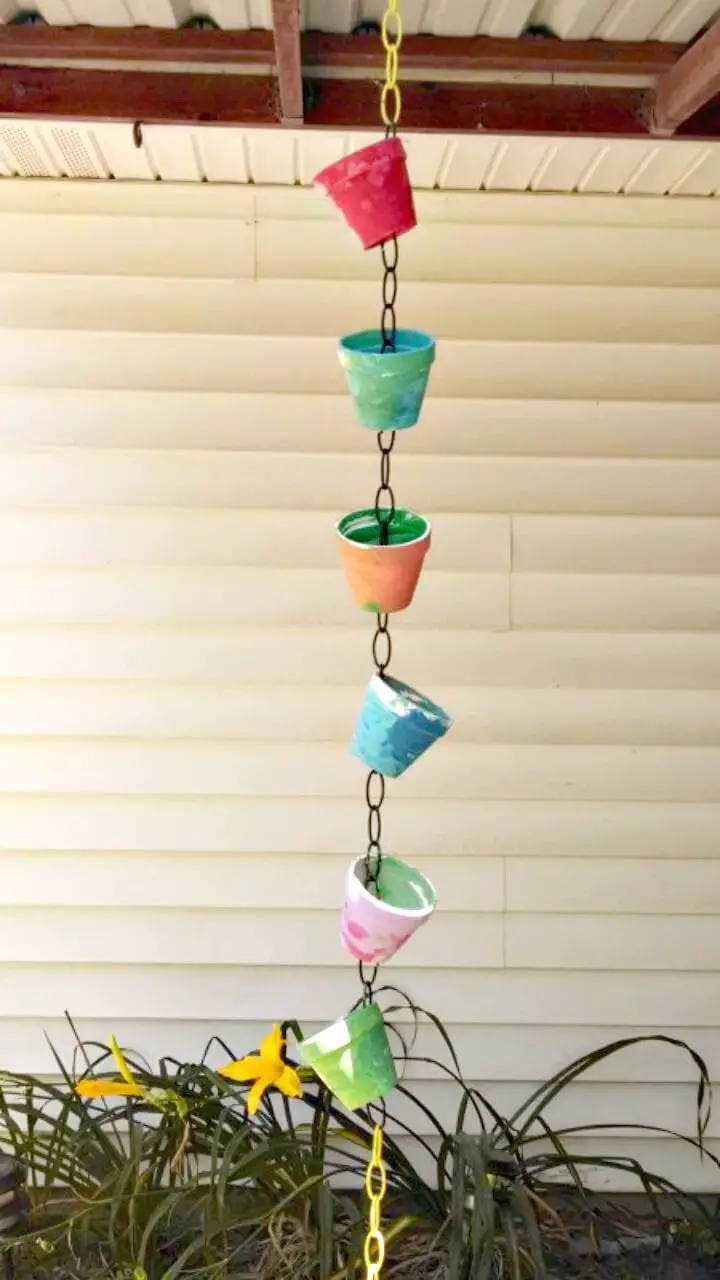
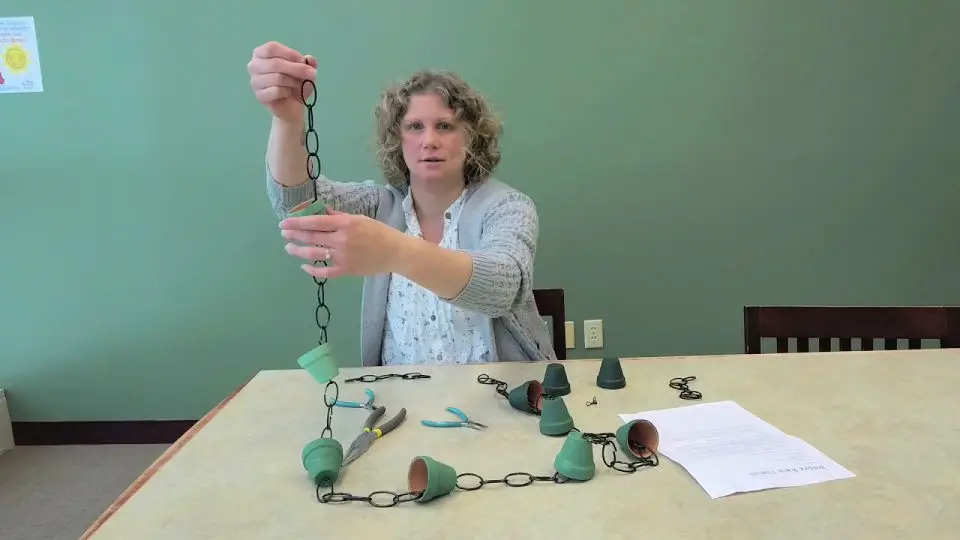
How To Make a Clay Pot Rain Chain
Transform your outdoor space into a mesmerizing display of artistry and functionality with DIY rain chains that harmonize form and function. By combining simple materials, you can create an enchanting water show during rainy seasons.
To craft this unique piece, gather the following essentials: six small clay pots from a dollar store, a saucer, white chalk paint, washers, an 8-foot black chain, river rocks from the same store, and top it off with a shepherd’s hook. The simplicity of this project belies its beauty-enhancing potential.
Begin by painting the clay pots with chalk paint, then attach washers to their edges using glue for added stability. Next, link the pots together in descending order of size using the black chain.
To prevent the pots from flying away when the rain pours, add some river rocks to each pot, giving them a satisfying heft. Finally, suspend this stunning handmade rain chain on your shepherd’s hook and bask in the endless charm it brings with every rainfall.
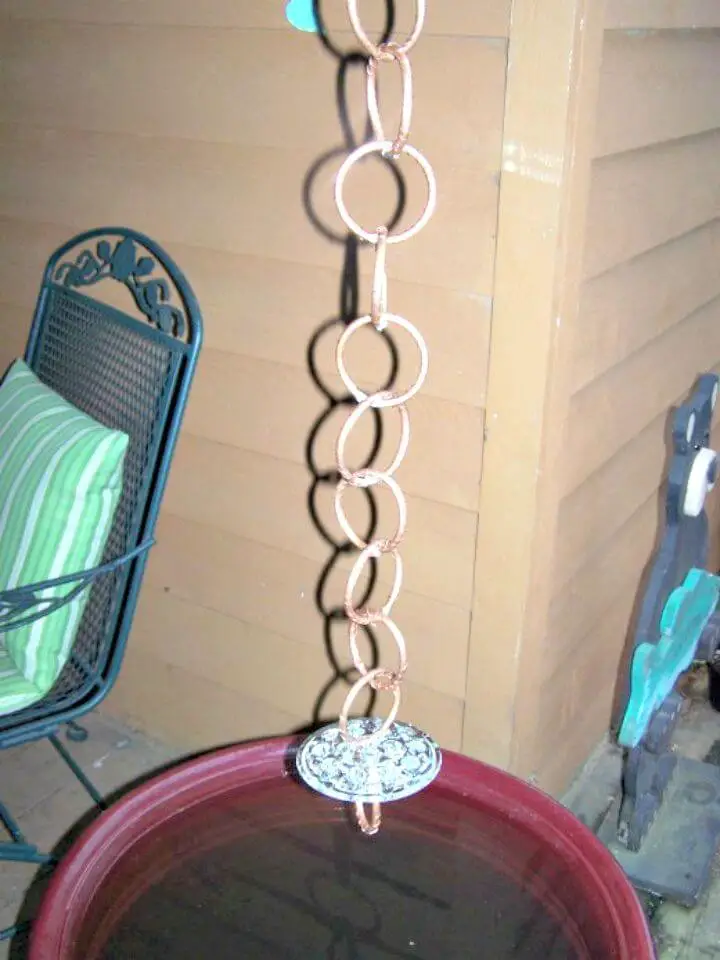
Simple Copper Pipe Rain Chain
Transform a simple copper pipe into an elegant and durable rain chain in just four effortless steps. By coiling the pipe into varying ring sizes, attaching them with flexible jump links, and connecting them seamlessly, you’ll create a stunning and functional piece that will beautifully adorn your home or garden’s exterior. With our step-by-step guide, anyone can craft a long-lasting copper rain chain that adds a touch of sophistication to any setting.
Inexpensive Clay Pot Rain Chain
Transforming ordinary terra cotta pots into a unique rain chain is an accessible DIY project that won’t break the bank. To create this charming feature, gather 6 or more small terra cotta pots, two to three 36-inch extender chains, and some basic pliers. Begin by disassembling the links at the desired points for each pot’s resting place. Next, gently squeeze one side of each link down until it fits seamlessly through the corresponding pot hole. With this simple process, you can enjoy the soothing sound of rainfall cascading down your clay pot rain chain all year round without incurring significant expense or effort.
Stunning DIY Copper Rain Chain

Transform your outdoor space with a stunning copper rain chain, expertly crafted from flexible copper tubing, intricately adorned with copper sheet metal and hobby wire. To bring this project to life, gather the following tools: a broom handle, bench vise, metal cutting reciprocating saw blade, pliers, jig saw, 24 TPI thin metal jig saw blade, cordless drill, and a drill bit designed specifically for drilling metal. By following these steps with precision, you’ll create a breathtaking rain chain that will undoubtedly elevate the beauty of any garden.
Make a Rain Chain Out Of Neon Zip Ties
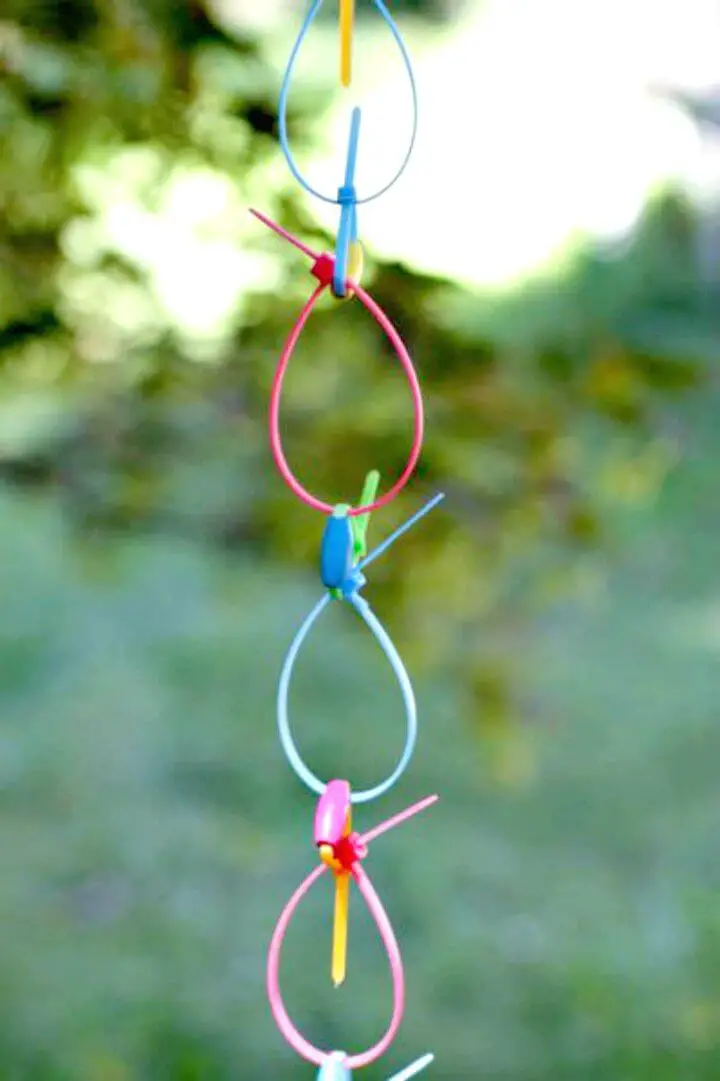
Add a vibrant touch to your home’s exterior with a unique DIY project that’s as fun as it is functional. Create a mesmerizing rain chain using neon zip ties and wooden beads, all for just $2 in materials. Start by forming loops from the larger zip ties, then wrap smaller ones around two loops before linking them together. Continue until you’ve reached your desired length. This easy craft will have you hanging an eye-catching feature outside your house in no time.
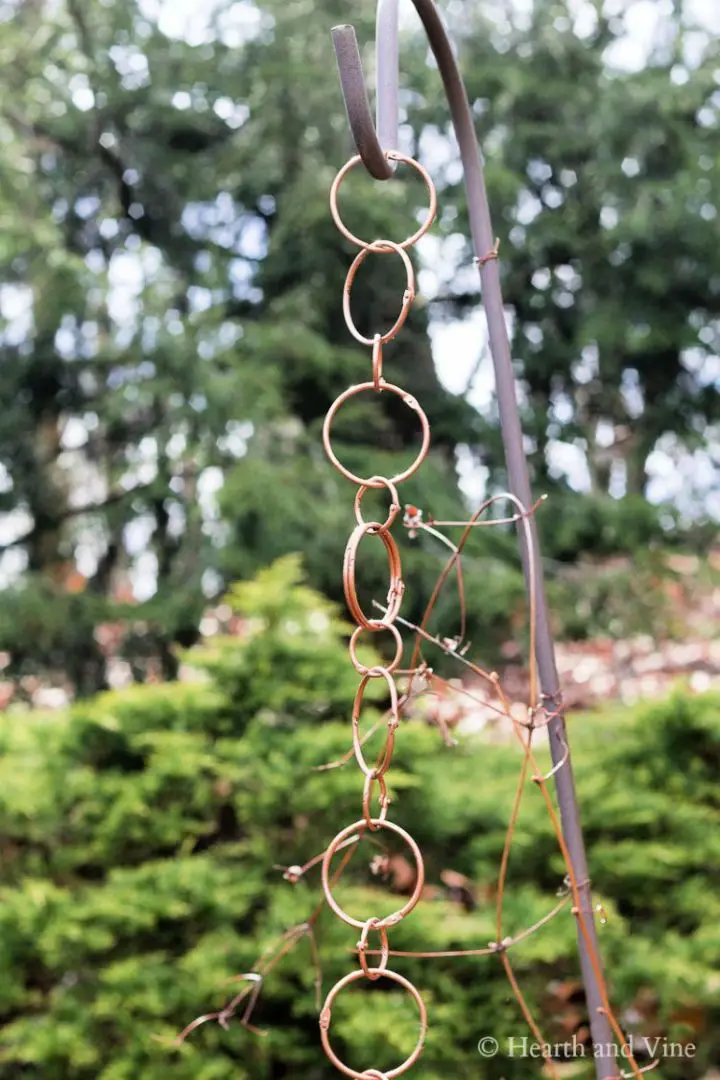
Make a Rain Chain Using Copper Wire
Transform your outdoor oasis into a breathtaking haven with a simple DIY rain chain project. With just a few essential items, including 1/2 inch of soft copper tubing, fine copper wire (optional), a flower frog (optional), and one small piece of 2-inch PVC pipe, you can create a unique and functional masterpiece in no time. Using basic tools like wire cutters, bring your design to life and add a touch of elegance to your home’s exterior. This easy-to-make addition not only enhances the aesthetic appeal of your yard but also helps manage water runoff during heavy rains, making it an ideal solution for any homeowner looking to create a harmonious balance between form and function.
DIY Stock Tank Rain Chain Fountain
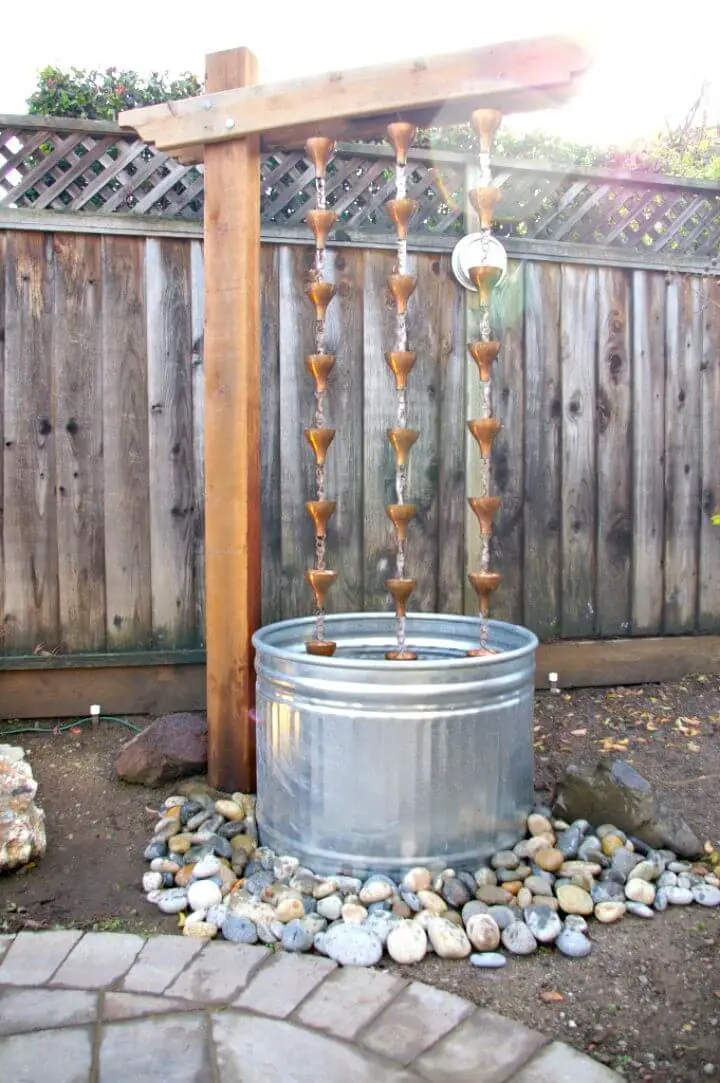
Transform the exterior of your home with creative rain chain ideas, boasting a wide range of designs from copper to DIY projects. To create a stunning fountain, start by sinking a 4×6 post in place, then cut decorative ends on two 2x6s and attach hooks to the inside face of one of them. Bolt these hooks to the 4×6 post, followed by cutting a hole in the back side of a stock tank approximately 9 inches from the bottom for power and tubing. Next, tap into an outdoor outlet, run conduit, and install a weatherproof outlet box. By cutting two chains measuring 8.5 feet each into three shorter chains, each around 5.5 feet long, you’ll be able to create a breathtaking rain chain fountain that will become the focal point of your backyard.
Wire Wrapped Rock Rain Chain
To create a breathtaking wire-wrapped rock rain chain, you’ll need only a few simple materials: 2 spools of floral wire, 5-10 coils of thick decorative floral wire, a bag of decorative river rocks, and some basic tools like paper clips, pencils, wire cutters or needle-nosed pliers. And the best part? No specialized skills are required – just follow along and you’ll be creating an incredible rain chain to adorn your outdoor space in no time. With these simple steps, you can craft a unique home decoration with your own hands, adding a touch of natural beauty to any setting.
Stylish DIY Outdoors Rain Chain
Elevate the curb appeal of your home by installing a visually striking DIY rain chain that doubles as an effective erosion preventer. Unlike traditional downspouts, this stylish solution can add a dash of personality to your exterior while keeping your yard healthy. The installation process is surprisingly straightforward – simply attach the chain to a rod positioned across the gutter opening using an additional gutter screw for support. To ensure optimal performance, consider adding a reducer to enhance water flow. But what truly sets rain chains apart is their customizability. Get creative and adorn each link with beads or other decorative elements that reflect your personal style, making this functional outdoor feature a unique reflection of your taste.
Unique DIY Rain Chain Tutorial

Transform your outdoor space into a charming oasis by crafting a one-of-a-kind rain chain. This whimsical DIY project combines functionality with artistic flair, making it the perfect choice for those seeking a unique decorative accent. Drawing inspiration from traditional Japanese water features, this tutorial guides you through the process of designing and assembling your own rain chain. With its intricate design and soothing sound, this decorative piece will add a touch of serenity to any garden setting.
Make Ombre Rain Chains With Step by Step Instructions
Transform your landscape by incorporating sustainable DIY rain chain ideas, effortlessly guiding water flow while elevating the aesthetic appeal of your garden. To add a pop of color, create an ombre rain chain by painting pots in a gradient of hues – from soft blues and greens to rich purples and reds – that harmonize with the surrounding landscape. Once the paint is dry, assemble the individual components of the chain for a unique finishing touch that adds character to any outdoor space. Let your creativity shine and bring an ombre rain chain to life in your own garden!
Easy to Make a Beautiful Rain Chain
To give your house a touch of elegance without breaking the bank, consider crafting a homemade rain chain using everyday materials. This innovative project can be completed in just 20 minutes with minimal tools, making it an ideal DIY endeavor for busy homeowners. By utilizing marbles and aluminum wire, you can create a functional yet visually appealing piece that redirects water flow like a traditional downspout, perfect for gardening or outdoor area beautification. With its simplicity and versatility, this rain chain project is sure to become a seasonal staple in your home’s decor.
Quick and Easy DIY Ombre Rain Chain
Transform your outdoor space with a one-of-a-kind ombre rain chain, crafted effortlessly through this DIY project. To create this unique piece, gather the following materials: nine small terra-cotta pots, one large saucer, outdoor paint, a paintbrush, a 12′ gold chain, pliers, and mini s-hooks. Begin by painting the base of each pot and the saucer with an ombre pattern, allowing the colors to blend seamlessly. Next, divide the chain into manageable sections and use the mini s-hooks to link each terra-cotta pot together in a flowing sequence. Finally, suspend your rain chain from the top end of its last pot, placing the terra-cotta saucer below to collect runoff water. With this simple yet striking DIY project, you can bring a pop of vibrant color to your outdoor space and enjoy the rhythmic sound of rainfall.
Conclusion:
While these DIY rain chain projects may seem like a small addition to your outdoor space, they can have a significant impact on its overall aesthetic. By repurposing materials such as copper, ceramic, or PVC pipe into unique and visually appealing designs, you’ll be able to create a one-of-a-kind feature that not only guides rainwater but also adds a touch of sophistication to your yard or garden. Whether you opt for a subtle ombre design or something more bold, the possibilities are endless when it comes to crafting a personalized rain chain that reflects your personal style and enhances your outdoor living area.
