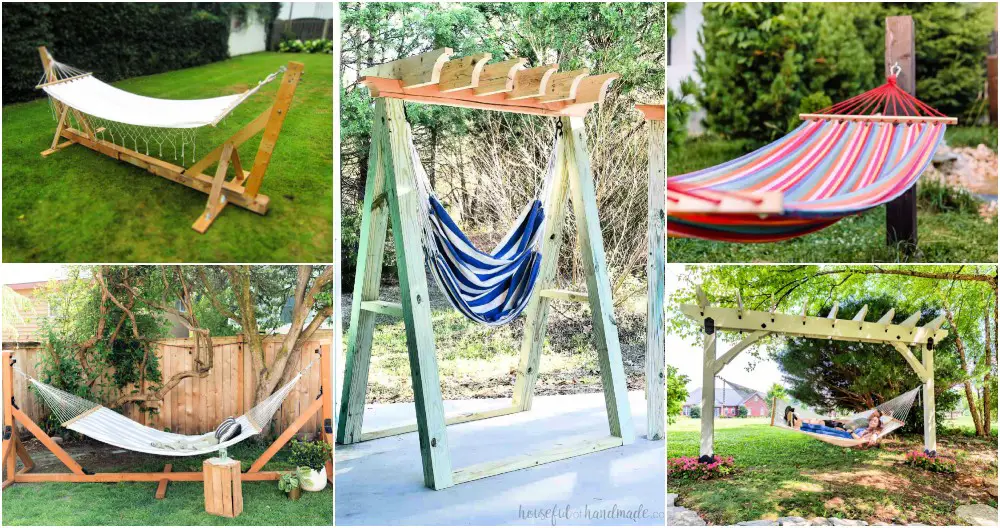
25 Free DIY Hammock Stand Plans
Crafting a DIY hammock stand is an incredibly rewarding experience that’s within reach of any DIY enthusiast. With 25 free DIY hammock stand plans available, you’re sure to find one that matches your skill level and yard size. Whether you’re building with PVC pipe or repurposing natural materials like trees and logs, each plan has been carefully designed to guide you through the process. By consulting our comprehensive step-by-step guides, you’ll be able to select the perfect stand for your backyard retreat.
What is a hammock?
Imagine sinking into a soft, lightweight haven, suspended between two points that cradle your body in ultimate comfort. A hammock is more than just a piece of equipment – it’s an invitation to unwind and let the world slow down. Whether you’re outdoors, basking in the warmth of the sun or indoors, surrounded by the coziness of home, a hammock is the perfect refuge from the hustle and bustle of daily life. Portable, affordable, and easy to set up, it’s no wonder these fabric or rope creations have become a staple for relaxation enthusiasts everywhere. Hours of blissful lounging and napping await – all you need is a hammock and a willingness to let go of the world’s demands.
Can you build a hammock stand?
While it may seem daunting, building a hammock stand is actually a relatively simple DIY project that can be completed with basic carpentry skills and minimal tools like saws, drills, hammers, measuring tapes, and screws. Before you get started, take your time to double-check measurements and ensure all parts are securely fastened to guarantee stability and safety. With these precautions in mind, you’ll be able to enjoy a relaxing retreat with your new DIY hammock stand.
How do you make a simple hammock stand?
To create a basic hammock stand, gather four poles, four eye bolts, and eight nuts. Begin by securing two of the poles in an ‘X’ pattern. Drill a hole in each pole, then insert an eye bolt into each hole. Next, attach the remaining two poles on either side of the ‘X’, utilizing the remaining eye bolts and nuts. Finally, secure your hammock to the stand using rope or bungee cords. With these simple steps, you’ll have a sturdy homemade hammock stand ready for use.
How do you make a PVC hammock stand?
To construct a sturdy PVC hammock stand, begin by assembling ten pieces of 3/4-inch PVC pipe and fittings into an A-frame shape. Two 12-inch lengths are then inserted into the base of each side, secured using elbow connectors. Next, four additional 24-inch lengths are attached to the top of each side, fixed in place with T-connectors. The structure is completed by attaching two 48-inch lengths to the apex of the frame, held firmly in position through the use of elbow connectors. With this foundation established, you can explore a range of relaxing PVC pipe projects for your backyard.
Can you make a hammock stand with 4×4?
With 4×4 lumber, building a hammock stand is a feasible DIY project. To get started, gather four pieces of 4×4 and two lengths of 2×6, the latter of which should be cut to the desired dimensions. Secure each piece together with screws and angle brackets, ensuring they form a sturdy foundation. Once assembled, attach hooks for your hammock at either end, completing your stand. Now you can unwind and enjoy the fruits of your labor, relaxing in your very own homemade hammock stand.
What are the dimensions of a hammock stand?
When selecting a hammock stand, it’s crucial to consider the dimensions of both your hammock and the surrounding space. Start by measuring your hammock carefully, as this will help you determine the ideal size for your stand. Typically, stands range from 8 feet to 15 feet in length, with a width of approximately 4 feet. Additionally, most stands come equipped with adjustable height settings, allowing them to accommodate users of varying heights. Before making a purchase, take the time to measure out the area where you plan to use your stand. This will ensure that it fits seamlessly into its designated spot, providing a comfortable and secure resting space.
Are hammock stands worth it?
If you’re an avid hammock user, investing in a hammock stand can be a wise decision. These stands offer unmatched stability and make setting up your hammock a breeze, allowing you to position it exactly where you want. What’s more, they provide unparalleled flexibility, enabling you to effortlessly relocate the hammock as needed. While budget is always a consideration, if you’re willing to invest in a stand, it can be a game-changer for your overall hammock experience.
How tall should a hammock stand be?
When selecting a hammock stand, consider the size and weight of your hammock to ensure proper fit. As a general rule, choose a stand that’s at least 12 inches taller than your hammock, with an extra 6-12 inches for larger or heavier options. Adjustable stands offer flexibility in case you’re unsure about the ideal height, while also providing peace of mind knowing the weight capacity can accommodate your needs.
How do I make a free standing hammock stand?
Building a free-standing hammock stand requires minimal expertise, as it primarily involves assembling a few wooden components. To begin, procure four pieces of lumber: two for the vertical posts, one for the base plate, and another for the crossbar. Cut each piece to precise dimensions, then drill holes in them for secure fastening. Next, bolt the individual parts together, taking care to ensure a sturdy structure. Finally, attach your hammock to the stand using rope or straps. Crucially, anchor the stand firmly to the ground before use to guarantee stability and safety.
Can you use a portable hammock on a stand?
When it comes to enjoying a portable hammock, having a sturdy stand can be a game-changer. By utilizing a metal or wooden stand, you can create a secure and elevated lounging space without being limited by the need for two trees or other supports. The process of setting up your hammock and stand is relatively straightforward, allowing you to quickly transition from a comfortable outdoor experience to an even more luxurious one. With this versatile combo, you’re free to indulge in nature’s splendor anywhere, anytime.
How to make a wooden hammock stand?
To construct a fundamental wooden hammock stand, gather 4 to 6 pieces of lumber (2x4s or equivalent), fasteners, and supports. Measure and cut the wood to your desired dimensions for the stand’s framework. Create two U-shaped structures by combining the lumber, securing the joints with screws and brackets. Next, join the two U-frames using longer boards, further reinforcing them with screws and brackets. Once complete, you can securely attach the hammock between the frameworks and indulge in a cozy retreat.
What kind of wood is used for hammock?
While traditional hammock construction often employs wooden materials like pine, cedar, or cypress, it’s the versatility of these timbers that makes them a popular choice. Pine, being the most widely used option, offers a remarkable balance between strength and affordability. Cedar, with its natural rot-resistance, is also an attractive selection for those seeking a low-maintenance hammock. Cypress, on the other hand, provides added benefits in the form of inherent insect repellent properties, making it a more premium yet practical choice. Ultimately, all three wood types share a common trait – their durability and longevity make them an excellent foundation for constructing sturdy and long-lasting hammocks.
Are metal or wood hammock stands better?
Ultimately, the type of hammock stand one chooses depends on a combination of factors, including personal preference, intended use, and environmental conditions. Metal stands are often more durable and resistant to rust, making them an excellent choice for outdoor enthusiasts who prioritize long-term durability. In contrast, wooden stands tend to be lighter and more budget-friendly, rendering them suitable for indoor or casual use scenarios where portability is a priority. Ultimately, the decision between metal and wood hinges on one’s specific needs and preferences.
How do you attach a hammock to a chair?
To set up a hammock on a chair, you’ll need sturdy rope or cord that can wrap around the chair and has secure knots at both ends. Start by tying one end of the rope around an armrest, then form a loop with the other end. Pass the loops through the hammock’s holes and pull them tight to create a snug fit. Secure each side with a knot at the desired length, making sure they’re tightened enough to prevent any slipping or sagging. Before using it for the first time, test the setup a few times to ensure everything is safe and secure.
How to build a hammock stand?
To set up a sturdy hammock stand, you’ll need four posts, some sort of tethering material like rope or chain, screws for assembly, and an anchor point to secure everything in place. Begin by digging two-foot deep holes for the posts and filling them with concrete. Once the concrete has dried completely, it’s time to connect the posts to each other using either screws or a combination of rope and chain. Next, firmly attach the anchor point to one end of the hammock stand, then hang your hammock in its new home. With these steps completed, you’re ready to relax and enjoy the fruits of your labor.
How to shorten a hammock so it fits your stand?
To shorten a hammock for its stand, start by gathering both sides of the rope and securing them with a tight knot. Then, carefully pull out any excess fabric that’s been bunched up behind the knot. Move up along the rope about 4 inches from the first knot and tie another secure knot to keep everything in place. Next, trim away any remaining excess fabric, taking care to remove any frayed ends for safety. Finally, hang your hammock on its stand and adjust the tension to ensure a snug fit that will keep you comfortable as you relax.
How to tie your hammock to anything that stands?
To secure your hammock to any available anchor point, begin by threading the suspension system’s straps or ropes through the end loops of your hammock. Next, wrap these straps around the tree branch, pole, or other structure you’ve chosen to tie to. To prevent the knot from coming undone, use a reliable and adjustable type like the square or bowline knot. Once the knot is secure, adjust the tension of the strap or rope to achieve a comfortable and taut hammock angle that suits your relaxation needs.
How to make homemade hammock?
To craft a unique homemade hammock, begin by cutting two pieces of outdoor fabric to four times the desired length. Next, sew the longer edges of the fabric together, leaving the shorter ends open. This will create the foundation of your hammock. Following this, attach sturdy loops to each end and then thread rope through these loops. Finally, secure your handmade hammock by hanging it between two robust trees or posts, allowing you to fully relax in your cozy creation.
How to make a hammock from a tarp?
Start your hammock-making journey by determining the ideal size for your cozy retreat. Measure out the dimensions you desire and cut the tarp accordingly. With scissors in hand, trim the fabric along these measurements to create a rectangular shape. Next, bring together the three open sides of the tarp pocket by sewing them shut, leaving just enough room at each end for a secure attachment point. To construct the hammock’s frame, attach two sturdy carabiners to the ends of the pocket and then add four ropes that will serve as the structure’s support beams. With your hammock now framed, find suitable trees or other sturdy anchors to suspend it from, and get ready to relax in style.
How to macrame a hammock?
Begin by creating a sturdy foundation for your macrame hammock using 4-6mm cotton cord. To do this, create two rows of 20 vertical cords and then divide them into two sections, resulting in two sets of 10 vertical cords each. Next, weave a row of square knots along the base, carefully folding and tying each set of 10 one at a time. This will form the base of your hammock. Once you’ve completed the foundation, start adding rows to the vertical cords, alternating between square and half-hitch knots as you go. Continue this pattern until you reach your desired length for the hammock. Finally, tie off the ends so that you can hang your finished macrame hammock and enjoy the fruits of your labor.
How far apart can you hang a hammock?
When setting up your hammock, the distance between the two points of suspension largely depends on the length of the rope or straps used. For instance, when working with a 10-foot rope, it’s often recommended to have the points spaced around 8-10 feet apart for maximum comfort and support. That being said, this ideal distance can fluctuate depending on your desired level of slack in the hammock. Feel free to experiment with different spacings to discover the perfect configuration that suits your personal preferences.
How does a folding stand work?
Folding stands offer a convenient solution for displaying devices such as laptops, tablets, or monitors at comfortable viewing angles. Characterized by two adjustable arms that attach to a sturdy base, these stands allow users to customize the display height according to their needs. The collapsible design enables effortless storage, making them an excellent option for individuals who require a portable and space-saving display solution.
Can you make a hammock stand out of metal?
To create a metal hammock stand, start by assembling an arch-shaped frame using steel pipes or metal bars. This structure will serve as the foundation for your hammock’s support system. Next, drill holes into the metal framework to accommodate the ropes that will hold your hammock in place. It’s crucial to ensure the metal is sturdy enough to comfortably support the weight of your hammock and any occupants. With this frame built, you’ll be able to enjoy a leisurely hammock experience right in the comfort of your own home, complete with the freedom to sway gently in the breeze.
How big is a pallet wood hammock stand?
A pallet wood hammock stand’s dimensions can vary greatly depending on the size and weight capacity of the hammock being supported. Typically, these stands measure around 6 feet tall by 4 feet wide, providing ample space for relaxation. Some models also boast an adjustable height feature, allowing users to customize their experience and accommodate different types of hammocks. The durability of pallet wood is impressive, with many stands capable of supporting up to 250 pounds or more in weight, making it a trustworthy option for those seeking a sturdy and reliable hammock stand.
How much does it cost to make a hammock stand?
The cost of building a hammock stand is influenced by various factors, including the type and quality of materials used. Typically, the price range can span from $30 to $200 or more, depending on the specific features you desire. The size and any additional accessories also impact the overall cost. By shopping around for materials and taking on the project yourself, you can effectively keep costs in check.
What is a rocking hammock stand?
A sturdy hammock stand, often constructed from steel or aluminum, is designed to securely suspend and hold a hammock in place. Capable of supporting up to 300 lbs, it evenly distributes the user’s weight across its base, allowing for a comfortable and relaxing experience as one rocks gently back and forth without concern. The ease with which these stands can be set up, taken down, and relocated makes them an attractive solution for those seeking a worry-free hammock experience outdoors.
Is it safe to nap in a hammock?
When it comes to napping in a hammock, proper installation and securing are crucial for a safe and comfortable experience. Ensure that the support structures can withstand your weight when you recline, and opt for a fully reclined position for maximum comfort and security. As with any nap, remain mindful of your surroundings and rely on common sense to guide you towards a restful and rejuvenating snooze.
How to Build a Pergola Hammock Stand
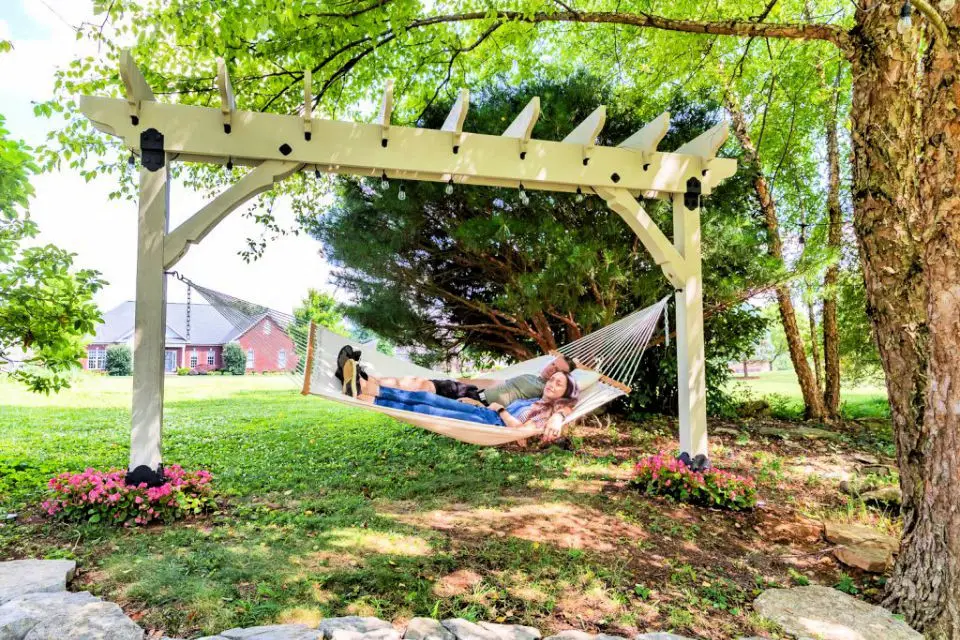
As the warm weather approaches, it’s time to revamp our outdoor spaces and make them perfect for relaxation and entertainment. One fantastic way to do this is by building a DIY Pergola Hammock Stand that doubles as a retractable projector screen. This ingenious structure combines style with functionality, allowing you to enjoy the great outdoors while watching your favorite movies or sports games. To help you get started, we’ve created a step-by-step tutorial on how to build your very own pergola hammock stand. With just a few simple materials and some basic DIY skills, you’ll be enjoying the sunshine in no time. So why wait? Grab your tools and let’s get building! The result will be a unique outdoor space that’s perfect for summer barbecues, movie nights under the stars, or simply relaxing with a good book.
Homemade Wood Hammock Stand
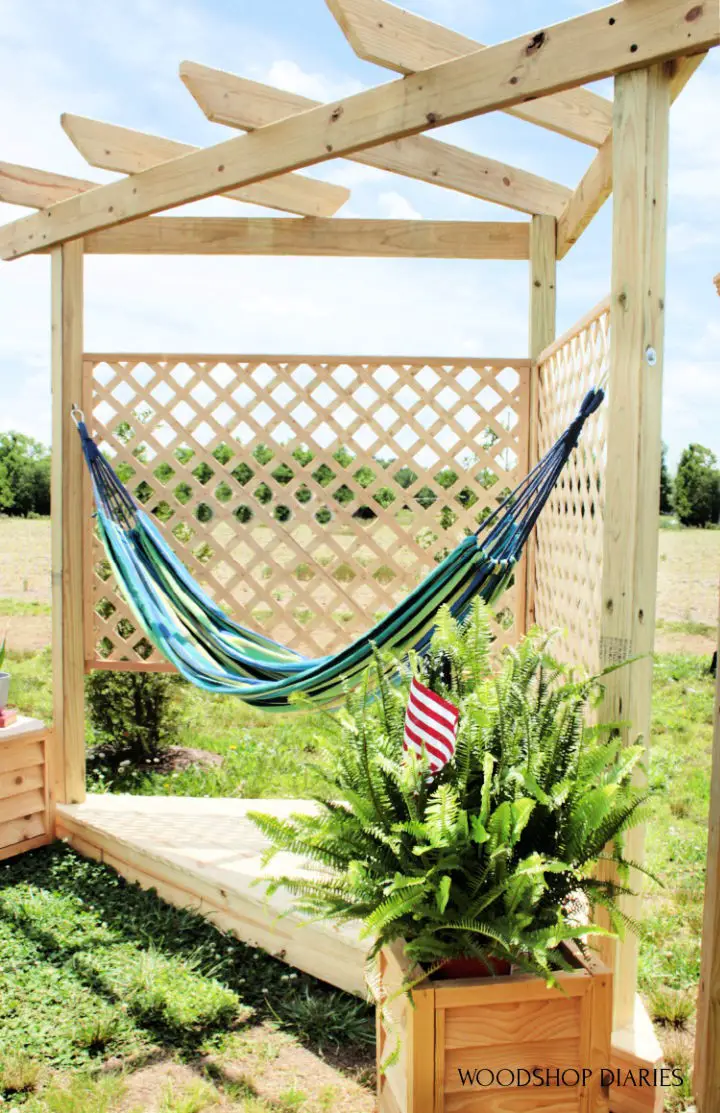
Imagine having a serene retreat in your own backyard, where you can relax and unwind amidst nature’s beauty. The DIY Hammock Stand with Floating Deck Pergola is an excellent way to create such a haven. This innovative structure combines the coziness of a hammock with the functionality of a floating deck pergola, providing a unique outdoor space that’s both beautiful and functional. With its easy-to-follow instructions and affordable materials, this project is accessible to DIY enthusiasts of all skill levels. The treated lumber used in construction ensures durability and weather resistance, allowing you to enjoy your new outdoor retreat for years to come. As you lounge in the hammock surrounded by lush vegetation or gaze out at the stars from under the pergola’s lattice sheets, you’ll be grateful for the peace and tranquility this structure brings. The DIY Hammock Stand with Floating Deck Pergola is an excellent addition to any backyard, inviting relaxation and recreation in equal measure.
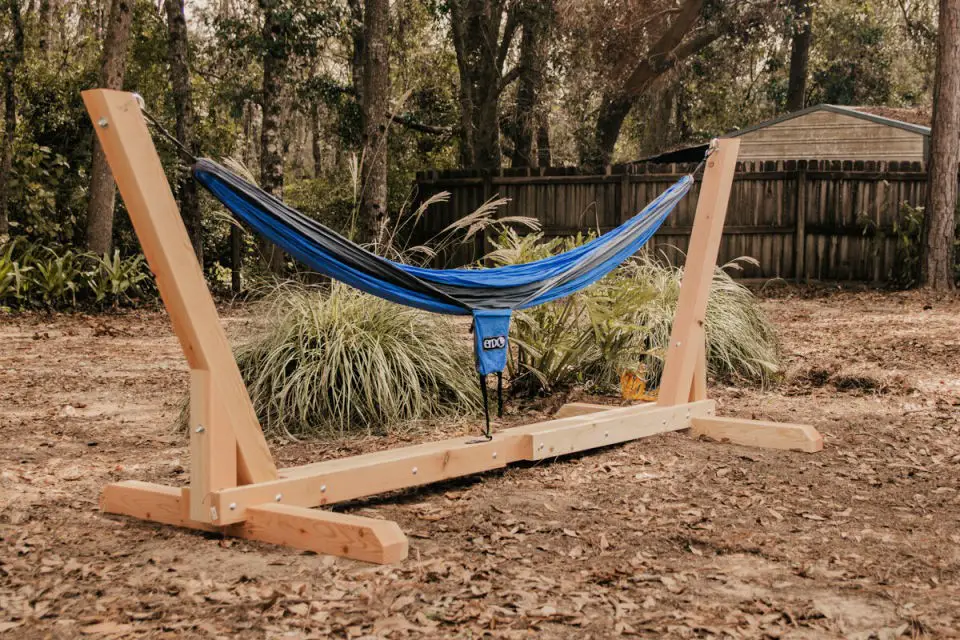
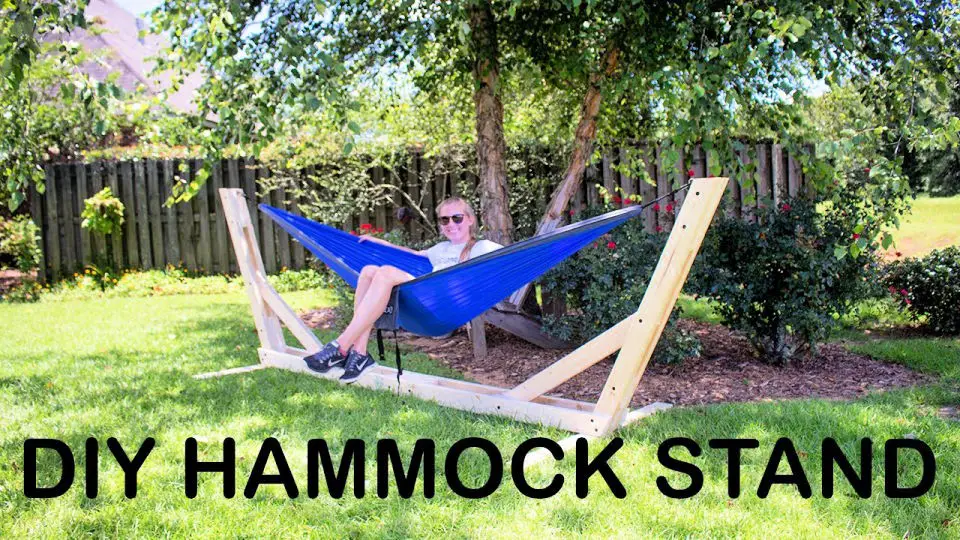
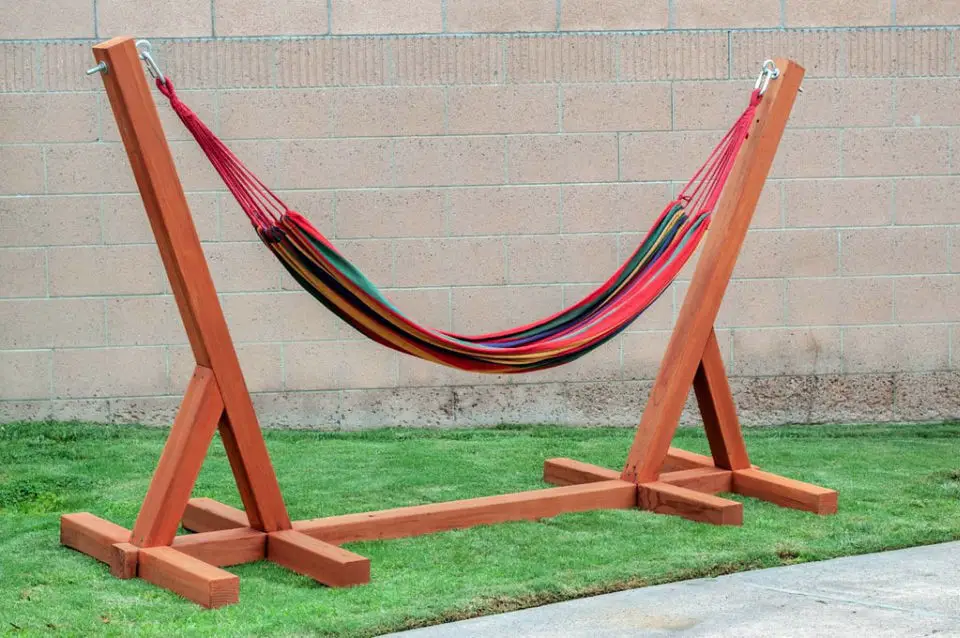
DIY Free Standing Hammock Stand
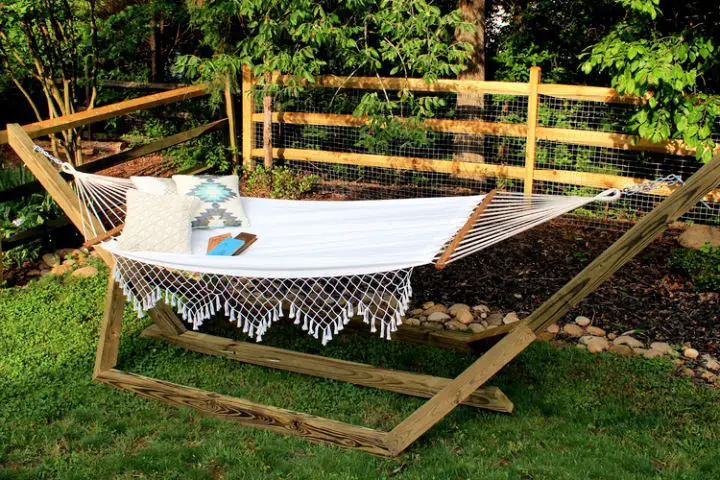
Building a DIY Freestanding Hammock Stand is an affordable and easy DIY project that can be completed in just a few hours. This traditional-look stand is perfect for two people and offers the added benefit of being free-standing, allowing you to take it wherever you go. The best part? It only costs around $60 to build! To get started, follow these step-by-step instructions: Cut four 6-foot-long 4×4 pressure-treated posts, and one 8-foot-long 4×4 pressure-treated post using a 12-inch miter saw. Mark the cut lines with a pencil before making each cut.Drill four pilot holes through each 6-foot post, about 1 foot from the top and bottom of the post. Countersink the pilot holes so that the heads of the screws will be flush with the surface of the wood. Then, screw the 6-foot posts together at the top and bottom using 4-inch corrosion-resistant deck screws and a drill. Repeat this step for the remaining 6-foot posts until you have two sets of posts screwed together at the top and bottom – these will be the sides of your hammock stand.Next, cut two 5/8-inch notches out of each 8-foot post using a spade drill bit attached to a drill. The notches should be cut from each end of the post and wide enough to fit the 6-foot posts snugly inside them. You may need a mallet to tap the 6-foot posts into place.Finally, screw an eye bolt into each end of the 8-foot post, using a wrench to tighten the hex nut securely. Attach a washer to each eye bolt before screwing it into place – these eye bolts will be used to secure your hammock to the stand later.Once you’ve completed the build, simply place your DIY Freestanding Hammock Stand in your desired location and enjoy! As with any DIY project, always follow all safety precautions when using your hammock stand, and inspect it before use to ensure that it is sturdy and secure.
Build Your Own Hammock Stand

Elevate your outdoor experience with a DIY 3-person Hammock Stand that’s as versatile as it is portable. Whether you’re camping under the stars or enjoying a festival vibe, this sturdy stand is designed to accommodate up to three people at once. Assembling the stand is a breeze thanks to clear instructions that won’t leave you scrambling at the last minute. Plus, its adjustable height feature ensures a comfortable and relaxing hangout session. And let’s not forget its sleek design that seamlessly integrates with any hammock setup, making it the perfect addition to your outdoor oasis.
Building a Garden Hammock with Stand
Transform your outdoor space into a serene retreat by creating a DIY garden hammock with a stand. This ingenious project combines the comfort of a hammock with the practicality of a sturdy wooden stand, making it an ideal addition to any backyard oasis. The sleek design and step-by-step instructions ensure that even novice crafters can successfully bring this project to life. With its uncomplicated construction process, you’ll be lounging in your new DIY garden hammock before you know it.
Easy DIY Hammock Stand
Create the ultimate outdoor experience with ease by building a DIY Hammock Stand 2.0. This affordable and straightforward project requires minimal materials, including 2x4x8 lumber, 4x4x8 lumber, bolts, nuts, washers, screws, eye bolts, and of course, your hammock. With these simple components, you’ll be able to customize the stand to fit any size hammock and enjoy your outdoor oasis without worrying about finding two perfectly spaced trees. Simply follow the step-by-step instructions provided in this tutorial, and you’ll be lounging in style in no time.
Hammock Chair Swing Stand Ideas

Elevate your indoor space with this DIY Hammock Swing Chair Stand, a unique fusion of form and function. Not only does it bring a touch of whimsy to any room, but its versatility is unparalleled – simply suspend it from any ceiling to create an inviting atmosphere. And the best part? This project is surprisingly easy to complete, requiring minimal tools and expertise. To get started, you’ll need a drill, drill bits, a socket wrench or screwdriver, a stud finder, an S hook, stainless steel ceiling mount, two spring snap hooks, four expansion bolts (concrete) or 4 lag screws (wood), a sturdy chain or manila rope capable of supporting up to 300 lbs., and one hammock swing chair. A step-by-step guide is included in the tutorial, making it easy to follow along and bring your creative vision to life.
Wooden Hammock Chair Stand Plan

Get ready to indulge in the ultimate DIY adventure with this budget-friendly and easy-to-build wooden hammock stand project. Perfect for DIY enthusiasts, this stand not only provides a comfortable spot to relax but also adds a touch of elegance to your backyard. With our FREE PDF plans and step-by-step instructions, you’ll be able to construct this beautiful stand in just a couple of hours, making it an ideal weekend project. This hammock stand is more than just a functional piece – it’s a way to create shade and a perfect spot to unwind on those lazy summer afternoons. With basic carpentry skills and a few simple tools, you’ll be able to build this stunning stand in no time. So gather your materials and dive into the tutorial below to learn how to craft your own DIY wooden hammock stand.
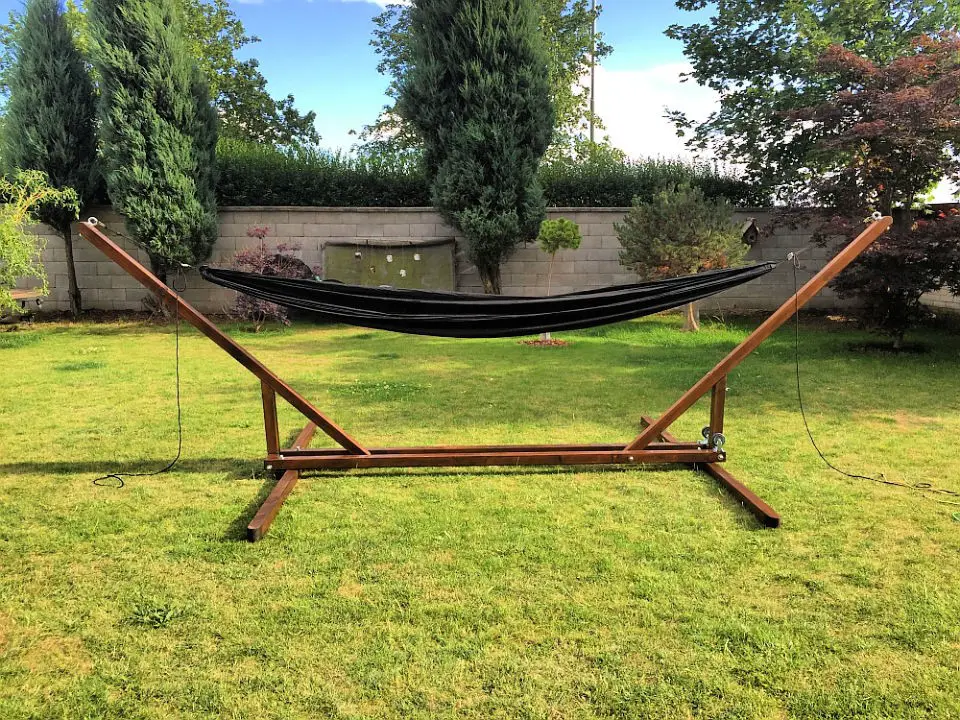
DIY Backyard Hammock Stand
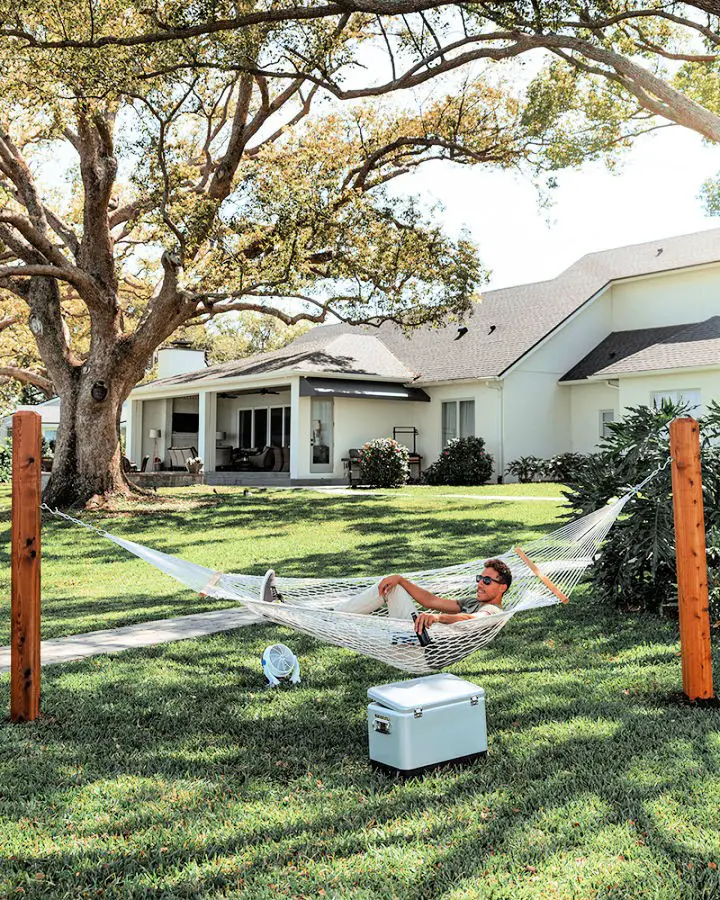
Elevate your backyard relaxation with this simple DIY hammock stand, perfect for a single person to unwind. This easy-to-assemble project requires minimal tools and materials, making it accessible to anyone willing to get creative. To build this stand, you’ll need two 6” x 6” x 8’ pressure-treated posts, one hammock, two metal hooks and eyelets, and four 25lb bags of Quickrete. Additionally, gather a post-hole digger, shovel, drill/driver, titanium drill bits, safety glasses, work gloves, and a screwdriver.Begin by digging two holes in your desired location using the post-hole digger. Next, mix the concrete according to the bag instructions and pour it into the holes. Insert the pressure-treated posts into the holes, ensuring they’re plumb with a level. Allow the concrete to set for at least 24 hours before moving on.Once the concrete has set, attach the hammock by pre-drilling holes in each post using the drill/driver and titanium drill bit. Then, screw the metal hook and eyelets into place using a screwdriver. Finally, hang your hammock from the hooks and enjoy the fruits of your labor.
Portable DIY Hammock Stand
Want to create a cozy outdoor retreat without breaking the bank? Building your own DIY Hammock Stand is an excellent way to do just that. With some basic materials like treated pine wood, bugle screws, dome head coach bolts with washers and nuts, a hammock, hammock hooks, paint, and PVA or wood glue, you can construct a sturdy stand for your favorite relaxation spot.To start building your Hammock Stand, begin by cutting the lumber to size according to your cut list. Next, pre-drill holes and assemble the front and back legs, as well as the front and back support beams, using screws. The side frames are assembled similarly, with a focus on attaching the side beams to the legs via screws.Once the frame is taking shape, align the side frames so that the top beams are flush, then attach them securely with screws. Finally, add the remaining support beam to the center of the side frames, securing it with screws as well.Now that your Hammock Stand is built, it’s time to give it some personality! Paint or stain the frame any color you like, or choose a natural look for a more rustic vibe. Once the paint is dry, install the hammock hooks by predrilling holes and screwing them in place. And finally, hang your hammock from the hooks and enjoy the fruits of your labor.
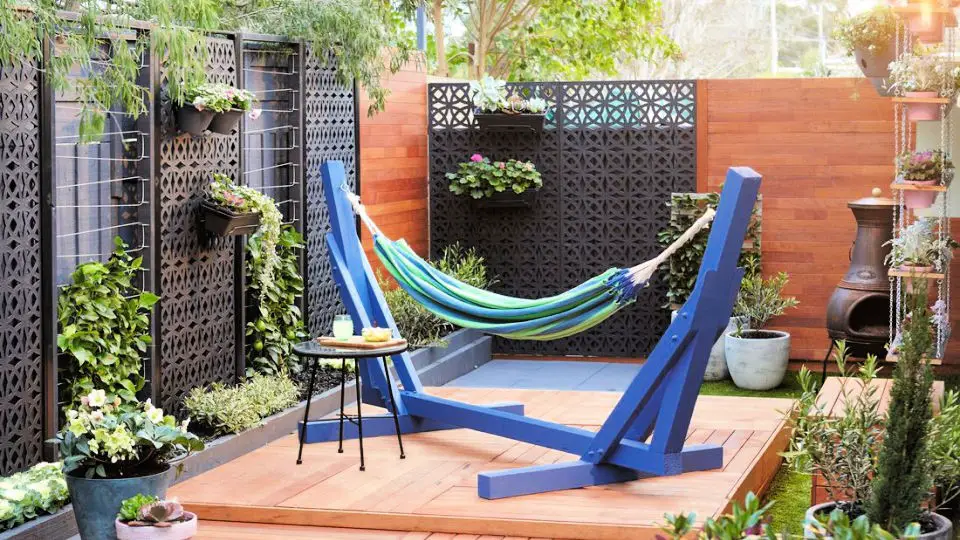
Modern Hammock Stand Plans
Add a touch of personalization to your backyard oasis by crafting a custom hammock stand that reflects your unique style. Rather than settling for a standard store-bought option, take on this DIY project and reap the rewards of a sturdy and stylish structure.To get started, gather the necessary materials: nine 8-foot long 2×4 boards, long bolts, deck screws, S hooks, and an outdoor wood stain that matches your home’s aesthetic. Next, cut the boards to size using a saw, then drill holes into each piece. Assemble the frame by attaching the boards together with the long bolts, washers, and nuts.Once the structure is complete, secure your hammock in place using the S hooks. The final touch? A rich coat of outdoor wood stain that complements your backyard’s natural beauty. By following these straightforward steps, you’ll be lounging in comfort and style in no time.
DIY Folding Hammock Stand
Building a DIY foldable hammock stand is an excellent way to elevate your backyard experience. With just a few basic materials and some simple construction steps, you can create a stunning structure that not only adds beauty but also provides functionality. The best part? This project is surprisingly easy to complete in a short amount of time. To get started, you’ll need the following materials: wood, wood glue, bolts, nuts, washers, stain or paint, heavy-duty eye bolts, and caster wheels.Once you have your materials gathered, follow these straightforward steps to build your own hammock stand:Begin by cutting the wood according to the dimensions outlined in a tutorial or plan. Then, assemble the frame using wood glue and bolts. Next, attach the caster wheels to the bottom of the frame for easy mobility. Secure the heavy-duty eye bolts into place, and finally, hang your hammock from the eye bolts and start relaxing.With these simple instructions, you can create your own beautiful hammock stand that will provide years of enjoyment. So gather your materials and get started today!
Outdoor Hammock Stand from Scratch
Add a touch of whimsy and relaxation to your outdoor space by building a DIY backyard hammock stand from scratch. With this simple guide, you can create a comfy spot to enjoy the sun or take a nap. Here’s how: First, gather the necessary materials and get started.Cut four pieces of lumber into equal lengths using a saw. These will be the posts for your hammock stand. Smooth out any rough edges with sandpaper.Drill four holes in each piece of lumber, spaced evenly apart. The holes should be large enough to accommodate hex bolts. Assemble the posts by passing the bolts through the holes and securing them with washers and nuts.Attach metal brackets to each post using screws. These will support the hammock bed. Stain the posts and brackets with a wood stain, letting it dry fully before moving on to the next step. Apply varnish for extra protection against weathering and wear.Add hitch rings with plates to each bracket, also secured with screws. These will connect the hammock bed to the stand. Finally, attach two 3/8-inch spring links to each hitch ring, completing your backyard hammock stand. Simply add your hammock bed and enjoy lazy afternoons lounging in style.
Ultimate DIY Hanging Chair Stand
Looking for a creative way to unwind in your backyard? Look no further than this DIY project, which combines functionality and relaxation in one ultimate hammock chair stand with pergola. With the free printable plan provided, you’ll be able to create a cozy oasis that will quickly become the go-to spot for unwinding with friends and family.To get started, gather your materials: 4×4 boards, 2×4 boards, 2×6 boards, pocket hole screws, heavy-duty eye screws, and heavy-duty carabiners. You’ll also need a hammock chair to complete the look.Begin by cutting all your boards to size according to the provided cut list. Next, drill pocket holes into the shorter 2x4s and 2x6s, which will provide a sturdy foundation for your structure.Assemble the top frame by attaching the 2x6s to the 4x4s with pocket hole screws and wood glue. Then, attach the legs to the top frame using the same method, creating a stable base for your hammock chair.For added support and style, consider adding cross braces between the legs. Once these are in place, you can move on to attaching eye screws to the top of each leg, which will serve as anchors for your hammock chair.Finally, hang your hammock chair from the eye screws using carabiners, and enjoy the fruits of your labor. With this DIY project, you’ll have a unique and inviting outdoor space that’s perfect for relaxing with loved ones or simply enjoying some quiet time to yourself.
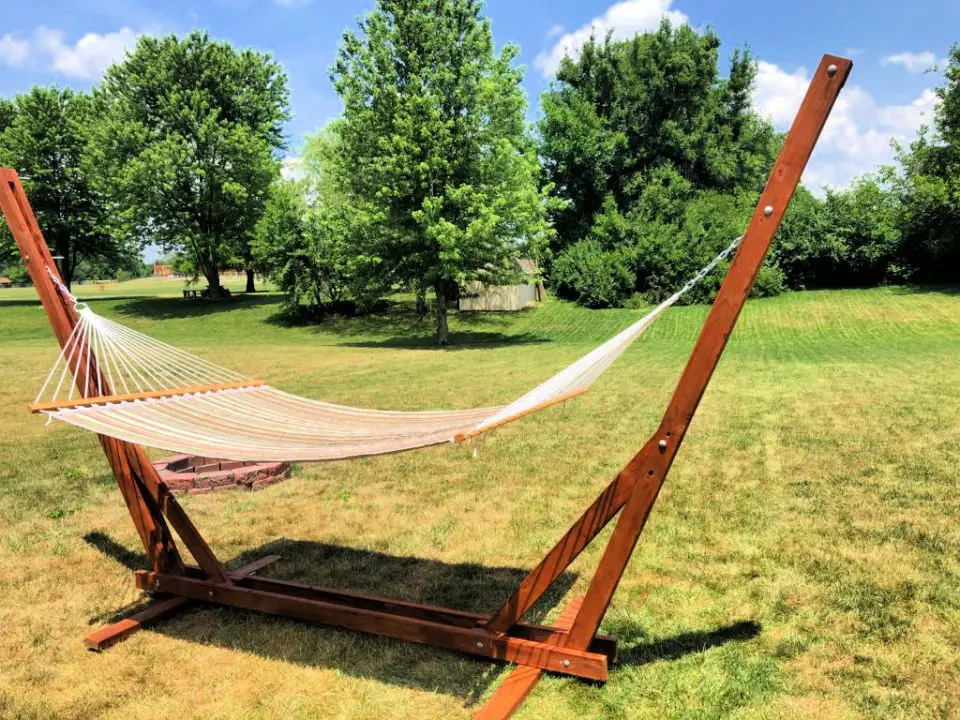
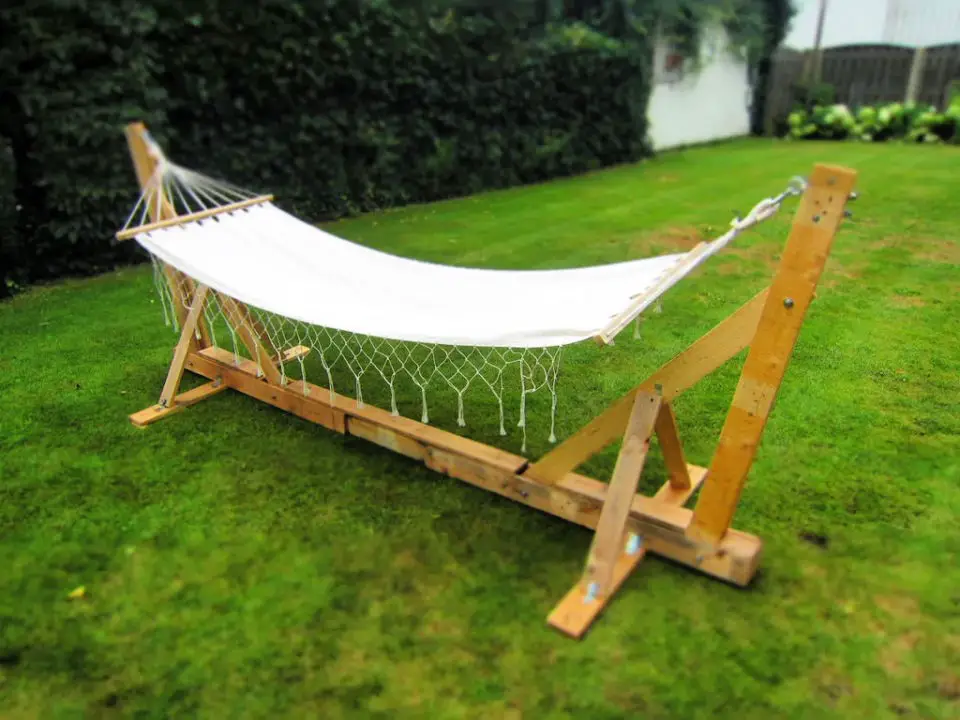
How to Make a Hammock Stand

If the sweltering summer heat has got you down, why not try building a DIY hammock stand to create your own tranquil oasis? This straightforward guide will walk you through the process of constructing a sturdy and reliable hammock stand that will provide countless hours of relaxation for years to come.
To begin, cut your lumber into the necessary sizes: three 4x4s at 12 feet long, two 4x4s at 8 feet long, and one 2×4 at 12 feet long. The key to a successful hammock stand is in the foundation, so make sure you take the time to get these cuts just right.
Next, assemble the frame of your hammock stand using angle brackets and screws. Start by attaching the two 8-foot 4x4s to the ends of the three 12-foot 4x4s, creating a strong base for your structure. Then, add the 12-foot 2×4 on top of the frame, flush with the 8-foot 4x4s.
With the frame in place, it’s time to add some support beams to ensure your hammock stand is stable and secure. Cut two more 12-foot 4x4s in half, then attach them between the top and bottom rails of the frame using mending plates and screws. Finally, add a touch of flair with post caps and solar accent lights.
With just a few hours of effort, you can create a beautiful and relaxing spot to enjoy all summer long. So why wait? Grab your tools and get started today!
Cheap DIY Hammock Stand
Imagine drifting off to sleep while suspended in a cozy hammock, lulled by the gentle rustling of leaves or the soothing sounds of nature. If you’re like many people, you may think this scenario is reserved for camping trips or backcountry excursions, but with a DIY outdoor hammock stand, you can bring this luxury right into your own backyard. And the best part? You don’t need to break the bank or have extensive carpentry skills to make it happen. With just a few simple tools and some basic materials, you can construct a sturdy stand for under $25. The process is straightforward, requiring minimal effort and expertise, making it an accessible project for anyone looking to upgrade their outdoor sleeping arrangements. So why wait? Gather your supplies and follow the easy-to-follow guide below to start building your very own DIY outdoor hammock stand today!
Super Cozy Hammock Stand Plan

Are you ready to create your perfect relaxation spot? Building a DIY super cozy hammock stand is easier than you think. With basic skills and simple tools, you can have your very own free-standing hammock stand in no time. Let’s dive into the project! To get started, you’ll need pressure-treated 4x4s for stability, heavy-duty hook screws and wood screws for construction, and two carabiners to hang your Hammock from. Don’t forget the most important part – your Hammock itself!Once you have all the materials, mark out the location of your DIY hammock stand and measure up the support posts. Cut them to size, then move on to assembling the horizontal beams. Use wood screws to attach them to the support posts, making sure they’re evenly spaced for a comfy Hammock experience.The final step is adding the finishing touches. Screw in the hook hooks at the top of each post, thread the carabiners through, and hang your Hammock from them. Stand back, relax, and enjoy your new DIY hammock stand!
DIY Hammock Posts Ideas
Transform your backyard into a relaxing retreat with this DIY hammock stand from posts, a simple and affordable project that’s easy to complete in just a few steps. By using pressure-treated posts and minimal materials readily available at any hardware store, you’ll be able to create a sturdy and lasting structure that will provide countless hours of relaxation and stress relief. Not only will it boost your mood, but it’s also an incredibly cost-effective way to add a unique touch to your outdoor space. So why wait? Follow this easy-to-follow guide and start building your own DIY hammock stand from posts today! With its enduring quality and versatility, you’ll be enjoying the fruits of your labor for years to come.
How to Build a Foldable Hammock Stand
To add a touch of comfort and functionality to your backyard or patio without emptying your wallet, consider constructing a DIY hammock stand. This straightforward project can be completed on an afternoon, providing you with a cozy spot to catch some Z’s or get lost in a good book. The best part? You won’t have to break the bank, as this DIY foldable hammock stand is surprisingly affordable compared to its pre-made counterparts. All it takes is some basic woodworking skills and materials, which are outlined below. With just a few simple steps, you’ll be lounging in your very own DIY hammock stand in no time!
DIY Indoor Hammock Frame
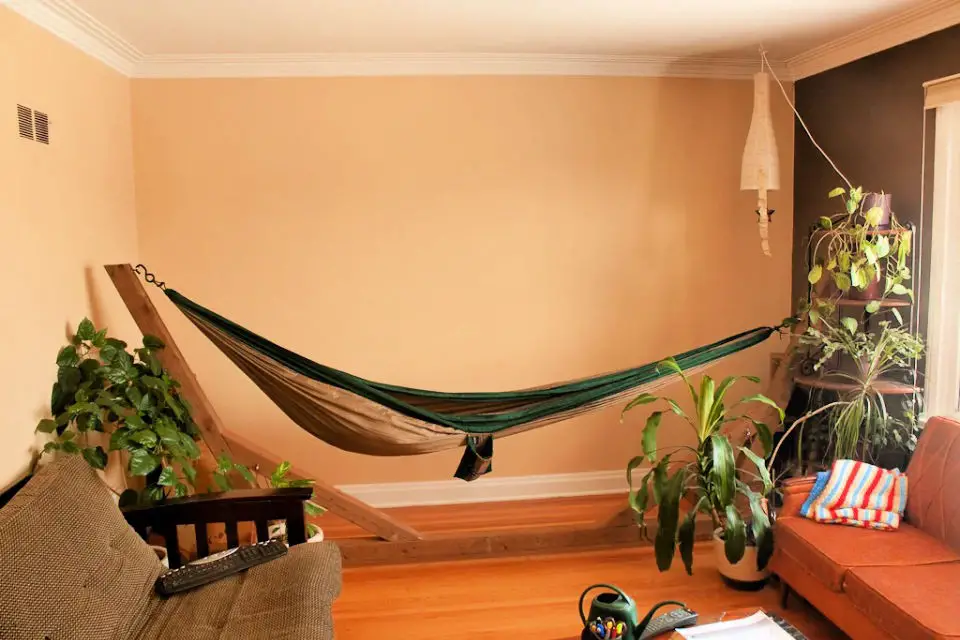
Transform your living space into a cozy retreat with a DIY indoor hammock stand. This clever project not only provides a comfortable spot for lounging, but also serves as a stylish and functional solution for winter afternoons spent indoors. With just a few basic materials, you can create a sturdy and adjustable stand that cradles your hammock in comfort. The best part? It’s surprisingly easy to build.To get started, gather your materials: four 4x4x10 posts, twelve lag bolts and washers, eight 2-inch eye bolts with wood thread, three 3-inch eye bolts with wood thread, four turnbuckles, and aircraft cable or high-tensile climbing rope. Begin by cutting two of the 4x4s in half to create four 10-inch horizontal support beams.Next, use lag bolts to attach the beams to the posts at a height that suits your lounging style. Then, install eye bolts along the beams at equal intervals, with the threaded side facing down.With the stand assembled, it’s time to hang your hammock! If using aircraft cable, thread one end through all eight eye bolts. If using rope, tie each end to an eye bolt using a secure clove hitch knot. Make sure those knots are snugly in place!Finally, adjust the length of the rope or cable by threading it through turnbuckles. Once you’ve achieved your desired length, tighten the turnbuckles to secure your hammock. And just like that, you’ll be lounging in style and comfort with your very own DIY indoor hammock stand.
Free 4×4 Hammock Stand Plan
Unleash the relaxation in your backyard with this effortless DIY 4×4 Hammock Stand project. With minimal time investment of just a few hours, you can create a fantastic outdoor retreat that’s easily portable and perfect for lounging, daydreaming, or reading a book. The stand offers ample space to catch some rays, enjoy the fresh air, or simply take a nap.To bring this project to life, gather your essential materials: five 4×4 redwood posts, outdoor wood screws, eyebolts, quick links, washers, stain of your choice, and a hammock. Don’t forget your trusty power tools – a circular saw, miter saw, and power drill/driver.Begin by cutting the 4×4 redwood posts into eight equal pieces. Next, use your miter saw to precision-cut two pieces at a 45-degree angle. Then, attach these angled pieces to the ends of the remaining six straight pieces using four-inch screws.Once all eight pieces are securely attached, it’s time to drill holes for the eyebolts on each corner post, ensuring even spacing. Insert the eyebolts and tighten with washers. Finally, add quick links to your hammock and attach it to the stand using three-inch screws. Don’t forget to seal or stain your masterpiece to protect it from the elements. With this DIY 4×4 Hammock Stand, you’ll be all set for a cozy outdoor escape!
Portable DIY Hammock Stand

A portable DIY hammock stand is an affordable and effortless way to create a year-round outdoor recreation space. This straightforward guide will walk you through building a sturdy stand using 2X4 beams (8′, 6′, and 4′) , bolts, washers, and tightening washers. The first step is to cut the beams according to the tutorial’s specifications.Next, assemble the frame by securing the legs to the crossbars with bolts and washers. Then, attach the supports to the legs using the same fastening method. Finally, hang your hammock from the frame, ensuring an even weight distribution to maintain balance.With these simple steps, you’ll be enjoying your DIY portable hammock stand in no time!
Metal Pipe Hammock Stand Ideas

Create your own relaxing oasis with this DIY Metal Hammock Stand project. This sturdy and durable structure requires basic welding skills and a few simple steps to complete. The end result is a one-of-a-kind spot for lounging outside, providing a fun boost to your outdoor adventures. To get started, gather the necessary materials: two metal posts, a chop saw or grinder with a cutting disc, a welder, a piece of metal strip, and some handy supplies. Next, cut the metal posts to the desired height using the saw or grinder. Then, use the welder to attach the metal strip to the top of each post, creating a strong foundation for your hammock. Finally, add any additional details you like, such as decorative trim or a hammock, and you’re ready to relax in style.
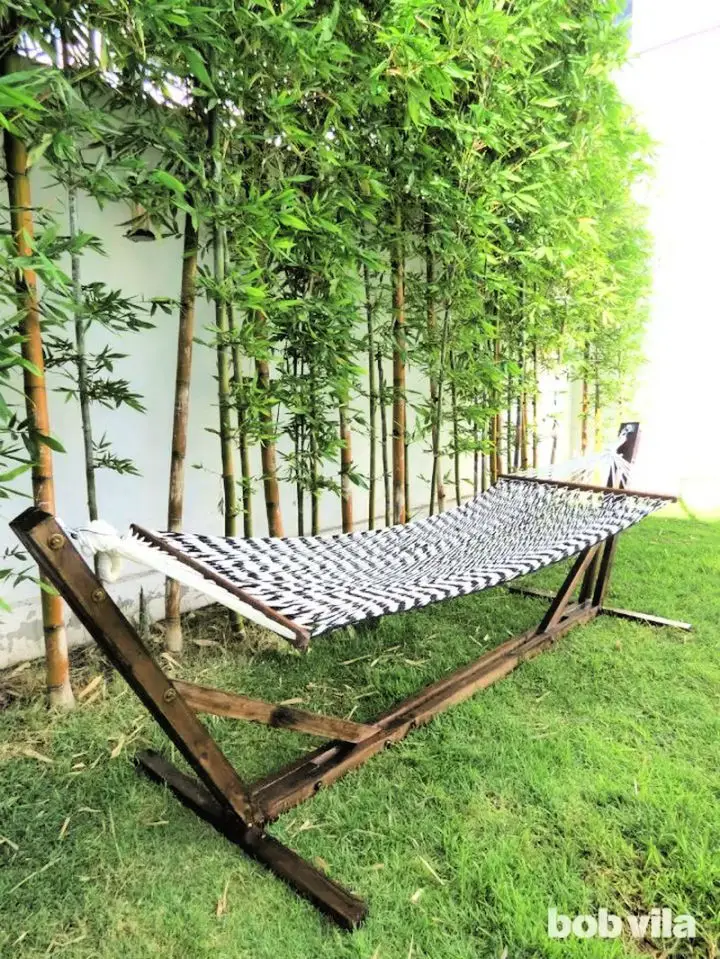
Build a Pallet Hammock Stand
The DIY pallet hammock stand is an ingenious outdoor addition that not only invites relaxation but also offers a low-impact workout opportunity. Its thrifty and cost-effective nature makes it an attractive option for entertainment enthusiasts. What’s more, this project is remarkably easy to undertake, requiring minimal expertise.To embark on this creative journey, you’ll need nine pallet blocks, a threaded rod, nuts, corner brackets, screws, and two end nuts. With these materials at your disposal, follow our step-by-step guide to constructing your very own DIY pallet hammock stand.
DIY Large Garden Hammock Stand

Create a cozy outdoor retreat with this practical and aesthetically pleasing DIY large garden hammock stand. With its uncomplicated design and accessible materials, this project can be completed in just one day, yielding a comfortable seating area that will effortlessly add a relaxed ambiance to any backyard or patio.To build the stand, you’ll need 4x4s, 2x6s, and adjustable L-angles. For the structural components, gather eight 1/2-inch by 7-inch zinc-plated or galvanized bolts, zinc-plated or galvanized lock washers, eight zinc-plated or galvanized washers, and eight nuts. Additionally, you’ll require two galvanized screw eyes and four 16-gauge concrete form angles. To secure the frame, heavy-duty connector screws will also be necessary.Follow these straightforward steps to construct your DIY Large Garden Hammock Stand:First, cut the 4x4s and 2x6s to length using a power saw.Next, drill pilot holes through each end of the 4x4s.Assemble the frame by fastening the 4x4s together with the bolts, washers, and nuts.Secure the L-angles to the top of the frame using connector screws.Attach the screw eyes to the L-angles.Suspend your hammock from the screw eyes.Finally, place the concrete form angles on top of the 2x6s and secure them with connector screws.With these simple steps, you’ll be enjoying your new hangout spot in no time!
Conclusion:
With the inspiration provided by diverse free hammock stand plans, you’re now ready to embark on building your very own DIY project. Whether you’re envisioning a rustic, elegant stand crafted from reclaimed wood or something more playful and eye-catching, there’s a perfect plan awaiting you. The versatility of DIY hammock stands means that the possibilities are endless, allowing you to customize your design to fit your unique style and preferences.
