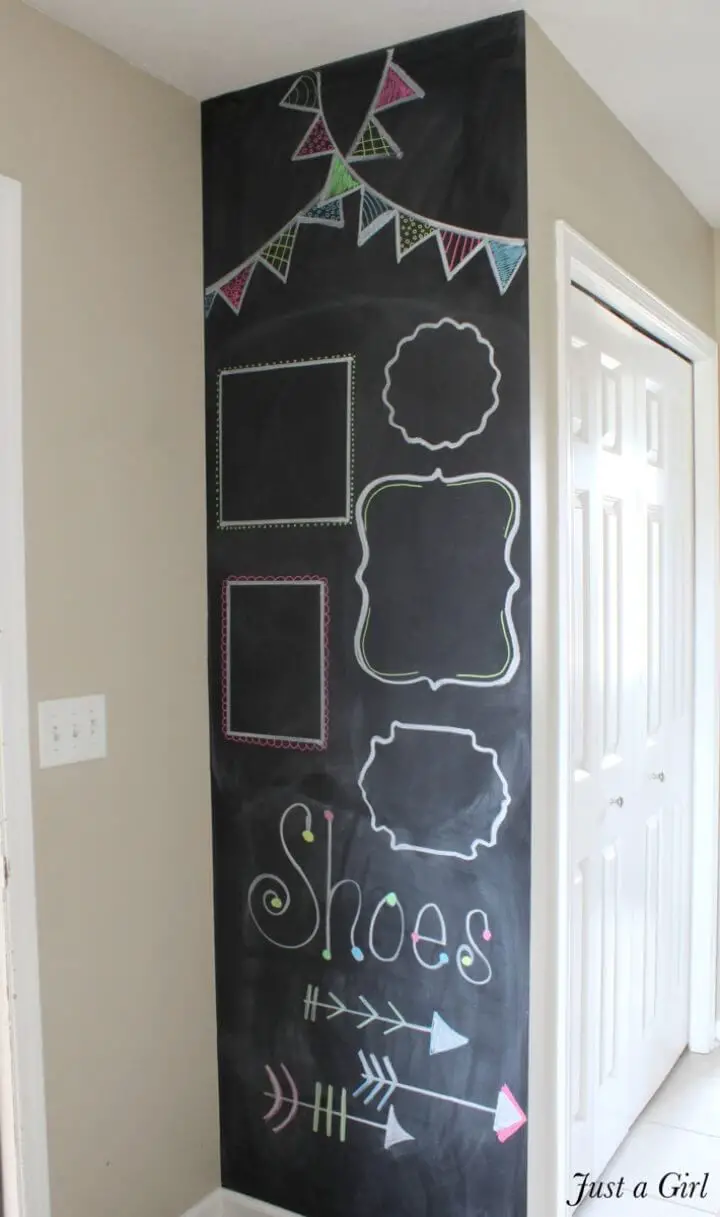
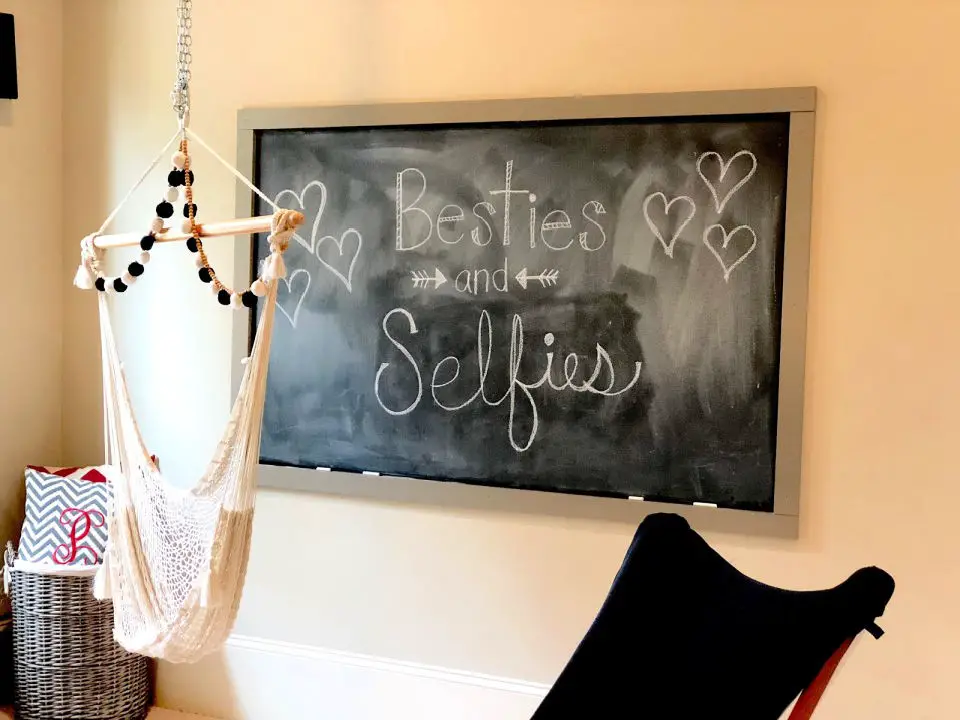
Budget-Friendly DIY Chalkboard Wall
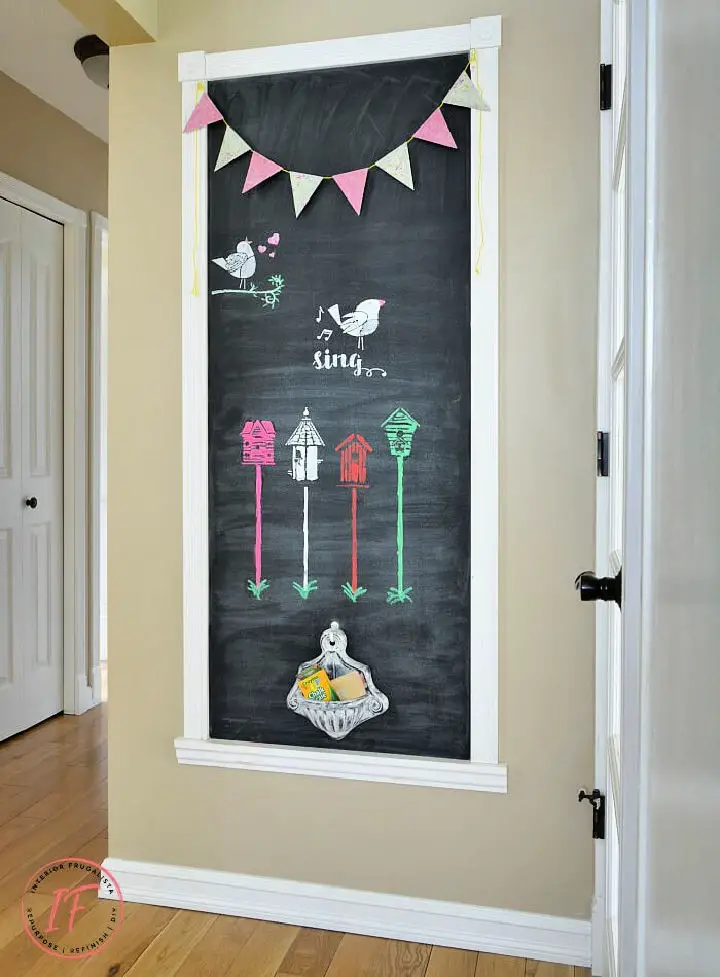
Transform a wall or door into a vibrant focal point by creating a DIY chalkboard. This easy-to-execute project requires only a few hours of effort and follows five simple steps. Gather the necessary materials, including MDF board, finishing nails, construction adhesive, latex primer, chalkboard paint, and your preferred trim. Begin by preparing a smooth surface, prime it with a coat of latex primer, and then apply the chalkboard paint. Allow the paint to dry before priming the chalkboard surface with chalk. Next, frame the chalkboard with trim that complements your home’s décor, considering a ledge for chalk storage. The result is not only a functional space but also an inviting addition to your home. With countless color options and opportunities to personalize the area with decorative items like bunting banners, this project enhances your space in a creative, cost-effective, and engaging way.
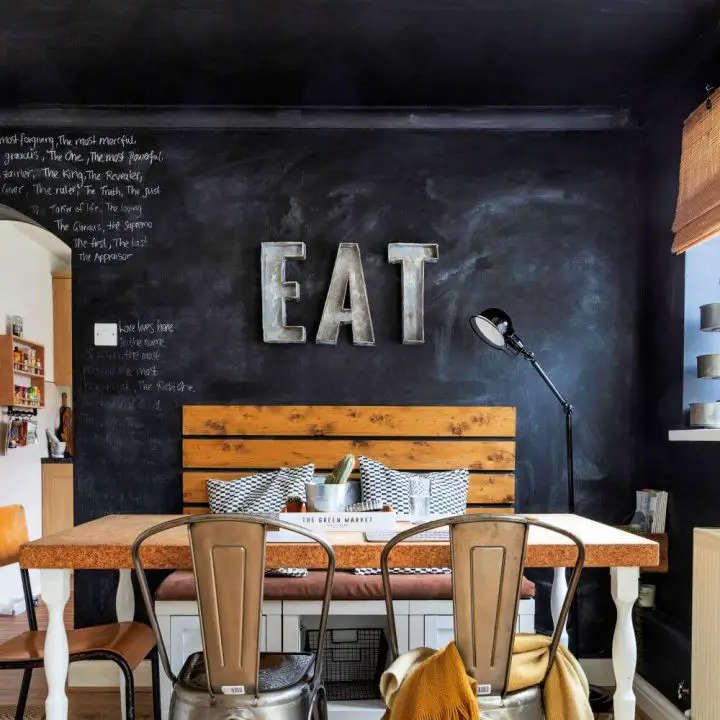
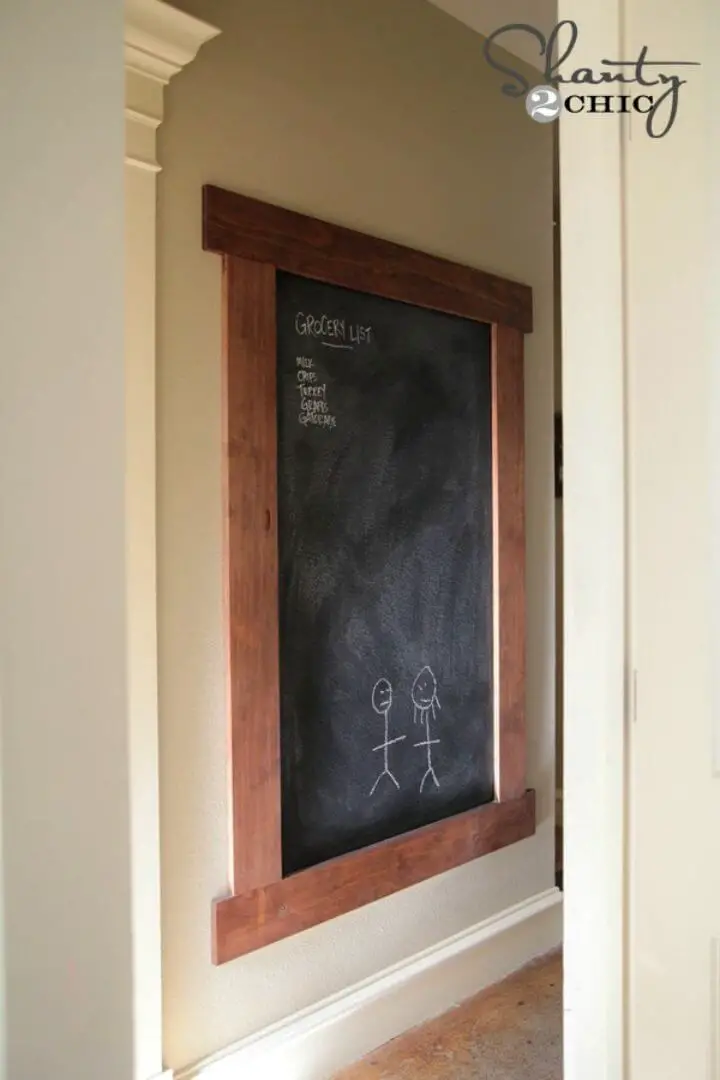
Build a Wood Framed Chalkboard Wall
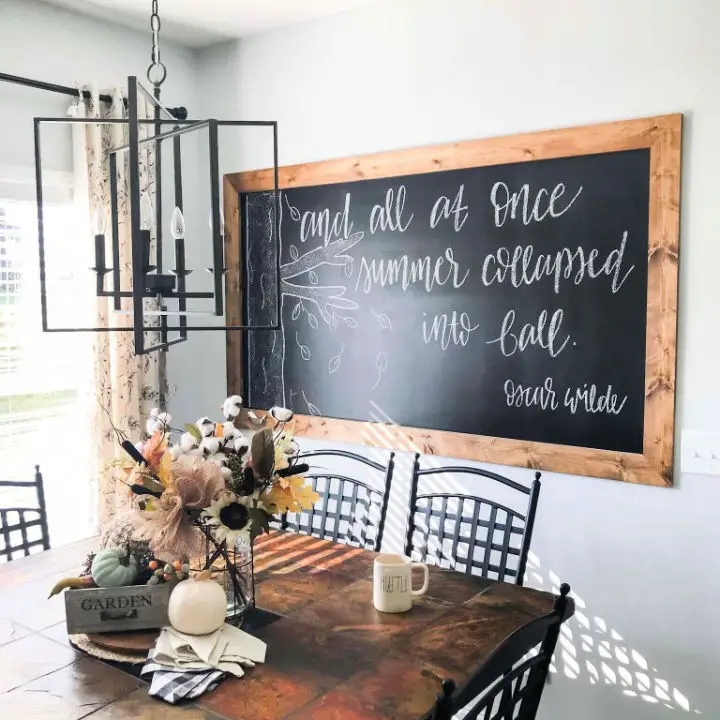
Transform your breakfast nook into a vibrant hub with a budget-friendly DIY framed chalkboard wall. This intuitive project not only invites creative expression, but also serves as a chic focal point in your home. Follow this step-by-step guide to create the perfect blend of functionality and style: begin by outlining the space with painter’s tape, then apply Rust-Oleum’s iconic black chalkboard paint. Next, frame it using Minwax-stained 1x4s for a rustic touch. Finally, add a practical twist by incorporating drawer pulls as a chalk holder, making it easy to jot down notes or ideas. With this personalized statement piece, you’ll breathe new life into your home and showcase your one-of-a-kind aesthetic.
How to Build a Magnetic Chalkboard Wall
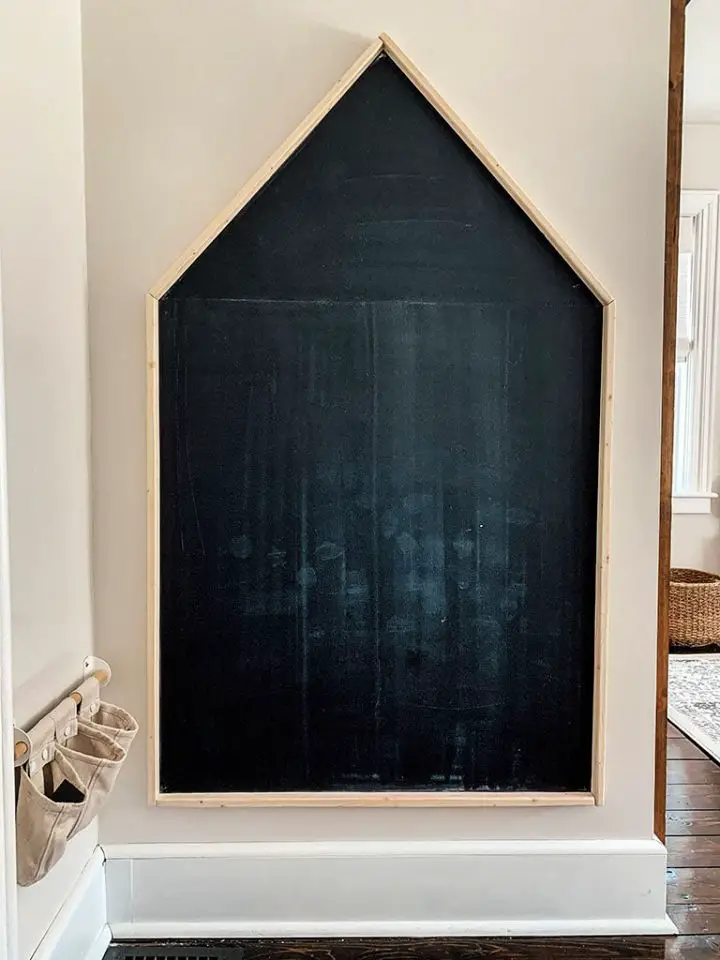
Transform your little one’s playroom into a creative haven with a DIY magnetic chalkboard house. This interactive wall décor piece is surprisingly easy to make using basic materials like plywood, furring strip board, chalkboard paint, a hanging hooks kit, and sheet metal stock for the magnetic feature.
By crafting a house-shaped board, adhering sheet metal to create a magnetic surface, painting it with vibrant chalkboard hues, framing it with furring strips, and finally installing it on your wall, you’ll provide an engaging space for your child to explore their creative side while learning and playing. With its 60″ x 36″ dimensions, this DIY magnetic chalkboard house is the perfect addition to any playroom without breaking the bank.
Join in on the fun and satisfaction of making this project today and watch your child’s imagination run wild!
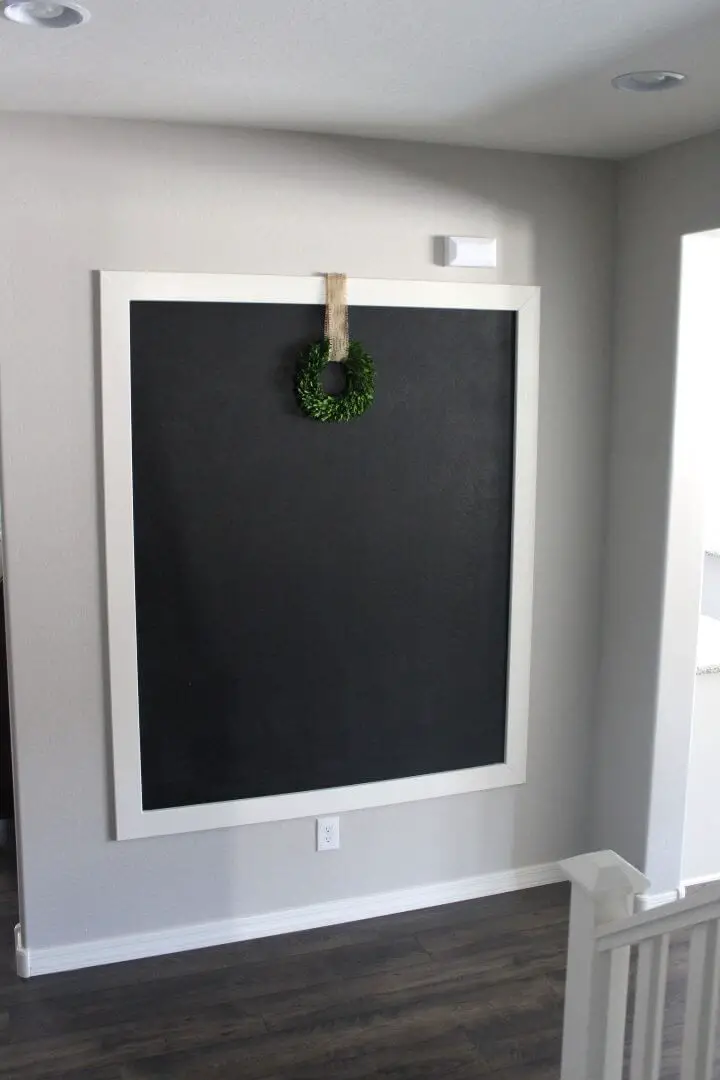
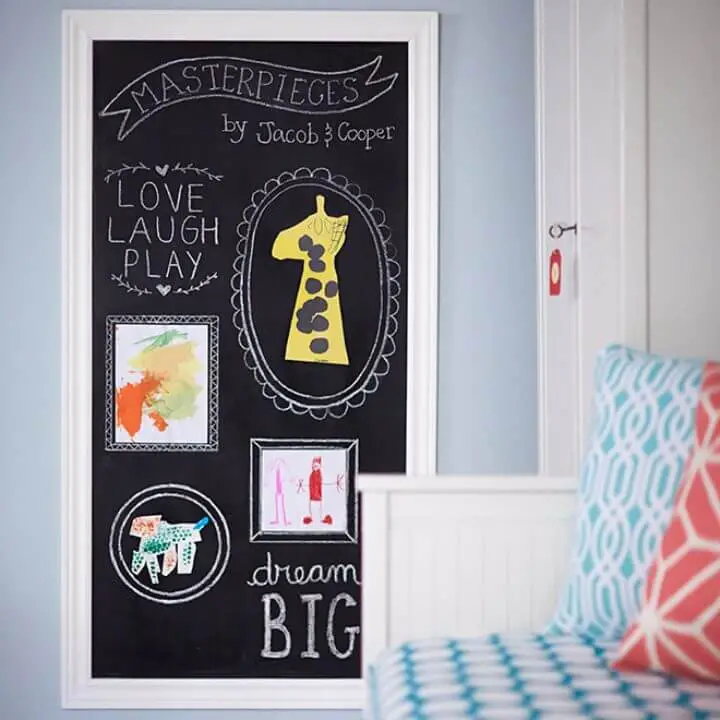
Easy DIY Framed Chalkboard Wall Art
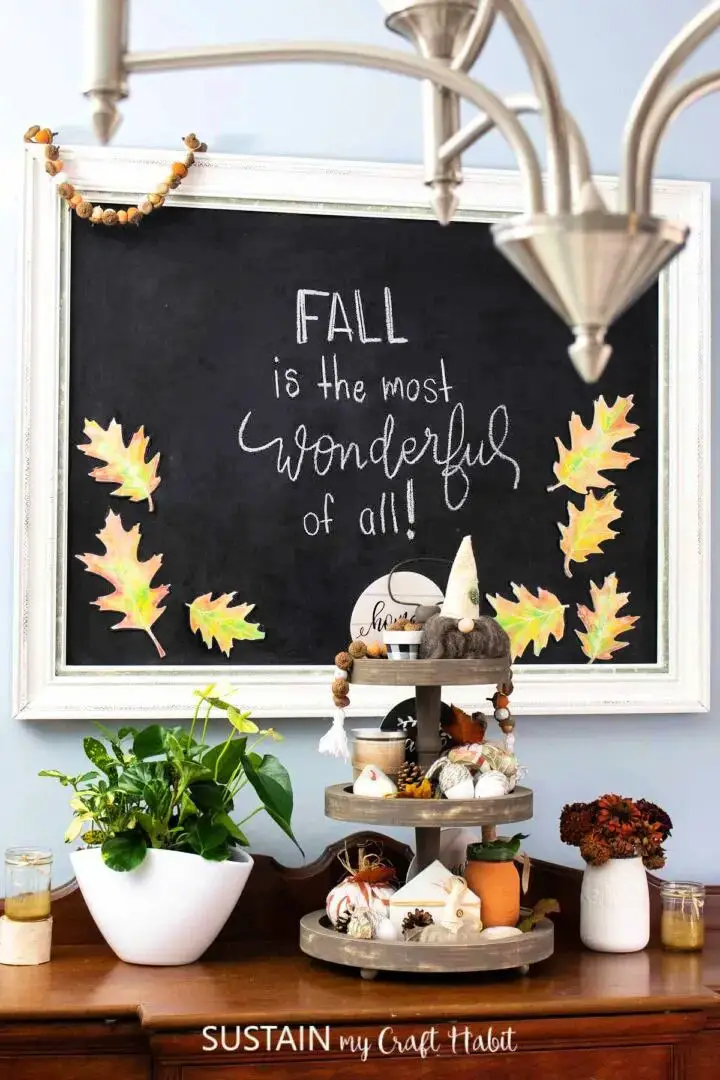
Transform your everyday home décor into a vintage haven by upcycling a DIY framed chalkboard. This creative endeavor showcases the power of repurposing discarded items into unique works of art, breathing new life into old furniture and giving it a second chance to be loved. The result is an interactive piece that serves as a thoughtful way to leave notes or holiday wishes for loved ones, while also adding a touch of elegance to any room. Imagine a soft blue backdrop featuring this charming chalkboard – the perfect blend of form and function.To bring this idea to life, you’ll need a large picture frame (36″ x 48″), some white paint, chalkboard paint, and brushes. Start by giving the frame a good cleaning, then apply a coat of white paint. Once dry, use chalkboard paint on the backing board, let it set, and reattach it to the frame. If you want to take it up a notch, add some seasonal magnets for an extra touch of whimsy.The best part? This project is incredibly easy to execute, requires minimal materials, and can be completed in no time. It’s also a fantastic way to breathe new life into old frames that might otherwise collect dust. If you’re unable to find the perfect frame at home, thrift stores or garage sales are great places to start your search. With this project, you’ll not only create something truly unique but also add a dash of creativity to your living space.
Make a Chalkboard Wall With Step by Step Instructions
Transform a plain wall into an interactive masterpiece with a DIY chalkboard wall, perfect for kids’ playrooms or any room seeking a dynamic touch. By using chalk paint instead of wallpaper, you’ll enjoy a cost-effective, easy-to-apply solution that offers a rich and authentic chalkboard experience. With just a few simple supplies – including chalk paint, a box of chalk, and optional trim or border – you can add a creative flourish to your home. This low-maintenance project is ideal for those who crave flexibility, as the design can be easily changed at any time. To achieve an authentic blackboard feel and ensure easy erasing, don’t forget to condition the chalkboard wall before use. Ready to unlock the full potential of your space? Start crafting your chalkboard wall today!
How to Make a Perfect Chalkboard Wall
Transform a dull wall into an immersive experience with a DIY chalkboard wall. This straightforward guide will walk you through the process of selecting the ideal wall, choosing the right chalkboard paint, preparing and painting the surface, and adding the finishing touches. To get started, you’ll need basic materials like painter’s tape, sandpaper, chalk, and Rustins, Dulux, or Rustoleum chalkboard paint. This budget-friendly project is an effective way to infuse your space with personality while providing a functional and engaging writing surface. A chalkboard wall is the perfect addition to any home, ideal for jotting down notes, creating art, or leaving heartfelt messages.
Turn Your Wall Into a Giant Chalkboard
Transform a ordinary home wall into an engaging and practical feature by creating a DIY chalkboard. This creative project offers endless possibilities for fun and functionality, whether you’re tracking upcoming projects or showcasing your artistic side.
To bring this idea to life, simply combine Rust-Oleum chalkboard paint, Zinsser Primer, and 1×3 pine boards. The result is a large, customizable chalkboard that can be easily constructed in just a few steps. This project is perfect for solo DIY enthusiasts or families looking to add some creative flair to their decor.
Not only is this project easy to execute, but it’s also adaptable to fit any wall size and can be completed while keeping an eye on your little ones. The finished chalkboard wall not only enhances your home’s aesthetic appeal but also provides a unique space to organize tasks or let your child’s artistic skills shine. So why not give it a try and create a blend of function, style, and play in your home today?
Pretty DIY Giant Chalkboard Wall
Transform your walls into vibrant hubs of creativity and interaction with a dynamic DIY chalkboard wall project. This giant, framed chalkboard stands out as a unique accent in any room, inviting kids to doodle, friends to leave birthday messages, or you to share festive greetings. With basic supplies like chalkboard paint, wood trim, painter’s tape, and other essentials, this simple yet impressive project brings life and personality to your walls. A creative solution for utilizing large wall spaces, the chalkboard wall offers endless enjoyment and utility while keeping costs low. This innovative home decor idea injects new energy into your living space.
How to Paint a Chalkboard Wall
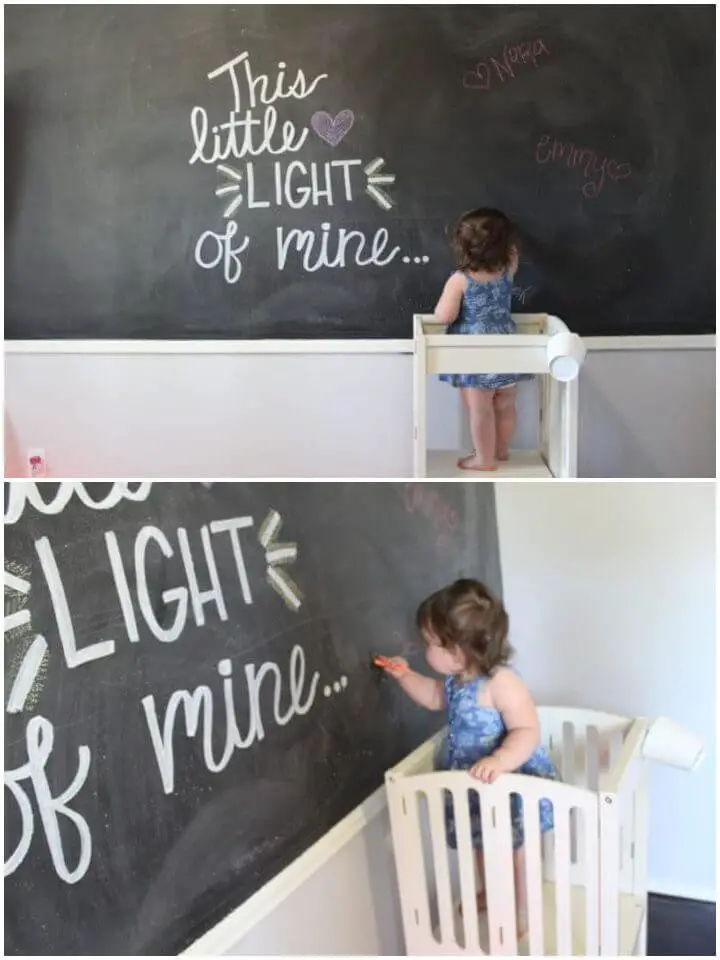
Transform your home’s walls with the trendy and functional chalkboard paint. This cost-effective DIY solution offers a unique visual element and a space for creativity, whether it’s doodling, leaving messages or reminders. The process requires more than just applying paint, however. To achieve a long-lasting result, start by conditioning the wall with chalk to create an evenly blended surface. Once set, remove excess chalk and let your imagination run wild – even kids can join in on the fun! When complete, this decorative and functional space becomes an interactive hub where everyone can contribute their own creative expression.
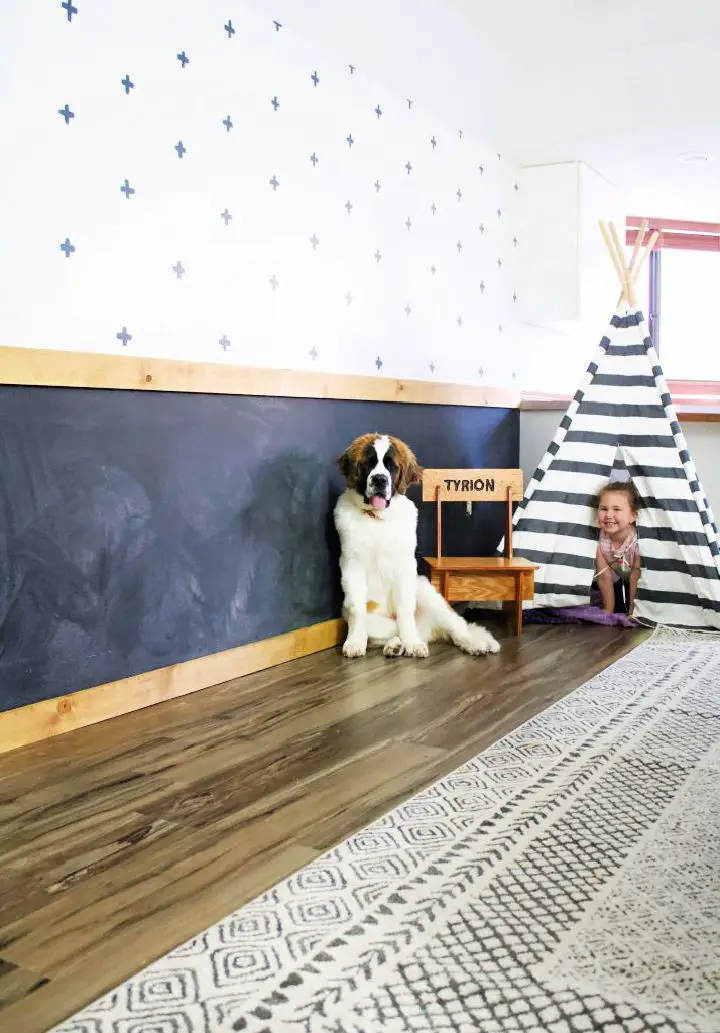
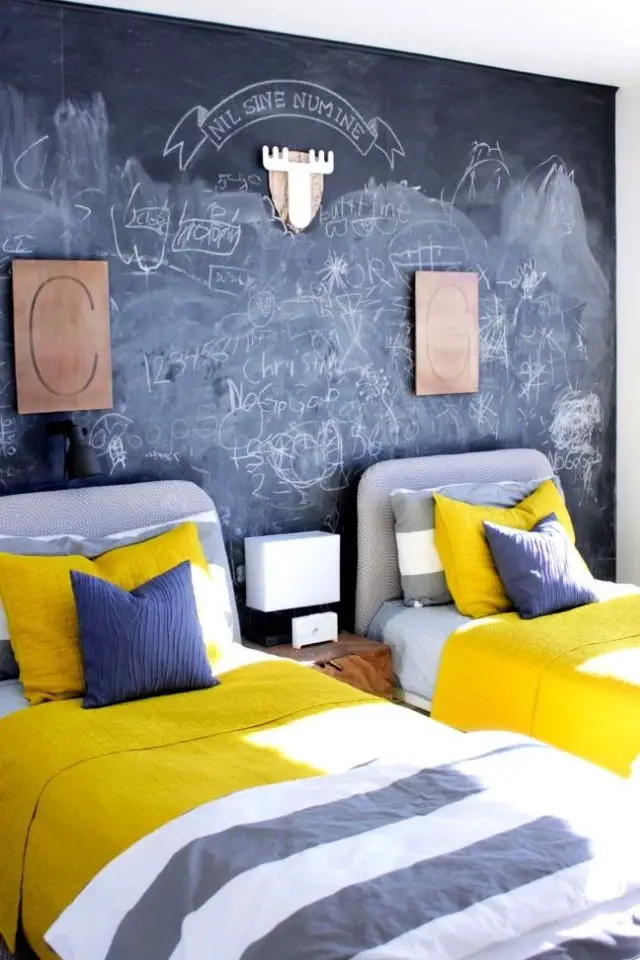
Chalkboard Wall to Jazz Up for Child’s Room
Transform a ordinary wall into an extraordinary canvas with a DIY chalkboard wall that reflects your personality. With a few simple supplies like a level, measuring tape, chalkboard paint, and a paint roller, you can turn any space into a creative haven.
Start by preparing the surface, then use your trusty measuring tape and level to mark out the area. Apply multiple coats of paint, allowing each coat to dry before adding more. After a three-day setting period, bring the chalkboard to life with a simple rubdown using white chalk.
Take it to the next level by adding wooden trim or painted frames, securing them with a nail gun for a professional finish. This one-of-a-kind decor piece serves multiple purposes – showcase your favorite artwork, jot down reminders, and add a touch of whimsy to any room.
DIY Playroom Chalkboard Wall for Kids
Transform your playroom into a vibrant haven for creativity and self-expression by incorporating a DIY chalkboard wall. This dynamic space invites your little ones to unleash their imagination, fostering independence and artistic growth. To bring this vision to life, start with a can of Rust-oleum chalkboard paint and apply multiple coats to achieve the desired depth and durability.
As you await the final coat to dry, exercise patience by allowing a 3-day window before introducing writing or drawing tools. Once ready, season your new chalkboard wall with a light layer of chalk to prevent any unwanted residual marks from previous artistic endeavors.
While bright chalkboard markers may initially seem tantalizing, their removal can be a challenge – it’s best to reserve them for longer-term masterpieces. This chalkboard wall promises an immersive and engaging creative outlet for your children, offering endless opportunities for self-expression and imagination.
Make a Magnetic Chalkboard Wall
Transform your home into a creative haven for your toddler with a DIY magnetic chalkboard wall that doubles as a unique decor piece. This innovative project combines functionality with style, providing an engaging space for young children while adding a touch of personality to your living space.
To bring this idea to life, you’ll need a few essential materials: magnetic primer, chalkboard paint, a small paint roller, chalk, a soft cloth, an eraser, and magnetic accessories. Once you’ve selected the perfect location and mapped out your design, it’s simply a matter of painting, drying, and framing.
As you complete this project, you’ll be rewarded with a wall that fosters creativity in your child and showcases your DIY skills. With minimal costs and straightforward instructions, this endeavor is a worthwhile addition to any playroom or child-friendly space.
Handmade Wooden Framed Chalkboard Wall
Transform a dull hallway into a vibrant hub of creativity with this easy-to-executed DIY project. By utilizing readily available materials like Pine or Whitewood boards, Rust-Oleum Chalkboard Paint, and Varathane Stain, you can create an interactive space that encourages self-expression for under $30. The addition of a frame lends a touch of sophistication to the chalkboard’s rustic charm. This low-commitment project allows you to easily switch up the design whenever you desire, making it perfect for those who like to keep their spaces fresh and personalized. With its unique blend of functionality and aesthetic appeal, this DIY framed chalkboard wall is an excellent way to breathe new life into your home.
Affordable DIY Chalkboard Wall
Transform your child’s bedroom into an artistic haven by creating a DIY chalkboard wall that celebrates their creativity and imagination. This versatile feature allows them to express themselves freely at any time of day, whether it’s practicing vocabulary, illustrating bedtime stories, or hosting a game of Pictionary. The possibilities are endless!To bring this project to life, Amy used chalkboard-painted plywood, which harmoniously blends with the room’s vibrant yellow comforters and blue & white pillows. To get started, you’ll need 4×8 1/4″ plywood, Benjamin Moore Chalkboard Paint, and a foam roller.This creative endeavour not only elevates your child’s room but also fosters imagination, growth, and self-expression. A child’s room is more than just a place to sleep – it’s a space where they can dream, learn, and create.
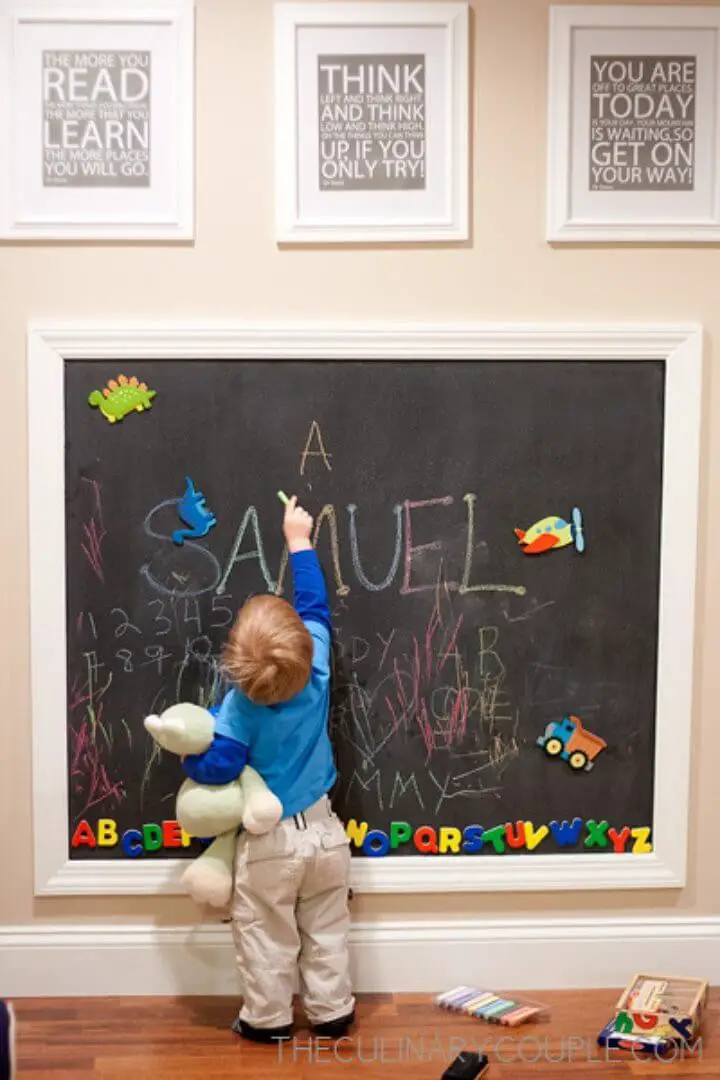
Make a Magnetic Chalkboard Wall for Kitchen
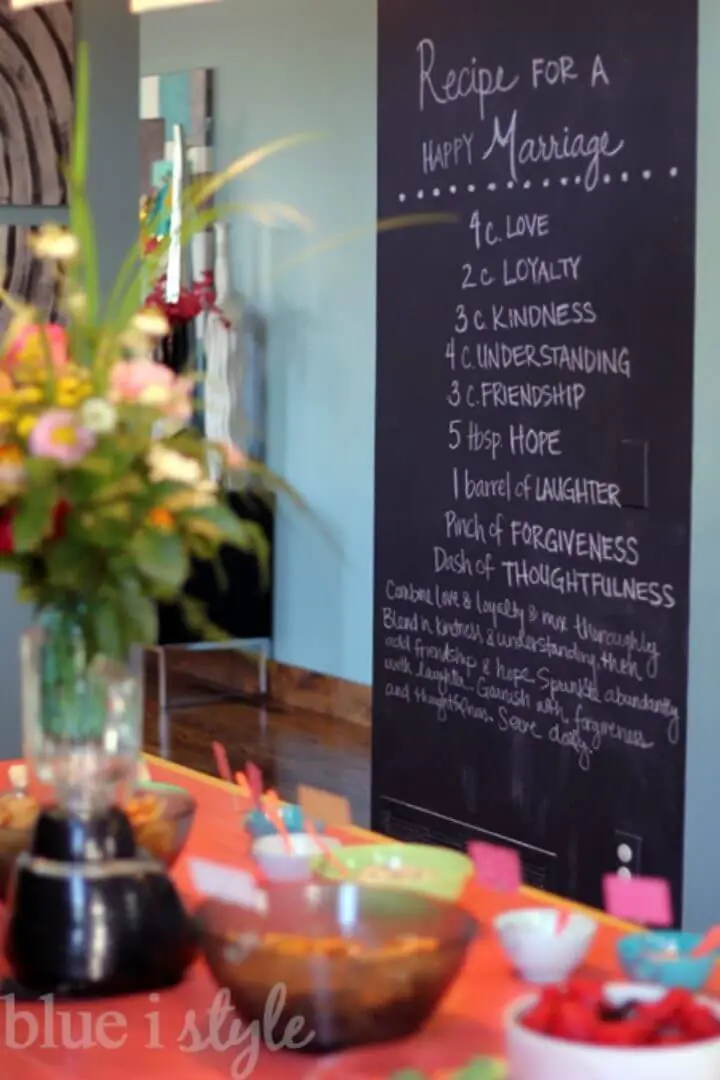
Unleash the creative genius in your home by transforming a blank space into a vibrant chalkboard wall! This innovative project combines magnetic primer and chalkboard paint to create an engaging area for both kids and adults to express themselves. I opted for a narrow wall adjacent to the fridge, where it can’t be missed.
nThe process was straightforward: three coats of Rustoleum Magnetic Primer and two coats of black latex chalkboard paint. The striking black surface may seem bold, but it has become a conversation starter and a central focal point in our home.
nThis chalkboard wall is more than just a pretty face – it’s a dynamic space for keeping toddlers entertained, commemorating special moments, or simply serving as a canvas for creativity. Its magnetic feature also adds a unique twist, allowing lightweight magnets to stick perfectly, ideal for DIY alphabet learning tools. So go ahead and make every doodle count with your very own chalkboard wall!
Make Your Own Chalkboard Wall at Home

Imagine a space where creativity knows no bounds, where little hands can bring colors and imagination to life. A DIY chalkboard wall can become that haven, crafted with high-quality Krylon chalkboard paint from Sherwin Williams. The process is surprisingly straightforward: start by preparing the wall carefully, then apply multiple coats of chalkboard paint for added durability. Finally, give it a finishing touch with white chalk to achieve that authentic, rustic chalkboard look. This versatile addition to your home encourages children to express themselves freely, without worrying about making mistakes or causing damage. It’s an effortless way to foster artistic exploration and create endless opportunities for fun and creative expression. Whether you’re capturing special moments, celebrating milestones, or making exciting announcements, this chalkboard wall becomes a charming focal point in your home, adding character and whimsy to your decor.
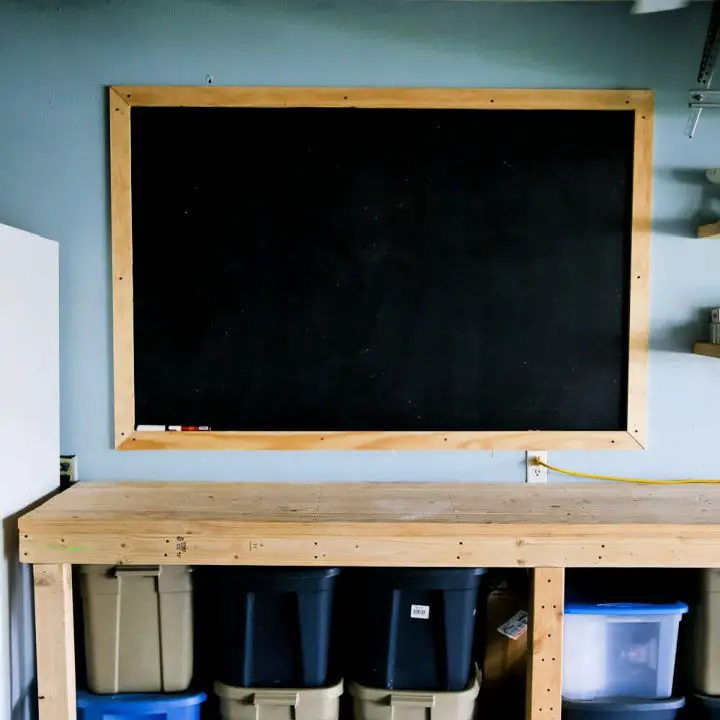
Simple DIY Giant Chalkboard Wall
Transform any room in your home or workspace into a functional masterpiece with a one-of-a-kind giant chalkboard crafted from homemade paint. This innovative DIY project not only provides a unique organizational tool but also adds an air of character to the space, making it perfect for jotting down thoughts, plans, and ideas. To create this oversized chalkboard, start by gathering essential materials like plywood, paint, 1 x 3 x 6 boards, upholstery nails, and other basic hardware items. The key to this project lies in the use of homemade chalkboard paint, which is surprisingly easy to make by blending plaster of Paris with black paint. This budget-friendly alternative to store-bought options requires minimal effort but yields a stunning result. Not just limited to listing tasks, this giant chalkboard serves as an effective organization tool and a creative outlet, allowing you to unleash your inner artist while keeping your thoughts and plans neatly in check.
Homemade Framed Chalkboard Wall
Transform your home into an interactive art studio for your little ones with a DIY chalkboard wall! This straightforward project combines creativity, education, and fun, providing a safe space for kids to express themselves. Simply apply chalkboard paint to a 6ft x 3ft area of your hallway, creating a vast canvas for their artistic endeavors.
With an investment of just $10 in paint, you’ll cover around 100 sq. ft., offering excellent value compared to purchasing a traditional chalkboard. To complete the look, frame your artwork zone with wood and stain, harmonizing with your home’s décor.
Not only is this setup perfect for teaching letters and words, but it also serves as a menu board or an opportunity for parents to hone their hand-lettering skills! For a stress-free painting experience, tackle the project after your kids’ bedtime, ensuring a smooth, uninterrupted paint job. After three days, your chalkboard will be fully dry and ready to use, providing endless hours of fun family activities.
Embark on this creative adventure and enjoy the versatility and quality time with your loved ones that a DIY chalkboard wall has to offer.
How to Make a Chalkboard Wall for Staircase Entry
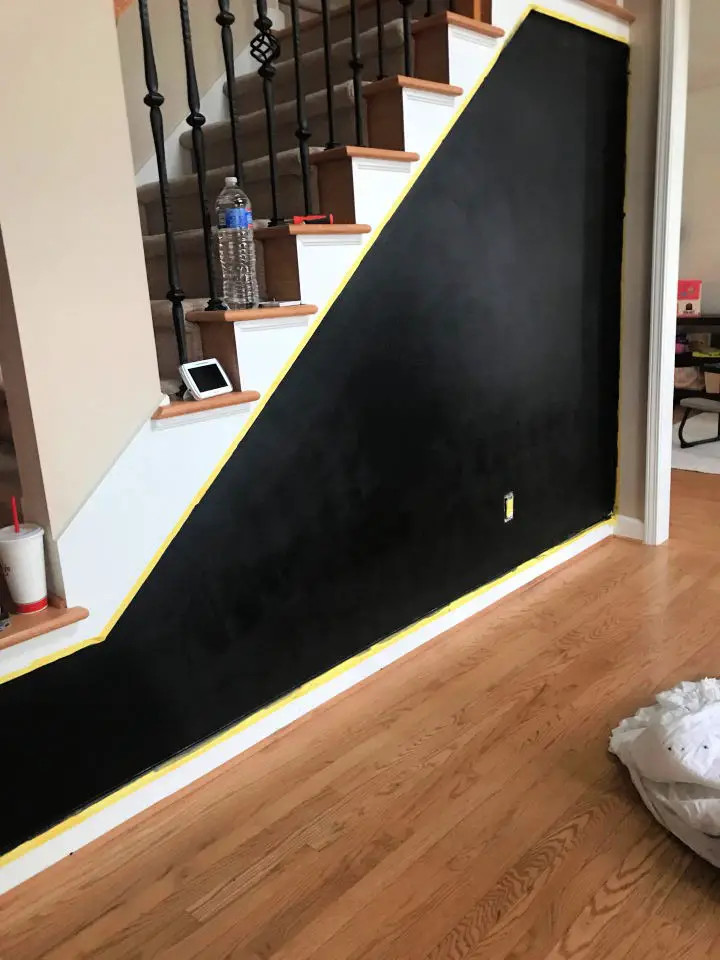
Transform any wall into an interactive canvas with this engaging DIY chalkboard project! Perfect for capturing memories, celebrating milestones, or creating a fun atmosphere, it’s an eye-catching backdrop that brings a playful vibe to your home. To get started, you’ll need high-density foam rollers, Zinsser Bulls Eye 1-2-3 Primer, chalk paint, and a few other tools. This project is ideal for showcasing your little ones’ artistic talents in a unique way that also adds to your interior decor. By embracing the joy of creativity, you’ll create a conversation starter that will spark imagination and inspire fun interactions.
DIY Chalkboard Wall Design
Transforming a living space into a creative haven for children is easier than you think. A chalkboard wall offers endless possibilities for imagination and self-expression. This interactive feature isn’t just a simple blackboard; it’s an opportunity for kids to let their artistic spirits shine. To bring this idea to life, gather the necessary materials: a level, painter’s tape, high-quality chalkboard paint (Rustoleum is a recommended choice), and a trim board. Measure out the desired dimensions of your chalkboard, apply the paint, and let it dry completely. Next, frame the chalkboard with painted trim boards to give it a polished finish. To ensure optimal use and longevity, be sure to condition the chalkboard with chalk after every cleaning and before its first use. This rewarding project will not only keep kids engaged but also add an unexpected touch of decor to your space.
Conclusion:
These DIY chalkboard wall ideas provide an innovative way to elevate your living space. By offering 20 distinct designs that cater to various styles and budgets, you can effortlessly tailor your chalkboard wall to suit your unique needs and preferences. Whether it’s a bedroom, playroom, or kitchen, these projects will undoubtedly inspire you to incorporate the chalkboard paint trend into your home decor. With an array of materials at your disposal, get ready to turn your walls into a functional and artistic canvas for your thoughts, artwork, and creative expression.
