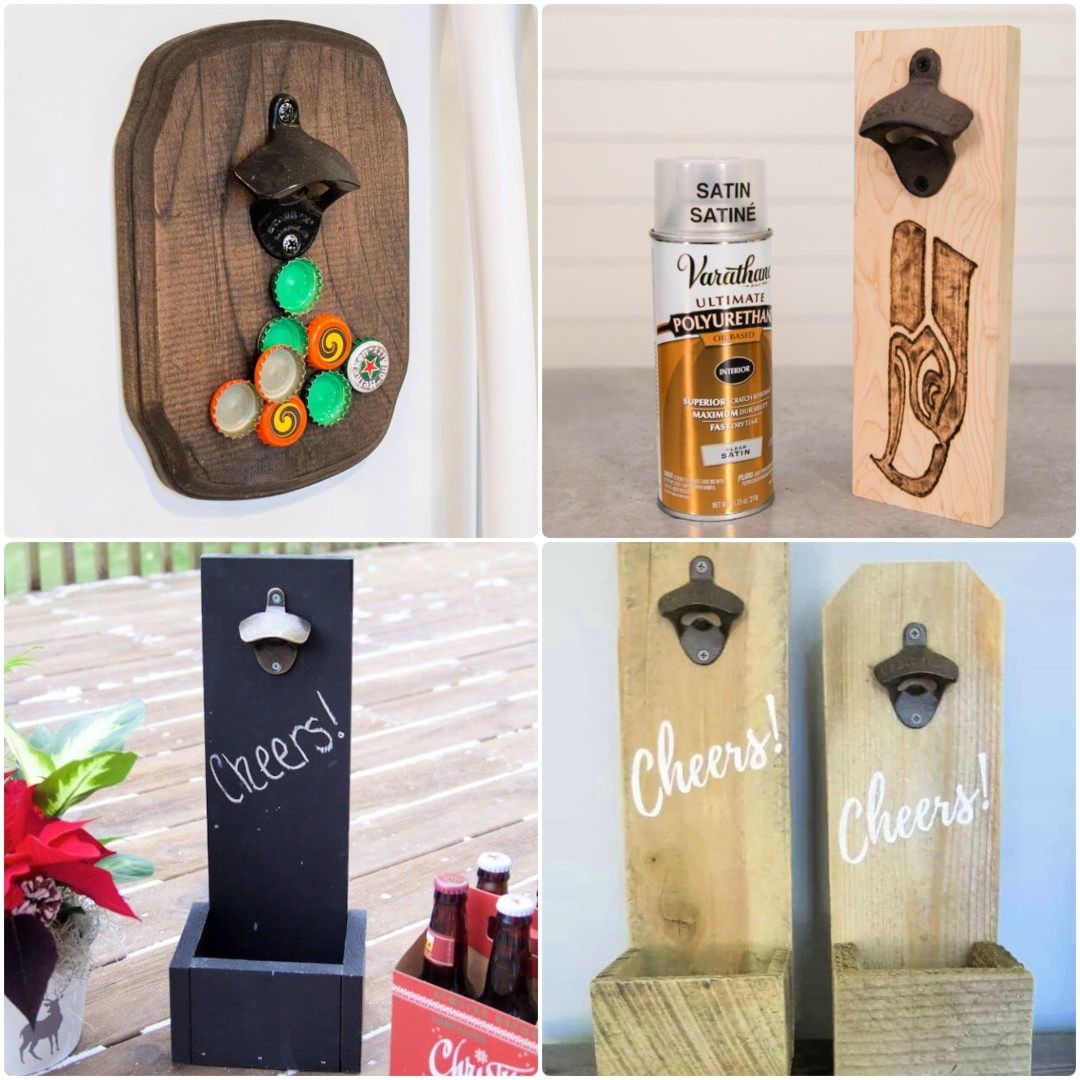
Wall Mounted Beer Bottle Opener
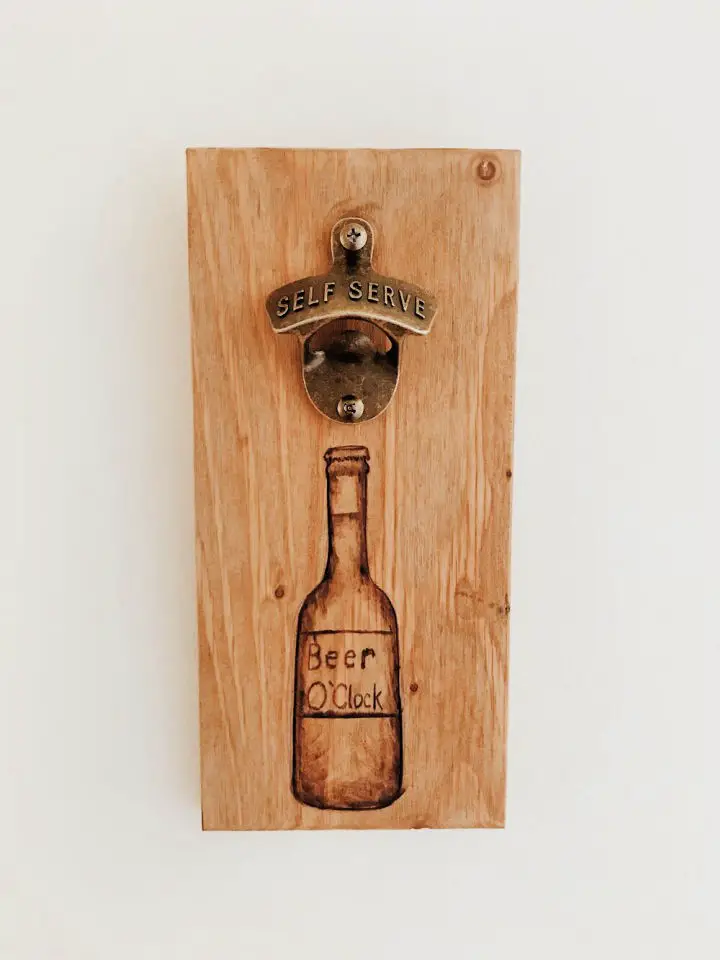
Transform someone’s day with a unique DIY wall-mount bottle opener that exudes practicality and style. This thoughtful gift idea is perfect for the special men in your life – or treat yourself! The crafting process is straightforward, requiring only a few basic materials: wood, a bottle opener, sandpaper, a pencil, a rag, a drill, wood stain, and a wood burner.
Begin by preparing your wooden piece and customizing its color with your preferred wood stain. Next, attach the bottle opener and get creative! Use a pencil to trace a design of your choice, then bring it to life with a few strokes of the wood burner. The result is a one-of-a-kind gift that’s sure to find a cozy spot in any room. And the best part? The size is entirely up to you, making it easy to tailor the project to fit your needs.
Homemade Bottle Opener for Father’s Day
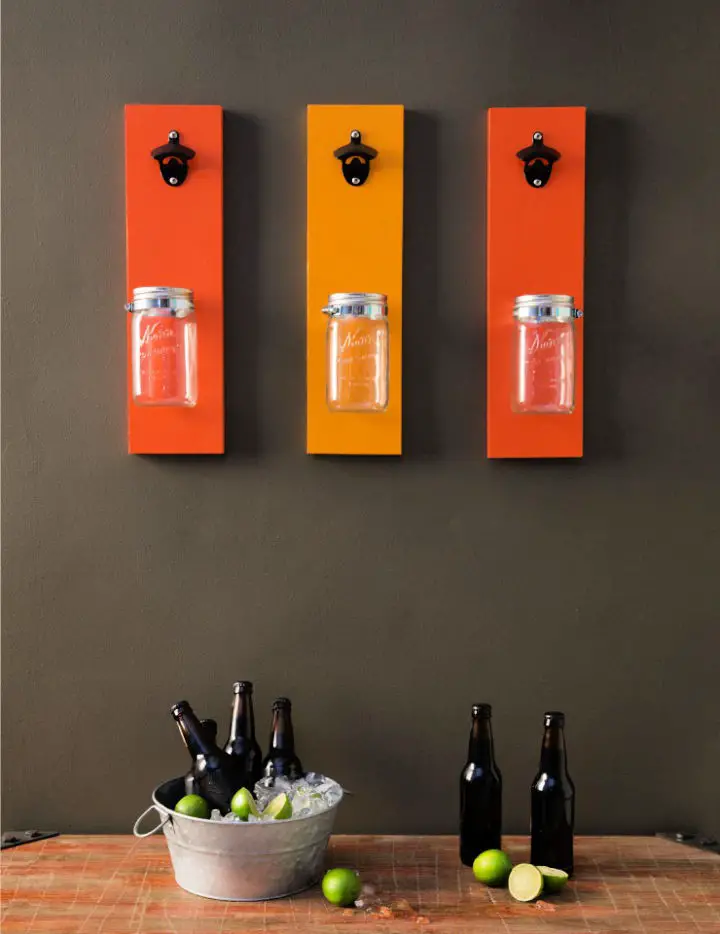
This Father’s Day, celebrate the most important man in your life with a unique handmade gift that’s both functional and sentimental. Create a DIY wall-mounted bottle opener using simple materials like 6×20 wood boards, paint, screw-on bottle openers, and 8 mason jars. The process is surprisingly easy: measure, cut, paint, and drill the wood board, then attach the bottle opener and jar. This rustic charm-enhancing project makes for a heartfelt gift that your dad will not only use but also cherish. It’s not just about gifting; it’s about making a token of love that he’ll carry with him. So gather your tools and get creative to make this Father’s Day one to remember!
How to Make a Wall-Mounted Bottle Opener

Transform your hangout space into a unique haven with a custom wall-mounted bottle opener that can be completed in just one evening! This DIY project combines functionality with decorative flair, perfect for your bar area, man cave, garage, or porch. By using readily available materials like 1×4 scrap wood, chicken wire, decorative push pins, and wood glue, you’ll create a functional piece that also captures bottle caps. The assembly process involves: cutting the wood to size, gluing the pieces together to form the frame and catcher base, attaching a personalized decal and chicken wire for added charm, and finally, affixing the bottle opener to complete your DIY masterpiece. This easy-to-follow guide takes you through each step of the creation process, blending utility with aesthetics for your relaxation spot. Don’t forget to exercise caution when handling tools and enjoy the creative process of crafting this functional piece of art.
Affordable DIY Magnetic Bottle Opener
Get ready to mesmerize your friends with a DIY magnetic bottle opener that defies gravity! This innovative project utilizes high-powered neodymium magnets, cleverly hidden within the design, to create an captivating display of ‘floating’ bottle caps. With a combination of readily available materials like wood, bottle openers, Krazy glue, and screws, as well as tools such as Forstner bits, countersink drill bits, and palm routers, this DIY endeavor is surprisingly accessible. This comprehensive guide will walk you through the entire building process, from shaping the wooden face to drilling magnet holes, assembly, and finishing touches. Whether you’re looking to elevate your next party or create a one-of-a-kind gift for Uncle Lou, this magnetic bottle opener is sure to impress.
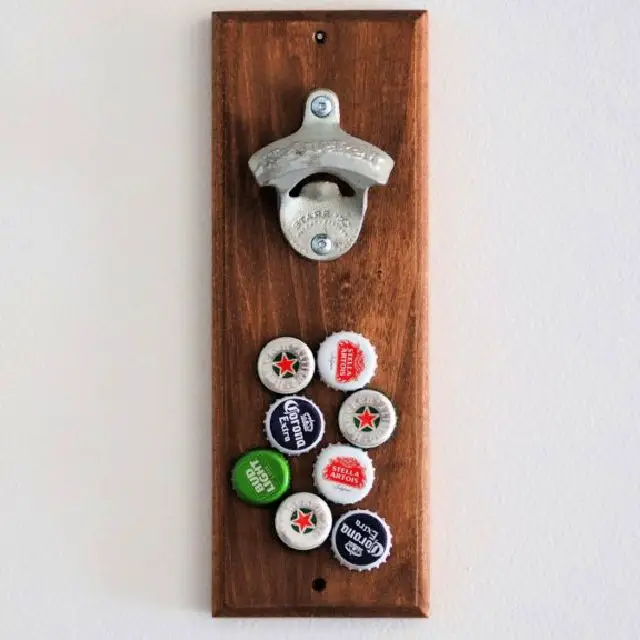
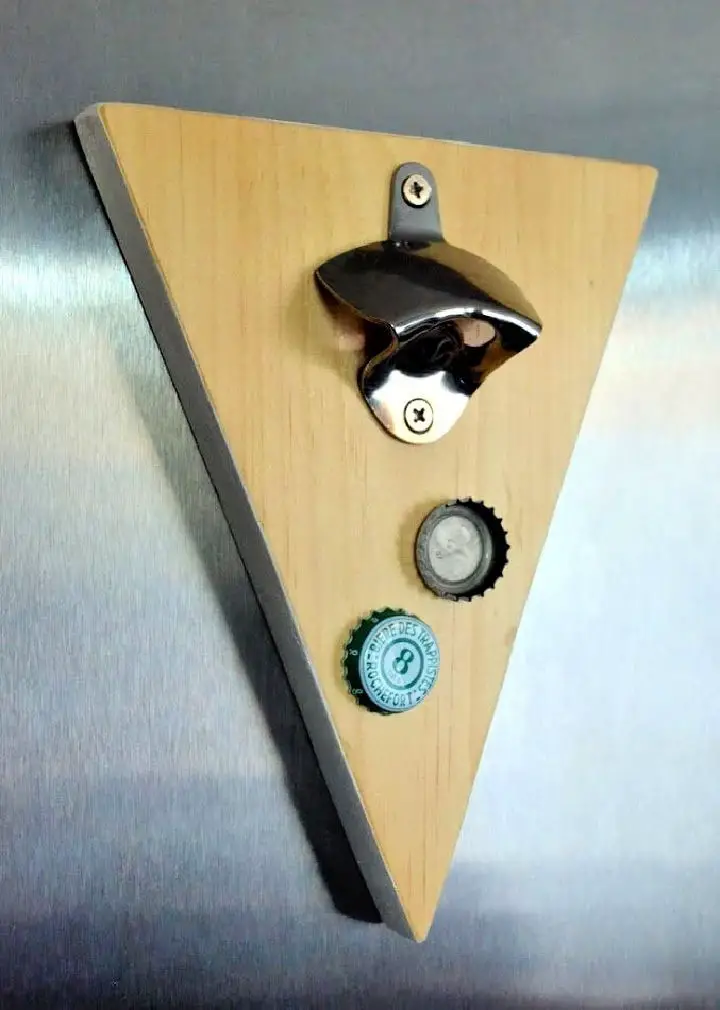
Magnetic Bottle Opener With Catch
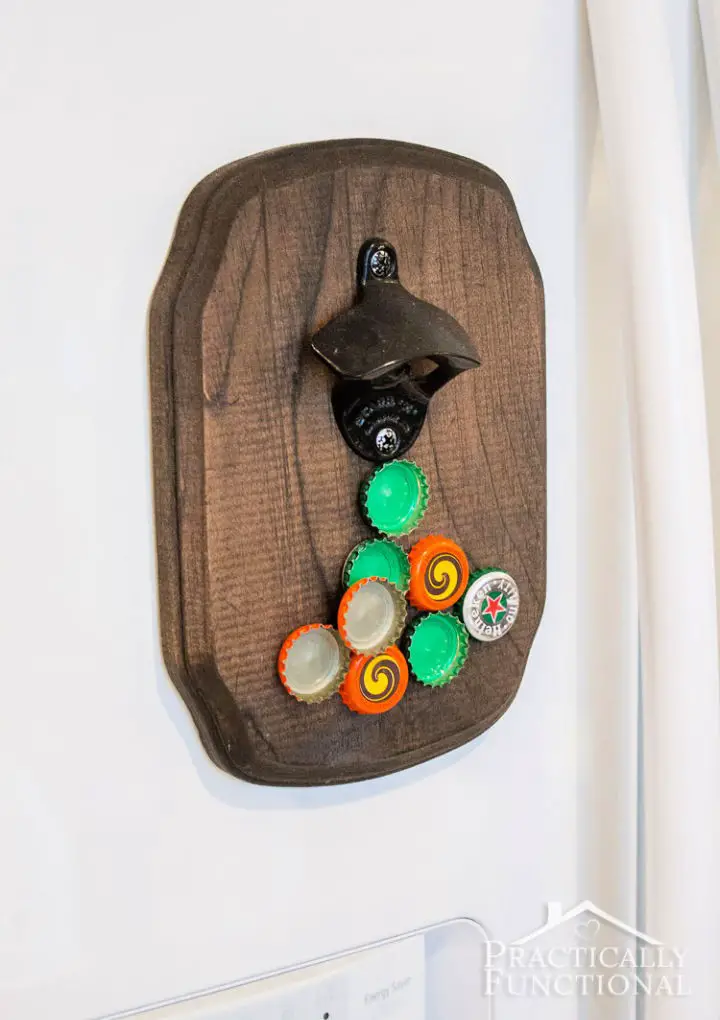
Transform your kitchen with this clever DIY refrigerator-mounted bottle opener, crafted from a 3×1 pine board. This magnetic marvel effortlessly captures multiple caps, eliminating clutter and adding a touch of personality to your space. The built-in Neodymium magnets secure the opener to your fridge, providing a reliable and convenient experience. To complete the design, a satin finish adds an air of elegance, while a protective felt covering on the back ensures durability. With its unique blend of form and function, this DIY project is perfect for woodworking enthusiasts. Simply follow the comprehensive instructions and bring this practical yet creative addition to your home today!
Inexpensive DIY Pallet Wood Bottle Opener
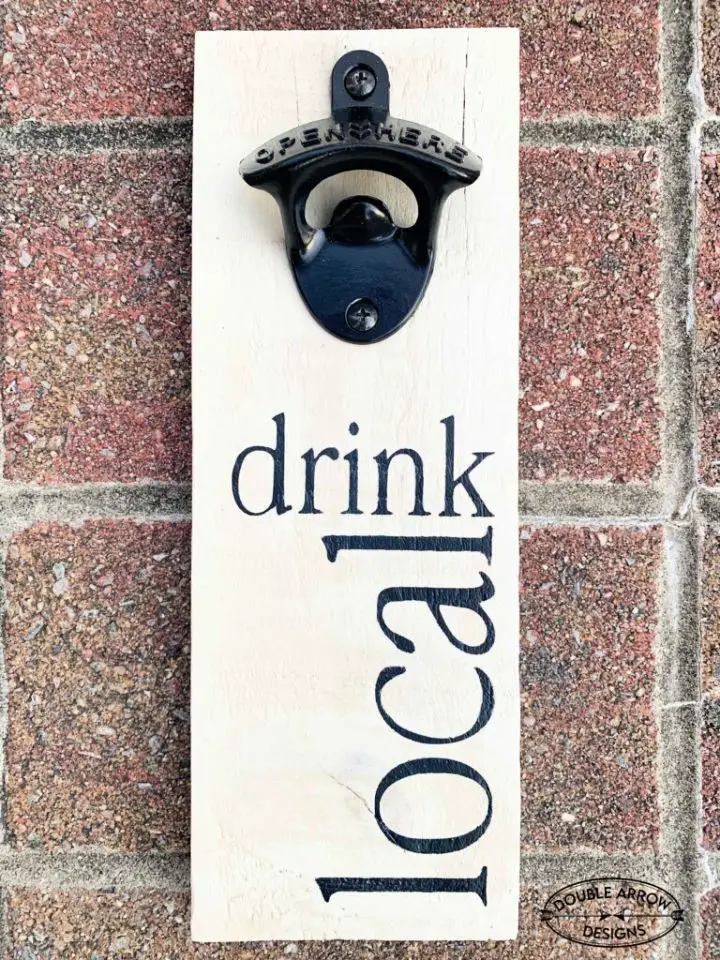
Transform your creative potential by crafting personalized DIY bottle openers that blend functionality with artistic expression. This engaging pallet wood bottle opener project is a perfect way to celebrate Father’s Day or add a unique touch to your outdoor gatherings. With just a few simple materials, including pallet wood, a metal bottle opener, acrylic paint, and a stencil, you can bring this innovative item to life.
In your workshop, start by prepping the pallet wood pieces with a hand sander, followed by painting or staining them to suit your style. The stenciling step allows for added personality, with options like ‘Drink Local’ adding a touch of whimsy to the wooden surface. A comprehensive guide ensures minimal stencil bleeding and walks you through sealing the bottle opener for outdoor use.
The final step is attaching the metal opener, leaving you with a one-of-a-kind conversation piece ready to crack open cold beverages at your next gathering. Try this straightforward yet rewarding DIY project and wow your friends with your craftsmanship.
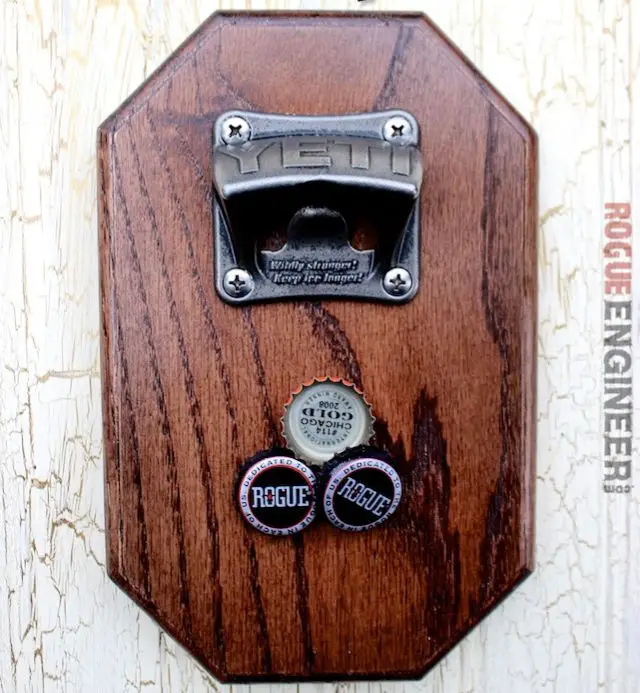
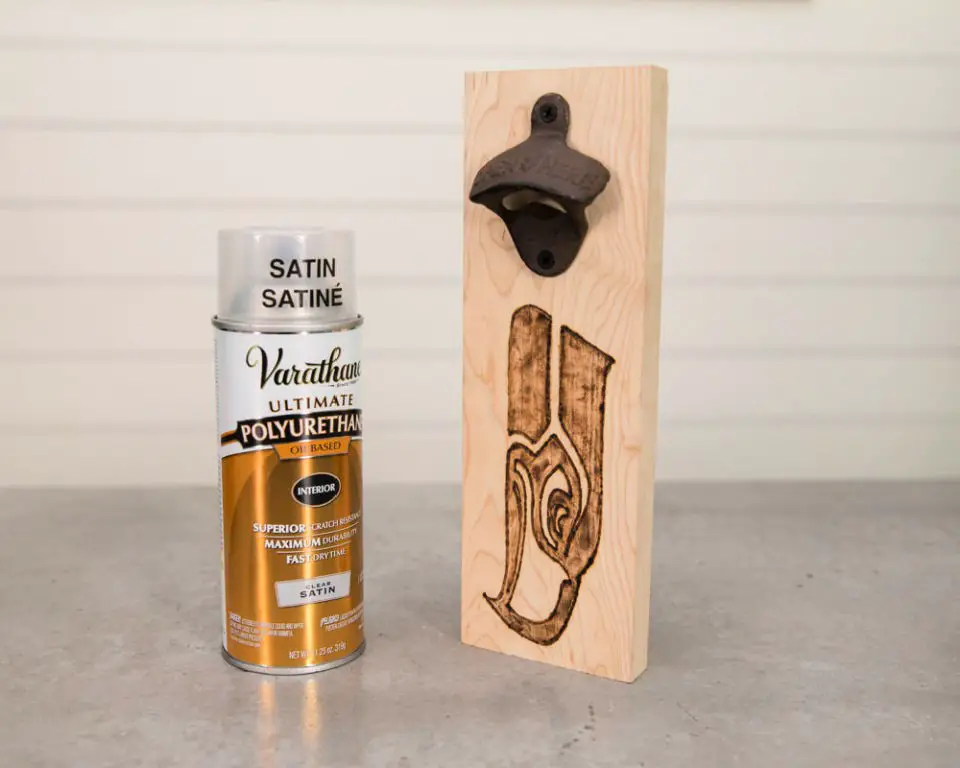
Build a Bottle Opener With a Hidden Magnet
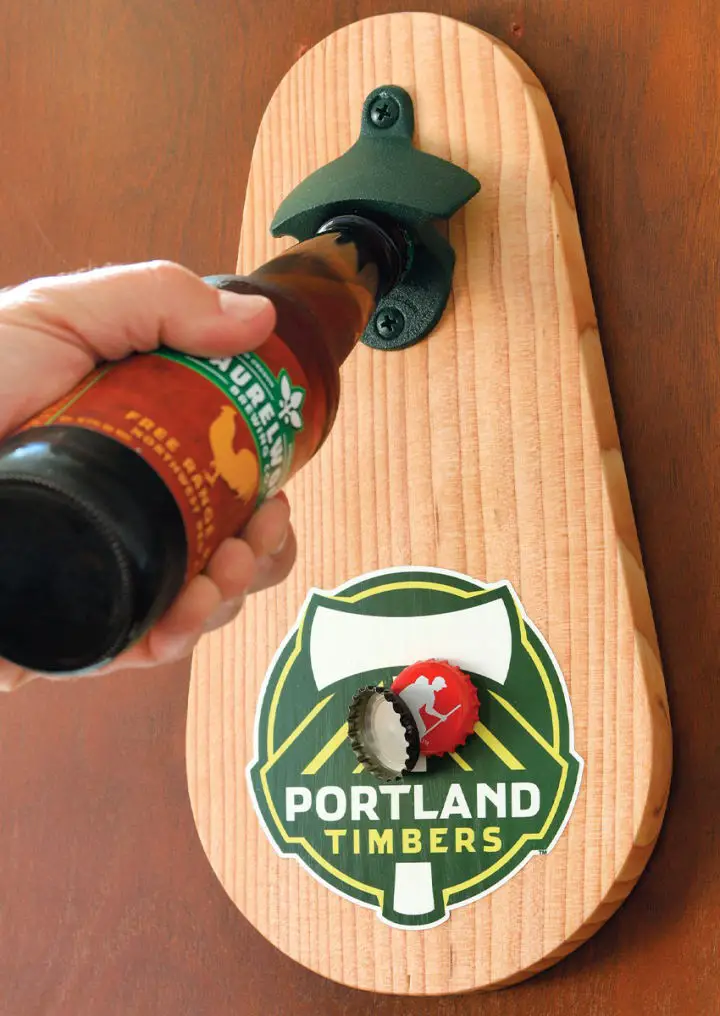
Transform any gathering into an unforgettable experience with your very own DIY masterpiece – a custom bottle opener featuring a cap catcher mechanism. Begin by designing a wooden board that can accommodate your preferred logo, mark the cutting paths, and precision-cut the wood to perfection.
Next, embed a neodymium magnet within the board to create a mesmerizing cap-catching effect. After drilling and gluing, add a personal touch with your favorite sticker or decal. Then, pinpoint the hardware positions, pre-drill, and secure the components in place.
Finally, apply two coats of polyurethane to seal and protect your handiwork. The end result is a functional bottle opener that not only enhances your barware but also sparks conversations at any gathering. Unleash your creativity and experience the thrill of uncapping a cold one with this innovative DIY project.
Modern Plexiglass Bottle Opener
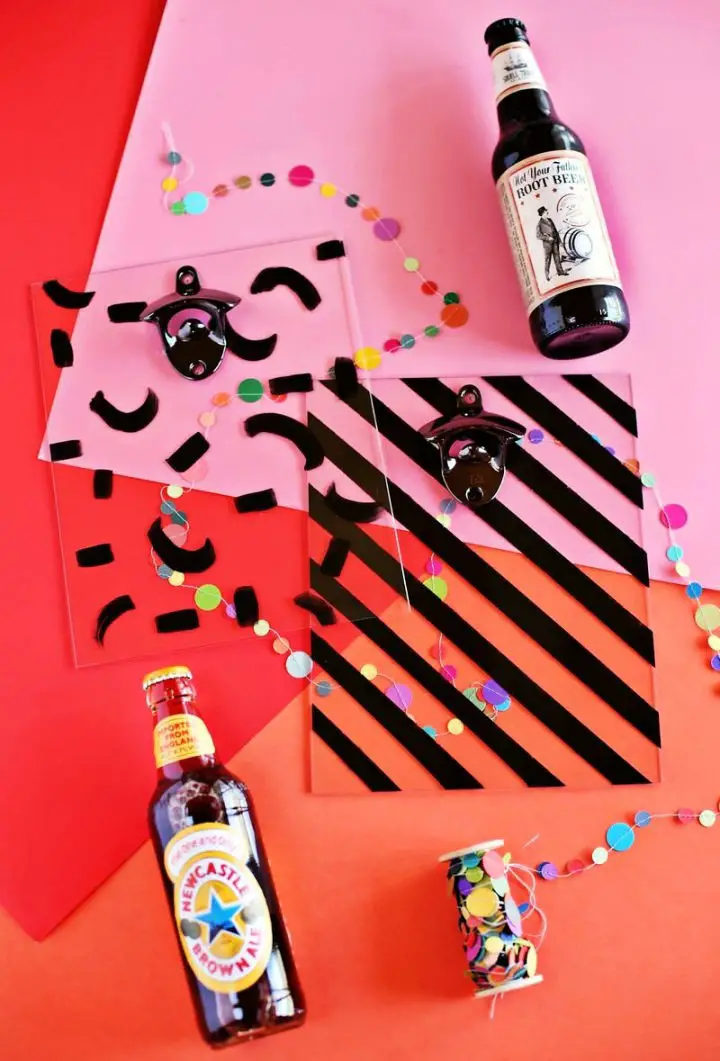
Transforming everyday items into unique creations has never been more exciting than with this DIY plexiglass bottle opener project. Combining the durability and sleek appearance of plexiglass with the functionality of a bottle opener, you’ll be amazed at how effortlessly you can turn two 8×10 inch sheets of plexiglass, along with essential hardware sets, a drill, craft paint, electrical tape, and optional transparency sheets into an extraordinary accessory. The addition of this clever bottle opener not only enhances its practicality but also gives it a distinct charm. To put the finishing touches on your masterpiece, apply custom paint at the back to protect against scratches during use. Once dry, assemble the components, and you’ll be left with a stunning plexiglass bottle opener that will undoubtedly add a touch of elegance to any kitchen setting or serve as an impressive handmade gift.
Quick and Easy DIY Bottle Opener
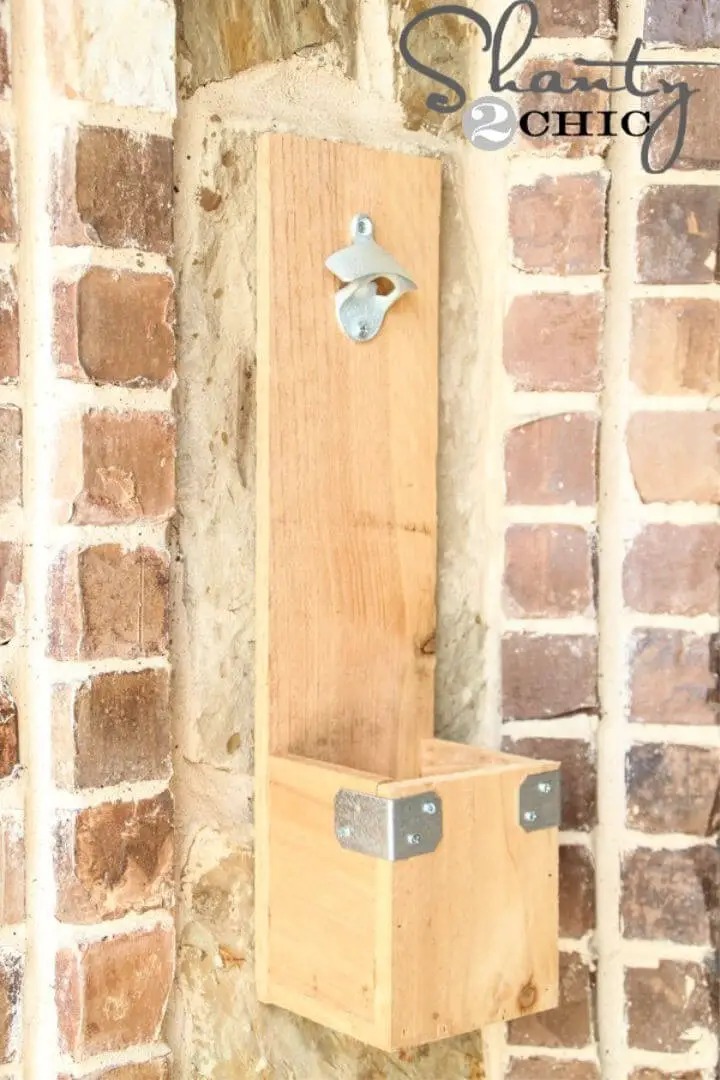
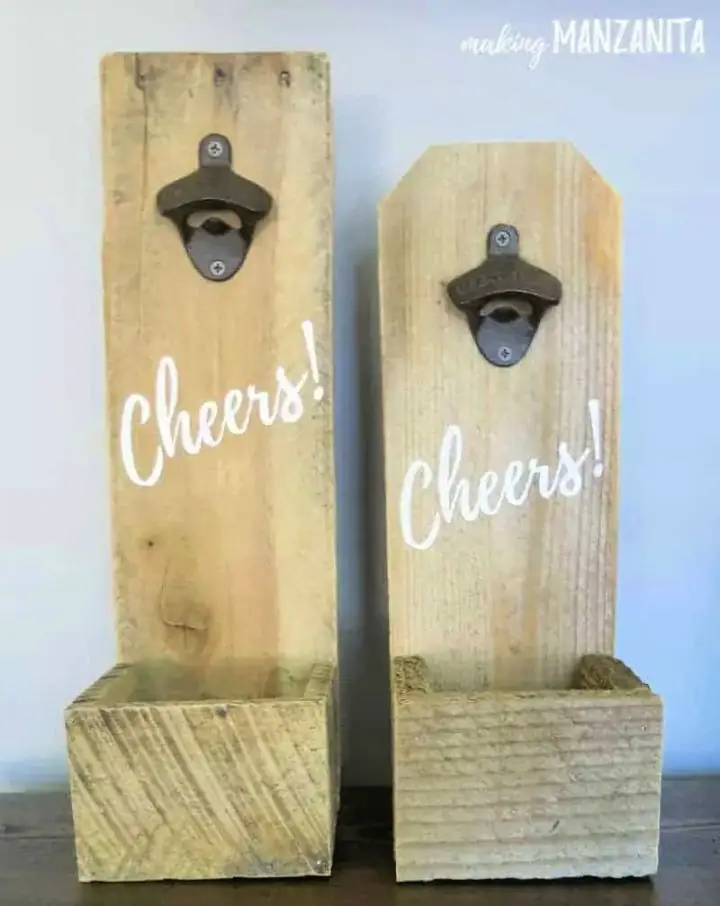
Transform Father’s Day or any special occasion with a thoughtful DIY gift – a unique bottle opener project. This engaging craft combines cedar fence plank scraps, metal hardware, a zinc bottle opener, and basic tools like a hand saw, wood glue, and nails. If you don’t have the necessary scraps, a 1x6x6 piece from your local hardware store will suffice. Build a small box to catch bottle caps and attach it to a larger board, securing the bottle opener to the top. For an added touch of elegance, incorporate metal brackets into the corners. This practical addition to your patio or indoor bar can be completed in approximately 10 minutes for around $10. The result is a functional and stylish piece that will surely bring joy to its recipient.
How to Build a Wooden Bottle Opener

This holiday season, spread joy by gifting handcrafted items with a thoughtful and easy DIY project: creating a unique bottle opener with a cap bucket. Using everyday materials like a wall bottle opener, wood screws, brad nails, and wood glue, you can assemble this practical gift in no time. What’s more, it’s an excellent way to show the love and care that goes into making a personalized present rather than settling for mass-produced ones. The resulting bottle opener is a valuable addition to any household, ensuring your gift will be cherished and used often. To inspire you with a wealth of DIY gift ideas, follow along with our step-by-step video guide.
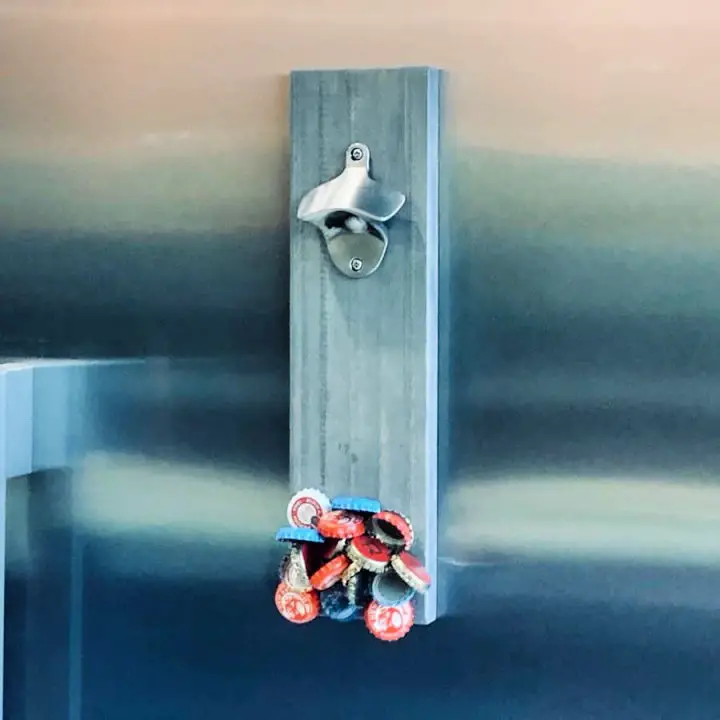
Making a Magnetic Bottle Opener
Immerse yourself in the world of DIY innovation by creating a sleek magnetic bottle opener for your kitchen or bar area. Not only does this project add a touch of style to your space, but it also offers a practical solution for storing bottle caps. The best part? It’s an affordable endeavor that won’t break the bank, with a total cost under $25.To bring this project to life, you’ll need a few essential tools, including a drill, miter saw, router (optional), safety glasses, and hearing protection. For materials, you’ll require a piece of 1 x 6 x 12″ Oak, a wall-mounted bottle opener, and strong neodymium magnets.The process involves several steps:Cutting the Oak to length to create the perfect base for your magnetic bottle opener.Routing edges (optional) to add a touch of finesse to your design.Drilling holes for the magnets, ensuring they’re securely in place.Finishing the piece to give it a polished look.Mounting the magnets and bottle opener, allowing you to easily attach it to your refrigerator or any non-magnetic surface using a sawtooth hanger or keyhole router.This DIY magnetic bottle opener is more than just a functional addition to your space – it’s a reflection of your creativity and willingness to take on a new challenge. With this project, you can personalize your area with an appealing blend of functionality and aesthetics.
Simple DIY Bottle Opener for Father’s Day Gift
Embellish Father’s Day celebrations with a heartfelt, handmade reclaimed wood bottle opener that exudes rustic charm. This DIY project not only yields an affordable yet thoughtful gift but also fosters sustainability by repurposing natural materials.
As you embark on this creative journey, you’ll have the opportunity to infuse your gift with personal touches through various stages – from sanding and cutting to crafting a cap catcher box and painting intricate designs. The process is surprisingly straightforward, requiring only a few essential materials like wood, wood glue, nails, adhesive liner, acrylic paint, and a bottle opener.
By presenting this unique wooden bottle opener as a token of appreciation, you’ll undoubtedly delight Dad with a gift that’s both functional and stylish, making it an unforgettable Father’s Day experience.
How to Make a Wall-Mounted Bottle Opener
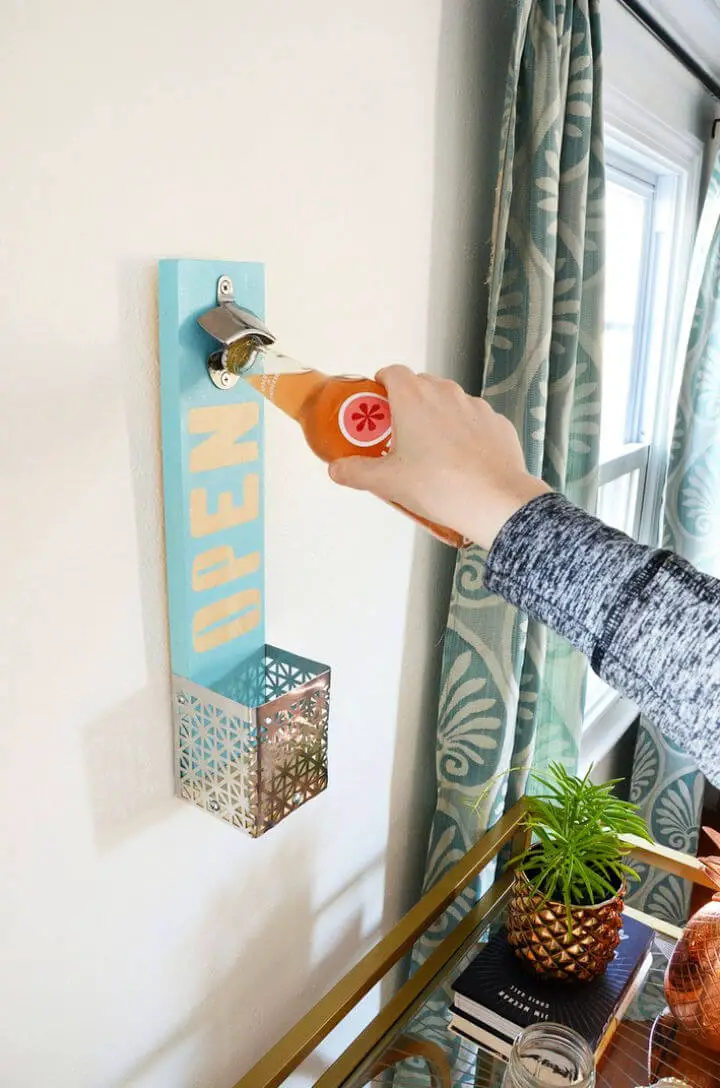
Transform your home bar into a stylish and functional oasis with this DIY wall-mounted bottle opener project. With just a few simple materials, including wood pieces, a radiator cover, a bottle opener, bendable wire, an adhesive shipping label, and spray paint, you can create a unique piece that’s both practical and eye-catching. Customize it to your taste by experimenting with different radiator cover finishes or spray paint colors, or add a personal touch with your favorite sports team’s colors or family names. Not only will this project provide easy access to your beverages, but it’ll also keep your space clutter-free by collecting stray bottle caps. Follow our step-by-step guide and expert tips to create a one-of-a-kind piece that reflects your personal style.
Adorable DIY Magnetic Bottle Opener
Indulge in the satisfaction of crafting a one-of-a-kind magnetic bottle opener that’s both a thoughtful gift and a functional companion for any beer aficionado. This DIY project is perfect for Father’s Day or as a token of appreciation for friends who share your passion for craft brews. With pre-cut wooden craft plaques serving as the foundation, you’ll be creating a unique piece that combines the rustic charm of wood with the convenience of embedded magnets, effortlessly collecting bottle caps and keeping floors safe from damage.
Handmade Magnetic Bottle Opener Using Scrap Wood
Transform your kitchen with creative DIY bottle opener ideas that combine upcycling and sustainable living principles. Breathe new life into discarded scrap wood by crafting a magnetic cap catcher that not only opens bottles but also adds a touch of elegance to your kitchen decor. This innovative project utilizes readily available materials such as magnets, glue, a straight edge, clamps, a metal bottle opener, a miter saw, a jigsaw, a mouse sander, sandpaper, wood stain, paint, wood filler, and a spray sealer to create a functional masterpiece that can be mounted on your fridge or any other preferred spot. The best part? You can customize it with shapes, stains, and paint colors, adding personalized lettering or stencil patterns for an extra dash of creativity. Whether you’re using it yourself or gifting it to someone special, this DIY bottle opener is sure to impress. So why not get crafty with your scrap wood today and start making a statement in your kitchen?
Make Your Own Magnetic Bottle Opener
Transform your social gatherings with a personalized magnetic bottle opener that combines functionality and flair. This DIY project allows you to craft a unique opener using basic materials like white maple, a wood burner, and powerful magnets. The pièce de résistance is the option to imprint your preferred logo or image, making it a one-of-a-kind piece that reflects your personality.The step-by-step guide takes you through each phase of the process, from carefully burning your design onto the wood to strategically placing the magnets that effortlessly catch bottle caps. With all the necessary supplies readily available at your local hardware store, this project is both convenient and budget-friendly.The end result is a delightful, magnetic bottle opener that not only serves its purpose with ease but also sparks engaging conversations at any social gathering. Give it a try and infuse your parties with creativity and charm.
Cheap DIY Coaster Bottle Opener
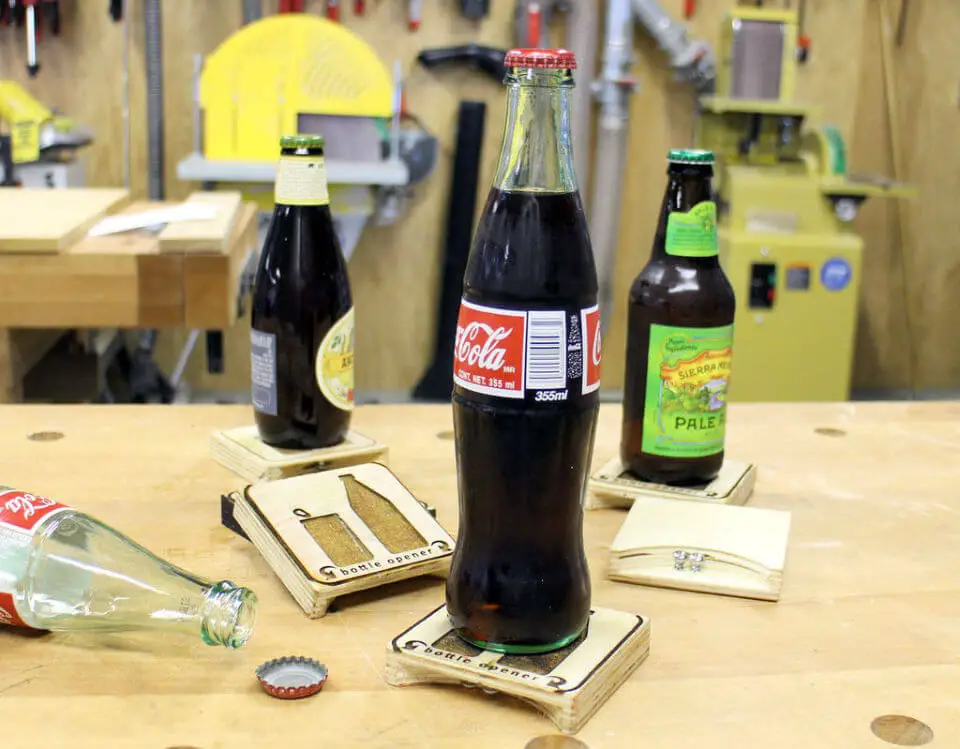
Transform your home bar with a creative DIY bottle opener that’s both functional and stylish. This innovative coaster-based design not only adds a personal touch to your drinkware collection but also makes it easy to open your favorite bottles right at the table. Start by slicing 3/4-inch thick plywood into 3.5-inch squares, creating a stable base for the opener’s screw. Mark the midpoint and depth of each square, then use a biscuit cutter to create a precise hole for the screw installation. The best part? You can customize this coaster with your personal touch or embellishments, making it perfect for parties or everyday use. With a few simple steps, you can turn your woodworking skills into functional art that’s both practical and impressive.
Making a Wooden Bottle Opener
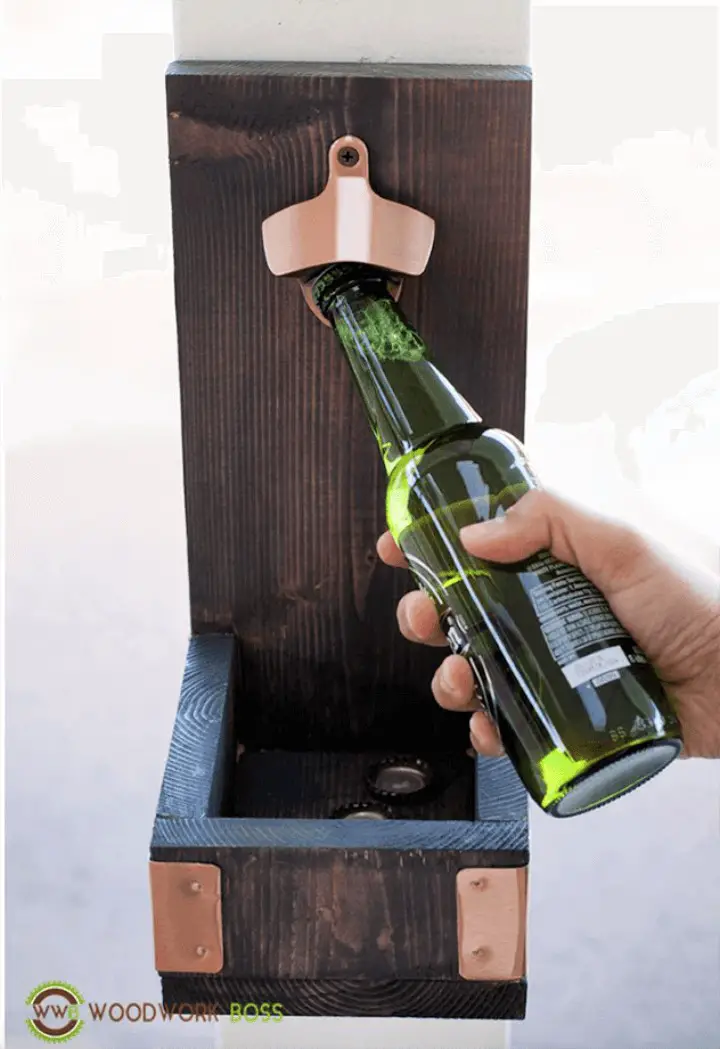
Add a touch of practicality and style to your kitchen by crafting a wooden bottle opener with an integrated cap catcher. This DIY project demands basic woodworking skills and tools, such as a hammer or brad nailer, saw, screwdriver, and drill. You’ll need the following building materials: 1-inch by 6-inch board, 1 1/4-inch finish nails, wood glue, stain or paint, and a bottle opener. To take it to the next level, consider adding copper trim for an extra flair. Once assembled and finished with your preferred color scheme, this functional piece will serve as both a handy tool during social gatherings and a visually appealing wall decoration. Moreover, this homemade bottle opener can be repurposed as a thoughtful gift for friends, family, or neighbors. Follow the step-by-step instructions and bask in the pride of creating something unique and useful.
Building a Bottle Opener That Pops
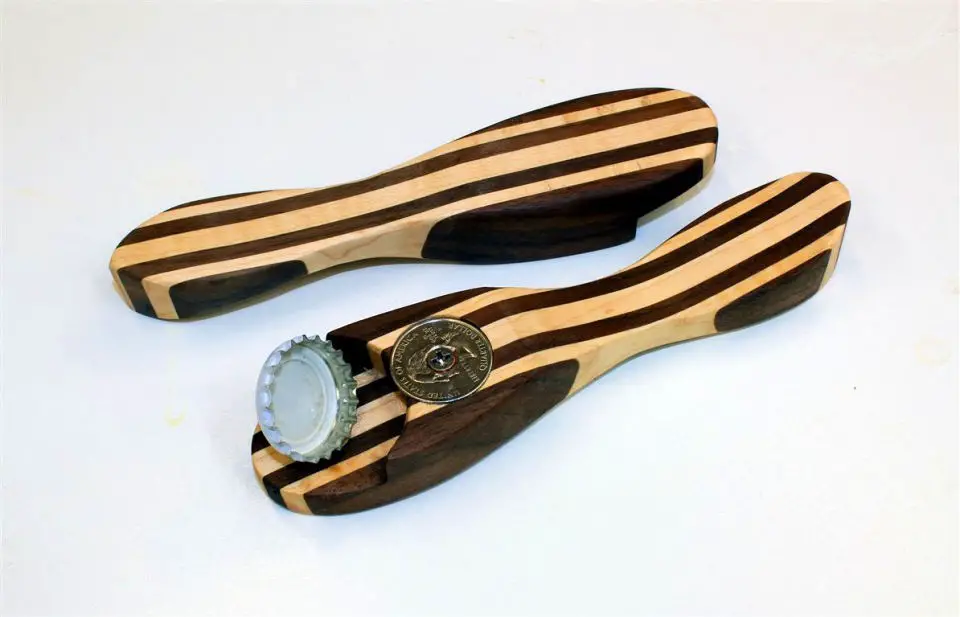
Transform your drink-opening experience into an eventful encounter by crafting a DIY bottle opener that truly makes a splash. This unique wooden contraption cleverly employs a US quarter as the mechanism for opening bottles, adding an extra layer of excitement with a hidden rare earth magnet that catches the bottle cap in mid-air. The construction of this opener combines contrasting hardwood strips like maple and walnut to create a visually appealing design. Feel free to experiment with other hardwoods that suit your taste, though keep in mind that softwoods might not be the best choice due to their potential for denting under the opener’s functional demands.
A step-by-step guide takes you through the process, from preparing a blank on the drill press to sanding and protecting the finished product. The crafting process also incorporates design elements focused on comfort and durability, such as a curved handle and a robust oil-based poly finish. Finally, test your creation with your favorite beverage, and cheers to creativity and functionality!
Fun and Easy DIY Bottle Opener Game
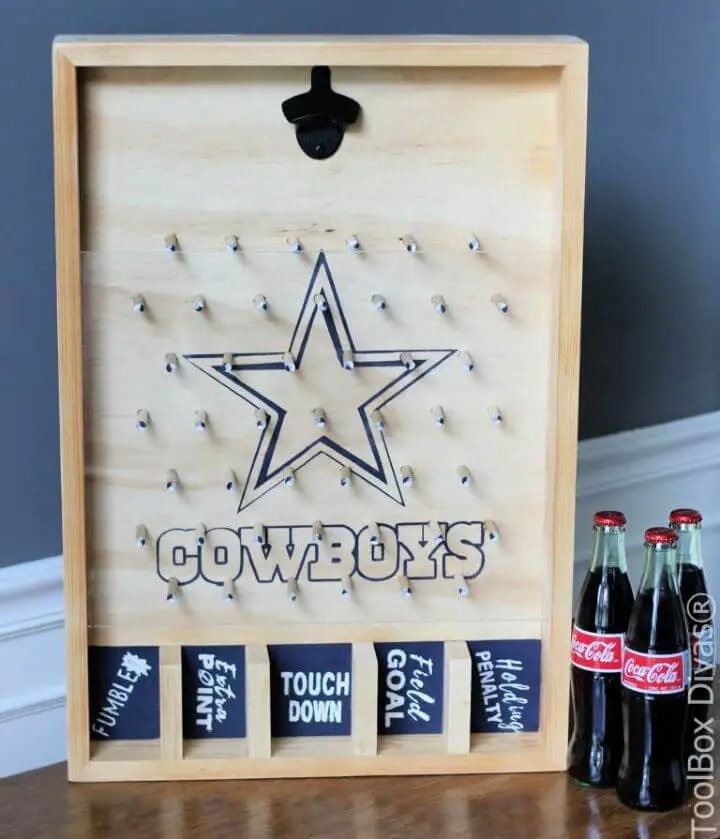
Transform the humble wall-mounted bottle opener into a captivating DIY game that doubles as a conversation piece! Begin with a 2×4 plywood sheet, carefully crafting it into a 2×16 inch board featuring a meticulously designed nail pattern for bottle caps to fall into place. The wooden dowels serving as pegs add an element of fascination as the bottle caps descend, making this game both enjoyable and customizable. Tailor your design to fit your favorite sports team or color scheme, ensuring your unique creation stands out from the crowd.
To bring this project to life, gather a few essential materials: plywood, a steel framing square, a drill, wooden dowels, paint, and a bottle opener. With these affordable tools, you’ll be amazed at the big impact this game has on your gatherings and decor. Whether it’s a thoughtful Father’s Day gift or a show-stopping addition to your entertainment area, this bottle opener game is sure to impress and start conversations.
Conclusion:
In the world of DIY, creativity knows no bounds when it comes to crafting unique bottle openers that not only serve their purpose but also become a conversation piece in any room. By repurposing materials like wood, scrap metal, and plexiglass, you can create functional and innovative designs that are sure to impress friends and family alike. Whether it’s a wall-mounted beer bottle opener or a cleverly disguised magnetic catcher, these DIY projects offer endless possibilities for customization and personalization. As an added bonus, they make thoughtful gifts for special occasions like Father’s Day, allowing you to showcase your skills and thoughtfulness.
