Ready to add some sparkle to your space or seeking a creative outlet that combines relaxation with mindfulness? Our guide to creating 15 Easy DIY Glitter Jar Ideas is the perfect starting point for crafting dazzling decor pieces that not only brighten up any room, but also provide a soothing tool for mental focus. Whether you’re a seasoned crafter or just looking for a fun and engaging activity, our step-by-step instructions make it easy to create your own glitter jars that will appeal to crafters of all skill levels. But what really sets these DIY projects apart is their educational benefits, making them an excellent addition to any learning environment. In this guide, we’ll walk you through the essential materials needed for each project, along with alternatives and substitutions to help you get creative without breaking the bank. As you embark on this fun and rewarding process, be prepared for a beautiful outcome that not only shines but also provides a sense of accomplishment and joy.
Mindfulness and Educational Benefits of Glitter Jars
Glitter jars have a dual purpose that extends beyond their creative appeal – they can be a valuable instrument for cultivating mindfulness and facilitating learning experiences. The benefits of glitter jars are multifaceted, and they can be used in various ways to promote emotional regulation, sensory exploration, and educational activities.
Mindfulness with Glitter Jars
Mindfulness is the art of being fully immersed in the present moment, sans distractions. It’s an intentional practice that allows us to acknowledge our thoughts and emotions without the filter of judgment. By embracing mindfulness, individuals can effectively reduce stress levels and cultivate a deeper sense of calmness.One creative way to foster mindfulness is through the use of glitter jars. This innovative approach combines visual meditation with tactile stimulation, encouraging the mind to focus on the swirling colors and settle into a state of serenity.The process begins by observing the mesmerizing dance of the glitter as it swirls within the jar. This gentle visual exercise helps calm the mind, clearing the way for greater self-awareness and emotional regulation.Beyond simply watching the glitter, the act of shaking the jar serves as a powerful metaphor for navigating life’s turbulent emotions. As the glitter settles back into its tranquil state, we’re reminded that our own minds can be calmed in much the same way – a potent tool for managing stress and cultivating inner peace.
Educational Aspects of Glitter Jars
In a science-meets-art fusion, creating a DIY glitter jar offers a unique opportunity for exploration and creativity. By combining various liquids like water, glue, or glycerin, one can observe how density and viscosity affect the falling rate of glitter particles. This experiment also allows for color mixing demonstrations, showcasing the creation of secondary colors through primary colored glitters. Furthermore, it provides a platform to discuss light reflection and its role in producing the sparkle effect.
Beyond the scientific aspects, this project encourages artistic expression by incorporating various elements like beads or sequins into the jar’s design. The process of experimentation, including making predictions, observations, and drawing conclusions from different material quantities, can lead to engaging discussions. By integrating mindfulness and educational components into the DIY glitter jar, individuals can simultaneously relax and learn, resulting in a truly immersive experience.
Materials and Alternatives for DIY Glitter Jars
Crafting a mesmerizing glitter jar is an enjoyable activity that can be accomplished in the comfort of your own home using fundamental materials. To get started, you’ll require a few basic supplies, including [insert list of necessary materials]. If you don’t have all the required items, fear not! Here are some suitable alternatives to help you achieve this creative endeavor.
Essential Materials
When it comes to crafting your DIY glitter jar, you’ll need a few basic supplies. A standard jar with a secure seal will work perfectly – mason jars are a popular choice, but you can also repurpose old food containers or drink bottles. To add some extra sparkle to the mixture, fine glitter is the way to go. Feel free to mix and match different colors to create a unique look that’s all your own. Next, grab some clear glue – either school glue or glitter glue will do the trick. This special adhesive helps keep the glitter suspended in the liquid, creating a mesmerizing effect as it falls through the jar. Finally, warm water fills out the rest of the container and ensures everything mixes together smoothly.
Alternatives
While mason jars are ideal for this project, feel free to get creative with other clear containers that have a tight-fitting lid. Old baby food jars, plastic bottles, or even glass vials can be great substitutes. If you don’t have glitter, metallic confetti or crushed eyeshadow can create a similar effect. For the adhesive, consider alternatives like hair gel or corn syrup if you’re out of clear glue. These thicker substances will alter the way the glitter moves, but they’ll still produce a stunning visual result. If water isn’t your preference, try using baby oil or glycerin instead. These liquids will slow down the glitter’s descent, adding to the calming ambiance.
Tips for the Best Results
To ensure a seamless blending experience, start by combining the glue with warm water before introducing the glitter. This simple step helps prevent clumping and ensures a smooth mixture. Once the glue is well-mixed with the water, you can then add the glitter without worrying about lumps or uneven distribution.
When it comes to storing your glittered jar, make sure the lid is securely fastened to prevent any accidental spills or leaks. If you’re particularly concerned about airtightness, consider reinforcing the seal with a hot glue gun or super glue for added peace of mind. After sealing the jar, give it a good shake to watch as the glitter swirls and moves around, creating a mesmerizing effect.
How to Make a Glitter Jar
Create a captivating and calming glitter jar, perfect for relaxation or artistic expression with kids. To achieve this mesmerizing effect, follow these simple steps:
What You Will Need:
To create a unique and eye-catching DIY project, you’ll need to gather some essential materials. These include a mason jar, clear school glue, glycerine of vegetable origin, a whisk for mixing, food coloring to add vibrant hues, various sizes of glitter, including extra fine options, sparkly or glittery paper for the lid, boiling water to create a smooth consistency, scissors for trimming any excess materials, and fabric pen or marker to add personal touches.
Step-by-Step Guide:
Transform ordinary glass containers into dazzling works of art by creating your own mesmerizing glitter jars with ease. Follow these straightforward steps and unleash your creativity:
Prepare Your Mason Jar
To initiate the process, carefully pour enough boiling water into your mason jar to fill it approximately one-quarter of the way. This initial step is crucial in setting the stage for the subsequent steps, and ensuring that the desired outcome is achieved.
Adding the Glue
When it’s time to create your sparkly concoction, start by pouring anywhere from a half to a full bottle of clear school glue into the jar. The quantity of glue you use will directly impact the speed at which the glitter settles, with more glue resulting in a slower, more hypnotic descent.
Mix in Glycerine
To elevate the visual appeal of your glitter, consider incorporating two tablespoons of vegetable glycerine into the mixture. While this step is technically optional, it can significantly enhance the whirlpool-like swirl pattern that develops when the glitter settles. Ensure thorough mixing by vigorously whisking the blend.
Color Your Jarscape
Start by incorporating small amounts of food coloring into the mixture, gradually increasing the quantity as you strive for the perfect hue. Be mindful that even just a few drops can significantly impact the color’s intensity, allowing for adjustments to be made with ease. It is essential to remember that less is often more in this scenario, and you can always add additional coloration if desired.
It’s Glitter Time!
As you embark on this creative endeavor, it’s time to add the pièce de résistance – glitter! Begin by introducing extra fine iridescent glitter as the foundation, allowing its subtle shimmer to serve as a captivating base. From here, feel free to experiment and incorporate an assortment of colors such as dark blue, light blue, gold, silver, or any hue that strikes your fancy. Aim for approximately half a cup of glitter in total to achieve the ideal balance of sparkle and density.
Whisk it Up
Once you’ve given your mixture a good whisking, it’s time to add the final touches. Pour in enough boiling water to fill the jar to the top, while sprinkling in any remaining glitter to give your concoction an extra touch of sparkle.
Sealing Your Jar
To create the finishing touch for your decorative jar, begin by tracing the shape of the lid onto a sheet of sparkly or glittery paper. Cut out a circular shape that corresponds to the size and design of your jar’s lid. Next, carefully place the cut-out piece on top of the lid, ensuring it is securely fastened in place.
Shake and Enjoy!
As you complete the ritual, the jar’s contents begin to stir. With a gentle shake, the glitter particles dance across the liquid, creating an mesmerizing display of swirling colors. The soft rustling sound adds to the calming ambiance, inviting you to pause and appreciate the beauty unfolding before your eyes.
Video Tutorial
Enhance your crafting experience by capturing the magic of a glitter jar with a comprehensive visual tutorial. For a hands-on walkthrough, we recommend exploring this engaging YouTube video, which offers a step-by-step demonstration of the process.
Customization Ideas for Your DIY Glitter Jar
Transforming a basic glitter jar into a personalized masterpiece is an art form in itself. To make it truly special, consider infusing it with personal touches that reflect your personality or the occasion. Some creative ways to do so include…
Choose a Theme
When crafting a message that resonates with your audience, consider anchoring it to a shared experience or personal connection. This can be as simple as selecting a theme that speaks to you or your target audience’s interests, whether it’s a beloved hue, a nostalgic holiday, or a universal value like hope or inspiration. By tapping into a common thread, you’ll create an emotional bond with your message, making it more memorable and impactful.
Add Personal Touches
Transform your jar into a unique treasure by infusing it with personal touches. One way to do this is by attaching a small photograph to the inside of the lid, creating a personalized keepsake that holds sentimental value. Alternatively, you can bring the jar to life by adding tiny figurines that come together to form a miniature scene when the jar is shaken. For a more philosophical approach, consider including a rolled-up quote that speaks to your values or inspires reflection. Simply write or print the quote on paper and tuck it away inside the jar, allowing its wisdom to be discovered anew each time you open the lid.
Make It Functional
To repurpose an old jar, consider filling it with heavier objects such as beads, pebbles or even small stones to create a functional paperweight that adds a touch of elegance to any desk or table. For a more whimsical approach, why not transform the jar into a soft glow nightlight by inserting a small battery-operated light? The gentle illumination can provide a comforting ambiance in any room, making it perfect for bedrooms, reading nooks or even as a decorative accent in a living space.
Celebrate the Seasons
As the seasons change, so too can the theme of your spring-inspired decorations. For a gentle, whimsical look, consider incorporating pastel glitters with flower-shaped sequins that evoke the beauty of blooming flowers. As summer approaches, brighten up your decor with neon glitters and tiny seashells that recall sunny days at the beach. When fall arrives, bring in warm, earthy tones with leaf confetti that mimics the vibrant hues of changing leaves. And finally, for a winter wonderland effect, go for a clean and crisp look with white or silver glitter, punctuated by delicate snowflake sequins.
Commemorate Special Occasions
To make your celebrations even more special, consider incorporating personalized elements that tie in with the occasion and its honorees. For birthdays, for instance, you can match the glitter used to the person’s favorite color, adding a touch of whimsy with number-shaped confetti that reflects their age. When it comes to weddings, draw from the couple’s chosen hues to create a unique and meaningful look, accompanied by a small charm that represents their union. For anniversaries, take a layered approach, using different colors of glitter to symbolize each year the couple has been together, with each layer telling a story of its own.
Troubleshooting Common Issues with DIY Glitter Jars
As you create your glitter jar, it’s not uncommon to run into a few snags. Fortunately, we’ve got solutions for some of the most common problems you might encounter, ensuring your final product is nothing short of mesmerizing. Glitter tends to settle at the bottom of the jar, which can be frustrating if you’re looking for an even distribution. To combat this, simply shake the jar gently but firmly a few times, allowing the glitter to redistribute evenly throughout. If some stubborn clumps persist, try adding a small amount of oil or glycerin to help loosen them up. Another issue people encounter is static electricity causing the glitter to cling to the sides of the jar. To combat this, you can add a dash of vinegar or rubbing alcohol to the liquid inside the jar, which will help dissipate the static and keep the glitter suspended.
Glitter Clumping
The pesky problem of stuck-together glitter is a common one, resulting in unsightly clumps instead of a smooth, even flow. To prevent this issue from getting in the way of your creative endeavors, it’s essential to ensure that you mix your glue and water thoroughly before adding the glitter. This simple step can make all the difference in achieving the desired effect. If, despite your best efforts, clumps do form, don’t worry – just add a bit more liquid to dilute the mixture, and then gently shake everything together to separate the particles. With these easy tips, you’ll be well on your way to creating beautiful, glittery masterpieces with minimal fuss.
Cloudy Water
When observing your homemade cleaning solution, you might notice that the liquid inside the jar appears cloudy or murky instead of its usual crystal clear state. This issue can be easily resolved by using distilled water from the outset to prevent cloudiness. If, however, you’ve already used tap water, a simple solution is to allow the mixture to sit for several hours; often, the impurities will naturally settle at the bottom, leaving you with a clearer cleaning solution.
Glitter Falling Too Quickly
When it comes to creating a relaxing atmosphere with glitter, one common issue is that it tends to sink to the bottom of the mixture far too quickly, negating its calming effects. To address this problem, consider adding a small amount of glue to your mixture. By increasing the viscosity of the liquid, you can slow down the rate at which the glitter falls, allowing it to remain suspended in the solution for a longer period. This simple adjustment can make all the difference in achieving the desired visual effect and promoting a sense of serenity.
Leaky Jar
When you find that liquid is seeping out of your jar’s lid, it can be frustrating to deal with. To fix this issue, start by tightening the lid as much as possible. If that doesn’t completely seal the opening, consider using waterproof glue or clear tape to add an extra layer of protection. Before using the jar, test the seal by turning it upside down over a sink. This will ensure that your contents remain safely contained.
Faded Glitter
The initial challenge with using glitter is that it tends to lose its vibrancy and luster as time passes. To overcome this issue, it’s essential to utilize premium, non-fading glitters specifically engineered for use in liquid-based applications. Furthermore, it’s crucial to minimize the jar’s exposure to direct sunlight for prolonged periods, thereby preserving the glitter’s color intensity.
Maintenance and Care for Your Glitter Jar
To preserve the therapeutic benefits and visual appeal of your glitter jar, it’s essential to maintain its sparkle and tranquility. This can be achieved by following these simple steps: First, gently shake the jar every few days to redistribute the glitter and prevent it from settling at the bottom. Second, periodically add a small amount of water or glitter dust to replenish the sparkly effect. Finally, avoid exposing your glitter jar to direct sunlight, heat, or moisture, as this can cause the glitter to lose its luster.
Regular Cleaning
When maintaining your jar over time, you might notice a slight haze developing on its interior surfaces. To restore clarity, carefully employ a gentle cleaning regimen. Start by soaking the jar in warm water mixed with a small amount of mild dish soap. Gently scrub away any residue or debris using a soft-bristled brush or cloth, then thoroughly rinse the vessel to remove all soap residue. Allow it to air-dry completely before refilling, ensuring no residual moisture is left behind.
Checking the Seal
Prior to use, thoroughly inspect the seal of your container. Confirm that the lid is securely fastened to preclude any potential leaks. In case you’re concerned about the integrity of the seal, consider reinforcing it with waterproof adhesive or a thin layer of clear nail polish applied around the rim for added peace of mind.
Glitter Settling
When observing that the glitter has started to settle or clump at the bottom of the jar, take a moment to give it a gentle yet thorough shake. In the event that the glitter continues to stubbornly cling to the bottom, consider introducing a small amount of clear liquid soap into the mixture. This subtle addition can help revitalize the movement and circulation of the glitter within the jar.
Storage
To maintain the vibrancy of your glitter jar’s colors, store it in a location that shields it from direct sunlight. A cool and dark environment is ideal for preserving the pigments’ intensity.
Safe Handling
When handling a jar, particularly one made of delicate materials like glass, it’s essential to exercise caution. Ensure the jar is kept out of reach from inquisitive young minds and furry friends to avoid any potential mishaps.
FAQs About Glitter Jars
As you embark on crafting your own DIY Glitter Jar, you may encounter some uncertainty. To alleviate any concerns, we’ve compiled a list of frequently asked questions and their corresponding answers.
What type of glue should I use?
For a successful DIY project, it’s essential to choose the right adhesive. Opting for clear school glue or glitter glue is an excellent starting point. Not only are they non-toxic, but their viscosity also makes them ideal for achieving the desired outcome. With these options, you’ll be well on your way to creating a masterpiece that’s both beautiful and durable.
Can I use any jar?
When it comes to storing homemade goods like jam or preserves, the type of jar you use is crucial. While mason jars are a popular choice, they’re not the only option. In fact, any clear, sealable jar that’s clean and dry will do. This includes recycled food jars – just be sure to give them a good scrub before filling them up.
How much glitter is too much?
When it comes to adding sparkle to your bathwater, a little goes a long way. Aim for a moderate amount, roughly equivalent to one to two teaspoons of glitter. Be cautious not to overdo it, as excessive glitter can result in cloudy or even opaque water, detracting from the intended ambiance.
What can I use instead of glitter?
Consider embracing eco-friendly alternatives to traditional glitter options. For instance, opt for biodegradable glitter that can easily decompose and minimize your environmental impact. Alternatively, you could choose colorful rice as a sustainable substitute. This not only reduces waste but also offers a unique and creative way to add some sparkle to your projects or celebrations.
How do I prevent mold?
To maintain a hygienic environment, consider introducing a small amount of antibacterial gel into the water within your jar. This simple step can effectively deter the growth of mold and other microorganisms.
Can I make it glow in the dark?
To add an extra touch of magic, consider using glow-in-the-dark paint to cover the inner surface of the jar or incorporating glow-in-the-dark glitter into your concoction.
Is it safe for kids?
While it’s true that kids can take part in the mason jar crafting process, it’s crucial to exercise caution and ensure proper adult supervision, particularly when working with glass jars.
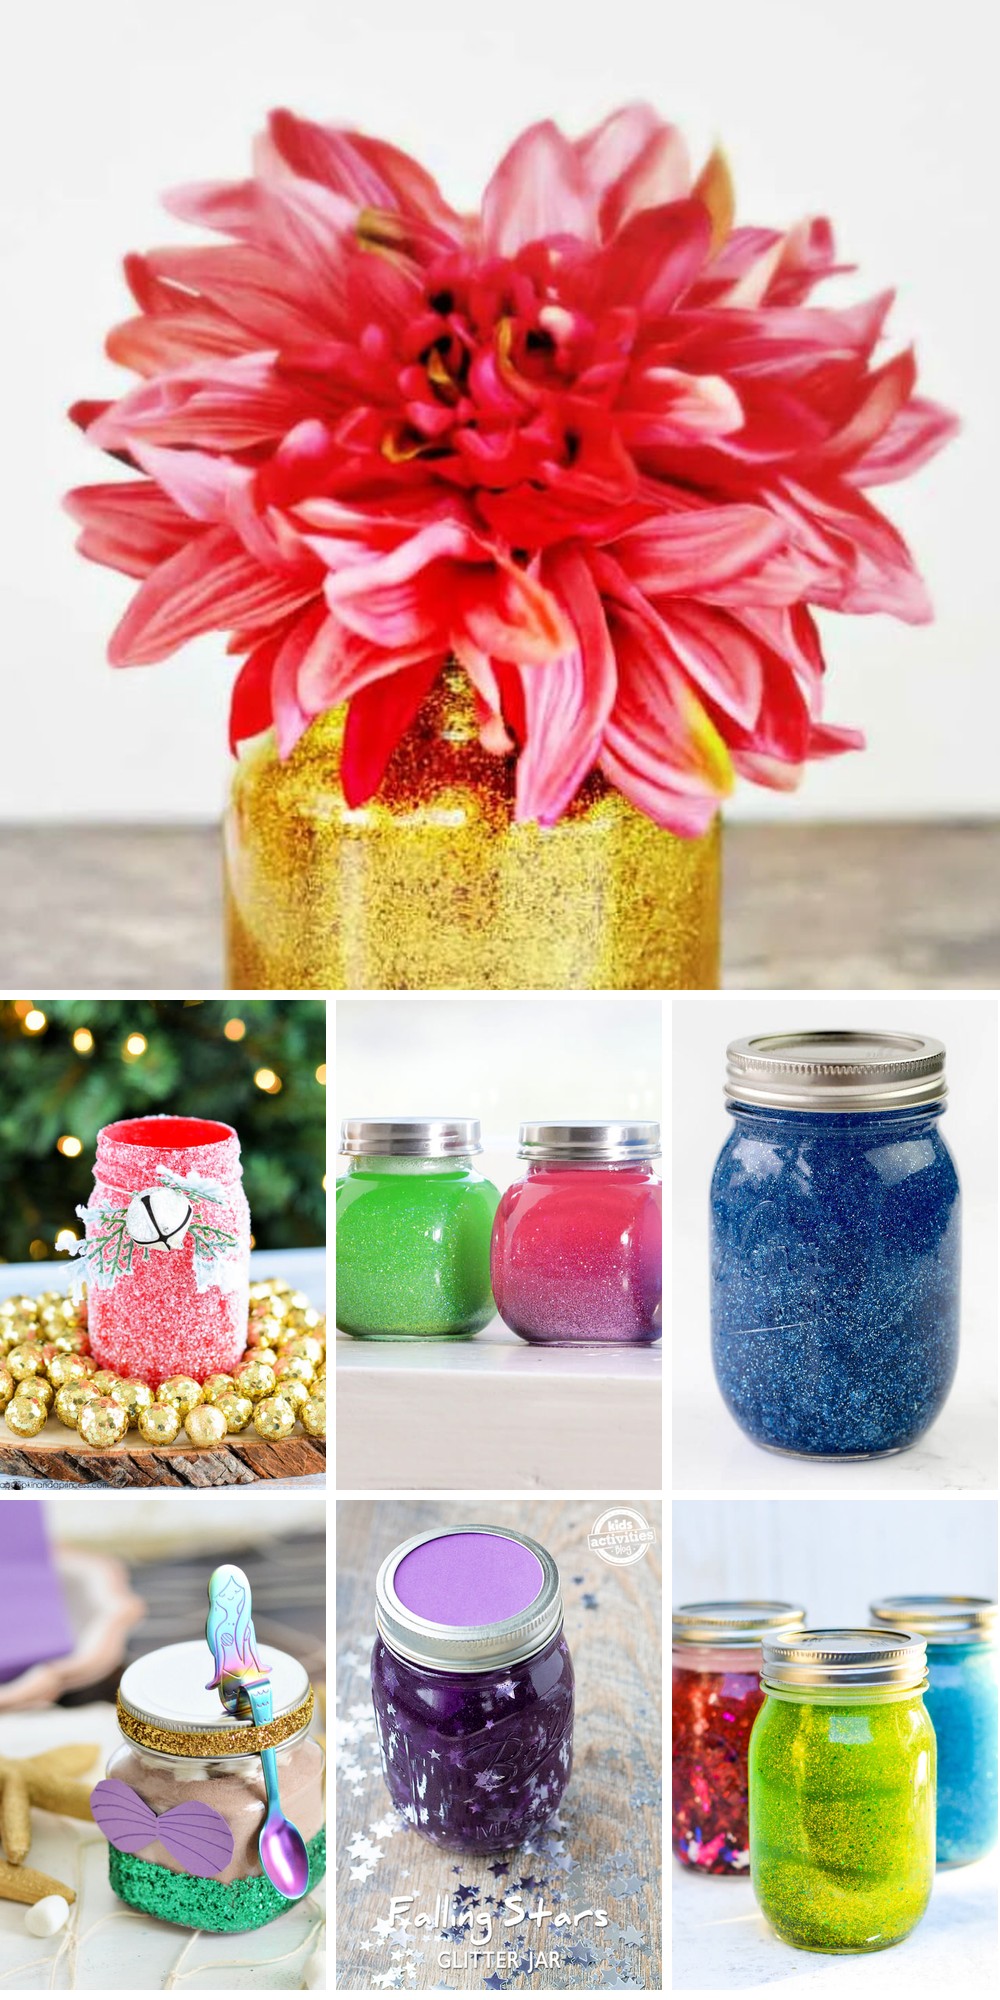
15 Easy DIY Glitter Jar Ideas To Make Your Own
Transform your surroundings by creating 15 simple yet stunning DIY glitter jars that exude elegance and whimsy. Follow a series of straightforward guides to craft one-of-a-kind masterpieces that reflect your personal style.
DIY Glittery Winter White Mason Jars
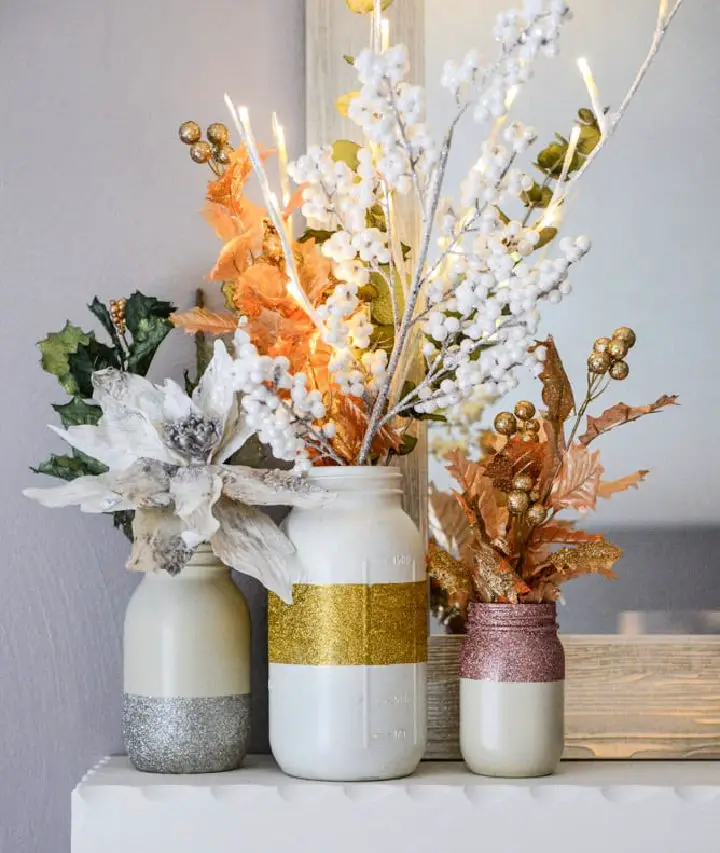
Transforming your home into a winter wonderland just got a whole lot easier with this DIY guide on creating glittery winter white mason jars. Perfect for those who adore the sophistication of winter whites and the mesmerizing sparkle of glitter, this project will have you crafting like a pro in no time. You’ll learn how to expertly layer different shades of spray paint to add depth and dimension to your jars, while discovering the perfect types of glitter to achieve that enchanting frosted look. These versatile jars can be filled with everything from fresh flowers to LED branches, making them a must-have for any winter décor setup. Whether you choose to display them proudly on your mantle or use them as a stunning centerpiece, these beautiful creations are sure to add a cozy and festive touch to your space. With clear instructions and helpful tips, making these gorgeous jars is an enjoyable and straightforward experience.
Mason Glitter Jar Filled With Flowers
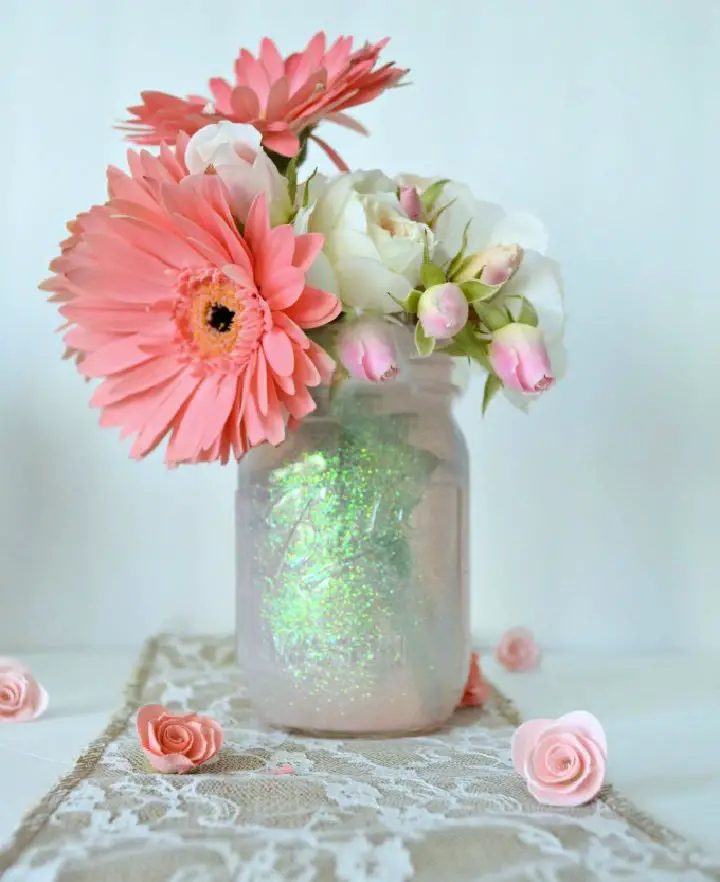
Transform any room into a vibrant spring oasis by creating a dazzling DIY Mason Glitter Jar. This delightful craft project is perfect for adding a pop of color to your space, and it’s surprisingly easy to make with just a few simple materials. According to Kristin from My Uncommon Slice of Suburbia, all you need is some glitter, glossy Mod Podge, and a mason jar to get started. With her step-by-step guide, you can effortlessly create shimmering decorations that will brighten up any room. To take it to the next level, learn how to work with fresh flowers by inserting a plastic cup inside the jar, creating a charming and sparkling vase that captures the essence of spring. Get creative, have fun, and enjoy the satisfaction of making beautiful, glittery mason jars that reflect your personal style and bring a touch of sunshine into your day.
Easy DIY Glitter Mason Jar Centerpiece
Transform an ordinary Mason jar into a stunning centerpiece with this DIY glitter project. This budget-friendly and easy-to-execute guide is perfect for weddings, garden parties, or any festive event. To get started, you’ll need a 16 oz Mason jar, craft paint, Mod Podge, glitter, and a few basic tools. Simply follow the step-by-step instructions to paint, add a touch of sparkle with the glitter, and finish your jar. The best part? You can customize the colors to match any theme or occasion. To add a personal touch, simply place your preferred flowers or stems into the finished jar. With these simple steps, you’ll be able to create a truly unique and impressive centerpiece that’s sure to wow your guests.
How to Make a Little Mermaid Party Favor Jar
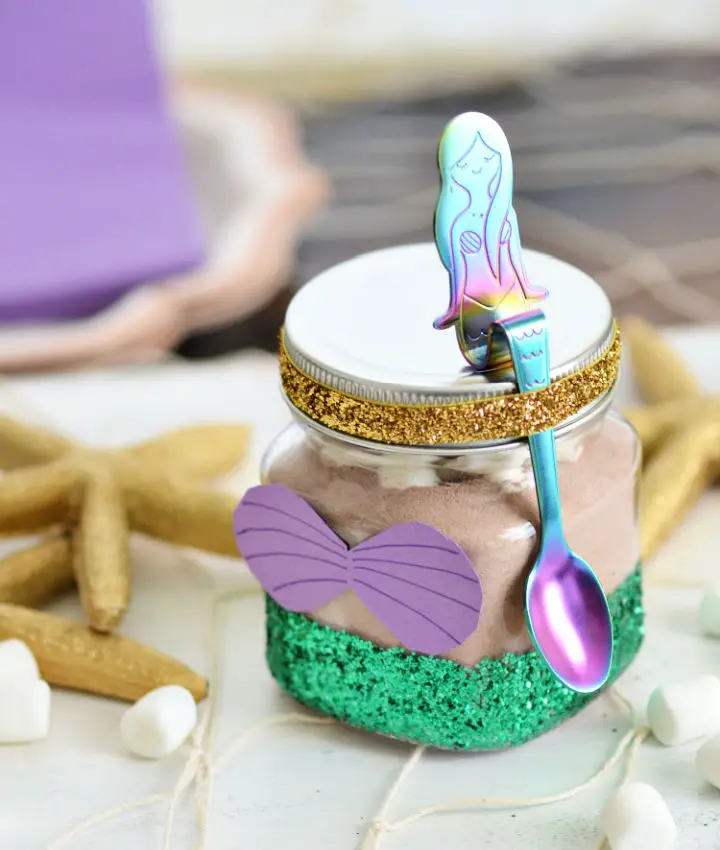
Add a touch of magic to your Little Mermaid party by crafting unique DIY favors with Finding Zest’s easy-to-follow guide. Create glitter jars filled with treats, drink mixes, or small gifts that will leave your guests mesmerized. With a simple step-by-step process, anyone can create these enchanting favors, choosing colors that match Ariel’s iconic look or personalizing them to fit your event’s theme. To take it to the next level, consider filling the jars with non-edible treats like bath salts for a memorable experience that will have everyone feeling like they’re underwater.
Making a Glitter Vase

Transform an old candle jar into a dazzling DIY glitter vase that adds a touch of sparkle to your home decor. This simple project is perfect for repurposing and giving new life to discarded containers. Start by thoroughly cleaning the jar, removing any leftover wax and residue. Next, apply a thin layer of Mod Podge to the inside of the jar using a foam brush, then sprinkle your favorite glitter on top. Allow it to dry completely before adding an additional coat if desired for extra opulence. Not only does this craft breathe new life into old candle jars, but it also serves as a stylish organizer for various items around your home. Get inspired and personalize your space with this upcycling idea that’s sure to impress.
How to Make a Glitter Jar
Assembling a glitter jar is a delightful way to help children cultivate mindfulness and regulate their emotions. By following our simple, step-by-step guide at Fireflies and Mud Pies, you can create this soothing tool that doubles as a visual reminder for kids to focus, breathe deeply, and find peace as the glitter slowly settles to the bottom. This tactile experience isn’t just calming – it’s also an engaging challenge, like waiting for the last sparkles to disappear before bedtime. By embracing both the crafting process and the sense of calm it brings, you’ll discover the dual benefits of a homemade glitter jar.
DIY Calming Glitter Jar for Kids
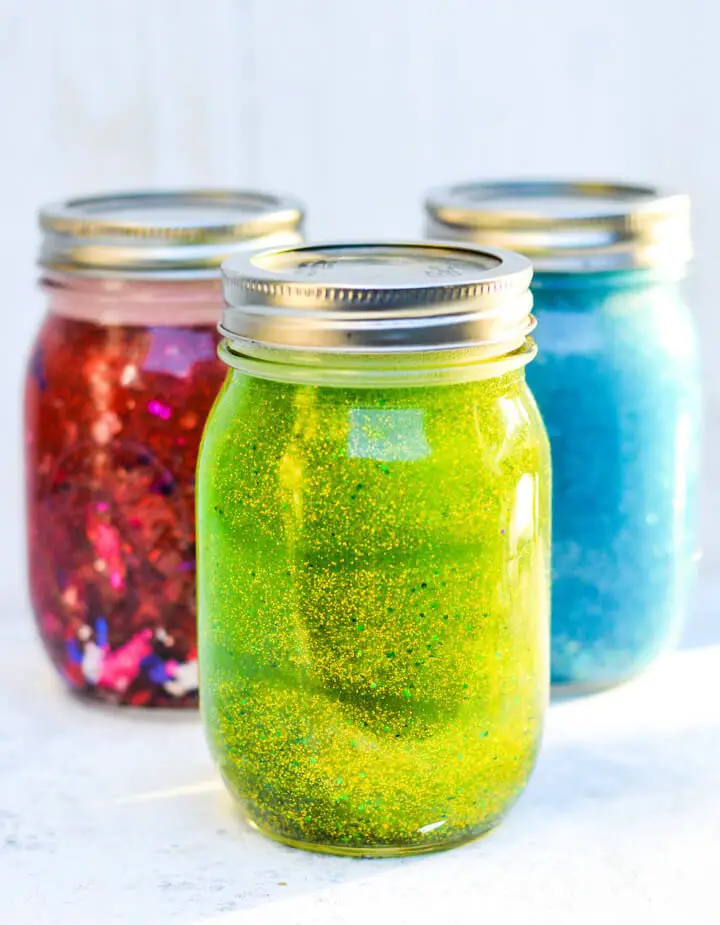
Transform a simple jar into a soothing sanctuary for your child with the Glitter Jar mindfulness tool, endorsed by Blissful Kids. Suitable for children aged three and above, this calming craft activity helps youngsters focus, unwind, and regulate their emotions. By combining clear glue, warm water, glitter, and food coloring, you can create a captivating visual representation of quieting the mind. As your child shakes the jar, watch as the glitter swirls and gradually settles, much like the mind’s natural return to calmness. This activity offers a unique opportunity for quality bonding time while promoting emotional well-being. With helpful tips and additional ideas for variations, you can customize this experience to suit your child’s needs.
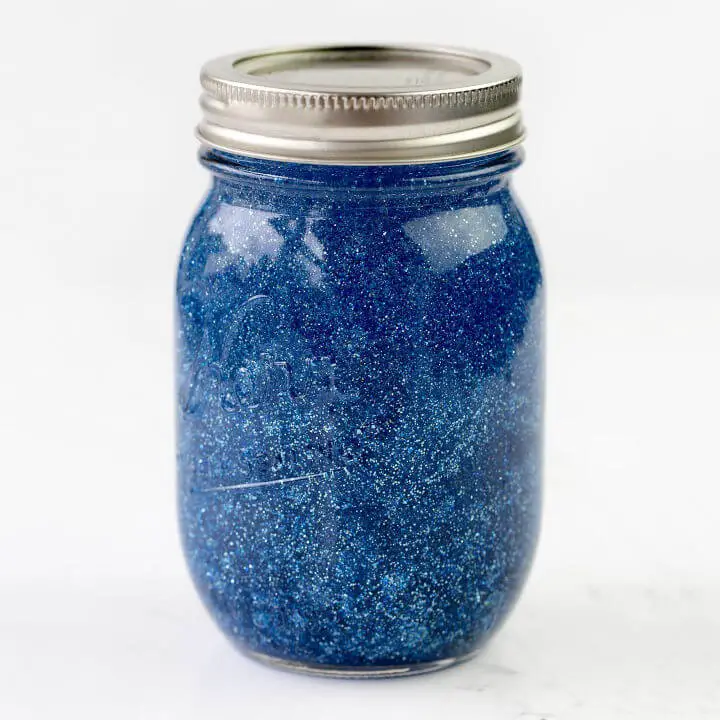
Falling Stars Glitter Jar Tutorial
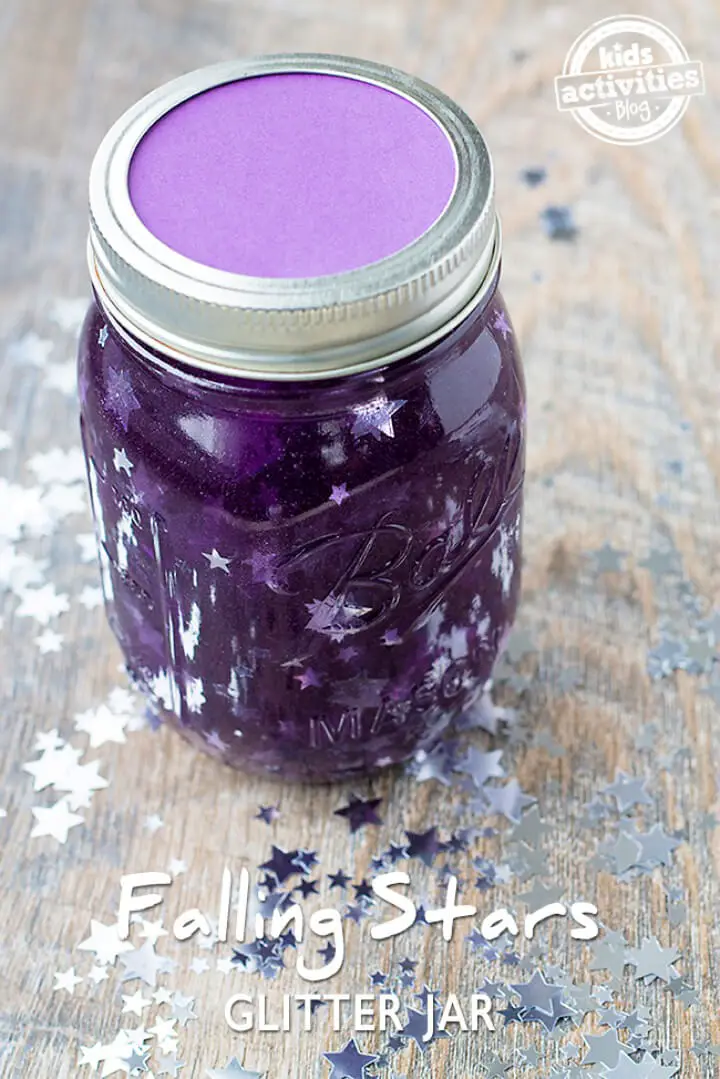
Create a mesmerizing sensory experience for children by making a DIY Falling Stars Glitter Jar Craft. This calming and magical project is perfect for helping young minds relax and unwind. The process of combining clear glue, distilled water, black food dye, and silver star confetti into a mason jar creates a captivating swirling effect that resembles the night sky. Not only is this sensory bottle simple to make, but it also serves as a valuable tool for promoting mindfulness and emotional management. By following the easy-to-follow step-by-step instructions, you can create a fun and therapeutic activity that kids will love. Shaking up some tranquility has never been easier!
Glitter Mason Jars for Pencils Organizer
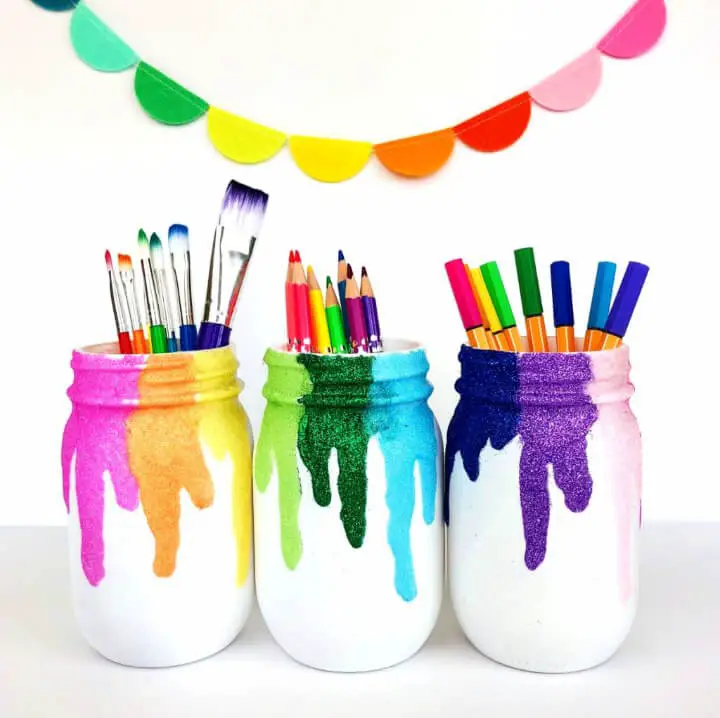
Transform ordinary spaces into dazzling displays with a DIY Glitter Mason Jars craft from Color Made Happy. This fun project requires just a few simple materials: mason jars, white primer, fine glitter, glue, and an optional sealant. With easy-to-follow steps that involve applying primer, layering glue and glitter, and sealing if desired, you’ll be able to create beautiful and functional jars perfect for storing art supplies, showcasing flowers, or brightening up your desk. For detailed instructions and more craft inspiration, visit Color Made Happy.
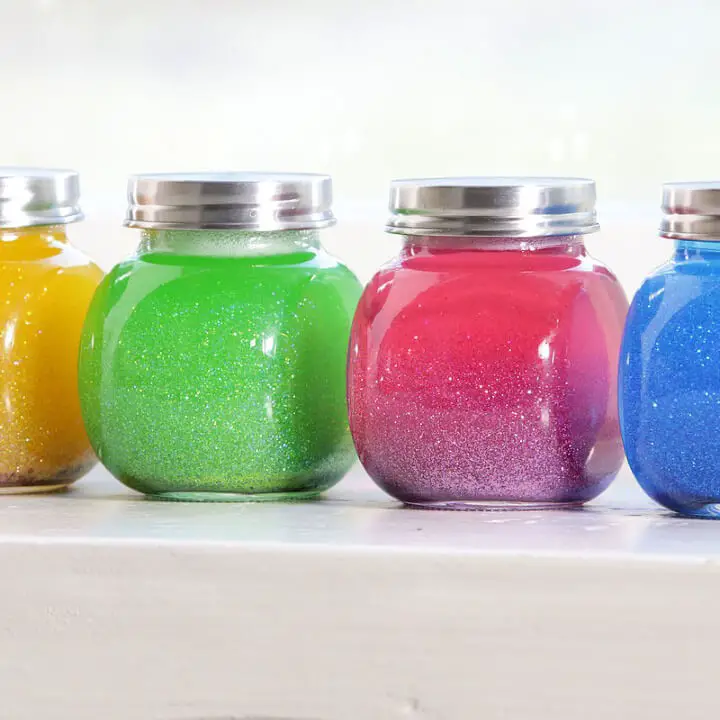
Eye-Catching DIY Calm Down Glitter Jars
Crafting calming down jars can be a delightful experience for both children and caregivers alike. The process offers a chance to bond with your little one while creating a unique tool to help them navigate their emotions. By combining household ingredients like soft soap, glitter, and food coloring, you can design a jar that sparks your child’s imagination and provides a calming distraction during stressful moments. Follow the simple steps to assemble your glitter jars in various colors, then secure the lid with glue once you’ve achieved your desired mixture, ensuring a safe and enduring companion for your child.
Make Glitter Mason Jar Luminary
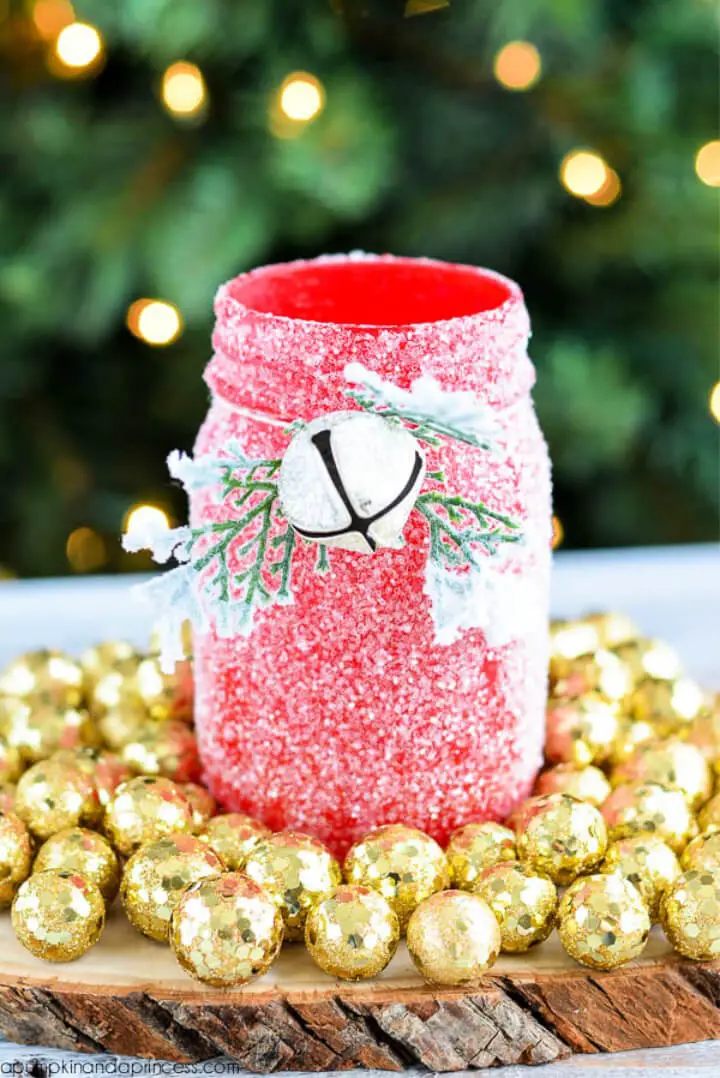
Transform your Christmas table into a warm and welcoming space with a DIY glitter mason jar luminary, inspired by the creative minds at A Pumpkin And A Princess. This charming craft combines the rustic charm of a mason jar with the festive sparkle of glitter, creating a cozy ambiance that’s sure to delight. To begin, apply a thin layer of red chalky finish paint, allowing the light to shine through in its natural brilliance. Once dry, apply a coat of decoupage glue and sprinkle with iridescent glitter for an added touch of elegance. Complete the look by adding some greenery and a bell for a touch of seasonal flair. This easy-to-follow project is perfect for those who appreciate handmade touches in their holiday celebrations, guaranteeing to brighten up your winter evenings.
Cute DIY Glitter Mason Jar
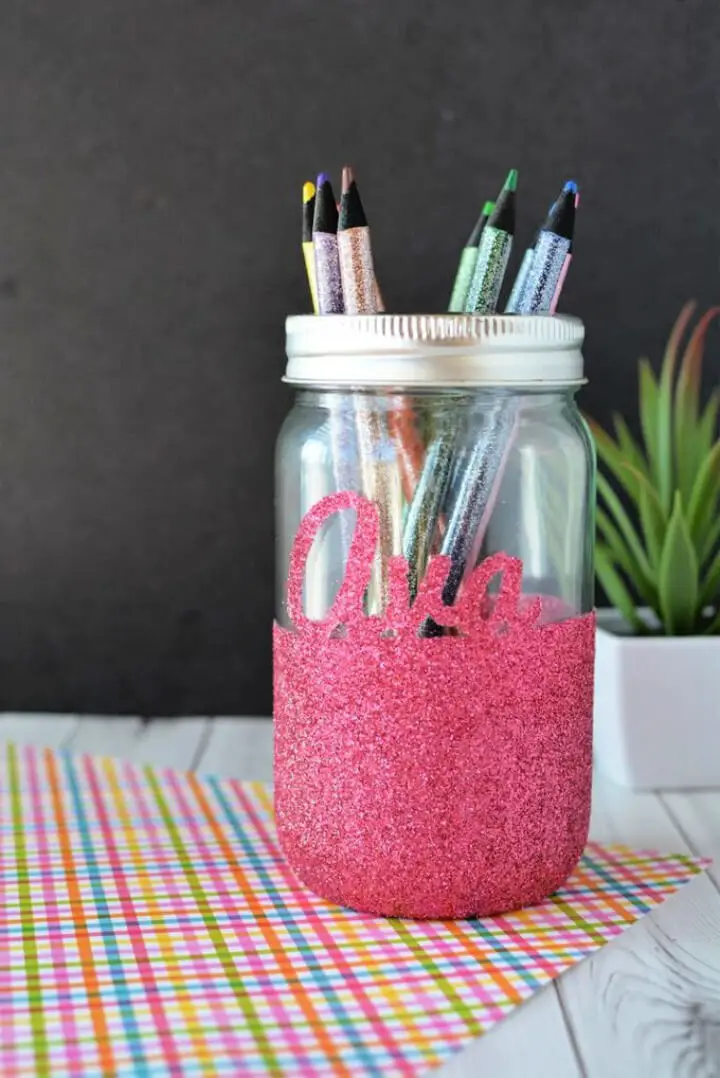
When refreshing your desktop or study table decor, consider adding a touch of luxury with a DIY glitter pencil holder. As featured in The Best of Life Magazine, this easy-to-follow guide empowers crafters to transform a simple mason jar into a stunning container for tealight candles, pencils, or any other desired items. To achieve this look, start by ensuring your jar is spotlessly clean and free from oil residue, then apply a steady hand when applying the glue. Next, use a utility knife to carefully remove your vinyl stencil once the glitter has set. These unique creations are perfect for personalized gifts or as a fun weekend project, bringing an unmistakable sparkle to any room they’re displayed in.
How to Make Glitter Mason Jar
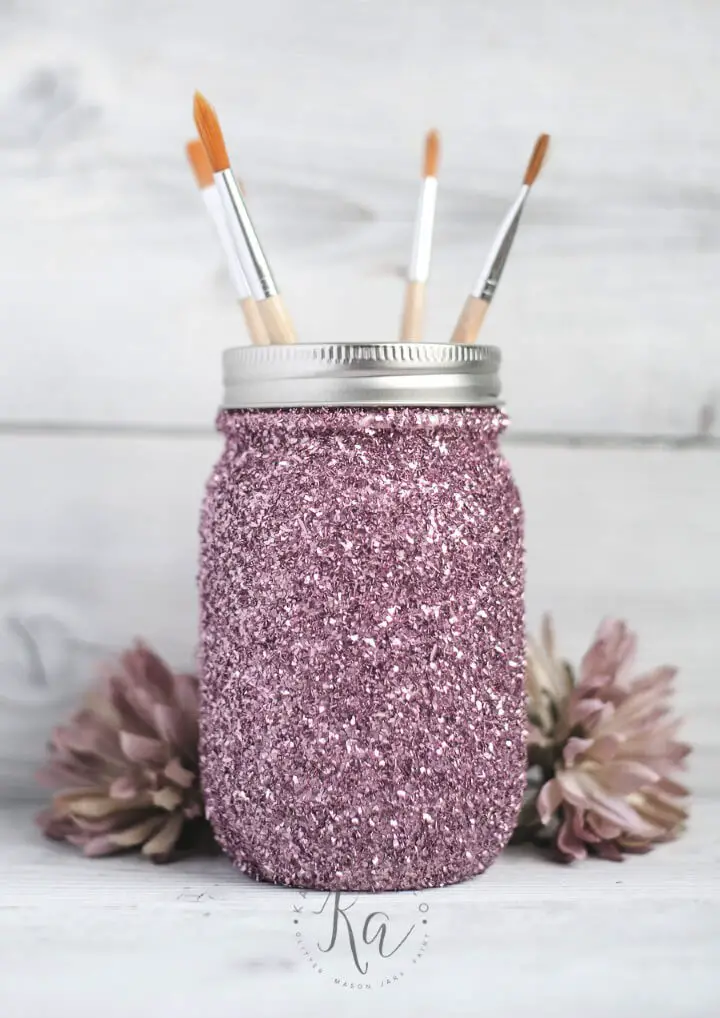
If you’re yearning to add a pinch of sparkle to your crafts, the DIY Glitter Mason Jar Tutorial on Sprinkled and Painted at KA Styles.co is an absolute treasure trove of creative inspiration. This comprehensive guide effortlessly guides you through the delightful process of transforming a humble jar into a dazzling masterpiece, one step at a time. As you work through the tutorial, you’ll gain valuable insights into selecting the perfect type of glitter and adhesive, as well as applying a lasting top coat to seal in the magic. Whether you’re looking to personalize your home decor or create a thoughtful gift, a glitter mason jar has the power to infuse any space with an extra touch of whimsy and wonder. So why not indulge in this creative endeavor for the pure joy of bringing something truly special into being?
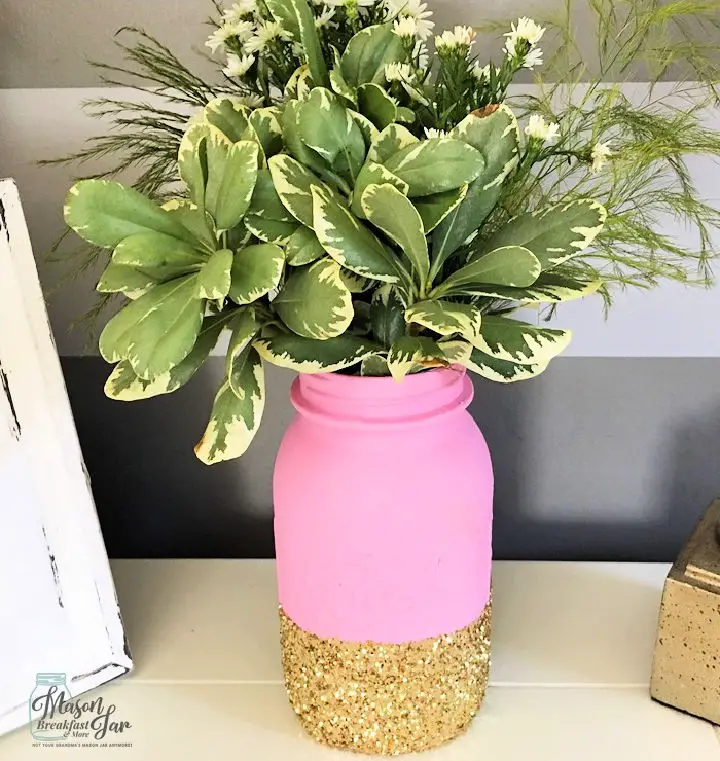
Handmade Pink Glitter Jar
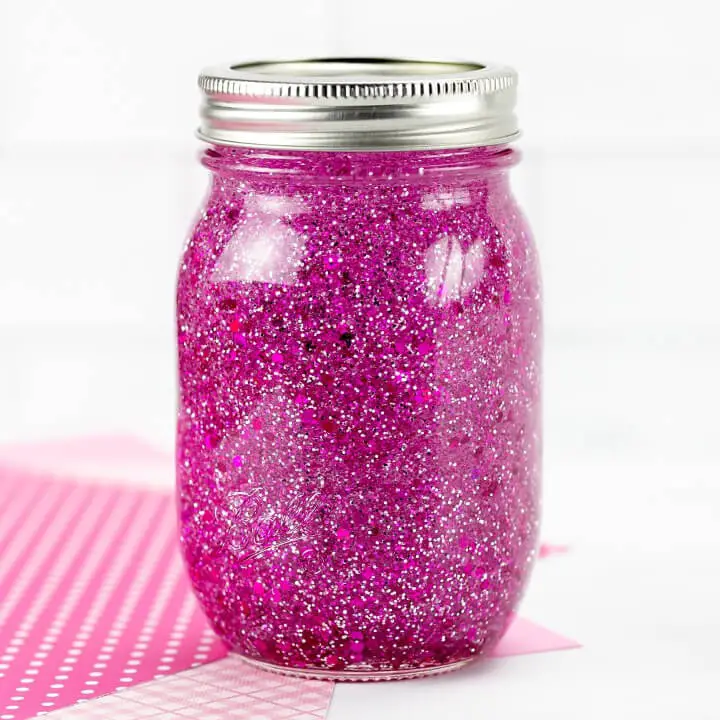
Transform ordinary mason jars into breathtaking pink glitter wonders with the help of Fireflies and Mud Pies’ step-by-step guide. This engaging craft activity is perfect for kids, serving as an excellent introduction to mindfulness and relaxation techniques. With just a few simple ingredients like distilled water, clear glue, and an assortment of glitters in various shades of pink – from metallic to magenta – you can create multiple stunning jars in no time. Not only will these sparkling containers add a pop of color and whimsy to any room, but they also double as a calming tool to help children develop emotional regulation skills. So grab your mason jar and get ready to unleash the tranquility as we embark on this easy yet enjoyable project that’s sure to bring a sense of serenity into your home.
How to Make a Glittered Glass Jar
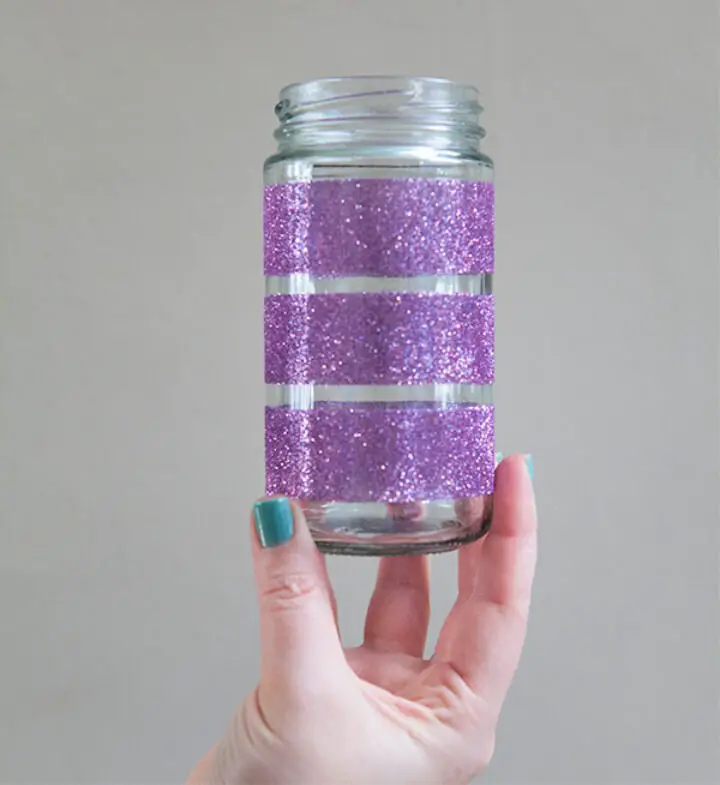
Elevate your home decor or special events with a touch of elegance by upcycling everyday glass jars into stunning candle holders. In this DIY guide, we’ll show you how to add a dash of glamour using Martha Stewart Crafts glitter and double-sided craft tape from Something Turquoise. This easy-to-follow project is not only simple but also allows for endless design flexibility – simply swap out the glitter shade or tape pattern whenever your mood strikes!
Conclusion:
As we conclude this comprehensive guide to creating 15 easy DIY glitter jar ideas, you’re now equipped with the tools and inspiration needed to embark on a creative journey. Not only does this activity serve as a unique outlet for self-expression, but it also allows you to add a personal touch to your surroundings or craft thoughtful gifts for others. To take your creations to the next level, feel free to experiment with customization options that reflect your personality or the occasion’s essence. Should any challenges arise during the process, our troubleshooting tips are available to ensure your glitter jars maintain their captivating allure. Now that you’re armed with knowledge and inspiration, it’s your turn to bring these dazzling projects to life.
