Crafting a DIY wooden lamp is not only a fulfilling experience but also an excellent way to infuse your home with a personal touch. With a vast array of 25 handmade DIY wooden lamp ideas and plans, you’re sure to find the perfect design that resonates with your space and style. Working with natural wood allows you to incorporate warmth and uniqueness into any room, making it a practical yet creative way to illuminate your space while showcasing your crafting skills.
What drives people to opt for DIY wooden lamps? Beyond the satisfaction of creating something from scratch, these projects empower you to tailor designs to your specific needs and preferences. You can select materials that harmonize with your home’s aesthetic and choose the size that best fits your space. Moreover, diving into DIY wooden lamp projects can be a fun and engaging way to spend your time. As you delve into the following sections, you’ll uncover various ideas and plans to inspire your next project. Let’s ignite our creativity and begin building something beautiful and functional.
Why Choose DIY Wooden Lamps?
Making your own wooden lamps offers a trifecta of benefits that make it an attractive DIY project for many enthusiasts. Not only do you get to customize the lamp to fit your unique space, but you also gain cost-effectiveness, eco-friendliness, and personal satisfaction. Here’s why this project stands out:
Customization is key when it comes to wooden lamps. By choosing the type of wood, size, and shape that suits your decor, you can create a one-of-a-kind piece that reflects your personal style.
But DIY wooden lamps aren’t just about aesthetics – they’re also a cost-effective way to add some warmth to your space. Using reclaimed or leftover wood from other projects can significantly reduce the expense of buying designer lamps.
And let’s not forget the eco-friendly benefits of using reclaimed wood. By repurposing materials that might otherwise end up in a landfill, you’re doing your part for the environment.
Perhaps most satisfying, however, is the sense of accomplishment that comes from creating something with your own hands. A DIY wooden lamp serves as both functional art and a testament to your creativity and hard work.
And if you’re feeling generous, consider making a DIY wooden lamp as a gift for someone special. The thought and effort you put into crafting it make it a truly unique and personalized present.
Ultimately, choosing to make your own wooden lamp is an opportunity to combine creativity, sustainability, and personalization in a way that brings warmth and character to your space.
How to Make A Designer Lamp With Wood
Crafting a wooden lamp can be a fulfilling DIY experience, as it brings a sense of sophistication and coziness to any space. To make the process smoother, we’ve put together a step-by-step guide that’s perfect for beginners and seasoned woodworkers alike. With these simple instructions, you’ll be able to create your own stunning wooden lamp that showcases your creativity and skill.
Materials and Tools Checklist for a DIY Wooden Lamp
To elevate your creativity and infuse personal touches into your space, create a unique DIY wooden lamp that harmoniously blends form and function. By carefully selecting the right materials and tools, you can craft a truly exceptional piece that showcases your artistic side. To guarantee a lamp that exceeds expectations in both functionality and aesthetics, consider this revised checklist:The foundation of your masterpiece lies in the wood choice. Cherry and Walnut are excellent options, as their contrasting colors and grain patterns add depth and sophistication to your creation.Beyond the wooden structure, ensure you have all the necessary hardware at hand: a reliable socket, durable wire, efficient plug, and an eye-catching lampshade that brings everything together.
Tools:
To create a unique and functional lamp, one needs to utilize a variety of tools in their woodworking arsenal. A table saw is essential for making precise straight cuts in wood, while a miter saw allows for accurate angled cuts. The router with a quarter inch spiral up-cut bit proves useful for hollowing out areas where wiring will be housed. For drilling holes for lamp hardware, a 3/8 inch drill bit is necessary. When it comes to cutting intricate shapes or curves, one can rely on either a band saw or handsaw. Smoothing and leveling wood surfaces requires the use of a plane or hand planer. Wood glue serves as the adhesive for joining pieces together, while clamps hold the wood in place until the glue dries. To progressively smooth the wood, various grits of sandpaper are necessary. Optional tools include a trim router for adding decorative edges or profiles and a 1/2 inch round over bit for softening wood edges. The countersink bit prepares wood to accept screws without splitting, while a screwdriver or drill is used for assembling lamp hardware.
Finish:
To elevate your woodworking project, consider incorporating Rubio Monocoat, a premium finish that not only safeguards the wood against damage but also amplifies its inherent charm. When crafting a stunning wooden lamp, prioritize showcasing the wood’s natural beauty and highlighting your craftsmanship. Ensure you work in a well-ventilated area with proper safety equipment to guarantee a smooth and successful process.
Steps to Craft Your Lamp
To start crafting your wooden lamp, begin by selecting the perfect wood types for your project. Cherry and Walnut work harmoniously together due to their contrasting colors. If necessary, laminate the pieces together to achieve the desired thickness for the lamp base. Once you have your wood, it’s time to cut it to size. Rip the Walnut down to about two inches thick for the frame. Cut the sides of the lamp frame to approximately 57-58 inches in length and the stretchers (horizontal frame pieces) to about five inches wide.Next, prepare the wood for wiring by using a router to create a groove down the center of one leg for the wire. Make sure this groove exits at the bottom but stops short at the top. For the top stretcher, drill a 3/8 inch hole from the end grain, halfway through, then sideways to make an L-shaped channel for the wire.Once you have your wiring channels in place, secure the wire by laying it in the groove and cutting a thin strip of wood (matching the groove’s width) to glue over the wire. Ensure this strip is flush with the leg’s surface.Assembly begins by gluing the stretchers between the sides using butt joints, reinforced with glued end-grain plugs for added strength. Clamp until dry, then move on to preparing the base. If laminated, clean up any glue lines and cut it to size. Use a trim router to create a mortise for the frame to fit into the base, adding both strength and stability.Finally, assemble everything by dry fitting the frame into the base, sanding any rough edges, then gluing and clamping. For extra security, add screws through the base into the frame. Once your lamp is assembled, round the edges with a router if desired, apply your finish, and let it dry. Attach the lamp hardware according to manufacturer instructions, ensuring the neutral and hot wires are correctly connected.After everything is assembled and the finish is dry, test your lamp by inserting a bulb, testing the lamp, and adding a lampshade.
Video Tutorial
For those who prefer a visual approach, a step-by-step YouTube video accompanies this written guide. The combination of both provides an immersive experience, allowing each step to be better understood with the aid of visual examples and expert tips. Creating a custom-designed lamp from wood is an accessible process that can add a unique touch to any room. Whether you’re an experienced woodworker or just starting out, following this comprehensive guide will empower you to craft a functional piece of art that not only serves as a light source but also becomes a conversation starter in your home.
Safety Tips for Crafting a DIY Wooden Lamp
As you embark on creating a DIY wooden lamp, safety should be your top priority. The combination of manual tools and electrical elements demands attention to avoid mishaps and guarantee a trouble-free crafting process. To ensure a successful project, heed these fundamental safety guidelines:
Personal Protective Equipment (PPE):
To ensure a safe and healthy work environment, it’s crucial to prioritize personal protective equipment (PPE). This includes essential items such as safety glasses, which safeguard your eyes from hazardous materials like sawdust and flying debris. Additionally, work gloves provide vital protection for your hands against splinters and sharp edges that can cause injury or discomfort. Furthermore, ear protection is also a must-have when operating loud machinery, where earplugs or earmuffs can help prevent hearing loss and related issues.
Safe Tool Use:
Before diving into a DIY project, it’s essential to lay the groundwork by preparing yourself and your tools properly. Start by familiarizing yourself with the manuals that came with your tools – this will help you understand their functions, capabilities, and any specific safety precautions or guidelines to follow.
Next, inspect each tool carefully for any signs of damage or wear. This is crucial, as using a damaged tool can lead to subpar results, increased risk of accidents, or even damage to your materials. Make a mental note (or better yet, keep a record) of which tools need to be replaced or serviced.
Finally, ensure that all materials are properly secured before starting your project. For instance, when cutting or drilling wood, use clamps to hold the pieces in place and prevent them from slipping or moving unexpectedly. By taking these simple yet vital steps, you’ll be well on your way to a successful DIY endeavor.
Electrical Safety:
When working with power tools, it’s crucial to adopt safe habits to prevent accidents and ensure a smooth workflow. To start, always unplug your tools when not in use or when changing bits. This simple step can help prevent unintended starts and minimize the risk of electrical shocks.
In addition to unplugging tools, make sure cords are in good condition before using them. Check for signs of wear and tear, such as fraying or damage, which can lead to electrical hazards. By taking a few seconds to inspect your cords, you’ll be better equipped to handle any unexpected situations.
Finally, when working with lamp kits, it’s essential to follow the manufacturer’s wiring instructions carefully. This may seem tedious, but following these guidelines will help you avoid common mistakes that can lead to electrical mishaps. By taking a proactive approach to safety, you’ll be able to work confidently and efficiently.
Workspace Safety:
When embarking on a DIY wooden lamp project, it’s essential to prioritize safety from the onset. To that end, ensure you’re working in a well-lit area where every detail is clearly visible. This will help prevent mistakes and ensure a smoother crafting experience. Additionally, maintain good airflow – especially when using materials like stains or varnishes – to avoid inhaling harmful fumes. Furthermore, keep a first aid kit nearby in case of any minor accidents or mishaps that may occur during the process. By adhering to these fundamental safety tips, you’ll be well-equipped to tackle your project with confidence and minimize potential risks.
Customization Ideas for Your DIY Wooden Lamp
With the flexibility to customize, your DIY wooden lamp becomes an extension of your individuality, allowing you to infuse it with your unique personality and creative flair. Consider incorporating your favorite colors, patterns, or textures to make your lamp truly one-of-a-kind. Perhaps you’ll add a pop of color with paint or stain, or introduce some visual interest through carved designs or intricate inlays.
Wood Selection:
To create a truly one-of-a-kind lamp design, consider combining different species of wood, such as rich Cherry and dark Walnut, to produce a visually striking contrast that showcases their unique characteristics. Alternatively, think outside the box by experimenting with unconventional shapes for the base, allowing you to add an extra layer of creativity and personality to your lamp’s overall aesthetic.
Design Elements:
To give your wooden lamp a unique and personalized look, consider adding intricate carvings that showcase your artistic flair. Alternatively, you can use non-toxic paints to introduce vibrant colors or patterns that reflect your personal style. For a more subtle approach, apply wood stains to bring out the natural grain of the wood and add depth and character to your lamp’s design.
Functional Add-Ons:
To elevate the reading experience, consider incorporating a range of features into your lamp design. First, incorporate a dimmer switch that allows users to adjust the lighting level to suit their needs. This feature not only enhances ambiance but also provides energy efficiency by reducing unnecessary brightness. Additionally, add USB ports to the base for charging devices, making it a convenient and practical solution for readers and writers alike. Furthermore, design adjustable arms or shades that enable users to direct light exactly where needed, minimizing glare and promoting comfortable reading.
Decorative Accents:
Transform your DIY wooden lamp into a unique piece that reflects your personal style by incorporating metal accents, beads or stones, and fabric wraps. To achieve a modern industrial look, attach metal details to the lamp, such as metallic strips, rivets, or hardware. For a bohemian vibe, embed beads or stones into the wood to add a touch of elegance and whimsy. Alternatively, wrap fabric around parts of the lamp to introduce texture and warmth, perfect for creating a cozy atmosphere.
Troubleshooting Common Issues with DIY Wooden Lamps
As you embark on the creative journey of building a DIY wooden lamp, you may inevitably run into some obstacles. To ensure your project remains on track, it’s essential to be prepared for the common challenges that arise during this process. By familiarizing yourself with these potential issues and learning how to address them, you’ll be well-equipped to overcome any hurdles and successfully complete your wooden lamp.
Problem: Wood Splitting
Wood splitting can occur when drilling or screwing techniques are inaccurate, resulting in unsightly damage. To prevent this issue, it’s essential to take a proactive approach by pre-drilling holes before inserting screws. Furthermore, it’s crucial to avoid over-tightening, as this can exacerbate the problem and cause further splitting.
Problem: Uneven Stain
When it comes to achieving a professional-looking finish, the key lies in understanding the root cause of imperfections. One common issue that can lead to unsightly blotches is applying stain unevenly or on surfaces that haven’t been properly prepared. To overcome this hurdle, it’s essential to start by sanding the wood evenly and thoroughly, ensuring a smooth canvas for your stain. Once you’ve achieved this, apply the stain with a consistent technique, using gentle strokes to evenly distribute the color. By taking these simple steps, you can significantly reduce the likelihood of blotches and end up with a beautiful, uniform finish that showcases your woodworking skills.
Problem: Loose Lamp Parts
The primary culprit behind lamp malfunctions is often the gradual loosening of internal components, typically resulting from either inadequate initial assembly or the natural wear and tear that occurs over time. To rectify this issue, it’s essential to conduct a thorough inspection of all connections within the lamp, followed by any necessary tightening of loose screws. If required, additional reinforcement can be achieved through the application of adhesive or sealant materials to ensure a more stable and secure fit.
Problem: Flickering Light
The root cause of flickering can stem from a multitude of factors, including a loose or poorly seated light bulb, faulty electrical connections within the circuitry, or an incompatibility issue between the bulb and the dimmer switch used to control its brightness. To address this issue, it’s essential to first verify that the bulb is securely fastened into place, then inspect the wiring for any signs of loose or frayed connections. Finally, confirmation should be made that the dimmer switch is suitable for the specific type of light bulb in use.
Maintenance and Care for Your DIY Wooden Lamp
For a beautifully crafted DIY wooden lamp to retain its charm, it’s crucial to perform routine upkeep. To ensure your lamp remains in excellent condition, follow these essential maintenance tips:
Firstly, dusting is a must. Use a soft cloth or brush to gently remove any dirt or debris that may have accumulated on the lamp’s surface. This simple step can make a significant difference in maintaining its overall appearance.
Secondly, it’s vital to protect your wooden lamp from moisture and humidity. Wipe down the lamp with a dry cloth after exposure to water or high humidity to prevent damage or warping.
Lastly, inspect your lamp regularly for any signs of wear and tear. Addressing minor issues promptly can prevent them from becoming major problems later on.
Cleaning the Lamp
For optimal performance and longevity, make sure to regularly dust your lamp using a soft cloth or a duster. This gentle approach will effectively remove dust buildup without causing any damage. Additionally, if your lamp features a shade, be sure to follow the manufacturer’s guidelines for cleaning, as the material may require specific care.
Protecting the Wood
To preserve the integrity of your wooden lamp, it’s crucial to take precautions against moisture and wear. Firstly, ensure you keep the lamp away from damp environments, as this can cause warping or promote mold growth. Furthermore, to maintain the wood’s natural beauty, regularly reapply a finish to protect it from scratches and fading. By taking these simple steps, you’ll be able to enjoy your wooden lamp for years to come.
Electrical Maintenance
When inspecting your DIY wooden lamp, start by carefully examining the cord for any signs of damage or wear. If necessary, replace it with a new one to prevent any potential electrical issues. Additionally, when replacing the bulb, make sure to use the correct type and wattage to avoid overheating. This will help prolong the lifespan of both the bulb and the lamp itself. By following these simple yet important maintenance tips, you’ll be able to enjoy the warm and cozy ambiance your wooden lamp provides for years to come.
FAQS on DIY Wooden Lamp Projects
Crafting a unique wooden lamp can be an incredibly rewarding experience. As you embark on this DIY adventure, it’s natural to have queries that’ll guide you through the process. That’s why we’ve compiled some of the most frequently asked questions, providing valuable insights to ensure your project shines from start to finish.
What types of wood are best for making a lamp?
When it comes to crafting lamps, hardwoods such as walnut, cherry, and maple are ideal selections due to their exceptional durability and stunning finish. While these timbers offer a classic look, reclaimed wood can also be a budget-friendly and environmentally conscious choice, lending an one-of-a-kind charm to your lamp creation.
Can I use any type of bulb for my wooden lamp?
For wooden lamp applications, it’s highly recommended to opt for LED bulbs. By virtue of their low thermal output, these bulbs significantly diminish the likelihood of compromising the integrity of the wood or inadvertently sparking a fire hazard. Furthermore, LED bulbs have earned a reputation for being energy-efficient, making them an attractive choice for those seeking to reduce their environmental footprint.
How can I safely drill a hole for the wire in my wooden lamp?
To begin, identify the route your wire will take. Next, select a drill bit that is just slightly larger in diameter than the cord itself. As you start drilling, maintain a steady and deliberate pace to avoid any potential splitting of the wood. If possible, it’s a good idea to test your technique on a scrap piece of wood before moving on to the actual project.
What finish should I use on my wooden lamp?
When it comes to achieving a natural appearance, consider opting for a linseed oil or tung oil-based finish. These oils not only bring out the grain patterns in the wood but also provide a layer of protection against scratches and wear. However, if you’re looking for a more durable finish that can withstand frequent handling, polyurethane or lacquer might be a better option for your lamp. As with any new finish, it’s essential to test it on a scrap piece of wood first to ensure the desired results.
How do I attach the lamp hardware to my wooden lamp?
Once you’ve drilled the hole for the wire and prepared your wooden base, thread the wire through the hole with ease. Next, follow the manufacturer’s guidelines to secure the wires to the socket terminals, ensuring a sturdy connection. To simplify the process, consider using a lamp kit, which typically includes all the necessary parts and step-by-step instructions, making it a breeze to assemble.
Can I make a lamp without electrical experience?
When it comes to assembling a lamp kit, don’t let uncertainty hold you back – take control with a comprehensive package that includes pre-assembled parts and step-by-step guidance. To ensure a safe and successful installation, always adhere to the manufacturer’s guidelines and safety precautions. If you’re unsure about any aspect of the process, consider consulting with or hiring an electrician to review your work before powering on the lamp.
How can I customize my DIY wooden lamp?
When it comes to customization, there are numerous ways to make your wooden lamp truly one-of-a-kind. One approach is to opt for a distinctive shape or design for the lamp base itself. This can be achieved by mixing and matching different wood types to create striking contrasts. For added flair, you could also incorporate decorative elements such as carvings or inlays into the design. Another avenue of customization is choosing a custom-made lampshade that perfectly complements your wooden base’s unique features. Finally, don’t overlook the power of color – by painting or staining the wood to match your existing decor, you can seamlessly integrate your new lamp into the overall aesthetic.
Is it cheaper to make a wooden lamp myself?
While creating your own wooden lamp from scratch may require some effort, it’s an excellent way to save costs, particularly when using reclaimed wood or repurposing materials you already possess. Moreover, the DIY approach grants you the flexibility to customize your design to your liking, a feature that might come at a premium if you were to commission a professional.
Can my wooden lamp be eco-friendly?
Embracing eco-friendliness in your lamp-making venture is as simple as incorporating reclaimed wood or sustainably sourced materials into your design. This thoughtful approach not only adds a touch of uniqueness to your creation but also minimizes its ecological footprint. Furthermore, selecting energy-efficient LED bulbs for illumination amplifies the environmental benefits, making it an excellent choice for those looking to reduce their carbon footprint.
What safety precautions should I take?
To work safely on your wooden lamp, it’s essential to prioritize personal protection and a well-maintained workspace. Start by donning protective eyewear and gloves whenever you’re cutting, drilling, or sanding wood, as these tasks can generate harmful particles and debris. Additionally, ensure that your workspace is adequately ventilated, particularly when applying finishes, to prevent the buildup of hazardous fumes. When making any adjustments or repairs, always remember to unplug the lamp first to eliminate the risk of accidental electrical shocks. Furthermore, be mindful of electrical safety guidelines during the installation of lamp hardware, adhering strictly to manufacturer instructions and taking necessary precautions to avoid electrical hazards.
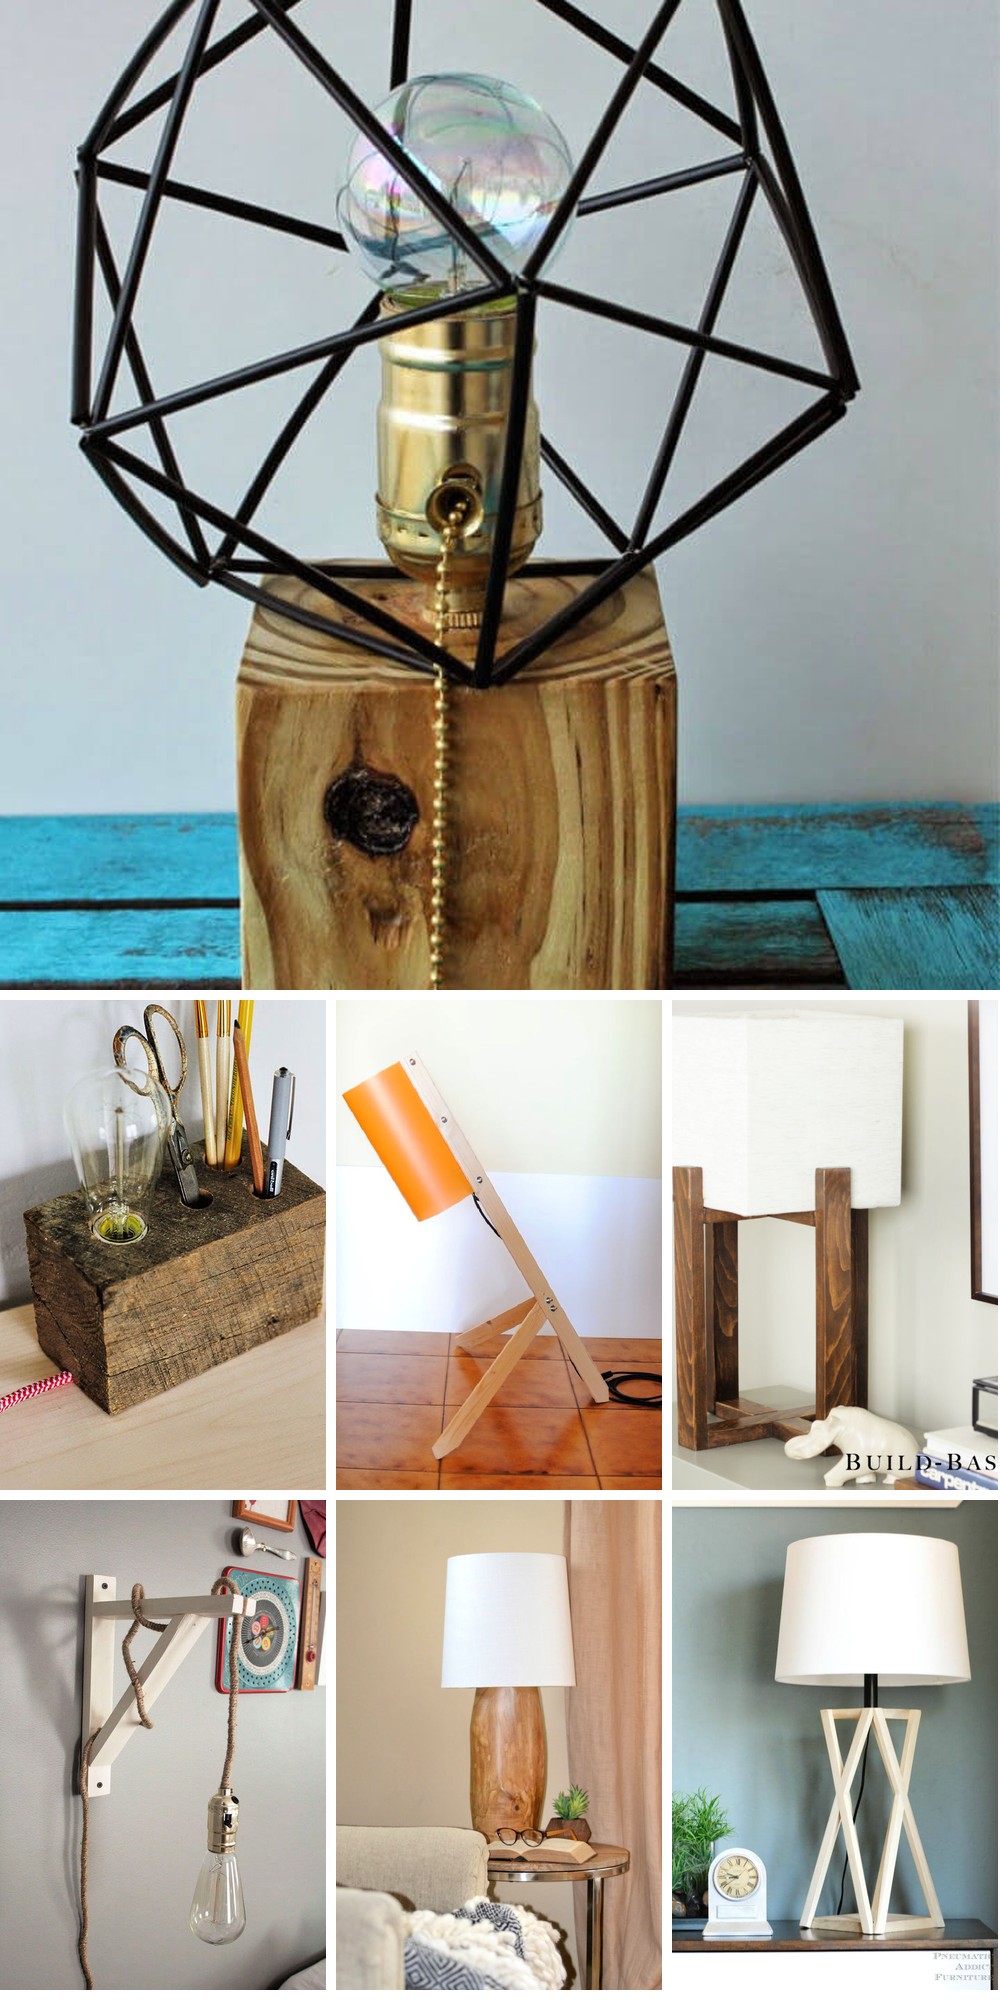
25 Handmade DIY Wooden Lamp Ideas and Plans
Transform your living space with 25 innovative and distinctive handmade DIY wooden lamp designs, each accompanied by a comprehensive plan to guide you in bringing your unique vision to life.
Reclaimed Wood Lamp With Himmeli Shade
Transform your space with an innovative blend of creativity and sustainability! This DIY reclaimed wood lamp, paired with a geometric himmeli shade, breathes new life into everyday materials, yielding a showstopping piece of home décor. By repurposing a piece of reclaimed wood and straws, this eco-friendly lamp embodies the essence of upcycling. Its modern geometric shade brings a fresh perspective, making it an excellent addition to any room. Follow this straightforward guide to craft your own stylish and environmentally responsible lamp today, and experience the joy of elevating your home’s ambiance while embracing the sustainability movement.
Modern DIY Rustic Wood Lamp
Transform your living space with a unique, handcrafted modern rustic wood lamp. This DIY project combines natural elements with contemporary design, resulting in a stunning piece that’s perfect for any room. To create this beautiful lamp, you’ll need a piece of salvaged wood, a drill, an extra-long drill bit, a lamp kit, a lampshade, and a clear sealer. For an added touch of elegance, consider dipping the base in white paint. With its simplicity and creativity, this lamp is sure to elevate your home’s ambiance.
How to Make a Minimal Wood Lamp
Embark on a DIY adventure by crafting a minimalist wood lamp that exudes warmth and sophistication. This project is perfect for those who value the organic charm of natural wood, as it requires only basic tools and materials to bring your vision to life.
Easy DIY Driftwood Lamps – IKEA Hacks
Transform your space with this creative DIY project, an inspired solution from Stephanie mae foster. Who says that crafting unique and gender-neutral bedside lamps has to be expensive? With just a $28 investment per lamp, Stephanie shows you how easily accessible materials and a dash of creativity can yield stunning, organic-feel lighting pieces that will elevate your home decor without breaking the bank. This step-by-step guide ensures a rewarding creation process as you learn to harness the charm of driftwood to create something truly special. For the full tutorial, visit Stephanie Mae Foster.
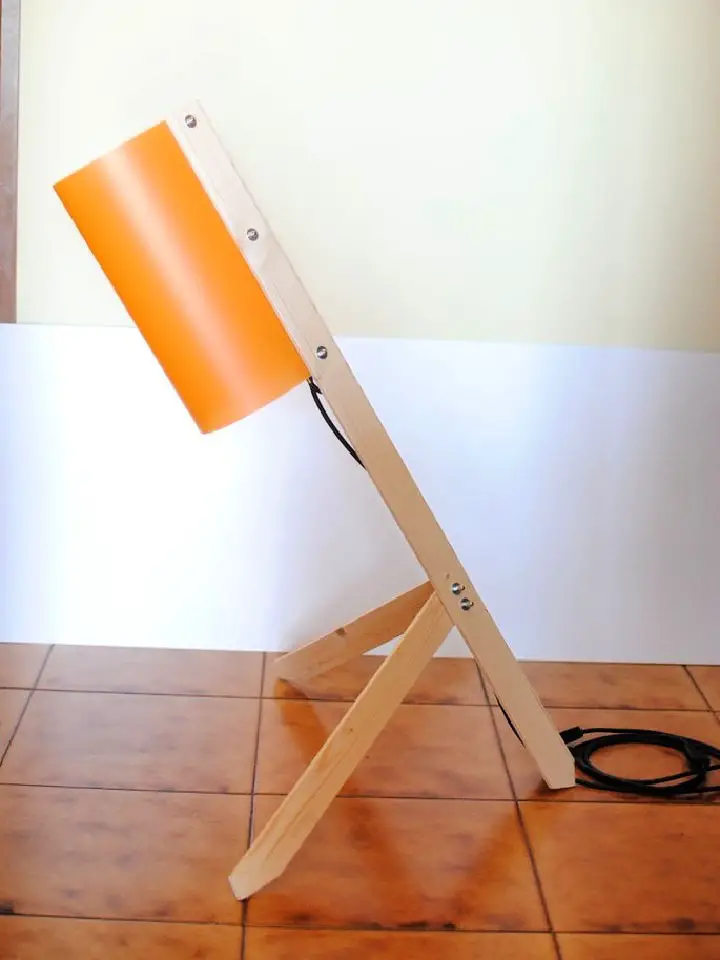
Making a Desk Lamp Out of Wood
Transform your workspace into a vibrant oasis by crafting a modern DIY desk lamp with a mesmerizing color-changing LED light. This unique piece of furniture combines the warmth of walnut wood with the sophistication of brass accents, and takes it to the next level with a distinctive knot filled with gold epoxy for an added touch of elegance. For those looking to bring smart home technology into their daily routine, this lamp is the perfect solution. Its color-changing LED light syncs seamlessly with your phone, allowing you to effortlessly change the mood and ambiance of your room. Follow along as we guide you through a fun and engaging DIY project that not only enhances your workspace but also adds a pop of color and personality to your surroundings.
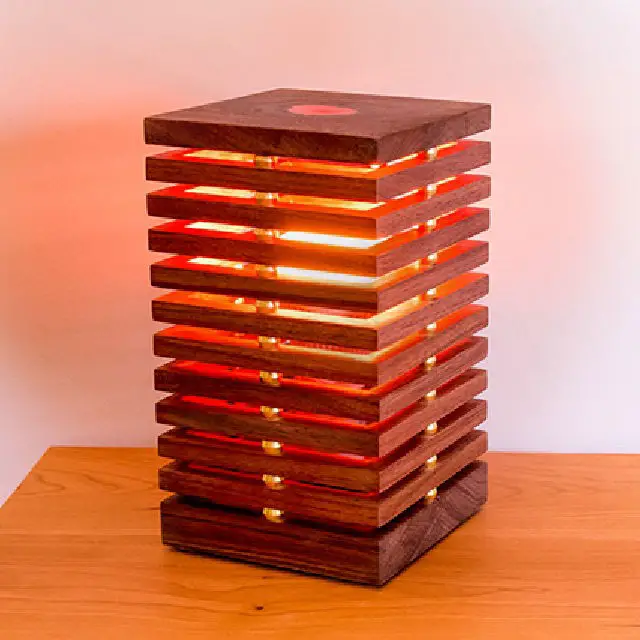
How to Build a Wooden Cube Lamp
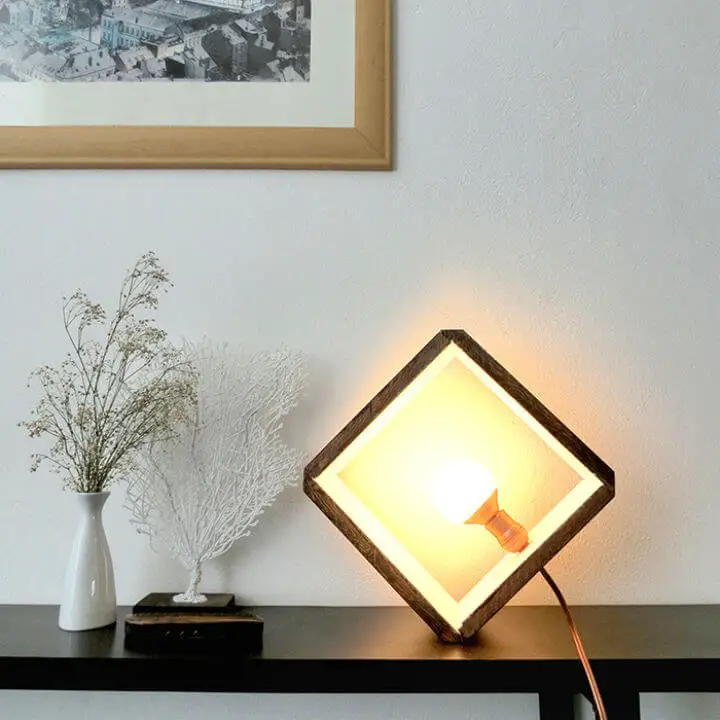
Transform your home’s ambiance with a stylish, handmade wooden cube lamp that exudes modern sophistication. This DIY project is not only budget-friendly but also encourages creativity and resourcefulness. By utilizing readily available materials like scrap wood and fundamental tools, you can effortlessly bring this unique lighting fixture to life. Not only will it provide a warm glow, but it will also serve as a conversation-starting centerpiece in any room. For a comprehensive walkthrough on crafting this innovative cube lamp, visit Ohoh Deco for inspiration.
Make Your Own Wood Tapered-X Lamp
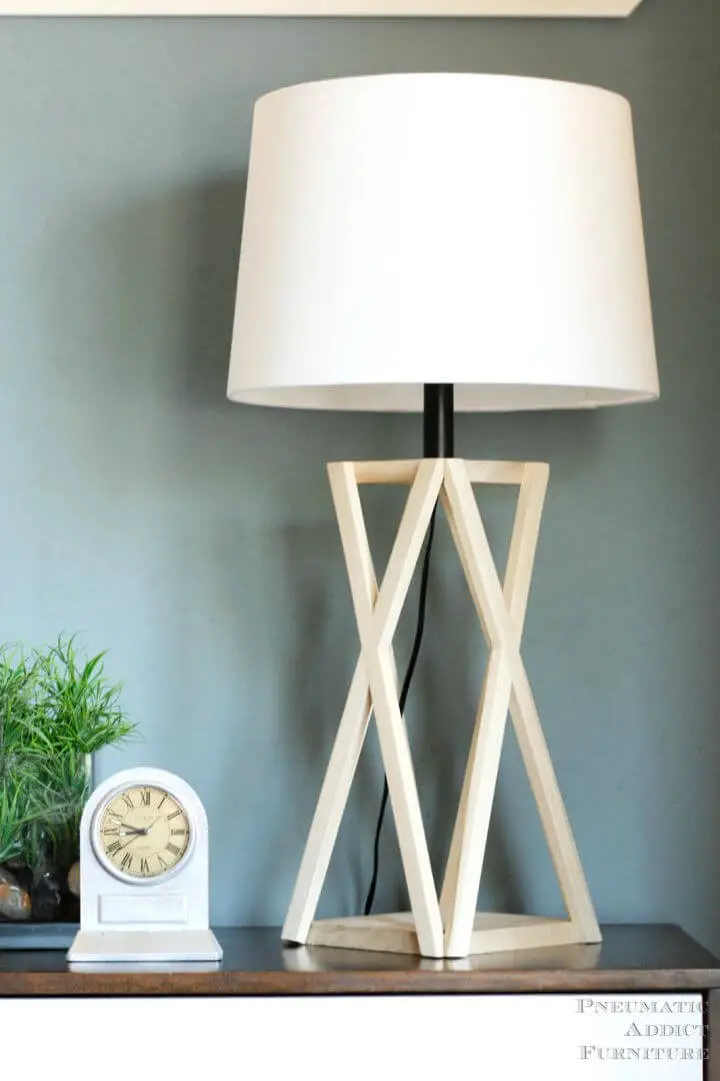
Transform your living space with a one-of-a-kind, architectural-inspired DIY project by crafting a custom Tapered X Lamp. Perfect for hands-on enthusiasts, this unique lighting fixture adds a touch of sophistication to any room. By following a clear and comprehensive guide at Pneumatic Addict, you’ll be guided through the process of selecting high-quality materials, assembling the lamp kit, and overcoming potential challenges. With the tools at your disposal, you’ll gain a sense of accomplishment as you bring this stunning piece to life. The finishing touches are entirely up to you – opt for an unsealed, natural look or seal it for a polished finish.
Stylish DIY Wooden Table Lamp
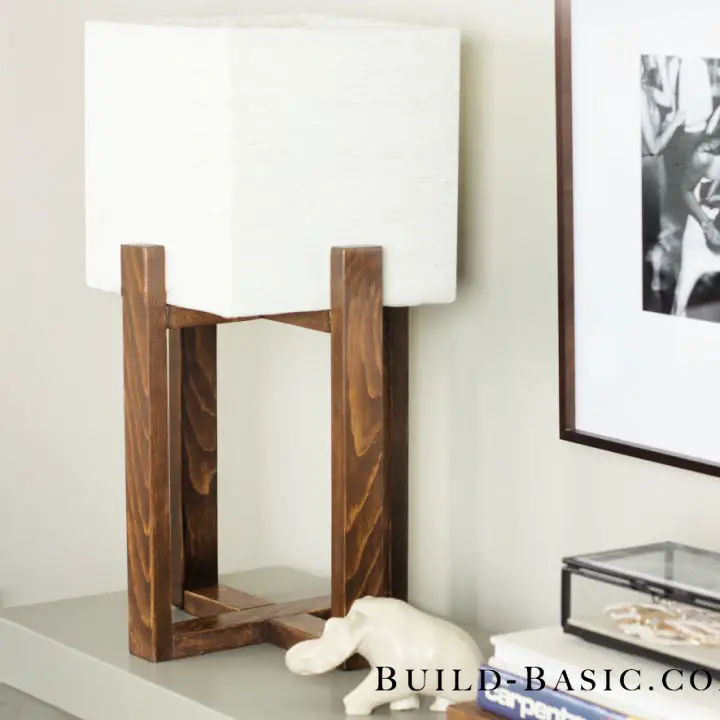
Transform your space into a cozy haven by creating a modern table lamp that exudes warmth and character. This DIY endeavor is not only budget-friendly, requiring just $9 in materials, but also incredibly straightforward, taking approximately 1 hour and 15 minutes to complete. The project’s simplicity belies its impact, as you’ll be crafting a custom base using 1×2 pieces and a unique lampshade with square dowels and fabric. Every step is meticulously detailed to ensure a seamless experience. Whether you’re looking to add a personal touch to your lighting or simply wanting to try something new, this project has it all. Get started on this engaging and rewarding DIY adventure today by visiting Build Basic for the full tutorial.
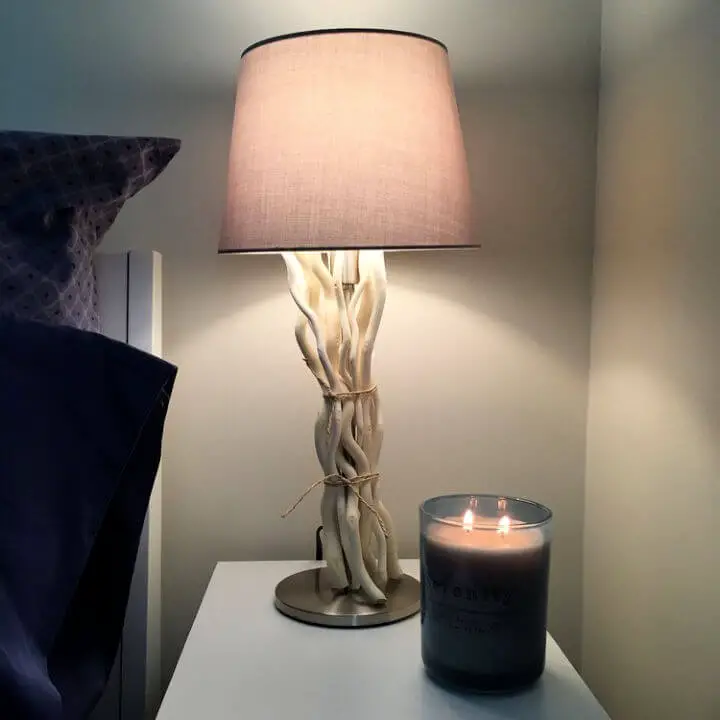
Homemade Drift Wood Tripod Floor Lamp
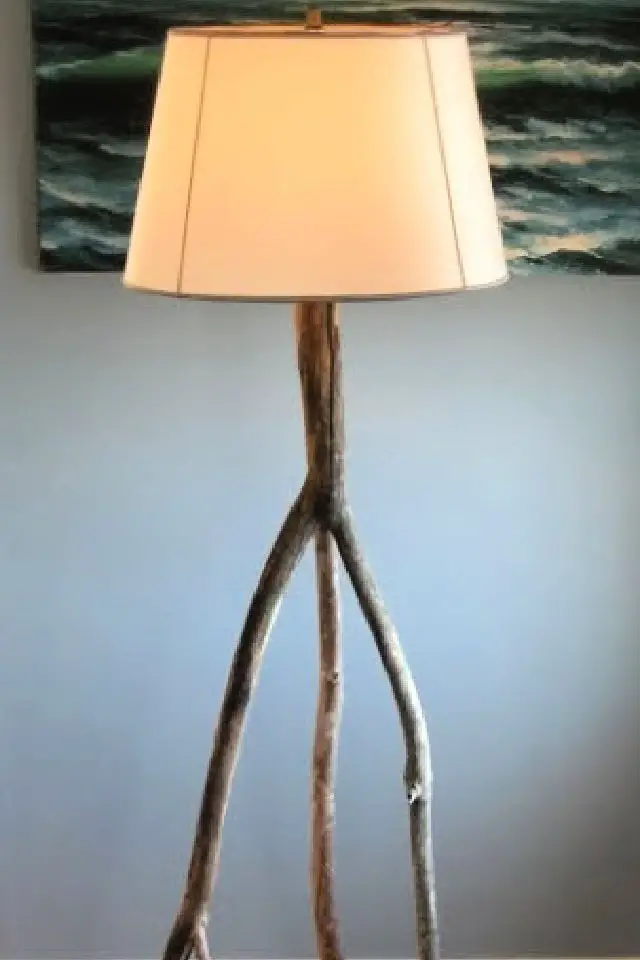
Transform your home’s ambiance with a unique DIY tripod floor lamp crafted from driftwood branches! This straightforward guide shows you how to repurpose naturally found wood into an eco-friendly, one-of-a-kind lighting piece. By carefully joining and securing two distinctive driftwood branches, you’ll create a sturdy tripod base that provides a foundation for the rest of your project. With minimal hardware from your local store and a few simple steps, you’ll drill, assemble, and complete your lamp, including wiring and socket installation. Ready to illuminate your space with this coastal-inspired DIY endeavor? Learn more at Completely Coastal.
DIY West Elm Inspired Floor Lamp
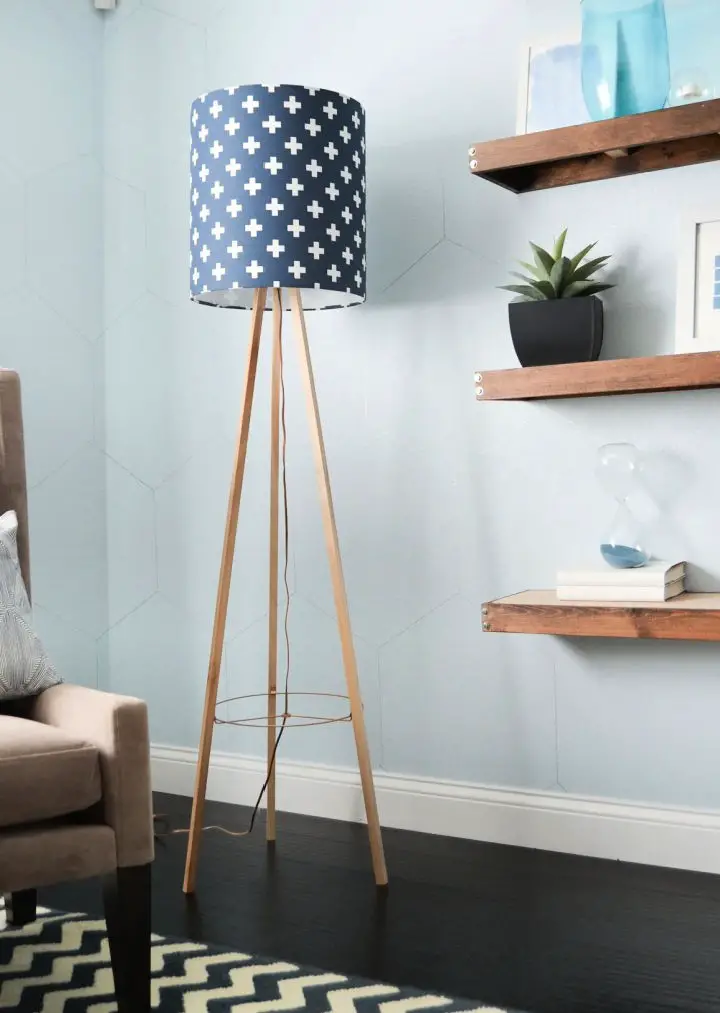
Elevate your space’s ambiance by creating a one-of-a-kind tripod floor lamp inspired by West Elm’s high-end designs, all without breaking the bank. By following our step-by-step guide, you can recreate the luxurious look for under $40 using basic tools like a saw and drill. From material selection to final assembly, we’ll walk you through every detail, sharing expert tips to make the process smooth sailing. Say goodbye to bland decor and hello to a uniquely stylish space with this DIY masterpiece.
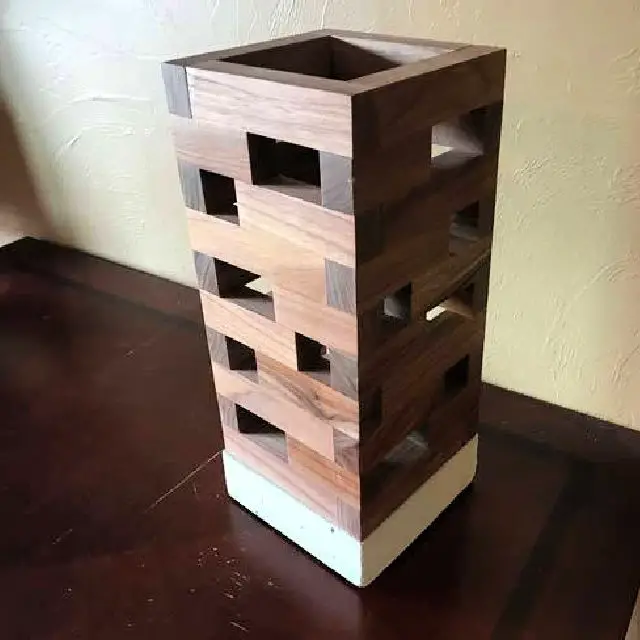
How to Make a Wooden Base Desk Lamp
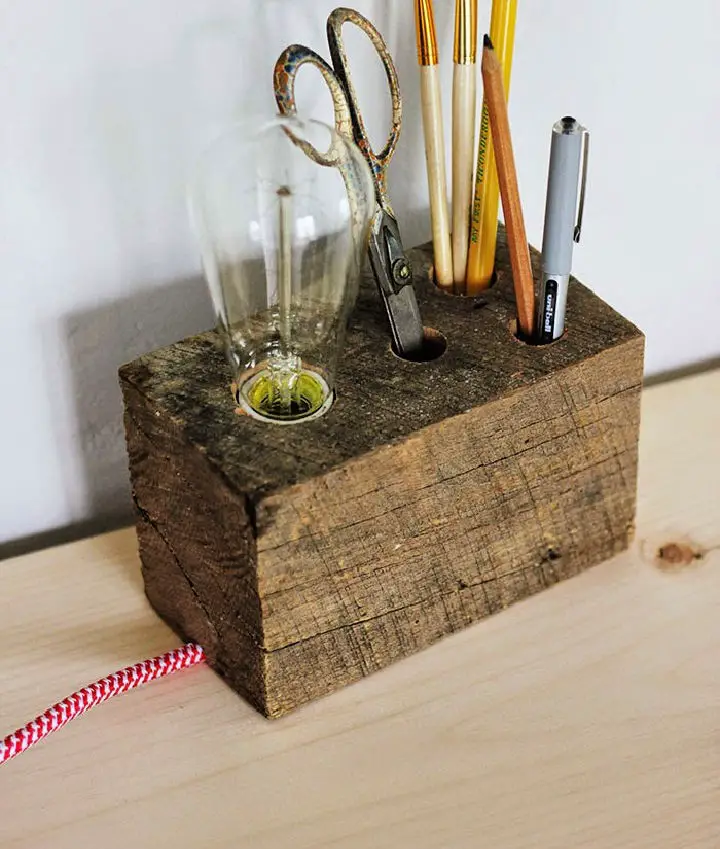
Are you ready to elevate your workspace with a touch of handmade flair? This simple yet sophisticated wooden base desk lamp tutorial is the perfect project for anyone seeking a minimalist and practical addition to their work area. By combining functionality with style, this DIY endeavor offers a creative way to organize your pens and brushes while also providing ample lighting. To bring this chic piece to life, you’ll need just a few basic materials: a wooden block, a drill press, a light socket, and a handful of other easily accessible supplies. Ideal for renters or anyone looking for a low-maintenance lighting solution, this desk lamp is sure to illuminate your space and inspire your creativity.
Handmade Balsa Wood Lamp – Free Plans
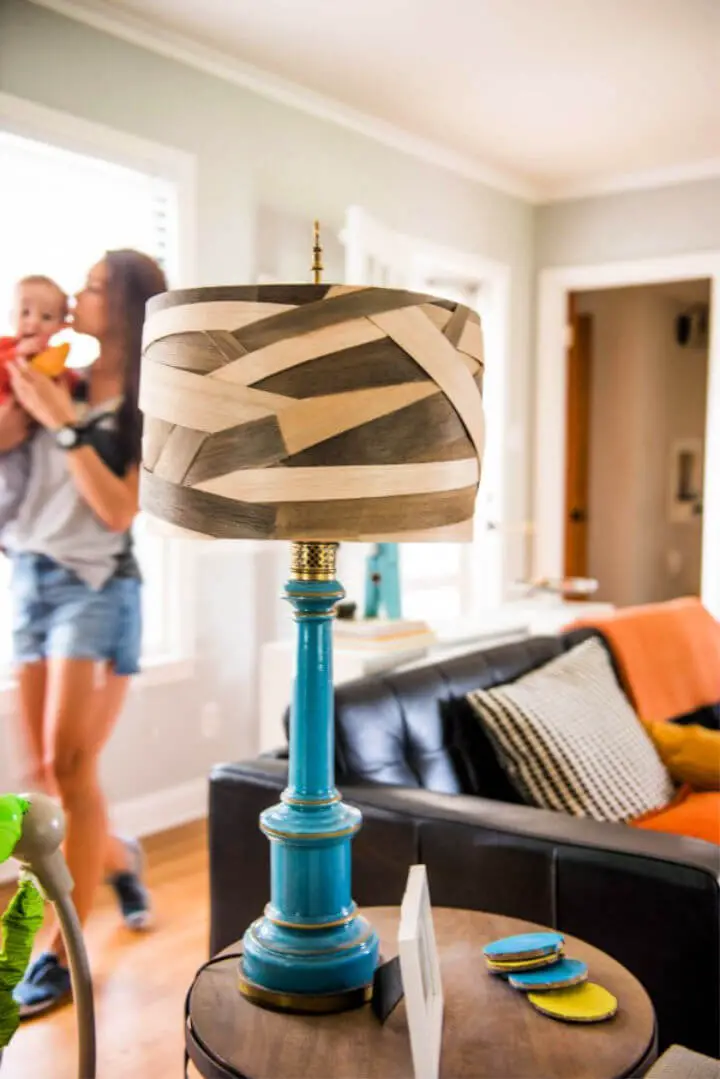
Transform your living space into a true reflection of your personal style by crafting a one-of-a-kind DIY lampshade. This creative project requires only basic materials such as balsa wood strips, acrylic paint, and a dash of imagination. While it may demand some patience, the end result is well worth the effort – a unique piece that showcases your individuality and adds a touch of personality to your home décor. Perfect for anyone looking for a hands-on adventure, this step-by-step tutorial guides you through the process of painting, cutting, and assembling your very own lampshade masterpiece. With this DIY project, you’ll have the opportunity to take an ordinary lamp and turn it into an extraordinary statement piece that reflects your unique perspective. Ready to add some personality to your room? Check out the full tutorial here.
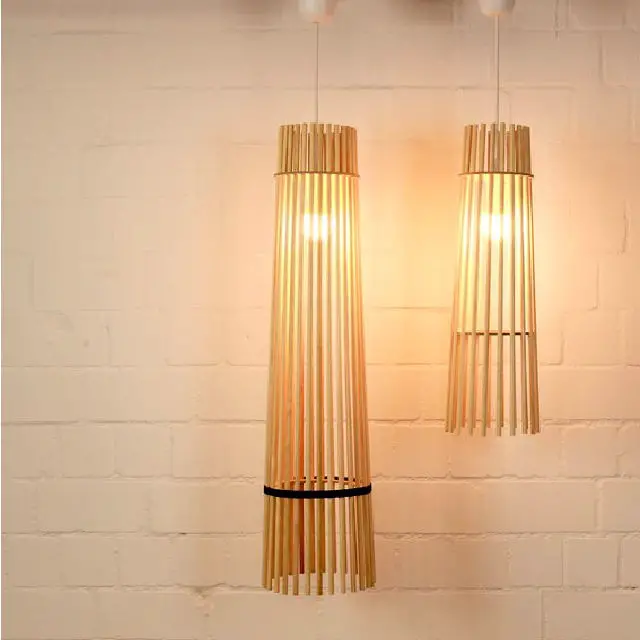
Minimal Frame Pendant Lamp Out of Wood
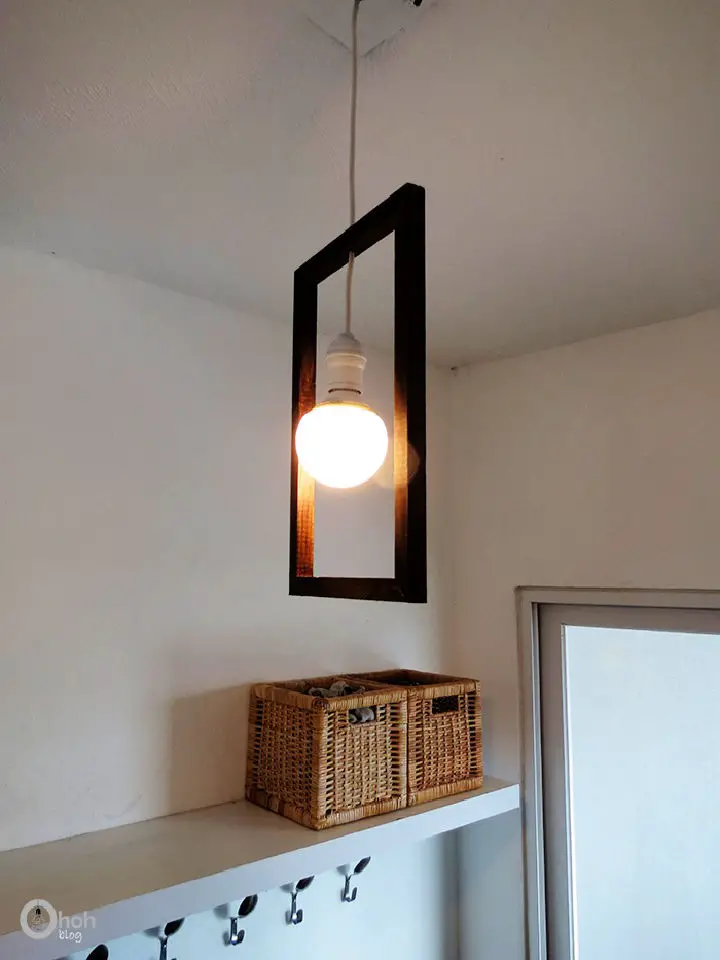
Transform your home decor with a captivating DIY project that showcases your creativity. This straightforward tutorial from Ohoh Deco, featuring a minimalist frame pendant lamp, not only guides you through the process but also adds a unique personal touch to any room. The design is simplicity itself, requiring basic materials such as wooden components, an electrical cable, and a light socket. To further personalize the piece, you can choose to paint or stain the frame, allowing it to seamlessly blend with your desired aesthetic. Perfect for introducing a modern flair to your entryway without overwhelming the space, this project invites you to unleash your inner DIY enthusiast and illuminate your home with the magic of creation.
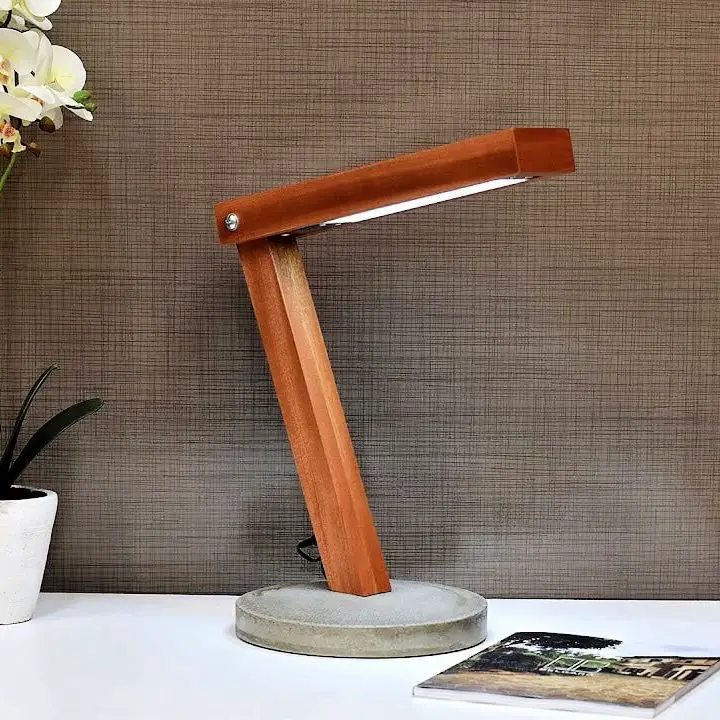
DIY Walnut Accent Wood Lamp
Transform any room with a unique touch of craftsmanship! By following our easy-to-follow DIY guide, you can create a captivating walnut accent lamp that exudes cozy warmth. This project combines the sophistication of walnut wood with the ruggedness of concrete, resulting in a one-of-a-kind piece that’s sure to impress. Whether you’re an experienced DIY enthusiast or just looking for a fun and rewarding project, this comprehensive guide will take you through every step, from preparing the wood to casting the concrete. With the final product, you’ll have a stunning lamp that not only adds ambiance but also showcases your creative skills.
Building a Stacked Wood Lamp
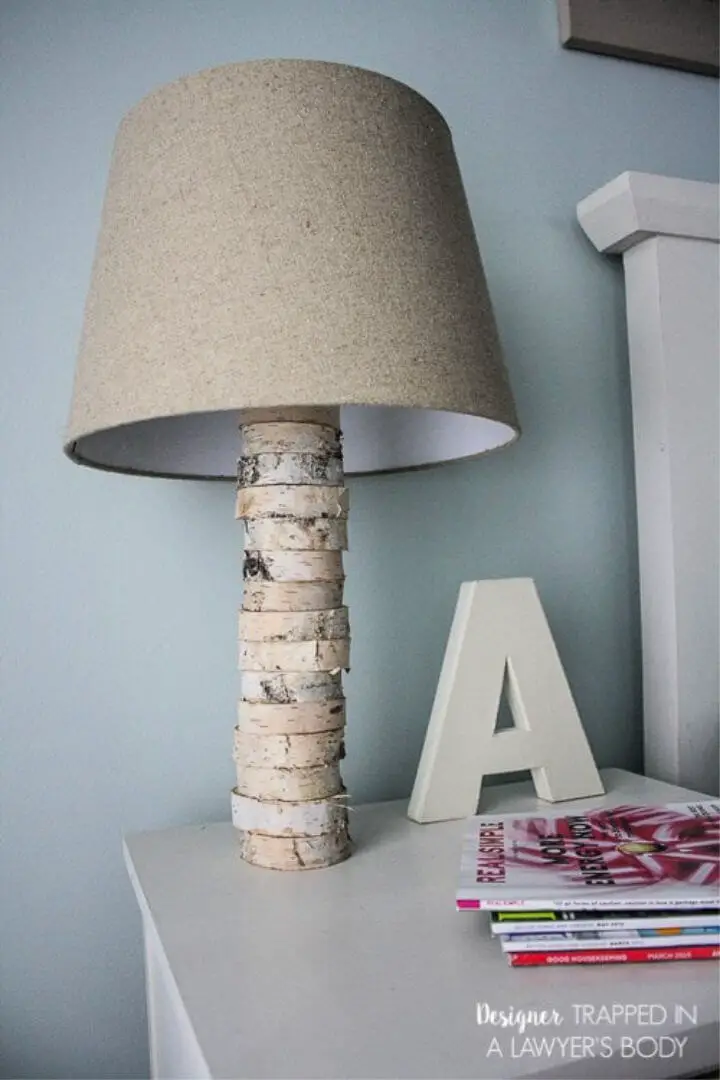
Transform your space with a stunning DIY stacked wood lamp, inspired by Anthropologie’s high-end designs but at a fraction of the cost. This rustic yet surprisingly simple project brings nature indoors, combining birch wood slices and a basic lamp kit to create a unique piece that adds warmth to any room. By following easy-to-follow steps for drilling and assembling the wood slices, you can customize your lamp with a choice of lampshade, all for around $40. For a comprehensive guide on crafting this eye-catching lamp, visit Designer Trapped.
Make a Wood Wall Lamp Under $40
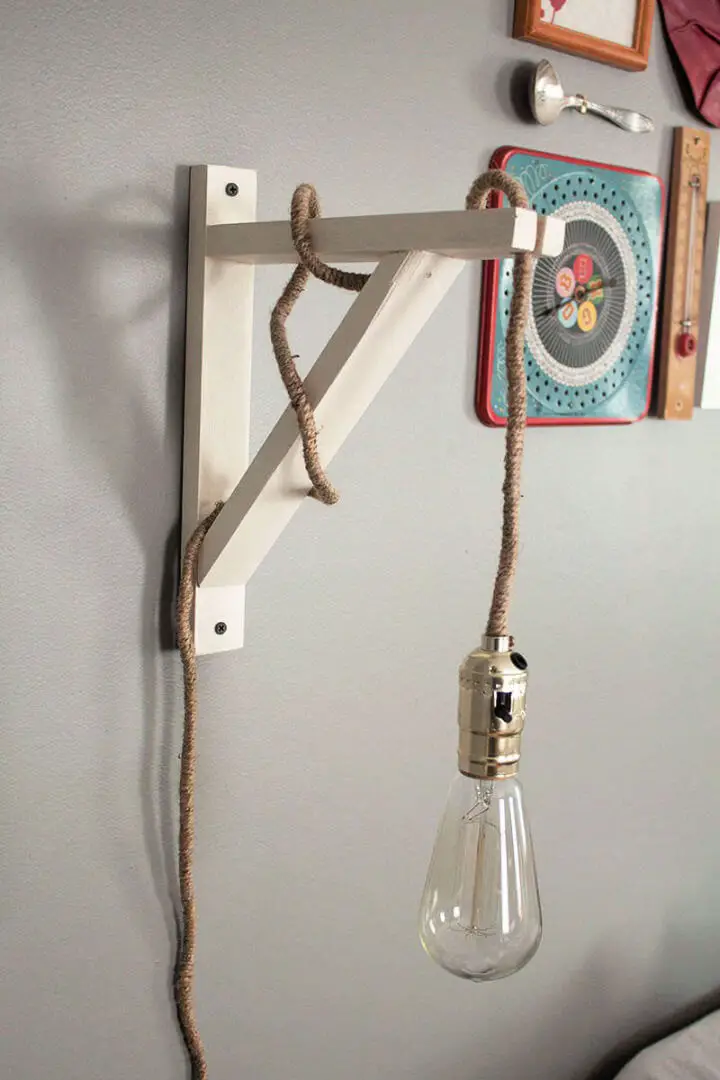
Transform any room into a stylish sanctuary without breaking the bank! This DIY Wall Lamp project is an easy and budget-friendly way to add some industrial-chic flair to your space, all for under $40. The Homesteady’s comprehensive guide takes you by the hand through every step of the process, from selecting the right materials to wiring and decorative wrapping. With clear instructions and no prior electrical experience required, this project is perfect for DIY newbies and seasoned pros alike. By following along, you’ll not only create a unique piece that reflects your personal style but also add a touch of warmth and ambiance to your home. So why wait? Grab your tools and get ready to illuminate your space with this charming handmade lamp.
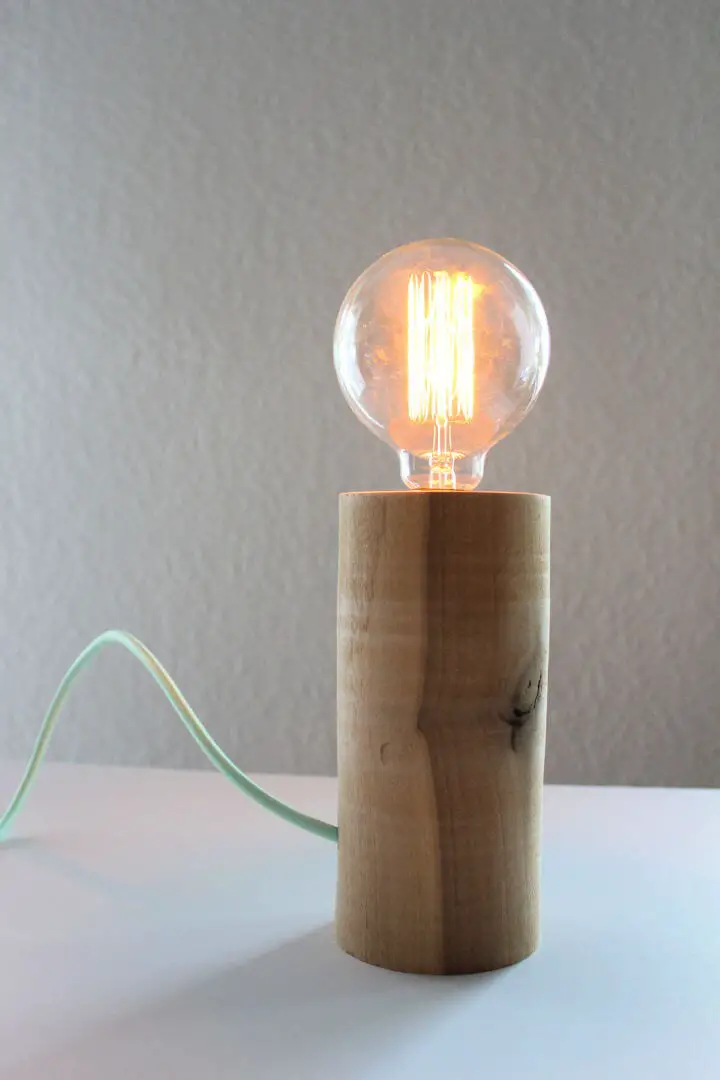
Quick and Easy DIY Wood Block Lamp
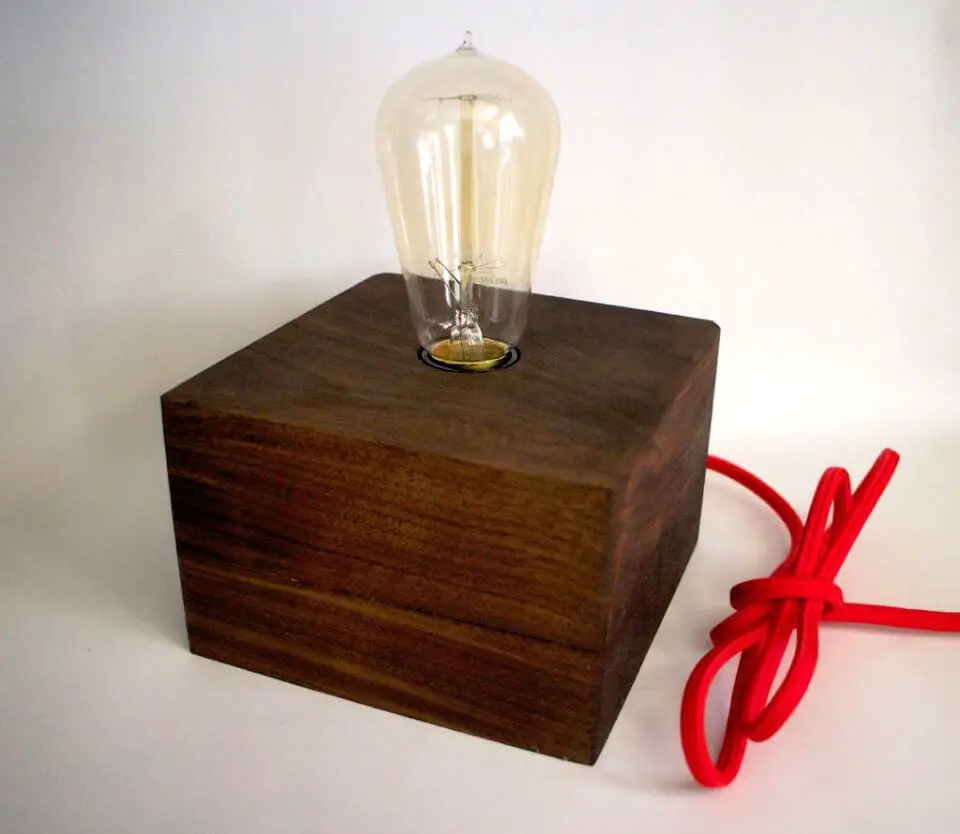
Transform your space with the understated elegance of a handmade Wood Block Lamp. This DIY tutorial provides a straightforward, step-by-step process for turning a humble block of wood into a captivating lamp, where a rich walnut block is beautifully complemented by a vibrant red wire. Without requiring complex wiring, this project seamlessly blends simplicity with practicality, making it an ideal addition to your bookshelf or desk as both a stylish paperweight and warm light source. As you follow the instructions, you’ll be able to add a cozy ambiance to any corner of your home, creating a sense of warmth and invitation.
How to Build a Wood Pendant Lamp
Transform your home’s ambiance with a one-of-a-kind DIY wood pendant lamp that exudes simplicity and sophistication. Craft enthusiasts will love the ease and versatility of this project, which can be customized to fit any style or decor. Using our complimentary template, you’ll be able to create a stunning wooden lampshade in no time, requiring only minimal tools and expertise. The possibilities are endless, as you can choose from various wood colors and adjust timber lengths to give your piece a truly unique touch. This inviting and warm lighting solution is perfect for adding a cozy glow to any room. To get started, follow our clear and concise guide that outlines the necessary materials, tools, and assembly instructions. We can’t wait to see how you personalize this project and share your creation with us!
DIY Wooden Edison Bulb Table Lamp
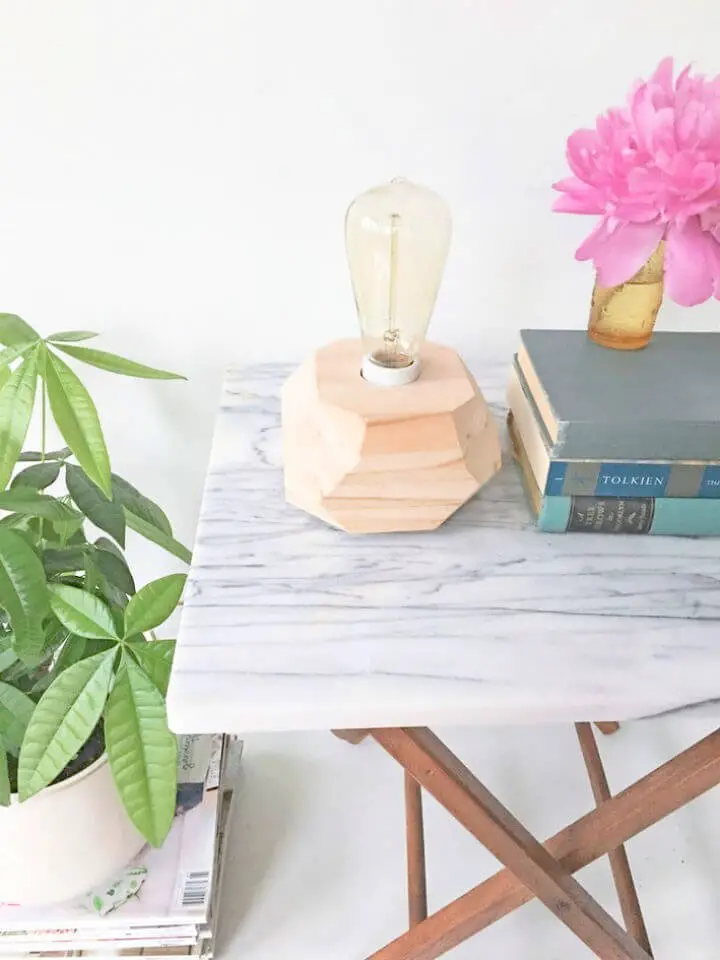
Transforming your living space through DIY endeavors can be an incredibly fulfilling experience. For those with a passion for crafting unique pieces, creating a Wooden Edison Bulb Table Lamp is a fantastic project to undertake. This straightforward endeavour adds a touch of minimalist elegance to any room, requiring only basic woodworking and electrical installation skills. To get started, gather the necessary materials, including a 1X6 board, drill, spade bits, Loctite Adhesive, Porcelain Lamp Socket, lamp cord, threaded lamp pipe, rubber feet, and a few more essentials. By following step-by-step instructions, you’ll be able to cut and glue wood, drill holes for the lamp parts, and assemble your finished piece. The beauty of this project lies in its ability to allow for creative freedom, making it an engaging activity that culminates in a stunning, functional decor item. For a comprehensive guide, visit Curbly.
Making a Tree Stump Natural Wood Lamp
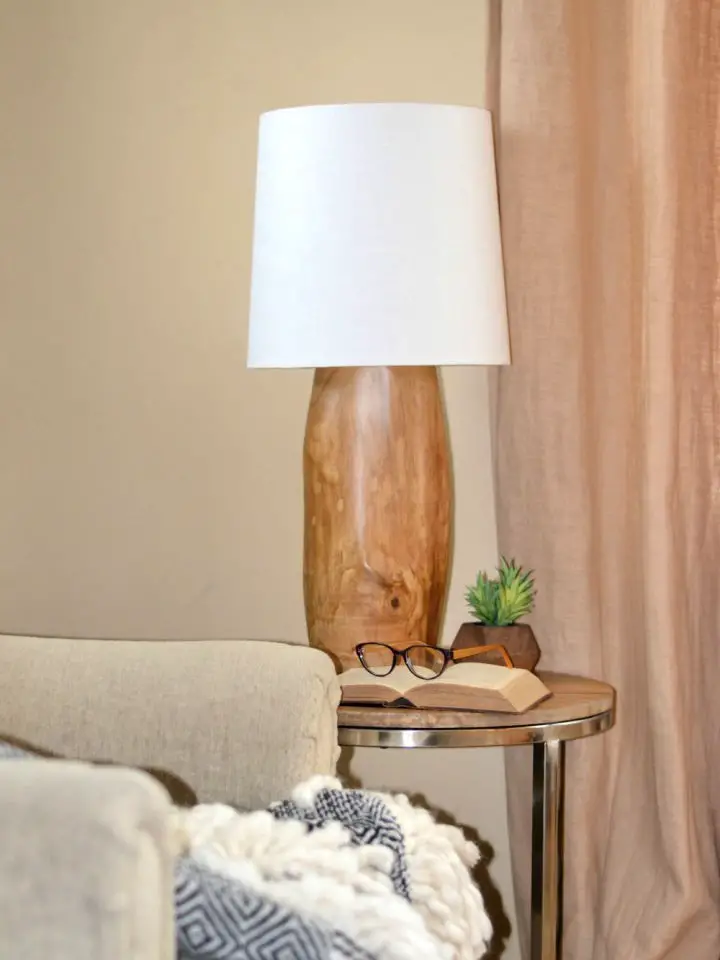
Elevate your living space with the warmth and character of handcrafted decor. At Rachel Teodoro’s blog, find a step-by-step guide to creating a modern tree stump natural wood lamp that combines rustic charm with sleek sophistication. What was once a humble wood vase can now become a stunning centerpiece, offering high-end style at an affordable price. This comprehensive guide covers every aspect of the DIY project, from sourcing materials to assembling the final product, empowering you to create a unique and eye-catching focal point for your home that’s perfect for cozy reading nooks or adding warmth to any room.
How to Make a Pallet Wood Lamp
Bring rustic charm into your home by transforming leftover pallet wood into a stunning lamp. Our step-by-step guide makes the process surprisingly accessible, as you’ll learn how to cut, reinforce, and wire the wooden frame to create a unique lighting fixture. To give your project an extra touch of elegance, incorporate scrap molding for a polished finish. By following our instructions, you can proudly display your handiwork in your newly lit space.
Build a Wood Lamp at Home – Step by Step
Transform your home into a cozy sanctuary with the warmth of a handmade wood design lamp. This unique piece seamlessly blends the natural beauty of wood with sophisticated design, making it an ideal addition to any room’s décor. As the lamp casts a serene and inviting glow, it creates the perfect ambiance for unwinding on a quiet evening or adding a soft touch to your daily routine.
To bring this charming creation into your own home, follow the easy-to-follow guide available on Instructables. This project is perfect for DIY enthusiasts looking to infuse their space with a personal touch and add a dash of creativity.
Easy Steps to Make a Wood Pendant Lamp
Delve into the meticulous process of crafting a stunning wood lamp using just a single wooden slat. By carefully cutting the wooden pieces according to a pre-designed template and meticulously gluing them together, you’ll create an exquisite lampshade that exudes elegance and sophistication. Once complete, simply fit a bulb inside, connect it to a power source, and bask in the warm, cozy glow that this captivating wood lamp will emanate. For a detailed guide on bringing this DIY project to life, be sure to explore the comprehensive tutorial. Prepare to showcase your craftsmanship and revel in the beauty of handmade artistry as you bring this unique creation to fruition.
Simple DIY Branch Table Lamp
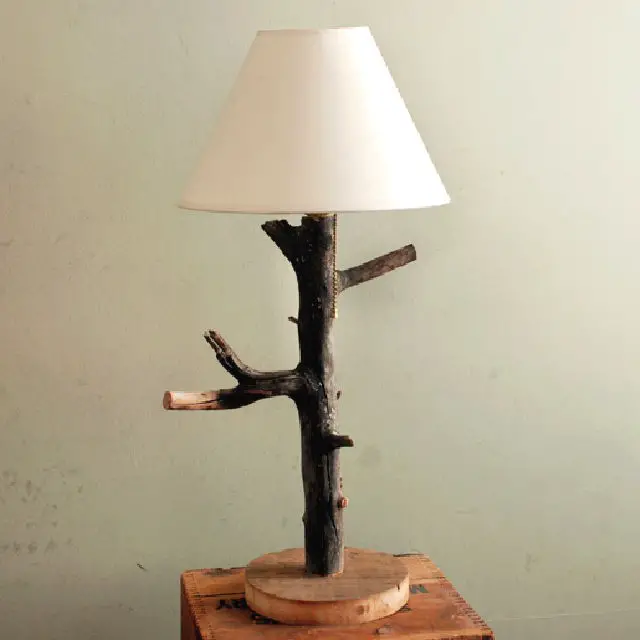
Unleash your creativity by crafting a one-of-a-kind DIY branch table lamp that brings the outdoors in. This straightforward project requires minimal materials: a natural branch, light socket, lampshade, bulb, extension cord, and wooden base. You’ll also need some basic tools like a hand saw, scroll saw, drill, pliers, and wood glue to shape your branch and assemble the lamp. Follow this DIY guide to transform your lighting with a rustic yet sophisticated piece that exudes personalized charm.
Building a Smart Wooden Lamp
Embark on a creative journey by crafting your own smart lamp with our step-by-step guide. This comprehensive tutorial, courtesy of EL Passion, seamlessly blends the charm of concrete and wood to create a one-of-a-kind lighting solution featuring an RGB LED strip and Bluetooth connectivity. Designed for electronics enthusiasts and DIY aficionados, this project is carefully broken down into approachable steps, ensuring a satisfying building experience from start to finish. From material selection to software setup and structural crafting, this tutorial provides everything you need to bring your innovative idea to life, perfect for adding a personal touch to your space or gifting a thoughtful homemade piece. And if you’re looking for an eco-friendly alternative, consider creating a solar lamp – our DIY Solar Light ideas are affordable and easy to make at home, allowing you to brighten up your home and garden while reducing your energy consumption.
How to Build a Wooden Desk Lamp | DIY Project
Conclusion:
As we bring our exploration of 25 handmade DIY wooden lamp ideas and plans to a close, it’s clear that the journey has been just as illuminating as the final product. By embracing the opportunity to infuse your space with personal touches through DIY woodworking, you’re not only creating something unique but also cultivating a sense of pride and accomplishment that comes from crafting something beautiful and functional with your own hands. From selecting the perfect wood to mastering the finer details of finishing, each step is an opportunity to refine your skills and bring your vision to life. The secret to a successful DIY wooden lamp project lies in striking a balance between patience, precision, and creativity. With these qualities in mind, gather your materials, follow our guides, and watch as your space transforms with a one-of-a-kind lamp that reflects your unique style and craftsmanship.
