Why Make DIY Triangle Shelves?
While DIY projects often focus on the end result, making triangle shelves offers a range of benefits that extend beyond the final product. By embarking on this DIY journey, you’ll not only gain practical storage or decorative spaces but also develop skills, save money, and boost your sense of accomplishment.
One of the greatest advantages is personalization – you have complete control over materials, sizes, and finishes to ensure that the shelves perfectly align with your unique style and space requirements. This level of customization allows you to create a truly bespoke piece that meets your specific needs.
Another significant benefit is cost-effectiveness. By using basic tools and materials, you can craft high-quality shelves that rival professionally made ones without breaking the bank. This not only saves you money but also gives you a sense of pride in having created something with your own hands.
As you work through the project, you’ll have ample opportunities to develop your woodworking and crafting skills. Each step – from measuring and cutting to sanding and finishing – presents a chance to refine your DIY abilities and build your confidence.
The sense of satisfaction that comes from completing a project like this is unparalleled. Displaying items you’ve made yourself on the shelves can bring daily joy and a sense of pride, making them more than just functional pieces but also decorative statements.
Triangle shelves are incredibly versatile, too, and can fit seamlessly into almost any room or decor style. They’re perfect for displaying books, plants, collectibles, or even serving as a standalone design element. Their compact size also makes them ideal for adding storage or decor to smaller spaces without taking up valuable floor space.
Ultimately, choosing to make DIY triangle shelves is about more than just creating a piece of furniture – it’s about crafting something that adds value, character, and functionality to your home.
How to Make a Triangle Shelf
Transforming your space with the perfect triangle shelves is an exciting DIY project that brings a unique geometric flair. Whether you’re looking to showcase small treasures or elevate your wall decor, these versatile shelves are easily within reach with basic tools and materials at hand. As we delve into this guide, get ready to unlock the secrets of creating your own stunning triangle shelves.
What You’ll Need
To complete the project, you’ll need a range of materials. Start with the base components: 3/4 inch plywood will provide the structure for your shelving unit. For cutting and shaping this material, a reliable saw is essential – either a table saw or hand saw will do the trick. To ensure precise angled cuts, invest in a miter gauge or angle tool. As you work on your project, keep your wood smooth and splinter-free with sandpaper up to 220 grit. Bonding these pieces together will require a strong adhesive like Titebond II wood glue. Protect any surrounding surfaces from damage with painter’s tape. If you want to add extra hold to your shelves, consider using a brad nailer – just be sure to fill any holes left behind with wood filler. Before assembling the unit, use a stud finder to locate the studs in your wall and plan accordingly. To secure your shelving system firmly in place, you’ll need L brackets and screws. For non-stud mounting applications, drywall screw anchors will come in handy. Finally, seal and protect your finished product with shellac or your desired finish.
Preparing the Wood
To start building your shelves, begin by measuring and cutting your plywood into precise strips. You’ll need nine of these strips in total, each measuring 3 and 3/4 inches long, to create three shelves. To achieve a clean finish, it’s essential to ensure that each cut is straight and accurate. Once you have your strips ready, set your saw blade at a 30-degree angle and use this setting to cut the strips into triangular lengths. Each piece should be approximately 18 inches from the inside angle of the triangle. This unique design will give your shelves a distinctive look without the need for mitered edges.
Assembling the Shelves
To prepare the pieces for assembly, begin by sanding each one up to 220 grit to remove any impurities and create a smooth surface both inside and out. Once sanded, apply wood glue along the edges of the triangular shape, making sure to secure it tightly. To add extra pressure and prevent any gaps from forming during the drying process, use painter’s tape to hold the edges in place. Next, reinforce the glued joints with a brad nailer, taking care not to compromise the shelf’s aesthetic appeal. Finally, fill any resulting nail holes or imperfections with wood filler and smooth them out using sandpaper, ensuring a seamless finish.
Finishing Touches
When it comes to finishing your shelves, opt for a durable and clear coat like shellac. To achieve even coverage, apply the finish by spraying or brushing it onto the surface. Once complete, inspect your work to ensure a smooth and polished finish.
For mounting your shelves, start by locating studs in your wall using a stud finder. This will provide robust support for your shelves. Attach L brackets to the wall, making sure at least one bracket per shelf is secured into a stud. If you’re dealing with drywall without a stud, use drywall screw anchors as an alternative. Next, attach the shelf to the brackets, taking care to hide any hardware and maintain a clean appearance.
To avoid drilling through the wrong spot, pay attention to your drill angle when attaching the shelf. This simple precaution can save you from a lot of frustration and hassle. To make it easier, place a piece of tape on the drill bit as a depth guide, ensuring you don’t go too far.
Video Tutorial
To enhance your learning experience and gain a deeper comprehension of the triangle shelf-making process, I recommend combining this written guide with a step-by-step video tutorial available on YouTube. The visual aid complements the described techniques, fostering clarity and a stronger understanding of the project. By following these steps, you’ll be able to craft stunning triangle shelves that not only exude professionalism but also infuse your space with a unique personal touch, making them an excellent choice for both functional and decorative purposes.
FAQs on DIY Triangle Shelf
Embarking on a DIY triangle shelf-making adventure can be an incredibly fulfilling experience. To ensure a successful and stress-free project, it’s essential to address the most frequently asked questions that arise during this process.
What materials do I need to make a DIY triangle shelf?
To kick-start your project, you’ll need a solid foundation. This typically includes 3/4 inch plywood or an alternative wood type of your preference. To ensure precise cuts, a saw – either a table saw or hand saw – is essential. For added accuracy, consider investing in a miter gauge or angle tool. Once you’ve cut your pieces to size, smooth out any rough edges using sandpaper up to 220 grit for a professional finish. Wood glue (Titebond II is recommended for its exceptional bond strength) will be used to bring your project together, while painter’s tape comes in handy for clamping pieces securely as the glue dries. For added stability, you may choose to use a brad nailer, though this is optional. To conceal any imperfections or nail holes, wood filler can be applied. If you’re looking to mount your shelf securely, L brackets, screws, and a drill will be necessary. In some cases, drywall screw anchors may also come into play if you’re not working with studs. Finally, don’t forget to add a protective coat of finish, such as shellac, to both protect and enhance the natural beauty of your wood.
How do I cut the wood for a triangle shelf?
To construct the triangle shelf’s sides, begin by cutting 3 and 3/4-inch plywood strips to a consistent length. Divide each strip into three equal parts, ensuring they’ll fit together seamlessly when assembled. Next, adjust your saw blade to a precise 30-degree angle, allowing for a smooth join without the need for mitered edges. Finally, cut each strip to an identical length of 18 inches from the inside edge, resulting in crisp, clean sides that will support your shelf’s unique triangular shape.
How can I ensure my triangle shelves are evenly spaced when mounted?
To achieve precise spacing between your shelves, start by planning the distance you want between each one. Use a combination of a level and measuring tape to create markings on the wall where each shelf will be installed. Ensure each mark is level and accurately measured, using the same distance for all marks. As you mount the brackets, refer back to these marks to guarantee evenly spaced shelves that provide a clean and organized appearance.
Can I make a triangle shelf without power tools?
While the absence of power tools may necessitate more manual effort and time, it’s still possible to craft a simple triangle shelf without them. Instead of relying on a power saw for cutting wood, consider using a hand saw as a viable alternative. Manual sanding with sandpaper will undoubtedly be more labor-intensive, but the end result can still be satisfactory. When it comes to assembly, you may opt to use wood glue and painter’s tape to secure your shelf, rather than relying on a brad nailer for added reinforcement.
How do I finish my DIY triangle shelf?
To complete your shelf project, you’ll need to follow a few key steps. Once the assembly is done, it’s time to smooth out any rough edges by sanding the surface with progressively finer grits – starting with a coarser one and working your way up to 220. This will help ensure a professional-looking finish. Next, apply your chosen coating material, such as shellac, using either a brush or spray can, while following the manufacturer’s guidelines for optimal results. Allow the finish to dry completely before considering any additional coats – if you want to add an extra layer of durability, that is. Just be sure to let it fully dry before installing the shelf in its final location.
Can triangle shelves support heavy items?
When it comes to determining how much weight a triangle shelf can support, several factors come into play.
The type of wood used, as well as its thickness, plays a significant role in the overall strength of the shelf. Additionally, the method of assembly – such as using glue and nails – can also impact the shelf’s capacity to bear weight.
Another crucial consideration is how the shelf is mounted. Mounting it into wall studs, for instance, can provide more support than relying solely on drywall. For lightweight to medium-weight items like small plants, books, or decorative pieces, a well-constructed and properly mounted triangle shelf should be sufficient. However, if you’re planning to store heavier items, it’s essential to ensure the shelf is securely attached to wall studs and consider using thicker wood or additional brackets for added support.
By addressing these common questions, our goal is to make your DIY triangle shelf project more enjoyable and stress-free.
16 DIY Triangle Shelf Ideas (How to Make Triangle Shelf)
Transforming your home’s aesthetic just got a whole lot easier, thanks to the versatility of DIY triangle shelves. With their unique shape and customizable designs, they can add a touch of sophistication to any room. To help you get started on creating your own one-of-a-kind triangular masterpiece, we’ve compiled 16 creative DIY triangle shelf ideas that showcase the possibilities of this clever design. Follow these easy tutorials and learn how to bring a dash of personality to your space.
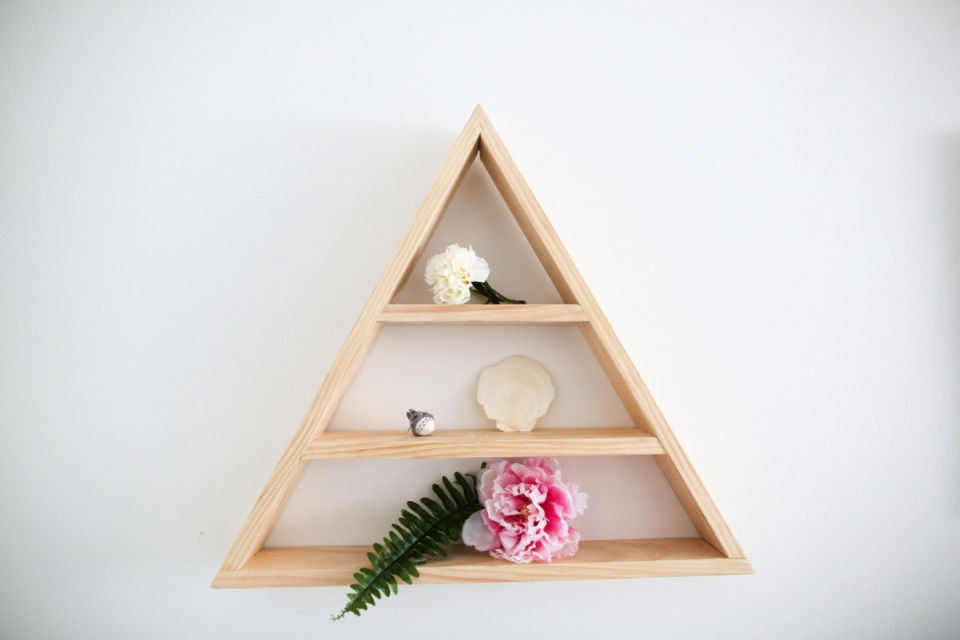
Adorable DIY Triangle Display Shelf
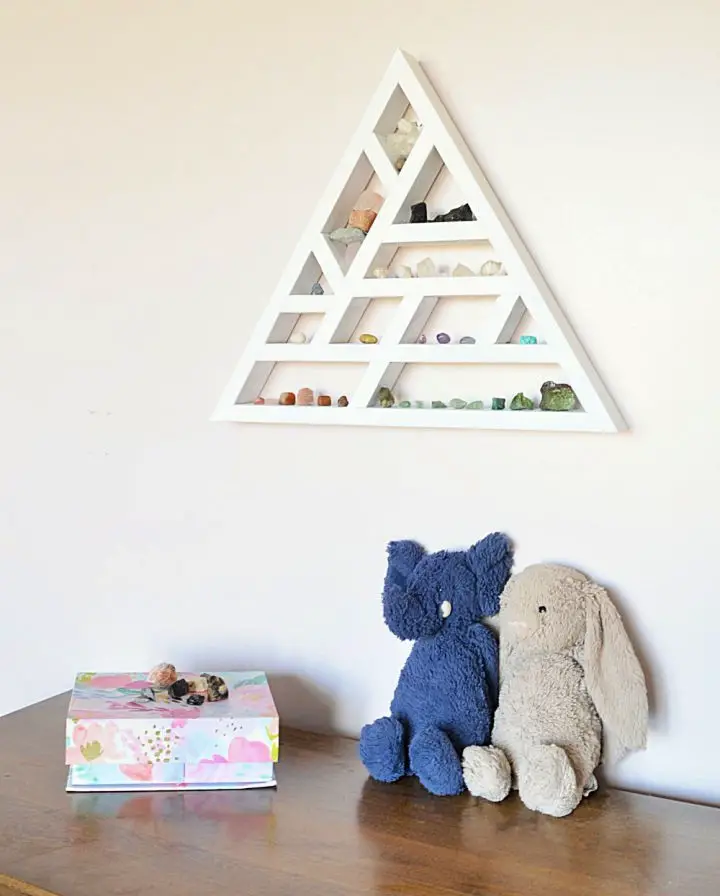
Transform the look of your space by creating a one-of-a-kind Triangle Display Shelf that showcases your treasured possessions. The Vanderveen House offers an intuitive tutorial on how to construct this geometric masterpiece from scratch using versatile poplar wood. The project takes you through the steps of cutting, sanding, assembling, and painting to produce a visually striking shelf that can be tailored to fit your décor. With the freedom to choose different woods and finishes, you can customize the shelf to harmonize with your surroundings. Once completed, this easy weekend DIY endeavor will provide an unique way to display your prized collections, whether they’re rocks, jewels, or something else entirely.
Making Geometric Triangle Shelves
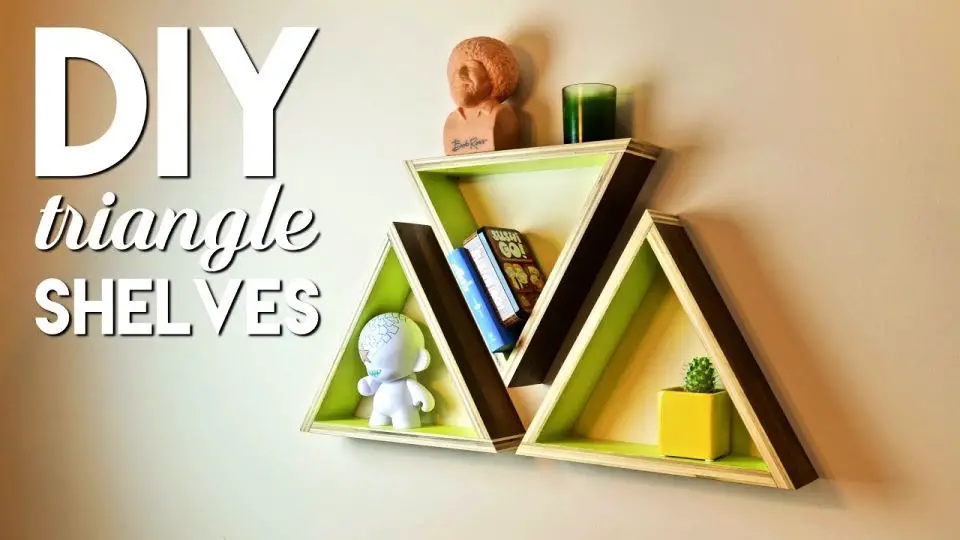
Transform the look of your home with a simple yet impactful DIY geometric triangle shelf project. Perfect for beginners, this woodworking tutorial requires minimal skills and basic materials like walnut veneer plywood or any preferred wood type. With a dash of creativity and a splash of color via paint, these shelves can add a striking focal point to any room. For step-by-step guidance, including precise measurements and assembly tips, visit Crafted Workshop for the complete instructions.
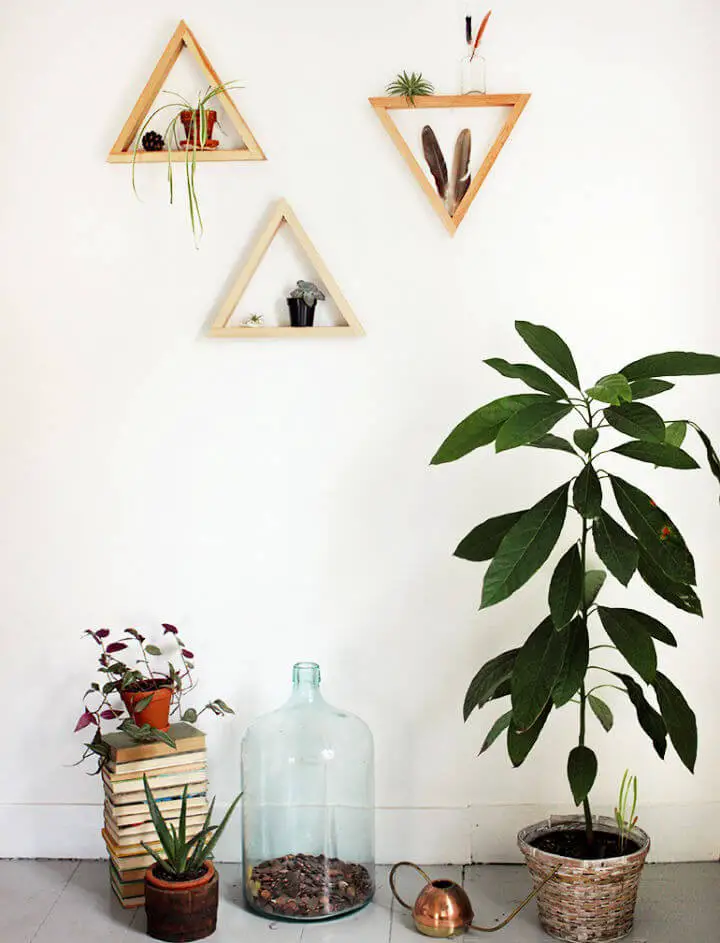
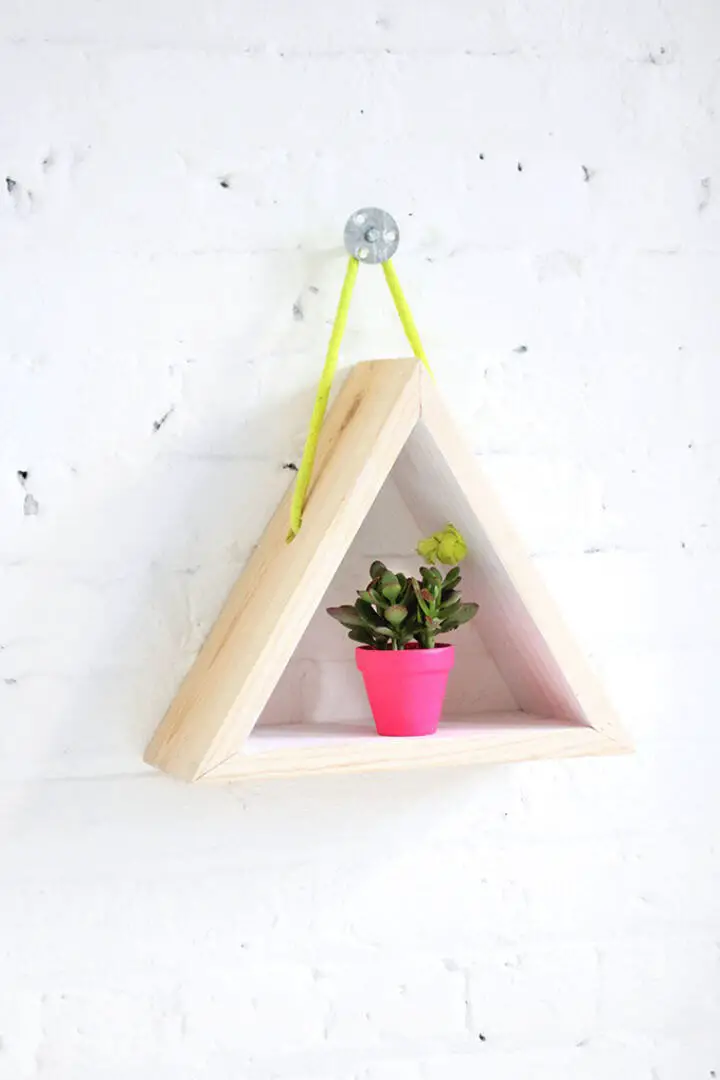
Handmade Triangle Hanging Shelves
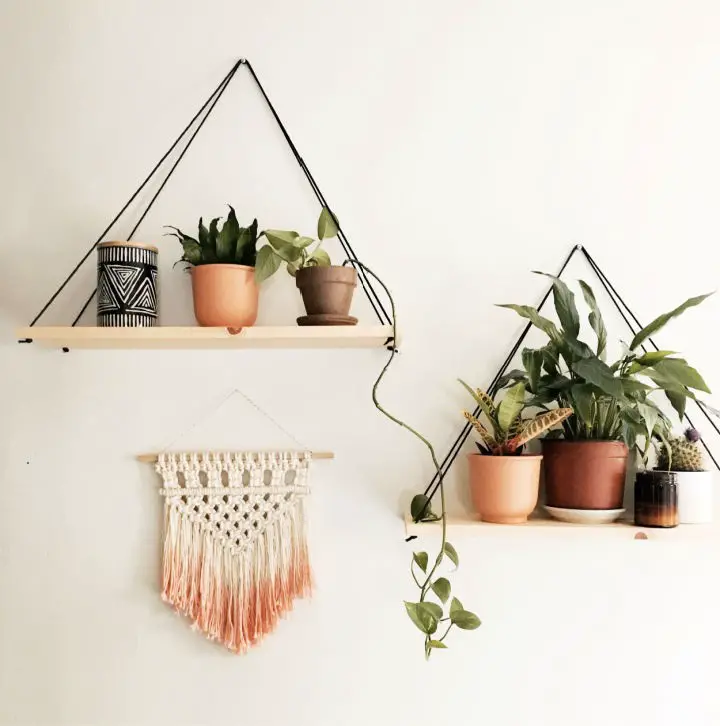
Transforming your space just got a whole lot easier with DIY Triangle Hanging Shelves, courtesy of the talented Liz Morrow. In under 15 minutes and with minimal floor space required, you can create functional and stylish shelving that’s perfect for showcasing plants or decorative pieces. To get started, you’ll need a few simple materials – a common board, some rope or cord, and basic tools like a saw and drill. Once you have everything you need, follow Liz’s straightforward steps to cut your board, secure your shelves on the wall, and add a unique touch to any room. For more inspiration and tutorials from Liz Morrow Studios, visit their website today.
Unique Triangle Shelf Design

Transform your space with the versatility of DIY Triangle Shelf, brought to you by Pacific North Jess. This engaging project allows for creative freedom in terms of size and materials, catering to individual tastes and home décors. As you embark on this hands-on journey, you’ll master the art of selecting the perfect wood type and precision-crafting precise angles for a flawless assembly. Perfect for those who relish personalized DIY experiences and unique home accents, this tutorial promises a satisfying building experience. Whether you’re crafting solo or sharing the adventure with a friend, Pacific North Jess’s step-by-step guide will guide you through the process, resulting in a one-of-a-kind triangle shelf that reflects your personal style.
How to Make Triangle Shelves
Transform your home decor with the modern simplicity of DIY triangle shelves. Not only do they provide extra storage space, but they can also be used to showcase cherished items like plants, books, or collectibles. The best part? You don’t need to be a seasoned crafter to create these unique pieces, thanks to Instructables’ step-by-step guide. With their help, you can easily craft shelves that serve as both functional storage solutions and striking wall art. Start your project today and discover how these eye-catching triangles can instantly elevate any room.
Easy DIY Triangle Shelf
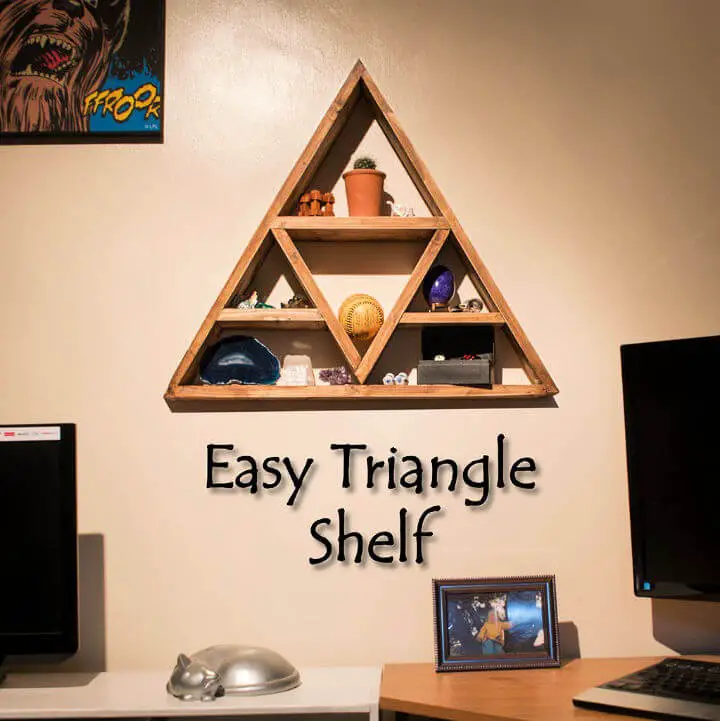
Elevate any space with the versatility of an Easy Triangle Shelf, where style meets functionality. This DIY project is a breeze to execute, requiring minimal tools and materials. Perfect for those who crave a touch of sophistication in their decor, this shelf also offers ample storage room. For a comprehensive guide on how to create your own Easy Triangle Shelf, head over to Instructables. With its effortless simplicity, you can transform your room’s ambiance and organization in the blink of an eye.
Making Wooden Triangle Shelves
Transform your space with the understated elegance of DIY Wooden Triangle Shelves. According to The Merrythought, these sleek shelves are not only visually striking but also surprisingly straightforward to create. With just a few essential tools such as a circular saw, wood glue, and a nail gun, you can quickly assemble these modern shelving units. Ideal for displaying cherished trinkets or lush greenery, they provide an effortless way to infuse your home with a personal touch. Join in on this engaging project and discover how effortlessly enhancing your home decor can be.
Rustic DIY Hanging Triangle Shelf

Transform your home decor with a creative DIY Hanging Triangle Shelf, perfect for showcasing plants, books, or decorative pieces. Following HGTV’s expert guidance, bring this stylish project to life by first preparing wooden dowels through cutting and sanding, then adding a natural touch with stain. Next, give PVC fittings a pop of color with paint, assemble the frame, and add those finishing touches that make all the difference. With this unique piece, crafting enthusiasts can elevate their living space while enjoying a sense of accomplishment.
Super Cool Triangle Shelf Idea
Elevate your living space with a minimalist and geometric masterpiece: a DIY Triangle Shelf. As design trends shift towards simplicity and sleekness, crafting your own elegant piece can add a personal touch without breaking the bank. This project is accessible to anyone willing to take on a DIY challenge, requiring only basic supplies from the hardware store and simple assembly steps. Perfect for showcasing cherished accessories, this chic triangular shelf is a cost-effective way to bring visual interest into any room. For a comprehensive guide, visit the tutorial here.
Colorful DIY Triangle Shelves
Elevate any room’s ambiance by infusing it with personal touches using these straightforward DIY triangle shelves. Following the expert guidance of Josh and Sarah, gather a few fundamental materials such as pine boards, wood glue, and a miter saw, then follow their clear step-by-step instructions. With the flexibility to choose from a natural finish or add a pop of color with paint, these versatile shelves can be tailored to suit any style. Whether you’re looking for a thoughtful gift or seeking to enhance your own living space, discover how to bring this creative project to life at A Beautiful Mess.
How to Make a Triangle Shelf
Embark on a creative journey by crafting a one-of-a-kind triangle shelf with Petite Modern Life’s guidance. From selecting the ideal wood at your local hardware store to mastering precise miter saw cuts at a 30-degree angle, you’ll navigate each step with confidence. When unexpected setbacks arise, such as conflicting wood stain options or stubborn paint, you’ll be equipped to overcome them effortlessly. With the flexibility to customize the shelf’s size and finish to suit your style, this DIY project becomes a versatile addition to any room in your home. Kickstart your DIY adventure today and infuse your space with a personal touch.
Homemade Hanging Triangle Shelf
Elevate your DIY skills with this modern and effortless hanging triangle shelf project. A creative spin on a popular Pinterest find, this tutorial from I SPY DIY demystifies the process of transforming basic materials into a sleek storage solution. Simply combine wooden triangles, rope, dye, and a drill to craft a one-of-a-kind piece that effortlessly adds charm to any room corner. By embracing repurposed design and incorporating personal touches, you’ll create a unique decorative element that showcases your resourcefulness and flair.
How to Build a Triangle Display Shelf
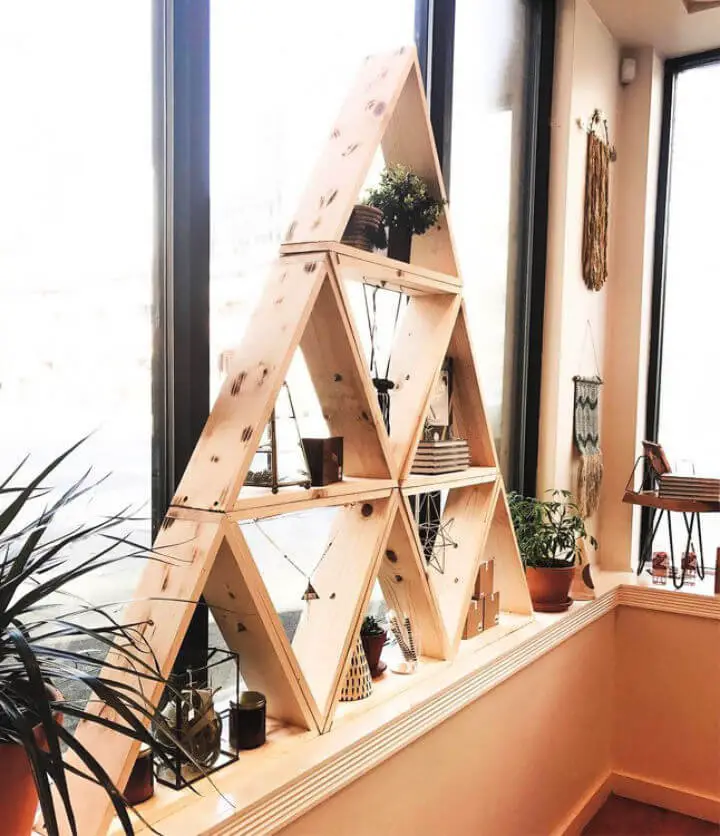
Bring creative flair and functional storage to your space by crafting a DIY Triangle Display Shelf inspired by Poppytalk’s simple guide. Constructed from readily available pine boards and basic hardware, this unique shelf injects visual interest and usability into both retail and residential settings. By incorporating natural light through transparent elements, it offers an innovative way to showcase items while allowing for effortless visibility. To personalize the project, consider adding a pop of color with paint, stain, or even wood-burning techniques. As you embark on this DIY journey, you’ll be rewarded with a stylish and practical addition that seamlessly blends with your existing décor.
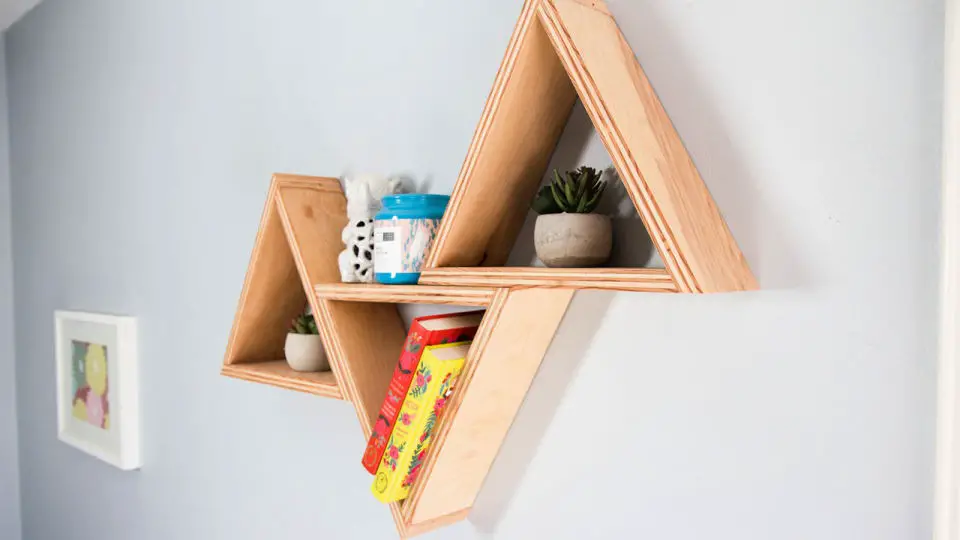
DIY Triangle Shelves for Wall Decor

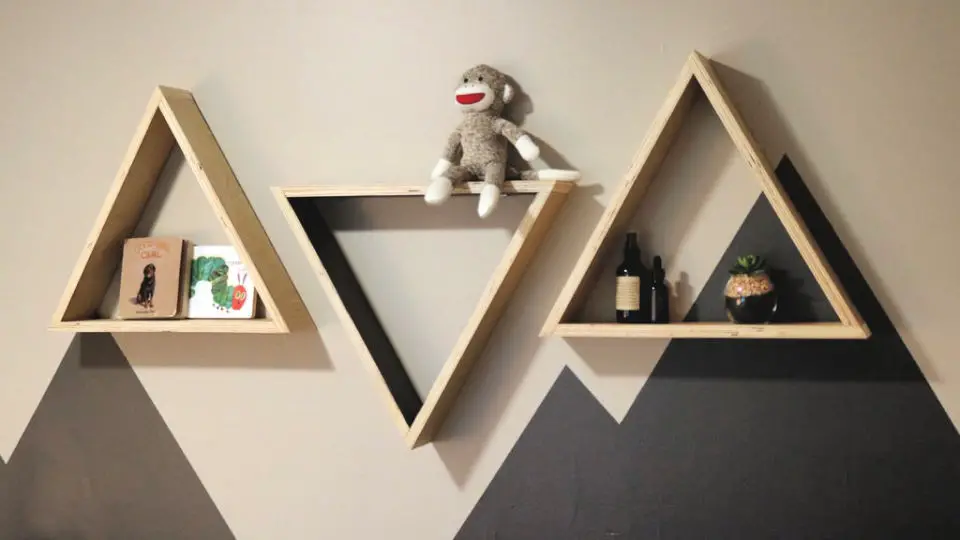
Transform your home’s aesthetic with these easy-to-make DIY triangle shelves. Not only do they bring a touch of modern sophistication to any room, but they also provide a unique and functional way to showcase your favorite books, decorative items, or plants. Inspired by the minimalist chic often seen in urban settings, these customizable shelves can be tailored to fit any space or style. In this post, I’ll walk you through a straightforward method for creating triangle shelves using precise 30-degree angle cuts, making it an ideal project for a relaxing weekend afternoon. Not only will you be adding a stylish touch to your home, but you’ll also have the satisfaction of having crafted something with your own hands.
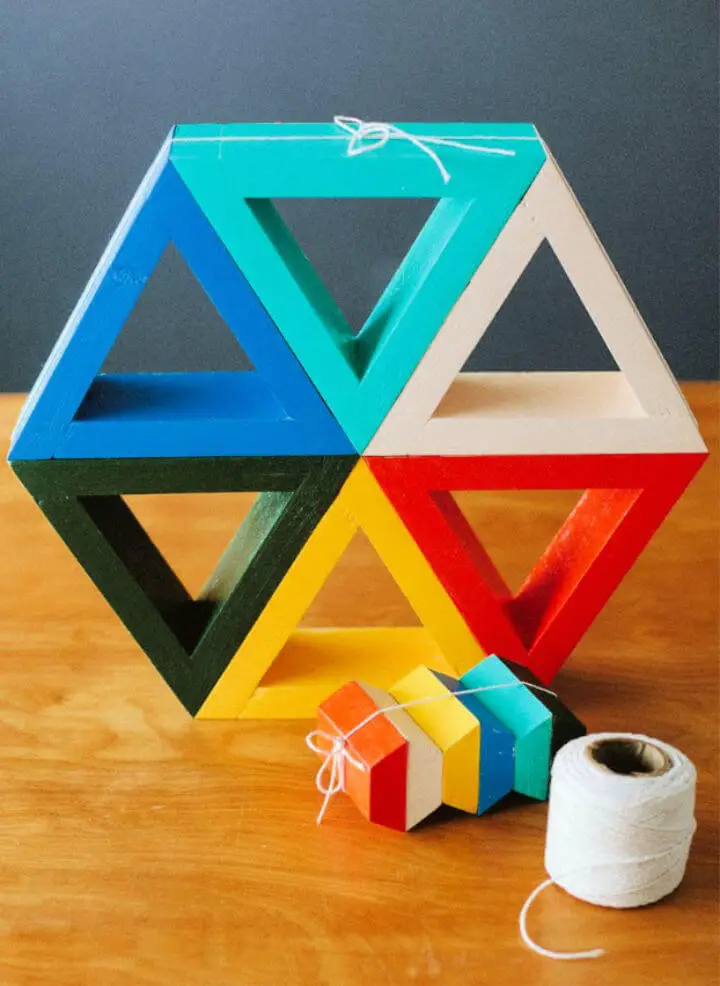
Build Hexagon and Triangle Shelves

Transform your living space with effortless style and budget-friendly flair by creating chic DIY Hexagon and Triangle Shelves. Crafted from a single 1x6x8 board, these versatile shelves offer a stylish solution for showcasing your favorite items without breaking the bank. With a step-by-step guide on My Love 2 Make, assembly becomes a seamless process, allowing you to customize the size to fit your space perfectly. Whether you opt for the sleek, geometric hexagon design or the edgy, angular triangle shape, these shelves promise to bring a unique touch to your home décor. Perfect for DIY enthusiasts seeking to elevate their interior on a budget!
DIY Triangle Shelves Under $20
Transforming a single sheet of plywood into multiple stylish triangle shelves has never been more accessible or affordable, all under $20! With the guidance of Mr. Fix It DIY, you can create a personalized space that showcases your favorite succulents, candles, or small books. The straightforward instructions cover materials, cutting, assembling, and finishing, making this project not only budget-friendly but also an excellent way to add a touch of uniqueness to your walls.
IKEA Hacks:
To ensure the sentimental value of treasured possessions endures, it’s essential to provide them with extra care. One creative way to showcase cherished keepsakes is by repurposing IKEA Billy Bookcase Hacks for a unique and budget-friendly home decor solution. By putting your own spin on this versatile piece of furniture, you can create a stunning wall display that will be the envy of all who see it.
Conclusion:
As you conclude our in-depth exploration of 16 innovative DIY triangle shelf ideas, you’re now empowered with the skills and creativity to create your very own one-of-a-kind triangle shelf. Not only will this piece of furniture elevate the aesthetic appeal of any room, but it also serves as a practical display space for showcasing your most treasured possessions. Through our step-by-step guide, we’ve guided you through every stage of the DIY process, from sourcing the necessary materials to adding those finishing flourishes that bring it all together. The end result is a truly rewarding DIY experience that adds a touch of personality to your home’s décor. With this newfound confidence and inspiration, why not start your DIY adventure today and breathe life into your triangle shelf ideas?
