Why Build a DIY Toddler Bed?
While building a DIY toddler bed may seem like a daunting task, the rewards far outweigh the challenges. This hands-on approach offers a multitude of benefits that extend beyond just saving money. By taking on this project, you can create a personalized sanctuary for your child that not only reflects their unique personality but also serves as a symbol of quality and craftsmanship. With DIY construction, you have complete control over the materials used, ensuring a sturdy and safe bed that’s free from harmful chemicals often found in mass-produced furniture. Moreover, building a bed with your child can be a fantastic bonding experience, fostering a sense of ownership and accomplishment as they participate in every stage of the process, from planning to painting. This project also presents an opportunity for you to develop your woodworking skills, solving problems, following plans, and learning new techniques along the way. Plus, building a bed yourself can be significantly more cost-effective than purchasing one pre-made, allowing you to choose materials that fit your budget and avoid unnecessary markups. Perhaps most importantly, creating something with your own hands yields a deep sense of satisfaction and pride, knowing that every time your child hops into their new bed, they’ll be surrounded by the love and effort that went into making it.
How to Build a Toddler Bed
With the goal of creating a toddler bed that is both sturdy and entertaining, featuring an integrated slide and storage, it’s understandable to feel intimidated by the project. However, by following a clear and concise guide from start to finish, even the most novice woodworker can successfully bring this vision to life. This comprehensive guide will walk you through every step of the process, from preparing the timber to final assembly, providing all the necessary information required to confidently build a delightful toddler bed that your little ones will love.
Preparing Your Materials
When it comes to constructing a wooden fence, the type of timber you choose can greatly impact the overall cost and appearance of the project. A budget-friendly option is to start with Redwood Pine, which offers a paint-friendly surface that’s easy to work with. Alternatively, if you prefer the durability of hardwood, Maple is an excellent choice.Before construction begins, it’s essential to measure and cut your timber according to the specific dimensions required by your project. This includes cutting bed posts, barrier posts, rails, slats, and supports to their precise lengths.In addition to cutting the timber to size, you’ll also need to address any imperfections that may be present in the wood. This can include filling knots or voids with a 2-part wood filler and then sanding the area smooth.Finally, when working with slats, it’s crucial to rip them to their final width and then lightly sand the edges to remove any sharpness and ensure a safe and comfortable surface.
Constructing the Barrier
To accommodate the bed rail, modify the barrier posts by cutting sections to fit snugly around it. For a sleeker appearance, bevel the front edges of the posts to soften their profile. Next, use a drill guide and Forstner bits to create holes for bolting the barrier to the side rail. This will ensure a secure and sturdy attachment. Finally, prepare the barrier posts and rails by drilling dowel holes that are precisely placed and deep enough to provide a solid connection.
Building the Headboards
To create a sturdy and safe headboard assembly, start by labeling and drilling distinct bedposts. This involves using a drill guide to precisely locate dowel and bolt holes, ensuring each post is uniquely marked for its hole layout. Next, utilize a router to smooth out all exposed edges on the posts and rails, eliminating any sharp or hazardous corners that could cause injury.
Moving forward, it’s crucial to assemble the headboard components by gluing dowels into their respective posts and attaching the rails. To guarantee a secure fit, apply clamps to hold everything in place while the glue dries.
Attaching the Long Rails and Slat Supports
To secure the slats in place, attach the slat supports to the long rails, carefully ensuring they are centered and evenly spaced. A simple yet effective method involves applying glue and screws to hold them firmly in position. Next, use a palm router to add a 1/8 inch round-over to all rail edges, except where the slats will rest. This subtle detail adds visual appeal and helps to prevent any rough edges from causing discomfort.
Final Assembly Steps
To ensure a sturdy foundation, begin by pre-drilling holes in the bed slats for secure attachment under the mattress. Once this is done, move on to assembling the frame itself. This involves connecting headboards to long rails using furniture bolts and carefully inserting dowels to prevent any gaps or looseness. Next, focus on installing the slats and barrier rail. Start by spacing the slats evenly along the bed frame, then secure them in place with wood screws. Finally, align the barrier rail alongside the side rail and fix it firmly into position, guaranteeing a stable and comfortable sleeping surface.
Paint and Varnish
When it comes to creating a durable and child-friendly environment, it’s essential to start with prime and paint. Begin by priming all paintable surfaces to ensure a strong foundation for your finish coats. Then, apply at least two coats of low VOC, child-safe paint that meets your standards for quality and safety. This approach not only provides a durable finish but also helps minimize the risk of harmful fumes or chemicals in the air. Additionally, consider applying a matte finish varnish to posts made of pine to enhance their natural beauty while maintaining a safe environment for children. By taking these steps, you can create a space that’s both beautiful and secure for kids to explore and play.
Video Tutorial
By combining the written guide provided with the step-by-step YouTube video on making a toddler bed with storage and slide, you’ll gain a more in-depth understanding of the construction process. The visual elements of the video will help clarify complex steps, allowing you to better visualize the process and tackle each stage with confidence.
To successfully complete this project, it’s essential to approach it with careful preparation, accurate measurements, and patience. With both resources at your disposal, you’ll have a comprehensive roadmap that outlines every step, ensuring your toddler bed is not only functional but also a fun and rewarding DIY experience.
FAQs on DIY Toddler Bed Plans
Creating a custom toddler bed through a DIY project can be an engaging experience for parents seeking a one-of-a-kind and cozy sleeping environment for their little ones. To guide you in starting this venture, we’ve addressed some common queries below, providing valuable insights to ensure your project’s success.
What materials do I need to build a DIY toddler bed?
To embark on a woodworking project for a child’s piece of furniture, you’ll need to gather the following essential materials. These may include durable timber options like Redwood Pine or Maple, as well as wood screws and bolts for assembly purposes. Additionally, having a reliable supply of wood filler will come in handy for filling any imperfections. To ensure a smooth finish, don’t forget to stock up on sandpaper. Your chosen paint or varnish should also be suitable for use on children’s furniture, given the intended audience. Finally, it’s crucial to have a well-stocked toolbox featuring a saw, drill, router, and clamps to help you shape and assemble your project with precision.
How much will it cost to build a DIY toddler bed?
When it comes to calculating the cost of your project, several factors come into play. The type of materials you select and whether you already own the necessary tools will significantly impact the overall expense. On average, the cost can range from $50 to $200. To keep costs more manageable, consider opting for more budget-friendly wood options and leveraging any existing tools at your disposal.
Is it safe to build a toddler bed myself?
When crafting a DIY toddler bed, it’s crucial to prioritize safety above all else. To ensure a hazard-free experience for your little one, make sure to smooth out any rough edges or surfaces with sandpaper or a file. Additionally, double-check the overall stability of the bed frame to prevent tipping or collapse. Moreover, opt for child-safe paints and finishes that meet rigorous standards. By following these simple yet essential guidelines, you can create a cozy and secure haven for your toddler to sleep and play.
Can I make a toddler bed without advanced woodworking skills?
When it comes to DIY toddler bed projects, many plans are intentionally designed for beginners. These guides provide clear step-by-step instructions that eliminate the need for extensive woodworking experience. The Kreg Jig is a valuable tool in this context, as it simplifies tasks like drilling pocket holes and makes the project more manageable for those without advanced skills.
How do I ensure the bed is the right size for my child?
When it comes to DIY toddler bed plans, it’s essential to consider the size of your mattress from the start. The majority of these plans are designed with standard crib mattresses in mind, which typically measure around 52 inches long by 27.5 inches wide. To avoid any potential issues, make sure to double-check the dimensions of your mattress and adjust the plans accordingly if necessary. This will help ensure a snug fit and prevent any gaps or obstructions that could compromise the bed’s stability or safety.
Can I add storage or other features to the toddler bed?
When it comes to DIY bed plans, many designs offer customization options that cater to individual tastes. For instance, under-bed storage compartments or guard rails can be incorporated to enhance functionality. Furthermore, themed bed frames – think house-shaped or vehicle-inspired designs – can add a touch of whimsy and personality to the room. The beauty of DIY projects lies in their ability to be tailored to one’s unique needs and preferences, allowing users to put their own creative stamp on the final product.
Where can I find step-by-step instructions or tutorials for building a DIY toddler bed?
Abundant online resources, including DIY blogs, YouTube channels, and dedicated woodworking websites, provide an extensive array of free and paid toddler bed plans accompanied by detailed instructions and visual aids. Popular platforms such as JenWoodhouse.com and AnaWhite.com offer a wealth of information to get started.
20 DIY Toddler Bed Plans Free (Build DIY Kids Bed)
Create a cozy and customized sleep sanctuary for your tiny tot by crafting their own DIY toddler bed using these 20 comprehensive and absolutely free plans, complete with step-by-step guidance. Give your child’s bedroom a personal touch by building a one-of-a-kind kids’ bed that reflects their unique personality.
DIY Kids House Bed with Storage
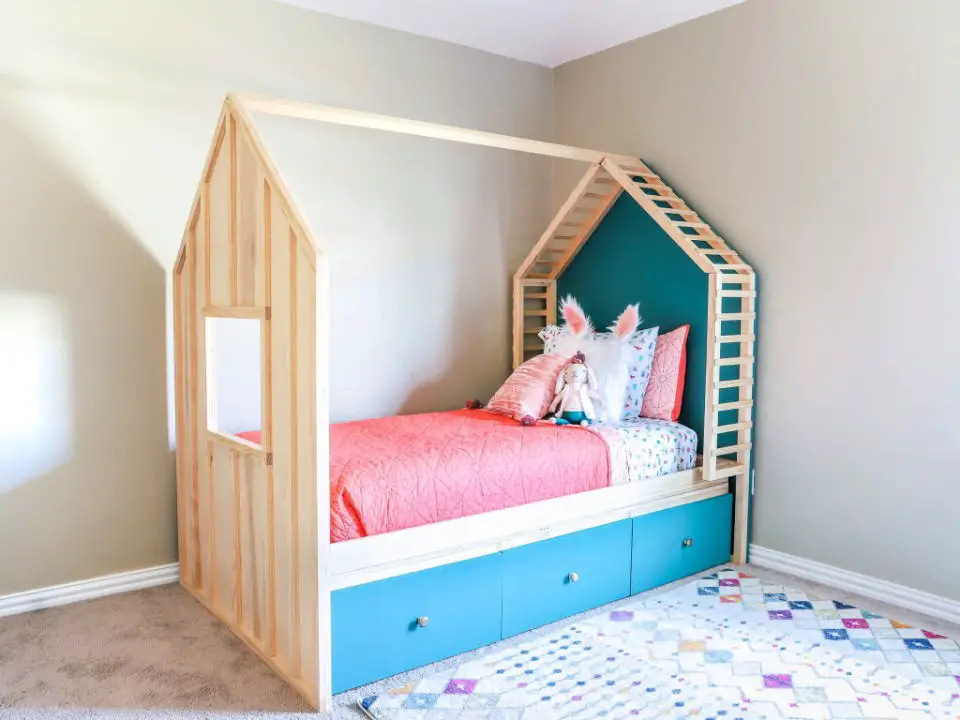
Transforming your child’s room into a whimsical haven just got a whole lot more fun and practical! With the DIY Kids House Bed, you can combine functionality with playfulness, creating a perfect space for your little one to store their treasures and toys. And the best part? It’s incredibly easy to build, thanks to the comprehensive guide on JenWoodhouse.com. The bed boasts not only storage drawers but also a cozy retreat that will delight your child. The project is packed with step-by-step instructions, accompanied by helpful photos and a video tutorial. So why wait? Grab your tools and get started on building a magical space for your child today!
How to Build a Kids Teepee Bed
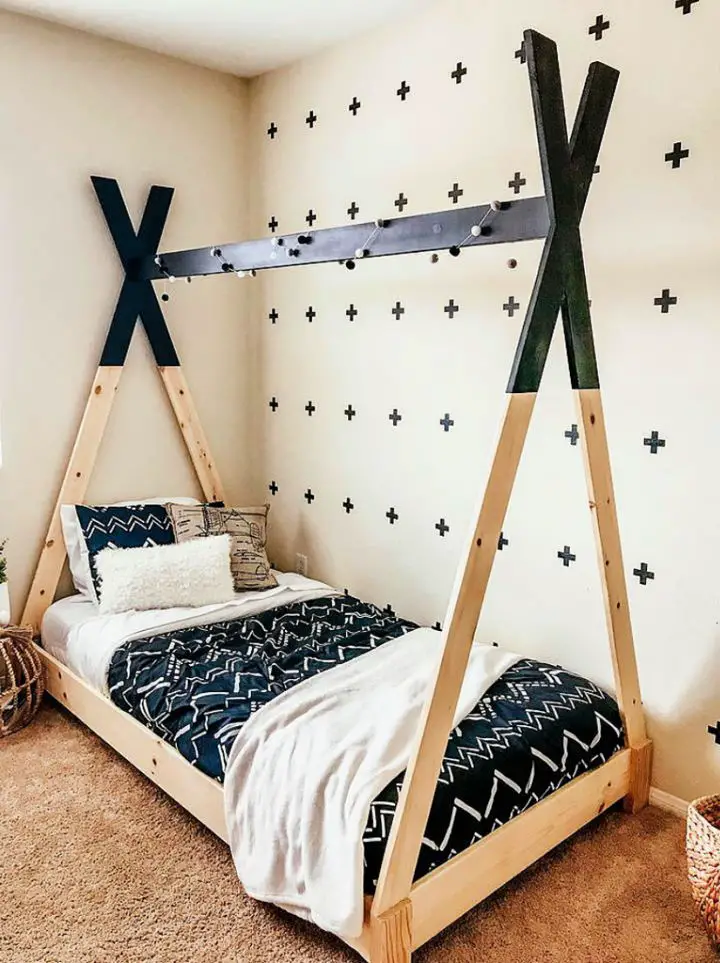
Transform your child’s bedroom into an immersive adventure zone with a DIY Kids Teepee Bed, carefully crafted by M. E Refined Designs. This bed is more than just a place to rest; it’s a catalyst for creative exploration and imagination. The teepee’s natural wood finish and striking black accents create a striking focal point in any child’s room. To get started on this engaging project, head over to Handmade Haven for a comprehensive plan and material list that makes the building process a breeze.
Kids Cabin Bed out Of Plywood
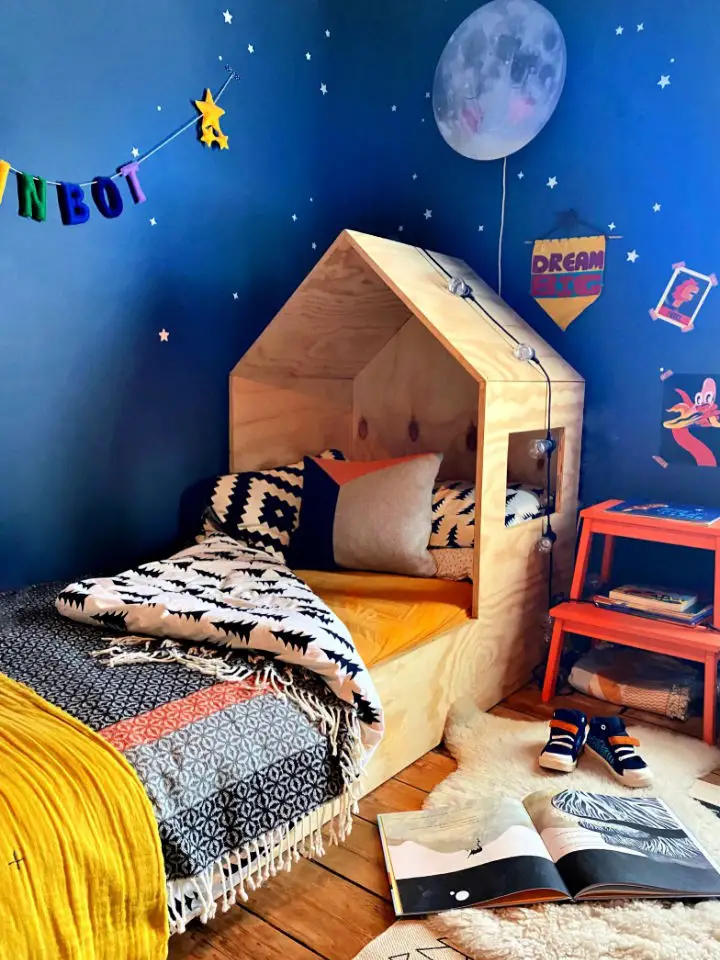
Transform the humble abode of your little ones into an inviting sanctuary by constructing a DIY Plywood Cabin Bed, carefully crafted to harmonize with unisex children’s bedroom décor. Our personal experience and passion for creating a special haven for our son inspired this unique bed design, which not only promotes comfort but also encourages imagination and creativity. The soothing blue undertones blend seamlessly with vibrant yellow and orange accents, yielding a serene sleeping quarters that effortlessly transitions into a playful retreat. For a comprehensive, step-by-step guide to building this functional yet imaginative masterpiece, visit The Wooden Hill. By designing a room that adapts to your child’s evolving needs, you’ll be nurturing joy, creativity, and a lifelong love for their personal space.
How to Build a Rustic Kid’s Bed
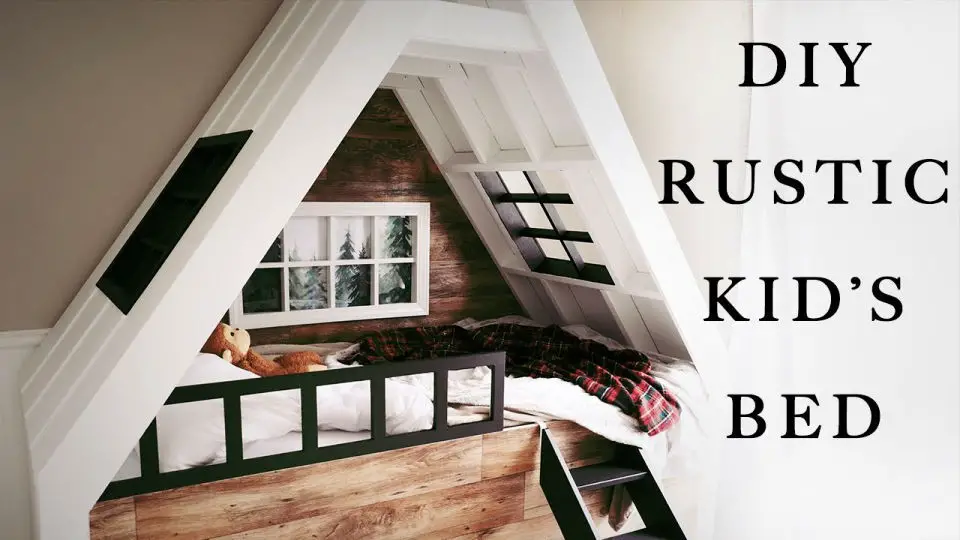
Imagine a rustic kids’ bed that’s more than just a piece of furniture – it’s an invitation to adventure and sweet dreams. Build Basic’s comprehensive guide takes you on a journey from design inspiration to the final touches, teaching you how to craft a charming A-frame style bed with optional trundle for extra space. The tutorial is designed to be easy to follow, allowing you to assemble and disassemble the bed with ease, making it perfect for moving or reshuffling rooms. For the complete step-by-step guide and downloadable building plans, click here.
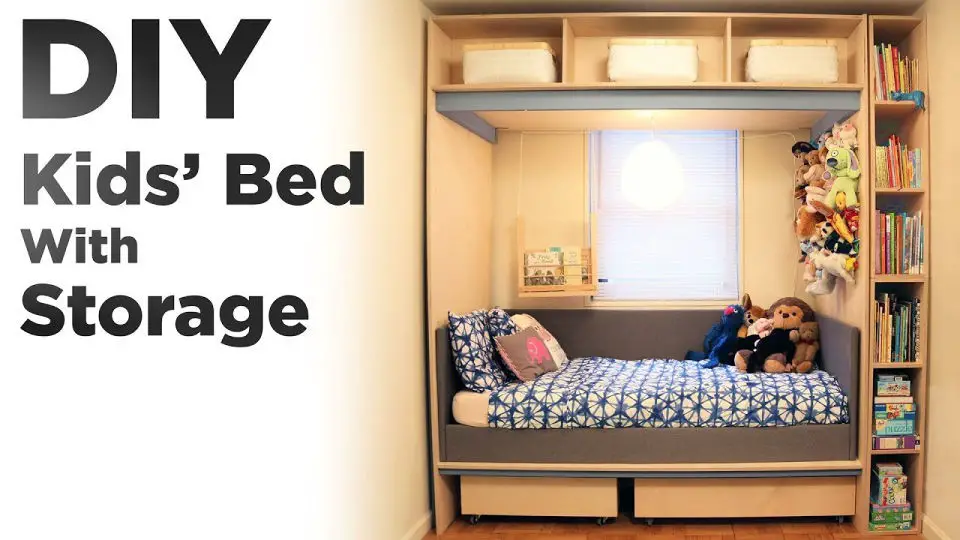
DIY Kids Bed with Storage
Transform your child’s bedroom into a cozy oasis by creating a DIY toddler bed with storage. This innovative project is perfect for small spaces, providing ample storage for toys, books, and art supplies while freeing up floor space. With our easy-to-follow tutorial, you can revitalize your kid’s room in just three days, making it a clutter-free sanctuary.
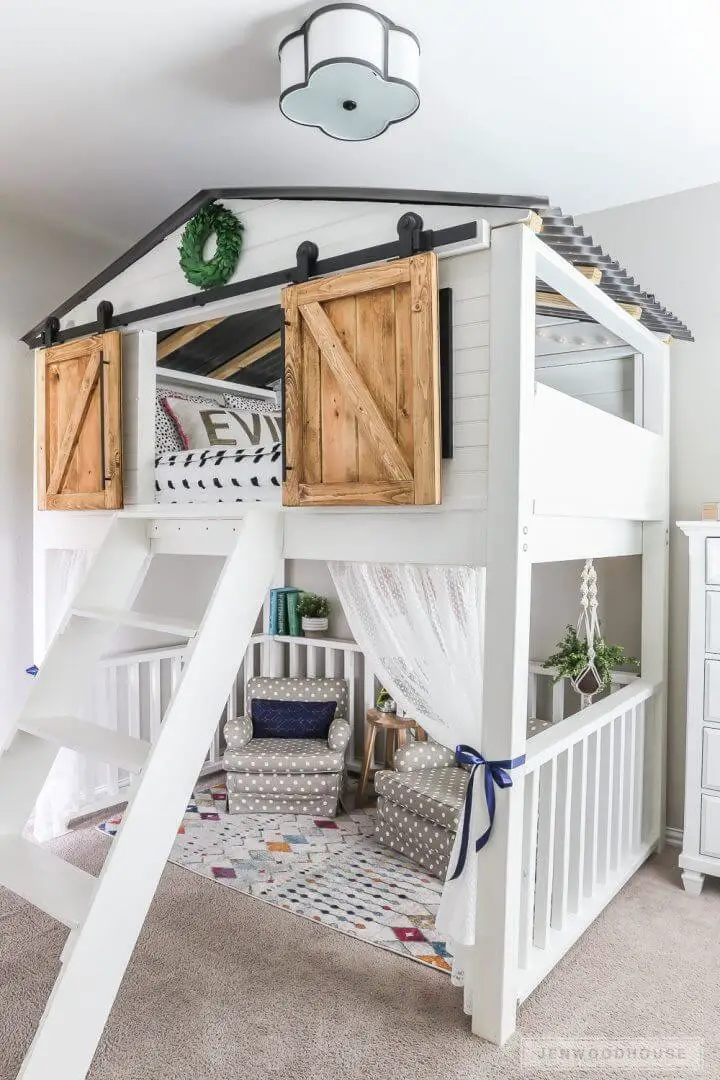
Build Sliding Barn Door Loft Bed
Transform your living space with the warmth of DIY craftsmanship. By building a charming Sliding Barn Door Loft Bed, you can effortlessly merge functionality with rustic charm. This project is perfect for full-size mattresses and serves as more than just a cozy retreat – it’s a statement piece that elevates the overall aesthetic of your room.
With an estimated budget of $550 and suitable for 9-foot ceilings, this creative endeavor promises to be a rewarding experience. For a detailed, step-by-step guide, comprehensive materials list, and valuable insights to ensure your project is a success, visit Jen Woodhouse’s website. Begin bringing your dream bed to life today!
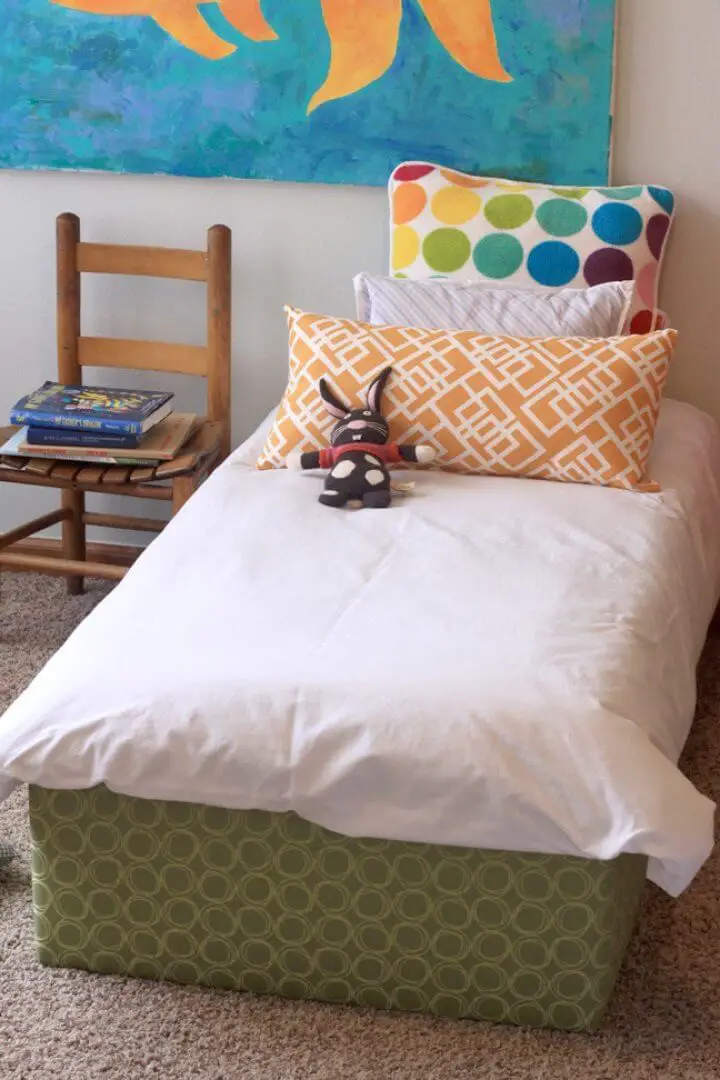
DIY Two Toddler Beds for $75
On Design Mom, you’ll find an engaging and budget-friendly project that shows you how to construct two adorable toddler beds for just $75. These compact beds cleverly utilize crib-size mattresses, ensuring a comfortable fit without overwhelming the space. This step-by-step guide seamlessly blends practicality with creativity, making it an accessible and appealing option for anyone looking to create a cozy and safe sleeping environment for their little ones. Whether you’re building one bed or tackling the project with a friend to make two, this guide makes it possible to bring your vision to life.
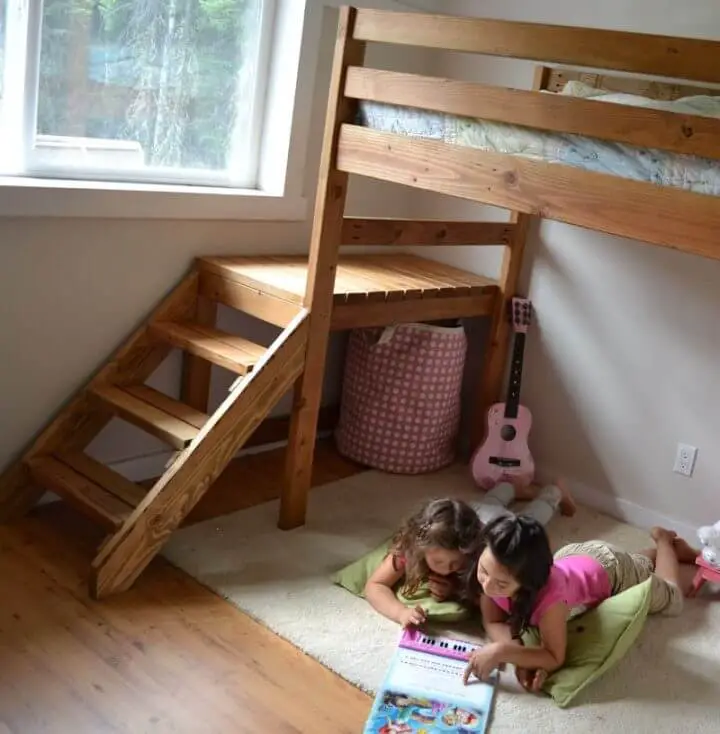
Making a Camp Loft Bed With Stair
For parents seeking a tailored sleep solution for their toddlers, DIY toddler bed plans offer a unique opportunity to create a personalized haven for little ones. The Camp Loft Bed with Stair, Junior Height, is an ideal choice for smaller spaces, boasting a sturdy and appealing design crafted from robust 2×4 and 2×6 lumber. This junior height loft bed is perfectly suited for rooms measuring just over 8×8, optimizing space without sacrificing storage. One of its standout features is the convenient platform providing easy access, transforming bedtime into a fun and safe experience. Imagine cozying up with your child during bedtime stories, all while enjoying the extra space created by this cost-effective and beautiful loft bed design. For a step-by-step guide on how to build this impressive structure, visit Ana White for inspiration.
Handmade Bunk Beds for Kids
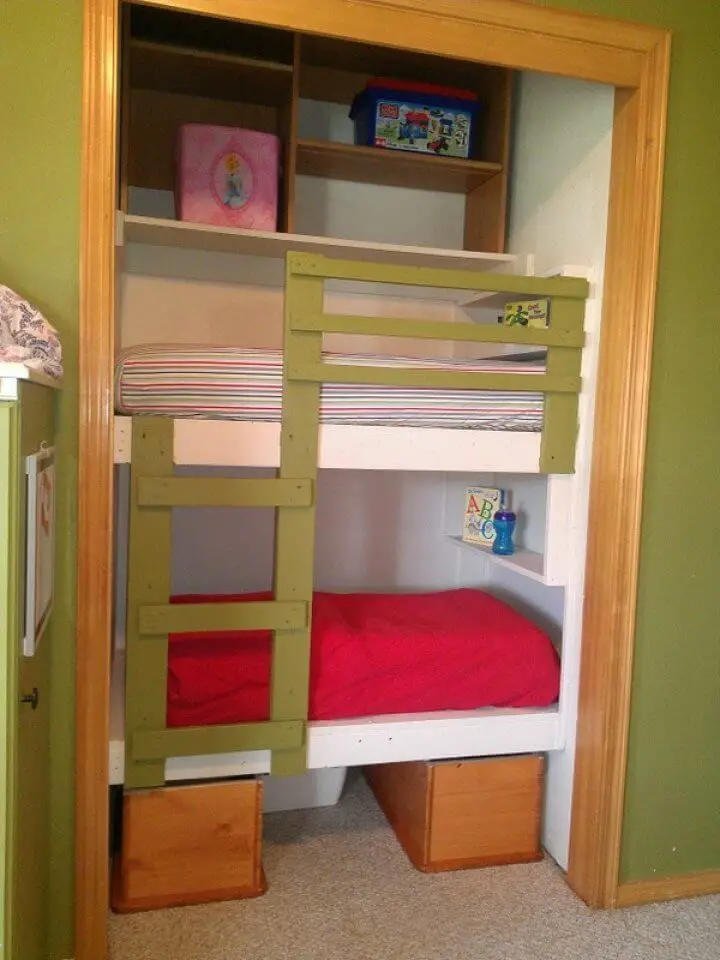
Transforming an ordinary closet into a cozy bunk bed area is a game-changer for small homes. With a little creativity, you can turn a tight space into a functional retreat that’s both charming and practical. This DIY project is perfect for families looking to add a personal touch to their children’s bedrooms without sacrificing functionality. By breaking down the process into manageable phases, from demolition to painting and finishing touches, you’ll be equipped to take on this engaging challenge and create a space your kids will cherish. For more inspiration and guidance, head over to theycallmegranola.
Build a Micro-bus Bunk Bed and Playhouse
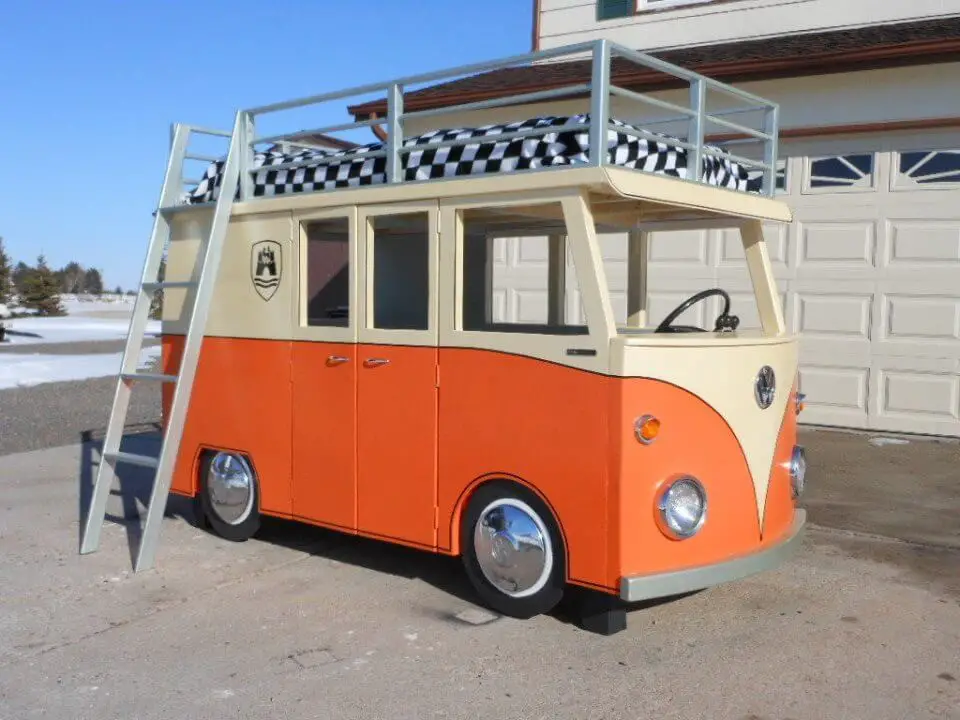
Transform the bedroom of your little adventurer into an enchanting playground by bringing the Micro-Bus Bunk Bed and Playhouse to life. This DIY project is a labor of love that combines creativity, functionality, and whimsical design, making it the perfect gift for any child who loves adventure and Volkswagen. Whether you’re planning a cozy nook or a sleepover extravaganza, this charming structure can easily accommodate a single mattress, providing a restful retreat or a fun play area. To get started on your own Micro-Bus Bunk Bed and Playhouse project, head over to Instructables for detailed instructions and a step-by-step guide that will walk you through the process of bringing this imaginative playground to life.
DIY Clubhouse Bed for Kids
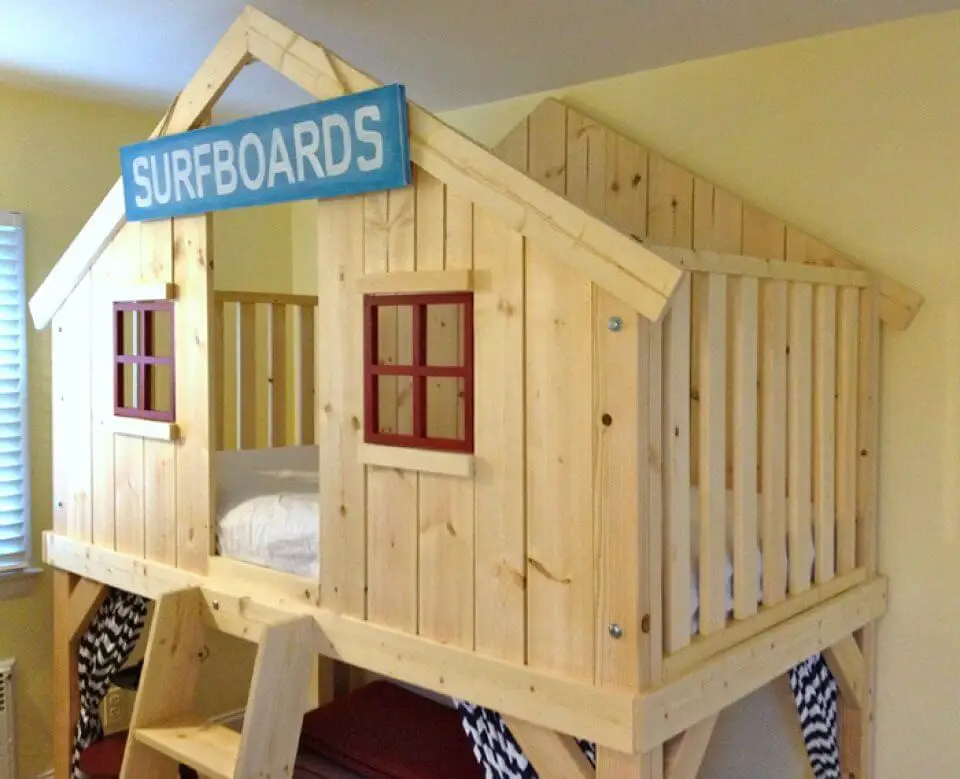
Transform any bedroom into a whimsical retreat for your little ones with Ana White’s inspiring DIY project, the Clubhouse Bed. This intermediate-level build offers a sturdy and enchanting space for sleep, imaginative play, and making cherished memories. With its hidden fort below and playful design above, this clubhouse bed is the perfect spot for kids to let their creativity shine.
Build Kids Teepee Trundle Bed
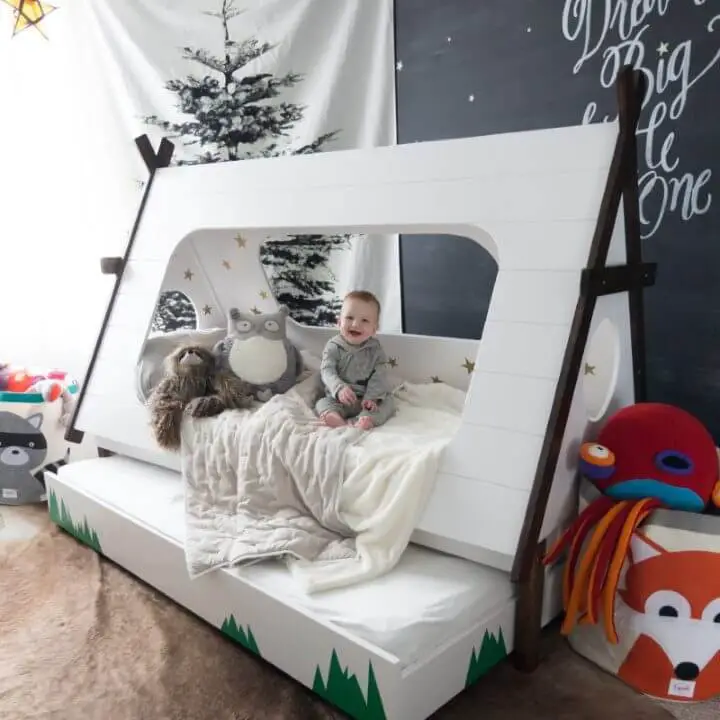
Transform your toddler’s bedroom into a whimsical retreat with a stylish DIY teepee trundle bed. By opting for affordable Ikea VYSSA SLÖA mattresses, you can create a cozy and safe space for play and rest without breaking the bank. The key to success lies in meticulous preparation, ensuring every wooden piece is smooth to the touch and free from splinters. This enchanting bed not only serves as a captivating centerpiece but also cleverly features a trundle, maximizing space and functionality. To bring this magical bed to life, follow a detailed step-by-step guide on Imgur.
Hanging Kid’s Bed for Under $100
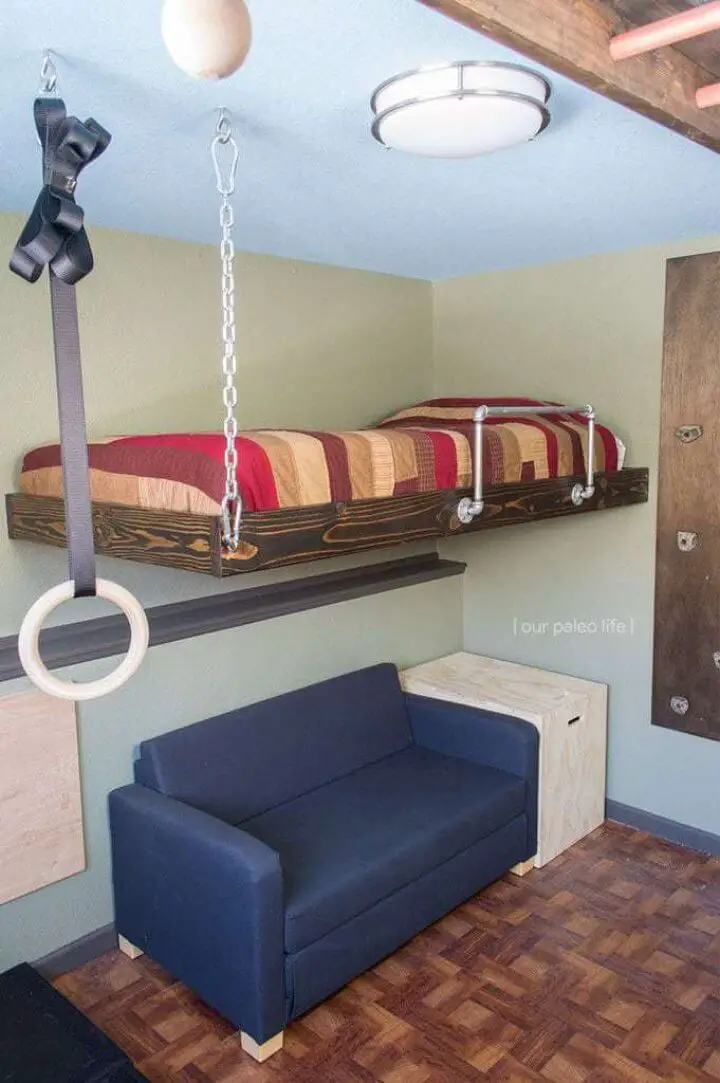
Transform small spaces into cozy retreats by embracing creativity! A floating bed is an innovative solution that not only conserves floor space but also infuses a unique character to any room. By following this comprehensive guide, you can build your own hanging bed and unlock the secrets of creating a one-of-a-kind haven. From sourcing materials to adding the finishing touches, every step is meticulously outlined to ensure success, even for those new to DIY projects. Whether it’s for an outdoor reading nook or a playful kids’ loft bed, this project is budget-friendly and achievable. Start crafting your dream floating bed today and watch as your room transforms into a stylish, space-efficient sanctuary.
Adorable DIY Toddler House Bed
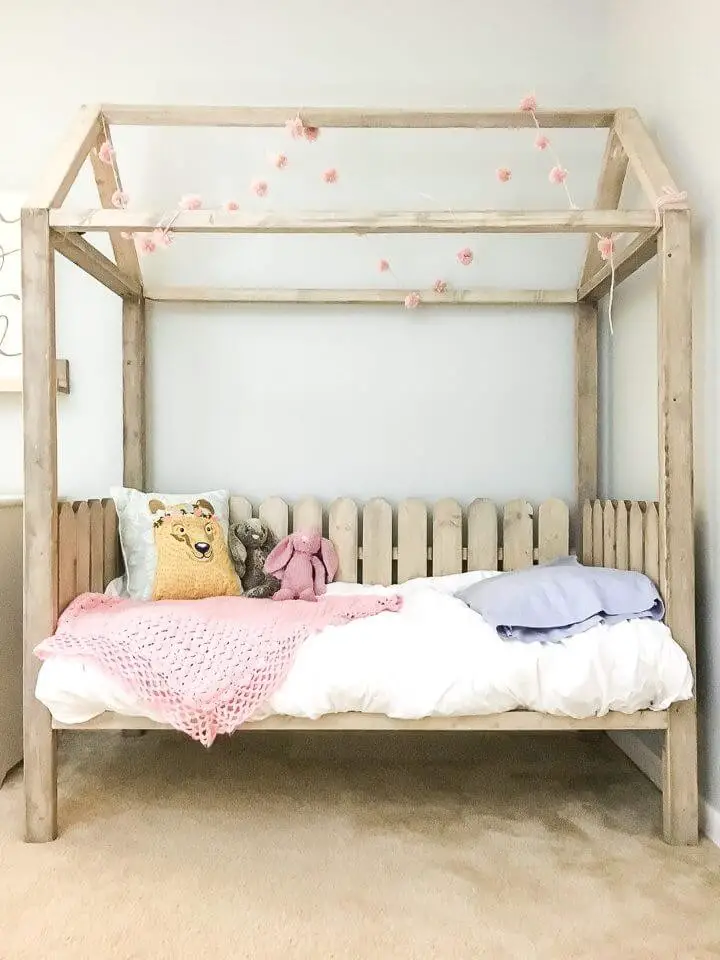
Transform any toddler’s room with a whimsical DIY Toddler House Bed project that’s not only budget-friendly but also easy to create. With just under $50 in materials, you can turn a simple sleeping area into an enchanting nook that sparks joy and ignites imagination. Building this bed is all about infusing it with love and creativity, resulting in a delightful space that your little one will adore.
Handmade Wooden Loft Bed for Kids
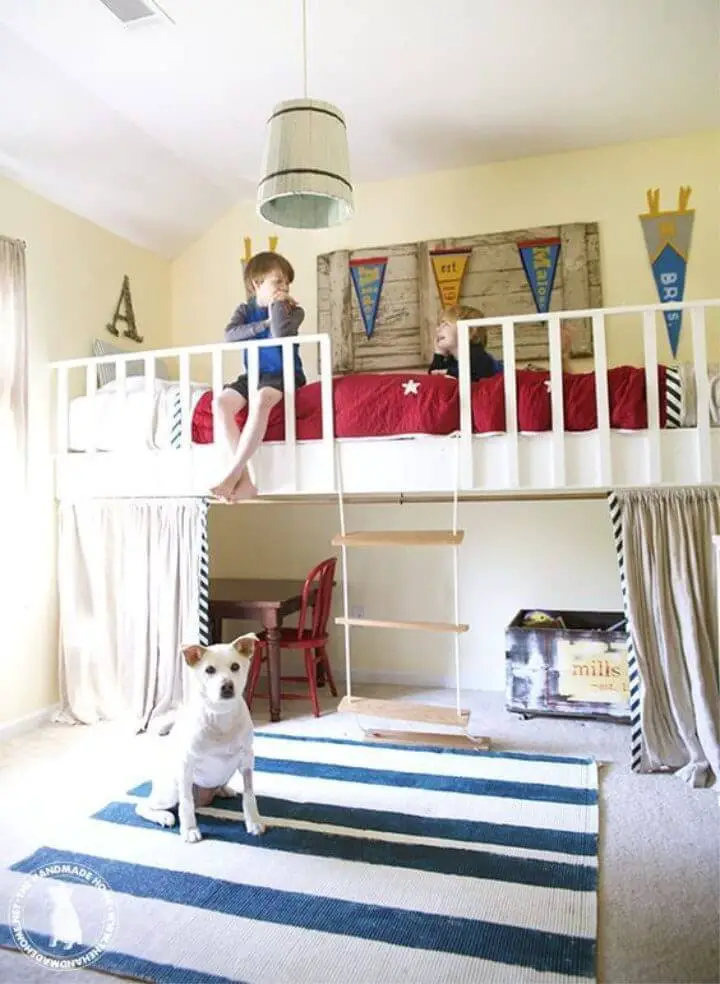
Transform your child’s bedroom into a playful sanctuary with our comprehensive guide to building a loft bed. This DIY endeavor is easier than you might think, requiring only basic tools, untreated wood for easy customization, and a bit of elbow grease. With our step-by-step instructions, you’ll learn how to construct a sturdy base, attach a secure railing, and even add a fun rope ladder. For the complete materials list and detailed steps, visit The Handmade Home. By following this project, your child’s bedroom will transform into their ultimate haven.
Loft Bed With Storage and a Desktop Space
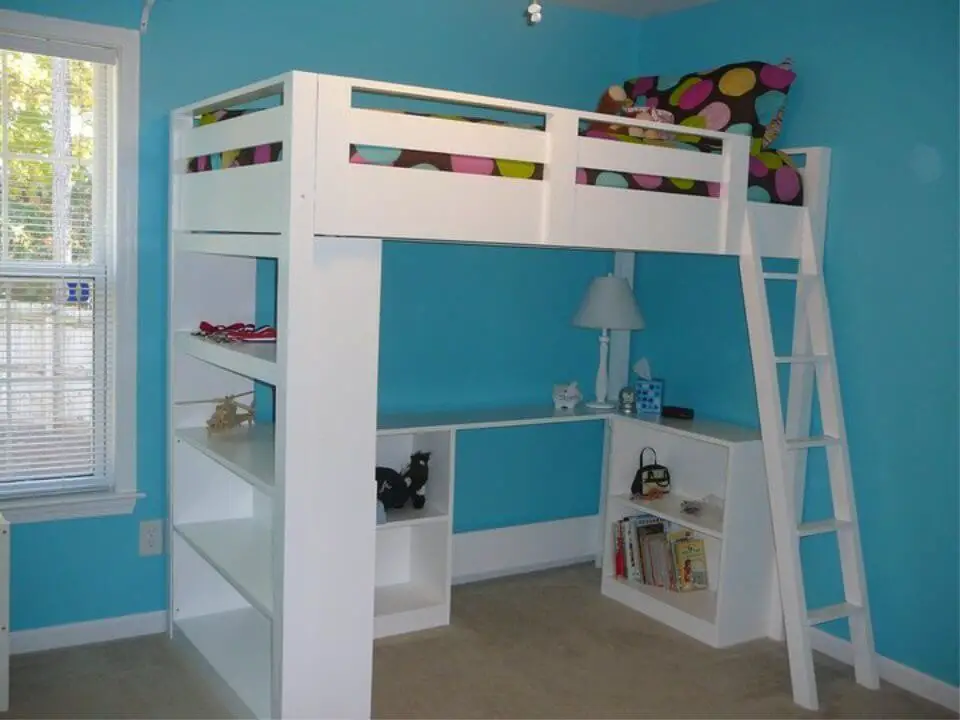
Building a fun and functional bed for your child just got a whole lot easier with these easy DIY kids bed plans. One of the most innovative solutions is an Under Loft Bed Desk System that combines ample storage with a productive workspace, complete with two compact bookcases. This intermediate-level project takes unused under-loft areas and transforms them into a clutter-free environment with stylish functionality, perfect for small spaces. To bring this project to life, follow Ana White’s detailed guide, which includes all the necessary steps and materials. By creating an efficient and elegant space, you’ll be bringing a touch of sophistication to your living area.
Unique DIY $160 Twin Bed
Elevate your DIY game by tackling a twin bed project that seamlessly blends simplicity with sophistication. This comprehensive guide will guide you through the process of crafting a charming and affordable twin bed, perfect for giving your space a stylish makeover.
For those with basic woodworking experience, this project is an excellent opportunity to utilize tools like the Kreg Jig and showcase your creativity. By following each step, from initial cuts to final paint application, you’ll create a bed that not only exudes professionalism but also reflects your personal touch.
Transform your bedroom into a cozy retreat and unlock endless possibilities for relaxation and rejuvenation.
DIY Triple Bunk Bed for Kids
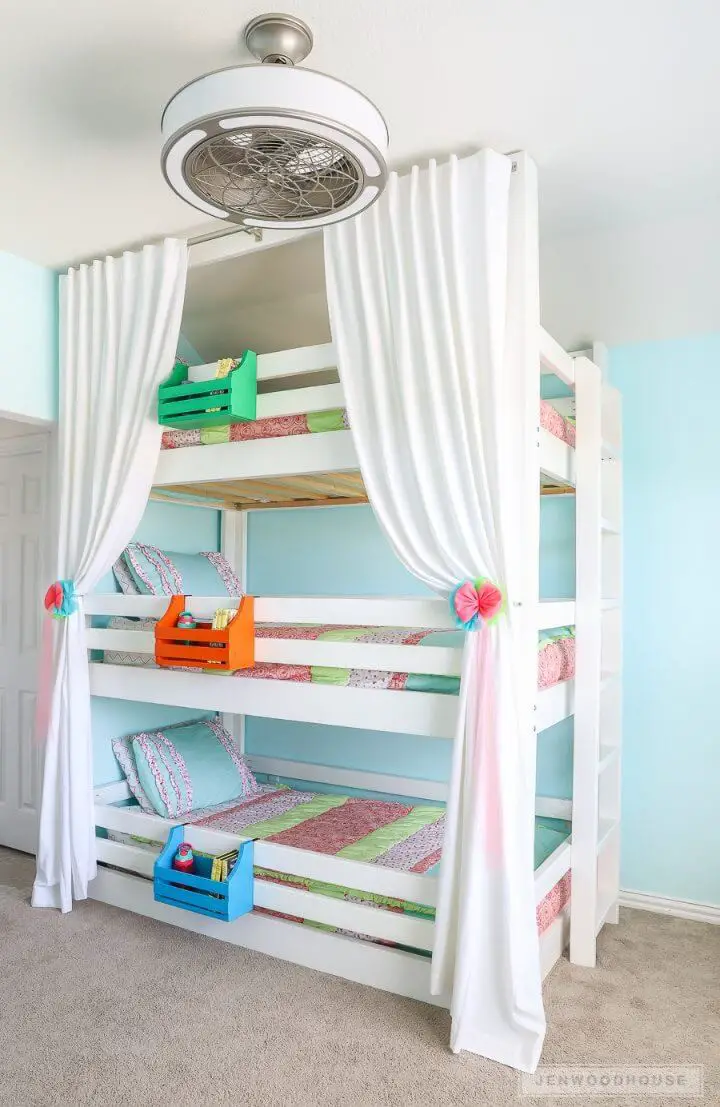
Elevate any small room into a warm and inviting retreat by crafting a DIY triple bunk bed, courtesy of Jen Woodhouse’s comprehensive guide and plans. This space-saving design is ideal for siblings or sleepover gatherings, accommodating three twin mattresses while preserving ample floor space.
With a total material cost of under $200, this project offers an affordable and entertaining endeavor. Follow straightforward steps to construct panels, mattress boxes, and a ladder, then effortlessly assemble the pieces. To give your creation a personalized touch, add bedding and curtains that reflect your unique style.
Are you ready to create a multi-tiered sleeping solution? Dive into this detailed guide and bring your vision to life!
Free Pottery Barn Inspired Bed Plans
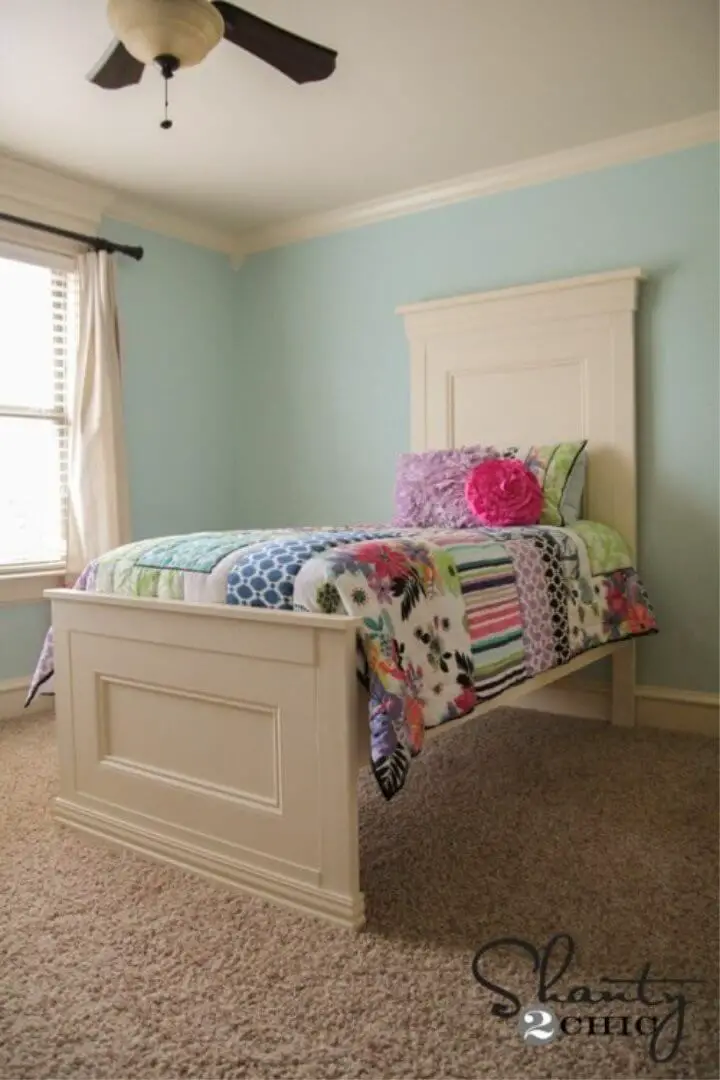
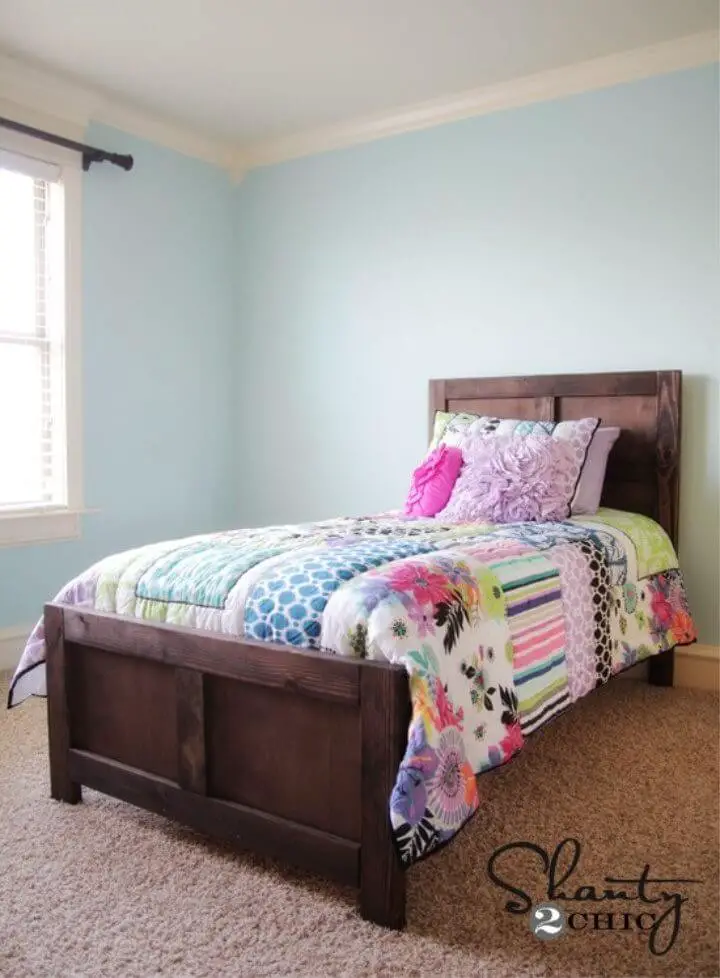
Transform your bedroom into a cozy retreat by crafting a charming bed reminiscent of Pottery Barn’s signature style. Join Shanty-2-Chic on a fun-filled DIY journey, where you’ll learn to build a sturdy and durable frame using PureBond Plywood and pine boards. With the help of a Kreg Jig, this project simplifies the construction process, ensuring a rewarding experience that yields a beautiful and budget-friendly result. By following easy-to-adopt steps, you’ll add a personal touch to your bedroom decor, making it the perfect haven to unwind. Get ready to dive into detailed instructions and unlock the magic of DIY home improvement.
How to Build a Beadboard Twin Bed
For those looking to add a personal touch to their home, embarking on a DIY project can be an incredibly rewarding experience. Building a twin bed with a unique beadboard design is one such endeavor that’s sure to bring a charming touch to any room. With the help of Build Basic’s comprehensive guide, even the most novice DIY enthusiasts can achieve success. The tutorial transforms ordinary tongue-and-groove patterned boards into a beautiful bed frame perfect for kids’ or guest bedrooms. The step-by-step photos and detailed cut list provided make it easy to follow along, ensuring a classic, country, or beach-style bed upgrade that’s sure to impress.
Conclusion:
Creating a cozy sleeping space for your toddler is now within reach with our detailed DIY guide to crafting a custom bed. By following our 20 comprehensive plans, you’ll gain the confidence and skills to tackle any project, regardless of your skill level. Not only will you save money by building your own kids’ bed, but you’ll also have the freedom to tailor the design to fit your child’s unique personality and your home’s decor. The end result is not only a functional piece of furniture but also a treasured memory of creating a special space for your little one.

