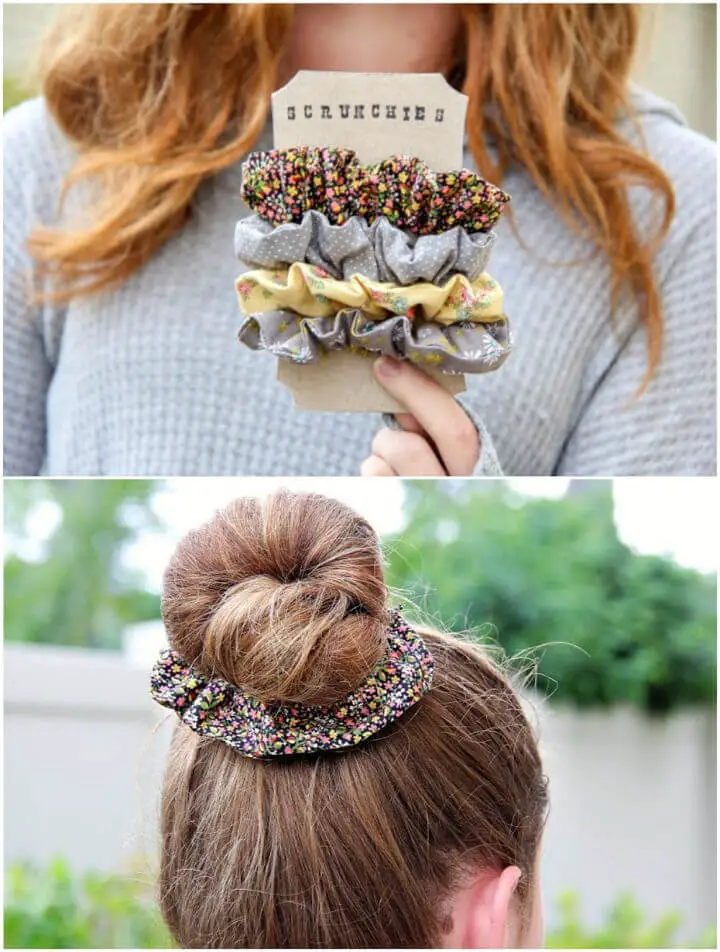
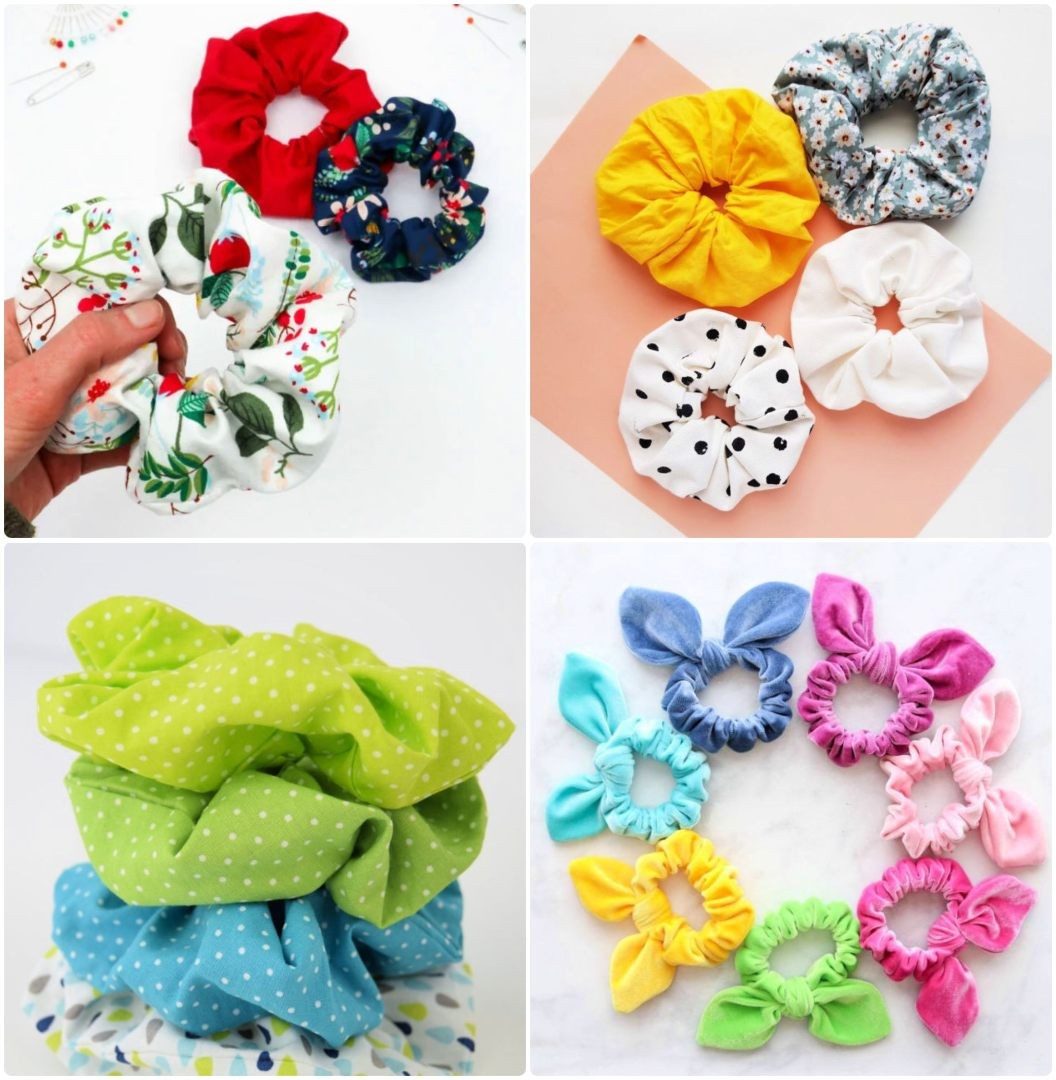
How to Make a Scrunchie
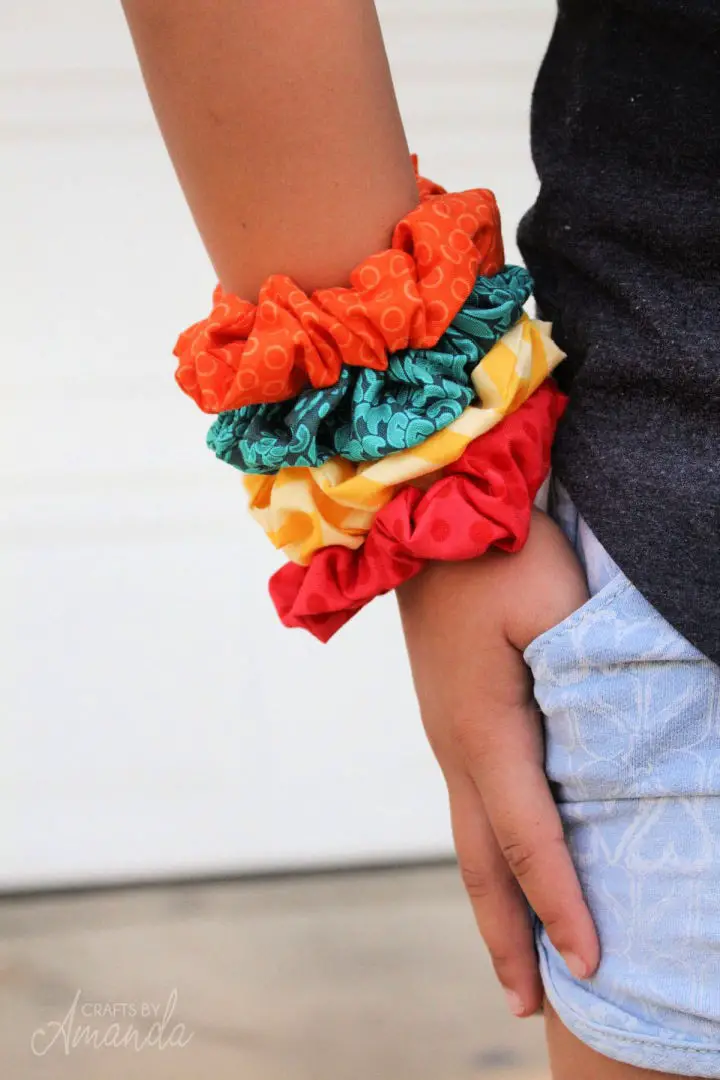
Unleash the nostalgia of the 1990s hair accessory trend by creating your own DIY scrunchies with this step-by-step guide. This versatile craft project requires minimal sewing supplies and is perfect for anyone looking to add a personal touch to their accessories. With an array of fabrics and basic crafting tools, including a rotary cutter, fabric scissors, a sewing ruler, cutting mat, sewing machine, and thread, you can create a vibrant collection of scrunchies that match any outfit or style. Follow the detailed instructions from cutting and folding the fabric to threading the elastic and sewing the final stitch. Not only will you have a unique accessory and a great gift for friends and family, but you’ll also be able to add a hint of 90s nostalgia to your ensemble with your homemade scrunchie.
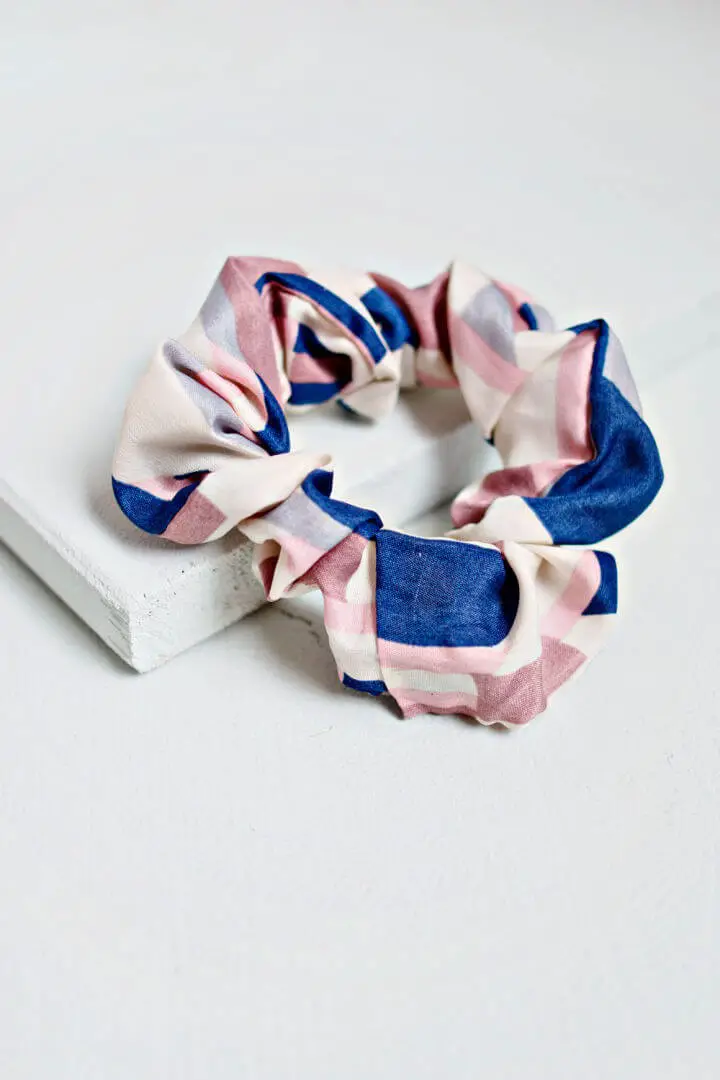
Make Your Own Knot Scrunchie
Indulge in a blast of nostalgia by creating these DIY knotted hair scrunchies, a retro-chic accessory that’s made its way back into fashion. Not only are they an excellent way to repurpose leftover fabric scraps, but they can also be whipped up quickly, making them the perfect gift idea for any occasion. The process is surprisingly straightforward, requiring only basic sewing supplies, a safety pin, and a 1/4-inch wide elastic piece. With our step-by-step guide, you’ll be able to customize scrunchies to suit any hair thickness, ensuring they’re suitable for everyone. What’s more, our free pattern template allows for endless variations to match every outfit and occasion. Whether you’re looking to elevate your style or gift someone the ultimate nostalgic accessory, learning how to make these scrunchies is a must-do.
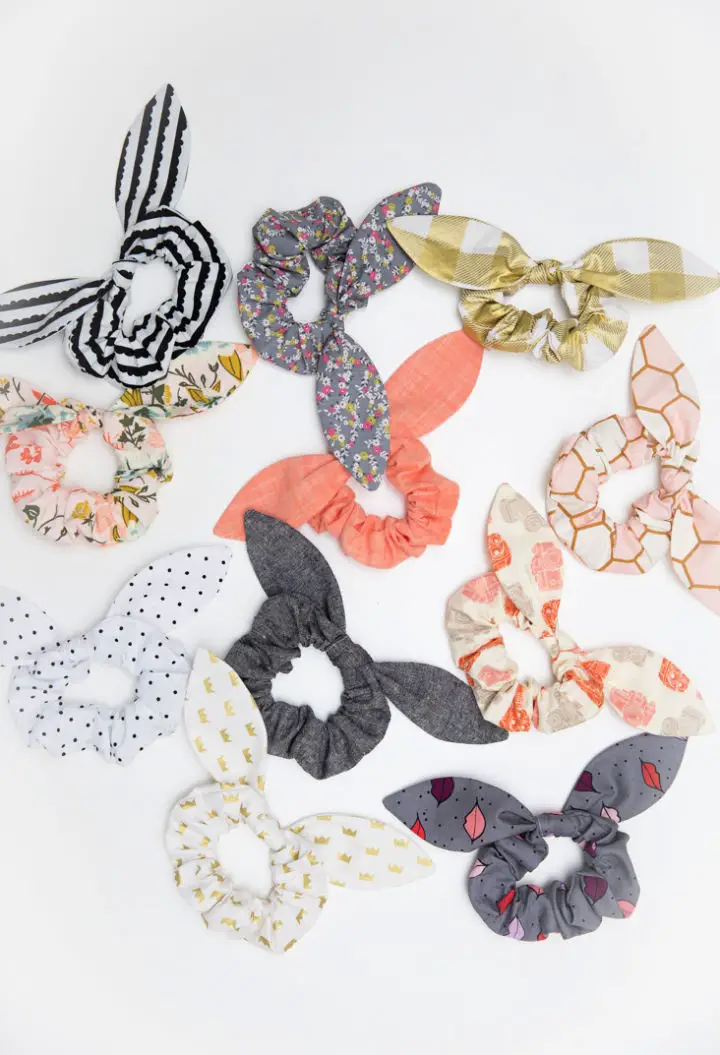
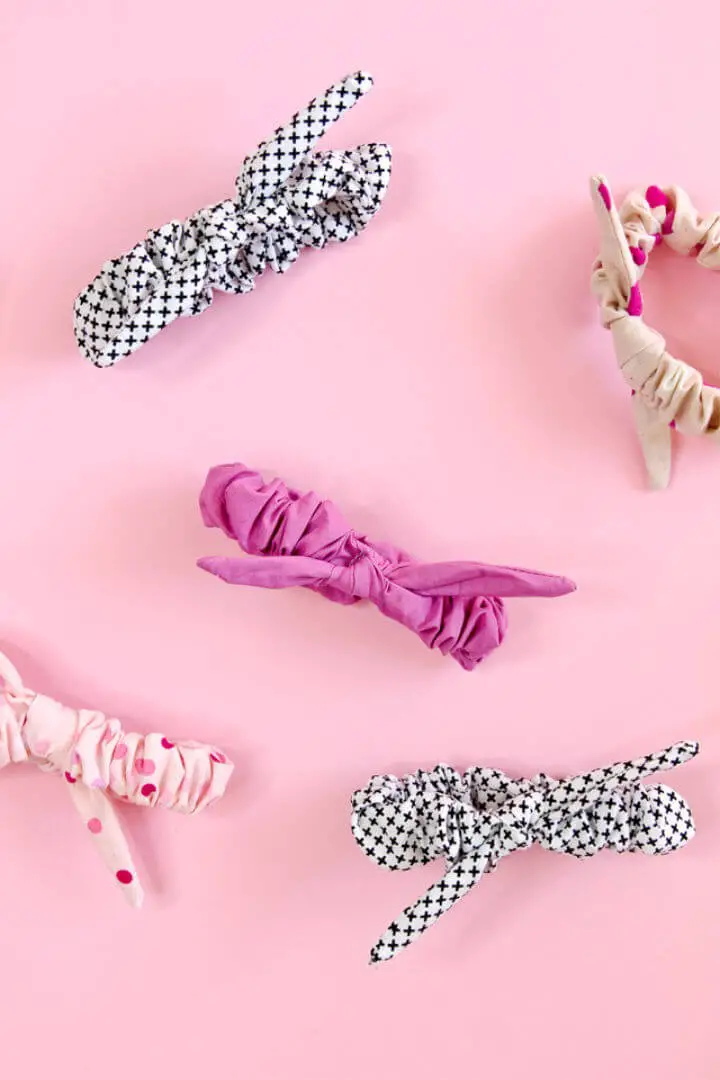
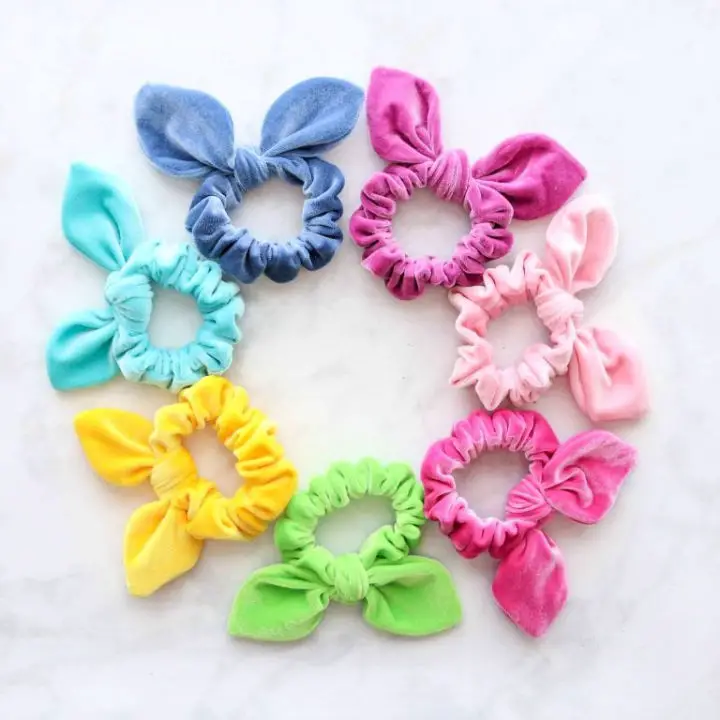
Cute DIY Bunny Ear Scrunchie
Give your hairstyles a playful twist with a charming DIY Bunny Ear Scrunchie project that’s both budget-friendly and creative. Handcrafting your own unique scrunchies is not only a fun activity, but it also allows you to express your personal style without breaking the bank on store-bought alternatives. This comprehensive guide will walk you through every step of creating a scrunchie with bunny ears, using basic supplies like fabric, scissors, thread, and a sewing machine (or needle and thread). The downloadable PDF pattern for the bunny ears is free and easy to follow, making it accessible to crafters of all skill levels. The finished product is not only a statement piece for your own hair but also makes a thoughtful gift for friends and family. So, get creative and elevate your hair accessory game with this innovative DIY project that’s sure to bring a smile to anyone who sees it.
Awesome Draped Bow Scrunchies
Transform your hair accessory game by crafting adorable DIY draped bow scrunchies from scrap fabric. This eco-friendly project is perfect for creative souls looking to repurpose leftover materials, requiring only basic supplies such as fabric scissors, a sewing machine, elastic, and a safety pin or loop turner. By following this step-by-step guide, you’ll be able to create a stylish addition to your hair accessories collection with minimal waste and maximum uniqueness.
How to Sew a Scrunchie
Revive the ’90s with this simple DIY guide and learn to sew scrunchies from scratch! This versatile hair accessory has made a comeback, and we’re here to show you how to create personalized scrunchies that complement any outfit. With just fabric, elastic, safety pins, scissors, thread, and a needle or sewing machine, you can craft unique scrunchies that are as eco-friendly as they are stylish. The beauty of this DIY project lies in its ability to up-cycle scrap fabric or repurpose old clothes, promoting a zero-waste lifestyle while making one-of-a-kind accessories. Whether you’re a kid or an adult, these handmade scrunchies are perfect for elevating hairstyles like braids, ponytails, or topknot buns. And as a bonus, we’ll also walk you through the process of creating adorable bunny ear scrunchies. Let’s bring back the scrunchie trend while embracing sustainability! By making your own scrunchies, you’re not only adding a touch of nostalgia to your wardrobe but also reducing waste and promoting creativity.
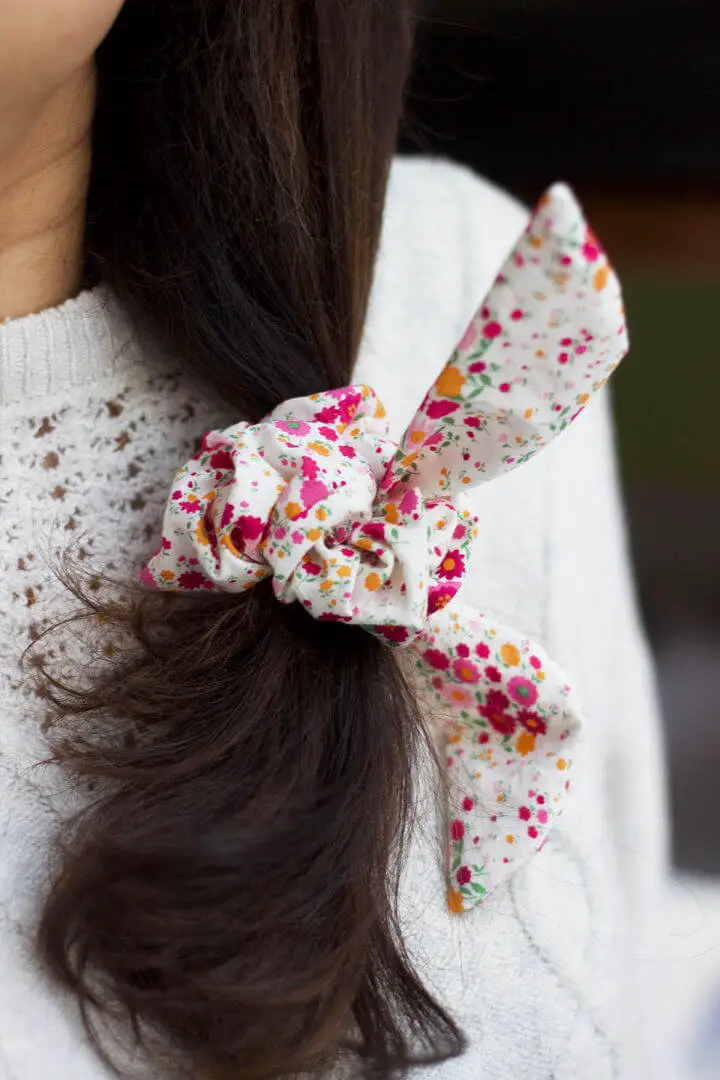
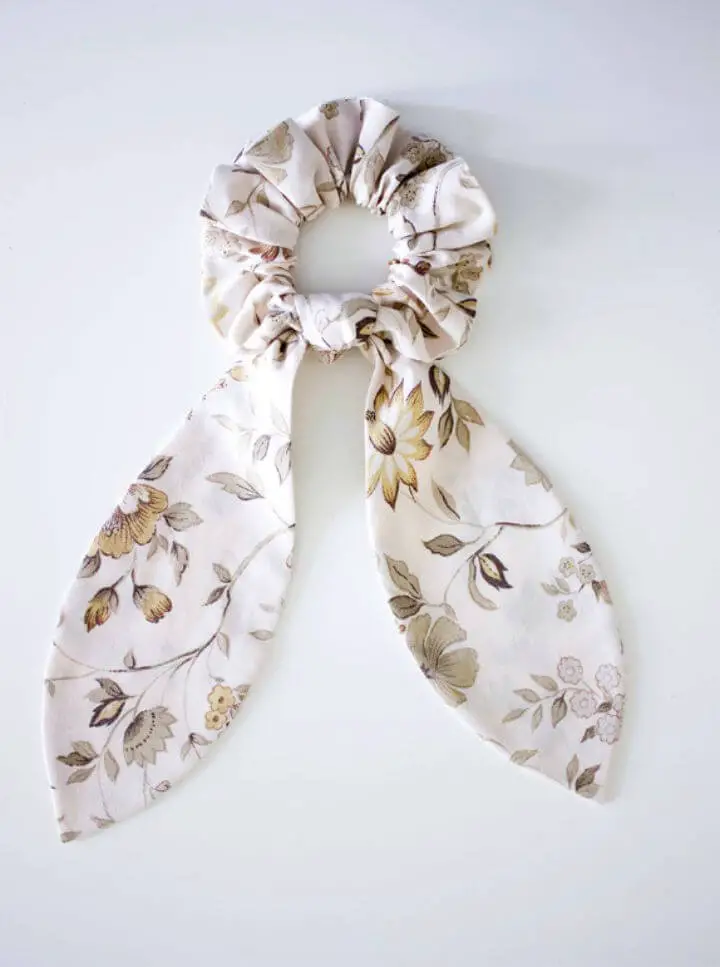
Free Knot Bow Scrunchie Sewing Pattern
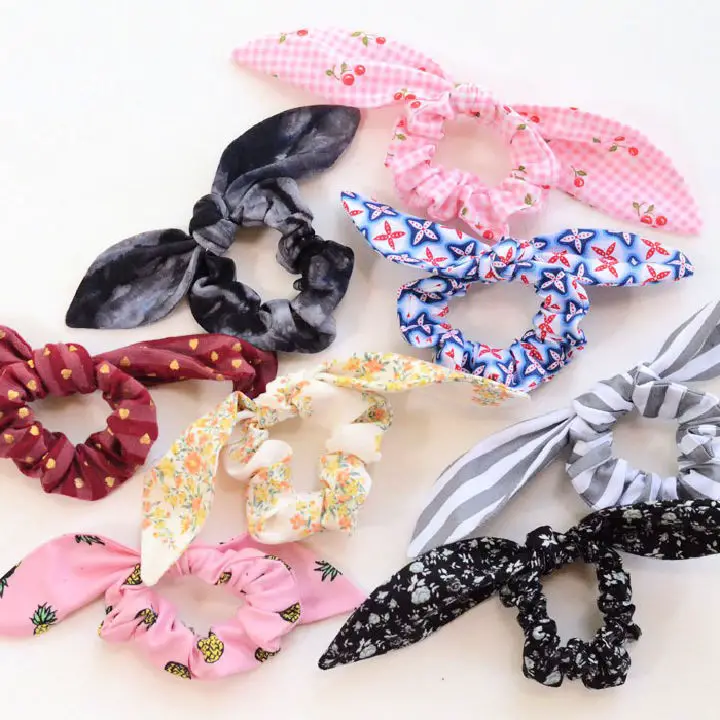
Elevate your hairstyle with this chic DIY knot bow scrunchie sewing pattern, which takes the basic scrunchie to new heights of elegance and cuteness. By incorporating fabric scraps, elastic, a safety pin, and a dull pencil or wooden dowel, you can transform an ordinary ponytail into a fashionable statement piece. The versatility of this project lies in its ability to be customized with longer or shorter bow sizes, allowing you to experiment with various fabrics such as stripes, florals, knits, and silky textures. With this DIY magic trick, you’ll not only save money but also add a personal touch to your hair accessory collection. Whether you’re looking to impress your teenager with your crafting skills or want to spice up your own hair game, these knot bow scrunchies are the perfect solution.
How to Make a Scrunchie With Cricut
Transport yourself back to the vibrant era of neon-colored everything with these stylish DIY scrunchies that are surprisingly easy to create. Using your Cricut Maker, you can effortlessly achieve precise cuts in a variety of fabrics – think cotton, linen, or even silk – and add personalized touches like iron-on vinyl designs for an extra layer of customization. The best part? No extensive sewing skills are required; simply master the art of straight stitches and you’ll be on your way to crafting chic, one-of-a-kind hair accessories that make perfect gifts, party favors, or stocking stuffers. Plus, they pair beautifully with DIY personalized zipper bags for a thoughtful and coordinated look.
Easy Scrunchie Sewing Project for Beginners
Revitalize your daily style with homemade scrunchies, a simple yet captivating sewing project suitable for all skill levels. By breathing new life into spare fabric pieces, you can curate a personalized collection of hair accessories that reflect your unique taste. The process requires basic sewing skills and easily accessible supplies such as fabric scraps, safety pins, and elastic. This activity is an excellent way to encourage youngsters to put down their screens and develop a sense of accomplishment as they create their own one-of-a-kind hair adornments. These DIY scrunchies have become a hit among friends and are also perfect for gift-giving or adding a touch of whimsy to your everyday look. To take it to the next level, you can experiment with creating bow scrunchies, amplifying the cuteness factor. So, if you’re ready to unleash your creativity, follow this step-by-step guide and start crafting scrunchies that will bring joy to yourself and others.
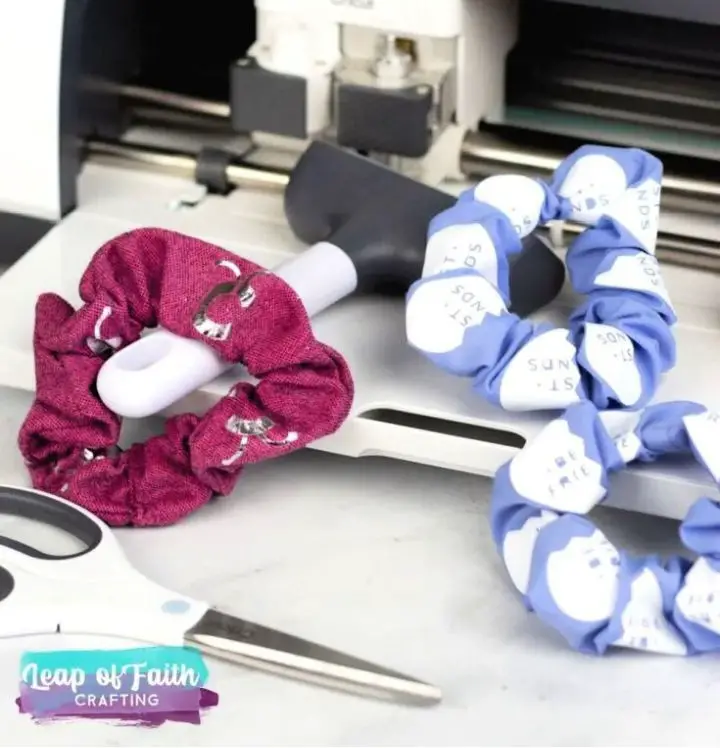
Handmade Scrunchy With a Cricut Machine
Unlock the charm of retro fashion with this DIY scrunchy project, expertly crafted using a Cricut Maker Machine. This fun and creative endeavor allows you to personalize hair accessories or wrist embellishments that seamlessly match your outfits. By leveraging the precision and speed of the Cricut Maker Machine, you can effortlessly cut and sew multiple scrunchies in no time. To get started, gather essential supplies like pink fabric, an SVG file, a sewing machine, white thread, and elastic. With these simple components, you can transform a fat quarter fabric into three exquisite scrunchies. Follow the guided process to cut, sew, and assemble your scrunchy, including the addition of a stylish bow tie that covers the stitching and elevates the overall appeal. Let your creativity shine by making these handmade scrunchies today and add a nostalgic touch to your style statement.
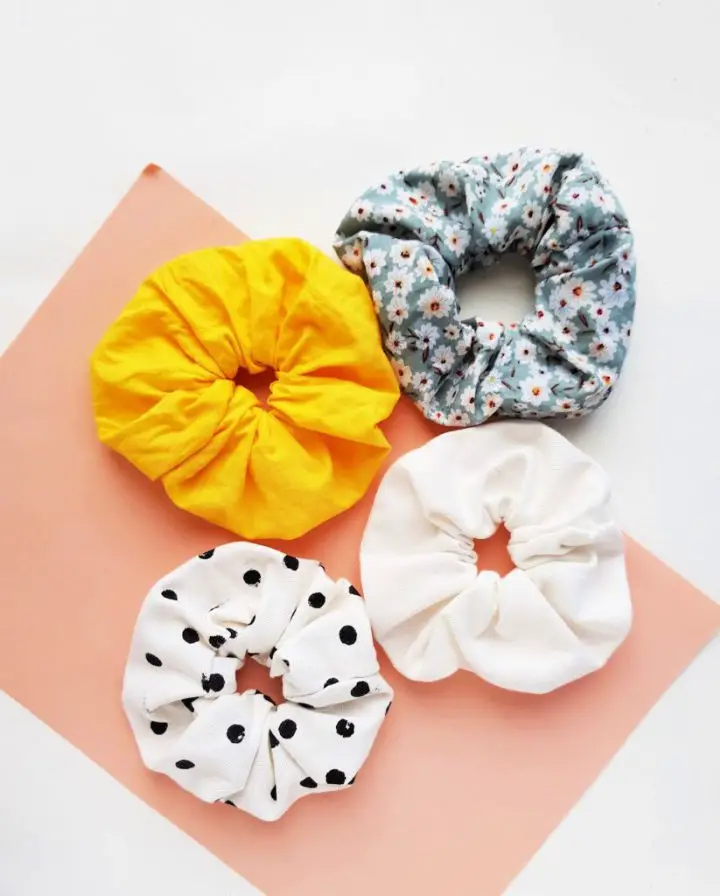
Simple and Inexpensive DIY Scrunchie
With a vast array of design options, scrunchie patterns cater to diverse tastes and styles, from subtle solids to eye-catching prints. Seeking a fun and cost-effective project? This DIY guide will walk you through the process of creating multiple stylish scrunchies using basic materials like fabric, elastic, and simple crafting tools. The best part? You’ll not only create headache-free hair accessories but also repurpose old shirts or fabric scraps, perfect for tailoring to specific occasions or events. With endless possibilities for fabric choices, you can craft giant scrunchies for a bold statement or opt for more subtle designs. Start your creative journey today and enjoy the satisfaction of crafting unique and affordable hair accessories that reflect your personal style.
Homemade Old T-shirt Hair Scrunchie
Give new life to your worn-out shirts or fabric scraps by crafting unique DIY hair scrunchies. A perfect activity for environmentally-aware individuals and craft enthusiasts, this project is a fantastic way to breathe new life into old materials while expanding your hair accessory collection. With only 10 minutes of sewing required, you’ll need basic supplies such as an old shirt or fabric, measuring tape, scissors, pins, elastic, sewing machine, textile glue, and safety pin. This eco-friendly endeavor presents a thrilling opportunity to create personalized hair ties that reflect your personal style. The possibilities are endless, as the type of fabric or print you choose can result in scrunchies that are truly one-of-a-kind. It’s an exciting, sustainable way to elevate your hair accessory game while giving old materials a second chance.
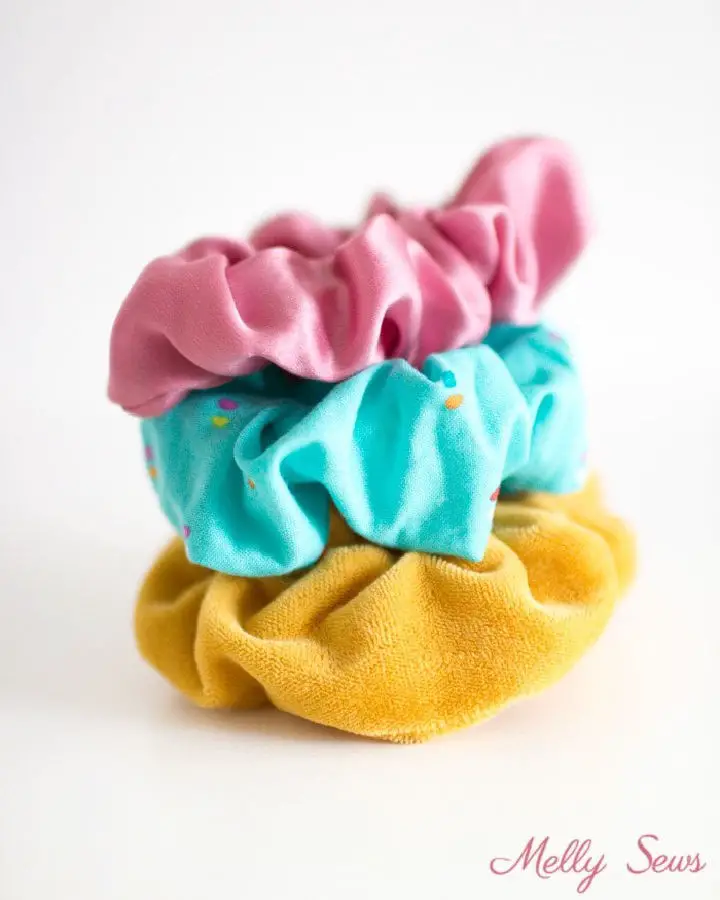
Easy to Sew Scrunchies at Home
Transform your hair care routine with an effortless DIY silk scrunchie that combines style and functionality. This innovative accessory not only gently treats your locks but also keeps them kink-free and healthy throughout the night. The secret to its success lies in the use of silk, a fabric that allows natural moisture retention, ensuring soft and resilient hair. Furthermore, the wideband design minimizes damage typically caused by traditional rubber hair ties. To create this game-changing scrunchie, simply gather scraps of silky fabric, a sewing needle, pins, safety pins, and an elastic band. Follow our step-by-step guide to craft a tube from your chosen fabric, then thread the elastic band through to complete your DIY project. This fun and accessible project is perfect for kids or beginners looking to dip their toes into sewing, while also promoting sustainability by utilizing leftover materials and reducing waste. Give it a try today and experience the benefits of a healthier, stylish hair care solution.
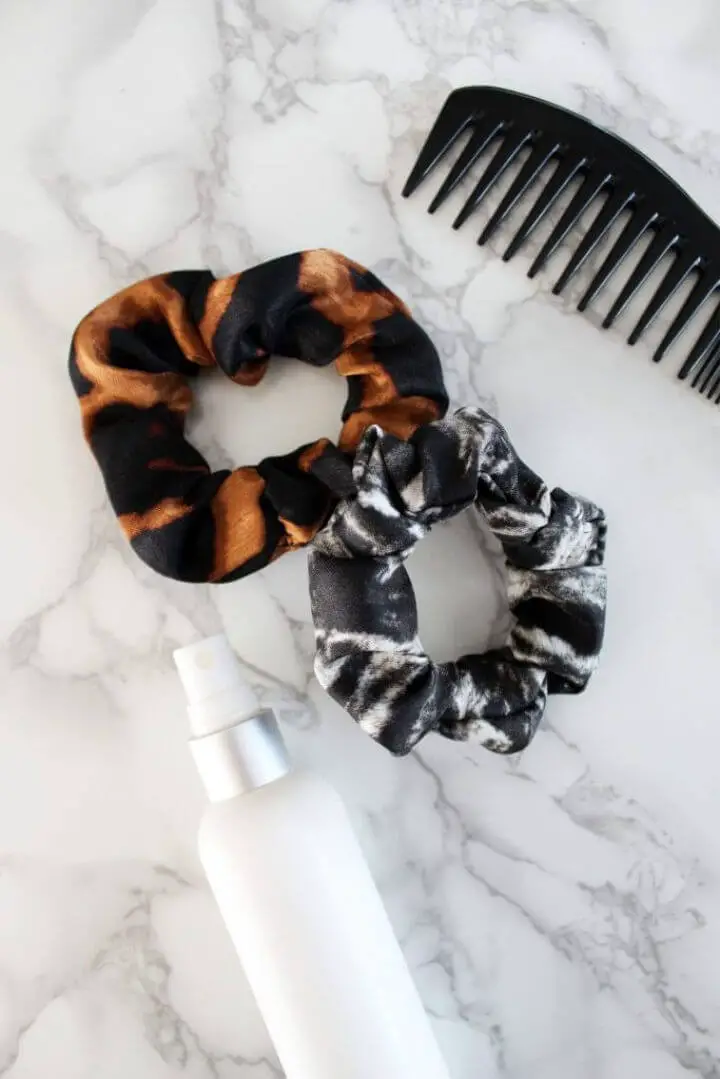
How to Sew Holographic Scrunchies
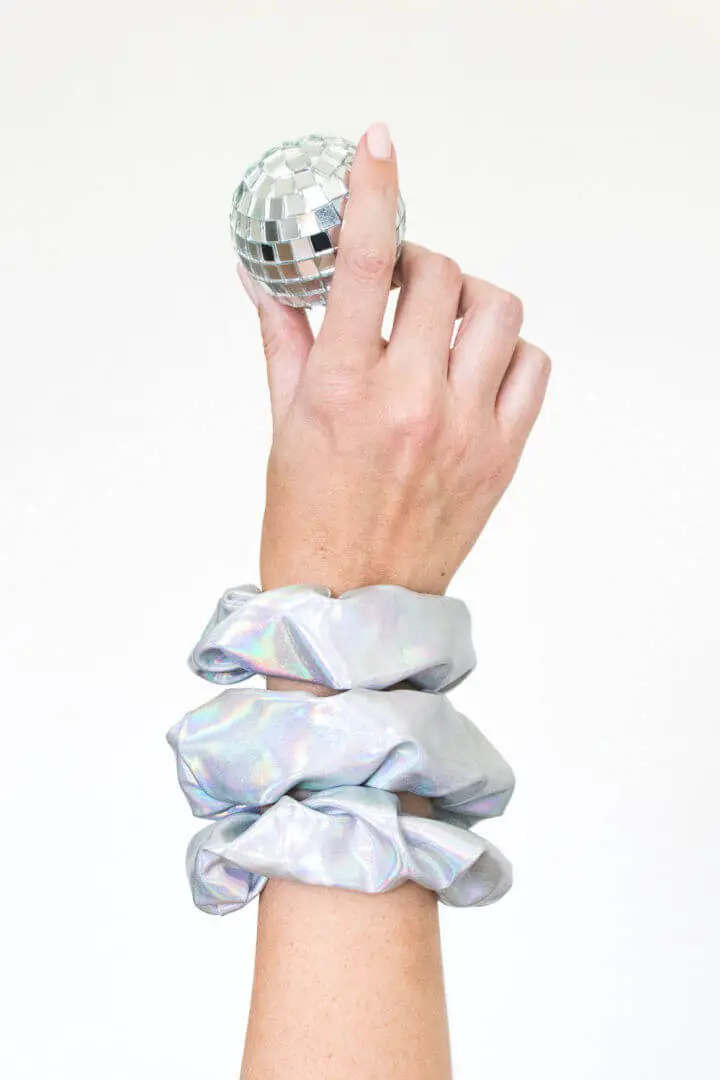
Step into the world of 90s nostalgia and make a fashion statement with these DIY holographic scrunchies. This innovative hair accessory not only showcases your personal style but also demonstrates your creative prowess. The secret to these mesmerizing scrunchies lies in half a yard of iridescent fabric, which adds an otherworldly sheen to any outfit. Perfect for those with thin locks or sporting a messy bun, these scrunchies effortlessly elevate one’s look with minimal effort required. To embark on this creative journey, you’ll need to gather the following materials: fabric scissors, thread, pins, measuring tape, a sewing machine, and some dedicated time. The process itself is a medley of precision cutting, calculated folding, meticulous pinning, fluid sewing, and thoughtful threading. As you bring your vision to life, remember that creativity knows no bounds – repurpose oversized shorts or scraps of fabric from thrift stores to give new life to old materials.
Making Scrunchies With Step-by-Step Instructions
Revamp the iconic 90s trend with this beginner-friendly DIY scrunchie project. By following these easy steps, you can create a collection of personalized hair accessories that reflect your unique style. The best part? No prior sewing experience is required, as this tutorial will guide you through each step, from fabric cutting to elastic insertion. With just basic materials like fabric, elastic, scissors, a sewing machine, and a pen with a snug- fitting cap, you can craft colorful scrunchies that are not only soft on your hair but also add a vibrant pop of color to any hairstyle.
Quick and Easy DIY Scrunchies
Unleash your creativity and give your style a refreshing boost with this 30-minute DIY project: crafting handmade scrunchies! This retro accessory has made a comeback, and its versatility in colors and patterns has won over hearts once again. With just a few basic supplies like fabric scraps, a safety pin, a sewing machine, and 1/4″ elastic, you can whip up an assortment of unique scrunchies in no time. Simply follow the step-by-step instructions, and before you know it, you’ll be proudly showcasing or generously gifting these charming hair accessories. You can even create a custom cardboard holder to add an extra touch of elegance to your presentation. So, embark on this fun creative journey and infuse your fashion statement with a personal touch today.
Sew a Scrunchie – Free Pattern
Transform your style with a personalized DIY scrunchie. Start by gathering the essentials: fabric of your choice, hair ties, scissors, a needle and thread, pins, and a ruler. Measure and cut out a 14 by 4-inch piece of fabric, then fold and stitch it into a long rectangular shape, forming the foundation of your scrunchie. Next, insert the hair tie and neatly fold it within the fabric, securing it with fine, short stitches. With these simple steps, you’ll be able to create unique hair accessories that are both a great personal accessory or a thoughtful gift for friends and loved ones. This DIY guide offers an easy, affordable, and fashionable way to make your own scrunchies, straight from your hands.
Sew a Scrunchie With Written Instructions
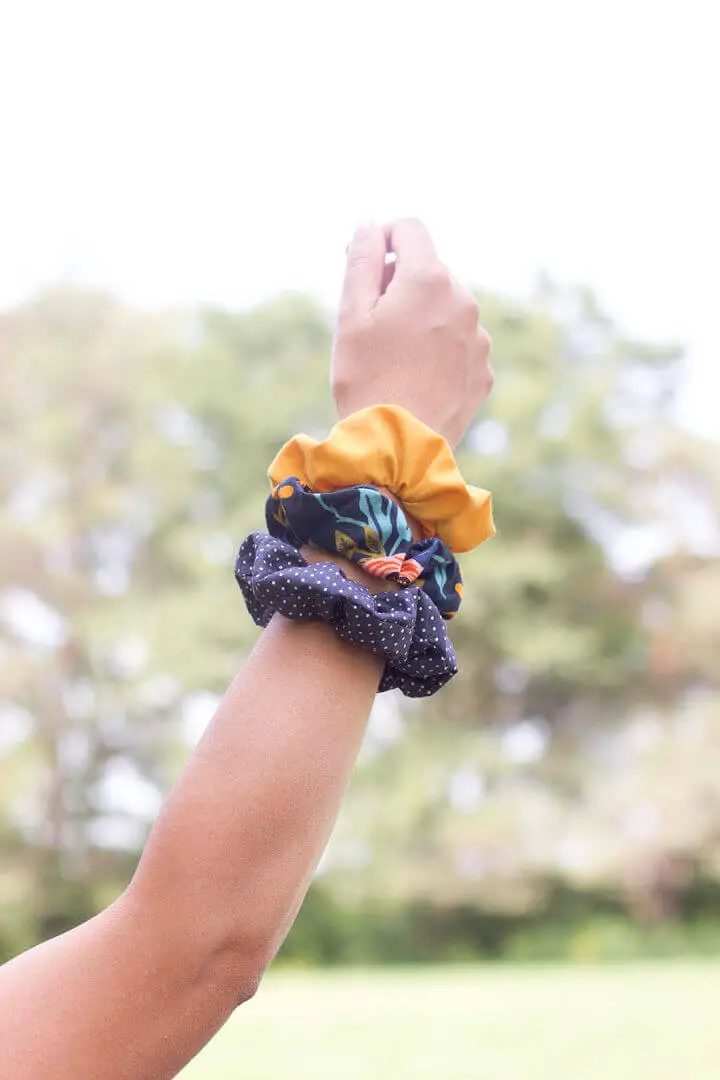
Crafting handmade scrunchie patterns offers a unique blend of sustainability and self-expression. By repurposing fabric scraps and basic sewing tools, you can create one-of-a-kind hair accessories that reflect your personal style. These delightful DIY scrunchies not only add a charming touch to your hairstyle but also make for a fashionable wrist adornment. The process is surprisingly straightforward: simply cut your fabric into strips, sew them together to form a tube, thread in some elastic, secure the ends, and finish by closing the tube. With this easy tutorial, you can whip up a collection of scrunchies suitable for any season or occasion. As an added bonus, this project provides an excellent opportunity to repurpose leftover fabrics, adding a creative twist to your crafting journey while keeping your hairstyles fresh and spirited.
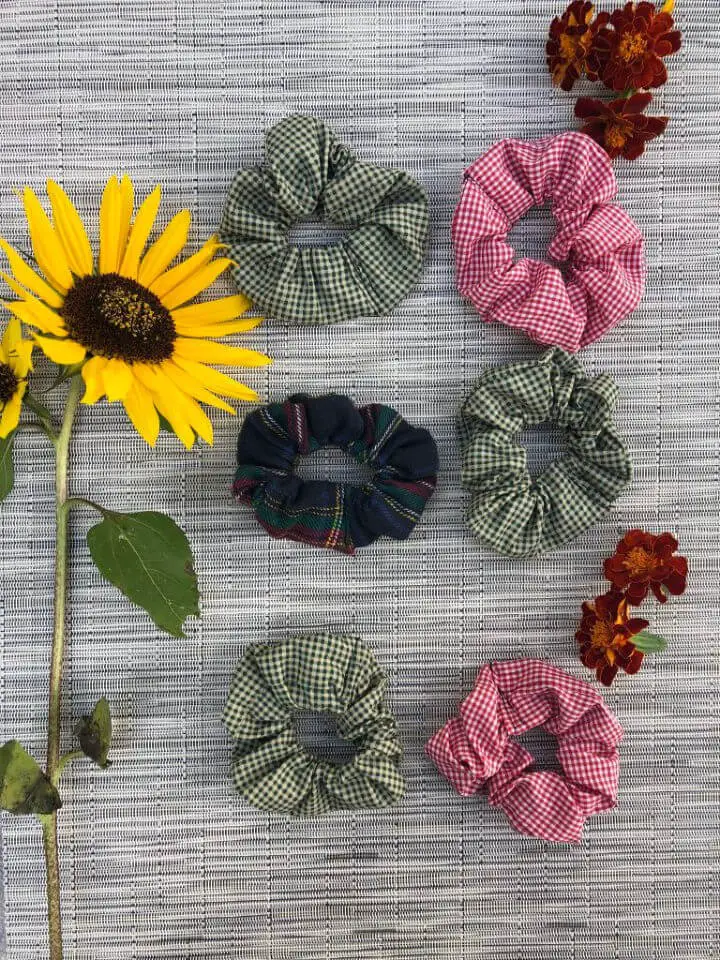
DIY Scrunchies Gift for Teenagers
Transform fabric scraps into stylish DIY scrunchies using this comprehensive guide! Not only do these hair accessories make perfect gifts for teenagers, but they’re also an excellent way to upcycle old materials and add a fashionable touch to any hairstyle. By offering a size chart for seven scrunchie dimensions, you can tailor the project to fit any hair type perfectly.
Beyond their functional purpose, scrunchies can be worn as a wrist accessory or add a chic touch to high or low ponytails. To get started, you’ll only need a few basic materials: fabric scraps, elastic, a simple chopstick for turning, matching thread, a safety pin or an elastic threader, and sewing essentials.
This step-by-step guide makes it easy to turn your leftover fabrics into beautiful, functional scrunchies. With clear instructions and minimal requirements, you can start creating your own DIY scrunchies today!
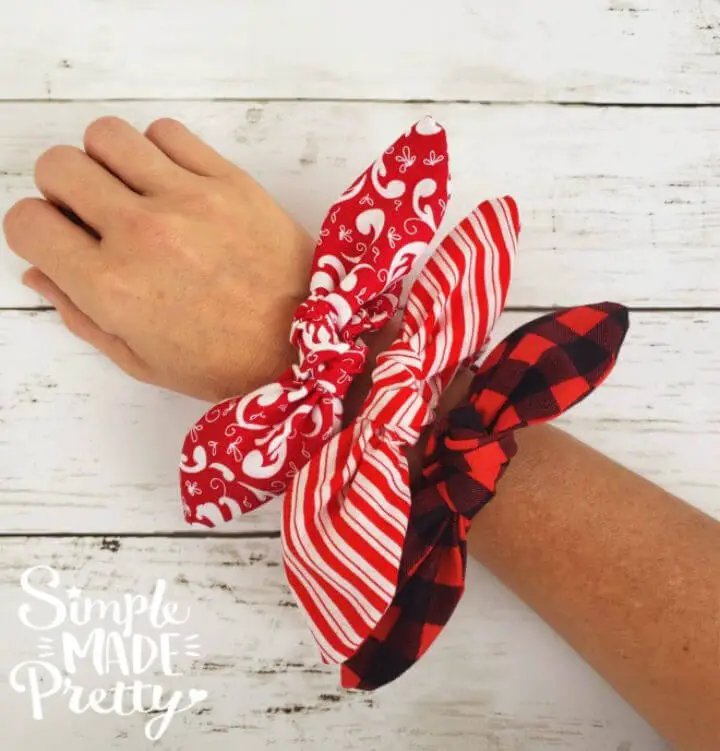
How to Make a Bow Scrunchie
Step into the nostalgia of the 90s with a modern twist – the iconic bow scrunchie. This DIY guide empowers you to put your own spin on this retro fashion staple, transforming it into a functional and stylish hair accessory that reflects your unique taste. To bring this project to life, you’ll need non-stretch fabric, scissors, a sewing machine, pins, and some elastic. The process unfolds in three steps: first, craft a tube from your chosen fabric; next, thread an elastic band through it; and finally, finish with a neat bow that adds the perfect touch of elegance. This tutorial not only revives a classic hair accessory but also offers a creative outlet to customize and match your outfits – whether you’re looking for seasonal flair or a daily pop of color. By mastering the art of crafting a bow scrunchie, you’ll add a fun and playful element to your style.
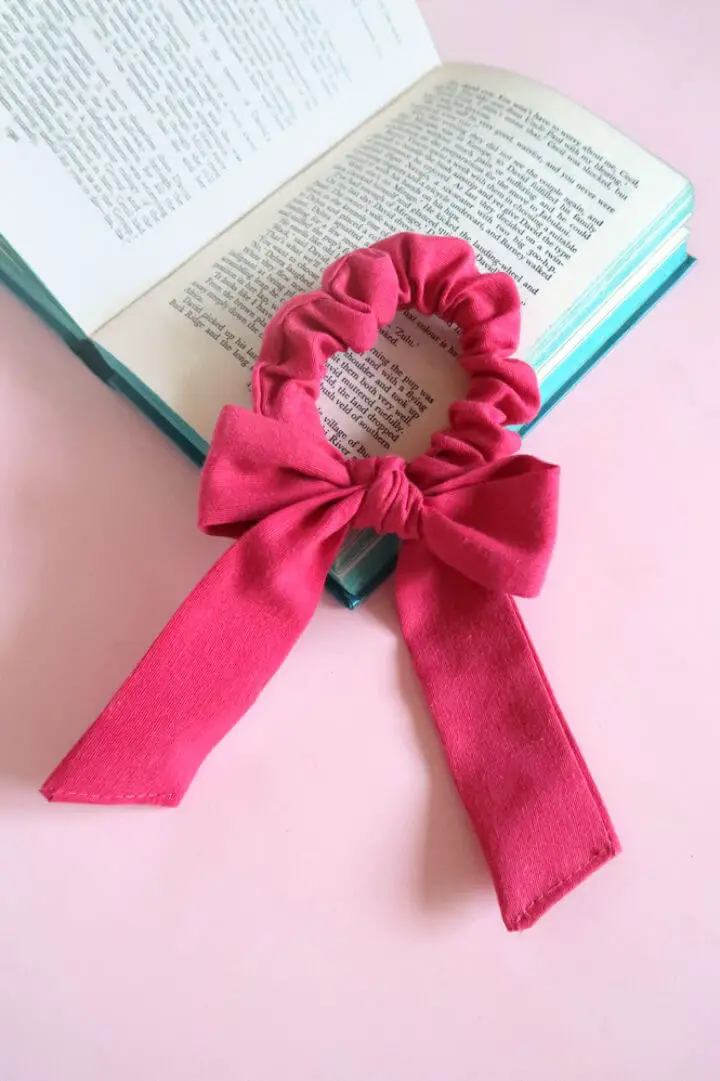
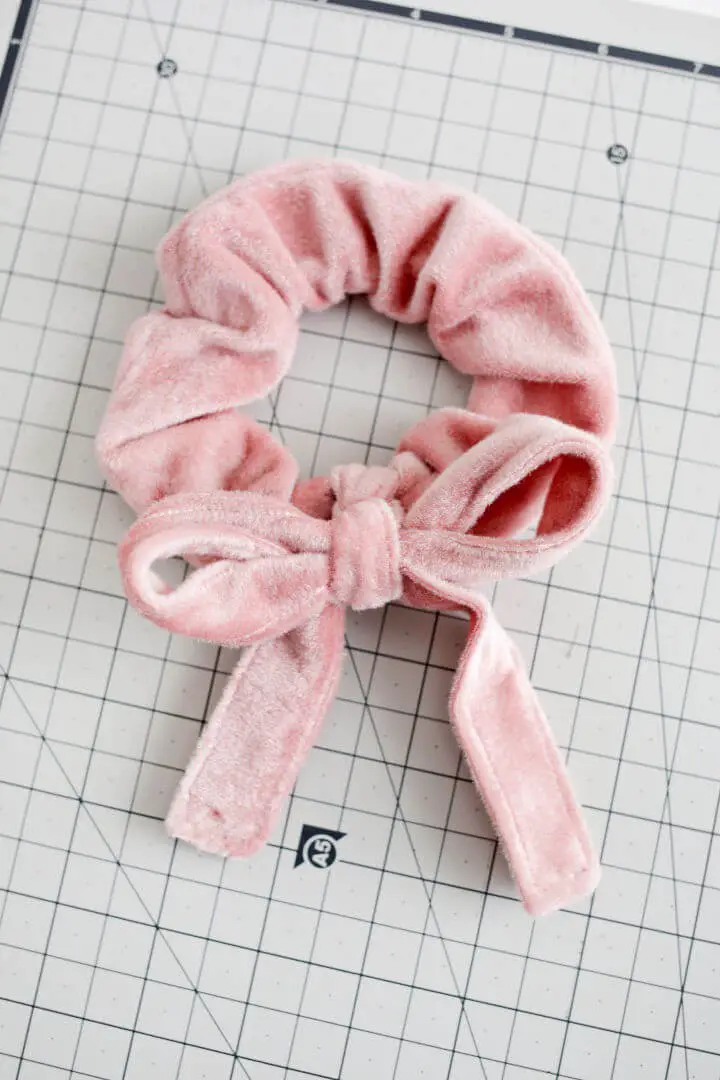
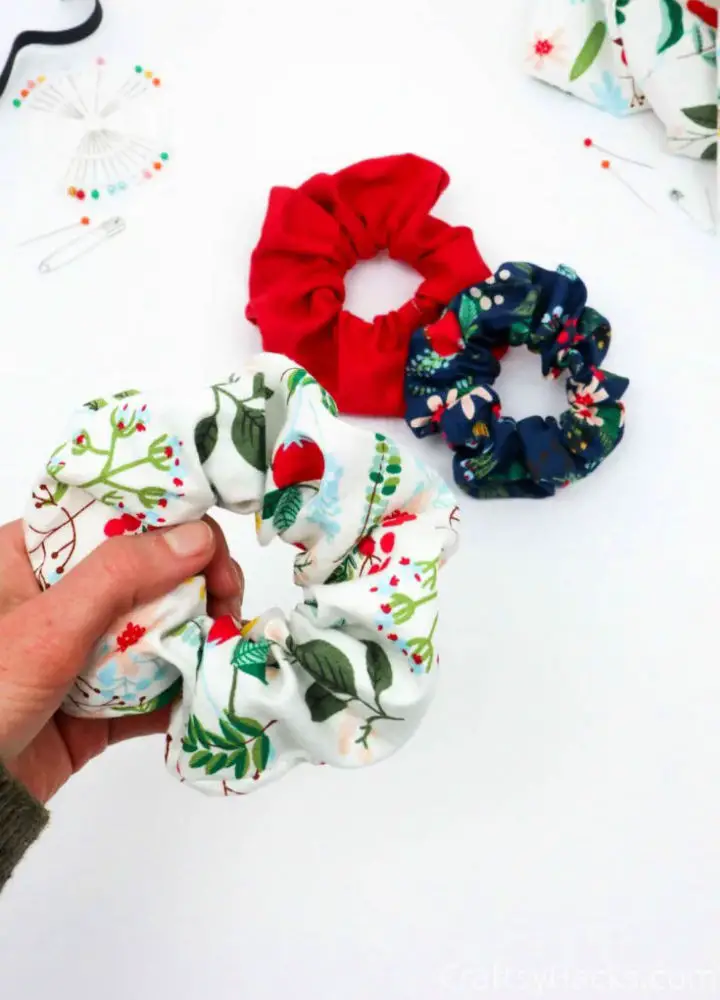
Homemade Knotted Scrunchies
Celebrate Valentine’s Day in a unique way by embracing the trendiness of DIY mermaid-themed Valentines, complete with a stylish velvet scrunchie that doubles as a non-candy treat holder for kids. The scrunchies boast a clever knotted bow design that cleverly conceals topstitching, adding an extra touch of girlish charm. Crafted using a Cricut Maker machine, the process is effortless and precise, allowing you to effortlessly create multiple scrunchies with perfect strips of fabric. This Valentine’s Day treat not only brings undersea magic to your celebration but also adds a handmade twist that makes it truly special.
Pretty DIY Bow Scrunchie
Elevate your summer style with a delightful DIY bow scrunchie that’s not only stylish but also sustainable. Repurpose scrap or leftover fabrics, thrifted garments, or even bedsheets to create a one-of-a-kind accessory that adds a touch of elegance to any hairstyle. To get started, gather the required materials: paper for the pattern, non-stretch fabric, 8mm elastic, loop turner, ruler, and scissors. Cut out your pattern and fabric pieces, then thread the elastic through a fabric tube and secure it with a sturdy knot. Finish off the scrunchie by steaming it to give it a smooth finish, and tie the bow around the seam for a neat and tidy appearance. Not only does this project breathe new life into unused fabric, but it also offers a unique and chic addition to your hairdos.
How to Make a Scrunchie With Fabric
Transform your hairstyle with a personalized hair scrunchie that perfectly complements your unique style. This accessible sewing project is ideal for individuals of all ages, particularly teenagers and tweens seeking to express themselves through fashion. With an array of fabric options available, including satin, silk, velvet, flannel, or repurposed scraps, you can create a one-of-a-kind scrunchie without exceeding the $1 mark. The comprehensive guide offers valuable insights on working with various fabrics and securing the scrunchie with either a knot or sewing machine. By following these straightforward instructions, you’ll be able to craft stunning scrunchies for personal use or as thoughtful gifts for loved ones. Now, you can effortlessly match your hair accessory to any outfit without compromising on style or budget.
Make a Scrunchie for Professional Look
Indulge in a delightful sewing project that combines nostalgia with sophistication – making DIY scrunchies. As 90s trends resurface, these stylish hair accessories crafted from luxurious velvet, silk, or casual t-shirt knits not only evoke memories of your youth but also offer a polished finish. Beyond just keeping your locks in place, this endeavor presents an opportunity to upcycle fabric scraps into a lucrative side hustle at craft fairs, making it a clever way to create, monetize, and showcase your handmade skills.
Furthermore, the method can be adapted to produce headbands and infinity scarves, diversifying your DIY repertoire. So, are you prepared to dive into the world of sewing scrunchies? This creative pursuit will not only add a fashionable touch to your hair accessory collection but also foster a sense of accomplishment.
Sew a Scrunchie With a Bow
Discover the joy of upcycling with free scrunchie patterns that combine creativity, fashion, and sustainability. This easy-to-follow DIY tutorial and sewing pattern allows you to create stylish scrunchies in just 10 minutes, reducing waste and repurposing fabrics. With various designs to explore, from simple ponytail-friendly options to intricate styles that elevate any hairstyle, you can customize your scrunchies using different fabrics. A PDF pattern and SVG file for Cricut are also included for precise execution. Embrace the art of scrunchie making and channel your 90s nostalgia in a budget-friendly way.
Fun and Easy DIY Scrunchie
Immerse yourself in the world of DIY crafting by creating a unique fashion accessory that complements any outfit with our easy-to-follow guide on making custom scrunchies. Use a variety of fabrics, such as silk, satin, velvet, or cotton, to create your own one-of-a-kind designs. With just a few simple materials like fabric (recommended size: 5×24 inches), elastic ribbon, sewing pins, scissors, safety pins, and a sewing machine if available, you can repurpose scrap fabric and save money while staying in style.
This step-by-step guide takes the guesswork out of the process, walking you through how to fold, pin, sew, and assemble your custom scrunchie. With this tutorial, you’ll be able to create scrunchies in various sizes to suit different hair types and styles, making it easy to find the perfect accessory for any occasion.
Conclusion:
Craft enthusiasts of all skill levels can enjoy a fun and practical activity by creating their own DIY scrunchies. With countless free patterns to choose from, including knot bow designs and holographic styles, the possibilities are truly endless. By sewing your own scrunchie, you not only express your personal style but also give old materials like t-shirts new life. Exploring different methods and materials allows you to develop your sewing skills while creating unique custom hair accessories that can elevate your wardrobe. Start your DIY scrunchie adventure today and discover the joy of upcycling and self-expression.
