Why DIY Rope Projects?
Transforming everyday materials into unique creations has never been more exciting with DIY rope projects! Our step-by-step tutorials and creative ideas will help you unlock a world of possibilities, regardless of your crafting level.
One of the greatest advantages of rope crafts is their affordability. By utilizing leftover materials or repurposing items you already have, you can create beautiful pieces without breaking the bank.
The versatility of rope is also noteworthy – with various textures and colors to choose from, you can craft everything from rustic home decor to stylish accessories that reflect your personal style.
What’s more, many rope DIYs require only basic skills like cutting, gluing, or simple sewing, making them accessible to beginners. As you work on your project, you’ll discover a sense of accomplishment and pride in your handiwork.
Rope crafts also offer the opportunity for personalization – tailoring projects to suit your taste or needs ensures that each creation is unique and meaningful.
Finally, crafting with rope can be an eco-friendly way to create, as repurposing materials or using natural fibers reduces waste and minimizes your environmental impact.
Beyond the practical benefits, working with rope can have a therapeutic effect. The process of creating something with your own hands can be incredibly relaxing, providing a creative escape from the stresses of everyday life.
In short, DIY rope projects offer endless possibilities for self-expression and creativity, all while being gentle on your budget and the environment.
How to Get Started with DIY Rope Projects
Embark on a journey to create your own unique DIY rope projects from the comfort of your own home. By mastering the art of rope crafting, you’ll unlock a world of creative possibilities, where functional pieces meet stunning aesthetics. With our expert guidance, you’ll discover innovative ideas, valuable tips, and step-by-step tutorials that will empower you to bring your vision to life.
Choosing the Right Rope
When embarking on a DIY project, it’s essential to start with the right rope choice. A vast array of materials is available, including jute, cotton, sisal, and nylon, each boasting distinct textures and strength levels. For indoor applications such as placemats or decorative items, opting for softer ropes like cotton or jute ensures a pleasing texture and flexibility. Conversely, outdoor projects or those requiring added durability may benefit from the sturdiness of sisal or nylon.
Gathering Essential Tools
To embark on a successful rope project, it’s crucial to gather the required tools beforehand. These essentials include scissors for trimming rope to the perfect length, a hot glue gun for securing ends and adding decorative touches. Depending on the specific project, you may also need a sewing machine, although this is optional. Additionally, a measuring tape is vital for ensuring accurate measurements, guaranteeing your finished product turns out as intended.
Understanding Basic Techniques
When working on rope projects, you’ll typically employ a few fundamental techniques that are straightforward to learn. These methods include wrapping, coiling, and stitching. Wrapping involves encircling an object with rope for decorative purposes or to create a new surface. Coiling, on the other hand, entails making circular shapes by spiraling the rope, which is often used in crafting items like placemats, trivets, or rugs. Stitching involves joining rope ends or adding fabric accents using a needle and thread or a sewing machine.
Starting Your First Project
Create a unique decorative piece with ease using this DIY rope mirror project, perfect for beginners who don’t have extensive tools or materials at their disposal.
To get started, gather the following materials:
– A round mirror
– Sisal rope
– Hot glue gun and glue sticks
– Scissors
Begin by preparing the mirror’s surface. Make sure it’s clean to ensure a strong bond between the rope and the glass.
Next, apply hot glue to a small section of the mirror’s edge and attach the starting point of your sisal rope. Continue applying glue in sections and wrapping the rope around the mirror, overlapping each layer slightly to avoid any gaps forming.
Once you’ve reached your desired level of coverage, cut the rope and secure the end with additional glue. And that’s it! You’ll have a beautiful and functional DIY rope mirror to add some rustic charm to any room.
Tips for Success
To ensure a successful outcome, consider taking a thoughtful approach from the outset. Begin by visualizing your design or layout and having a clear idea of where you’re heading. This forward planning can significantly reduce waste and save valuable time and materials. Additionally, don’t underestimate the value of experimentation and practice. Before diving into your main project, take some time to work on a smaller scale, testing out new techniques and getting a feel for how they’ll play out in your final piece. And remember, it’s all about personal expression – don’t be afraid to add your own unique flair by exploring different dyeing techniques or incorporating embellishments like beads or tassels.
Conclusion
Embarking on DIY rope projects is an excellent way to create unique, practical, and aesthetically pleasing items for your personal space or as thoughtful gifts for others. By commencing with a straightforward endeavor such as crafting a rope mirror, you’ll not only develop your creative skills but also gain the confidence to tackle more complex endeavors.
FAQs on DIY Rope Projects and Crafts
Embarking on DIY rope projects can be a thrilling adventure, offering a sense of accomplishment as you shape and create something from scratch. To kick-start or take your crafting experience to the next level, consider these frequently asked questions that will guide you through the process.
What types of rope are best for DIY projects?
When selecting a rope for your project, it’s essential to choose one that suits your specific needs. For indoor crafts such as placemats or decorative items, cotton or jute ropes are ideal due to their softness and visual appeal. These materials provide a pliable texture that makes them perfect for delicate applications. In contrast, sisal or nylon ropes are more suitable for outdoor projects or those requiring greater durability. When making your selection, be sure to consider the rope’s texture, strength, and flexibility in relation to its intended use.
Do I need any special tools for rope crafts?
To start creating your rope project, you’ll need some fundamental tools that are likely already stocked in your home. While the specific requirements may vary depending on the project’s complexity and design, there are a few essential items that will form the foundation of most endeavors. These include scissors for trimming and shaping the rope, a hot glue gun for securing loose ends and adding decorative flourishes, and a measuring tape to ensure accurate lengths. A sewing machine can also be useful in certain projects that require stitching, although this is not always necessary.
How can I prevent the ends of the rope from fraying?
To prevent fraying at the ends of ropes, several approaches are available. One method is to utilize adhesives or coatings by applying a small amount of clear glue or nail polish to the affected areas and allowing them to dry completely. An alternative approach involves applying heat to lightly melt the synthetic fibers found in nylon ropes using a lighter or heat gun. It’s essential to carry out this process in a well-ventilated area to ensure proper ventilation and minimize any potential health risks. For projects that involve sewing, another option is to fold the ends of the rope back onto themselves and then sew them into place, effectively securing the loose fibers.
Can rope projects be machine-washed?
When considering how to care for your rope project, it’s crucial to take into account the type of rope used and the specific requirements of the item being created. For instance, cotton and jute ropes can typically withstand gentle machine washing in cold water, but it’s vital to air-dry them to prevent shrinkage. In contrast, sisal or nylon-based projects may require more delicate care, with spot cleaning or hand washing being safer options to avoid damaging the rope or compromising the structural integrity of the finished piece. Before attempting any cleaning method, it’s always a good idea to conduct a small-scale test on an inconspicuous area first, just in case.
How can I personalize my rope projects?
To elevate your rope projects from ordinary to extraordinary, consider infusing them with personal touches. This can be achieved by experimenting with various techniques and materials. One approach is to tint the rope to harmonize with your desired color palette before commencing your project. Alternatively, you could incorporate decorative elements such as beads, tassels, or charms into your finished piece for added visual interest. For a truly one-of-a-kind appearance, try blending ropes of distinct textures or hues together. Finally, don’t be afraid to think outside the box and utilize fabric paint or markers to add intricate patterns or designs directly onto the rope.
Are rope crafts suitable for beginners?
Rope crafting is an excellent choice for beginners, as it requires minimal skills and expertise. In fact, most projects only demand basic techniques such as cutting, gluing, and simple stitching. This allows new crafters to start with straightforward projects like coasters or small baskets, building their confidence before tackling more intricate designs.
How can I make my rope crafts eco-friendly?
To reduce the environmental impact of your rope projects, adopt these eco-friendly strategies: Instead of relying on synthetic fibers, opt for natural alternatives like cotton or jute, which are biodegradable and compostable. Repurpose or recycle materials from past projects, giving them a second life and reducing waste. Additionally, seek out ropes manufactured using recycled materials. By embracing these sustainable practices, you can indulge in your crafting passion while making a positive impact on the environment.
DIY Rope Projects and Crafts – 20 Things to Do with Rope
Unleash your inner crafter by exploring a plethora of innovative DIY rope projects that can be effortlessly recreated in the comfort of your own home. With an array of creative endeavors spanning from elegant plant hangers to functional coasters, you’re sure to find inspiration in this diverse collection of fun and engaging ideas.
Beautiful Rope Placemats With Fringe
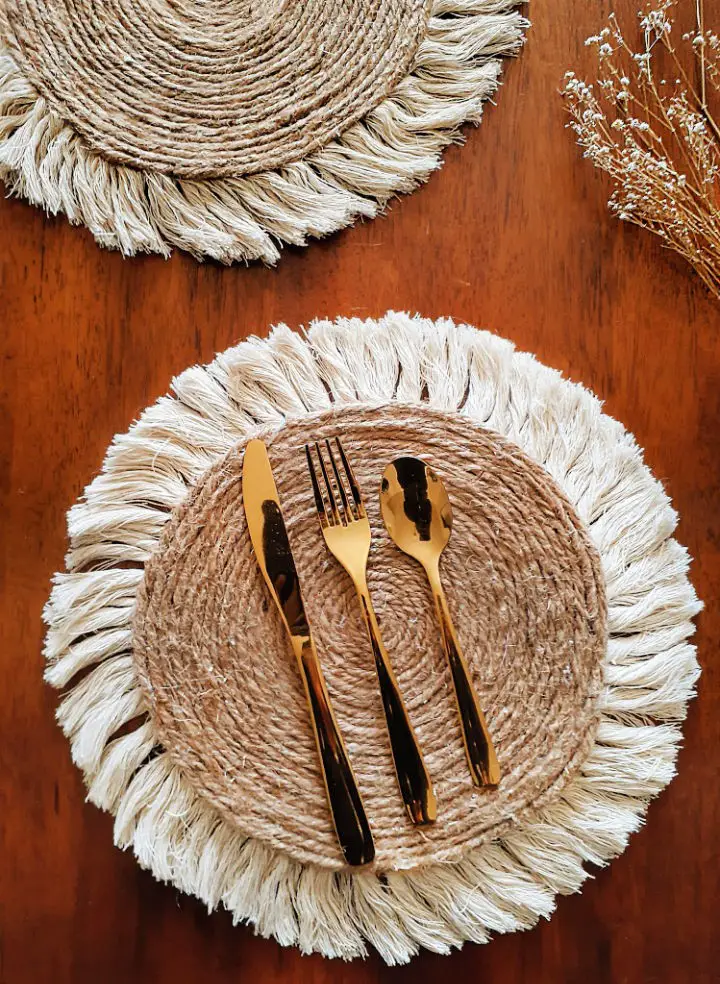
Transform your dining experience into an intimate gathering spot by creating your own bohemian-inspired rope placemats with fringe using Opal Crown’s DIY tutorials. This straightforward guide provides the necessary steps to craft unique and durable placemats from jute and nautical rope, a fraction of the cost of store-bought alternatives. To get started, gather essential materials including jute rope, hot glue gun, scissors, and a bit of patience. The addition of fringe lends a chic finishing touch, elevating your table setting with a handmade charm that’s perfect for cozy dinner parties or adding an aesthetic boost to your kitchen.
How to Make a Coastal Rope Wreath
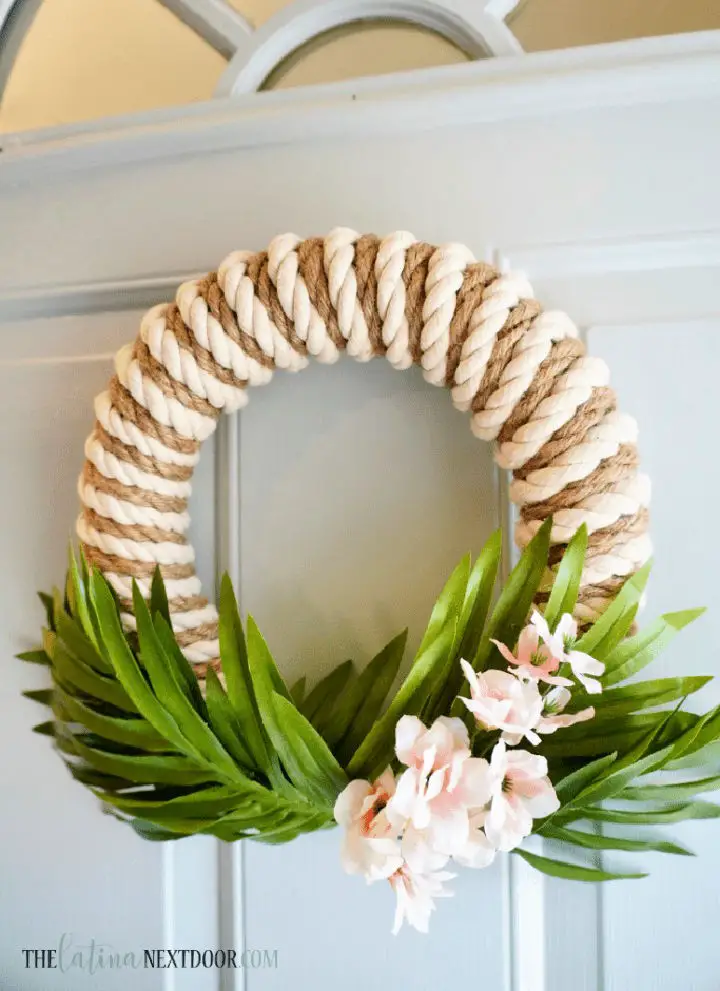
For homeowners seeking to infuse their living spaces with the warmth and charm of coastal living, The Latina Next Door offers a user-friendly and budget-friendly guide to crafting a stunning DIY rope wreath. By leveraging readily available materials like wreath forms, nautical and regular rope, greenery, and florals – all of which can be easily sourced from your local dollar store – this project is designed to be accessible to everyone. With Yami’s clear and concise instructions, you’ll be able to create a beautiful, summery wreath without any hassle, whether it’s for decorating your door or as a thoughtful gift.
DIY Rope Organizer for Desk
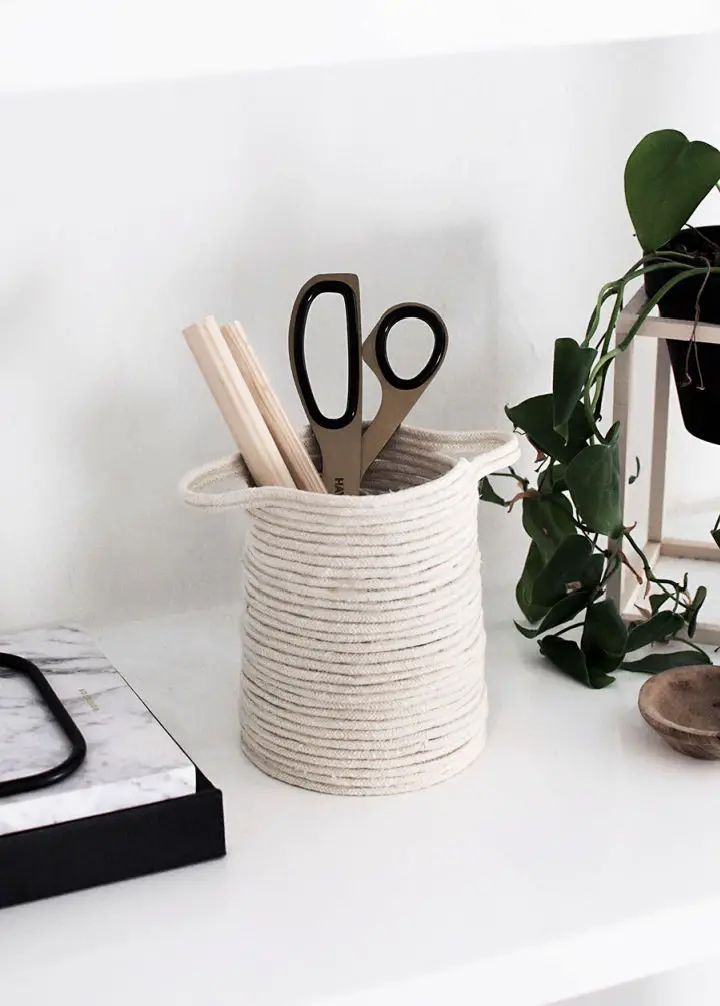
Transforming your space or wardrobe is just a twist away with fun rope projects that add a touch of creativity and whimsy. Start by tidying up your workspace with the DIY rope organizer guide from Craftsy Hacks, where you’ll learn to craft charming rope baskets that are both functional and stylish. Perfect for corralling pens, scissors, or even small plants, these handmade containers will elevate any desk or home office. With clear, step-by-step instructions, this project is accessible to crafters of all levels, allowing you to personalize your rope basket with decorations that match your unique style while avoiding damp areas to ensure its durability. Get ready to inject a dose of creativity and organization into your life.
Making a Rope Bag
Looking to add a personal touch to your accessory collection? Our step-by-step guide on crafting a one-of-a-kind rope tote bag is the perfect way to do just that. With a focus on practicality as well as style, this DIY project is accessible to even those with limited sewing experience. By following our clear instructions on selecting thread colors, managing cotton cord, and sewing the base and sides, you’ll be able to create a versatile bag that’s perfect for everyday use or gifting. As you work through the process, you’ll learn how to seamlessly transition between different thread colors and master the technique of shaping your tote. To give your finished piece an extra touch of personality, we’ll also walk you through adding tassels and other finishing touches. Whether you’re a seasoned crafter or just looking for a fun creative project, our guide has got you covered. So why not get started today?
Easy DIY Rope Mirror
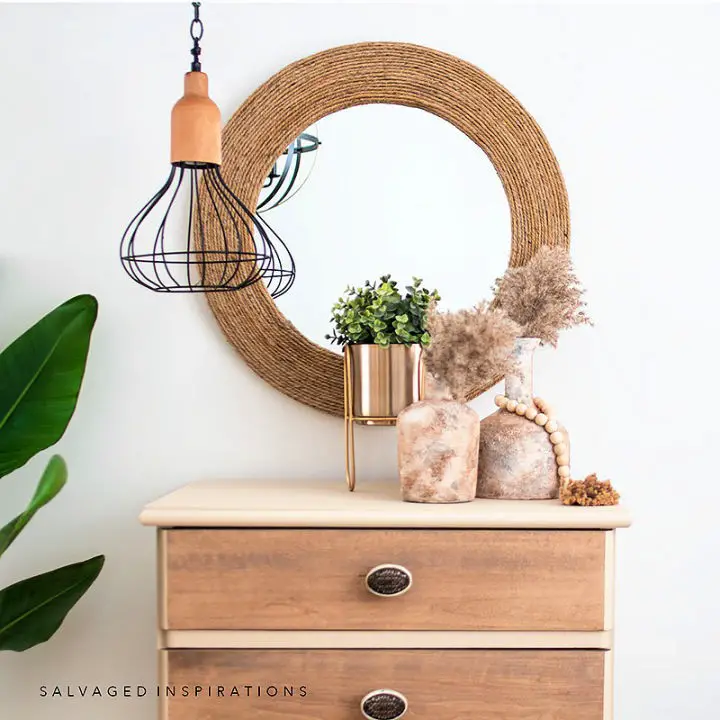
Transform a humdrum mirror into a sophisticated showstopper by breathing new life into it with this DIY rope mirror tutorial from Salvaged Inspirations. This straightforward yet impactful makeover requires just a few essential tools: a round mirror, sisal rope, scissors, a glue gun, and some additional necessities. By following this easy-to-master guide, you can recreate the look of a luxurious designer mirror for a fraction of the cost – under $20. The step-by-step process is meticulously detailed to ensure a seamless transformation, from prepping the mirror frame to securing the rope in place with precision. Whether you’re looking to add a personal touch to your living space or give an old piece new life for staging purposes, this project guarantees a captivating and rewarding crafting experience.
Pizza Pan Decorative Tray With Wood and Rope Accents
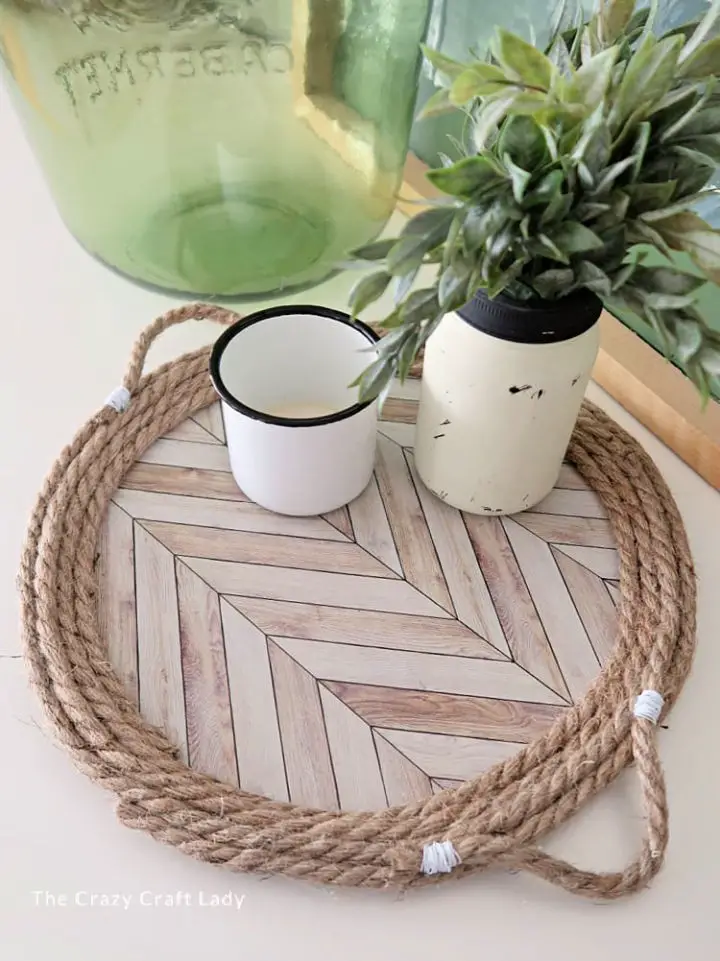
Transforming ordinary objects into extraordinary decorative pieces is an art form, and the nautical rope craft ideas showcased here will have you hooked from the start. Imagine upcycling a humble pizza pan into a stunning tray that exudes coastal charm. With a little creativity, some wood pattern wallpaper, and a length of jute rope, you can create a rustic masterpiece that’s both functional and visually striking. This tutorial is perfect for DIY enthusiasts looking to add a unique touch to their home decor. By following the easy-to-follow steps, you’ll be guided through the process of turning everyday items into one-of-a-kind treasures that are sure to impress. It’s a wonderful way to breathe new life into discarded materials and create a truly personalized space.
Creative Sea Glass Rope Lantern
Transform an ordinary pickle jar into an extraordinary sea glass rope lantern with ease! This DIY project is perfect for adding a touch of coastal charm to your home. With just a few simple materials like Krylon sea glass spray paint, jute rope, and a hot glue gun, you’ll be able to create a beautiful lantern that evokes the spirit of Japanese glass fishing floats. The step-by-step guide is designed to be clear and concise, making it accessible to crafters of all levels. Not only will you be creating something truly unique and personal, but you’ll also be giving new life to an everyday item, making this project a great way to get creative while reducing waste.
DIY Small Rope Basket
Create a charming small rope basket with ease by following our step-by-step guide. This DIY project is perfect for craft enthusiasts who don’t have sewing skills and want to achieve a natural, minimalist aesthetic using macrame cord. To get started, you’ll only need a glue gun, scissors, and parchment paper. Begin by coiling the rope on the parchment paper, applying glue as you go to build a sturdy base. Once the base reaches your desired size, stack the rope in layers to form the basket’s sides. To finish off the look, hide the rope’s end inside the basket. The resulting DIY rope basket is versatile and can be used to store small items like makeup brushes on your desk or even as a planter for your plants. Its simplicity makes it an excellent addition to any home decor.
Rope Planter Step by Step Instructions
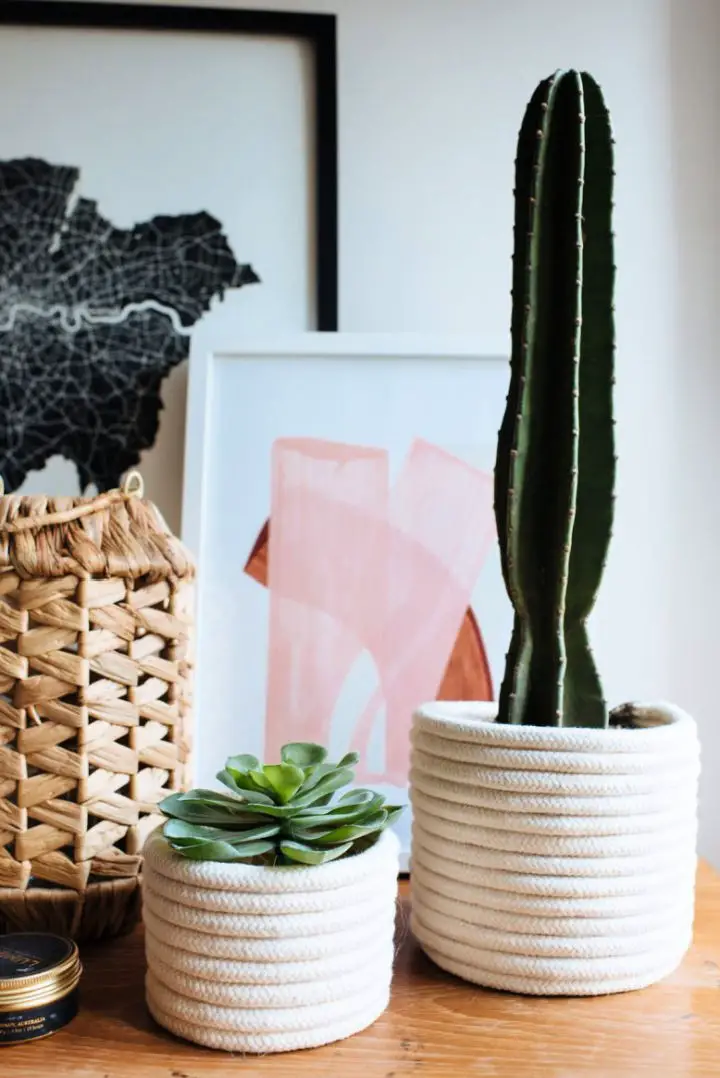
Elevate your space with rustic charm by incorporating chic rope decor ideas. With Geneva Vanderzeil’s effortless DIY guide on Collective Gen, you can craft a unique and inviting rope planter that effortlessly brings a touch of elegance to any setting. By combining a simple rope and glue gun, you can create a customized container to showcase your favorite greenery. The tutorial is designed for ease, making it accessible even for those new to DIY crafts. Learn how to coil the rope into a sturdy base and build upon it with style, all without requiring sewing skills. This rope planter project serves as both a functional storage solution and a delightful decorative piece that seamlessly blends with your home or office aesthetic.
Make Your Own Rope Bowl
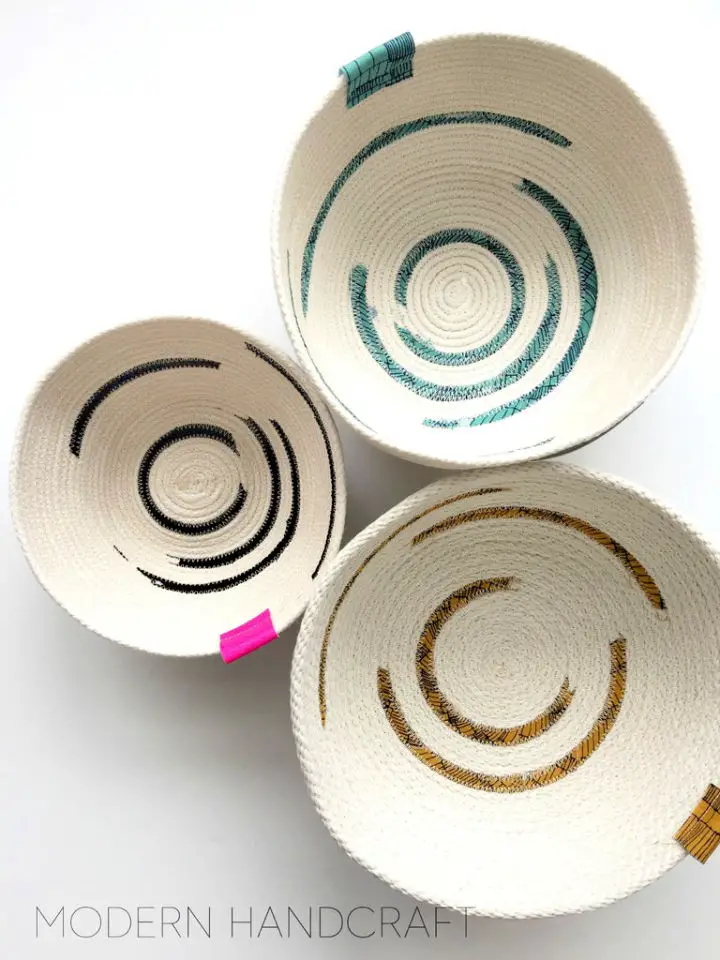
Get ready to create a one-of-a-kind rope bowl that exudes charm! Inspired by Nicole Daksiewicz’s step-by-step guide on Modern Handcraft, you’ll embark on a journey of self-expression as you craft these zigzag stitched masterpieces. Whether you’re gifting or adding a touch of handmade elegance to your home decor, these bowls can be uniquely personalized with an array of threads and fabric accents.To get started, gather essential materials: natural cotton rope, a trusty needle, and your sewing machine set to zig-zag stitch. With a dash of creativity, transform simple components into a stylish and functional piece that reflects your personal style. The tutorial is designed to be informative, engaging, and easy to follow, ensuring a rewarding crafting experience that will leave you feeling accomplished.
DIY Rope Wrapped Planters
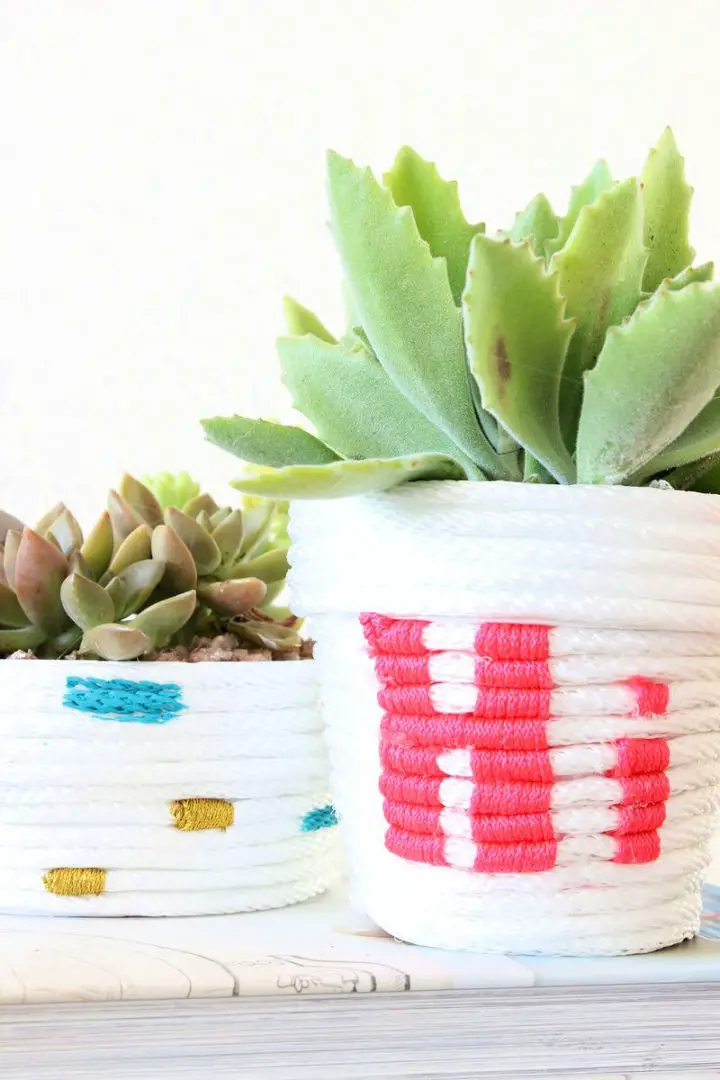
Elevate your home decor by transforming plain terra cotta pots into charming planters with a simple DIY rope-wrapping project inspired by Mallory and Savannah from Classy Clutter on A Beautiful Mess. This creative craft requires minimal materials like white acrylic paint, hot glue, and imagination, making it perfect for adding a cozy, handcrafted touch to any space. With the option to create a personalized ‘Hi’ greeting or an abstract design with pops of color, these rope-wrapped planters offer endless possibilities for customization. Follow the straightforward steps to bring a delightful handmade element to your indoor garden.
How to Make Your Own Rope Name Art
Transform a ordinary space into an extraordinary one with this DIY Rope Name Art tutorial from Love of Family & Home. This rustic yet personalized decorative piece is perfect for adding a charming touch to birthday parties, sprucing up a child’s bedroom with a Western theme, or simply creating a unique display that reflects your personal style. With simple materials like a pallet, stain, rope, and a hot glue gun, you can easily follow Tonya’s step-by-step guide to craft an eye-catching name art that will surely impress your guests and add a special touch to any celebration or room décor.
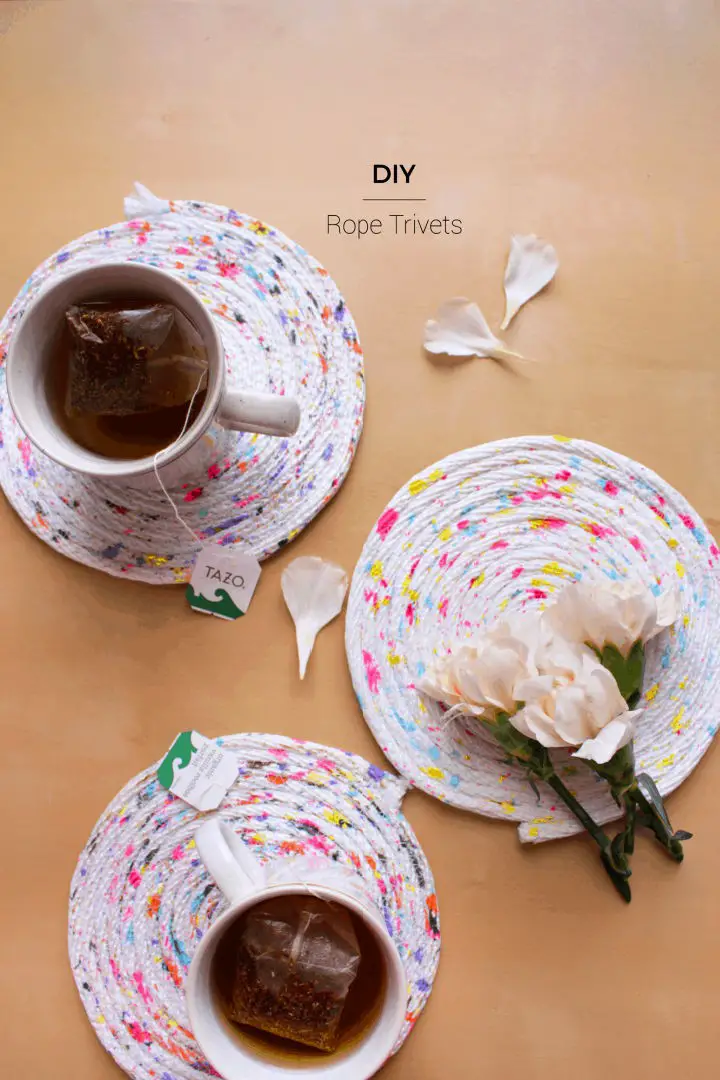
How to Make Rope Trivets
Transform the look of your home with decorative rope ideas that exude an artisanal charm. Breathe new life into discarded rope by upcycling it into stunning trivets, courtesy of Fish & Bull. These functional pieces not only safeguard your surfaces but also inject a pop of color and personality to your living space. With just a few humble materials – rope, acrylic paint, and a sewing machine – you can transform the mundane into something truly remarkable. Follow our clear, step-by-step guide to create your own one-of-a-kind splatter-painted rope trivets. Perfect for craft enthusiasts looking to put their personal touch on their home decor, this DIY project is sure to delight. Get ready to give your hot pots a sophisticated resting place with this unique and artistic endeavour.
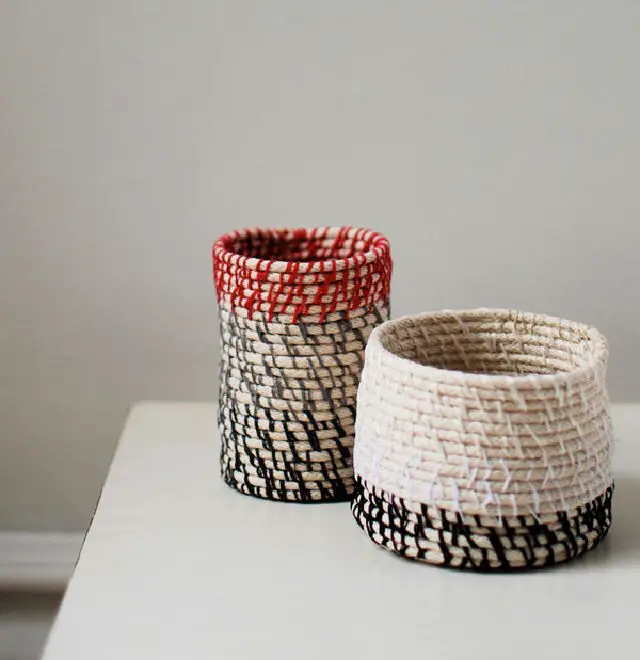
Easy Rope Coil Vessels Tutorial
Immerse yourself in the soothing world of rope coil vessels with We Are Scout’s comprehensive tutorial. This creative outlet is perfect for storing treasured jewelry or keeping your workspace tidy, allowing you to tailor the size and shape to suit your unique style. With just a few essential materials – including cotton rope, scissors, embroidery floss, and a needle – you can embark on this therapeutic crafting journey. The step-by-step guide presents a distinctive stitching method that imbues texture and visual appeal to your vessels, making them ideal for personalizing your home or gifting. As you work through the process, you’ll find solace in the repetitive motions, which will help you unwind and relax as you stitch in the warmth of the sun. With endless possibilities for color and shape variations, you can even experiment with dyeing the cotton rope to give your creations a one-of-a-kind look.
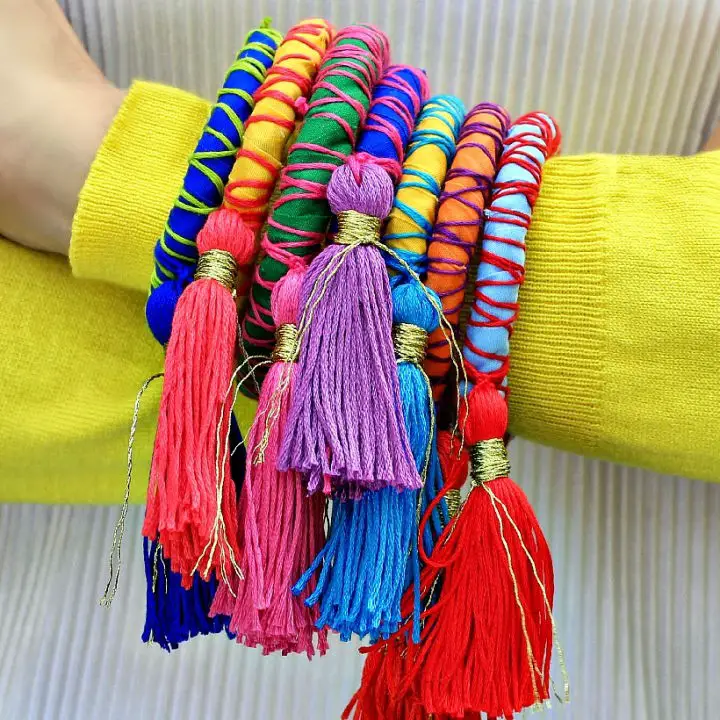
DIY Rope and Tassel Bangles
Transform your accessories game by crafting adjustable rope and tassel bangles that complement any wrist size. By combining polypropylene rope, vibrant embroidery floss, and fabric strips, you’ll create one-of-a-kind pieces that add a touch of personality to your wardrobe. This simple yet elegant project requires minimal supplies, making it perfect for beginners or as a thoughtful gift for friends and family. Follow our easy-to-follow instructions to learn how to cut the rope, secure the ends, and add tassel embellishments for a truly personalized look. Whether you’re looking to elevate your jewelry collection or create a unique accessory to stack with your favorite pieces, these stylish bangles are sure to impress.
How to Do a Rope Picture Hanger
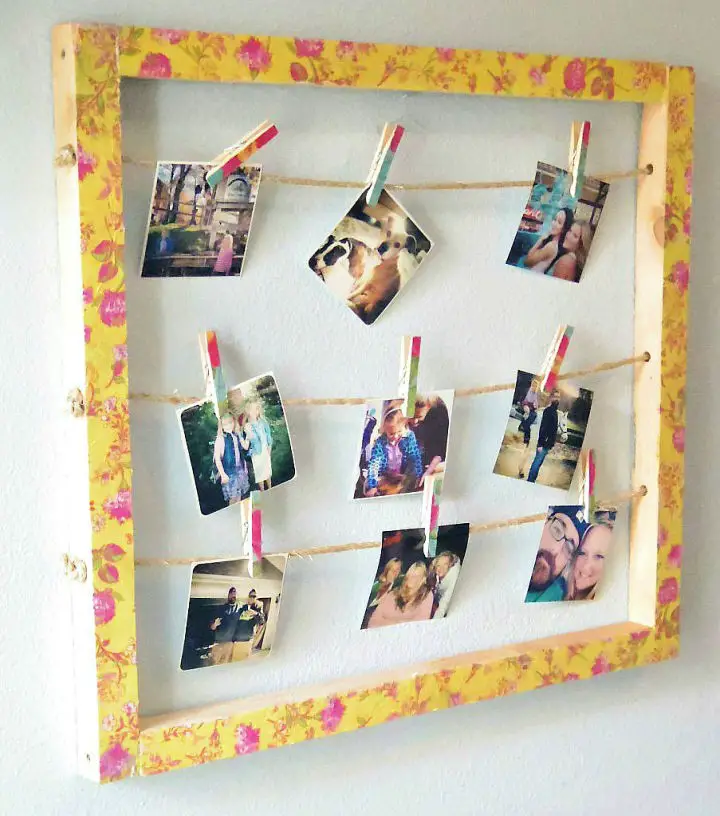
Transform the ordinary into something extraordinary by infusing handmade charm into your home decor with this DIY rope picture hanger tutorial from Addison Meadows Lane. Crafty enthusiasts will appreciate the simplicity of this step-by-step guide, which utilizes basic materials like wood, screws, rope, and decorative napkins to create a one-of-a-kind picture display that showcases cherished memories. With its straightforward instructions and helpful hints, this project allows you to add a personalized touch to your walls, making it an ideal way to turn everyday items into stunning decor pieces. As you get started with the necessary supplies, you’ll be delighted to find a lovely rope picture hanger that will keep your treasured moments front and center.
Simple DIY Rope Table Chargers
Elevate the ambiance of your outdoor dining with a touch of handmade charm using DIY rope table chargers from Lia Griffith. These rustic yet sophisticated chargers are not only visually striking but also remarkably easy to craft. With just a few simple materials, including a low-temp hot glue gun, scissors, sisal rope, and cork, you can create a set of durable table chargers that will leave your guests impressed at any summer gathering. Lia Griffith’s clear instructions make it easy to follow along and elevate your crafting skills, allowing you to add a unique personal touch to your outdoor decor.
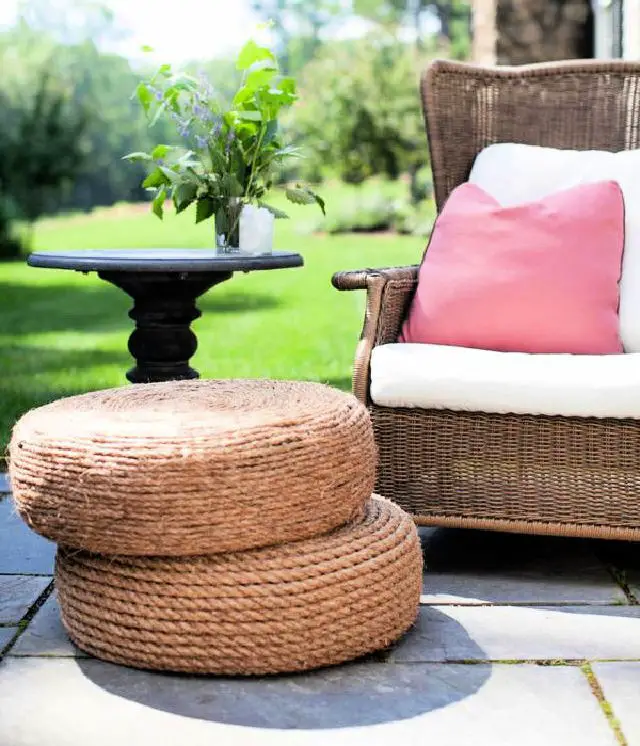
Homemade Rope Ottomans
Unlock the endless possibilities of rope crafts and transform an old tire into a one-of-a-kind rope ottoman with Style Me Pretty’s innovative DIY guide. This project is perfect for adding a touch of personality to your sunroom or patio. With just a spare tire, sisal rope, nylon rope, hot glue gun, scissors, and optional sealer for outdoor use, you can create a functional piece that blends form and function. To start, wrap the nylon rope tightly across the tire’s base, providing a sturdy foundation. Next, meticulously weave and glue the sisal rope around the tire’s sides and top, forming a snug and attractive cover. Finally, apply a sealant for outdoor use if desired to ensure your creation remains durable and long-lasting. By following these simple steps, you can create a unique and stylish upcycled home accessory that reflects your personal style.
Making a Round Rope Rug
Indulge in the world of rope crafts for adults, where creativity meets functionality. For those seeking sophisticated DIY solutions, learn how to craft a charming round rope rug with Geneva Vanderzeil’s comprehensive tutorial from collective gen. This straightforward yet satisfying project allows you to infuse your living space with a personal touch. By following step-by-step instructions, you’ll master the art of rolling rope into a spiral, securing it with strong adhesive, and shaping a rug that suits your size preferences, even up to 1.5m across. Perfect for enthusiasts of handcrafted home decor, this guide is an absolute must-try for anyone eager to elevate their abode with a unique, handmade rug. The clear, engaging, and instructive guidance ensures that you can easily bring this stylish and practical piece to life.
DIY Candy Painted Rope Trivet
Transform your dining space with a one-of-a-kind candy-painted rope trivet, where form meets function. This vibrant piece is easily crafted using natural jute rope, a glue gun, and an assortment of bright acrylic paints, including baby pink, surf blue, and lavender, all available at pop shop america. As you carefully paint each twist of rope, you’ll be creating not only a practical surface for hot dishes but also a stunning work of art that adds a touch of personality to your home. A perfect project for craft enthusiasts, this DIY endeavor promises both entertainment and functionality.
Conclusion:
As you wrap up your DIY rope project journey, it’s clear that embracing this versatile material offers a world of creative possibilities, extending from elevating your home decor to crafting one-of-a-kind gifts. The insights gained through our guide on selecting the perfect rope, acquiring the necessary tools, and mastering fundamental techniques now empower you to tackle the 20 things to do with rope we’ve explored. The key to success lies in cultivating patience, nurturing creativity, and embracing a willingness to learn and adapt. With these essential elements in place, seize your rope and embark on your next DIY escapade, transforming humble materials into extraordinary masterpieces.

