DIY Rain Stick Out of Recycled Paper Towel Roll
Experience the serenity of eco-friendly crafting with this simple DIY project for a homemade rainstick. This unique instrument recreates the calming sound of falling rain, making it an ideal way to engage children in creative activities while teaching them about recycling and upcycling.
The process requires minimal materials, including a paper towel roll, sheet of paper, aluminum foil, plastic wrap, dry beans or popcorn kernels, and your choice of markers or stickers for decoration. The clever inclusion of aluminum foil slows down the movement of the kernels, mimicking the soothing pitter-patter of rain.
Transform your everyday kitchen and craft room supplies into an enchanting auditory experience with this homemade rainstick. Its calming melody is sure to bring a shower of fun to your home. Let your imagination run wild as you craft with a purpose.
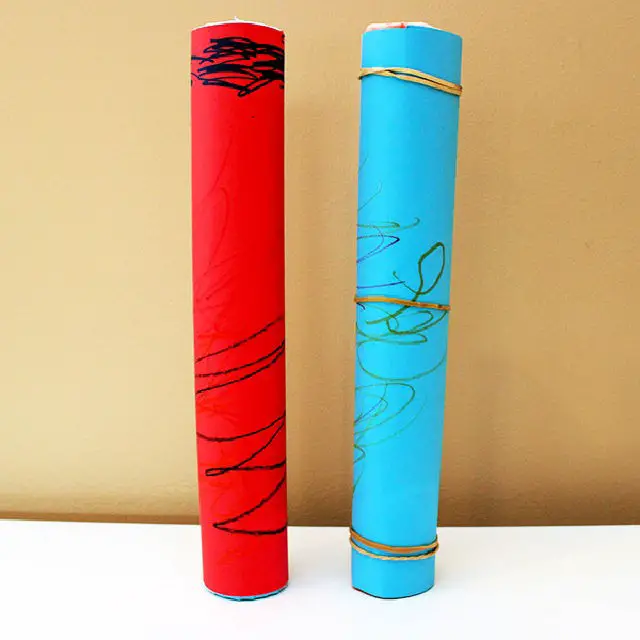
Paper Towel Roll Rainstick Craft

Transform a gloomy rainy day into a fun-filled adventure by crafting a homemade rainstick! This easy DIY project is an excellent way to engage your creativity and senses, while also creating a delightful musical instrument. To get started, gather simple materials like a paper towel roll, colored construction paper, rubber bands, aluminum foil, rice, scissors, and a glue stick.
Begin by wrapping the construction paper around the tube and securing it with some glue. Next, create a corkscrew shape using the aluminum foil to fit snugly within the tube. Add a pinch of rice for texture, then seal both ends with paper squares held tightly in place by rubber bands. Voila! Your rainstick is now ready to produce soothing, rhythmic sounds that will transport you to a sunny day.
This tactile craft activity is perfect for kids, as it encourages creativity and sensory exploration. Feel free to get artistic and decorate your rainstick with colors, patterns, or even glitter to make it truly one-of-a-kind. So, the next time the rain rolls in, don’t let it dampen your spirits – shake things up with this supremely simple yet effective craft project!
How to Make Rainsticks – Step-by-Step Instructions
Transform a gloomy day into an opportunity for creative expression with your kids by crafting rainsticks from cardboard tubes. Gather any spare tubes you have lying around and let your children’s imagination run wild as they decorate them with crayons, construction paper, or other materials of their choice.
To bring the sound of rain to life, seal one end of the tube and insert a crumpled piece of aluminum foil. Then, add about 1/2 cup of rice or birdseed before sealing the other end. As you shake the rainstick gently from side to side, the soothing sound of falling rain will fill the air.
This project is an excellent way to make indoor activities enjoyable, rewarding, and achievable for your kids. By embracing this weather-themed craft, you’ll not only be making some noise but also fostering a sense of family fun and creativity.
Homemade Rainstick Using a Cardboard Tube
Imagine embarking on a creative journey with your little ones, crafting a homemade rainstick that’s both a fun and educational experience. This engaging DIY project is perfect for kids to explore the world of sound in a hands-on way. By using everyday materials like cardboard tubes, paint, yarn, and various fillers, you’ll be amazed at how easy it is to create a unique instrument that produces a distinct sound.
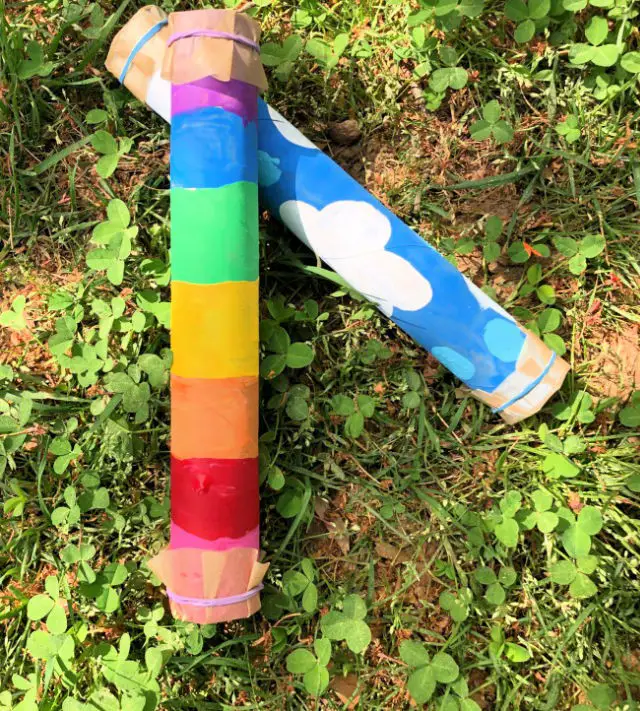
Easy Rainbow Rainstick Craft for Kids
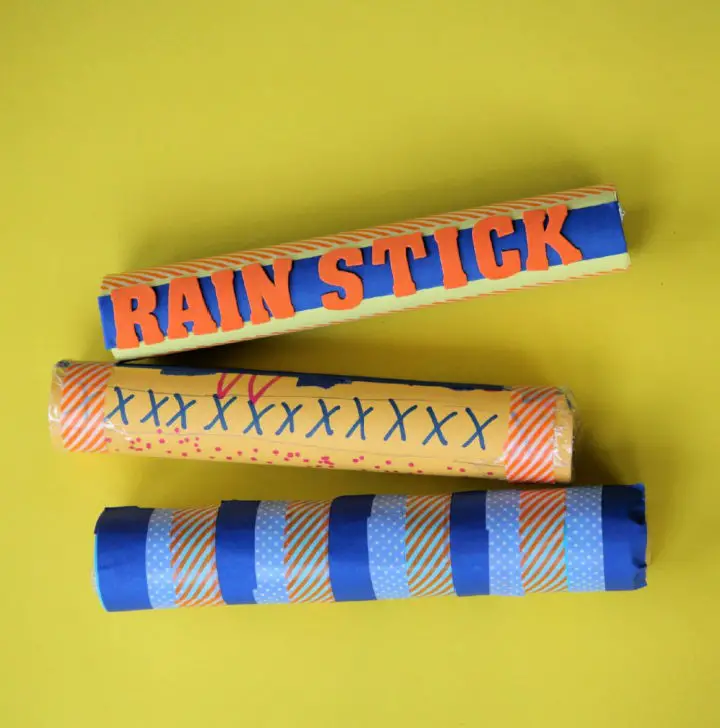
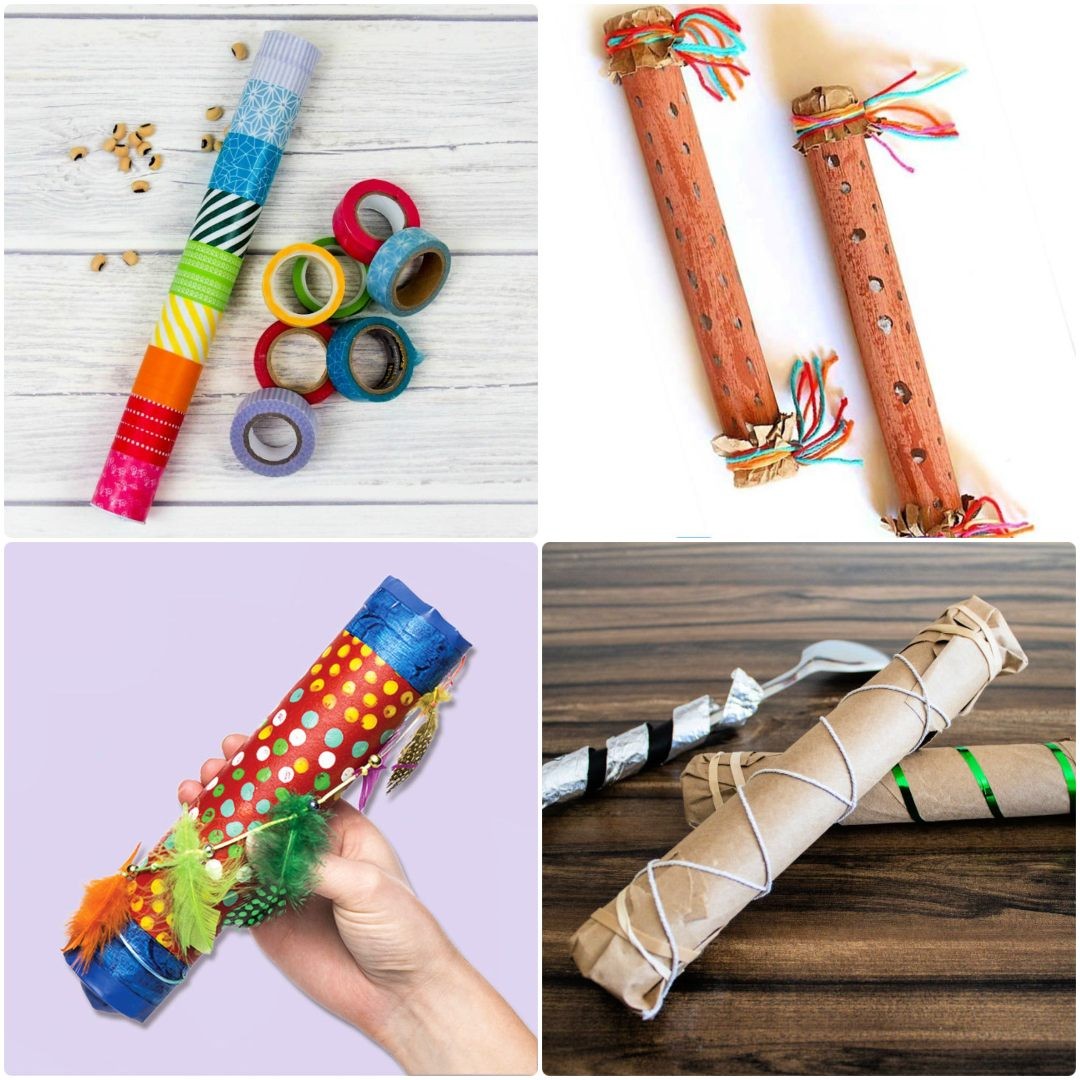
Transform an ordinary cardboard tube into a vibrant rainbow rainmaker using recyclable materials! This DIY project is a perfect blend of art, music, and eco-friendliness. By combining the humble cardboard tube with colorful washi tape, white duck tape, and dried beans or rice, you can create a lively homemade musical instrument that will bring joy to both kids and adults. With its rich cultural heritage drawing inspiration from the Aztecs’ rainmaking traditions, this craft is not only a delightful plaything but also a meaningful way to celebrate special occasions like St. Patrick’s Day. Let your creativity shine and bring colors to life with this easy-to-make, eco-friendly craft!
How to Make a Rain Stick for Preschoolers
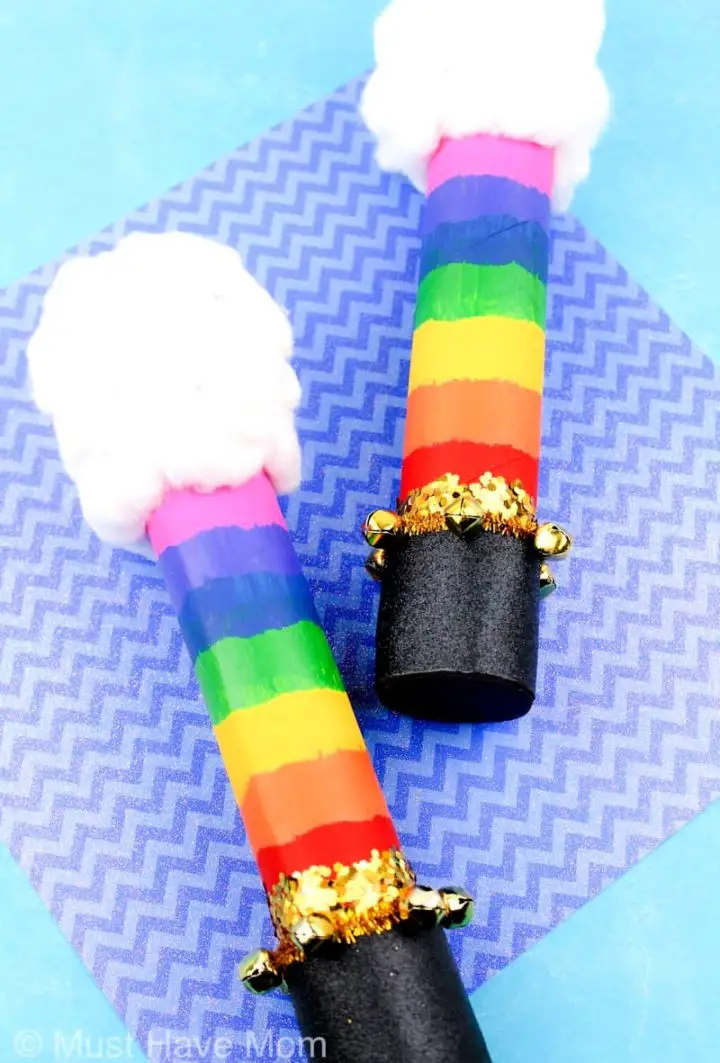
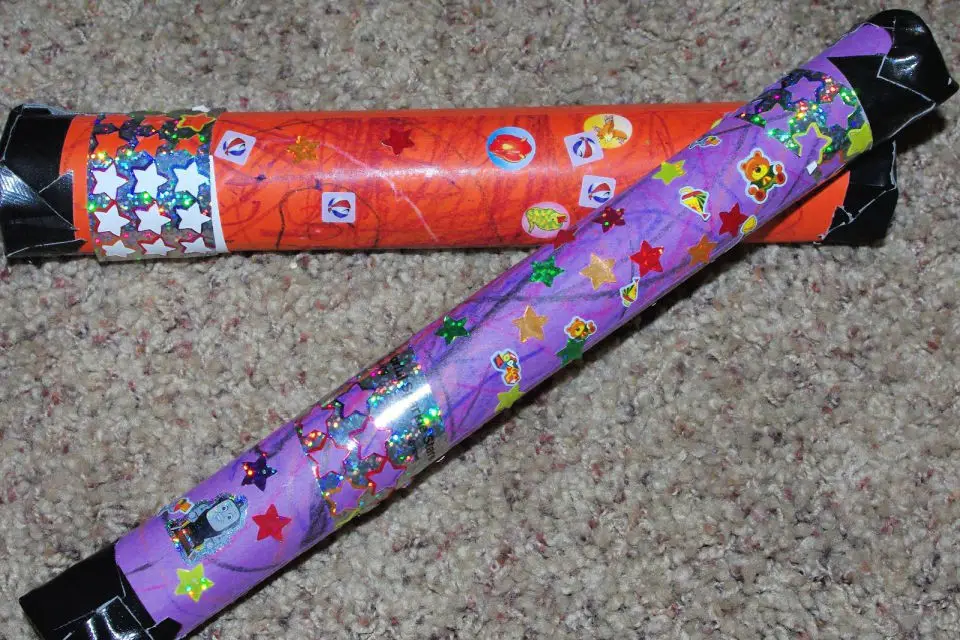
Transform an ordinary paper towel roll into a mesmerizing rainbow rain stick, fostering creativity and imagination in your kids. This innovative upcycle project combines discarded materials with vibrant art supplies, transforming them into a one-of-a-kind toy that’s both educational and entertaining. As you guide your children through this easy-to-follow process, they’ll learn about recycling, develop their artistic skills, and gain an appreciation for the beauty of sound. With supplies like paint, foil, rice, gold bells, and glitter, you’ll create a dazzling rainmaker that’s perfect for St. Patrick’s Day or any rainy day. As your little ones explore this homemade musical instrument, they’ll discover the joy of learning through play, unleashing their creativity and imagination in a kaleidoscope of colors.
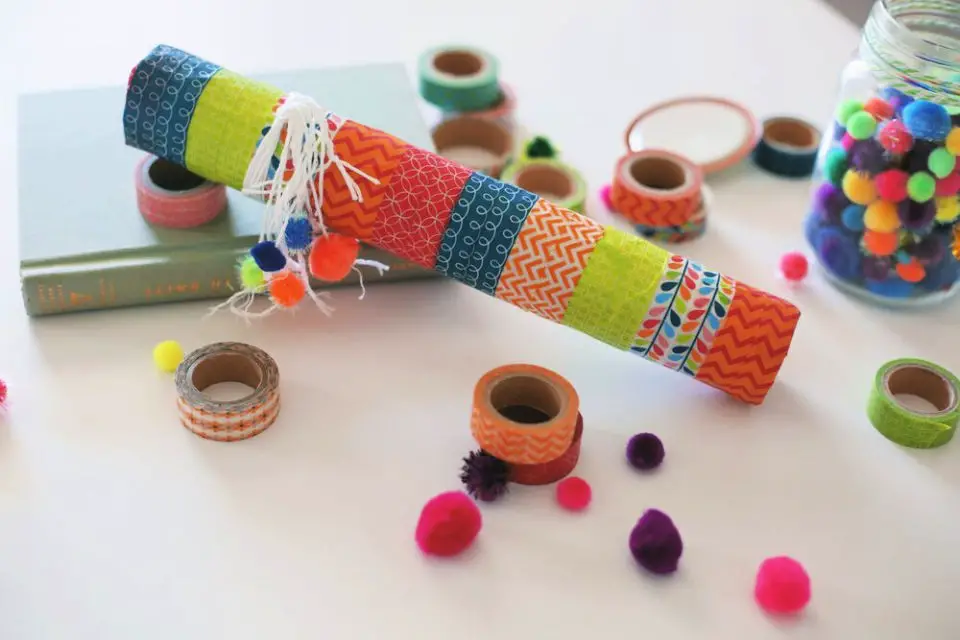
Bright and Colourful Rainstick Tutorial
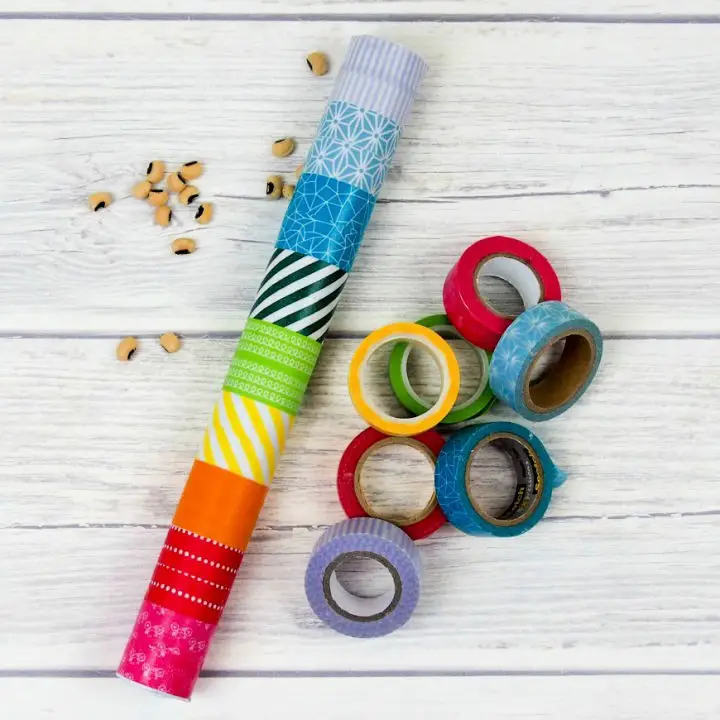
Transform ordinary materials into an extraordinary DIY rainstick with your kids! This straightforward guide will walk you through the process, from decorating a cardboard tube to creating a calming sound experience that mimics the rhythm of raindrops. With minimal parental involvement and just a few supplies like pens, cotton wool, washi tape, quinoa, and paper, your little ones can engage in a creative and educational activity that develops their motor skills and imagination while fostering a sense of pride and accomplishment. As you explore this fun project together, feel free to discover more innovative craft ideas on the blog for endless inspiration!
How to Make Your Own Rain Stick

Transform everyday items into a mesmerizing sound-making instrument by crafting your own rain stick at home. This accessible project is perfect for kids and requires minimal materials, including gift wrap tubes, cereal boxes, packing tape, assorted beans, and decorative embellishments. Unleash your creativity by wrapping the outer layer with kraft paper, crayons, yarn, feathers, or any other craft supplies you have on hand. The result is a unique, educational toy that not only entertains but also encourages auditory exploration. Give it a try!
Handmade Rain Stick Using Recycled Products
To create a unique instrument that captures the essence of rain, follow this step-by-step guide. With just a few simple materials like cardboard rolls, toothpicks or pipe cleaners, wax paper, and rice or dry beans, you can craft your own rain stick. Assemble the components, fine-tune the elements to achieve the perfect sound, and immerse yourself in the calming and creative experience of making your very own rain stick. Unleash your artistic side and bring the serenity of rainfall indoors.
Cheap DIY Rainstick Instruments
Transform a mundane household item into a mesmerizing DIY rainstick that sparks creativity and imagination in your preschooler! With just a few simple materials like a paper towel roll, grocery bag, tin foil, a large spoon, and rice, you can create an engaging toy that’s perfect for sensory play. Here’s how: Start by rolling the tin foil into a long strip, then wrap it around the spoon handle to form a coil. Next, insert the coil into the paper towel roll, securing the ends with the grocery bag and rubber bands. Once you’ve got your rainstick assembled, pour in some rice and watch as it comes to life, producing a soothing, rain-like sound when tilted. To take it to the next level, add some visual flair with markers, stickers, paint, or ribbon. This interactive toy not only fosters creativity and learning but also encourages musical exploration, making it an excellent activity for developing your little one’s auditory skills.
How to Do Rain Stick
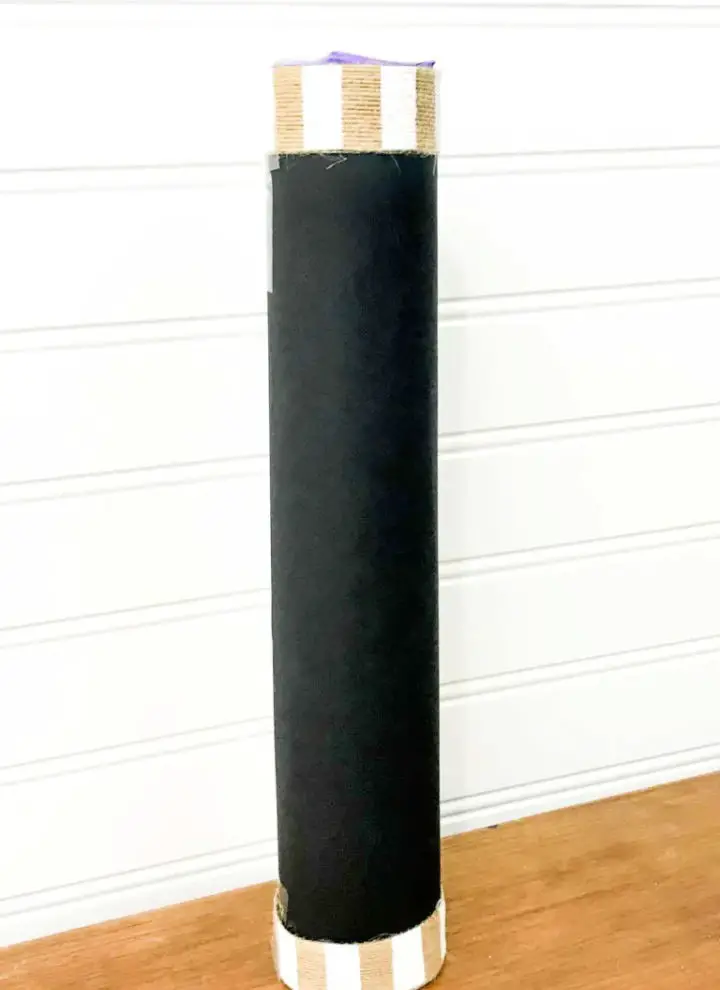
Transform your space into an oasis of serenity by crafting a DIY rainstick! This ancient instrument has been reimagined using household materials to bring a touch of magic to your surroundings. Begin by decorating a kitchen towel tube with acrylic paints in a pattern that reflects your personal style, allowing it to dry completely before proceeding.
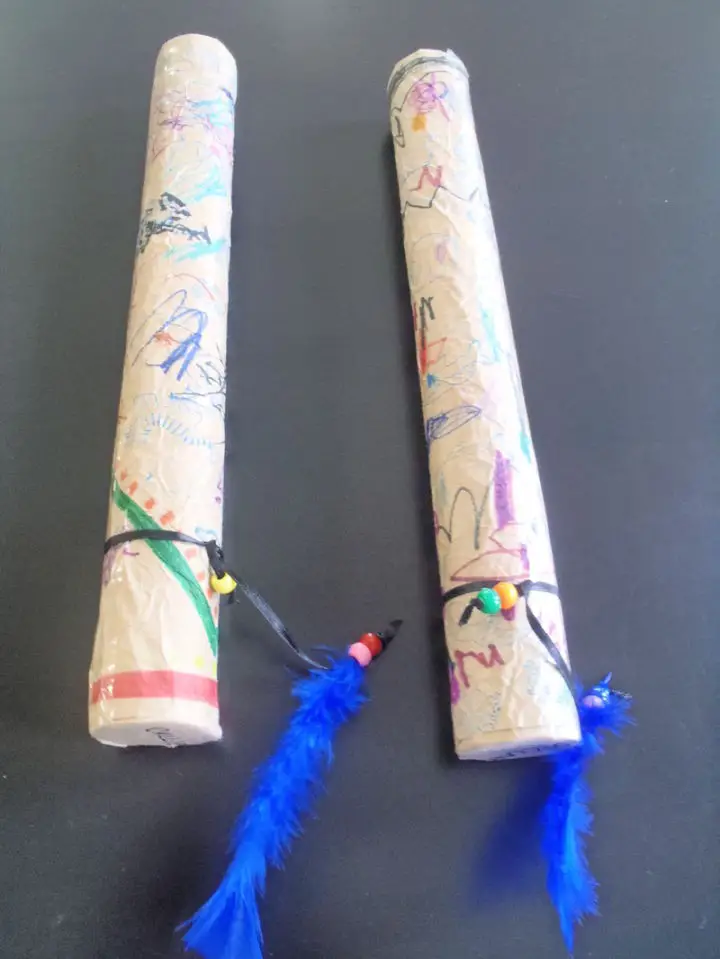
DIY Native American Rain Stick

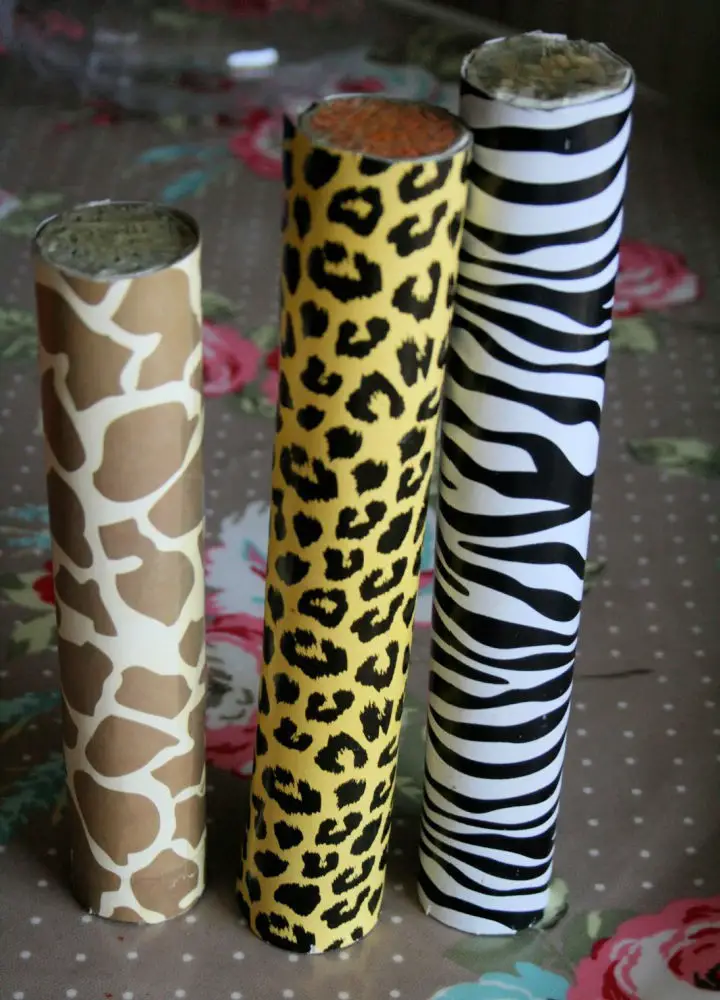
Embark on a sensory journey by crafting your own DIY Native American-inspired rainstick, a delightful blend of creativity and cultural exploration suitable for both children and adults. The core material is a humble kitchen roll tube transformed through the layering of colored cards and filled with rice, lentils, beads, or small pebbles to alter the sound. By following a straightforward step-by-step guide, you’ll meticulously build up red, yellow, and green cards, securing them with double-sided tape. The process culminates in an opportunity for personal expression through decorative embellishments, making this unique project a captivating conversation starter that brings a touch of melodic charm to your surroundings.
Simple DIY Musical Rainstick
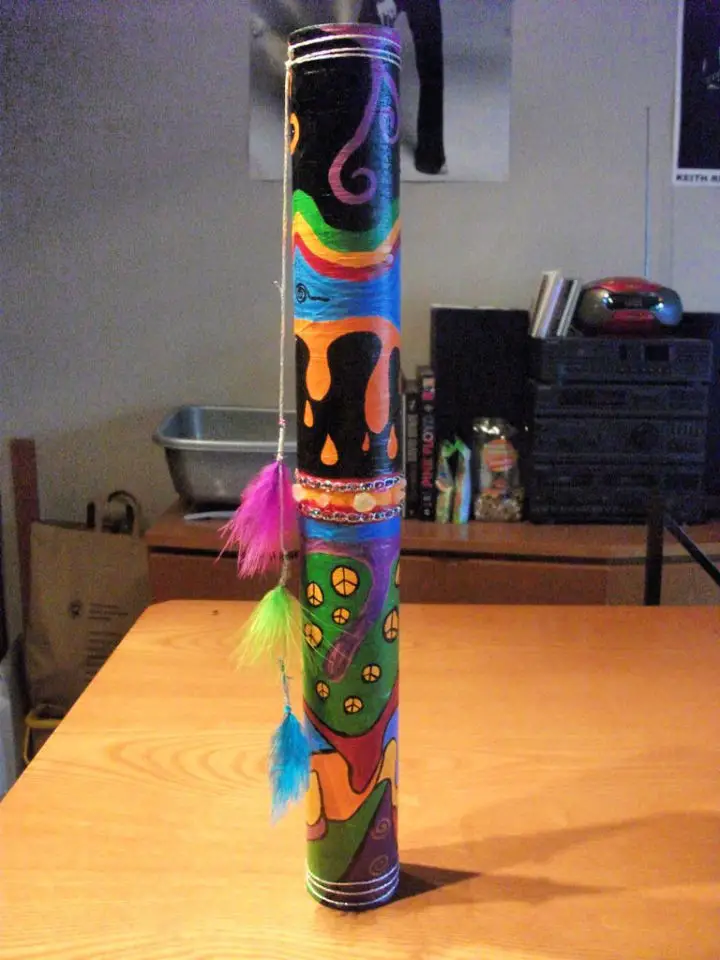
Transform your space into a serene oasis with a DIY rainstick that’s both a craft project and a musical instrument. Using simple materials like cardboard tubes, aluminum foil, and rice or lentils, you can create a reusable tool that fills the air with soothing sounds. The process is straightforward: wrap craft paper around the tube to give it a decorative touch, then create a spiral pattern on the foil to guide the rice as it flows through the stick. Finally, seal both ends securely to ensure the sound waves flow freely. But why stop there? Unleash your creativity by adding feathers, beads, or stamps to take your rainstick to the next level. This project is perfect for all ages and can inspire kids to learn about the history of rainsticks and traditional construction methods. With a little imagination, you can create a unique instrument that will have you making music and enjoying the rhythm of the rain in no time.
DIY Recycled Paper Tube Rainsticks
Transform the ordinary into an extraordinary musical experience by crafting DIY paper tube rainsticks with children. By combining DecoArt Americana Paints, scissors, parchment paper, and household materials, this engaging project not only fosters creativity but also nurtures all aspects of child development, including intellectual, social-emotional, motor, and language skills. As music plays a vital role in school readiness, let’s explore this innovative activity that harmonizes learning, creativity, and self-expression. This collaborative effort is an opportunity to explore color, build confidence, and unleash imagination, making it an ideal way to spend quality time with kids.
Simple Rain Stick Craft for Kids
Unlock your inner child’s creative potential by crafting a unique rain stick instrument! This DIY project simulates the calming pattern of rainfall, producing soothing sounds that will transport you to a serene environment. To begin, gather a paper towel roll, aluminum foil, rice, clear tape, a wooden spoon, and a broom handle. Optional tools include a funnel for easy filling and colored paper for decoration.
Start by twisting the aluminum foil into spirals using the broom handle and wooden spoon as guides. These twisted shapes will be inserted into the paper towel roll, followed by a quarter cup of dried rice. Secure the ends of the roll with circles of paper and copious amounts of clear tape.
Add a colorful touch to your rain stick by wrapping it in colored paper, and let your creativity shine by decorating with markers and rubber bands. Once you’ve finished crafting, sit back and enjoy the rhythmic sound of ‘rain’!
Create Your Own Rain Stick
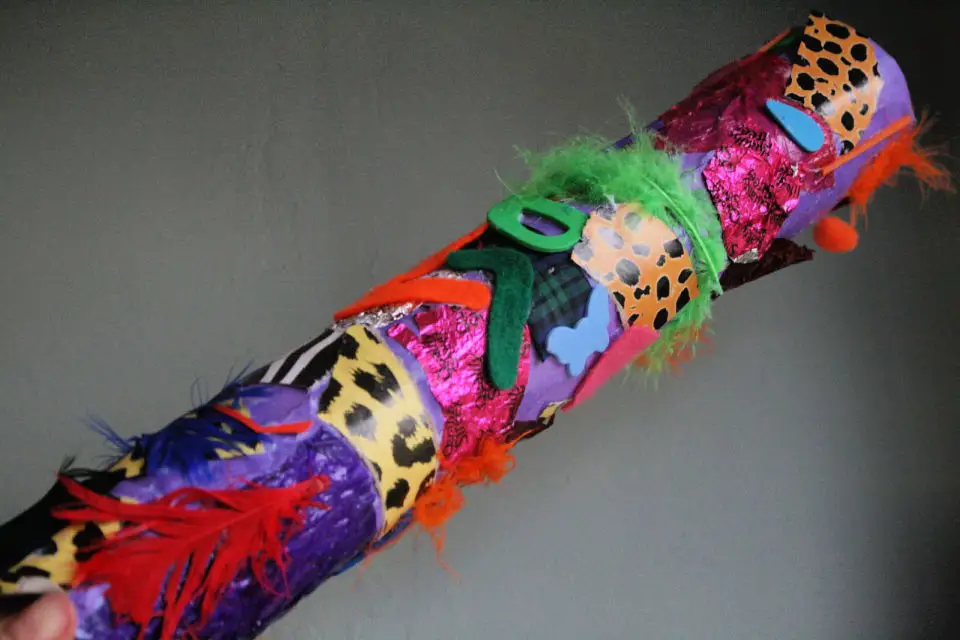
Immerse yourself in the soothing sounds of DIY rain sticks, a delightful craft that recreates the symphony of falling rain. By twisting these unique instruments from side to side, you’ll be transported to a serene atmosphere, perfect for calming your senses. To bring this musical masterpiece to life, gather a few simple materials: a cardboard tube, some nails, a hammer, duct tape, and your preferred filling – such as beans or rice. As you shape the sticks into captivating artwork, feel free to get creative with decorating materials like washi tape, wrapping paper, fabric, or even foil, allowing you to personalize it according to your style. This engaging project is an excellent way to spend quality time with loved ones, making it a memorable experience for the whole family.
Making a Rainstick From a Paper Towel Roll
Transform everyday items into an innovative musical experience with a simple yet captivating craft project. By upcycling a humble paper towel roll and combining it with household materials, you can create a one-of-a-kind rainstick that will mesmerize both children and adults. The process is straightforward: gather basic supplies like cardboard tubes, rice, and decorative items such as paint, beads, or ribbons. As the sensory activity unfolds, creativity flows, and children become fully engaged, lost in the rhythm of the falling rain’s enchanting sound. With minimal effort and detailed instructions, you’ll be delighted to discover how easily you can replicate this captivating instrument.
How to Make Rain Stick in 7 Steps
Transform an everyday cardboard tube into a one-of-a-kind rain stick that produces a soothing sound. This DIY project requires minimal materials: a 1.5m cardboard tube, nails, and lentils. Start by hammering the nails in a spiral pattern around the tube, maintaining equal spacing for a consistent sound profile. The type of filling material used – lentils, rice, beans, or sand – allows for personalization of the ‘rain’ sound to your liking. Secure both ends with wooden circles or similar materials and wrap the tube in masking tape to keep the nails in place. Unleash your creativity by adding acrylic paint and optional embellishments like ribbons or feathers. Finally, seal your masterpiece with varnish for durability and enjoy the calming rhythm of your handmade rain stick, infused with unique character and personal flair.
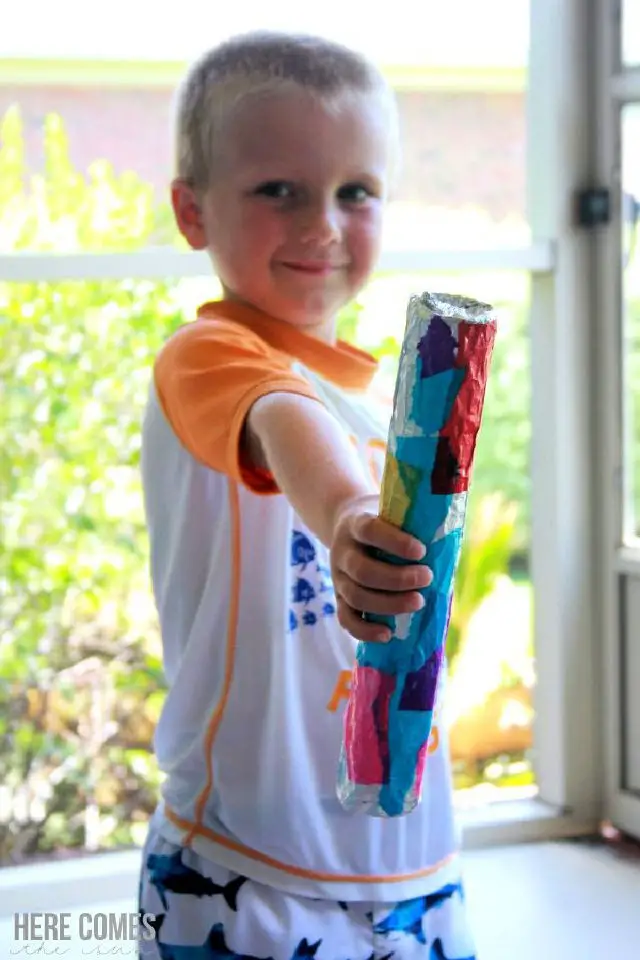
How Do You Make a Rain Stick
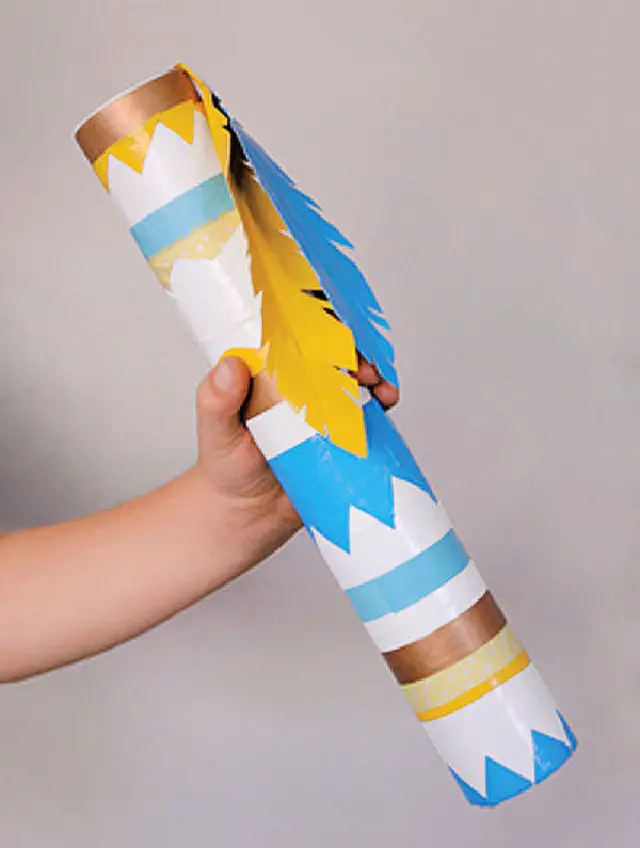
Transform a humble paper towel tube into a melodious instrument reminiscent of rainfall with your very own DIY rainstick. By combining the humble materials of tin foil, uncooked rice, and colorful masking or duct tape, you’ll create an instrument that not only produces a delightful sound but also fosters creativity and learning about acoustics. To construct this unique instrument, begin by fashioning a tin foil coil that will slow down the flow of rice when placed inside the tube, resulting in a prolonged, rain-like sound. Take it to the next level by adding decorative duct tape feathers for a personalized touch. When held at a gentle 45-degree angle, your rainstick is ready to produce a soothing, rhythmic sound that can be repeated again and again. This exciting project is an excellent way to combine creativity with learning about the wonders of sound!
Make Your Own Rain Stick
Transform a simple cardboard tube into an enchanting musical instrument that recreates the calming sound of falling rain with this DIY rainstick project. The core components are a sturdy tube, small nails, and your preferred filling material – think beans, rice, or even macaroni. This creative endeavor offers a unique opportunity for young children to express themselves through colorful wrapping paper or delightful decorations from a treasure trove. As you complete the project, you’ll be left with a homemade instrument that captures the essence of a gentle rain shower and serves as a fun, interactive learning tool. The making of a rainstick not only fosters an understanding of instruments and music-making but also refines fine motor skills, encourages creativity, dance, and movement – an ideal blend of learning and entertainment.
DIY Baby Size Rain Sticks
Create a mesmerizing DIY baby play bottle in just 5 minutes that will captivate your little ones’ imagination. This simple yet engaging toy not only provides entertainment but also fosters motor skills and color recognition. To get started, gather an empty bottle, baby oil, water, food coloring, craft foam, sequins, silver glitter, and glycerine. As the glitter and shapes dance around inside the bottle, your babies will be fascinated by this sensory experience. Feel free to customize with different colors and shapes to keep playtime exciting and fresh. Always supervise your little ones while they’re playing with these bottles to ensure a safe and enjoyable experience.
How to Make a Rainstick at Home
Transform everyday household items into a unique and educational DIY rainstick with this fun project guide. By combining materials like paper towel rolls, aluminum foil, rice, and paper, you’ll not only ignite your child’s creativity but also introduce them to the fascinating science of sound waves.
As they learn how sound travels through different mediums and interacts with its environment, they’ll also discover the principles behind noise-canceling headphones. Take it to the next level by using an empty Gerber Puff bottle as a base for your custom rainstick.
This inexpensive and easy-to-construct DIY Rainstick offers a captivating blend of art, music, and science that’s sure to delight both kids and adults alike.
Creative PVC Pipe Rain Stick
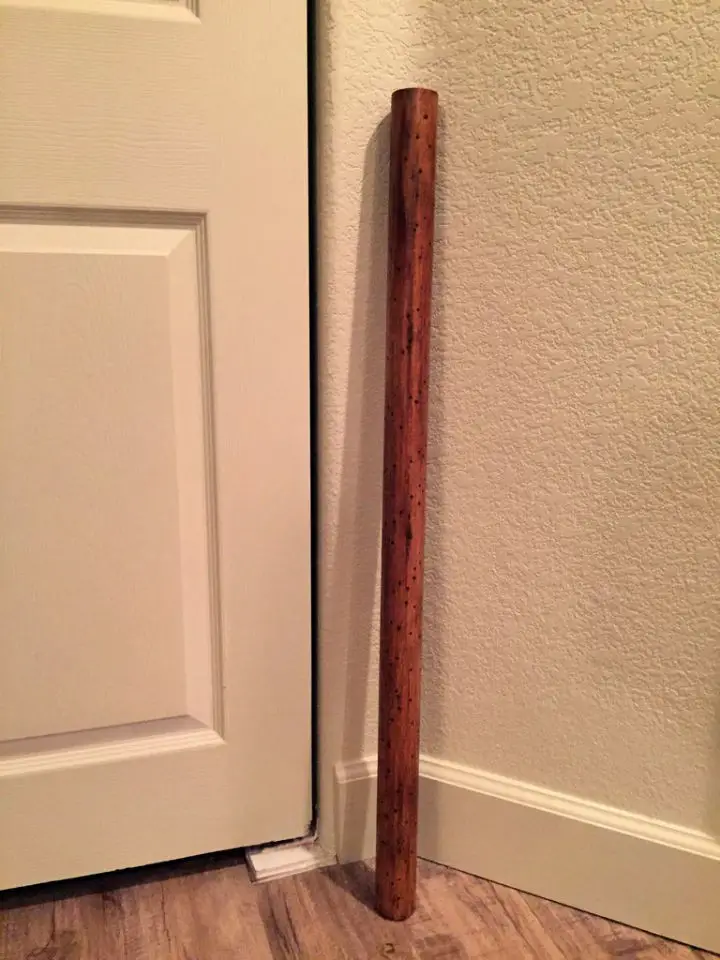
Transform your living space into a serene atmosphere with this innovative DIY project using a PVC pipe rain stick. This unique percussion instrument mimics the soothing sound of falling rain, providing an immersive audio experience from the comfort of your home.
This creative endeavor combines resourcefulness and imagination, utilizing a standard 36-inch long PVC pipe drilled with holes and paired with bamboo skewer sticks. The straightforward process yields a visually appealing piece that produces calming sounds, making it an excellent addition to your DIY repertoire.
While the PVC pipe rain stick may seem like an unconventional musical instrument, its striking acoustic effects and aesthetic appeal make it a compelling inclusion in your collection of handmade creations.
Easy DIY Rain Stick
Transform a mundane summer day into a musical adventure with a DIY rainstick project that’s perfect for bonding with your little one! Using readily available materials like a paper towel roll, nails, aluminum foil, tissue paper, Mod Podge, and rice, you can create a unique instrument that captures the soothing sounds of rainfall. As you work together, your child will develop their creativity and fine motor skills while enjoying the thrill of transforming simple supplies into something new. To add an extra layer of fun, experiment with different fillers or tube lengths to produce a variety of sounds. This engaging craft is an excellent way to combine play and learning, guaranteeing hours of entertainment and inspiring your child’s love for DIY projects.
Making Your Own Rain Stick
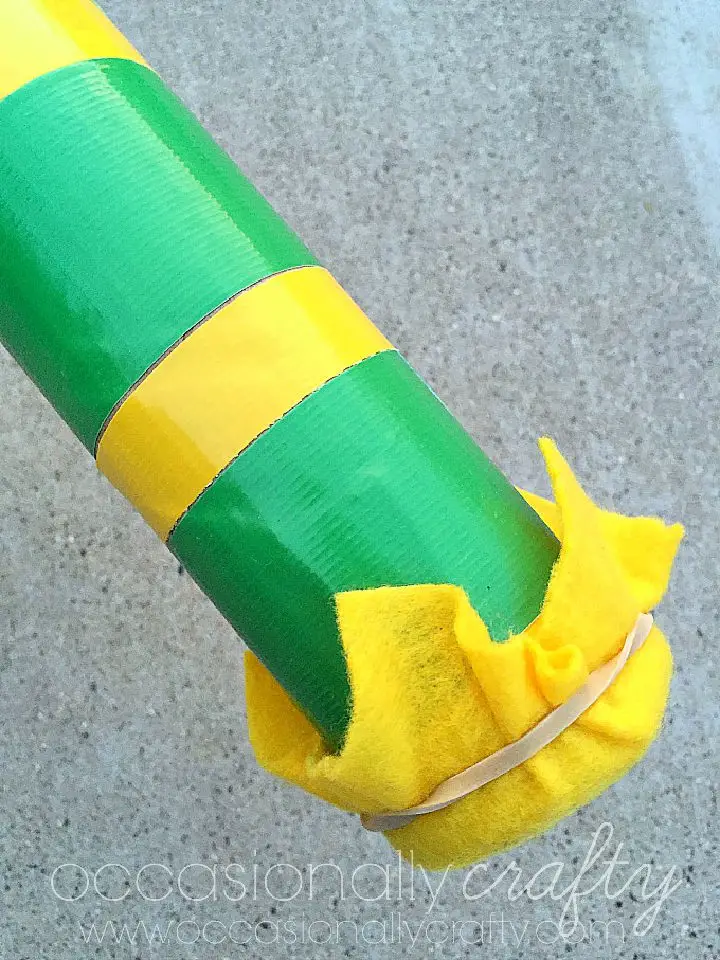
Transform everyday items into a sensory experience reminiscent of the Amazon Rain Forest with your DIY rain stick. This fun and easy project requires minimal supplies, including an empty mailing tube or paper towel roll, beads or dry beans, packaging tape, colorful duct tape, a small square of felt, and a rubber band. Begin by sealing one end of the tube and decorating it with vibrant duct tape, then add a cup of beads or beans to create the signature ‘rain’ sound. Seal the other end and top it off with a felt piece secured with a rubber band. As you gently tip it from side to side, the cascade of beads will mimic the soothing rhythm of rainfall, providing an immersive and educational experience. Create your own rainforest adventure today with this unique project!
Conclusion:
As you delve into the world of DIY rain stick crafting, the possibilities for creativity and entertainment become truly limitless. From repurposing paper towel rolls to creating simple instruments for kids, using PVC pipes or even drawing inspiration from Native American traditions, the wellspring of ideas is virtually bottomless. Whether you’re embarking on this project as a fun educational activity with children or simply seeking to tap into your artistic side, the end result promises to be both captivating and calming.
