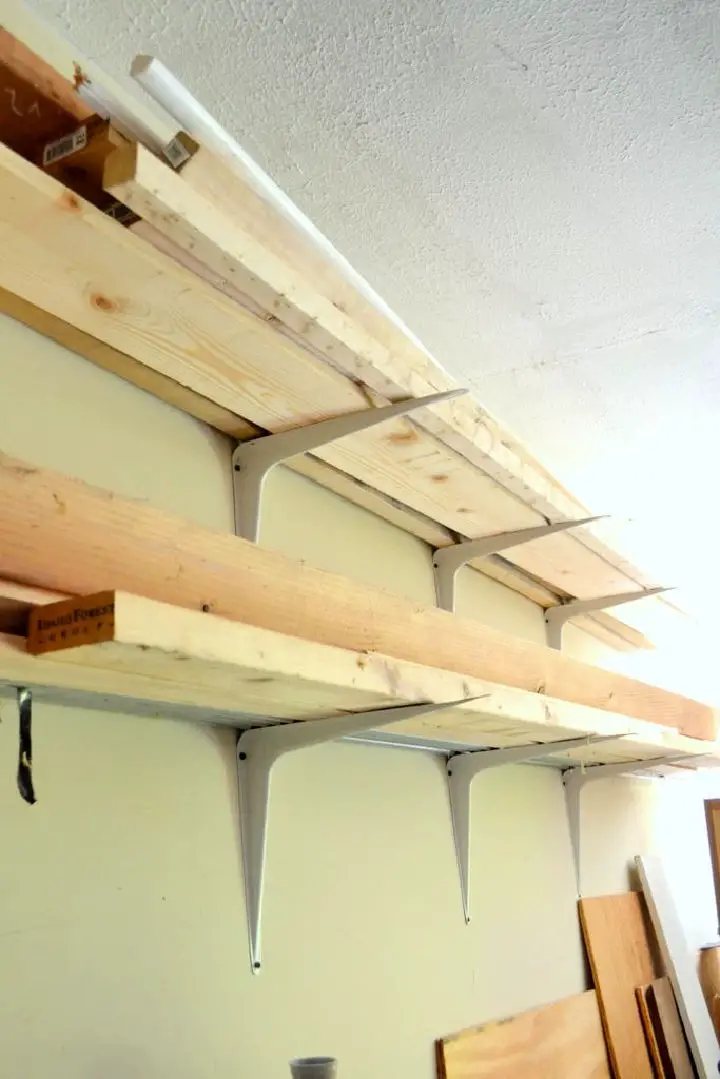
Gorgeous DIY Cantilever Lumber Rack
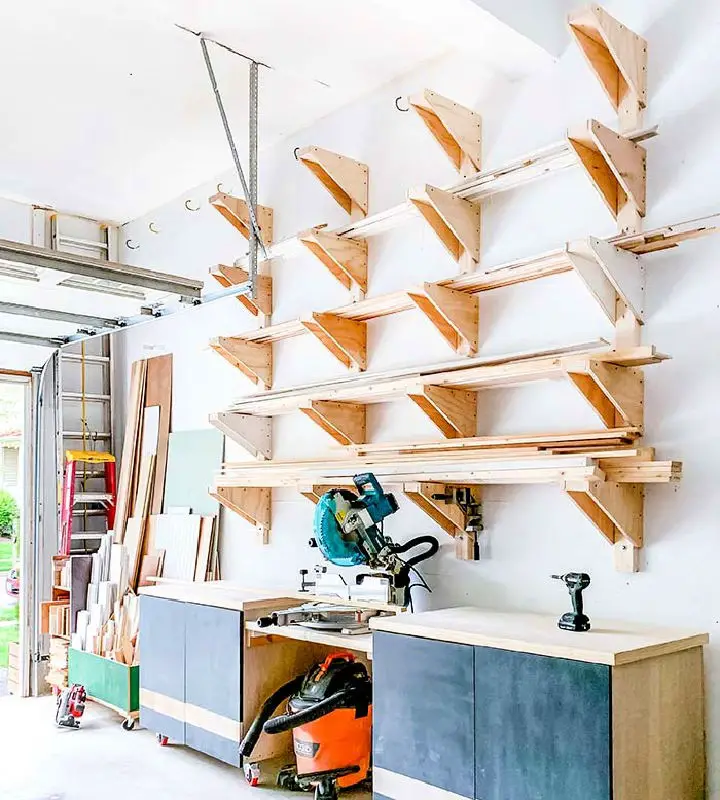
Transform your garage into a functional haven by crafting cantilever shelves using basic materials like 2x4s, plywood, and lag screws. This DIY guide simplifies the process of building a wall lumber storage rack, addressing the perpetual issue of wood storage in garages. The result is a designated space for larger tools and lumber. With a straightforward set of instructions covering stud location, vertical support installation, and bracket assembly, this shelving system streamlines your workspace while adding a touch of structural elegance to your garage. By doing so, you’ll cultivate a clutter-free environment that fosters productivity and creativity.
How to Make a Lumber Rack With EMT Conduit
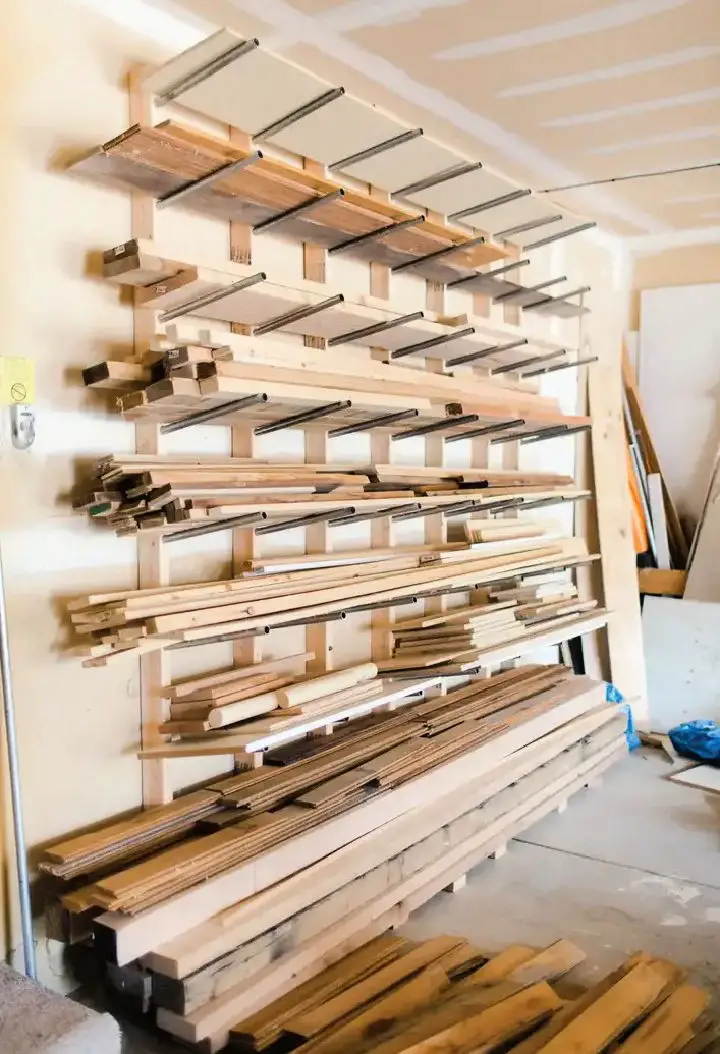
Are you tired of struggling to manage your ever-growing lumber collection? Consider creating a comprehensive do-it-yourself organizational system to streamline your workspace. A dedicated lumber rack not only provides easy access to your supplies but also optimizes space usage, making it an efficient solution for any workshop or storage area.
This project utilizes the sturdy and cost-effective design of a heavy-duty lumber rack that’s affordable and easy to build. With minimal materials required – 2 x 4 x 8 lumber, 3/4″ EMT conduit, and 6″ lag screws – you can construct your own lumber rack and enjoy a rewarding and financially prudent DIY experience.
One of the best aspects of this project is its straightforward assembly process. By using used materials if possible, you’ll not only reduce waste but also save money. The end result is a highly functional and organized storage solution that keeps your lumber neatly stacked, easily retrieved, and conveniently sorted.
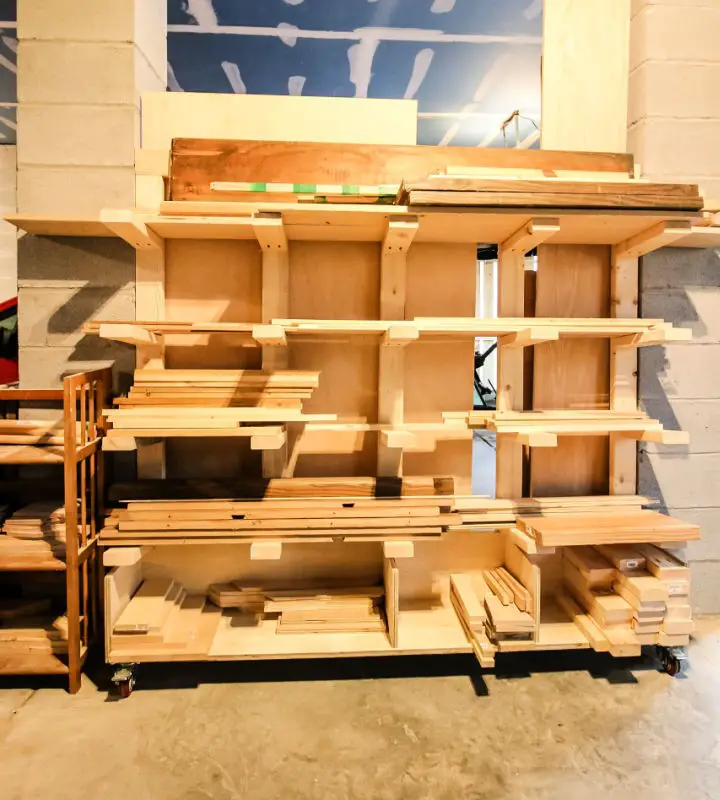
Free Lumber Rack Woodworking Plan
Transform your workspace into a haven of efficiency with a DIY lumber rack designed to accommodate full sheets and boards. This customizable storage solution, crafted from just one plywood sheet and 13 studs, is perfect for corner spaces or any area where you need to keep materials organized and within reach. With its versatility in mind, this project features four open shelves for up to 8′ boards and longer, a solid top shelf, and a spacious base shelf. Plus, the included locking wheels make it mobile, allowing you to easily move it around your workshop or garage as needed. By following our detailed plan and step-by-step instructions, you’ll be able to build this lumber rack with ease. The benefits of having a well-organized workspace are numerous – from saving time and effort in the long run to boosting productivity and enjoyment. So why wait? Start planning your lumber rack today and revolutionize your workshop organization!
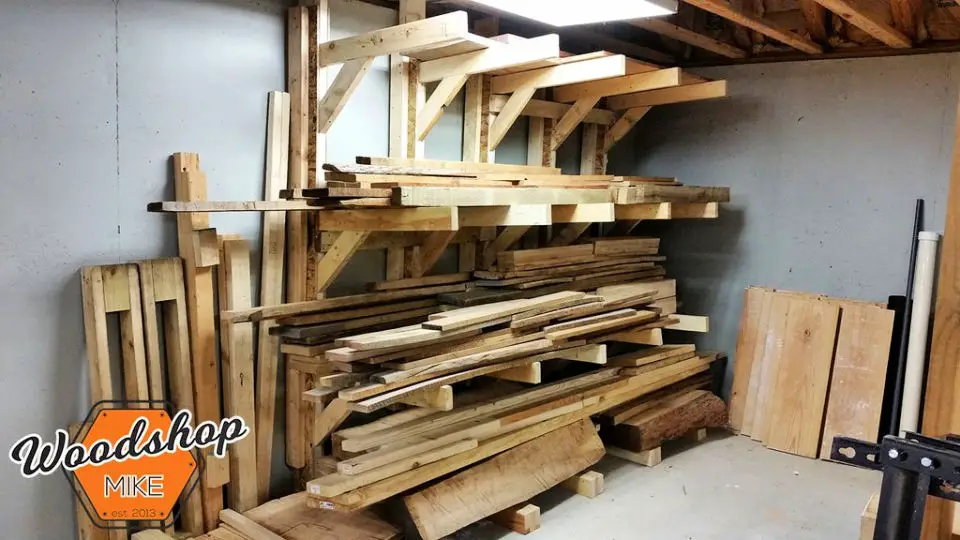
Cheap DIY Wooden Lumber Racks

Transform your garage space into a tidy and efficient storage haven with a DIY lumber organizer project. This practical solution is perfect for decluttering your basement during renovations or streamlining your woodworking area. Designed to accommodate various wood sizes, including short-cut pieces, long planks, and sizable plywood, the organizer keeps items from slipping out of place. Constructed using 2x4s, 2x6s, and plywood, with pocket screws and lag screws securing it firmly to the garage wall, this innovative design elevates your lumber off the ground, deterring pests and optimizing space. Whether tackling a basement renovation or seeking a more organized woodworking setup, this lumber organizer plan provides a sturdy and user-friendly solution.
Simple Lumber and Scrap Wood Storage Rack
Transform your workspace into an organized haven with this comprehensive guide to building a versatile DIY scrap wood storage cart! As you tackle more woodworking projects, leftover lumber can quickly accumulate, making it crucial to develop a system for storing these scraps efficiently. This tutorial is specifically designed for woodworkers, providing a step-by-step process to construct a portable storage solution that accommodates various sizes of wood, including longboards, small pieces, and sheets of plywood.
Throughout the guide, you’ll learn how to utilize key tools like the Plunge saw, Miter saw, and Kreg pocket hole jigs, as well as common materials such as plywood, 2×4 boards, and rolling locking casters. But this storage cart is more than just a practical solution – it’s also an opportunity to hone your skills and develop your craft.
Make a Lumber Rack With Step by Step Instructions
Transform your workshop into a well-organized space with this straightforward DIY lumber rack. Constructed from fundamental 2x4s and wood screws, it’s an excellent storage solution for managing your lumber pile. The rack’s dimensions are tailored to fit within standard-sized workshops, boasting an 8-foot height and 14-inch rungs.
If you have higher ceilings, simply adjust the length of the 2x4s to suit your needs. Assembling this practical solution is a breeze, requiring minimal tools like a saw, drill, level, stud finder, and measuring tape.
This cost-effective and efficient storage system keeps your lumber off the ground and neatly stacked against the wall, making your woodworking experience smoother and more enjoyable. Don’t forget to secure the rack-to-wall studs for added stability. With this DIY project, you’ll be well on your way to a clutter-free workshop.
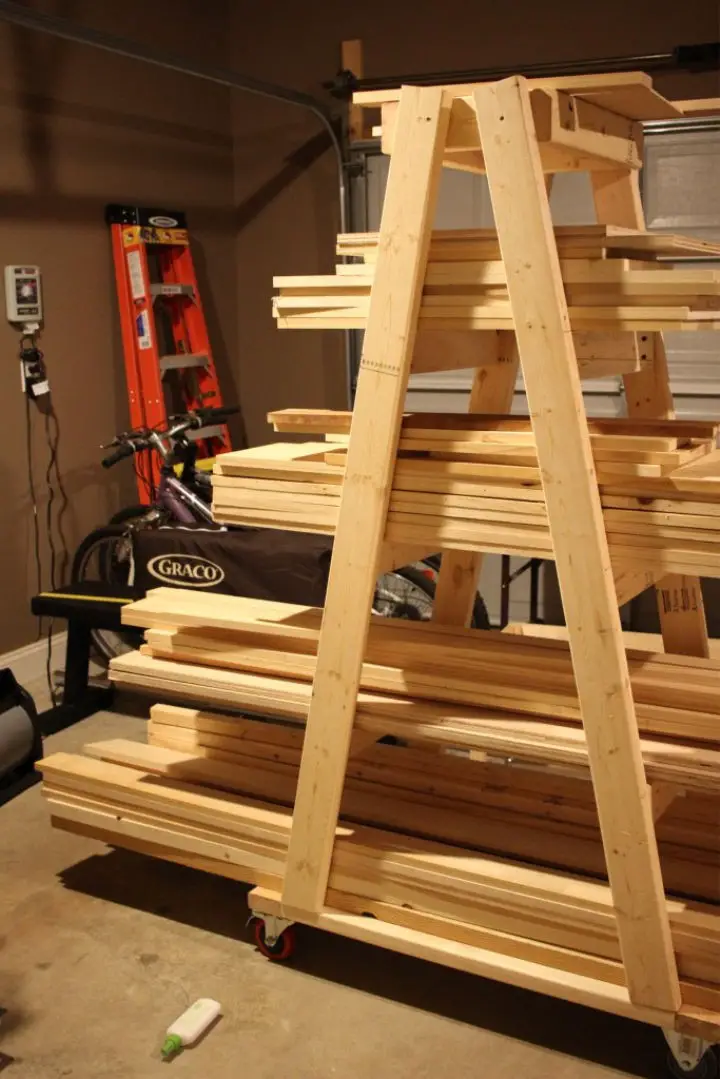
Make Your Own Wooden Lumber Rack
Effortlessly transform your workshop into a haven of organization and productivity with the DIY A-frame lumber rack. By combining readily available materials and tools, you can create a space-efficient storage solution that makes the most of your workspace’s real estate.
To construct this sturdy rack, carefully select straight, defect-free planks – ideally cedar or other weather-resistant woods – and ensure perfect alignment using a spirit level before securing them with galvanized screws. With 2×4 lumber, screws, caster wheels, and basic tools (hammer, measuring tape, framing square, level, miter saw, drill, screwdriver, and sander) at your disposal, you can complete this project in just one day.
This symmetrical and practical lumber rack is designed to enhance your workspace, keeping your materials neatly organized and within reach. With its efficient design, you’ll be able to work smarter, not harder.
DIY Combo Miter Saw Station Lumber Rack
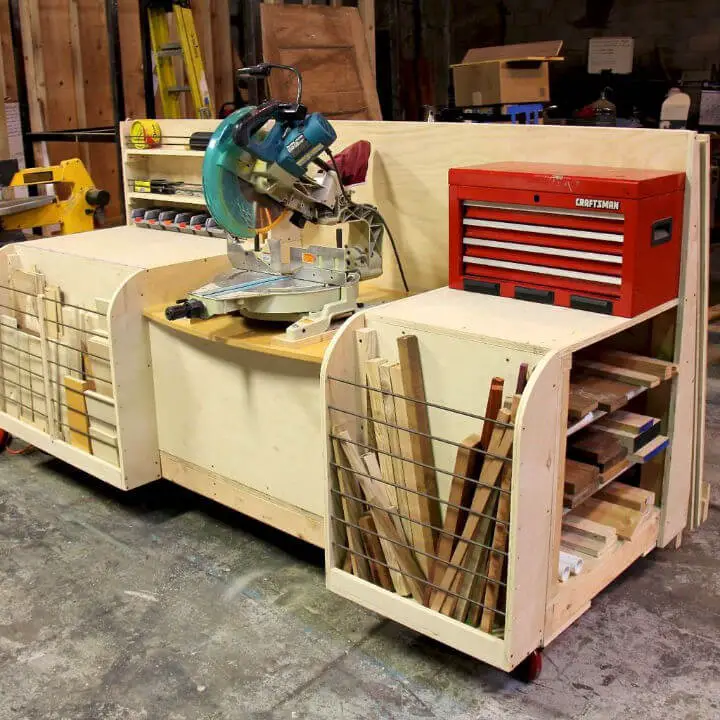
Maximizing your woodworking space just got a whole lot easier with this ingenious dual-purpose addition: a combo miter saw station and DIY lumber rack. This game-changing structure not only provides ample storage but also offers a functional work surface that can accommodate longboards and 4’x8′ sheet goods, making it perfect for woodworkers who need to stay organized and efficient.
The design is rooted in the classic Fine Woodworking magazine, with a modern twist. Built from durable materials like plywood, square wood stock, and iron pipe, this sturdy yet semi-portable station features heavy-duty locking casters that make it easy to move around your workshop.
What’s impressive about this project isn’t just its functionality but also the level of detail provided in the descriptions. While it’s not a step-by-step guide per se, the detailed explanations and inspiration will have woodworkers eager to customize their own space. With this combo miter saw station and lumber rack, you’ll never have to choose between storage and functionality again.
Build a Rolling Lumber Rack and Sheet Goods Cart
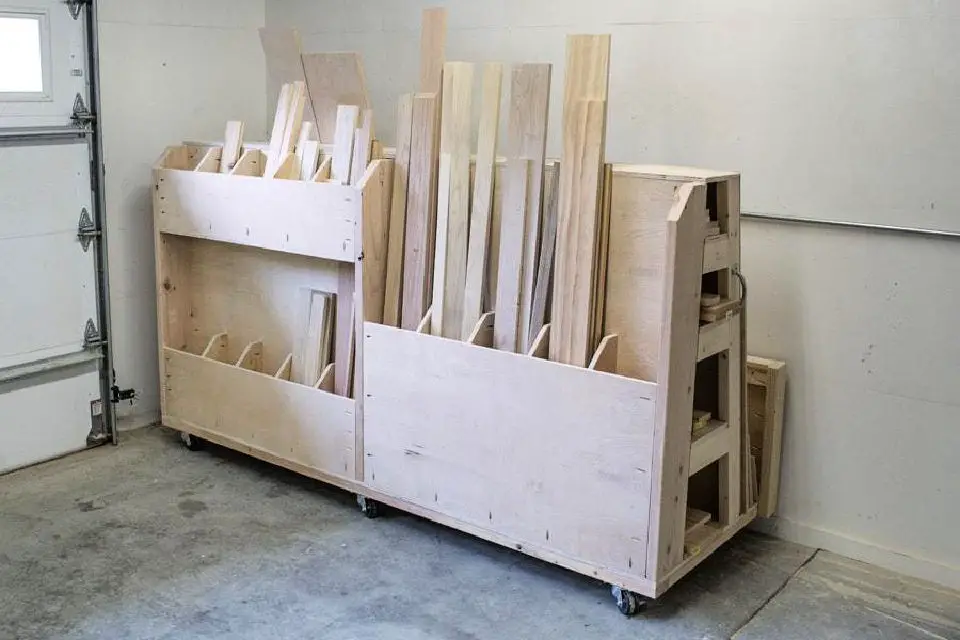
Transform your woodworking space with this ingenious DIY rolling lumber & sheet goods cart. This versatile storage solution features spacious shelves for longboards, upright bins for shorter pieces, and a dedicated area for sheet goods. The cart’s mobility allows you to effortlessly move it around your workspace as needed, streamlining your workflow and reducing clutter. To build this cart, you’ll need moderate woodworking skills and standard materials like various board sizes and plywood, as well as hardware and supplies such as pocket hole screws, finish nails, heavy-duty locking swivel casters, utility pulls, lag screws, washers, and wood glue. Once assembled, this rolling lumber cart will revolutionize your workspace organization, providing a systematic approach to storing your woodworking materials. Embark on this project today and take your woodworking experience to the next level.
Cheap and Easy DIY Lumber Rack for Storage
Transform your DIY garage into a well-organized haven by crafting a budget-friendly and efficient lumber storage rack using heavy-duty shelf brackets. This clever solution enables you to store various types of lumber, conduit pipe, and scrap wood in a systematic manner, thereby streamlining your woodworking or renovation projects.
The wall-mounted design not only saves floor space but also prevents warping, allowing for effortless access and maintaining an orderly workspace. Moreover, distinguishing between different wood types, such as valuable hardwoods and basic 2x4s, becomes a breeze.
Revitalize your work environment with this practical and visually appealing storage solution that won’t break the bank or require tedious assembly. Experience increased productivity and creativity as you effortlessly retrieve the materials needed for your next project, with your lumber neatly arranged and ready to go.
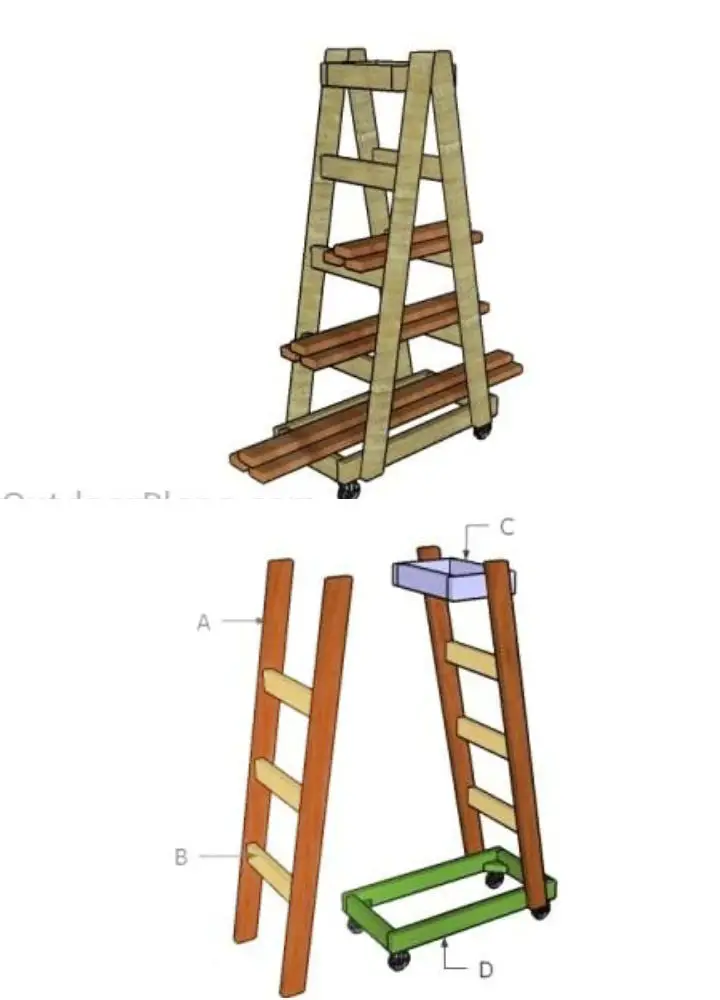
Build Your Own Mobile Lumber Rack
Elevate your garage’s functionality with a cleverly designed DIY mobile lumber rack, built using easy-to-follow plans. This innovative storage solution not only accommodates an impressive amount of lumber but also effortlessly moves around your workspace. Constructed from sturdy 2×4 boards and featuring swivel caster wheels, this project is a masterclass in efficient storage design.
To bring this vision to life, you’ll need a range of tools at your disposal, including a Kreg Jig, right angle clamps, a Japanese hand saw and guide, and a Nobex Champion Miter saw. The process unfolds with simplicity: cut the boards, drill pocket holes, assemble the ladders, build the base, attach the caster wheels, construct the top rack, and finally, join the ladders to the base and top rack.
The end result is a mobile lumber rack that dramatically optimizes your garage space, ushering in a new era of organization and productivity. With this DIY project, you’ll be showcasing your skills as a handy enthusiast while keeping your workspace clutter-free and ready for the next creative endeavor.
How to Make a Wooden Lumber Rack

Transform your woodworking space into a well-organized and efficient zone with a creative DIY lumber rack. This compact design can be seamlessly integrated into hallways or small areas, boasting a unique blend of functionality and sustainability. The clever construction features five uprights, each sporting four supportive arms, providing a total of 20 sturdy supports to store an array of lumber pieces. A thoughtful design element is the subtle bump at the end of each arm, ensuring that your materials remain securely in place, eliminating any risk of accidental slippage. Assembling this rack is a breeze, requiring only a bandsaw and tenon jig. For those who desire a more detailed approach, comprehensive plans are available for download. Beyond serving as a practical storage solution, this innovative DIY lumber rack breathes new life into discarded materials, promoting eco-friendly woodworking practices. By keeping your supplies neatly arranged and within easy reach, you’ll be perfectly poised to tackle your next woodworking project with confidence.
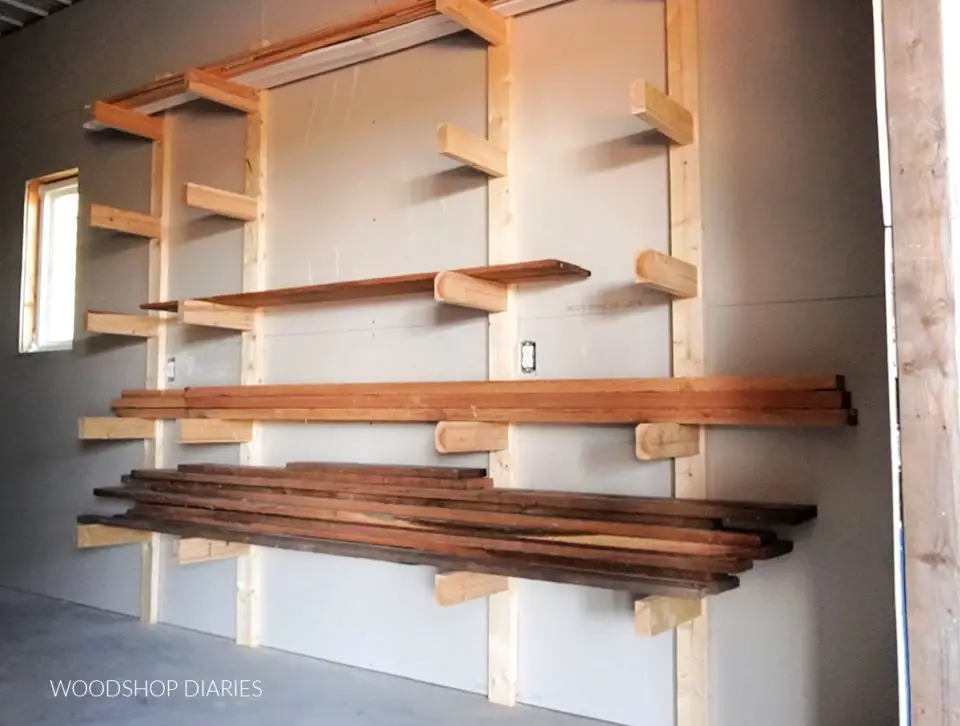
Building a Free Standing Lumber Rack
Elevate your woodworking game with a DIY wall-mounted lumber storage solution that adapts to your shop’s dimensions. The modular design of this project allows for effortless adjustments based on your storage requirements, making it perfect for spaces of varying sizes. When complete, the rack measures up to 10 feet wide and 8 feet tall, providing an abundance of space to store your wooden treasures.
Built using essential materials like 2x4s, OSB plywood, screws, and glue, this sturdy rack features four expansive shelves extending approximately 30 inches. This generous storage capacity enables optimal organization and utilization of your workshop space.
Beyond its functional benefits, the design also adds a touch of sophistication to your workshop, creating a professional and tidy environment that’s pleasing to the eye. By banishing clutter and embracing this custom-built rack, you’ll be saying hello to an efficient workspace and goodbye to chaos.
Handmade Wall Mounted Lumber Storage Rack
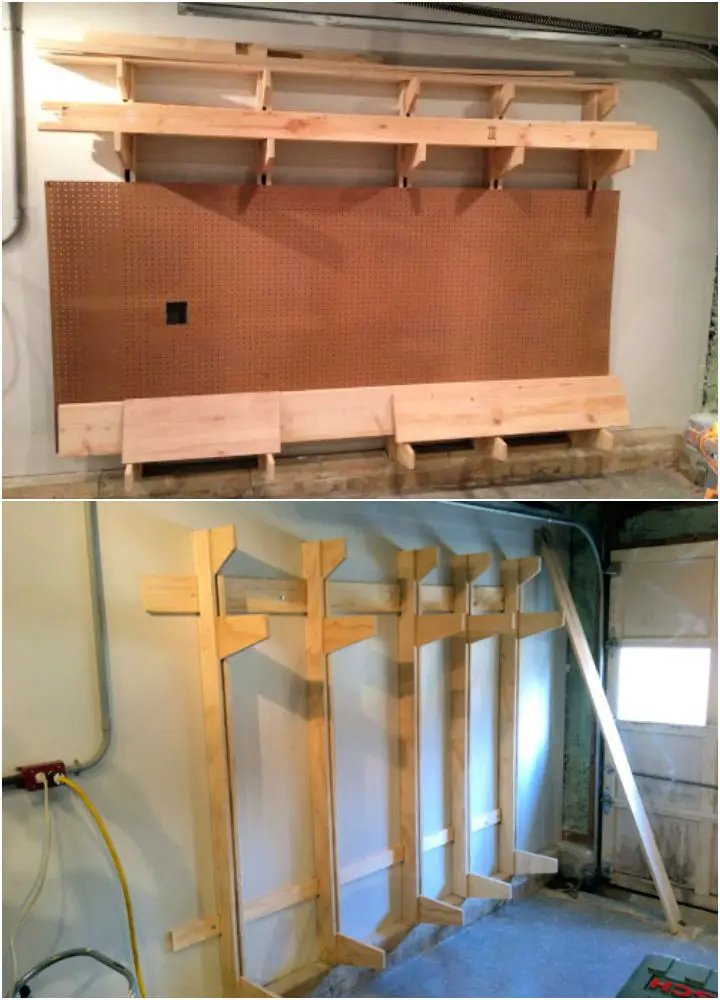
Transform your DIY workshop into a well-oiled machine with a sturdy lumber rack, cleverly mounted onto the wall. By keeping materials off the floor, you’ll experience a significant boost in workspace efficiency. This economical solution is crafted from just 1.5 sheets of 3/4-inch plywood, flathead screws, lag screws, washers, and wood glue – making it an accessible DIY project that won’t break the bank. To bring this vision to life, you’ll need to employ a range of tools, including table saws, Miter saws, jig saws, and drills. The construction process involves carefully ripping the plywood, cutting the shelves and notches, and assembling the pieces with screws and glue. This meticulously designed lumber rack boasts ample space for dimensional lumber and sheet goods of any length, while its removable shelves allow for easy adjustments. By combining strength, convenience, and cost-effectiveness, this wall-mounted rack is an essential addition to any workshop.
DIY Lumber Rack and Plywood Cart Tutorial
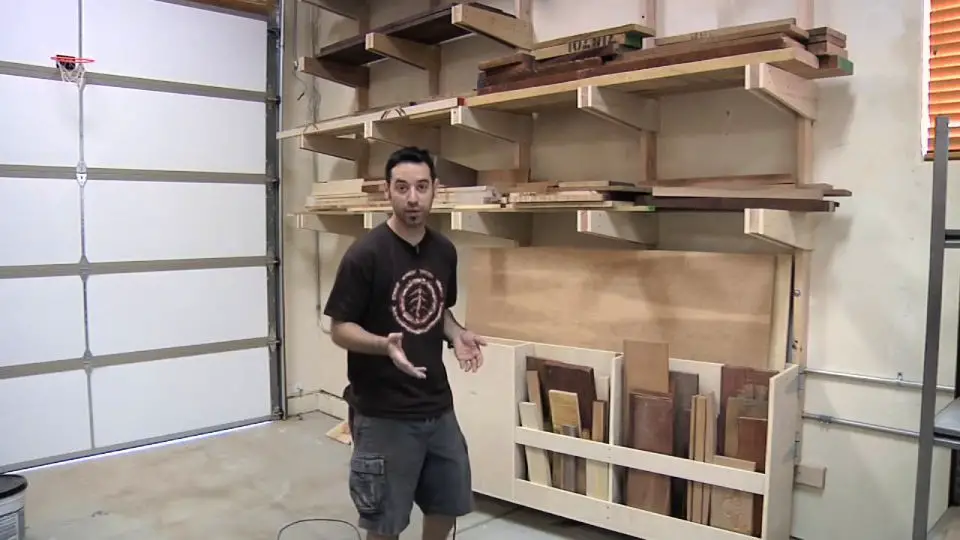
Transform your woodworking space into a well-oiled machine with a DIY lumber rack, an ingenious solution for storing raw materials in a safe and organized manner. Built from 2×4 lumber and 3/4″ shop-grade plywood, this sturdy structure is specifically designed to accommodate wood enthusiasts who take pride in their collection.
nThe rack’s robust design features vertical uprights securely bolted to wall studs and bracket supports firmly screwed to the uprights. Additionally, it boasts under-rack storage that swings out on casters for effortless loading of sheet goods and cut-offs.
nWhat’s more, this adaptable storage solution is adjustable to suit your personal preferences and shop needs. With a DIY lumber rack, you’ll be able to bid farewell to clutter and hello to an efficient woodworking experience.
Conclusion:

The benefits of a well-designed DIY lumber rack cannot be overstated when it comes to maximizing the efficiency of your woodworking space. Whether you’re working out of a garage, workshop, or wood shop, a custom-built rack can revolutionize the way you store and organize your lumber. By incorporating creative ideas like cantilevered shelves or mobile storage solutions into your design, you’ll be able to find a solution that perfectly suits your needs. When it comes to materials, don’t be afraid to think outside the box – EMT conduit or wooden shelves can add a unique touch to your project. With careful planning and execution, you can create a practical, budget-friendly, and visually appealing DIY lumber rack that elevates your workspace and saves you time.
