DIY Marquee Light Letter Pumpkins:
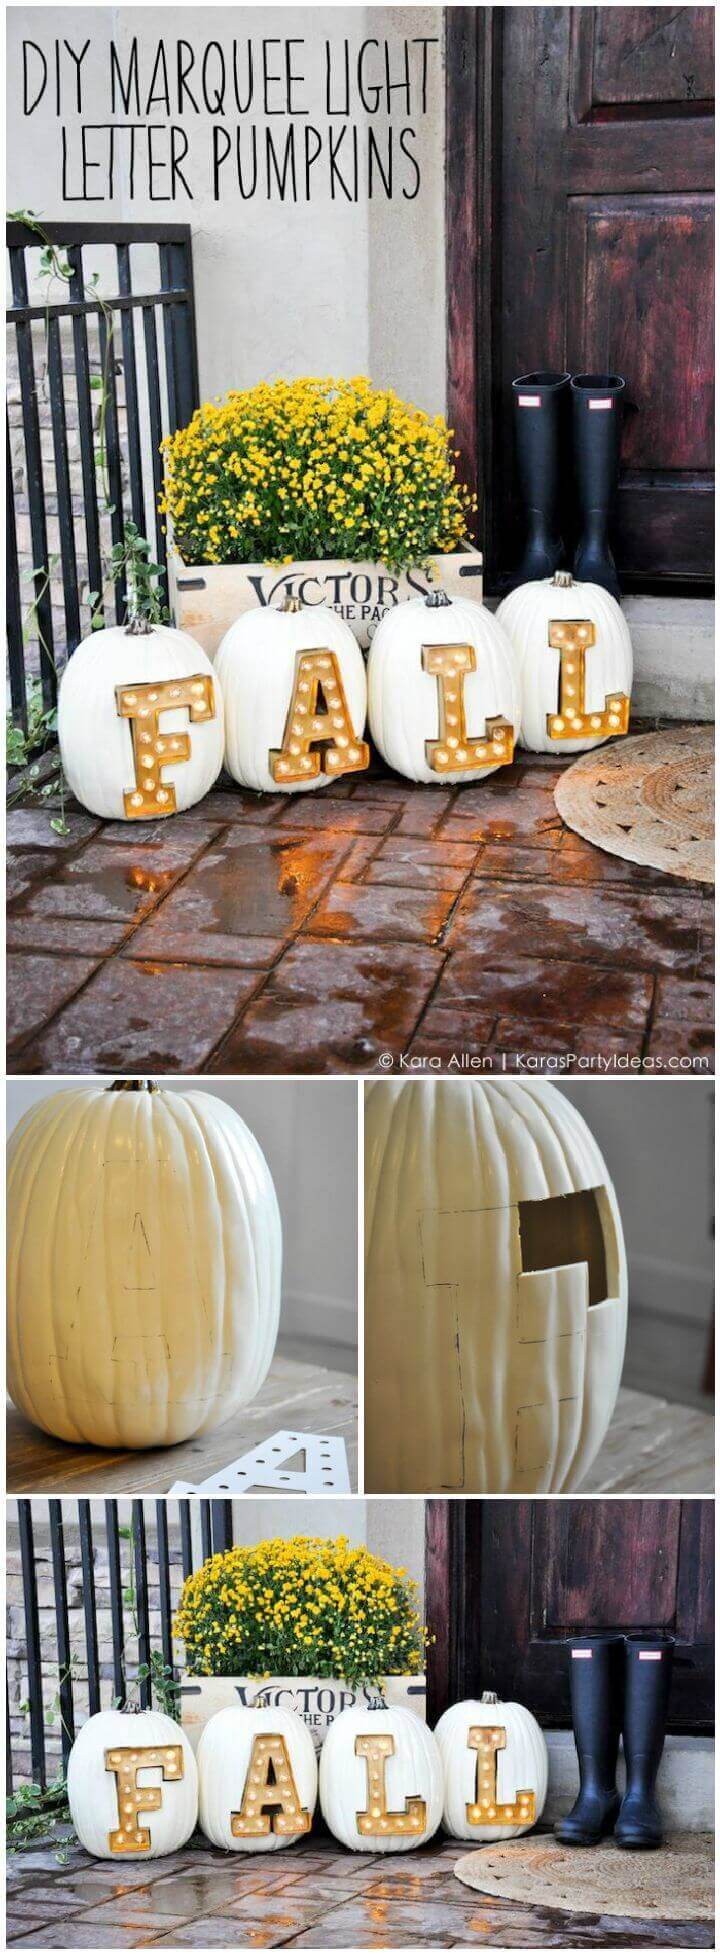
As Halloween approaches, it’s hard to imagine a festive atmosphere without pumpkins being part of the decorations. To add a touch of whimsy and personality to your Halloween decor, why not try using marquee lettered pumpkins? It’s a simple yet effective way to give your pumpkins some extra flair. Start by selecting some craft pumpkins and inserting your chosen marquee letters into them. To make it happen, first create a template for the letters using paper or cardstock, then use an X-Acto knife to cut out the traced parts. You’ll find step-by-step instructions and project details on [website URL].
DIY Watercolor Pumpkins:
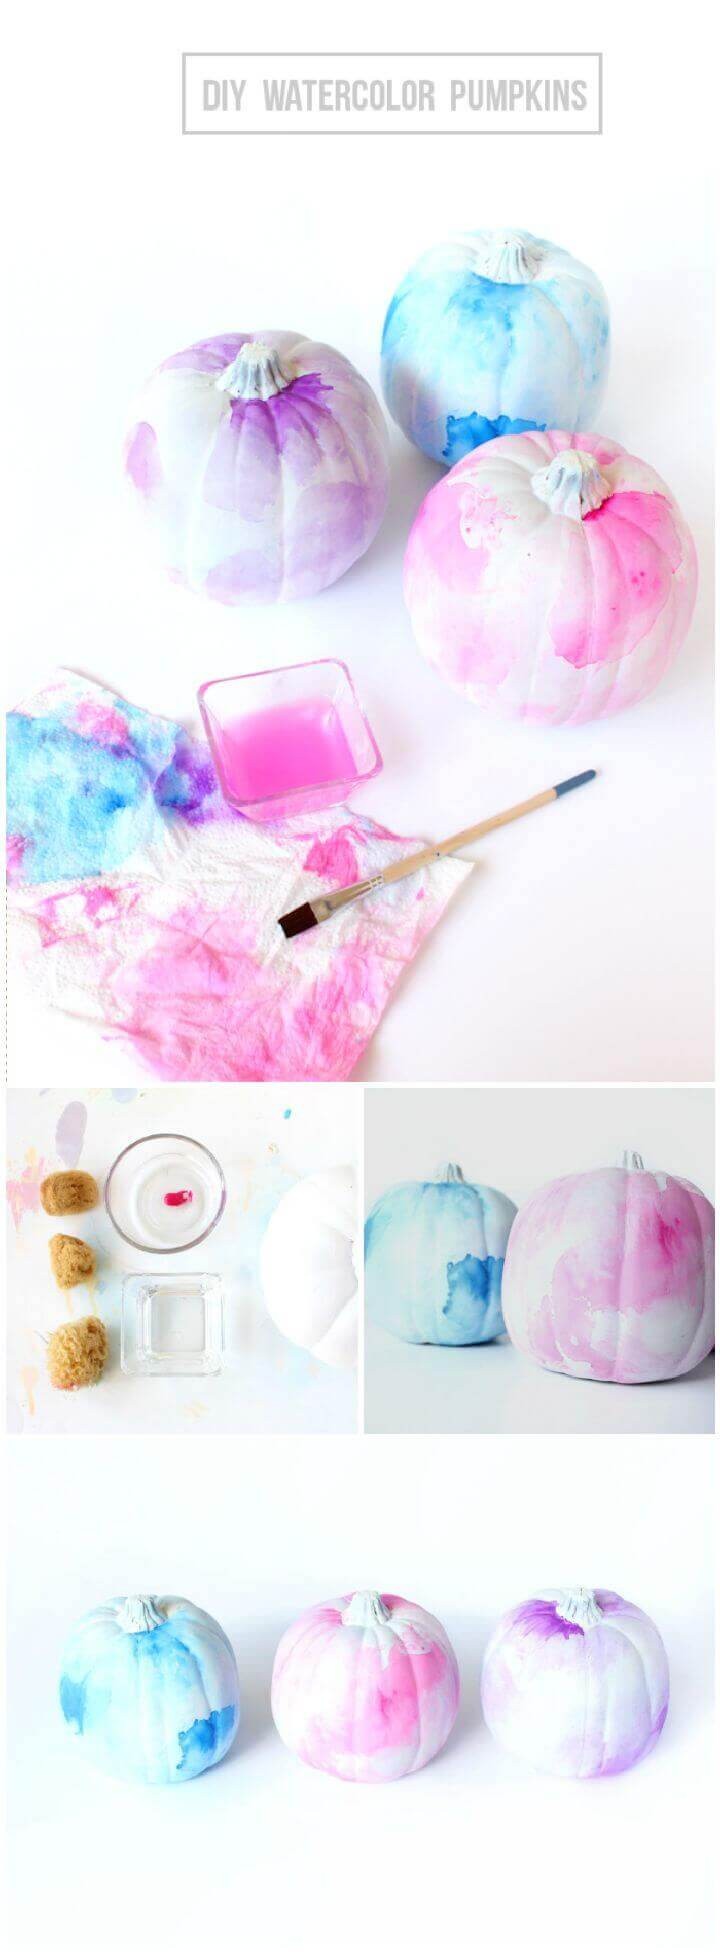
For an added pop of color to your Halloween decorations, consider painting your pumpkins a vibrant hue. To achieve this unique look, combine watercolors with white paint on plastic craft pumpkins. Take inspiration from the samples below, and then follow along for the complete project details and step-by-step instructions.
DIY White Corset Pumpkin:
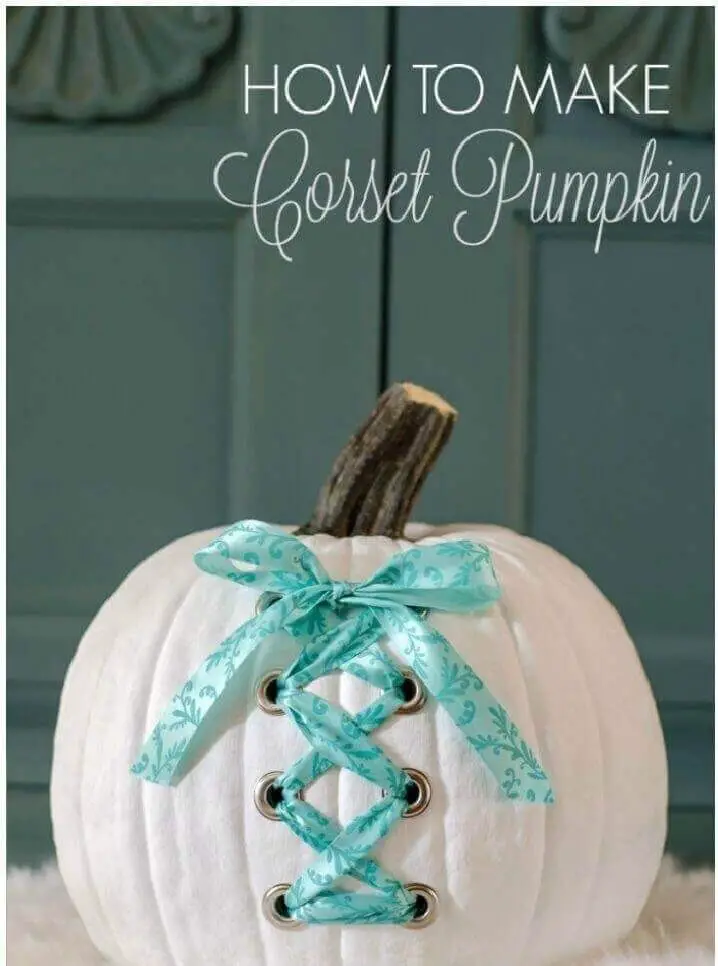
Add an air of sophistication to your Halloween decor with this intriguing pumpkin project. By incorporating a decorative ribbon and grommets, you can create a one-of-a-kind centerpiece that’s sure to impress. To begin, carefully cut open the back of the pumpkin and scoop out the insides using a spoon. Once the pumpkin is hollow, drill small holes in the sides for inserting the grommets. Then, add a coat of paint to give your pumpkin some extra flair. For more detailed instructions on how to bring this unique project to life, be sure to check out our step-by-step guide at homestoriesatoz.
DIY Sharpie Owl Pumpkins:
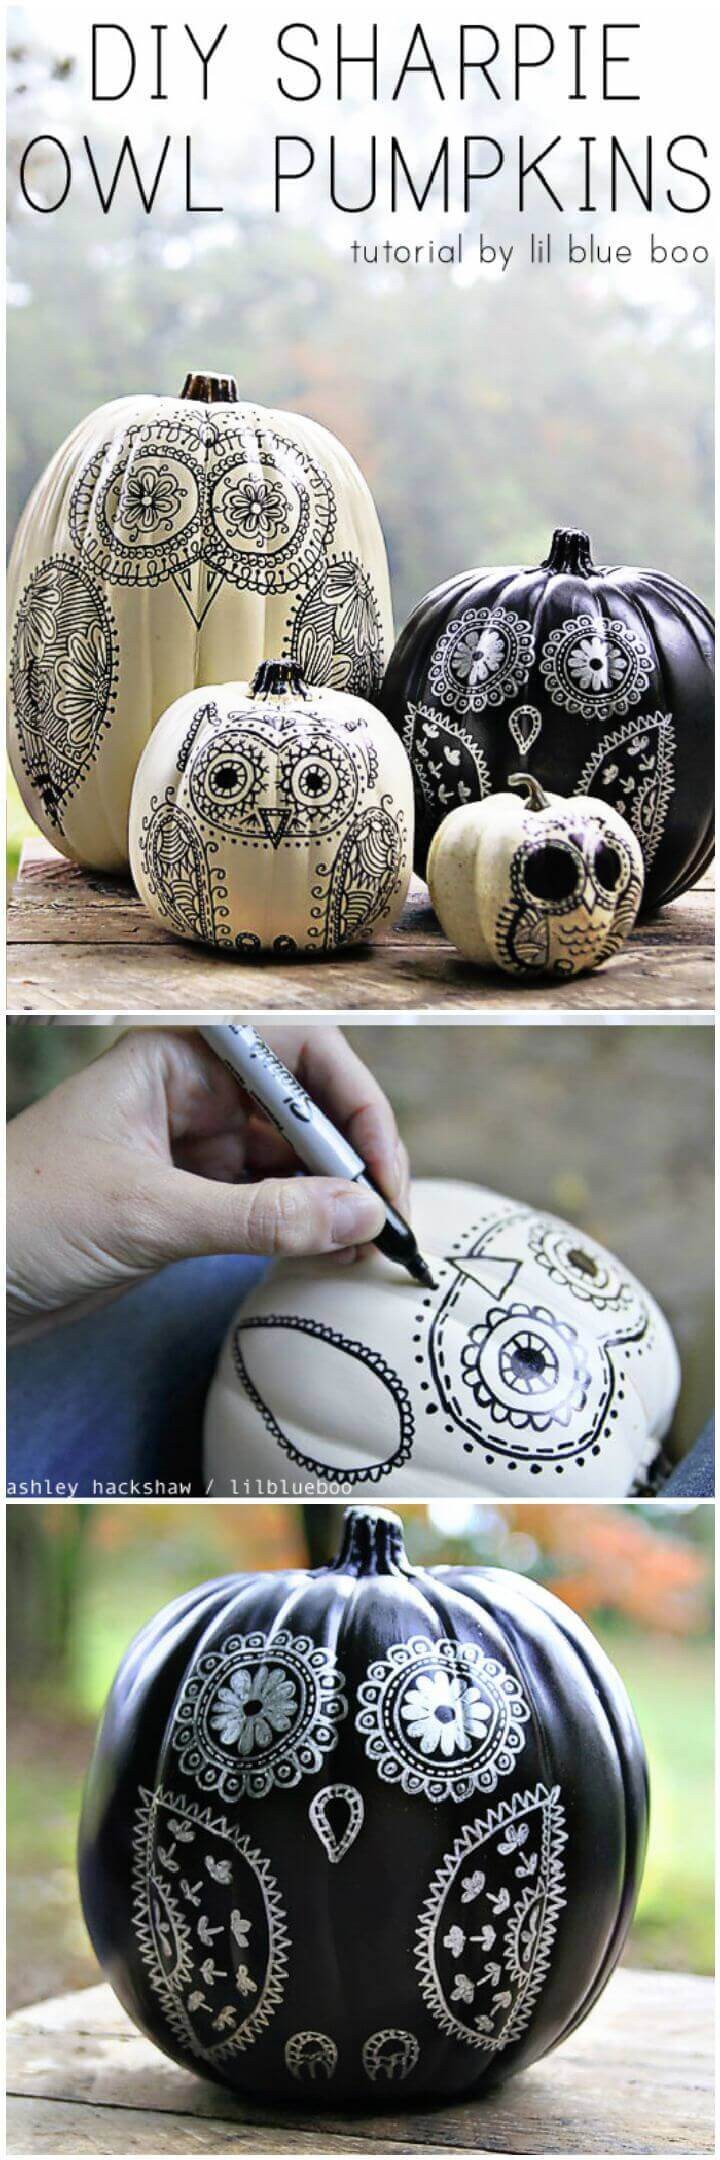
Elevate your Halloween decor with unique, artistic pumpkin creations. One way to do this is by transforming Styrofoam pumpkins into stunning sugar skulls using custom paint markers. This Mexican-inspired craft adds a touch of elegance and sophistication to your spooky celebrations. To achieve the best results, use silver and black markers for white and black painted pumpkins respectively. By incorporating these decorative masterpieces into your Halloween setup, you’ll be sure to stand out from the crowd and make this year’s celebrations truly unforgettable.
Decoupage Photo Pumpkin:
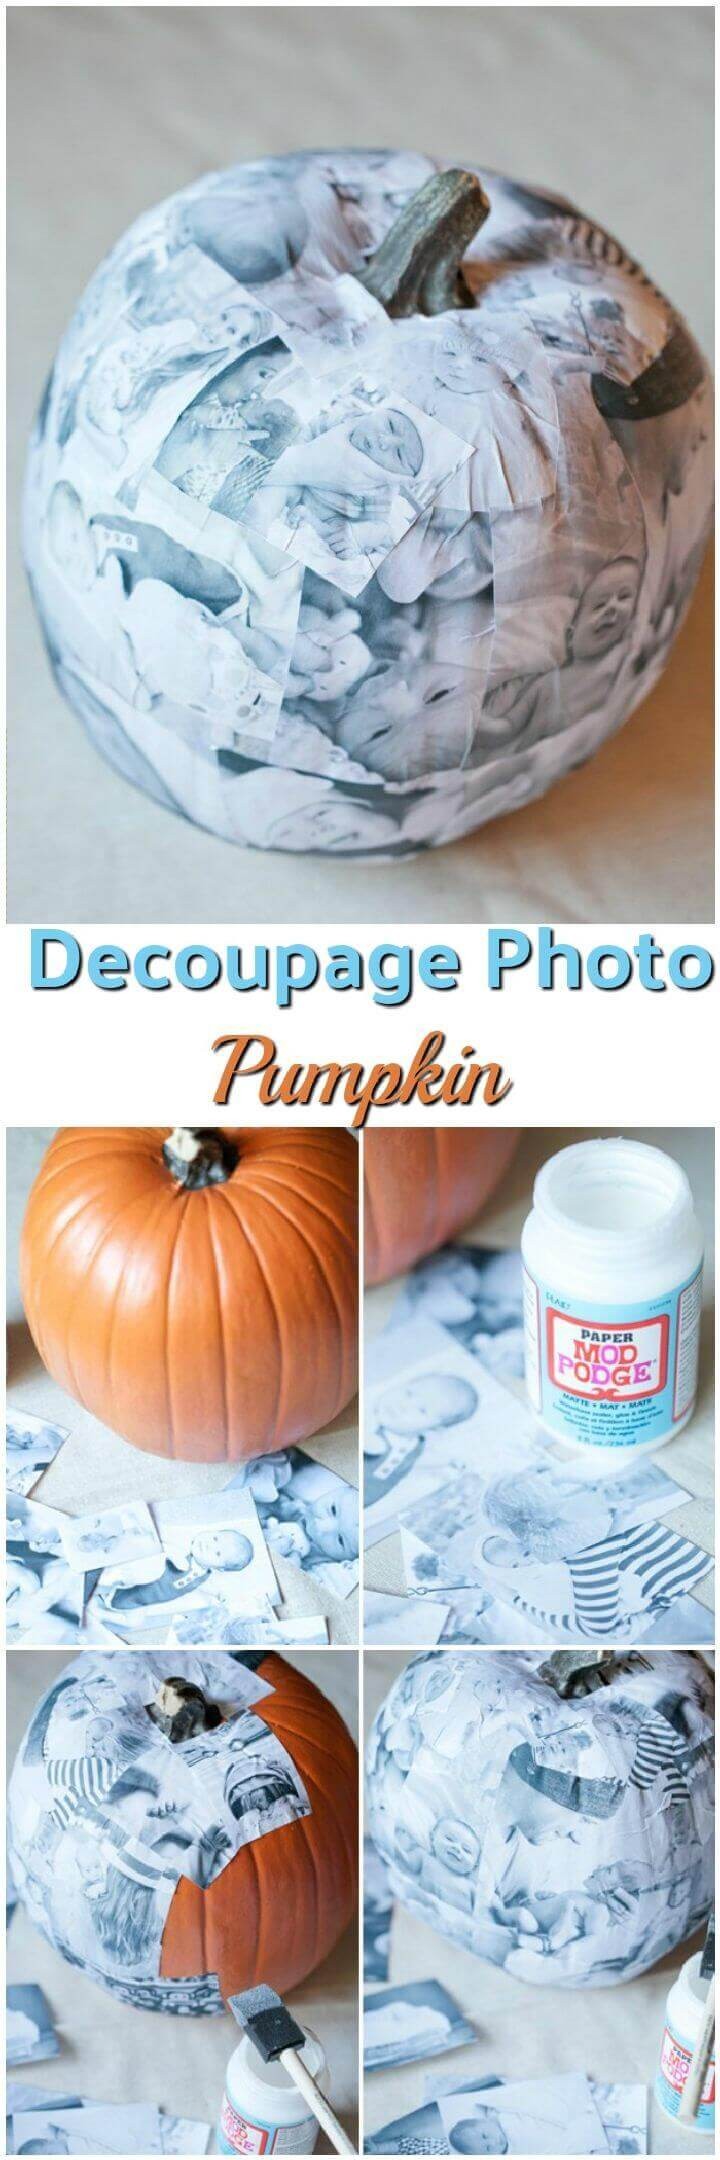
Make this Halloween season one to remember by generating buzz around your extraordinary decorations. To achieve this, try using special decoupage Halloween pumpkins that will undoubtedly turn heads. The process is straightforward: simply apply a thin layer of mod-podge to the pumpkin and use a brush to adhere your favorite photos. Continue until the entire surface is covered, then sit back and enjoy the envy-inducing results. For a detailed guide and step-by-step instructions, visit sugarandcharm for inspiration.
Bats Flying Across a Pumpkin:
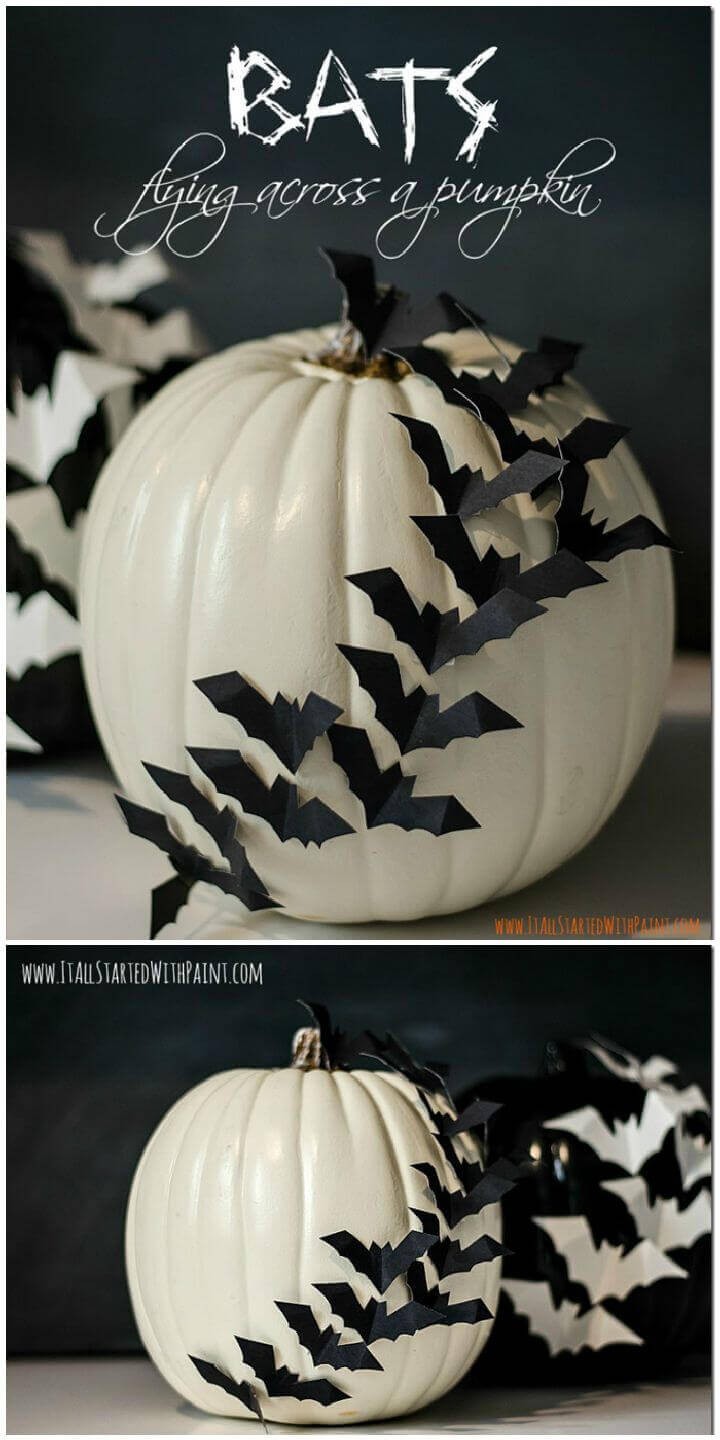
Take your Halloween decorations to new heights with these eerie bat-filled pumpkins. To create this spooky masterpiece, you’ll need just a few simple supplies: your favorite real or faux pumpkins, some poster board, and a few clever cuts. By attaching the bats to your pumpkins, you’ll be able to create dozens of flying creatures that will add an extra layer of fear factor to your Halloween decor. If you’re looking for step-by-step instructions on how to bring this project to life, head over to our website.
DIY Jeweled Pumpkins:
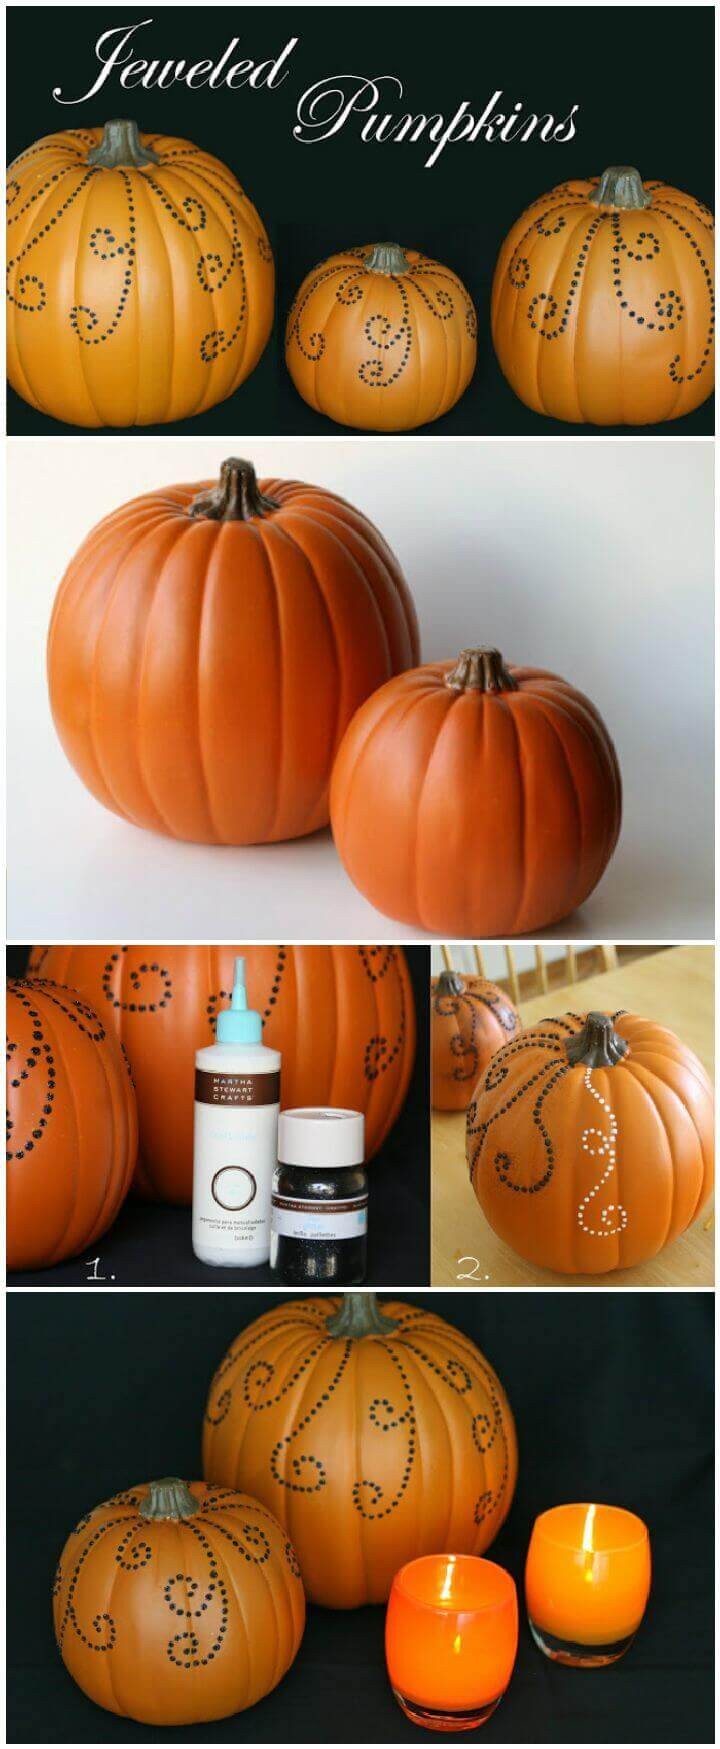
Why settle for expensive store-bought decorations when you can create your own unique and special Halloween pumpkins at home? With just a few simple materials, including glue and glitter, you can craft stunning centerpieces that will add a touch of spooky sophistication to any gathering. Start by applying small dots of glue to the pumpkin’s surface, then let your creativity shine by adding intricate designs and patterns. For an added layer of eeriness, try using black glitter to give your pumpkins a wickedly wonderful look. With this easy DIY project, you’ll be amazed at how quickly and affordably you can create a show-stopping Halloween display that will leave your guests in awe.
DIY Glow in The Dark Pumpkins:
Get ready to illuminate your Halloween pumpkins with a mesmerizing glow! The concept is deceptively simple: apply multiple shades of glow-in-the-dark neon paint to craft pumpkins, creating custom geometrical patterns that will shine brightly at night. This spooky-chic decor idea is sure to cast a spell on your guests and set the tone for a hauntingly good Halloween party. For a step-by-step guide on how to achieve this eerie effect, head over to ilovetocreateblog
House Numbers Pumpkin Topiary:
Transform your Halloween decorations into functional home decor by creating a unique house number topiary. Start by obtaining plastic numerals that can be screwed onto craft pumpkins, then use these as the base for your design. To add an ornamental touch, insert a wooden dowel through the centers of lettered pumpkins to create a shape reminiscent of ornaments. For the final step, prepare a container by covering it in newspapers and moss, then secure your lettered pumpkins within it using the central dowel. For a comprehensive guide on this project, visit The Picket Fence for complete details and step-by-step instructions.
Minion Painted Pumpkins:
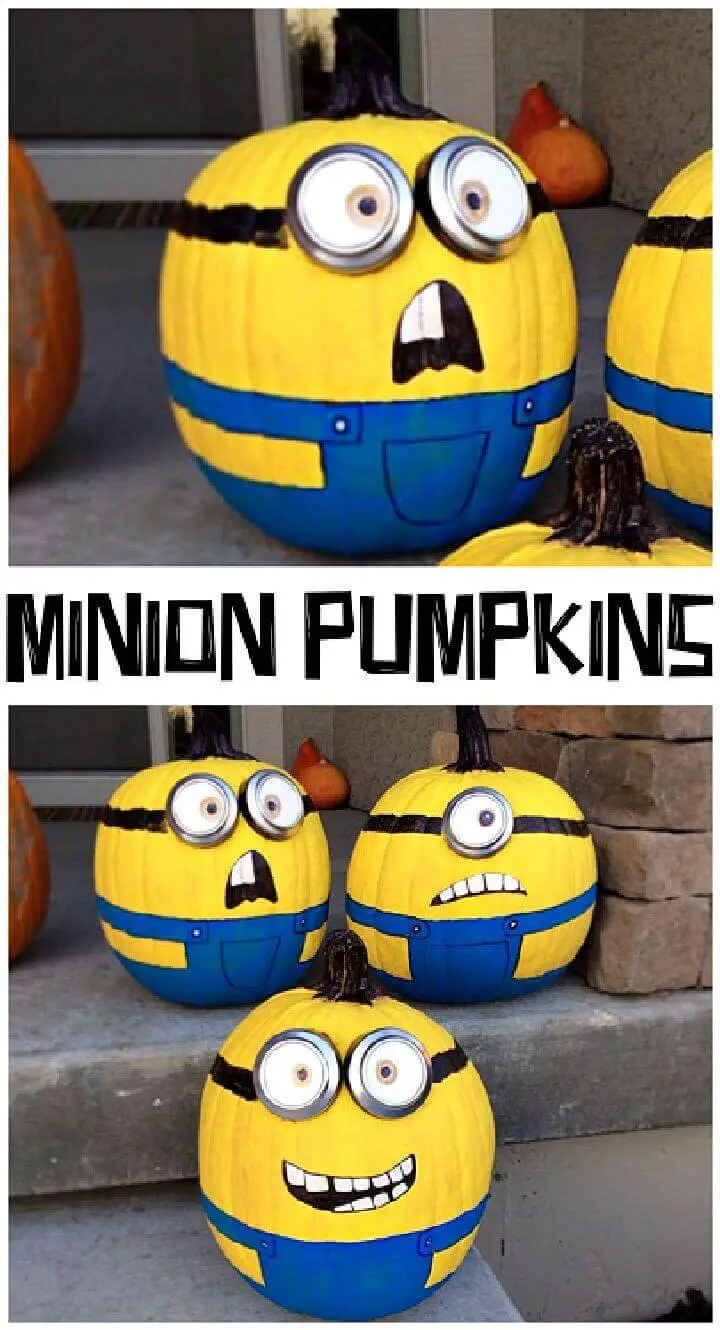
Transform ordinary pumpkins into whimsical Minion pumpkins that will delight kids throughout the fall season. This simple craft requires just a few basic materials: acrylic paint in yellow and blue, a black sharpie pen, and some creative flair! To create the distinctive goggles or eyes of your Minion pumpkin, simply reuse the bottoms of Coke cans and add some white paper or foam for added dimension. Next, get expressive with your black sharpie pen to bring your Minion to life, varying lip and tooth styles to convey different emotions. With these easy steps, you can create a whole squad of playful Minion pumpkins that will put a smile on any kid’s face.
DIY Lace Pumpkins:
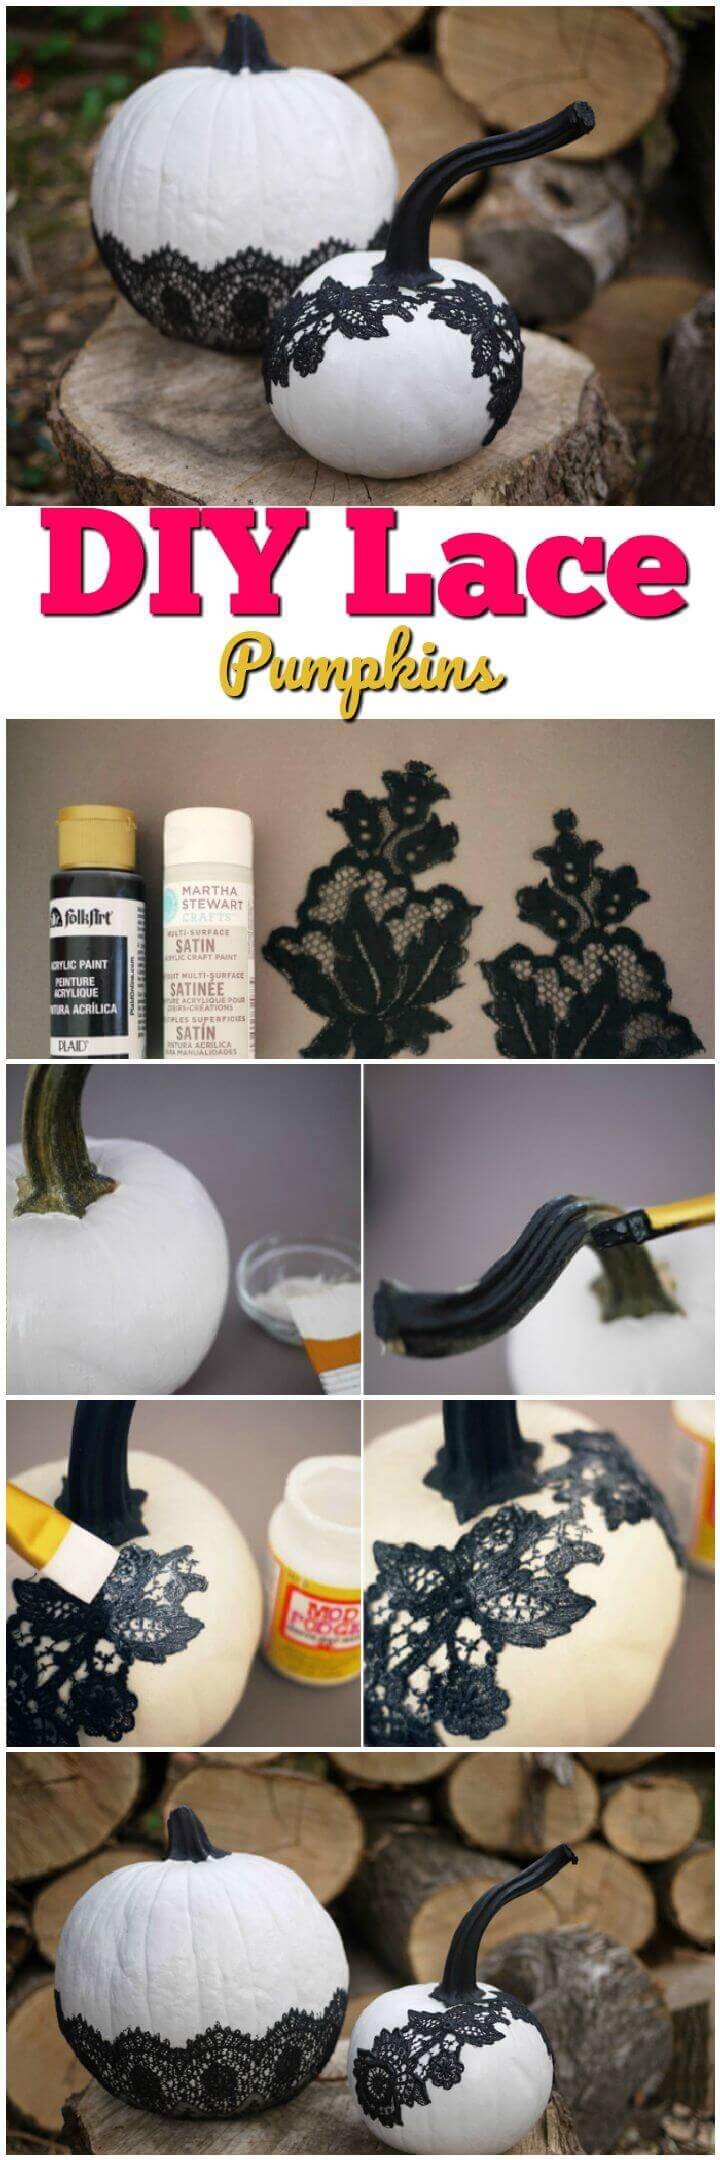
Transform your pumpkins into spellbinding masterpieces by incorporating lace appliques. The delicate texture and intricate patterns of the laces add a touch of elegance to your hand-painted or faux pumpkins, taking them from ordinary to extraordinary. For a hauntingly beautiful Halloween look, pair black dip-dyed laces with white painted pumpkins, securing them in place with mod podge for an eerie yet enchanting effect. This creative decorating idea is sure to cast a spell on your guests this All Hallows’ Eve.
Gold Thumbtack Covered Pumpkins:
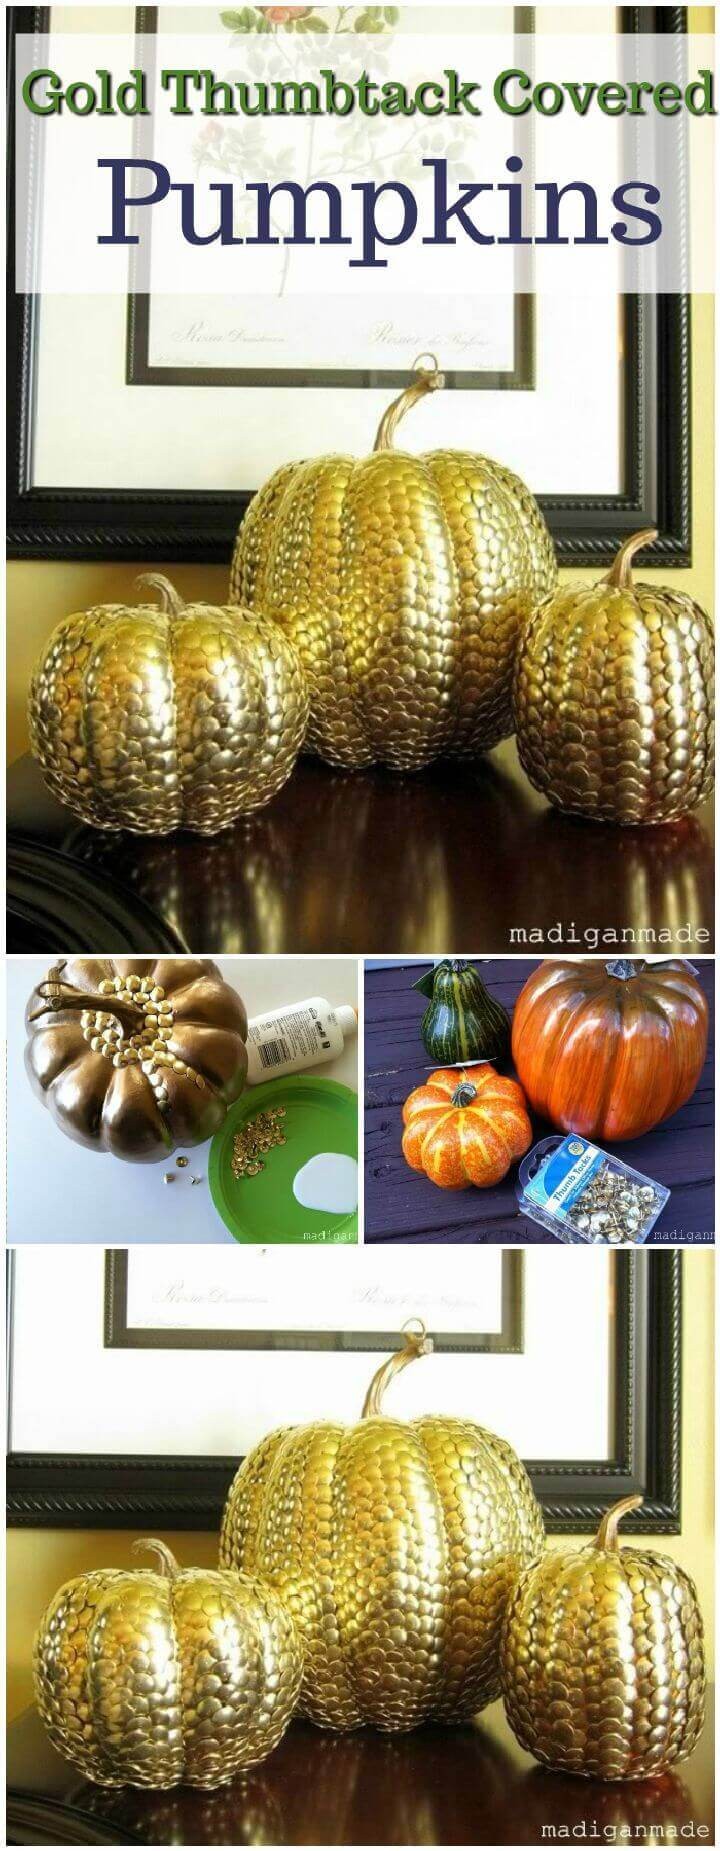
Get ready to mesmerize your guests with an otherworldly pumpkin makeover that will transform your fall decor into a dazzling display of elegance. This creative endeavor involves a surprising twist – instead of using glitter or paint, you’ll be covering your pumpkins in brass thumbtacks! Start by gathering your supplies and begin adding the thumbtacks one by one, gradually building up a mesmerizing metallic texture that will catch everyone’s eye. As the thumbtacks accumulate, the pumpkin will take on a spellbinding sheen, guaranteed to draw attention and spark conversations. For a detailed guide and step-by-step instructions on how to achieve this show-stopping effect, head over to Rosy Script.
Neon Dipped Pumpkins:
Imagine transforming your ordinary pumpkin decorations into extraordinary works of art. One way to do this is by painting the pumpkins white as a neutral background, then adding a pop of color with neon paint for a mesmerizing effect. The possibilities are endless when you experiment with different shades of neon, allowing you to create a unique and eye-catching set of colorful pumpkins. For a step-by-step guide on how to achieve this look, visit the anightowlblog site.
Thumbtack Ghost Pumpkin:
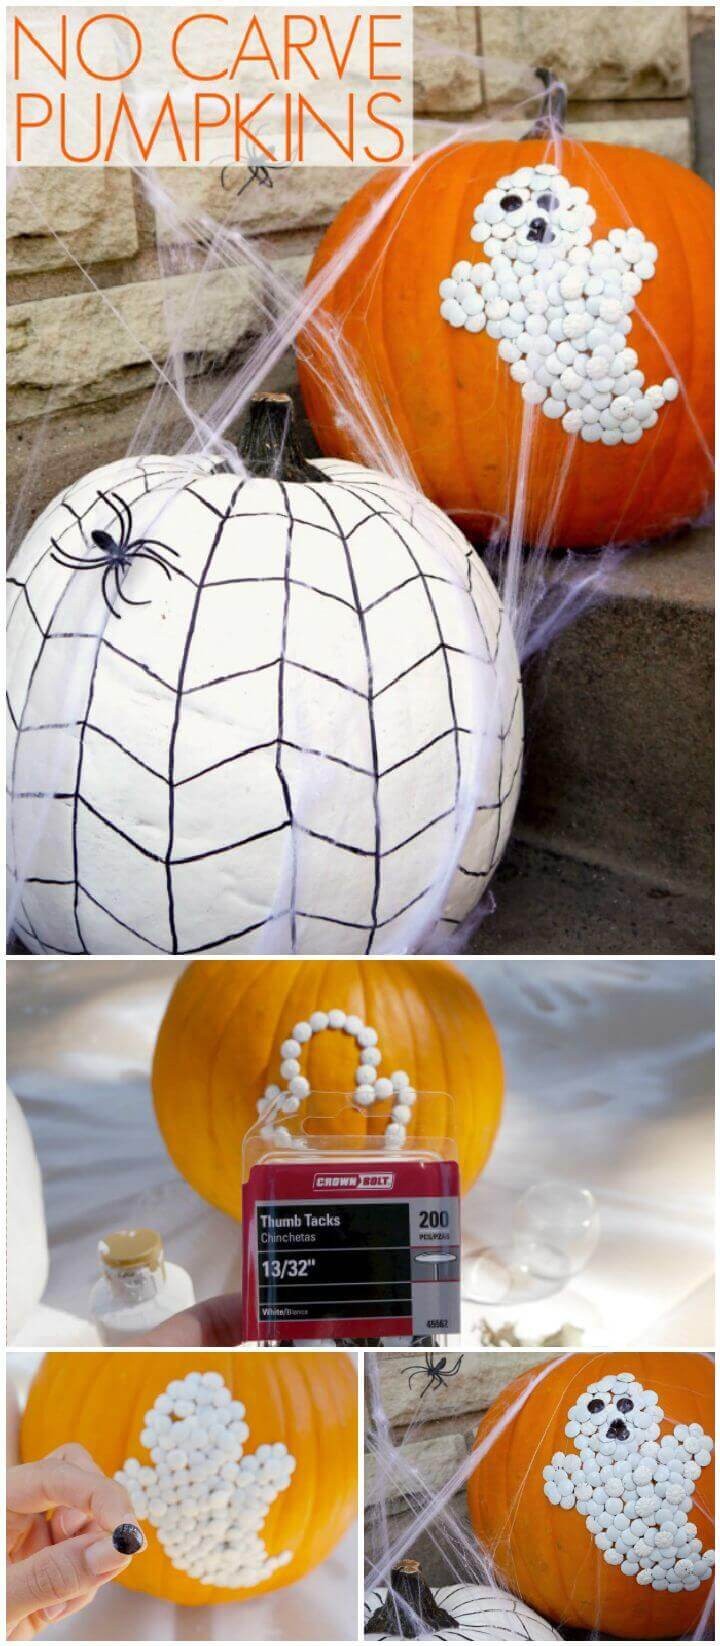
Transform your pumpkins into one-of-a-kind Halloween decorations without the need for carving. Start by giving them a ghostly makeover, where you’ll attach white thumbtacks to create the illusion of a friendly spirit. Simply paint the eyes and mouth black using a marker or paint to complete the eerie effect.For a spookier look, try adding some fake spider web details to your pumpkins. Begin by painting them with a coat of white acrylic paint, then use a black Sharpie to add custom lines that resemble spider webs. Finally, attach a faux black spider to create an unsettling yet fascinating display. With these simple makeovers, you’ll be able to create a unique and terrifying pumpkin collection that will impress your friends and family this Halloween.
Black and White Glam Pumpkin:
As Halloween approaches, it’s time to get creative with your pumpkins. Here’s a unique and elegant makeover that combines the classic white and black color scheme. Start by painting your faux pumpkin a crisp white, then add a touch of mischief by writing the word ‘BOO’ using rhinestone letters for a glamorous finishing touch.
Next, adorn your pumpkin with a dramatic black paper mache hat adorned with a feather and black glitter picks for an enchanting effect. To take it to the next level, wrap the hat in a special white ribbon featuring printed bats for a cohesive look.
This makeover is sure to impress! For complete project details and step-by-step instructions, head over to apumpkinandaprincess.
Frozen Elsa Pumpkin:

Are you a fan of the enchanting world of Disney’s Frozen? If so, you’re in luck! I’ve conjured up a magical pumpkin decorating idea inspired by the icy charm of Elsa herself. To begin this frosty makeover, start by giving your pumpkin a radiant glow with a coat of glitter paint. The result will be nothing short of mesmerizing. Next, add some extra sparkle with rhinestones and adhesive bling in shapes that evoke the whimsical magic of winter. Take it to the next level by incorporating adhesive glitter snowflakes that seem to dance across your pumpkin’s surface. And finally, top it all off with a Disney Frozen-inspired tiara, because what’s more regal than a princess-approved centerpiece? For a complete guide on how to bring this icy masterpiece to life, head over to apumpkinandaprincess for step-by-step instructions.
DIY Fall Halloween Melted Crayon Pumpkin:
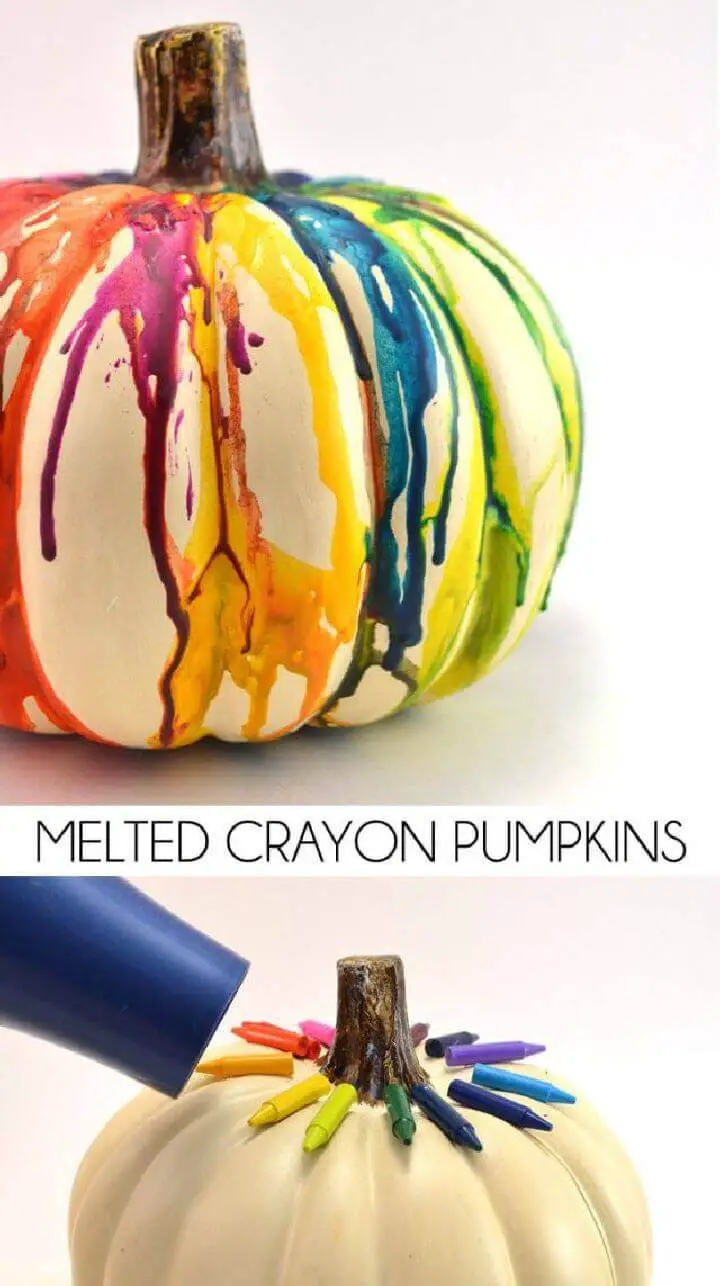
Transform your pumpkins into vibrant masterpieces using crayons as a medium for unique fall decorations. The process involves dripping melted crayons from the top down, allowing them to flow and create intricate, multi-colored patterns. This unconventional approach yields stunning results that will undoubtedly draw attention. While traditional fall decor often incorporates natural hues, this colorful display is sure to captivate onlookers. For a comprehensive guide, including step-by-step instructions, visit momspark for the complete project details.
Confetti Pumpkins:
Transform your faux pumpkins into vibrant and playful conversation pieces by applying a colorful confetti finish. Begin by generously applying glue around the pumpkin’s surface, followed by a generous sprinkling of confetti in your chosen hue(s). This unique decoration is sure to start conversations at your next Halloween gathering or event. For a complete guide on how to create these one-of-a-kind decorations, visit madeinaday.
DIY Painted Baseball Pumpkin:

Pumpkins, with their rounded shape, are surprisingly versatile. They can be transformed into a wide range of creative objects that add charm to everyday scenes. One such example is a baseball-inspired pumpkin that will delight sports enthusiasts and make for a fantastic decorative piece. To create this unique design, start by tracing the outline of the baseball pattern onto your pumpkin, then use acrylic paint in varying shades to bring the design to life. Before you begin the makeover, be sure to prime your pumpkin with a coat of white paint. The result is a stunning baseball-themed pumpkin that uses a palette of black, white, burnt umber, and bright red paints to achieve its near-realistc appearance. For a detailed guide on how to recreate this project, visit lifeinleftfield.
How to Carve a Pumpkin with a Hot Knife|:
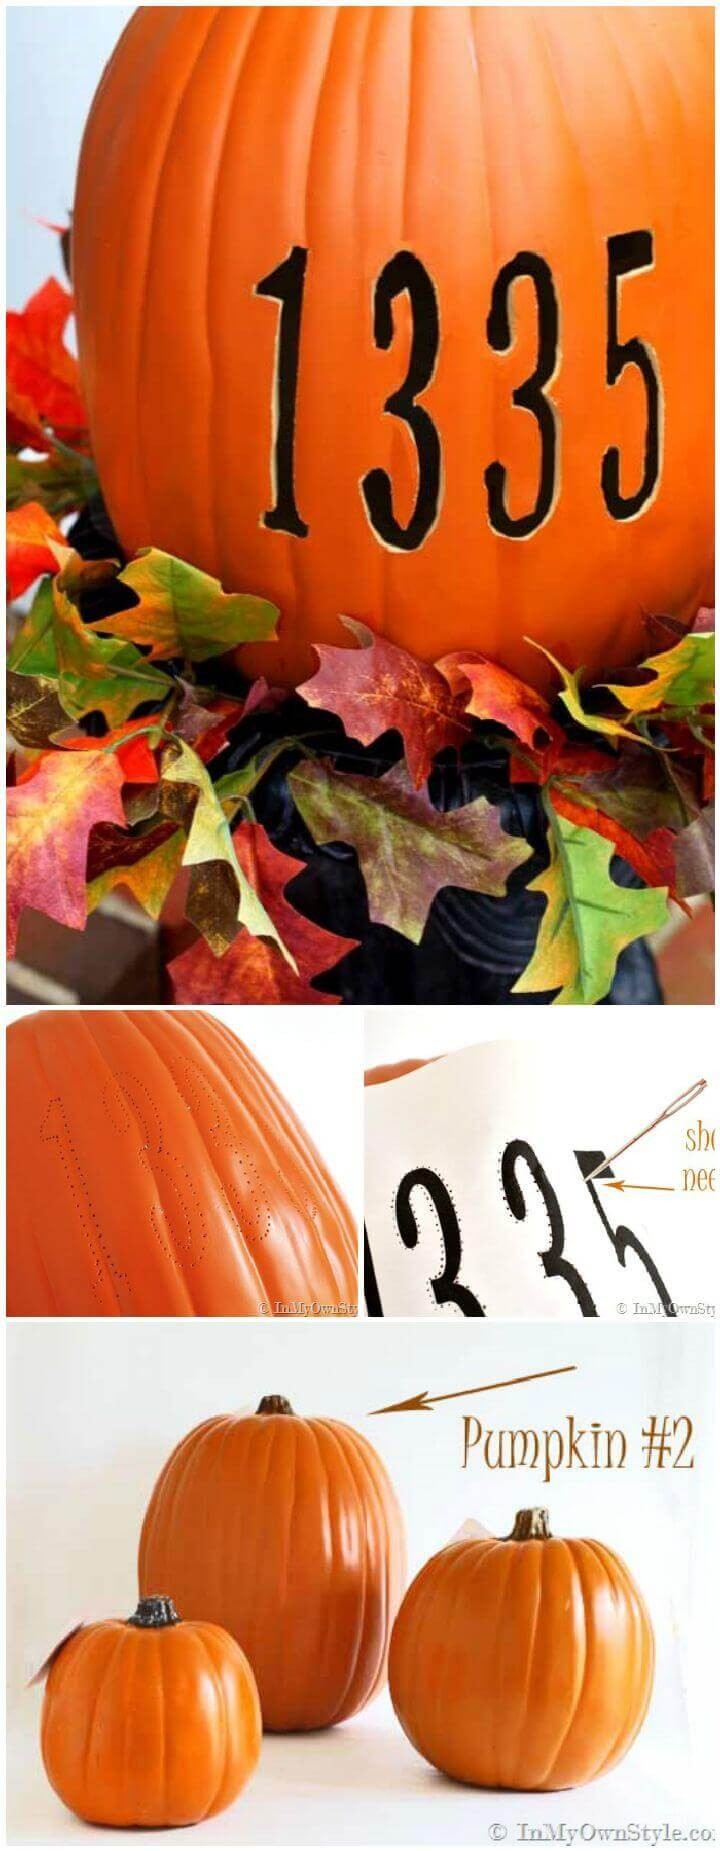
If you’re familiar with carving, it’s time to put those skills to use for a unique pumpkin decorative makeover. To get started, print out your preferred design, numbers or any other pattern you like. Next, tape the printout around your chosen pumpkin and then create tiny holes along the edges using a needle. This will result in a dotted outline of your design once completed. Once you have your design outlined, grab an X-Acto knife and carefully cut out the surface along the traced dots. The end result is a beautifully carved pumpkin that can add a personal touch to your home exterior or main entrance. For a more detailed guide on how to achieve this look, check out my latest project here.
