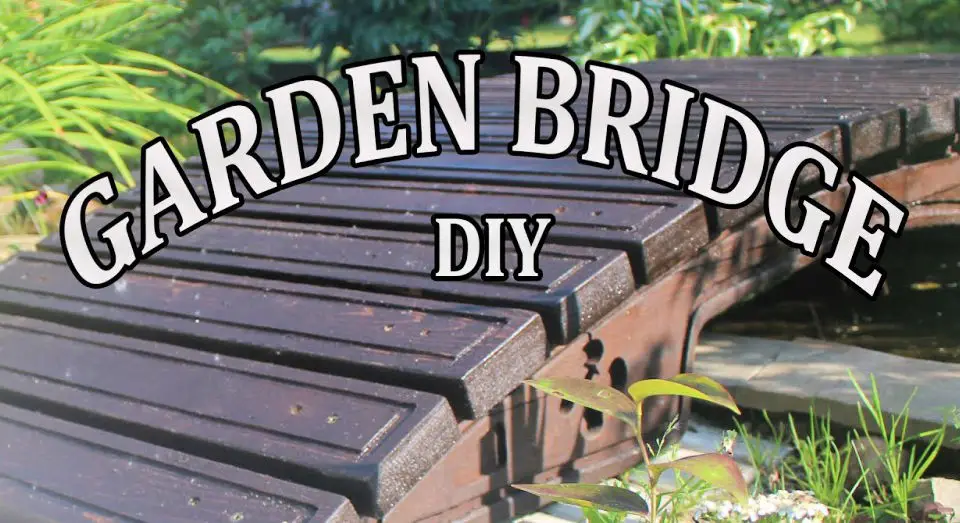
Building a DIY garden bridge can elevate your outdoor space, offering both functionality and aesthetic appeal. This comprehensive guide aims to simplify the process by breaking it down into manageable steps. We’ll cover material selection, necessary tools, and more, ensuring that even those new to woodworking can achieve impressive results. Our approach is perfect for anyone motivated to enhance their garden’s beauty. As we explore the specifics of building a garden bridge, you’ll discover 12 inspiring DIY plans and ideas tailored to guide you through each phase of construction. From preparing the frame to adding the final touches, our detailed walkthrough ensures success. With this guide, get ready to transform your garden into a serene retreat.
Why Build a Garden Bridge?
A garden bridge is often more than just a functional pathway – it’s an opportunity to transform your outdoor space into a serene and picturesque oasis. The benefits of incorporating a garden bridge extend far beyond its aesthetic appeal, as it can also enhance the practicality, value, and personal satisfaction of your garden.From a visual perspective, a well-designed garden bridge can be a stunning focal point that draws the eye and complements the natural beauty of your surroundings. But its functional significance shouldn’t be overlooked – it provides a safe and dry way to cross over wet or uneven areas, making your garden more accessible and enjoyable.Furthermore, a beautifully crafted garden bridge can increase the overall value of your property, making it an investment that pays off in the long run. And for those who enjoy DIY projects, building a garden bridge offers a sense of accomplishment and personal satisfaction as you bring your vision to life.One of the most appealing aspects of building a garden bridge is the freedom to customize it – you can choose the size, design, and materials to perfectly match your garden’s theme and your personal style. This allows you to create a truly unique and meaningful outdoor space that reflects your personality and complements your home.Ultimately, incorporating a garden bridge is an opportunity to reconnect with nature and slow down in today’s fast-paced world. It invites you to step outside, observe the beauty of your surroundings, and find peace in the tranquility of your own backyard.
How to Build a Garden Bridge
Crafting an arched pond bridge is a creative way to elevate the aesthetic appeal of your garden or outdoor area. By simplifying the construction process into manageable steps, this guide empowers beginners and seasoned DIY enthusiasts alike to produce impressive outcomes with minimal effort.
Materials and Tools Needed:
When embarking on a decking project, it’s essential to have the right tools and materials at your disposal. A reliable saw, such as a jigsaw, drill, or circular saw, will help you navigate even the most complex cuts with ease. Additionally, don’t forget to invest in a tape measure, pencil, and personal protective gear like earmuffs and safety glasses to ensure your workspace is both accurate and safe.
For added support and stability, consider using decking spacers and clamps, although this is not a necessity. To build the frame of your deck, you’ll need 140 by 35 mm structural treated pine, which will provide the necessary strength and durability. For the top layer, opt for treated decking pine in a width of 90 mm.
To secure your frame and prevent any sagging or instability, you’ll require eight 90-degree angles to provide additional support. Meanwhile, choose long screws for the frame’s rigidity and shorter decking screws for the top layer. Finally, don’t forget to include wood glue in your arsenal of materials to help hold everything together.
Step 1: Prepare the Frame Materials
To begin, you’ll need to prepare your framing planks. Start by cutting four pieces of 140 mm by 35 mm treated pine into two 1.8 meter lengths and two 60 centimeter lengths. This will provide the foundation for your bridge, with an additional 10 centimeters on one side to allow for a slight incline. Meanwhile, cut the decking timber, which should be around 90 mm wide, into four 2.4 meter lengths. These will eventually form the surface of your bridge.
Step 2: Make the Arches
When crafting the iconic arches that define the structure of your bridge, begin by sketching curved lines onto each plank designated for the sides. A flexible piece of wood can be leveraged to achieve a seamless curve. To maintain visual harmony, ensure your curves are symmetrical and evenly spaced. Next, use a jigsaw to carefully cut out the arches, followed by a gentle smoothing of any rough edges that may have resulted from the cutting process.
Step 3: Assemble the Arches
To reinforce the structure, apply a generous amount of wood glue to the cut curves and securely fasten them to the top of the framing planks. Ensure a sturdy bond by screwing them in place, taking care to pre-drill precise holes to prevent the wood from splitting or cracking.
Step 4: Attach Cross Beams
To reinforce the structural integrity of your frame, secure crossbeams between the two arches by attaching them with 90-degree angle brackets and decking screws. This crucial step not only enhances the overall stability of the frame but also prepares it for the addition of decking timber on top.
Step 5: Prepare the Decking
To achieve the desired appearance and ensure a seamless integration with the surrounding environment, it’s essential to carefully measure and cut the decking timber to the required length. A prudent approach would be to leave a slight overhang on both sides of the bridge to account for any minor adjustments or settling that may occur over time. Following the initial cutting, take the time to meticulously sand the edges of the timber to produce a smooth finish that will enhance the overall aesthetic appeal of your project.
Step 6: Attach the Decking
To construct a sturdy deck foundation, lay the decking planks across the frame, ensuring they’re spaced uniformly apart. Prior to installation, pre-drill holes in each plank to prevent splitting and subsequent damage. Additionally, utilize decking spacers to maintain consistent gaps between planks, promoting a professional-looking finish. Finally, secure the planks firmly to the frame by screwing them into place.
Step 7: Finishing Touches
To further reinforce the integrity and visual allure of your bridge, consider applying a stain or protective coating. This step is not strictly necessary for the underside, but treating all surfaces with a couple of coats can significantly extend the life expectancy of the wooden structure. By doing so, you’ll be able to enjoy its natural beauty for an extended period.
Step 8: Installation
As you’ve completed your DIY bridge project, it’s time to thoughtfully position it over the pond or designated area. To ensure seamless integration into your outdoor space, make sure to carefully adjust the surrounding landscape. This might involve subtle alterations to the terrain, placement of decorative elements, and possibly even the pruning of nearby foliage. By doing so, you’ll be able to create a harmonious connection between your bridge and its surroundings, ultimately enhancing the overall aesthetic appeal of your garden.
Video Tutorial
To further enhance your understanding of building an arched pond bridge, I recommend supplementing this written guide with a hands-on approach by watching our accompanying video tutorial on YouTube. This visual companion piece showcases the step-by-step process in action, providing a richer and more comprehensive learning experience. With the right tools and a moderate level of patience, you’ll be surprised at just how straightforward the project is. Whether you’re an experienced DIYer or taking on your first project, this guide is designed to empower you with the skills and confidence needed to achieve success. As you get started, remember that the journey is just as important as the end result – happy building!
Design Inspiration
As you explore the realm of garden bridges, the possibilities are boundless. Whether you’re seeking a charming pedestrian path to traverse a small stream or a striking statement piece to anchor your outdoor oasis, there’s an aesthetic to suit your vision. Popular designs include classic wooden arches that seamlessly integrate with natural surroundings, evoking a sense of timelessness and rustic charm. Alternatively, Zen-inspired flat bridges, often accompanied by pebbles and understated foliage, can create a serene atmosphere reminiscent of Japanese gardens. For a touch of sophistication, ornate metalwork bridges boasting intricate designs can elevate your garden’s elegance quotient. And for the more adventurous, replica bridges drawing inspiration from famous landmarks like Monet’s Garden Bridge or the Lattice Bridge in Chinese gardens offer a unique opportunity to pay homage to these iconic structures. Ultimately, the key is to choose a bridge that harmonizes with your garden’s theme and aesthetic, elevating its natural beauty.
Material Selection
The selection of materials for your garden bridge is a critical decision that balances both visual appeal and durability. The following options are available:
Wood remains a popular choice due to its natural appearance. Redwood, cedar, and pressure-treated pine are notable examples of wood types that exhibit resistance to decay and insects.
Metal structures, typically constructed from wrought iron or steel, can provide an air of elegance while offering durability. However, they do require protective coatings to prevent rust and ensure longevity.
Composite materials, a blend of wood fibers and plastic, offer a low-maintenance solution that is resistant to rot and insect damage.
Each material has its unique advantages and disadvantages, making it essential to consider factors such as climate, garden style, and personal maintenance preferences when making your selection.
Step-by-Step Building Guide
Creating a garden bridge can be a delightful DIY endeavor. To help you get started, here’s a concise outline: Begin by meticulously measuring your space to determine the ideal size and aesthetic of the bridge. Once you have a clear vision, move on to establishing a solid foundation. Secure the posts firmly in the ground with concrete for added stability. Next, construct the framework, ensuring it’s level and sturdy enough to support any weight or load. The decking stage is crucial – lay the planks carefully, leaving small gaps for water drainage. For an extra layer of security, attach railings, especially if your bridge is elevated or spans a significant distance. Finally, add the finishing touches by staining or painting the bridge to protect it from the elements and harmonize with your garden’s unique charm. Always prioritize safety, verifying that all connections are secure and the bridge can comfortably accommodate its intended load.
Safety Considerations
When embarking on a DIY garden bridge project, it’s essential to prioritize safety from the outset. A crucial aspect is ensuring the structure can support the weight of multiple individuals without compromising its integrity. To achieve this, consider the load capacity of your bridge and design it accordingly. Additionally, if the bridge spans a considerable height, incorporating railings on both sides is vital for maintaining stability and preventing accidents. Furthermore, a non-slip surface treatment or textured materials should be employed to minimize the risk of slips and falls. It’s equally important to conduct regular inspections to identify any signs of wear or damage, promptly addressing these issues to maintain the bridge’s safety and longevity.
Landscaping Integration
A garden bridge is more than just a pathway – it’s an integral part of the landscape. To achieve seamless integration, consider the following strategies.
Positioning: Strategically place the bridge in areas where it can serve as a natural transition point or provide a scenic viewpoint to a standout garden feature.
Planting: Flank the bridge with plants that complement its style and aesthetic. For example, a Zen-inspired bridge might be paired with bamboo or moss, while a rustic wooden bridge could be surrounded by wildflowers or ferns.
Lighting: Soft lighting can not only highlight the bridge’s unique features but also ensure safe navigation at night.
By thinking of the bridge as an opportunity to create a journey through your garden, you can craft a truly immersive and enchanting experience.
Cost Analysis
When it comes to budgeting for a garden bridge, several factors come into play. The type and quality of materials used are significant variables in determining the overall cost. For instance, larger bridges may require more substantial materials and potentially professional assistance, driving up expenses. Additionally, consider the cost of any extra features you might want to incorporate, such as railings, lighting, or decorative elements. To keep costs in check, explore opportunities to save by using reclaimed materials or streamlining your design without compromising safety or aesthetics.
Maintenance Tips
To ensure your garden bridge remains a treasured feature of your outdoor space, regular maintenance is crucial. Start by performing routine inspections after extreme weather events or changes in seasons. This allows you to identify and address any signs of damage or wear, such as cracks or loose boards. Additionally, keep the bridge free from debris and mildew by cleaning it regularly. Preventing rot and slip hazards is vital for ensuring a safe and enjoyable experience for all users. Furthermore, reapply protective coatings, such as stains or sealants, as needed to shield the material from the elements. By following these simple yet essential maintenance tasks, you can enjoy your garden bridge for many years to come.
Community Showcase
By inviting readers to share their own garden bridge experiences, you can create a two-way dialogue that benefits both your audience and your content. One way to do this is by setting up a dedicated space for photo submissions, where enthusiasts can showcase their creations and share the stories behind them. This could include asking questions like what inspired their design choices or what lessons they’ve learned along the way. By actively responding to these submissions and featuring notable projects, you can foster a sense of community among your readers, making them feel seen and heard. Furthermore, this type of engagement not only provides social proof for your advice but also gives you valuable insights into how your audience is applying the concepts you’re sharing. This can help refine your guidance and make it more relatable to your readers’ real-world experiences.
FAQs On DIY Garden Bridge
Elevating your outdoor space is a top priority for many homeowners, and one effective way to do so is by incorporating a stunning garden bridge. To ensure a seamless experience, we’ve addressed common queries that may arise during the planning and execution process.
What materials are best for building a garden bridge?
When it comes to constructing a garden bridge, the choice of materials is crucial. Budget, visual appeal, and lifespan all play a significant role in determining the ideal selection. A cost-effective option like treated pine offers excellent resistance to rot and insect damage, making it a practical choice for many. For those seeking a more premium look, hardwoods such as cedar, redwood, and teak provide unparalleled durability and natural charm, albeit at a higher price point. Alternatively, composite decking materials can provide a modern aesthetic with low-maintenance requirements, ensuring your garden bridge remains a beautiful feature for years to come.
How long does it take to build a garden bridge?
Building a garden bridge is a task that demands consideration of multiple factors – the intricacy of the design, one’s level of expertise, and the availability of required tools. The timeframe for completion can range from a leisurely weekend project to an extended endeavour spanning several weekends, depending on the complexity of the venture.
Do I need a permit to build a garden bridge?
When it comes to permits for small, decorative bridges, the rules can differ depending on where you are in the world. If your bridge is tiny and purely ornamental, without crossing over any public waterways, a permit might not be necessary. However, if your bridge is larger, more functional, or spans a body of water that falls under local, state, or federal regulations, you’ll likely need to obtain a permit before commencing construction. To avoid any potential issues, it’s always best to consult with your local building department or regulatory authority prior to starting your project and ensure you have the necessary permits in place.
Can I build a garden bridge if I have no carpentry experience?
With minimal carpentry experience, it’s possible to build a garden bridge, even with a simple design. To make the process more manageable, seek out step-by-step instructions or DIY guides specifically designed for beginners. Additionally, having access to basic tools and a willingness to learn are essential components of this project. Video tutorials can also provide valuable guidance as you work through the process.
How can I ensure my garden bridge is safe?
When it comes to designing a garden bridge that’s both aesthetically pleasing and structurally sound, it’s crucial to consider several key factors. Firstly, opt for durable materials that can withstand the elements and support the expected weight load of the bridge. This might include sturdy woods like ipe or cedar, or even composite materials. Next, ensure that your design plan is solid, with secure joints and correct assembly of all parts. A well-planned structure will be able to withstand normal wear and tear, as well as extreme weather conditions like heavy rain or strong winds. Finally, make maintenance a regular part of your garden bridge’s upkeep by inspecting it regularly for signs of damage or deterioration. Address any issues promptly to prevent minor problems from becoming major repair jobs down the line.
How do I protect my garden bridge from the elements?
To safeguard your garden bridge against the harsh elements, consider the following crucial steps:
Selecting Durable Materials: Opt for materials that are inherently resistant to rot, decay, and insect damage.
Applying a Protective Coating: Utilize a waterproof sealant, paint, or stain to shield wood surfaces from moisture. Be sure to reapply as instructed by the product manufacturer.
Sustained Maintenance: Perform regular inspections to identify and repair any damage, such as cracks or loose components, to prevent water from seeping in and accelerating deterioration.
Can I add lighting to my garden bridge?
When it comes to adding lighting to your garden bridge, the possibilities are endless. Not only can it enhance the overall aesthetic of the area, but it also provides an added layer of safety during nighttime hours. Solar-powered lights are an excellent choice for those looking for a cost-effective and eco-friendly option that requires minimal installation effort. With no need for electrical wiring, these lights are perfect for those who want to avoid any potential headaches. Low-voltage LED lights are another popular option, offering a wide range of styles and colors to help create the desired ambiance. When it comes to installing any electrical components, it’s crucial to ensure they’re waterproof and installed according to the manufacturer’s instructions to guarantee safe and trouble-free operation.
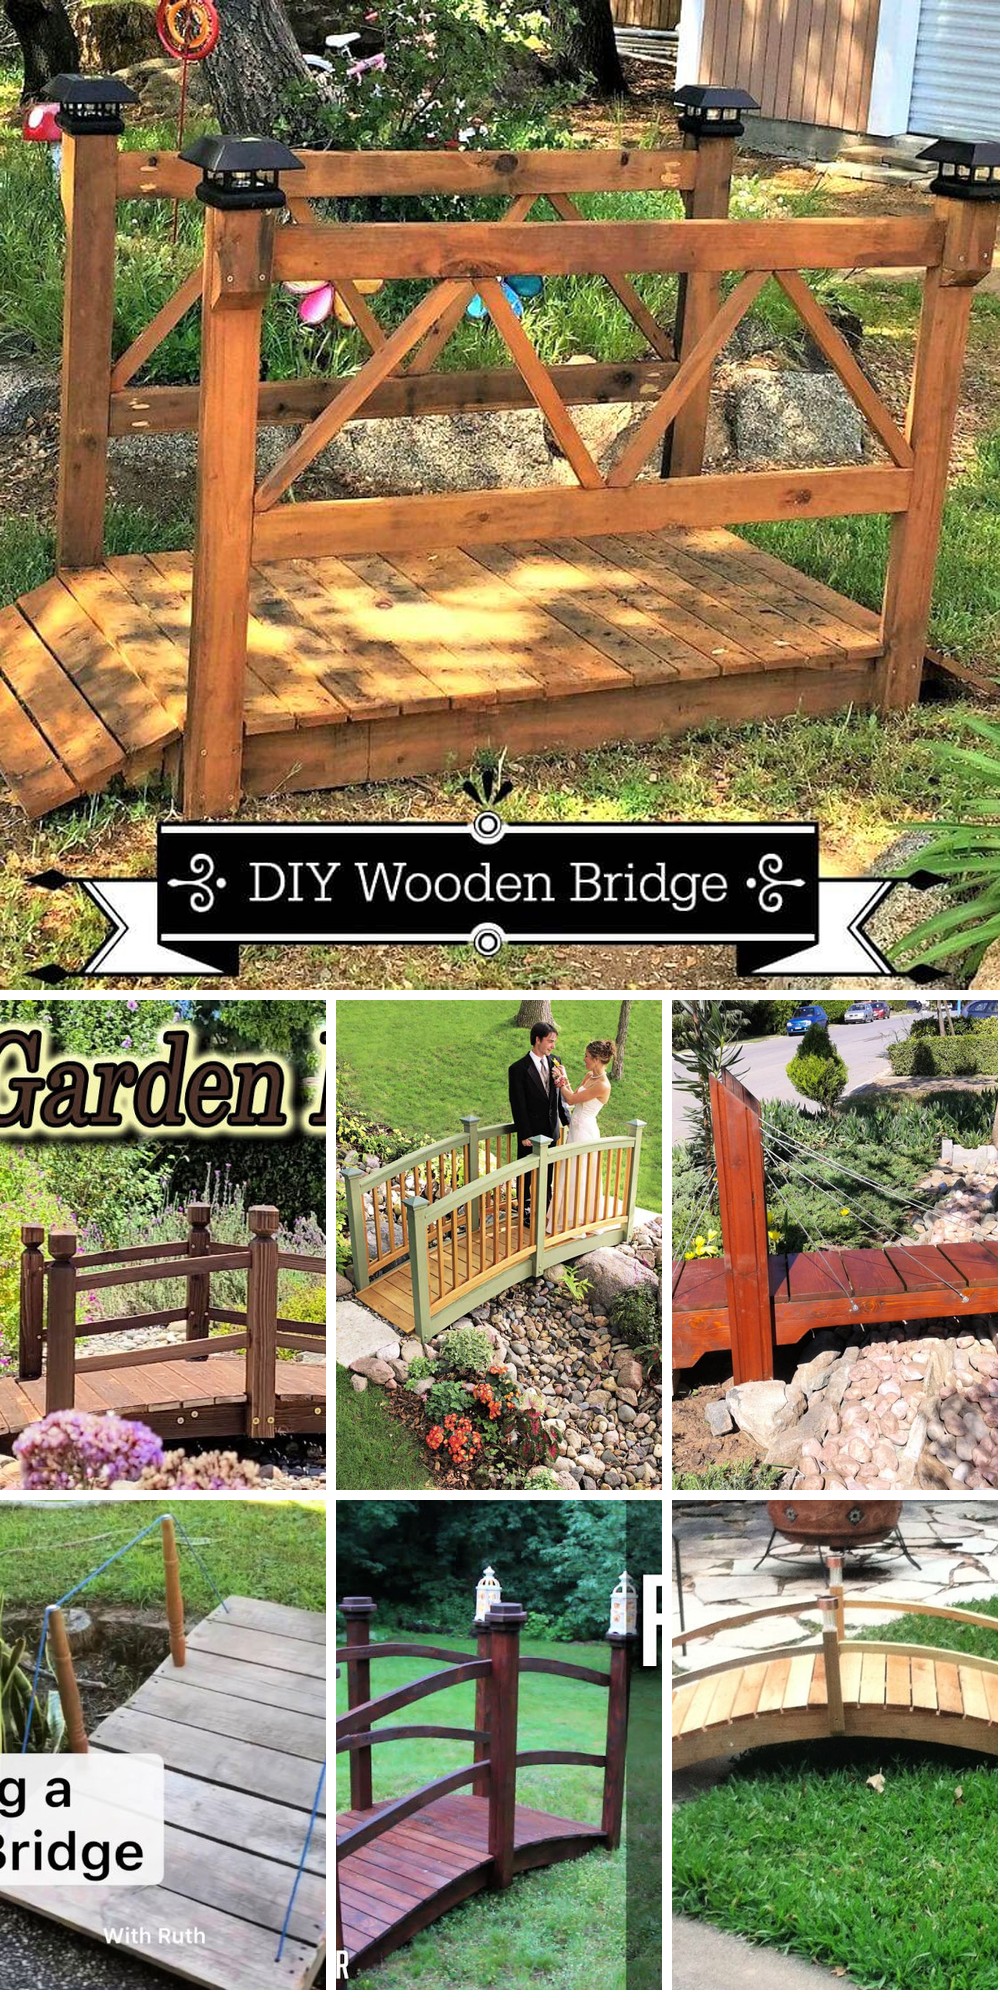
12 DIY Garden Bridge Plans and Ideas (How to Build)
Unleash your creativity and bring a touch of magic to your outdoor sanctuary by building your very own DIY garden bridge. With a plethora of inspiring designs, we’ve curated the top 12 DIY garden bridge plans and ideas that will guide you in creating an enchanting focal point for your garden. Let’s get started and transform your outdoor space into a serene oasis.
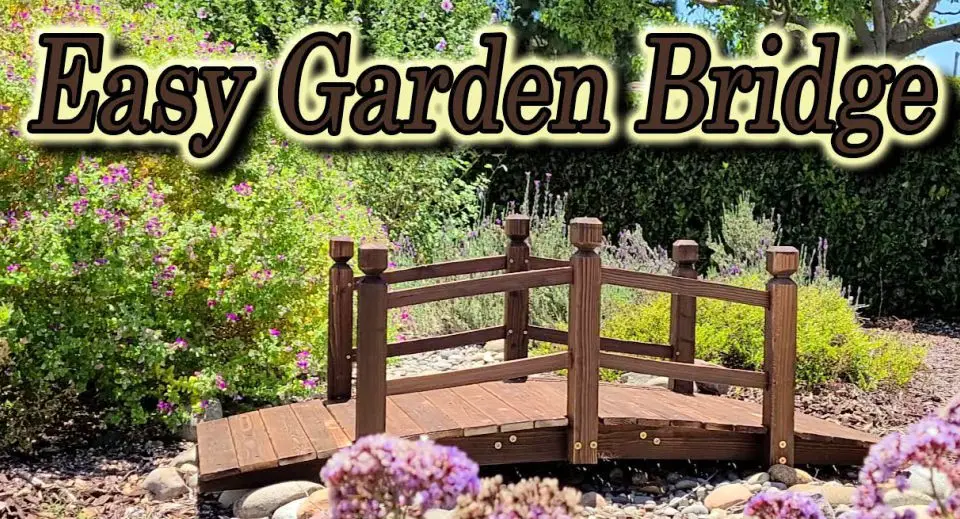
Classic Arched Backyard Garden Bridge
Elevate your backyard’s ambiance by crafting a timeless arched bridge with Family Handyman’s straightforward guide. Perfect for traversing a small stream or adding a decorative element to your garden, this project is within reach for DIY enthusiasts with basic tools like a circular saw, drill, and sander. By following step-by-step instructions on preparing the site, cutting and assembling the arches, and applying the finishing touches, you’ll create a functional yet visually stunning wooden bridge that showcases your skills.
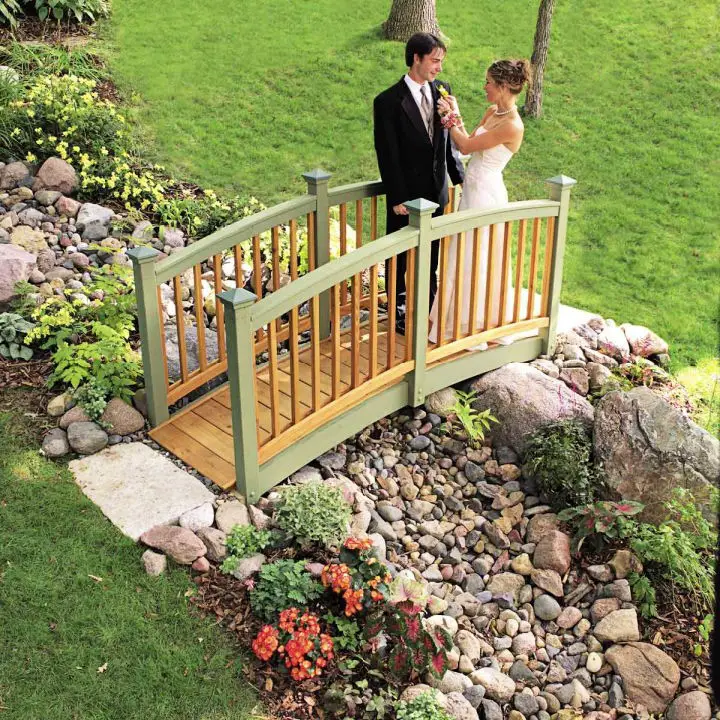
How to Make a Garden Bridge
Transform your garden into a tranquil oasis by crafting a beautiful and functional Garden Bridge. This DIY project offers the perfect blend of style and practicality, allowing you to create a charming structure that not only enhances your outdoor space but also provides a convenient pathway. For a detailed and informative guide on building a sturdy and attractive Garden Bridge, refer to Instructables’ comprehensive tutorial. The step-by-step instructions ensure an enjoyable and successful building experience, ideal for any garden enthusiast looking to make a lasting impression on their outdoor haven.
Homemade Japanese Garden Bridge
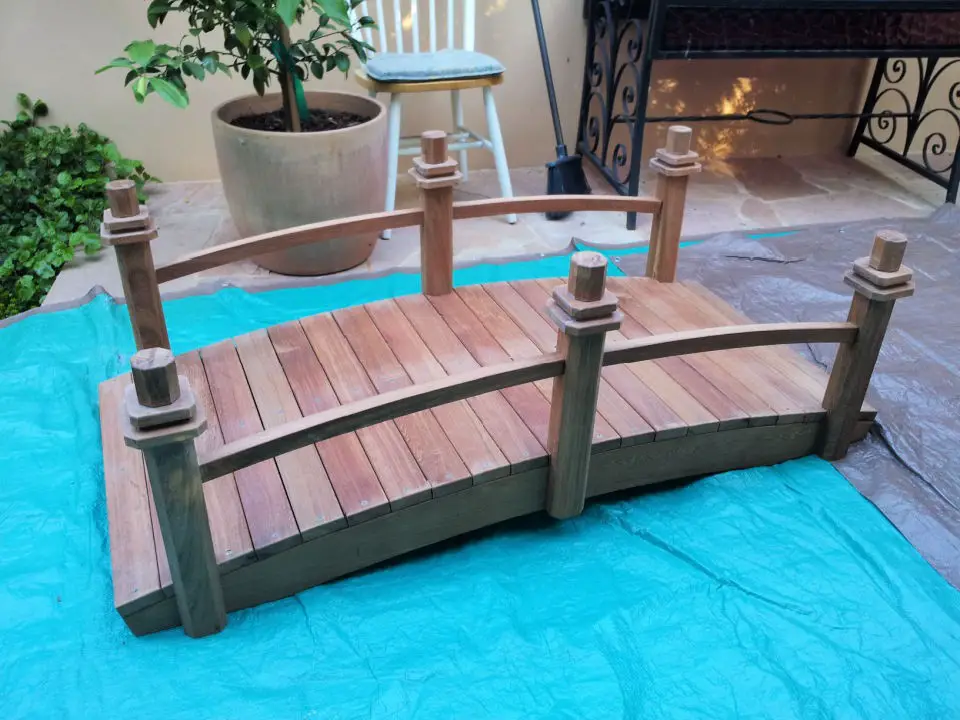
Step into a tranquil oasis with this enchanting Japanese-inspired garden bridge. Crafted from rich Machiche wood, the design whispers tales of nostalgia, reminiscent of the wooden blocks that brought joy to childhood playtime. As you bring your outdoor vision to life, remember that a few extra clamps can be a wise investment. This charming addition is perfect for gardening enthusiasts seeking to infuse serenity into their backyard retreats.
Building Your Own Garden Bridge

Create a peaceful oasis in your backyard with this do-it-yourself suspended garden bridge project. This comprehensive guide takes the guesswork out of construction, providing clear and concise instructions for every step. Whether you’re working with a small or large outdoor space, this charming bridge will become a focal point that draws you in to appreciate nature’s splendor. For inspiration and guidance, head to Instructables to start building your own serene retreat today.
How to Build a Wood Garden Bridge
Transforming your garden with a charming DIY wood garden bridge is an endeavor that began as a playful safari party prop, but evolved into an exquisite decorative piece for any yard. By dedicating a few weekends to crafting this attractive bridge, which started as a simple design and transformed into a stunning garden feature. With the comprehensive guide on Hometalk, you can follow step-by-step instructions from constructing the base to adding finishing touches like solar light post caps. This fulfilling project will allow you to bring a touch of whimsy to your outdoor space.
DIY Garden Bridge With Concrete Footings

Transform your outdoor oasis with a charming garden bridge featuring concrete footings. Perfect for gardening enthusiasts seeking to infuse their space with sophistication and practicality, this project is surprisingly easy and fulfilling. To bring your vision to life, consult Instructables’ comprehensive guide, which provides crystal-clear instructions suitable for DIYers of all skill levels. Unlock the full potential of your garden by incorporating a functional yet visually stunning bridge today.
Free Arched Garden Bridge Plan
Transform your backyard haven with an arched garden bridge from MyOutdoorPlans. This DIY project seamlessly blends functionality and charm, making it an ideal way to elevate your outdoor space. By following a straightforward set of instructions and using readily available materials and tools, you can bring this stunning feature to life in just a few days. Its adaptability ensures the bridge fits perfectly into your specific vision, serving as both a practical addition and a statement piece that harmoniously complements your property’s natural beauty.
Building a 6 Ft Bridge for Garden
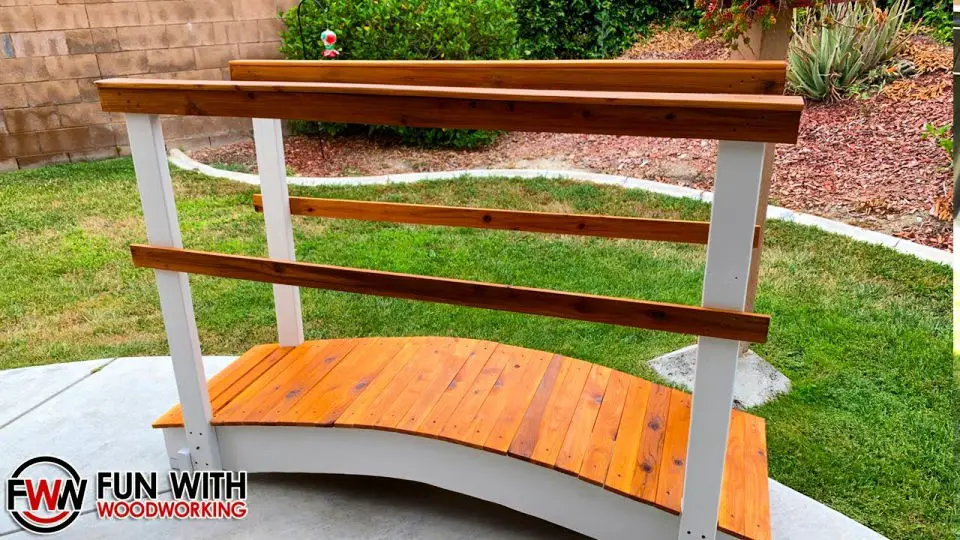
Transform your garden or commemorate a milestone with a delightful 6 ft bridge that exudes charm. This comprehensive guide is designed specifically for beginners, providing a straightforward, step-by-step approach to ensure a stress-free experience from start to finish. To further aid in the process, refer to the accompanying tutorial from Fun With Woodworking, which offers a detailed visual representation of each stage. Whether you’re looking to elevate your outdoor space or create a meaningful keepsake for a special occasion, embark on this DIY adventure today and craft a functional masterpiece that will be cherished for years to come.
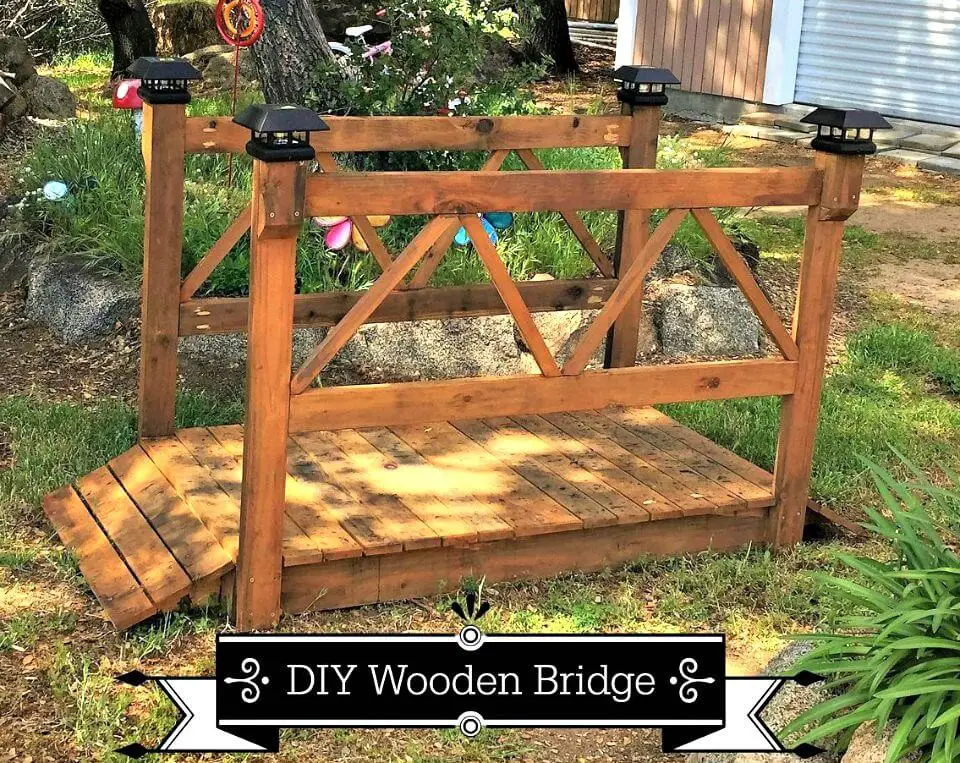
Fairytale Garden Bridge From Dimensional Lumber
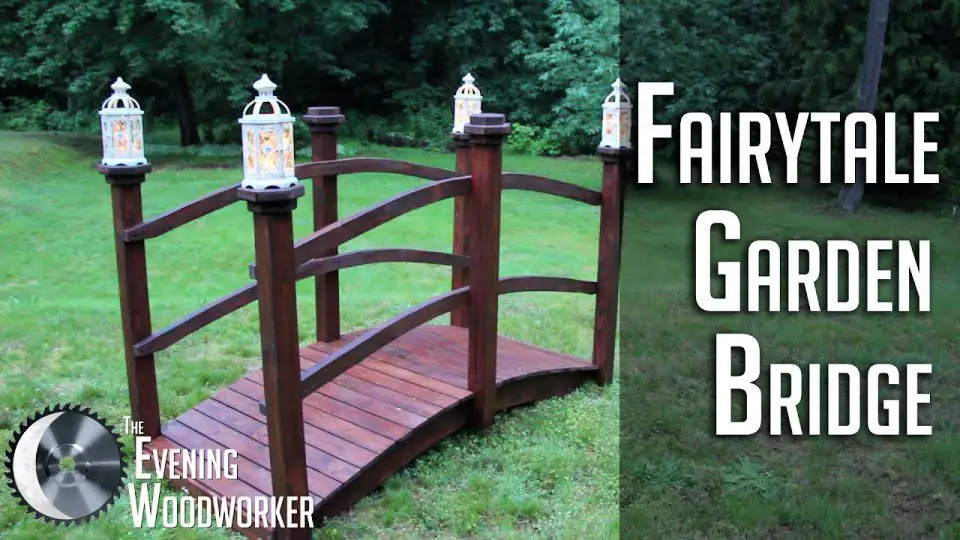
Step into a whimsical world with our comprehensive Fairytale Garden Bridge guide, tailored to delight both seasoned gardeners and those seeking to infuse their outdoor space with a touch of magic. This thoroughly informative resource is designed to engage and educate, making it an excellent project for elevating your garden’s charm. By following our expert guidance, you’ll be able to craft a captivating bridge that will undoubtedly become the crowning jewel of your serene garden oasis.
Make Your Own Garden Bridge
Elevate your outdoor space with a charming DIY bridge made from upcycled pallets! This eco-friendly project not only reuses materials but also adds a touch of whimsy and functionality to any garden or yard. Perfect for families, this unique feature is sure to delight kids and adults alike. By repurposing old pallets, you’ll not only create a stunning visual focal point but also encourage outdoor exploration and play.
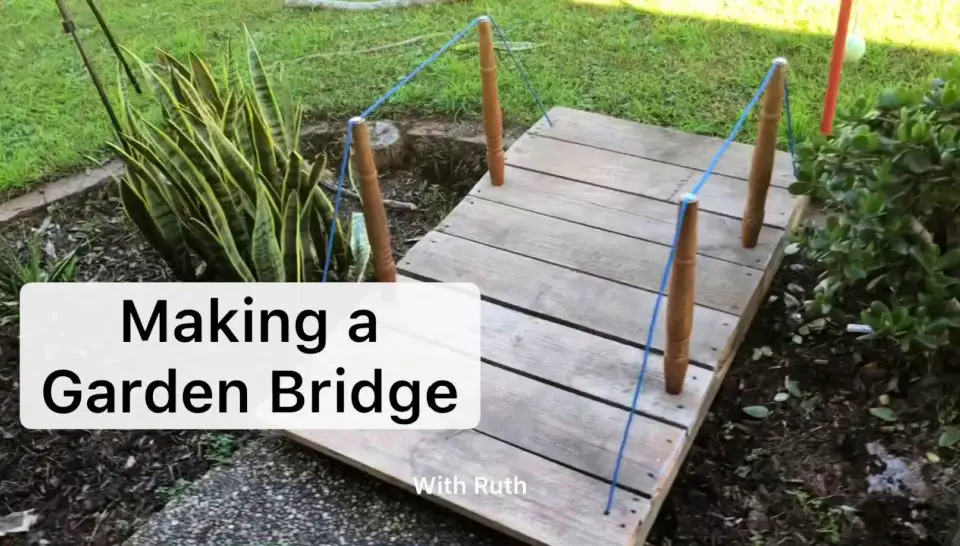
Make a Garden Bridge With Hand
Transform the charm of your garden by creating a unique, handmade bridge that doubles as a functional art piece. This accessible guide provides a clear roadmap for crafting a picturesque bridge using readily available materials, allowing you to elevate your outdoor space with ease. Not only will this project bring a touch of serenity to your surroundings, but it’s also an engaging and rewarding DIY endeavor that can be completed in no time.
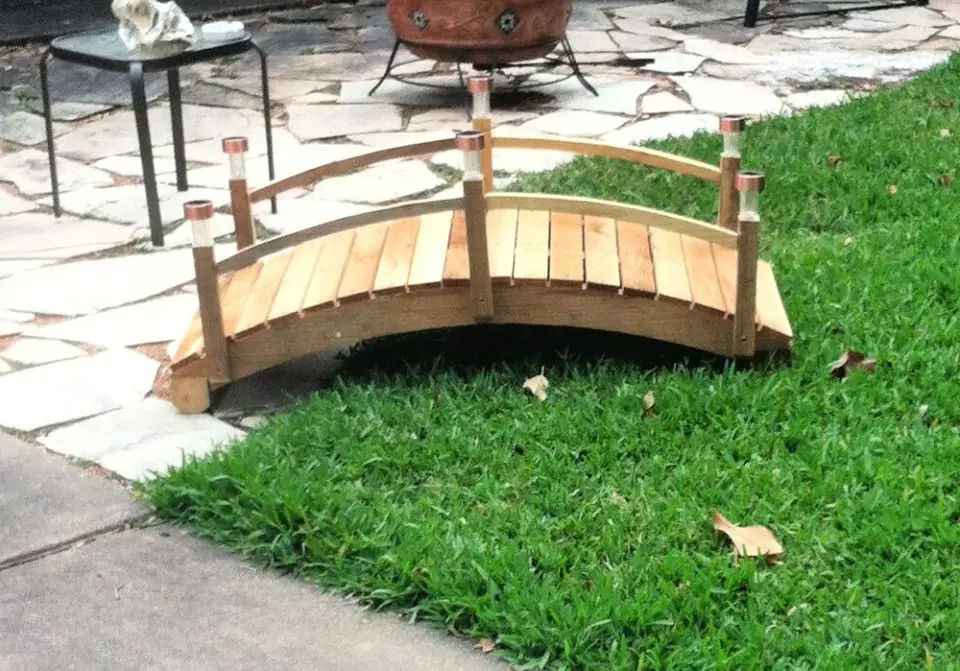
Easy DIY 5ft Garden Bridge for Yard
Elevate your yard’s aesthetic with a stunning 5ft garden bridge, achievable through a straightforward DIY process. This robust structure can withstand up to 400 pounds, seamlessly blending style with practicality. A perfect solution for ponds or dry creek beds, it invites you to discover the joy of creating something beautiful and functional in just a few easy steps. Whether you’re an experienced DIY enthusiast or just starting out, this project’s simplicity makes it accessible to all. Start building today and watch your outdoor space transform into a breathtaking haven!
Conclusion:
As the journey of building your own garden bridge comes to a close, it’s undeniable that this transformative project can dramatically enhance the charm and functionality of your outdoor space. By providing a step-by-step guide that covers every aspect of construction, from material selection to execution, we’ve made the daunting task of constructing 12 DIY garden bridges achievable for anyone eager to elevate their garden’s aesthetic appeal.
At the heart of this endeavour lies the importance of prioritizing safety and proper finishing techniques. By embracing these fundamentals, you’ll be able to ensure the longevity of your creation, ultimately leading to a serene oasis that will bring joy and tranquility to your landscape for years to come.
