Unique DIY Wooden End Table
As Memorial Day approaches, you’re probably excited about the long weekend but also worried about the unpredictable weather forecast. Fear not! Instead of focusing on outdoor plans, why not create something amazing indoors? I’m talking about a rustic-chic side table that’s perfect for any living space.
This DIY project is designed to be sturdy and stylish, using two-by material for a robust look. With just a few simple tools like screws, spruce two-by-sixes, and one-by material for a sleek finish, you’ll have your new side table assembled in no time.
In this step-by-step guide, I’ll walk you through the process of cutting, drilling, sanding, and assembling the table. You’ll learn how to create a sturdy and stylish addition to your home that’s not only visually appealing but also practical.
One of the unique features of this design is the removable tabletop, which adds an extra layer of storage to its charming aesthetics. So, whether you’re looking for a place to display decorative items or stash away some essentials, this side table has got you covered.
So, why not bring in the holiday spirit with this fantastic DIY project? With just a few simple steps and some basic materials, you can create something truly special that will be enjoyed by you and your family for years to come.
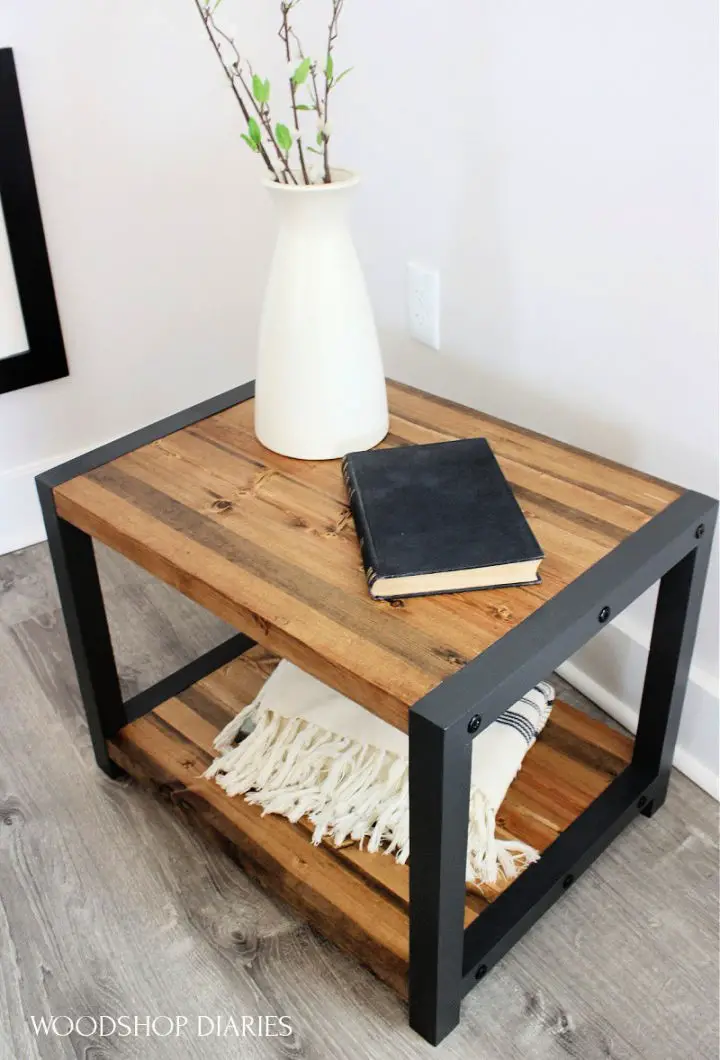
Free Rustic End Table Plan
Create a one-of-a-kind DIY rustic end table that seamlessly blends storage with a timeless aesthetic. This straightforward woodworking plan combines two shelves and a reclaimed wood top, secured by a striking black frame. The result is a functional piece that showcases your creativity while keeping essentials within easy reach.
With a modest list of materials including 2x4s, 2x2s, wood glue, screws, and a pocket hole jig, you’ll be guided through the process from start to finish. This project is perfect for reusing spare lumber, yielding a unique piece that reflects your personal style.
This comprehensive guide takes you by the hand, providing step-by-step instructions on preparing reclaimed lumber to applying a finish. By following along, you’ll develop valuable woodworking skills and gain a beautiful piece of furniture without breaking the bank. So why not take the plunge and create this stunning rustic end table today?
Designer Inspired Two Tier End Table Makeover
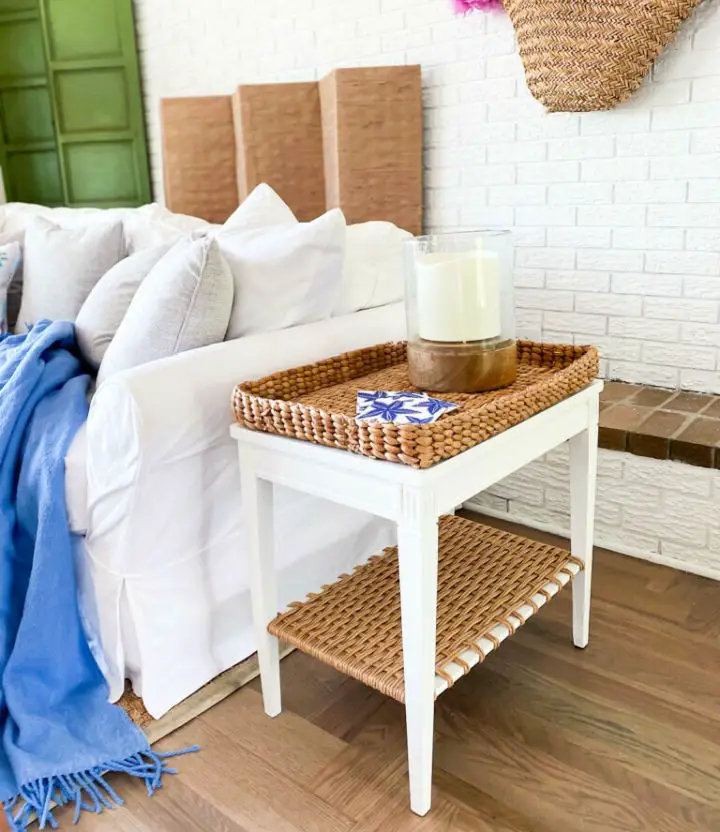
Give new life to an old wooden end table with a creative DIY two-tone woven technique, offering a designer’s touch at a fraction of the cost. This innovative project transforms a thrifted find into a stunning piece that combines functionality and aesthetic appeal.
Starting with a budget-friendly discovery from a yard sale or thrift store, this makeover reinvigorates old furniture, resulting in a stylish and practical end table that offers both utility and charm. By combining a crisp white paint job with a contrasting woven tray for added character, this project promises a fresh and modern look.
This DIY endeavor is a testament to the power of simple materials like paint, wax, and paper fiber rush cord in completely transforming a piece of furniture. The outcome? A sleek, two-tier end table that rivals those found in high-end furniture stores at a significantly lower cost. Let this project inspire you to approach your furniture makeover journey with creativity and resourcefulness.
Making an End Table With a Shelf
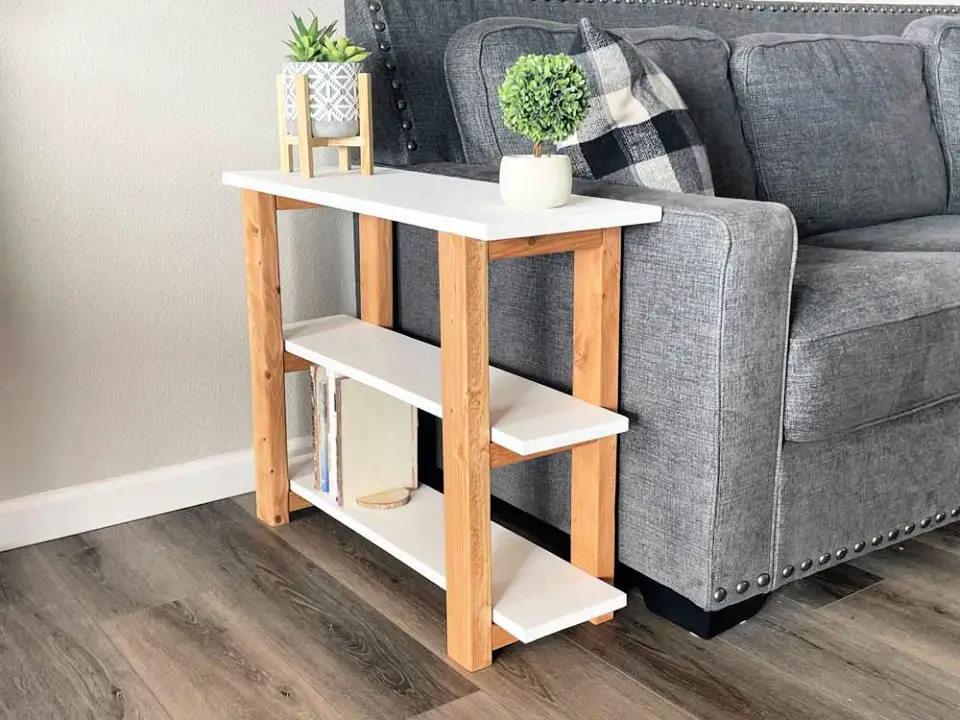
Assembling a sleek and versatile DIY end table with a bottom shelf using 2x2s is a perfect weekend project for those who crave simplicity and functionality. To get started, gather your essential tools: a saw, drill/driver, wood glue, clamps, wood screws, black timber screws, and a sander. With these materials at hand, you’ll embark on a journey of crafting top and bottom shelves, constructing the frame, drilling pilot holes, and ultimately, bringing all the elements together to achieve a stunning finish.
The beauty of this project lies in its adaptability – you can customize it to match your unique decor, making it an excellent addition to your living space. Whether it’s placed beside your couch, recliner, or even used as a nightstand, this compact and modern table is sure to bring a touch of DIY flair to any room.
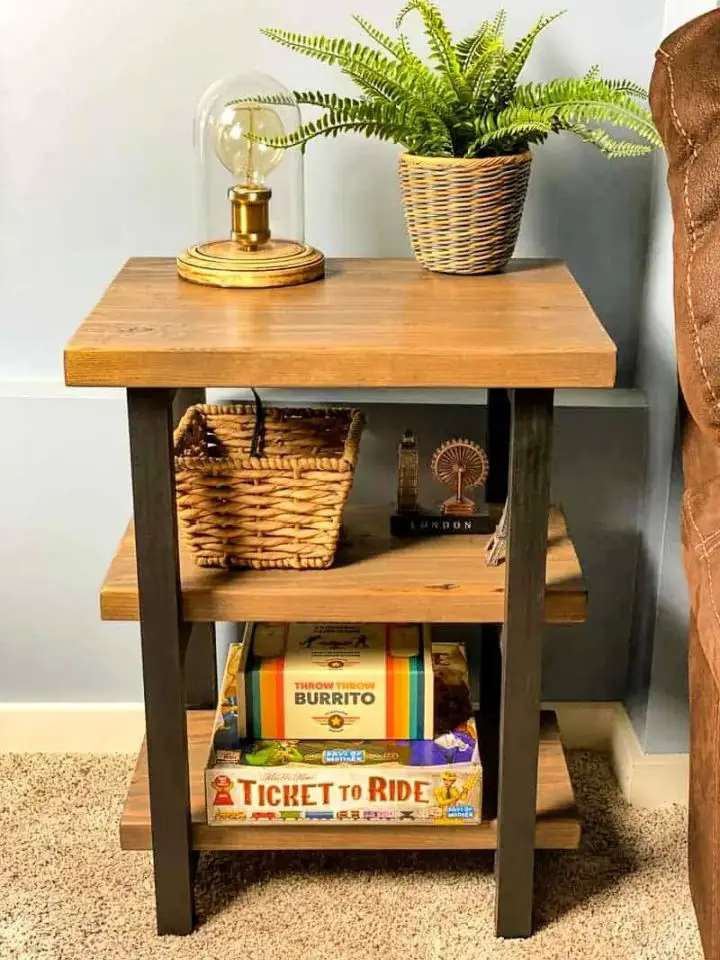
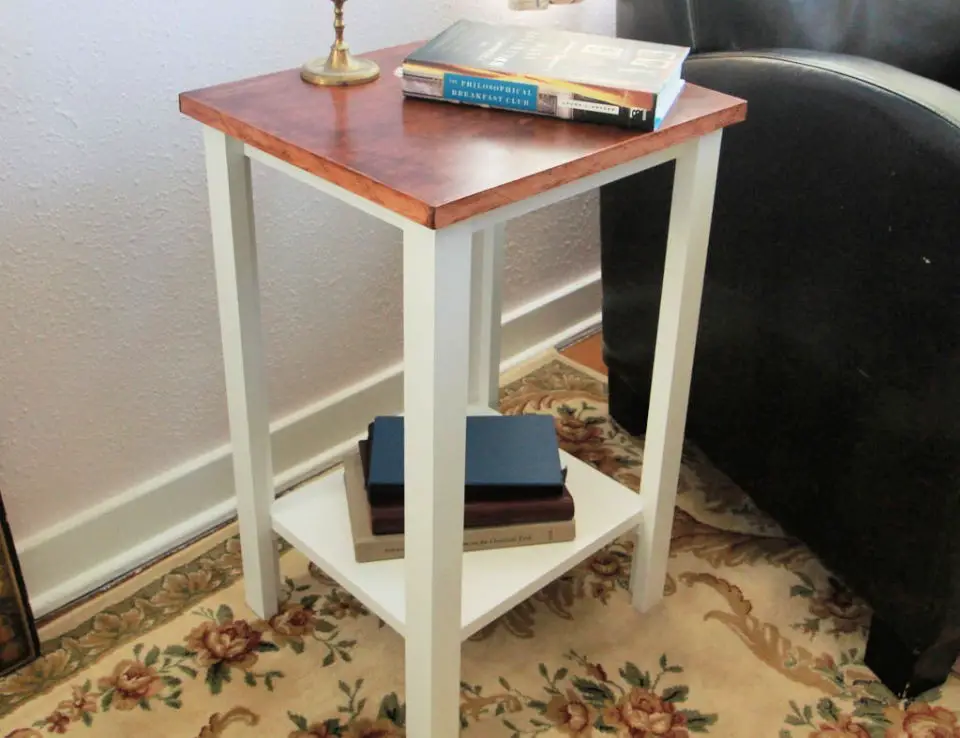
Best Narrow Side Table Design
Transform your living space with a straightforward DIY project: a compact end table. This versatile piece of furniture brings functionality and style to any room, serving as a convenient spot for your morning coffee, favorite book, or TV remote control. Its sleek design adds a touch of sophistication to your decor, making it an ideal addition to any setting. Designed with beginners in mind, this project requires only basic materials and tools, ensuring that anyone can bring their creative vision to life.To get started, gather the following materials: a 4-foot long 1×8, a 30-inch long 1×12, a 12-foot long 2×4, and an assortment of self-tapping wood screws. The provided cut list ensures you have the precise dimensions for each component, streamlining the building process.The step-by-step instructions guide you through constructing the two-leg sets, attaching the shelves, and assembling the tabletop, resulting in a beautiful narrow-end table perfect for your living room or any other space where you need a little extra storage and style. By tackling this project, you’ll develop your creative skills, gain practical experience, and enjoy the satisfaction of crafting something with your own hands.
How to Make Your Own End Table
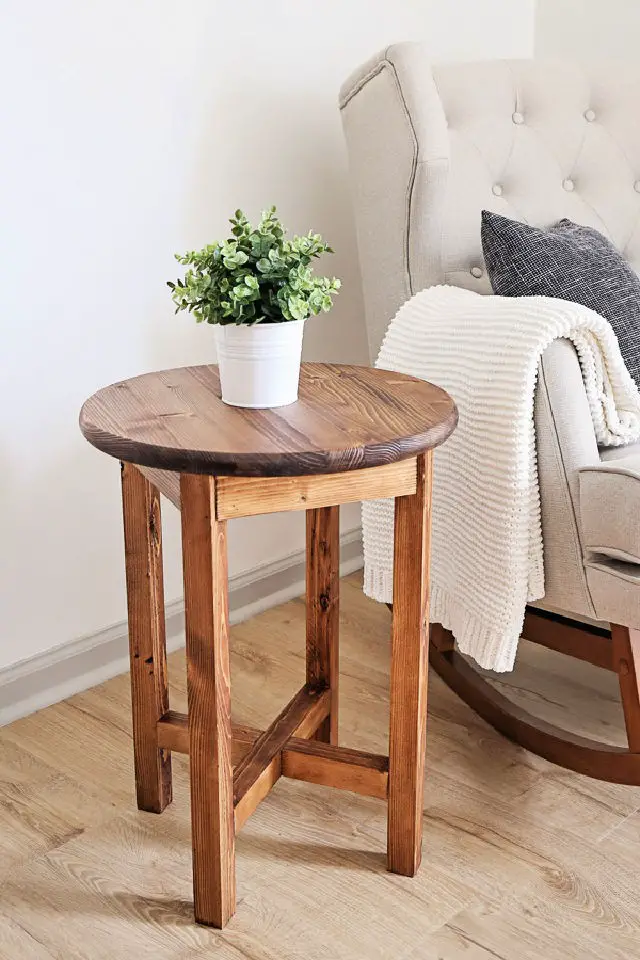
Indulge in the world of woodworking by creating this charming DIY end table, crafted from budget-friendly lumber. Perfect for small spaces or rooms requiring an elegant storage solution, this project seamlessly blends classic and modern styles, making it a versatile addition to any room’s decor. To bring your vision to life, gather essential materials like 18-inch round panel boards, 2x2s, 1x3s, brad nails, Kreg screws, wood glue, and your preferred stain or paint finish. With this end table, you’ll not only gain a functional piece of furniture but also showcase your creativity and woodworking skills. So, don’t hesitate – start building your masterpiece today!
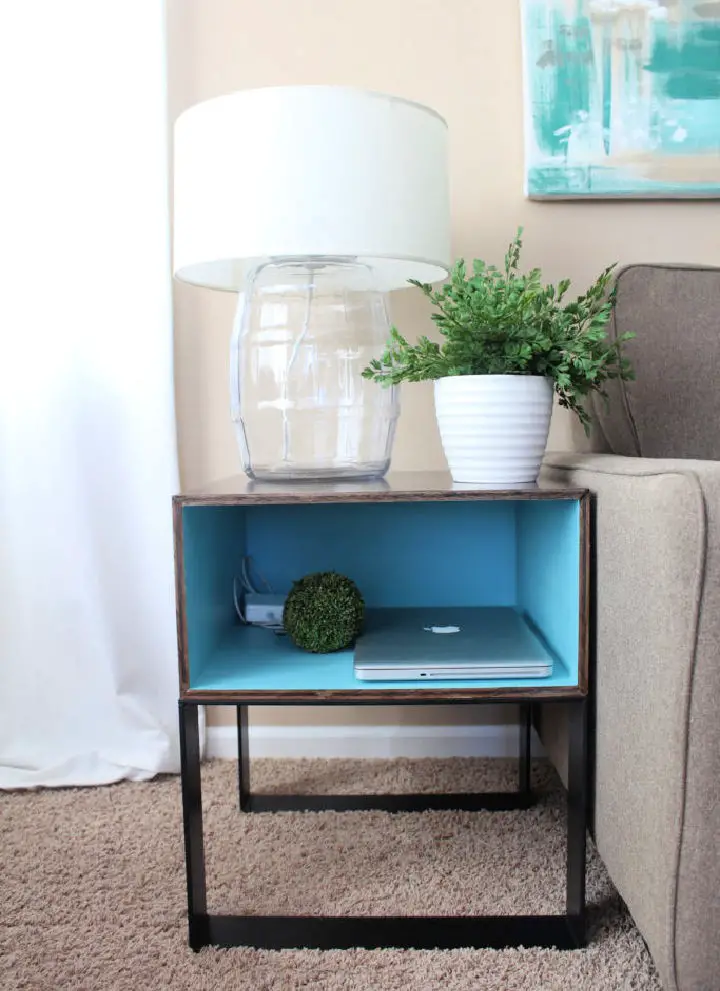
How to Build a Crate End Table
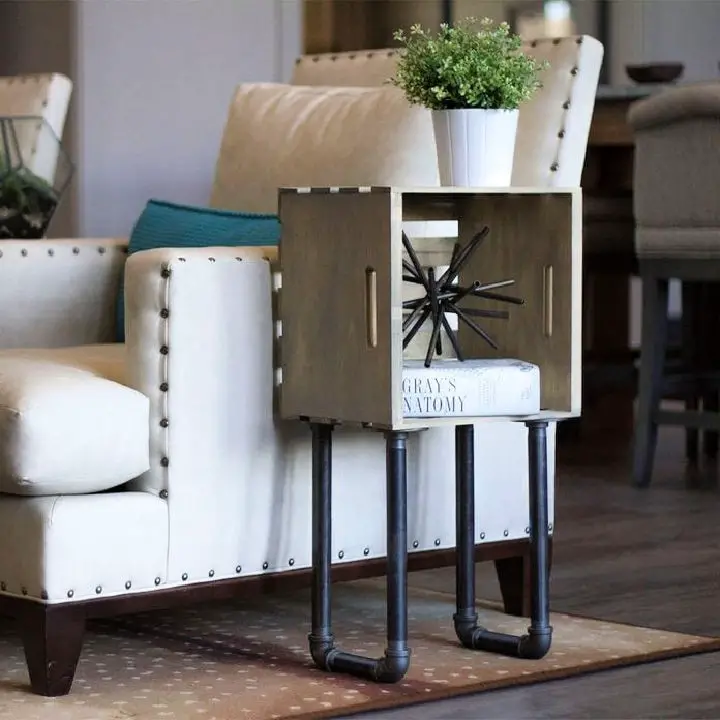
Transform your living space with DIY end table plans that blend style, functionality, and creativity. One such design is the unique wooden crate end table, which harmoniously merges rustic wood charm with industrial steel elements. The materials required for this project are a medium-sized crate, a wooden board, and steel components like floor flanges, pipes, and elbows.
The assembly process is straightforward: lay out the parts, build the legs, reinforce the crate side with the board, and finally assemble the end table. This DIY project is perfect for those looking to add a touch of creativity to their home decor without breaking the bank. With minimal effort and a moderate budget, you can create a bespoke piece of furniture that not only complements your aesthetic but also meets your functional needs.
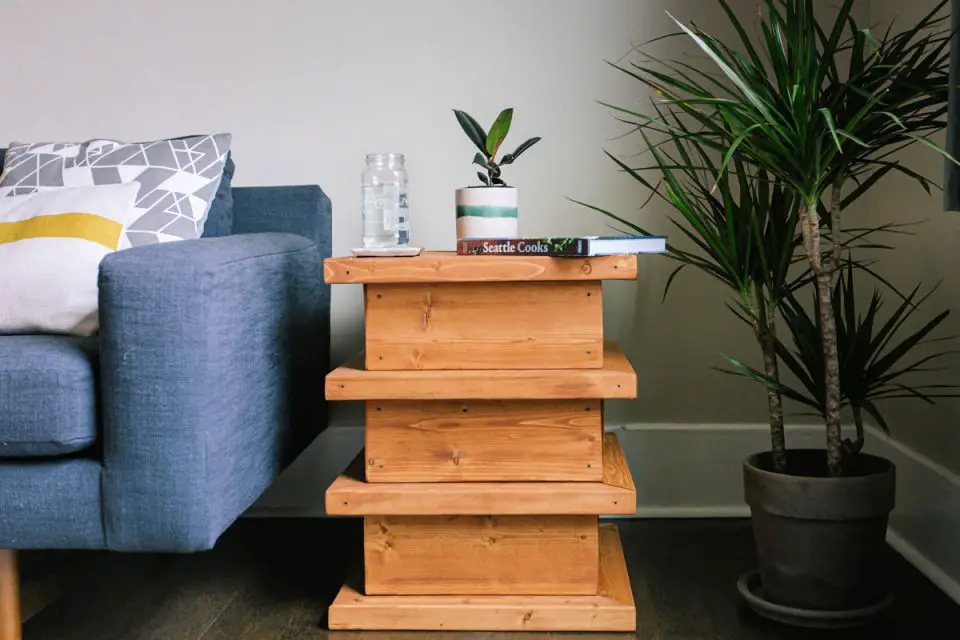
Build Your Own Geometric End Table
Transform your living space with a one-of-a-kind geometric DIY end table that combines aesthetics and practicality. While its intricate design may seem complex, the building process is surprisingly straightforward, allowing you to add a unique touch to your room. To get started, you’ll need basic tools such as a miter saw, drill, Kreg pocket hole jig, tape measure, clamps, and safety equipment.The primary materials required are 2 x 2 lumber and 1 x 4 lumber, used for constructing the table’s framework and tabletop, respectively. This end table boasts a beautiful white wash stain and early American stain combination, giving it a charmingly rustic yet modern appearance.Perfect for displaying your favorite plants, books, or a cozy lamp, this end table strikes a perfect balance between style and functionality. As you create your very own piece of furniture, you’ll relish the joy of bringing your design to life and take pride in the end result.
Rustic DIY End Table for Living Room

A DIY end table can bring a unique touch to any living room, blending rustic charm with modern flair. This project is surprisingly affordable, estimated at around $80 when including table legs. To get started, you’ll need 1×2 boards, a project panel, wood glue, and 1.25″ brad nails.The process begins by attaching the boards to the panel, carefully crafting a chevron pattern through meticulous 45˚ cuts. This adds visual interest and helps create the table’s distinctive character. To further enhance its charm, add 1×3 trim pieces to give it a neat, tray-like appearance. Once all elements are securely in place, attach the legs to complete your rustic end table.What makes this project truly special is that you can modify it to suit your personal style. Consider adding pulls to the sides to transform it into a functional tray. As you work on this project, remember that it’s not just about building a table – it’s about creating a one-of-a-kind piece of furniture that reflects your unique taste and flair.
Simple DIY End Table Under $10
Transform your living space on a budget by crafting a DIY end table from a quarter sheet of plywood. With a mere $10 or $20 investment, you can elevate the ambiance with a stylish piece that would cost an arm and a leg at a furniture store. This project requires minimal expertise, only basic tools like a table saw, circular saw, nail gun, and drill are needed to bring your vision to life.
Modern DIY Industrial End Table
Transform your living room with modern industrial DIY end tables that seamlessly blend warmth and coolness. By combining flat bar steel and birch plywood, you’ll create one-of-a-kind pieces that exude a sense of craftsmanship and style. Don’t worry if you’re new to metalwork – the process is manageable even for beginners, requiring only a bit of elbow grease and some helpful hands from friends or family. The best part? You can achieve these professional-looking results at a fraction of the cost of buying similar items retail, with each pair coming in at just $80.05. Let your creativity shine and give your space a makeover with these unique end tables that will be the envy of all who see them.
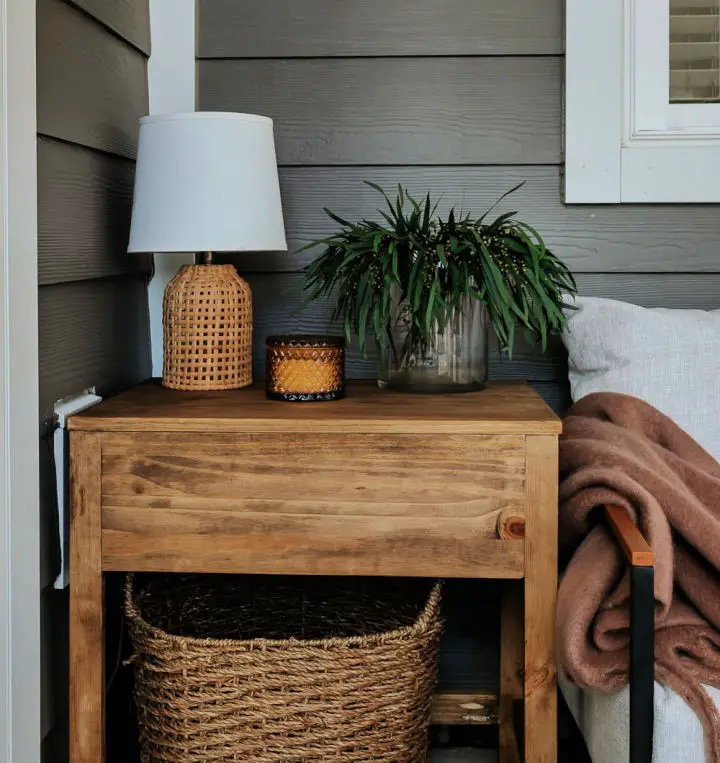
How to Make an End Table With Drawer
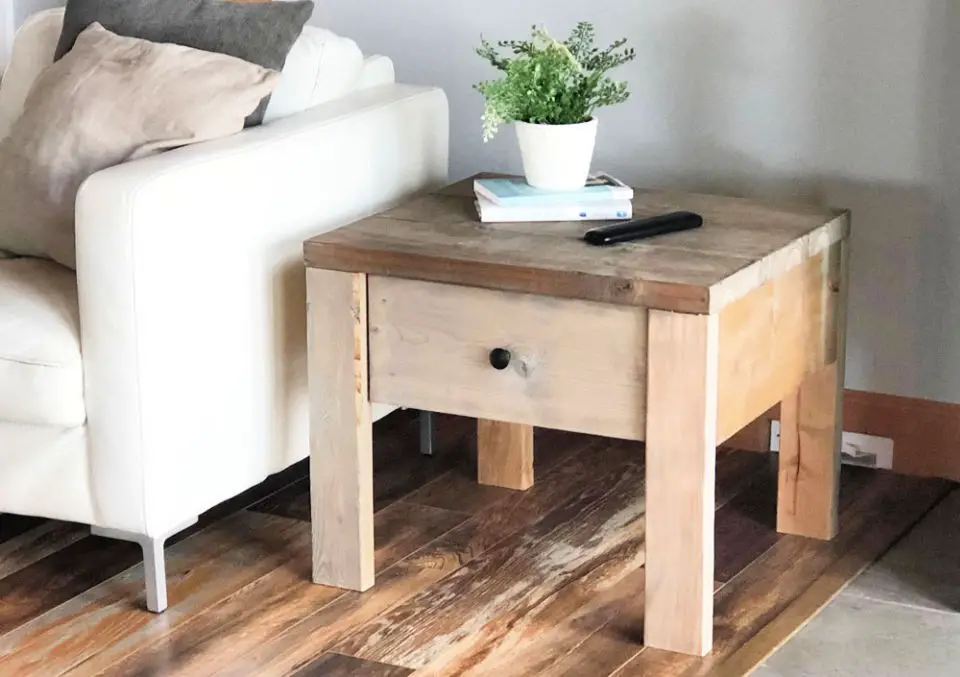
Transform your living space with this step-by-step guide on crafting a DIY end table with a drawer. The project showcases a sophisticated solid wood design that exudes rustic charm and functionality, requiring only basic power tools and lumber to bring it to life. The substantial table features a generous drawer and a planked wood top, offering ample storage and a touch of natural elegance.
The sturdy structure makes it an attractive addition to any room, doubling as a convenient nightstand that effortlessly blends with various decor styles. With the option to paint, you can customize this piece to suit your unique aesthetic. To ensure success, comprehensive instructions are included, featuring a shopping and cut list, accompanied by a video tutorial to guide you through the crafting process.
Easy End Table Building Plans
Transform your home with a chic DIY modern end table that won’t break the bank – all for under $30! This budget-friendly alternative to high-end retail versions boasts a rustic charm courtesy of its wooden construction. The build process is surprisingly straightforward, involving five key steps:Firstly, precision-cut boards to the desired length.Next, add pocket holes for added stability and structure.Then, assemble the base and top brace, providing a sturdy foundation for your table.Fourth, attach the legs, giving your end table its signature modern silhouette.Finally, cut and fix the tabletop, followed by a stylish staining process that adds depth and character to your creation.Once complete, this DIY masterpiece offers a robust and modern aesthetic, making it perfect as a nightstand, plant stand, or elegant addition to your living room. So gather your tools, follow our detailed guide, and bring your vision to life – all without sacrificing quality or style!
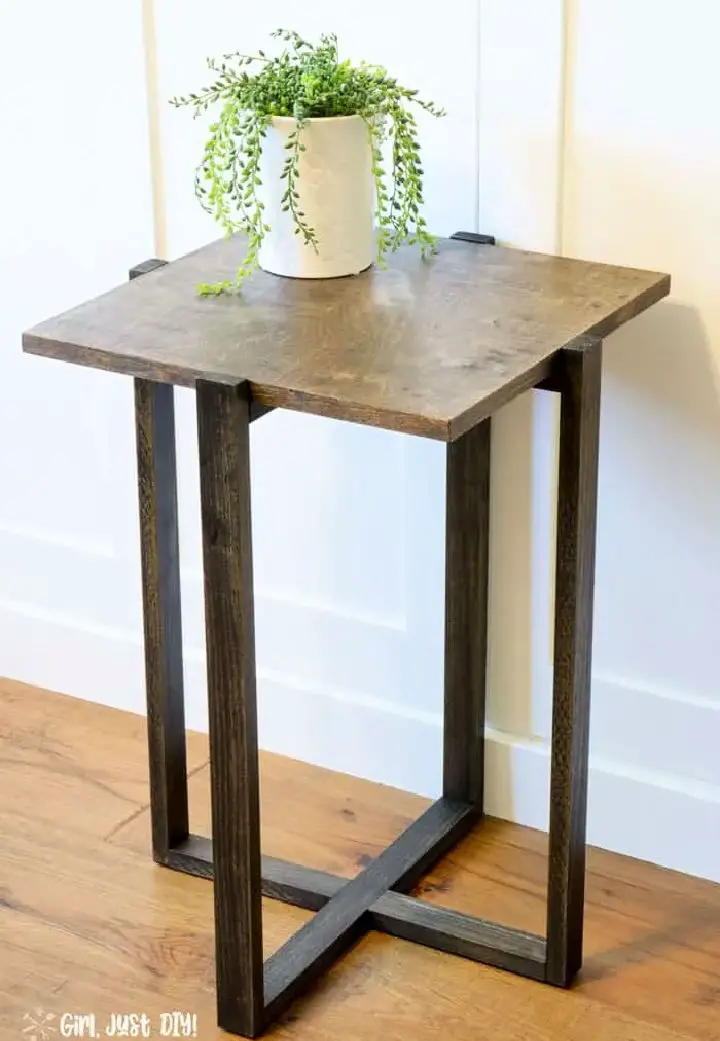
DIY Small X End Table Blueprints
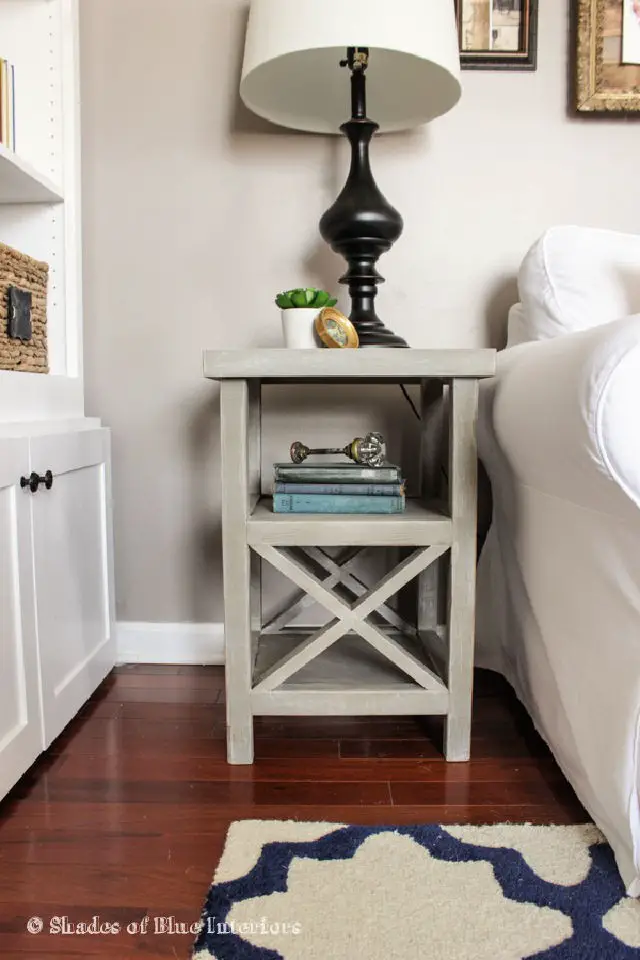
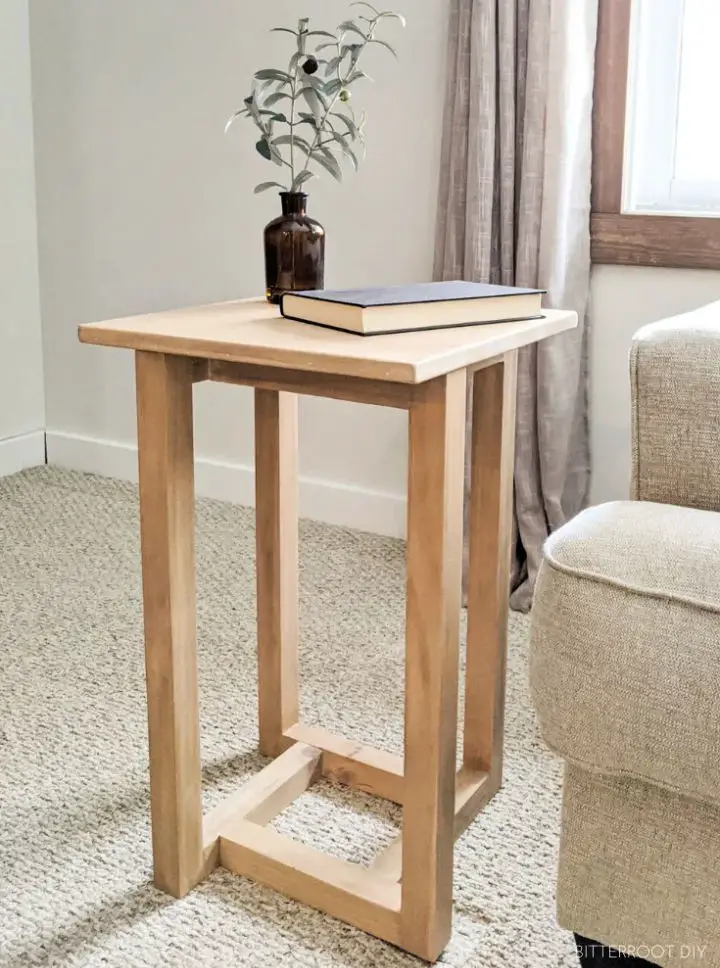
Immerse yourself in the satisfaction of crafting a unique DIY X-end table that harmoniously combines aesthetics with functionality. This charming piece is specifically designed for small spaces, offering practical storage while adding a touch of elegance to any room. And the best part? You can create this beautiful table for under $20 in materials! With just one Saturday evening and a dash of creativity, you’ll be able to produce a versatile end table that’s perfect for showcasing your favorite lamp or storing essential items within arm’s reach. The 16x16x24-inch finished product is a testament to the DIY spirit – building affordable, functional, and stylish furniture from the comfort of your own home.
Build a Farmhouse End Table
Discover a wealth of DIY end table plans online, complete with step-by-step instructions, material lists, and expert advice to ensure a successful project. This rustic farmhouse end table is surprisingly easy to build, requiring only basic materials like 2x2s, 1x2s, 2x4s, 1x8s, brad nails, pocket hole screws, and various wood treatments. The instructions guide you through the process with clarity, from cutting precise angles on a miter saw to assembling the base, legs, and tabletop. With patience and attention to detail, you’ll create a sturdy and stylish end table that brings a touch of farmhouse charm to your home.
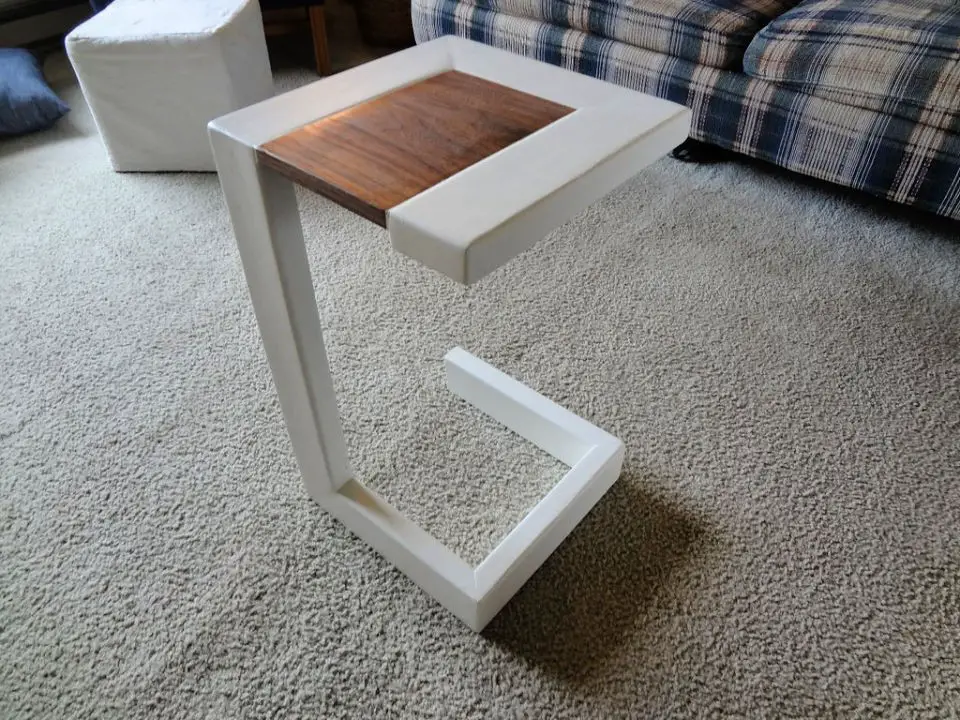
How To Make an End Table
Discover the joy of creating your own DIY furniture by building an end table that perfectly complements an existing coffee table. Using leftover red oak plywood and sturdy black metal U-shape legs, this project showcases the importance of precision in measurements, cutting, and sanding, as well as strategic edge banding to achieve a smooth finish. The application of wood conditioner ensures even stain absorption, resulting in a rich espresso hue that adds warmth to the overall design. After securing the legs and sealing with polyurethane, the end result is a beautifully matching end table that exemplifies the satisfaction of transforming raw materials into a unique piece of home decor.
Building a Criss Cross End Table

Transform your interior design by crafting a one-of-a-kind DIY end table featuring a crisscross design. This project not only saves you money but also allows you to infuse your space with a personalized touch. By combining materials like poplar and pine boards, tiles, paints, and wood screws, you’ll create a light, functional, and stylish piece that’s perfect for small spaces. With clear guidance throughout the process, from building the box frames to attaching the mosaic tiled tops, you can rest assured your end table will be sturdy and durable. By creating this custom-made crisscross end table, you’ll have the opportunity to make your home even more beautiful and tailored to your unique style.
Free Rustic Wooden End Table Plan
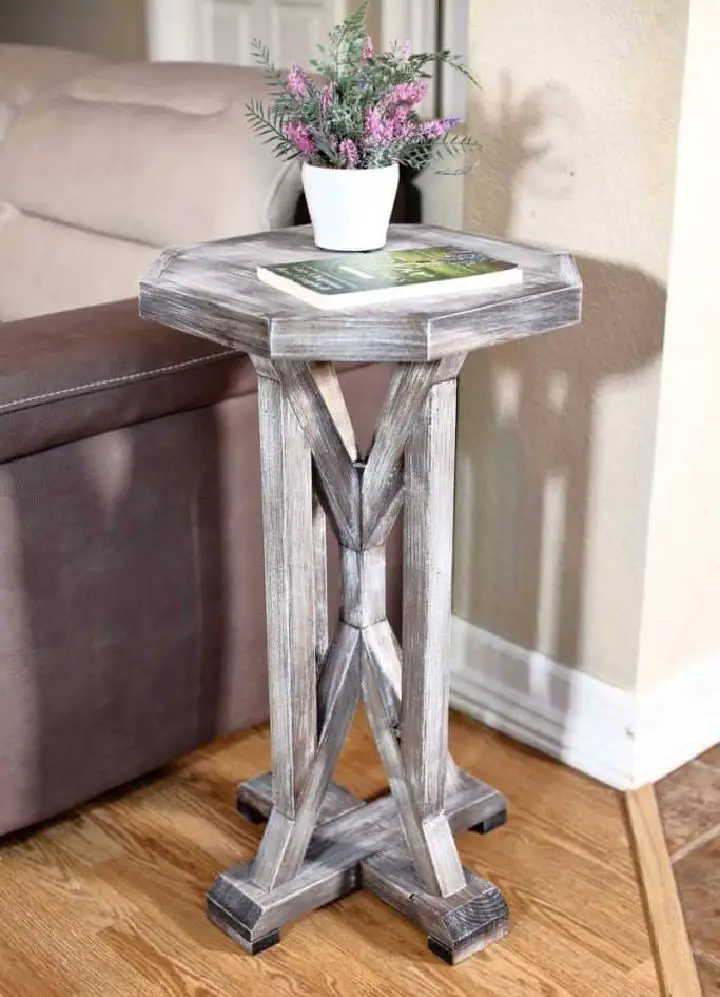
Discover the serenity of rustic charm through a DIY end table project that seamlessly blends form and function. This versatile piece serves as an ideal companion for your couch or chair, while also doubling as a nightstand in your bedroom or additional storage in your kitchen or bathroom. Its expansive surface area is perfect for placing lamps, drinks, or reading materials, with the lower compartment cleverly hiding clutter from view.
Behind its rustic door, adjustable shelves offer customizable storage options for books, magazines, and more, allowing you to tailor the piece to your unique needs. This project requires basic woodworking skills and a range of tools, including a miter saw, pocket hole jig, drill, and jig saw.
Choose from a variety of wood types – this project uses pine for its affordability and workability – and bring a touch of rustic elegance to your home with this easy-to-create end table.
Make a Mid-Century Walnut End Table
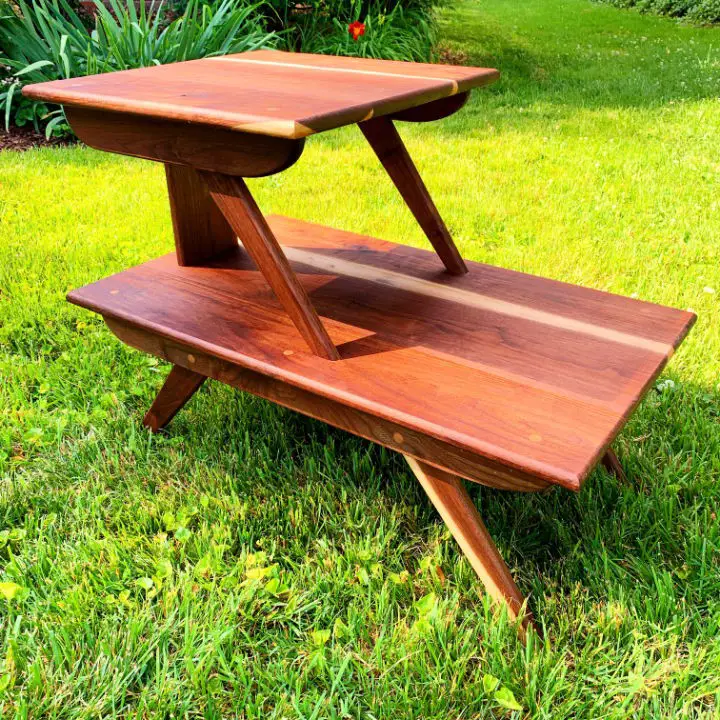
Unlock the secrets of creating a breathtakingly beautiful two-tiered Mid-century-modern walnut end table with this comprehensive DIY guide. By mastering woodworking techniques, you’ll be able to craft a one-of-a-kind piece that exudes elegance and sophistication. The step-by-step process begins by preparing the tiers and building support rails, which lays the foundation for the tapered legs that add a touch of whimsy and refinement. As you work your way through the instructions, you’ll learn how to attach the legs securely, ensuring a sturdy yet visually appealing final product. With detailed guidance on tools and supplies needed, as well as expert tips for achieving a professional finish, you’ll be confident in your ability to bring this stunning piece of furniture to life. As a bonus, you’ll discover how to infuse your interior decor with the unique charm of this mid-century modern masterpiece, perfect for adding a touch of refinement to any room.
How to Make an End Table With Charging Station
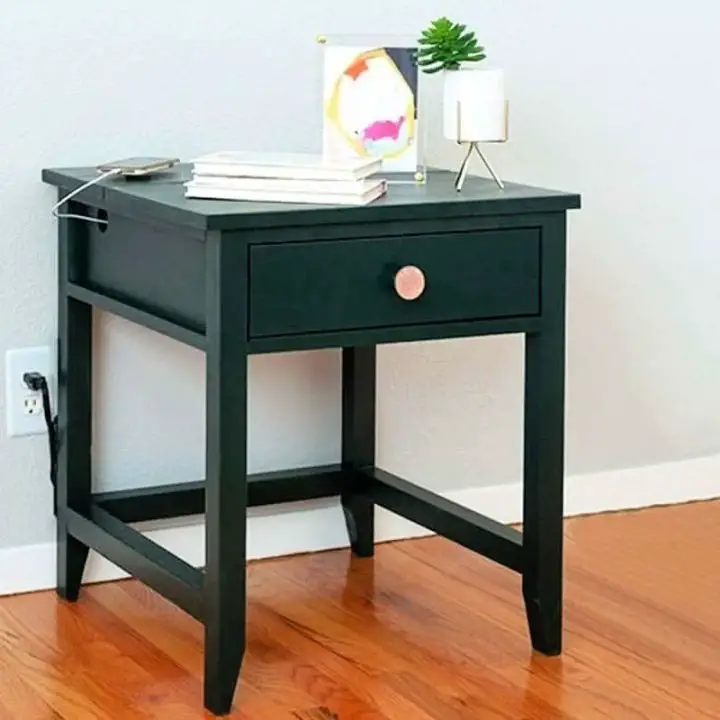
Create a functional and stylish DIY end table with a built-in remote charging station to eliminate clutter and add a touch of sophistication to your living space. This versatile piece can also serve as a charging nightstand, perfect for keeping your devices charged and within reach. To bring this project to life, follow the step-by-step instructions and gather the necessary materials. With some creativity and customization, you can tailor the size and design to fit your unique space. The result is an organized and attractive addition to your room that keeps all your cords and cables neatly hidden.
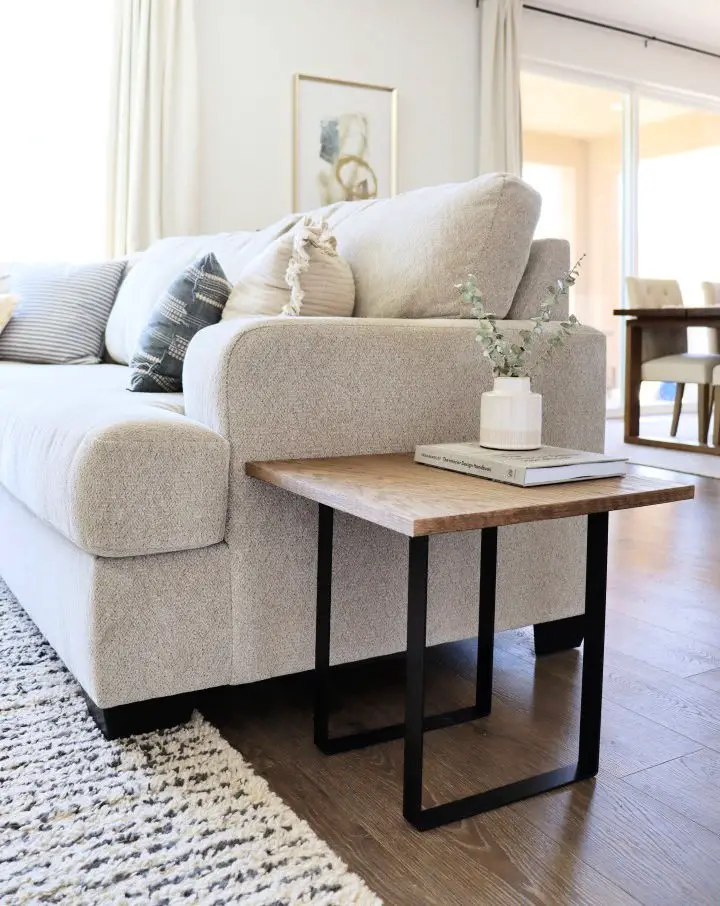
2×4 End Table Woodworking Plan
Transform your weekend into a creative oasis by building a stunning end table with this easy-to-follow DIY 2×4 woodworking plan. Starting with readily available materials, including 10′ 2×4 walnut scraps, screws, and plugs, you’ll be guided through the process of cutting seven precision pieces using a miter saw, band saw, and sander. The longest piece will serve as the leg, while the remaining components will come together to form the tabletop’s sleek frame. Once assembled, sanding and finishing touches bring out the rich warmth of the walnut, infusing your room with a touch of sophistication. This repurposing project is an opportunity to breathe new life into surplus wood, crafting a functional and visually appealing piece of home decor that elevates your living space. With this straightforward guide, you’ll be able to build your modern end table in no time, transforming your weekend into a creative triumph.
Making Your Own End Table

Transform your living space into a stylish haven by crafting unique DIY end tables that effortlessly blend with various design themes, including farmhouse, coastal, and rustic styles. With a budget-friendly expenditure of approximately $50, you can create two sturdy end tables that exude character while meeting practical needs. To bring your vision to life, gather the following materials: lumber (2x4s, 2x2s, 1x3s), plywood, pocket hole screws, wood glue, wood stain, wood filler, glaze, latex paint, sealer, and optional felt pads.
Start by crafting the base, attaching the bottom shelves, securing the plywood tabletop, and constructing the frame. Cut and assemble your top pieces, then apply wood filler to any nail holes or small gaps to achieve a seamless finish.
To add depth and richness to your end table, employ a layered stain application to achieve a warm, brownish tone. Seal with a triple-thick polyurethane coating for added protection and durability. As a finishing touch, consider attaching felt pads to the table legs for floor protection. These bespoke end tables will not only elevate the ambiance of your living room but also provide a functional solution for everyday use.
Handmade End Table Using Pallet
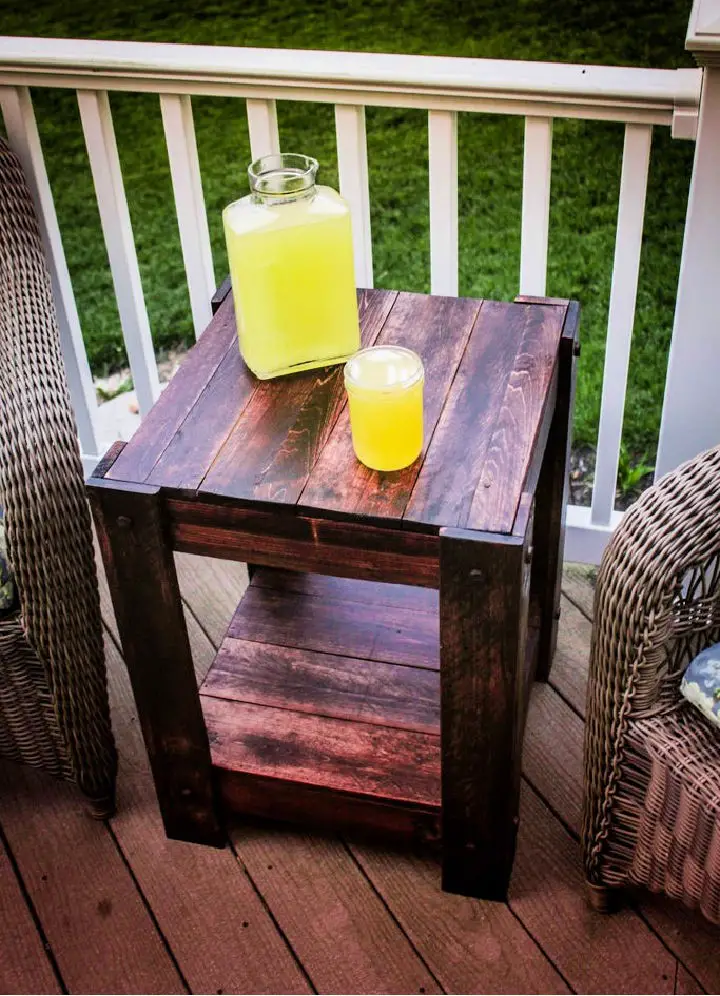
Elevate your space with a custom DIY end table crafted from reclaimed wood. This straightforward project transforms old pallets into a unique piece of furniture, showcasing your woodworking skills and commitment to sustainability. The process begins by sourcing suitable pallets, deconstructing them, and cutting the pieces to size. Next, assemble the frames, add horizontal slats, and install the legs and pins. With each step, you’ll be creating a functional piece of furniture that adds warmth and character to your home. As a budget-friendly project, it delivers a high-end look without breaking the bank. And when you’re done, you’ll have a one-of-a-kind conversation piece that’s sure to spark interest.
Building Your Own End Table
Are you ready to transform discarded scrap wood into a stunning, functional piece of furniture? This DIY guide will empower you to create a unique and charming end table from repurposed materials, giving unwanted scraps a second chance at life. By embracing sustainability and adding a personal touch to any room, this project embodies the perfect blend of creativity and environmental responsibility.
To bring your vision to life, simply follow these steps: carefully cut the wood to precise dimensions, drill pocket holes for seamless connections, assemble the table base, attach the top, and finish with sanding and staining or painting. To protect your masterpiece from the elements, a few coats of polyurethane provide the final layer of protection.
The end result is an exquisite end table that not only conceals unsightly wall outlets but also offers additional storage space beneath and a surface for showcasing decorative items. By repurposing scrap wood, you’re upgrading your space while giving old materials a new purpose.
Homemade Corner End Table
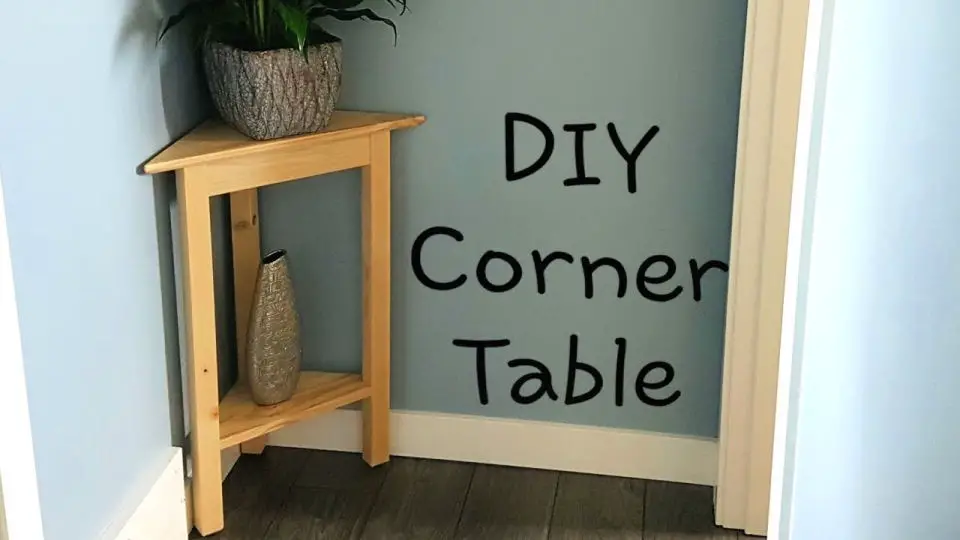
Transform your home’s ambiance with a one-of-a-kind DIY corner end table, tailored to your personal style. By following our comprehensive plans and incorporating your unique design elements, you can create a statement piece that adds character to any room. Whether it’s a cozy hallway or a lively living space, this table’s understated design ensures seamless integration into its surroundings. But beyond just being a functional piece of furniture, your DIY corner table embodies your creative spirit and serves as a testament to your ability to bring ideas to life.
With ample surface area for displaying cherished mementos, a vase for fresh flowers, or simply a decorative accent, this table provides the perfect canvas for showcasing your personal flair. You can further customize it by adding a compact drawer or multiple shelves, catering to your specific needs and preferences.
To bring your vision to fruition, you’ll only need a few essential tools: a pocket hole jig, a sprayer, and a power screwdriver. Our easy-to-follow guide will walk you through each step of the process, ensuring that your corner table turns out flawlessly. So why wait? Join the DIY journey today and create a truly unique piece that reflects your personality!
Conclusion:
These DIY end table plans provide an innovative and budget-conscious way to revamp your living space. By exploring the diverse selection of free plans, including rustic, industrial, and modern designs, you can create the ideal end table that harmonizes with your personal style and requirements. The abundance of DIY options now presents the perfect opportunity to embark on a creative journey, crafting a functional and aesthetically pleasing piece of furniture for your home.
