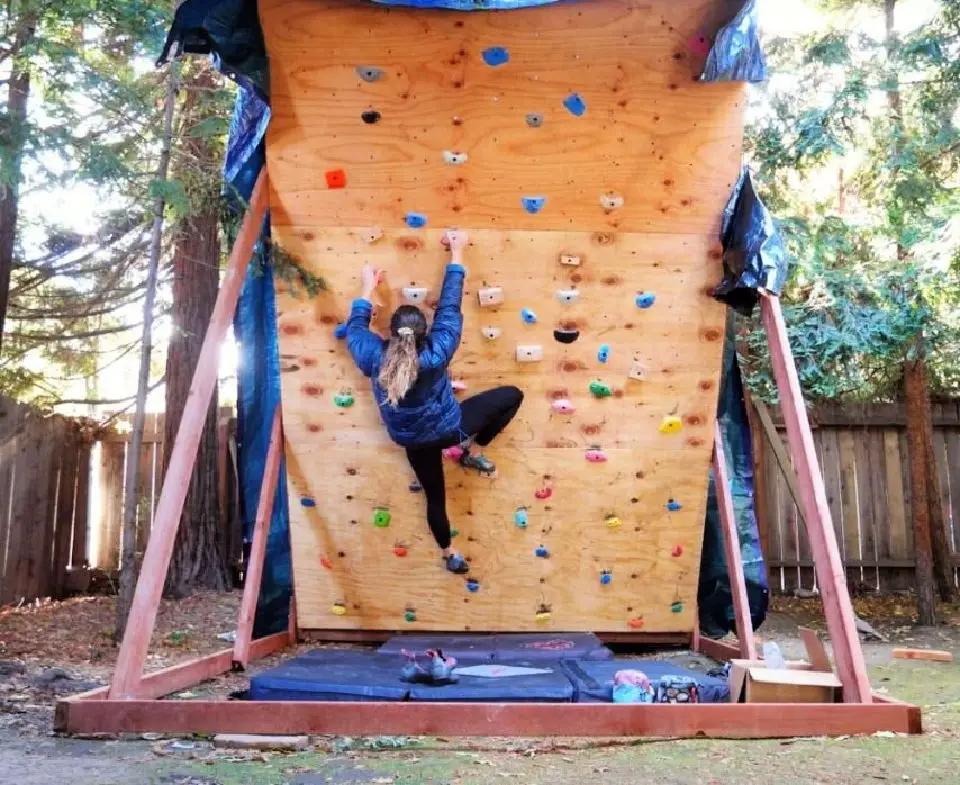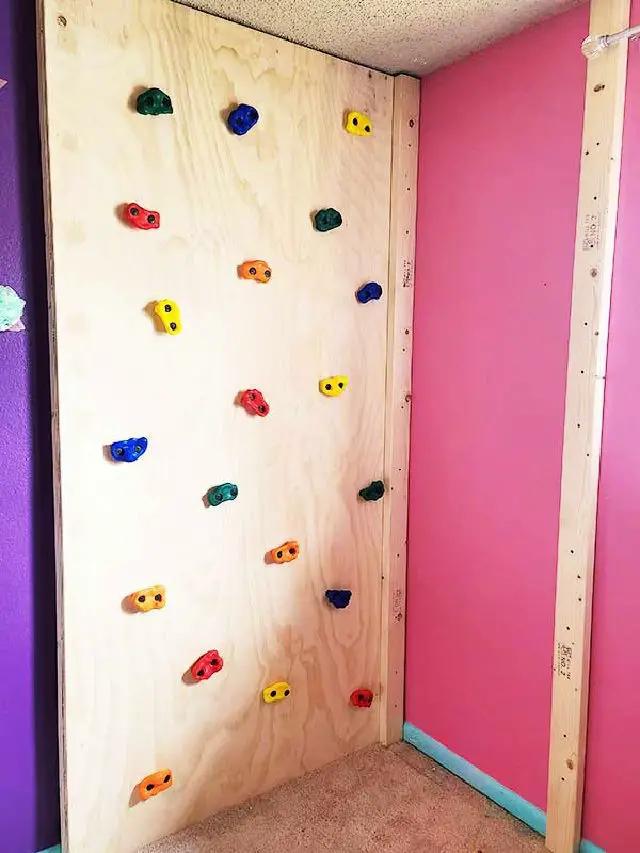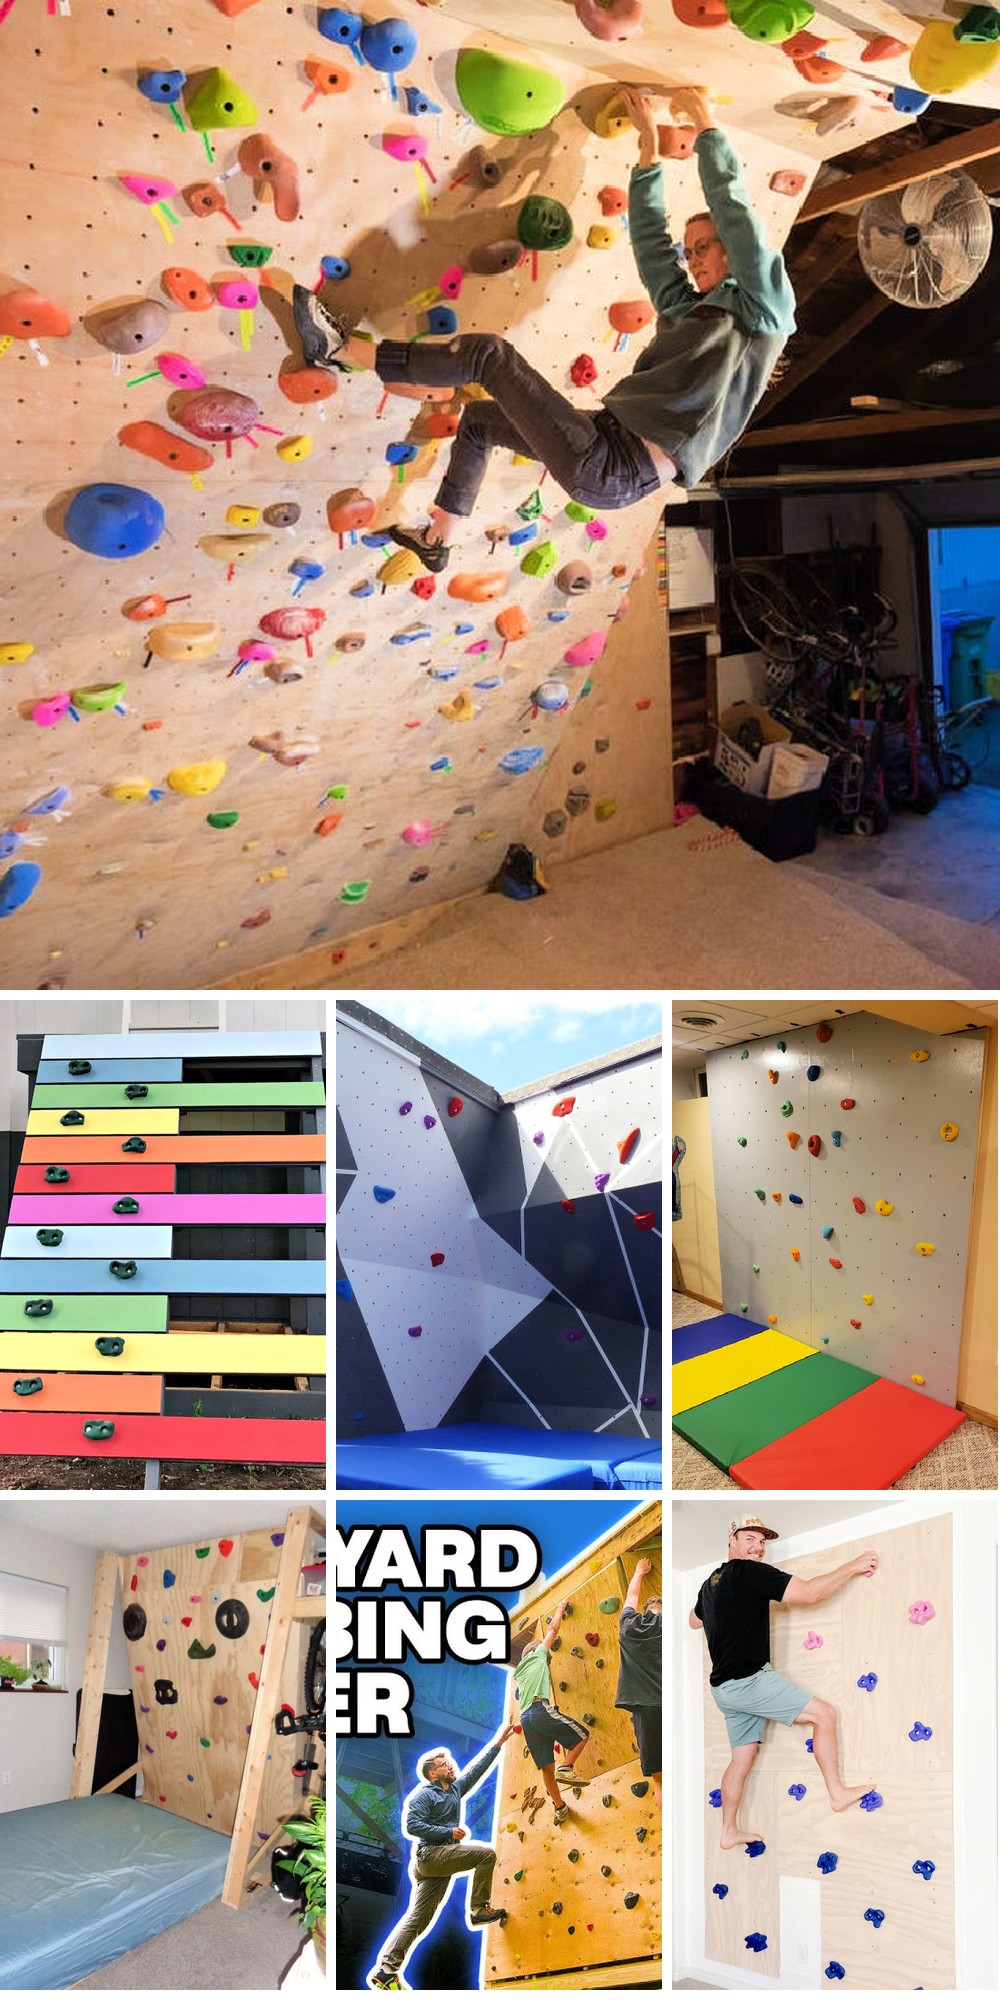
If you’re looking to bring some thrill and excitement to your home or backyard, consider constructing a DIY climbing wall. Not only will it provide a fun way to stay active, but it’ll also create a unique space for family gatherings and social events. This article provides 25 DIY climbing wall plans to help guide you through the process of building a safe and enjoyable climbing area tailored to your needs.
Each stage of the project, from planning and material gathering to installing climbing holds, is crucial in creating a sturdy and reliable climbing wall. By following our straightforward and easy-to-understand tips, you’ll be able to navigate each step with ease, whether you’re aiming for an indoor or outdoor setup. Get ready to transform your space into a thrilling climbing zone! With these DIY plans, you can start building your own climbing wall today.
Why Build a DIY Climbing Wall?
Constructing a DIY climbing wall at home offers a plethora of benefits for both children and adults. The process can be incredibly rewarding, providing numerous advantages that extend beyond physical activity alone.
One of the most significant benefits is promoting physical exercise. In today’s digital age, it’s crucial to encourage regular physical activity to improve overall health and wellbeing. A climbing wall provides a unique way to stay active, build strength, and enhance coordination – all while having fun.
Climbing also presents a mental challenge that fosters critical thinking and problem-solving skills. Navigating routes requires strategy and planning, making it an excellent activity for developing these essential life skills.
Having a climbing wall at home allows you to create a safe environment where the risks are minimized under your supervision. This level of control is particularly important when it comes to children’s safety.
A DIY climbing wall also offers the flexibility to customize the difficulty levels, colors, and themes to suit the preferences and skill levels of your family members. This personalization ensures that everyone can participate and enjoy the activity, regardless of their abilities.
Another significant advantage is cost-effectiveness. Building a climbing wall at home can be more economical than regular visits to climbing gyms, especially for families with multiple children or those who frequent these facilities regularly.
Perhaps most importantly, constructing a DIY climbing wall can be a fantastic bonding experience for the whole family. Working on a project together allows you to teach your kids valuable skills and work towards a common goal, strengthening your relationships in the process.
Finally, mastering a climbing wall can be a significant confidence booster for both children and adults. Overcoming challenges and achieving success can encourage individuals to take on new challenges with enthusiasm and motivation.
To ensure the success of your DIY climbing wall project, it’s essential to plan carefully, select the right materials, and prioritize safety measures.
How to Make an Indoor Climbing Wall
Transforming an indoor space into a climbing haven is a fantastic project that combines functionality with entertainment. By following this comprehensive guide, inspired by the DIY spirit of ‘I Like to Make Stuff,’ you’ll be able to construct a secure and enjoyable climbing wall within your own home, perfect for keeping everyone active and engaged.
Step 1: Planning and Measuring
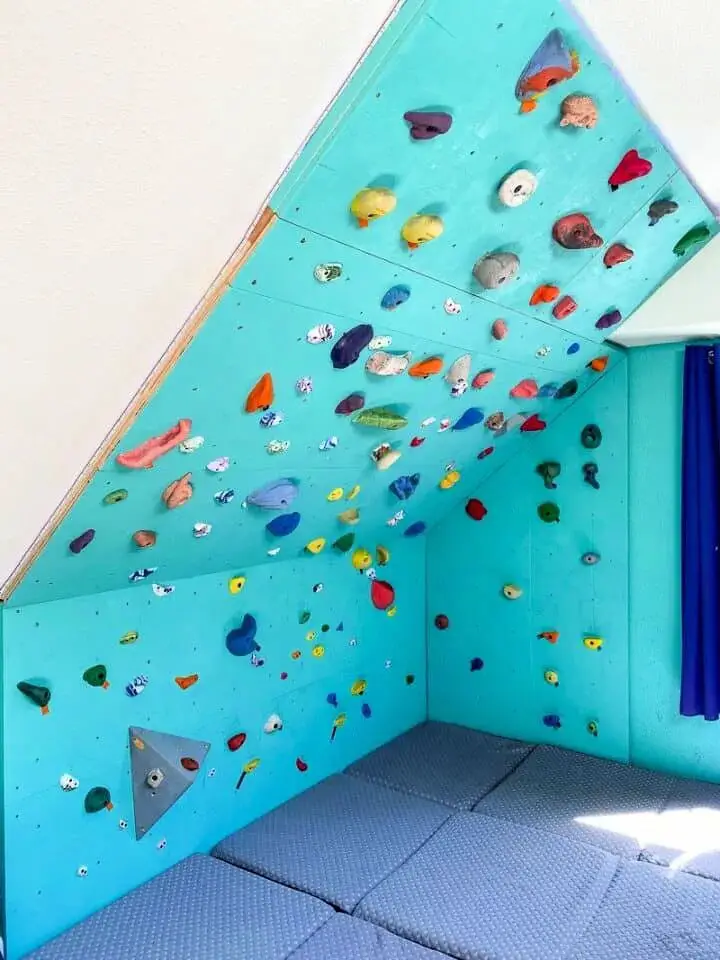
Before setting up your climbing wall, it’s crucial to meticulously measure the available space, focusing on its dimensions – height, width, and any unique features such as sloping ceilings. This detailed approach will enable you to create a comprehensive plan and visualize the installation process more effectively. To facilitate this, consider creating a simple diagram or even a 3D model of the space to help you better comprehend the layout and identify potential challenges.
Step 2: Gathering Materials
To initiate the project, create a comprehensive list of necessary materials based on your measurements and plans. This typically encompasses 2×4 lumber for the framework, plywood panels for the wall surfaces, and fastening tools such as framing nails or screws. Additionally, consider investing in a nail gun or drill to streamline the process. Climbing holds will also be essential for completing the structure. By having all required materials at your disposal, you’ll be well-prepared to tackle each stage of the project with confidence.
Step 3: Cutting and Framing
When starting your project, begin by cutting the 2x4s into manageable lengths for the wall’s frame. Assemble the base and vertical elements together using either a framing nailer or screw gun. To guarantee accuracy, ensure all corners are square by utilizing a speed square. If necessary, adjust the angles of the top pieces to fit snugly against the ceiling or sloped areas, taking care to maintain precise alignment.
Step 4: Assembling the Wall Frame
Before constructing the wall’s frame, start by fitting together the individual pieces on the ground to visualize the final structure. This step is crucial when working with walls that feature angled or overhanging sections, as it allows you to accurately measure and cut the 2x4s accordingly. Once you have a solid understanding of the layout, assemble the frame using nails or screws, taking care to ensure each component is sturdy and precisely square.
Step 5: Installing the Frame
To complete the installation process, first position the frame against the designated wall area, taking care to align it properly for a seamless fit. If necessary, remove any existing baseboards and trim them to size for a flush fit with the climbing wall’s frame. Next, secure the frame to the wall by driving long screws into the studs behind the drywall, ensuring a stable and safe installation that is crucial for the climbing wall’s overall performance.
Step 6: Adding the Climbing Surface
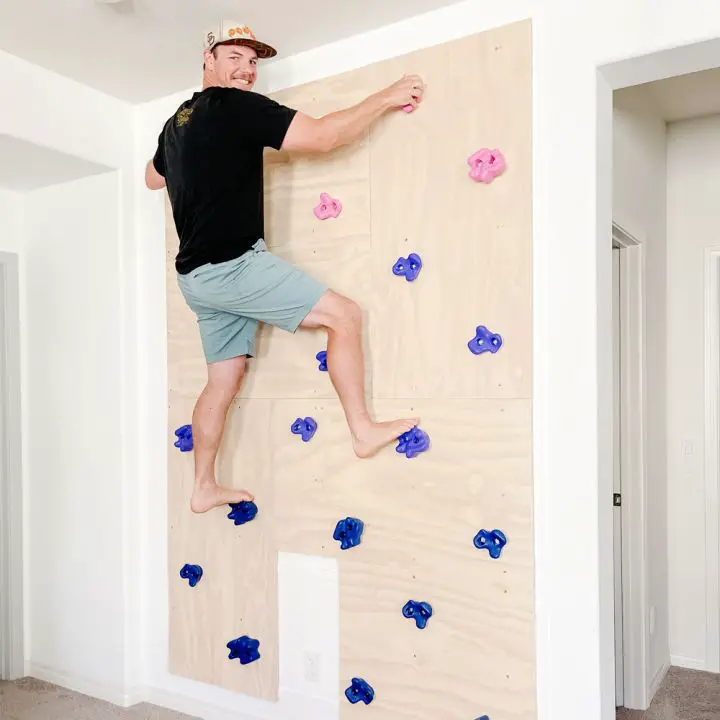
Once you’ve secured the frame, focus on building the climbing surface by attaching plywood panels. A crucial step is drilling holes for the climbing holds before installing them, aiming for an 8-inch-by-8-inch grid pattern that avoids the frame studs. To facilitate this process, attach T-nuts to the backside of the panels, which will later be used to screw in the climbing holds.
Step 7: Sanding and Finishing
Before assembling the climbing wall, it’s essential to sand down every edge and surface to eliminate any potential splinters and guarantee a seamless climbing experience. Additionally, applying a clear coat of polycrylic provides a protective barrier for the plywood, allowing you to easily paint or customize the wall in the future if desired.
Step 8: Installing Climbing Holds
With the finish drying, it’s time to get creative and attach your climbing holds to the wall. Feel free to experiment with various configurations to design a diverse range of routes and obstacles. However, never compromise on safety – ensuring all holds are firmly secured is crucial for protecting climbers as they navigate the wall.
Video Tutorial
When planning an indoor climbing wall, consider supplementing written guides with visual tutorials like this YouTube video, which provides a step-by-step walkthrough of the construction process. By combining both formats, you’ll gain a deeper understanding and enhance your ability to execute the project successfully.
Building an indoor climbing wall can be a fulfilling endeavor that brings entertainment and physical activity into your home. To ensure a positive experience, make sure to plan meticulously, prioritize safety precautions, and seek expert guidance if needed. With careful planning and execution, you’ll be able to enjoy the fruits of your labor and spend quality time climbing on your new wall.
FAQs on Building a DIY Climbing Wall
When it comes to constructing a personal climbing wall, several concerns are likely to arise. This section aims to address some of the most pressing queries you may have when embarking on this project.
What materials do I need to build a DIY climbing wall?
To construct a fundamental DIY climbing wall, you’ll typically require the following essential components: A sturdy framework comprised of 2×4 lumber, which will serve as the base structure. For the wall’s surface, you’ll need plywood sheets to provide a stable and textured area for climbers to grasp. Climbing holds are also crucial, which can be attached using T-nuts and screws or nails. Additionally, you’ll need a drill or screwdriver to assemble the frame and secure the plywood in place. To ensure a smooth finish, you may also need sandpaper or a sanding tool to lightly abrade any rough edges. Finally, don’t forget safety equipment such as mats or crash pads to protect climbers from potential falls.
How do I ensure my climbing wall is safe?
To guarantee the integrity of your climbing wall, it’s essential to focus on several key aspects. Firstly, secure the frame by ensuring a sturdy attachment to the wall studs or ground, if it’s a freestanding structure. Next, smoothen all surfaces and edges through sanding, eliminating any potential hazards such as splinters or cuts. Moreover, stable holds are vital; attach them securely and regularly inspect for signs of wear or loosening. Additionally, consider protective flooring options like crash pads, mats, or soft surface areas beneath the climbing wall to cushion falls. Finally, provide supervision, especially for children, to ensure their safety while climbing.
Can I build a climbing wall outdoors?
When it comes to building an outdoor climbing wall, there are a few extra considerations to keep in mind. First and foremost, you’ll need to think about weatherproofing. This involves using materials that can withstand the elements, such as treated wood and stainless steel hardware, to prevent rot and rust from setting in. Another important factor is sun exposure – make sure your wall’s orientation doesn’t expose it to prolonged periods of direct sunlight, which can weaken holds and make the surface uncomfortably hot. Finally, you’ll need to ensure the ground is level and stable before building your wall. For freestanding structures, anchoring them to the ground for added stability is a good idea.
How can I customize my climbing wall?
Elevate your climbing experience by personalizing your wall. To achieve this, incorporate a range of hold types, including jugs, crimps, and slopers, to create diverse routes that cater to different skill levels and allow for progression. Furthermore, consider planning routes with varying difficulty levels to ensure a challenging yet rewarding experience.In addition to the holds themselves, think creatively about the overall aesthetic of your climbing wall. You can paint the wall and select hold colors that fit a specific theme or blend seamlessly with your room’s décor. This thoughtful touch will not only enhance the visual appeal but also contribute to an immersive climbing atmosphere.To take customization to the next level, consider adding features such as overhangs, volumes (angled blocks), or even a crack to provide more variety and challenge for climbers of all levels.
How much does it cost to build a DIY climbing wall?
The cost of constructing a DIY climbing wall is influenced by several factors, including its size, material selection, and whether it’s installed indoors or outdoors. A compact, fundamental indoor structure might require an investment as low as $200-$300, whereas a larger, more sophisticated outdoor installation could exceed $1000 in price. Furthermore, accounting for high-quality materials and safety gear can also have a significant impact on the total cost.
Can climbing walls be taken down or moved?
When it comes to designing climbing walls, the notion of modularity and temporary installations can be a game-changer. This approach allows for greater flexibility, as sections or panels can be easily assembled, disassembled, or even removed altogether. For instance, modular walls can be designed in segments that are quick to put together or take apart, offering a degree of portability. Alternatively, freestanding climbing walls can be constructed to stand independently, albeit requiring anchoring or weighting for safety purposes. Another option is attaching removable panels to an existing structure using mounts, enabling the wall to be easily removed when needed. While movable walls do present some challenges in terms of ensuring stability and safety during use, careful planning can help mitigate these concerns, ultimately providing a versatile solution for indoor climbing facilities.
How to Build a Climbing Wall: 25 DIY Climbing Wall Plans
Unleash the adventure seeker within by creating your very own climbing wall at home. With our extensive guide, you’ll gain access to 25 unique DIY climbing wall plans, empowering you to turn any room into a thrilling climbing paradise that’s all yours.
Build a Kids Climbing Wall
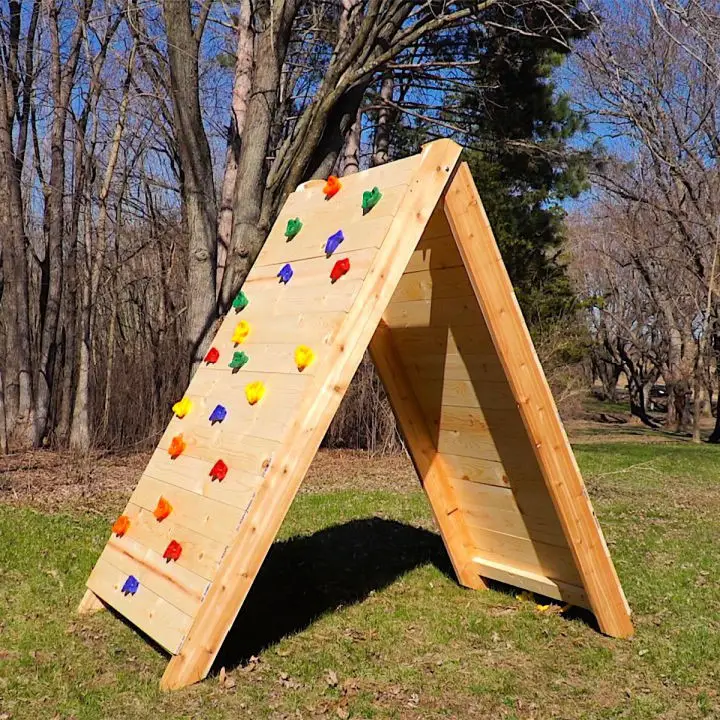
Transform your living space into an action-packed playground for kids by constructing a DIY climbing wall! With Family Handyman’s practical guide, you’ll discover a simple and enjoyable approach to building a folding A-frame climbing wall that guarantees non-stop fun and excitement. This project is perfect for families seeking to shake off cabin fever and inject some dynamic activity into playtime. The best part? It’s suitable for various skill levels, providing a safe and entertaining experience for kids while also serving as an exercise option for adults. Simply follow the step-by-step instructions, complete with a list of required tools and materials, to bring this thrilling adventure right to your backyard doorstep. By engaging your little ones in active play, you’ll watch them conquer new heights and have a blast doing it!
How to Make a Climbing Wall
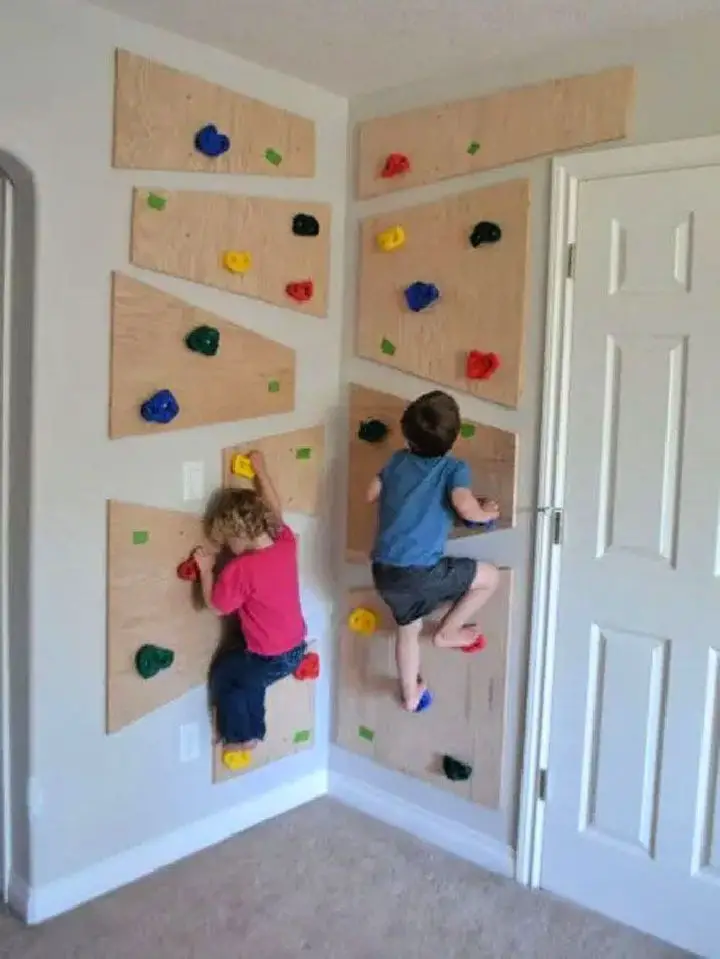
Bring the thrill of an adventure park indoors with a DIY climbing wall! By following The Created Home’s step-by-step guide, you can create a safe and engaging space for your kids to challenge themselves and reach new heights right in the comfort of your own home. Start by planning and assembling a sturdy plywood structure, and then arrange climbing holds tailored to various age groups. Plus, learn a clever trick for child-proofing the wall to ensure it’s used only under adult supervision. This fun project not only encourages physical activity but also fosters lasting memories as a family. So grab your tools, gather your materials, and get ready to embark on an indoor adventure that will have you scaling new heights together!
Building a Rock Climbing Gym for Kids or Adults
For those seeking an active lifestyle or wanting to keep kids engaged, building a DIY climbing wall at home is an excellent option. Vineta Jackson of The Handyman’s Daughter offers a thorough guide on constructing a sturdy indoor climbing wall. This tutorial spans the entire process, from framing to bolting and painting, ensuring a safe and enjoyable climb for individuals of all skill levels. By following these steps, you’ll acquire the necessary tools and expertise to create a personalized wall tailored to your climbing needs. Whether used for training or simply for fun, a home climbing wall is an excellent addition to any fitness regimen.
DIY Indoor Kids Rock Climbing Wall
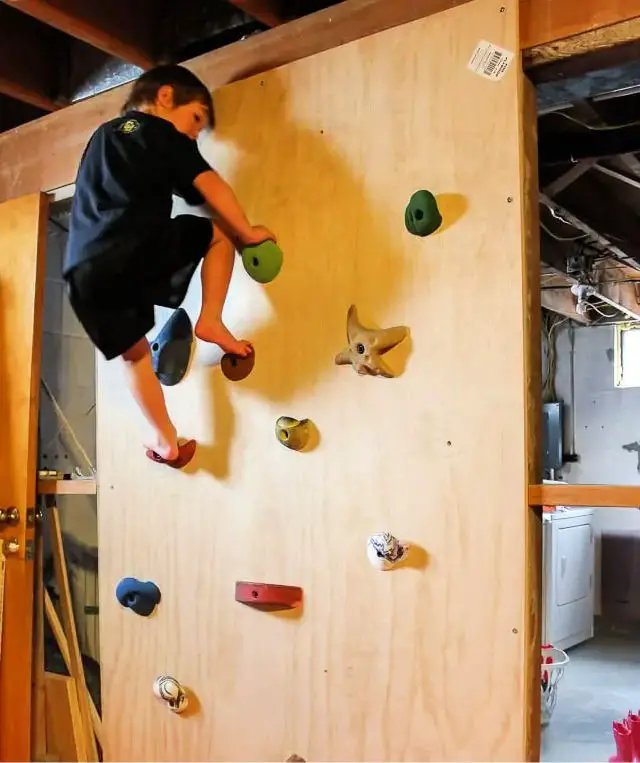
Create an adventure zone in your home with a DIY Indoor Kids Rock Climbing Wall that’s sure to captivate children and provide hours of physical activity. With basic materials like plywood, climbing holds, and safety mats, along with essential tools such as a drill and screws, you can assemble a sturdy and engaging climbing space. This step-by-step guide takes you through the process from preparation to installation, ensuring a seamless experience. Not only does this feature develop kids’ strength and coordination, but it also fosters creativity and confidence. Perfect for any indoor area, this climbing wall transforms ordinary spaces into thrilling playgrounds, offering a one-of-a-kind attraction that kids will adore.
DIY Kids Climbing Wall for a Treehouse
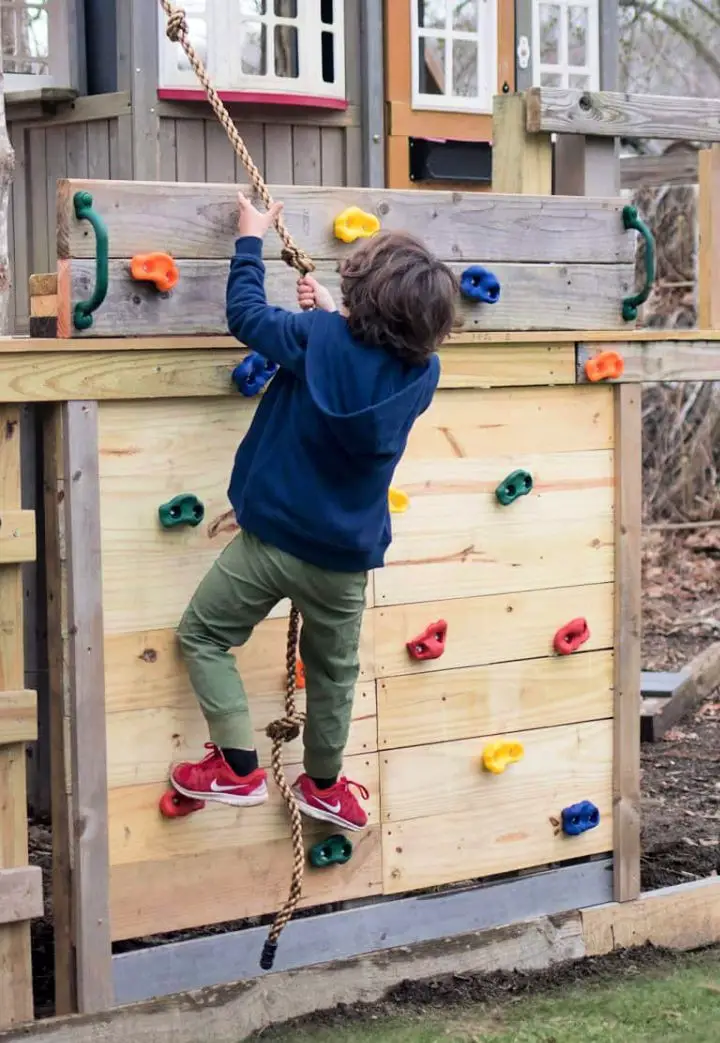
Bring the thrill of adventure to your treehouse with a DIY climbing wall that’s perfect for an engaging afternoon project with your kids. This comprehensive guide provides clear instructions and a straightforward list of materials needed to build a fun and challenging feature. Customize the size to fit your treehouse and elevate it with trim for a polished finish. The included rock climbing kit, featuring holds, handles, and rope, has everything you need to get started. This innovative project is perfect for families looking to add an extra layer of excitement to their backyard, promoting active play and imagination in the process.
Indoor Kids’ Climbing Wall
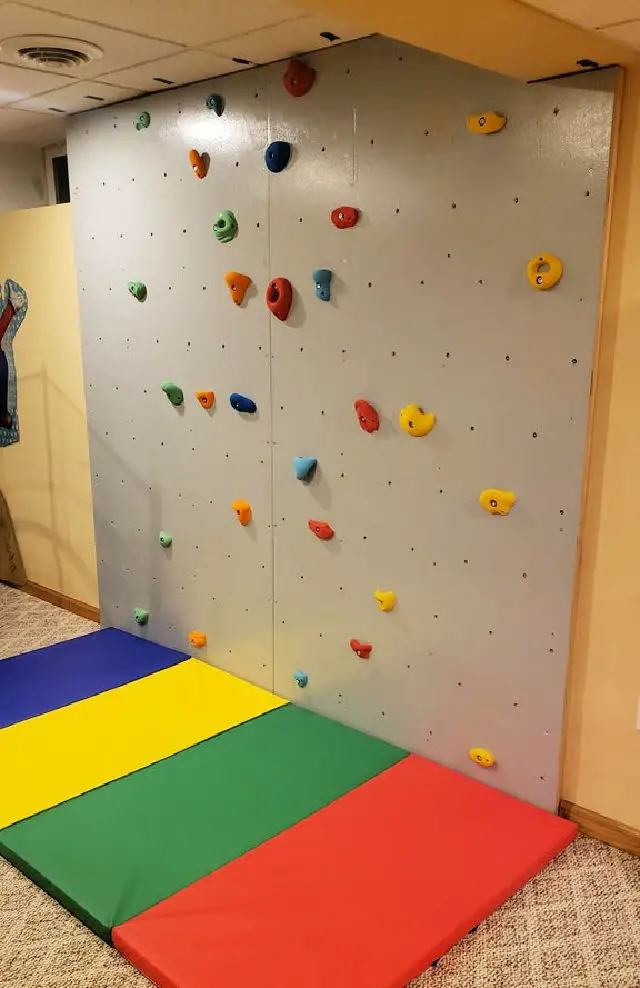
Turn your indoor space into a vibrant playground for kids with this step-by-step guide. Building an at-home climbing wall is a feasible project, even for those with basic woodworking skills. To get started, identify a suitable location, determine the ideal dimensions, and gather essential materials such as plywood, studs, and climbing holds. Follow simple instructions to secure 2x4s to your wall, drill holes in the plywood, and attach T-nuts for hold placement. For an added touch of personalization, consider painting the structure. This DIY indoor kids’ climbing wall not only fosters physical activity but also serves as a unique feature in your home. Don’t forget to prioritize safety by installing a proper mat for cushioned landings. Engage your family in active play and create a space where your little ones can thrive within the comfort of your own home.
Handmade Rock Climbing Wall for Kids
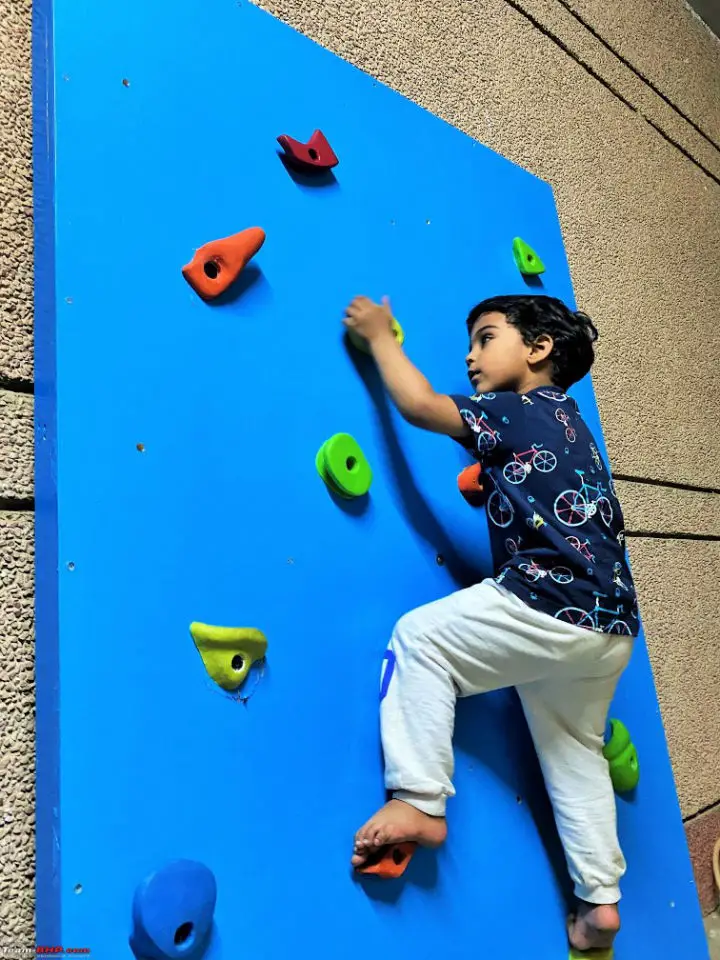
Constructing a rock climbing wall for kids can be an exhilarating DIY endeavor that not only fosters their motor skills and confidence but also provides a unique and meaningful gift. By following Team-BHP.com’s comprehensive guide, you’ll learn how to create a safe and enjoyable climbing surface that’s both sturdy and visually appealing. This hands-on activity is an excellent way to bring the thrill of climbing right into your home, where kids can spend hours engaging in active fun and developing their physical abilities.
Building an Indoor Rock Climbing Wall
For rock climbing enthusiasts looking to train at home, Instructables provides a DIY solution with its guide to building a freestanding indoor rock climbing wall for approximately $150. This comprehensive guide offers clear and detailed instructions, making it accessible to climbers of all skill levels. With this project, you can create a personalized space to hone your skills, save on gym fees, and enjoy flexible training sessions in the comfort of your own home. Additionally, the included safety tips and equipment recommendations ensure a secure climbing environment, allowing you to tackle new challenges whenever you like.
How to Make a Kids Climbing Ramp
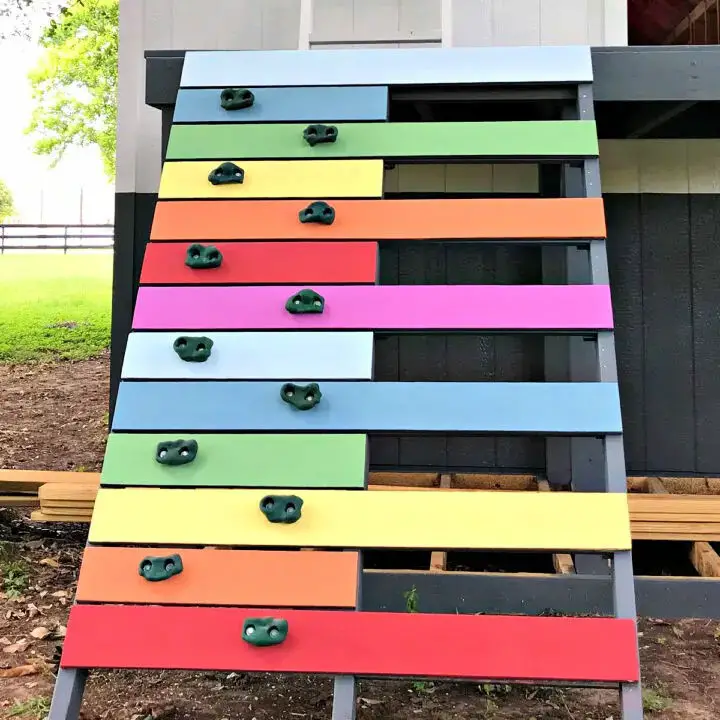
Get ready to unleash your child’s inner adventurer with a kids’ climbing ramp that will elevate their backyard playset experience! With Stephanie Abbott from Abbotts At Home, you’ll learn how to build this exciting DIY project step-by-step, featuring clear instructions, helpful images, and a comprehensive video tutorial. This sturdy structure combines pressure-treated lumber, climbing rocks, and deck painting or staining for added durability and a professional finish.
Whether your child craves a gentle incline or a vertical climbing wall, this versatile ramp can be tailored to their adventurous spirit. As you construct this engaging play area, you’ll empower your little ones with hours of active fun in the sun, creating lifelong memories.
Kids Backyard Climbing Wall
Transform your backyard into an action-packed playground for kids with Ari Tulla’s comprehensive DIY guide to building a climbing wall. This engaging project is perfect for parents seeking to keep their children active, engaged, and enjoying the outdoors. The straightforward four-step process begins with planning and space allocation, proceeds to selecting materials, constructing the wall, and finally, kicking off the climbing fun. With safety and enjoyment at its core, the guide provides detailed instructions on building a sturdy frame, preparing and painting the plywood, and securely mounting the wall. Priced at $400, including delivery, this project promises a rewarding, creative, and thrilling outdoor experience that will delight kids of all ages.
Kids Inside Rock Climbing Wall With Mural
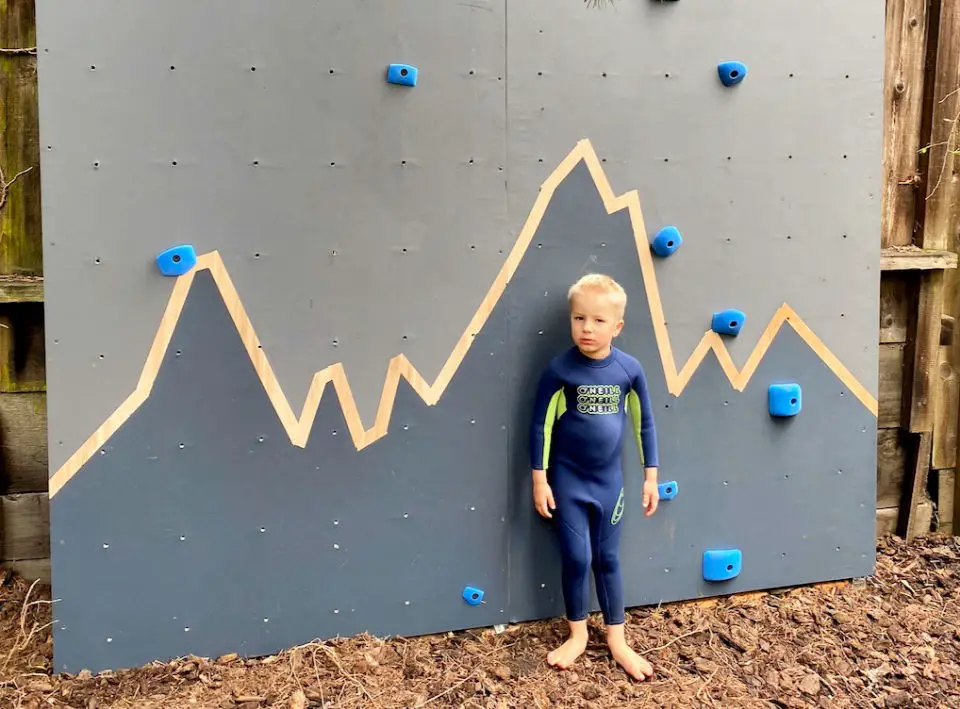
Transform your children’s playroom into a thrilling adventure zone by creating a DIY indoor rock climbing wall. To guide you through each step, we’ll walk you through building a sturdy and safe climbing area, complete with a vibrant mural to spark young imaginations. We’ll cover selecting the right materials, such as 3/4-inch plywood and reliable climbing holds from reputable brands like Rocky Mountain Climbing Gear and Synrock. You’ll also learn valuable tips for installing t-nuts, painting, and adding protective finishes to ensure durability and safety. This project is perfect for enhancing motor skills and offering endless fun – it’s sure to be a hit with the kids. With detailed instructions, you can follow along and upgrade your playroom into an engaging and exciting space.
Build Your Own Climbing Wall
Get ready to turn your home into a personal climbing sanctuary! Building a home climbing wall requires careful planning and execution. Our guide takes you through the key steps of selecting the ideal space, designing a layout that balances training and fun, and choosing high-quality materials that fit your budget. You’ll learn how to make informed decisions about everything from plywood to lighting and accessories, ensuring your custom-built wall is both functional and enjoyable. Perfect for busy parents or climbers who don’t have access to a gym, having a personal climbing haven at home can keep your passion thriving. Check out our series for a comprehensive guide on building your dream climbing space.
How to Build a Climbing Wall for Kids
Take the adventure indoors by creating a one-of-a-kind kids’ climbing wall in your home. With TwoFeetFirst’s expert guidance, you’ll be able to build a secure and engaging climbing area that will keep your little ones active and entertained throughout the year. Start by gathering the necessary supplies, including climbing holds and sturdy plywood, then follow our easy-to-follow instructions to ensure a safe and successful installation. This project is perfect for families with energetic kids who need an outlet for their physical activity during colder months or anytime they’re looking for indoor fun. The best part? Assembling this DIY climbing wall is surprisingly simple, making it an excellent addition to any play space that will encourage imaginative play and promote a love of adventure.
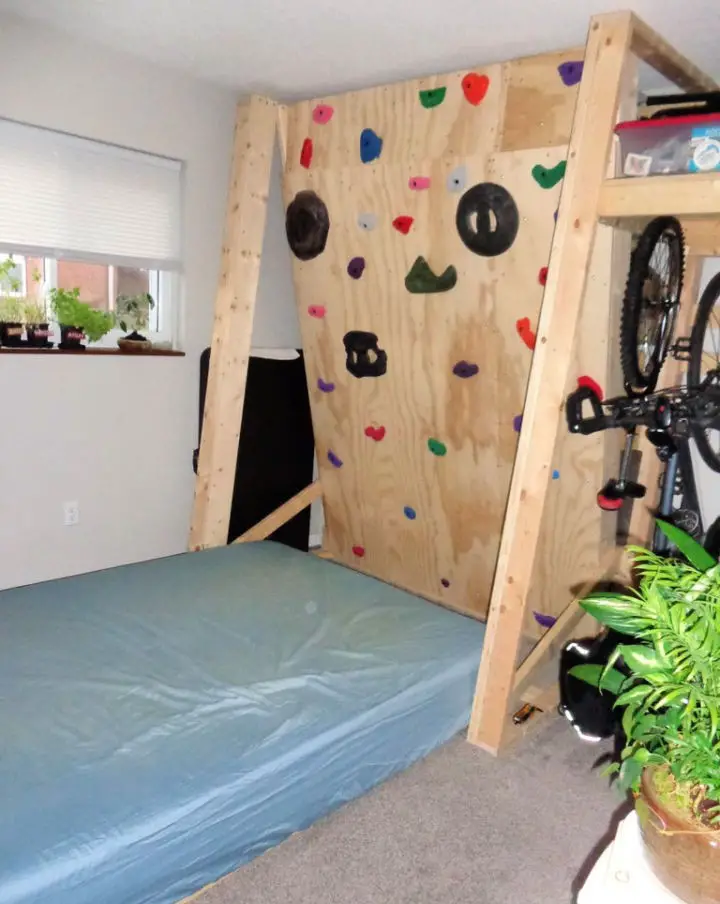
DIY Rock Climbing Wall Murphy Bed
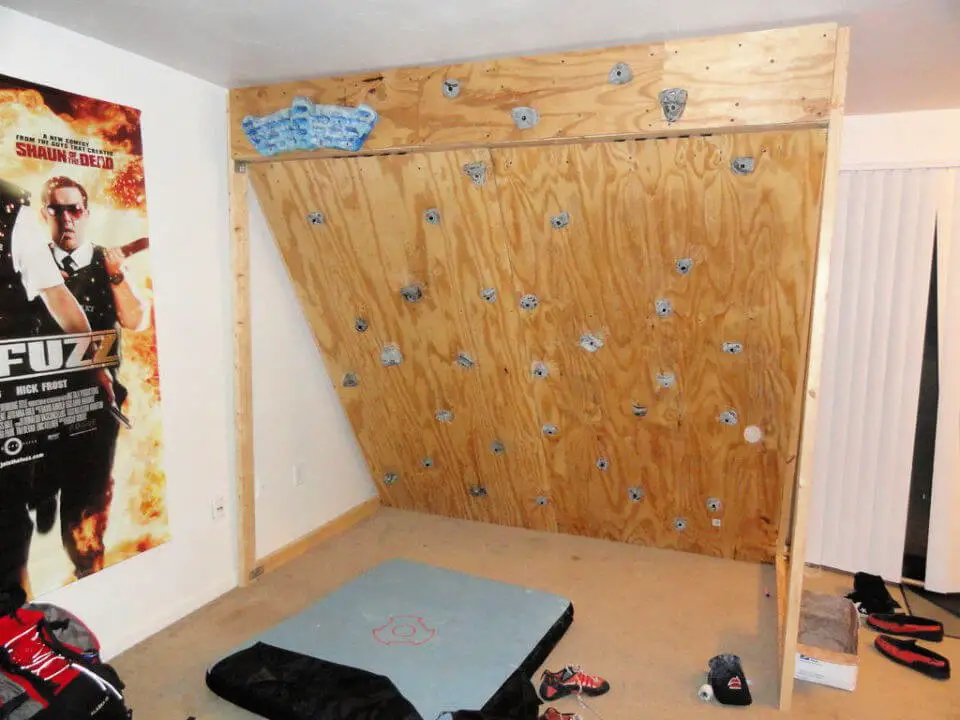
Turn an ordinary spare room into an extraordinary climbing space by following Instructables’ comprehensive guide to building a Rock Climbing Wall Murphy Bed & Vertical Bike Storage. This innovative project combines the thrill of rock climbing with the practicality of a guest bed and bike storage, making it perfect for enthusiasts and hobbyists looking to maximize space. The design is highly adaptable, allowing you to customize the build by excluding the Murphy bed or bike rack if desired.
The step-by-step instructions are user-friendly, ensuring that anyone can embark on this project with confidence. With detailed materials lists and cutting-edge construction tips, you’ll have everything you need to start building a customized climbing area that doubles as a cozy retreat for guests.
Homemade Kids Climbing Wall
Create an immersive indoor adventure for your kids with a DIY Climbing Wall, inspired by Oh So Savvy Mom’s expert guide. This straightforward tutorial empowers you to construct a secure and robust climbing space that fosters physical growth and bold exploration. On rainy days or when outdoor excursions aren’t feasible, this project will captivate your little ones while refining their motor skills, coordination, and balance. With comprehensive instructions and a curated materials list, you’ll be able to build an electrifying climbing wall that’s sure to become the crown jewel of your home’s play area.
How to Make a Rock Climbing Wall
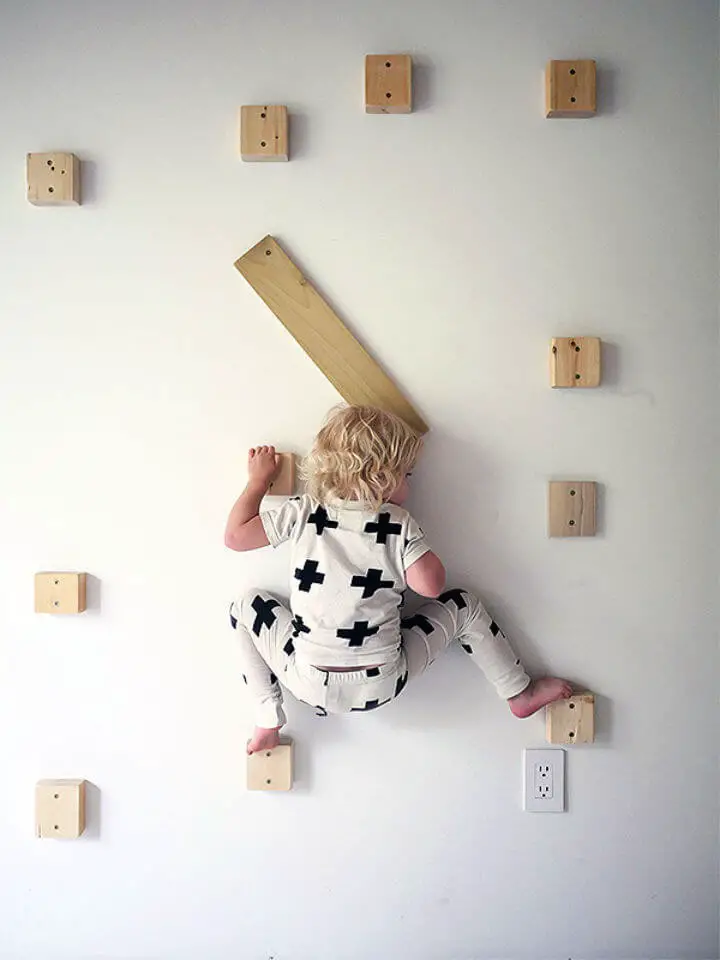
Transform your home into an ultimate playground for your energetic toddler with a DIY rock climbing wall from Design For Mankind. By leveraging simple materials such as 2x4s, screws, and some elbow grease, you can create a secure and engaging climbing space that challenges and entertains. The best part? This project requires minimal expertise and effort, making it an ideal activity for busy parents.
To get started, follow our step-by-step guide on cutting, sanding, and mounting your homemade ‘rocks’ to a wall using a stud finder for secure attachment. This innovative solution promises hours of active fun and an exciting new feature in your home that your child will adore. Imagine watching your toddler develop their climbing skills right in the comfort of your bedroom – it’s the perfect way to encourage physical activity and mental stimulation while having fun together.
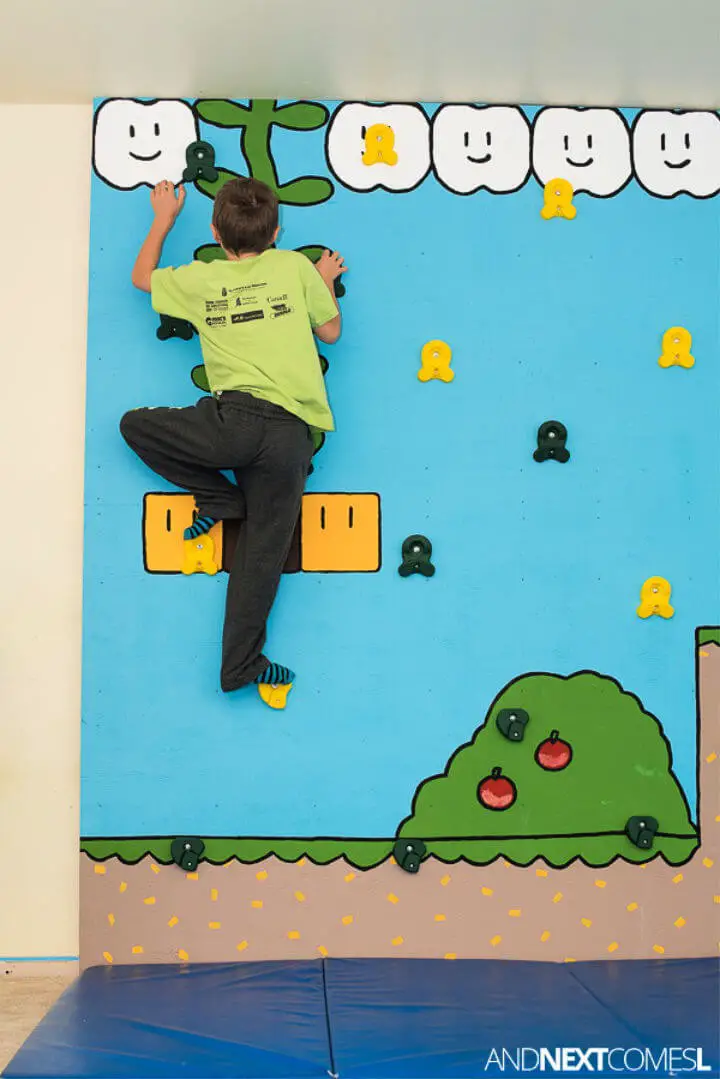
DIY Super Mario Themed Climbing Wall
Ready to unleash your child’s inner adventurer? Our DIY Super Mario Themed Climbing Wall is a fun and engaging project that can transform any room into a thrilling playground. With a comprehensive list of materials, from plywood to vibrant climbing holds, and easy-to-follow instructions, you’ll be able to construct an 8’x8′ climbing wall in your basement or playroom. The tutorial also provides creative painting tips to bring the Super Mario theme to life, adding an extra layer of excitement to this budget-friendly, do-it-yourself climbing wall project. This interactive space encourages active play and imagination in children, making it a great way to get kids moving and having fun indoors.
Building an Indoor Rock Climbing Wall
Transform your playroom into an immersive adventure zone by constructing a DIY indoor rock climbing wall! With a step-by-step guide from DIY Danielle, even novices can successfully complete the project. By building a safe and engaging climbing area, you’ll keep your kids active and energized during the colder months, while also adding a unique decorative element to your home.
This project not only provides endless entertainment for your little ones but also serves as an opportunity to express your creativity and personalize the wall with a theme that resonates with their interests. With its affordability and rewarding outcome, this DIY endeavor is sure to become a family favorite.
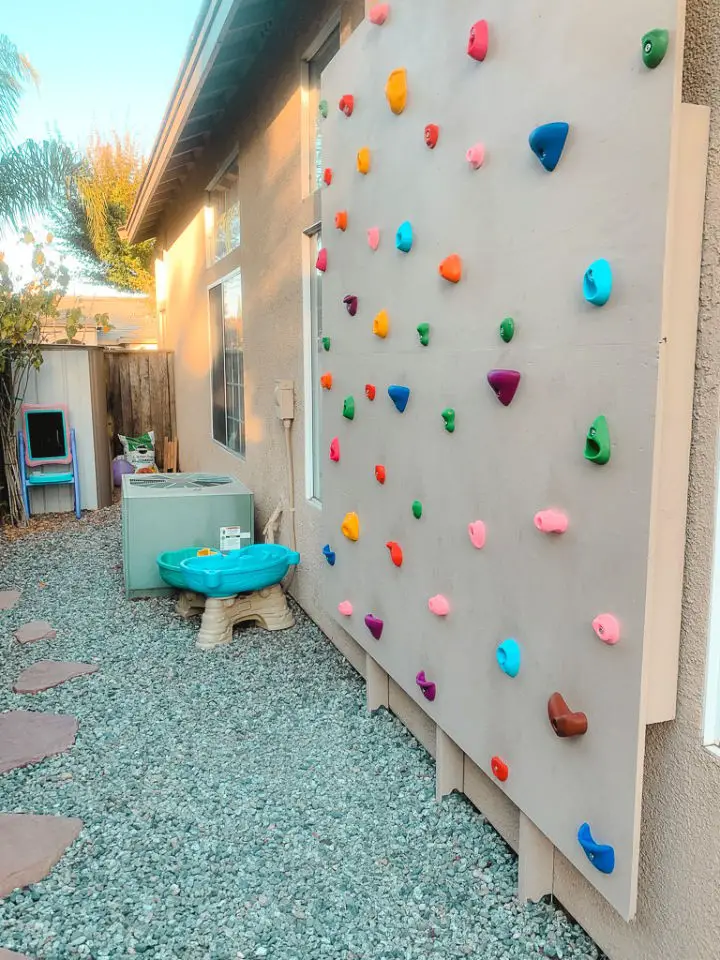
Make a Backyard Rock Climbing Wall
Transforming your backyard into a thrilling playground for kids is easier than you think! With Alia Sullivan’s step-by-step guide on ali-ish, you can create a safe and exhilarating outdoor climbing space using budget-friendly materials. For under $200, this DIY project not only guarantees hours of fun for the little ones but also maximizes the potential of unused outdoor areas. The secret to this affordable adventure lies in combining simple items like plywood, climbing holds, and basic tools to form a sturdy structure. To further enhance safety, consider adding a soft landing mat beneath. By following Alia’s engaging and instructive walkthrough, you’ll be well on your way to building an incredible climbing wall that will captivate your kids’ imaginations.
Build Your Own Home Climbing Wall
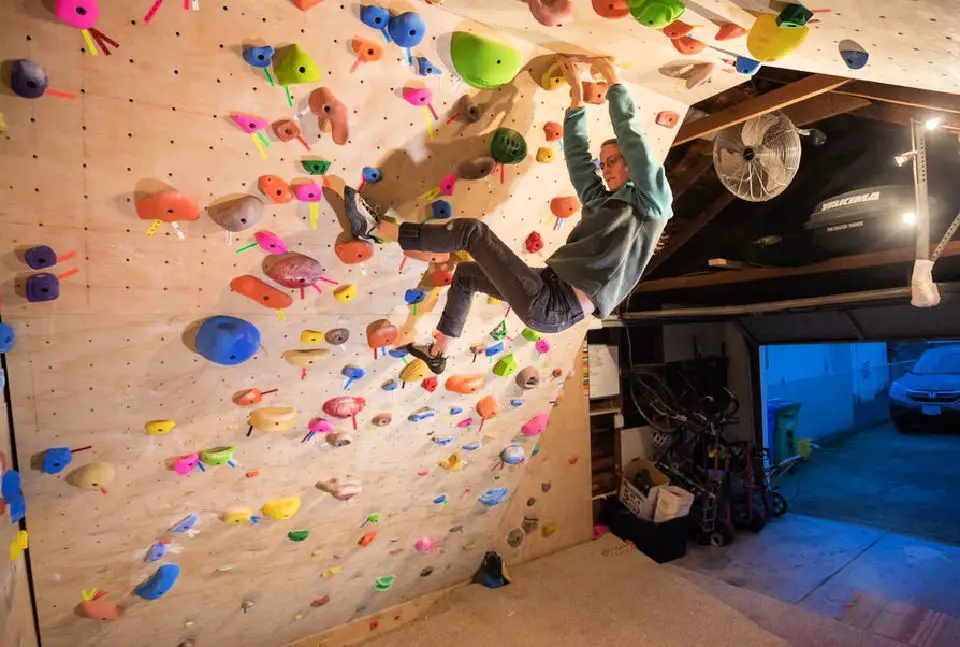
Get ready to turn your space into a thrilling climbing haven with Treeline Review’s comprehensive guide on building a home climbing wall. This step-by-step walkthrough takes you through the planning, material selection, and construction process, making it possible for DIY enthusiasts to create their own rock climbing setup. With valuable insights and money-saving tips, this guide is designed to accommodate various skill levels and preferences, ensuring your project is both enjoyable and functional. Take on the challenge and start setting up your personalized indoor bouldering gym today by following this informative and engaging manual.
Build a Playroom Rock Wall
Transforming a playroom into an adventurous climbing zone is just a DIY project away! A homemade rock wall can bring endless excitement to your child’s play area, and with a comprehensive guide from Homemade by Huseman, you’re all set to embark on this creative journey. Ali Huseman walks you through the step-by-step process of building a customizable rock wall that seamlessly integrates into any playroom or bedroom space. The tutorial is designed to be easy to follow, providing a clear list of materials needed, recommended tools for the job, and valuable tips to ensure a stress-free installation. By following these instructions, you’ll create a safe and thrilling climbing environment for your little ones right in the comfort of your own home. With careful planning and just a few hours of work, this rock wall will become a treasured addition to your child’s playtime, fostering creativity, imagination, and endless fun.
Make an Indoor Climbing Wall
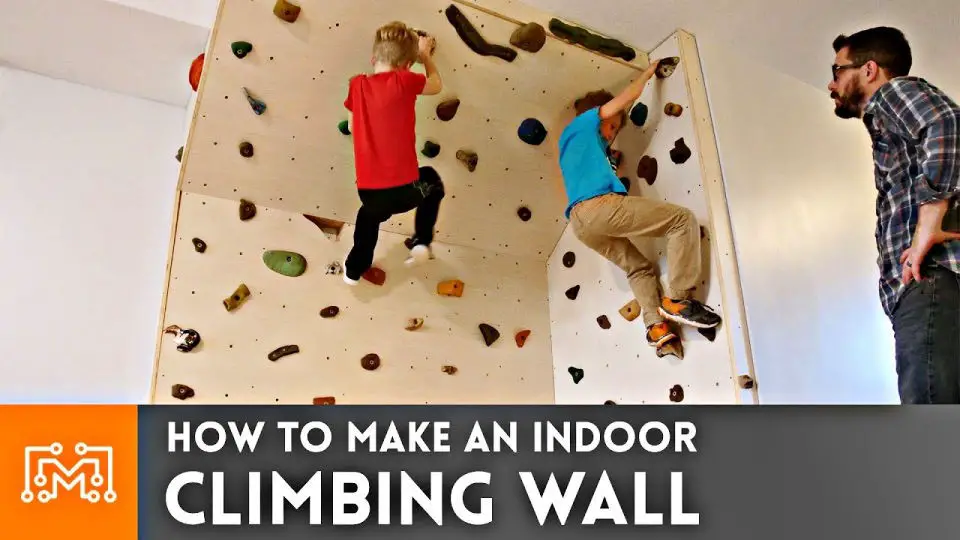
Transform any room into an adventure zone by crafting your own indoor climbing wall! This comprehensive guide takes you through the process of selecting the perfect materials – from plywood to two-by-fours and climbing holds – to create a sturdy and engaging setup that’s tailored to your space. With precision measuring, cutting, and assembly, you’ll master the art of building a frame that fits snugly against walls and ceilings, even accommodating unique angles. And with the added bonus of drilling and installing t-nuts for secure hold placement, you’ll unlock endless fun and physical challenges. Whether you’re looking to enhance a child’s play area or add a dynamic element to your home gym, building a climbing wall is a rewarding DIY project that encourages active play and skill development.
Freestanding Indoor Home Climbing Wall
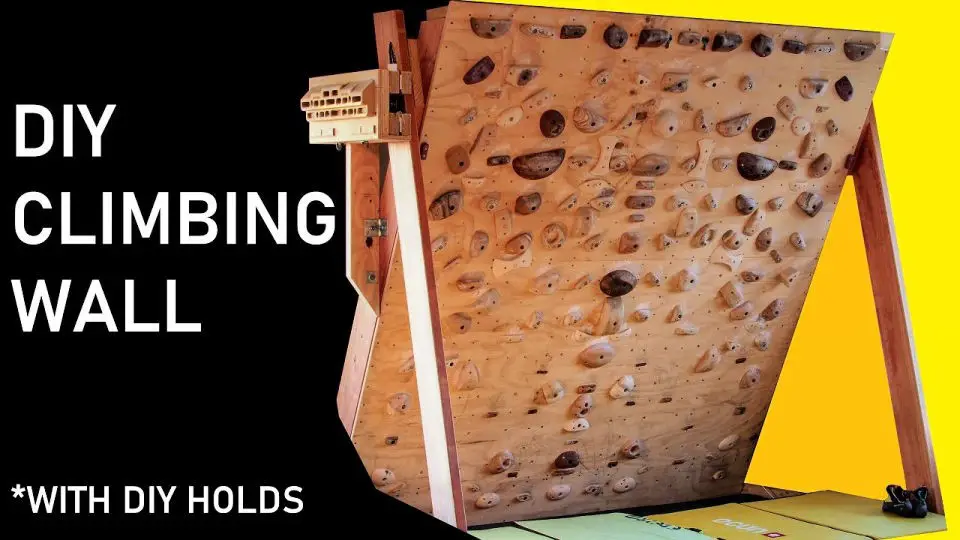
Transform your home into an adventure playground with a DIY free-standing indoor climbing wall, perfect for adding a thrilling twist to your living space. This project guide takes you through the process of building a sturdy and safe climbing haven, starting with a detailed framework construction using plywood and laminated two-by-fours for maximum support. To ensure a secure and stable structure, it’s essential to have the right tools and materials, including studs, bolts, and attention to precision. With this project, active families or individuals looking for a unique way to stay fit indoors will enjoy endless entertainment and a satisfying challenge in building their own climbing wall.
Homemade Backyard Climbing Wal
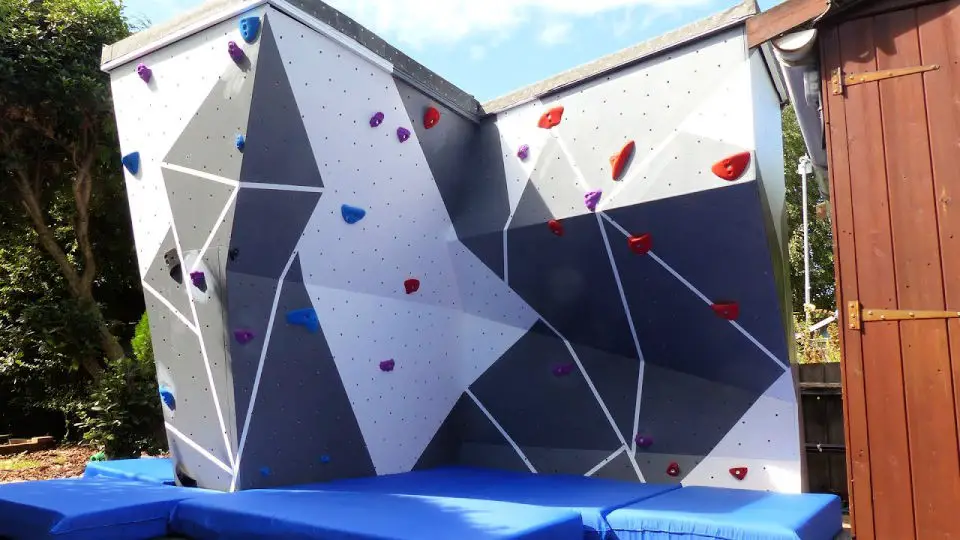
Transform your outdoor space into a thrilling adventure zone by building a one-of-a-kind backyard climbing wall. Constructed with a sturdy 1-inch square steel box section frame and covered in 18 square meters of robust 18mm thick plywood, this project is engineered to withstand the unpredictable British weather conditions. The waterproof roof, complete with a gutter system, further enhances durability. Weatherproof paint adds a finishing touch, ensuring your climbing wall remains ready to challenge and entertain. To get started, gather essential materials like steel, plywood, T nuts, and climbing holds, and unleash endless hours of climbing fun right in the comfort of your own backyard.
Backyard Climbing Wall
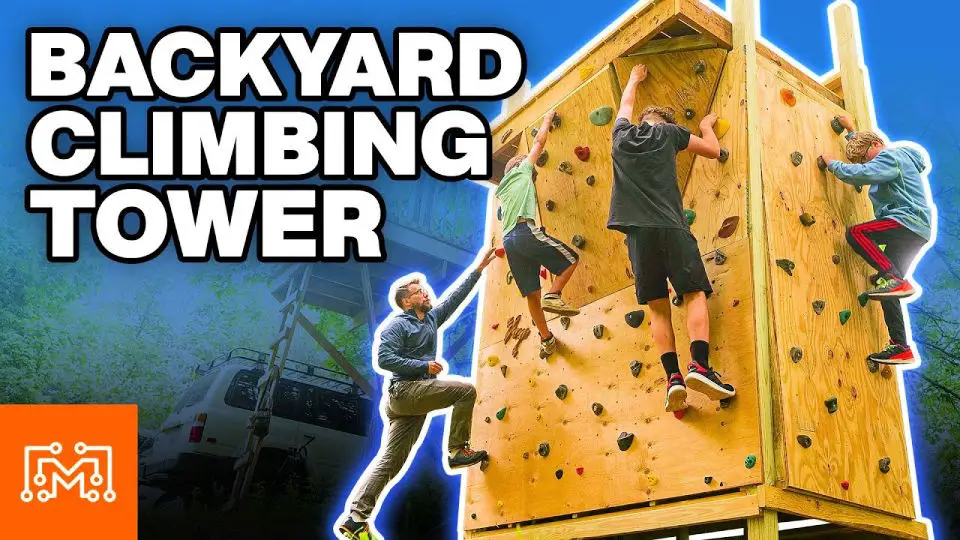
Transform your backyard into an thrilling outdoor adventure hub by building a custom DIY climbing wall. With straightforward materials such as 4×4 posts, plywood, and climbing holds, you can create a unique vertical challenge that’s perfect for all ages. Start by setting the 4×4 posts in concrete for added stability, then frame your structure to accommodate standard plywood sheets. Whether you choose to add overhangs for an extra level of difficulty or keep it simple, this versatile design invites creativity and allows you to personalize your climbing wall. Complete the build with a mix of bolt-on and screw-on holds to create a one-of-a-kind fitness and fun zone. With this engaging DIY project, you’ll be building a lasting playground feature that’s sure to provide endless outdoor excitement.
Frequently Asked Questions:
Discover the thrill of building a DIY climbing wall for kids, a fun and engaging project that’s easy to tackle. Our expert guidance will walk you through the process of constructing a sturdy structure that’s sure to delight your little ones.
How thick should plywood be for a climbing wall?
When it comes to building a climbing wall, selecting the right plywood is crucial. A minimum thickness of 3/4 inch is recommended, as this provides the necessary resistance and durability against wear and tear. Furthermore, high-quality plywood that meets safety standards is essential to ensure the climbing wall remains safe and secure for users. Among the various types of plywood available, 5-ply plywood stands out for its exceptional durability and ability to withstand heavier weights, making it an ideal choice for a climbing wall.
What do I need to build a rock wall for climbing?
To construct a sturdy rock climbing wall, you’ll require a range of materials, including climbing holds, anchor bolts, a drill with screws, a sledgehammer, level, angle grinder fitted with cutting discs and sandpaper, as well as essential safety gear like gloves and eye protection. It’s crucial to approach the construction process with care to ensure the wall is safe for climbers. With patience and attention to detail, you’ll be ready to start scaling your new climbing wall in no time.
How to build a child’s climbing wall?
To construct a child-friendly climbing wall, begin by calculating and procuring sufficient plywood to cover the designated space. Next, incorporate stability anchors to prevent movement, attach hand grips in varied patterns, outline routes with tape for visual navigation, and apply foam cushioning to the base of the structure for protection. Crucially, perform regular inspections to guarantee the wall’s safety.
What wood is best for a climbing wall?
Birch plywood stands out as the premier choice for constructing a climbing wall. Its unique combination of strength, lightweight design, and exceptional durability make it an ideal material for this purpose. Moreover, it demonstrates impressive resistance to impacts, moisture, and extreme temperatures, further solidifying its status as a top contender. Additionally, birch plywood is remarkably easy to cut and shape, allowing for seamless customization to meet specific climbing wall requirements. In conclusion, when seeking the perfect material for a climbing wall, birch plywood emerges as the top selection.
Is it worth building a home climbing wall?
Having a home climbing wall offers numerous benefits that can’t be ignored. Not only does it provide an accessible and enjoyable way to stay physically active, but it also brings the thrill of indoor climbing to your doorstep, eliminating concerns about weather or time constraints. Moreover, installing one adds a unique and conversation-starting element to any living space.
How far apart should holes be on a climbing wall?
When designing a climbing wall, it’s crucial to consider the spacing of holes and adjust it according to user needs. A commonly recommended guideline is that the distance between the two largest holds should be at least 12 inches apart, while the average gap between any two adjacent holds shouldn’t exceed 8 inches. Additionally, sufficient clearance between individual routes must be maintained to prevent hand or foot jams when transitioning from one route to another.
How do you make a simple climbing wall?
To construct a basic climbing wall, start by gathering the essential components: plywood sheets, wooden support posts, screws, and anchor bolts. Once you have these materials at hand, begin by attaching the posts to the plywood using screws. Next, secure the posts in place with anchor bolts to ensure stability. The final step is to add some flair to your wall – either through a coat of paint or the addition of texture for improved grip. With those details taken care of, you’re ready to start enjoying your new climbing wall!
What angle should a child climb a wall?
When it comes to climbing a wall as a child, the approach taken depends on the surface and difficulty of the wall itself. A good starting point is to adopt an upright posture while keeping your body close to the wall, allowing you to get a feel for the terrain. As kids gain more experience and confidence, they can experiment with different angles – from vertical to more horizontal – to find what works best for their unique climbing style. Regardless of the angle chosen, safety should always be the top priority; it’s crucial to ensure that there are no loose materials or hazards that could cause accidents.
Are toddler climbers worth it?
Investing in a sturdy toddler climber can be a worthwhile decision for parents seeking to provide their young ones with a dynamic learning and play experience. Not only do these climbing structures offer hours of entertainment, but they also contribute to the development of essential physical coordination and social skills. A quality toddler climber is an investment that will pay off in the long run, as it can withstand repeated use and inspire a sense of adventure and exploration in your child.
How thick should a rock wall be?
The thickness of a rock wall is influenced by a range of factors, including its intended purpose, the type of rocks being used and the prevailing climate. While a general guideline suggests that walls should be at least 8 inches thick to ensure stability in most environments, local conditions can also dictate the need for thicker constructions. Ultimately, it’s essential to consult relevant building codes to determine the specific requirements for your project.
Can you build a stone wall without a foundation?
While it is technically possible to construct a stone wall without a foundation, doing so requires careful consideration and planning. One approach involves building the wall directly onto the ground, using stones with sharp edges that interlock to provide stability. Crucial to this method’s success is proper drainage, as water accumulation can lead to erosion and compromise the structure’s integrity. To further enhance stability, many successful stone walls are reinforced with mortar or gravel. This added reinforcement helps mitigate the effects of temperature fluctuations and other stressors that might cause displacement or cracking over time. When it comes to building larger stone walls, a foundation remains the most effective means of ensuring maximum structural integrity.
Can I use plywood for a rock wall?
Plywood is an excellent choice for constructing a rock wall, thanks to its impressive combination of durability, affordability, and ease of installation and maintenance. What’s more, this versatile material offers a wide range of colors and styles, allowing you to tailor the look to your personal preferences. Furthermore, plywood boasts a unique set of attributes that make it well-suited for rock walls: it’s lightweight yet surprisingly strong and impact-resistant. With proper installation, you can enjoy a stunning rock wall that will withstand the test of time.
Does layering plywood make it stronger?
Layering plywood can significantly enhance its strength by combining multiple thin wooden sheets glued together. This process not only increases the material’s resistance to bending and impact damage but also results in a thicker, more robust material with improved structural integrity compared to a single piece of wood. Furthermore, the added layers reduce shrinkage and warping that typically occur when wood is exposed to temperature and humidity fluctuations.
How steep should a climbing wall be?
When it comes to climbing walls, the ideal angle depends on the desired level of difficulty. Steeper angles, typically between 30-40 degrees, are more suitable for advanced climbers who require a greater challenge. In contrast, less steep angles, ranging from 10-20 degrees, are better suited for beginners. However, the most crucial factor is ensuring the wall can be climbed safely. Ultimately, it’s up to each climber to determine their comfort level and adjust accordingly.
Can you hang plywood instead of drywall?
Plywood can be a viable alternative to traditional drywall for wall and ceiling applications, boasting impressive insulation and noise reduction capabilities. One of its most significant advantages is the simplified installation process, which eliminates the need for mudding and taping. Nevertheless, it’s crucial to select the appropriate sealant when installing plywood to guarantee a long-lasting finish.
What are the 3 basic forms of climbing?
Climbing encompasses a range of styles, with three primary forms: bouldering, sport climbing, and traditional (or trad) climbing. Bouldering, for instance, involves ascending routes of 20 feet or less without the aid of ropes or harnesses, requiring a high level of physical fitness and strategic thinking to overcome obstacles. In contrast, sport climbing relies on fixed protection devices bolted into the rock face, allowing climbers to make use of ropes and harnesses for added safety. Traditional climbing, meanwhile, demands a combination of technical skill and problem-solving as climbers must carefully place their own protection equipment throughout the ascent. Despite these differences, each form presents its unique challenges, appealing to climbers with varying levels of experience and preferences.
How do you make a cheap climbing hold?
Creating a budget-friendly climbing hold is an accessible DIY project that requires minimal materials and basic tools. To begin, gather your supplies: wood, bolts, nuts, and screws. Start by drilling holes in the wood where the bolts will be inserted. Next, secure the holds using the nuts and screws, taking care to ensure a sturdy attachment. For added safety, don’t forget to smooth out any rough edges with sandpaper before your climbing adventure commences.
How are indoor climbing walls made?
Indoor climbing walls typically utilize a combination of materials, including plywood, fiber glass, steel, and artificial rock surfaces. These structures often incorporate handholds and footholds to create routes with varying levels of difficulty for climbers to navigate. The walls can be designed with multiple angles and feature unique elements such as roofs, ledges, and caves. Crucially, safety must be prioritized during construction, necessitating the use of high-quality materials and meticulous installation processes at all times.
What is the first rule of climbing?
When embarking on a climb, prioritizing safety is crucial. This begins with having a trusted spotter who can vigilantly monitor your movements and provide support if necessary. Additionally, it’s essential to don the correct equipment, including a helmet and harness, and master the art of secure rope-tying techniques. Open communication with your partner throughout the climb is also vital, ensuring you’re both aware of any potential risks or hazards in the surrounding environment. By placing safety at the forefront of your climbing experience, you’ll be well-prepared to tackle even the most challenging ascents.
What is the easiest type of climbing?
While often overlooked as the most accessible type of climbing, bouldering is a fantastic entry point for those new to the sport. Characterized by short, dynamic climbs that can be tackled solo or with friends, this style of climbing doesn’t necessitate specialized gear beyond sturdy shoes and reliable crash pads. The shorter nature of bouldering routes lends itself well to exploration, allowing beginners to develop their skills and build confidence in a low-pressure environment.
What are the 4 levels of climbing difficulty?
Climbing difficulty is typically categorized into four distinct levels: beginner, intermediate, advanced, and expert. These categories are defined by the Yosemite Decimal System, with ratings ranging from 5.0 to 5.12b+. Each tier presents its own set of challenges, requiring a unique blend of technical proficiency, route-reading skills, and physical endurance. This diversity makes climbing an engaging pursuit for climbers of all skill levels, allowing individuals to progress at their own pace and enjoy the rewards that come with overcoming each level’s distinct obstacles.
Are female climbers better?
While some might argue that female climbers possess an edge over their male counterparts, the reality is that every climber, regardless of gender, brings unique strengths and weaknesses to the sport of rock climbing. Ultimately, success in climbing hinges not on one’s gender, but rather on a commitment to self-improvement and a willingness to continually hone one’s skills through dedicated practice. In fact, it’s precisely this focus on personal growth that allows climbers of all genders to achieve remarkable feats and push themselves to new heights.
Is 2 too old for a Pikler triangle?
As children reach the 2-year mark, their gross motor skills have matured enough to utilize a Pikler triangle effectively. Nonetheless, it’s essential to consider individual differences in physical and mental development before investing in one. If unsure about your child’s readiness, consult with a pediatrician or early childhood professional for personalized guidance.
At what age do climbers peak?
While the prime climbing age may vary among individuals, most climbers tend to reach their peak between 22 and 28 years old. At this stage, they typically boast optimal physical strength and have honed their skills to a high level, allowing them to excel in competitions or tackle challenging ascents with ease. While some may naturally decline after this period, others can maintain their competitive edge through sheer dedication and experience, remaining formidable opponents well into their 30s and 40s.
What is the cheapest material to build a wall?
When it comes to building a wall on a budget, corrugated sheet metal is often the most affordable option. This lightweight material is not only easy to install but also boasts impressive durability features, including fire-resistance and resistance to rot and insect damage, making it a low-maintenance choice. For those looking for alternative options, cinder block, brick veneer, or stucco can be viable alternatives. Ultimately, the key is selecting a material that aligns with your project’s specific needs and budgetary constraints.
At what age can kids start with climbing walls?
When it comes to climbing walls, most facilities set an age limit of 6 years old and above. But this guideline is not a hard and fast rule, as the suitability of climbing for children largely depends on their individual skill level and physical abilities. Before letting your little ones scale new heights, consult with a qualified instructor to ensure they can climb safely. It’s also essential to familiarise yourself with the specific rules and regulations at your local gym or climbing centre, as age restrictions may apply.
Are Climbing walls safe?
When it comes to climbing walls, safety should always be top of mind. By implementing proper safety measures, such as donning a helmet and utilizing approved harnesses, you can minimize the risk of accidents and enjoy a secure climbing experience. Additionally, taking the time to inspect the holds and surfaces before beginning your ascent is crucial in ensuring a safe climb. It’s also essential to remain vigilant about your surroundings at all times. By following these guidelines, climbing walls can offer an enjoyable and secure adventure for climbers of all levels.
Conclusion:
As the journey of crafting your personalized climbing space comes to a close, I hope the 25 DIY climbing wall plans we’ve explored have sparked an insatiable passion within you. Whether you’re seeking to revolutionize your home’s recreational landscape or inject a thrilling workout component, these blueprints provide a reliable guide. To guarantee a safe and enjoyable experience for every climber, meticulous planning, thoughtful material selection, and precise installation are essential considerations. As you progress on this exhilarating project, remember that each step forward brings you one step closer to realizing your very own remarkable climbing wall. May the satisfaction of seeing your vision take shape be matched only by the endless joy and adventure it brings!

