Free DIY Arbor Plans
Whether you’re aiming to create an inviting entrance or a cozy seating area, the world of DIY arbors offers countless possibilities for adding personality and charm to your outdoor space. From straightforward plans that require minimal equipment to more complex designs featuring sliding panels, built-in benches, or lush greenery, there’s a vast array of styles and materials to explore. With these 30 free DIY arbor plans, you can craft a timeless four-post piece adorned with decorative accents, a wooden lattice arch supported by natural stone or cedar, a rustic pallet trellis overflowing with fragrant blooms, or even an whimsical octagon with an overhanging roof! By delving into the possibilities and selecting the perfect design for your outdoor space, you’ll not only add architectural flair but also provide an added layer of seclusion and shade while elevating the visual appeal of your garden. Building a DIY arbor is an excellent way to inject personality and style into your outdoor living area, making it an ideal project for anyone looking to add some magic to their surroundings.
What is the purpose of a garden arbor?
A garden arbor serves as an inviting haven in the great outdoors, where one can seek respite from the elements while basking in the serenity it provides. Its presence elevates the aesthetic appeal of a backyard or garden, making it an ideal spot for relaxation and introspection. Moreover, arbors offer a unique opportunity to showcase climbing plants and vines, resulting in a breathtaking visual display that enhances any outdoor setting. As a tranquil retreat, the purpose of a garden arbor is multifaceted, combining functionality with beauty.
What is considered an arbor?
Arbors are outdoor structures that bring a touch of natural elegance to any setting. Typically crafted from wood or other organic materials, these charming features provide shelter and ambiance, transforming spaces into tranquil retreats. The framework usually consists of latticed sides topped with a roof, allowing for versatile uses such as seating areas, walkways, or entranceways. Ranging from simple trellises to elaborate pergolas and gazebos, arbor designs can be both freestanding and attached to buildings, walls, or fences. As a thoughtful addition to any garden or outdoor space, arbors not only add visual appeal but also infuse landscapes with character and charm.
What is the best wood to build an arbor?
When it comes to building an arbor, one wood stands out from the rest: cedar. Its natural resistance to rot, decay, and pests makes it a practical choice, while its sturdiness and lightweight properties make it easy to work with. Moreover, cedar’s versatility is unparalleled, available in a range of styles and sizes that cater to diverse needs. The aesthetic appeal of cedar also can’t be ignored – its attractive appearance will elevate the look of your garden, making it an ideal choice for creating a stunning arbor.
How do you make a simple wooden arbor?
To construct a wooden arbor, begin by identifying the desired location and tracing its outline. Next, excavate two holes approximately 4 feet deep for the posts and install concrete footings to ensure they’re level. Cut your wood pieces according to the intended size of your arbor and secure them using galvanized screws or bolts. For added durability, apply a weather-resistant finish to protect the wood from environmental elements.
This DIY endeavor shouldn’t require more than a couple of hours’ commitment and can be an excellent activity for a weekend project. To guarantee success, it’s essential to utilize high-quality materials and meticulously follow arbor construction plans and guidelines. By investing just a small amount of effort, you’ll have created an outdoor space that will provide enjoyment for years to come.
What material do you use on an Arbour?
When it comes to building an arbour, the choice of materials is crucial. The design, size, and purpose of the structure all play a role in determining which materials are best suited for the job. Wood, metal, plastic, and vinyl are popular options, each with its own unique characteristics. Wood, for instance, offers durability and versatility, making it a great choice for creating intricate designs. Metal, on the other hand, provides strength and stability, often preferred for taller or larger arbours. Plastic and vinyl can be used to add weatherproofing or a modern twist to the arbour’s design. Ultimately, the right material will depend on your specific needs and personal preferences.
How do I make a simple garden arch?
To construct a charming garden arch, begin by collecting four wooden or metallic components that will serve as the framework for the structure. Secure these pieces together using bolts and screws, ensuring a sturdy foundation. Next, add cross-members between the framework elements to create an even, curved shape reminiscent of a traditional arch. Once the basic frame is in place, apply a coat of paint to bring out the details and give your garden arch a polished appearance. This straightforward DIY project is certain to infuse your outdoor space with warmth and character.
How do you make a sturdy arbor?
To construct a robust arbor, you’ll need to gather or acquire pre-fabricated components. Begin by burying four posts in the ground and securing them with concrete. The frame should consist of 2×6 lumber, while 2x4s can be used for cross-members to provide structural support at the top. Before installing roofing materials such as wood shingles or shakes, attach metal brackets or braces to each corner to ensure stability. Once the basic structure is in place, you can add trellises, benches, and other decorative elements to give your arbor a unique charm.
How much does it cost to build a wood arbor?
The cost of building a wooden arbor can be quite variable, influenced by several factors including its size, materials used and level of complexity. On one hand, it’s possible to build a basic arbor for a few hundred dollars; on the other hand, more elaborate structures or those using high-quality materials can easily exceed thousands of dollars. Factors such as hiring professional labor or opting for treated lumber will also impact the final cost. While some simple arbors may be had for under $1000, it’s often best to consult with a local carpenter or contractor to get a more accurate estimate.
How tall should a garden arbor be?
When designing a garden arbor, it’s essential to strike the right balance between structure and greenery. The ideal height will depend on the types of plants, decorations, or features you plan to incorporate within its space. A good starting point is to ensure that there’s sufficient clearance for people to comfortably walk underneath, while also allowing enough sunlight to filter through into your garden. To achieve this harmony, take stock of the overall scale and dimensions of your garden, as well as the heights of any plants or decorations you plan to feature within the arbor’s framework. By considering these factors, you’ll be able to create a beautiful and functional arbor that complements your outdoor space.
What’s the difference between a trellis and an arbor?
While trellises and arbors share some similarities, they serve distinct purposes in the garden. Trellises, typically constructed from latticed wood or metal panels, are designed to support climbing plants like vines, clematis, and roses. Their compact size makes them ideal for smaller spaces, focusing primarily on plant display. In contrast, arbors are freestanding structures built with wooden posts and beams, often featuring an arching roof. These larger structures can function as seating areas or entranceways, adding depth and visual appeal to the garden. Despite their differences, both trellises and arbors contribute to the overall aesthetic of your outdoor space.
What is the difference between an arbor and a pergola?
While arbores and pergolas share some similarities, their defining characteristics lie in their structural differences. Arbores are typically defined by two vertical posts with curved beams spanning across the top, forming an archway that can function as a passage or entrance. In contrast, pergolas feature a more complex framework consisting of four or more vertical posts connected by crisscrossing horizontal beams, creating a lattice-like structure. This distinction in design not only influences their aesthetic appeal but also their functional purposes, with arbores often serving as a pathway and pergolas being used primarily for decorative purposes, adding beauty and shade to outdoor spaces.
What wood should I use for an arbor?
When it comes to selecting wood for an arbor, climate and aesthetic goals should be top of mind. For durability and resistance to rot, cedar, redwood, and pressure-treated lumber are popular options. In areas with lower humidity or moisture levels, pressure-treated pine can also be a viable choice. Before making a final decision, it’s crucial to consider the size, design, and structure of your arbor to ensure the selected wood meets its demands.
How to build an outdoor arbor?
To create a beautiful and durable outdoor arbor, start by collecting the essential tools and materials: wood, saw, screws, drill, and brackets. Begin the construction process by carefully cutting the wood to the desired size. Next, secure the pieces together using screws, ensuring a sturdy foundation for your arbor. For added stability, drill holes and attach brackets to provide extra support. Finally, apply a coat of paint or stain to protect your creation from the elements, allowing it to withstand the harsh weather conditions. With these steps complete, you’ll be left with a stunning outdoor arbor that not only adds aesthetic appeal but also serves as a functional structure for relaxation and enjoyment.
How to build a freestanding arbor?
When it comes to building a freestanding arbor, the process begins by marking and digging four corner post holes. Next, insert the posts into concrete and allow them to set. To create the framework for the structure, attach two or three beams of wood across the top of the posts, forming a roof-like shape. This is followed by connecting horizontal boards at each corner and adding additional boards as desired to achieve the desired design. Finally, secure everything in place using galvanized screws, resulting in a sturdy and visually appealing arbor that you can enjoy.
Building an Outdoor Lattice Arbor
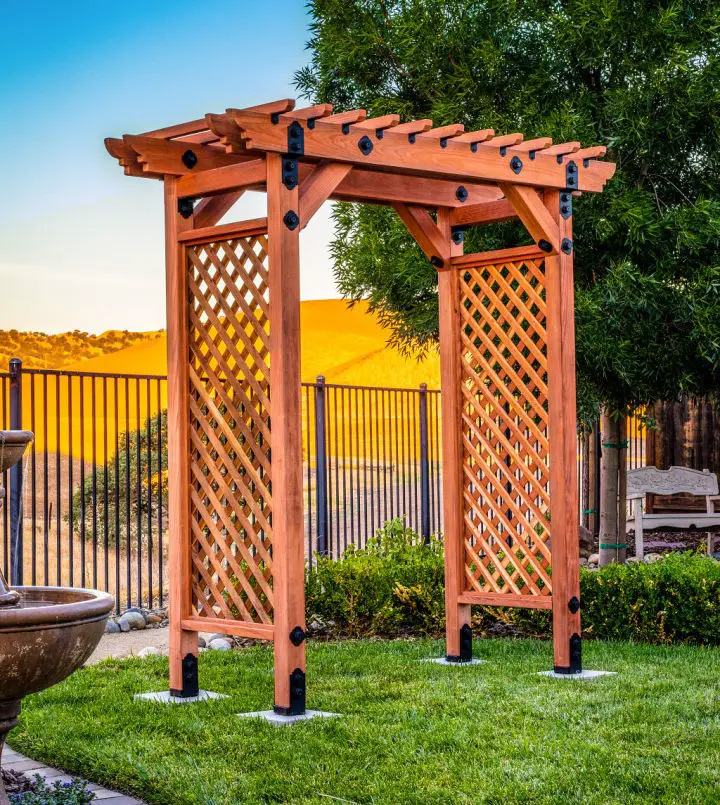
Transform your outdoor space into a serene oasis by creating a stunning DIY outdoor lattice arbor. This elegant structure not only provides respite from the sun, but also adds a touch of sophistication to your backyard. To bring this vision to life, you’ll need a selection of lumber, wood lattice panels, and various hardware components. A saw, screwdriver, tape measure, clamps, framing square, and straight edge will also come in handy. Don’t worry if the process seems daunting – our comprehensive tutorial is designed to guide you every step of the way. So why wait? Roll up your sleeves and start building your own DIY outdoor lattice arbor today!
DIY Copper Arbor for Wedding
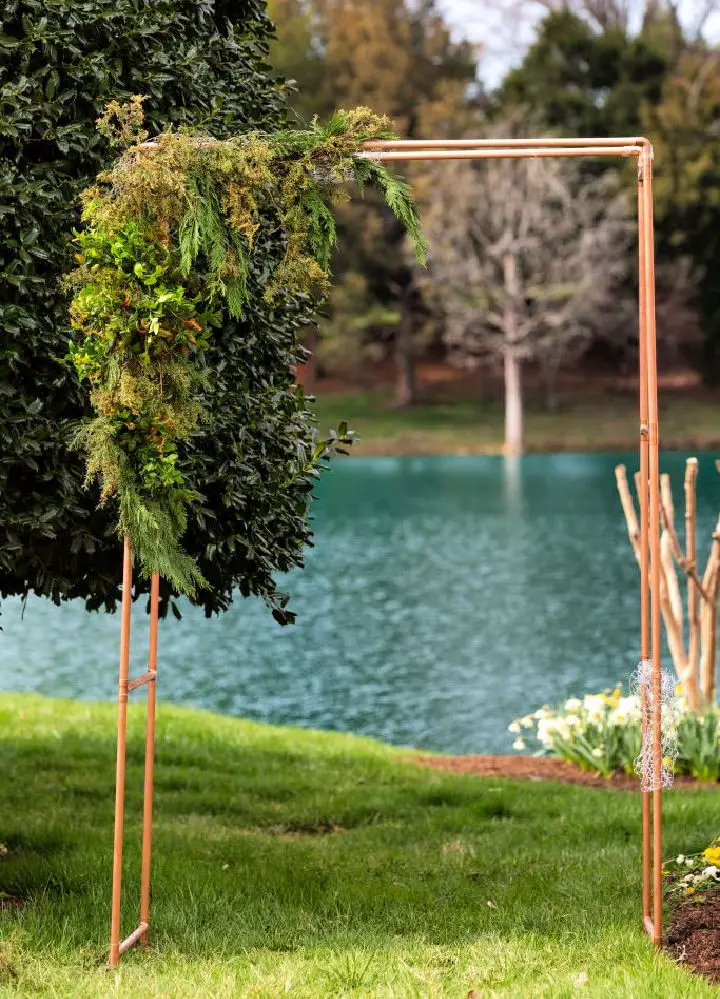
Crafting a DIY copper arbor for your wedding is an incredibly rewarding experience that requires minimal effort and yields remarkable results. By combining 3/4-inch copper piping, fittings, grocery store flowers, and additional elements such as chicken wire, greenery, and other decorative items, you can bring to life a stunning focal point for your special day. A range of tools, including a pipe cutter, metal epoxy, protective gloves, shears, hammer, and tent stakes, will aid in the creation of this timeless wedding backdrop. All these supplies are easily accessible at most home improvement stores. To add a rustic touch, finish with cotton rope and take advantage of its versatility. After your big day, you can repurpose it as a beautiful trellis or use it to capture memorable family photos. This easy-to-follow tutorial provides step-by-step instructions for creating this breathtaking wedding backdrop, which can be reused in the garden or repurposed for future celebrations.
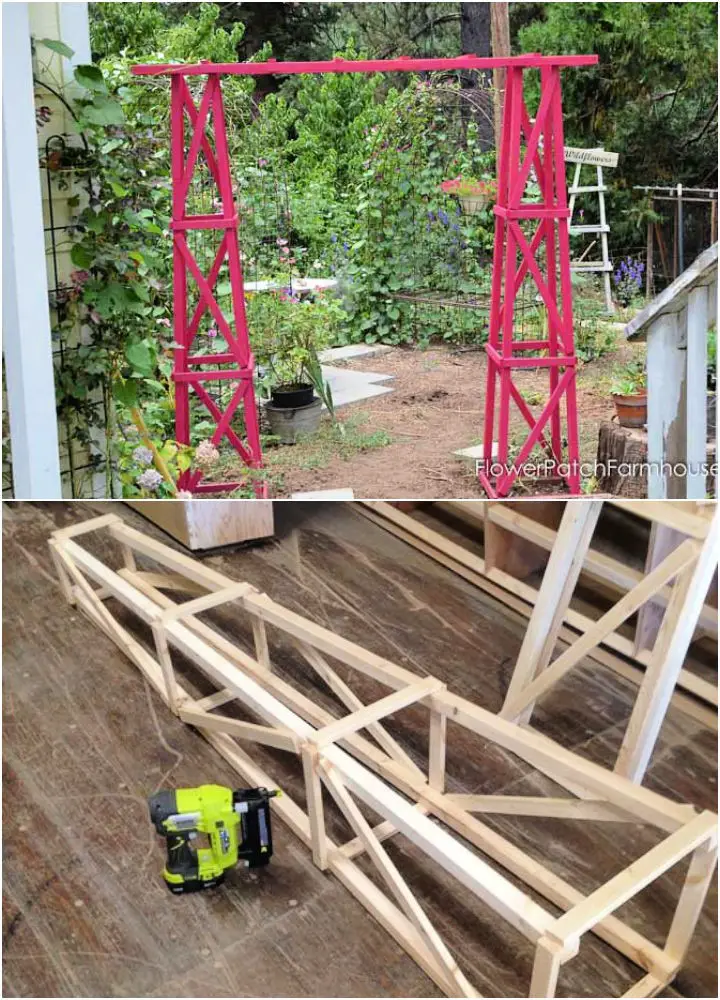
Homemade Backyard Arbor
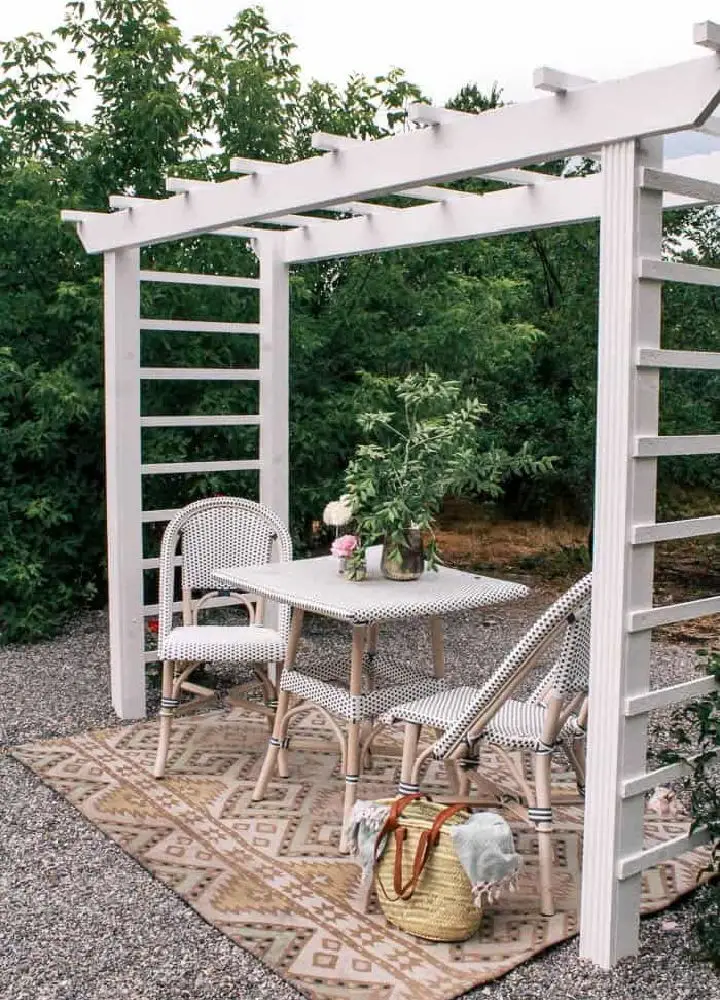
Transform your outdoor space by constructing a unique homemade arbor using recycled materials! With minimal effort and the right supplies, you can bring an artistic touch to your backyard without breaking the bank. To begin, gather four 4x4x8 Pressure Treated Posts for the foundation, concrete for secure installation, two 2x6x8 lumber pieces for joists, two 2×2 lumber pieces for rafters, and lattice strips along with deck screws measuring 2 1/2 inches in length. Once you have all the necessary materials, follow a simple tutorial to bring your arbor design to life. This remarkable structure will not only add visual appeal but also create a cozy atmosphere perfect for relaxation or entertainment.
DIY Outdoor Bench with Arbor
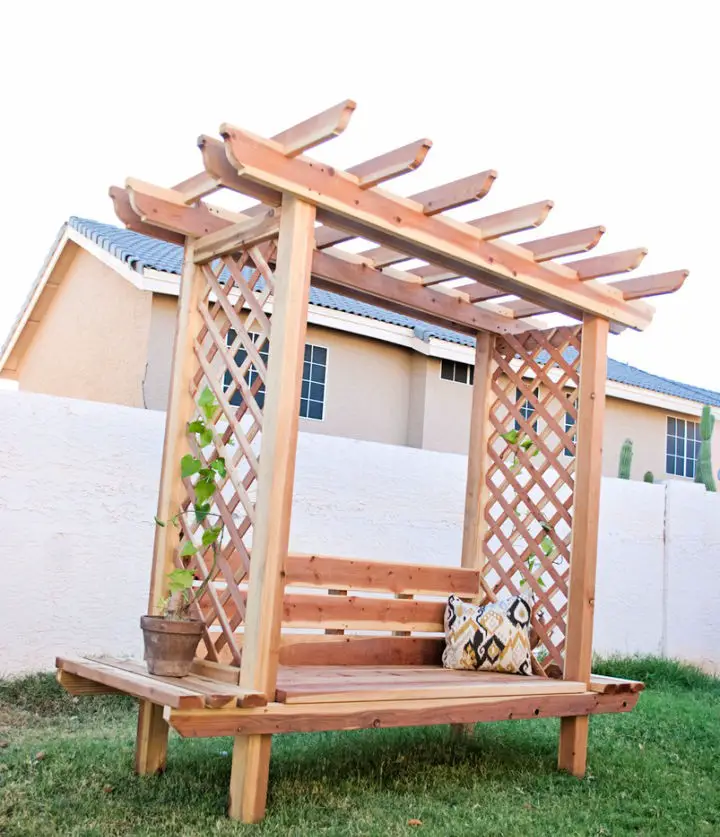
Transform your yard into an inviting oasis by crafting a charming DIY outdoor bench and arbor. This rustic yet elegant seating solution seamlessly blends form and function, providing a serene retreat that beckons you to linger. With its comfortable design and natural beauty, this project is sure to become a focal point in your garden.To embark on this creative journey, gather the necessary materials: lumber, screws, pocket hole screws, wood filler, sandpaper, and primer or wood conditioner for optimal results. As you follow along with this easy-to-follow tutorial, you’ll discover the joy of bringing your outdoor space to life.
Build Your Own Ceremony Arbor
For a visually stunning yet budget-friendly wedding decoration option, consider crafting a DIY ceremony arbor that will be the focal point of your special day. With just the right materials and this straightforward guide, you can create a breathtaking arbor in your own backyard. To start, gather an arbor structure – whether you opt to build one yourself or purchase it – along with two floral foam cages, one large for the upper arrangement and one medium for the lower/middle setup. Additionally, stock up on essential supplies like floral snips, zip ties, flowers, and greenery. With these simple yet elegant elements, you’ll be well on your way to crafting a unique arbor setting that will leave your guests in awe.
Corner Arbor Plan with a Bench

If you’re searching for a straightforward and comprehensive guide to constructing a corner arbor with a bench, this project is an excellent choice for those with intermediate skills. The entire process takes approximately 12 hours to complete. A list of required supplies can be found in the tutorial, making it easy to follow along from start to finish. Even if you’re new to DIY projects, this step-by-step guide will walk you through every stage of the process, ultimately leaving you with a beautiful and functional garden arbor featuring comfortable seating. The best part? Your friends will be green with envy, begging for your expertise on how they can create their own stunning corner arbor.
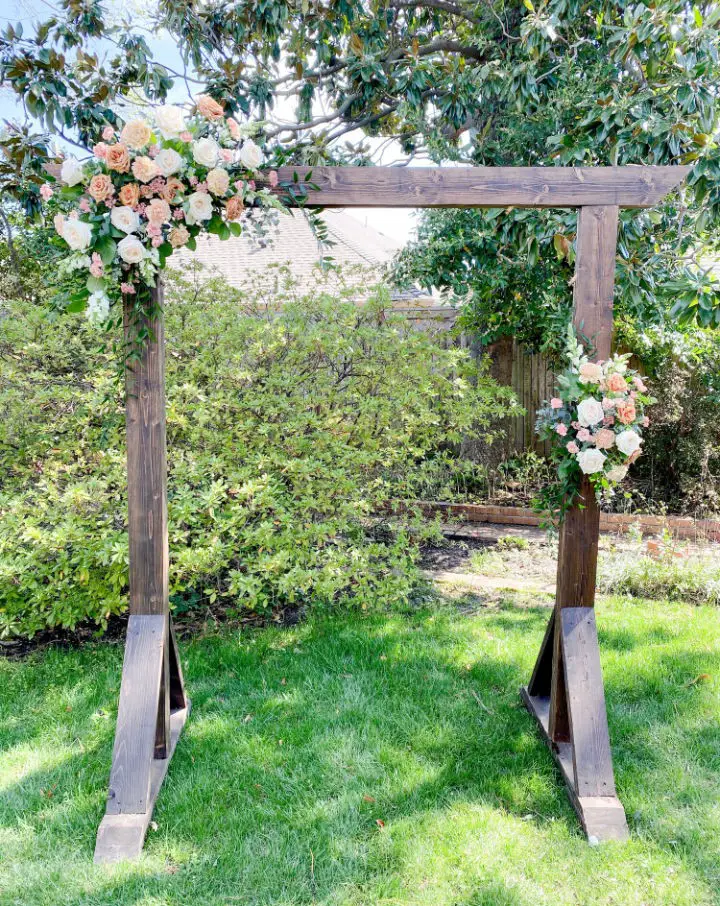
Building a Big Wooden Wedding Arbor for Less Than $100

Crafting a DIY wooden arbor for under $100 allows you to create an impressive focal point that adds a touch of romance to any outdoor wedding or event. This step-by-step tutorial will guide you through the process of building a stunning, handmade piece measuring 88 inches long, 90 inches wide, and 48 inches tall – perfect for any ceremony. With just a few simple materials, including two 10-foot 2x4s, two 10-foot 2x6s, three 8-foot 2x6s, screws, and stain or paint (optional), you’ll be well on your way to creating something truly special. To complete the look, don’t forget to add some finishing touches with flowers and greenery – and get ready to impress your guests! With a little creativity and elbow grease, you can create an arbor that will be the perfect centerpiece for any outdoor celebration.
Easy DIY Garden Arbor With Gate
Transforming your outdoor space just got a whole lot easier with the addition of a stunning DIY garden arbor featuring a charming gate. By following this simple, step-by-step guide and utilizing easily accessible materials, you’ll be able to craft a breathtaking piece that effortlessly adds an air of sophistication to your backyard retreat. To bring your vision to life, gather two pressure-treated 12-foot long 6x6s for the posts, two pressure-treated 10-foot long 2x8s for the headers, one pressure-treated 8-foot long 2×10 for the arch, concrete mix, and deck screws. With these supplies in hand, combined with this user-friendly tutorial and a dash of elbow grease, you’ll be proudly showcasing your custom creation in no time.
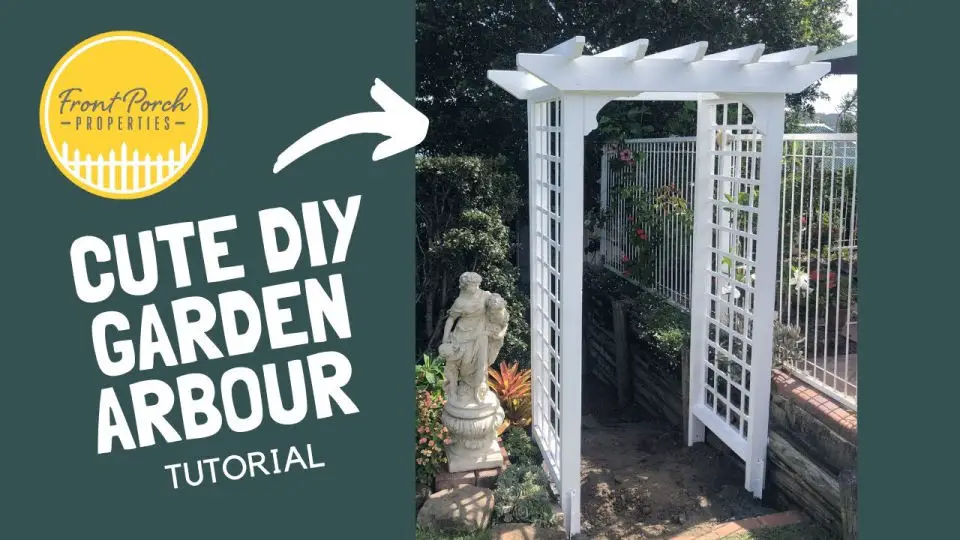
Build a Garden Arbor Arch
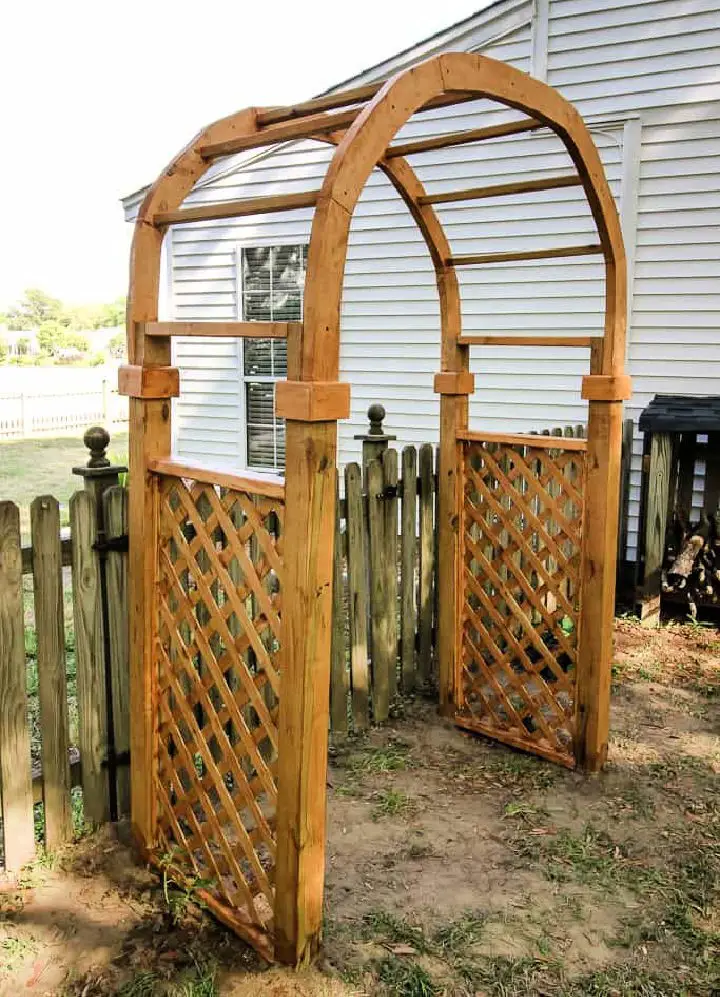
For the uninitiated, constructing a garden arbor arch may seem daunting, but fear not! With a few essential supplies and some imagination, even the most novice DIY enthusiast can create a stunning backyard feature. The beauty of this project lies in its simplicity, thanks to our downloadable PDF plans that guide you every step of the way.
To build this showstopping arch, you’ll need just two 8ft long 4×4 posts, two 2’x4 lattice panels, three 2-foot long 2x4s, and four 4-foot long 1x1s for each side. By following our step-by-step instructions, you can bring your vision to life and bask in the envy of your neighbors.
This tutorial is designed to empower even the most DIY-challenged individuals with the confidence to tackle this project and reap the rewards of a beautifully crafted arbor arch.
DIY Wood Wedding Arbor

A wooden wedding arbor is a stunning feature that can elevate any special occasion or event. With simple materials and this straightforward guide, you can create an exquisite piece without breaking the bank. To build one, you’ll need three 2x4x12 pieces of wood, one 2x4x8 piece, wood screws, greenery, flowers, and decorative cloth (or other embellishments). The estimated cost for this project is $50-$70, depending on the materials used, making it an affordable addition to your celebration. By incorporating a wooden wedding arbor, you can introduce a touch of sophistication to your event.
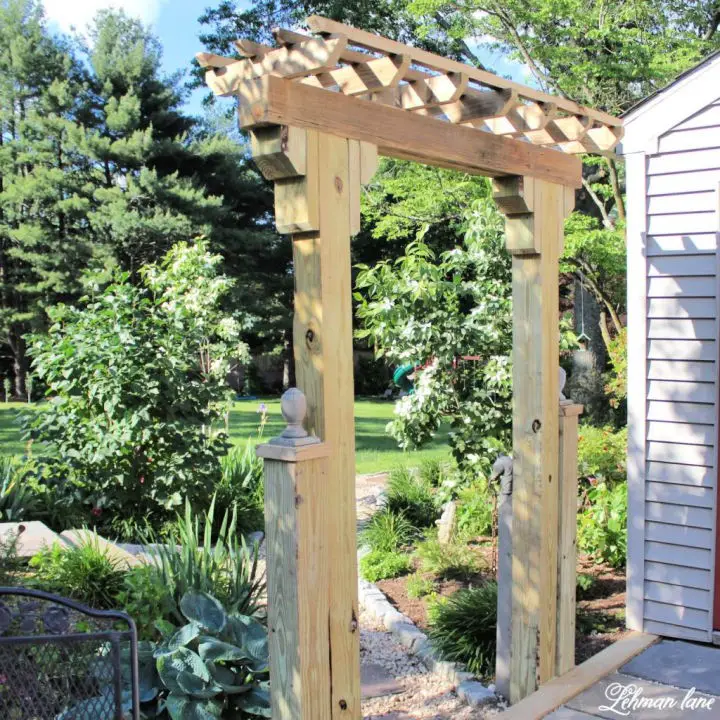
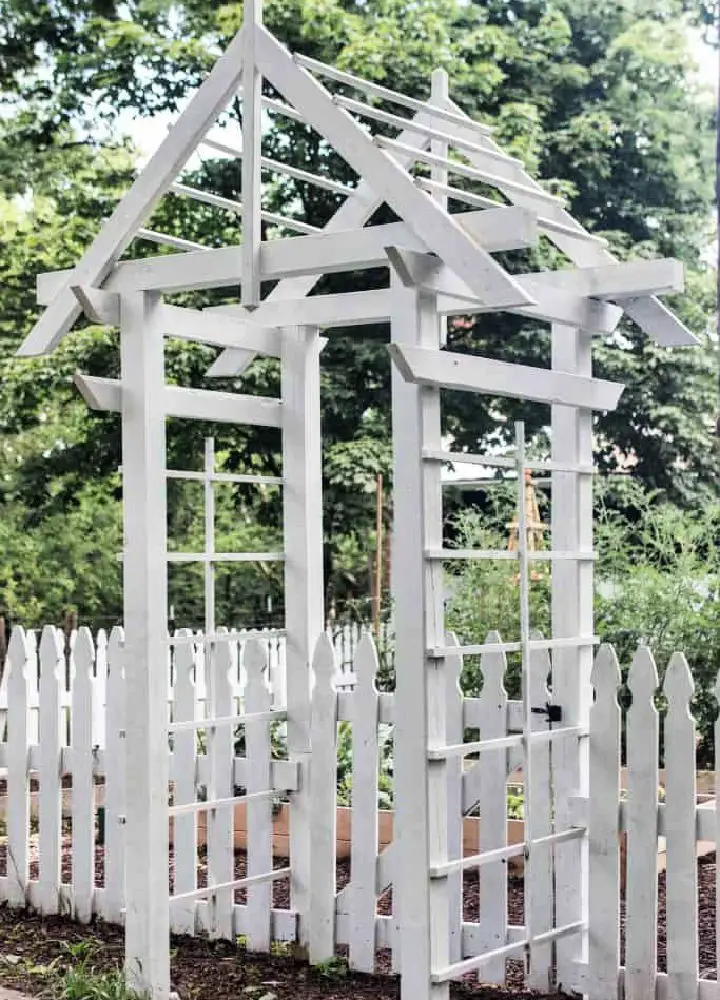
Classic Gateway Arbor Building Plan
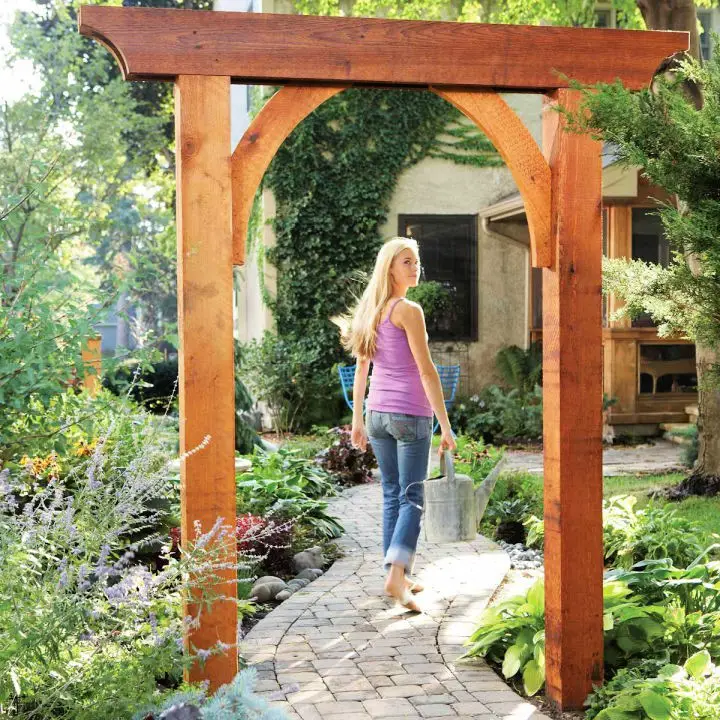
Transforming a DIY classic gateway arbor is an excellent way to introduce a striking garden arch that can significantly elevate the ambiance of your yard or garden. The best part? This impressive structure can be built in under a day! Once complete, you can seamlessly integrate it into a trellis or pergola or utilize it as a frame for a walkway within a fence. To get started, head to your local home improvement store and gather the necessary materials: two 2x8s measuring 8 feet long (for headers), two 2x10s also measuring 8 feet long (brackets), three 2x4s measuring 8 feet long (stretcher), deck screws, one 6×6 post measuring 10 feet long (posts), braces, concrete mix, and stakes. With these supplies and some basic tools at your disposal, follow this straightforward tutorial to build your classic gateway arbor today!
Make a Rustic Style Bamboo Arbor

Transform your party or event with a unique DIY rustic-style bamboo arbor, effortlessly combining nature’s charm with creative flair. By manipulating green saplings into free-form shapes, drilling holes in wooden blocks, and securing everything with natural jute twine, you’ll create a striking structure that will be the envy of all your guests. To take it to the next level, adorn the arbor with vibrant flowers and lush greenery, ensuring a breathtaking focal point for any special occasion or birthday celebration. This innovative project is sure to garner admiration and provide a fun, creative outlet.
How to Build a Freestanding Arbor
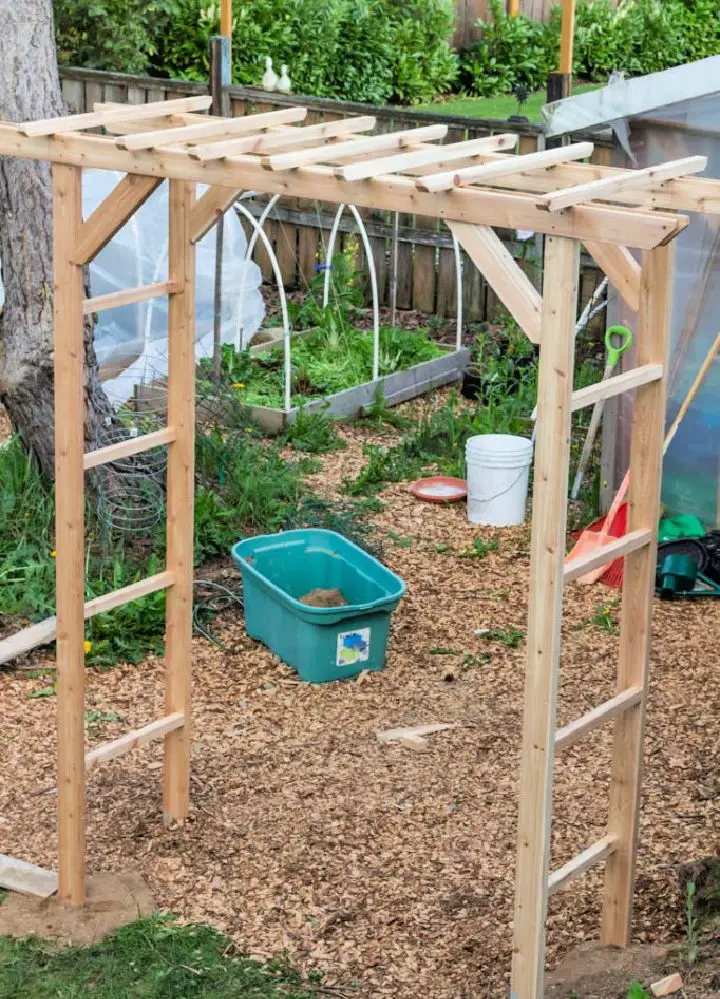
Transforming your backyard into a serene oasis is now possible with a DIY freestanding arbor that requires minimal effort and budget-friendly materials. With cedar lumber, deck screws, galvanized nails, concrete mix bags, and rocks of varying sizes at hand, you can craft an attractive focal point in just one day. A comprehensive guide on how to construct this charming garden arbor is available, complete with expert advice on making it weather-resistant. By following these simple steps, you’ll be able to create a captivating spot in your yard that invites relaxation and tranquility.
DIY Garden Arbor With Faux Patina
Transform the ambiance of your backyard with a DIY garden arbor boasting a realistic faux patina. By combining basic materials like lumber, decking screws, carriage bolts with washers and hex nuts, crown staples for an air nailer, a patina kit available in bronze, iron, or copper finishes, E-Z mender brackets, and stain – specifically the Behr Waterproofing Stain in Chocolate – you can craft a sturdy arbor that defies the elements. This accessible tutorial guides you through building an arbor at your own pace, allowing for seamless customization to reflect your unique personal style. Before long, you’ll have created a breathtaking focal point for your outdoor space, destined to provide years of joy and relaxation.
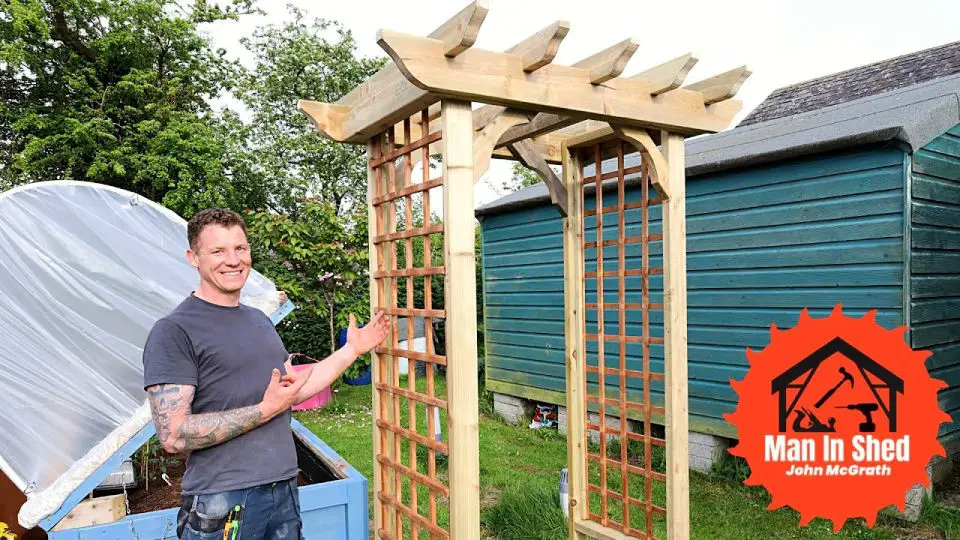
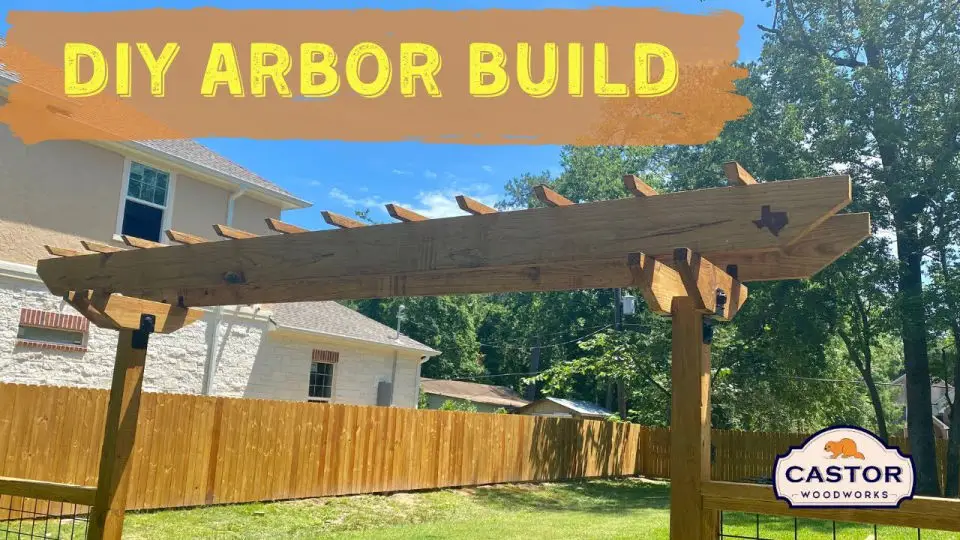
How to Build a Pergola Arbor
Transforming your backyard into an alluring outdoor oasis is now easier than ever with the creation of a DIY pergola arbor. By utilizing free building plans and basic materials such as lumber, you can effortlessly assemble this project even if you’re new to woodworking. With just a few simple hardware pieces like braces, brackets, nuts, bolts, washers, screws, and connectors, you’ll be able to create a beautiful shaded area that invites relaxation and entertainment in no time.
Free Wooden Entry Arbor Plans
Transform your outdoor space without breaking the bank with this DIY wooden arbor project. With a modest investment of around $100 for lumber, paint, and concrete, you can create a stunning archway that will stand the test of time. If building isn’t your forte, don’t worry – all you need is some natural water-resistant wood and eight sheets of A4 paper to get started. Additional essentials like glue, a fretsaw, and a drill will also come in handy to bring your wooden arbor dreams to life. To make the process even smoother, download free DIY plans that provide an easy-to-follow guide to help you build your own DIY Wooden Arbor Plans efficiently.
Simple and Rustic DIY Shutter Arbor
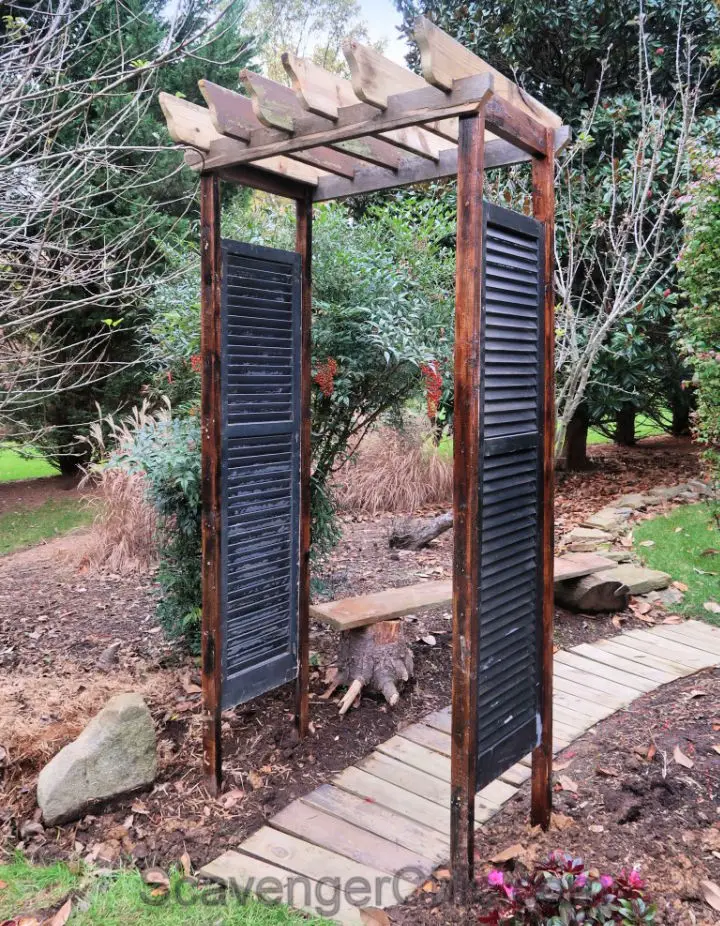
Elevate your outdoor oasis with a rustic shutter arbor, crafted with ease using readily available materials. To get started, gather two matching shutters, three wooden strips (2x4s or pallet side pieces) measuring 18 inches wide and 48 inches long each, four longer wooden planks (8-foot 2x3s or 2x4s), deck screws, and top arbor components (1x6s, 1x4s, or pallet wood pieces) cut to 38 inches. If the dimensions don’t perfectly fit your space, fear not – simply adjust the lengths to accommodate narrower or wider shutters. This DIY project is perfect for a relaxing weekend, yielding a charming and unique addition to your yard that’s sure to delight.
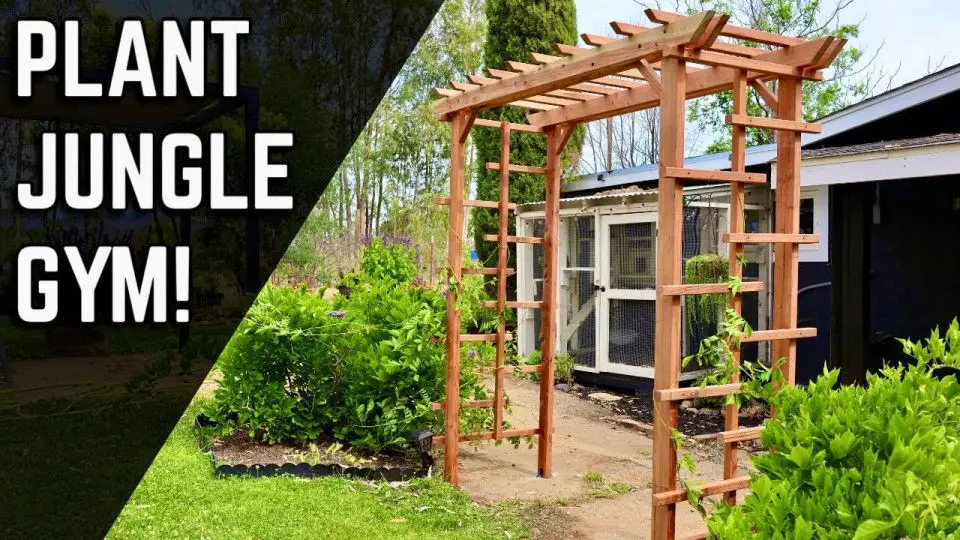
Free Wooden Garden Arbor Plan
For the budget-conscious DIY enthusiast, crafting a wooden garden arbor can be an achievable project without breaking the bank. By employing arts and crafts or artisan styles, one can replicate various designs while keeping costs low. To get started, gather essential supplies such as pressure-treated 4×4 posts and 1x6s, wooden ladder trellises, wood deck screws, a post-hole digger, hand saw, drill, and necessary bits. Depending on the desired arbor design, additional materials like 2×2 balusters may be required. To ensure accuracy during construction, consider investing in safety glasses, rocks or bricks for added support, pencils for marking lines, and a plumb line. Fortunately, most of these materials can be sourced at an affordable cost, typically under $100.
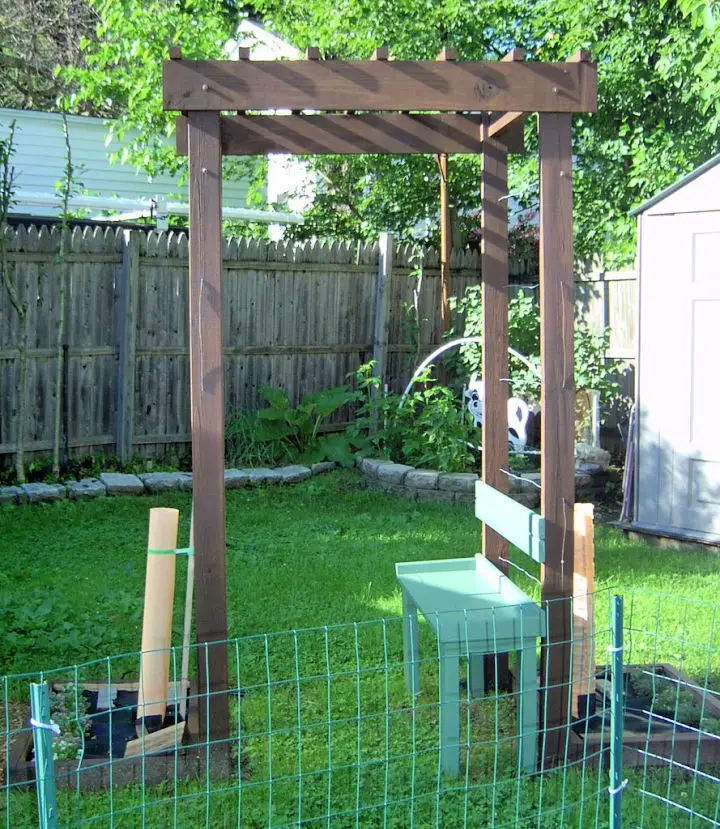
How to Make an Entry Arbor
Creating a DIY entry arbor is a fantastic way to add a touch of elegance and sophistication to your outdoor space. By using simple tools and materials, you can construct a stunning wooden arbor in just a few hours. The addition of wood finials, lag bolts, and L-shaped brackets provides extra support and visual appeal. For an added design element, you can even incorporate scrap pressure-treated wood to create angled tops for the tall posts. Take it a step further by incorporating a flowering vine to cover the arbor and white flowers along the patio’s edge. The result is a truly breathtaking DIY entry arbor that transforms your outdoor space into an inviting room. Imagine spending time in this serene atmosphere, surrounded by lush greenery and vibrant blooms – it’s the perfect spot to relax and unwind.
DIY Grape Arbor for Small Space
Transforming small outdoor spaces with vintage charm can be achieved through creative DIY projects. One such endeavour is constructing a grape arbor that adds a touch of rustic elegance to your backyard garden. With a modest collection of materials and tools, you can breathe new life into the space. The essential components include deck screws, lag screws, galvanized wire, gravel, cement, lumber, railings, paint and stain, as well as soil and grow tubes for nurturing young plants. When winter approaches, ensure that your arbor is securely brought indoors to shield it from harsh weather conditions. This endeavour not only injects character into the space but also serves as a perfect opportunity to express your creativity and get hands-on with your project. With proper care and attention, your grape arbor will flourish, providing years of enjoyment and ambiance.
Handmade Obelisk Arbor
Incorporating a DIY obelisk arbor into your garden design can have a profound impact, adding a touch of elegance and sophistication. What’s more, this project requires minimal investment in materials, with costs ranging from $50 to $60. The beauty of the DIY obelisk arbor lies not only in its affordability but also in its ease of construction. With step-by-step photo plans and a comprehensive schematic, even novice DIY enthusiasts can successfully bring this vision to life. Furthermore, the portability of the finished structure makes it easy to reconfigure your garden design as needed, allowing you to experiment with different layouts and arrangements. For those who want to dive straight into building their own obelisk arbor, a PDF file containing detailed plans is available for instant download.
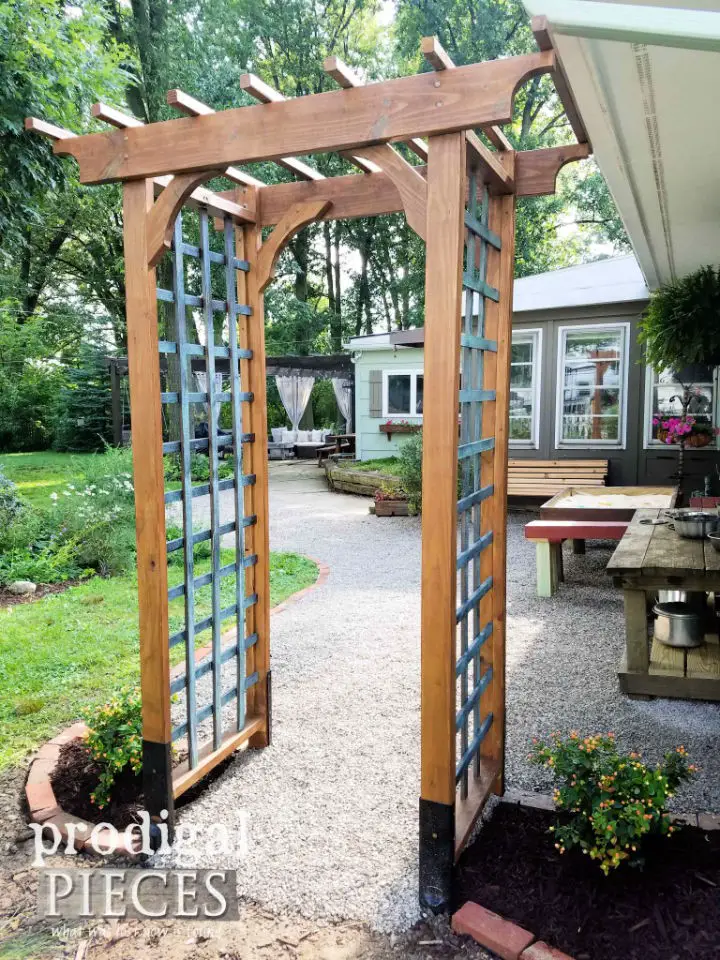
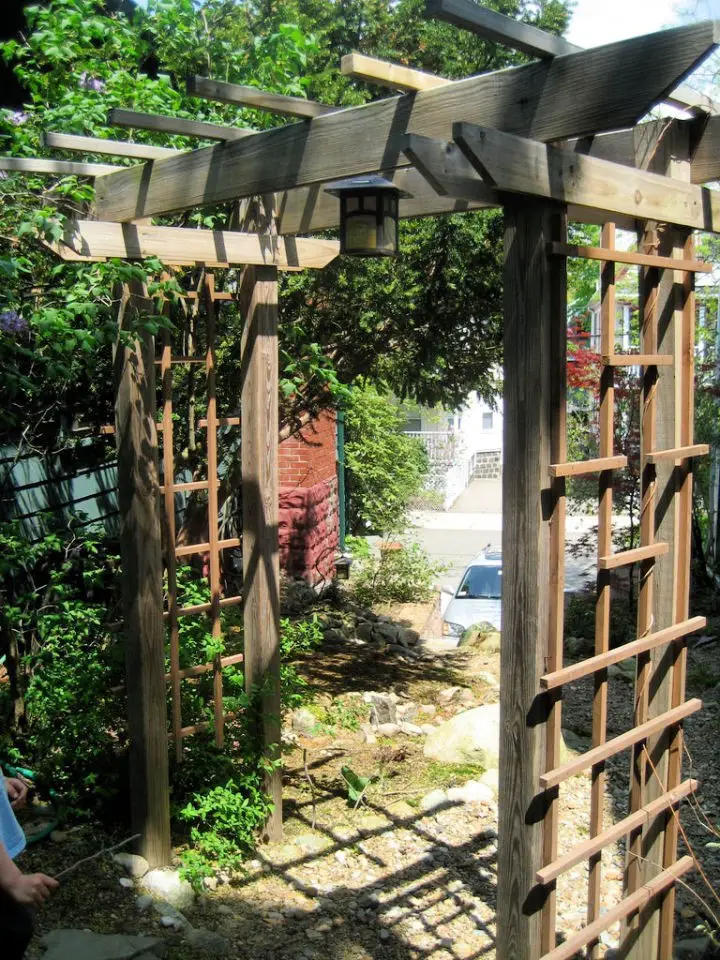
DIY Trellis Arbor
Creating a DIY trellis arbor for your outdoor garden entrance can be a transformative experience, providing an inviting and serene retreat without breaking the bank. You can use cost-effective materials such as six eight-foot 4×4 posts, eight eight-foot 2×4 boards, joist hangers, L brackets, tie plates, and cement to bring this project to life. With these supplies, you’ll be able to complete the trellis arbor in a weekend or two, making it an ideal DIY endeavor for your free time. Don’t forget to treat the wood with a preservative or paint after assembly to ensure its longevity and aesthetic appeal.
Cheap DIY Arbor for Entrance
Transforming your garden’s entrance into a charming homestead-style haven is a straightforward DIY endeavour that can be accomplished in just one to two days. With minimal materials readily available at most home improvement stores (6-8 foot 4x4s, 4-8 foot 2x4s, 2-8 foot 1x4s, paint or stain, drill and drill bits, table saw, miter saw, screws) you can craft an attractive entrance that exudes warmth and welcome. Whether adorned with a quaint picket fence or left au naturel, this outdoor project is sure to elevate the visual appeal of your exterior, making it more impressive and inviting for all who enter.
Decorative Garden Arbor Ideas
The humble DIY garden arbor is a game-changer when it comes to elevating the aesthetic appeal of any outdoor space. Without requiring an extensive toolkit or advanced DIY expertise, anyone can construct a stunning structure that becomes the focal point of their garden. In fact, this project is an excellent opportunity for both seasoned DIY enthusiasts and newcomers alike to flex their creative muscles and produce something truly remarkable.
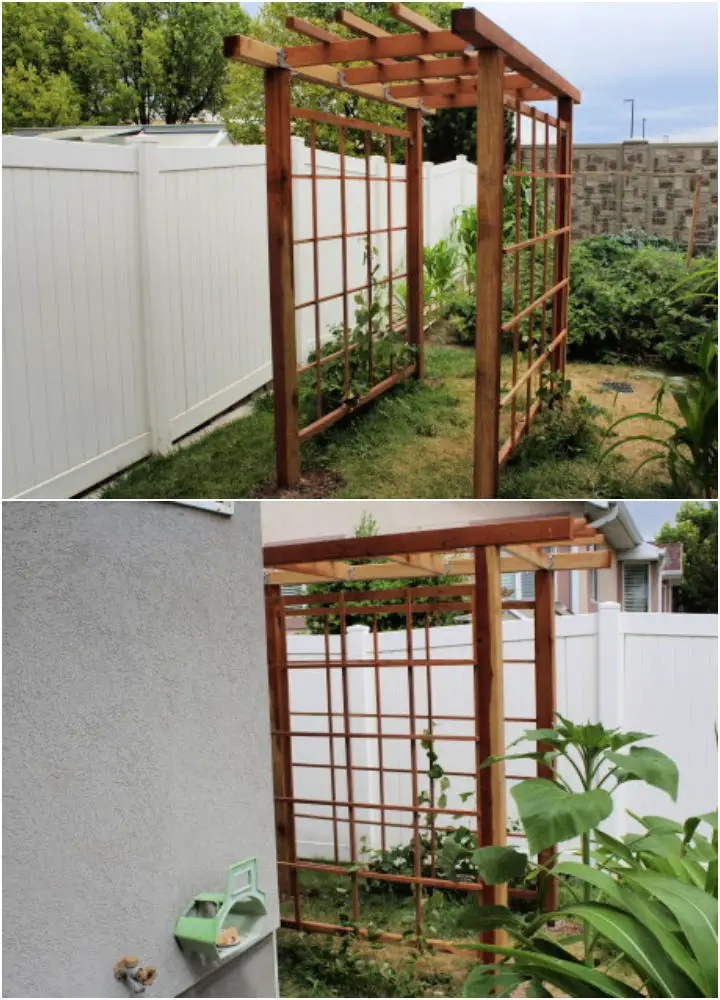
Modern Arbors with Redwood Trellis
Transforming your outdoor space with a DIY modern arbor featuring a stunning redwood trellis is an excellent way to inject personality and flair into your yard. By constructing this unique combination, you’ll unlock previously unused areas, breathing new life into your exterior design. The project’s feasibility lies in the availability of essential tools, a willingness to learn, and the guidance of straightforward DIY blueprints.
The sense of accomplishment that comes with building something from scratch is unparalleled, making it an achievement to be proud of. Moreover, this DIY endeavor will not only enhance your home’s aesthetic appeal but also provide long-term financial benefits by reducing costs compared to pre-fabricated solutions.
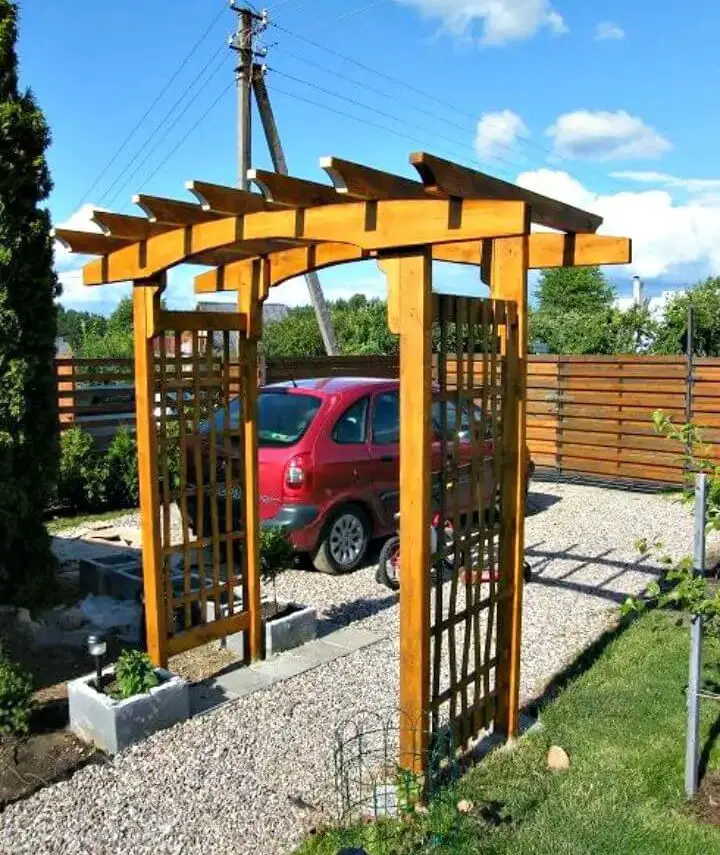
DIY Driveway Arbor
Upgrading your driveway with a DIY arbor can instantly add charm and character to your home’s exterior. The best part? It’s an affordable way to give your outdoor space a makeover. With minimal materials required, installing a DIY arbor is surprisingly straightforward. At its core, the project involves combining various wooden components, including two 6x6x12 posts, two 2x8x12 pieces, one 2x6x12 piece, and four 4×16 pieces. To bring it all together, you’ll need a selection of screws and connectors from trusted brands like Simpson Strong-Tie. These essential tools will ensure your arbor is both sturdy and visually appealing. Once the framework is in place, you can add a touch of whimsy with a grapevine garden arbor or other decorative elements, such as solar-powered candle lanterns or metal hooks. The result is a unique and inviting entrance that reflects your personal style.
Homemade Arbor Trellis
Create a stunning focal point in your garden by building a homemade arbor trellis that exudes elegance and sophistication. With minimal materials, including verandah brackets, framing timber, lattice, and pink primed pine planks, you can craft a breathtaking arbor to frame a picturesque view or adorn a pathway within a day. The key lies in utilizing the right tools – circular saw, drill, planer, drop saw, hammer, and nail gun – to shape the wood to perfection and secure each piece with precision. By carefully following these steps, you can construct an architectural marvel that showcases your unique style and makes your garden truly stand out.
How to Make an Arbor for Fence Gate
Looking to elevate your yard’s ambiance with a straightforward DIY project? Consider constructing a DIY arbor for your fence gate! Not only is it an accessible build requiring minimal materials, but it’ll effortlessly transform your outdoor space into a visually stunning oasis. The beauty of this DIY endeavor lies in its simplicity, allowing you to achieve a show-stopping arbor without investing excessive time or resources. With just the right tools and basic DIY know-how, you can create a striking focal point for your fence gate, taking your yard’s aesthetic appeal to new heights.
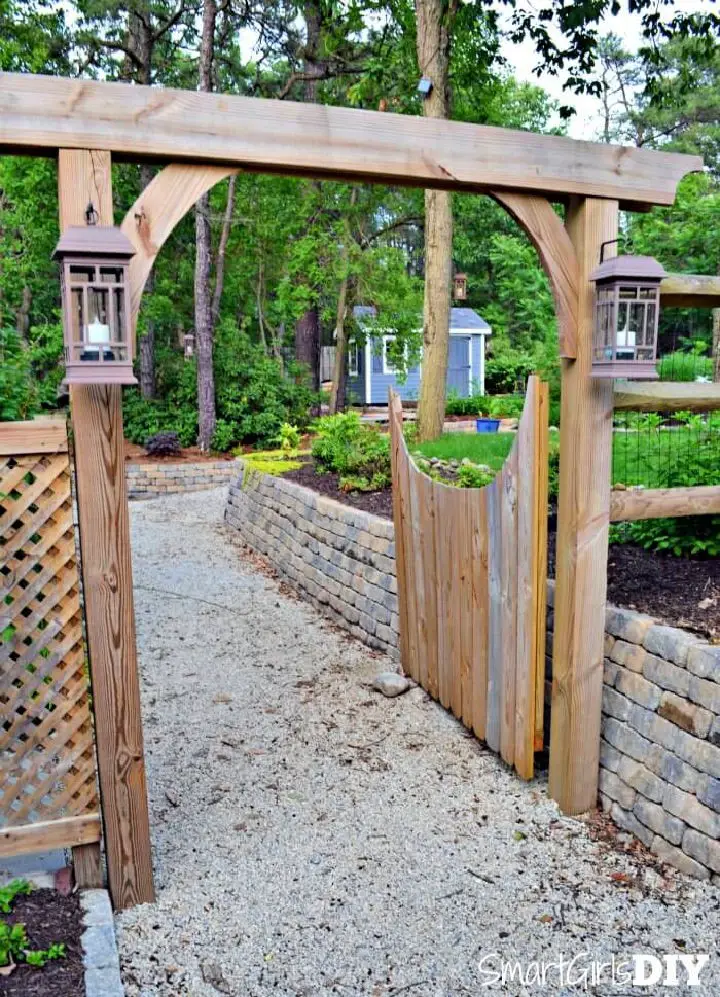
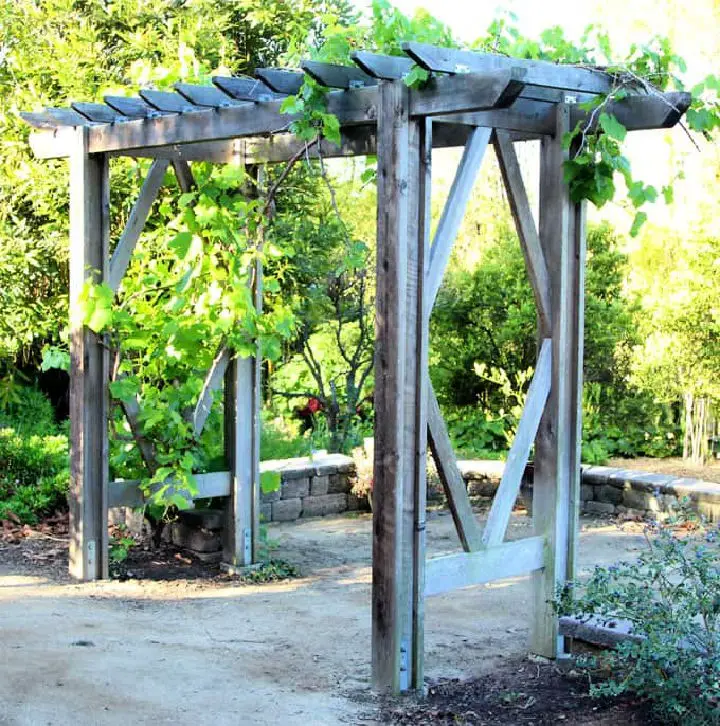
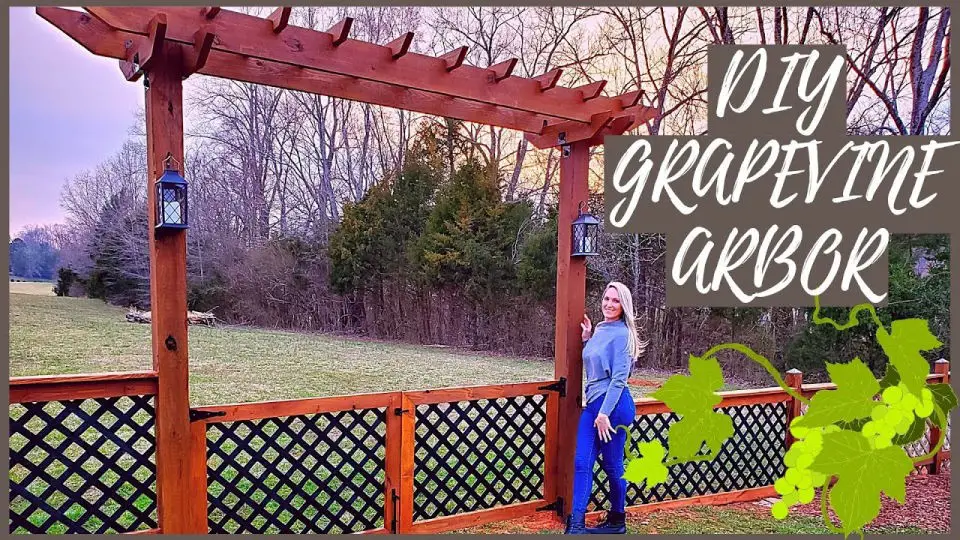
Garden Arbor and Fence for Grapevines
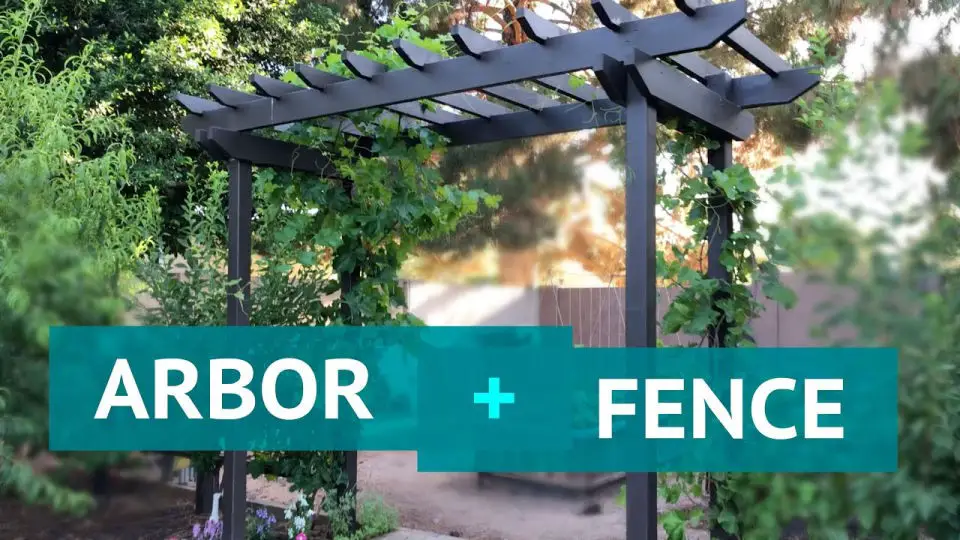
Transforming your garden with a DIY grapevine arbor and fence is an achievable and rewarding weekend project that requires basic woodworking skills and minimal materials. By investing just a day’s work, you can create a stunning focal point for your outdoor space, elevating its aesthetic appeal while adding significant value to your property. With simple supplies like screws and lumber at hand, the process becomes even more accessible.
DIY Cedar Arbor with Bench and Planters
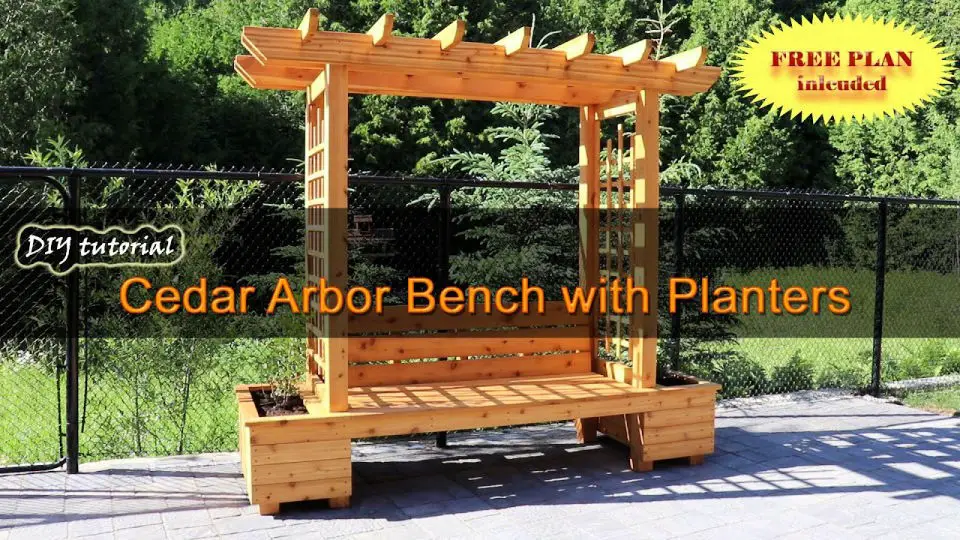
Take your garden or patio to the next level by crafting a stunning DIY cedar arbor with a built-in bench and planters, complete with a complimentary plan and easy-to-follow tutorial. With minimal materials such as cedar boards, eye screws, anchors, L brackets, and wood screws, you can bring this show-stopping structure to life in an afternoon for a fraction of the cost of buying it pre-made.
Whether you’re seeking to infuse charm into your outdoor seating area or provide a picturesque haven for your plants during the sweltering summer months, this DIY arbor is the perfect solution. Impress yourself and others with your DIY prowess and create this masterpiece today!
Conclusion:
Transform your outdoor space without denting your wallet by utilizing these 30 free do-it-yourself arbor plans. From humble, straightforward archways to more intricate structures featuring built-in seating, there’s a perfect design waiting to elevate the aesthetic of your garden or entryway. So gather your tools and embark on a DIY adventure that will yield a stunning arbor at an unbeatable price!
