What you’ll need
Materials
When it comes to selecting the type of wood for your dog house, you have a range of options to consider, including cedar, pine, fir, or even hardwood if you want something that will truly last. For my part, I’d be inclined towards one of these three options.It’s also important to keep in mind that when working with dimensional lumber, the actual measurements can differ from the nominal sizing. To account for this, I’ve added around 10% as wastage to all the measurements below.For the framing lumber, you’ll need:* 2×4 pressure-treated lumber (total: 25 feet 1 inch or 4 pieces at 8 feet long)* 2×2 pressure-treated lumber (total: 59 feet 2 inches or 8 pieces at 8 feet long)Moving on to the plywood sheeting, you’ll need:* ½-inch pressure-treated plywood (total area: 3261 square inches or one piece at 3×3 feet and another at 5×3 feet)* And if you’re planning to insulate your dog house, you’ll also require an additional:* 5/16-inch pressure-treated plywood (total area: 4778 square inches or three pieces at 5×3 feet each)For the cladding and insulation, you’ll need:* 4-inch tongue-and-grove boards (total area: 92 feet 4 inches or 12 pieces at 8 feet long)* And if you’re planning to insulate your dog house, you’ll also require an additional:* 1-inch thick foam insulation board (total area: 4085 square inches or three pieces at 2×8 feet each)Finally, for the fasteners, you’ll need:* A box of 3-inch deck screws* A box of 2-inch deck screws* A box of 1-inch long brads that are compatible with your brad nailerAnd last but not least, for the roofing:* 2640 square inches of felt paper and asphalt shingles
Tools
When it comes to tackling woodworking projects, having the right power tools can make all the difference. Among the most essential ones are saws and drivers that enable you to cut and shape wood with precision and ease. These include the versatile power saws like circular saws, table saws, and miter saws; the handheld jigsaw perfect for curved cuts; drill and drill bits for making precise holes; impact driver and driver bits for heavy-duty driving tasks; brad nailer for joining pieces together; and corner clamps for securing them in place.
Step 1: Making the Base
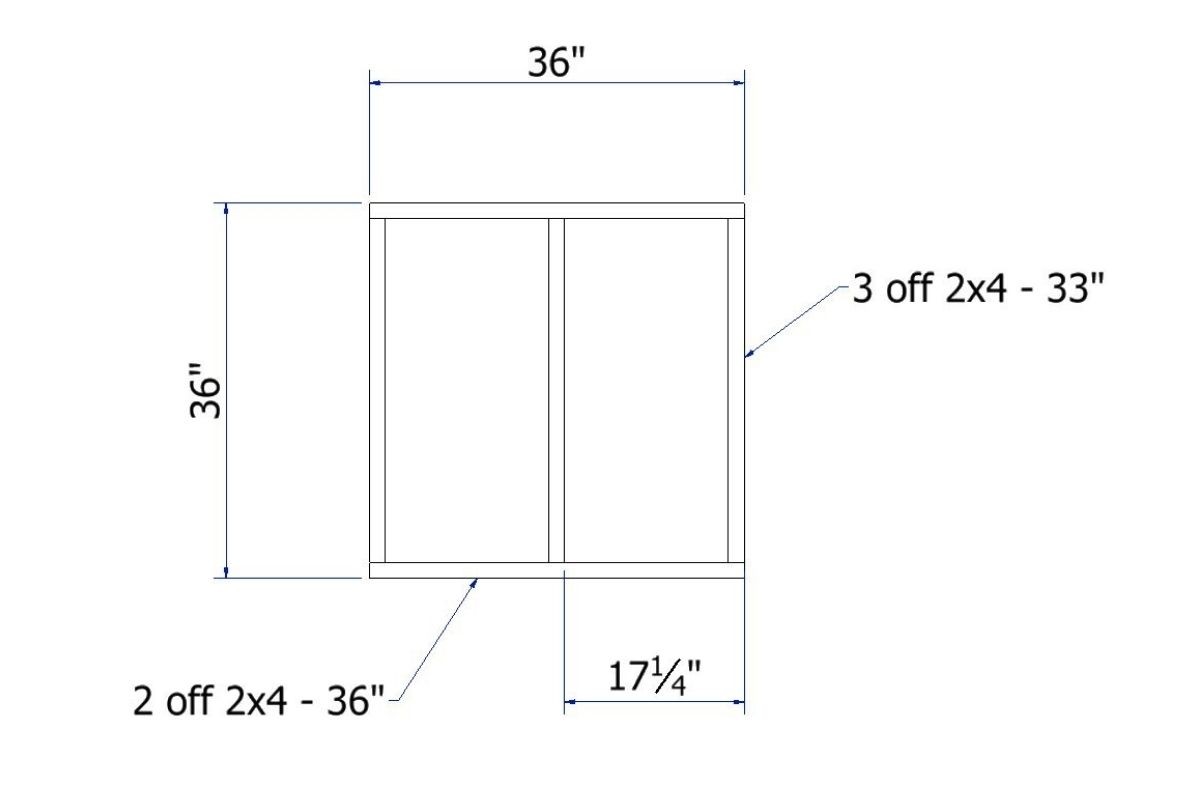
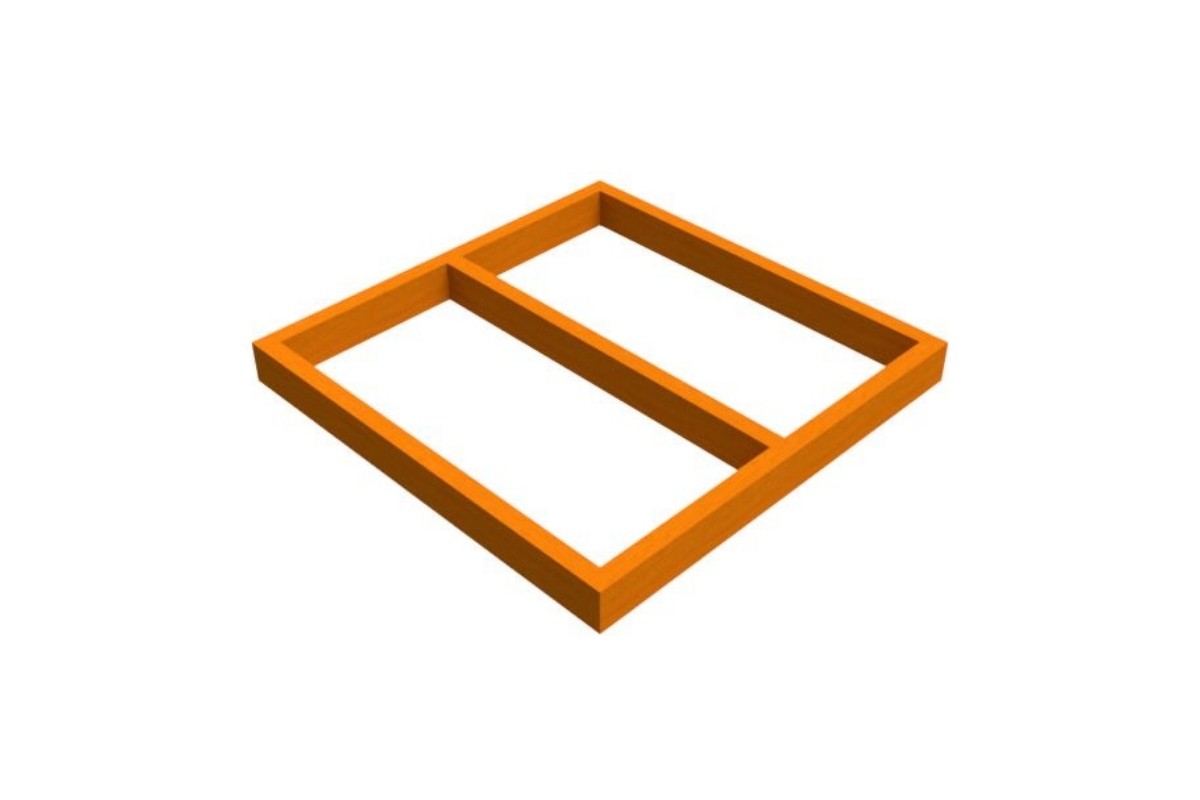
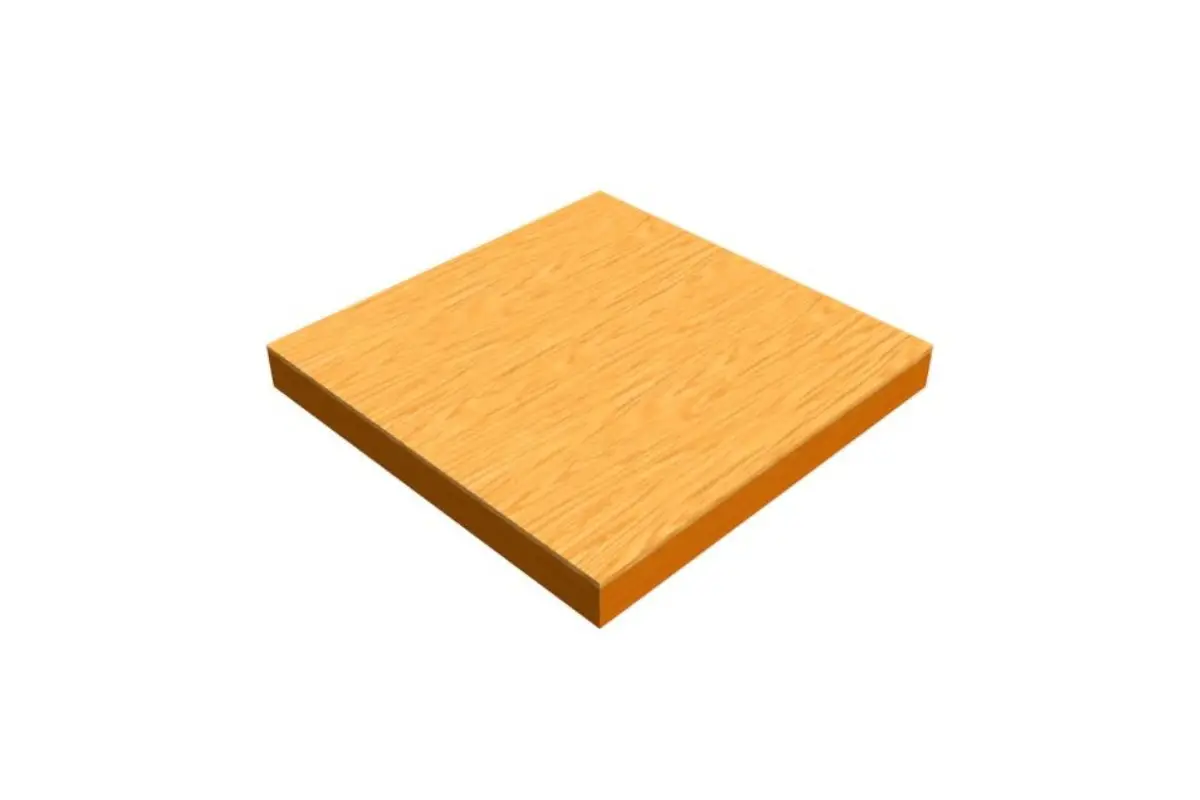
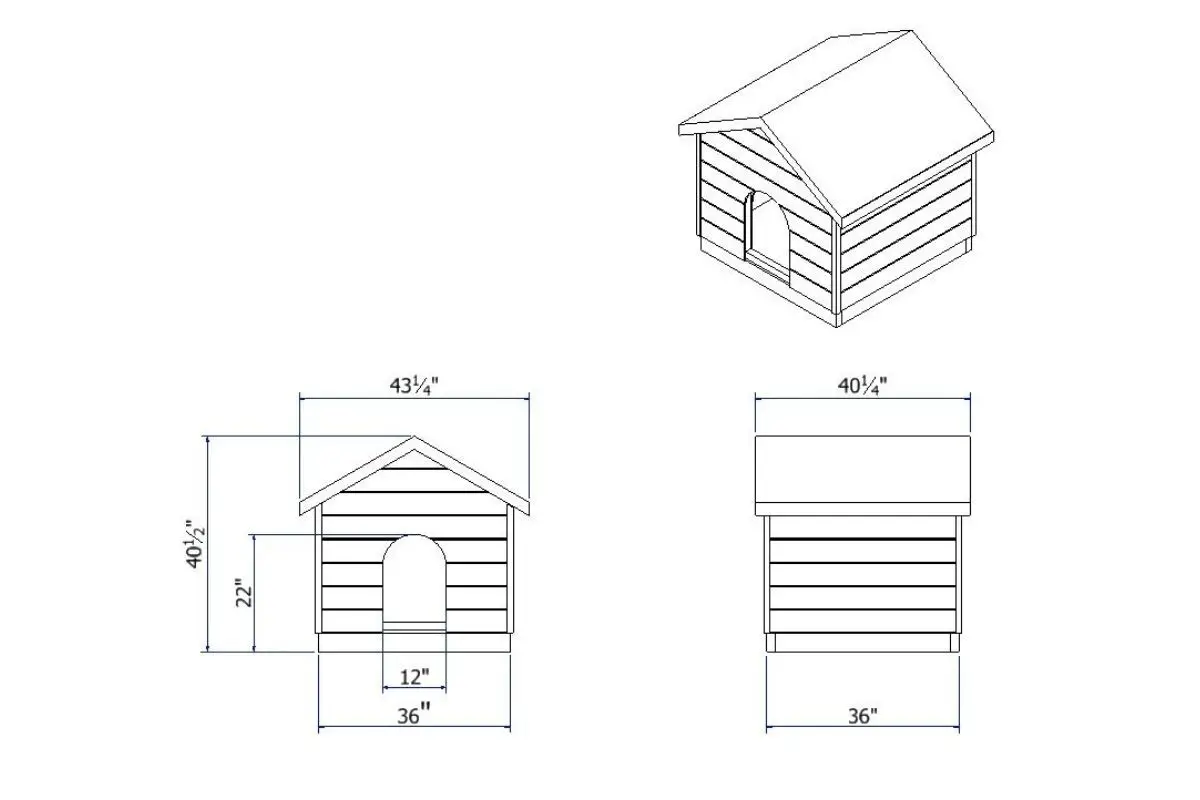
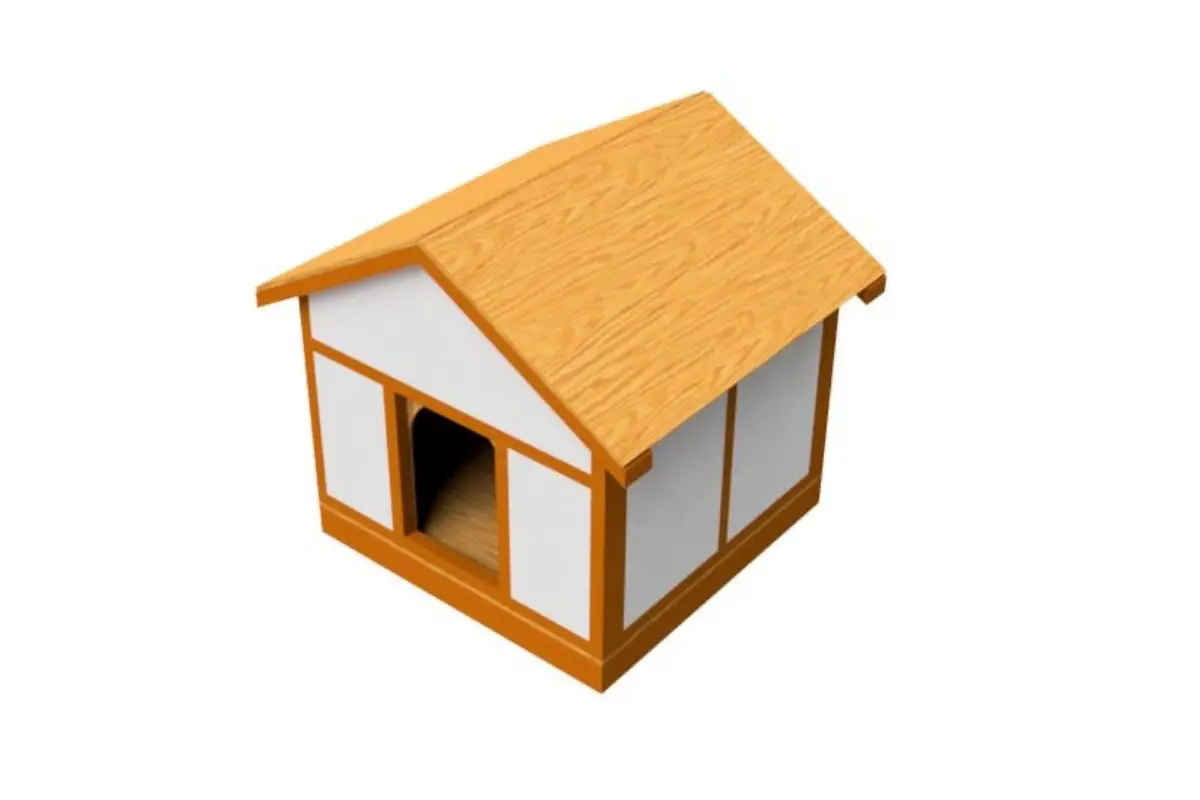
Start by constructing the foundation of your doghouse project by building its base. To do this, cut five pieces of timber – two at 36 inches and three at 33 inches – from your 2×4 stock. This will form the frame of the base, which is crucial for ensuring the rest of the structure remains square. You can use three-inch screws to secure these lengths together, taking care to pre-drill pilot holes with a diameter of 1/8 inch to prevent splitting. If you’re concerned about achieving perfect squareness, consider utilizing corner clamps. Once your base is stable and square, you can move on to installing the 36 inches by 36 inches plywood sheet that will serve as the base of the doghouse. A brad nailer will prove an efficient tool for this task, should you have one at your disposal. When selecting your plywood, opt for pressure-treated sheets, which offer greater durability and resistance to rot, dampness, and warping.
Step 2: Constructing the Side Frames
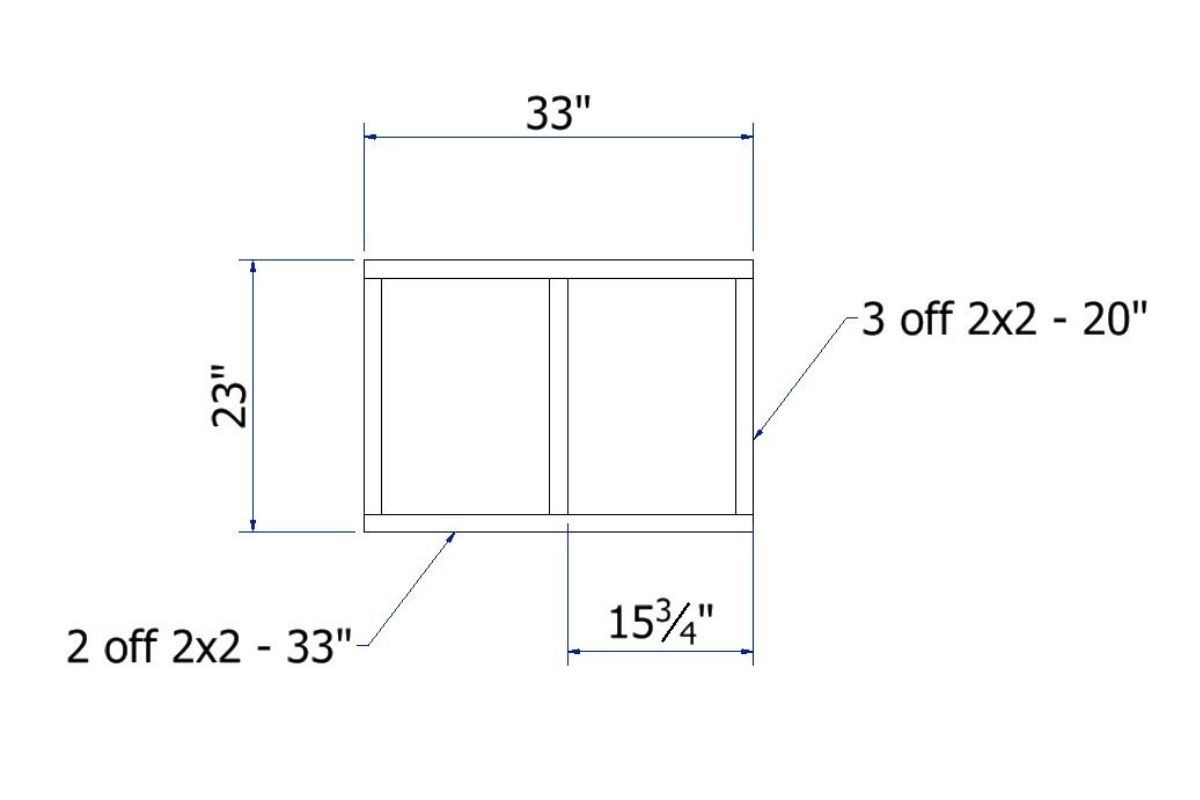
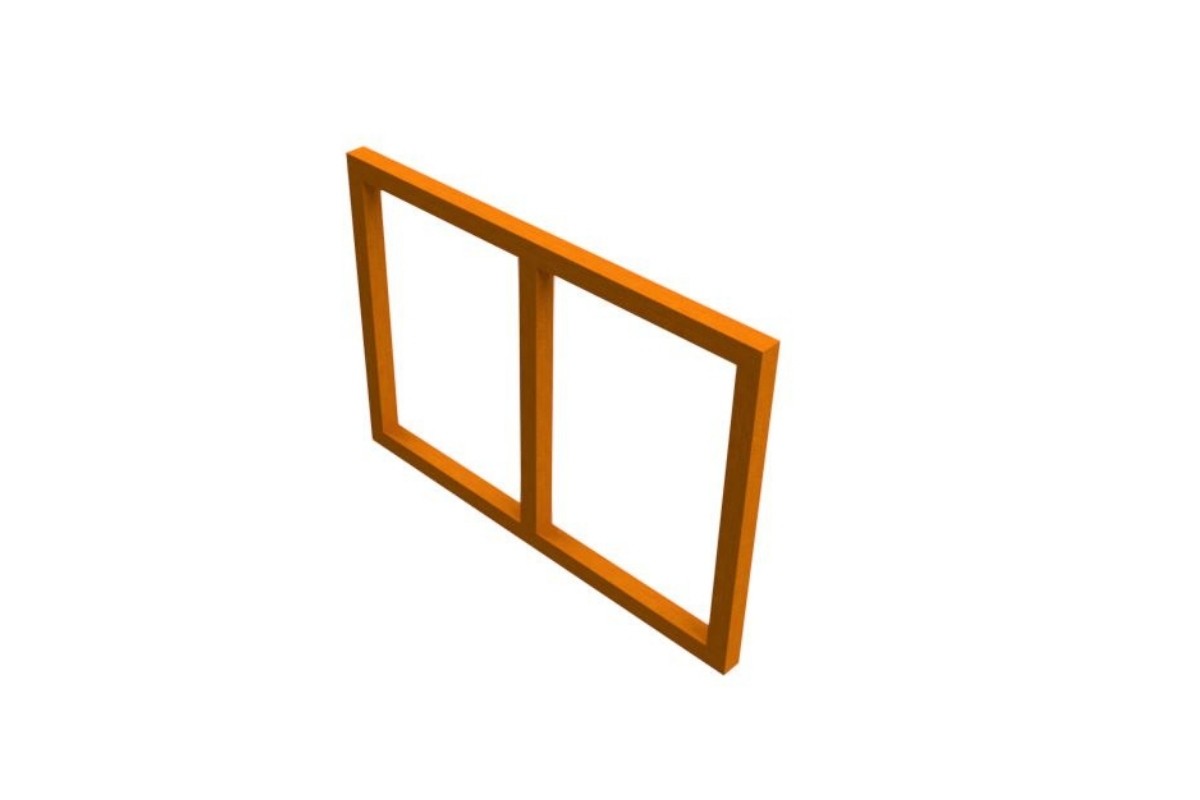

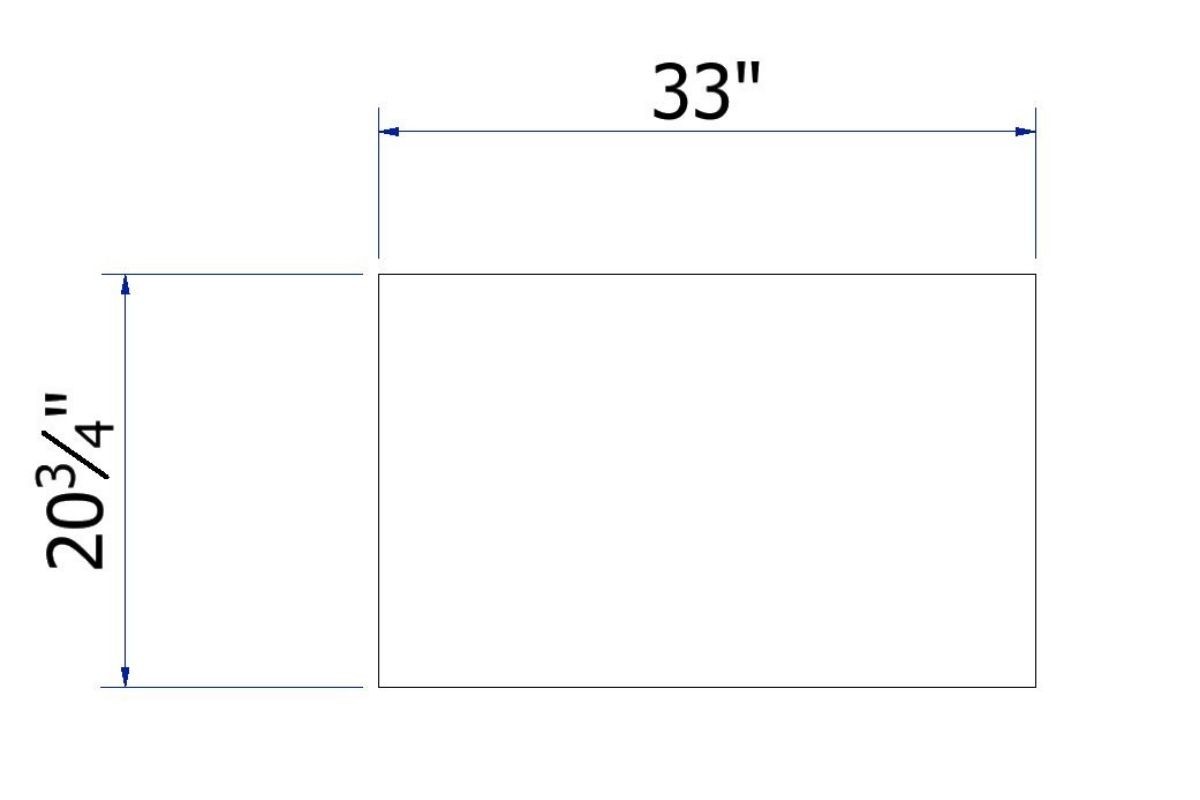
The side frames are a crucial stage in the construction process. To create them, you’ll need to cut six pieces of timber that measure 20 inches long and 2 inches wide. Additionally, you’ll require four more pieces with the same dimensions but measuring 33 inches long.
To assemble the frame, screw the individual lengths together using 2-inch deck screws. To ensure the frame is square, corner clamps will come in handy.
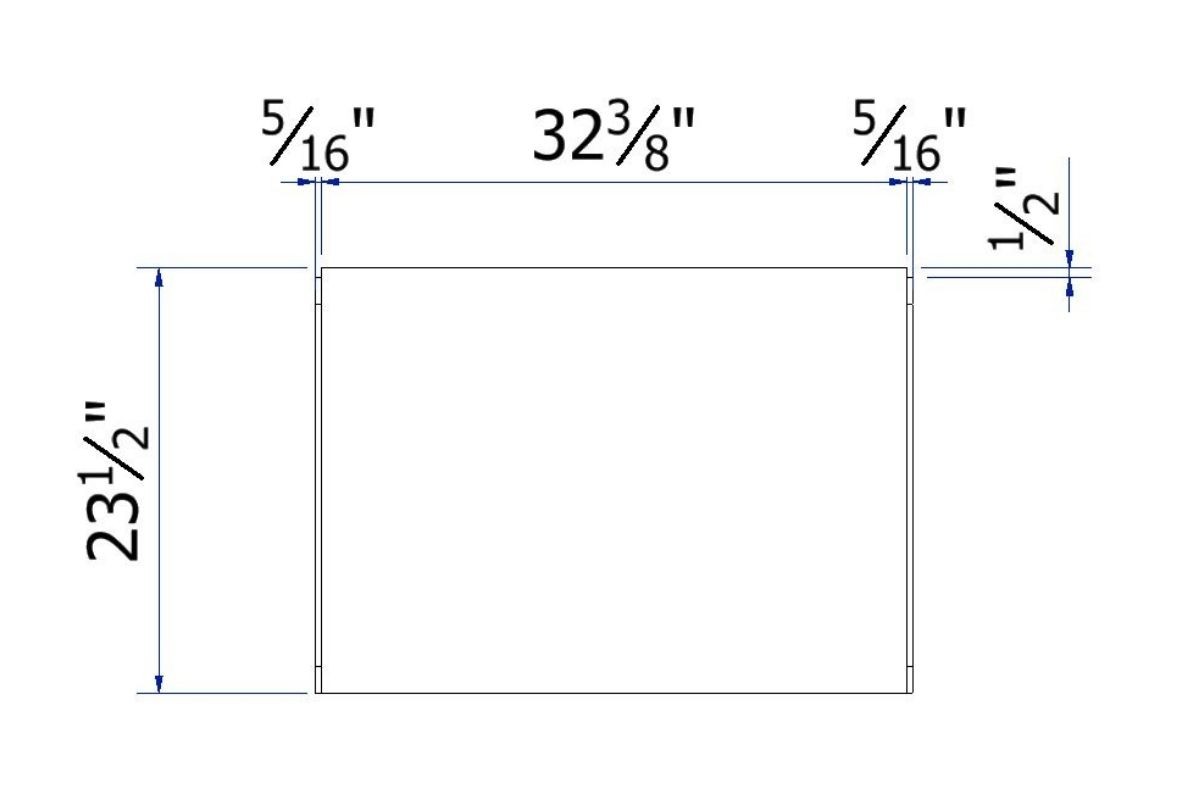
If you’re building in a chilly climate, now’s the time to add insulation. This can be achieved by cladding the frames on the inside with plywood that’s 5/16 inches thick.
You’ll need two pieces of plywood measuring 23½ inches by 32 3/8 inches each. Attach these to the side frames on both sides, ensuring the plywood is sub- flush by 5/16 inches on both sides and flush on the bottom. The top edge should be 1/2 inch proud.
Secure the plywood to the frame using 3/4-inch deck screws.
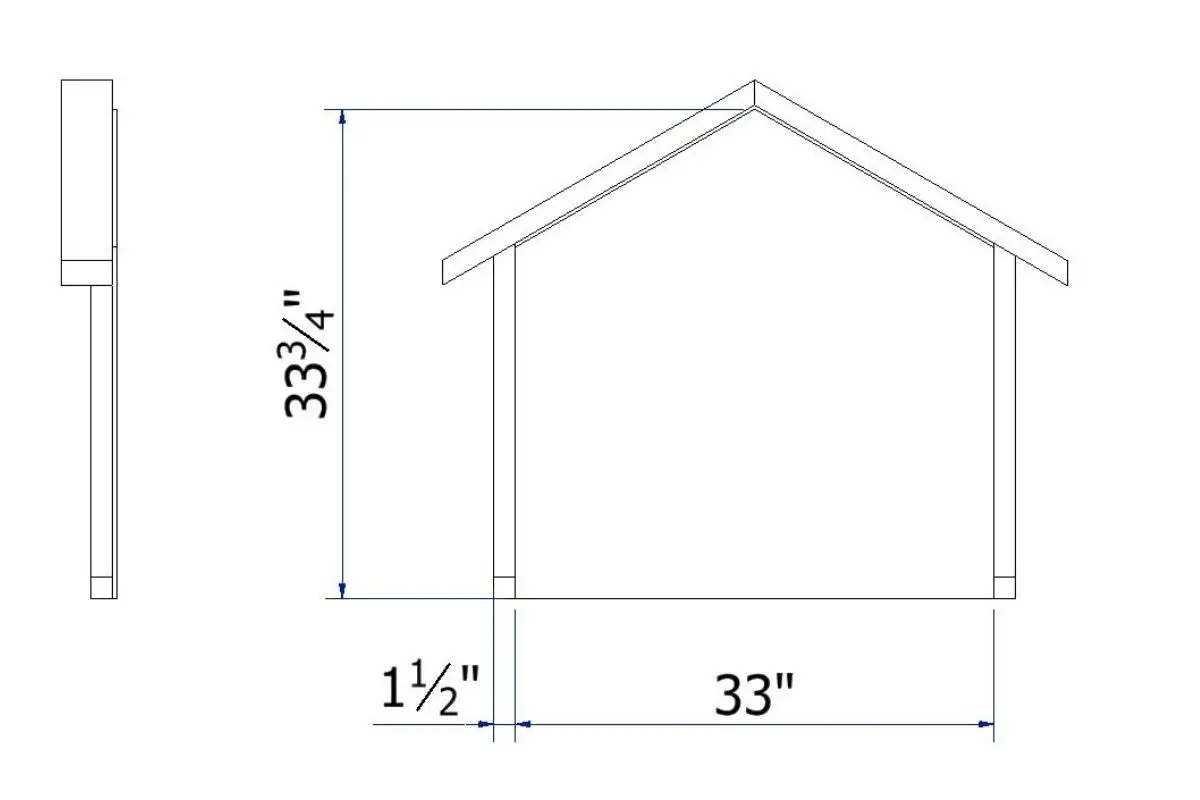
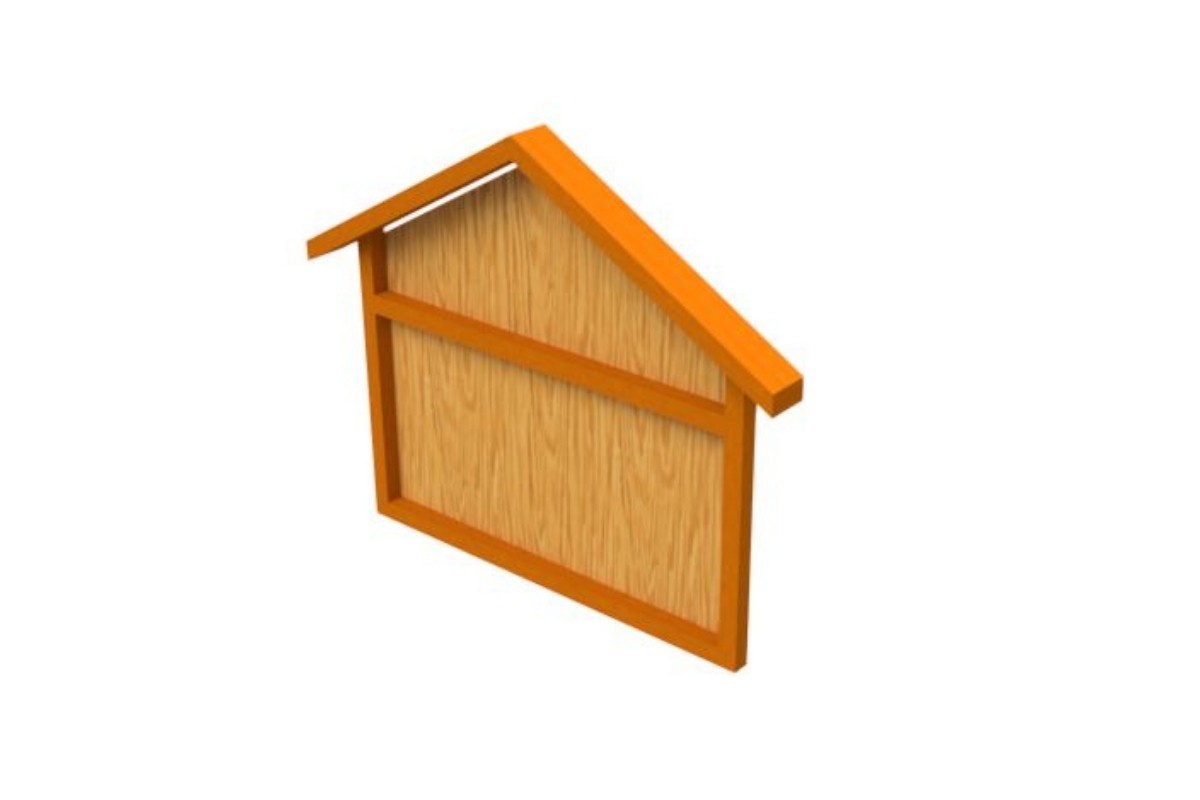
Step 3: Building the Front Frame
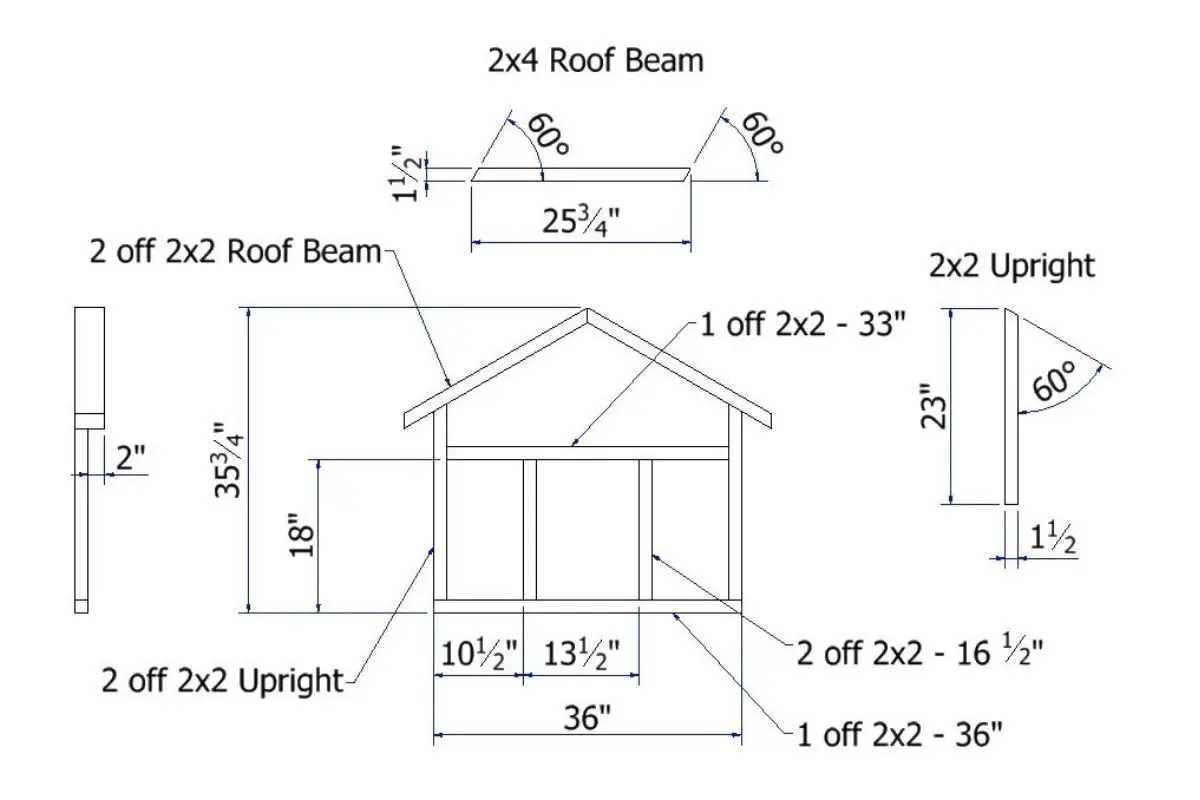
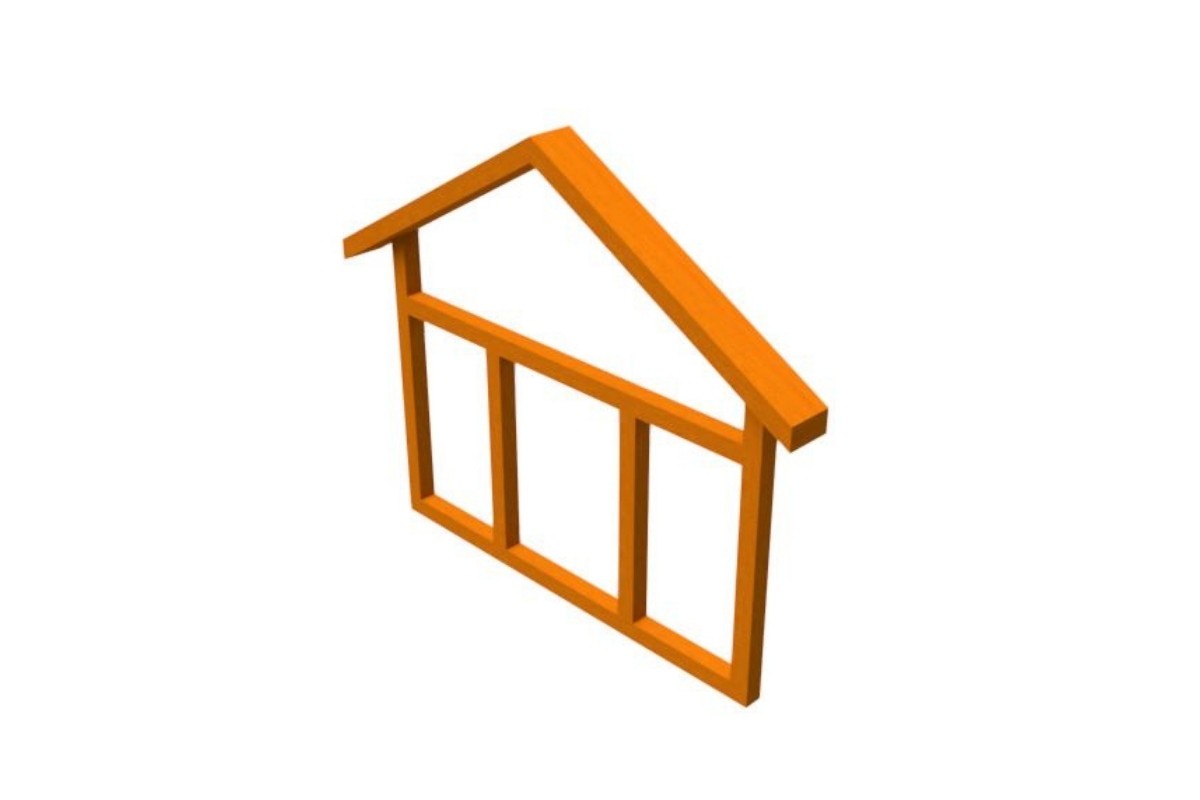

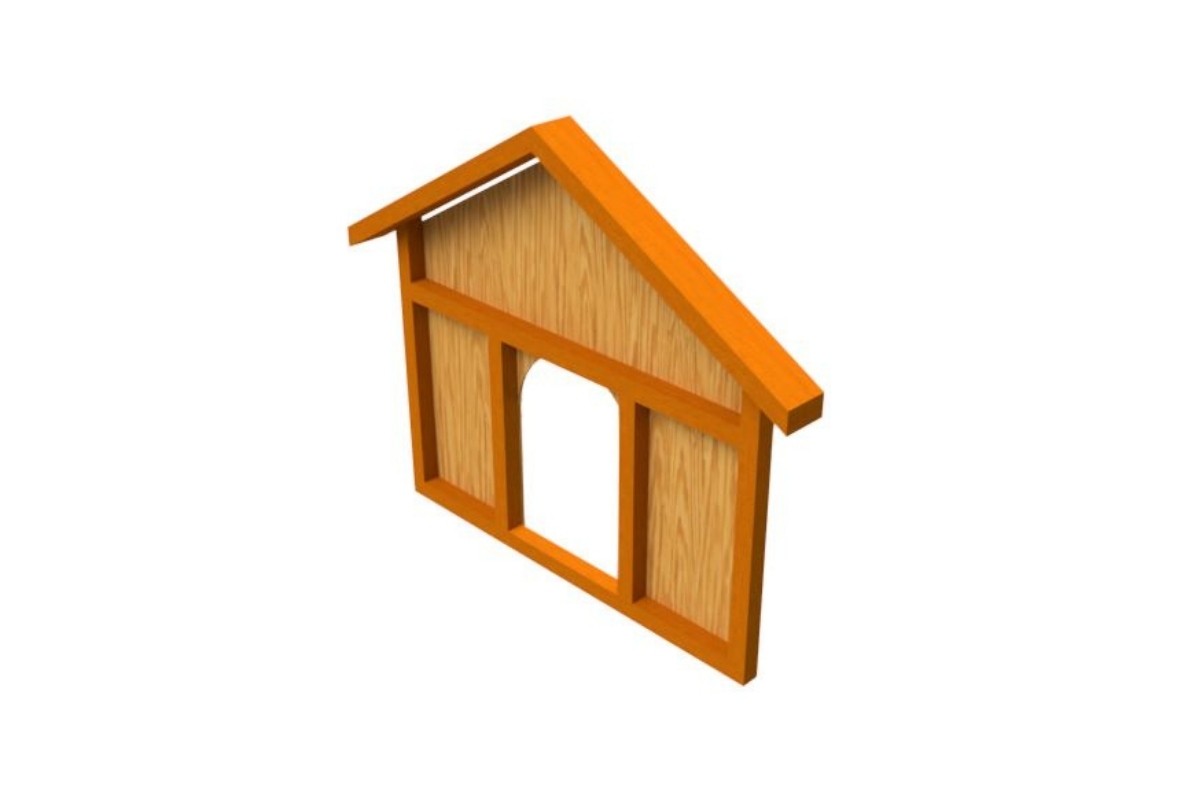
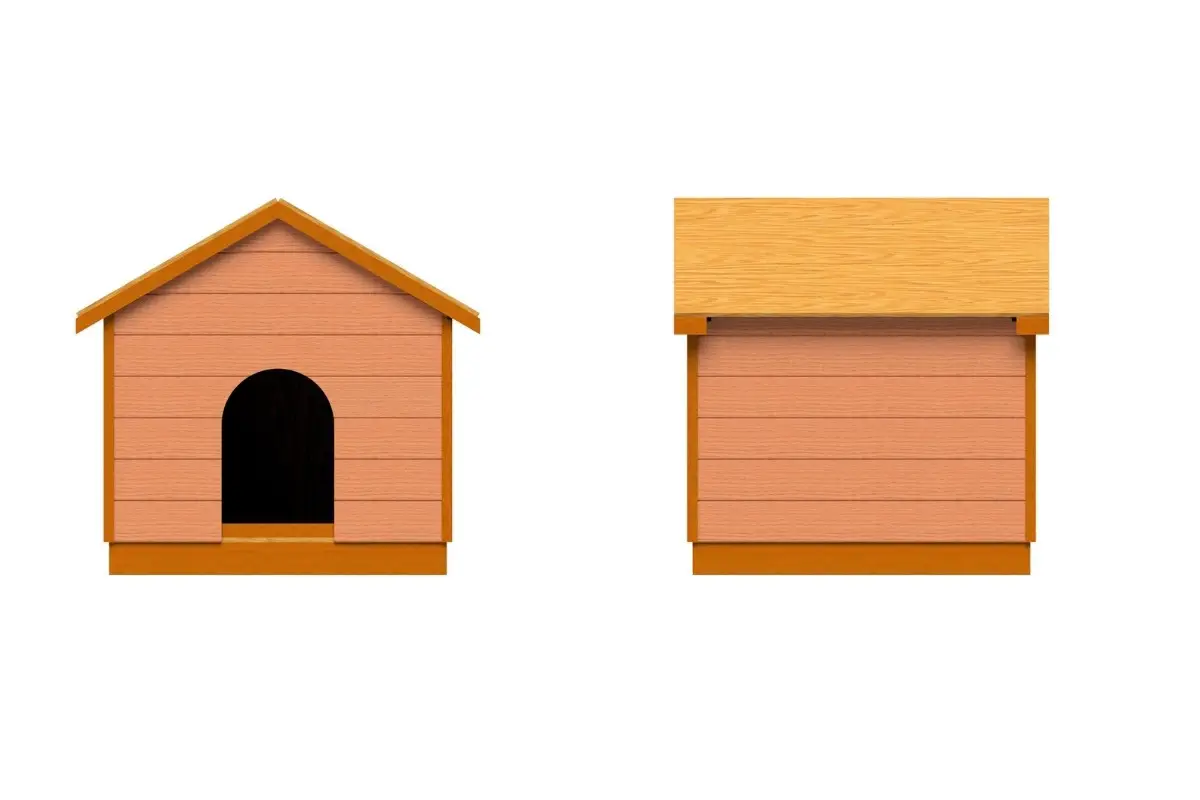
When building the frame, attention must be given to the door opening, making the construction process slightly more intricate. To create the front frame, you’ll need to cut specific lengths of lumber. This includes two pieces of 2×2 measuring 16 1/2 inches long, one piece of 2×2 at 33 inches, and another at 36 inches. For the uprights and roof beams, you’ll require two lengths of 2×4 each. The roof beams need to be trimmed to 25 3/4 inches in length and feature a 60-degree angle cut on both ends, with the angles facing in the same direction. Similarly, the uprights will necessitate two pieces of 2×4, 23 inches long, with a 60-degree angle cut on one end only, ensuring matching directions.Once all the frame members are accurately cut, you can proceed to assembling them using 2-inch deck screws. If you plan to insulate your dog’s accommodation, a key component will be a piece of plywood measuring 5/16” thick, which is detailed in the accompanying drawing.When attaching the plywood inside the front frame, focus on the side opposite the overhang created by the roof beams made from 2×4. Ensure the plywood is flush with the frame’s bottom and inside the uprights before securing everything in place using 3/4 inch deck screws.
Step 4: Assembling the Rear Frame

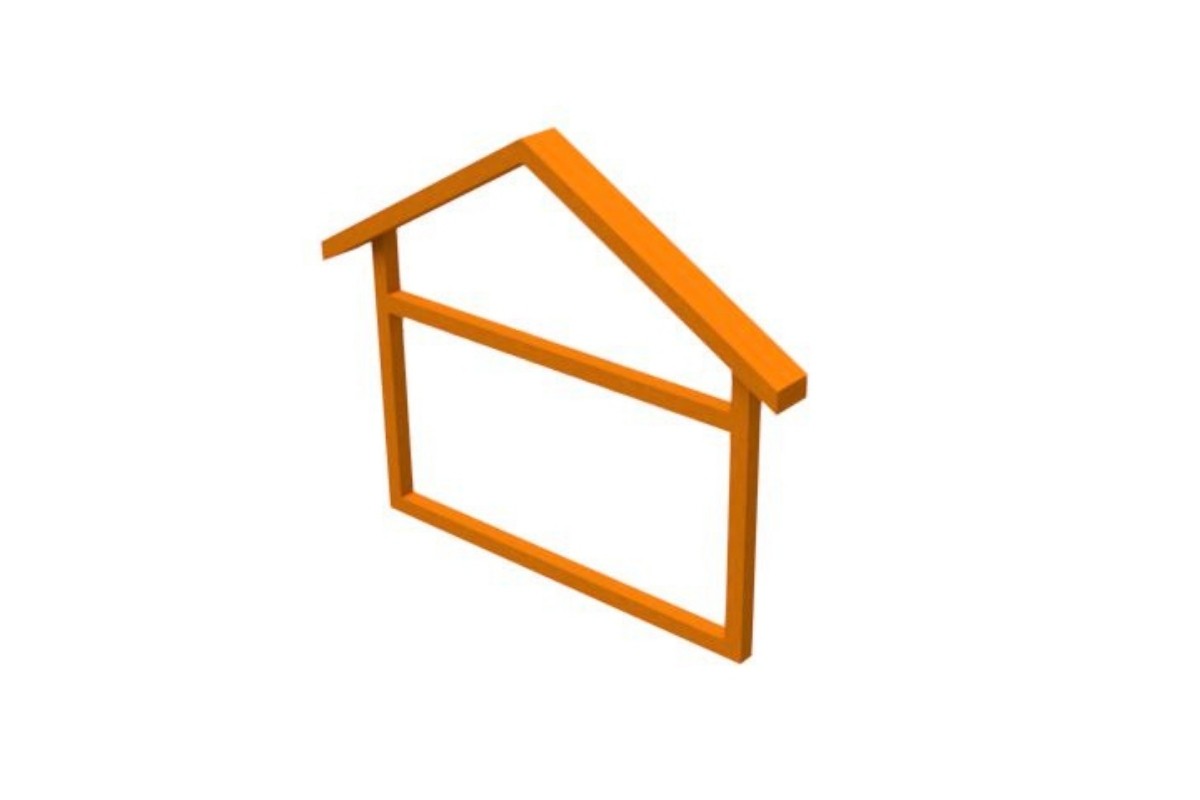
Constructing the rear frame is a relatively straightforward process, as you won’t have to contend with vertical members surrounding the front door. To complete this stage, use 2-inch deck screws to secure all components in place. You’ll also need a 5/16” section of plywood, which should be attached to the inside surface of the rear frame’s opposite end, ensuring a seamless fit.
Step 5: Bring the Frame Pieces Together
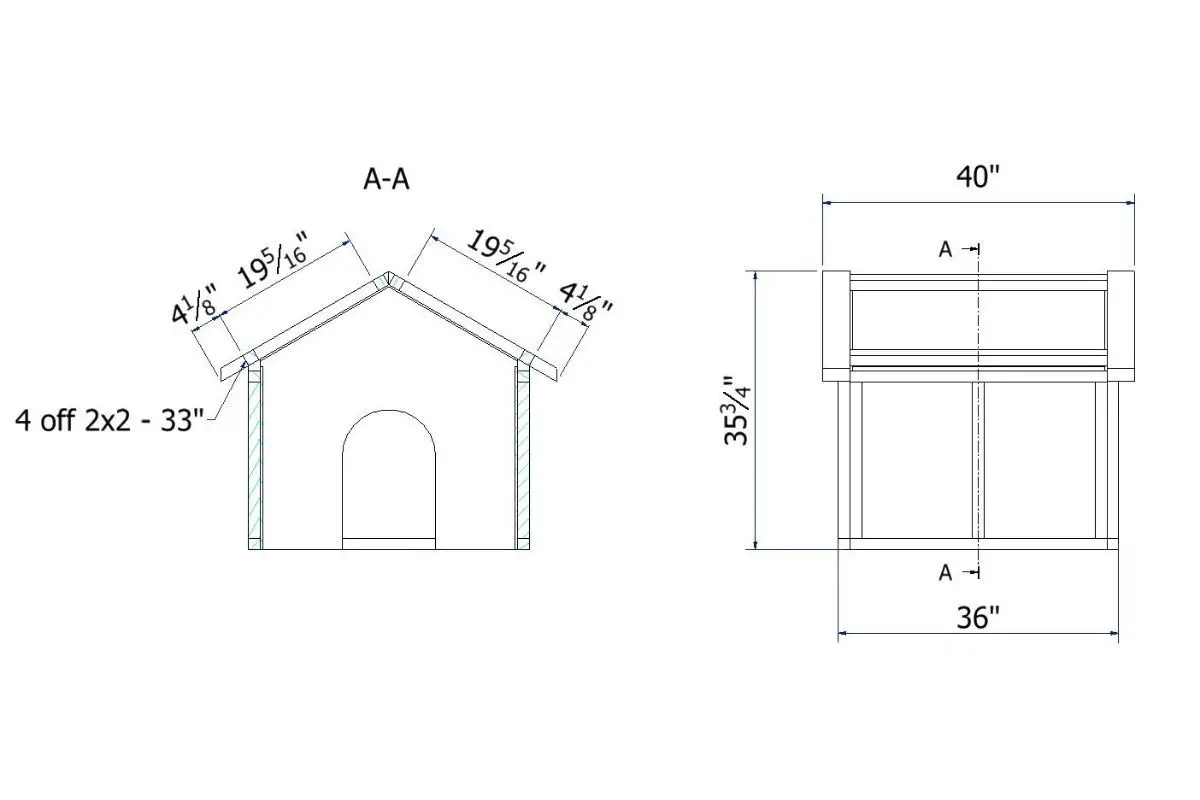

As you’ve prepared all the component parts of your dog house, it’s now time to bring everything together to form a sturdy structure. The first step in this process is to attach the framework sides to each other, creating the outer walls of the dog house. This step is crucial if you want to insulate the house, as it allows you to access the interior and attach the plywood roof. To begin, assemble the side, rear, and front frames by securing them with 2-inch deck screws. Next, cut four pieces of 2×2 lumber that are 33 inches long, which will serve as cross members for the roof. Use the provided drawing to determine how these pieces should be fitted together and secure them using 2-inch deck screws. For insulation purposes, you’ll need two pieces of 5/16 inch plywood, measuring 33 inches by 20 3/4 inches. Attach these boards to the inside of the cross members, ensuring they meet at the roof’s peak. Secure everything in place using 3/4 inch deck screws. Once the roof structure and walls are assembled, it’s time to attach them to the base. Double-check that everything is properly aligned before fastening it all together using 3-inch deck screws.
Step 6: Fit the Roof Boards and Insulation

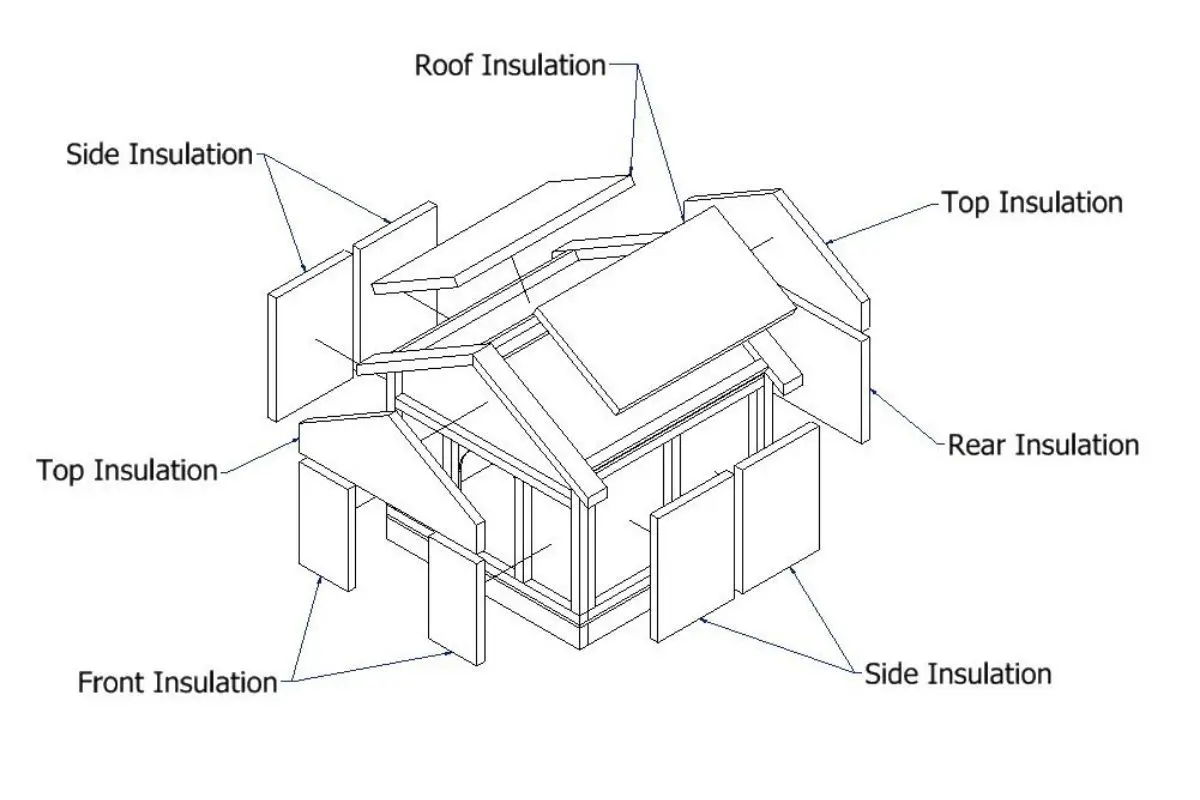
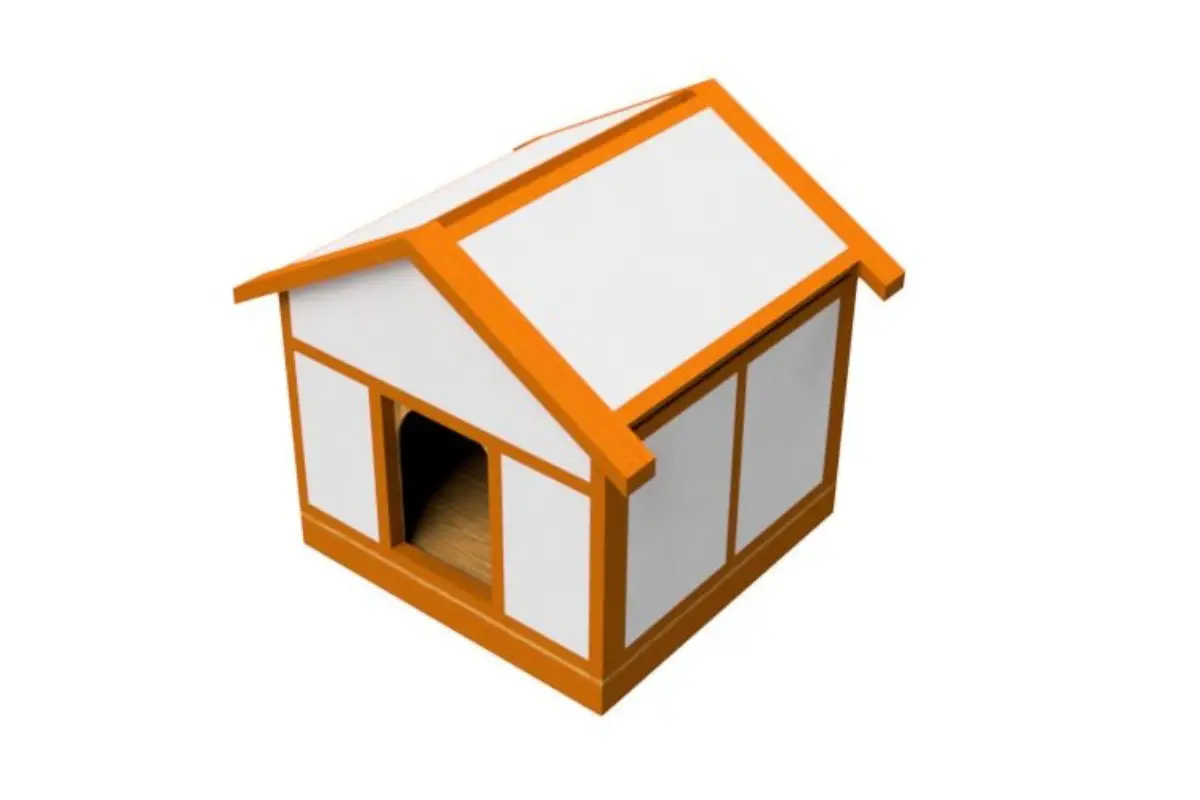
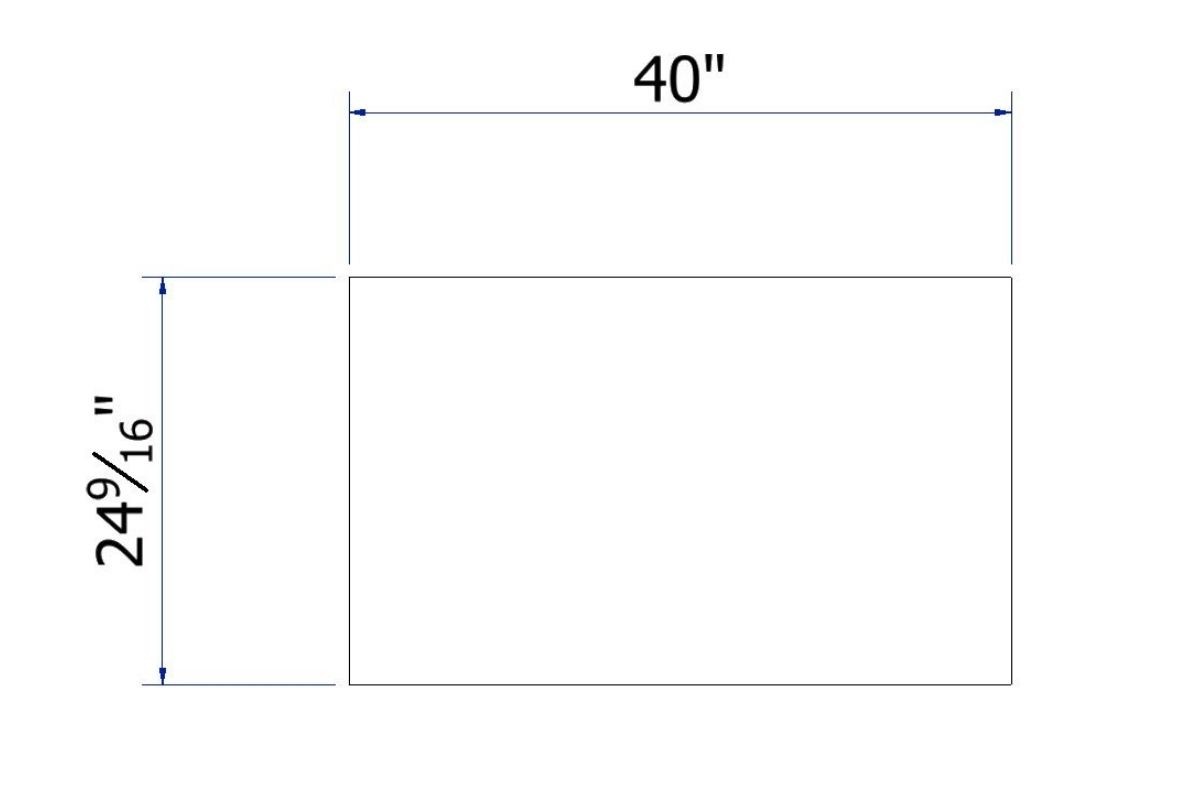
When it comes to insulating your project, you have a range of materials to choose from. The key is to select the right one for your needs and budget. Instead of opting for an insulation board, you could consider softer options like wool or fiberglass. However, if speed and ease are priorities, then an insulation board might be the way to go. In terms of cladding, the insulation board will simplify the process.To use insulation boards effectively, you’ll need to plan your material requirements accordingly. For a typical setup, you’ll need:* Four pieces for the sides* Two pieces for the front, roof, and top* One piece for the rearUse the diagram provided as a reference guide to ensure each section fits well and stays in place. If any of the boards feel loose, double-sided sticky tape can provide additional support.The final step is to prepare the roof’s ridge by cutting two pieces of 1/2 inch thick plywood. These should measure 24 9/16 inches x 40 inches. Secure them using 3/4 inch deck screws.
Step 7: The Finishing Touches – Roofing, Trim, and Cladding

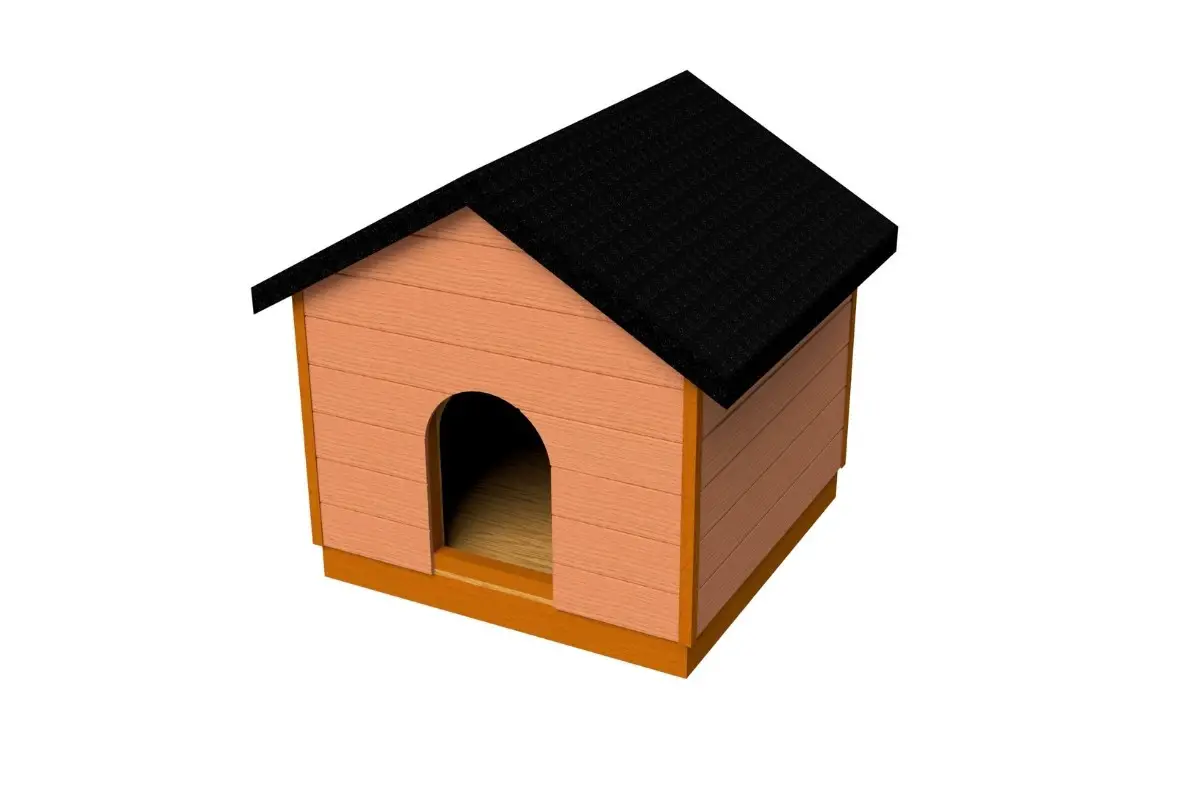
The final stages of building a dog house involve applying the cladding, trimming, and completing the roofing. The tongue and groove system is effective for cladding, although any size or siding board can also work well. For a comprehensive guide on trimming and cladding a shed – which shares similar principles with dog houses – search online. You’ll find reliable resources to help you through this process.Once the trim and cladding are complete, turn your attention to the roof. Ensure it’s waterproof by opting for asphalt shingles or roofing felt, depending on your personal preference.
Final Thoughts
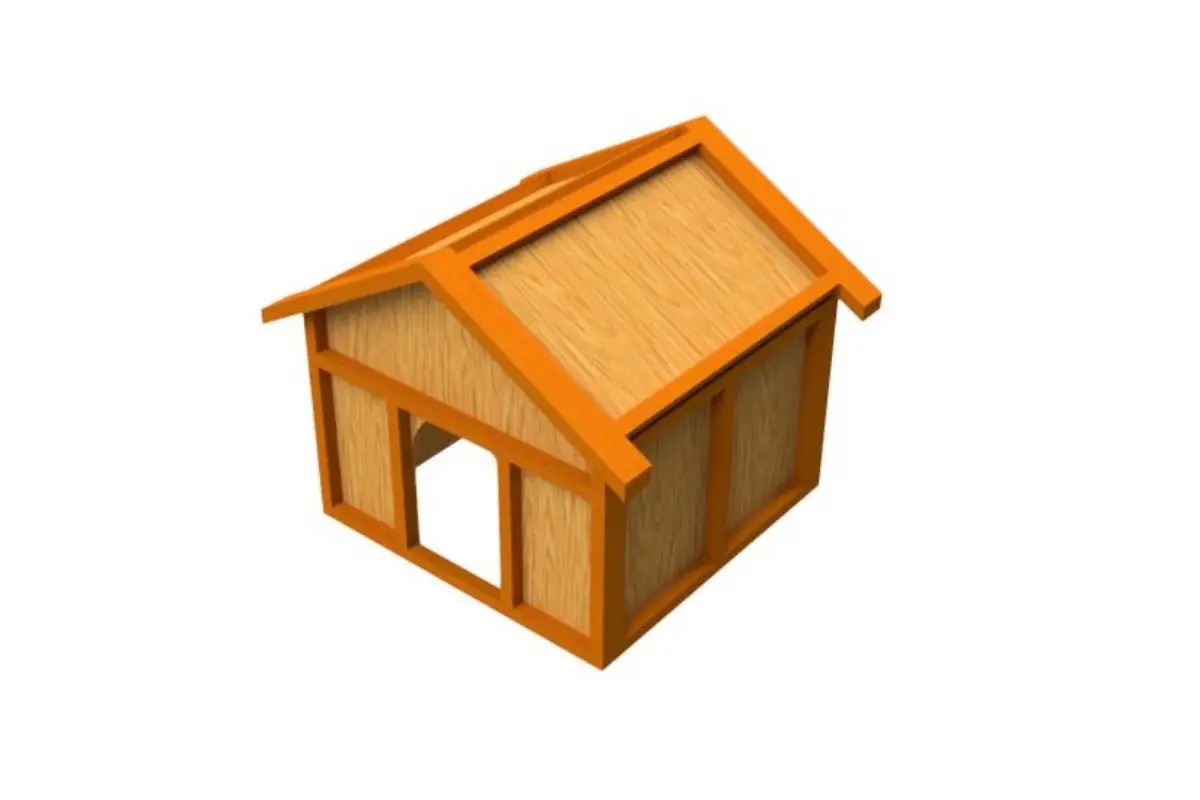
As you’ve completed this guide and developed a solid plan, it’s time to bring your dog house-building vision to life. I’m excited to hear about the progress you’re making and how your furry friend is thriving in its new surroundings. If you’d like to share any updates, photos, or stories, feel free to leave a comment below or reach out to me directly.
