While crafting a DIY stencil at home may seem intimidating, it’s actually a fun and rewarding project that allows for endless creativity. This guide will take you through the process step-by-step, covering everything from preparing your design to applying the final touches. With these instructions, you’ll be able to create unique art pieces or add a personal touch to your home decor with ease. We’ll dive into the world of stencil making, exploring materials needed, tracing and cutting techniques, design tips for effectiveness, and advanced methods for more ambitious projects.
How to Make a Stencil – Step by Step Guide
Transforming your creative vision into a tangible reality, crafting your own stencil offers an unparalleled sense of accomplishment. By mastering the art of stencil creation, you can infuse your projects with a unique personal touch, elevating the aesthetic appeal of crafts, home décor, and other endeavors. Without relying on expensive machinery, you can create custom stencils for walls, tiles, or signs that cater to your individual needs, making it an ideal pursuit for both solo and multi-project endeavors.
What You’ll Need:
To begin with, prepare these fundamental materials:
* Design: Select a design that resonates with you, whether it’s printed from your computer, hand-drawn, or repurposed from a magazine. The freedom to choose allows you to express yourself creatively.
* Stencil Material: A clear plastic sheet, preferably Mylar, is the preferred choice for its durability and versatility. This material comes in various thicknesses and sizes, including the popular 12×12 inches option that works well for reusable stencils.
* Cutting Tool: A craft knife or X-Acto Knife is essential for accurately cutting out your design. Its precision ensures a clean cut, saving you time and frustration.
* Work Surface Protection: A cutting mat provides a safe and stable surface for working on your project, preventing damage to your work area and ensuring smooth cuts.
* Adhesive: Painter’s tape helps keep your design in place while you work, giving you the confidence to focus on the task at hand. While not essential, an optional marker can be used to trace your design onto the plastic before cutting, ideal for intricate designs that require extra care.
Step-by-Step Guide:
Discover the art of crafting stencils with this straightforward, step-by-step process. By following these simple instructions, you’ll be able to create custom designs and add a personal touch to your projects.
Preparing Your Design
To safeguard your design, carefully position it on the underside of the stencil material. Utilize painters tape to firmly attach the design to the rear of the plastic, thereby preventing any movement or shifting during the cutting process.
Tracing and Cutting Your Stencil
Before diving into the cutting process, take a moment to double-check your design’s intricacies by tracing it onto the plastic with a marker. This step serves as a safeguard against errors and allows you to refine your approach before beginning to cut. For more complex designs, this step becomes especially crucial, as it enables you to identify any potential issues or areas requiring additional attention.
Once you’re satisfied with your traced design, proceed to carefully use your craft knife to cut along the marked lines. If your design is relatively straightforward, you might choose to forgo tracing altogether and instead rely on your cutting skills. Regardless of which approach you take, ensure that your blade is sharp to achieve clean cuts, and avoid rushing the process to maintain accuracy and control.
Finishing Touches
Carefully lift the stencil from the tape once it’s been cut away from the plastic sheet. Inspect the edges and corners for any rough spots or areas that require a bit more trimming to achieve a smooth finish. If needed, revisit the design with your craft knife to refine any imperfections.
Tips for a Perfect DIY Stencil
When selecting the ideal material for your project, consider alternatives to traditional cardstock or cardboard. Mylar, in particular, provides clean, precise lines while offering the added benefit of being reusable. To ensure the best possible outcome, it’s crucial to stay patient and take your time when cutting intricate designs. Additionally, maintaining a sharp craft knife is essential for producing smooth cuts and achieving optimal results.
Using Your Stencil
With your stencil at the ready, it’s time to embark on your DIY adventure. The key to a successful project lies in mastering the technique – from securing a strong bond between the stencil and surface to judiciously applying the perfect amount of paint. As you begin, keep in mind that refining your skills is an ongoing process. To take your stenciling game to the next level, consider delving into additional resources or tutorials for expert insights and guidance.
Video Tutorial
To dive deeper into the world of DIY stencils, I recommend checking out our in-depth video tutorial on YouTube, which takes you through every step of creating your own custom stencil from scratch.
Design Tips for Making Effective Stencils
When crafting a stencil, it’s not just about selecting an image – it’s about creating a harmonious balance between shapes and negative space to produce a visually striking and effective design. To achieve this, consider the following key principles: ensuring clear lines of sight, utilizing positive and negative space effectively, and deliberately positioning elements to create visual interest.
Understanding Negative Space
When discussing visual composition in stencil design, two essential elements come into play: Negative Space and Balance. The former refers to the area surrounding and between the subject of an image, which becomes crucial once paint is applied. It’s this negative space that helps define the overall image. To achieve a harmonious stencil design, it’s vital to strike a balance between the negative space and the positive image – meaning the actual subject being stenciled. If there’s too much detail, the stencil can become fragile and challenging to use.
Incorporating Text and Images
When it comes to stenciling text or images, there are a few key considerations to keep in mind. For text-based stencils, bold and simple fonts are usually the best choice. Thin or script fonts can be challenging to cut and may not be as legible once applied. On the other hand, if you’re working with images, it’s often helpful to simplify them down to their most basic forms. Complex images can be broken down into simpler shapes that are easier to stencil and still effectively convey the intended design or message.
Making Symmetry and Patterns
When it comes to stencil design, achieving visual harmony is crucial. One effective way to do this is by incorporating symmetry into your design. Symmetrical patterns are not only aesthetically pleasing but also simplify the alignment process during stenciling. Additionally, repeating patterns can add a sense of texture and depth to your overall design. As you create your pattern, consider how it will look when repeated across a larger area, taking care to balance visual elements and maintain a cohesive visual language.
Tips for a Successful Design
When creating a stencil, start by keeping things simple. Begin with basic shapes and designs, gradually building complexity as you gain confidence. Before applying your design to the painted surface, test it out on a small scale first. Cut a miniature stencil and apply it to ensure the translation from paper to surface is seamless. Additionally, make sure all parts of the stencil are securely connected and supported, preventing any potential breakage.
Advanced Stencil Techniques and Applications
Mastering the fundamentals of stenciling can be a gateway to unlocking more sophisticated techniques that enable you to create intricate, multi-dimensional designs. By building upon these core principles, artists can push the boundaries of their craft and produce unique pieces that showcase their creativity and skill.
Multi-Layered Stencils
To take your design to new depths, use a variety of stencils to build layers of color and detail. Begin by establishing the foundation with background elements and gradually work your way forward. As you add each layer, pay close attention to alignment, making sure each one is precisely positioned before applying paint. To achieve this precision, rely on registration marks as a guide, ensuring that every component falls into place seamlessly.
Gradient Effects
To achieve a unique color combination, start by blending two or more colors together using a sponge. This technique allows for a seamless transition between hues. Additionally, you can control the direction of the gradient effect by deciding whether it will be horizontal, vertical, or radial in nature. The key is to blend the colors in a way that creates a cohesive and visually appealing outcome.
Textured Effects
When it comes to adding texture and depth to your art, there are a few techniques you can employ to achieve the desired look. One such method is using stencil brushes, which allow you to create a textured appearance by dabbing or swirling the brush over the stencil itself. This technique gives you control over the amount of texture you apply, enabling you to achieve different effects depending on your brushstrokes. Another approach involves utilizing thick mediums like modeling paste through the stencil. By doing so, you can produce a raised, three-dimensional effect that adds an extra layer of visual interest to your artwork.
Application on Different Surfaces
When it comes to stencil art, the type of surface you’re working with can greatly impact the outcome. For fabrics, opt for fabric-specific paints and employ a light dabbing motion when applying them to prevent bleeding. Wood surfaces require some extra prep – start by sanding the area smooth, then apply a base coat before adding your stenciled design. And when tackling walls, don’t forget to use a level to ensure your design remains straight and even.
Maintenance Tips
To ensure optimal performance and longevity, it’s crucial to handle stencils with care. Upon completion of a project, thoroughly clean your stencils to prevent paint from drying and clogging the design, making it difficult to use them again. Furthermore, when storing your stencils, flat or rolled in a tube is recommended to avoid damage and extend their lifespan.
Maintaining and Storing Your Stencils
To maximize the lifespan and reuse value of your stencils, proper maintenance and storage are crucial steps. By following a few simple guidelines, you can keep your stencils in top condition, ensuring they remain effective tools for your creative endeavors. First and foremost, it’s essential to clean your stencils regularly to prevent the buildup of debris and residue. This can be done by gently wiping them down with a soft cloth or brush, taking care not to scratch the surface.
Cleaning Your Stencils
To keep your stencil in prime condition, it’s essential to clean it immediately after use. This swift action prevents the paint from drying and becoming stubborn to remove. When washing your stencil, opt for warm soapy water that gently loosens any residual paint. For plastic or Mylar stencils, a soft sponge can be used with a gentle scrubbing motion to effectively remove any remaining paint residue. Once clean, pat your stencil dry with a soft cloth to prevent damage and ensure it remains in great condition.
Storing Your Stencils
When storing stencils, prioritize their flatness whenever feasible. This simple precaution helps prevent bending or warping, ensuring they remain intact for future use. For limited storage space, consider rolling your stencils and placing them within a cylindrical container, such as a poster tube, to maintain their shape and condition. Furthermore, it’s crucial to keep stencils away from direct sunlight and heat sources, as these elements can accelerate material degradation over time. By adhering to these basic storage guidelines, you’ll be able to preserve your stencil collection for extended periods.
FAQs About Stencil Making
As you delve into the realm of stencil making, you may come across various uncertainties and queries. To provide clarity and guidance, we’ve curated a comprehensive list of commonly encountered questions and their answers, addressing both novice and experienced stencil enthusiasts alike.
What Materials Can I Use for Making Stencils?
When selecting materials for your craft project, you’re spoiled for choice with a variety of options to suit different purposes. Cardstock, Mylar, acetate, and adhesive-backed vinyl are all viable contenders, each boasting its own unique strengths. Consider the durability and flexibility you need for your specific project, and choose the material that best fits your requirements.
How Do I Prevent Paint Bleeding Under the Stencil?
When applying the stencil, it’s crucial to ensure it’s securely fastened to the surface. A simple yet effective technique is to employ a dabbing motion instead of brushing. This approach prevents the paint from creeping underneath the stencil’s edges, resulting in a crisp and clean finish.
Can I Reuse My Stencils?
When it comes to reusing stencils, the key is proper cleaning and storage. Many materials, such as Mylar and thicker plastics, exhibit excellent durability and can withstand repeated use with minimal degradation. By taking the time to thoroughly clean and store your stencils correctly, you can ensure they remain usable for a long time.
What’s the Best Way to Apply Paint Over a Stencil?
To create clean and defined results when painting, use a stencil brush or sponge to apply the paint in a gentle, dabbing motion. This approach enables you to achieve sharp edges and prevents unwanted bleeding of the paint, allowing for precise control over your artistic vision.
How Do I Make a Multi-Colored Stencil Design?
To achieve a unique and layered design, start by working with the lightest colors first and gradually build up to the darkest shades. Allow each layer to fully dry before moving on to the next one, as this will prevent any bleeding or muddying of the colors. If necessary, use separate stencils for each color to ensure crisp and precise edges.
Can I Make Stencils Without a Cutting Machine?
By utilizing a combination of precision and skill, you can effortlessly create intricate designs by manually cutting your desired material using a craft knife and a cutting mat.
How Do I Clean and Store My Stencils?
To maintain the longevity of your stencils, it’s essential to properly clean and store them after each use. Begin by washing the stencils with warm water mixed with a mild soap, gently scrubbing away any debris or residue. Rinse thoroughly and pat the stencils dry with a soft cloth to prevent water spots. Next, flatly lay out the stencils on a surface or roll them into a tube for storage. This will help protect the delicate design from damage or distortion.
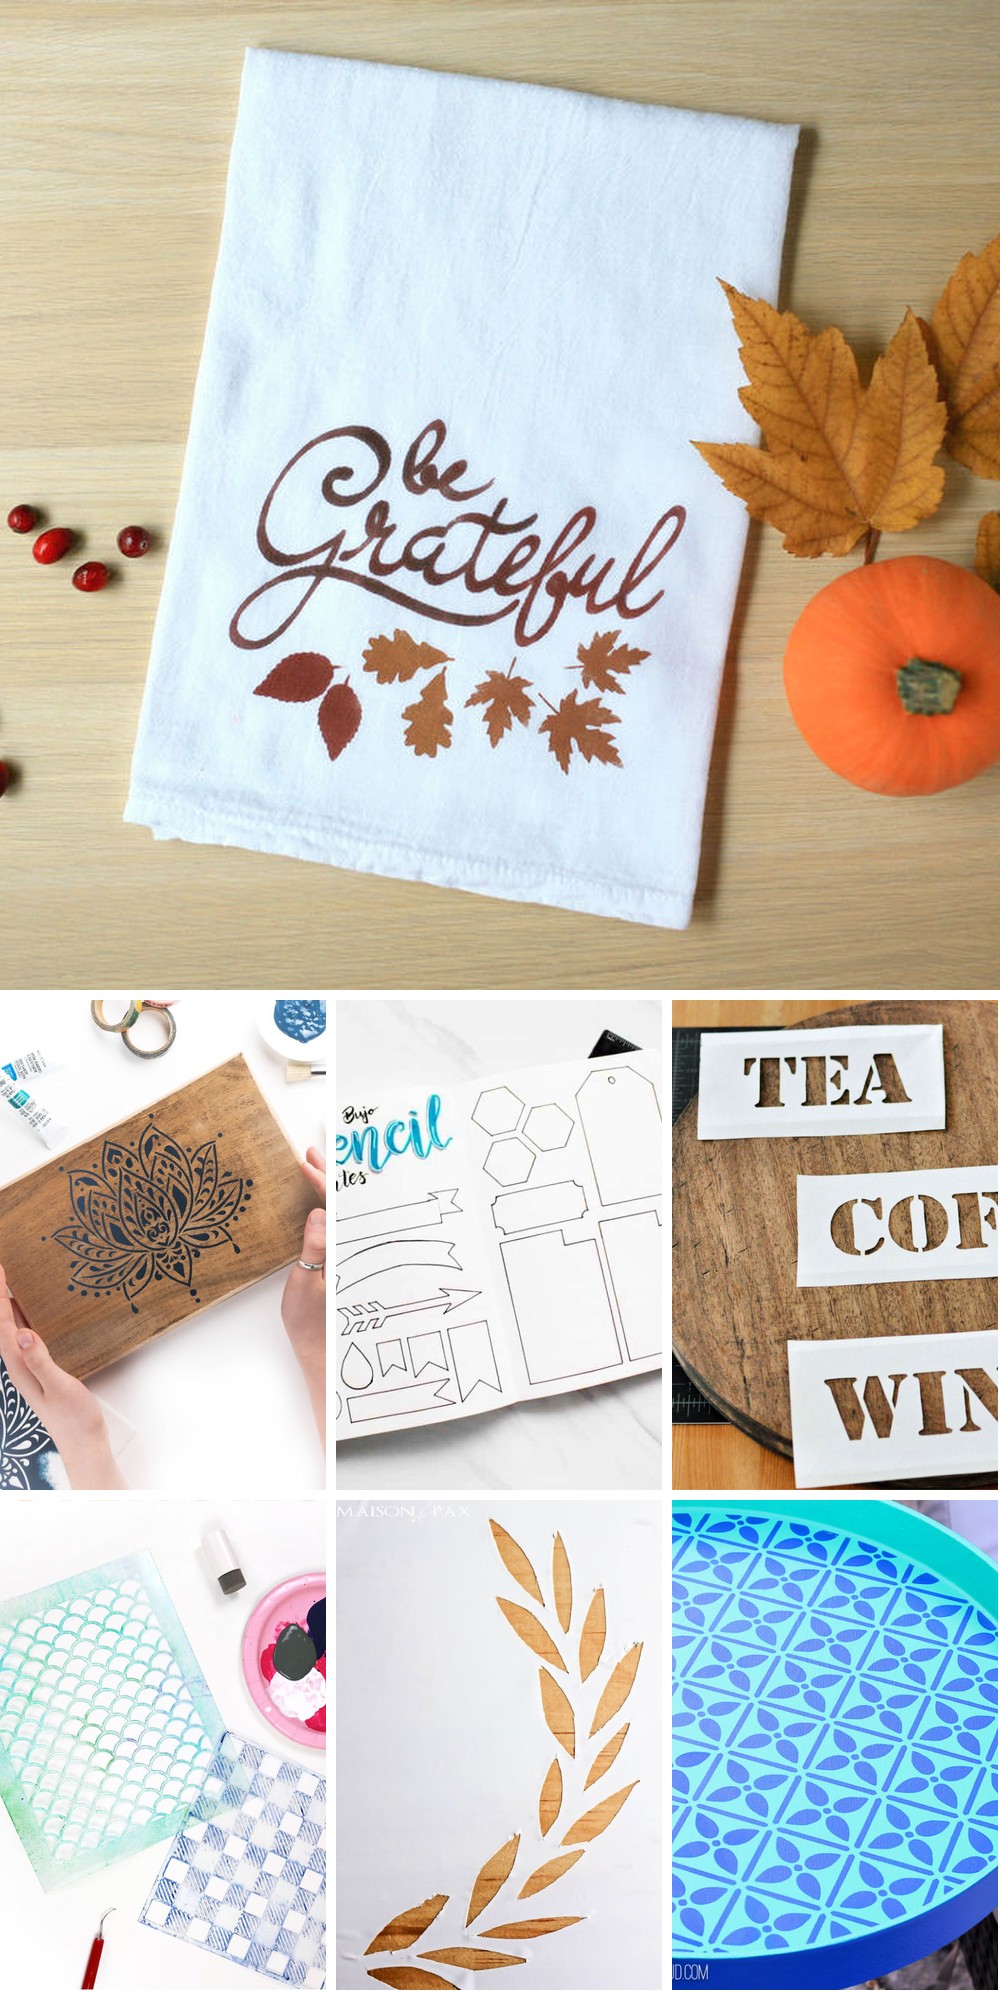
25 Unique Ideas To Make A Stencil at Home
Transform your DIY skills by exploring a diverse array of stencil-making techniques that can be easily replicated from the comfort of your own home. With 25 innovative ideas to draw inspiration from, you’ll be well on your way to unleashing your creativity and producing one-of-a-kind designs.
DIY Stencils With Dollar Tree Chopping Mats
Transform ordinary objects into extraordinary works of art by harnessing the power of DIY stencils made from Dollar Tree chopping mats. This innovative approach replaces pricey stencil materials with a budget-friendly solution, ideal for customizing walls, furniture, or fabric. The tutorial demystifies the process, guiding you through the straightforward steps of designing your stencil in Cricut Design Space and cutting it with a deep point blade. Proven tips on achieving precise cuts and maximizing stencil effectiveness ensure that your creations are crisp, reusable, and ready for use. Pair your masterpiece with Plaid FolkArt products and a sturdy stencil brush to unlock the true potential of paint, turning everyday items into breathtaking, personalized masterpieces.
How to Make a Stencil
Elevate your DIY projects by learning how to create custom stencils from scratch. With a simple and comprehensive guide from The Craft Crib, you’ll be able to add personalized touches to your creations using basic materials like cardstock and an X-ACTO knife. This straightforward method yields precise and durable results, perfect for painting designs on various surfaces. By following these easy-to-follow instructions, you can enhance your home decor or personalize gifts with professional-looking custom stencils.
Make Your Own Xl Vinyl Stencil
A lackluster space can be instantly transformed into a unique artistic expression by creating an oversized vinyl stencil. With Tried & True Creative’s comprehensive guide, you’ll learn the ins and outs of crafting your own ‘Crafte Diem’ vinyl stencil, from concept to completion. Utilizing a Cricut machine and stencil vinyl, this project is surprisingly accessible, even for those new to the world of crafting. The tutorial takes you through the process of preparing your cutting file, cutting out the design, and applying the stencil with ease, resulting in a meticulously precise painted motif. Get ready to take your craft space or any room to the next level with this engaging and creative project.
DIY Freezer Paper Stencils
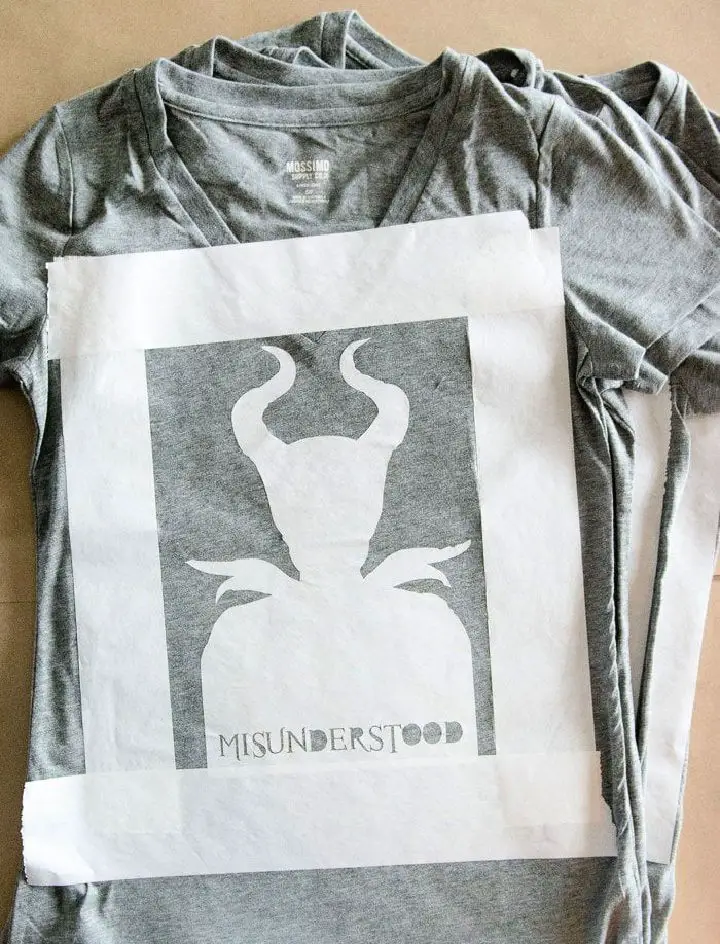
To give your fabric creations a unique touch, The Polka Dot Chair recommends an innovative approach using freezer paper. This DIY-friendly method allows you to achieve a hand-painted appearance on items like t-shirts and tote bags, infusing them with personalized charm. To get started, gather the necessary supplies: freezer paper, fabric paint, and a foam brush. Then, follow these straightforward steps: cut out your design, iron the paper onto your fabric, apply the paint using gentle strokes, and finally, set the paint by running a dry iron over the area. This accessible technique is perfect for crafting enthusiasts looking to add original artwork to their projects. Its versatility makes it ideal for decorating a range of items, from clothing and accessories to home decor pieces, making it a valuable skill to have in your repertoire.
Easy DIY Thanksgiving Tea Towel Silhouette Stencil
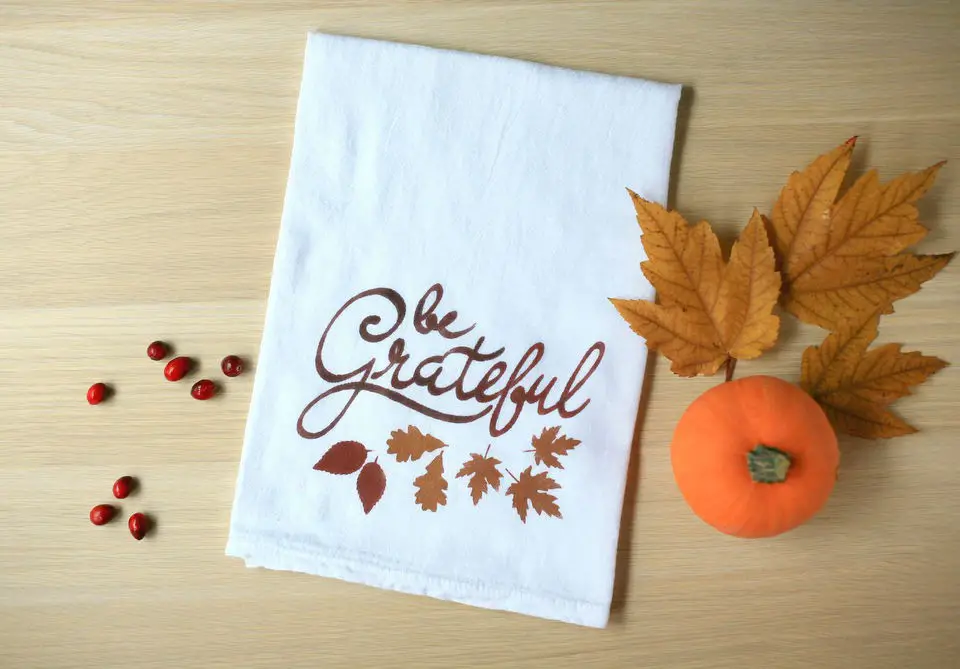
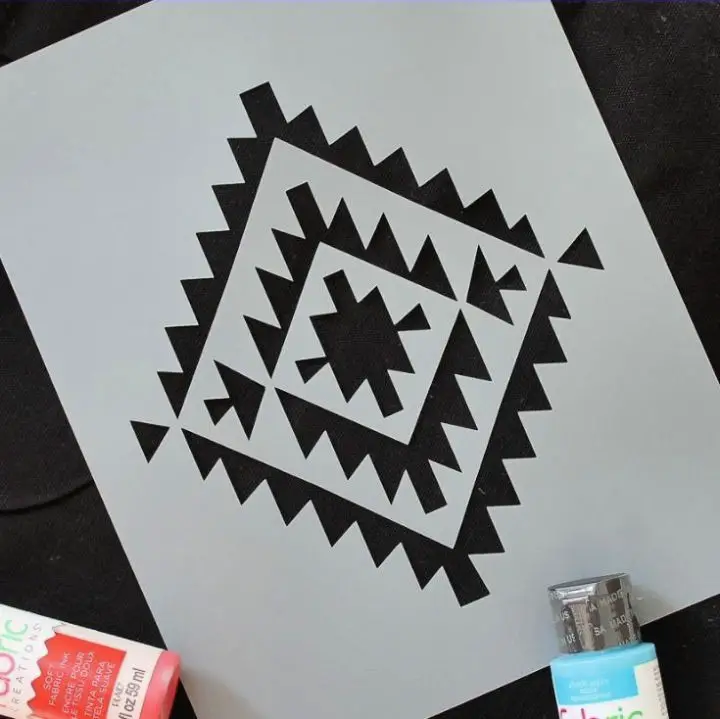
Add a warm touch to your Thanksgiving celebrations by creating one-of-a-kind tea towels or thoughtful gifts. The DIY tutorial from Make/Enjoy is an excellent resource for mastering the art of using Silhouette Fabric Ink Starter Kits to craft custom designs onto fabric. This comprehensive guide walks you through each step, from designing and cutting your stencil design to painting it onto fabric. With this engaging project, you’ll be able to elevate your kitchen decor or present a meaningful gift that reflects your personal style. Don’t miss the opportunity to take advantage of special deals on the Silhouette website starting November 20th by using the provided discount code. Get ready to make your holiday season more creative and memorable with this easy-to-follow DIY guide.
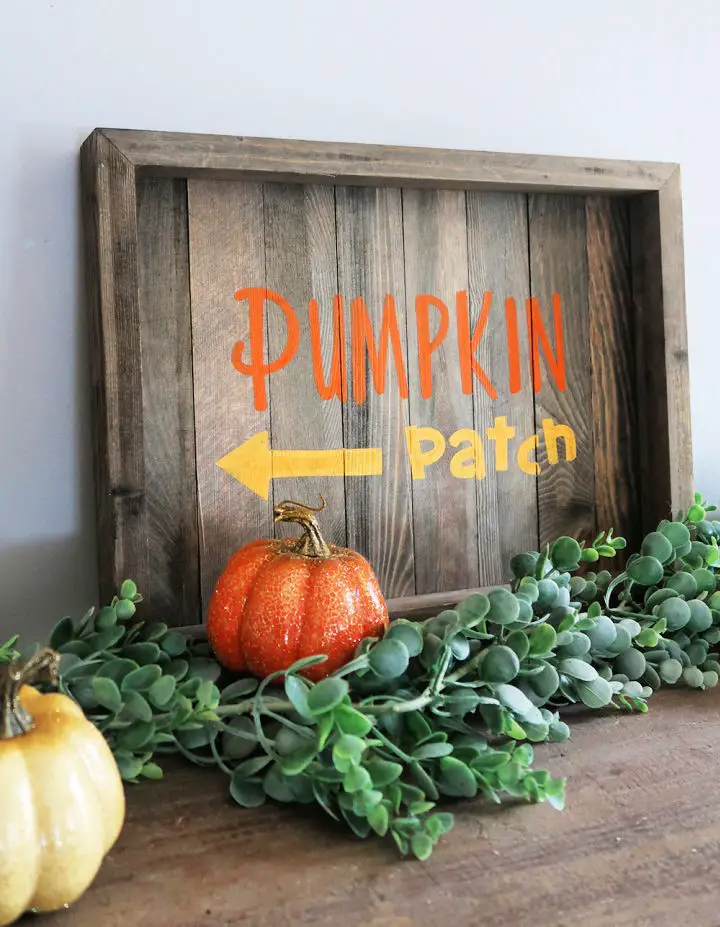
How to Make Plastic Stencil for Wood Signs
With this comprehensive guide on making plastic stencils, crafting personalized wood signs just became a more accessible and creative endeavor. By following LZ Cathcart’s clear and concise tutorial, you’ll gain the skills to produce durable and reusable stencils that can transform simple pine boards into stunning works of art. The process involves staining, designing, and spray painting your way to a custom sign, utilizing a cutting machine and stencil blanks as essential tools. This step-by-step guide is designed for DIY enthusiasts of all levels, providing a straightforward path to creating beautiful signs that will withstand the test of time.
Make Your Own Cookie Stencil
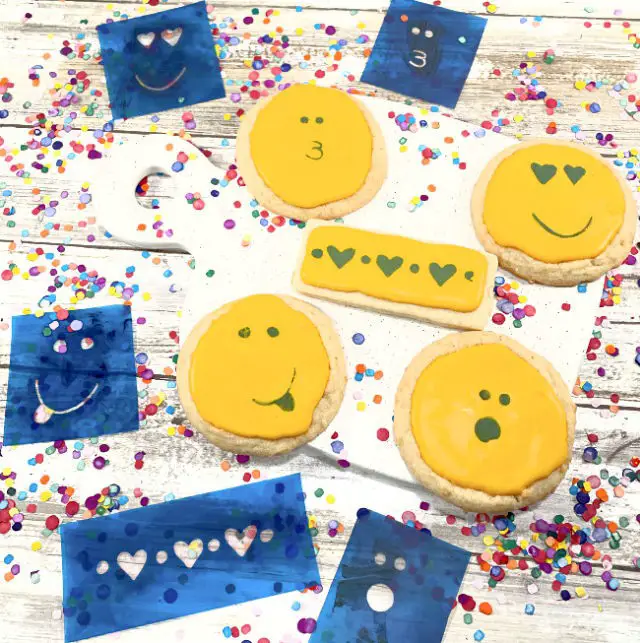
The Ikonart Custom Stencil Making Kit makes creating custom cookie stencils a straightforward process, thanks in part to Laura Kelly’s comprehensive guide at Inklings. This step-by-step tutorial is perfect for anyone who enjoys decorating cookies and wants each one to feature a unique design. With the kit, you’ll gain a solid understanding of how to print, expose, rinse, and post-expose your stencil, allowing you to create reusable designs that can add a touch of professionalism to your baked goods. Furthermore, you’ll learn expert tips on applying icing with your stencil for impressive results. Simply put, making custom stencils is a surprisingly easy process that can take your cookie decorating skills to the next level.
How to Make a Graffiti Stencil
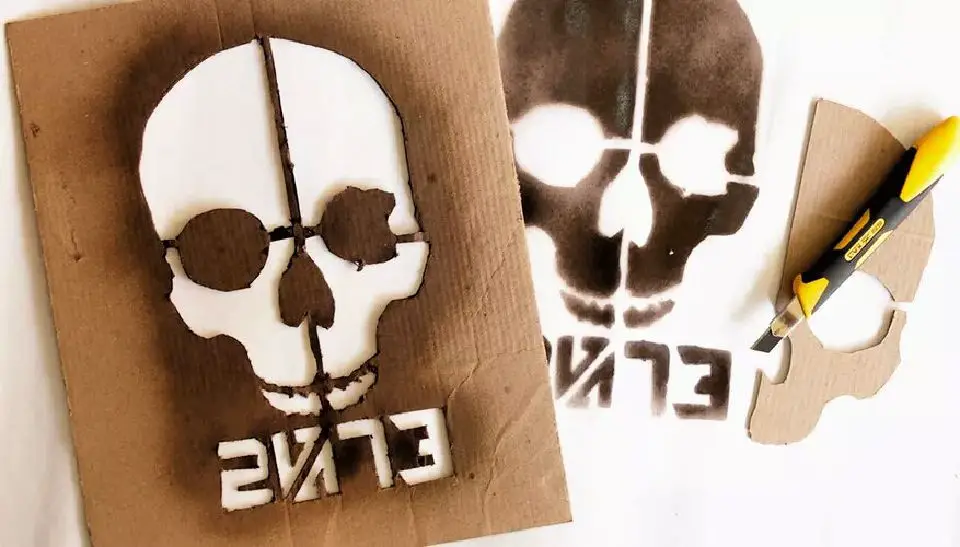
Transforming your artistic vision into reality has never been easier. At Our Pastimes, we’ll guide you in crafting eye-catching images that can be applied to various surfaces, from walls to clothing. To get started, gather a craft knife, light cardboard, heavy cardboard or a cutting mat, and a pencil. Begin by sketching your design onto the cardboard, taking care to plan your cuts strategically to preserve the integrity of your image. Next, carefully cut out your design using the craft knife, ensuring your work surface is protected from any potential accidents. With this simple yet effective process, you can turn plain objects into personalized works of art. Remember to keep your stencil dry to extend its use and get creative with unique designs that reflect your personality. This skill is perfect for adding a touch of flair to your environment or fashion, making it a fun way to express yourself.
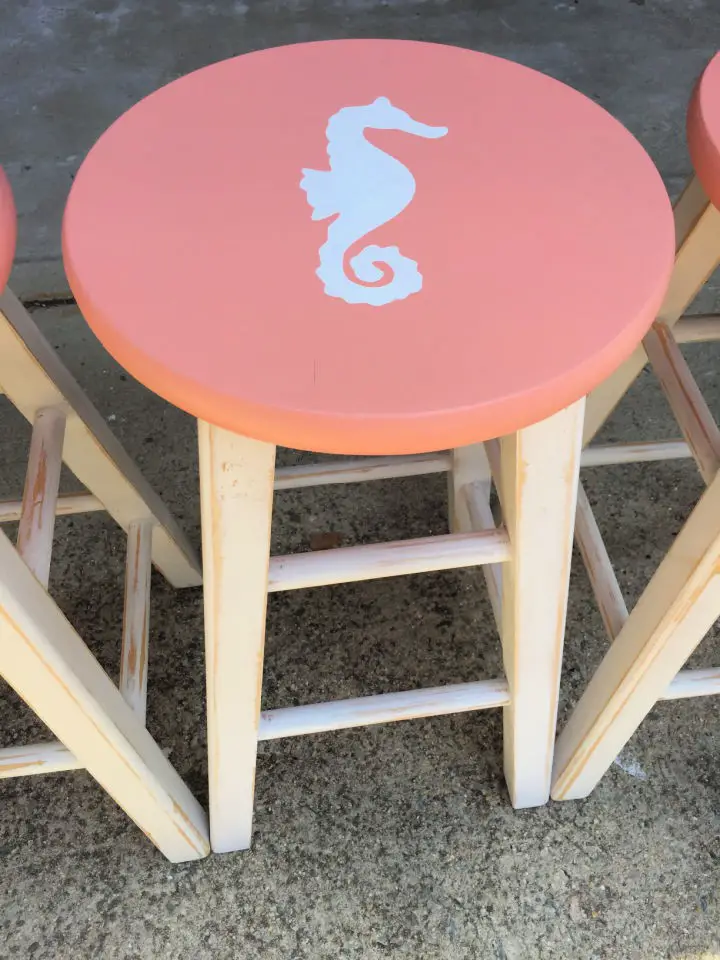
DIY Buffalo Plaid Stencil for Planter
With the right guidance, creating reusable stencils can be a fun and rewarding DIY project. For those with a Silhouette or Cricut at home, Persia Lou’s tutorial offers a comprehensive guide to transforming stencil material into a durable, multi-use tool for all decorating needs. The step-by-step process begins with preparing your cut file, followed by applying and painting the finished stencil. To showcase your new skill, try creating a stylish Buffalo Plaid planter – a versatile piece that complements any home decor. This instructive guide is designed to enhance your DIY experience, ensuring successful outcomes every time you craft.
Make Stencils to Decorate Home
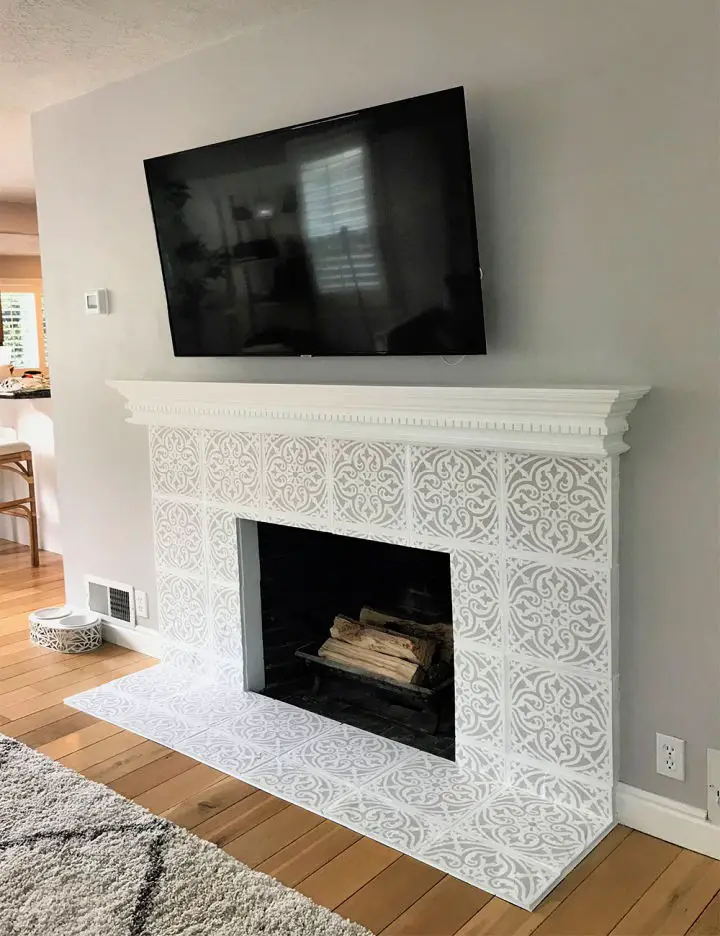
Transforming your living space with personalized decor is an exciting way to infuse charm and creativity. Cricut’s inspiring story about Chelsea Hentkowski, who elevated her home’s aesthetic by designing and applying custom stencils to her fireplace, serves as a compelling example. By breaking down the process into straightforward steps, you can replicate professional-looking results with basic tools. The key is selecting suitable materials, cutting precise patterns, and expertly applying paint to create stunning designs that reflect your unique style. With this detailed tutorial, you’ll gain the confidence and artistic flair needed to tackle your home improvement projects.
Custom Reusable Stencil With Cricut Maker
To infuse personal flair into your crafts and home decor, creating reusable stencils with a Cricut Maker is an exceptional approach. This process involves designing your own stencil in Cricut Design Space, cutting it out using the machine’s precision, and then effectively applying it to various surfaces. Anika’s DIY Life offers a comprehensive guide that walks you through every step of this creative journey, covering essential aspects like software usage, design selection, and proper positioning to ensure optimal results. The tutorial also highlights the importance of weeding your design carefully, as well as providing helpful tips on paint application and maintaining the stencil’s reusability for future use.
How to Make Stencil With Cricut
With Angie Holden’s expert guidance on The Country Chic Cottage, you can easily create custom stencils using a Cricut machine. This versatile technique allows you to choose from a range of materials, including vinyl, stencil film, or even paper, opening up endless possibilities for personalizing your home decor and fabric projects. A step-by-step video tutorial and clear instructions make the process straightforward and accessible, whether you’re looking to create one-time use stencils or reusable ones that can be used multiple times. By following along with this comprehensive guide, you’ll gain the skills and confidence to tackle a variety of crafting projects with ease, from adding a unique touch to your home decor to creating custom designs for fabric and more.
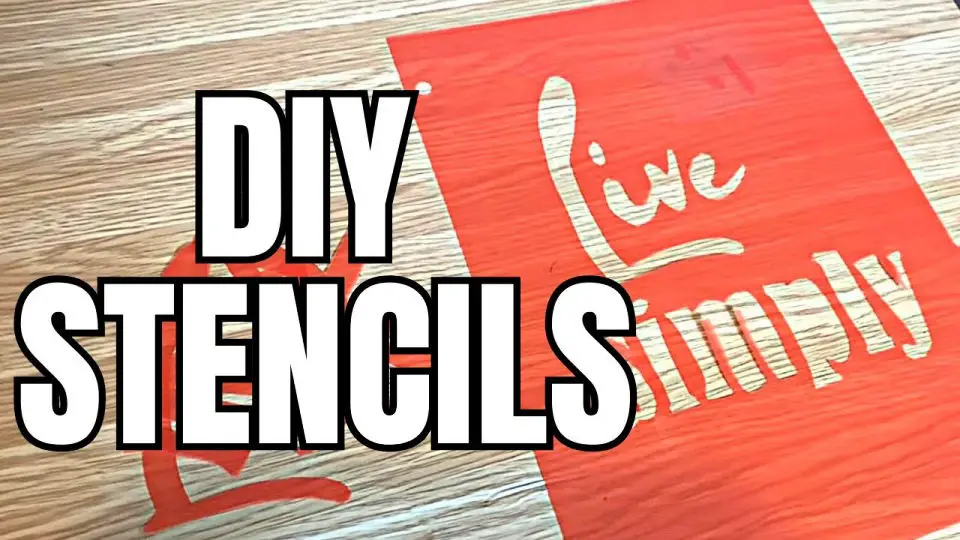
DIY Stencil Without Cutting Machine

When you’re itching to unleash your creativity on a project, but don’t have access to expensive cutting machines, it can be frustrating. Fortunately, Pastels and Macarons has put together a comprehensive guide to help you create your own stencil using everyday supplies. This valuable resource empowers you to take control of your artistic endeavors, whether you’re looking to personalize furniture, add some flair to a wall, or give a unique touch to any surface.
The tutorial takes an approachable and easy-to-follow path, breaking down the process into manageable steps. You’ll learn how to design stencils using tools you likely have at home, from selecting fonts to precise cutting. The guide is designed to be accessible and enjoyable for everyone, regardless of their level of expertise. With your newfound skills, get ready to transform the ordinary into something truly extraordinary with your handmade stencils!
Make Your Own Stencil With a Silhouette Cameo
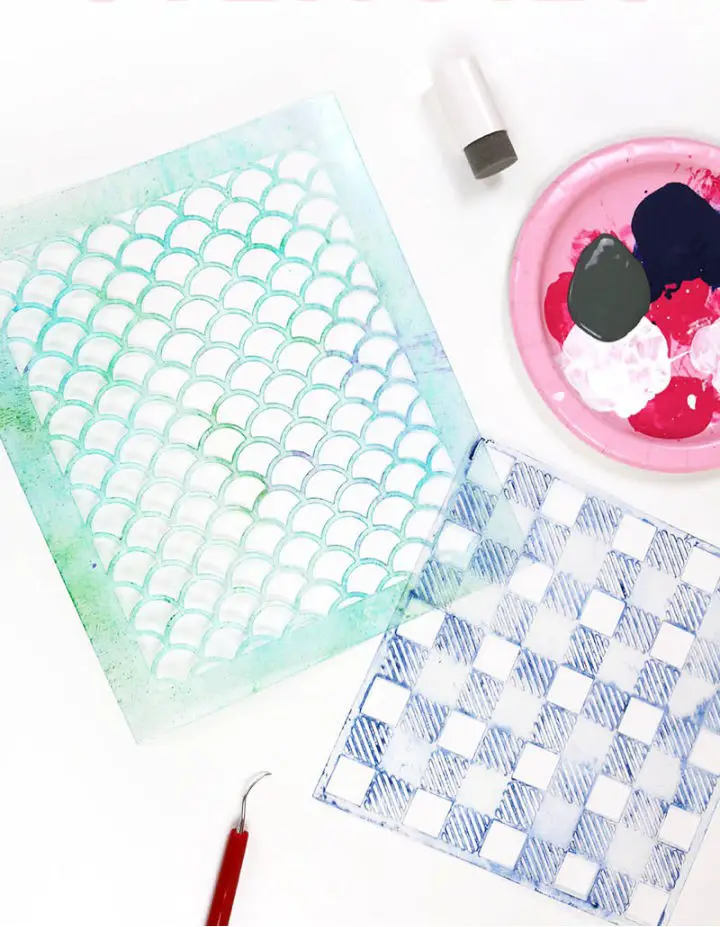
Transforming your home decor or craft project with bespoke stencils is a game-changer. By following Semigloss Design’s straightforward guide, even the most novice crafter can create custom designs using their Silhouette Cameo machine. The process begins by selecting the ideal materials – think cardstock to mylar – and designing stencils that eliminate isolated pieces for a seamless crafting experience. With expert tips on the best paints to use and techniques for preventing paint bleed, you’ll be well-equipped to produce stunning, reusable stencils that elevate any DIY project.
How to Make Stencil Like a Pro
Stenciling is an artful way to inject personality into your space with custom designs. To help you perfect this creative technique, Stencil Revolution provides in-depth guidance that covers everything from preparing the surface to choosing the right tools. Our comprehensive guide emphasizes the importance of mastering techniques like offloading paint for crisp edges and stabilizing the stencil during application. By following our beginner-friendly tutorial, you’ll gain the skills to achieve professional-looking finishes and develop a newfound appreciation for crafting. Additionally, we offer expert advice on how to care for your stencils, ensuring they remain in top condition for future projects.
DIY Stencil for Wood Signs
Are you ready to create professional-looking wood signs with custom stencils? With Weekend Craft’s step-by-step guide, you’ll learn how to select the perfect fonts and design a stencil using a Cricut machine. To prevent paint from bleeding, we recommend applying Mod Podge before painting. With these expert tips and some practice, you’ll be crafting wood signs that rival those found in stores. This tutorial is ideal for anyone looking to enhance their crafting skills, whether you’re personalizing your space or creating unique gifts.
How to Make a Custom Stencil Design
Creating a custom stencil design with your Cricut cutting machine is an artful endeavor that infuses your crafts with personality. With Lydia from Lydi Out Loud as your guide, you’ll navigate the user-friendly world of Cricut Design Space to bring your one-of-a-kind vision to fruition. From selecting the perfect materials, including Cricut stencil vinyl and indispensable tools, to constructing your design using fundamental shapes and welding them together, this tutorial guarantees a stress-free experience. This approach isn’t limited to reproducing the featured Moroccan tile design; rather, it empowers you to craft any stencil pattern that resonates with you. By following these concise, step-by-step instructions, you’ll be able to elevate your crafting game and produce a stencil that’s uniquely yours.
DIY Freezer Paper Stencil for Shirt

Unleash your creativity and give a plain t-shirt a unique makeover with freezer paper stenciling. By following Pretty Providence’s easy-to-follow steps, you can transform your fabric into a one-of-a-kind masterpiece that reflects your personal style. This simple yet effective method is perfect for craft enthusiasts looking to add a personal touch to their wardrobe or create thoughtful, handmade gifts. With just a few basic materials like freezer paper, fabric paint, and some common household items, you can bring your artistic visions to life on t-shirts, tote bags, and even wood surfaces. The end result is not only visually stunning but also incredibly satisfying – there’s no better feeling than wearing something you’ve created yourself.
Making a Cake and Beverage Stencil

Transform your dessert presentation with a custom touch using the DIY Cake & Beverage Stencil guide from A Beautiful Mess. Mandi Johnson’s creative approach makes it easy to personalize baked goods and drinks, perfect for adding a special flair to your treats. The process begins by selecting a template or designing your own stencil, then tracing it onto a sheet and carefully cutting out the shapes with a craft blade. Apply your new stencil to cakes, pies, or foamy beverages to create a charming, professional look that’s sure to impress guests. With helpful tips and simple supplies, this tutorial is ideal for anyone looking to elevate their dessert game.
DIY Bullet Journal Stencil
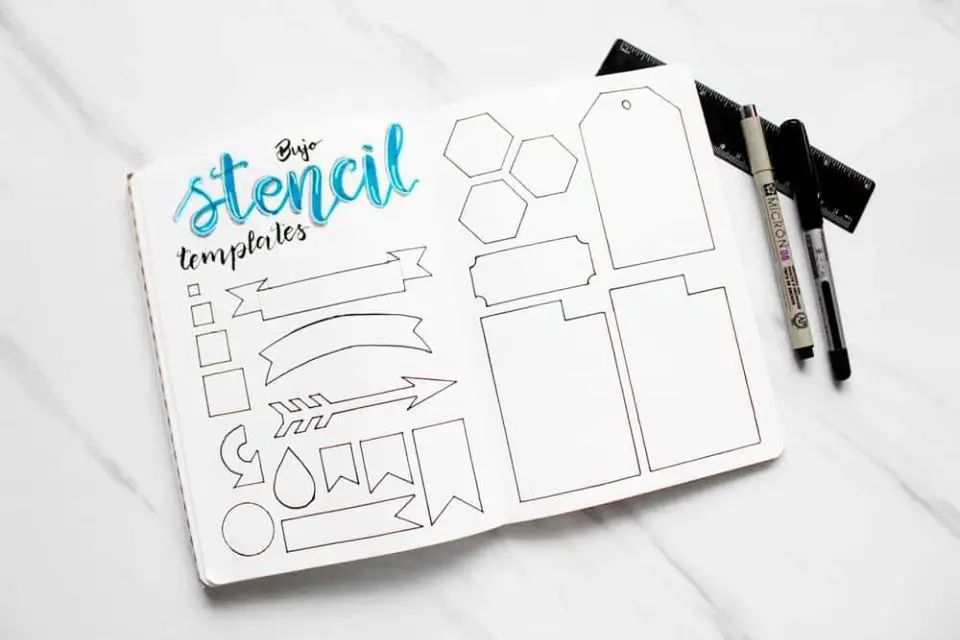
If you’re passionate about personalizing your bullet journal but find intricate page decorations time-consuming, creating your own DIY stencils is a fantastic solution to speed up the process without compromising on style. One great resource for learning how to make your own bullet journal stencils is Diary of a Journal Planner’s comprehensive guide, which provides step-by-step instructions on selecting the ideal materials, designing and hand-cutting custom templates. With just a few simple tools like scissors, a craft knife, and laminating sheets, you can turn your ideas into reusable designs that elevate your journaling experience and add a personal touch to your spreads.
How to Make a Stencil for Painting
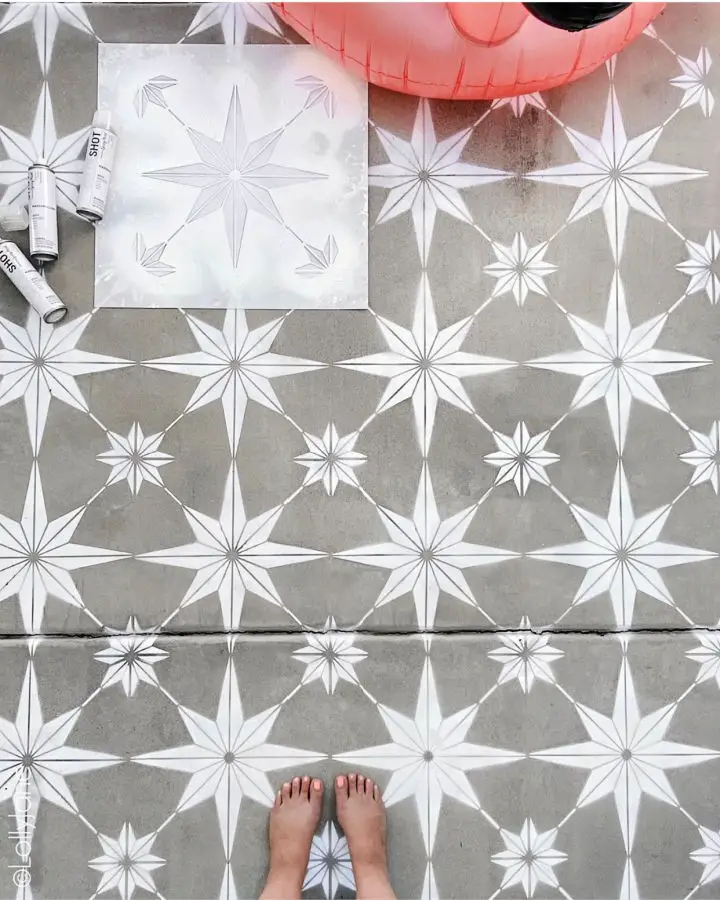
Transforming concrete surfaces into stunning works of art is now within reach. At Lolly Jane, we’re excited to share a comprehensive guide on how to stencil concrete using spray paint. By focusing on the importance of high-quality stencils and paint, we’ve simplified the process to make it both efficient and enjoyable. To get started, you’ll need just three essential tools: spray paint, a stencil, and repositionable adhesive. Our step-by-step tutorial takes you through every stage, from preparing the surface to sealing the finished design, ensuring a professional-looking result that’s uniquely yours. Whether you’re looking to add some personality to your outdoor or indoor space, our easy-to-follow instructions will guide you through the process with ease and confidence. If you’re ready to embark on this creative adventure, head to Lolly Jane for all the tips and tricks you’ll need to get started.
Make Your Own Vinyl Stencil
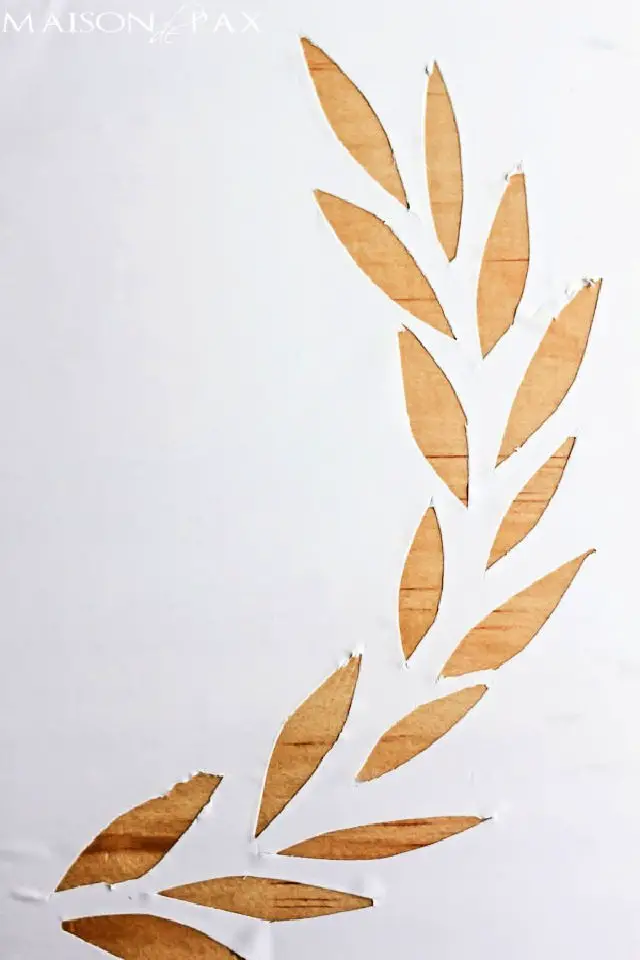
Creating custom vinyl stencils doesn’t have to break the bank. In fact, you can achieve professional-looking results using just a simple shelf liner. The clever folks at Maison de Pax demonstrate how to turn this humble household item into a versatile crafting tool. To get started, simply draw or print your desired design onto the shelf paper. Next, use a pen to firmly trace the design, leaving an impression on the paper. From there, you can use a utility knife and a stable cutting surface to carefully cut out your stencil. Once you’ve peeled off the backing, apply it to your project for a personalized touch. This straightforward technique makes quick work of crafting without requiring specialized equipment, making it perfect for unique home decor or special gifts.
Homemade Chalkboard Stencil
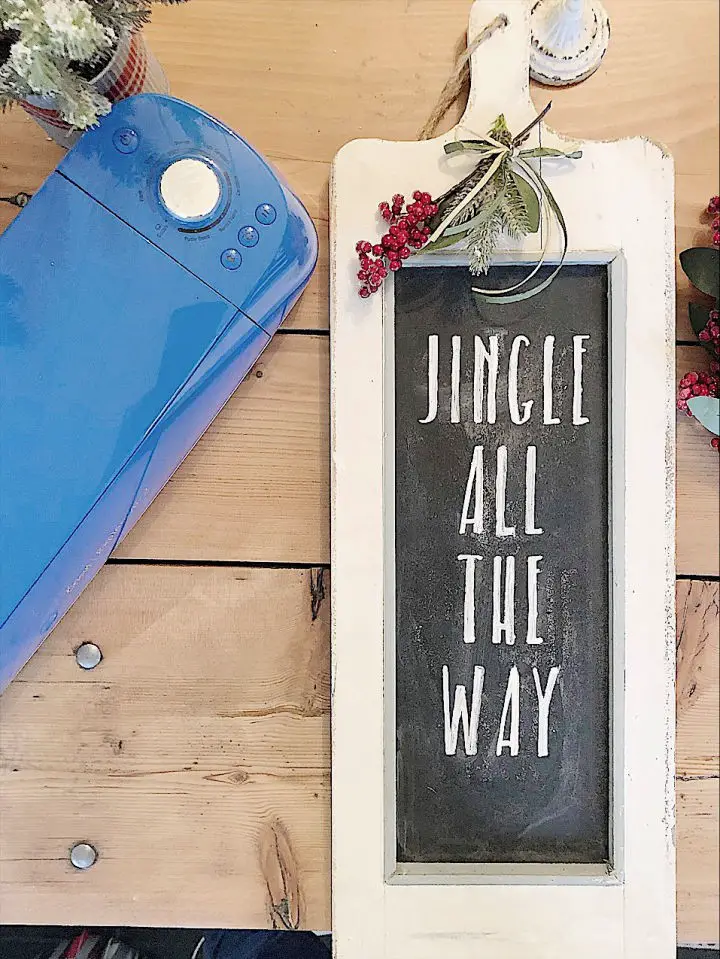
With the Cricut Explore Air 2, Cobalt machine available at JOANN, creating a personalized stencil has never been more accessible. This versatile cutting tool can precision-cut through various materials like vinyl, fabric, and even paper, making it perfect for customizing chalkboards. A step-by-step guide on My 100 Year Old Home provides a comprehensive tutorial on designing and producing reusable stencils using a Cricut machine. You’ll discover how to accurately measure your space, select the ideal font, and work with stencil blanks for precise cuts. Additionally, the guide offers helpful advice on securing the stencil and utilizing chalk markers for a crisp finish. Whether you’re a seasoned crafter or just starting out, this project is designed to empower you to bring your creative vision to life.
Making Your Own Reusable Craft Stencils
Crafting enthusiasts are constantly on the lookout for creative and budget-friendly ways to elevate their projects. One innovative approach is making custom stencils, which allows you to personalize your work without breaking the bank. Our YouTube video tutorial at Upcycled Life offers a simple and cost-effective method for creating reusable stencils without requiring expensive tools like a Cricut machine. By transforming readily available materials, such as index dividers from the dollar store, into unique stencils, viewers can learn how to add a personal touch to their home décor and crafts. The tutorial is designed to be easy to follow, with practical tips to help crafters of all levels achieve great results. Whether you’re a seasoned crafter or just starting out, this video will show you how to take your projects to the next level.
Easy to Make Stencils for Craft
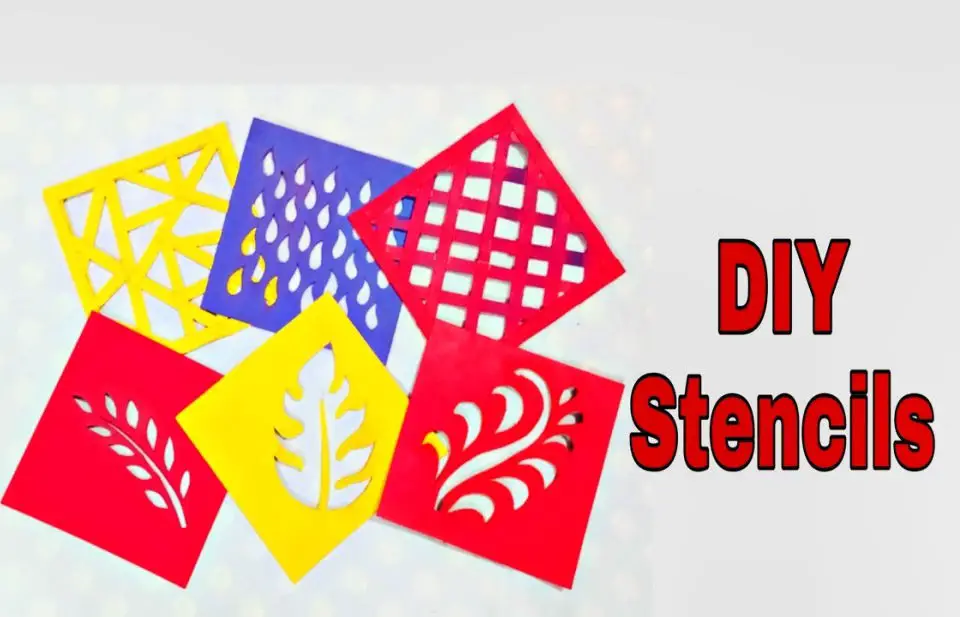
Discover the creative freedom that comes with crafting at home using DIY stencils! Whether you’re a scrapbook enthusiast or a mixed-media mastermind, learning to make your own stencils is an excellent skill to develop. With YouTube tutorials like Embellishment Art n Craft’s guide on creating six unique stencil designs, you’ll be well on your way to cutting and designing your own custom tools in no time. The best part? Not only are these handmade stencils cost-effective, but they’re also adaptable to suit any project that strikes your creative fancy. So why not grab a cutter and some paper, and let the fun begin as you unlock a world of possibilities with your very own collection of DIY stencils!
Conclusion:
With the completion of our guide, you now possess the skills and knowledge to bring your artistic vision to life through personalized stenciling projects. Not only will you be able to express yourself creatively, but also enhance your surroundings with bespoke items that reflect your unique style. As a creative endeavor, stencil crafting requires dedication and practice, yet the sense of accomplishment and visual satisfaction far outweigh any initial challenges. As you embark on this artistic journey, remember that the end result is a testament to your perseverance and creativity.
