Creating unique graphic tees is an excellent way to express your creativity and showcase your personal style. This fun and creative activity allows anyone to design and print their own distinctive tees at home, using a variety of techniques and tools. It’s not just about adding a design to a shirt; it’s about making a statement, conveying a message, or flaunting your artistic flair. To help you achieve this, we’ll guide you through the essential steps, from selecting the perfect fabric to choosing the ideal printing method. We’ll delve into material and tool reviews, step-by-step instructions for making your tee, and common issue troubleshooting. Additionally, we’ll explore design inspiration and sustainable practices to keep your projects fresh and eco-friendly. If you’re ready to turn your ideas into wearable art, join us as we embark on this exciting journey of creating DIY graphic tees.
Material and Tool Reviews for DIY Graphic Tees
To create impressive DIY graphic tees, selecting the right materials and tools is crucial for a successful project. The quality of your final product heavily relies on the choices you make. In this context, we’ll delve into the best options available to help you produce graphic tees that are not only visually appealing but also durable and long-lasting.
Selecting the Right Fabric
When it comes to crafting a graphic tee that’s truly exceptional, the foundation lies in the fabric itself. Among the top contenders are three primary options. Firstly, there’s cotton – a classic choice renowned for its unparalleled comfort and breathability. It’s an ideal canvas for most printing methods, allowing colors to hold fast without fading or bleeding. Next up is polyester, a synthetic material that boasts impressive durability and resistance to shrinkage and wrinkles. This makes it particularly well-suited for sublimation printing techniques. Finally, blends – a combination of cotton and polyester – offer the best of both worlds by balancing comfort with durability.
Choosing Your Printing Method
The visual appearance of your graphic tee can be significantly impacted by the printing method employed. Here’s a breakdown of some popular techniques, each offering unique benefits: Screen printing excels at handling bulk orders and designs with fewer colors, delivering a professional finish and long-lasting prints. When intricate details and small batches are required, heat transfer technology shines, allowing for vibrant, full-color images. For detailed and colorful designs that require a soft-to-the-touch finish, direct-to-garment (DTG) printing is the way to go, as it prints directly onto the fabric.
Essential Tools for DIY Printing
When embarking on a DIY project, having the right tools can make all the difference in terms of efficiency and accuracy. A cutting machine, such as a Cricut or Silhouette, is an essential tool that enables you to precisely cut out designs from vinyl or stencil material with ease. This device allows for intricate cuts and detailed designs, which can be particularly useful when working with materials like vinyl or stencil paper.
In addition to a cutting machine, a heat press is also a crucial component in the DIY process. A good quality heat press ensures that your heat transfer prints are evenly heated and adhere well to the surface you’re working on. This is especially important when using vinyl applications.
Finally, an inkjet printer is another must-have tool for any serious DIY enthusiast. With this device, you can create transfer papers for heat transfer printing, which is a great way to add text or images to a variety of surfaces.
In summary, having the right tools like a cutting machine, heat press and inkjet printer can greatly streamline your DIY process, allowing you to achieve professional-looking results with ease.
Tips for Long-Lasting Designs
To create durable and visually appealing DIY graphic tees, it’s essential to adopt a meticulous approach from the outset. A crucial step in achieving this goal is to pre-wash the fabric before applying your design. This simple yet effective technique prevents unwanted shrinkage that can compromise the overall appearance of your tee.In addition to using high-quality fabrics, you should also opt for premium inks that are designed to reduce fading and cracking over time. By making this small investment upfront, you’ll be rewarded with a graphic tee that retains its vibrant colors and texture even after repeated wear and washing.Finally, it’s vital to follow the recommended care instructions for your printed tees to ensure they remain in pristine condition. By understanding how to properly wash and dry your graphic tees, you can significantly extend their lifespan and enjoy them for years to come.By carefully considering these key factors and adopting best practices for printing and care, you’ll be well on your way to creating DIY graphic tees that not only look great but also remain a staple in your wardrobe. As with any creative pursuit, the key is to experiment and find what works best for you and your unique vision.
How to Make Graphic Tees – Step by Step Tutorial
Designing custom DIY graphic tees is more accessible than ever. With no need for extensive design experience or hefty price tags, anyone can create a one-of-a-kind tee in just a few simple steps. By leveraging user-friendly tools like Canva and Printful, you can bring your unique design to life without breaking the bank. Whether crafting a personalized project, indulging in a creative hobby, or taking the first step towards starting your own line, this comprehensive guide will take you from initial concept to finished product, all for free.
Step 1: Find Your Inspiration
As you embark on designing your graphic tee, start by cultivating an idea or theme that sparks inspiration. This creative catalyst can stem from various sources – the works of a beloved artist, a thought-provoking quote, or even the intricate patterns found in nature. In our case, we’ll be drawing motivation from a scissor-inspired design that embodies the essence of creativity and precision in craftsmanship.
Step 2: Designing Your Graphic Tee with Canva
To get started with designing a T-shirt on Canva, first head to the website and sign up for a free account if you haven’t already. The platform is user-friendly, even for those without prior graphic design experience. Next, navigate to the search bar and type ‘T-Shirt’ followed by selecting the appropriate template size that suits your needs. For this example, we’ll be using a 14×18 size. Once you’ve chosen your template, browse through the available options to find one that resonates with your design concept. If you have a specific template in mind, feel free to use it as a starting point and make adjustments as needed. In our project, we used a wolf-themed template as the foundation for our design. After selecting your template, start customizing by removing any unnecessary elements and making space for your new design. Then, add relevant text or imagery to your design, taking advantage of Canva’s features that allow you to easily manipulate size, color, and orientation. To further refine your design, apply filters or adjust the transparency levels of individual elements to achieve the desired level of subtlety.
Step 3: Making a Mock-Up
To ensure a seamless transition from concept to reality, utilize Canva’s innovative mock-up tool once your design is finalized. This feature allows you to preview your creation on various surfaces, including apparel such as T-shirts, providing an unparalleled opportunity to refine your design and guarantee satisfaction with the final product.
Step 4: Printing Your Tee with Printful
To get started with Printful, begin by signing up for a free account on their website. Next, choose the ‘Order for myself’ option and select ‘Explore Products.’ From there, navigate to the ‘Men’s T-Shirts’ category (or any other preferred category) and upload your Canva design to the chosen template. Once uploaded, ensure your design fits within the printable area of the T-shirt by adjusting its size and positioning as needed. After that, select a color for your T-shirt that complements your design well – for our project, we chose a tan shade to match the background of the design. Finally, review your order details, proceed to checkout, and wait for your custom T-shirt to be printed and shipped to you.
Video Tutorial
With a passion for creating unique and personalized graphic tees, many of us are eager to bring our designs to life without breaking the bank. One fantastic resource for making your own graphic tee is a YouTube video tutorial that provides a step-by-step visual guide on how to design and print your very own T-shirt. This comprehensive video pairs perfectly with the written instructions provided here, offering a double-pronged approach for those who prefer both visual and textual guidance. By watching this video, you’ll gain a deeper understanding of the process involved in bringing your creative vision to life on a graphic tee. Not only is creating a free graphic tee manageable, but it’s also an exciting and fulfilling experience that allows you to express yourself and showcase your unique style.
Design Inspiration for DIY Graphic Tees
Unleashing your creative expression and showcasing your individuality is where designing graphic tees comes in – a thrilling way to stand out from the crowd! By tapping into the latest trends, you can craft a truly one-of-a-kind design that mirrors your unique style. Let’s explore some of the most captivating trends for 2024, serving as the perfect catalysts for your imagination to run wild.
Embrace the New Wave of AI-Assisted Designs
The creative landscape has been forever changed by Artificial Intelligence (AI). As we enter 2024, AI-assisted graphic design is poised to become a defining trend for DIY enthusiasts and professionals alike. This technological advancement unlocks a plethora of possibilities, empowering users to tap into its capabilities and transform their projects. By leveraging AI, you can: generate novel concepts based on your design preferences; effortlessly explore color palette options that harmonize with your vision; and rapidly produce variations of your design in different styles or on diverse substrates.
Explore Composition-Heavy Designs
In the world of graphic design, composition is the unsung hero that brings it all together. This year’s trends are heavily influenced by composition, allowing designers to get creative with intricate designs on tees. When crafting your next graphic tee, think outside the box (or in this case, the shirt) and consider how you can strategically layer elements, manipulate negative space, and combine textures to create a visually striking piece that demands attention.
Incorporate Nature Reference Designs
As we move into 2024, one design trend that’s sure to stay timeless is nature-inspired prints. From delicate florals to bold animal motifs and breathtaking landscapes, incorporating elements of the natural world onto your wardrobe can instantly evoke feelings of serenity, adventure, or even a sense of wild freedom.
Play with Vibrant Colors and Abstract Gradients
Bold statements on your tees can be achieved by incorporating vibrant colors, which when paired with abstract gradients, create a modern look that’s sure to turn heads. To elevate your design further, don’t be afraid to experiment with various color transitions and shapes to discover the perfect gradient combination that makes your design truly stand out.
Return to Y2K Aesthetics
The nostalgia for the early 2000s is palpable, as its influence resurfaces in fashion and design. The Y2K aesthetic is defined by a bold fusion of bright colors, metallic accents, and a blend of futuristic and retro elements. To capture this spirit, consider incorporating tech-inspired graphics or pop culture references from that era into your DIY tees. This allows you to create stylish pieces that resonate with current culture. Ultimately, the best designs are those that reflect your unique personality, so while trends can serve as inspiration, don’t be afraid to add your own touch and make them truly yours.
Troubleshooting Common Issues in DIY Graphic Tees
When creating DIY graphic tees, it’s not uncommon for minor setbacks to arise. Fear not, as these obstacles are often easily resolvable. To ensure a successful outcome, we’ve compiled a comprehensive guide to help troubleshoot common issues and overcome any challenges you may face in the process. By addressing these potential roadblocks head-on, you’ll be well on your way to producing exceptional graphic tees that showcase your creativity.
Preventing Ink Bleeding
To preserve the crispness of your design, it’s essential to prevent ink bleeding. Achieving this can be accomplished by following a few simple steps. Firstly, utilize transfer paper that is specifically designed for your printer type to ensure compatibility. Next, adjust your printer settings to their highest quality setting and select the correct paper type. Finally, permit the freshly printed design sufficient time to dry before handling it, thus preventing any accidental smudging or smearing.
Avoiding Fabric Shrinkage
When it comes to designing on t-shirts, shrinkage can be a major issue that throws off your entire design. To minimize the impact of shrinkage and ensure your design remains intact, follow these simple steps:
Firstly, give your tee a pre-wash treatment before applying the design. This step helps reduce shrinkage by removing any excess dye or finishes that might cause distortion.
Secondly, consider using pre-shrunk fabric for your tee. This type of material is designed to minimize shrinkage and maintain its shape after washing.
Ensuring Design Longevity
To ensure your graphic tee stays looking great for years to come, it’s crucial to consider the materials used and the care instructions followed. Start by investing in top-notch transfer paper and inks that will withstand the test of time. Next, make sure you’re washing and drying your tee correctly – this means doing so inside out on a gentle cycle and avoiding high heat in the dryer.
Solving Design Fading
To extend the lifespan of your DIY graphic tees, it’s essential to implement a few simple measures to prevent fading. Firstly, consider using a UV spray on the design to shield it from the sun’s damaging rays. Additionally, when ironing the tee, make sure to do so on the reverse side to avoid direct heat application on the graphic. By taking these precautions, you’ll be able to maintain the professional appearance and longevity of your DIY designs. As with any skill, the key to mastering this technique is repetition – don’t be afraid to experiment and refine your approach as you go along.
Sustainability Practices in DIY Graphic Tees
When crafting DIY graphic tees, creative expression meets environmental stewardship. By embracing eco-friendly methods, you not only showcase your artistic side but also play a role in reducing the fashion industry’s ecological footprint. To make a positive impact on the planet while designing stylish tops, consider these sustainable practices that can be seamlessly integrated into your DIY projects:
Choose Eco-Friendly Materials
When it comes to creating sustainable products, selecting the right materials is a crucial step. One eco-friendly option is organic cotton, which is grown without the use of harmful chemicals and pesticides. This not only benefits the environment but also promotes healthier soil and ecosystems. Another way to reduce waste is by using recycled fabrics or repurposing old tees. For instance, you could turn an old t-shirt into a reusable bag or produce. Additionally, opting for eco-friendly inks such as water-based or soy-based inks can significantly minimize the negative impact on the environment. These inks are less harmful than their chemical-based counterparts and can help reduce pollution.
Minimize Waste
As you embark on a creative project, remember to be mindful of waste and its environmental impact. One effective way to reduce waste is by planning your design with precision. Before diving in, take the time to map out your project, considering the amount of fabric and ink you’ll need to use. This thoughtful approach can help minimize unnecessary usage and reduce waste. Additionally, don’t overlook the value of scraps – save them and repurpose them for smaller projects or patchwork designs. Not only will this help reduce waste, but it’ll also give your creations a unique touch.
Energy-Efficient Techniques
When it comes to caring for your tees, consider the environmental impact of your daily habits. For instance, instead of using hot water to wash them, opt for a cold wash cycle. This simple switch can significantly reduce the amount of energy consumed in the washing process.
Furthermore, skip the dryer and let your tees air dry. Not only will this save electricity, but it also helps prolong the lifespan of your garments by reducing wear and tear caused by machine drying.
Support Sustainable Brands
As consumers, we have the power to drive positive change in the world by making conscious purchasing decisions that align with our values. When buying materials for DIY projects like graphic tees, consider supporting brands that prioritize sustainability and eco-friendliness. This can be done by researching companies that integrate environmentally responsible practices into their operations and seeking out certifications like B Corp or Fair Trade to ensure ethical production standards are met. By choosing to work with sustainable brands, we’re not only creating unique and personalized apparel but also contributing to a more responsible and environmentally conscious approach to crafting.
FAQs About DIY Graphic Tees
Crafting custom graphic tees is an enjoyable DIY venture that yields fantastic results. To kick-start your creative journey, I’ll address common queries and provide valuable insights to guarantee your designs stand out, stay vibrant, and endure with wear.
What type of fabric is best for DIY graphic tees?
While cotton remains a top pick among fabric choices, its breathable properties and capacity to hold ink well make it an ideal option. That being said, polyester and blend fabrics can also be effective alternatives, particularly when utilizing specific printing techniques such as sublimation.
Can I use any printer to print designs on transfer paper?
When it comes to printing on transfer paper, it’s generally recommended to use an inkjet printer instead of a laser printer. This is because laser printers employ a distinct printing technology that can impact the quality and longevity of the printed image. Inkjet printers, on the other hand, produce prints with characteristics well-suited for transfer paper, making them a more suitable choice for this specific application.
How do I prevent the design from fading after washing?
When it comes to preserving the color intensity of a graphic tee, there are several simple yet effective steps you can take. Firstly, always wash your garment inside out in cold water to prevent fading. Additionally, choosing high-quality inks and transfer paper when printing your design can also help maintain its vibrancy over time.
What’s the difference between heat transfer and screen printing?
Heat transfer and screen printing are two popular methods used to decorate fabrics. In heat transfer, a design is printed on special paper and then transferred onto the fabric using heat. This method is particularly well-suited for intricate, multi-colored designs that require precise detail. On the other hand, screen printing involves pushing ink directly through a mesh stencil onto the fabric. While it may not be as effective for complex designs, screen printing is ideal for larger batches of fabrics and designs with fewer colors. Ultimately, the choice between heat transfer and screen printing depends on the specific requirements of your project.
How can I ensure my design is centered on the tee?
To ensure accurate placement, begin by marking the center of your t-shirt using a washable fabric pen or chalk. This will serve as a reference point for positioning your design. Once you’ve established this anchor point, carefully align your design with the marks before applying heat or ink.
Is it necessary to wash the tee before applying a design?
By taking a proactive approach before washing your t-shirt, you can significantly reduce the risk of shrinkage and guarantee that the design remains vibrant and even throughout.
Can I iron directly on the transferred design?
When it comes to ironing your graphic tees, it’s essential to take precautions to preserve the design. To avoid damaging the artwork, never iron directly on the design itself. Instead, opt for one of two methods: iron the tee from the reverse side or place a protective cloth between the iron and the design.
What are some eco-friendly options for DIY graphic tees?
When it comes to creating eco-friendly apparel, there are several key considerations to keep in mind. For instance, opting for organic cotton tees, water-based inks, and recycled materials can make a significant positive impact on the environment. Not only do these alternatives promote sustainability, but they also enable the creation of high-quality products that meet consumer demands.
How can I make a distressed look on my graphic tee?
Achieve a distressed appearance by subtly applying gentle pressure with sandpaper once the design is in place. However, exercise caution to avoid over- scrubbing, which may compromise the integrity of the fabric.
What should I do if the ink bleeds during the transfer process?
Ink bleeding is commonly caused by excessive heat or pressure during the printing process. To mitigate this issue, it’s essential to adhere strictly to the recommended temperature and timing guidelines provided in the printing instructions. For added peace of mind, consider performing a trial run before embarking on the actual print job.
Can I layer different designs on top of each other?
To successfully layer designs on a t-shirt, meticulous planning and execution are crucial. A key consideration is ensuring each layer is completely dry or set before adding the next, as applying too many layers can result in an unyielding and uncomfortable garment. By acknowledging these essential guidelines, you’ll be well-prepared to craft your own distinctive and stylish DIY graphic tees. As with any skill, mastering the process takes time and practice – don’t hesitate to experiment and refine your techniques as you go along.
15 DIY Graphic Tees
Embrace your creative side by crafting one-of-a-kind DIY graphic tees using a straightforward, step-by-step approach. This fun and rewarding project is ideal for unleashing your imagination.
Beginner-friendly DIY Graphic Tees

Elevate your personal style by transforming plain graphic tees into one-of-a-kind masterpieces. With just a few simple steps from Studio DIY, you’ll need only a basic tee, iron-on letters, and an iron to unlock the creative possibilities. This fun project is perfect for social gatherings or as a unique way to express yourself. Take inspiration from your favorite lyrics, quotes, or witty sayings and bring them to life on your very own personalized tees. Not only will you be rocking a customized look, but you’ll also have the opportunity to share your designs with friends and fellow enthusiasts, sparking lively conversations and debates about the clever phrases that catch their attention. So, what’s the first message you’ll want to broadcast from your tee? The possibilities are endless!
Make Your Own Fun Graphic Tees with Cricut’s

With just under 15 minutes on your hands, you can transform a plain tee into a statement piece with a unique DIY design using Cricut’s Patterned Iron-On. This versatile tutorial from The Crafted Sparrow allows you to choose from an array of patterns and colors that perfectly reflect your personal style. Whether you’re using the Cricut Maker or Cricut Explore Air 2, paired with the EasyPress, this project is a great way to add a touch of creativity to your wardrobe. Experience the thrill of crafting your very own customized t-shirt today.
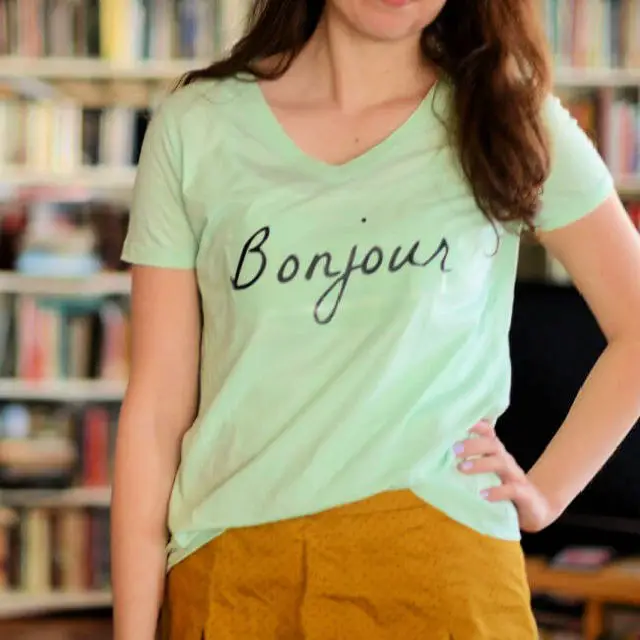
Handmade Graphic Tees with Free Printables
Unleash your creativity and personal style with DIY graphic tees, brought to life through free printables and expert guidance. Master the art of customization with simple yet effective methods like freezer paper stenciling or photo transfer paper, allowing you to express yourself through bold statements, playful designs, or anything in between. With this comprehensive guide, you’ll gain the skills and confidence to create durable, stylish creations that reflect your unique personality. From fun and successful DIY projects to unparalleled fashion statements, every step is designed to help you elevate your style game and make tees that truly speak to who you are.
DIY Graphic T-shirt with Silhouette Portrait
Get ready to unleash your creativity and give your wardrobe a personalized touch with this DIY graphic t-shirt tutorial using the Silhouette Portrait. This comprehensive guide will take you by the hand, from selecting the perfect design to the final iron-on application, teaching you how to craft a unique piece that reflects your personality. If you need extra supplies or more detailed instructions, head over to Sprinkle Creative for a step-by-step tutorial. With this guide, you’ll be able to create a t-shirt that truly represents who you are and lets your individuality shine through!
Making a Disney Beauty and The Beast Graphic T-Shirt
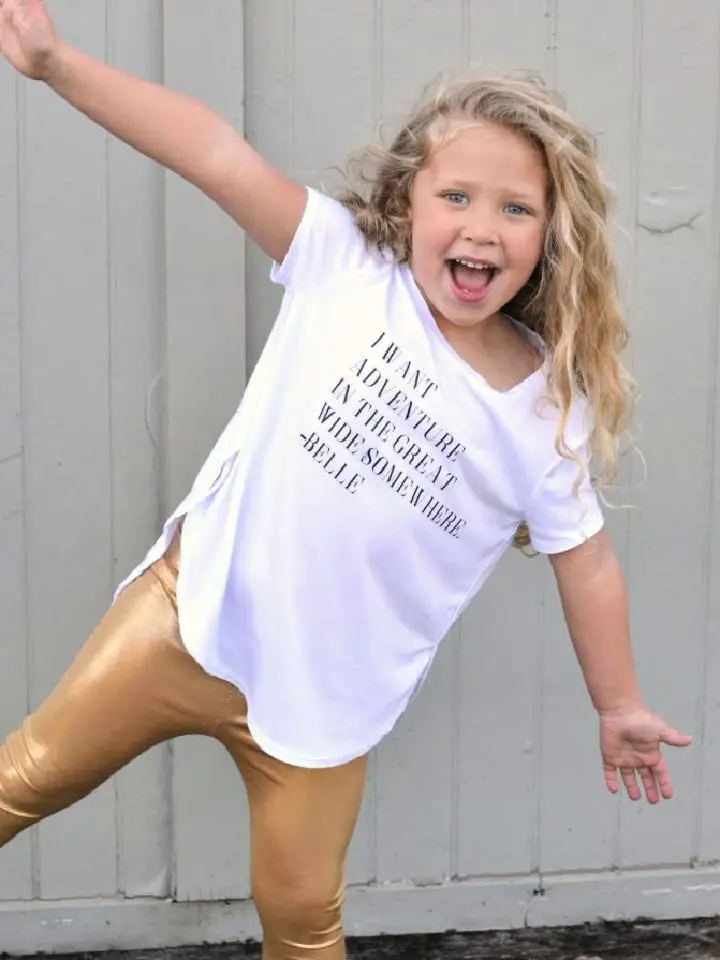
Transform your passion for Disney’s Beauty and the Beast into a wearable masterpiece with our easy-to-follow DIY guide on creating graphic tees. Perfect for fans of all ages eagerly awaiting the movie’s release or anyone seeking to add a touch of whimsy to their wardrobe. By following our simple, step-by-step instructions, you’ll unlock your creativity and craft a one-of-a-kind piece that reflects your unique style. For a comprehensive tutorial that will help you bring this magical design to life, visit Moms Without Answers and get ready to proudly showcase your Belle-inspired look.
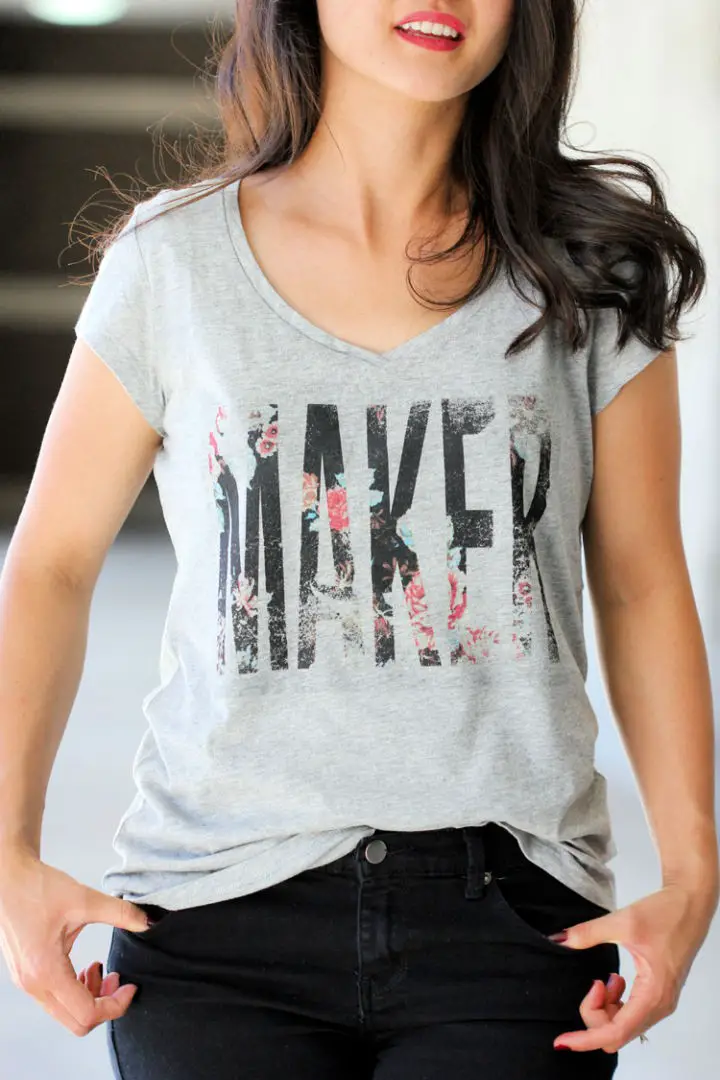
Homemade Vintage Summer Graphic Tee
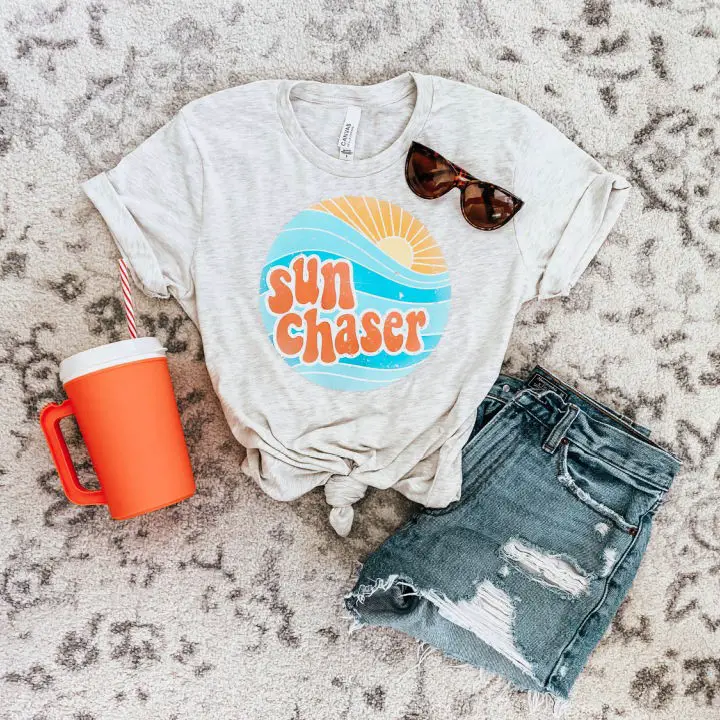
Give your summer wardrobe a vintage makeover by creating a one-of-a-kind graphic tee using Craftables. This step-by-step guide will walk you through the process of transforming Inkjet Printable Heat Transfer Vinyl into a unique and distressed design on a blank t-shirt. Within 30 minutes, you’ll gain the skills to add a personalized touch to your wardrobe, making it truly yours. With simple, easy-to-follow instructions, this DIY project is perfect for crafters of all levels, promising a fun and successful experience that will leave you feeling stylish and refreshed.
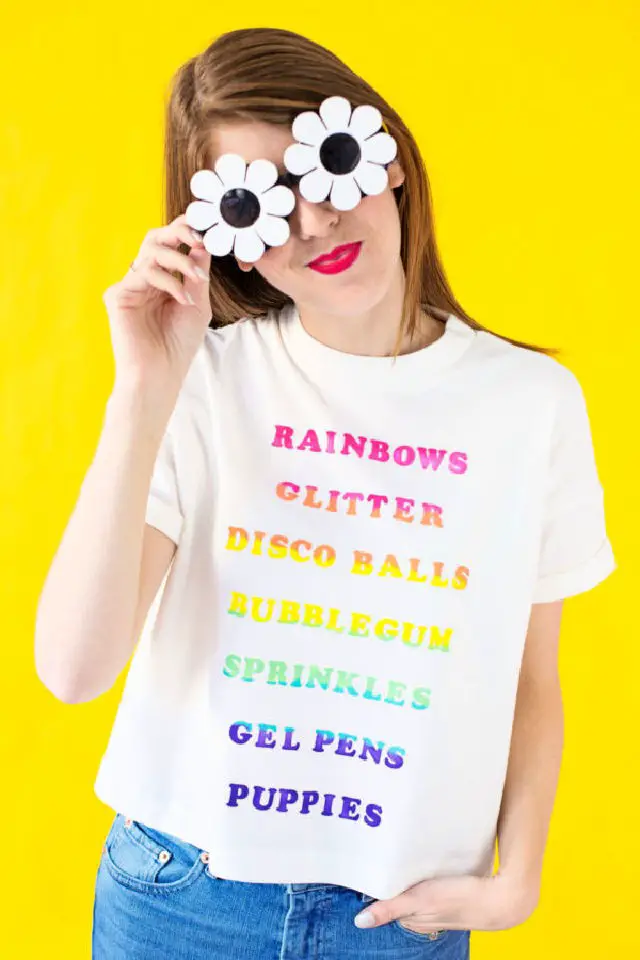
Easy DIY Glitter Graphic Shirts

Embrace your individuality by crafting one-of-a-kind graphic tees with our step-by-step guide. As you prepare for back-to-school, elevate your wardrobe game with DIY glitter graphic shirts that blend fashion and fun in perfect harmony. With The Simply Crafted Life, learn how to transform plain shirts into dazzling outfits using glitter heat transfer vinyl.
From selecting catchy song lyrics to carefully applying the vinyl, our instructions are designed to be easy to follow, ensuring a stunning outcome. Don’t forget to mirror your image and place the vinyl correctly for perfect results. Let’s dive into this craft and create designs that your kids will love to wear!
How to Make Graphic Tees – Step by Step
Unleash your creative expression by breathing new life into plain graphic tees with this straightforward DIY guide. With just transfer paper, a computer, and an iron, you can turn any ordinary tee into a one-of-a-kind statement piece that reflects your unique style and personality. Perfect for those who crave original fonts and wordplay, or want to add a touch of whimsy to their wardrobe. This step-by-step tutorial will take you from concept to reality, covering the design process as well as the ironing technique. Whether you’re creating a tee with a witty phrase or a design that resonates deeply with your passions, this guide empowers you to make your wardrobe a true reflection of who you are.
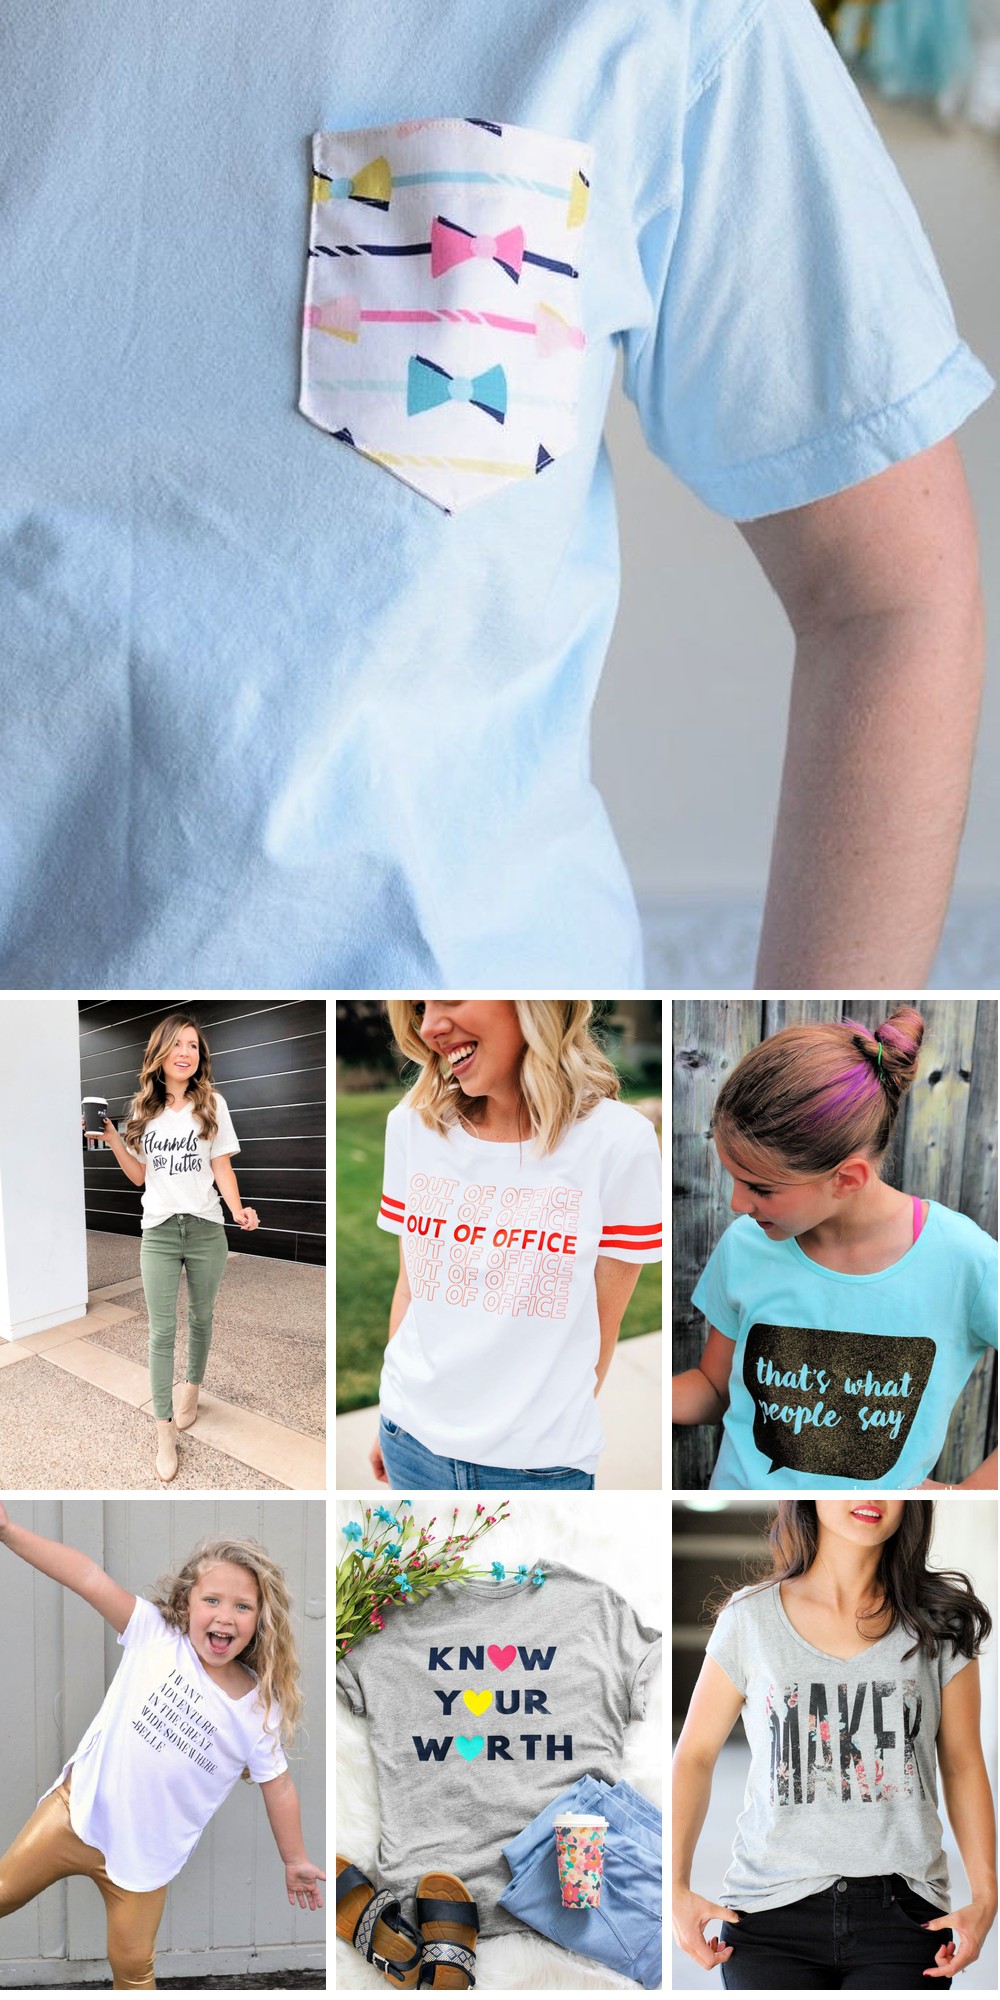
Make Embellished Pocket Graphic Tees
Give your wardrobe a personalized makeover by incorporating one-of-a-kind embellishments into a classic pocket tee. On Polka Dot Chair, we’re excited to share a step-by-step DIY tutorial that showcases how to bring creative flair to your t-shirts using accessible sewing and appliqué techniques.
This project is perfect for anyone who craves hands-on inspiration, as it guides you through crafting a tee that boasts charming details like bow-tie pockets and state silhouettes. With just a few simple materials, let’s add a special touch to your tees today!
Cool DIY Apres Ski Graphic Tees

Transform your winter wardrobe with a DIY graphic tee that’s uniquely yours. By following our easy steps, you can turn a basic pullover into a statement piece that’s perfect for warming up in style after a day on the slopes. At Francois et Moi, we’ve got a comprehensive guide to making your own cozy and chic ski-themed sweater. With just iron-on letters, an iron, and a pullover, you’ll be able to create a bespoke design that reflects your personality. This fun DIY project is ideal for anyone looking to add a personal touch to their winter attire. Simply follow the simple instructions and enjoy a one-of-a-kind sweater that’s as much fun to make as it is to wear.
Beautiful Out Of Office Graphic Tees
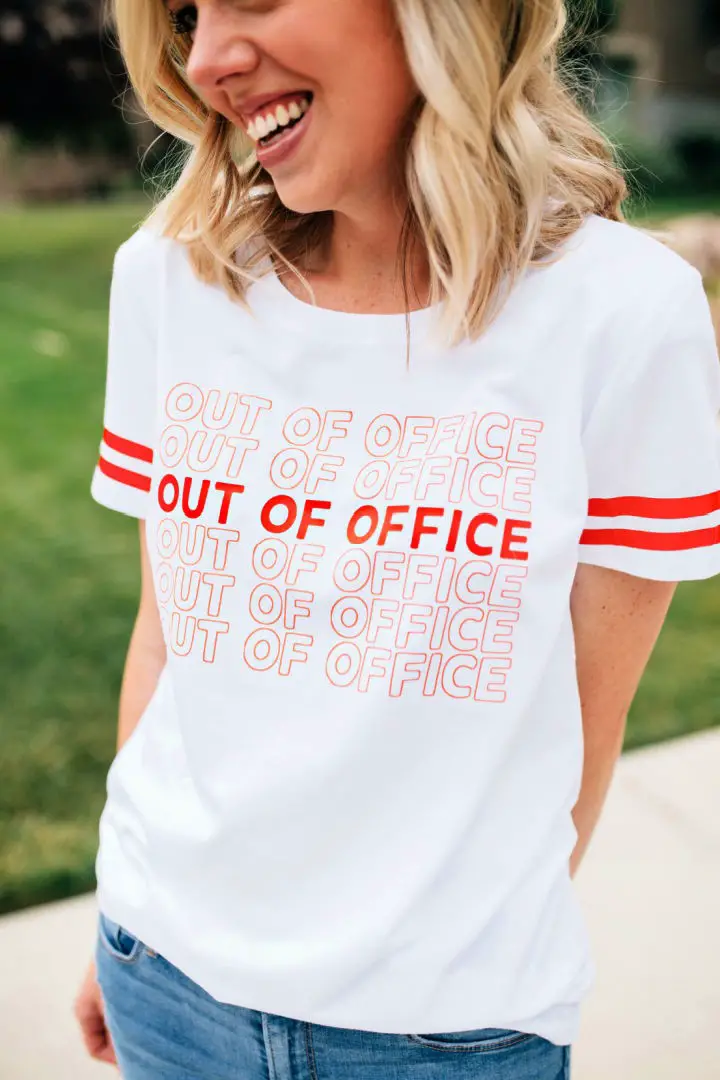
Unleash the fun of making memories with an unforgettable DIY out-of-office T-shirt, brought to you by The Pretty Life Girls. With their easy-to-follow guide, create a tee that perfectly captures the essence of your summer escapades. Whether you’re lounging by the pool or camping under the stars, express yourself in style with this simple and straightforward crafting process.
All you need is a blank T-shirt and Easyweed Heat Transfer Vinyl to get started. Follow these easy steps: cut out your design, carefully weed away excess vinyl, and iron it on for a professional finish. Before you know it, you’ll be rocking your very own DIY masterpiece this summer.
Reverse Applique T-Shirt Refashion

Unleash your creativity and transform ordinary graphic tees into extraordinary pieces of self-expression with these innovative DIY techniques. One such approach is reverse appliqué, a method that involves sewing a design onto a t-shirt and then carefully cutting away the top layer to reveal a contrasting fabric underneath. This unique technique allows you to add a personal touch to your wardrobe, giving old favorites a fresh new look. Whether you’re working with advanced cutting tools like the Cricut Maker or relying on simple scissors, this DIY approach makes it easy and fun to breathe new life into plain tees. Perfect for anyone looking to customize their clothing and explore the world of refashioning.
Gorgeous DIY Iron On Vinyl Shirt

Elevate the power of self-acceptance by giving voice to your confidence through fashion. The Know Your Worth Iron-On Vinyl Shirt from Purely Katie presents a unique opportunity to make a statement about your personal value. This DIY project is perfect for those who appreciate one-of-a-kind wardrobe additions that reflect their personality. With simple, step-by-step guidance, you’ll be delighted to create a custom T-shirt that serves as a testament to your individuality and worth.
How to Dye Flocked Iron On Letters
Revamp your wardrobe with a simple yet impactful DIY project: dyeing flocked iron-on letters. This creative endeavor allows you to breathe new life into your clothes, breaking free from the monotony of basic black-and-white designs. The possibilities are endless, ranging from delicate pastel hues to bold ombre rainbows. To bring this innovative idea to fruition, head over to Studio DIY for a comprehensive tutorial that will guide you through every step of the process. With this easy-to-follow approach, you can transform your tees and sweatshirts into one-of-a-kind masterpieces that reflect your unique style.
How to Style a Graphic Tee
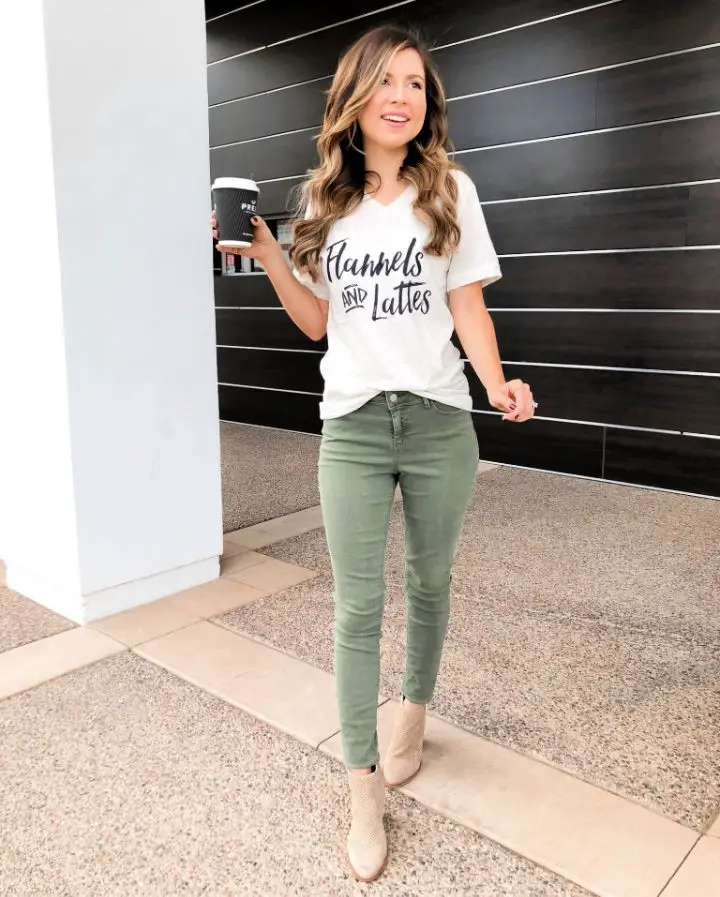
Elevate the humble graphic tee by incorporating it into two stylish DIY outfits, courtesy of Simply Sutter. To achieve a relaxed yet put-together look, pair your graphic top with olive-hued pants and ankle boots for a perfect blend of laid-back charm. For added flair, throw on a denim jacket to inject an extra layer of coolness into the ensemble. Alternatively, take things up a notch by combining your tee with sleek black trousers, heels, and a chic blazer – the epitome of dressy sophistication. These ingenious styling ideas will breathe new life into your treasured graphic tees, offering endless possibilities for reimagining your wardrobe staples. For visual inspiration and additional fashion guidance, visit Simply Sutter.
Conclusion:
With the DIY graphic tee-making process now well within your grasp, it’s essential to remember that this creative outlet offers more than just a fun and engaging experience. By taking on projects like these, you’re also able to express your personal style, explore sustainable fashion options, and even make a statement with your choices. The skills and knowledge we’ve shared with you so far will empower you to bring your designs to life, selecting the perfect fabric, choosing the right printing method, and executing each step with confidence. Furthermore, we’ve provided valuable design inspiration and troubleshooting tips to ensure that your creations not only meet but exceed your expectations. As a final reminder, every DIY graphic tee is a reflection of your unique creativity and individuality – so seize this opportunity to unleash your imagination and bring your one-of-a-kind designs to life with flair!
