Crafting a DIY throw blanket for summer is an excellent way to infuse personal style into your home decor while having fun with a creative project. With the right materials and a dash of imagination, you can create a throw that not only reflects your aesthetic but also complements the warmer months’ ambiance. This comprehensive guide will walk you through the process, providing valuable insights on selecting fabrics and expert tips to ensure your final product meets your expectations.
Embarking on a DIY throw blanket adventure is a wonderful way to welcome summer’s arrival. This step-by-step tutorial covers everything from material selection to the finishing touches, guaranteeing that your completed throw becomes a treasured addition to your summer setup.
Next, we’ll delve into the world of materials, exploring the essential elements for crafting the perfect summer throw blanket.
Material Selection for Your DIY Throw Blanket
When crafting a cozy and inviting throw blanket, the choice of material plays a crucial role in elevating its overall appeal. While design is essential, the right fabric can transform a simple blanket into a treasured possession within your home. To ensure your DIY project exceeds expectations, it’s vital to consider the ideal material for your throw blanket.
Understanding Fabric Qualities
The ultimate comfort factors in a blanket include its softness and ability to provide a sense of coziness. Materials like fleece and Sherpa excel in this regard, inviting you to snuggle up with their plush textures. On the other hand, durability is equally important, as you’ll want a blanket that can withstand regular use without losing its shape or compromising on quality. Wool, cotton, and high-quality synthetic materials are all good options here, boasting impressive longevity. Finally, ease of care is a crucial consideration – look for materials that are easy to wash and maintain, such as many synthetics which are machine washable, making them perfect for daily use.
Popular Materials for Throw Blankets
When choosing a material for your throw blanket, several options come into play. Fleece stands out for its plush texture, warmth, and versatility in colors and patterns. Its lightweight nature makes it an excellent choice for a cozy addition to any room. On the other hand, cotton is a popular pick for summer throw blankets due to its breathability and ability to regulate temperature. This natural fiber is also easy to care for, making it a practical option. For colder months, wool takes center stage with its insulating properties and moisture-wicking abilities. Its slightly heavier weight makes it perfect for snuggling up on chilly evenings. Linen, made from flax plant fibers, brings a refreshing touch to your throw blanket game. Its natural cooling properties and high absorbency make it an excellent choice for warm climates or year-round use in well-ventilated spaces. Lastly, bamboo fabric boasts eco-friendly credentials, as well as super softness, absorption, and hypoallergenic qualities. This gentle material is suitable for even the most sensitive skin types, making it a thoughtful gift for loved ones.
Tips for Choosing the Right Material
When selecting materials for your DIY throw blanket, it’s essential to consider how you plan to use the finished product. Will you be relying on it for warmth, using it as a decorative piece, or a combination of both? Your intended purpose will influence the type of material you choose. Next, think about the season and the climate where you’ll be using your blanket. For instance, lighter materials like cotton and linen are better suited for warm weather, while wool and fleece provide excellent warmth during colder months. Finally, don’t forget to factor in your personal preference. Choose a material that feels comfortable against your skin or one that complements your home’s aesthetic. By taking these factors into account, you’ll be able to select the ideal material for your DIY throw blanket, ensuring it meets your needs and exceeds your expectations.
How to Make a Throw Blanket – Step by Step
Gift-giving just got a whole lot easier! No-sew blankets are perfect for those who don’t have the time or skill to tackle sewing projects. And the best part? You can create a cozy and warm blanket using polar fleece, which is not only easy to work with but also incredibly soft and cuddly. Just imagine snuggling up on the couch with a brand new no-sew blanket, courtesy of your own creativity and some simple materials.
What You Need
To craft your polar fleece throw blanket, you’ll need two layers of this insulating fabric, specifically 1 and * yards in total, measuring 60 inches wide for the finished product. Additionally, you’ll require a few basic tools to get started: chalk or a vanishing ink pen to mark your fabric accurately; a ruler or measuring tape to ensure precise cuts; scissors or a rotary cutter to make those cuts a reality; and a cutting board, if using the latter, to protect your work surface from any stray fibers. If you’re concerned about erasing any markings made during the process, keep a spray bottle filled with water on hand for quick cleanups.
Step 1: Prepare the Fabric
Align the two pieces of polar fleece fabric side by side on a stable surface, making sure the long edges are precisely matched and parallel. Next, fold each piece of fabric in half lengthwise, ensuring the widths align perfectly. Before proceeding, carefully remove any salvage edges from both fabrics to create a smooth, even surface.
Step 2: Measuring and Marking
When it comes to determining the size of your blanket, one common approach is to utilize the full width of the fabric for a throw. For instance, if you’re working with fabric that’s 60 inches wide, you might consider cutting two and a half yards of this material into pieces measuring approximately 65 inches in length, which would result in a generously sized throw. Once you’ve decided on your blanket’s size, use a tool like chalk or a vanishing ink pen to mark a line three inches from the edge on all sides of the fabric layout. This simple step will provide a clear guide for the cutting process that follows.
Step 3: Cutting the Corners and Strips
To begin, carefully cut out squares from each corner of your fabric, using the 3-inch markings as a guide. Next, cut 1-inch wide strips along all four edges of the fabric, ensuring these strips extend through both layers and stop at the 3-inch vertical marks. If necessary, adjust the width of the final strips to maintain evenness, given that slight variations in measurement are expected.
Step 4: Making the Fringe Ties
To create a precise fringe, start by making a half-inch incision in the center of each strip, just below your 3-inch horizontal guideline. For added accuracy, fold the fabric as you cut, ensuring the fold aligns with the mark. This carefully crafted cut will serve as the entry point for pulling the fabric to achieve the desired fringe effect.
Step 5: Tying the Fringe
To create the desired fringe pattern, start by feeding the bottom strip of fabric through the initial cut, carefully drawing it all the way through to form a secure knot. As you pull the strip through, be sure to gently separate the two layers of fabric to tighten the knot and create a striking contrast in the fringe. This process should be repeated around the entire blanket, working one side at a time to achieve the desired visual effect.
Step 6: Finishing Touches
When you’ve finished filling out the puzzle, you’ll likely encounter some stubborn ink residue on the paper’s surface. To effectively remove these markings, try this simple technique: gently mist the affected areas with water using a spray bottle, then use a soft, lint-free cloth to dab away the remaining ink stains. This should leave your puzzle board looking smooth and ready for its next challenge.
Video Tutorial
To enhance your understanding of making a no-sew blanket, we recommend exploring a comprehensive video tutorial available on YouTube. This visual guide complements the written instructions provided below, allowing you to learn through both auditory and visual means. The video tutorial meticulously illustrates each step, providing an immersive learning experience that reinforces your comprehension.
Customization Ideas for Your DIY Throw Blanket
Transforming a DIY throw blanket from ordinary to extraordinary is just a matter of adding a personal touch. By incorporating unique elements that reflect your personality and style, you can turn a simple piece of home decor into a true reflection of yourself. Here are some creative ways to customize your DIY throw blanket:
Embellishments That Make a Statement
Infuse your handmade blankets with creative flair by incorporating tassels, pom poms, embroidery, and appliqué techniques. Tassels and pom poms can be attached to the edges of your blanket using yarn or faux fur for a playful and luxurious touch. For a more personalized approach, consider embroidering names, initials, or meaningful quotes onto the fabric. This elegant addition will make your blanket truly one-of-a-kind. Alternatively, use appliqué to add shapes and patterns made from fabric scraps, injecting color and whimsy into your design.
Functional Customizations
To add functionality and versatility to your handmade blanket, consider incorporating innovative design elements. One such feature is sewing pockets into the fabric to provide a cozy space for your hands, a remote control, or even a book. This thoughtful addition allows you to stay warm and comfortable while enjoying your favorite activities.
Another option is to incorporate weighted beads into the lining of your blanket, providing a tactile experience reminiscent of weighted blankets. This unique feature can be especially appealing to those who appreciate the calming effects of deep pressure stimulation.
For the ultimate in versatility, consider designing your blanket with a reversible concept. By using two distinct fabrics for the front and back, you can easily change the appearance of your blanket to suit your mood or decor. This clever design element offers endless possibilities for self-expression and practicality.
Seasonal and Thematic Designs
Transform your throw blanket into a one-of-a-kind statement piece with these creative customization ideas. Bring in the festive spirit by incorporating holiday-themed designs like twinkling Christmas trees or harvest-inspired pumpkins. Alternatively, draw inspiration from nature’s beauty and incorporate floral patterns or earthy tones to bring the outdoors in. For a modern twist, bold geometric shapes and lines can add a sleek touch. With these unique customization ideas, you’ll create a cozy and stylish throw blanket that reflects your personal style and adds warmth to your home. Remember, the key is to have fun and let your creativity shine through.
Care and Maintenance of Your DIY Throw Blanket
To extend the life of your DIY throw blanket and maintain its softness and inviting appearance, follow these simple steps for effective care and maintenance. By doing so, you’ll ensure your handmade blanket remains as cozy and comfortable as the day it was created.
Washing Your Throw Blanket
When it comes to cleaning your blanket, start by reading the care label to get a better understanding of what’s needed for your specific material. The manufacturer’s instructions will provide valuable guidance on how to wash your blanket without causing any damage.For machine-washable blankets, opt for a gentle cycle with cold water and a mild detergent. It’s essential to avoid using bleach or fabric softeners, as these chemicals can weaken the fibers over time. Instead, stick to gentle cycles and cold temperatures to keep your blanket in great condition.If you’re dealing with delicate materials, hand washing is often the best option. Use lukewarm water and a gentle soap, taking care not to wring or twist the blanket as this can cause damage. By following these simple steps, you’ll be able to keep your blanket clean and looking its best for years to come.
Drying Your Throw Blanket
When it comes to drying your blankets, safety should be your top priority. A great way to do this is through air drying, which works for all types of blankets. Simply lay the blanket flat on a clean surface or hang it on a line, taking care to keep it away from direct sunlight that could cause fading. This method not only prevents damage but also helps maintain the blanket’s natural texture.If you must use a dryer, be sure to select a low heat setting and remove the blanket while it’s still slightly damp to minimize shrinkage. To restore the blanket’s shape and fluffiness, take a few minutes to manually fluff it by hand.
Storing Your Throw Blanket
To ensure your DIY throw blanket remains warm, cozy, and visually appealing, it’s essential to follow proper care instructions. Firstly, when not in use, store your blanket in a cool, dry place, folding it neatly to minimize wrinkles. This simple step will help preserve the softness and texture of your handmade creation.
It’s also crucial to avoid compressing or stacking heavy items on top of your blanket, as this can cause permanent damage to its fluffiness. By taking these precautions, you’ll be able to enjoy your throw blanket for years to come, providing warmth and comfort to yourself and others.
By implementing these simple care tips, you’re not only extending the lifespan of your DIY project but also maintaining its aesthetic appeal. Remember, a little attention and TLC can go a long way in preserving the beauty and functionality of your handmade creation. As you continue to craft and care for your blanket, it will remain a treasured possession for years to come.
Sustainability Tips for Your DIY Throw Blanket
Crafting a DIY throw blanket not only promotes sustainability, but also infuses your home with a personal touch and a narrative that makes it truly unique. By adopting eco-friendly practices in your creative process, you’re not only reducing waste but also making a conscious choice to live more responsibly. In this context, making a sustainable DIY throw blanket is a thoughtful way to bring a piece of yourself into your living space while minimizing your environmental footprint.
Choose Sustainable Materials
When selecting textiles for your sustainable fashion choices, consider opting for organic cotton, which eschews the use of hazardous pesticides and synthetic fertilizers in its cultivation process. This eco-friendly approach not only benefits the planet but also yields a soft and gentle fabric that’s pleasing to the touch.
Another environmentally responsible option is recycled fabrics, which repurpose materials that would otherwise end up as waste, supporting a circular economy in the process.
Furthermore, natural dyes derived from plant or mineral sources can be a more sustainable alternative to synthetic dyes, presenting a lower environmental impact during the dyeing process.
Eco-Friendly Practices
To minimize waste during the project, plan ahead to utilize fabric efficiently. This can be achieved by saving and repurposing any scraps generated during the process for future projects or even using them as stuffing material. Additionally, consider reusing old sewing machines that consume less energy or opt for hand-sewing your blanket to reduce power consumption. Furthermore, when dyeing fabrics, conserve water usage by only utilizing what is necessary and ensuring responsible disposal of water. By implementing these strategies, you can significantly minimize waste, reduce energy and water consumption, making the project more environmentally friendly.
Support Fair Trade
When crafting your unique throw blanket, it’s crucial to prioritize ethical sourcing of materials. This involves purchasing from companies that guarantee fair wages and safe working environments for their employees. By doing so, you’ll not only create a cozy and visually appealing blanket but also contribute to a more sustainable future.
FAQs for DIY Throw Blankets
As the desire to create a personalized DIY throw blanket takes hold, it’s natural to be met with a flurry of questions, particularly for those venturing into crafting territory for the first time. To provide a sense of clarity and confidence, I’ve taken the liberty of addressing some of the most common concerns that may arise during this process.
What materials do I need to start making a throw blanket?
To create your handmade blanket, start by gathering essential materials: a suitable fabric choice such as fleece, cotton, or wool; a sewing machine or the manual alternative of needle and thread; scissors for trimming excess material; and any decorative elements like tassels or embroidery supplies that you wish to incorporate. The quantity of fabric required will depend on the desired size of your finished blanket.
How do I choose the right fabric?
When selecting a blanket, first consider its intended use. If you’re looking to stay warm, opt for materials like fleece or wool that are known for their insulation properties. On the other hand, if you’re seeking a lightweight, decorative throw, cotton or linen could be more suitable. Additionally, think about the texture, durability, and ease of care when making your decision. These factors will play a significant role in determining the overall quality and usability of your blanket.
Can I make a throw blanket without a sewing machine?
While traditional machine sewing may be the go-to method for many, hand sewing offers a unique therapeutic benefit that can’t be replicated by machines alone. Yes, it may take more time and effort to complete a project by hand, but the sense of accomplishment and satisfaction is equally profound. For beginners, starting with a simple running stitch or learning the blanket stitch for a decorative edge is an excellent way to get started.
How do I add a personal touch to my blanket?
To infuse a personal touch, consider exploring diverse techniques such as embroidery, appliqué, or incorporating distinctive trim elements. Select an approach that harmonizes with your aesthetic or the intended recipient’s preferences, allowing you to convey a unique sense of personality.
How do I care for my DIY throw blanket?
When it comes to caring for your new item, the type of material used plays a significant role in determining the best approach. In most cases, you can rely on a gentle wash cycle with cold water and air drying. However, it’s always important to consult the fabric’s care label for specific guidelines, as some materials may require more specialized treatment.
What are some common mistakes to avoid?
When diving into a DIY throw blanket project, it’s essential to consider the fabric preparation and thread selection. Failing to prewash the fabric can result in shrinkage, while using an inappropriate type of thread can compromise durability. To achieve a professional-looking finish, take your time with measurements and cutting. By understanding these crucial aspects, you’ll be better equipped to tackle your project with confidence. As this process is a learning experience, be sure to enjoy the journey of creating something unique and cozy for your home.
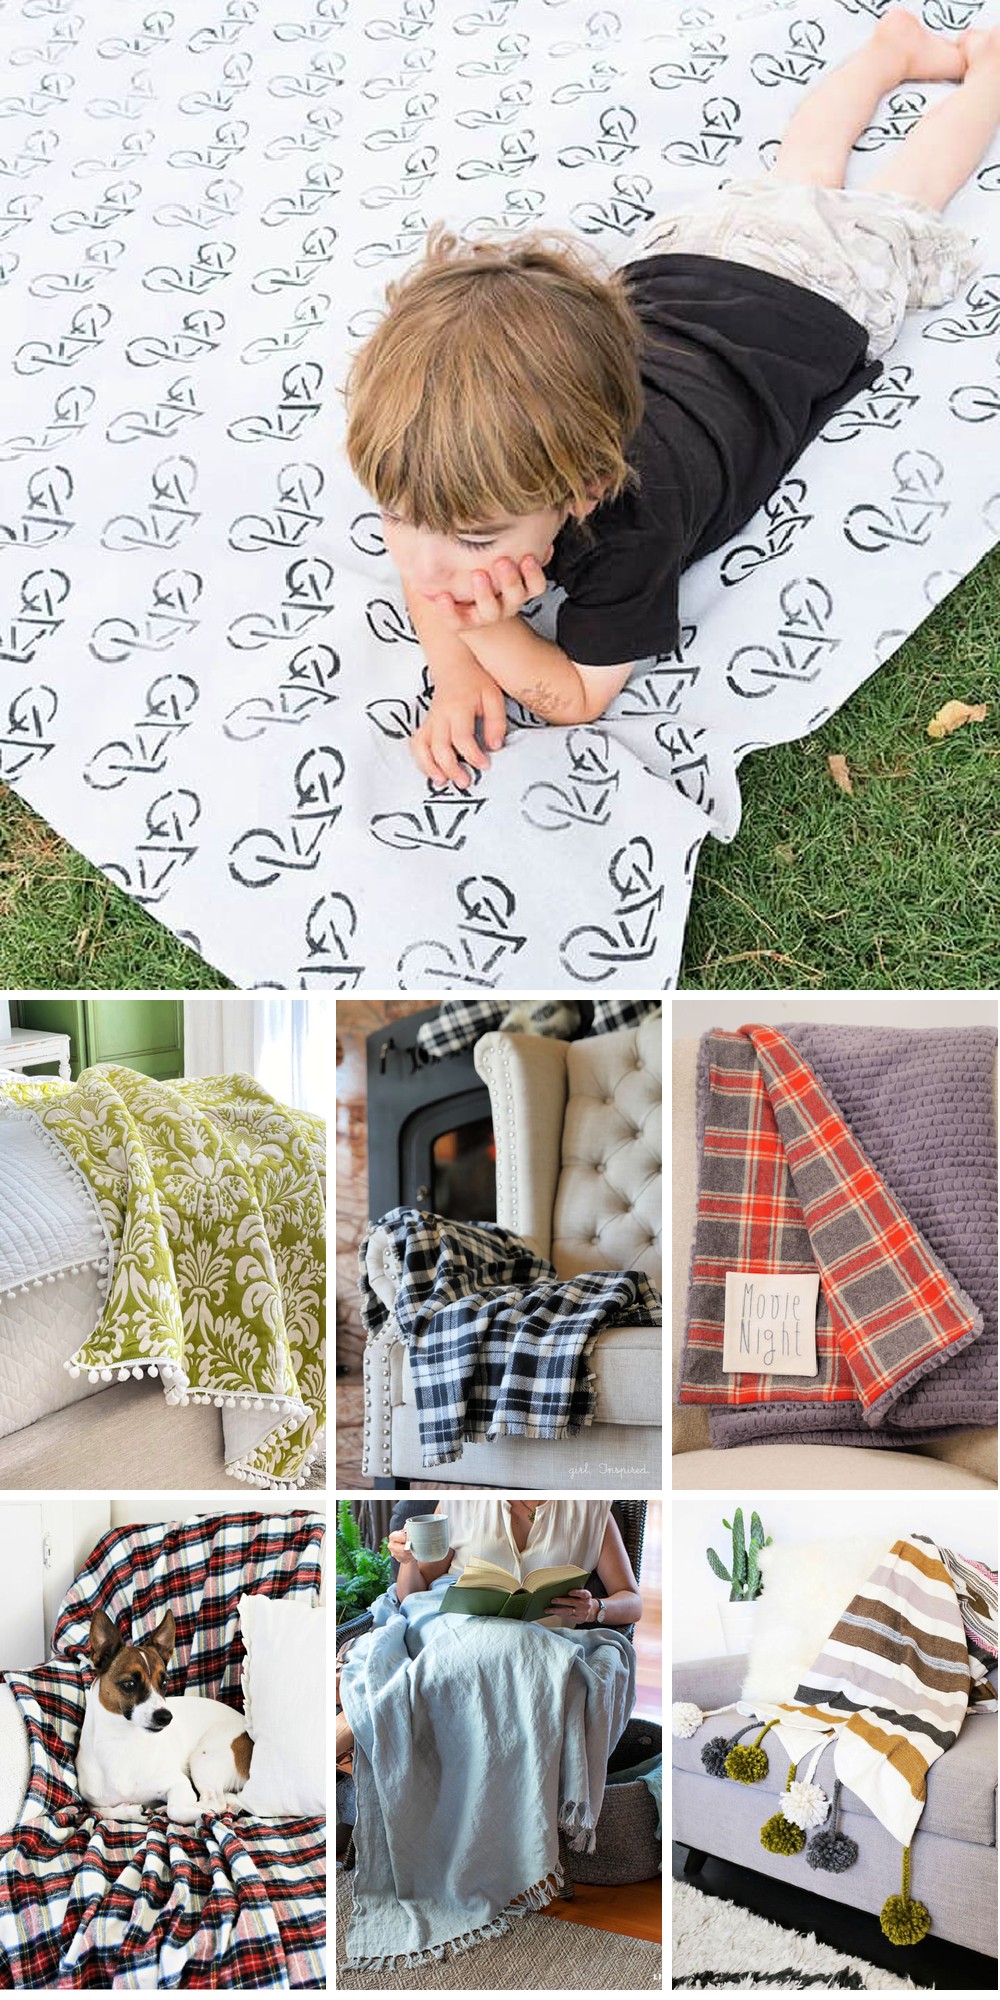
15 DIY Throw Blankets To Sew
If you’re seeking a creative outlet and wanting to add a touch of warmth and coziness to your home, consider creating your own throw blankets through sewing. With a variety of patterns and designs available, making your own throw blankets can be an exciting and rewarding DIY project. In this collection, we’ve curated 15 unique and inspiring throw blanket sewing projects that will help you get started on your creative journey.
DIY No Sew Color Block Summer Throw Blanket
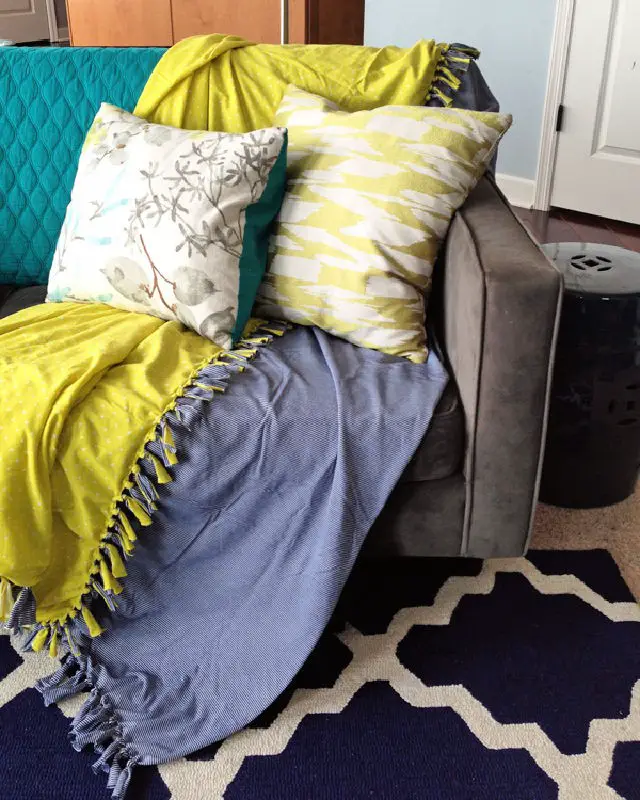
Transform a simple jersey fabric into a vibrant, no-sew summer throw blanket with Makely’s step-by-step guide. This DIY project is perfect for those seeking a quick and easy way to add some color and texture to their decor. By cutting, layering, and knotting the fabric, you’ll create a fringe that adds a playful touch to your throw, making it a cozy addition to your summer evenings. With clear instructions, you’ll be able to craft a lightweight blanket that not only keeps the chill off but also injects some personality into your home’s decor. Join this crafting adventure and relish the sense of accomplishment that comes from creating something functional and beautiful for your own space.
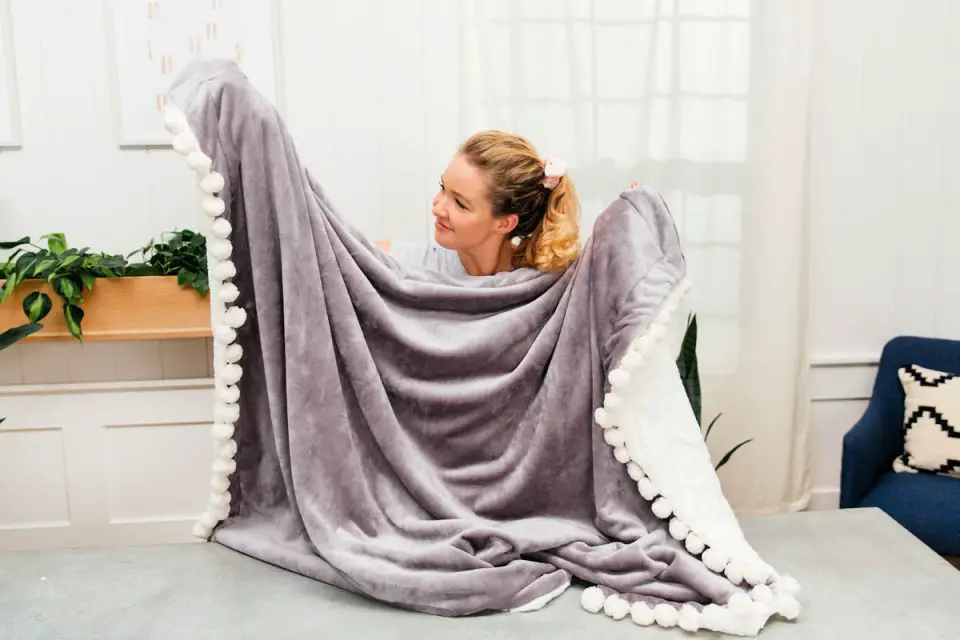
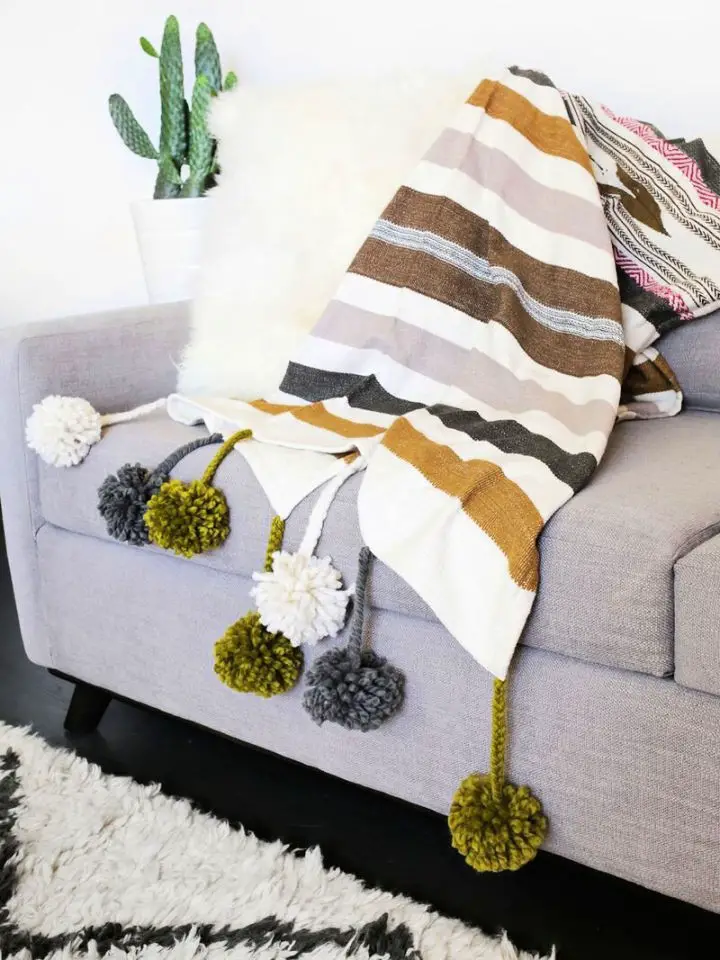
Handmade Giant Tassel Throw Blanket
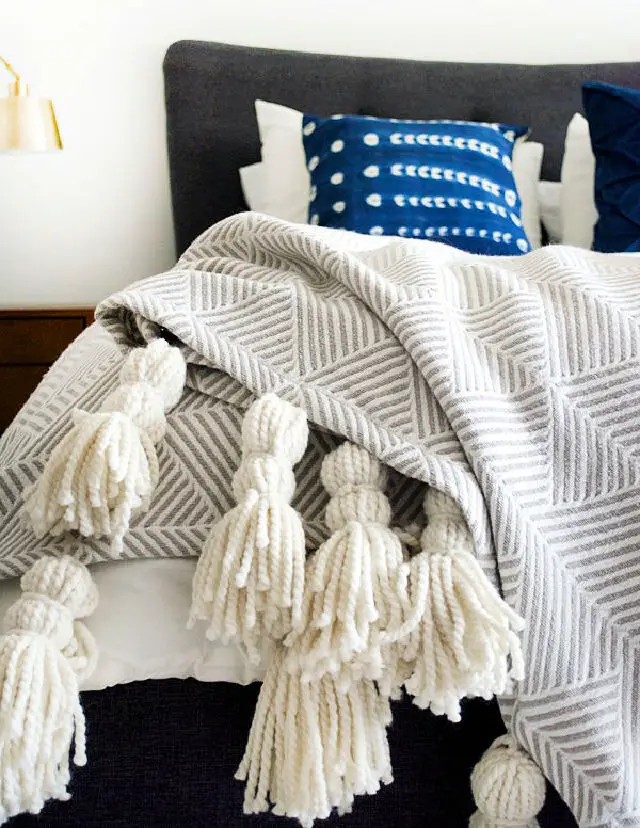
Transform your bedroom into a cozy oasis by creating a one-of-a-kind Giant Tassel Throw Blanket, inspired by Brepurposed’s DIY guide. Start with an affordable patterned throw from Target as the foundation, then add chunky off-white yarn to give it a plush and personalized touch. The process is surprisingly easy: simply wrap the yarn around cardboard, tie it up, and cut it into charming tassels. These embellishments can be effortlessly attached to your blanket, even with limited sewing skills, adding a bespoke touch that elevates your bedding without breaking the bank. This project is perfect for crafty individuals who enjoy creating unique home decor pieces that are both functional and fulfilling.
Make a Patchwork Sweater Throw Blanket
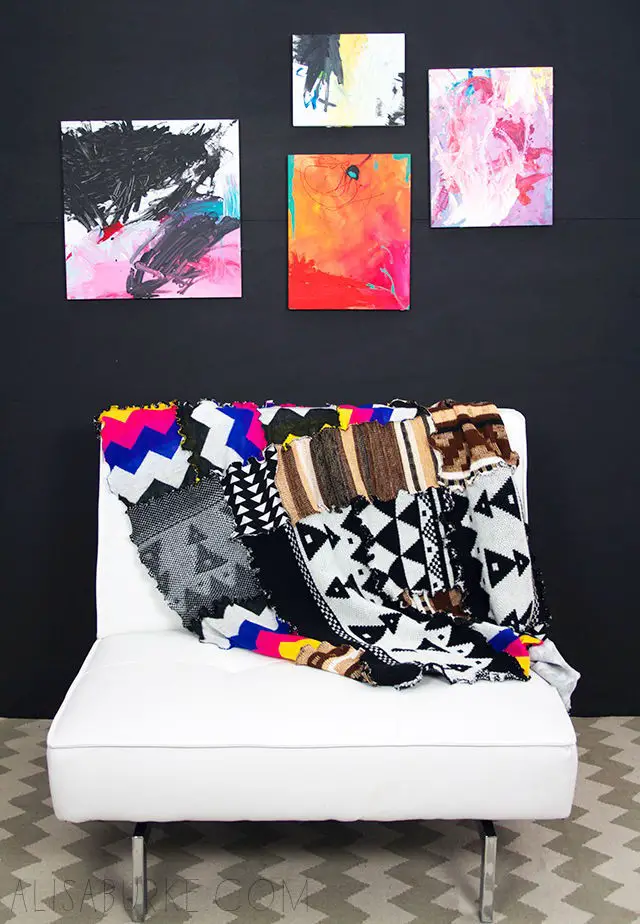
Transforming old or thrifted sweaters into a cozy patchwork blanket is an innovative and environmentally conscious project that’s perfect for craft enthusiasts. As the seasons change, gather an assortment of colorful and patterned sweaters from your thrift store visits. By cutting these sweaters into various shapes and sizes, then piecing them together, you’ll create a one-of-a-kind, personalized blanket. To ensure the seams don’t unravel, use a tight zigzag stitch, which also adds texture to the overall design. Alternatively, leave the stitches exposed for an added visual element. Whether or not you choose to back the blanket is up to personal preference – some may appreciate the unique appearance of the sweater’s reverse side. This rewarding project invites you to get creative and snuggle up with your very own patchwork masterpiece.
Quick and Easy DIY Cozy Flannel Throw Blanket
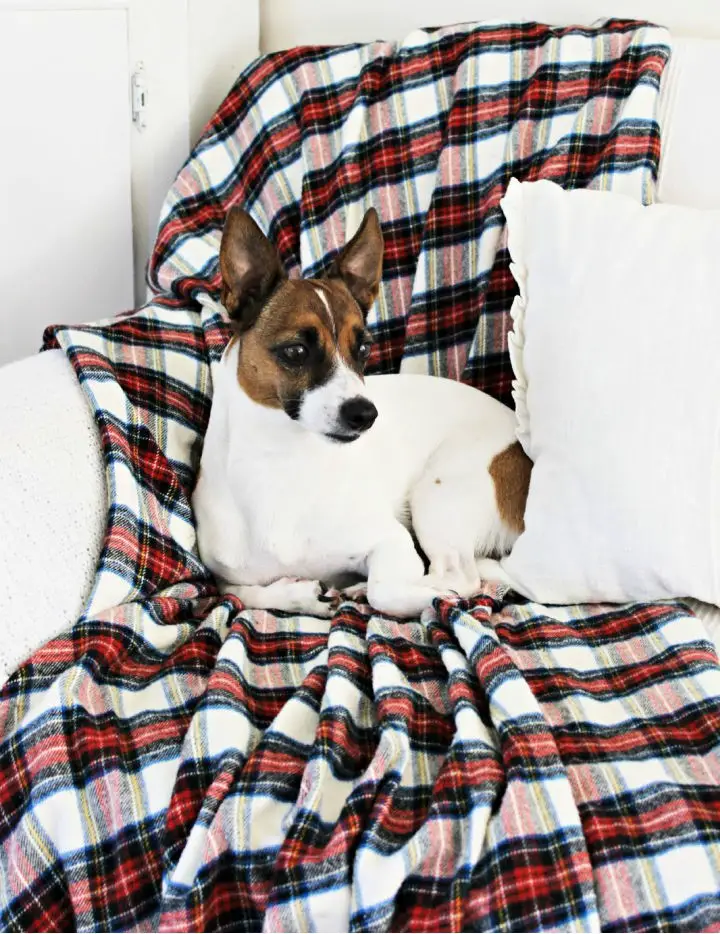
To infuse your home with a snug and inviting atmosphere, follow this straightforward guide for crafting a delightful flannel blanket. If you’re enamored with the softness and warmth of flannel, this DIY project is ideal for creating a plush throw to wrap up on chilly nights. With just a few essentials like flannel fabric, scissors, thread, and access to a sewing machine, you can quickly bring this cozy creation to life. This charming blanket is perfect for adding a pop of color and texture to any room, making it not only functional but also a delightful addition to your living space. So gather your supplies and let’s get started on crafting a lovely flannel blanket that will be cherished by both humans and pets alike!
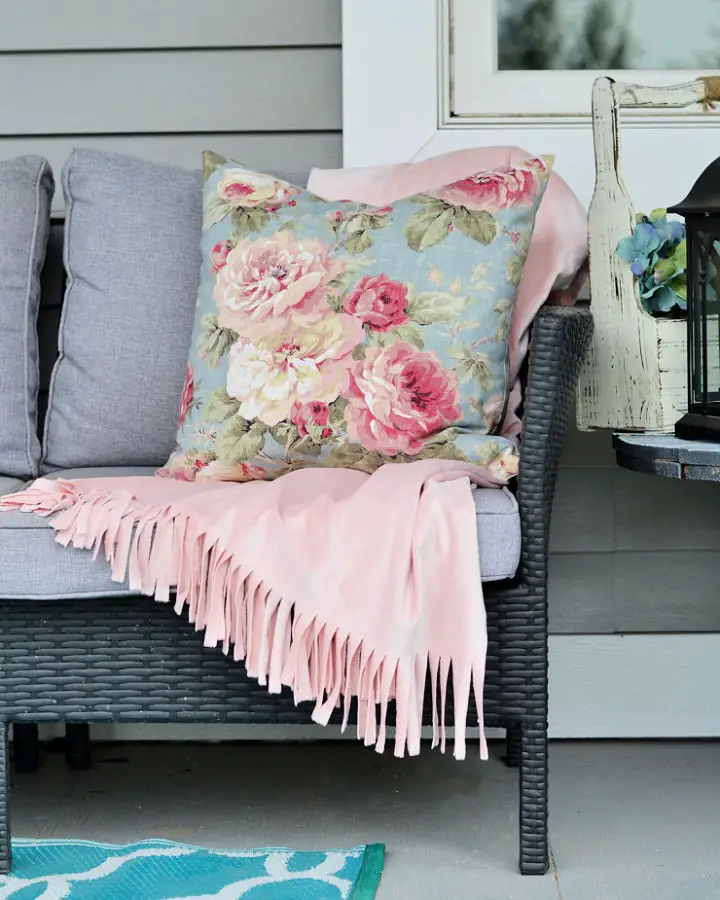
How to Make a Flannel Fringe Throw Blanket
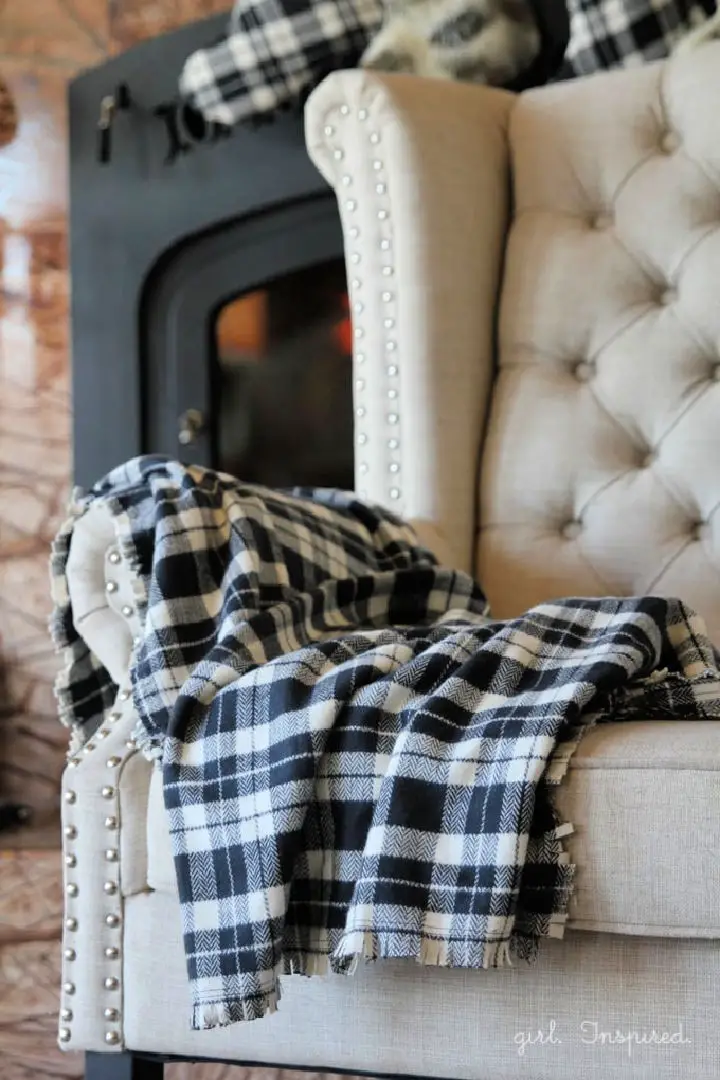
Get ready to wrap yourself in warmth with a DIY project that’s as cozy as it is effortless! Stefanie from Girl. Inspired. has crafted an intuitive guide on creating an Easy Flannel Fringe Blanket, perfect for snuggling up or gifting to loved ones. This no-sew, no-fuss option is ideal for anyone looking to add a personal touch to their home or create a heartfelt gift. With just a few simple materials – thick flannel, scissors, and an optional sewing machine – you’ll be on your way to creating a charming and practical blanket. Stefanie’s step-by-step instructions make it easy to measure, cut, and fringe your way to a beautiful and handcrafted result, accessible to all skill levels.
Homemade Giant Embroidery Picnic Throw Blanket
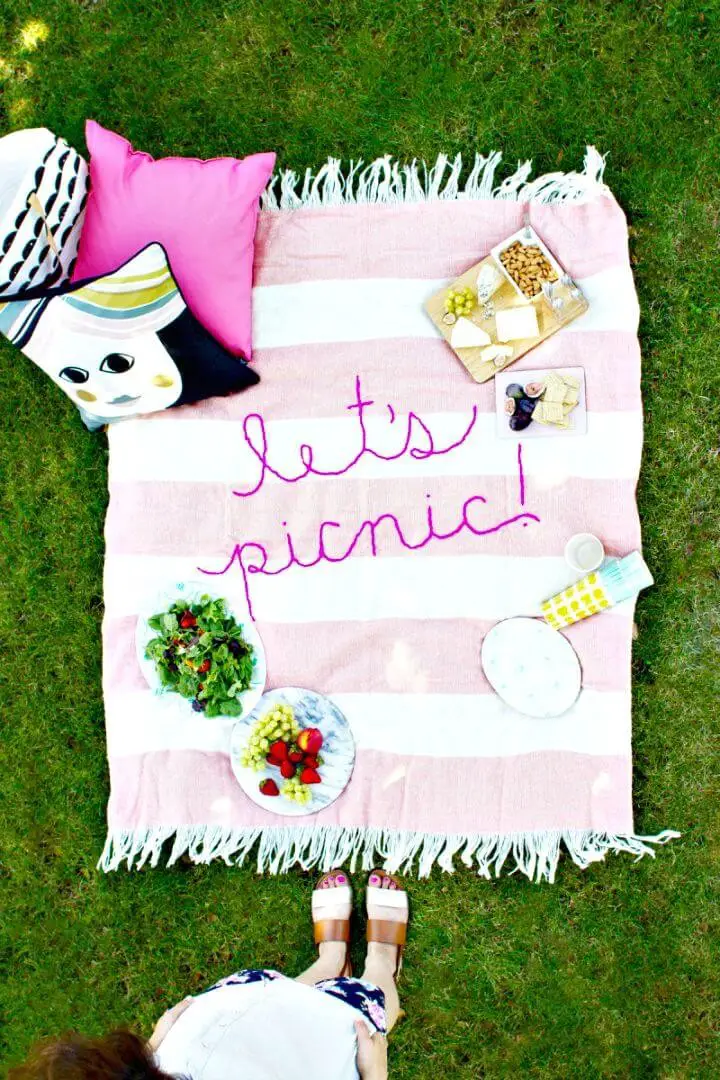
Transform your outdoor gatherings with a one-of-a-kind DIY Giant Embroidery Picnic Blanket from Lovely Indeed. This creative project empowers you to bring your personal style to any summer concert in the park, spontaneous al fresco dining, or casual backyard BBQ. By following this straightforward and accessible tutorial, you’ll be able to craft a unique, hand-embroidered design that sets you apart from the crowd. To get started, simply gather yarn, a large sewing needle, scissors, and chalk – then let your creativity shine. As you engage with friends and family while enjoying the great outdoors, you’ll also appreciate the functional beauty of your handmade picnic blanket.
Make a Travel Picnic Throw Blanket
Transforming a humble 5’x5′ poly-backed canvas drop cloth into a charming and functional travel picnic blanket is easier than you think, thanks to Vanessa Brady’s Tried & True Creative guide. By incorporating unique stencils and affixing handy leather straps, this DIY project takes the ordinary to extraordinary. Not only will your finished product elevate your outdoor gatherings, but it will also spark your creativity and appreciation for handmade items.
Pretty DIY Fabric Throw Blanket
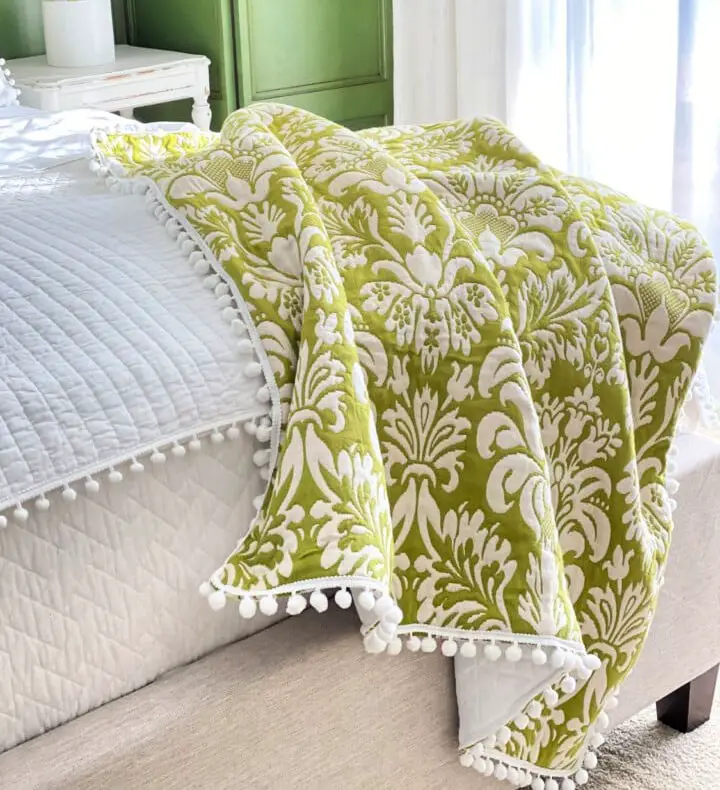
Discover the art of crafting a personalized throw blanket that reflects your unique style with Diane Henkler’s comprehensive guide. This step-by-step tutorial simplifies the process of selecting and sewing your own fabric, from washing and preparing the material to adding charming pom-pom trims for a distinctive touch. Whether you’re looking to add a pop of color to a room or create a cozy haven for snuggling up, crafting your custom throw blanket becomes an enjoyable and accessible experience with this informative tutorial.
How to Sew a Spring Throw Blanket
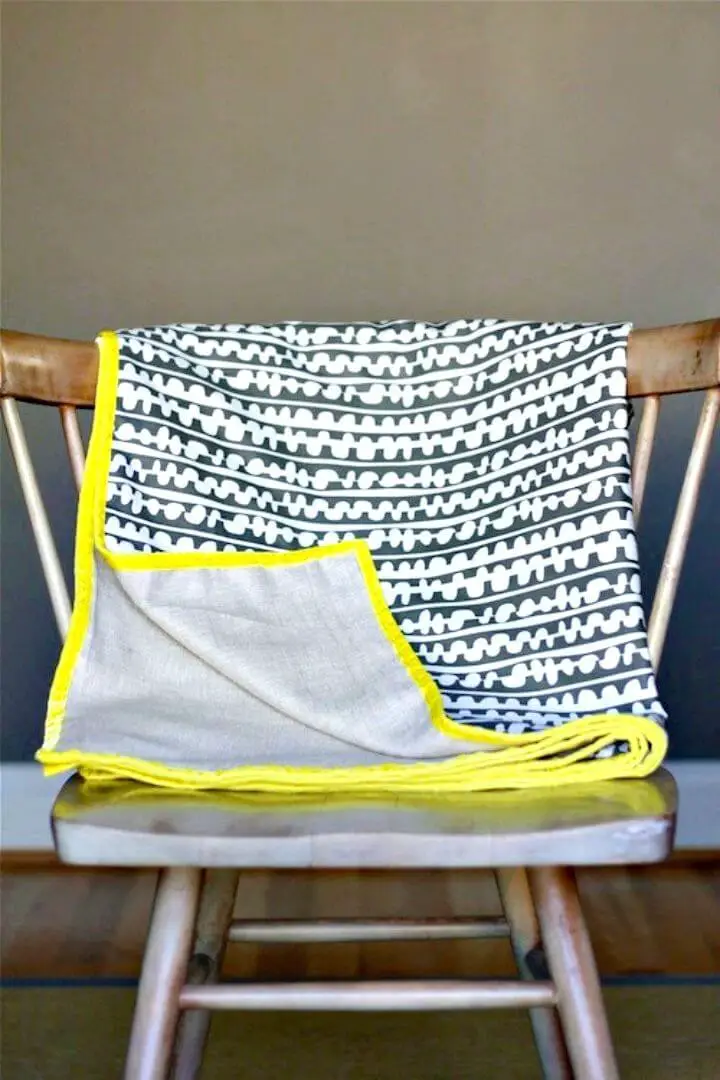
Transform your home decor into a cozy retreat with the simplicity of a DIY spring throw. By combining cotton print and medium-weight linen, you’ll create a unique piece that’s not only refreshing but also imbued with a sense of handmade charm. To get started, gather two yards of coordinating fabrics, some ribbon, matching thread, and your essential sewing tools. This easy-to-follow tutorial requires minimal materials and basic sewing skills, making it an ideal project for both beginners and seasoned crafters alike. As the seasons change, this spring throw will provide a delightful addition to your living space – whether draped over a bed or snuggled up with on chilly evenings, its elegant touch is sure to bring warmth and coziness to any room.
Awesome DIY POM Poms Throw Blanket
Transform your living space with a personalized touch by crafting a cozy DIY throw blanket. At its core, this project combines warmth and style, inviting you to unleash your creativity and add a dash of personality to your home. With a step-by-step guide from Dunn DIY, you’ll navigate the process of selecting the perfect fabrics, incorporating playful pom-pom trims, and mastering sewing techniques that yield a stunning and long-lasting finish. This comprehensive tutorial is designed to elevate your crafting skills while allowing you to create a one-of-a-kind throw blanket that perfectly reflects your unique aesthetic.
How to Make a Linen Throw Blanket
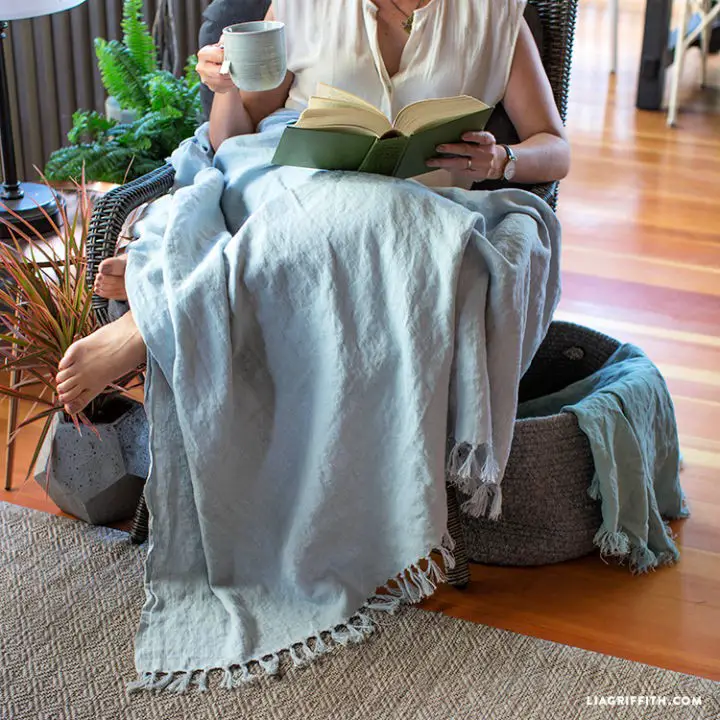
Transform your home with a cozy DIY linen throw blanket, perfect for snuggling up on summer evenings or crisp mornings. With a few simple tools like scissors and a seam ripper, you can create a stylish and warm linen blanket featuring frayed edges or chic tassels. The process is straightforward and can be completed in a few hours of crafting time. As you work with the natural beauty of linen, you’ll not only be adding a handcrafted piece to your living space, but also embracing the unique texture and character that only handmade creations can provide. For access to this tutorial and many more, consider joining Lia Griffith’s membership program for a wealth of crafting inspiration.
Making a No Sew Throw Blanket at Home
Transforming your living space into a cozy haven is just a few steps away with the creation of a no-sew throw blanket. This DIY project, expertly guided by Christina Dennis from The DIY Mommy, is perfect for anyone seeking to add a pop of color and texture to their room without the hassle of sewing. For this project, it’s essential to choose fabrics that resist fraying, such as plush minky, fleece, or knit jersey. To get started, visit your local fabric store and select your preferred material. Then, follow Christina’s easy-to-follow instructions to cut and style your new cozy accessory. This budget-friendly craft is an excellent way to enhance your home décor with a personalized and practical creation that reflects your unique taste.
Amazing DIY POM Pom Throw Blanket
As the autumn chill sets in, why not create a cozy retreat with a personalized touch? A Beautiful Mess offers a step-by-step guide to crafting a charming pom-pom blanket that’s sure to become your new favorite snuggle companion. With just yarn, cardboard, and basic sewing tools, you can learn to make fluffy, statement-making pom-poms that add a playful pop of personality to any throw blanket. The tutorial is designed to be easy to follow, taking you through the simple process of attaching these fun accents to a blank slate of your choice. The result? A stylish and unique home accessory that’s also machine washable – the perfect way to elevate your blanket game this fall.
Make Your Own Cuddle Throw Blanket
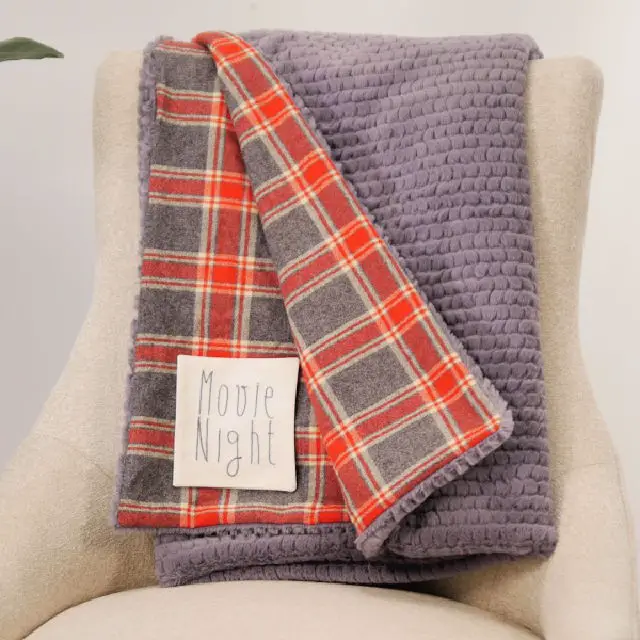
For those seeking to create a snug and inviting Cuddle throw blanket, WeAllSew offers a comprehensive guide to help you craft a plush addition to your home comforts. The tutorial by Julie Bridgeman takes you through the process of selecting the ideal luxurious fabrics, from Luxe Cuddle Brooklyn and Mammoth Flannel, and provides step-by-step instructions on cutting and sewing techniques. With expert guidance, you’ll learn how to add a personal touch with a custom label, making your throw blanket a unique gift or treasured keepsake. The guide also covers the importance of machine setup, material handling, and finishing touches, ensuring a professionally crafted result that’s both warm and durable.
Simple Handmade Quilted Throw Blanket

Create a snugly cozy quilted throw blanket with ease by following The Merrythought’s step-by-step guide. This DIY project is perfect for anyone looking to add a personal touch to their home or create a special gift for a toddler’s bed. With just fabric, batting, and bias tape, you can craft this charming throw in the span of an afternoon. Simply cut, layer, and stitch your way through the process, finishing with a neat edge courtesy of bias tape. The instructions are clear-cut and easy to follow, making the experience enjoyable and accessible for sewers of all skill levels. Once complete, simply toss your quilt in the washing machine to achieve that soft, lived-in feel, and get ready to wrap yourself up in the warmth and comfort of your new, handmade blanket.
Conclusion:
As you wrap up your very own summer throw blanket, it’s clear that the process has been both accessible and enjoyable. With this comprehensive guide serving as your roadmap, selecting the ideal material for the warm weather and following a step-by-step approach have become seamless tasks. Not only do these DIY blankets keep you cozy, but they also showcase your personal style through added customization and flair. Moreover, proper care and maintenance ensure that your handmade masterpiece not only endures but also retains its original beauty. For those passionate about sustainability, incorporating eco-friendly tips can elevate your project to a new level. With 15 unique throw blanket designs within reach, you’re now equipped to infuse your home with the charm of handmade uniqueness.
