Why Make Paper Snowflakes?
Making paper snowflakes is an art form that offers numerous benefits, from stimulating creativity to fostering quality family time. This cost-effective activity requires minimal materials – just paper and scissors – making it an ideal choice for holiday or party decorations on a budget. One of the most attractive aspects of paper snowflake-making is its eco-friendliness, as you can use recycled paper or reuse existing sheets, reducing waste and promoting sustainability. Additionally, this craft allows for complete customization, enabling you to tailor your designs to fit perfectly with your existing decor. Beyond its aesthetic appeal, making paper snowflakes also offers therapeutic benefits, providing a meditative respite from the digital world. Furthermore, this activity can be an educational experience for children, helping them develop fine motor skills and learn about symmetry and geometry in a fun and interactive way. By embracing the art of paper snowflake-making, you’ll enjoy a range of benefits that extend far beyond the simple act of crafting – from boosting creativity to promoting relaxation and family bonding.
How to Make Easy Paper Snowflakes
Transforming ordinary paper into intricate and delicate snowflakes is a delightful way to add a touch of winter wonder to your home. With this straightforward guide, you can master the art of creating these stunning ornaments, perfect for any holiday or winter-themed celebration, regardless of your level of crafting experience.
What You Need:
To start the process of making a paper plane, you’ll need some basic materials. First, grab a piece of lightweight paper in standard letter size or A4 format. Next, gather your cutting tools – scissors will be your go-to friend for this project. If you’re looking to add an extra level of precision to your folds, consider having a protractor on hand to help guide your movements. And finally, if you need to smooth out any wrinkles in the paper, you can use an iron set to a low heat setting – but be careful not to scorch the paper!
Step 1: Prepare Your Paper
To begin with, take a square piece of paper, ideally lightweight for effortless folding and cutting. To convert letter or A4 size paper into a square, simply fold one corner to the opposite edge, creating a triangle. Then, carefully cut off any excess paper outside the folded edge, ensuring a precise and even shape.
Step 2: Fold The Paper
To create a symmetrical snowflake design, begin by folding a square piece of paper in half diagonally to form an equilateral triangle. For increased precision, divide this triangle into three equal parts using a protractor or other measuring tool. Adjust your folds until the sections are evenly spaced and aligned perfectly before creasing the paper for optimal symmetry.
Step 3: Design Your Snowflake
Before diving into the creative process, take a moment to plan out your snowflake design. Folding your paper in half can help guide your sketching, allowing you to visualize the finished product and make any necessary adjustments before committing to cuts. If you’re new to crafting these delicate flakes, consider starting with a simple pattern featuring straight lines, as they can be more forgiving than intricate curves.
Step 4: Cut Out The Design
When crafting your intricate snowflake design, precision is key when cutting along the lines. Avoid cutting all the way across, as this may cause your delicate creation to break apart into fragments. If excess paper needs to be removed, consider doing so in smaller sections rather than attempting a single, large cutout, as this approach can prove less daunting and more manageable.
Step 5: Unfold and Iron
As you delicately unfurl the paper, the unique patterns and shapes of your snowflake begin to emerge. While it’s not essential, you may want to take a moment to gently iron out any minor creases that have formed during the folding process. This subtle touch can help enhance the overall appearance of your intricate design.
Tips
When crafting intricate paper snowflakes, precision is crucial. To achieve the most beautiful results, take your time and focus on each fold with deliberate care. As you experiment with different designs, remember that every snowflake can be a one-of-a-kind masterpiece. Don’t just stop at creating individual masterpieces – consider how you can use them to add a touch of winter wonder to your windows, ceilings, or even as part of a themed party décor.
Video Tutorial
To take your paper snowflake game to the next level, I highly recommend checking out the step-by-step video tutorial offered by Wonder Crafts at WonderCrafts Paper Snowflakes. This accompanying visual guide not only reinforces the techniques discussed in this written guide but also presents them in a captivating and easy-to-follow format that’s sure to spark creativity and inspire you to create even more intricate designs.
FAQs on Making Paper Snowflakes
Transforming ordinary paper into delicate, lacy masterpieces is an art form that can add a touch of whimsy to any room. As a beginner-friendly activity, creating paper snowflakes offers endless possibilities for creativity and self-expression. To guide you on this winter wonderland journey, we’ve compiled answers to some frequently asked questions, ensuring your entry into the world of paper snowflake crafting is smooth and enjoyable.
What type of paper is best for making snowflakes?
When it comes to crafting paper snowflakes, it’s essential to choose a suitable material that is both pliable and easy to manipulate. Lightweight papers such as copy paper, origami paper, or even repurposed book pages prove to be ideal candidates for this activity. Their lightweight nature makes them simple to fold and cut, allowing you to achieve the intricate designs and delicate shapes that are characteristic of traditional snowflakes.
Can I make paper snowflakes if I’m not good at crafting?
With minimal effort, anyone can create beautiful paper snowflakes. Beginners can start by crafting straightforward designs, while more experienced crafters can experiment with complex patterns. The simplicity of this activity makes it an excellent hobby for people of all skill levels to enjoy.
How can I hang my paper snowflakes without damaging them?
When it comes time to showcase your delicate creations, you have a few options available. For a more permanent solution, consider using a sewing needle to carefully thread a fine string through one point of the snowflake, allowing for hanging. Alternatively, opt for removable adhesive hooks or tape, which provide a damage-free way to display your snowflakes and allow for easy removal without causing harm to the delicate paper.
Are there templates available for paper snowflakes?
With a vast array of free templates readily available online, crafting intricate paper snowflakes has never been more accessible. Simple and complex designs alike offer a wealth of inspiration and guidance, empowering you to unleash your creativity and bring forth unique masterpieces.
Can making paper snowflakes be educational for kids?
Creating paper snowflakes offers a unique opportunity to educate children on various concepts while fostering their creative expression. The process helps develop an understanding of symmetry, as children learn to balance and mirror identical shapes on either side of the central axis. Geometry also takes center stage as they experiment with different folds and cuts to create intricate patterns. Furthermore, precision is key in crafting each delicate snowflake, which enhances their fine motor skills and hand-eye coordination.
How do I make my paper snowflake look more unique?
Transforming your snowflakes into masterpieces is all about creativity and experimentation. One way to add visual interest is by incorporating various cutting techniques, including curved edges, angled cuts, and intricate notches. If you’re feeling extra festive, consider embellishing your creations with glitter, paint, or colored markers to give them a personalized touch.
Is it possible to make colored paper snowflakes?
To add an extra layer of creativity to your snowflake-making process, consider incorporating colored paper or artistic mediums into your design. You can use colored paper as a base for your snowflakes, or add vibrant hues to white paper using markers, watercolors, or spray paint. Just remember to ensure the paper is completely dry before folding and cutting to prevent any unwanted creases or damage.
Can paper snowflakes be reused?
When it comes to preserving paper snowflakes, one of the most effective methods is to store them in a way that prevents damage and ensures they remain intact for future use. A simple yet effective approach is to flatten each snowflake between the pages of a book or in a folder. This not only keeps them safe from accidental creases or tears but also allows you to easily retrieve them when you’re ready to display your winter wonderland creation again.
What should I do if my snowflake doesn’t turn out as expected?
When diving into the world of crafting, it’s essential to approach each project with a mindset of experimentation and learning. If your first attempt at creating a snowflake doesn’t quite meet your expectations, don’t be discouraged – instead, take this opportunity to reflect on what might have gone awry and adjust your technique accordingly. And remember, just like the intricate patterns found in nature’s unique snowflakes, imperfections can often become charming characteristics that add to the overall beauty of your craft.
How can I make my snowflakes more durable?
To enhance the longevity of your paper snowflakes, consider laminating them or applying a clear contact sheet. This simple step will significantly improve their resistance to moisture and tearing. With these common concerns addressed, you’re now well-prepared to start crafting your own distinctive paper snowflakes. Savor the process and appreciate the one-of-a-kind masterpieces that will unfold.
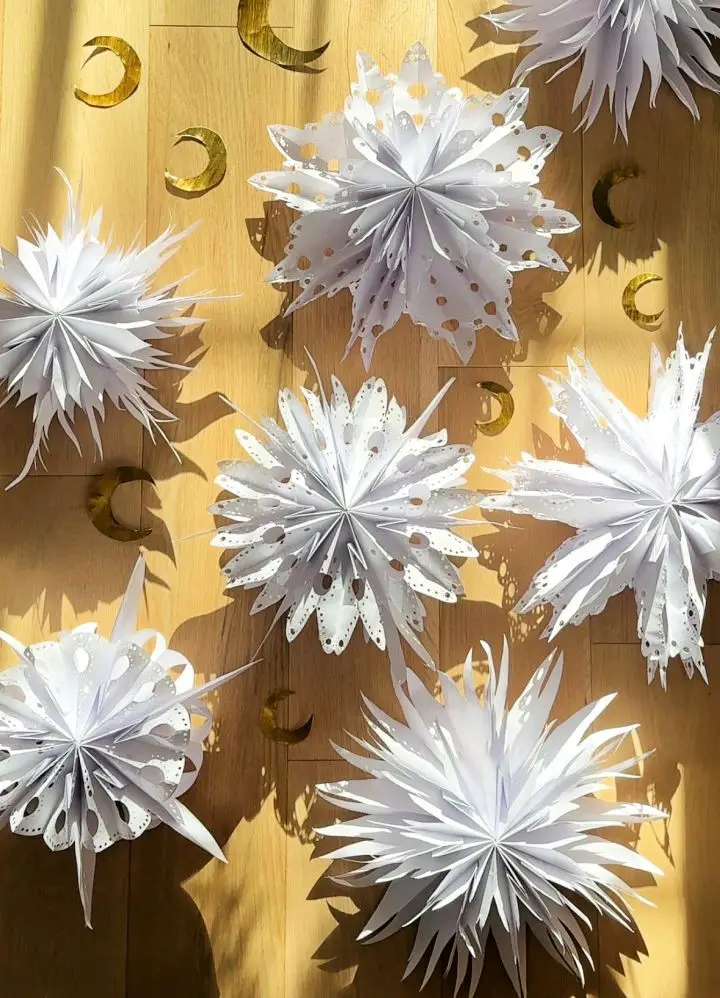
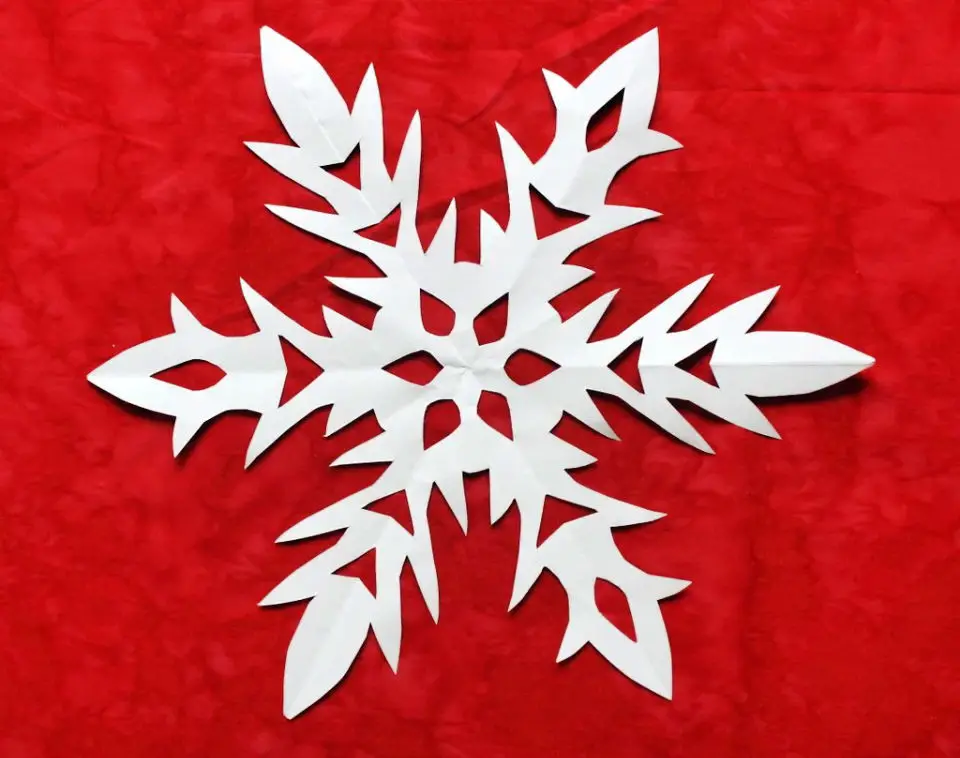
How to Make Paper Snowflakes (15 DIY Paper Snowflakes)
Discover the magic of creating intricate paper snowflakes with a simple and fun DIY project. Our comprehensive guide will walk you through the process, allowing you to craft 15 distinct designs that are perfect for winter-themed crafts and decorations.
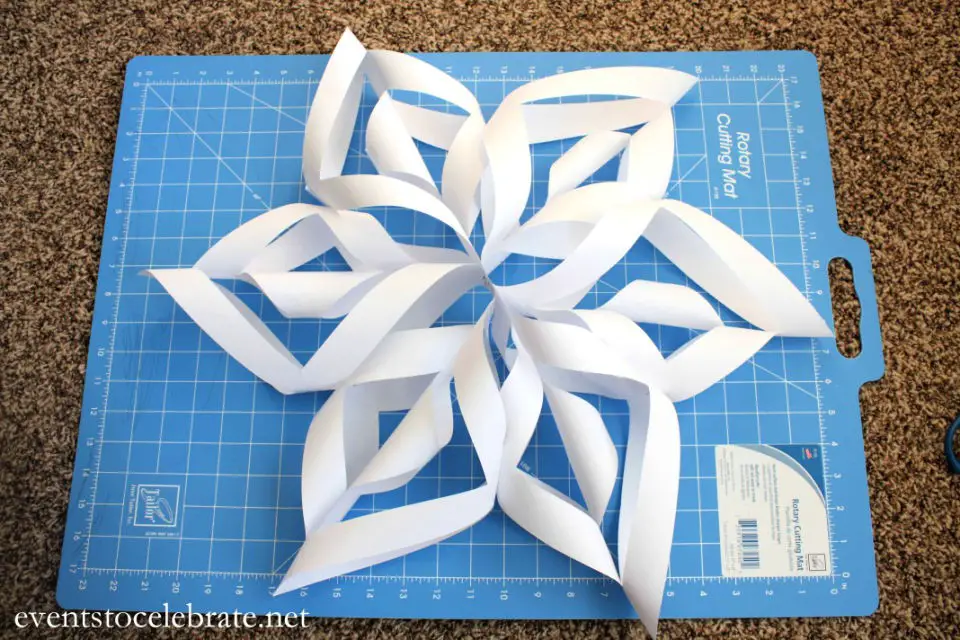
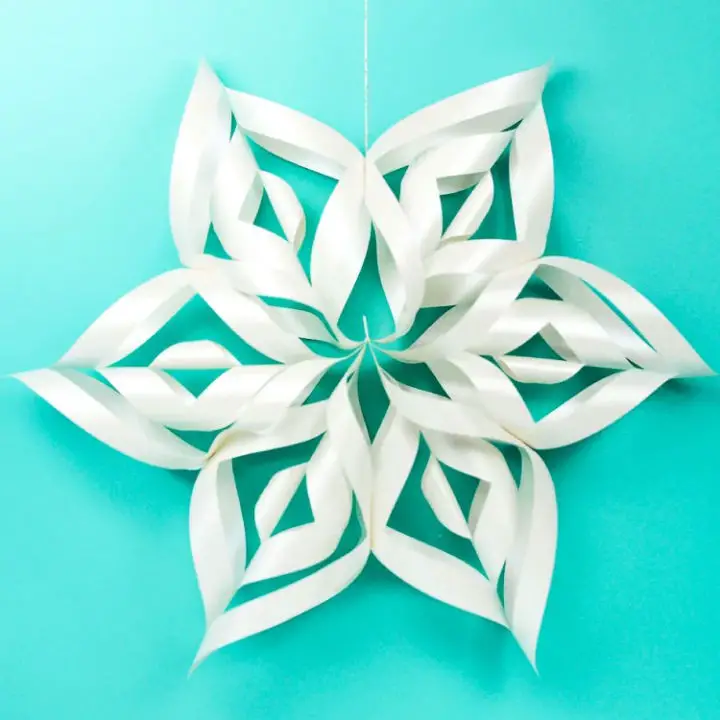
Easy DIY 3D Paper Snowflakes
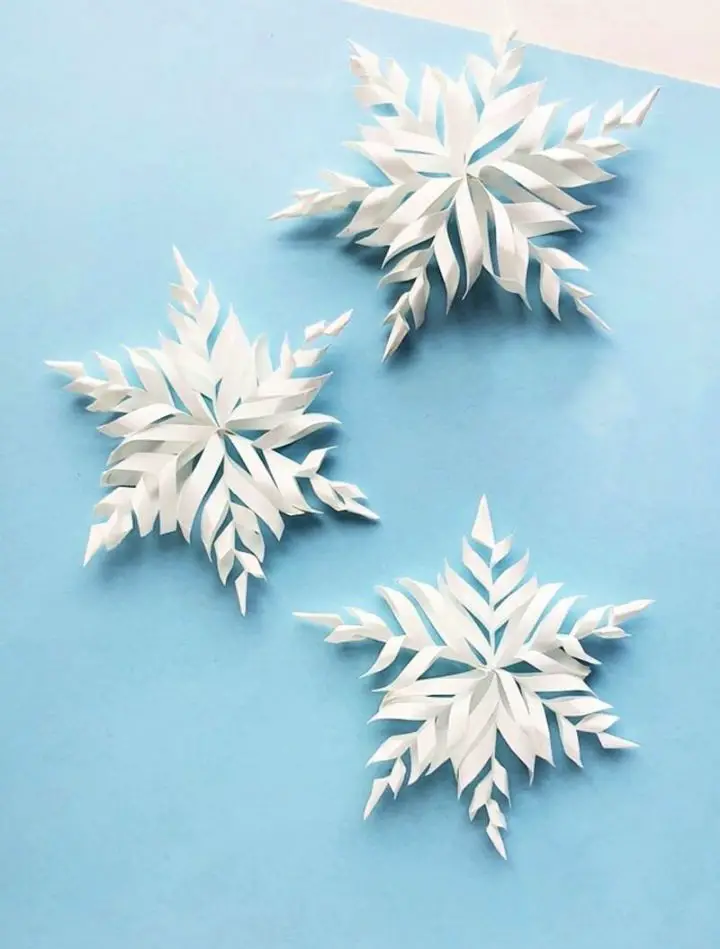
As you gear up for the holiday season, why not get creative with The Craftaholic Witch’s charming 3D paper snowflake guide? This enchanting DIY project brings a touch of magic to your home decor and is surprisingly simple to accomplish. With just basic materials like paper, scissors, and glue, you can effortlessly turn ordinary items into stunning snowflakes that appear complex but are actually easy to make.
Not only do these snowflakes add a whimsical charm to your holiday decorations, but they’re also an excellent way to spend quality time crafting with loved ones. Whether you’re looking for a fun family activity or seeking a unique decorative element, The Craftaholic Witch’s 3D paper snowflake tutorial is the perfect place to start.
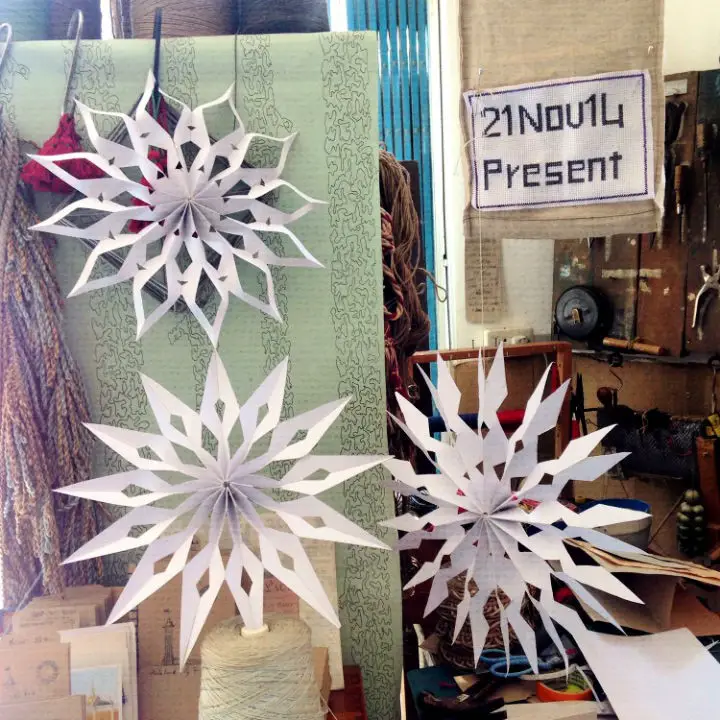
Make Your Own Paper Snowflakes
Transform your home into a winter wonderland with ease by creating handmade paper snowflakes using a simple and engaging guide from Sky Lark House. With just three basic materials – paper, scissors, and glue – you can turn ordinary paper into breathtakingly beautiful snowflakes in under an hour. This intuitive tutorial is perfect for anyone looking to add a personal touch to their holiday decor or gifts. As you follow the clear instructions, you’ll discover that crafting becomes a fun and enjoyable activity, allowing you to create unique patterns and designs that will adorn your festive tree or become part of a whimsical garland. Let the joy of crafting bring you closer to the magic of the season with this accessible and delightful project from Sky Lark House.
DIY Snowflakes Using Paper
Transform your space into a winter wonderland with the art of creating enchanting paper snowflakes, courtesy of DIY Thought. By breaking down the process into manageable steps, this tutorial empowers you to fold and cut paper into intricate masterpieces perfect for decorating or incorporating into crafts. With just two essential tools – paper and scissors – you can unlock a world of creativity and fine motor skills development, making it an inclusive activity suitable for all ages. As we guide you through the process, discover how simple paper can be transformed into breathtaking snowflake designs that will add a touch of magic to your festive decor.
Making Your Own Paper Doily Snowflakes
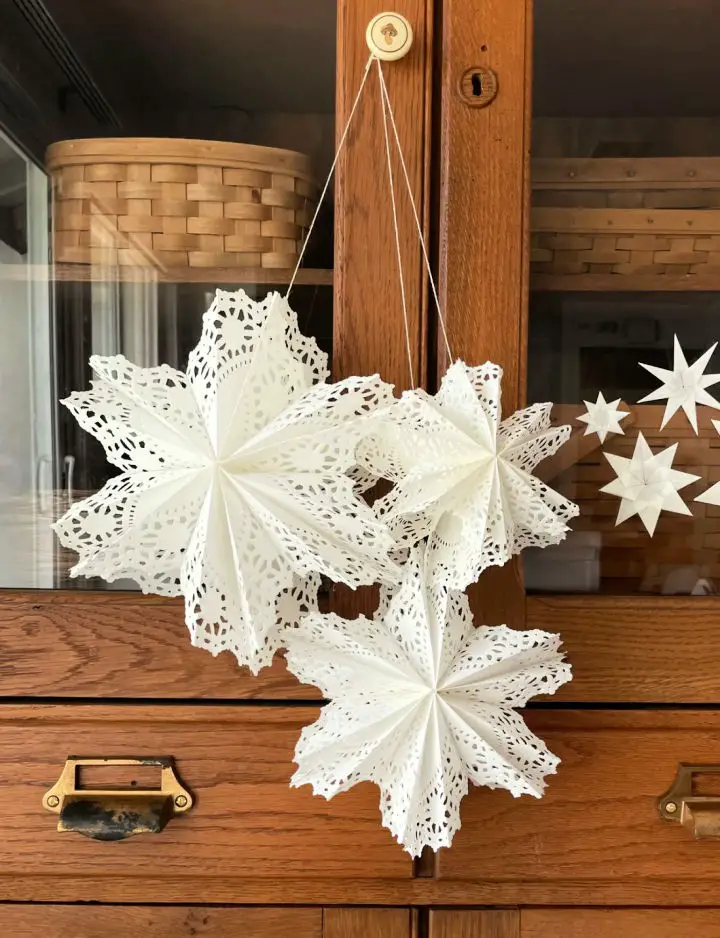
Bringing a touch of whimsy to winter decor, crafting paper doily snowflakes is an engaging and fun activity that requires only minimal materials. By following a simple guide available on the Woodlark Blog, you can create intricate, pattern-rich decorations without needing scissors or advanced crafting skills. The beauty of this project lies in its versatility, as snowflakes can be crafted in various sizes to create a stunning display. Notably, the guide also provides helpful tips for storing and recycling your creations, making it an eco-friendly craft option that’s gentle on the planet.
DIY Paper Snowflakes With Free Templates
Transform your space with a touch of winter wonderland charm by crafting beautiful paper snowflakes with Easy Peasy and Fun’s comprehensive guide and printable templates. From simple designs for quick projects to intricate patterns for those seeking a challenge, our collection offers 20 unique designs to make each snowflake a personal reflection of your creativity. Simply combine paper, scissors, and our step-by-step tutorial to bring the magic of folding and cutting paper snowflakes into your home decor. As you work through the process, discover how this fun activity can add a special touch to your holiday celebrations.
How to Make a Paper Bag Snowflake
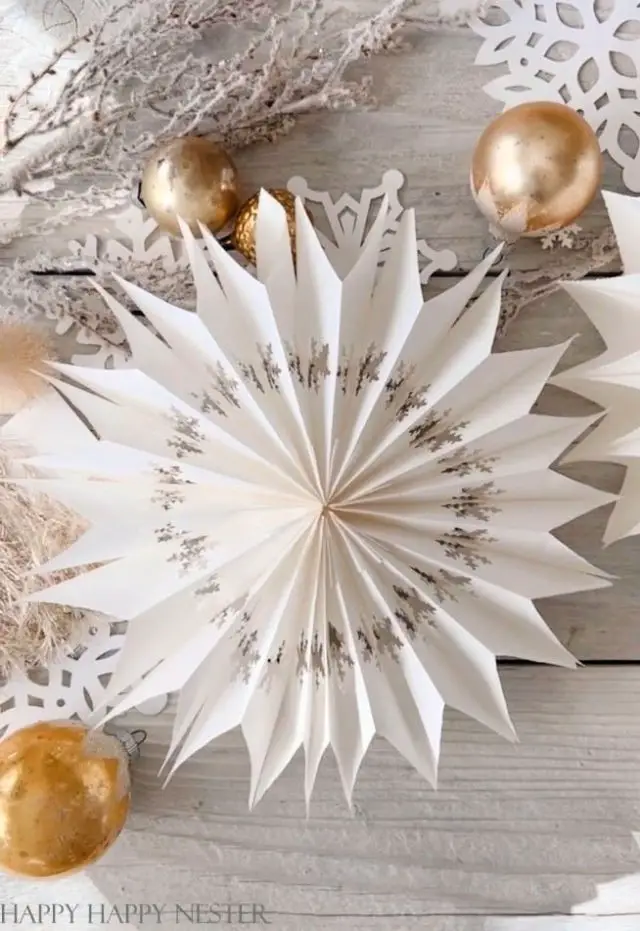
Discover the whimsical world of paper snowflakes with Happy Happy Nester’s Easy Paper Bag Snowflakes Tutorial. Janine Waite breaks down this trendy craft into manageable steps, empowering you to create breathtaking 3D snowflakes that infuse your holiday decor with a touch of magic. To get started, gather just a few essentials: paper bags, a snowflake hole punch, a glue stick, and scissors. This budget-friendly project is perfect for a relaxing afternoon of crafting, and Janine’s expert tips on glue application and hole punching will ensure your creations shine. Hang them up or use them to add a pop of color to your festive table – either way, these snowflakes promise to sparkle in your seasonal celebrations.
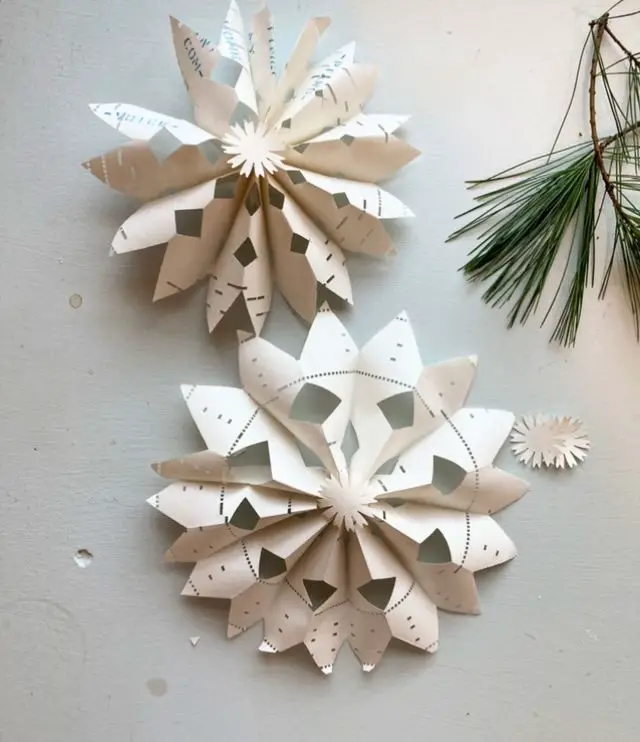
DIY $1 Paper Bag Snowflakes
Transform your holiday decor with the enchanting paper bag snowflake tutorial from The Kwendy Home. Choose from white, brown, or pre-designed paper bags to create intricate, eye-catching masterpieces that add a personal touch to any festive setting. With just seven paper bags, scissors, a hole punch, glue gun, and some optional display accessories like thin wire or Command hooks, you’re all set to craft your own unique snowflakes. Follow the simple steps to cut and shape your designs, then hang them over a fireplace, window, or staircase to bring a winter wonderland vibe to your home with a dash of handmade charm.
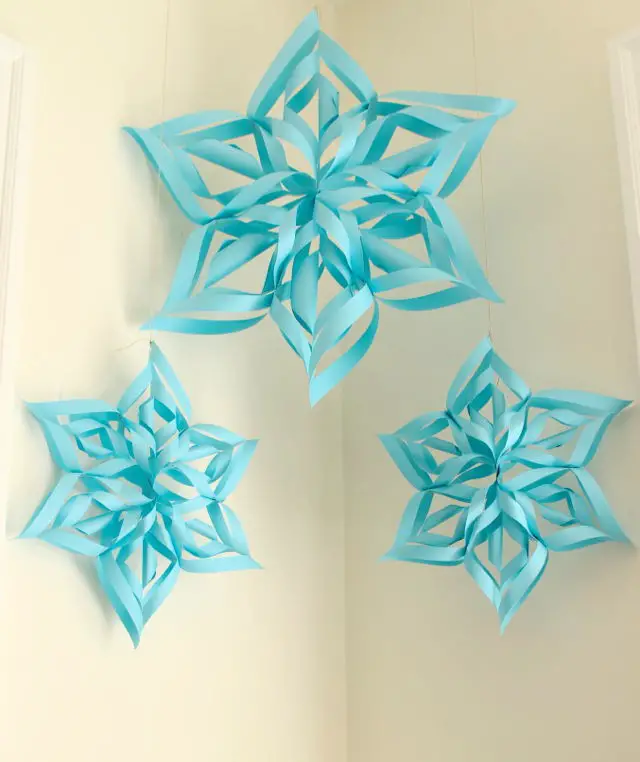
How to Do 3D Paper Snowflake
Transform your space into a winter haven with the magic of 3D paper snowflakes! With our easy-to-follow tutorial from Party Ideas for Real People, you can create stunning snowflakes using simple materials like paper, scissors, tape, and a stapler. Perfect for holiday decorating or a fun activity with kids, this craft adds a touch of sparkle to any celebration, whether it’s a Disney-themed party like Frozen or just a cozy night in.
Homemade Paper Snowflakes
Transform your space into a winter wonderland by crafting enchanting paper snowflakes using Morrison Polkinghorne’s guide. This delightful DIY project is ideal for adding a touch of festive charm to your decorations. To get started, gather basic materials such as a card, sharp knife, metal ruler, cutting board, double-sided tape, scissors, needle, and thread.
Begin by cutting a rectangular shape from the card, then use your scoring tool to create folds, transforming it into a concertina-like structure. Next, carefully snip the ends and carve out grooves along the length of the paper before securing the layers together at one end using thread or twine. Finally, unfold the snowflake and fasten it securely with double-sided tape to admire your breathtaking creation.
This hands-on activity offers a unique way to add some holiday magic to your space, making it an engaging and enjoyable DIY project for all ages.
Making a Paper Snowflake
Join us at Ladyface, where creativity knows no bounds and the art of crafting comes alive! Today, we’re excited to share a magical process that brings winter wonderland vibes straight to your doorstep. Say hello to 3D paper snowflakes – delicate masterpieces that add a touch of whimsy and charm to any room. Our step-by-step guide will walk you through the effortless art of folding, cutting, and shaping paper into intricate designs, perfect for adorning your home or office with an air of cozy sophistication. From selecting the ideal paper to the final flourish, each stage is presented with clarity and simplicity, ensuring that even the most novice crafter can achieve stunning results. As you work your magic, let the spirit of the season guide you, transforming ordinary paper into extraordinary snowflakes that will leave everyone in awe.
Simple DIY Paper Snowflake
Embark on a whimsical journey of creativity and meditation as you craft perfect paper snowflakes with the guidance from Instructables. As the winter season approaches, indulge in this cozy indoor activity that celebrates the beauty of nature’s six-sided wonders. The process of cutting and folding intricate patterns becomes an meditative experience, allowing you to tap into the essence of snowfall. Whether you’re a seasoned crafter or a curious beginner, creating paper snowflakes is a delightful way to add a touch of magic to your home or classroom, making it a perfect activity for holiday decorations or simply enjoying the joy of crafting.
Handmade Paper Snowflake
Unleash your inner crafter and spend a cozy day indoors with the kids, creating stunning paper snowflakes with our easy-to-follow templates. All you need is some paper, scissors, and our free template – or let your imagination run wild and design your own unique patterns. As you fold and cut your way to winter wonderland, our step-by-step guide and expert tips will ensure that every snowflake turns out beautifully crafted. Browse through our diverse assortment of templates, ranging from simple and elegant to intricate and elaborate, and let the creative magic flow. With these enchanting snowflake designs, even the chilliest of days will be brightened up with warmth and joy.
DIY Giant 3D Paper Snowflakes With the Cricut
Transform your holiday gatherings with enchanting giant 3D paper snowflakes crafted effortlessly with your Cricut machine. The team at Hey, Let’s Make Stuff has devised a step-by-step guide that demystifies the process, allowing you to create these mesmerizing decorations without denting your wallet. With just a few essential supplies – including paper, a Cricut Explore or Maker, and a downloadable SVG file – you can turn your space into a winter wonderland in no time. The instructions are meticulously crafted for ease of understanding, making it an ideal activity for anyone seeking to elevate their festive decor. In mere minutes, assemble your snowflakes and bask in the magic of the season as you gaze upon your beautifully adorned home.
Giant Paper Snowflakes Step-by-Step Tutorial

Transforming your space into a winter wonderland is just a matter of crafting giant paper snowflakes. These stunning decorations are perfect for event celebrations or themed parties like Frozen. With Gretchen’s easy-to-follow step-by-step photo tutorial, you can create breathtaking designs using simple materials like tape, scissors, a stapler, and paper. Even those with minimal crafting experience can enjoy making these oversized snowflakes with the help of her clear instructions and helpful visual aids. Hang them in your foyer or any space that could use a touch of cheerful seasonal charm. With patience and creativity, you’ll master the art of paper snowflake creation and add a unique handmade touch to your holiday decor.
How to Make Your Own Paper Snowflake

Winter magic can be brought right to your doorstep by crafting beautiful paper snowflakes. With Wonder Crafts’ engaging YouTube tutorial, you’ll learn how to turn a sheet of letter or A4 paper into an intricate work of art. The video guides you through each step, from folding the paper into a triangle to making precise cuts that create delicate and unique snowflake designs. Whether you’re looking for Christmas decorations or just a fun craft activity to enjoy on a cozy winter day, this project is perfect for all skill levels. As you transform a simple piece of paper into a stunning snowflake, you’ll be transported to a winter wonderland where the beauty of the season comes alive.
Conclusion:
As our journey through the world of paper snowflakes comes to a close, we’re left with a sense of accomplishment and a newfound appreciation for the simple joys that can be found in the art of crafting. From the initial fold to the final cut, you’ve not only learned how to create 15 unique DIY paper snowflakes but also discovered the value of adding personal touches to your surroundings. With the steps and tips we’ve shared, the possibilities are endless, and your next creative endeavor is just a sheet of paper away. As each snowflake takes shape, it’s a reminder that creativity is a reflection of our individuality, and by embracing this process, you’re filling your space with joy, wonder, and a touch of winter magic. The journey may be over, but the inspiration lives on, so grab your scissors and let the crafting begin!
