Why Choose Paper Plate Pumpkin Crafts?
Paper plate pumpkins offer a wealth of benefits for both kids and adults, extending beyond mere entertainment. Here’s how these humble crafts can enrich your next creative session:
Accessibility is key, as paper plates are a ubiquitous household item, eliminating the need for a trip to the store.
Moreover, their affordability makes them an attractive option for families, classrooms, and large groups seeking budget-friendly creative outlets.
The blank canvas presented by paper plates invites creativity, allowing kids to experiment with colors, designs, and materials, fostering artistic expression.
Fine motor skills are also honed through the various activities involved in making paper plate pumpkins, such as cutting, painting, and assembling, which is particularly crucial for young children’s development.
Beyond mere fun, crafting can be an educational experience. For instance, while creating a paper plate pumpkin, you can educate kids about the different parts of a pumpkin, its growth cycle, and cultural significance.
Furthermore, using paper plates in crafts offers a chance to teach children about sustainability and the importance of reusing materials, taking small steps towards a more eco-friendly future.
Finally, the versatility of paper plate pumpkins ensures that everyone, regardless of skill level, can enjoy making their unique pumpkin craft. Whether it’s painting, weaving, or creating a mosaic, the possibilities are endless.
In conclusion, choosing paper plate pumpkin crafts is an excellent way to celebrate the fall season in a simple, affordable, and enriching manner. So why not grab some plates and start crafting?
How to Make a Paper Plate Pumpkin Craft
Crafting a paper plate pumpkin is an effortless way to capture the essence of Halloween. This activity is particularly well-suited for kids, allowing them to tap into their creative side while embracing the spooky atmosphere of the season. To create your very own unique paper plate pumpkin, simply follow these straightforward steps.
Materials Needed
For a creative and eco-friendly DIY project, gather the following materials to get started. Begin with some humble beginnings – literally – using a simple paper plate as your base. Don’t worry if it’s not perfect; we’re going for rustic charm here! Next, grab some vibrant orange paint and a trusty paintbrush to add a pop of color to your plate. Once the paint is dry, cut out black construction paper into desired shapes or strips to create unique textures. You can also experiment with green construction paper for an added layer of depth. To hold everything together, reach for a reliable glue stick and some sharp scissors. And if you’re feeling extra artistic, toss in a marker for some additional flair.
Step 1: Painting Your Plate
To create a realistic pumpkin, start by applying an even layer of orange paint to your paper plate using a paintbrush. Allow the plate to dry completely before proceeding with the next step. The orange coating will serve as the foundation for your pumpkin, so take care to cover it thoroughly.
Step 2: Making the Face
As you wait for your plate to dry, seize the opportunity to craft the facial features of your pumpkin masterpiece. Using black construction paper, carefully cut out two triangular shapes to serve as the eyes and a mouth that reflects the tone you desire – be it eerie, playful, or joyful. Allow your imagination to run wild and infuse your design with personality.
Step 3: Attaching the Face
After the paint has dried on your ceramic plate, it’s time to bring your jack-o-lantern to life by attaching the black paper features. Begin by positioning the paper pieces onto the plate to create the pumpkin’s face, taking care to ensure a pleasing arrangement before securing them in place with glue.
Step 4: Adding the Stem
Transform your pumpkin by adding a defining feature – a stem! Take a piece of green construction paper and carefully cut out a stem shape. You can make it as long or short as you prefer, depending on the visual effect you’re aiming for. Once you have your stem prepared, secure it to the back of your paper plate pumpkin, positioning it at the top.
Step 5: Final Touches
Enhance your pumpkin design by incorporating subtle yet eye-catching embellishments. Consider adding delicate vines or leaves using a marker, carefully crafting intricate details that add texture and visual interest. For an even more elaborate look, cut out green construction paper to create realistic leaf shapes and secure them near the stem with glue, subtly framing your pumpkin’s natural beauty.
Troubleshooting Tips
When dealing with stubborn paint or paper issues, there are a few simple tweaks you can make to get your project back on track. For instance, if the paint is taking an eternity to dry, try giving it a gentle boost using a hairdryer on a low and cool setting. This should help accelerate the drying process without causing any damage to the paint or surrounding area. On the other hand, if you’re struggling with paper pieces refusing to stay glued in place, take a step back and reassess your glue application. Make sure you’re using sufficient amounts of adhesive and allow it adequate time to dry before applying additional pressure or attempting to reposition the pieces.
Video Tutorial
To enhance your understanding of the craft, we recommend watching our comprehensive video tutorial on making a paper plate pumpkin on YouTube. This step-by-step visual guide seamlessly complements the written instructions, making it easier for you to visualize and replicate the project at home.
Paper Plate Pumpkin Craft FAQs
Unravel the mysteries surrounding paper plate pumpkin crafts by gaining insight into frequently asked questions. As you delve into this creative endeavor, our comprehensive guide ensures a seamless and enjoyable experience, empowering you to unlock your full artistic potential.
What materials do I need for a basic paper plate pumpkin craft?
To create your own unique pumpkin masterpiece, start by gathering a few essential supplies. First, you’ll need a sturdy base to build upon – a paper plate will do just fine. Next, add some vibrant color to your design with orange paint and a trusty paintbrush. For the face of your pumpkin, cut out a small black construction paper shape to create a spooky or cheerful visage, depending on your mood. To add some stem-like flair, grab some green construction paper and snip it into a suitable shape. Finally, get ready to bring everything together with some good old-fashioned glue and a pair of scissors, perfect for trimming any stray edges.
Can I make a paper plate pumpkin craft without paint?
If painting isn’t your thing, there are other creative ways to decorate a plate without using actual paint. For instance, you can wrap it in orange paper for a pop of color. Alternatively, you could use vibrant orange markers or crayons to add some visual interest. These unconventional methods allow you to think outside the box and express yourself artistically without committing to a full-on painting session.
How can I make my paper plate pumpkin craft more durable?
To enhance the longevity and resilience of your handmade creations, consider the following strategies:
One approach is to opt for sturdier materials, such as thicker, high-quality paper plates that can withstand the rigors of handling and display.
Another method involves applying a protective layer to the finished project. Clear glue or mod podge can provide a safeguard against scratches, scuffs, and other forms of damage, allowing you to enjoy your handmade item for years to come.
Are there eco-friendly options for this craft?
For eco-conscious crafting enthusiasts, it’s possible to create environmentally friendly projects by incorporating sustainable materials and practices into the process. One effective approach is to utilize biodegradable or compostable paper plates as an alternative to traditional materials. Additionally, repurposing old newspapers or magazines for decorative purposes not only reduces waste but also adds a touch of uniqueness to the final product. Furthermore, opting for natural or non-toxic paints ensures that the project not only minimizes its ecological footprint but also promotes indoor air quality.
How can I make this craft educational?
As you create, consider weaving in a narrative that explores the life cycle of a pumpkin. This can be done by describing its journey from seed to maturity, highlighting key stages such as germination, growth, and harvesting. Additionally, use this opportunity to subtly teach concepts like color theory and geometric shapes, perhaps by mentioning how different hues and patterns emerge during the growing process. Furthermore, emphasize the significance of sustainability by pointing out the eco-friendly aspects of using natural materials, repurposing old items, or incorporating recycled elements into your craft project.
What if my child is too young to use scissors?
To make arts and crafts more accessible and enjoyable for younger children, consider preparing some elements in advance. This could include pre-cutting construction paper shapes to simplify the creative process and reduce frustration. Additionally, using stickers or pre-cut facial features can enable them to add a personal touch to their creations without requiring advanced cutting skills.
Can this craft be adapted for a group activity?
To ensure a seamless experience for group members, establish a well-stocked crafting station by laying out all necessary materials upfront. A time-saving strategy is to prep the plates with an initial orange coat, allowing participants to dive straight into the creative process. Furthermore, divide tasks according to age or skill level to promote collaboration and individual growth within the group.
How do I clean up efficiently after crafting?
To make the creative process smoother, it’s essential to prepare the workspace beforehand. Start by laying down a layer of newspapers or a plastic tablecloth to protect the surface from any potential mess. Having a bowl of water and some absorbent materials like rags or paper towels nearby can also help in case of quick cleanups. Furthermore, opting for washable paints and glue sticks will significantly reduce the risk of making a mess that’s difficult to clean. By taking these simple precautions, you’ll be able to focus on the creative activity without worrying about the aftermath.
Can this project be part of Halloween decorations?
Add a personal touch to your Halloween decorations with a paper plate pumpkin. This creative centerpiece can be hung from the ceiling, placed strategically around the house, or used as part of a larger display. Its versatility makes it an excellent addition to any festive decor, and its handmade charm will undoubtedly make your gathering feel more special.
15 Simple Paper Plate Pumpkins (Pumpkin Crafts for Kids)
This autumn, gather your little ones around the craft table and get creative with a delightful array of 15 straightforward paper plate pumpkins. Perfect for a fun-filled family activity, these easy-to-make pumpkin crafts are sure to bring joy and laughter as you work together to bring out their inner artists.
How to Make a Paper Plate Pumpkin

Embrace the magic of fall with a delightful Paper Plate Pumpkin Craft from Made To Be A Momma. This engaging activity not only keeps little hands busy on a crisp autumn afternoon but also hones their fine motor skills through creative play. As you step into the season, create adorable jack-o’-lanterns to adorn your home, classroom, or Halloween party with a painting and cutting process that’s as easy as it is enjoyable.
nThe key to a stress-free crafting experience lies in using large brushes for effortless paint application and laying down newspapers to ensure a mess-free adventure. With precision-cutting templates available, this charming craft is accessible to all ages. So gather your paper plates, paints, and scissors, and let the festive fun unfold!
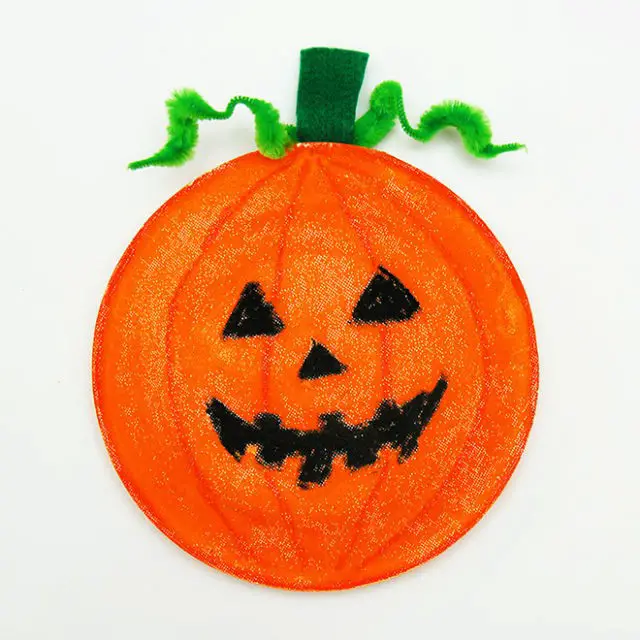
Fun Paper Plate Pumpkin Craft
Bring the magic of Halloween into your home or classroom with a delightful paper plate pumpkin craft. With just a few simple supplies like paper plates, paint, and pipe cleaners, you can turn a humble plate into a charming pumpkin decoration that’s sure to delight kids of all ages. Fireflies and Mud Pies provides a clear and easy-to-follow guide, making it an accessible activity for both in-classroom and at-home crafting experiences.
This hands-on project is the perfect way to encourage creativity while adding a touch of autumn charm to your decor or classroom bulletin boards. And with a free printable template available, you can get creative without worrying about starting from scratch.
DIY Paper Plate Pumpkin
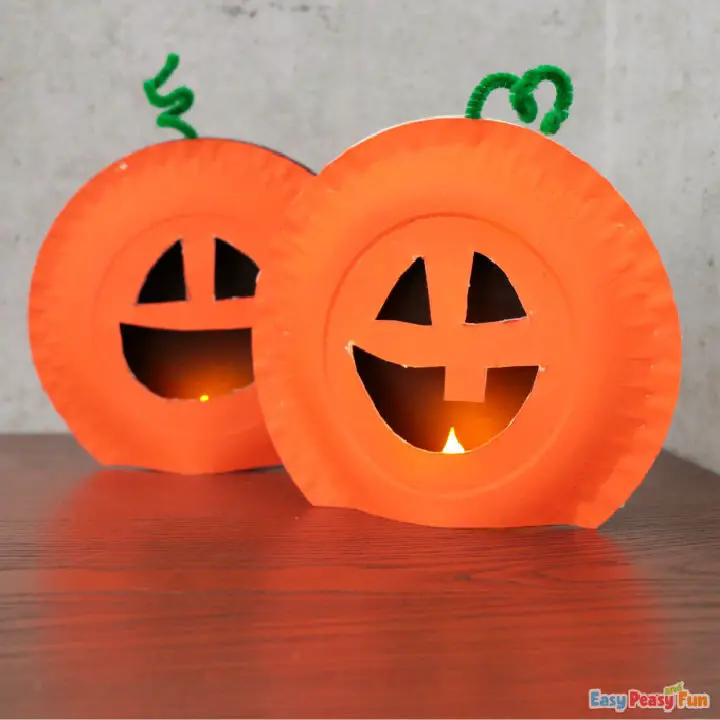
Embark on an enchanting Paper Plate Pumpkin Craft adventure, courtesy of Easy Peasy and Fun, as you celebrate the spookiest of seasons – Halloween. This creative endeavour offers a safer alternative to traditional pumpkin carving, allowing young ones to revel in festive fun without the perils of sharp tools. By painting paper plates, designing pumpkin faces, and assembling a radiant decoration complete with a flickering tea light candle, you’ll create a charming keepsake that illuminates windows and infuses spaces with an eerie glow. Perfect for both classroom projects and family crafting sessions, this accessible tutorial guarantees a delightful outcome that will cast its spell on all who behold it.
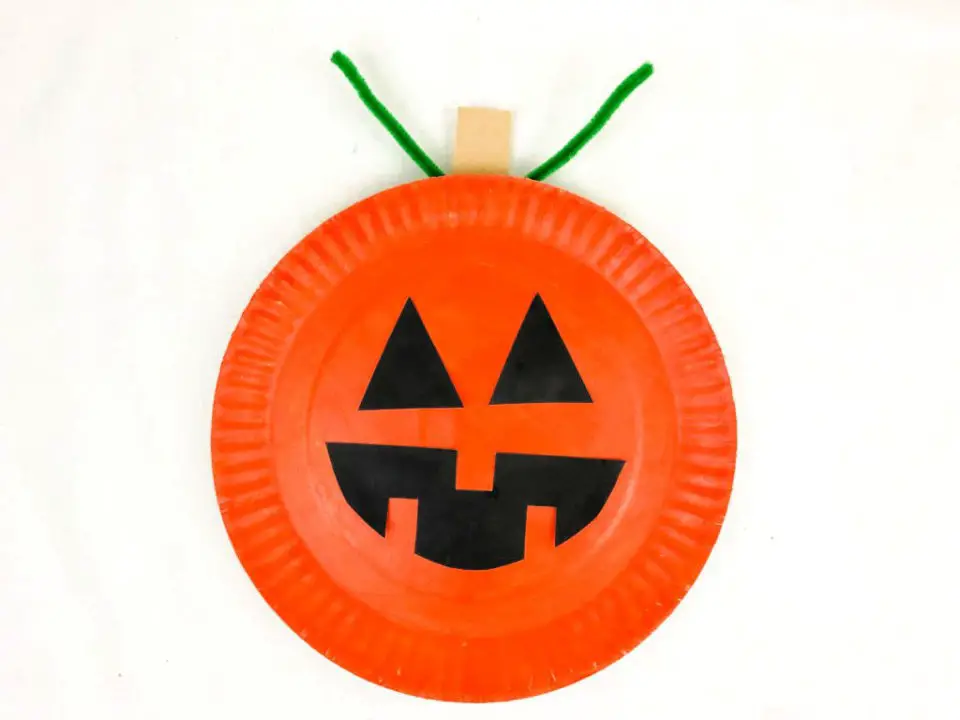
Halloween Paper Plate Pumpkin Craft
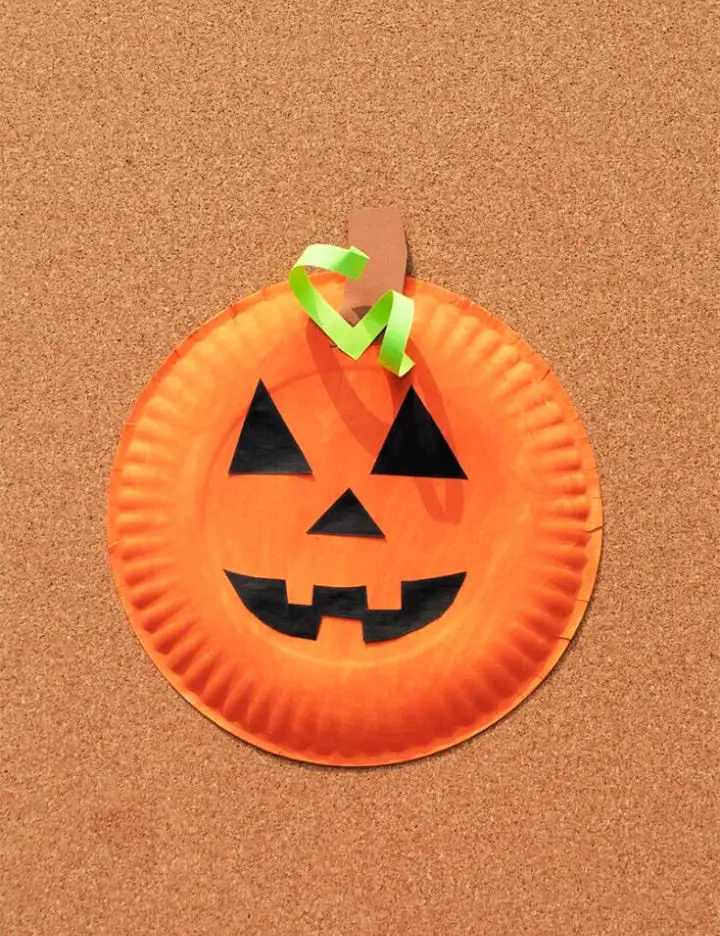
Dive into the Halloween spirit with Pjs and Paint’s delightful paper plate pumpkin craft, an ideal activity for young children and parents to enjoy together. This creative endeavor fosters bonding and encourages imagination, making it perfect for a family evening or Halloween party. With basic supplies like paper plates, paint, and construction paper, you can create a charming pumpkin decoration to adorn your home, classroom, or festive gathering.
nThe step-by-step instructions are clear and concise, allowing you to easily follow along and produce a delightful pumpkin that embodies the essence of the season. This activity not only provides entertainment but also helps develop fine motor skills in toddlers, making it an excellent choice for little ones.
nAs you craft your unique pumpkin, you’ll add a touch of whimsy to your festive decorations, making this a memorable experience for everyone involved.
Homemade Paper Plate Pumpkin
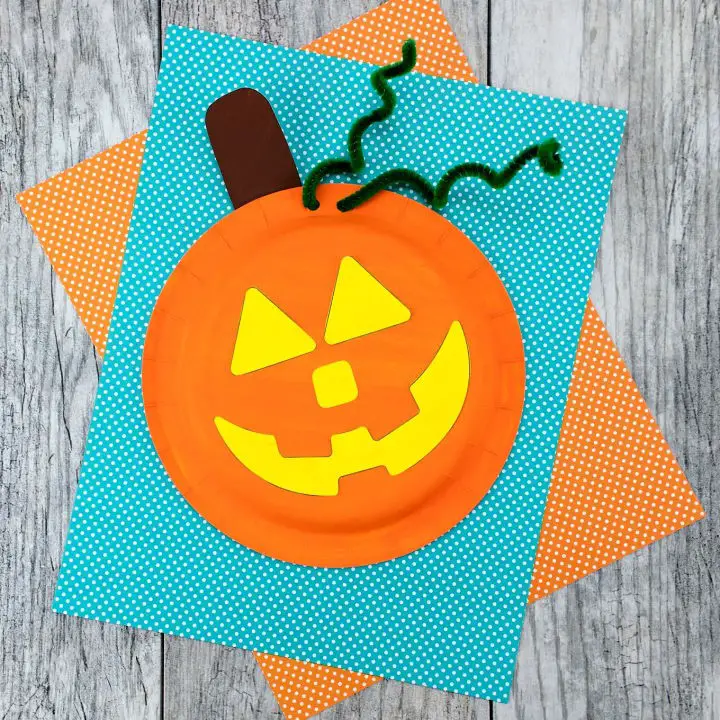
Bring the spirit of Halloween into your home or classroom with this enchanting paper plate pumpkin craft project. Perfect for kids and families alike, it’s an excellent way to combine creativity with simplicity. All you need are some basic materials like paper plates, orange paint, black cardstock, green pipe cleaners, and glue to create your own personalized pumpkin masterpiece. To add a playful twist, use the provided template to cut out various facial features and let kids have fun mixing and matching different expressions to design their unique pumpkins. Once assembled and painted, these delightful decorations can be used to celebrate the season in style. This craft project is easy to follow, fun to make, and encourages imagination and creativity – making it a perfect activity for a Halloween-themed event or celebration.
Easy DIY Paper Plate Pumpkin

Indulge in the autumnal ambiance with this delightfully easy paper plate pumpkin craft, an ideal activity to share with little ones! To create this adorable decoration, simply gather a paper plate, some orange and black markers or crayons, a hole punch, and a green pipe cleaner. Begin by coloring the plate with your chosen hues, then punch a small hole for the stem. Add a playful face to transform it into a one-of-a-kind Jack O’Lantern. This fuss-free craft is perfect for quality time with kids, allowing them to express their creativity without the need for scissors or glue. With these minimal supplies, you’ll be crafting a charming paper plate pumpkin that’s sure to bring warmth and coziness to any space.
Quick DIY Paper Plate Pumpkin
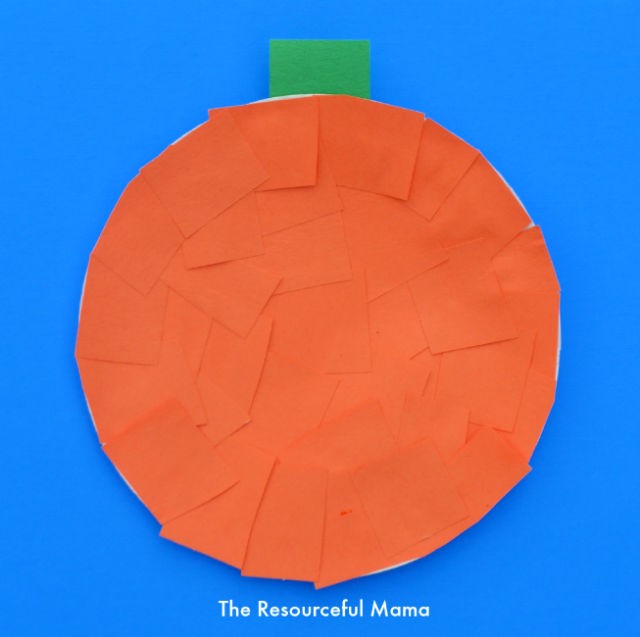
Transform a humble paper plate into a delightful pumpkin craft with ease using The Resourceful Mama’s step-by-step tutorial. This enjoyable activity requires minimal setup and uses readily available materials, making it perfect for a spontaneous fall-themed craft session at home. Simply gather a paper plate, orange and green construction paper, glue, and scissors to get started.
How Do You Make a Paper Plate Pumpkin
Transform plain paper plates into delightful pumpkin decorations this fall, perfect for the autumn season. By following this easy and engaging craft idea from FirstPalette.com, kids can unleash their creativity while developing fine motor skills through cutting, painting, and assembling. The result is a vibrant paper plate pumpkin that doubles as a festive Halloween Jack-o’-lantern. This activity is suitable for home, classroom, or party settings, adding a touch of seasonal charm to any space.
Handmade Woven Paper Plate Pumpkin
Transform a humble paper plate into an adorable woven pumpkin with Creative Station’s fun and interactive Paper Plate Pumpkin Weaving activity. Suitable for crafty individuals of all ages, this project requires minimal adult supervision and is an excellent way to develop fine motor skills. To get started, gather your materials – including orange wool, black self-adhesive felt, and some basic supplies. By weaving two threads simultaneously, you can speed up the process, and our downloadable template makes it even more accessible. As you work on this hands-on activity, watch as your unique woven paper plate pumpkin takes shape, bringing a touch of autumn charm to any room.
Pumpkin Paper Plate Lacing Craft
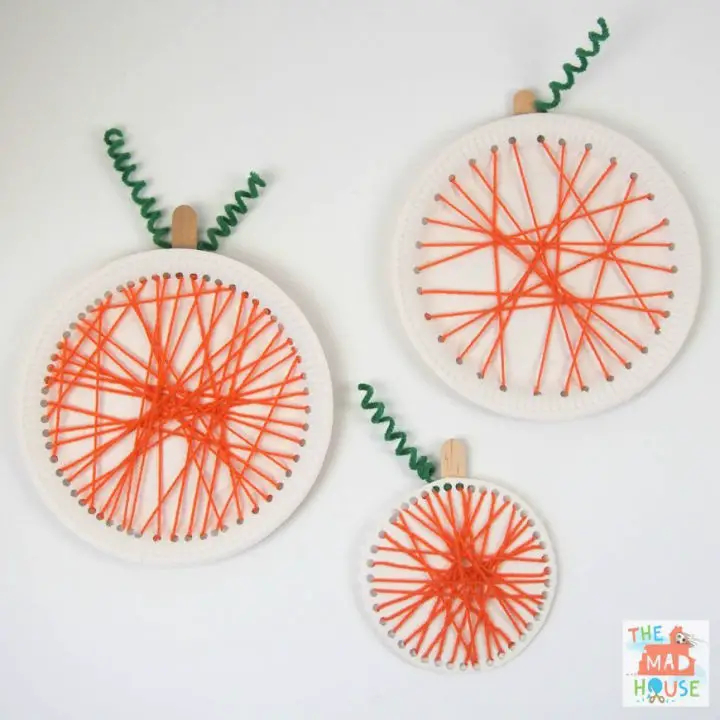
Transform a humble paper plate into a charming pumpkin decoration with the Pumpkin Paper Plate Lacing Craft from Mum In The Madhouse. This engaging activity is perfect for developing fine motor skills in children, while also making a lovely seasonal addition to your home. With just a few simple materials – including paper plates, yarn, a hole punch, and some creative flair – you can turn a basic plate into a delightful pumpkin. Use wool to weave through the holes in any pattern that strikes your fancy, then add a stalk and spirally-twisted pipe cleaner leaves for the finishing touches. The use of Blu Tack Glu Dots ensures a secure and hassle-free attachment of elements, making this craft accessible to crafters of all ages. Get ready to celebrate the beauty of autumn with this easy-to-follow and fun project!
DIY Rocking Paper Plate Pumpkin
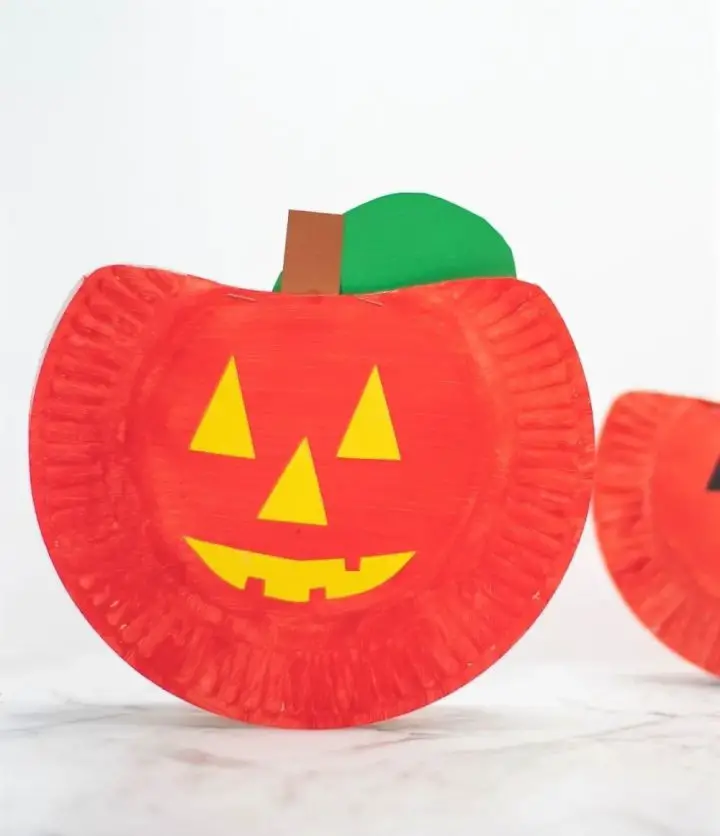
Add some spooky spirit to your Halloween crafts with Crafts By Ria’s innovative paper plate pumpkin craft! This fun and engaging activity is perfect for kids, transforming basic materials into delightful decorations. With just two paper plates, paint, scissors, and construction paper, your little ones can create their own rocking pumpkin that brings movement and joy to your fall celebrations.
This craft is an excellent way to develop fine motor skills and creativity through painting, cutting, and assembling. By following the simple step-by-step instructions, you’ll create a cute and playful pumpkin that rocks gently with just a little tap, making it an unforgettable crafting experience for kids this season.
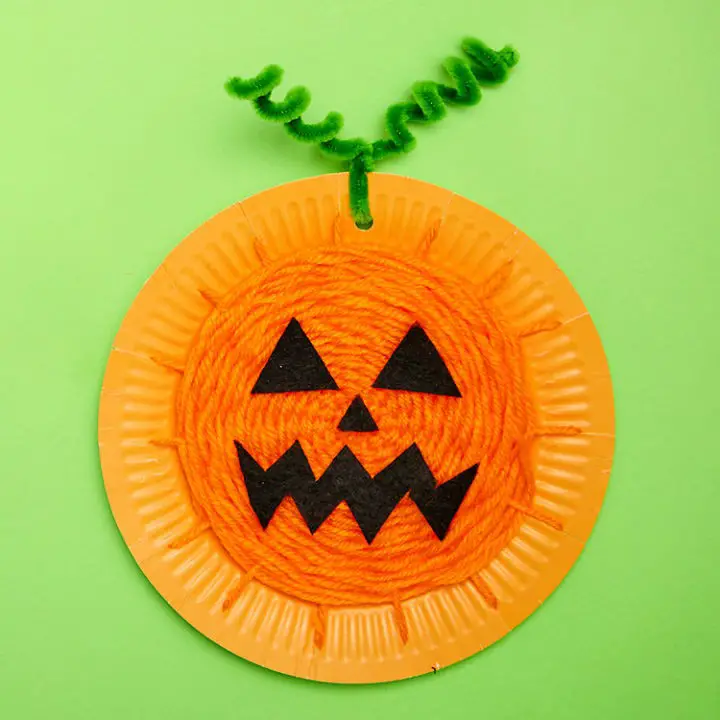
Make a Paper Plate Pumpkin
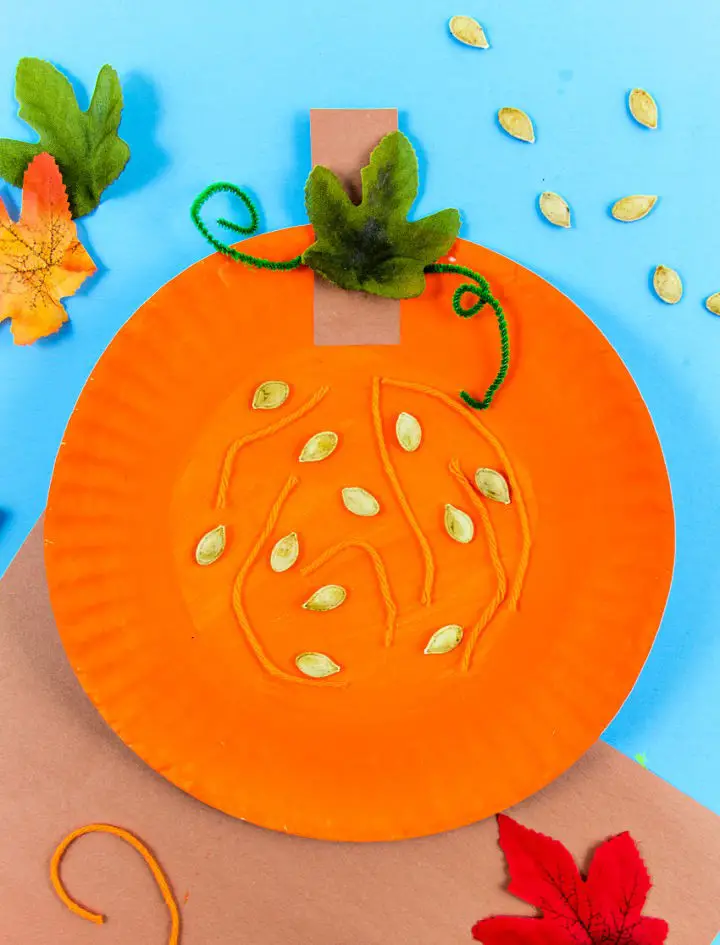
Immerse your little ones in the essence of autumn by embarking on a creative and educational adventure with Make and Takes’ vibrant paper plate pumpkin project! As you work together, not only will you create a charming decoration, but you’ll also learn about the various parts of a pumpkin. Using basic materials like orange paint, yarn, and pumpkin seeds, kids can unleash their creativity by painting, cutting, and gluing their way to a deeper understanding of this fall icon. This engaging activity is ideal for both classroom settings and family gatherings, as it effortlessly combines fun with education. By following the clear instructions, you’ll help children learn while they play, making for an unforgettable experience.
Tissue Paper Mosaic Pumpkin Paper Plate Craft
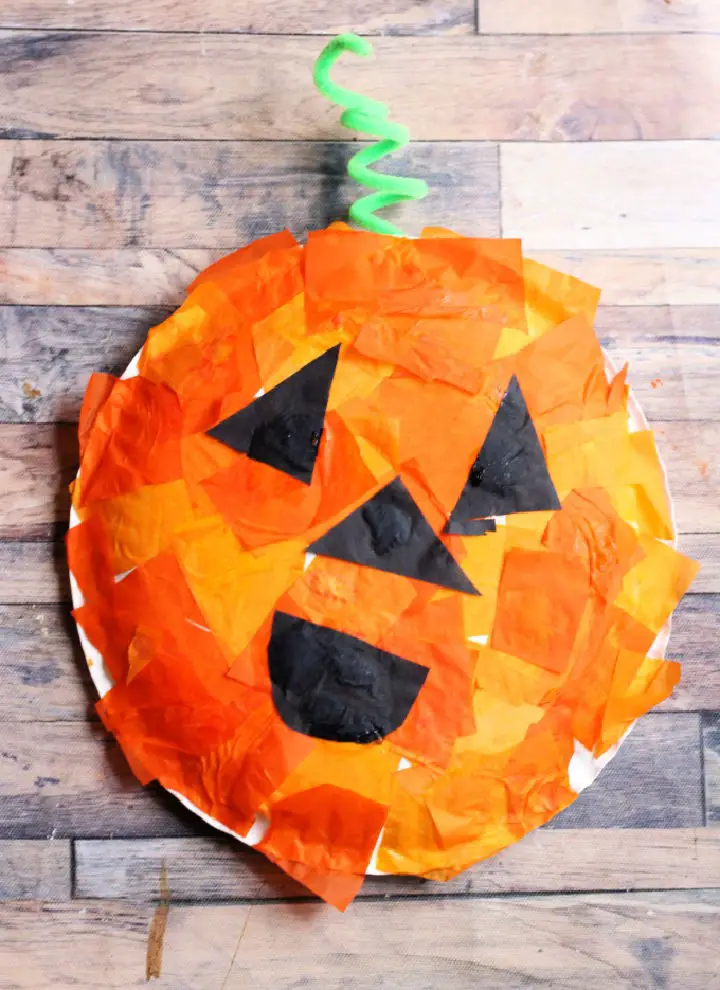
Bring the magic of the pumpkin season into your home with a delightful Mosaic Pumpkin Paper Plate Craft. This easy-to-make activity from Easy Peasy and Fun is an ideal way to spend quality time with kids, combining simple materials like paper plates, tissue paper, craft glue, and green pipe cleaners. By cutting tissue paper into squares, gluing them onto the plate, and adding a handcrafted pumpkin face, you’ll create a charming Halloween decoration that’s sure to delight. Not only is this activity a fantastic way to foster children’s creativity and fine motor skills, but it also makes for a wonderful family bonding experience. So gather your supplies and get ready to craft a vibrant array of paper plate pumpkins that will add a splash of color to your home this fall.
Simple DIY Halloween Paper Plate Pumpkin
Kick-start the Halloween excitement with an engaging paper plate pumpkin craft that’s perfect for kids! This delightful project combines painting, cutting, and assembling to create a festive decoration while nurturing fine motor skills. With just a few simple materials like a white paper plate, cardstock, vibrant orange acrylic paint, a brush, a green pipe cleaner, glue, and scissors, you can transform a plain paper plate into a charming pumpkin display piece that’s sure to delight the whole family.
Making a Mummy Paper Plate Pumpkin
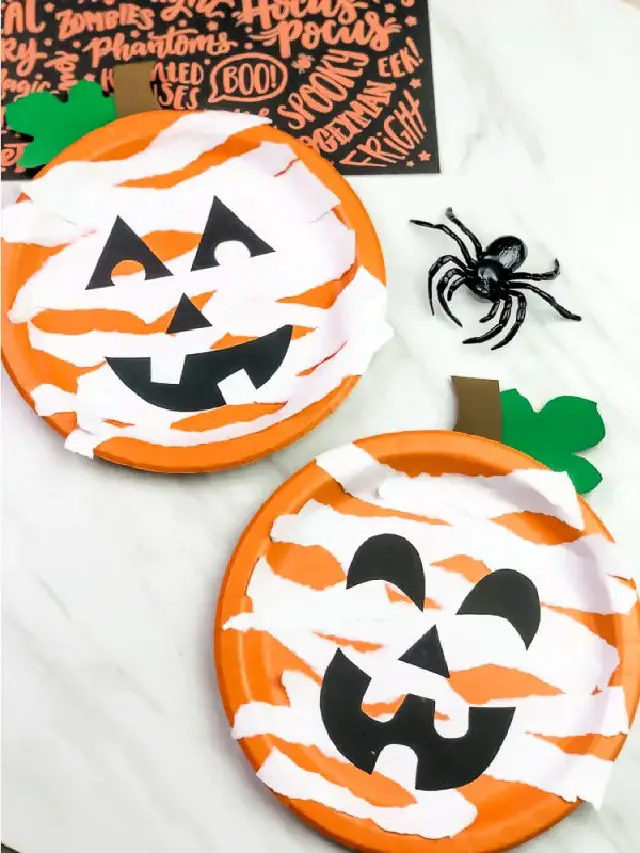
Embarking on creative adventures is an excellent way to encourage kids’ imagination and self-expression. The Paper Plate Pumpkin Craft from Simple Everyday Mom offers a delightful project for young children this Halloween season, ideal for preschool and kindergarten age groups. This engaging activity not only develops fine motor skills but also fosters creativity and personalization through facial expression experimentation. With easy-to-follow instructions and a free downloadable template, kids can craft their own unique jack o’lantern mummies, combining creative freedom with fun and discovery. All that’s required is some orange paper plates, basic crafting supplies, and an eagerness to explore. This enjoyable activity promises a memorable experience for both children and caretakers alike.
Conclusion:
In conclusion, our exploration of 15 simple paper plate pumpkins has showcased a fantastic way to engage children in creative activities that not only spark fun but also instill a sense of accomplishment. By following our step-by-step guide and utilizing readily available materials, families can enjoy quality time together, crafting memorable and charming pumpkin decorations that are perfect for Halloween or autumn displays. The humble paper plate has been transformed into a delightful decoration, enhancing their crafting skills and fostering a sense of pride in their creations. With these easy-to-follow instructions, anyone can create a unique and festive pumpkin decoration that’s sure to become a treasured family heirloom.
