Create regal masterpieces with ease by crafting a DIY paper crown. With 25 unique templates at your disposal, this comprehensive guide demystifies the process, covering material options and providing step-by-step instructions. By utilizing household items, recycled materials, and a dash of creativity, you’ll be well on your way to creating breathtaking crowns that add a touch of royal flair to any party or dress-up occasion. As we explore the world of paper crafting together, you’ll discover how to infuse your creations with personal style through colors, textures, and themes. Moreover, this guide prioritizes safety tips to ensure a fun and accessible experience for crafters of all ages. Should you encounter any hiccups along the way, don’t worry – we’ve got you covered with practical solutions to common troubleshooting issues. With these resources at your disposal, get ready to unleash your creativity and bring your paper crown vision to life.
Material Alternatives for Your DIY Paper Crown
Embarking on a DIY paper crown project is an excellent way to foster creativity and bring people together. However, not everyone may have the traditional materials at their disposal. To make this activity inclusive and enjoyable for all, I’d like to offer some creative alternatives that can be used in place of conventional supplies. By leveraging everyday items, you can still create a magnificent paper crown without having to venture out to purchase specialized materials.
Common Household Items
When it comes to crafting a royal crown, the base material is just as important as the design itself. Instead of relying on traditional materials like construction paper, consider using items you might otherwise throw away. For instance, cereal boxes provide a sturdy foundation that can be easily cut and shaped into a regal-looking crown. If you prefer a more rustic look, newspapers are another option to consider. Their flexibility allows for creative freedom in terms of painting or decorating your design. Alternatively, magazine pages offer a pop of color and texture, with their glossy finish adding an extra layer of depth when layered together. By repurposing these everyday items, you can create a unique and eye-catching crown that’s as functional as it is fashionable.
Going Green with Recycled Materials
When crafting with creative flair, it’s easy to overlook the hidden potential in everyday items. From household scraps to sentimental keepsakes, these materials can be repurposed into something truly special. Take toilet paper rolls, for instance. By cutting them into strips and combining them, you can create a sturdy base for a one-of-a-kind crown. Similarly, old greeting cards – those birthday or holiday cards that might otherwise end up in the recycling bin – possess a unique firmness that makes them perfect for crafting a durable, long-lasting crown. And then there’s used gift wrap, its patterns and shine begging to be repurposed into something new. Whether you’re creating a whimsical masterpiece or a statement piece, these humble materials are sure to add a touch of creativity and originality to your work.
For Added Decoration
When crafting a DIY crown, don’t discount the power of repurposing everyday materials. Fabric scraps, often discarded, can be cleverly glued onto your design to add a tactile dimension. Similarly, cleaned bottle caps can be transformed into eye-catching jewels by painting them and attaching them with adhesive. Even pasta shapes like farfalle can be given a luxurious sheen by painting them gold or silver, effectively substituting for gemstones. By embracing creative solutions and recycling materials, you’ll not only save money but also contribute to a more sustainable crafting process.
How to Make a Paper Crown – Step by Step
Embracing your creative side and expressing your royal flair doesn’t have to mean breaking the bank or requiring advanced crafting skills. With just some basic paper supplies, you can create a stunning and imaginative crown that’s perfect for dressing up parties, themed play, or simply adding a touch of whimsy to your daily attire. Follow this straightforward guide as we explore the simple yet charming process of crafting a one-of-a-kind paper crown.
You Will Need:
To get started, you’ll need a few basic materials. A standard-sized sheet of thick paper, such as an A4, will do just fine for most projects. Of course, if you’re looking to create something larger or more elaborate, feel free to use a bigger size. For cutting and trimming your design, scissors are a must-have item on your list. Finally, a good old-fashioned pencil is all you need to jot down any ideas or sketch out your initial design concept.
Step by Step Instructions
Discover the art of crafting a charming paper crown with this simplified, step-by-step process. By following these straightforward instructions, you’ll be creating your own royal headpiece in no time.
Step 1: Draw the Crown
As you prepare to craft your homemade tiara, begin by sketching the outline of your desired crown shape onto the paper. Feel free to stick with a classic pointed design or let your creativity shine through with wavy, curved, and intricate patterns. Ensure that your design spans the entire length of the paper, allowing for a snug fit around your head when the tiara is complete.
Step 2: Cutting Out the Crown
To achieve a precise and polished finish, carefully craft along the contours of your crown design using scissors. The attention to detail you bring to this step will directly impact the overall appearance of your completed crown, allowing it to exude a sense of professionalism and sophistication.
Step 3: Cut a Strip for the Back of the Crown
To achieve a comfortable fit, begin by cutting a strip of paper that is approximately 2 inches wide and long enough to stretch across the back half of your head. This adjustable band will enable you to customize the crown’s size to suit your individual measurements and keep it securely in place.
Step 4: Making the Slits to Fasten
To ensure a secure fit, create precise slits along both the top and bottom edges of your crown, approximately 1 inch in depth. These strategic cuts will enable you to fasten the crown around your head without relying on adhesive. As you prepare the crown for wear, align the slits so that they naturally interlock with those on the accompanying strip, forming a seamless bond.
Step 5: Attaching the Strip for the Back of the Crown
To secure the strip, align its slits with those on the crown and slide them into place, creating a circular shape that can be worn on the head. To customize the fit, manipulate the slits to interlock in various ways, ensuring a snug yet comfortable hold.
Step 6: The Finished Crown
With the securing process complete, you are left with a stunning, one-of-a-kind crown that’s perfect for showcasing to friends and family or incorporating into your everyday attire to add an air of nobility.
Video Tutorial
If you’re interested in learning the art of crafting a paper crown without relying on adhesive, I recommend exploring this comprehensive video tutorial. The step-by-step guide will walk you through each stage of the process, from start to finish, providing a clear understanding of how to bring your design to life.
Customization Ideas for Your DIY Paper Crown
To elevate the DIY paper crown-making experience, consider adding a personal touch through creative customization. This can be achieved by incorporating unique design elements that reflect your personality or style. For instance, you could add colorful embellishments like glitter, stickers, or rhinestones to give your crown an extra sparkle. Alternatively, you might choose to include meaningful symbols or motifs that hold significance for you, such as a favorite animal or flower. By infusing your crown with personal flair, you’ll not only create a truly one-of-a-kind piece but also make the crafting process more enjoyable and memorable.
Personalize with Color and Texture
Infuse creativity into your craft project by experimenting with vibrant hues and tactile textures. Start by selecting markers, crayons, or paint to add a pop of color to your crown. Feel free to go wild with a mix-and-match approach or opt for a cohesive theme-based palette. Next, incorporate textural elements like fabric scraps, crumpled aluminum foil, or layered tissue paper. Manipulate these materials through techniques like twisting, layering, and crumpling to add depth and visual interest.
Sparkle and Shine
When it comes to adding a touch of glamour to your craft project, consider incorporating glitter, sequins, or beads. To achieve a subtle sparkle, apply small amounts of glitter glue or loose glitter to specific areas you want to highlight. Alternatively, go big for maximum shine by applying more generous amounts. For a more luxurious look, use faux pearls or beads to mimic precious stones. These will catch the light beautifully and add an air of sophistication.
Themes and Characters
Transforming into royalty has never been more whimsical! To add an extra touch of magic to your royal attire, try incorporating shapes that evoke a sense of wonder and enchantment. Cut out stars, moons, or hearts from construction paper and attach them to your crown for a fairy-tale inspired look that’s sure to make you feel like royalty. Alternatively, channel your inner superhero by crafting a crown that’s worthy of the likes of Superman or Wonder Woman. Use symbols or logos that pay homage to your favorite heroes, and get ready to save the day in style.
Eco-Friendly Embellishments
Add some natural charm to your DIY crown by incorporating elements from nature’s bounty. Look to leaves, dried flowers, and seeds to bring an earthy vibe to your design. Before attaching these natural finds to your crown, ensure they’re clean and dry to prevent any unwanted mess. Alternatively, get creative with recycled materials like bottle caps, old buttons, or paper clips. Transform them into ‘jewels’ by painting or wrapping them in foil for a metallic finish that’s sure to add a touch of whimsy to your handmade headpiece.
Safety Tips for Crafting Your DIY Paper Crown
When embarking on the creative journey of crafting a paper crown, it’s essential to prioritize safety to ensure an enjoyable experience for all participants. To guarantee a worry-free adventure, consider the following crucial guidelines:
Choose the Right Materials
When it comes to crafting with kids, safety should always be a top priority. To ensure a fun and hazard-free experience, consider using non-toxic adhesives that are designed with young creators in mind. This simple precaution can help minimize the risk of unwanted exposure to harmful chemicals. Additionally, opt for child-safe scissors featuring rounded tips that greatly reduce the likelihood of accidental cuts. By prioritizing safety in these small but important ways, you’ll be setting a positive tone for your crafting sessions and helping to foster a sense of confidence and creativity in your young collaborators.
Crafting in a Safe Environment
Crafting with clarity and ease requires a deliberate setup, starting with the foundation of a well-designed workspace. Ensure your crafting area is bathed in soft, natural light or bright artificial illumination to minimize eye strain and promote precise cutting and decorating techniques. Meanwhile, maintain a tidy and organized workspace to prevent accidents and keep track of all materials at your fingertips.
Be Mindful of Small Decorations
When crafting with little ones, it’s essential to prioritize safety. Two crucial considerations are the potential for choking hazards and secure attachments. Beads, sequins, or other small items can easily become lodged in a child’s airway, making them a serious choking hazard. To mitigate this risk, exercise caution when using these materials. Additionally, ensure that all decorations are securely fastened to prevent them from falling off and becoming potential entanglement hazards.
Supervision is Key
When it comes to crafting with kids, safety should be the top priority. This is especially true when they’re working with sharp objects like scissors or handling tiny materials that can easily get lost. To ensure a fun and stress-free experience for everyone involved, make sure an adult is present to supervise and provide guidance. With their help, your little ones will be able to create their own unique paper crown without any risk of injury or frustration.
Troubleshooting Common Issues in DIY Paper Crown Crafting
While creating a paper crown can be a relatively smooth process, unexpected snags may arise. To maintain a seamless and stress-free experience, it’s essential to anticipate and address common issues that might crop up. By recognizing these potential pitfalls and learning how to overcome them, you’ll be able to focus on the creative aspects of crafting and enjoy the process from start to finish.
The Crown Doesn’t Fit
To begin crafting your custom crown, take precise measurements of the person’s head circumference. For a comfortable fit, add an inch to account for any overlap where the ends will meet. This initial step ensures a snug, secure fit that won’t compromise the overall look or functionality of the crown. Once you have this measurement, you can proceed with cutting your material to size. Next, consider incorporating an adjustable closure mechanism into your design. By creating slits at the ends of the crown and using a paper tab or similar device, you can create a size-adjustable feature that accommodates individuals with different head sizes. This thoughtful detail demonstrates your attention to detail and commitment to crafting a truly bespoke piece.
Decorations Keep Falling Off
When it comes to securing decorations on your crown, you’ll want to use an adhesive that’s up to the task. For heavier or more substantial decorations, consider reaching for hot glue or double-sided tape – these powerful bonding agents will help keep everything in place. Once you’ve applied the glue, make sure to press the decoration firmly onto the crown and hold it there for a few seconds to allow the adhesive to fully take hold. This simple step can make all the difference in ensuring your decorations stay put.
Crown Is Too Flimsy
To fortify the structure of your paper crown, consider reinforcing it with additional layers. This can be achieved by gluing two layers of paper together, opting for a sturdier material like cardstock, or combining both approaches to create an even more robust base. Additionally, incorporating support strips made from paper or cardboard along the inside of the crown will further enhance its stability.
Crown Edges Are Uneven
When crafting symmetrical edges, consider utilizing a template to ensure accuracy. You can either create your own crown template or download one from a reliable source. To use this template effectively, carefully trace its outline onto your paper, paying close attention to the details to achieve even edges. For optimal results, use a sharp pair of scissors and cut slowly along the lines, allowing you to maintain control as you work towards a clean edge.
FAQs for DIY Paper Crown Crafting
As the creative process unfolds for making a DIY paper crown, several inquiries naturally emerge. To alleviate any uncertainty, this section will tackle frequently asked questions and supply straightforward, trustworthy responses, empowering readers to successfully complete their craft project.
What materials do I need to make a paper crown?
To bring your creativity to life, you’ll require a few essential materials. These include construction paper or cardstock, which will serve as the foundation of your project. You’ll also need scissors to cut out shapes and designs, a ruler to ensure precise measurements, and a pencil for sketching out your ideas. If you’re feeling extra crafty, consider adding some decorative flair with items like stickers, glitter, or gems. Finally, glue or tape will help hold everything together, bringing your vision to fruition.
How do I measure the paper for my crown?
To create the ideal measurement, start by taking a strip of paper that’s roughly 24 inches in length and 3-4 inches in width. This size should provide a comfortable fit around your head, allowing you to gauge whether the final product will accommodate your unique measurements.
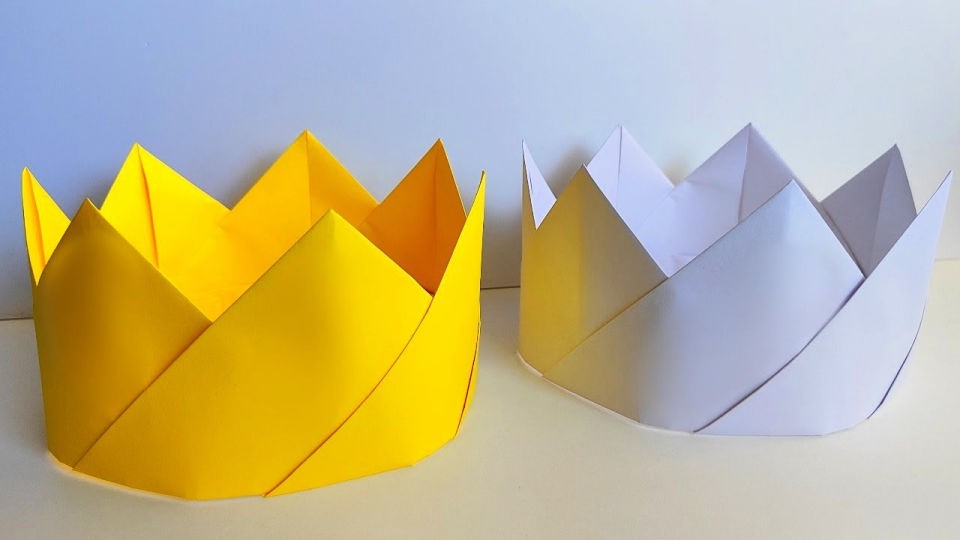
Can I make a crown without glue?
When it comes to creating a crown without using glue, there are creative alternatives to consider. One option is to utilize tapes or design custom-made tabs that fit snugly together, providing a secure and mess-free solution.
How can I make my crown stand out?
Unleash your artistic flair by incorporating vibrant hues and unconventional materials into your decor. Think outside the box and get creative with additions like iridescent glitter, colorful stickers, or even organic elements like leaves, flowers, or branches. By doing so, you’ll infuse your space with a unique personality that reflects your individuality.
What if the crown is too big or too small?
For a customizable closure, consider combining a slitted design with a tab feature. Alternatively, take precise measurements of your head to ensure the perfect fit, leaving room for about an inch of overlap.
How do I keep decorations from falling off?
When it comes to securing items that are particularly heavy or bulky, it’s essential to turn to robust adhesives that can withstand the weight and provide a reliable bond. Options like hot glue or double-sided tape are excellent choices for these types of situations, as they offer a strong hold that can’t be easily compromised by the item’s size or mass.
Can I make a crown for a themed party?
When it comes to creating a memorable celebration, don’t underestimate the power of a thoughtfully curated crown design and its accompanying decorations. By tailoring these elements to perfectly capture the essence of your chosen theme – such as a bold superhero logo for a hero-themed extravaganza – you’ll be well on your way to crafting an immersive and engaging experience that will leave a lasting impression on your guests.
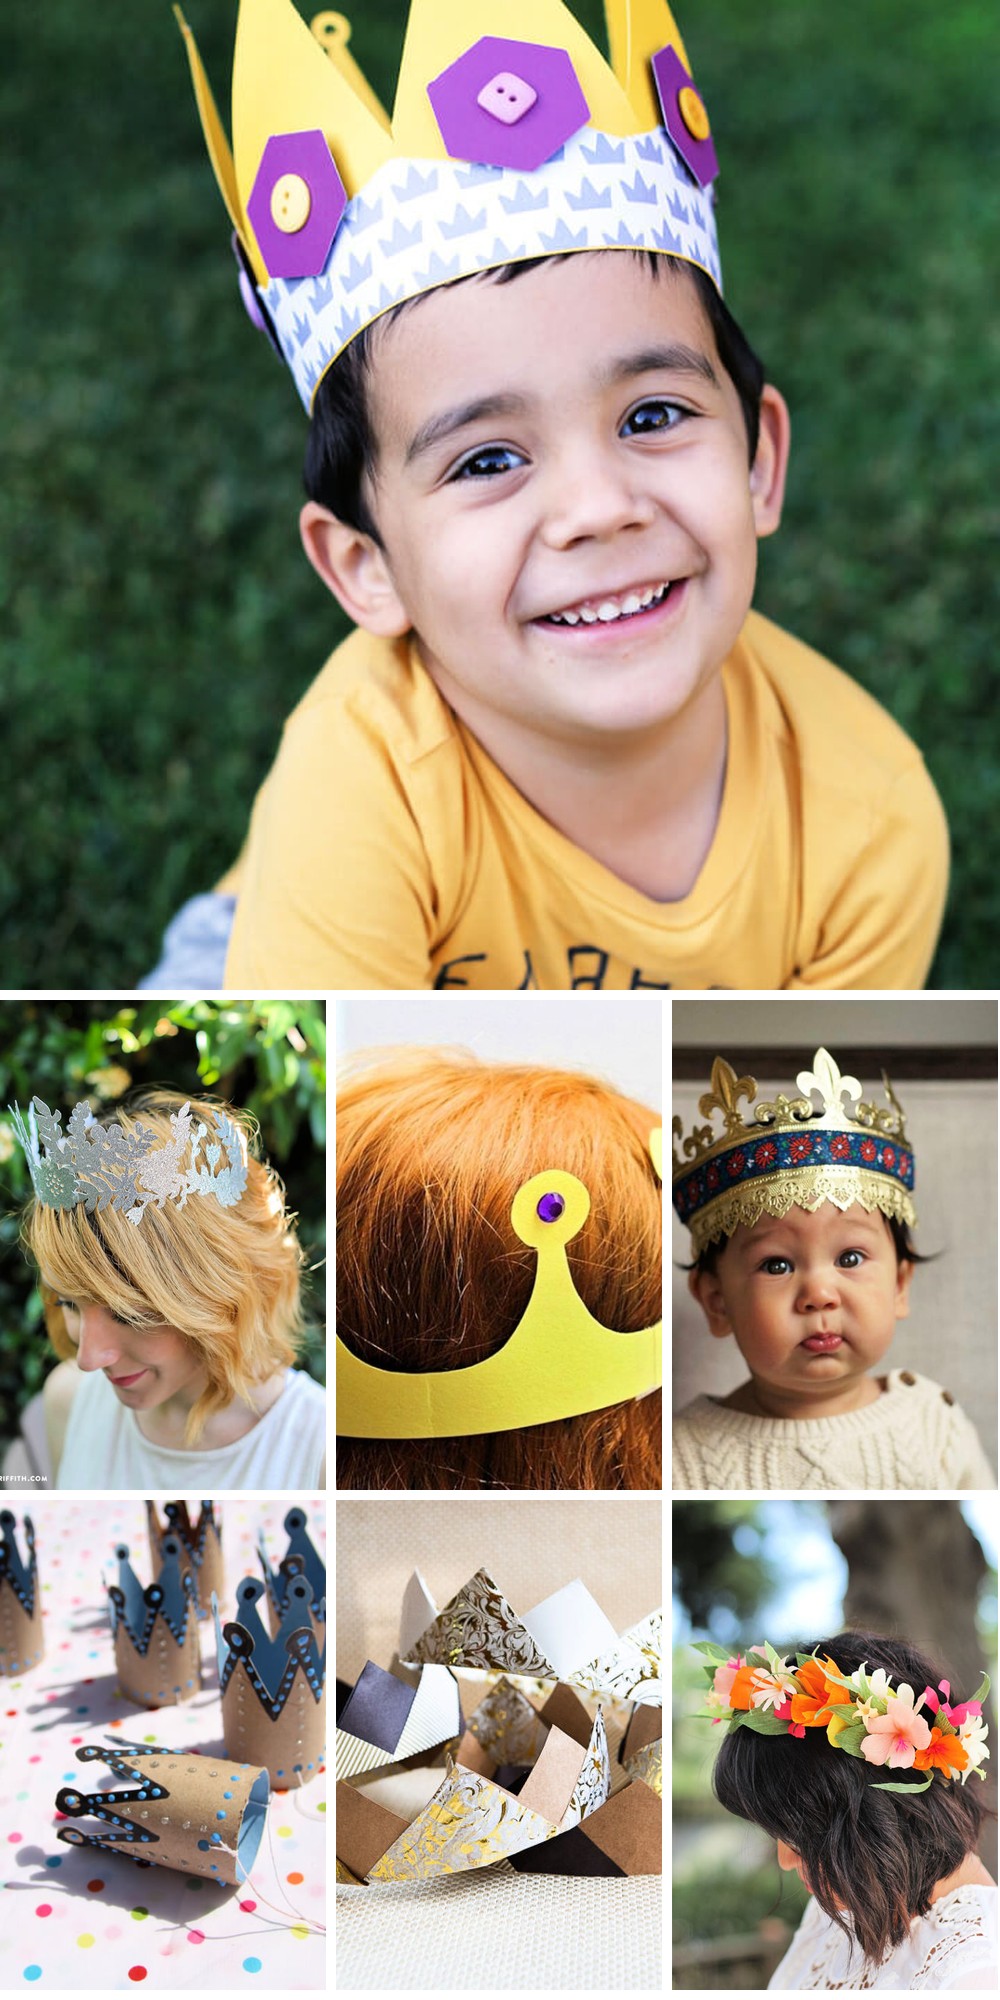
25 DIY Paper Crown Template
Unleash your creativity and craft breathtakingly beautiful paper crowns using our comprehensive 25-piece DIY template collection. Ideal for adding a touch of whimsy to parties, events, or simply indulging in some good old-fashioned imaginative play. Get instant access to this exclusive resource.
DIY Paper Party Crown
Transforming a child’s birthday celebration into a truly unforgettable experience can be achieved through the incorporation of thoughtful handmade elements, such as intricately crafted paper crowns. By following simple instructions and utilizing basic materials like cardstock and adhesive, parents can create regal accessories that not only delight their children but also foster a sense of togetherness during party activities. Embellishments like rhinestones or glitter can be added to further personalize these special creations. The templates provided make the assembly process straightforward, allowing both parents and children to participate in this engaging project with ease. As the birthday child dons their one-of-a-kind crown on their special day, watch as their face lights up with joy, making the celebration all the more memorable.
How to Make a Princess Crown
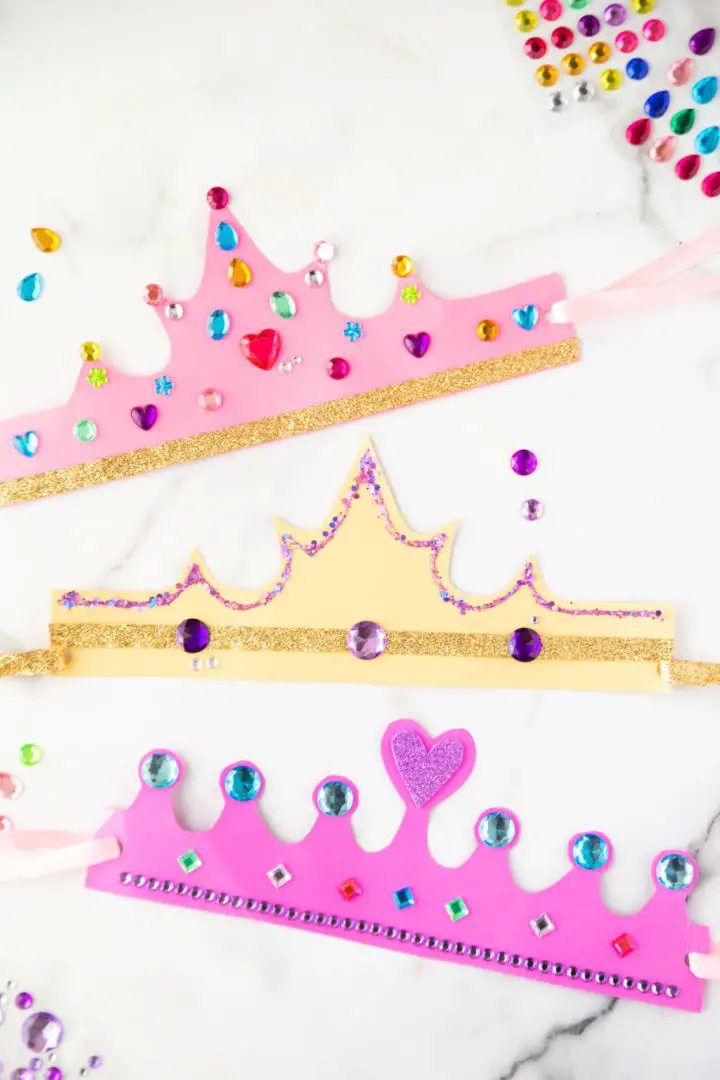
Transform ordinary playtime into extraordinary adventures with a touch of creativity! At Made To Be A Momma, we’re excited to share our step-by-step guide on creating bespoke Princess Crowns that will transport any little princess to a realm of wonder and enchantment. With our printable template and simple instructions, you can effortlessly craft these regal accessories using materials from your own home. Feel free to get creative with embellishments like gemstones, ribbons, and other artistic expressions that reflect your unique style. These DIY crowns are perfect for slumber parties, dress-up sessions, or as a fun activity to spark imaginative play. With a personalized Princess Crown, you’ll bring your child’s royal fantasies to life!
Handmade Paper Spring Floral Crown
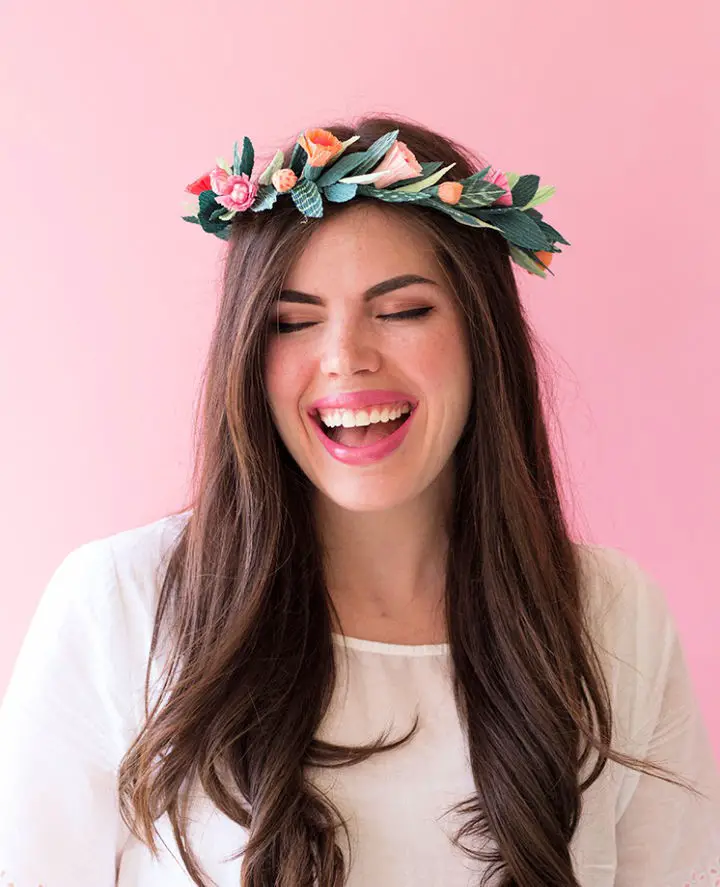
Transform your spring celebrations with a one-of-a-kind handmade paper floral crown, courtesy of The House That Lars Built’s DIY Paper Spring Floral Crown guide. This comprehensive tutorial empowers you to craft a long-lasting and radiant accessory, perfect for elevating everyday outfits or special events. To get started, gather basic materials such as crepe paper, stem wire, and a glue gun. Then, follow the intuitive step-by-step instructions to shape, cut, and assemble blooms, leaves, and buds into a stunning floral arrangement. For an extra touch of personality, consider adding custom details through painting. Whether you’re a seasoned crafter or just looking for a fun DIY project, this charming paper crown is sure to bring a smile to your face and add a pop of color to any springtime gathering.
How to Fold Origami Crown
Step into the whimsical world of paper craft with Persia Lou’s comprehensive guide to creating bespoke paper crowns. This engaging tutorial is designed for crafters of all skill levels, from novice to seasoned pro, making it an excellent activity for family bonding or solo creative pursuits. To get started, you’ll need a few basic materials: origami paper, adhesive gems, and optional colorful brads. As you work your way through the step-by-step process, you’ll discover the joy of transforming a simple square into a charming crown without the need for scissors or glue. Not only is this activity a great way to unwind and spark creativity, but it also allows for personalization – add decorations that reflect your unique style and make each crown truly one-of-a-kind.
Free Printable Paper Crown
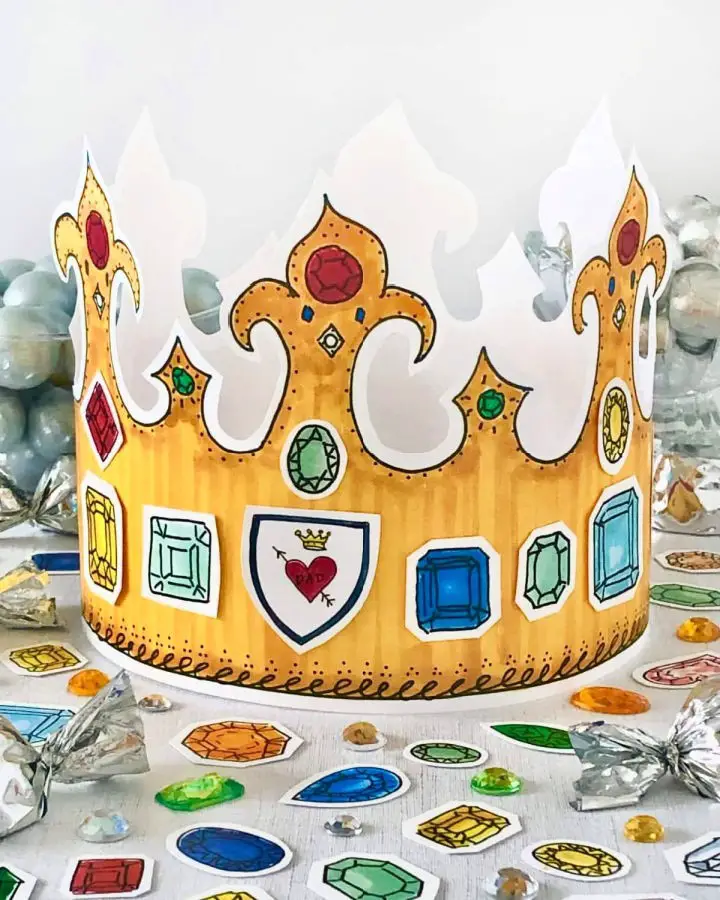
Mark Father’s Day with a unique and thoughtful gift – a handmade paper crown. This DIY project is not only fun but also allows for personalized touches that Dad will surely cherish. To get started, download the printable template and gather basic craft supplies like scissors, double-stick tape, and any decorative items you’d like to add. The straightforward steps guide you through cutting, assembling, and embellishing a majestic crown fit for the king of the family. This charming activity is an ideal way to show Dad your appreciation and love on his special day.
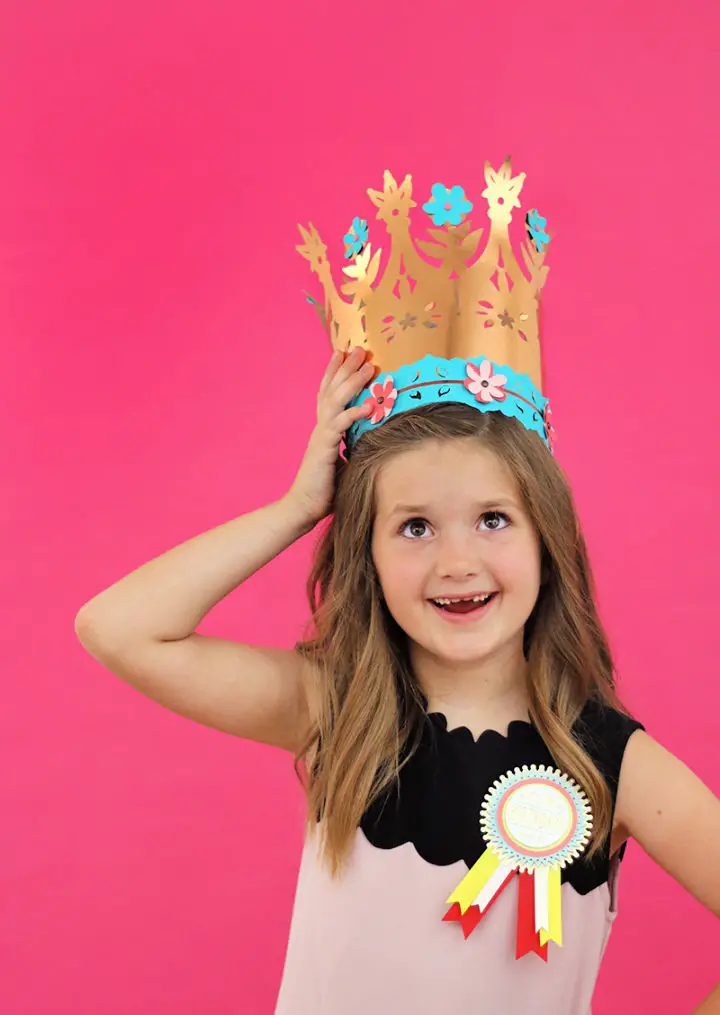
Personalized Crown for a Princess Birthday Party
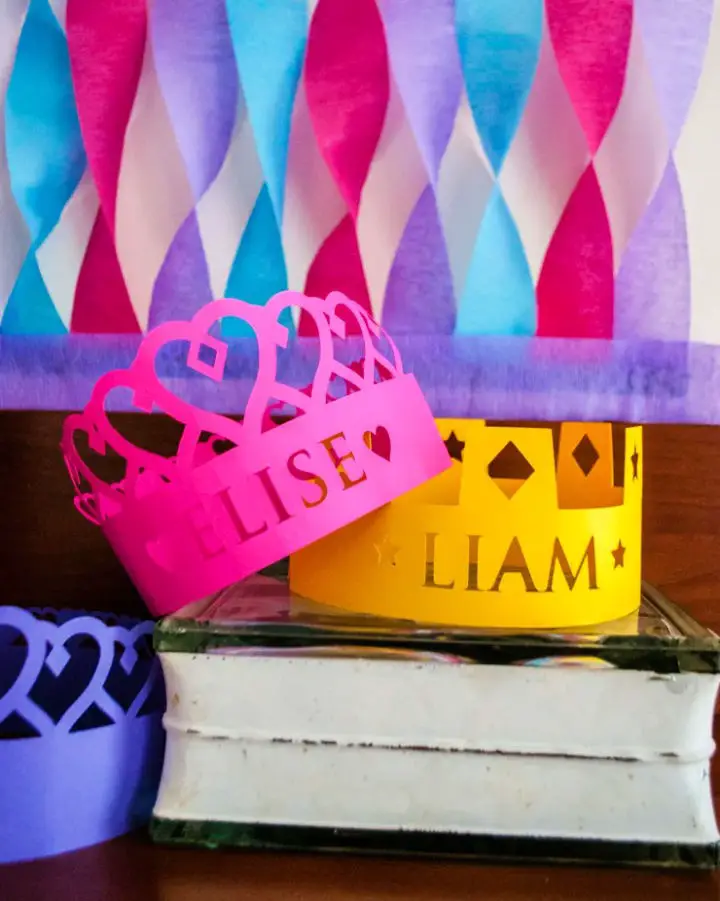
For those looking to add a touch of elegance to their princess-themed birthday celebration, Merriment Design provides a creative DIY project that allows for customization of 3D paper crowns. This tutorial serves as a comprehensive guide for creating personalized king and queen crowns using card stock and a Silhouette Portrait machine, making it accessible to both seasoned crafters and newcomers alike.
The step-by-step process is designed with ease in mind, offering helpful tips on handling sticky cutting mats and achieving the perfect name cutout. The end result is a unique party favor that doubles as a festive accessory, featuring each guest’s name in an elegant font. This engaging guide empowers you to create memorable crowns that will undoubtedly elevate the overall experience of your celebration.
How to Make a Paper Crown
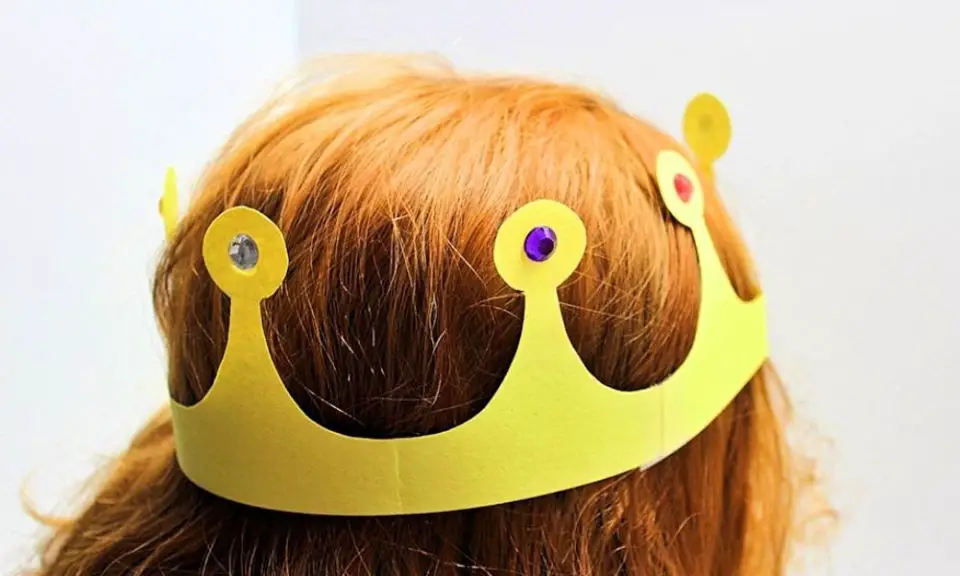
Create a whimsical paper crown for your little ones with our straightforward, step-by-step guide. This delightful DIY project is perfect for imaginative play, requiring only basic materials like construction paper, scissors, and tape. To make the process even more enjoyable, we’ve included a free downloadable template to help guide you through each step. Once crafted, encourage kids to add their own personal touches with vibrant decorations, transforming their crowns into one-of-a-kind masterpieces. This engaging activity promises an afternoon of creative fun for all young crafters.
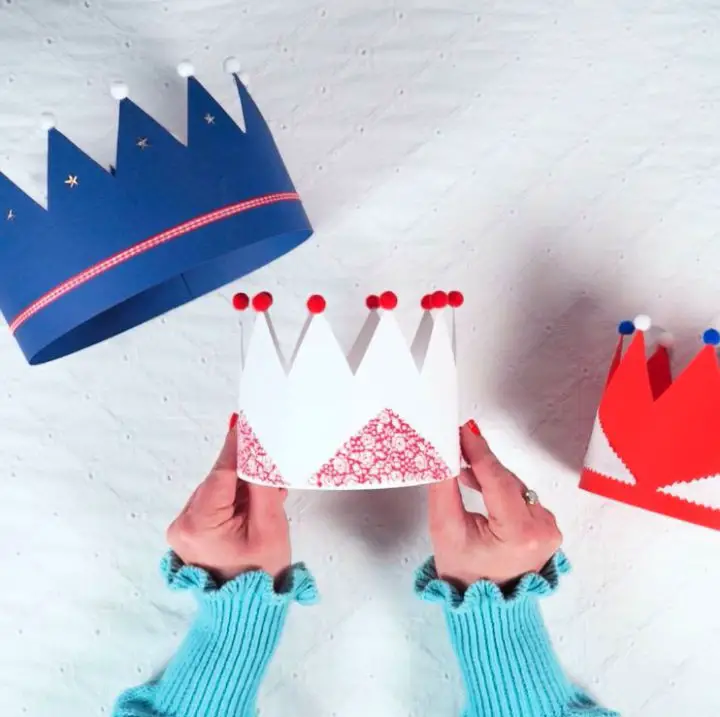
Free Printable Paper Birthday Crown
For a birthday party or encouraging imaginative play at home, Small for Big’s special paper crowns are an excellent DIY project to add a touch of royalty to your celebrations. Mari presents four distinct crown designs – the Geo Crown, Crown of Gems, Crown of Flowers, and Superhero Crown – each offering a unique flair to suit your little one’s style. These printable crowns are designed for ease and fun, making them simple to assemble and adjustable for adults who want to join in on the festivities! With just a bit of folding and creativity, you’ll be able to create charming crowns that will make magical moments reign supreme in memory.
DIY Paper Crown With Paper Doilies
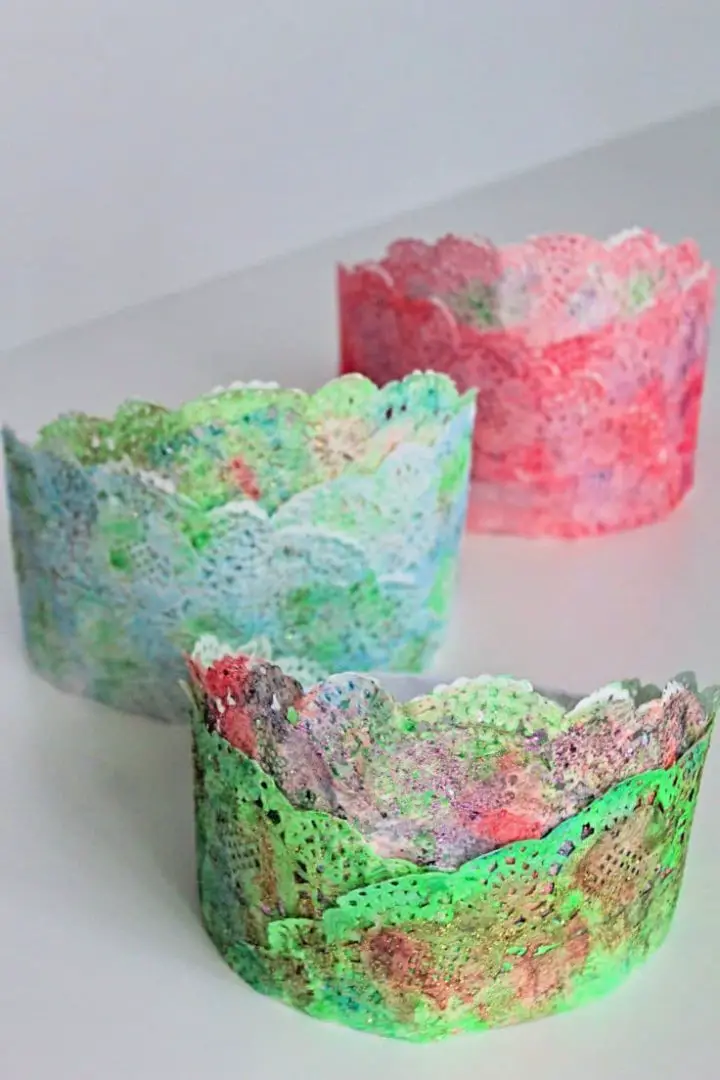
Unleash the magic of crafting with your kids by embarking on an enchanting adventure with the Paper Crown Craft tutorial from Easy Peasy Creative Ideas. This delightful project transforms ordinary paper doilies into majestic crowns that will make any young prince or princess feel like royalty. With a few simple steps, you’ll guide your children through the process of painting, decorating with glitter, and assembling their very own paper tiaras. Not only does this activity spark creativity, but it also provides a wonderful opportunity for quality family time and making memories that will last a lifetime. Gather your supplies, including cardstock, watercolors, and a dash of sparkle, to create a craft that’s sure to be a crowning achievement in fun!
Easy to Make Paper Crown
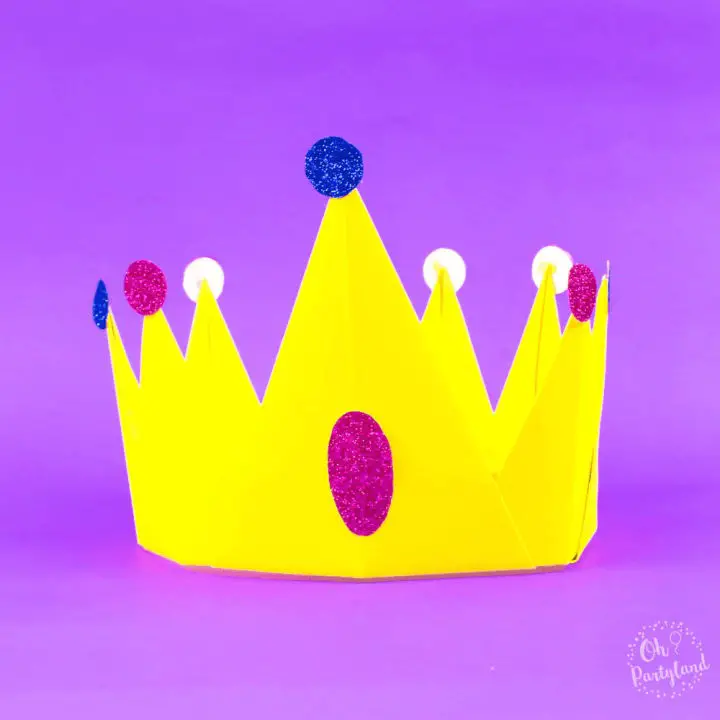
Transform a ordinary party into an extraordinary celebration by creating a stunning paper crown with ease! Using the tutorial from Oh Partyland, you can engage kids in a fun and simple craft activity at home or add a regal touch to any birthday bash. All you need is construction paper, glue, scissors, and some glittery decorations to make your creation truly shine. By following the step-by-step instructions, you’ll be able to fold and assemble your squares of paper into a majestic accessory that’s sure to impress. Take it to the next level by adding glittery cut-outs for an extra dose of sparkle. With these clear guidelines, crafting a homemade paper crown becomes an enjoyable and rewarding project for everyone involved.
Make Your Own Paper Crown
Elevate your crafting experience with the simplicity of creating a royal paper crown, suitable for all ages and skill levels. With minimal materials like paper, scissors, and glue, you’ll be well on your way to constructing a majestic headpiece in no time. Each step is carefully outlined in clear instructions, ensuring a seamless creative journey. Take it to the next level by adding personalized touches with decorations such as stickers and washi tape, making each crown uniquely yours. Whether it’s for a party, playtime, or simply a relaxing afternoon, this paper crown project promises to unlock your artistic side and leave you with a charming handmade accessory.
Autumn Paper Crow Craft
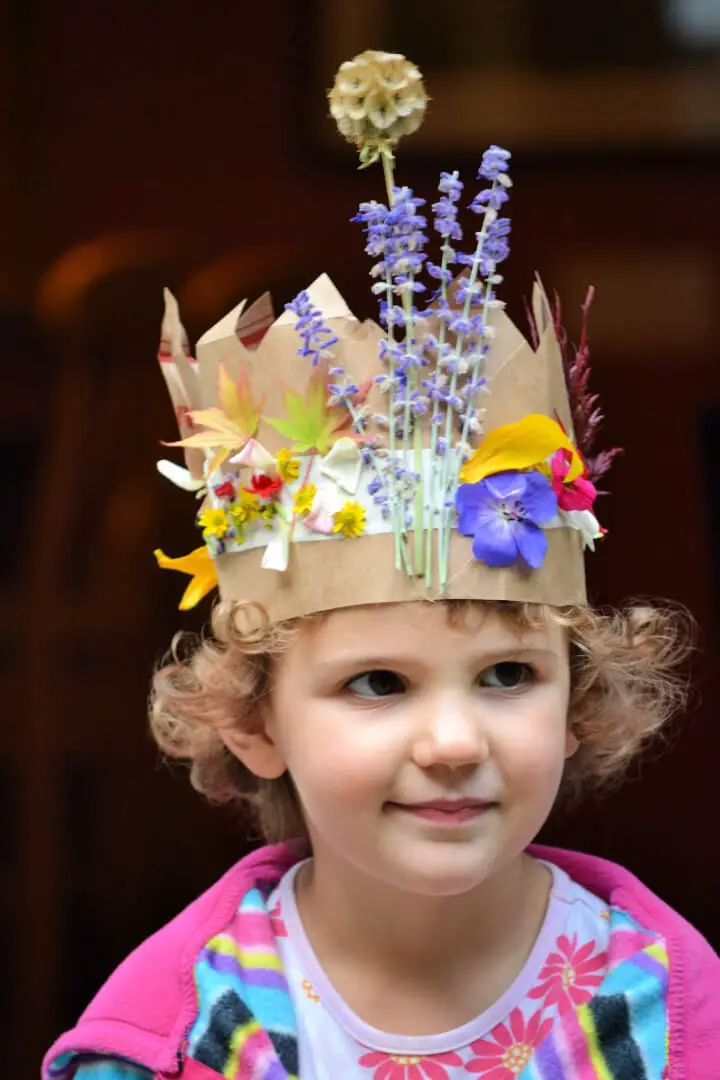
Transform your creative spirit into an exquisite Autumn Crown with just a few simple supplies and a dash of imagination! Begin by measuring heads to ensure a comfortable fit and cut a 2-inch-wide strip from a brown paper grocery bag. Add a touch of regality by customizing the top edge with a pattern that reflects your personal style. Next, lay a piece of duct tape, sticky side up, and attach the plain and patterned strips, leaving ample space to incorporate natural fall elements like leaves and flowers. This accessible guide makes crafting an enjoyable experience for all skill levels, allowing you to create a one-of-a-kind piece that embodies the essence of autumn.
DIY Toilet Paper Roll Birthday Crown
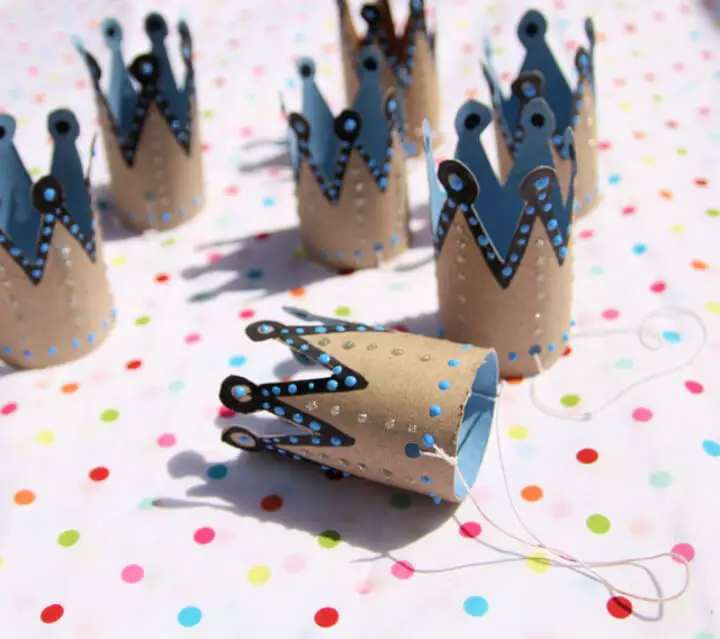
Transforming humble toilet paper rolls into birthday crowns is a creative and eco-friendly way to infuse celebrations with a touch of regality. By embracing this innovative idea, you’ll not only create adorable party accessories but also foster a sense of wonder and excitement among your guests. With just a few simple materials like colored tubes, permanent markers, fabric paint, and elastic thread, you can craft one-of-a-kind crowns that will leave everyone beaming with delight. The process is surprisingly straightforward, allowing you to savor the moment as you watch your loved ones’ faces light up when they don these handmade masterpieces.
Handmade Paper Crown for Everyone
Transforming an ordinary day into a regal affair is as simple as crafting a paper crown. At HonestlyYUM, we’re excited to share this fun DIY project that can add a touch of elegance to any celebration, whether it’s a birthday, anniversary, or simply a monthly milestone. The process of making your own paper crown is an enjoyable activity that combines creativity and precision. With just a few basic materials – including Dresden trim, ribbons of varying widths, and a sewing machine – you’ll be well on your way to creating a truly unique and handmade accessory. By stitching the trims together, adding ribbons for stability and charm, and securing the pieces for a snug fit, you’ll end up with a majestic paper crown that’s sure to add sparkle to any occasion.
DIY Fairy Paper Crown
Enchant your next celebration with a whimsical fairy paper crown, courtesy of Lia Griffith’s comprehensive guide. This delightful DIY project is perfect for birthdays, festivals, or any occasion that calls for a touch of magic. With the help of a template and SVG file, users with cutting machines can easily create this charming accessory. For those who prefer to craft by hand, a PDF template is also available. In just three easy steps, you’ll be able to assemble your crown and discover its versatility as not only a regal headpiece but also a charming cake stand decoration. Lia Griffith’s website offers a step-by-step guide to help you bring a sprinkle of fairy-tale elegance to your special occasions.
How to Make a Birthday Paper Crown
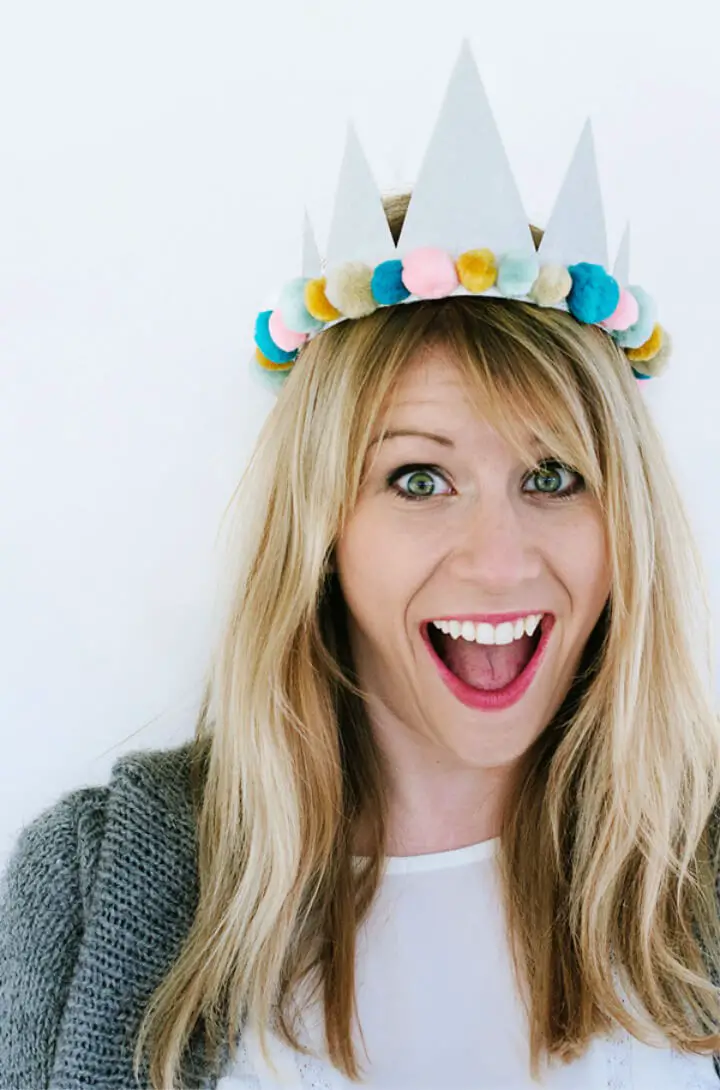
Bring a pinch of magic to your celebration with a DIY glitter crown that’s perfect for winter birthdays or any festive gathering. This project is an excellent way to get creative and add some sparkle to your special occasion. With its elegant design, playful pom-poms, and metallic shapes, this DIY craft is sure to bring joy to anyone who wears it. Whether you’re looking to create a whimsical first birthday accessory, a show-stopping bridal shower centerpiece, or a unique bachelorette party favor, this glittering crown has got you covered. The step-by-step instructions and vibrant photography in the guide make it easy for anyone to follow along and create their own stunning piece that’s sure to turn heads.
Fun and Easy DIY Paper Crown
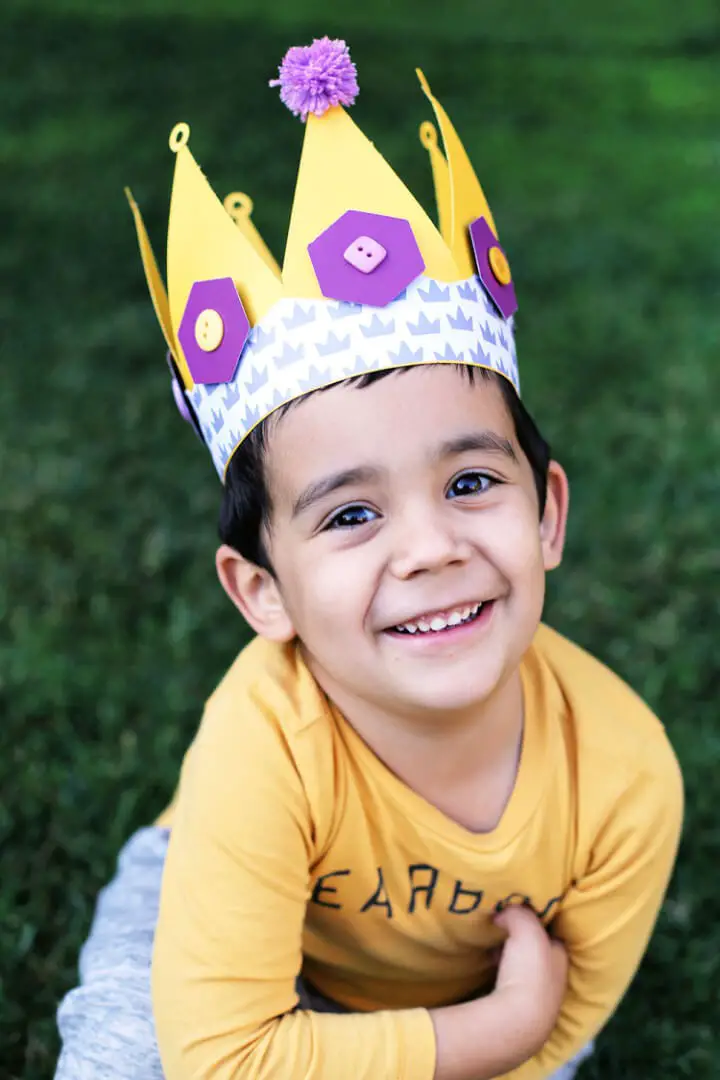
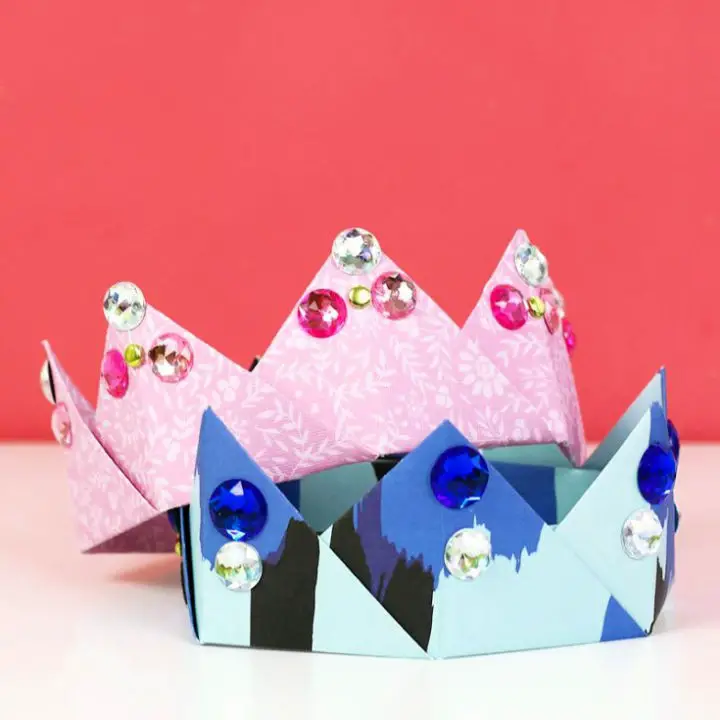
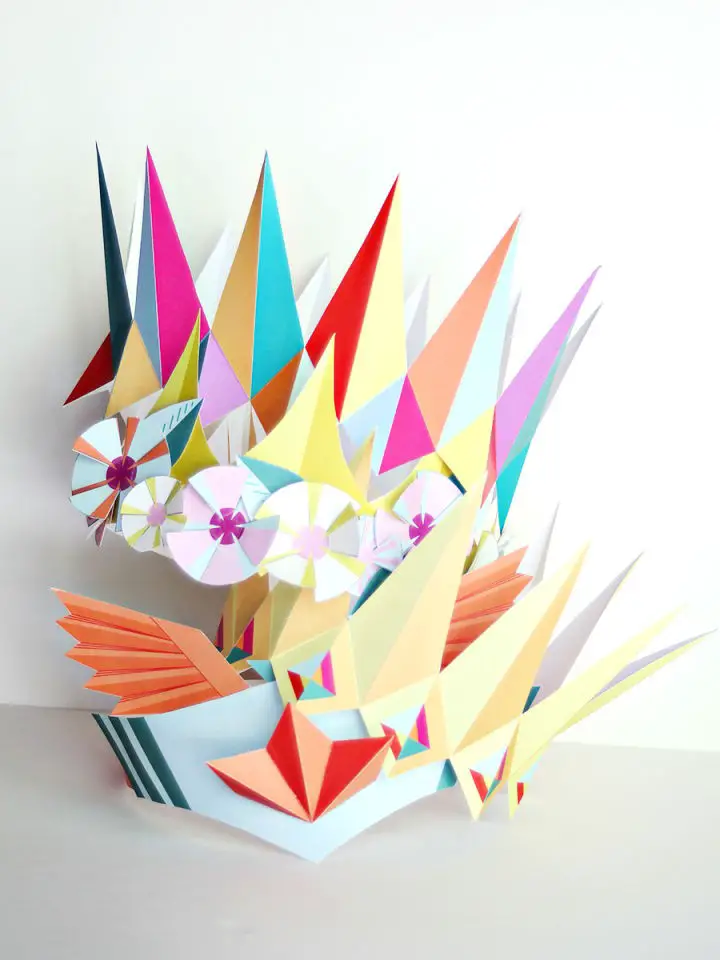
Bring the magic of royal crowns to life with your child through a fun and easy DIY Paper Crown craft. This project is perfect for sparking creativity and imagination, as well as fostering quality bonding time with your little ones. With simple tools like the Trim and Score Board, Banner Punch Board, and USB Glue Gun, you can help your child shape and embellish their very own colorful crown fit for a young king or queen. The step-by-step guide ensures safety and fun throughout the crafting process, making it an ideal activity for imaginative play or themed parties. As you cut, punch, and glue your way to a regal masterpiece, you’ll create cherished memories with your child that will last a lifetime.
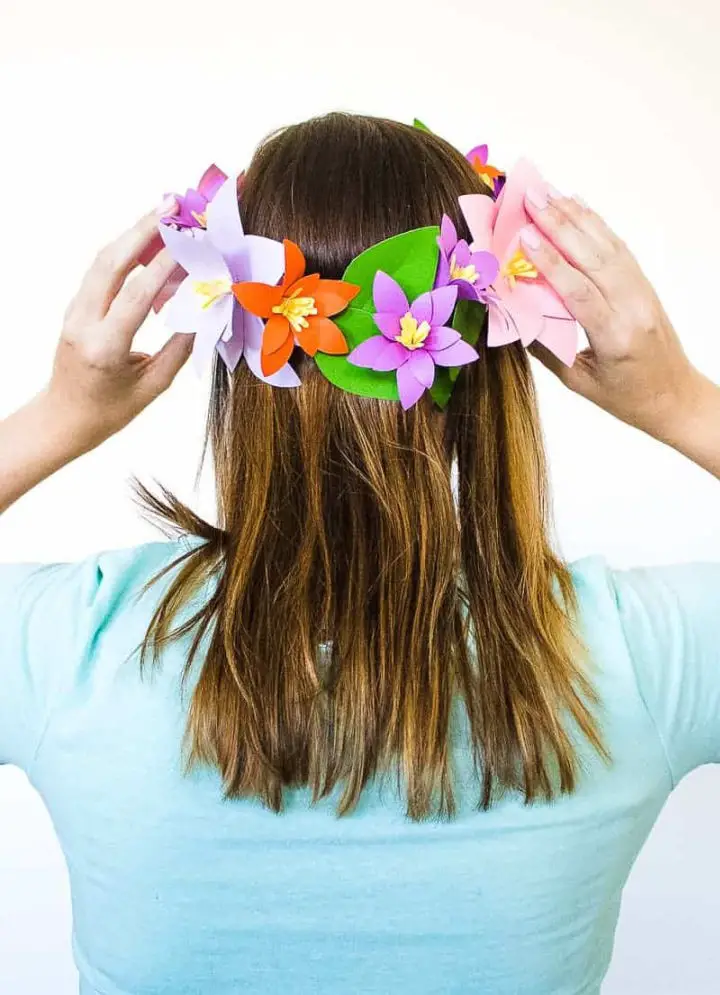
DIY Paper Flower Crown
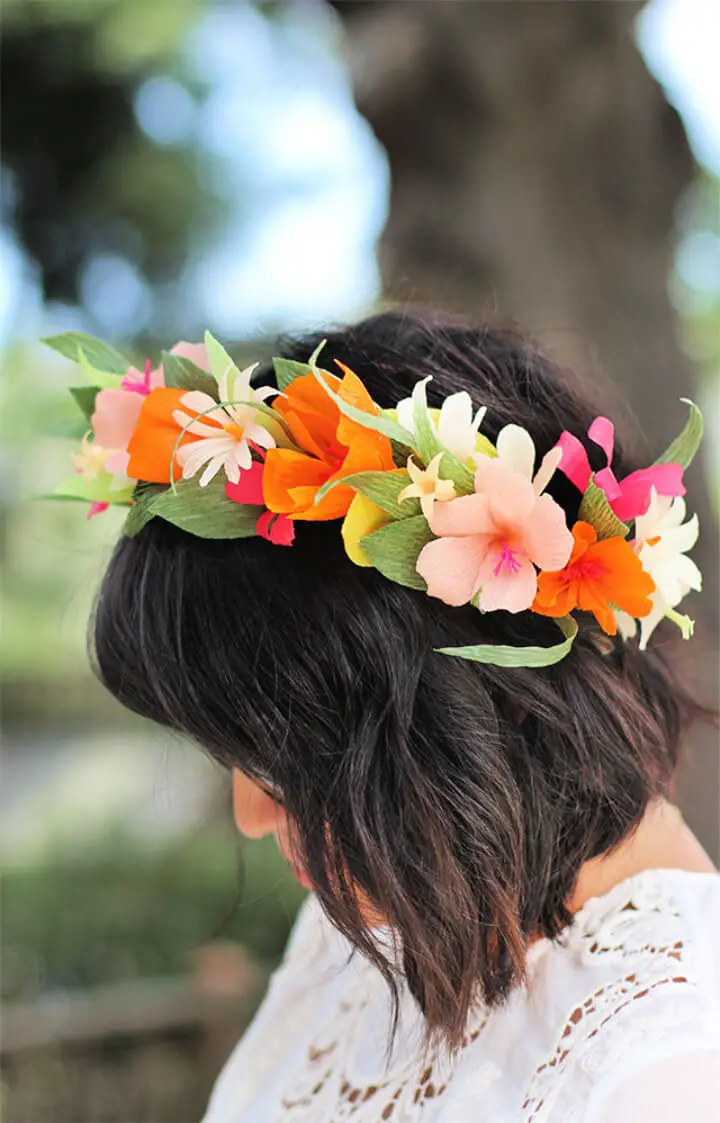
Experience the joy of crafting a breathtaking paper flower crown with Honestly WTF’s comprehensive step-by-step guide. This innovative tutorial draws inspiration from the French Globe de Mariée tradition, elevating it to new heights by incorporating crepe paper and wax for unparalleled durability and realism. Whether you’re looking to add a touch of romance to your wedding, festival, or midsummer celebration, this project promises to captivate with its timeless charm. With an exhaustive list of supplies, crystal-clear instructions, and expert tips on wax coating, even the most novice crafters can create a resplendent floral accessory that’s designed to stand the test of time. As you delve into the creative process, you’ll find yourself immersed in making a piece of wearable art that embodies the essence of special occasions.
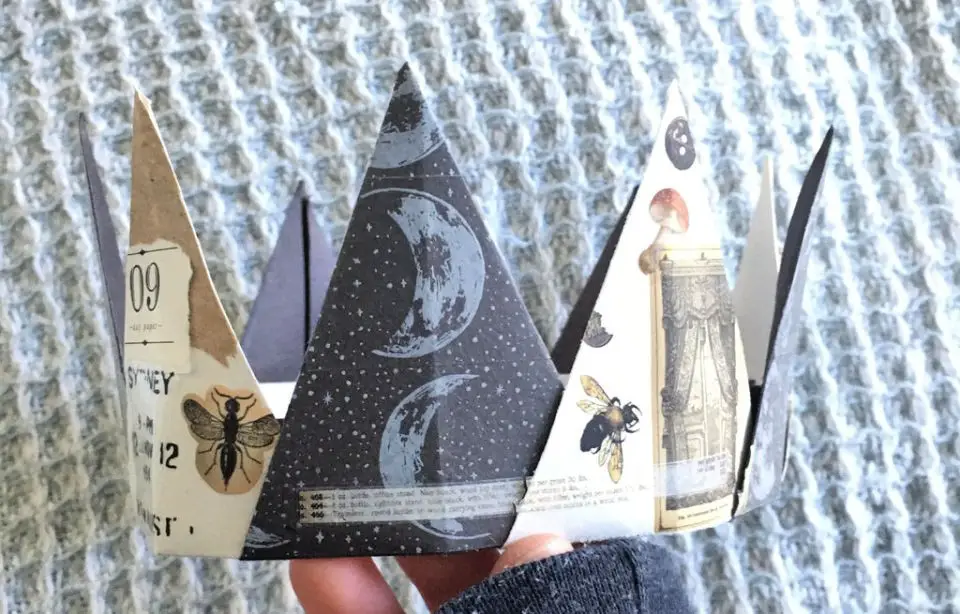
Making a Paper Crown From Upcycled Wrapping Paper
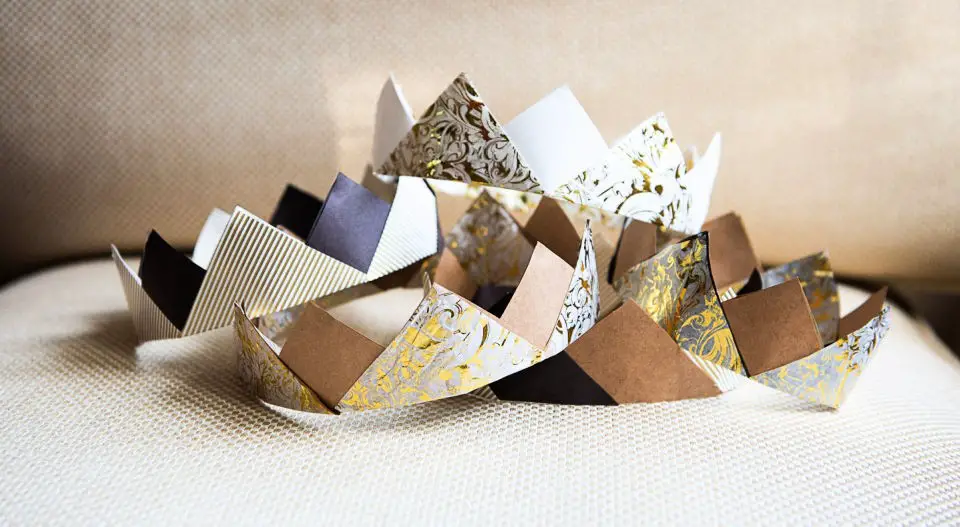
Transforming leftover wrapping paper into captivating DIY paper crowns is an innovative way to celebrate special occasions while embracing sustainability. With Compost and Cava’s comprehensive guide, you can easily upcycle wrapping paper scraps into unique, eco-friendly headwear perfect for New Year’s Eve or adding a playful touch to any gathering. The step-by-step instructions make it simple to craft various crown styles, allowing you to personalize your creation and add a charming touch to your friends’ and family members’ outfits. Whether you’re looking for a creative way to celebrate or simply want to add some whimsy to an evening, these delightful paper crowns are sure to impress.
Making a Paper Crown for Kids
Transform your classroom into a royal court by engaging toddlers, preschoolers, and kindergarteners in a delightful paper crown craft activity at Taming Little Monsters. This step-by-step guide enables little ones to develop their crafting skills while creating vibrant, decorative crowns fit for any young monarch. The process is simplicity itself, requiring just A4 colored craft paper, scissors, stickers, and tape. As children work through the easy-to-follow instructions, they’ll refine their fine motor skills while indulging in imaginative play. By adding personalized touches with stickers or gems, kids can take pride in a one-of-a-kind creation that doubles as a prop for dramatic play, fostering creativity and self-expression. Get ready to witness your students feel like royalty as they revel in the joy of crafting and storytelling.
Gorgeous DIY Paper Crown
As King Charles’ coronation approaches, why not get creative and craft your own paper crown? With Prima’s easy-to-follow guide, you can create vibrant and playful crowns using basic materials like colored card, fabric scraps, and pompoms. This fun and accessible project is perfect for craft enthusiasts of all skill levels, making it an excellent activity to involve children in. They’ll have a blast adding their personal touch to their royal creations. Add a unique and handmade element to your celebration by donning one of these delightful crowns – the perfect way to make the coronation festivities even more special.
Fun DIY Paper Flower Crown
Craft a show-stopping paper flower crown with our easy-to-follow guide. This vibrant accessory is perfect for weddings, festivals, or adding a touch of whimsy to everyday life. By following simple steps, you’ll transform cardstock into elegant flowers and assemble them into a unique piece that’s sure to turn heads. To get started, gather colored cardstock, scissors, a glue gun, and the provided templates. As you work through the process, enjoy the meditative rhythm of cutting, curling, and gluing – it’s the perfect way to unwind while creating something truly special. Don’t forget to measure the base for a comfortable fit, and get creative with your floral arrangements for a bespoke piece that reflects your personal style. The sense of accomplishment you’ll feel when wearing your handcrafted masterpiece is unbeatable.
Make a Paper Crown Without Glue
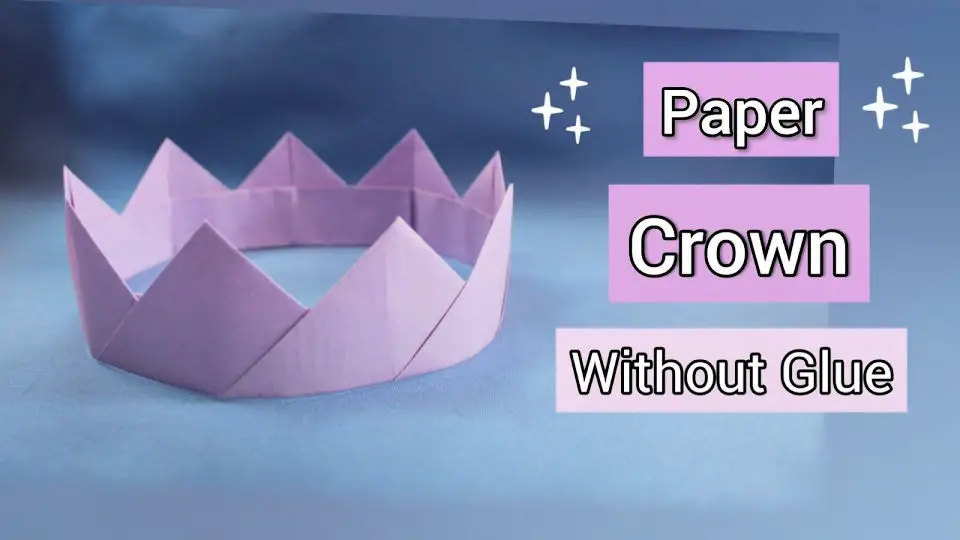
For those seeking to create a majestic accessory for playtime, a costume party, or a creative project, YouTube offers an accessible tutorial on crafting a paper crown without the need for adhesives. This comprehensive guide is designed to accommodate crafters of all ages and skill levels, providing crystal-clear instructions to yield a charming paper crown with minimal effort. The video’s step-by-step approach ensures that viewers can effortlessly follow along, resulting in a stunning final product. With this engaging tutorial, you’ll gain the skills necessary to transform ordinary paper into an extraordinary, wearable work of art that is sure to impress. Simply gather your materials and embark on the creative journey to craft your royal accessory!
How to Make a Crown With Paper
Transforming an ordinary sheet of paper into a majestic paper crown is a delightful DIY experience that can be enjoyed by anyone. With just an A4-sized piece of paper, you can create a charming headpiece perfect for imaginative play, birthday celebrations, or as a creative activity to share with kids. The process involves simple folding and cutting techniques that are easy to follow and yield a delightful accessory. For a step-by-step guide, check out YouTube’s tutorial by Origami & Alesya Gor, which will walk you through each fold and cut. As you craft your own regal headwear, get ready to add a touch of royalty to your day!
DIY Mini Paper Crown

Unleash your inner royal with this delightful DIY mini paper crown tutorial on YouTube. Whether you’re looking to add a touch of whimsy to a doll or indulge in some fun creative time with the kids, this easy-to-follow guide has got you covered. With just basic folding techniques required, this origami project is accessible to crafters of all skill levels, making it an ideal activity for those new to paper crafting. By following along with the step-by-step video tutorial, you’ll learn the secrets to creating your own charming 3D paper crown. Let your imagination run wild and enjoy the therapeutic benefits of crafting, as you bring these adorable miniatures to life.
Conclusion:
As we conclude our exploration of 25 DIY paper crown templates, it’s clear that creating beautiful, personalized crowns from home is a breeze. With readily available materials and endless customization options, you’re just a few simple steps away from designing a one-of-a-kind accessory for any occasion. Our step-by-step guides and helpful safety tips have equipped you with the knowledge to avoid common crafting mishaps, ensuring your paper crown making experience is as smooth as possible. This comprehensive guide aims to spark inspiration for your next creative project, showcasing just how enjoyable and accessible making your own paper crown can be.
