Why Make Stickers with a Cricut?
Personalization at Its Best
The versatility of crafting with a Cricut is unparalleled, allowing users to unlock a world of customization possibilities. From labeling pantry containers with bespoke designs to creating personalized decals for laptops and mobile devices, or even crafting unique decorations for planners and journals, the Cricut machine empowers individuals to turn their creative visions into tangible reality.
A Creative Outlet
Beyond the practical applications, creating stickers offers a unique blend of creativity and self-expression. The process of designing and manufacturing stickers can be a highly rewarding hobby, providing a sense of accomplishment and allowing individuals to tap into their artistic inclinations.
Cost-Effective Craft
Crafting custom stickers with a Cricut offers a cost-effective solution, eliminating the need for expensive pre-made options. By designing and printing your own stickers, you gain complete control over the quantity, minimizing waste and expenses. This DIY approach allows you to produce only what you need, making it an attractive alternative to purchasing bespoke stickers at a higher cost.
High-Quality Results
Unlike many other cutting tools on the market, Cricut does not compromise on quality in order to provide an affordable option. In fact, its precision cutting capabilities produce stickers with expertly finished edges and consistently reliable results, giving you a professional-looking finish with each use.
Easy to Share and Sell
Considering monetizing your crafting skills by converting them into a part-time venture? Stickers offer an attractive option due to their ease of shipping and strong market demand. By leveraging this unique combination, you can create a profitable product to sell at craft fairs or online platforms like Etsy.
Educational Experience
Making stickers with a Cricut can be an educational experience for both adults and children. The process involves various skills such as design, printing, and applying mathematical concepts like spacing and sizing, which can be a valuable learning opportunity for kids. When done correctly, it can also lead to beautifully crafted stickers that are perfect for personal use or gifting. To achieve successful results, it’s essential to follow some key tips. Firstly, choose the right material – sticker paper or printable vinyl that is compatible with your printer and Cricut machine. Next, ensure your Cricut machine is calibrated correctly to avoid any alignment issues during cutting. When designing your stickers, keep in mind the print then cut size limitations and design within the recommended dimensions. Before final printing, test a page on regular paper to check the alignment and adjust the settings if necessary. Additionally, consider the finish you want – matte or glossy – and choose your materials accordingly. Laminating sheets can add a professional touch to your stickers. By understanding the purpose behind making stickers with Cricut, you can fully appreciate the benefits and enjoy the process even more.
Essential Supplies for Making Stickers with Cricut
Crafting custom stickers with a Cricut machine is an enjoyable and fulfilling DIY endeavor. To set yourself up for success, gather all essential supplies before starting the project. Below, you’ll find a comprehensive list of necessities, organized to facilitate seamless execution.
Cricut Machine and Accessories
When selecting the right Cricut machine for your project, consider the capabilities of each model: Explore, Explore Air, Maker, or Maker 3. Keep in mind that the Cricut Joy does not support Print Then Cut functionality.
For precise cutting of sticker paper without damaging it when removed, use the Light Grip Cutting Mat. For printable vinyl that may require a stronger hold, opt for the Standard Grip Cutting Mat instead.
All Cricut machines come equipped with a Fine Point Blade, which is specifically designed for cutting sticker materials.
Printing Supplies
When selecting an inkjet printer for your DIY projects, consider the type of sticker paper you plan to use. Compatibility is key, so ensure your chosen paper is compatible with your printer. If you’re looking for a more flexible option, you can opt for printable vinyl instead of traditional sticker paper. Additionally, it’s a good idea to have some extra printer paper on hand for test prints and calibrations to guarantee the best results.
Design and Finishing Touches
To bring your sticker designs to life, you’ll need the right tools and software. The Cricut Design Space Software is an essential component for setting up and creating your custom sticker designs. For added protection and a professional finish, consider incorporating Acrylic Sealer or Self-Laminating Sheets into your process. Alternatively, if manual lamination isn’t your thing, you can opt for a Laminating Machine to streamline the process.
Additional Tools
When it comes to working with stickers, having the right tools can make all the difference in terms of efficiency and quality. For instance, weeding tools are a must-have for peeling and cleaning up sticker residue after cutting. On the other hand, a squeegee or scraper tool is crucial for ensuring a bubble-free application of laminating sheets. Additionally, scissors are essential for cutting laminating sheets to size or trimming excess material, allowing you to achieve a professional finish.
Tips for Success
To optimize your Cricut’s performance, it’s essential to ensure that its firmware is up-to-date. This will guarantee a seamless cutting experience. Additionally, having spare materials on hand for testing purposes will prevent you from wasting valuable supplies. Prioritize precision by performing a Print Then Cut Calibration before starting your project, as this step ensures accurate cuts and minimizes the risk of errors. Once you’ve got your supplies list ready, you can confidently embark on your sticker-making journey. Break down the process into manageable steps, and you’ll be creating custom stickers in no time. Remember that patience and practice are vital components – don’t get discouraged if your initial attempts aren’t perfect. Instead, enjoy the creative process and have fun exploring the world of design.
How to Make Stickers with Cricut
Embarking on the adventure of creating stickers with Cricut can be an exhilarating experience. To ensure a seamless beginning, follow this step-by-step guide as it leads you through the fundamental processes, laying the groundwork for a successful and enjoyable journey.
Step 1: Set Up Your Workspace
To embark on a creative journey with your Cricut machine, it’s essential to prepare a conducive workspace. Start by clearing a flat surface that can comfortably accommodate both the machine and your materials. Adequate lighting is also crucial, as it will help you maintain precision while cutting out designs. Finally, ensure you have a nearby power source for your Cricut machine and your computer or tablet, allowing seamless connectivity between devices.
Step 2: Gather Your Materials
Before diving into the world of sticker printing, ensure you have all the necessary materials within arm’s reach. Here’s a concise rundown to get you started:
Cricut Machine: Confirm that your machine is compatible with the print-then-cut feature.
Inkjet Printer: This type of printer is generally recommended for sticker printing due to its precision and quality output.
Sticker Paper: Opt for either Cricut’s proprietary sticker paper or printable vinyl, depending on your personal preference. Keep in mind that both options have their own unique characteristics and advantages.
Cutting Mats: Prepare a light grip mat specifically designed for sticker paper and a standard grip mat for printable vinyl to ensure seamless cutting performance.
Additional Supplies (Optional): Consider investing in an acrylic sealer or self-laminating sheets if you want to add an extra layer of protection and give your stickers a glossy finish. Having these optional supplies on hand will enable you to take your sticker printing game to the next level.
Step 3: Connect and Prepare Your Cricut Machine
To get started with your Cricut, follow these straightforward steps: First, link your device by plugging it in and pairing it with your computer or tablet via Bluetooth or a USB connection. Once you’ve established the connection, navigate to Cricut Design Space on your device and log in to your existing account or create a new one if you haven’t already done so. If prompted, make sure to update your machine’s firmware to ensure optimal performance. This will guarantee that your Cricut is running smoothly and efficiently.
Step 4: Calibrate Your Machine for Precision
To ensure precise cuts with your Cricut, calibration is a crucial step in the process. To calibrate your machine, navigate to the menu within the Cricut Design Space and select the ‘Calibration’ option. Next, opt for ‘Print Then Cut’ and follow the on-screen prompts to print out a test sheet. Once printed, place this sheet onto your cutting mat and load it into the Cricut for calibration purposes.
Step 5: Plan Your Design
As you begin designing your custom stickers, take a step back to consider the purpose and theme of your creation. Will they serve as organizational tools, decorative accents, or thoughtful gifts? Clarifying these aspects will help guide your design decisions and ensure your stickers effectively communicate their intended message.
To get started, think about the visual elements you’ll need to bring your concept to life. Will you be using your own images or graphics, or drawing inspiration from Cricut’s vast library of designs? Having a clear sense of purpose and theme will allow you to make intentional choices about the visuals that best represent your project.
Step 6: Design in Cricut Design Space
Unleash your artistic side by customizing your project with ease! Simply upload your own images or select from our extensive design library, which offers a wide range of options to suit your creative vision. To give your design a polished look, take advantage of the ‘Offset’ feature, allowing you to add a crisp white border that adds a touch of professionalism. Once you’re happy with your layout, arrange your designs within the designated Cricut Print Then Cut boundaries, ensuring a seamless and efficient cutting experience.
Step 7: Test Before Committing
Before diving into the actual cutting process, it’s essential to conduct a trial run to guarantee accuracy and efficiency. Start by printing your design onto regular printer paper. This will allow you to assess the overall quality of your print and identify any potential issues. Next, perform a test cut using your chosen material to verify the precision of your calibration settings. By doing so, you’ll be able to fine-tune your settings and ensure a seamless cutting experience.
Step 8: Print and Cut
With your design ready, it’s time to bring it to life! Start by sending your sticker design to print using Design Space’s ‘Make It’ function. Once you have your physical stickers in hand, place the printed sheet onto a suitable mat and load it into your Cricut machine. As you watch, your Cricut will accurately cut out your custom sticker designs with precision.
Step 9: Apply Finishes (Optional)
When choosing a glossy finish, it’s essential to apply an acrylic sealer spray or a self-laminating sheet prior to making your final cut. This simple step will require you to adjust your cut settings to account for the added thickness of the sealant, ensuring a precise and professional-looking outcome.
Step 10: Enjoy Your Stickers
As you’ve carefully crafted each sticker, take pride in your creations and enjoy the sense of accomplishment that comes with bringing them to life. Transform these small masterpieces into unique embellishments for journals, notebooks, water bottles, or any other item that could use a personalized touch. By embracing this process and being patient with yourself, you’ll develop the skills necessary to excel at Cricut sticker making. Remember, every attempt is an opportunity to learn and improve, so don’t be too hard on yourself if your first few attempts don’t turn out exactly as you envisioned. Instead, view each sticker as a chance to refine your technique and grow as a crafter.
Frequently Asked Questions About Making Stickers with Cricut
Unlock the secrets to crafting bespoke stickers with Cricut, a powerful tool that’s sure to revolutionize your creative endeavors. This comprehensive guide provides expert answers to frequently asked questions, arming you with the knowledge necessary to design and produce unique, personalized stickers that reflect your individual style.
Can I use any printer for printing stickers to cut with Cricut?
When it comes to printing stickers for Cricut cutting, you’re not limited to a specific brand of printer. Any inkjet printer can be used, provided that the sticker paper is compatible with your printer’s technology. It’s essential to check the compatibility of the paper, as some are designed specifically for use with either inkjet or laser printers.
What is the difference between a kiss cut and a die cut?
When it comes to cutting stickers, there are two primary methods: Kiss Cut and Die Cut. The Kiss Cut technique involves making an incision solely in the sticker layer, preserving the backing paper intact. This approach is particularly useful when you want to create sticker sheets with multiple individual stickers. In contrast, the Die Cut method cuts through both the sticker layer and the backing paper, resulting in separate, individually cut stickers.
How do I prevent my stickers from smudging?
When it comes to preserving the integrity of your stickers, there are two effective methods to consider: applying a clear acrylic sealer spray and utilizing self-laminating sheets. By introducing a protective barrier between the ink and the outside environment, these techniques can significantly boost the durability of your stickers.
Can I make stickers with the Cricut Joy?
While the Cricut Joy is an impressive cutting machine in its own right, there’s one key feature it can’t replicate: Print Then Cut. The culprit? A lack of sensor technology, which is a crucial component for this function. If you’re looking to unleash the full potential of Print Then Cut, you’ll need to opt for one of Cricut’s more advanced machines, specifically the Explore, Explore Air, Maker, or the newly introduced xTra model.
What if my Cricut is not cutting my stickers correctly?
To achieve the perfect cut, you may need to fine-tune your settings. Start by adjusting the material setting to suit a thicker or thinner option, depending on the specific requirements of your project. Make sure your machine’s firmware is up-to-date and recalibrate as needed to ensure precise cutting. Additionally, consider increasing the offset around your stickers for added flexibility in your cuts. By taking these steps, you’ll be able to achieve the desired level of precision and accuracy.
Can I upload my own designs to make stickers?
To add custom designs to your Cricut projects, utilize the platform’s Upload feature and select your preferred SVG or PNG file. When uploading, ensure you opt for ‘Print Then Cut Image’ to guarantee seamless integration with your future cuts.
How can I ensure that my Cricut machine reads the registration marks correctly?
To get the best results from your Cricut, ensure the surrounding area is well-lit but avoid harsh direct sunlight and shadows that can affect the cutting performance. When feeding the mat into the machine, double-check its alignment to prevent any issues. If you’re still experiencing problems, try recalibrating your Cricut or performing a forced firmware update to resolve any software glitches.
What should I do if the stickers are not aligned after cutting?
To optimize your Cricut cutting experience, you have several options available to you. First, you can fine-tune the room lighting and mat alignment to ensure that your designs are properly positioned for cutting. Additionally, you can increase the offset around your designs to account for any minor variations in mat placement. Furthermore, you can force a firmware update to ensure that your Cricut is running with the latest software capabilities. Finally, if you notice a consistent misalignment issue, you can make slight adjustments to the offset in Design Space to correct the problem.
What are some creative ways to use DIY stickers from Cricut?
DIY stickers offer a world of possibilities for personalization and creativity. From embellishing notebooks and water bottles to crafting custom labels and unique gifts, the applications are endless. Whether you’re looking to elevate your bullet journal or simply add a touch of personality to everyday items, Cricut’s DIY sticker capabilities make it easy to unleash your imagination. The key is to have fun and be willing to experiment with different designs and materials – don’t be afraid to try new things and see what works best for you.
Making Stickers with Cricut
Unlock the creative possibilities of Cricut by learning the art of making custom stickers. With this comprehensive guide, you’ll discover the step-by-step process for crafting unique decals and labels that reflect your personal style.
How to Make Stickers With a Cricut
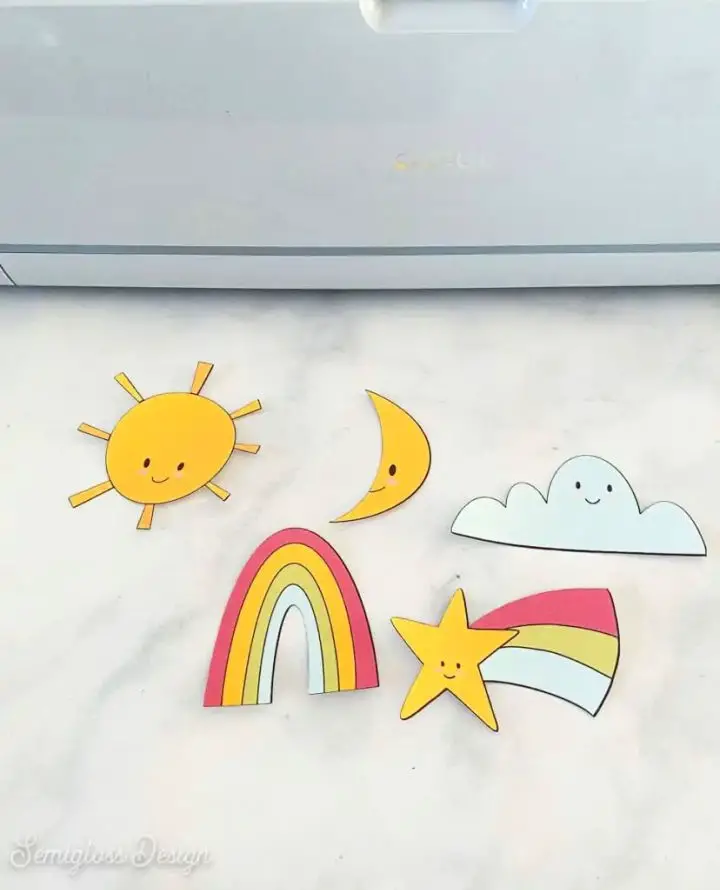
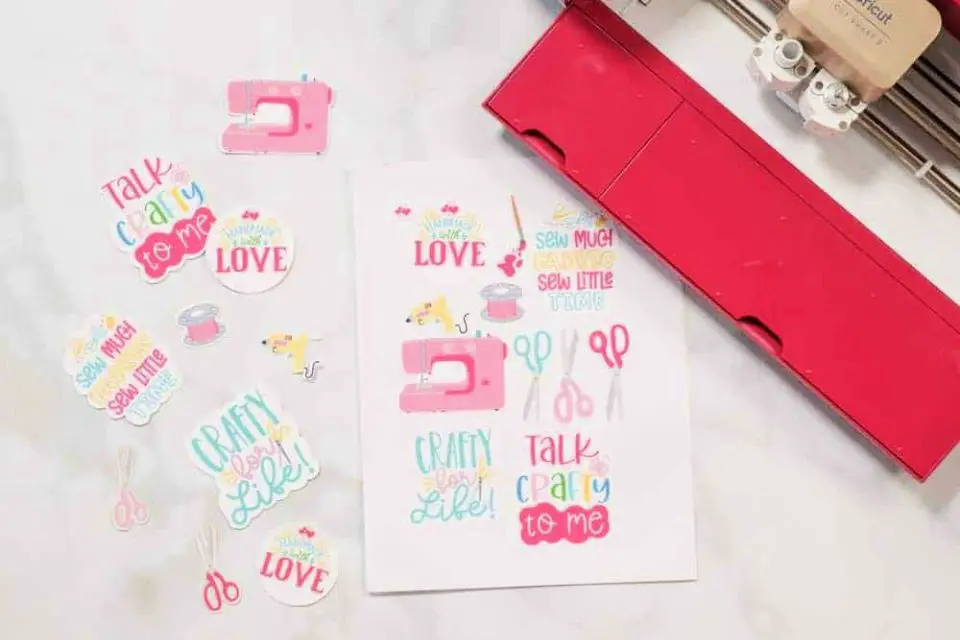
At Semigloss Design, we’re thrilled to share our expertise in creating custom stickers using Cricut machines. In this comprehensive guide, Emy Flint walks you through the process of crafting both die-cut and kiss-cut stickers, ideal for expanding your shop’s product offerings. With her wealth of knowledge, you’ll gain valuable insights on selecting the right materials, designing stunning artwork, and mastering the Print then Cut feature of your Cricut machine. The tutorial is meticulously crafted to ensure a smooth experience as you produce high-quality stickers that will impress your customers. Additionally, we’ll provide tips on packaging your stickers to make a lasting impression and elevate your overall crafting game. By following our step-by-step guide, you’ll be well-equipped to create unique and eye-catching stickers that are sure to stand out in the market.
Make Your Own Stickers With Cricut
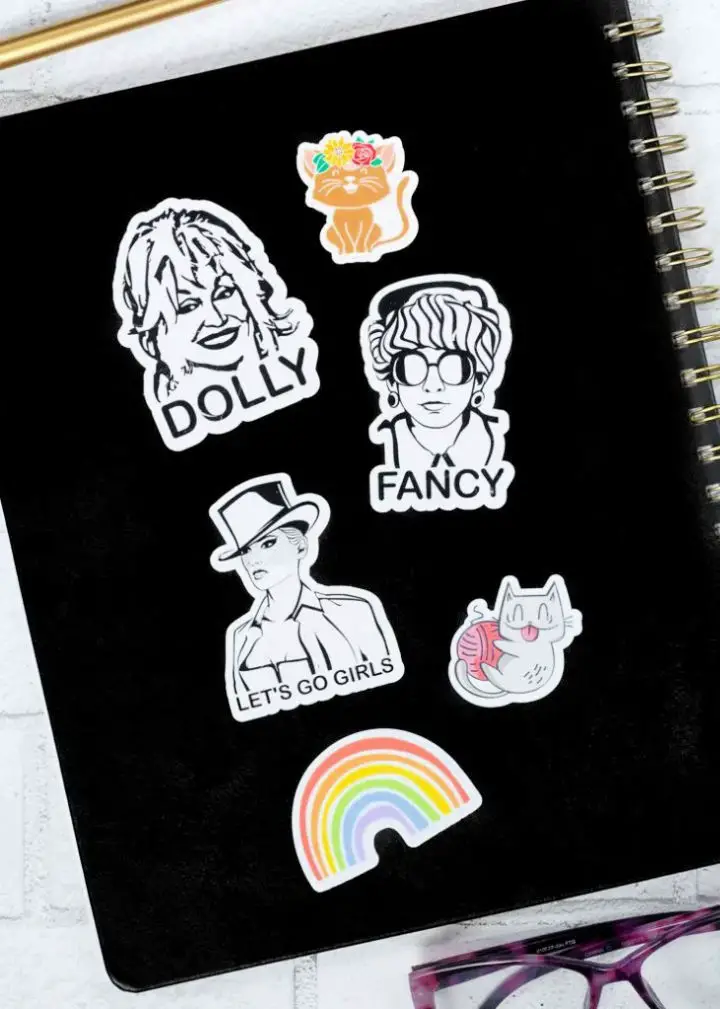
Discover how easy it is to create custom stickers at home with the guidance of Let’s Craft Instead’s in-depth tutorial on using a Cricut cutter with a standard home printer. This comprehensive guide delves into the details of making waterproof stickers, exploring various vinyl options and providing expert reviews to help you find the perfect match for your project. Brittany takes you by the hand through the ‘print-then-cut’ feature, empowering you to effortlessly transfer any image onto your desired surface. As a crafting enthusiast, this tutorial is designed to be both informative and engaging, helping you produce professional-quality stickers without breaking the bank. Whether you’re looking to add a personal touch to everyday items or create unique gifts, Let’s Craft Instead equips you with the skills to turn your ideas into reality.
DIY Cricut Stickers and Decals
Get ready to unleash your creativity and take control of your sticker-making process! With Laura Silva’s expert guidance from Lauras Crafty Life, you’ll learn how to craft custom stickers and decals using a Cricut machine. This detailed tutorial will walk you through every step, from choosing the perfect materials like printable vinyl and clear sticker paper to adding the final touches that make your creations durable and waterproof.
Through easy-to-follow instructions, you’ll discover how to design and print your own stickers, as well as cut and apply decals for various applications, such as personalizing water bottles, laptops, and more. Laura’s helpful tips and tricks will ensure a seamless crafting experience, empowering you to customize your world with unique, self-made designs that reflect your personality.
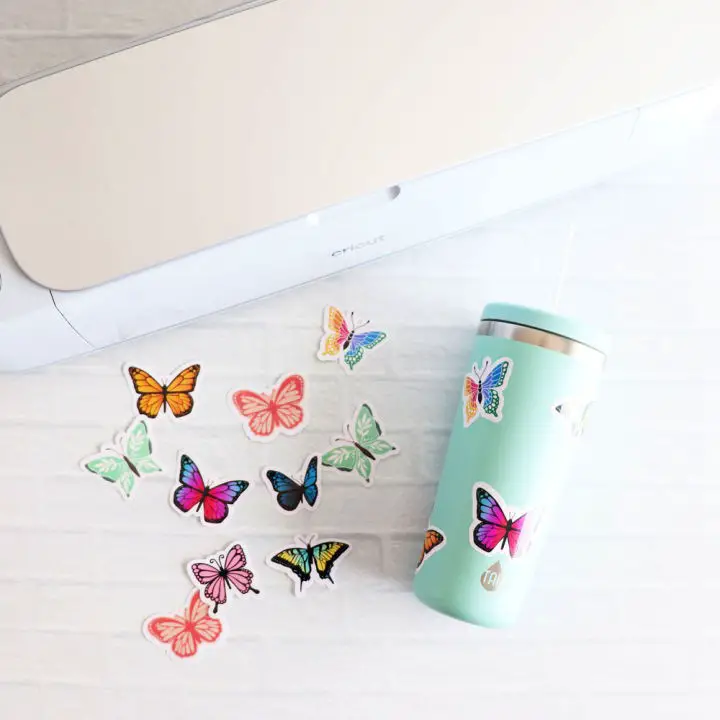
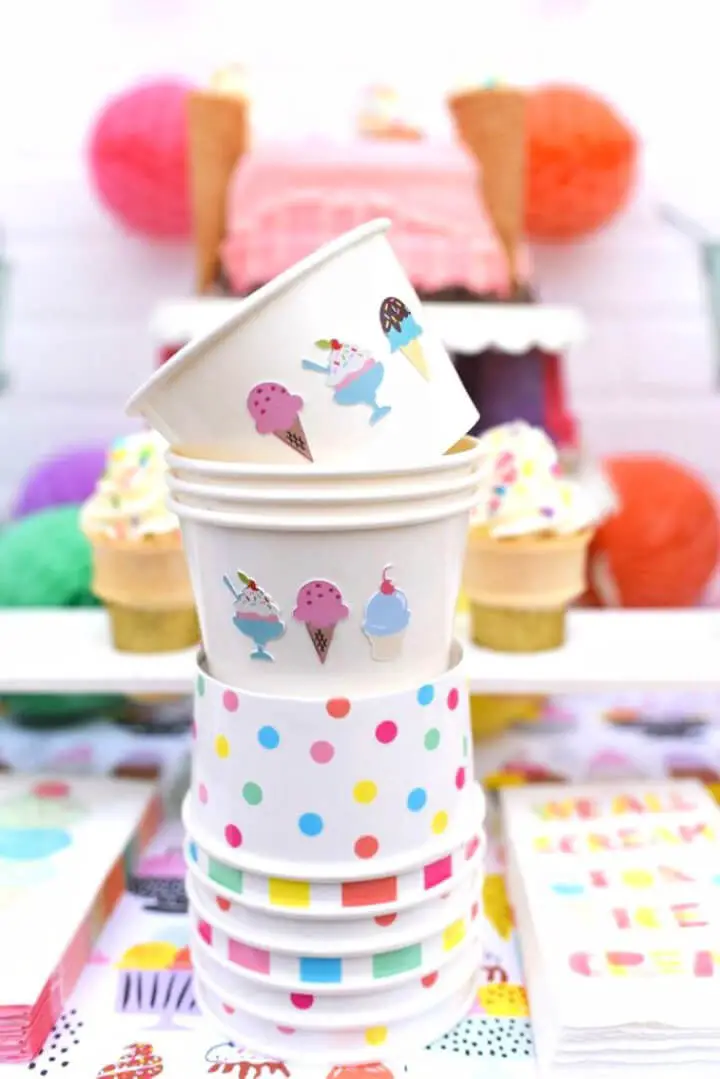
Make Waterproof Stickers With Cricut
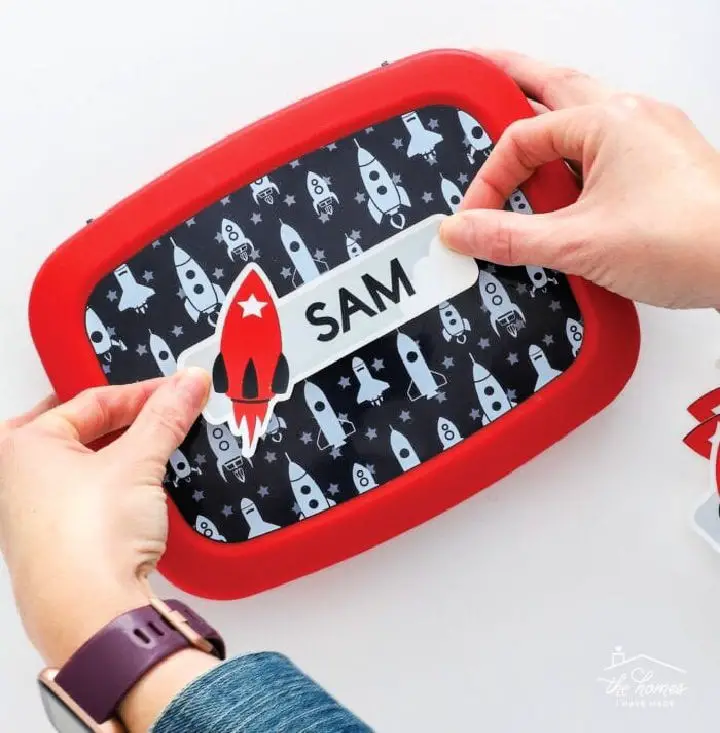
To create durable waterproof stickers using a Cricut machine, head to The Homes I Have Made blog for a step-by-step guide on personalizing water bottles, lunchboxes, or sports gear with custom decals that withstand daily wear and tear. By combining waterproof sticker paper with a simple lamination process, you can ensure your designs remain vibrant even after repeated dishwasher cycles. This tutorial is perfect for parents preparing for back-to-school season or anyone looking to add a personal touch to their items. With tips on designing in Cricut Design Space, selecting the right materials, and applying the finished product, this easy-to-follow guide makes sticker crafting accessible and rewarding for all skill levels. Start making your own long-lasting waterproof stickers today with this comprehensive tutorial.
DIY Vinyl Car Window Decals With Cricut
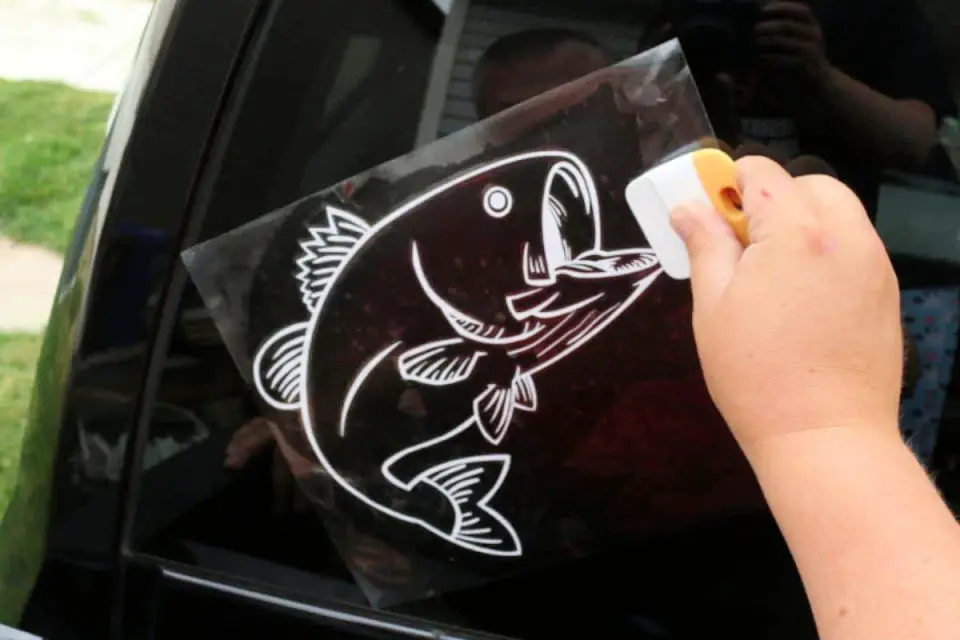
Transforming your vehicle into a personalized masterpiece with Cricut vinyl car window decals is an exciting DIY project that lets you express your unique style or passion. The Crafty Blog Stalker’s comprehensive guide simplifies the process of creating these attention-grabbing decorations from scratch, walking you through uploading your chosen design to Cricut Design Space, expertly cutting it with your machine, and applying the decal to your vehicle’s window with precision. Additionally, this step-by-step tutorial provides valuable insights on choosing the right vinyl for your project and maintaining your new decal’s appearance. Perfect for crafting enthusiasts, this guide ensures a seamless and enjoyable experience, resulting in a professional-looking car embellishment that showcases your individuality.
Make Your Own Cricut Stickers
Transforming creative ideas into stunning, personalized stickers has never been easier with the comprehensive guide on Daydream Into Reality. This valuable resource empowers users of the Cricut Maker or Explore to bring their unique visions to life through step-by-step instructions and expert tips. From crafting custom designs in Cricut Design Space to mastering the Print then Cut feature and overcoming common obstacles, this tutorial provides everything needed to produce top-notch stickers that elevate any project.
DIY Stickers With a Cricut Using Print
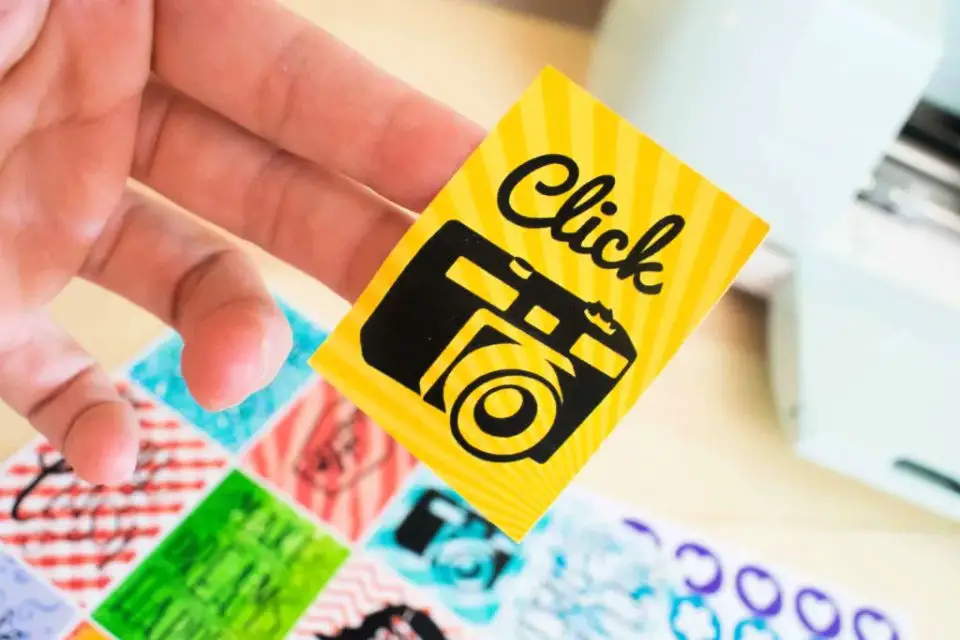
Elevate your sticker game with the Print then Cut and Offset tool on your Cricut machine, as demonstrated by Everyday Jenny. This in-depth guide takes you through a step-by-step process for creating stunning stickers using your own printer and Cricut’s precision cutting technology. By mastering the Offset tool and avoiding common mistakes, you’ll be able to produce flawless borders and achieve professional-looking results. Whether you’re crafting labels, gift tags, or personalized stickers, this comprehensive tutorial ensures a seamless experience. With a focus on creativity and ease of use, this guide will expand your crafting horizons, providing practical tips to help you create high-quality stickers from the comfort of your own home.
DIY Cricut Stickers at Home
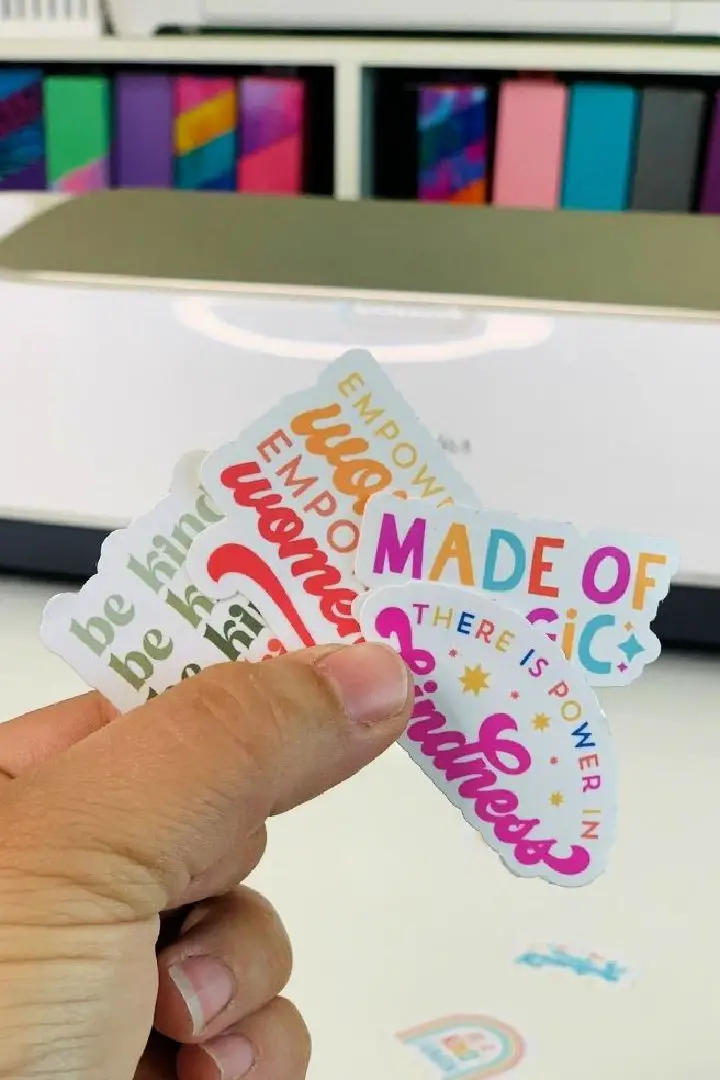
To create personalized stickers with a Cricut Maker or Explore, Hey, Let’s Make Stuff provides an extensive guide that walks you through the process from start to finish. Leveraging the offset feature in Cricut Design Space, you can transform any image – including clip art, SVGs, and photos – into custom stickers. The tutorial is designed to be easy to follow, with step-by-step instructions that empower you to create your designs with confidence. Additionally, the guide offers valuable tips on selecting the right materials, ensuring your stickers turn out professional-looking. Whether you’re looking to elevate your crafting projects or simply add a personal touch to your belongings, this comprehensive tutorial will help you master the art of making Cricut stickers and achieve the desired results.
How to Make Stickers With Cricut Printable Viny
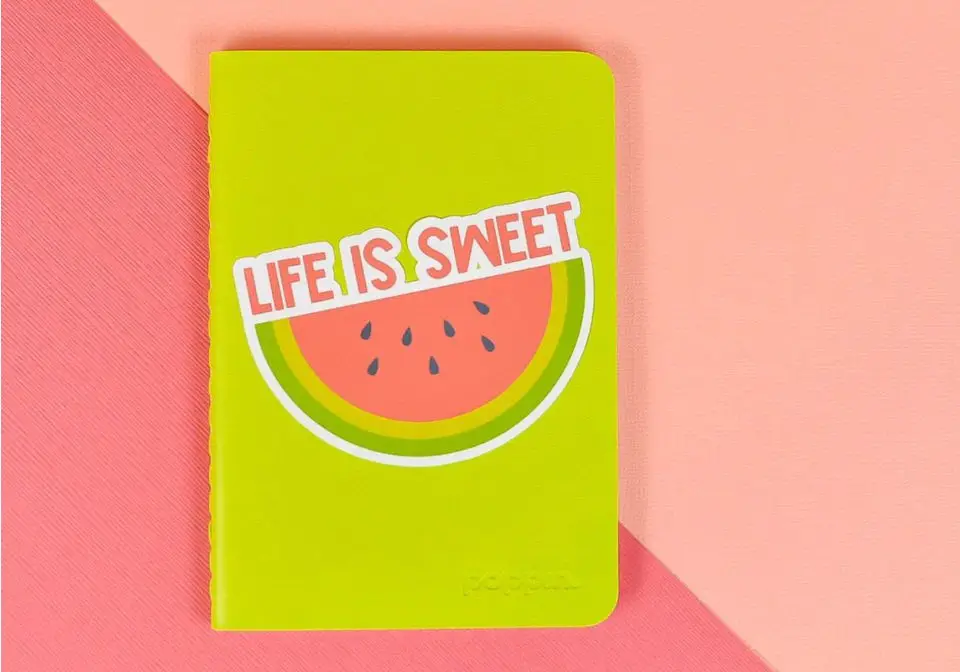
If you’re looking for creative ways to personalize items or gift unique tokens with a personal touch, look no further than the world of vinyl stickers. With Cricut’s Printable Vinyl and their intuitive design software, creating professional-quality custom stickers has never been easier. The process begins by designing your sticker image in Cricut Design Space, where you can customize every detail to your liking. Once designed, the Print-And-Cut feature takes over, precision-cutting your creations with ease. The result is a durable, matte-finish sticker that’s perfect for sealing envelopes, customizing water bottles, or adding a personal touch to any gift. With this engaging and easy-to-follow tutorial from Doodle Craft Blog, you’ll be well on your way to elevating your crafting game with custom stickers that are sure to impress.
Cricut Print Then Cut Stickers
Crafting custom stickers at home is an excellent way to add a personal touch to gifts, projects, and everyday items. One fantastic resource for achieving this is the tutorial on Sweet Red Poppy, which delves into the process of combining Cricut’s Print Then Cut feature with a Canon Pixma TS9521C printer. By following these steps, you’ll be able to upload designs to Cricut Design Space, print them with high-quality settings that ensure vibrant colors, and cut them precisely using your Cricut machine. This method is particularly well-suited for printable vinyl or sticker paper, making it an ideal choice for projects like gift tags, labels, cupcake toppers, and more. The tutorial also provides valuable tips on troubleshooting and ensuring perfect cuts, allowing you to create professional-looking stickers with ease from the comfort of your own home.
Making Stickers Using Cricut Print Then Cut
Unleash the fun of creating personalized stickers with your Cricut machine using the Print then Cut feature! Make Life Lovely’s comprehensive tutorial takes you by the hand, walking you through the process of transforming designs into custom stickers for your projects. From selecting the perfect images in Cricut Design Space to printing and cutting your creations, this guide ensures a smooth crafting experience. With expert tips on handling thicker sticker paper and achieving the ideal cut, you’ll gain the confidence to elevate your crafts with one-of-a-kind stickers. Say goodbye to ordinary party favors, scrapbooks, and home decor – and hello to unique, DIY charm!
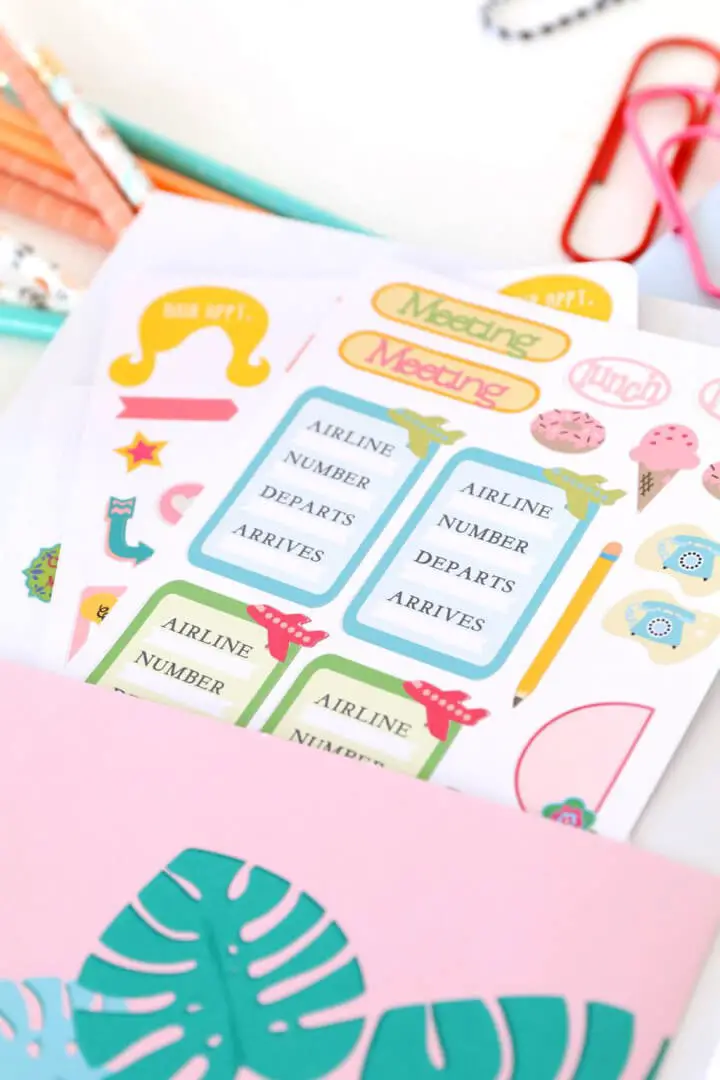
Cricut Print + Cut Wedding Planning Stickers
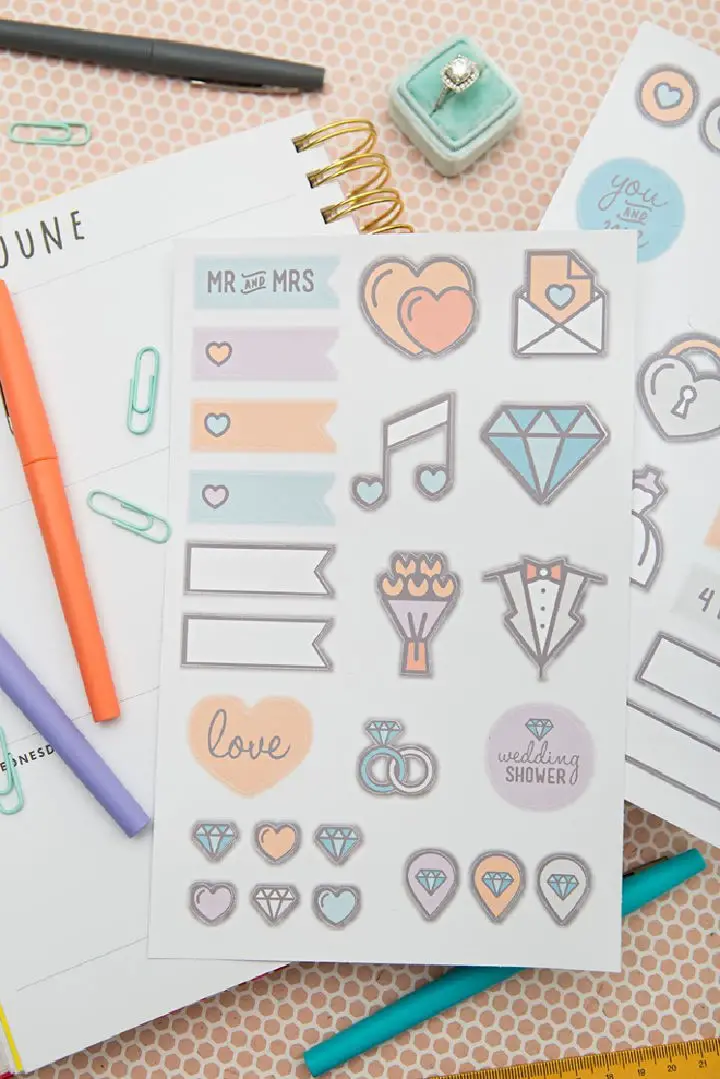
As you embark on the joyous journey of planning your wedding, it’s natural to feel overwhelmed by the sheer amount of details to keep track of. That’s where Something Turquoise comes in with its unique solution: free printable wedding planning stickers. These charming little tools allow you to personalize your planner and stay organized in a visually appealing way. By using them to mark important dates, tasks, and ideas, you’ll be able to see the big picture while still enjoying the creative process of planning your special day.
The best part? The DIY tutorial is incredibly easy to follow, requiring just a Cricut Explore and some printable vinyl to achieve professional-looking results. Whether you’re a planner enthusiast or simply looking for a fun way to stay on top of your wedding prep, these cut-and-print stickers are an excellent resource.
What sets them apart, however, is the love and attention to detail that’s gone into crafting each sticker. Not only are they functional, helping you stay organized and focused, but they’ll also become a treasured keepsake from your wedding journey.
DIY Planner Stickers With Cricut
Transforming your agenda with custom planner stickers created by your Cricut machine is a fantastic way to infuse personal flair into your daily organization. By leveraging the print and cut feature in Cricut Design Space’s patterns section, you can design and manufacture a one-of-a-kind sticker collection using Hello Creative Family’s step-by-step guide. This comprehensive tutorial walks you through the process of selecting various shapes and patterns, adding text overlays, and utilizing the flatten feature to prepare your designs for printing and cutting. With these creative tools at your disposal, you’ll be able to craft unique and stunning stickers that elevate your planner game. The end result is a harmonious blend of functionality and aesthetics, ensuring a successful and enjoyable planning experience.
DIY Happy Planner Stickers With Cricut
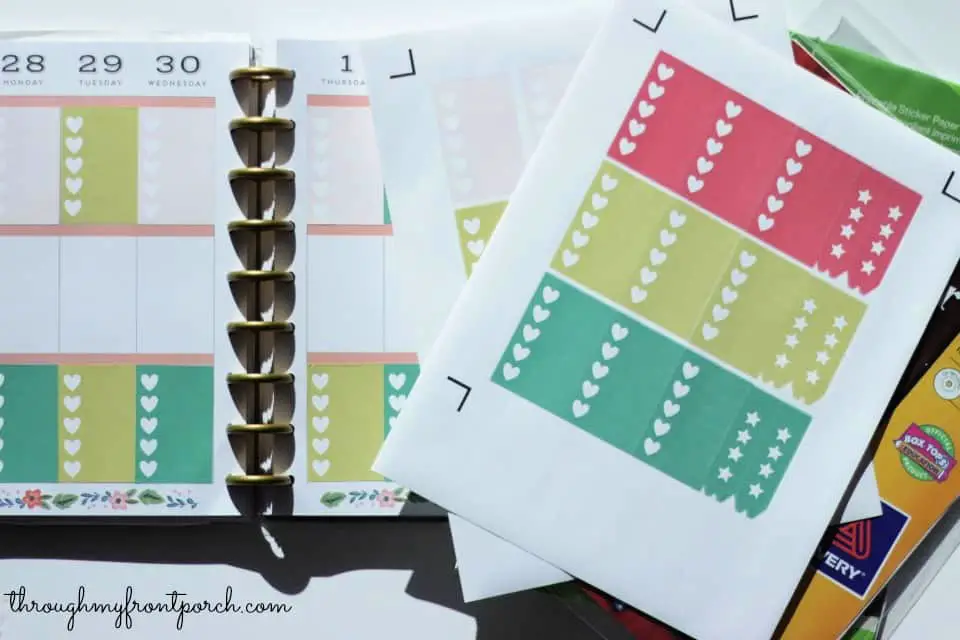
Want to elevate your Happy Planner game? Look no further than Through My Front Porch’s treasure trove of free, customizable stickers! As a Cricut enthusiast, you’ll adore the printable designs that double as functional and visually appealing embellishments for your planning routine. The stickers are cleverly crafted to seamlessly integrate with the Happy Planner layout, featuring an array of shapes like heart-bullet point rectangles and star-tipped arrows in bold hues like berry red, gold, and dark teal. Not only do these stickers add a touch of whimsy to your daily planning, but they also provide helpful tips on mastering the ‘Print then Cut’ feature in Cricut Design Space, allowing you to efficiently cut full-sheet sticker paper with ease. Say goodbye to dull days and hello to a more streamlined, stylish approach to organization – all thanks to these delightful stickers!
How to Cut Planner Stickers With Cricut
Get creative with your planning by crafting custom planner stickers using the Print Then Cut feature on your Cricut Explore Air. On Damask Love, you’ll find a step-by-step guide on how to transform Printable Sticker Paper into unique and personalized designs for your planners. With this easy-to-follow tutorial, you can turn functional planning tools into stylish and one-of-a-kind pieces that reflect your personal style. Say goodbye to generic stickers and hello to a fun and creative way to stay organized with these quick and simple DIY planner stickers.
Conclusion
Want to bring a personal touch to your DIY projects? With our in-depth guide on creating stickers using Cricut, you’ll be able to craft customized decals and labels that reflect your unique style. From journals to water bottles, the possibilities are endless when it comes to designing personalized accents. By following this step-by-step tutorial, you’ll unlock a world of creativity and transform your ideas into stunning reality. With every sticker you create, you’ll witness your designs come to life in an instant.
