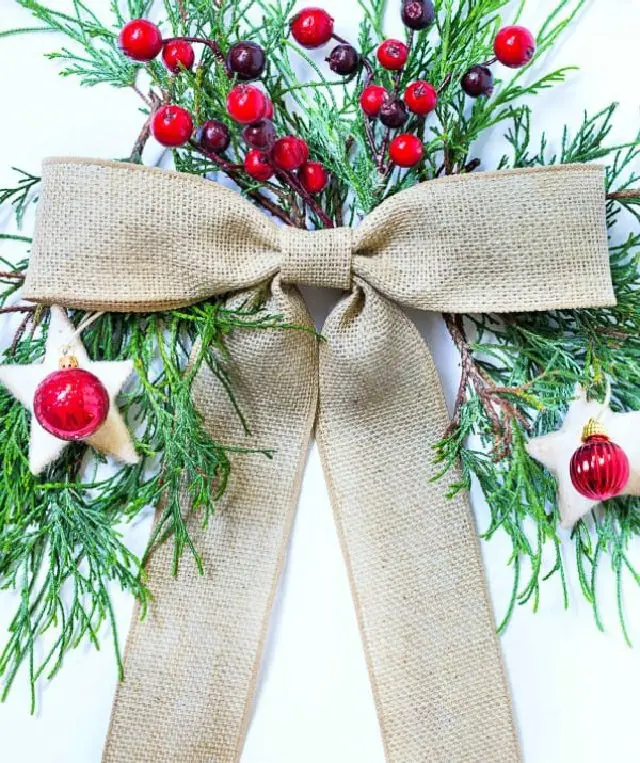
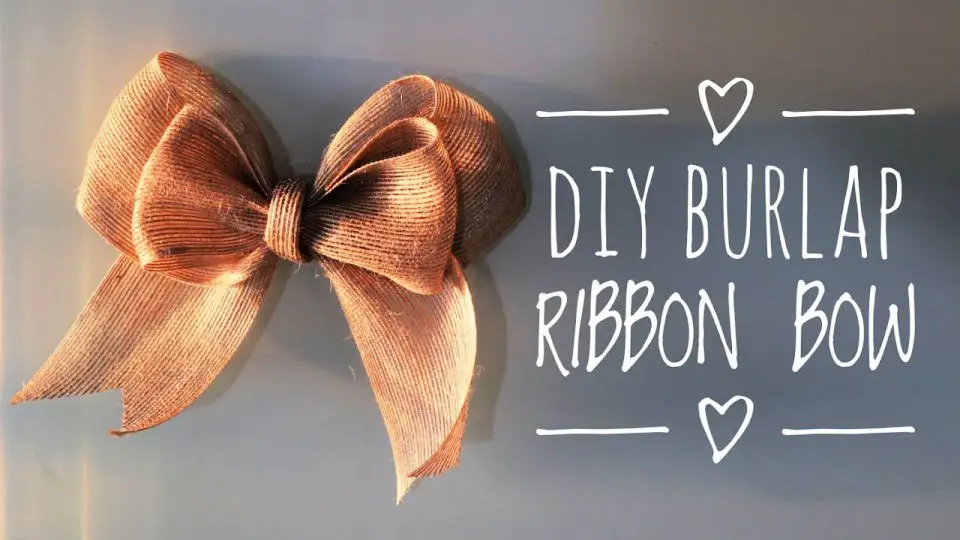
How to Make a Burlap Bow for Wreath
To elevate the charm of your holiday wreath, consider crafting a charming burlap bow. This rustic accessory can add a touch of whimsy and elegance to your seasonal decor. To get started, follow this easy-to-follow guide that will have you creating a beautiful DIY burlap bow in no time.
Materials Needed:
To craft the rustic yet charming floral arrangement, you’ll need four essential elements. First and foremost, you’ll require burlap ribbon in a width of 2 to 3 inches. Next, it’s crucial to have a good pair of scissors on hand. Additionally, you’ll need some floral wire or a reliable zip tie to secure your stems in place. Finally, consider investing in a ruler or measuring tape for added precision when trimming and arranging your flowers.
Step-by-Step Guide:
To create a beautiful burlap bow, start by cutting a length of ribbon that’s about 24 inches long for a medium-sized bow. You can adjust the length depending on how full you want the bow to be and how long you want the tails to be. Next, lay the ribbon flat and fold it back and forth to create two loops on each side, making sure they’re even in size. Pinch the center of the ribbon where all the loops meet to hold them in place. Then, use floral wire or a zip tie to securely attach the center of the ribbon, which will be the middle of your bow and keep the loops together. Once you’ve secured the center, gently pull apart the loops and fluff them out to create a full and even bow. Make any necessary adjustments to ensure the loops are symmetrical and pleasingly shaped. For the tails, cut another piece of ribbon that’s 12-18 inches long, fold it in half to find the center, and attach it to the back of the bow using the same wire or zip tie. Trim the ends of the tails at an angle or in a ‘V’ shape for added detail. Finally, use excess wire or an additional piece to secure the bow to your wreath by twisting it around the base. Make any final adjustments to the bow’s loops and tails to ensure they look even and full, and then step back and admire your beautiful burlap bow!
Tips for a Perfect Bow:
To create a high-quality handmade bow, start by selecting premium burlap ribbon that maintains its shape well for a polished appearance. When forming the loops, utilize a ruler or measuring tape to ensure uniformity. For added stability and shaping ease, consider opting for wire-edged burlap ribbon. As you craft your bow, take the time necessary to carefully shape and fluff each loop to achieve the desired level of fullness. Remember that the essence of a handmade bow lies in its distinctive character – it’s not about perfection, but rather the care and festive spirit that goes into creating it.
Frequently Asked Questions About Making Burlap Bows
For those curious about the art of crafting burlap bows, this section provides valuable insights and practical advice on how to create stunning bows using burlap fabric. With a focus on addressing common questions and concerns, readers can gain a deeper understanding of what it takes to make beautiful burlap bows.
What materials do I need to make a basic burlap bow?
To craft a straightforward burlap bow, gather the following essential materials: a length of burlap ribbon with a width of approximately 2 to 3 inches, a pair of scissors, floral wire or a zip tie, and an optional ruler or measuring tape for added precision in your measurements. With these basic components at hand, you’re ready to create a charming and rustic-looking burlap bow.
Can I make a burlap bow without sewing?
Most burlap bow tutorials, as demonstrated in previously shared examples, do not necessitate the use of a needle and thread. Instead, creative alternatives like floral wire, zip ties, or hot glue can be employed to keep the bow in place, offering a convenient and versatile solution for crafty enthusiasts.
How do I stop the edges of burlap from fraying?
When working on projects that involve fragile materials like fabric, a little extra care is necessary to prevent fraying. One effective method is to apply a small amount of clear-drying fabric glue or Mod Podge along the edges using a craft foam brush. Allow this application to dry completely before moving forward with your project. This simple step can make all the difference in ensuring a professional-looking finish.
Can I use wired burlap ribbon for making bows?
Wired burlap ribbon is particularly well-suited for crafting bows due to its ability to maintain a sturdy shape and its ease of manipulation, allowing for greater control when forming the desired bow design.
How long should the tails be on a burlap bow?
When it comes to tail length, personal preference often plays a significant role in determining the ideal length. For most medium-sized bows, a general guideline suggests 12-18 inches per tail as a suitable starting point. However, this can be adjusted based on the specific size of the bow or the desired aesthetic look. Ultimately, the key is to experiment and find a length that strikes the right balance for you.
Is it possible to make a multi-layered burlap bow?
To add dimensionality to your bow creations, simply layer multiple loops of burlap ribbon in different lengths, carefully securing each one to achieve a multi-textured look.
How do I attach a burlap bow to a wreath?
When it comes time to add a rustic touch with a burlap bow on your wreath, you can achieve this by utilizing the leftover floral wire from your project or acquiring an extra length for securing the bow directly onto the wreath’s foundation. Start by twisting and wrapping the wire around the base of the bow, ensuring a sturdy hold that won’t come loose over time.
Are there eco-friendly advantages to using burlap?
As a sustainable alternative to synthetic materials, burlap boasts the dual benefits of being both natural and biodegradable. Its environmentally friendly credentials make it an attractive option for creative endeavors and decorative purposes.
Can I add embellishments to my burlap bow?
Elevate the aesthetics of your bow by incorporating creative embellishments. Consider adding decorative elements such as buttons, artificial flowers, or beads to the center or tails of your creation, giving it a unique and personalized touch.
What is the best way to store burlap bows?
To preserve the integrity of your burlap bows, store them in a cool, dry environment shielded from direct sunlight, which can cause fading. If the bows are wire-constructed, take care not to crush them as this can compromise their shape. By adhering to these guidelines and embracing the creative process, you’ll be able to craft stunning burlap bows that add a unique touch to your decor and DIY projects.
Explore DIY Burlap Bows
Transforming ordinary DIY projects into extraordinary ones, the humble burlap bow is an accessible and creative way to add a charming rustic touch. By embracing this simple yet elegant art form, you’ll discover endless possibilities for enhancing your crafts, decorations, and personal expressions.
Pretty DIY Burlap Bow for a Wedding
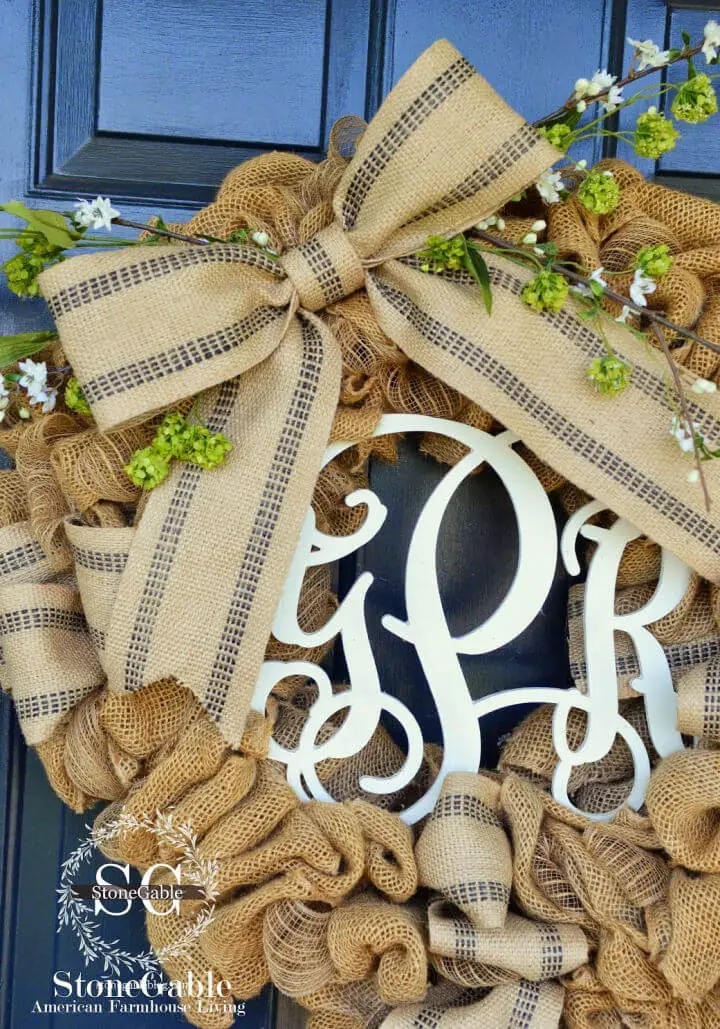
To give your wreaths, decor, and gifts an air of elegance, mastering the art of crafting perfect burlap bows is a skill well worth acquiring. With StoneGable’s comprehensive tutorial, you’ll learn how to create stunning bows using sturdy yet stylish burlap webbing. The step-by-step guide meticulously breaks down the process into manageable components, including constructing the bow body, tails, and center, as well as adding finishing touches like French cuts. By emphasizing the importance of precise measurements and secure fastening methods, you’ll be equipped to produce a professional-looking result that will elevate your crafting endeavors.
Make Your Own Burlap Bow at Home
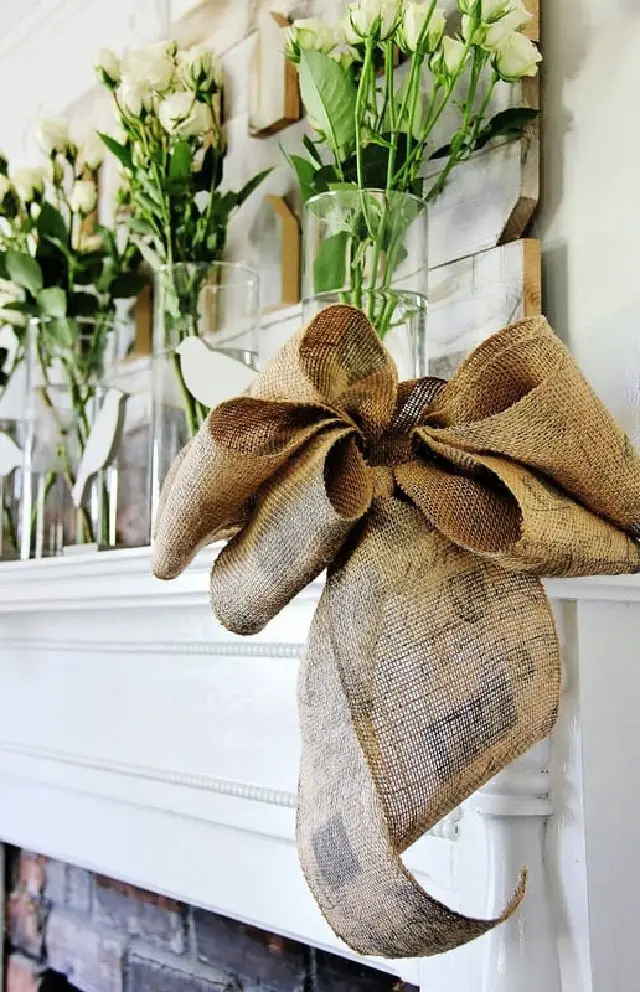
Transform any setting with the charming rustic touch of a handmade burlap bow. Thistlewood Farm’s comprehensive guide simplifies the process, ensuring that even novice crafters can produce stunning results. By following these easy-to-follow steps, you’ll discover how to choose the ideal burlap ribbon, create bows of the perfect size, and add a professional finish. This versatile DIY project is perfect for embellishing wreaths, mantels, or adding a unique touch to weddings and parties. The tutorial also offers valuable advice on sourcing materials and creating budget-friendly bows, empowering you to bring your creative vision to life in mere minutes.
Easy Way to Make a Burlap Bow
Crafting a charming burlap bow is an effortless way to infuse rustic charm into your wreaths, garlands, or Christmas trees. By following the straightforward guide on Single Girl’s DIY, you can create your own burlap bows at a fraction of the cost of store-bought decorations. With minimal supplies like burlap ribbon, twine, scissors, and a hot glue gun, you’ll be able to whip up stunning bows that add a personal touch to your home decor. The step-by-step instructions are designed to ensure a stress-free and successful crafting experience, allowing you to express your creativity and give your decorations a unique handcrafted flair.
Quick and Easy DIY Burlap Bow Tutorial
With Debbie’s easy-to-follow tutorial, you can create a charming burlap bow in no time. This rustic accessory is perfect for embellishing wreaths, gifts, or home decor. The process requires just three simple materials: burlap ribbon, twine, and scissors – no glue or staples needed! With a straightforward folding technique and crystal-clear instructions, you’ll have a beautiful bow in under 60 seconds. The tutorial is ideal for crafters of all levels, offering a fun and rewarding project with an attractive result. To help guide you along the way, Debbie has also provided a helpful video that complements the step-by-step directions. So why not give it a try and add a touch of handmade charm to your creations?
How to Make a Burlap Bow at Home
With its effortless rustic charm, creating a burlap bow is a DIY delight that can be accomplished in mere minutes. Following Chatfield Court’s step-by-step guide, you’ll learn to craft a lush, textured bow using an array of basic supplies – from burlap ribbon and jute twine to Mod Podge, scissors, and floral wire. Embracing imperfection, the tutorial focuses on creating a charming, full-bodied bow that exudes farmhouse elegance, making it an ideal project for DIY enthusiasts of all skill levels. By mastering the art of folding, securing with twine, and preventing fraying with Mod Podge, you’ll be left with a beautiful, rustic bow that effortlessly adds springtime charm to your wreath or any decorative piece.
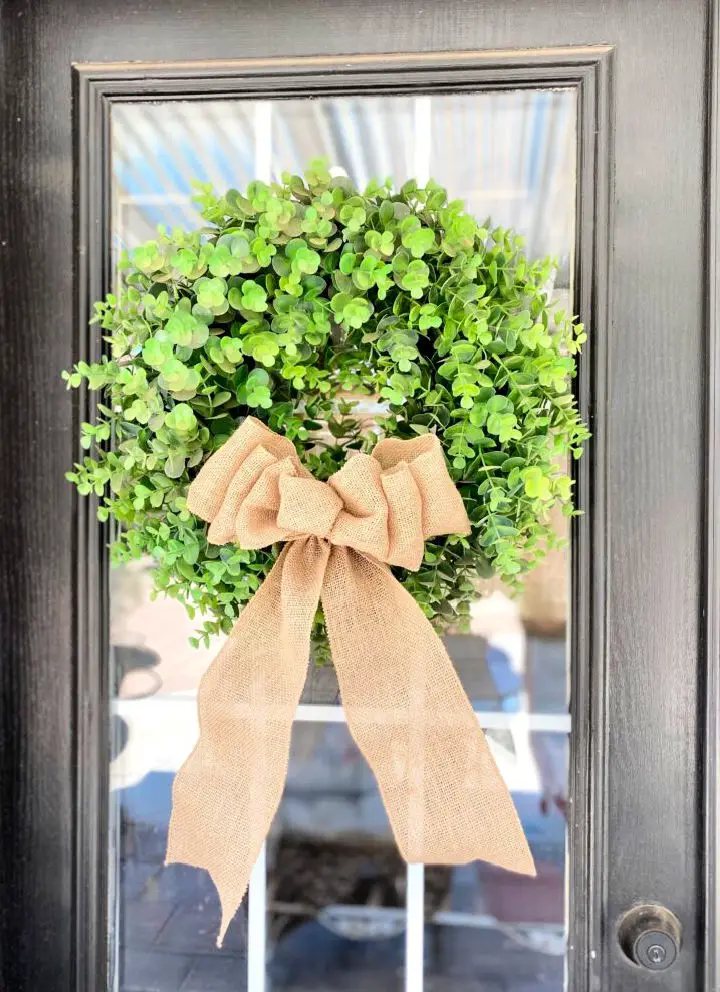
Homemade Burlap Bow for a Wreath
Transform your home decor with the art of bow-making using On Sutton Place’s comprehensive guide. With just a few essential supplies, including ribbon, scissors, and a heavy-duty stapler, you’ll be guided through a step-by-step process by Ann Drake. The clear instructions and accompanying images will have you mastering the craft in no time, whether you prefer burlap or wider ribbons. As you effortlessly create charming bows for your wreaths and other projects, you’ll gain the confidence to add a personal touch to your decorations.
Simple and Easy DIY Burlap Bow
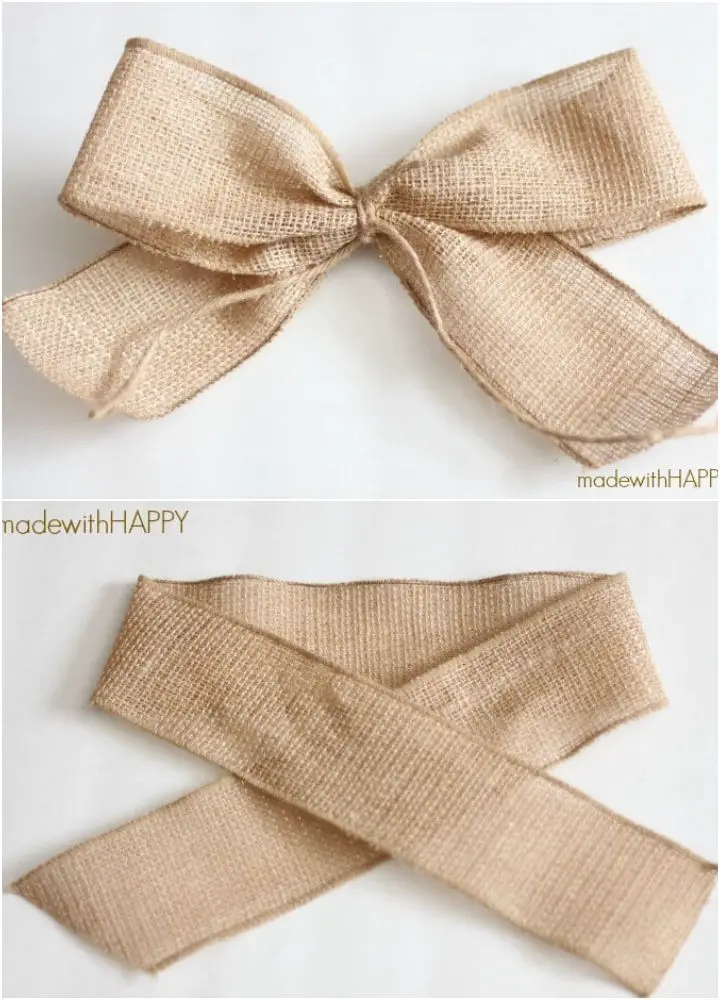
Transform everyday decor into charming rustic accents with this step-by-step guide on crafting a beautiful burlap bow. This DIY tutorial, inspired by Made with Happy, is perfect for elevating holiday wreaths, tree toppers, or even pews at special events. With a straightforward approach and essential supplies like burlap ribbon, twine, and scissors, you’ll be able to create an elegant bow in no time. Clear instructions on cutting, folding, and tying the bow make it accessible for craft novices, ensuring stunning results with minimal effort. Let the rustic charm of burlap add a personal touch to your decor and make this project a satisfying and enjoyable experience.
Homemade Burlap Bow Under $12
Crafting a burlap bow is an excellent way to infuse your home décor or special events with a charming, rustic flair. By following Renovated Faith’s straightforward DIY guide, you’ll be able to create a custom-sized and shaped bow that perfectly complements your project’s unique needs. This versatile technique isn’t limited to burlap; it can also be applied to other types of ribbons, ensuring your bows always have a professional finish. With just a few basic supplies like burlap ribbon, a hot glue gun, and some craft wire, you’ll be well-equipped to create a stunning bow that can embellish wreaths, gifts, or any home décor item. The tutorial’s clear instructions are paired with a helpful video that breaks down each step, making the process accessible and enjoyable for anyone looking to add a handmade touch to their decorations.
Make a Burlap Bow With Written Guide

With its effortless charm, a handmade burlap bow can instantly add a touch of rustic whimsy to any decor. To create one for yourself, simply follow this step-by-step guide, which requires just a few basic materials: burlap ribbon, a hot glue gun, scissors, and floral wire. In seven straightforward steps, you’ll be able to transform these humble components into a stunning decorative piece that’s sure to elevate your crafting projects. Whether used to embellish a wreath or showcased on its own, this charming bow is guaranteed to bring a delightful burst of character to any setting.
DIY Burlap Bow for Gift Basket
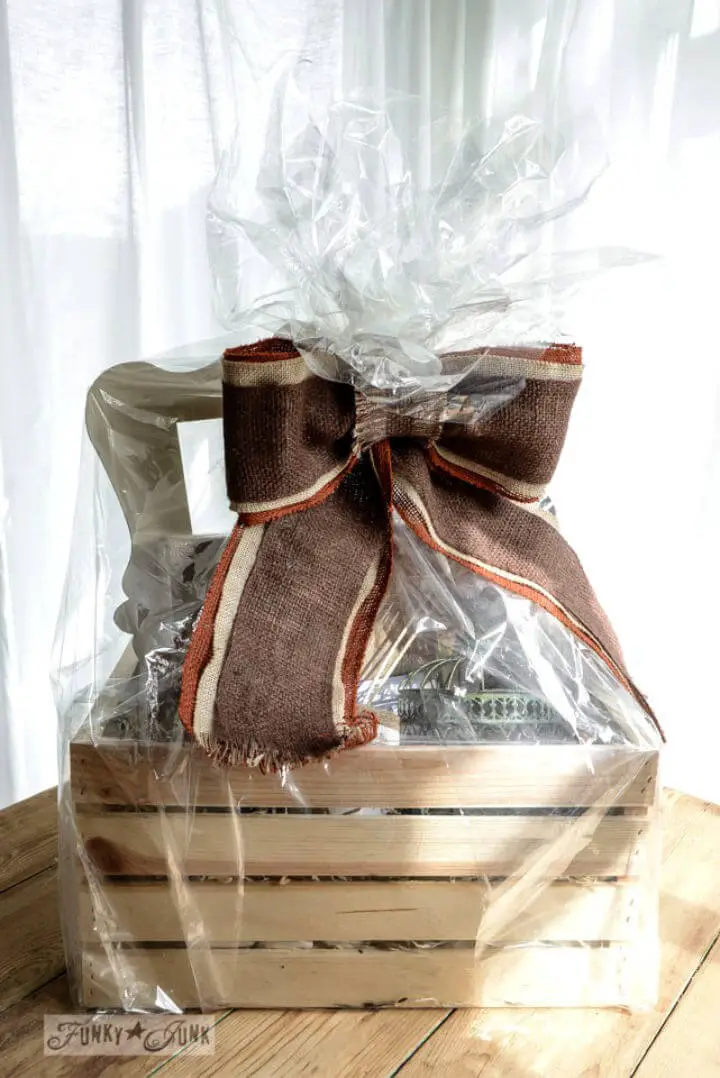
Discover the charm of burlap in your crafts by learning how to create a rustic burlap bow with Funky Junk Interiors’ step-by-step guide. To achieve a textured, multi-layered look, combine three different shades and widths of burlap ribbons. With just a few simple materials – including hot glue, pipe cleaners, and your chosen burlap – you can assemble a stunning bow to adorn gifts or home décor. Begin by layering the burlap, securing each layer with light glue before bringing both sides to the back and tying the center with a pipe cleaner. For an added touch of rustic charm, gently fray the top layer before gluing for a chic finish. This straightforward tutorial provides a country-inspired method for crafting a stylish burlap bow that’s perfect for adding a touch of whimsy to your projects.
Handmade Burlap Bow for a Wreath
Craft charming burlap bows that elevate your wreaths or home decor with Hootshack’s intuitive guides. Three straightforward methods await you, using basic materials such as burlap ribbon or fabric, wire, and hot glue. From the simplicity of a loop bow to the classic elegance of a tied bow, these step-by-step instructions are designed to be crystal clear, engaging, and effortless to follow. Additionally, learn how to prevent fraying when working with burlap fabric, ensuring your bows look polished and professional. Whether you’re looking to add a rustic touch or simply appreciate the unique texture of burlap, these tutorials serve as a valuable resource for creating captivating bows.
DIY Burlap and Lace Bow For Chair
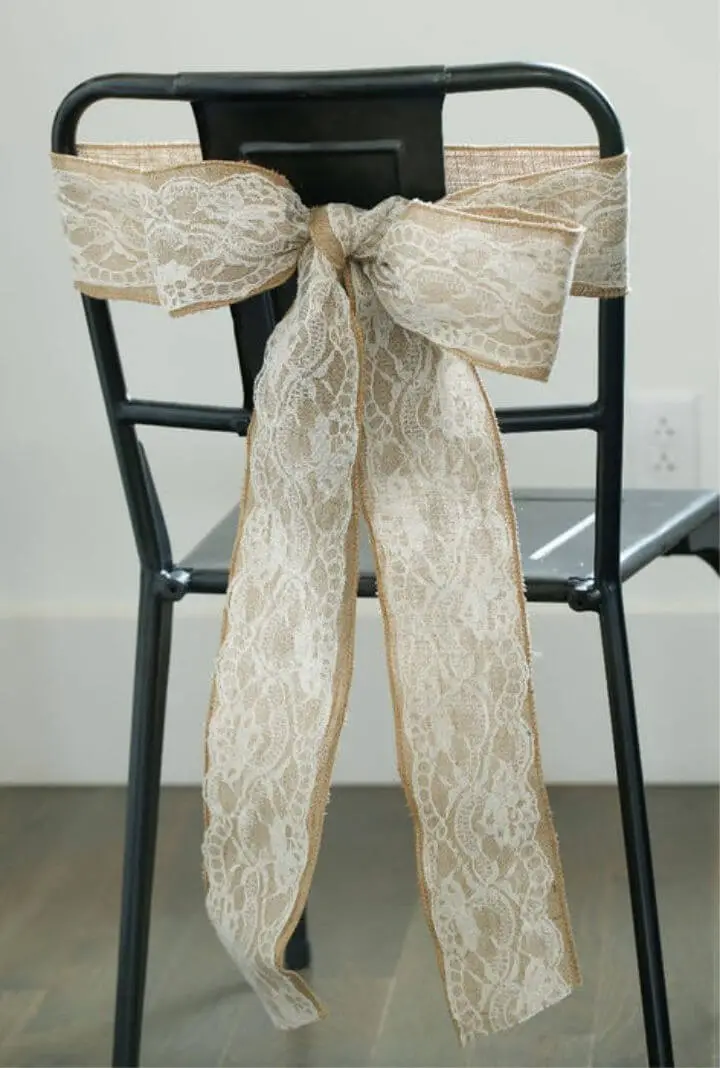
Crafting a chair bow is an effortless way to infuse your seating area with refinement. For events or everyday use, Instructables provides a detailed guide to creating a chair bow that exudes elegance. To get started, you’ll need a few basic materials: 4-inch wired burlap in a natural hue, 4-inch ivory lace ribbon, and a trusty hot glue gun equipped with glue sticks. The process is surprisingly intuitive, allowing anyone to produce a polished-looking bow without requiring advanced crafting expertise. By following the step-by-step instructions, you’ll be able to transform ordinary chairs into show-stopping centerpieces.
How to Make an Easy Burlap Bow
Crafting a rustic burlap bow can elevate the charm of any project, and with the right guidance, it’s a surprisingly simple process. On Extraordinary Chaos, Sarah Christie shares a comprehensive, seven-step guide that walks you through every stage of creating a stunning burlap bow. Whether you’re looking to enhance your home décor or add a personal touch to a thoughtful gift, this tutorial ensures you can achieve professional-looking results with ease. The straightforward instructions cover everything from cutting and fraying the burlap to assembling the final product, giving you the confidence to create bows of any size. With just a few basic tools like a hot glue gun, scissors, and burlap at your disposal, you’ll be all set to craft an eye-catching bow that adds a special touch to your creative projects.
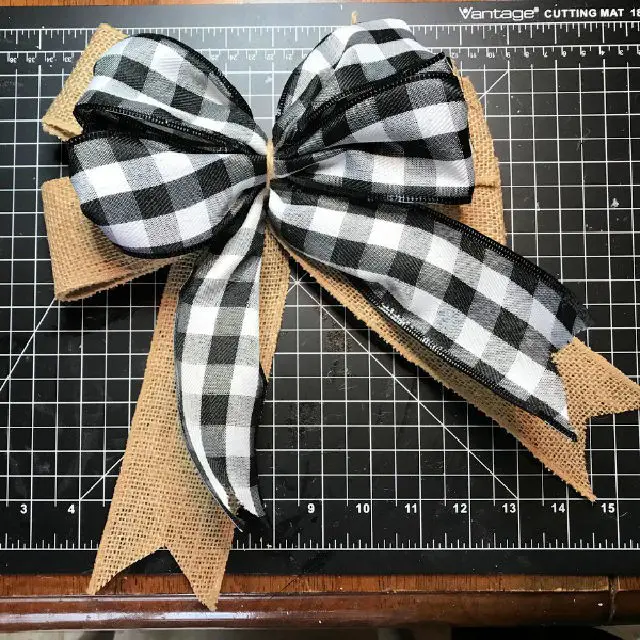
Best Way to Make a Burlap Wreath Bow
For those looking to infuse their home decor with a charming rustic touch, crafting a burlap wreath bow is an ideal project. The natural texture and adaptability of burlap make it a popular choice for creating a warm and inviting atmosphere. Our latest guide takes you through the straightforward process of creating a layered burlap bow to adorn your wreaths, utilizing just a few essential supplies like plain and decorative burlap ribbon and pipe cleaners. With our step-by-step tutorial, you’ll be guided effortlessly through each stage, ensuring a beautiful outcome that will leave your front door making a lasting impression.
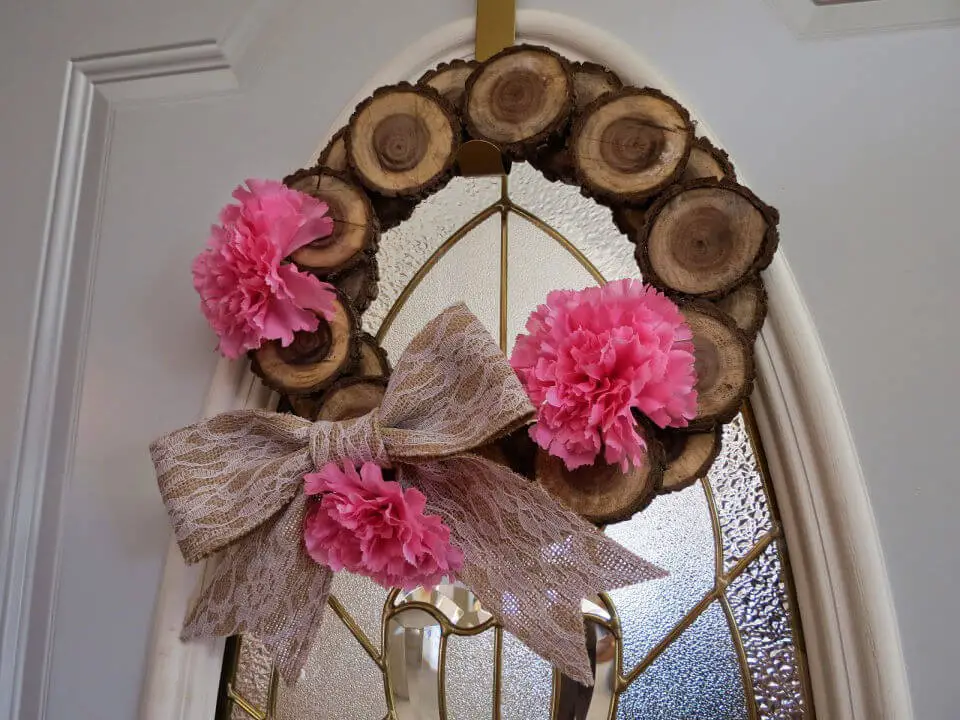
Making a Burlap Seashell Wreath With Bow
Bring the laid-back charm of the seaside into your home with a charming Burlap Seashell Wreath. This project combines the rustic beauty of burlap with the unique allure of seashells to create a one-of-a-kind piece that’s perfect for crafters who adore natural aesthetics and coastal vibes. The tutorial provides a straightforward, step-by-step guide to crafting a stunning shabby chic-inspired wreath that’s ideal for welcoming summer or adding a touch of the ocean to any room. With expert instructions on cutting burlap strips, arranging seashells in a visually appealing way, and creating an elegant burlap bow, you’ll have a blast crafting a personalized piece that can also make a thoughtful gift for loved ones. Whether you’re looking for a unique decor addition or a special token to commemorate a beach-loving mom on Mother’s Day, this Burlap Seashell Wreath is the perfect creation to inspire your creativity and add a dash of coastal flair to your home.
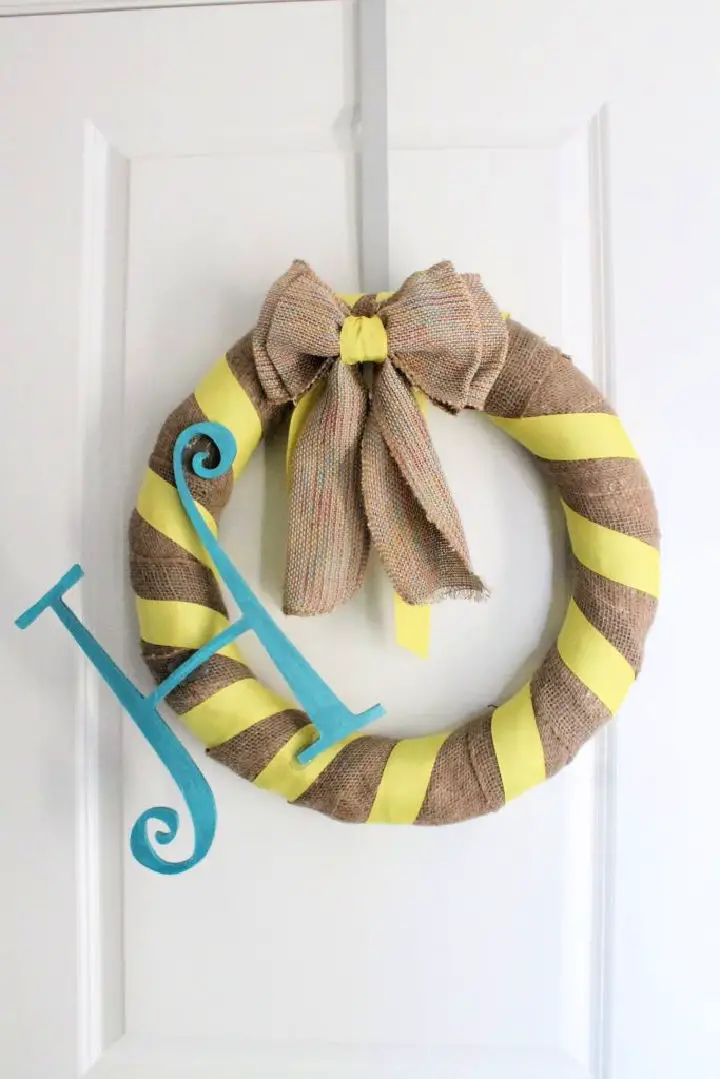
How to Make a Burlap Big Bow for a Wreath
Crafting a stunning ribbon bow is easier than you think! With Liz on Call’s comprehensive guide, you’ll learn how to create a beautiful, wire-edged bow that can add a touch of elegance to your home decor or make a great addition to your holiday decorations. By following the step-by-step instructions and helpful tips, you’ll be able to master the art of making uniform loops and securing them with a pipe cleaner, resulting in a professional-looking finish. Whether you’re looking to add a personal touch to your wreaths or create something special for an upcoming occasion, this guide is designed to help you enhance your crafting skills and bring joy to your creative pursuits.
Cheap DIY Lace and Burlap Bow
As the seasons transition from winter to spring, there’s something charming about creating a rustic tree branch wreath with a burlap bow and vibrant flowers. Laura from Victorious Christian Woman shares her delightful guide on how to craft this natural decoration using readily available materials. The process is surprisingly enjoyable, thanks to Laura’s clear and simple instructions. With her step-by-step approach, anyone can transform ordinary materials into an extraordinary piece of home decor that exudes warmth and seasonal cheer. So, grab your glue gun and let’s get started on creating a wreath that will bring a touch of nature to your doorway.
Making a Burlap Wreath Bow – Step by Step
Are you looking for a unique way to add some rustic charm to your home decor? A handmade touch is just what you need! Crafting a beautiful burlap wreath bow with a Princess and Her Pirates guide is the perfect solution. This DIY project is surprisingly easy and budget-friendly, making it an excellent addition to your crafting skills.
With this straightforward tutorial, you’ll learn how to cut and tie burlap ribbon and grosgrain to create a stunning bow that looks like it was made by a professional. All you need are some basic materials like scissors, twine, and a stapler – no advanced skills required! Simply follow these step-by-step instructions to make an eye-catching bow that can be used to adorn wreaths, gifts, or any space in need of a cozy, homespun touch.
Double Layered Burlap Bow for Wreaths
Looking for a simple and enjoyable way to create the perfect double-layered bow for your wreath decorations? We’ve got you covered! Our step-by-step guide makes crafting beautiful bows accessible to anyone who can cut, fold, and tie. The tutorial focuses on twine and wired ribbon, providing a charming and elegant addition to any wreath. By breaking down the process into manageable steps, we ensure a stress-free crafting experience that yields a stunning double-layered bow with tidy fishtailed ribbon tails. With our guide, you’ll learn to create both the larger bottom layer and smaller top layer of the bow, taking your door décor to the next level.
Easy DIY Burlap Bow Tutorial
Discover the charm of crafting a rustic burlap bow to elevate your home decor or special event. This comprehensive tutorial, showcased on YouTube, offers a straightforward guide to creating a stunning burlap ribbon bow with minimal effort required. Perfect for DIY enthusiasts and those seeking to hone their crafting skills, the video tutorial provides crystal-clear instructions to help you produce a lovely handmade bow that can be effortlessly applied in various settings – from wreath adornments to gift wrapping. Join the ranks of viewers who have successfully followed these steps and revel in the satisfaction of creating your own unique burlap bow. For this informative and accessible video, visit YouTube for a simplified approach to crafting beautiful burlap bows.
Conclusion:
With the mastery of DIY burlap bows, you’ll effortlessly inject a touch of rustic sophistication into your décor projects. By following our easy-to-follow step-by-step tutorials, you’ll be able to craft exquisite burlap bows that will elevate any wreath or decorative arrangement to new heights. The beauty lies in its simplicity – with just a few essential materials and a dash of creativity, you can bring the natural charm of burlap into your personal or event spaces, adding a unique and personalized flair to your creations.
