How to sew a button on a shirt?
When sewing on a button, begin by pinpointing the center of the buttonhole. Create a small incision in the fabric, being meticulous not to enlarge the hole. Next, thread your needle with a length of thread that is twice the distance from the top of the buttonhole to its bottom, and tie a knot at one end. Insert the needle through the back of the fabric, emerging precisely at the center of the buttonhole. Then, pass the needle through the button’s center, before returning it to the fabric’s rear side. Repeat this process four or five times, ensuring that each time you push the needle through the fabric, it re-emerges at the same point on the opposite side. This will establish a cross-stitch pattern that securely fastens the button in place. After completing your stitches, pass the needle through to the fabric’s rear side and secure the thread with a knot. Trim any excess thread.
How to sew a button on pants?
Sewing a loose button back onto your pants is a straightforward process that requires just a needle, thread, and some basic stitching skills. To start, thread the needle with a length of thread that’s roughly double the size of the button. From the back side of the fabric, insert the needle and emerge just above where you’ll be reattaching the button.
Next, take small stitches through the center of the button, making sure to capture all four holes in each pass. Pull the thread tight after each stitch and repeat the process two or three more times to ensure the button is securely fastened.
Once you’re satisfied that the button is firmly in place, knot the thread on the back side of the fabric and trim away any excess thread. And with that, your pants are now sporting a neatly reattached button – no sewing expertise required!
15 Ways to Sew a Button on Pants and Shirts
To address your query on how to sew a button, I’m pleased to offer 15 practical methods, tips, and guidelines that cater to various types of buttons, including those with four holes, large buttons from leather jackets or fur coats, two-hole buttons, or shank-backed ones. Whether you’re dealing with a missing button on your shirt, pants, or any other garment, our comprehensive guide has got you covered. Not only will we provide step-by-step instructions for sewing by hand using a needle, but we’ll also share a convenient technique for machine-sewing your buttons back into place. So, gather your fallen-off buttons and let’s get started!
How to Sew a Button – Step-by-step Tutorial
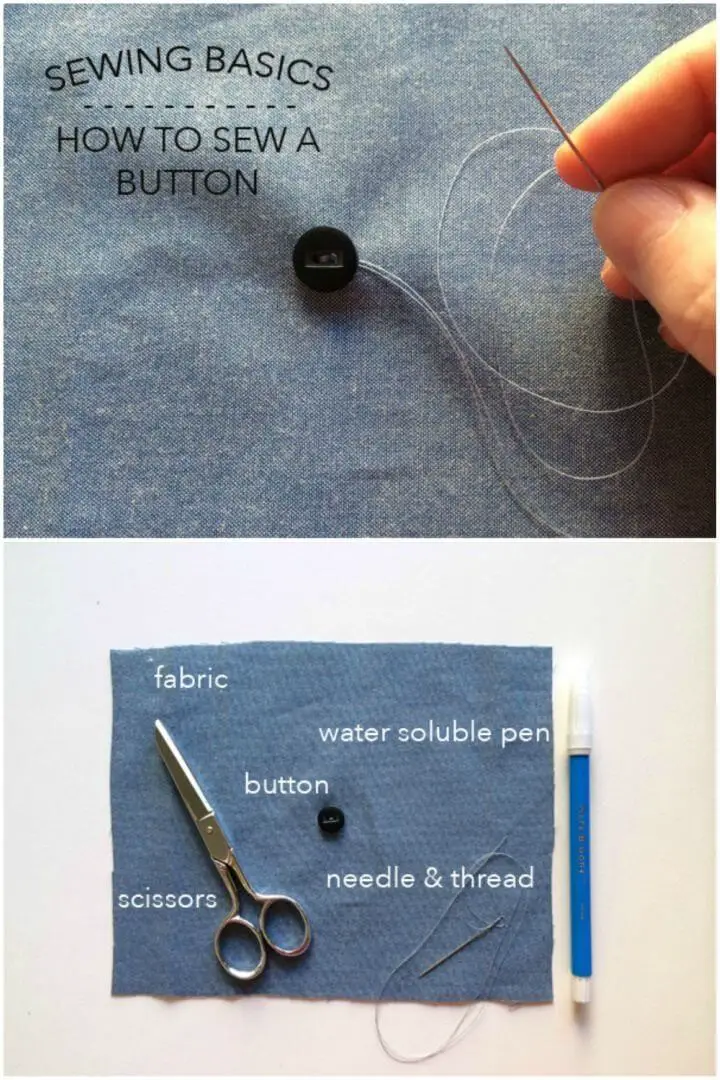
For those who struggle with the seemingly straightforward task of sewing on a button, rest assured that you’re not alone. With just a few basic materials – including fabric, scissors, a button, some thread, and a hand-sewing needle – anyone can master this fundamental sewing skill.
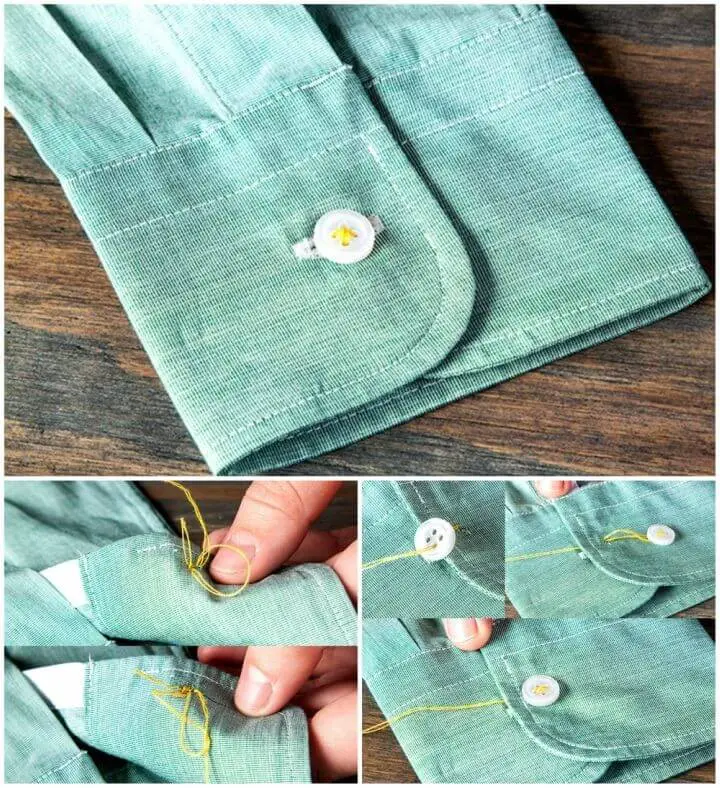
How to Sew a Button on a Shirt

Got a shirt lingering at the back of your closet with a missing button? Don’t let it remain in limbo! With these straightforward DIY instructions, you’ll be able to reattach that button and revitalize your wardrobe in no time. The process is surprisingly easy, requiring just a few simple steps to get your garment looking brand new again.
Best Way to Sew on a Button
With minimal effort and just 5 minutes of your time, you can master the art of sewing on a button like a pro! To get started, gather your essential tools: a thread that matches the color of your shirt, a needle, scissors, and of course, the wayward button itself. The process begins by threading the needle with your chosen thread and then skillfully guiding it up from underneath the fabric to secure the button in its rightful place.
How to Sew a Button Apple Tree
Imagine strolling through a lush orchard on a crisp autumn day, surrounded by the warm glow of ripened apples. The wooden embroidery hoop serves as the tree’s sturdy trunk, while the burlap and variegated yarn blend together to create a vibrant canopy. Embellish this natural landscape with green and red embroidery floss, carefully threading the story of harvest season. Add some verdant buttons for added texture, securing them in place with a trusty glue gun and adhesive sticks.
Sew Brass Buttons on a Blazer
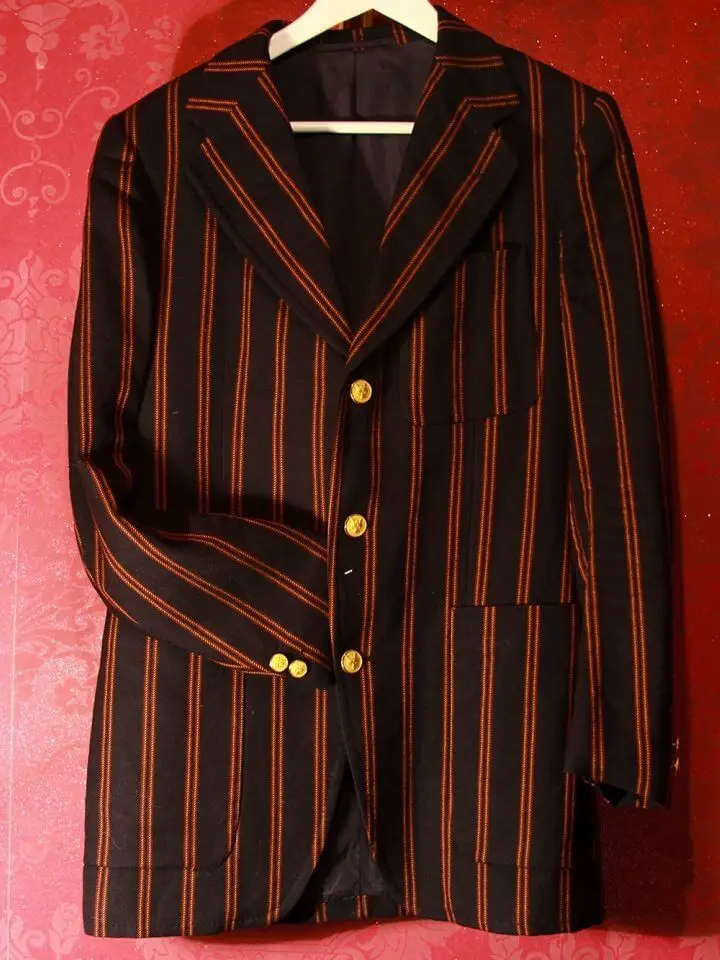
Transform your blazer into a stylish masterpiece by crafting your own brass buttons. You don’t need to splurge on expensive market finds when you can create them yourself. The heft of these brass accents is a great feature, and with the right sewing technique from Be Spoke Unit, you can effortlessly incorporate them into your design.
Easy to Sew on Buttons with a Sewing Machine
For those who find needlework tedious or intimidating, fear not! With the aid of a sewing machine, you can master the art of sewing a button in no time. This tutorial provides a step-by-step guide on how to effortlessly attach a button using your trusty sewing machine, making it a breeze for even the most novice seamsters.
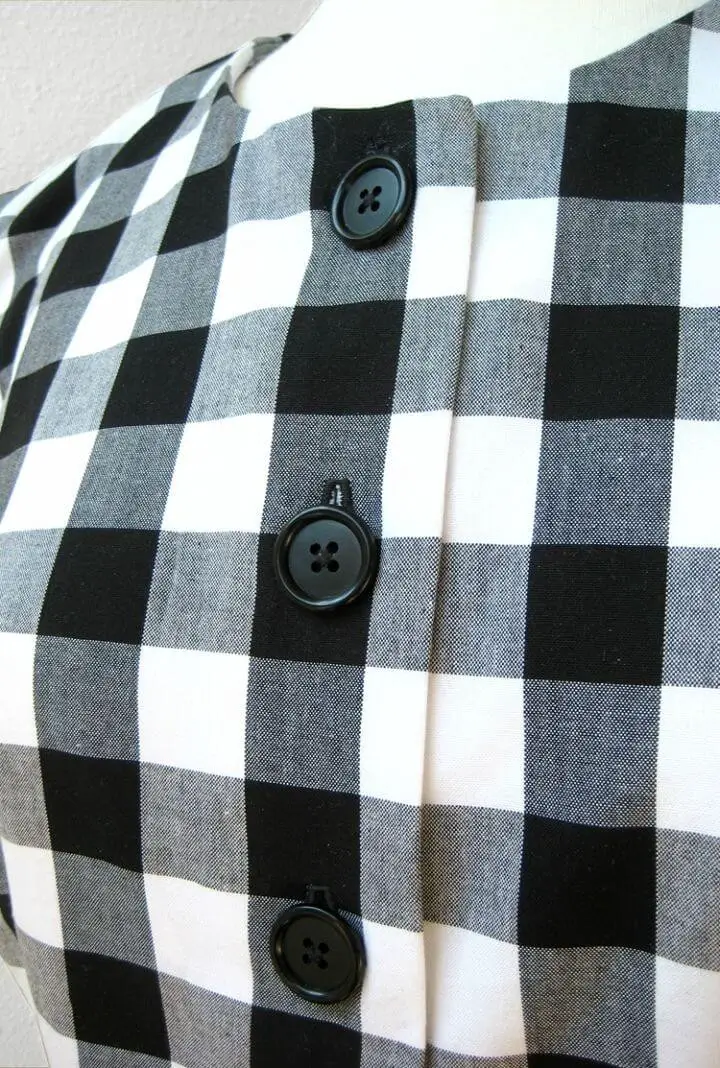
Sew a Button on a Shirt for Beginners
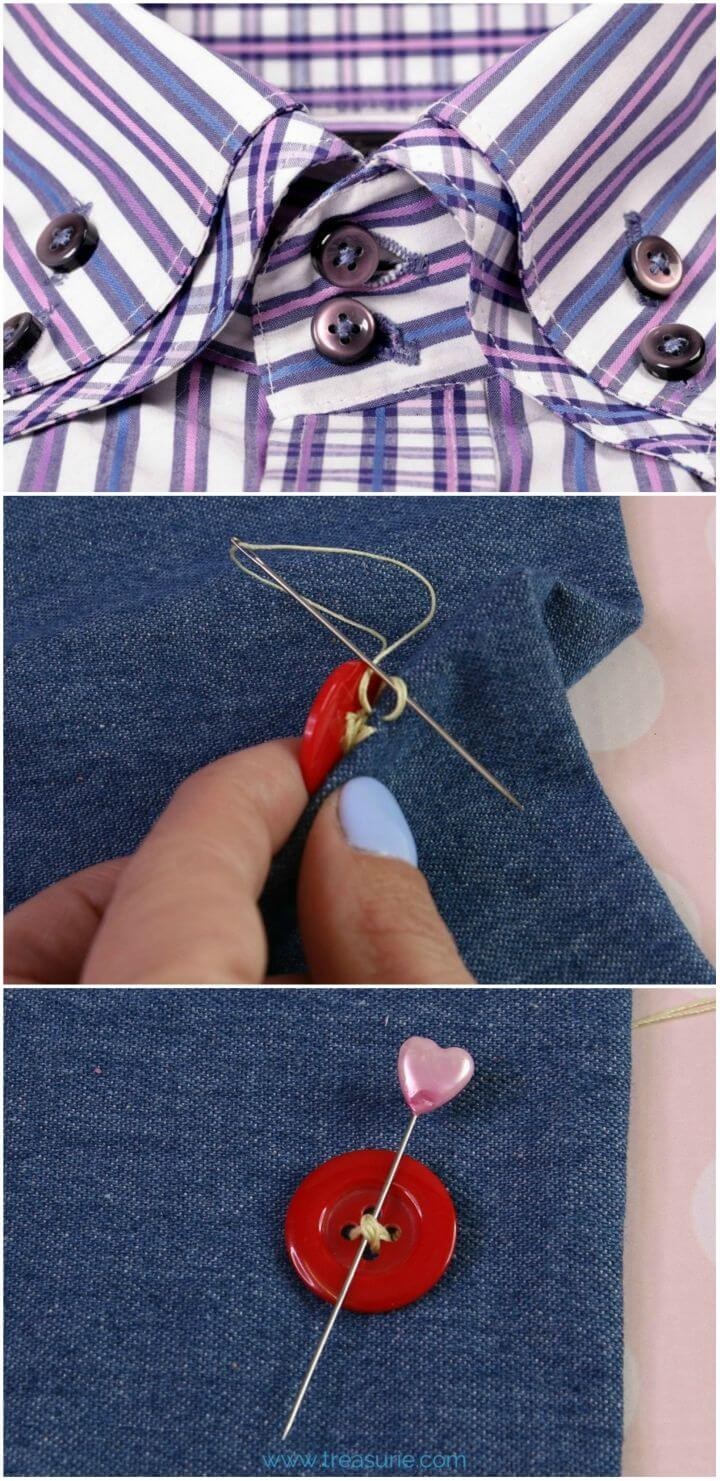
Mastering the art of sewing a button is an indispensable skill that can benefit individuals of all ages. At its core, sewing a button requires a fundamental understanding of threading a needle with double thread. While it may seem like a trivial task, having a trusted technique to rely on can make all the difference. In fact, Treasurie has developed a revered approach to sewing buttons that is sure to prove invaluable for anyone looking to hone their skills.
Easy Way to Sew Partial Button Placket
Adding a touch of whimsy and comfort to your little one’s wardrobe, this partial button placket is an effortless way to create a onesie that’s both adorable and practical. Simply take an existing shirt with a pre-sewn body, then use a pencil, ruler, and your creativity to determine the perfect opening for the placket. With just these few simple steps, you’ll be able to transform a standard shirt into a cozy onesie that’s sure to become a favorite in your child’s wardrobe.
How to Sew Buttons with a Sewing Machine
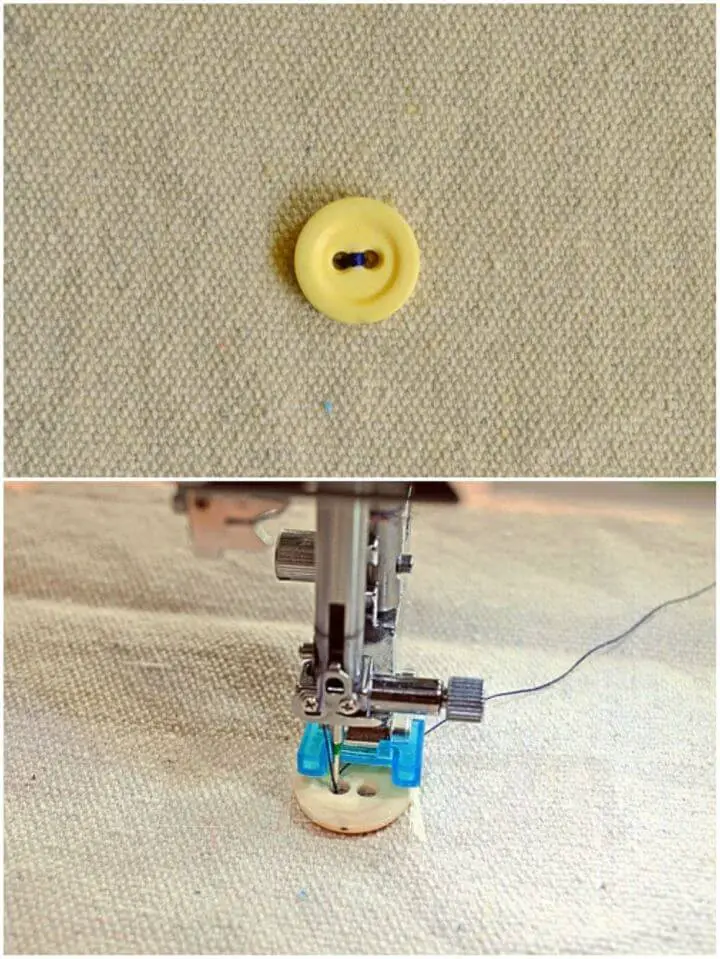
To reattach buttons to their rightful place on your shirt, follow this easy approach. To make the stitches nearly invisible, use the same colored thread as the garment itself. Alternatively, opt for a vibrant contrasting thread for a bold look! For step-by-step guidance, refer to the accompanying tutorial.
How to Sew a Button – Basic Steps
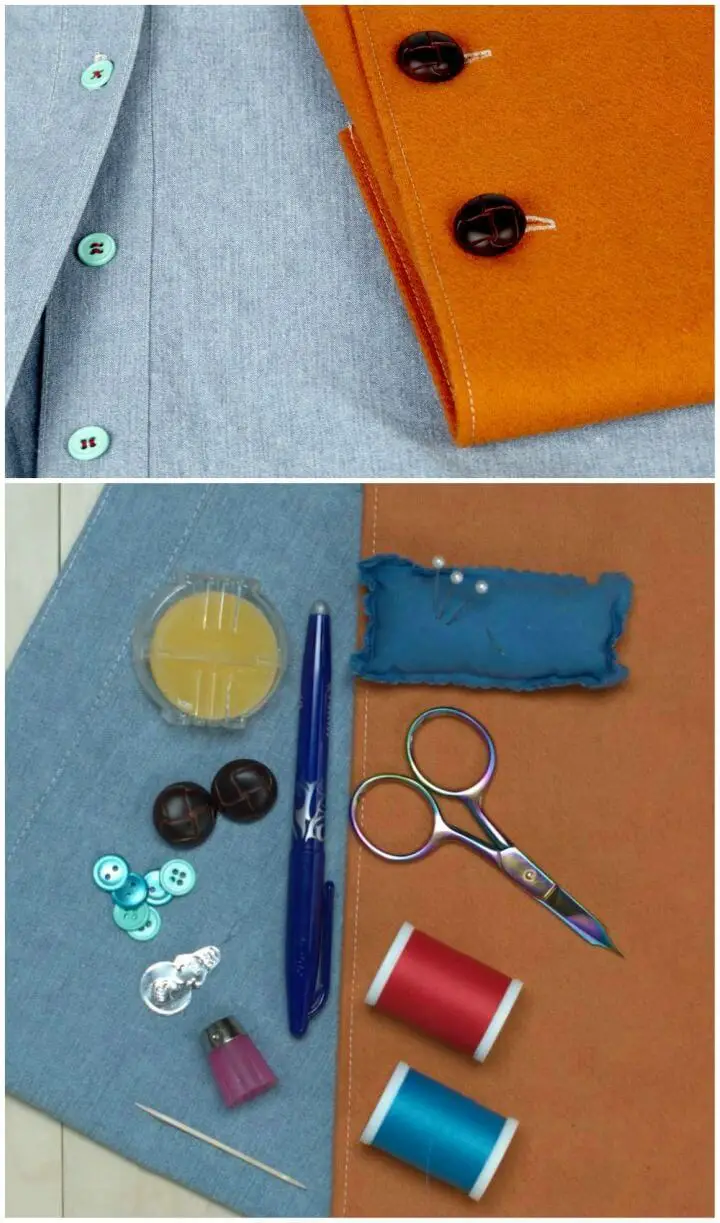
Mastering the art of button sewing requires a solid foundation in the right tools and techniques. To get started, gather your essentials: beeswax, buttons, needle threader, thimble, toothpick, marking pen, hand needle, scissors, and thread. The humble beeswax plays a crucial role in this process, serving as a thread conditioner that strengthens and detangles the fabric. With these fundamentals in place, you’ll be well on your way to sewing buttons with confidence.
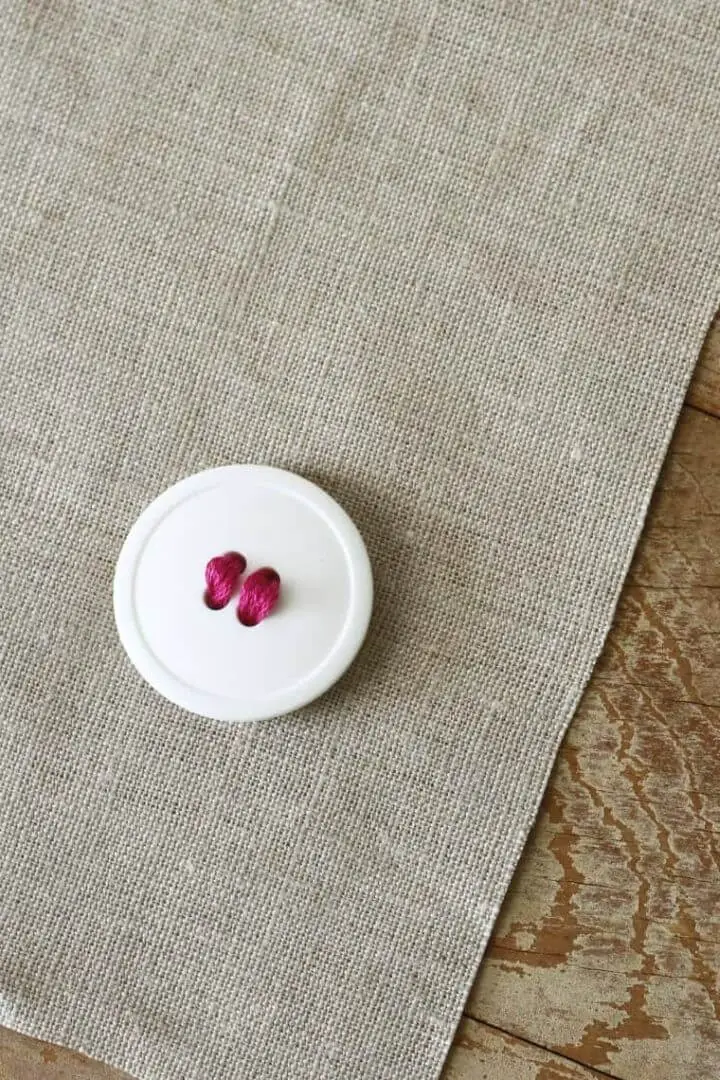
Sew a Sew-through Button
Savoring the satisfaction of a perfectly sewn button can be a great feeling. And the best part? You don’t need any specialized tools or extensive sewing experience to achieve this level of perfection. With just a few simple items – including a straight hand sewing needle, scissors, a standard button, and a toothpick – you can easily master the art of sewing on buttons. One helpful tip to keep in mind is to prepare your thread by leaving two ends long enough to thread through the needle. This makes it easier to get started and will help you avoid any frustrating tangles or knots along the way.
Easy to Sew a Button-closure Pouch
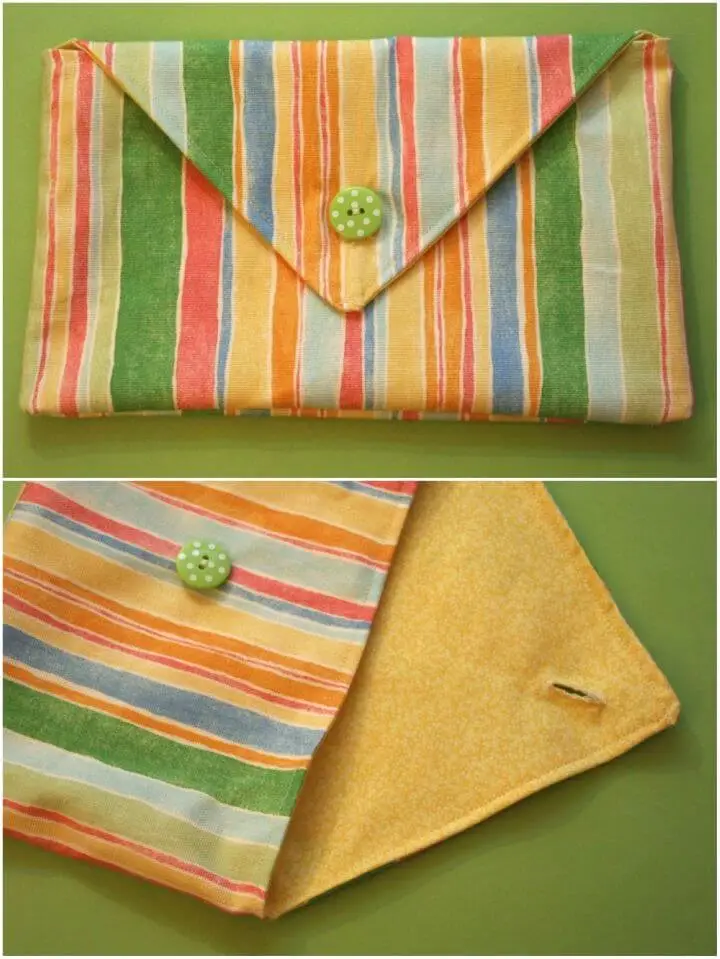
When searching for a reliable makeup or toiletries bag that can keep up with your busy lifestyle, this clever button closure pouch is definitely worth considering. Its chic design makes it an attractive option for anyone looking to carry their essentials in style. For those who are handy with a sewing machine, Chic and Jo offer a comprehensive guide on how to create this very pouch from scratch.
How to Attached a Button
Say goodbye to the frustration of losing a button on your favorite shirt or sweater, because sewing a new one is now a breeze! This straightforward technique involves simply threading the needle and carefully inserting it into the fabric, allowing the button to be securely fastened once again.
How to Sew a Button on a Coat or Jacket
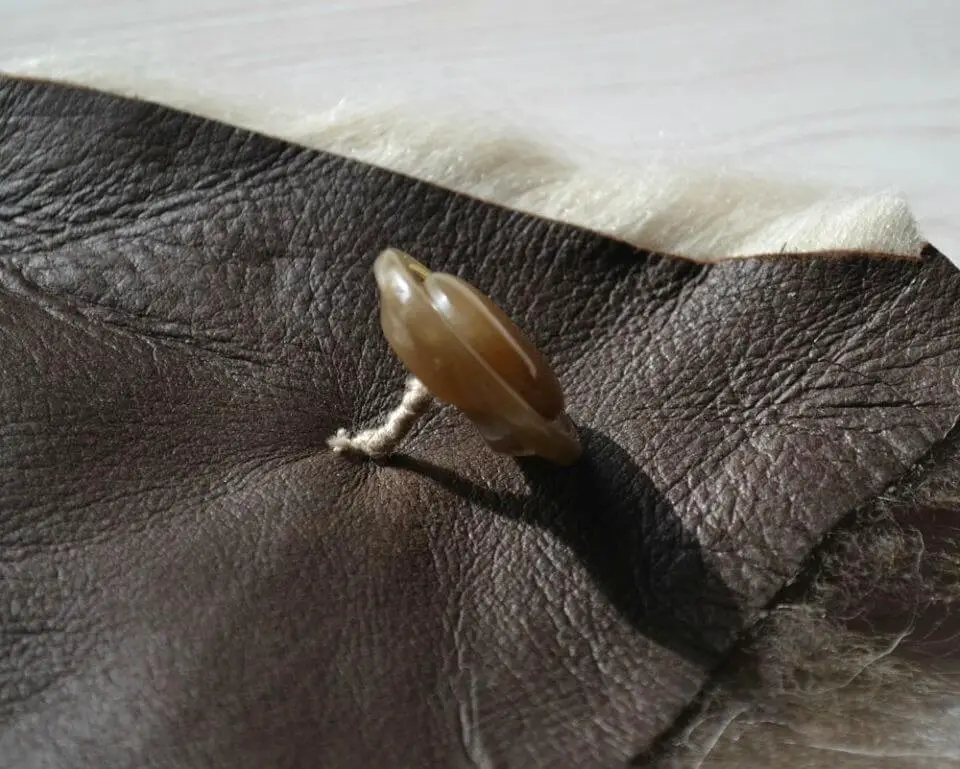
When a cherished jacket falls victim to a missing button, it’s easy to feel at a loss. However, with Sew Way, you can breathe new life into your favorite piece of clothing by learning how to sew on a replacement button – even if that button is large and the fabric is thick, like leather. To tackle this task, you’ll want to reach for a medium-sized hand needle, perfect for handling larger buttons.
3 Ways to Sew a Button
When it comes to sewing on a button, there are several techniques to explore, such as using four holes, two holes, or even creating a shank. Before diving into the various methods, it’s essential to first pinpoint the exact spot where you want to attach the button. This crucial step sets the stage for a secure and well-executed sewing process.
Conclusion:
With the comprehensive tutorials we’ve provided on how to sew a button, it’s unlikely that you’ll ever have to part ways with a favorite shirt again. Not only can you repair torn seams, but also create adorable onesies and partial button plackets for your little ones. So, what’s holding you back? Let’s dive in and get started right away!