Starting your pillowcase-making journey can elevate the comfort and style of your bedroom, but where do you begin? With a comprehensive collection of 30 free patterns at your fingertips, crafting your unique design has never been more accessible. This treasure trove of patterns caters to diverse tastes and needs, offering a wide range of styles and materials. From soft cotton to eco-friendly bamboo and luxurious silk, each material recommendation ensures a tailored fit for every preference.
Beyond fabric selection, the guide delves into customization ideas that add a personal touch, including monograms, embroidery, or quilting. With step-by-step instructions on sewing a pillowcase and expert troubleshooting tips, this comprehensive resource empowers you to create a masterpiece that embodies your unique style.
Whether seeking elegance or comfort, this ultimate guide has everything you need to turn your creativity into a comfortable haven.
Material Recommendations for Pillowcases
While a pillowcase’s primary function may seem like an afterthought in the grand scheme of bedroom decor, its choice can significantly impact the quality of your nightly repose. In this exploration, we’ll delve into the most comfortable materials to ensure a restful slumber.
Cotton: The Classic Choice
When it comes to bedding materials, cotton stands out for its exceptional breathability and unparalleled softness. This natural fiber is a top pick for individuals seeking a cooler sleeping environment. For an added layer of indulgence, opt for Supima cotton, renowned for its silky texture and remarkable durability.
Bamboo: Soft and Sustainable
Known for its exceptional softness and environmental credentials, bamboo fabric has emerged as a popular choice among individuals prioritizing sustainability without sacrificing comfort. This eco-friendly material offers a guilt-free alternative for those looking to reduce their ecological footprint.
Silk: For the Luxurious Sleep
Indulge in silky comfort with pillowcases that redefine relaxation. These luxurious linens don’t just pamper your senses; they also minimize skin and hair irritation caused by friction during slumber, ensuring a restful night’s sleep.
Linen: Lightweight and Natural
With its lightweight texture and laid-back aesthetic, linen is an excellent choice for those seeking a cozy yet effortless sleeping experience. As it’s washed, the fabric only becomes softer and more inviting, making it a top pick for creating a peaceful retreat.
Flannel: Cozy for Colder Nights
As the temperatures drop on a cold winter night, there’s nothing quite like the comfort of snuggling up with a set of warm and cozy flannel pillowcases. These plush treats are not only soft against your skin but also provide an added layer of warmth, ensuring you stay snug and cozy as you drift off to sleep.
Eucalyptus: Cool and Refreshing
Eucalyptus fabric stands out for its remarkable cooling properties, making it an excellent choice for individuals who tend to overheat at night. Its hypoallergenic nature is also a significant advantage, particularly for those with sensitive skin or allergies. When selecting the ideal material for your bedding, consider factors such as breathability, softness, and durability. Prioritize quality, personal comfort, and any specific needs you may have, ensuring a restful and rejuvenating sleep.
Customization Ideas for Pillowcases
Crafting a pillowcase is more than just creating a resting spot for your head. It’s a chance to infuse your personal touch and showcase your individuality. By incorporating custom touches, you can transform a simple pillowcase into a reflection of your personality and style. Consider adding unique embellishments, such as hand-beaded designs or intricate appliques, to give your pillowcase an extra layer of character. You could also experiment with bold prints or vibrant colors to make a statement. Whether you’re going for understated elegance or playful whimsy, the possibilities are endless when it comes to customizing your pillowcase.
Personalize with Monograms
A classic approach to personalizing your pillowcase is by adding a monogram, which can be a timeless expression of your unique taste. When selecting a font, opt for one that resonates with your style, and carefully consider the placement – either at the corner or center – to achieve maximum visual impact.
Embroidery for Elegance
The humble pillowcase is elevated to an entirely new level when adorned with intricate embroidery. From the delicate dance of petals and vines to the striking geometry of abstract shapes, each stitch imbues the fabric with a unique sense of sophistication.
Play with Patterns
Embrace bold design choices by incorporating vibrant patterns into your bedroom decor. The likes of stripes, polka dots, and other playful motifs can inject a sense of whimsy and personality into the space. Feel free to experiment with different combinations to create a unique look that reflects your style.
Add Texture with Applique
When it comes to adding visual interest to a pillowcase, appliqué is an excellent technique to create texture and depth. This process involves sewing various shapes or designs onto the fabric using contrasting materials that will create a striking visual effect.
Quilting for Comfort
Combining quilting with pillowcases can bring together the warmth of comfort and the elegance of style. By crafting a unique patchwork design featuring various fabric pieces, you can create a cozy finishing touch that adds personality to your home decor. Alternatively, you can quilt a specific pattern onto the pillowcase itself, further enhancing its aesthetic appeal.
Color Block for a Modern Look
Embellish your pillowcase with a pop of color by applying bold sections in complementary hues. Select two or three colors that harmonize perfectly and bring them to life on your pillowcase. This technique not only adds visual appeal but also imbues the fabric with a sense of personality and uniqueness. The most important thing is to allow yourself to get creative and have fun with the process, as it’s in the joy of self-expression that true beauty lies.
How to Sew a Pillowcase with Free Pattern
Creating custom pillowcases is not only an enjoyable crafting activity, but it also offers a fantastic way to infuse your bedroom with personalized touches or surprise someone with a thoughtful, handmade gift. Building upon the expertise of renowned craftswoman Angela Wolf, this comprehensive guide distills the essential steps required to create stunning pillowcases that showcase your unique style.
Materials Needed
To embark on a sewing project, you’ll need to gather the right tools. These essentials include cotton fabric, renowned for its softness, durability, and breathability. For accurate measurements, a tape measure is crucial. Cutting and trimming your fabric will require either scissors or a specialized fabric cutter. To mark patterns and designs, tailor’s chalk or a fabric marker will come in handy. A sewing machine with matching or contrasting thread will allow you to create a seamless finish. Pins are necessary for holding fabrics in place during the stitching process. Finally, an iron and ironing board will be essential for removing wrinkles and creases from your finished project.
Step-by-Step Guide
To create a handmade pillowcase with a customized fit, start by selecting cotton fabric for its comfort and durability. Before cutting, wash and dry the fabric to pre-shrink it, ensuring a perfect fit. Once prepared, measure your pillow to determine the required dimensions. A standard size is 20” by 30”, but you may need to adjust according to the desired fit. Cut two pieces of fabric, each measuring 21” wide (accounting for seam allowances) and 41” long, adding 11” to the length for the fold at the opening.Next, mark the fold areas on each piece of fabric using tailor’s chalk, folding the edges towards the wrong side and pressing. This creates a crisp crease that will help guide your stitching later. Repeat this process for the second piece of fabric.Unfold the fabric pieces and align them with right sides facing each other, ensuring the corners and pressed lines match up. Pin along the three unfinished edges to secure in place.Using a ½” seam allowance, stitch around the three pinned edges, starting with a backstitch to secure the thread. When reaching a corner, keep the needle down, lift the presser foot, turn the fabric, and continue stitching.After sewing, finish the seam allowances by using a zigzag or overlock stitch to prevent fraying. Next, make the folded hem by turning the pressed folds towards the wrong side again, aligning the side seams. Pin and then stitch 1/8” away from the folded edge.Finally, turn the pillowcase right side out and press along the creases. Fold back about 4” of the fabric at the opening and press again. Tack the side seams by sewing a few back-and-forth stitches along the seam lines to hold the fold in place.Congratulations! You have successfully sewn a custom pillowcase, tailored to your preferred fit and style. Insert your pillow, and enjoy your handcrafted creation.
Video Tutorial
If you’re looking for a more visual approach to sewing a pillowcase, I recommend checking out Angela Wolf’s tutorial on Craftsy. This video provides a clear and beginner-friendly guide to each technique, perfectly complementing our written instructions. By following these straightforward steps, even the most novice sewer can transform a piece of fabric into a one-of-a-kind pillowcase that adds a touch of handmade charm to their bedding. What’s more, this project is equally enjoyable for both beginners and seasoned sewists alike, offering a sense of accomplishment and satisfaction with each stitch.
Troubleshooting Common Issues When Sewing Pillowcases
When it comes to sewing pillowcases, even the most experienced crafters can run into minor snags. To help you avoid frustration and achieve professional-looking results, let’s explore a few common hurdles and how to overcome them. By being aware of these potential issues upfront, you’ll be well-equipped to tackle any challenges that arise, ensuring your finished pillowcases are not only beautiful but also durable and long-lasting.
Addressing Incorrect Measurements
To avoid a common pitfall, it’s crucial to meticulously measure and re-measure your fabric dimensions before making any cuts. A simple yet vital step is to factor in seam allowances when calculating the total length of your fabric. By doing so, you’ll ensure that your finished project turns out as intended, with no surprises along the way.
Seam Allowance Slip-ups
When it comes to creating a pillowcase, forgetting to factor in the necessary seam allowance can result in a finished product that doesn’t quite fit as intended. To avoid this common mistake, it’s essential to incorporate a standard seam allowance into each fabric piece, typically ranging from 1/4 to 1/2 inch on all sides. By doing so, you’ll ensure a smooth and accurate sewing process, ultimately yielding a pillowcase that fits comfortably around your pillow.
Fabric Not Feeding Properly
When experiencing uneven fabric feed during sewing, inspect the presser foot and feed dogs to identify potential problems. Make any necessary adjustments to the tension setting.
Puckering Seams
When issues arise with puckering, it’s often due to excessive tension on the sewing machine. To rectify this, take a moment to adjust the tension setting and double-check that the appropriate needle size is being used for your specific fabric type.
Thread Bunching
When encountering thread bunching beneath the fabric, it’s likely caused by incorrect threading practices. To resolve this issue, ensure that your sewing machine is properly re-threaded, taking care to position the presser foot in the upright position as you complete the threading process.
Needle Breakage
When using a needle for sewing, it’s crucial to select the right type and size for your fabric to prevent breakage. Additionally, ensure the needle is properly secured in the machine to avoid any issues during use. By following these simple tips, you can minimize common mistakes and create a pillowcase that not only functions well but also turns out looking great. Simply put, attention to detail in this area will make all the difference in the quality of your finished project.
Maintenance and Care Tips for Pillowcases
To preserve the integrity of your pillowcases, it’s crucial to adopt a regular maintenance routine. By following these simple steps, you can extend their lifespan and ensure they remain soft and inviting for a prolonged period.
Washing Your Pillowcases
For optimal comfort and hygiene, incorporate regular washing into your routine. Target a frequency of every one to two weeks for pillowcases. When it comes to detergents, opt for gentle formulas that cater to your specific fabric type. Be sure to adhere to the care label instructions to avoid any damage or misshapenness. If you’re working with delicate materials like silk, consider handwashing or utilizing a mesh bag within a gentle wash cycle to ensure their integrity is maintained.
Drying with Care
When it’s time to wash your pillowcases, be sure to dry them with care. Tumble drying on a low setting is a good option, but avoid high heat as it can cause damage to the fabric. If you prefer to air dry, lay the pillowcases flat or hang them up to prevent stretching and ensure they retain their original shape.
Storing Properly
When it comes to storing pillowcases, a simple yet effective approach is to fold them neatly before placing them in a location with consistent temperatures and humidity levels. By doing so, you’ll not only prevent wrinkles but also ensure they remain fresh and ready for use whenever needed. A cool, dry place is ideal for storage, as this helps maintain the fabric’s integrity and prevents any damage that might occur due to exposure to heat, moisture, or direct sunlight.
Sustainability in Crafting Pillowcases
When it comes to creating sustainable pillowcases, the benefits extend far beyond just doing good for the planet – it’s also an opportunity to infuse your home with a unique and personalized touch. To take your crafting to the next level of eco-friendliness, consider these simple yet effective tips:
Choosing Sustainable Materials
When it comes to selecting fabrics for your garments or home textiles, consider opting for eco-friendly options with reduced environmental footprints. Organic cotton, bamboo, and recycled materials stand out as excellent alternatives that not only benefit the planet but also contribute to a more sustainable lifestyle.
Reducing Waste
To reduce waste, it’s essential to utilize every scrap of material at your disposal. Before making a cut, take the time to thoughtfully plan out your design and consider how you can repurpose any leftover pieces for smaller projects or future endeavors.
Supporting Local Suppliers
Incorporating eco-friendly practices into your daily routine doesn’t have to be overwhelming. By prioritizing local sourcing whenever possible, you’ll not only reduce your carbon footprint but also support the local economy. This approach has a ripple effect that benefits both your personal life and the environment. With attention to detail in maintenance and care, as well as a focus on sustainability during the crafting process, you’ll be able to enjoy the long-lasting quality of your pillowcases while making a positive impact. The cumulative effort may seem small, but it can collectively lead to significant improvements in both your sleep quality and the health of our planet.
FAQs About Pillowcase Patterns
When it comes to making a pillowcase, many people may be unsure about the process. To help alleviate any confusion, we’ve compiled a comprehensive FAQ section that addresses common questions and provides clear guidance for those new to sewing.
What size should I cut my fabric for a standard pillowcase?
When crafting a standard pillowcase, it’s essential to cut the primary fabric to the right dimensions. A suitable starting point is a rectangular shape measuring 27 inches in length by 43 inches in width. This size allocation provides sufficient material for any seams or stitching required, while also ensuring a comfortable fit around the pillow itself.
How do I finish the open end of the pillowcase?
For a polished appearance on your pillowcase, consider employing two techniques: the burrito method or French seams. The former involves rolling the fabric, sewing it to conceal the seams, while the latter creates a sleek finish by folding and sewing the edges in a way that eliminates visible stitching.
Can I make a pillowcase without a cuff or trim?
A simpler option for designing your pillowcase is to forego the cuff or trim altogether. By doing so, you’ll be left with a straightforward fabric cover that’s both quicker to create and remains fully functional.
How often should I wash my pillowcase?
To maintain a fresh and hygienic sleeping environment, consider washing your pillowcase every one to two weeks. It is crucial to adhere to the specific care instructions provided for the fabric type you have selected, as different materials may require distinct cleaning methods.
What materials are best for a pillowcase?
A variety of natural fibers like cotton, bamboo, silk, linen, flannel, and eucalyptus provide distinct advantages when it comes to fabric selection. Each material brings its own unique characteristics to the table, whether it’s breathability, softness, or a commitment to sustainability.
How can I make my pillowcase crafting more sustainable?
When embarking on a sustainable sewing journey, opt for eco-friendly materials such as organic cotton or bamboo. Furthermore, prioritize local suppliers to minimize your carbon footprint. By addressing these frequently asked questions, you’ll gain the confidence to tackle your pillowcase project with ease. Remember, patience and practice are essential components of successful sewing.
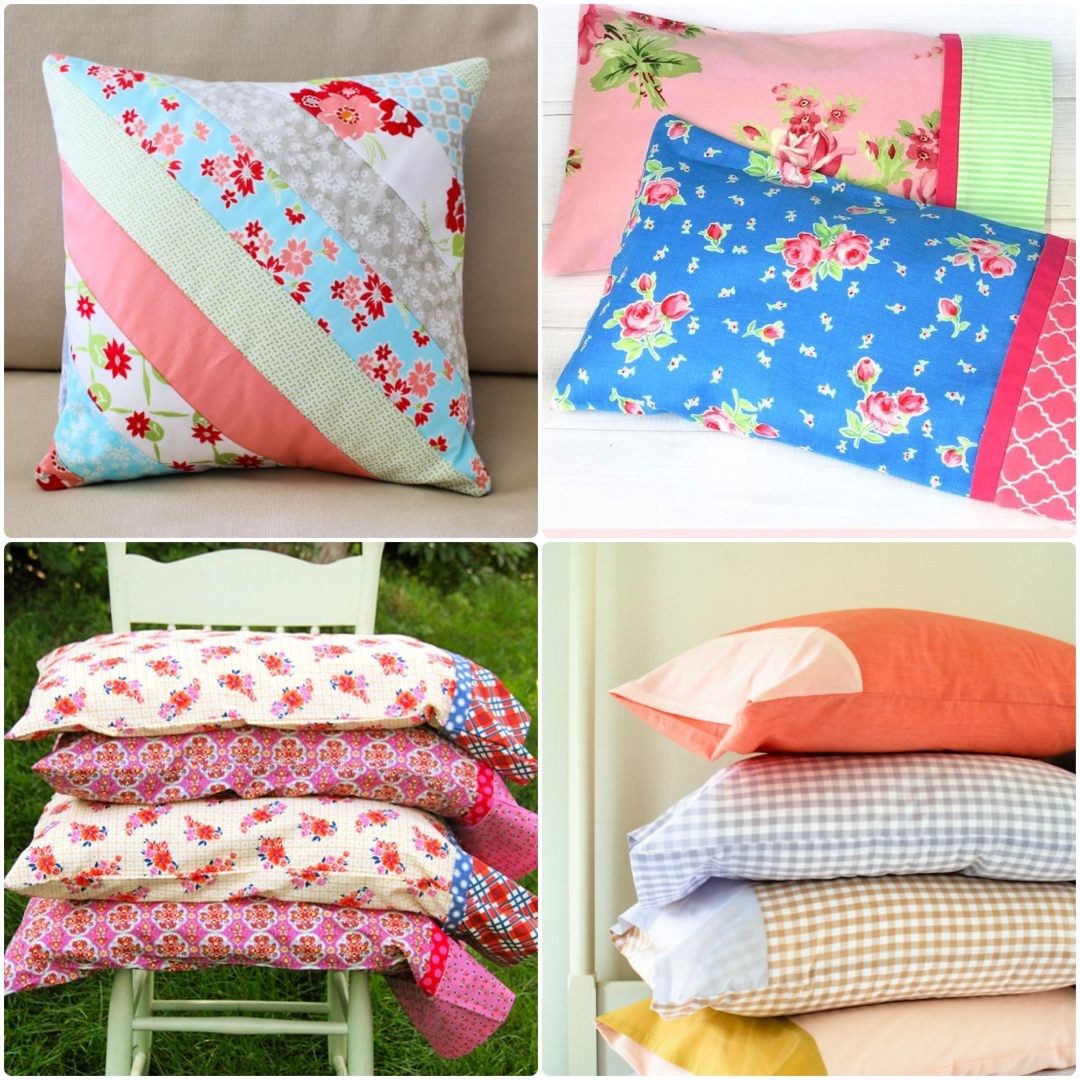
30 Free Pillowcase Patterns To Sew Your Own Pattern
Unleash your creativity by exploring a vast array of free pillowcase patterns, perfect for sewing one-of-a-kind designs that reflect your personal style. With over 30 options to choose from, you’ll be empowered to craft stunning pillowcases that elevate any room’s décor.
One-Yard Magic Pillowcase Sewing Pattern
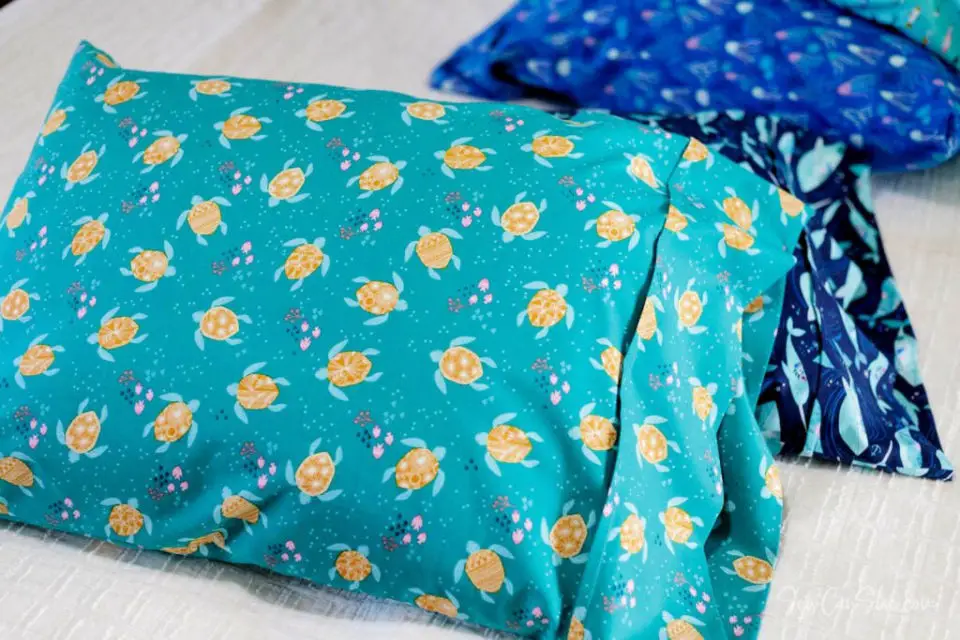
Craft your own customized pillowcases with this easy-to-follow sewing tutorial! With just one yard of fabric required, you’ll learn to create beautiful pillowcases without wasting a single scrap of fabric. This project is an excellent introduction to the world of sewing, making it perfect for gifts or personalizing your living space. The straightforward instructions and minimal cutting make it accessible to sewers of all skill levels, while the lack of complex folding techniques keeps things simple and stress-free. As you work through this comprehensive guide, you’ll discover the joy of exploring your creative side and transforming ordinary fabric into extraordinary pillowcases. Not only will these handmade pillowcases add a personal touch to your home, but they also make thoughtful presents for any occasion. With its forgiving sewing process, this project is ideal for those looking to test their stitching skills or simply wanting a quick and fun sewing project. Start creating today and discover the satisfaction of turning ordinary fabric into extraordinary pillowcases!
Free Fabric Pillowcase Sewing Pattern
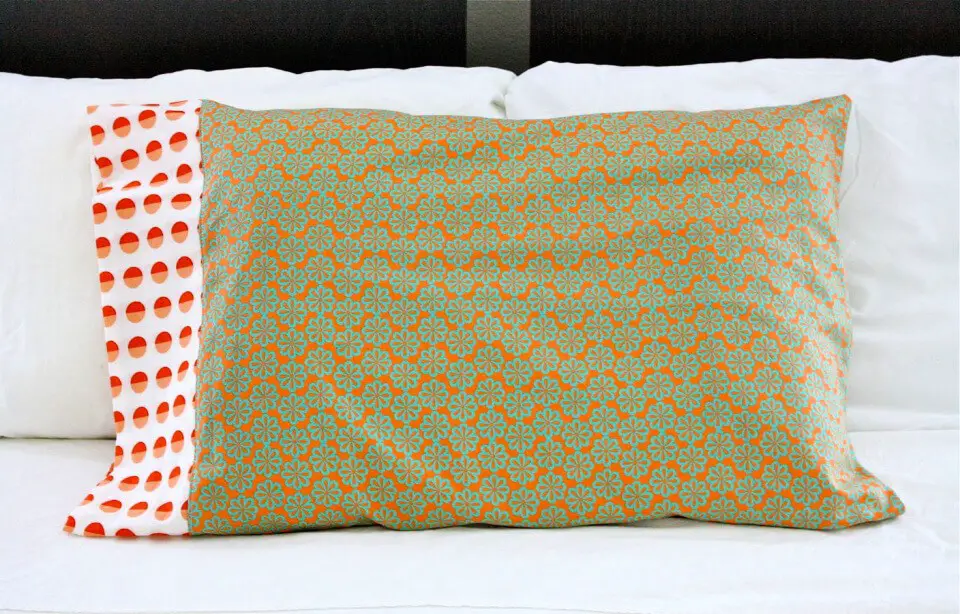
Revamp your bedroom ambiance by crafting a simple yet customizable pillowcase using this straightforward sewing pattern. Within half an hour, you’ll have a standard-sized pillowcase ready to be used or gifted, allowing for a personal touch. The beauty of this DIY project lies in its ability to adapt to various fabric choices, from vibrant patterns to classic cotton, thereby reflecting your unique style. A few essential materials are required: the chosen fabric, matching thread, and a sewing machine. This tutorial utilizes the efficient ‘burrito method’ to achieve a clean finish, while the optional French seam technique enhances durability. Furthermore, you can incorporate an accent color for added flair, allowing you to truly personalize your bedroom aesthetic.
How to Make Pillowcases
Transform your home with a personalized pillowcase that reflects your unique style and craftsmanship. This comprehensive DIY guide will walk you through the process of creating a customized pillowcase using basic materials such as 1 yard of fabric, a sewing machine, thread, pins, a ruler, and scissors. With adjustable sizes for Standard, Queen, and King pillows, this project offers versatility to suit every bedding need.
The step-by-step process involves cutting fabric pieces, layering and rolling the main fabric to create the trim, and using the burrito method to craft a decorative border. A standout feature of this design is the inclusion of a durable French seam, which ensures a professional-looking finish and longevity. The end result will be a stylish addition to your bedroom decor that showcases your creativity and flair. Give your bedding an upgrade and learn how to make a pillowcase today!
DIY Nine Patch Pillowcase
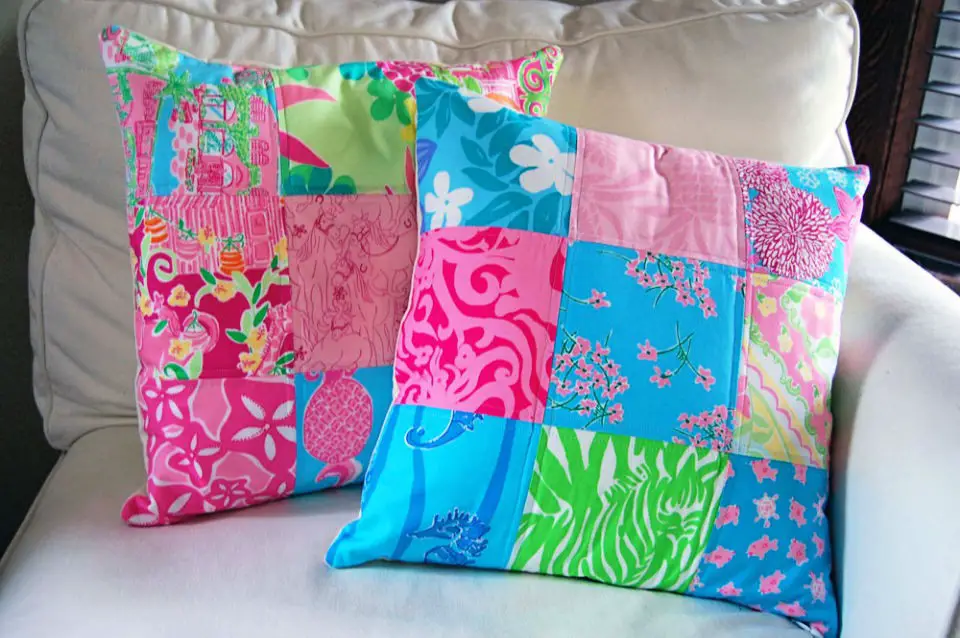
Embark on a creative journey by making a delightful nine-patch pillow that showcases your favorite fabrics. This charming project is an ideal way to revamp your porch decor or commemorate a special holiday. To get started, gather the necessary supplies: nine 6-inch squares of contrasting prints, a 16-inch by 16-inch pillow form, quilting cotton, batting, an invisible zipper, thread, pins, and an iron. With these materials at hand, you’re ready to begin your creative adventure. The process is surprisingly straightforward – simply arrange your squares, sew rows together, press seam allowances, piece the fabric together, create a quilt sandwich, quilt the front, attach the zipper, and finally insert the pillow form. By following these easy-to-follow instructions, you’ll be able to craft custom pillow covers with ease, allowing you to express your creativity while adding a touch of personality to your living space.
How to Sew Bed Pillow Cases
Create a cozy haven or spread love and joy with these free pillowcase patterns, perfect for all skill levels and tastes. Learn to craft three unique styles, including the signature ‘Burrito’ method, using fabrics of your choice. With sizes ranging from standard to queen to king, there’s a design to fit every bed in your home. Our comprehensive instructions make it easy to enhance your space or bring a smile to someone’s face. Every stitch sewn can become a thread of joy for someone in need, so why not start sewing and multiply happiness with this fun and rewarding DIY project?
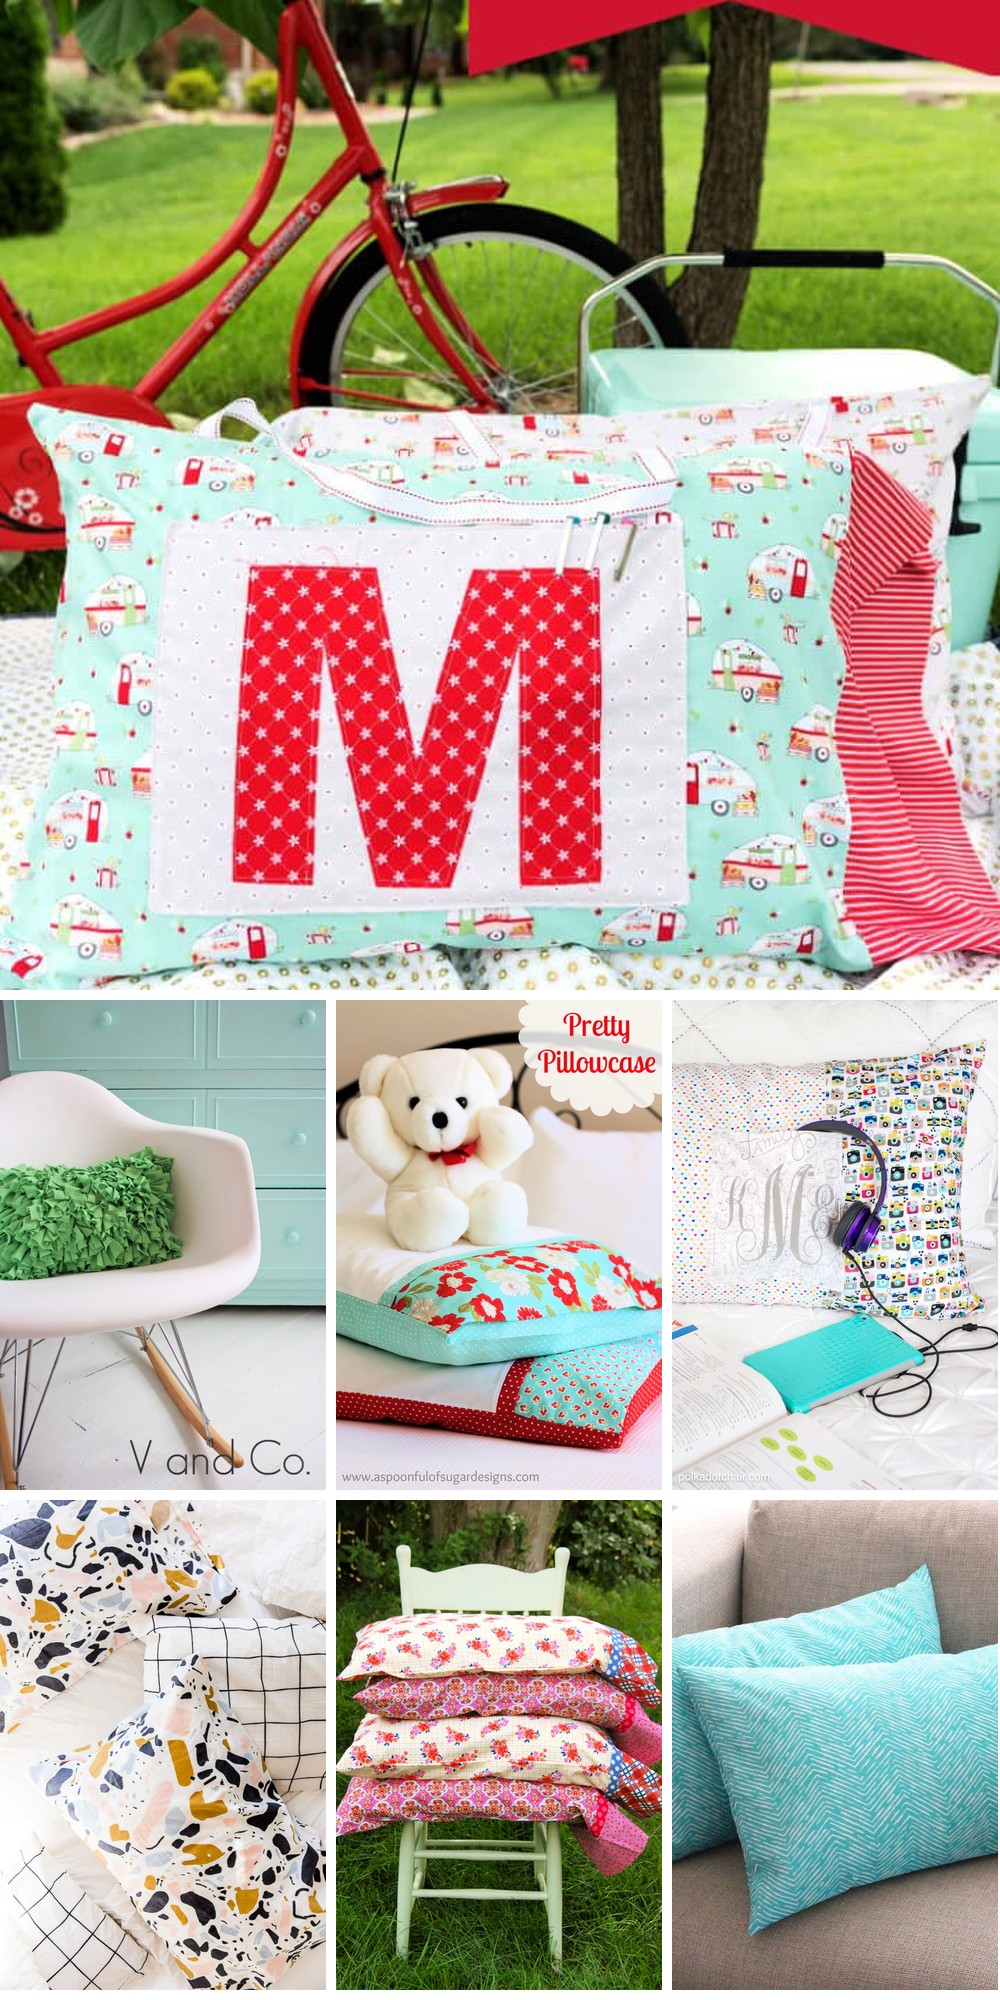
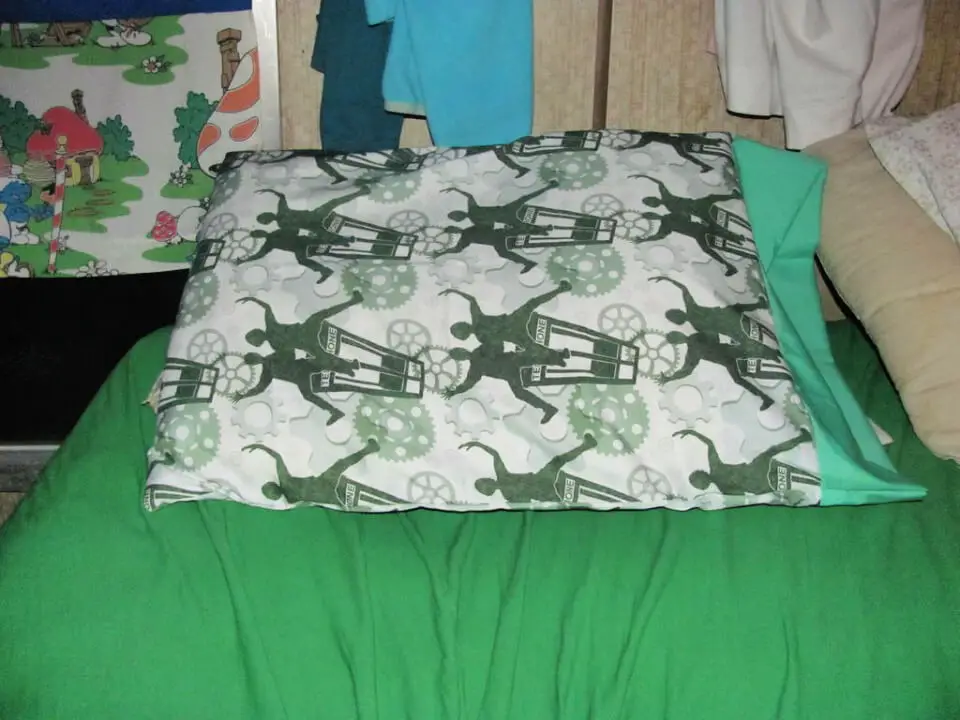
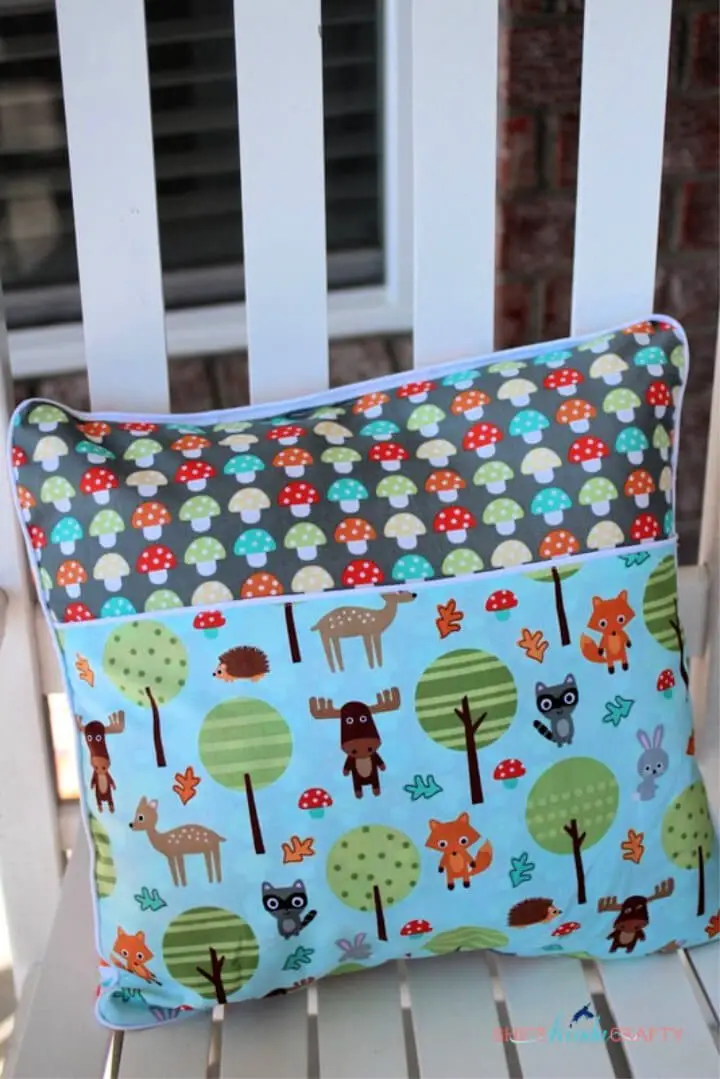
How to Sew a Road Trip Pillowcase – Free Pattern
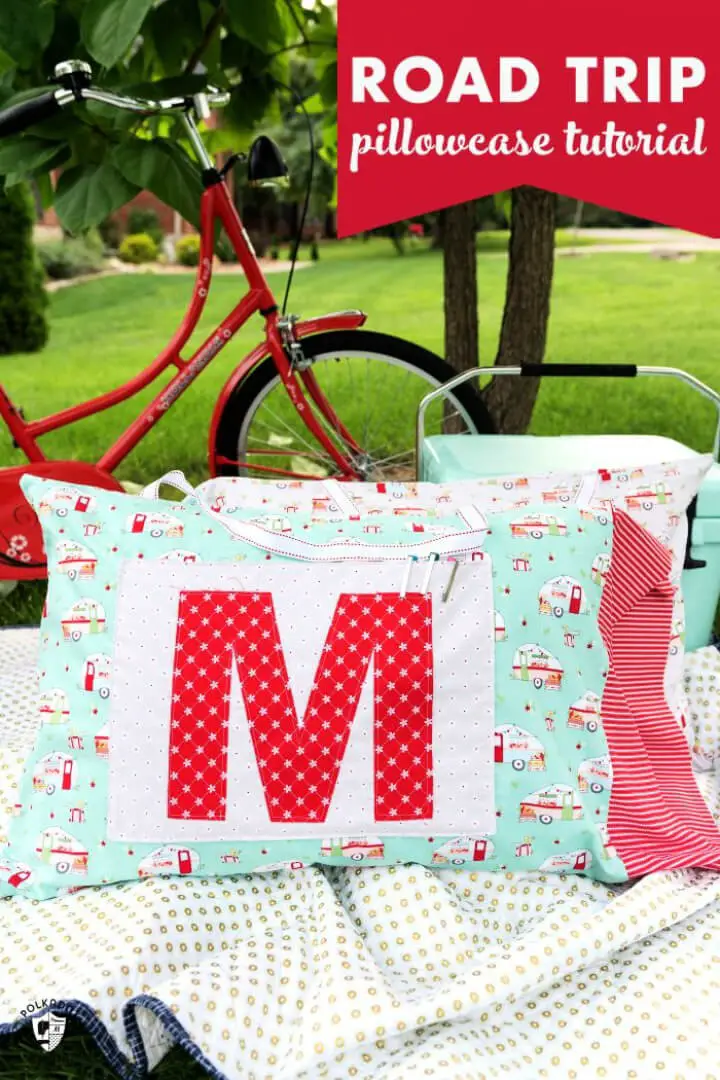
Are you looking to elevate your family’s travel experience? A DIY road trip pillowcase pattern can help keep children’s belongings organized during long car rides. This unique project combines functionality with whimsy, featuring a convenient pocket for storing essentials. The vibrant vintage Adventure fabric line by Bev of Flamingo Toes adds a pop of color and style to the storage solution. The process involves creating a custom appliqué, attaching the pocket, constructing the pillowcase, and finishing it off. The design is versatile, allowing you to add a personalized monogram to the pocket for an extra-special touch. For parents seeking a comprehensive guide, this project includes detailed instructions for certain steps. Designed with kids in mind, these pillowcases are perfect for minimizing clutter and ensuring that road trips remain fun, organized, and stress-free.
Easy DIY Conkerr Cancer Pillowcases
Indulge in the joy of crafting with DIY pillowcases, a project that’s perfect for kids and adults to enjoy together. This simple yet impactful endeavour allows you to breathe new life into fabrics with vibrant designs, bringing smiles to children facing serious health issues. By following our easy-to-follow tutorial, you’ll learn how to transform two pieces of fabric into handmade pillowcases that can make a real difference in the lives of those who need them most.
With step-by-step guidance, you’ll discover how to cut out rectangles, sew your pieces together, and add unique borders to create professional-looking seams. Plus, we’ll share valuable tips on making the most of your fabric scraps, ensuring that this project not only brings joy but also promotes eco-friendliness.
As you work through our comprehensive guide, you’ll not only be creating a beautiful pillowcase but also turning your creativity into comfort and colour for those who need it most. So why not get started today and make every day count?
Simple Pillowcase Pattern for Beginners
Refresh your bedroom ambiance by creating a personalized pillowcase using any fabric you like. This DIY project is a great way to bring your design ideas to life, allowing you to experiment with different materials such as linen, cotton, or jersey. Start by selecting the perfect fabric, and then consider repurposing unexpected items like an old shower curtain into a stunning pillowcase. With just 1-2 yards of fabric, a sewing machine, iron, straight pins, thread, and scissors, you can create a pillowcase that fits your standard, queen, or king-sized pillows. This straightforward task is perfect for personal use or as a thoughtful gift for loved ones. It’s an enjoyable sewing experience that lets you add a touch of personality to your living space and showcase your creativity. Make your own pillowcase and have fun with this simple and quick sewing project today!
Make Your Own Pillow Case
Bring new life to your living space by crafting a unique, homemade pillowcase that reflects your personal style. Despite minimal sewing experience, this DIY project is surprisingly easy, requiring only basic straight-line stitching. To get started, gather the essential supplies: scissors, ruler, thread, and fabric – approximately one yard for the main body and an additional quarter yard for accenting. The step-by-step process unfolds effortlessly: create a pattern, cut out the fabric, pin the pieces together, sew along the edges, hem the opening, attach the panels, and finish with a final seam. With this straightforward guide, you can add a personal touch to your decor, infusing it with charm and coziness.
DIY Pillowcase With French Seams
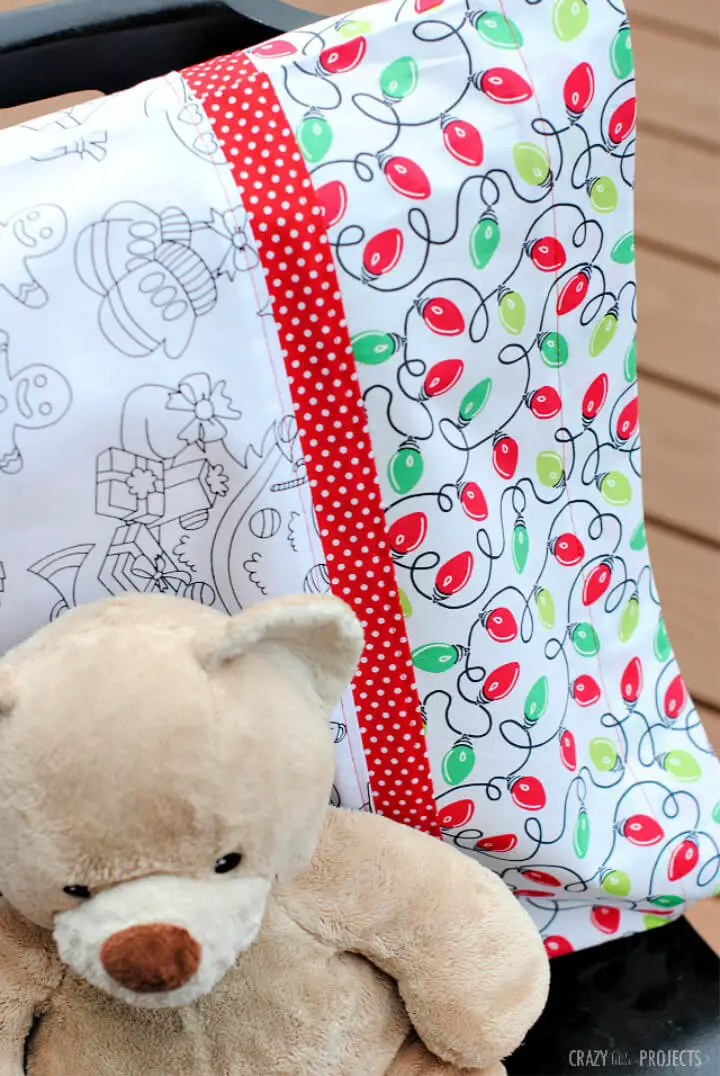
Transform your living space into a winter wonderland by creating a unique and festive DIY pillowcase in under 30 minutes! This fun and practical project combines sewing and coloring to produce an adorable holiday-themed pillowcase that’s perfect for the whole family. With the option to incorporate French seams or basic seams, you can add a polished touch to your creation. The best part? This tutorial is versatile and can be used with any fabric throughout the year, making it a great activity to enjoy during every season. Not only will you be creating something special, but you’ll also be developing your crafting skills and having fun while doing it.
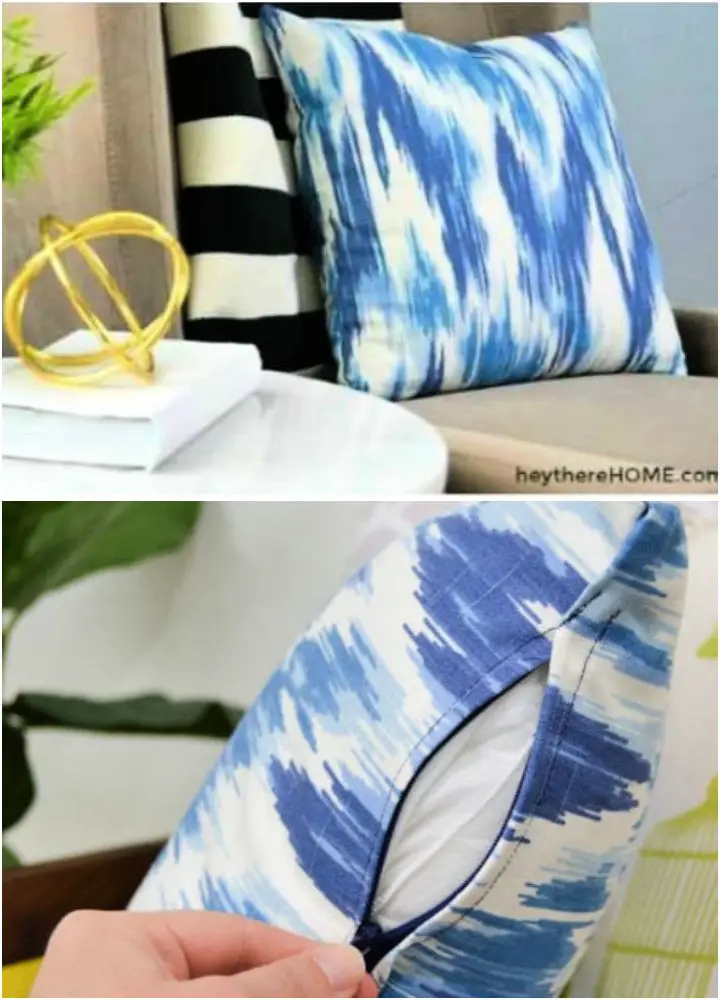
How to Sew an Envelope Pillowcase
Transform your home decor and gift-giving endeavors by infusing them with personal touches through the art of DIY pillowcase making. This comprehensive guide will walk you through every step, from selecting and preparing fabric to cutting and sewing, ensuring a precise fit for your pillows that eliminates any unwanted peeking. The result is a charming blend of functionality and charm.The process begins with crafting the front of the pillowcase, featuring an accent strip, followed by the back and cuff sections. These elements are carefully stitched together to form an envelope enclosure, guaranteeing a snug fit around your pillows. With a finished size of approximately 18 X 29 inches, this handmade masterpiece can be easily adjusted to accommodate any pillow dimensions.This DIY project is not only a thoughtful way to elevate your home decor but also a meaningful gift for loved ones. Whether you’re looking to breathe new life into your bedding or present someone with a heartfelt token, this guide has got you covered.
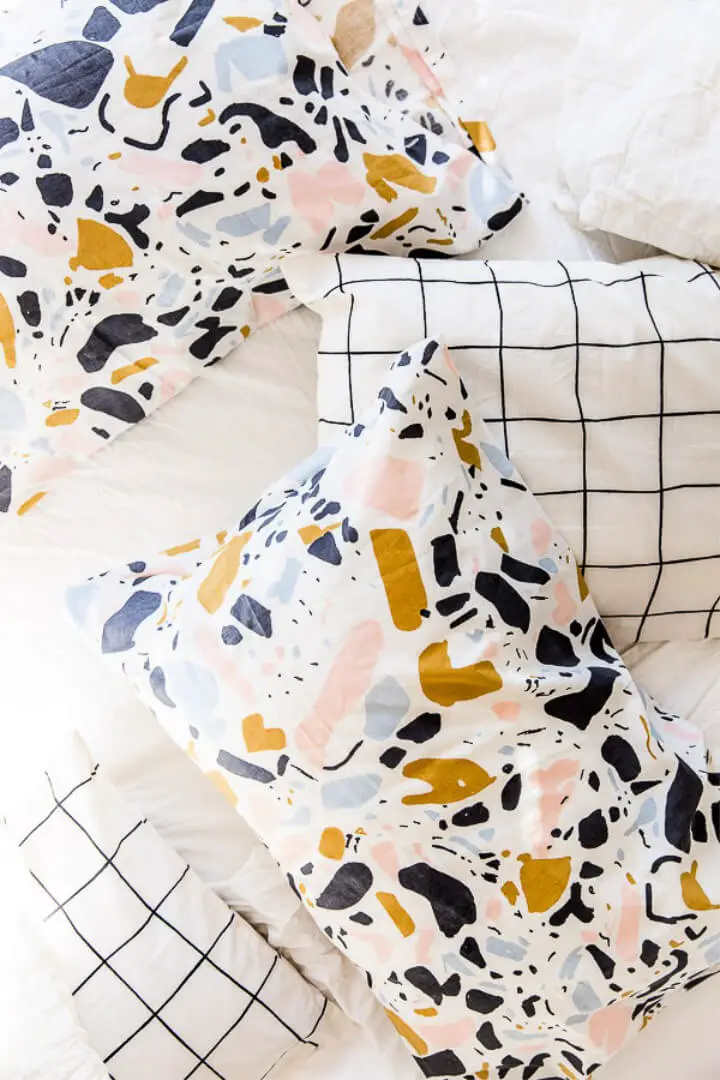
Free Pillowcase Sewing Pattern for Beginners
Discover the joy of DIY sewing by creating a customized pillowcase that reflects your personal style. This easy-to-follow tutorial is perfect for beginners and experienced sewers alike, providing a step-by-step guide to crafting a unique and cozy pillowcase. With its user-friendly instructions and helpful tips, you’ll be inspired to get creative with fabric scraps and mix-and-match colors and patterns to suit every season. Whether you’re looking to add a personal touch to your home décor or create a thoughtful gift for someone special, this simple sewing project is the perfect way to unleash your creativity and make something truly special. So, join in on the fun and get ready to craft a one-of-a-kind pillowcase that’s sure to become a treasured possession.
DIY Dinosaur Pillowcase for Kids
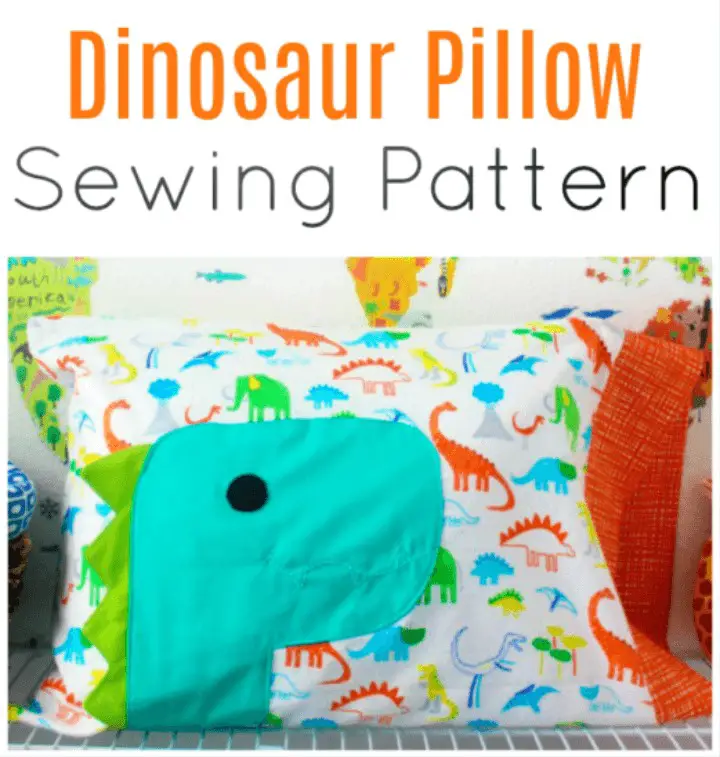
Bring the thrill of crafting a custom dinosaur pillowcase to life with our free pattern available in travel, kid, and standard sizes. Perfect for kids who are fascinated by prehistoric creatures, this unique creation is sure to spark their imagination. The pattern features a delightful T-Rex design, complete with 3D spikes that add an extra layer of realism. With just a few basic materials, including flannel for the main pillowcase, calico and broadcloth for the band and dinosaur appliqué, and some essential sewing supplies, you can create this charming project in under an hour. And the best part? It’s perfect for beginners! By following our straightforward, step-by-step guide, even those new to sewing can complete this fun DIY project in no time.
DIY Pillowcases for Every Bed
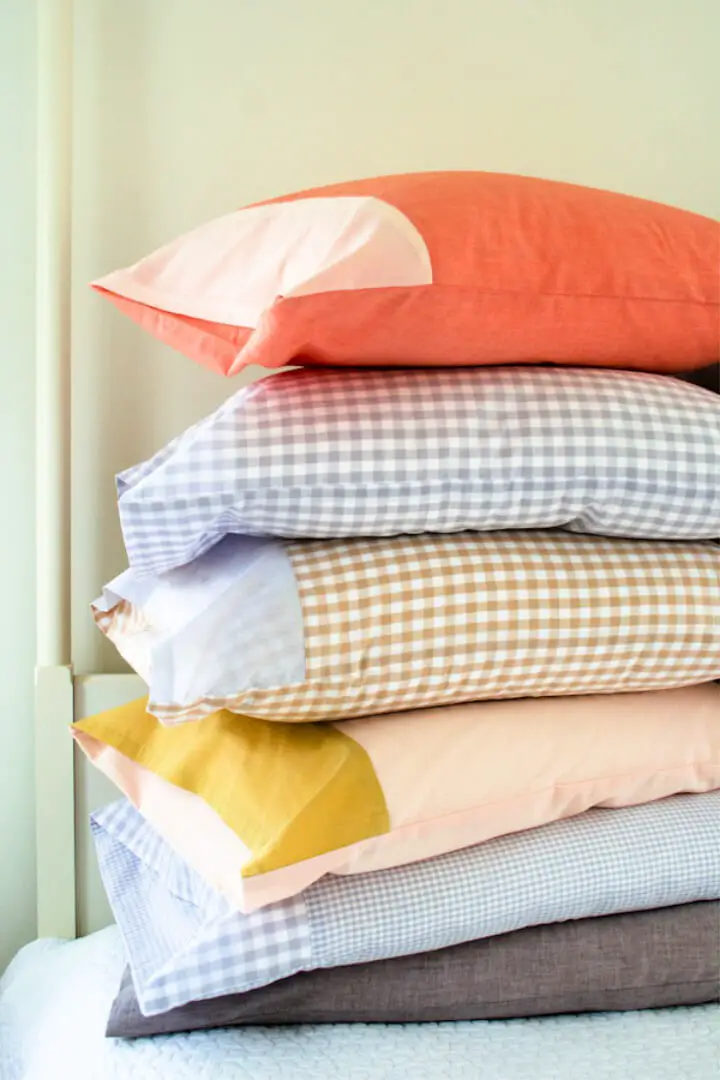
Whether you’re looking to revitalize your bedroom or create a unique handmade present, these free pillowcase patterns offer endless possibilities. With easy-to-follow instructions and inspiration for various styles, you’ll be motivated to take on the challenge of creating custom pillowcases that reflect your personal taste. From simple yet elegant designs to bold and playful options, the versatility of homemade pillowcases is limited only by your imagination. This accessible DIY project requires minimal materials – cotton fabrics, coordinating thread, and a sewing machine – making it an ideal activity for crafters of all skill levels. As you work through the step-by-step guide, you’ll discover the satisfaction that comes from creating functional and decorative pieces that bring warmth and personality to any room. With each pillowcase you complete, you’ll be reminded of the joy that can come from taking on a creative project and seeing it through to its completion.
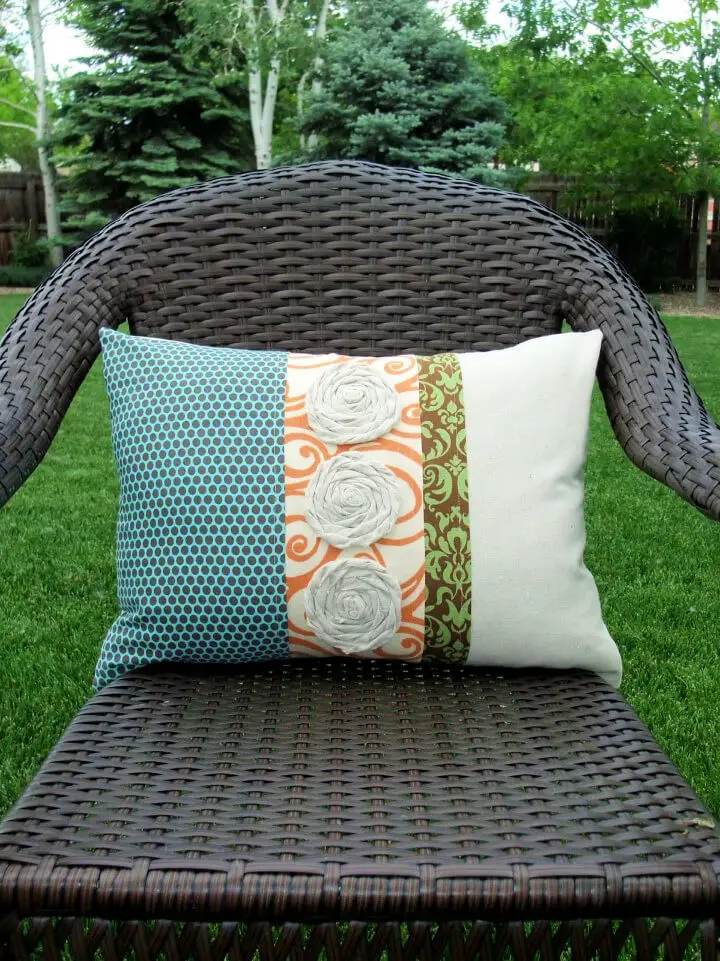
Sewing a Color Block Pillow With a Twist
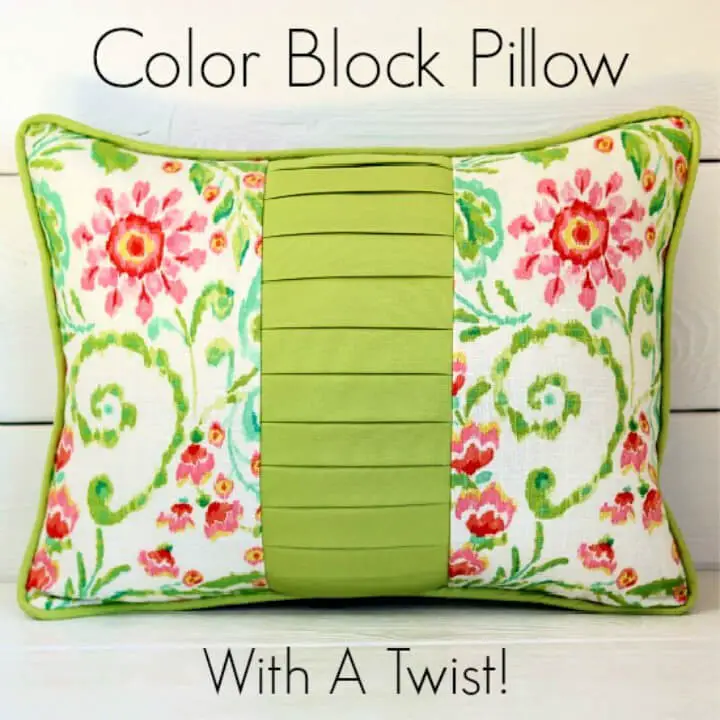
Elevate your living space with a DIY color block pillow, where vibrant colors and textures come together to create a one-of-a-kind piece that redefines interior decor. This unique project is perfect for crafty enthusiasts looking to repurpose cherished fabric scraps, breathing new life into them. The pièce de résistance lies in the knife-pleated middle section, adding an extra layer of depth and visual interest to the pillow, while the back remains plain for a reversible option.
To bring this design to life, you’ll need at least two different types of fabrics, a pillow form, and a fabric stabilizer to secure the pleated section. The beauty of this project lies in its flexibility – adjust the size to suit your pillow and choose from an array of fabrics to create a piece that reflects your personal style.
This color block pillow is more than just a decorative addition; it’s a creative outlet that combines functionality with self-expression. As you sew, imagine the transformation taking shape before your eyes, as your room’s aesthetic takes on a fresh and exciting new look.
How to Make Outdoor Pillow Covers
Breathe new life into your worn-out outdoor pillows without breaking the bank or contributing to waste. By upcycling them, you can not only save money but also adopt a more sustainable lifestyle. The result is a refreshed outdoor space that captures the essence of summer and showcases your unique creativity.
For this DIY project, you’ll need an old or new outdoor pillow form, some eco-friendly fabric, paper-backed fusible web, ribbon, and an anchor template. With these materials, you can give your pillows a fresh makeover and transform your outdoor space into a cozy oasis that reflects your personal style.
This guide is perfect for anyone looking to add a touch of personality to their home decor while promoting environmental responsibility. So why not get creative and turn those old pillows into stylish and durable works of art? You’ll be enjoying the fruits of your labor in no time, lounging in comfort and style.
French Seam Envelope Pillowcase Pattern
Free pillowcase patterns offer a fantastic way to repurpose fabric scraps and infuse your pillows with personality. With hundreds of designs and tutorials available for all skill levels, you can easily create stunning throw pillows that elevate the aesthetic of your living space. The French seam technique, in particular, is a game-changer. By sewing one seam inside another, it conceals raw edges and results in a sleeker, more refined finish compared to traditional envelope pillowcases. This method also allows you to transform a simple 20-inch pillow into an eye-catching decor piece by adding a textured border. The construction technique cleverly hides the initial seam’s raw edge, making the process even smoother. To streamline things further, choose solid-colored fabric for the back pieces and add a contrasting element to your design. With French seams, you can easily give your living room or bedroom a chic makeover that’s sure to impress.
How to Sew Fabric Camping Pillow
Embark on the delightful adventure of creating your own camping pillow with our step-by-step guide. This DIY project is designed to be adaptable, allowing you to customize it to fit any size pillow or personal style. With just a few simple materials and supplies, including exquisite fabrics like Ann Kelle’s prints, you’ll have a unique pillow that’s perfect for road trips, sleepovers, or cozy nights at home. The addition of a clever pocket provides an convenient storage spot for small treasures, making this project a thoughtful gift idea when filled with special treats. Let your creativity shine as you bring this charming camping pillow to life.
Free Pocket Reading Pillow Sewing Pattern
Transform your child’s summer into a haven of joy and creativity with this on-the-go pocket reading pillow sewing tutorial. This multifaceted project brings together comfort, practicality, and whimsy by crafting a one-of-a-kind reading pillow that doubles as a storage container for their favorite books or treasures. Using readily available materials like fat quarters, ribbon, fusible fleece, piping, and an 18-inch pillow form, this comprehensive guide takes you through every step of the process to create a charming, portable companion perfect for yard adventures, car rides, or any other occasion where your little one’s imagination runs wild. This delightful sewing project infuses your home with a touch of style while inspiring children to cherish the magic of reading. So why not take matters into your own hands and stitch up this special reading pillow today, making your child’s summer reading sessions cozy, inviting, and utterly enchanting?
DIY Embroidered Tassel Pillowcase
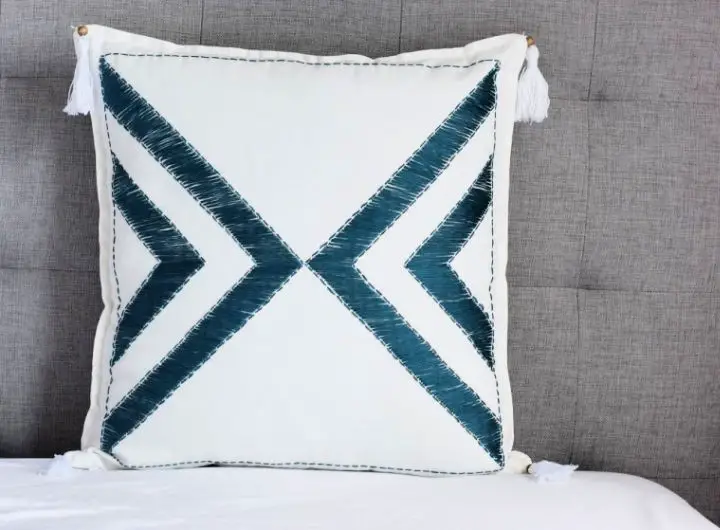
Transform your living space with a DIY embroidered tassel pillowcase that exudes creativity and uniqueness. By repurposing an IKEA pillowcase, generous embroidery thread, and basic crafting tools, you can create a one-of-a-kind, reusable, and washable pillowcase that adds a touch of personalized elegance to your home decor. Embellish the pillowcase with a charming turquoise pattern and attach tassels to its corners for a delightful finishing touch. This project encourages leisurely crafting, offering a cost-effective alternative to store-bought pillows while allowing you to express your personal taste and style. Be prepared to invest time in this creative endeavor, resulting in a beautiful piece that reflects your unique aesthetic.
How to Sew Hexie Pillowcase
Indulge in a creative weekend retreat by crafting a stunning DIY hexagon pillowcase, perfect for those seeking a delightful scrap buster project. The intricate florals and bold hues of pink, blue, yellow, and green on the hexies will transport you to a charming era. This enchanting pillowcase not only elevates an iron bed adorned with a matching quilt but also makes for a thoughtful Christmas gift or a unique addition to any home. To create this masterpiece, stitch 22 hexagons onto the cuff of the pillowcase, measuring 28.5 x 18.5 inches to fit a standard Australian pillow. The journey begins with gathering materials including hexagon papers, assorted fabric scraps, and specific dimensions of pink polka dot, gingham fabric, and white homespun. As you weave your magic, infuse your home decor with the warmth and personality of the Hexie pillowcase.
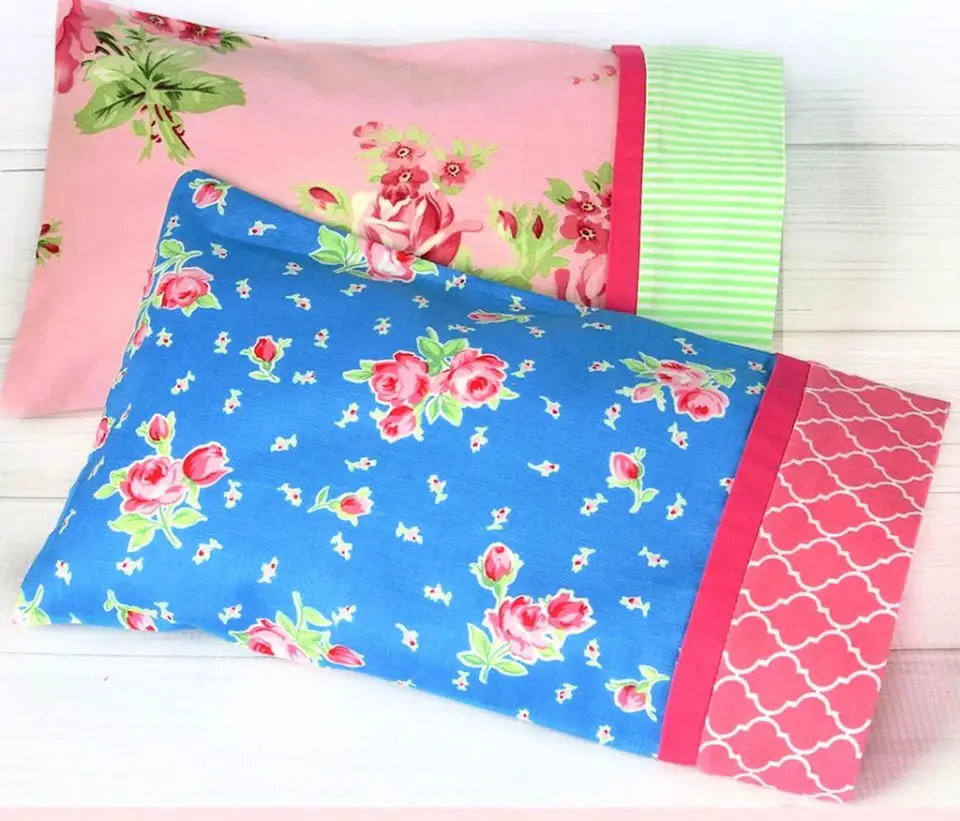
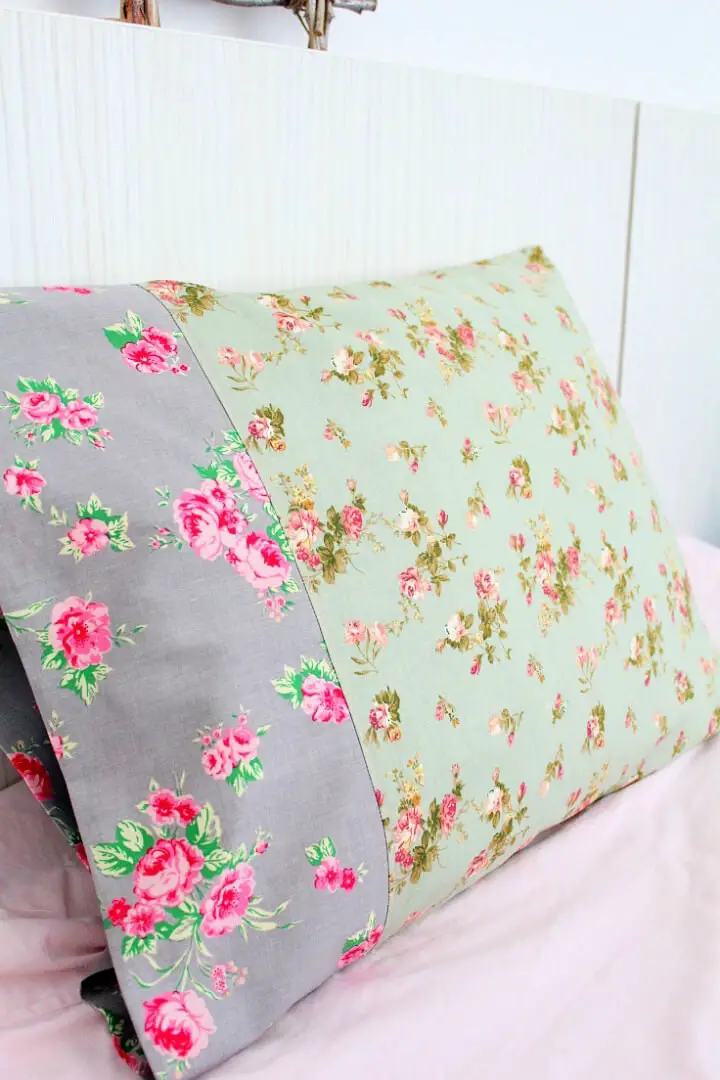
Quick and Easy DIY Pillowcase
There’s something uniquely satisfying about slipping into bed and resting your head on a freshly made pillowcase, isn’t there? With the flexibility to choose from a wide range of fabrics and patterns, creating your own pillowcases can be a fun and rewarding DIY project. By revamping your guest room with these charming, handcrafted pillowcases, you can inject a warm and inviting atmosphere into the space. The combination of contrasting colors and textures on the cuff adds a stylish touch, cleverly concealing the pillow while presenting an aesthetically pleasing look. What’s more, this project offers a great opportunity to get creative with your bed linen, or even turn it into a thoughtful gift for friends and family. If you involve children in the process, they’ll not only develop their sewing skills but also gain a sense of pride and accomplishment as they see their handmade creations come to life. The finished pillowcase size is tailored to fit standard Australian pillows, but can be easily adjusted to suit other sizes. With these easy-to-make pillowcases, you’ll be able to boost the homely appeal of your guest room in no time.
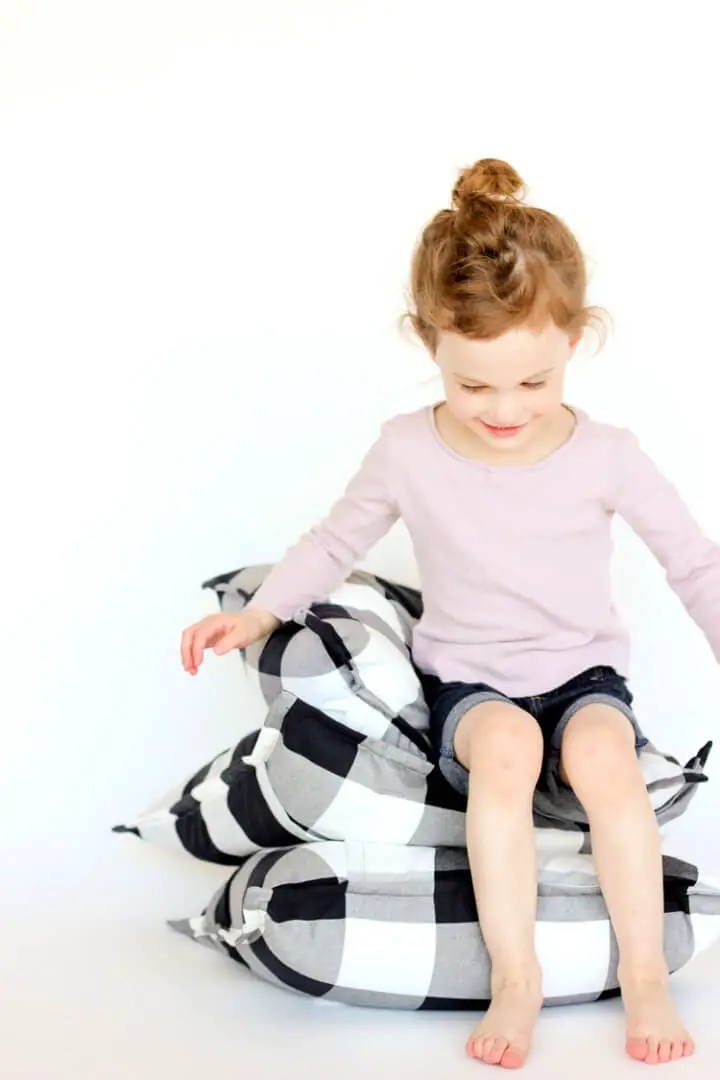
Giant Pocket Pillow Sewing Pattern
Transform your bedroom or college dorm room into a cozy oasis by upcycling a regular body pillow into a one-of-a-kind giant pocket pillow that caters specifically to modern teenagers’ needs. This DIY project combines style with practicality, featuring a zippered back and a handy pocket for stashing gadgets, books, or other personal items. To create this unique comfort piece, you’ll need just three fabric prints, an 18-inch zipper, a body pillow form, and optional iron-on letters – all of which can be sourced in about an hour. With your creativity and some basic sewing skills, you can turn a mundane bedroom accessory into a statement piece that reflects your personality and adds warmth to any space.
How to Sew Shag Pillow – Free Pattern
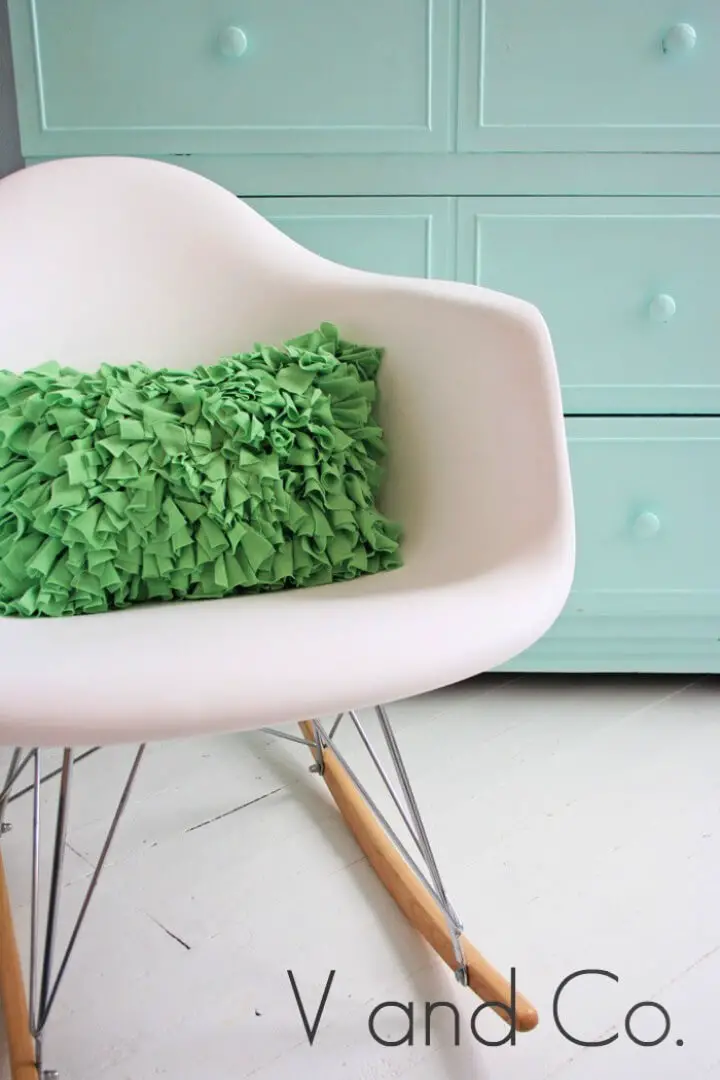
Discover the joy of upcycling with this hands-on tutorial on creating a one-of-a-kind jersey fabric pillow. With just a yard of vibrant green jersey fabric, two squares of cotton fabric, and a pair of trusty scissors, you can transform your living space with a pop of color and comfort. Inspired by the lingering winter chill, this project’s textured design resembles a lush ‘grassy knoll’, infusing any room with a splash of spring. The process involves layering small strips of fabric onto a cotton base, resulting in a fuzzy, stylish, and cozy appearance that’s surprisingly forgiving – minor variations in strip placement only add to the unique charm. Not just a functional pillow, this DIY delight doubles as an intriguing textured play surface for small toys. So why not unleash your creativity and give this tactile treasure a try?
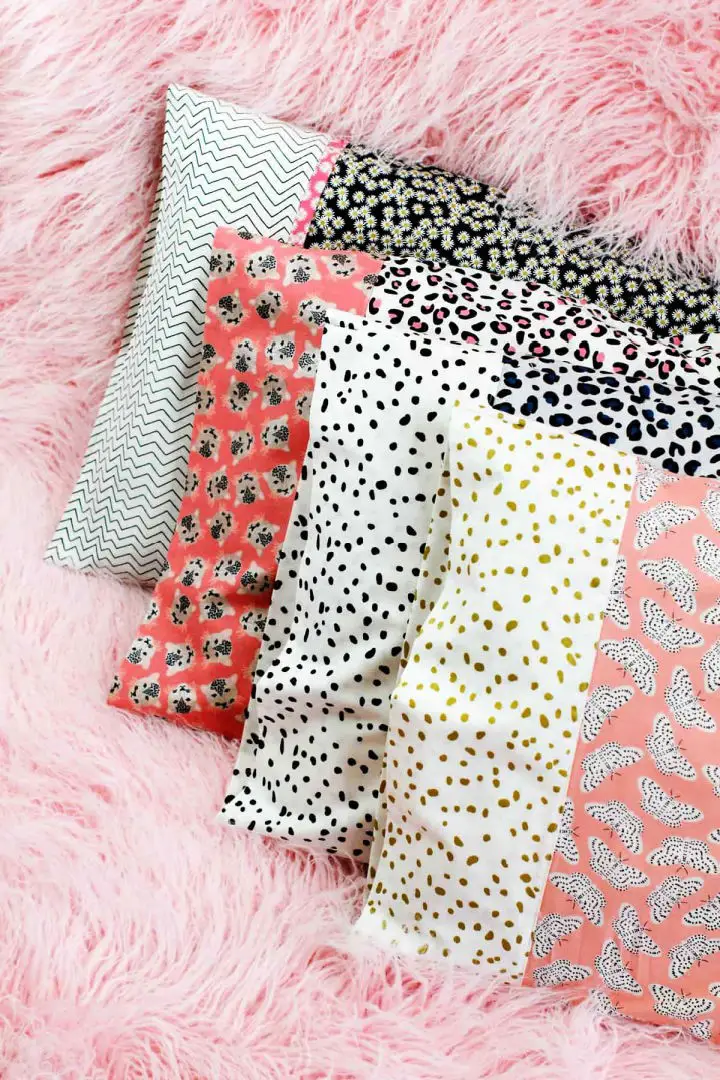
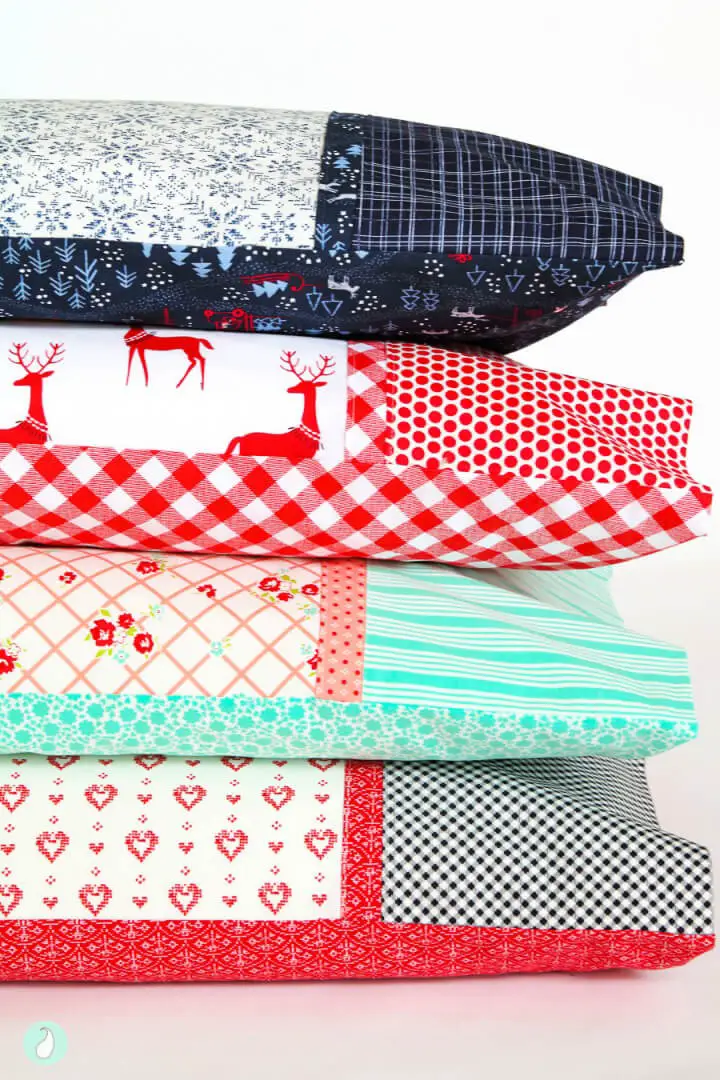
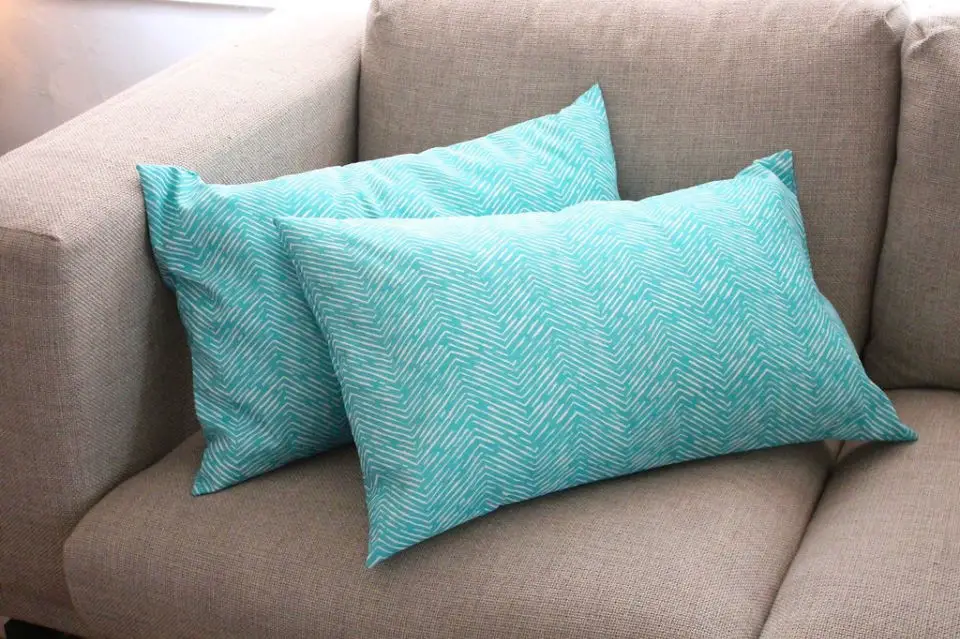
Sewing a Pillowcase Set in 30 Minutes
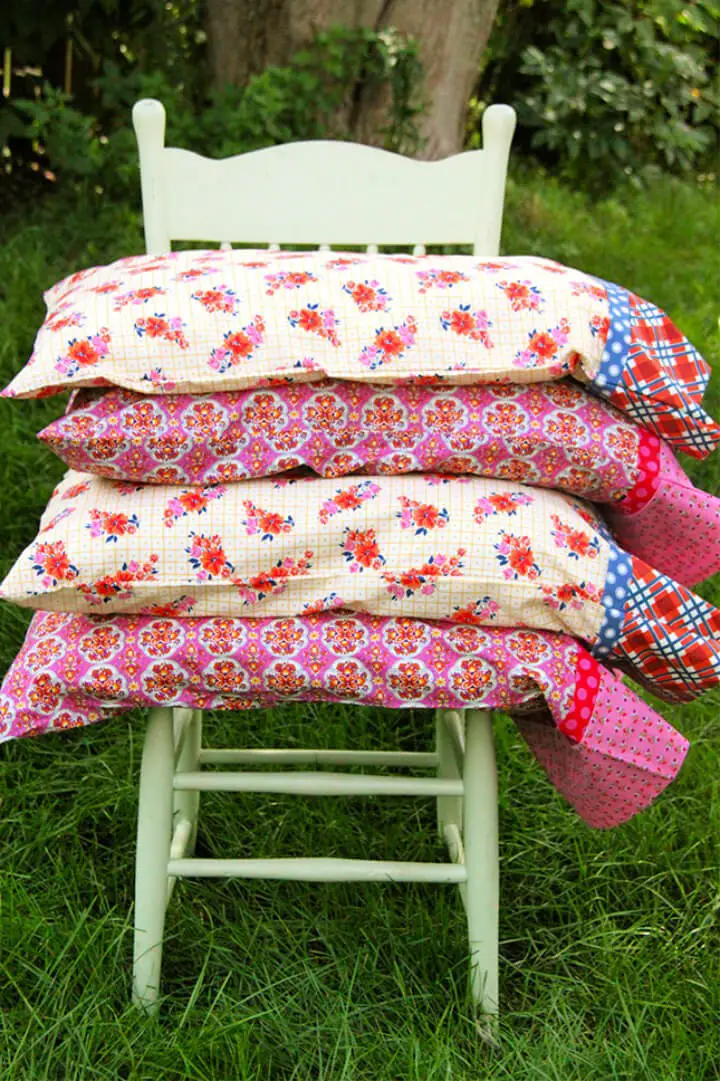
Transforming your bedroom’s aesthetic without breaking the bank is now possible thanks to these complimentary pillowcase patterns. With a few simple stitches, you can create cozy, charming, and one-of-a-kind pillowcases that exude a polished finish. In just 15 minutes per pillowcase, you can whip up an entire set in under half an hour! This step-by-step guide takes the intimidation out of sewing by walking you through the process of crafting seamless pillowcases that boast a refined look. Quilting cotton is the perfect medium to infuse your bedroom decor with a vintage flair. With easy-to-follow instructions and minimal supplies, this project is accessible to both novices and seasoned crafters. Give your bedroom linens a personalized touch by creating handmade, unique pillowcases that reflect your personal style.
How to Make a Zippered Pillow Cover
Transform your home decor by creating a zipper pillow cover like a pro, without any prior experience. This comprehensive DIY guide will walk you through the easy-to-follow steps, complete with photos and video tutorials, to craft custom pillow covers that match your unique style. With the right tools – think sewing machine, zipper foot, and high-quality home decor fabric – you’ll be amazed at how effortlessly you can achieve professional-looking results. Plus, enjoy the convenience of washing your pillow covers whenever needed. This beginner-friendly tutorial will empower you to tackle even the most daunting DIY projects with confidence.
Free Fabric Pillow Sewing Pattern
Want to add some visual flair to your living space? This tutorial shows you how to create a one-of-a-kind pillow that combines the elegance of damask, the whimsy of swirls, and the charm of polka dots and florals. By following our step-by-step guide, you’ll pick up basic sewing skills while crafting a statement piece that’s equal parts stylish and durable.
DIY Travel-Sized Pillowcase With Minky Edge
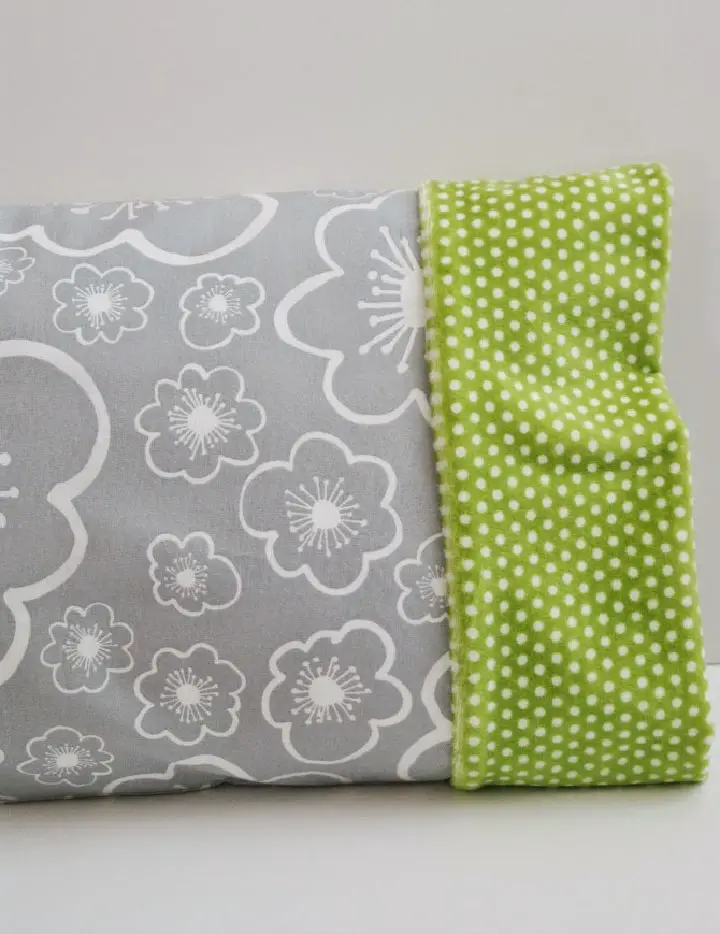
Transform any travel adventure into a cozy oasis with this DIY pillowcase tutorial, featuring a luxurious minky edge for ultimate softness and comfort. This simple sewing project is perfect for creating adorable pillowcases that not only pack easily but also add a touch of ease to your travels. With step-by-step instructions and expert tips on working with minky fabric, you’ll be guided through the process of selecting the right materials and bringing these charming companions to life. Whether you’re embarking on a summer road trip or a spontaneous weekend getaway, these delightful travel pillows are sure to delight your family and become their new favorite travel accessory.
DIY Envelope Pillow Cover
Transform your living space with a unique DIY envelope pillow cover that reflects your personality! By following this straightforward guide, you’ll unlock the secrets to measuring, cutting, sewing, and assembling the perfect custom pillow cover. The result? A washable, durable, and stylish addition to your couch. Whether you’re a beginner or an experienced seamstress, this tutorial will empower you to create envelope pillow covers that exude your personal style in just a few easy steps.
How to Make a Striped Pillowcase
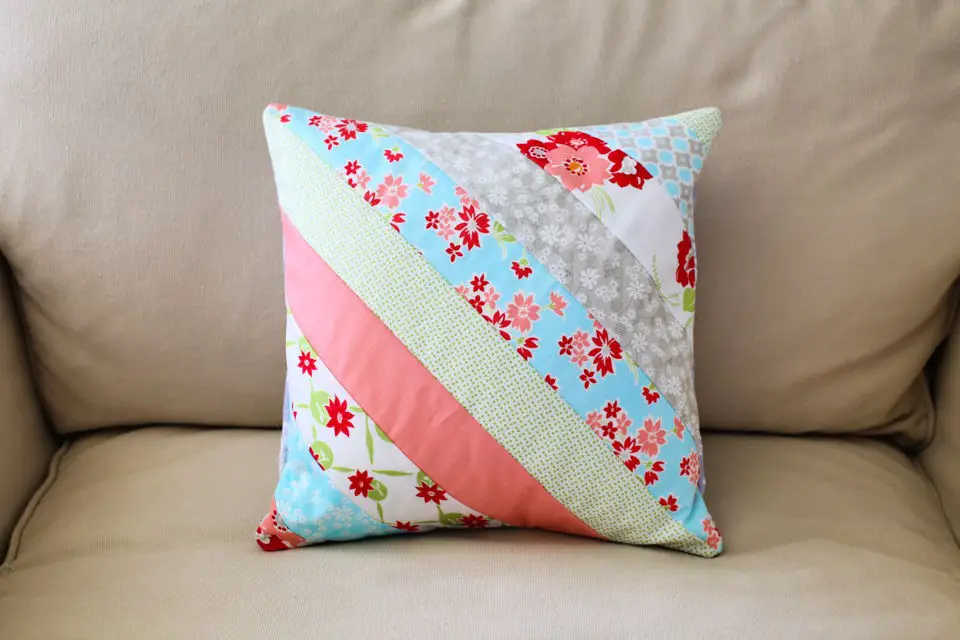
Transform your living space into a cozy retreat by crafting a one-of-a-kind striped pillowcase from the comfort of your own home. This accessible DIY guide takes you through the process of creating a 12-inch square pillowcase featuring an envelope closure, using simple sewing skills and jelly roll strips as the foundation. With this step-by-step tutorial, you’ll learn how to prepare the fabric strips, attach them at a 45-degree angle, add batting for added durability, and complete the project with bold printed fabric on the backside. By following these easy-to-follow instructions, you’ll be able to sew the front and back pieces together in no time, resulting in a stunning pillowcase ready to be filled with your favorite pillow form. With this fun and creative project, you can elevate your home decor and add a personal touch to your space.
Conclusion:
In conclusion, our detailed guide on 30 free pillowcase patterns offers a vast array of designs and materials for customization, while also providing valuable insights into personalization, troubleshooting, and care. With this comprehensive resource, you’re equipped to select the ideal fabric, whether it’s cotton or silk, and add a unique touch through monograms or embroidery. Moreover, the guide covers all aspects, from mastering the step-by-step sewing process to exploring sustainable options for your creations. As a result, you now possess the necessary tools to craft stunning, long-lasting pillowcases that not only reflect your personal style but also meet your specific needs.
