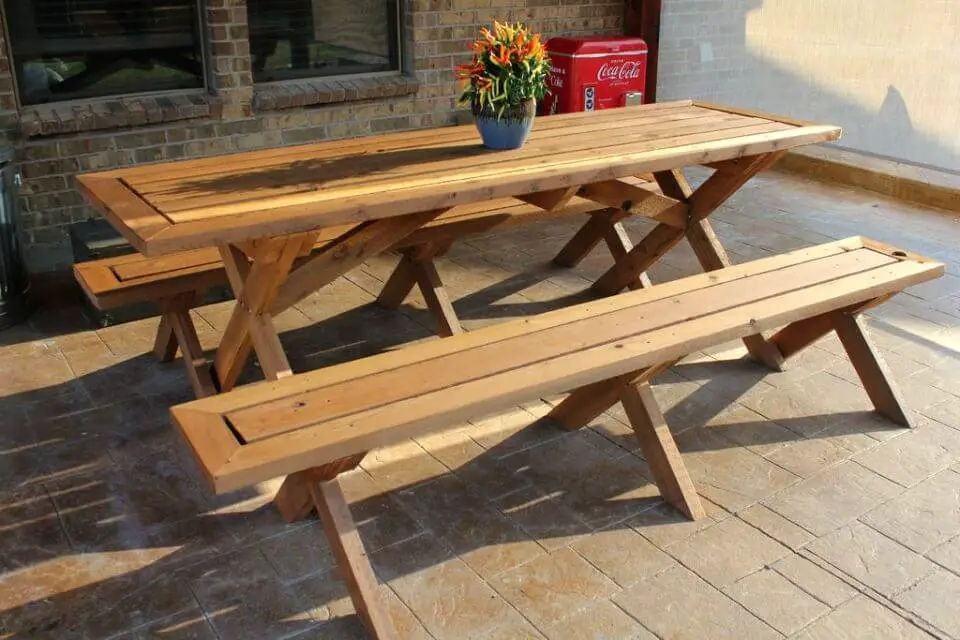
Transform your outdoor space with a sturdy DIY picnic table that’s perfect for gathering friends and family. To get started, explore our collection of 30 free DIY picnic table plans and discover the simplicity of building your own outdoor oasis. This comprehensive guide provides more than just blueprints – it’s packed with customization ideas, safety precautions, environmental considerations, and troubleshooting tips to ensure your project is a success, regardless of your level of experience. From novice builder to seasoned DIY enthusiast, you’ll find expert advice and clever hacks to make the perfect picnic table for your outdoor space.
How to Build a Picnic Table – Step by Step
Creating a custom picnic table with built-in benches can elevate your outdoor space into a cozy haven perfect for enjoying meals, socializing, or simply relaxing in nature. With this comprehensive guide, you’ll learn how to construct a sturdy and inviting picnic table that will become the heart of your backyard gatherings.
Materials and Tools Needed
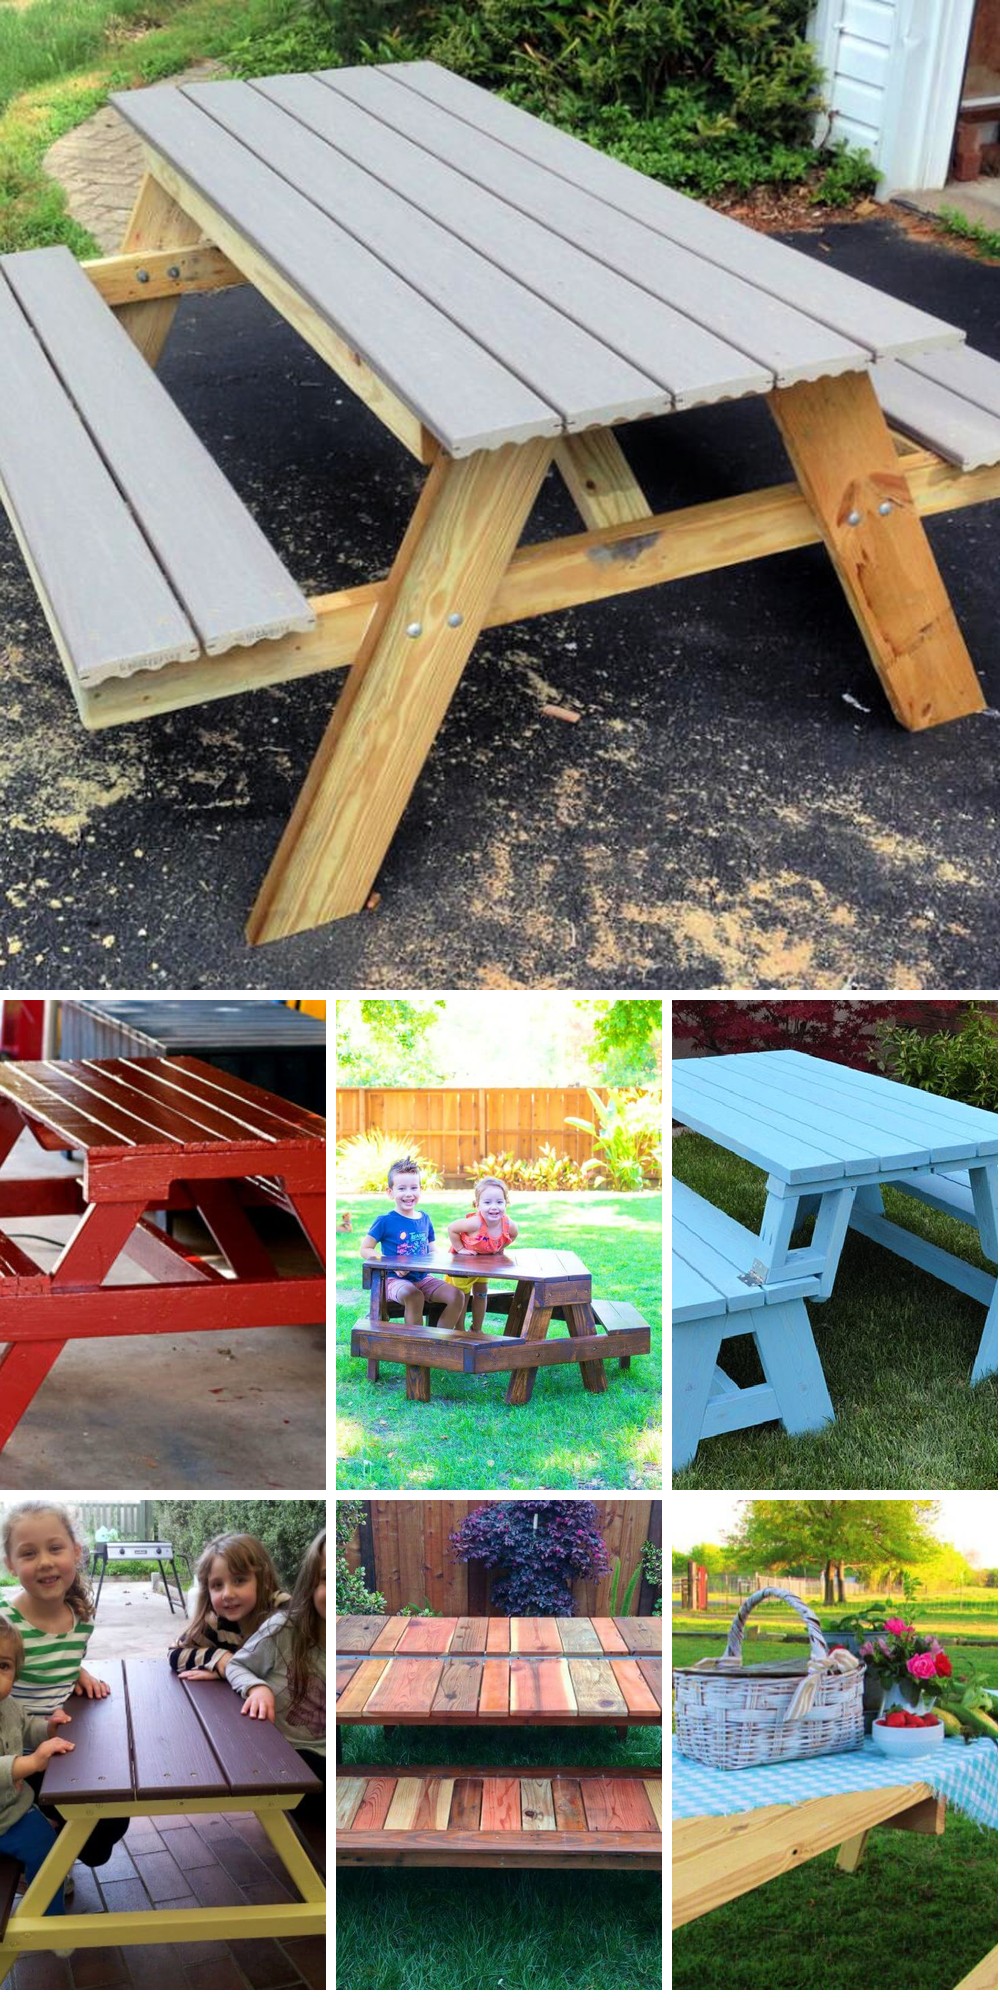
To complete the outdoor furniture project, you’ll need to gather a variety of materials. For the main structure, comprising the table top and benches, you’ll require six 2x8s, while the cross supports and additional seating will necessitate six 2x6s. Three 2x4s will serve as supplementary reinforcement for the design. Fastening everything together will involve using exterior screws with lengths of 2.5 inches and 3.5 inches. The carriage bolts, accompanying nuts, and washers will also play a crucial role in securing the pieces. To cut your lumber to precise specifications, you’ll need a circular saw and an optional but highly beneficial miter saw for making angled cuts. Ensure that your measurements are accurate with the aid of a tape measure. For making square cuts and ensuring proper alignment, use a speed square and a larger square. In addition to these tools, you’ll require clamps to hold everything in place while you assemble the pieces. Finally, equip yourself with a drill featuring a 0.5-inch drill bit, a screw gun or impact driver, and a ratchet with a three-quarter inch socket, all of which will be essential for driving screws and bolts throughout the construction process.
Making the Cuts
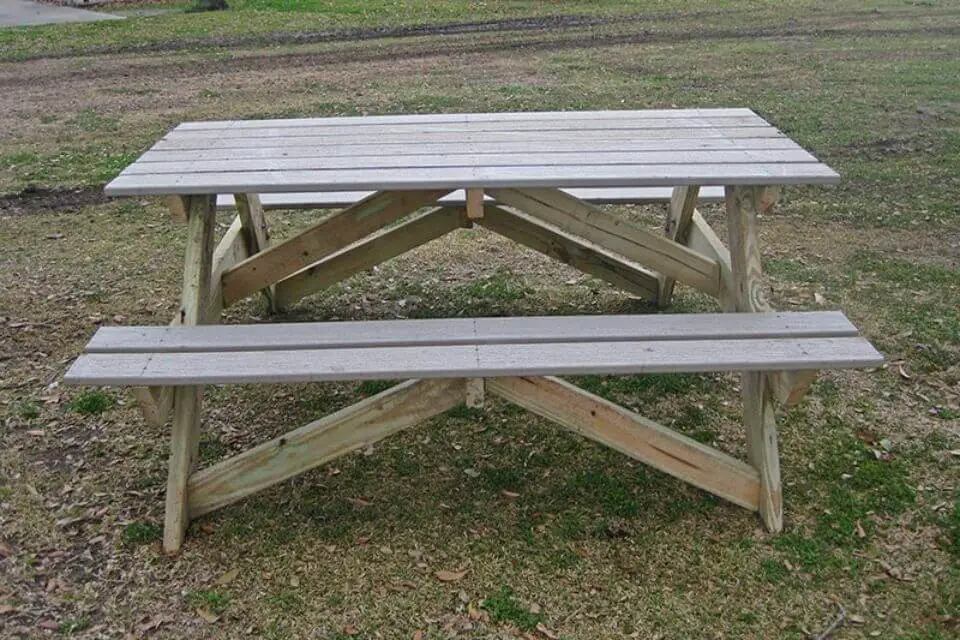
To build the table top and benches, start by cutting the 2×8 lumber to size. A typical picnic table is around 8 feet long, making it a versatile size for most needs. For the cross supports, cut six short pieces from 2x6s for the benches and four for the table top itself. The legs of the table require 30-degree angled cuts at both ends, with a length that allows the table to sit at your preferred height (typically between 28-30 inches). Finally, prepare two lower supports using 2x6s, ensuring they fit snugly between the legs and under the table for added stability.
Assembling the Table Top
Begin by laying the table top planks, also known as 2x8s, face down on a flat surface. Next, secure them together using the cross supports, strategically placing one at each end and two evenly spaced in the middle to maintain structural integrity. To guarantee a consistent gap between the boards, utilize your speed square, ensuring precise alignment and a level surface is achieved.
Assembling the Legs
To ensure a sturdy and stable framework, attach each leg to a cross-support at a precise 90-degree angle. To guarantee accuracy, utilize the larger square as a reference point. Once the legs are correctly positioned, secure them in place using carriage bolts that will provide added robustness and structural integrity to the overall design.
Attaching Benches
To build a sturdy seating arrangement, begin by constructing each bench by firmly attaching two-by-eights (2x8s) to the bench’s cross supports. Once complete, securely fasten the benches to the sides of the table, taking care to space them evenly and ensure they’re perfectly level.
Finishing Touches
To complete the renovation of your outdoor picnic table, start by addressing any rough edges. Use sandpaper to smooth out splinter-prone areas around seating and table borders. This will create a safe and comfortable surface for gatherings. Next, consider protecting the wood from the elements with stain or paint, choosing a color that complements your outdoor decor. Finally, perform a thorough inspection to ensure all hardware is securely tightened and the table remains stable, guaranteeing many enjoyable meals and social events.
Maintenance Tips
Regularly inspect and secure loose fasteners, such as bolts and screws, to prevent damage or further deterioration. Additionally, maintain the wooden surface by reapplying a layer of stain or paint every three to five years, ensuring the wood remains protected from environmental factors and preserves its natural beauty.
Video Tutorial
For those who prefer a more visual approach, we’ve also created a comprehensive DIY Picnic Table Build video tutorial on YouTube. This step-by-step guide serves as the perfect accompaniment to this written guide, offering a detailed and easy-to-follow visual representation of the techniques discussed. By combining both formats, you’ll be able to tackle your picnic table project with confidence. Not only will it enhance your outdoor space’s functionality, but it will also provide years of enjoyable gatherings for friends and family. When planning your project, don’t forget to consider personalizing your picnic table to suit your unique space and needs.
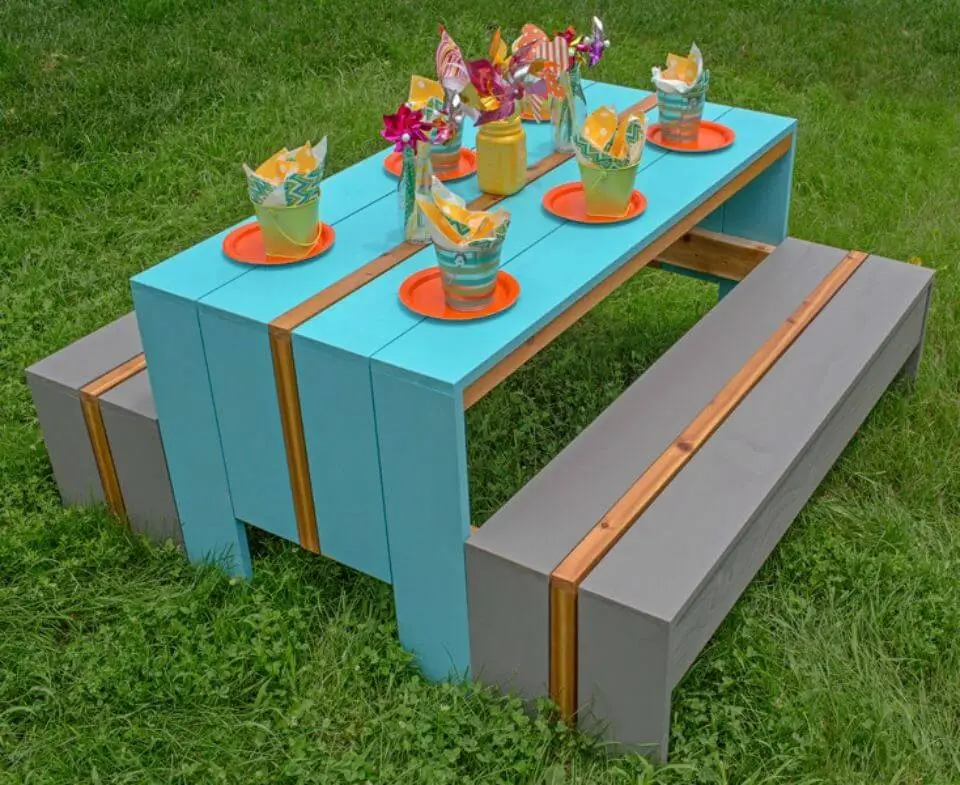
Customization Ideas for Your DIY Picnic Table
Crafting a bespoke picnic table that harmoniously reflects your unique style or seamlessly integrates with your outdoor setting can be an incredibly fulfilling experience. To spark your imagination and guide the customization process, consider these creative concepts:
Choose a Theme
To kick-start the design process, establish a core theme that speaks to you. This could be a rustic charm, sleek modern aesthetic, seaside-inspired ambiance, or even a playful whimsy. Your chosen theme will serve as a guiding force in selecting colors, finishes, and other design elements, providing a cohesive foundation for your space.
Selecting Colors and Finishes
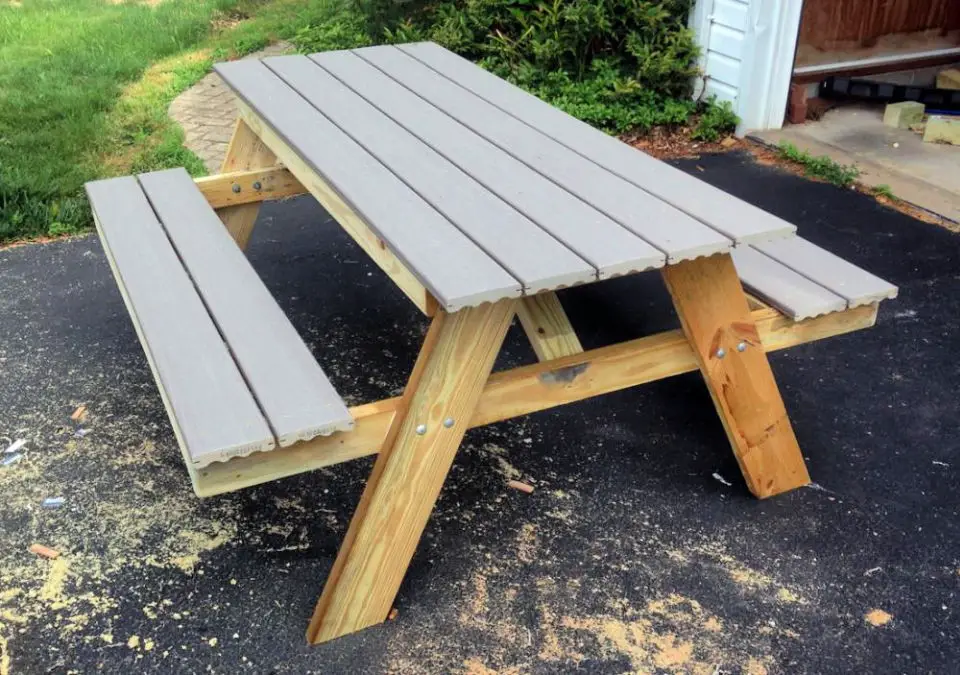
When it comes to enhancing the ambiance of your outdoor space, think beyond the usual suspects and give your picnic table a bold makeover. A vibrant hue like red, blue, or yellow can transform the piece into a stunning focal point in your garden, drawing attention and creating a lively atmosphere. Alternatively, opt for a more subtle approach by staining the wood to bring out its natural grain while also providing protection from the elements. Choose a stain that complements the wood’s unique characteristics and adds depth to your outdoor space.
Adding Decorative Elements
Transform your outdoor space by incorporating creative and functional elements. Stencils are an excellent way to introduce patterns or designs onto the tabletop or benches, injecting geometric shapes or nature-inspired motifs that add character and visual interest. For a more permanent and durable solution, consider creating a mosaic design using tiles for the tabletop. This project can be a fun and engaging family activity, allowing you to bond while crafting something beautiful and unique.
Functional Additions
When designing an outdoor dining space, consider incorporating built-in coolers or ice buckets into your table design. This feature allows you to keep drinks cold and refreshing during gatherings. For added functionality and comfort, include a hole in the center of the table that accommodates a patio umbrella. This provides shade on sunny days, creating a more enjoyable atmosphere for socializing and dining.
Lighting
To create a warm and inviting atmosphere, consider incorporating string lights into your outdoor setting. You can attach them underneath the table or along its edges to produce a cozy ambiance in the evenings. Alternatively, opt for solar lanterns that can be placed on or around your table. These eco-friendly lighting options charge during the day, providing a sustainable source of illumination for your gatherings.
Personal Touches
When it comes to personalizing your wooden furniture, there are several ways to add a unique touch. One popular option is to engrave special dates or family names directly into the wood. This not only adds a touch of elegance but also serves as a meaningful way to commemorate important events or honor loved ones. Additionally, for a truly one-of-a-kind piece, consider incorporating handprints on the underside of the table. This hidden feature can be a lovely surprise for family members and friends who notice it, making the piece even more special and sentimental. By combining these two elements, you can create a truly personalized and meaningful piece of furniture that reflects your values and style.
Safety Precautions for Building a DIY Picnic Table
As you embark on a DIY adventure such as constructing a picnic table, it’s crucial to prioritize safety above all else. To guarantee a successful and risk-free project, heed the following essential guidelines.
Personal Protective Equipment (PPE)
When engaging in woodworking projects, it’s crucial to prioritize personal protective equipment (PPE) to ensure a safe and healthy working environment. A key aspect of this is wearing the right gear on your hands, eyes, and ears. Start by investing in sturdy gloves that can withstand potential splinters and cuts. This will provide a layer of protection between your skin and any sharp edges or rough surfaces. Next, safety glasses are an absolute must-have to safeguard your eyes from flying debris, sawdust, or other hazardous particles that may become airborne during your project. Finally, if you’re working with loud power tools or machinery, don’t forget to incorporate hearing protection into your routine. This could be in the form of earplugs, earmuffs, or even noise-cancelling headphones – anything to reduce the risk of long-term hearing damage.
Safe Tool Handling
Before utilizing any tool or equipment, it’s essential to develop a solid understanding of its operating procedures by thoroughly reading through its manual. Additionally, conduct a visual inspection of each tool prior to use to identify any signs of damage or wear. This crucial step ensures that you’re not only using the right tool for the job but also doing so safely and effectively. Moreover, make it a habit to use each tool for its intended purpose and adhere strictly to the safety guidelines outlined by the manufacturer.
Workspace Safety
In order to work efficiently and safely, it’s essential to ensure your workspace is well-organized and free from potential hazards. This includes keeping the area clear of clutter that could cause tripping or other accidents. Additionally, having a first aid kit readily available can help you respond quickly and effectively in case of minor injuries. Furthermore, when working with flammable materials, it’s crucial to store a fire extinguisher nearby, allowing you to put out small fires before they spread. By taking these simple precautions, you’ll be better equipped to tackle your tasks without worrying about unexpected interruptions or complications.
Troubleshooting Common Issues
While meticulous planning can help minimize surprises, unforeseen challenges may still arise when constructing a picnic table. Fortunately, being prepared for these obstacles is crucial to ensuring a successful build. To that end, here are some common issues you might encounter and how to address them:
Wood Splitting
To ensure a seamless and splinter-free woodworking experience, it’s essential to adopt two crucial strategies: drilling precise pilot holes beforehand and maintaining the sharpness of your tools throughout the process. By pre-drilling holes for screws, you’ll prevent wood from splitting along the grain, thereby preventing those pesky cracks and fissures that can mar the appearance of your finished project. Meanwhile, keeping your cutting edges keen will also help to minimize the risk of wood splitting, as dull tools are more likely to cause unwanted tears in the wood’s natural fibers.
Uneven Surfaces
To achieve perfectly aligned tables, use a leveling system that ensures each leg is evenly spaced. This process involves checking the level of the table and making adjustments to the legs as needed. Start by placing the table on a flat surface and using a leveling tool to check its position. If necessary, adjust the length of the legs by adding or removing shims until the table is stable and even.
Paint or Stain Problems
To achieve a flawless finish on your wooden project, it’s essential to lay the groundwork before applying paint or stain. This starts with a thorough sanding process that smoothes out any imperfections in the wood. By doing so, you’ll create a surface that’s ideal for receiving the coating of your choice. Additionally, when it comes to actually applying the paint or stain, it’s often more effective to apply multiple thin coats rather than one thick coat. This not only helps prevent drips and runs but also ensures a uniform finish that looks great and lasts.
Environmental Considerations for Your DIY Picnic Table
As you embark on constructing a DIY picnic table, it’s essential to factor in its ecological footprint. To minimize the environmental impact, incorporate these eco-conscious strategies into your project.
Choose Sustainable Materials
When it comes to choosing sustainable wood options, consider opting for recycled or reclaimed wood instead of newly harvested timber. This approach not only reduces the demand for virgin lumber but also helps preserve natural resources and minimize waste. Another way to ensure your wood selection aligns with environmental values is by seeking out certified wood products that have been verified by organizations like the Forest Stewardship Council (FSC). FSC certification guarantees that the wood comes from responsibly managed forests, which not only protects biodiversity but also supports local communities and promotes sustainable forestry practices.
Eco-Friendly Treatments
When it comes to creating a sustainable home, the products you use can make all the difference. For instance, opt for natural stains and paints that boast low levels of volatile organic compounds (VOCs). This simple switch can significantly reduce air pollution. Furthermore, when selecting sealants, prioritize water-based options that are environmentally friendly. By making these conscious choices, you’ll be doing your part to protect the planet while still achieving the aesthetic look you desire.
Minimize Waste
When embarking on a woodworking project, it’s essential to adopt a thoughtful approach to minimize waste. One effective strategy is to plan cuts carefully, taking precise measurements before making any incisions. This meticulous process ensures that each piece of wood is used efficiently and reduces the likelihood of unwanted scraps. Additionally, consider repurposing leftover wood pieces for smaller projects or decorative elements, such as coasters, picture frames, or even a wooden birdhouse. By implementing these practices, you can not only conserve resources but also unleash your creativity and produce unique, eco-friendly masterpieces.
Disposal
When it comes to building a picnic table, consider the environmental impact of your decisions. One way to do this is by adopting sustainable practices from the outset. This includes reusing leftover materials whenever possible, ensuring that any waste generated during construction is properly recycled.
In addition to reducing waste through recycling, you can also make a positive impact by donating unused materials to local schools or community centers. These organizations often have projects that can utilize your contributions, helping to further the cause of sustainability in your area.
By incorporating these eco-friendly strategies into your project, you can create a picnic table that not only serves its intended purpose but also respects the natural world.
Maintenance and Care for Your DIY Picnic Table
Savvy picnickers know that a well-maintained picnic table is the key to countless hours of outdoor delight. With proper care, this humble structure can remain a treasured spot for gathering and relaxation for years to come. To keep your table in top condition, simply follow these straightforward tips:
Regular Cleaning
When it comes to maintaining the cleanliness and integrity of wooden tables, it’s essential to employ gentle yet effective methods. One such approach involves using a mild soap and water solution to regularly clean the surface, thereby preventing the buildup of dirt and grime. This not only enhances the table’s overall appearance but also helps to preserve its natural beauty by avoiding harsh chemicals that might strip away the finish or damage the wood. Additionally, it’s crucial to use a soft-bristled brush when cleaning to prevent scratching the wood, thus ensuring the table remains in excellent condition for years to come.
Weather Protection
To safeguard your wooden structure against the elements, consider applying a water-repellent finish that can help shield it from rain and moisture. Additionally, opt for finishes that provide built-in UV protection to prevent fading and sun damage. This two-pronged approach will not only maintain the wood’s integrity but also preserve its natural beauty.
Seasonal Care
When the cold winter months arrive, consider taking precautions to safeguard your outdoor table. If feasible, bring it inside to shelter it from extreme temperatures and precipitation. Alternatively, if this isn’t possible, utilize a high-quality waterproof cover to provide protection when the table is not in use. This will help maintain its integrity and extend its lifespan.
Inspection and Repair
Regularly inspect your DIY picnic table for signs of wear or damage, such as scratches, dents, or loose joints. Ensure all hardware is securely tightened, including screws and bolts. By adopting these simple maintenance habits, you’ll be able to enjoy a sturdy and welcoming outdoor space for many gatherings to come.
FAQs About DIY Picnic Tables
Get answers to all your questions about creating a DIY picnic table that suits your outdoor space and personal style. Discover expert advice and insider tips to help you build the perfect spot for al fresco dining.
What is the best wood to use for a DIY picnic table?
When it comes to selecting the ideal wood for your DIY picnic table project, durability and resistance to decay are essential factors to consider. Look no further than naturally rot-resistant options like western red cedar, coastal redwood, or pressure-treated pine, which offer a sturdy foundation for years of outdoor use.
How much wood do I need to build a picnic table?
When planning your outdoor furniture project, it’s essential to consider the quantity of wood required for your specific design. For a typical picnic table, the amount of 2×4 lumber needed typically falls within the range of 10 to 12 feet. This measurement assumes a standard size tabletop, and the actual quantity may vary depending on the desired dimensions and intricacies of your project.
Can I build a picnic table without power tools?
While it is technically possible to construct a picnic table without relying on power tools, such an endeavor would undoubtedly necessitate a significant investment of time and manual labor. The absence of power machinery means that traditional hand tools, including saws, hammers, and screwdrivers, must be utilized to drive the construction process forward.
How do I protect my picnic table from the weather?
For optimal picnic table longevity, consider applying a sealant offering both ultraviolet (UV) protection and water resistance properties to safeguard against the elements.
What is the standard size for a picnic table?
Picnic tables typically boast dimensions that facilitate comfortable seating and dining. The standard height usually ranges from 28 to 34 inches, providing ample space for individuals to sit and socialize. The tabletop width is generally consistent, spanning between 28 to 30 inches in length, while the overall table length can vary slightly, measuring around 6 to 8 feet.
How can I make my picnic table more stable?
To reinforce the structural integrity of your DIY project, it’s crucial to ensure that all legs are uniformly trimmed to the same length. This uniformity is vital in distributing the weight evenly across the base, thereby preventing any one leg from bearing an excessive load. Furthermore, adding diagonal braces between the legs provides additional stability by creating a rigid network of support. By adopting this approach, you can confidently rely on your creation’s ability to withstand various types of stress and pressure.
What kind of finish should I use on my picnic table?
To safeguard your picnic table against the harsh outdoors, opt for a high-quality exterior finish like a weather-resistant varnish or a specially designed deck stain. This will provide a durable barrier against the elements, ensuring your table remains sturdy and attractive for years to come.
How do I maintain my picnic table?
To maintain the longevity of your picnic table, it’s essential to establish a routine for regular cleaning and protection. A gentle soap and water solution can work wonders in keeping the surface free from dirt and debris. Moreover, applying a fresh coat of protective finish every one to two years will help shield the wood from the elements and extend its lifespan.
Can I add an umbrella hole to my picnic table?
To elevate your outdoor dining experience, consider incorporating a practical and stylish element: an umbrella hole on your picnic table. This simple yet effective modification involves drilling a precise hole in the center of the tabletop, allowing for effortless umbrella installation and a seamless integration with your patio furniture.
How long does it take to build a DIY picnic table?
While building a DIY picnic table may require varying amounts of time, the average timeframe for completion is often within a weekend or a span of two weekends. By comprehensively addressing common questions and concerns, individuals can gain invaluable insight to successfully tackle this project.
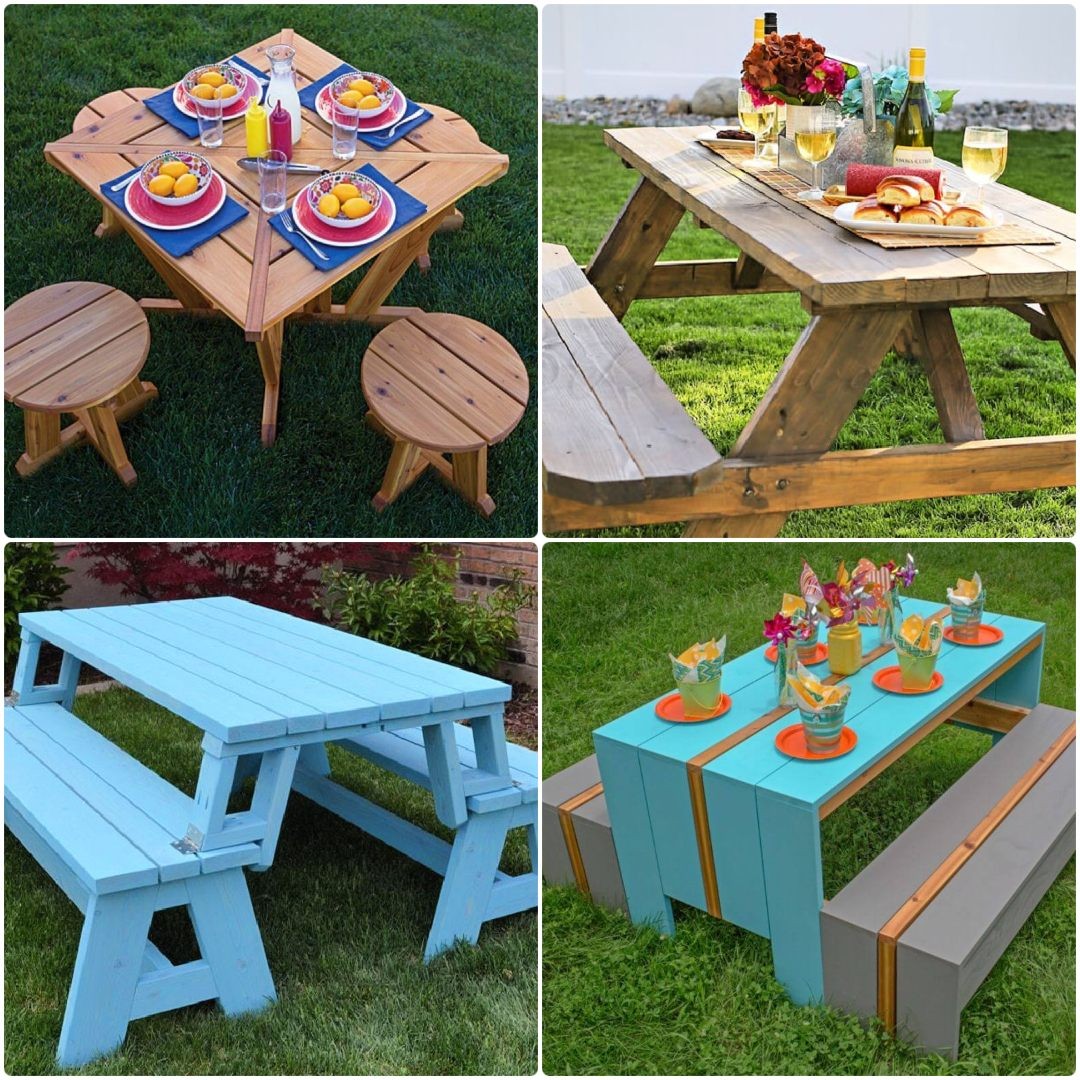
30 Free DIY Picnic Table Plans
Transform your backyard into an idyllic outdoor oasis with 30 innovative, completely free DIY picnic table plans. Whether you’re looking for a rustic country charm or sleek modern design, this extensive collection has something for everyone.
How to Build a Wooden Picnic Table
Transform your backyard into the perfect setting for impromptu gatherings with a DIY picnic table that exudes elegance and practicality. This ingenious project combines composite decking and pressure-treated wood, yielding a sturdy, low-maintenance surface that’s as worry-free as it is enjoyable. The thoughtful design serves not only as a functional dining spot but also a stylish focal point for outdoor adventures, whether you’re hosting a family picnic or an impromptu bubble-making session. With the composite tabletop ensuring food safety and stain resistance, you can indulge in worry-free dining with loved ones. In just one day, you’ll be able to construct this charming table, converting your backyard into a vibrant hub of fun and connection. And the best part? You’ll save significantly on store-bought alternatives while crafting your own unique outdoor furniture piece.
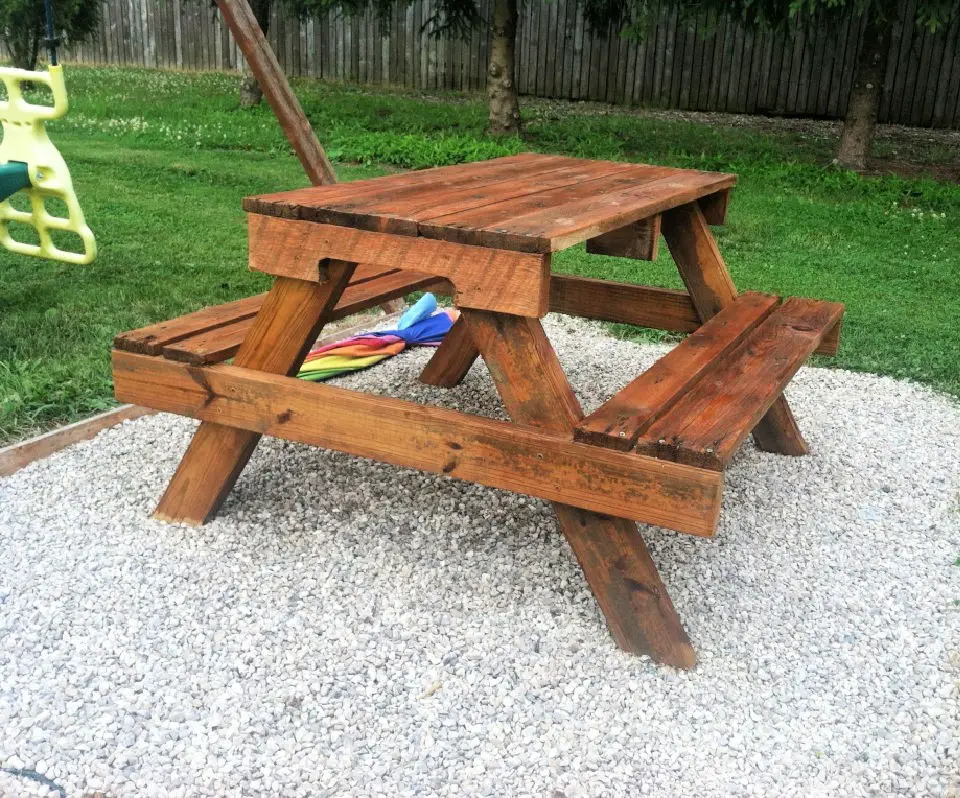
DIY Pallet Wood Picnic Table for kids
Bring the great outdoors to your backyard by creating a DIY kid’s pallet picnic table that fosters creativity and encourages outdoor play. With minimal materials like shipping pallets, 2x4s, screws, and exterior paint, you can build a sturdy and functional table tailored to your child’s size. By following simple step-by-step instructions, you’ll take apart the pallet, construct the tabletop and benches, attach legs, and assemble the final piece. The result is a dedicated space for your kids to enjoy snacks, color, or paint, adding an adorable touch to your outdoor area. To ensure safety and aesthetics, simply sand and paint the finished product.
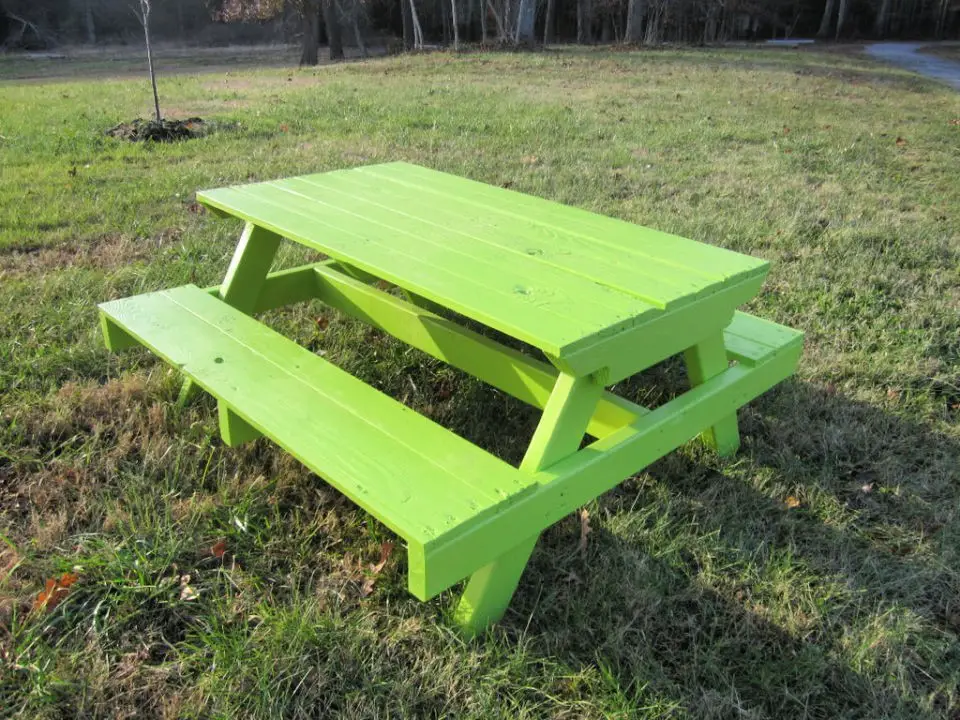
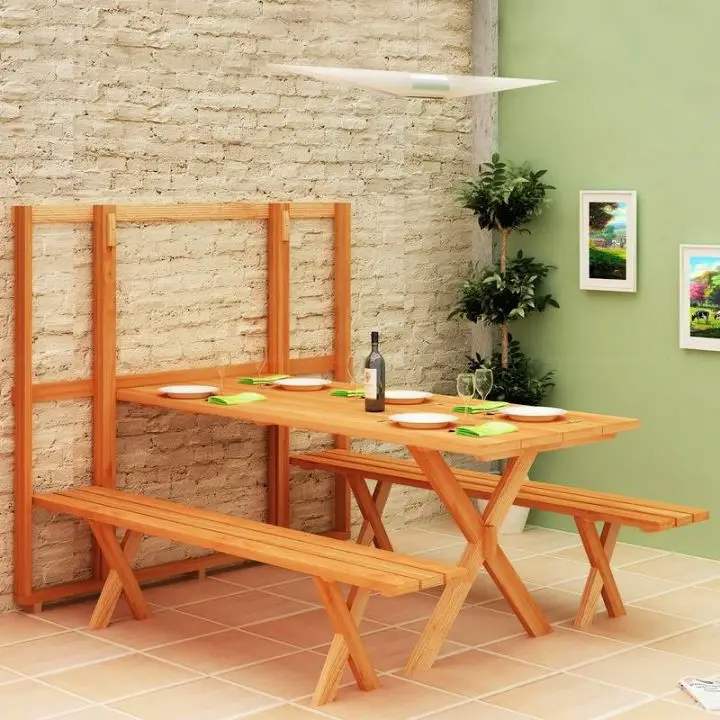
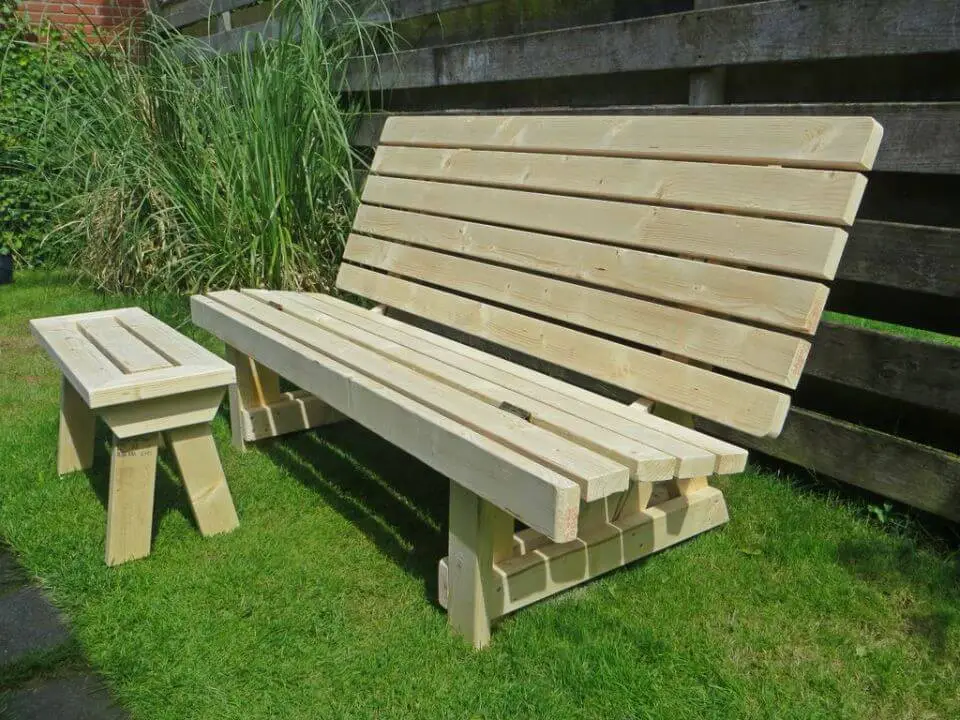
Convertible Picnic Table and Bench
Transform your backyard into a charming oasis with these DIY picnic table plans, suitable for all skill levels. This versatile project serves as both a meal spot and a pair of garden benches, perfect for cozying up in the great outdoors. The clever design features a folding tabletop that converts into a backrest, providing ample seating options. Follow the easy-to-follow step-by-step instructions to assemble the legs, stretcher, and arms, then attach the bench top and finish with sanding, staining or painting, and applying an outdoor polyurethane for added protection.
DIY Picnic Table From Pallet Wood
Transform your backyard into an extension of your living room by creating a one-of-a-kind DIY pallet picnic table with your kids. This fun and functional project is the perfect opportunity to bond over crafting and get creative together. To start, gather materials you might already have at home: one pallet, two 2x4x8′ pressure-treated boards, three-inch wood screws, and your preferred stain, paint, or water sealer. Once you have everything ready, begin by disassembling the pallet and cutting your pieces to size. Assemble the tabletop, secure the legs and seat supports, then attach the pallet wood seats. After that, sand down any rough edges and apply a coat of stain, paint, or sealer to give it a personalized touch. With some imagination, you can turn this simple structure into a vibrant masterpiece. No matter what the weather is like outside, make outdoor dining a family tradition with your new pallet picnic table!
Building a Modern Picnic Table for Kids

Turn your backyard into a haven of fun and creativity by crafting a custom, modern kids’ picnic table that’s both beautiful and functional. This masterpiece can accommodate up to six little ones, making it the perfect spot for impromptu picnics, playdates, or family gatherings.
With just basic woodworking tools like a miter saw, drill, and sander, along with straightforward instructions and precise measurements, you’ll be able to bring this project to life. Don’t worry if you’re new to woodworking – the end result is well worth the effort! This DIY table boasts durability and style, thanks to its 1×4, 2×4, and 2×2 lumber framework.
While some woodworking experience is necessary to complete this project, the sense of accomplishment you’ll feel when it’s done will be unmatched. Unleash your inner DIY enthusiast, elevate your outdoor space, and create a delightful area where your children can thrive.
Handmade Wooden Picnic Table
Transform an ordinary backyard into an extraordinary playground for kids with this sturdy DIY picnic table! Designed to withstand wind gusts and perfect for larger children and small adults, this project is a must-have for any family. With its 2x construction and materials list featuring 2×6 and 2×4 boards, exterior-rated self-tapping star-bit screws, you’ll be creating a reliable outdoor space in no time. Follow the easy-to-follow video tutorial to see how simple steps turn these materials into a durable picnic table. Plus, get expert tips on ensuring your table is levelled correctly to avoid any wobbling. With this project, you’ll be enjoying stress-free outdoor meals and playtime with your kids in no time. Get ready to unleash your inner DIY enthusiast and create a long-lasting piece that will bring joy to your family for years to come.
Making a Picnic Table With Written Instructions
Embark on a DIY adventure with this comprehensive guide to building a spacious wooden picnic table. The design, crafted entirely from 2x4s, strikes the perfect balance between functionality and traditional charm. Begin by referencing our detailed cut list and adjusting your miter saw according to the specified angles.To ensure stability, employ m8 threaded rods for the leg constructions, securing them further with 80mm wood screws. As you assemble the legs, keep in mind that they should align with the 2×4 connections to guarantee a level surface. For added convenience, we’ve included conversion tables for measurements in both inches and fractions.With attention to detail and a commitment to your project, you’ll be enjoying alfresco meals in style and comfort in no time.
Build a Boho Pallet Wood Picnic Table

Bring rustic charm to your outdoor living spaces by crafting a DIY pallet-style picnic table that comfortably seats 4-6 people. This straightforward tutorial guides you through the simple steps required, utilizing just $70-$80 worth of materials and approximately 30-45 minutes of time. The result is a charming alfresco dining setup crafted from 14 pieces of timber, wood glue, and nails. This project prioritizes safety and hygiene by selecting new materials, eliminating concerns over repurposed pallets. With its perfect blend of functionality and style, you can customize the design to suit your space requirements and preferences. Give it a try and add a personal touch to your outdoor gatherings.
Reclaimed Wood Flat-Pack Picnic Table
Embark on a creative adventure by constructing a one-of-a-kind DIY pallet picnic table with an ingenious built-in center trough for storing drinks or cultivating herbs. This innovative design allows for easy disassembly and reassembly, making it the perfect companion for your next outdoor escapade.
The project’s foundation is built upon reclaimed redwood table legs, chosen for their exceptional quality and character. The resulting picnic table measures 60 inches by 41 inches with a thoughtful 5-inch wide trough, blending form and function in harmony.
While this project may take around a week to complete, savvy crafters can significantly reduce the time spent using a jointer and planer. As you bring your vision to life, you’ll not only be creating a unique addition to your outdoor space but also embracing the philosophy of recycling and upcycling.
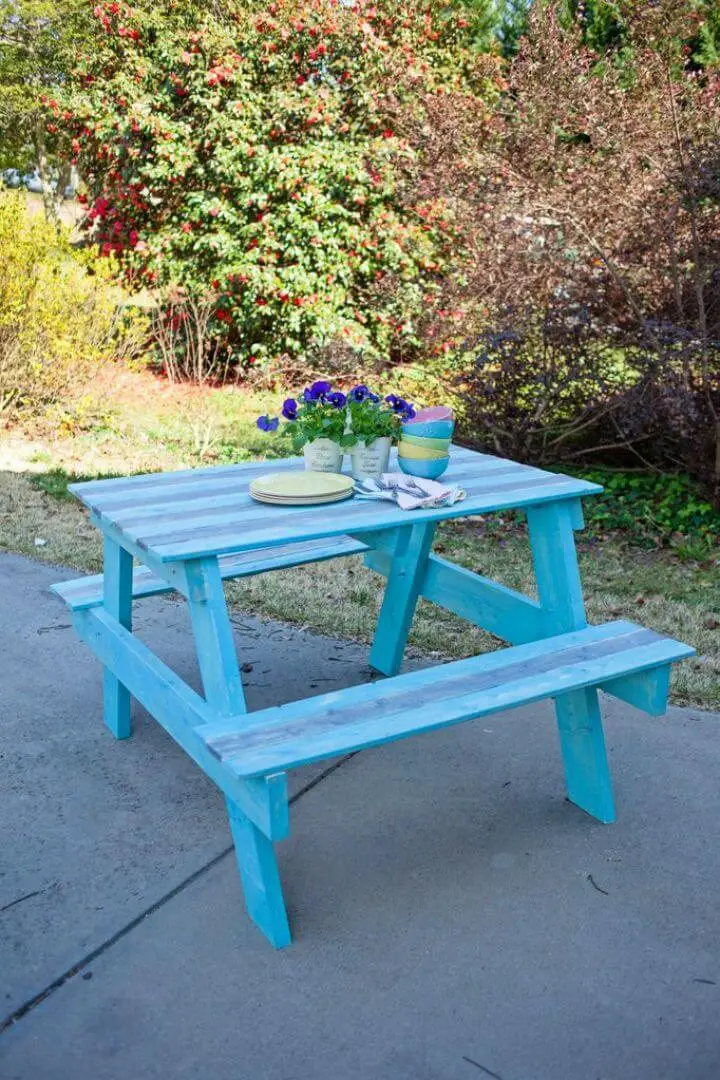
DIY Picnic Table for Children’s
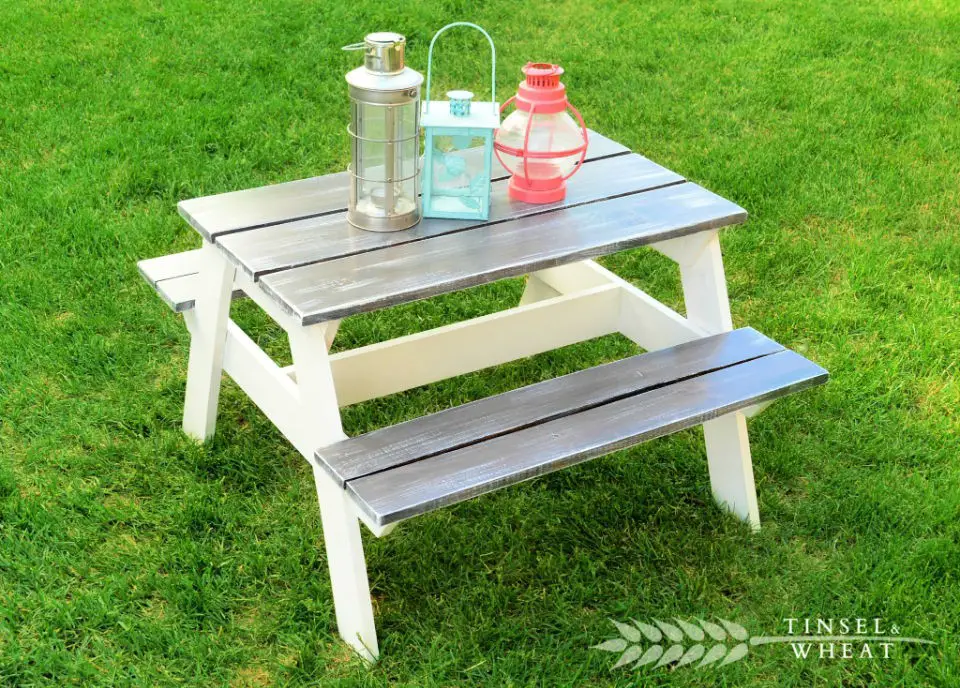
Discover the joy of creating a free picnic table plan that suits your unique outdoor space, style, and budget. Bring the outdoors in by crafting a DIY picnic table that will become a cherished memory-making spot for your family. This economical project costs approximately $22.50 in lumber to complete, making it an accessible and inviting addition to any backyard. The essential materials include a pine board, wood screws, wood glue, a power drill, and various painting and staining tools.
With this comprehensive guide, you’ll have step-by-step instructions, a cut list, and detailed images for each step to ensure a seamless DIY experience at home. Beyond being a fun spot for meals and playtime, this picnic table encourages creativity and fosters an appreciation for outdoor activities among children. The unique finishes, blending Restoration Hardware Grey and Vintage Aqua stains, add a stylish touch to your backyard decor.
Let’s get started on building this memorable piece of furniture that will become a beloved part of your home today!
Affordable Compact Picnic Table and Stools
Transform your outdoor area into a cozy retreat with a bespoke, compact DIY picnic table and stool set. This innovative project is designed to accommodate smaller spaces or gatherings of four, offering a refreshing alternative to traditional outdoor furniture. The cedar wood construction ensures long-lasting durability in even the most unpredictable weather conditions.
To bring this vision to life, you’ll need a moderate level of skill and the following materials: 12 2×4 boards, six 5/4 x 6 inches decking boards, an assortment of exterior pocket-hole screws, oil-based exterior toner or stain, and nylon chair glides.
The step-by-step instructions will guide you through building the table and stools with a stylish twist on conventional outdoor furniture. This compact picnic table and stool set brings an undeniable charm to your yard, offering a unique and personalized touch that’s impossible to replicate with store-bought pieces. Make your outdoor living space truly one-of-a-kind with this exceptional DIY project.
IKEA Mini Picnic Table Hack
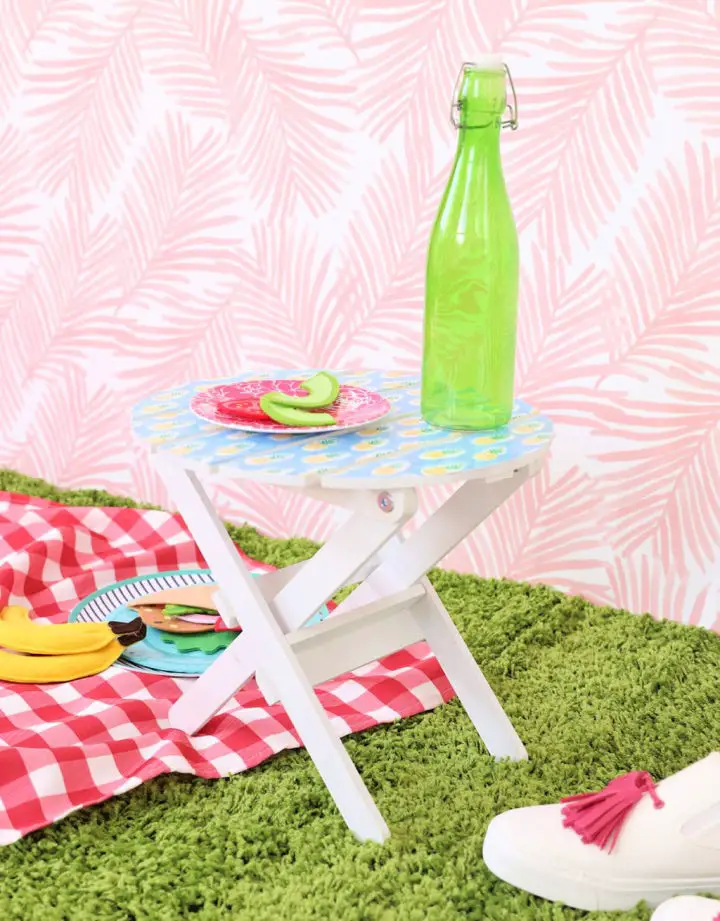
Transform your outdoor leisure time with a creative spin on the traditional picnic setup. By repurposing an IKEA Vildapel plant stand into a DIY mini picnic table, you can effortlessly elevate your parkside experience. The compact and portable design eliminates the hassle of water bottles toppling over onto your blanket, ensuring a stress-free picnic experience.
The addition of a unique leather carrying strap adds both convenience and a touch of sophistication to your outdoor gathering. This clever project not only provides a sturdy base for your picnic essentials but also serves as an attractive conversation starter. By breathing new life into an everyday item, you’re creating functional outdoor decor that’s sure to impress.
The next time you plan a picnic, why not do it in style with your handmade IKEA hack mini picnic table?
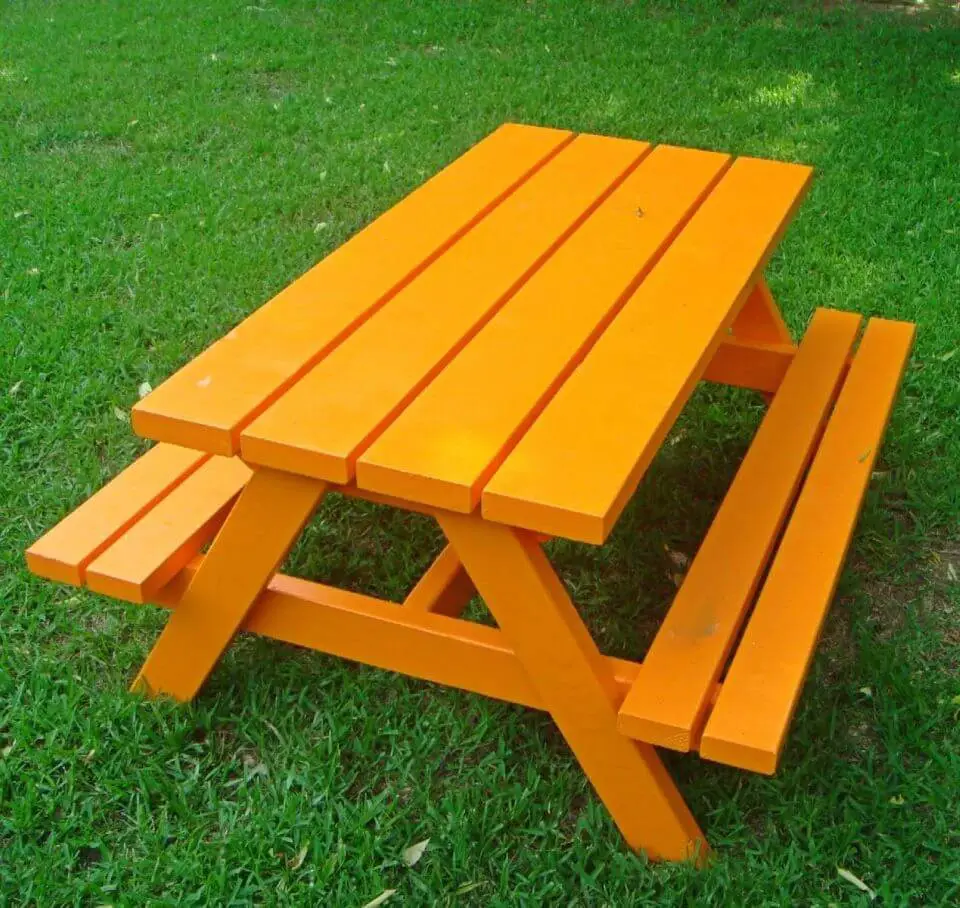
Easy DIY Picnic Table
Elevate your backyard experience with these uncomplicated free picnic table plans, accessible to both novices and seasoned DIY enthusiasts. Within 30 minutes or less, you can assemble this straightforward yet visually appealing table, effortlessly transforming your outdoor space into a charming retreat. The comprehensive kit, readily available at home improvement stores for under $100, streamlines the construction process, making it an ideal choice for those new to DIY projects. Once assembled, apply a weatherproof stain to safeguard the wood and accentuate its natural charm. We recommend utilizing Olympic Maximum Stain + Sealant in One in the Coffee hue, which yields a stunning aged appearance while serving as a protective sealant. Assembled, this picnic table assumes a charming campground ambiance, perfect for savoring outdoor meals and hosting social gatherings amidst nature’s splendor.
How to Make a Wooden Fold-up Picnic Table
Transform your outdoor space into a cozy retreat with a DIY fold-up picnic table that’s as versatile as it is functional. This innovative design combines the simplicity of a bench with the practicality of a table, making it perfect for compact areas or gatherings on-the-go. The clean lines and sturdy construction ensure it blends seamlessly with existing furniture, while its eco-friendly appeal comes from using reclaimed lumber or repurposing old materials. Take customization to the next level by tailoring the dimensions to fit your unique outdoor space. To further personalize your picnic setup, consider adding features like a built-in cooler or planter that complement your outdoor aesthetic. And when the party’s over, the table effortlessly folds away, freeing up valuable space for other activities. With its impressive versatility and ease of use, this DIY project is an excellent way to elevate your outdoor adventures and make memories with friends and family.
How to Build a Wooden Picnic Table – Step by Step
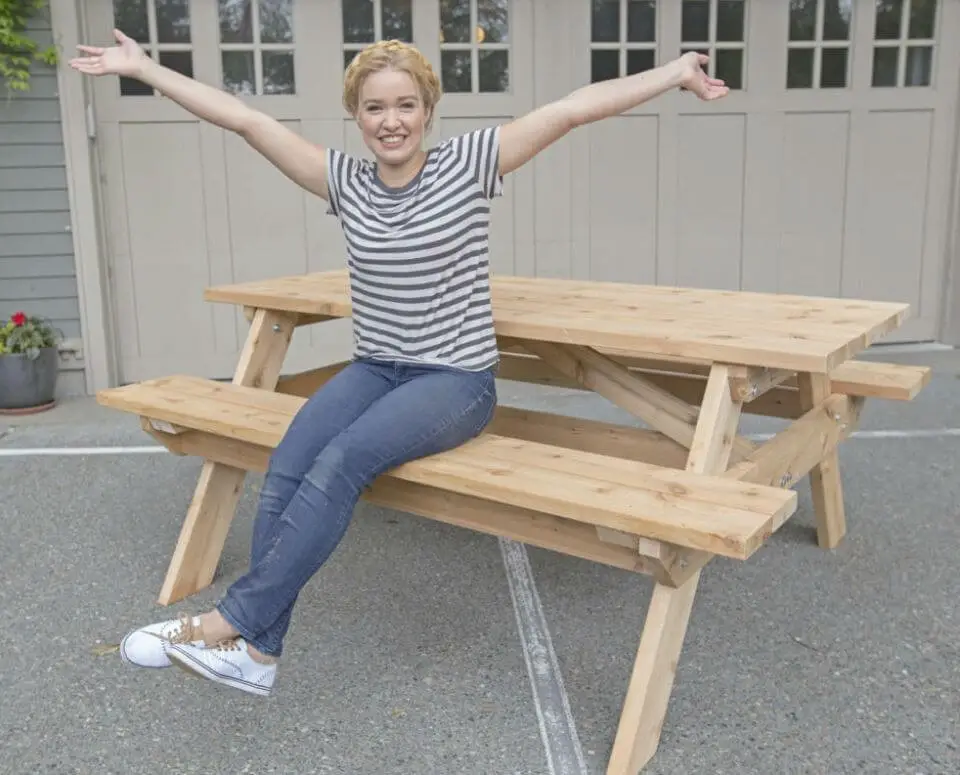
Transform your outdoor living space into a cozy retreat with a durable and attractive DIY cedar picnic table. This rewarding project requires minimal materials, including cedar decking and basic hardware, and only about 4-5 hours of your time. With step-by-step guidance, you’ll be able to construct this sturdy and rustic seating solution, perfect for family gatherings or casual get-togethers. The end result is not only an inviting space but also a testament to the value of DIY endeavors, as even a second attempt can yield improved results. Join the ranks of DIY enthusiasts by making this picnic table and elevating your outdoor space’s functionality and charm.
Free Wooden Picnic Table Plan
Bring joy and creativity into your family’s daily life by crafting a DIY kids’ picnic table that can seat four children comfortably. This compact and sturdy piece is perfect for family gatherings, playdates, or casual meals. Made from 90mm x 35mm treated pine, the table is both lightweight and strong enough to withstand even the most energetic of youngsters. While building this table may require some time and effort – especially if you choose to laminate the panels – the end result will be well worth it. With just 8m of structural pine, a few bolts and screws, and some paint, you’ll have everything you need to get started. As your children help with the construction process, they’ll develop valuable hands-on skills and foster their creativity in a fun and engaging way. The finished product promises countless hours of entertainment for years to come.
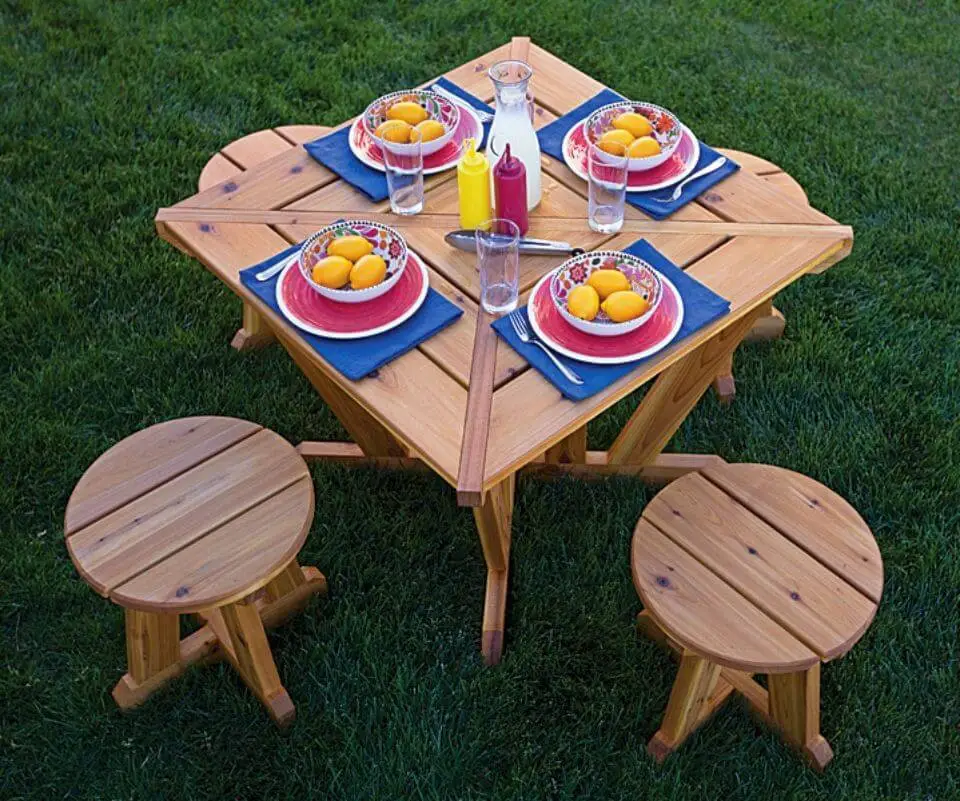
Building a Hexagon Picnic Table
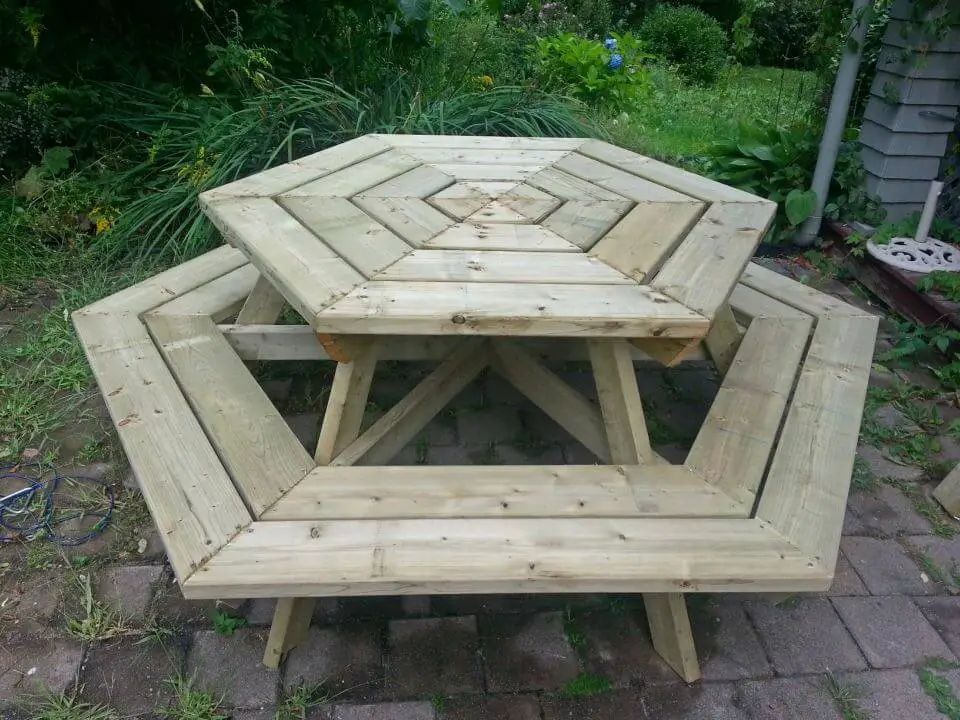
Transform your backyard gatherings with this comprehensive DIY guide to creating a unique, hexagon-shaped picnic table. By combining traditional charm with modern functionality, you can create a welcoming space that fosters memories and connections. The project requires 2×4 and 2×6 lumber, self-tapping exterior screws, primer, paint, and wood conditioner. Each step of the assembly process is carefully outlined to ensure a seamless build. What sets this design apart is its versatility – it can be adapted to any outdoor setting, making it perfect for families, friends, or community gatherings. Building your own furniture provides a sense of accomplishment, but it’s the moments spent around the table that will truly be treasured. With this DIY picnic table plan, you’ll be well on your way to creating a space where memories are made and traditions are formed.
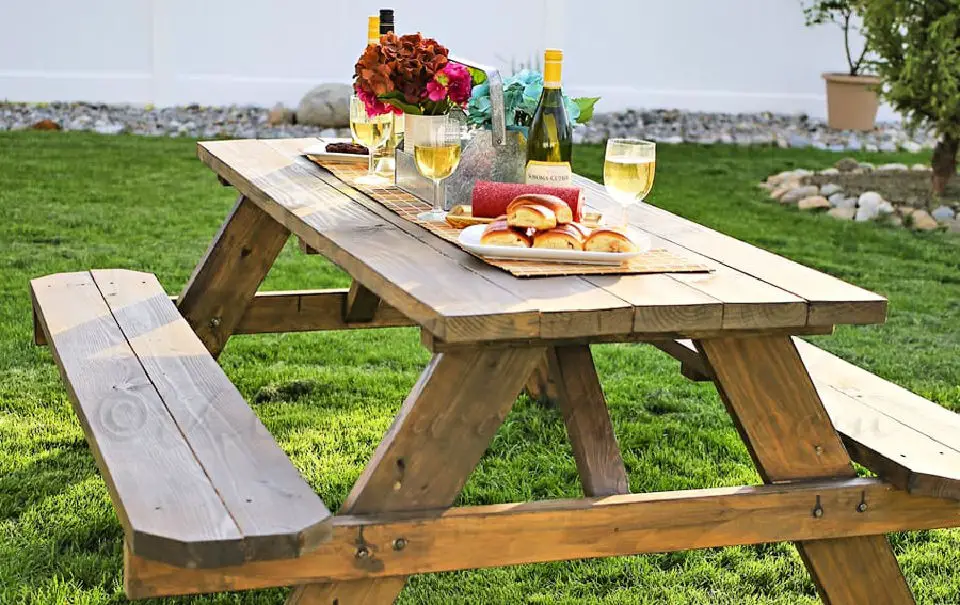
Simple DIY Farm-Style Picnic Table
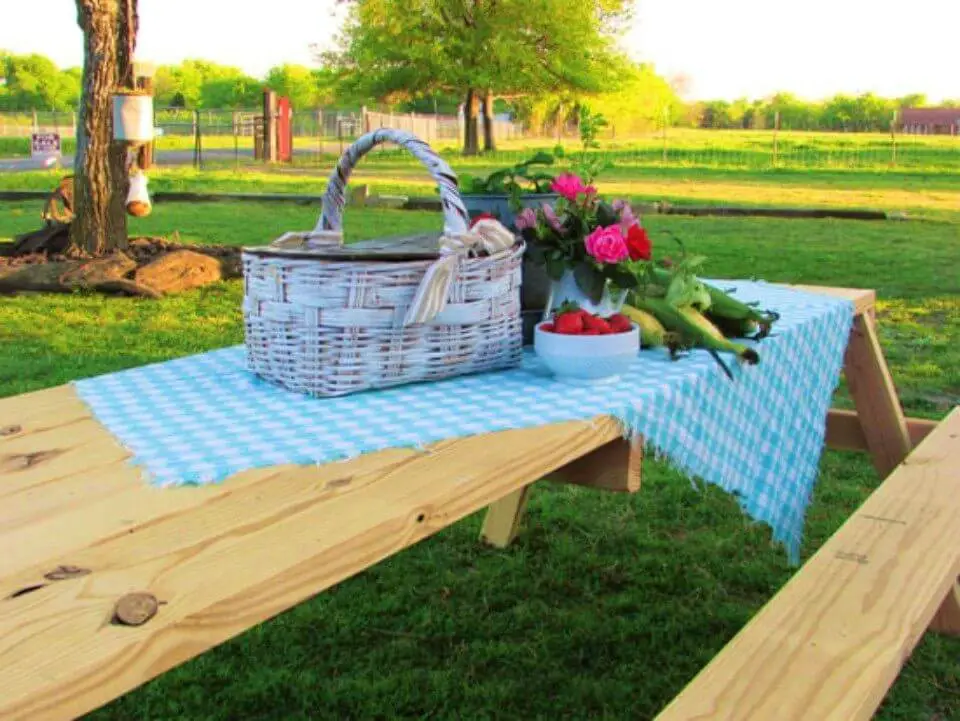
Immerse yourself in the joy of outdoor dining with a sturdy, DIY picnic table that becomes the centerpiece of warm and lively gatherings. The nostalgia of childhood beach dinners, spent lingering around wobbly wooden tables, can now be replaced with an upgrade that’s both functional and memorable.
A well-crafted wooden picnic table is more than just a practical tool – it’s an invitation to create treasured moments with loved ones. With simple materials like 2-by-8 boards, deck screws, and basic power tools, you can build a robust table that withstands the test of time.
The rustic charm of a wooden picnic table elevates any outdoor space, and building it yourself adds to its value. By following this step-by-step guide, you’ll be able to assemble a versatile picnic table perfect for any occasion – whether it’s an afternoon lunch, evening dinner, or quiet retreat. With your DIY picnic table, the possibilities are endless.
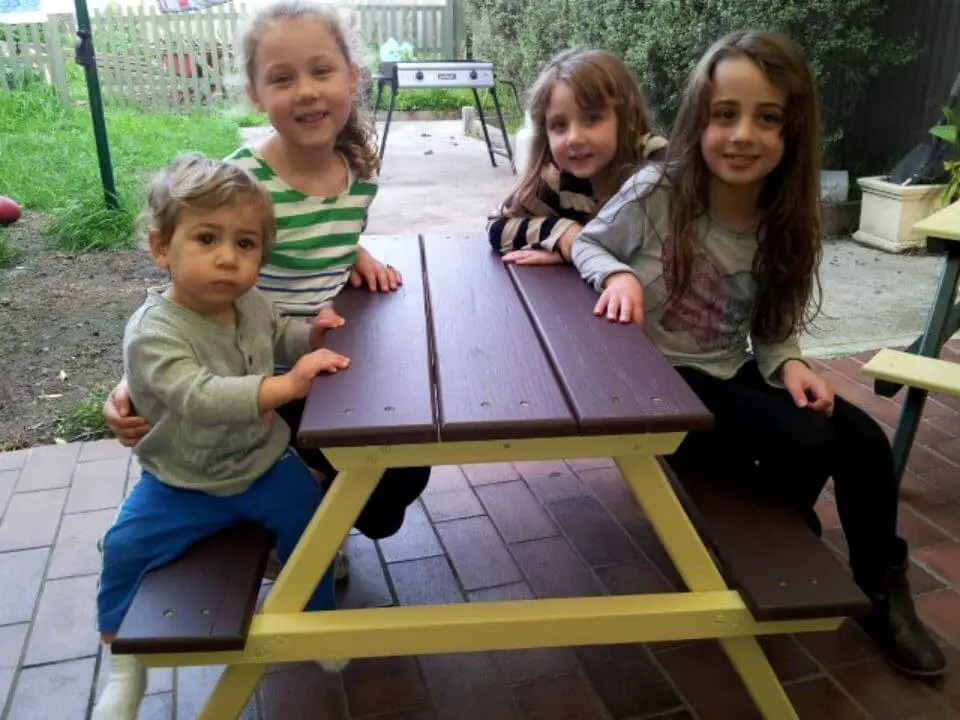
Make a Composite Toddler Picnic Table
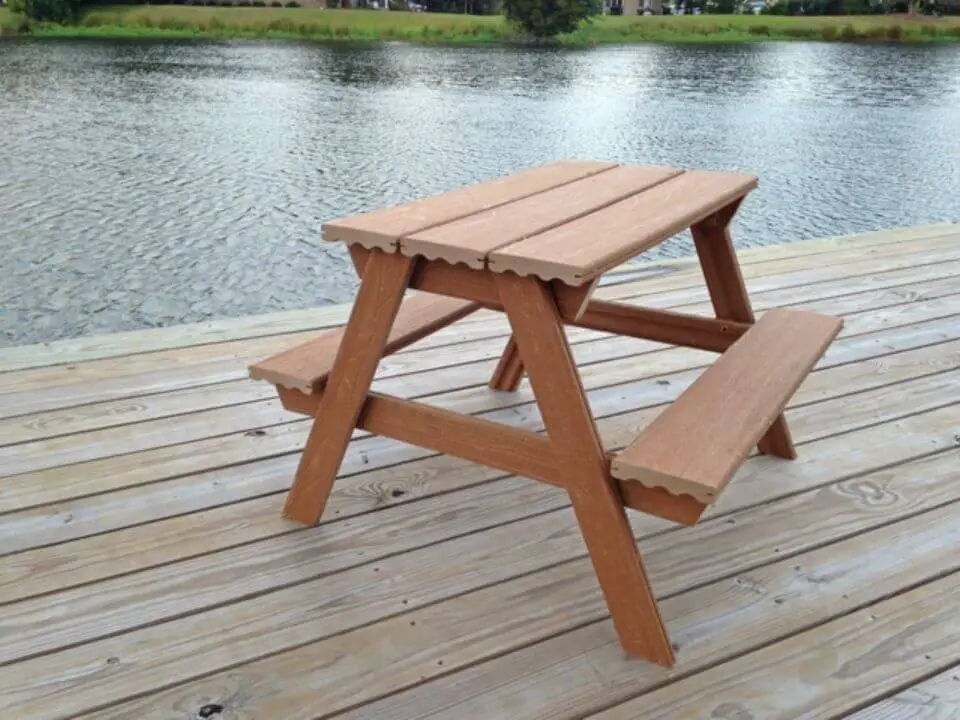
To create a sturdy and long-lasting composite toddler picnic table for outdoor use, all it takes is some DIY know-how and elbow grease. This budget-friendly project is perfect for hosting grandchildren on sunny days, providing a low-maintenance solution that’s easy to clean and maintain. With three 8-foot composite decking boards, you can build this versatile table without breaking the bank – it’ll cost you around $45. To get started, gather your materials: three 1x6x8′ composite decking boards and exterior-grade screws. Follow along with our step-by-step guide, complete with helpful illustrations at each stage to ensure a seamless assembly process. We’ve also included a cut list and plans for added convenience. As you work on the project, don’t forget to smooth down any sharp edges before your little ones start using the table. With this durable and low-maintenance picnic table in place, you’re ready to surprise your family with a fun and functional outdoor space.
Build a Wooden Picnic Table
Transform your outdoor dining experience by crafting a handcrafted picnic table that combines functionality with the warmth of nature. With just 12 carriage bolts, nuts, washers, six lag screws, and 3.5- inch exterior screws, you can create this sturdy DIY piece of furniture that’s designed for comfort and built to last.
What sets this project apart is its flexibility – you can choose from various screw head types to suit your personal preference and ease of use. Built with durable materials, this picnic table invites you to savor meals in the great outdoors, basking in the gentle breeze and warm sunlight.
This outdoor furnishing seamlessly blends into your alfresco space, creating a cozy dining spot that elevates your outdoor experience. So why not get started and turn your backyard into an inviting retreat?
How to Build and Paint a Picnic Table
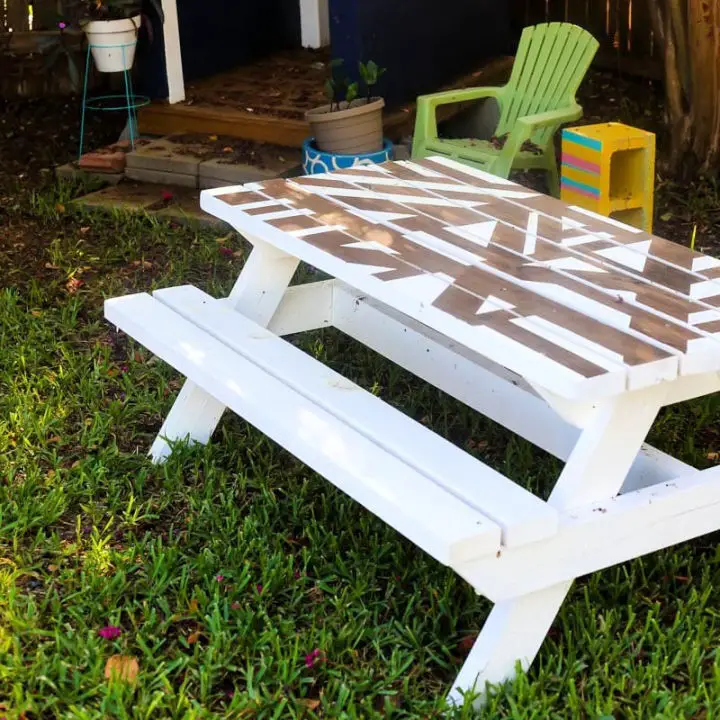
Let’s embark on an exciting DIY adventure! By crafting this picnic table project, we’ll not only expand our skills but also create a treasured memory for our little ones. The building process is relatively straightforward, involving the assembly of tabletop pieces onto support boards, cutting and attaching legs, and fitting seats. Feel free to modify the dimensions to suit your personal style.The real magic happens when we add a splash of color with a geometric design using a Wagner Studio Plus sprayer. With patience and creativity, we can transform this project into a stunning piece that will captivate our children and leave them thrilled. Loveandreno
Amazing DIY Pallet Wood Picnic Table
This summer, transform your backyard into an inviting oasis by crafting a unique DIY pallet picnic table. Not only will this project elevate the aesthetic appeal of your outdoor space, but it also serves as a cost-effective solution for hosting gatherings and making memories with loved ones. By repurposing discarded pallets and low-cost scrap wood, you can create a sturdy and rustic table that exudes charm and character. With just a few essential tools like a miter or table saw, nail gun, drill, and more, this DIY project can be completed in approximately 4 hours. The step-by-step guide ensures a seamless process, from disassembling the pallet boards to finishing with a personalized stain or paint. As you sit back and enjoy your newly crafted table, you’ll revel in the sense of accomplishment that comes from turning ordinary materials into something extraordinary.
2-in-1 Wooden Picnic Table and Bench
Elevate the functionality of your outdoor space with a DIY 2-in-1 picnic table that effortlessly converts into a bench. Constructed from readily available 2×4 softwood, this design prioritizes ease of access and efficient use of space, making it an ideal choice for compact decks. The assembly process involves a combination of gluing and screwing, bolstered by the added stability of a triangular block supporting the legs. To further enhance accessibility, shorter supports are added beneath the table after leg assembly. The seat top, featuring four 12mm steel rods, is secured through drilling three 2x4s, applying glue, and inserting 15mm blocks for added strength. This ingenious, space-saving solution provides a practical dining area and a comfortable seating option. With this DIY project, you can transform your outdoor setting into a versatile entertainment zone, perfect for social gatherings and everyday relaxation.
Quick and Easy DIY Wooden Picnic Table
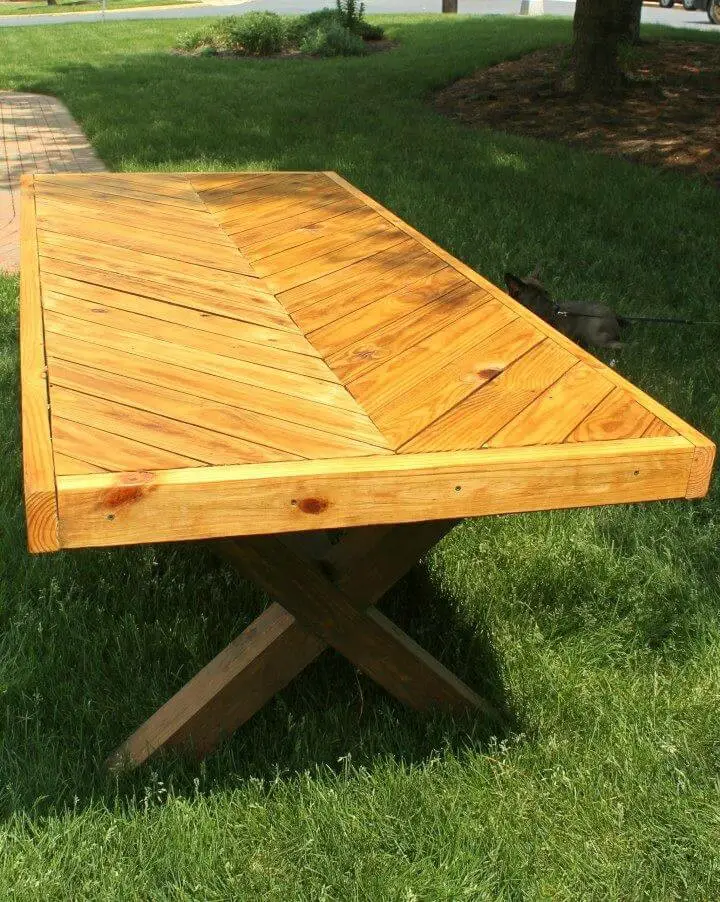
Step into the world of upcycled DIY and discover how an old tree fort can be transformed into a one-of-a-kind picnic table! This accessible woodworking project invites you to design an X-frame masterpiece with a visually striking herringbone top, all crafted from repurposed wood that celebrates sustainability. As you work through this novice-friendly guide, you’ll utilize tools like a circular saw, Ryobi nail gun, and belt sander to bring your vision to life. The finishing touches come in the form of staining and sealing, which not only preserves the wood but also amplifies its natural charm. And the best part? You’ll likely have plenty of leftover wood to put towards matching benches or other complementary projects, allowing you to extend the life of this unique picnic table into a whole outdoor gathering space that’s as cozy as it is conversation-worthy.
Turn a Suitcase Into a Picnic Table With Speaker System
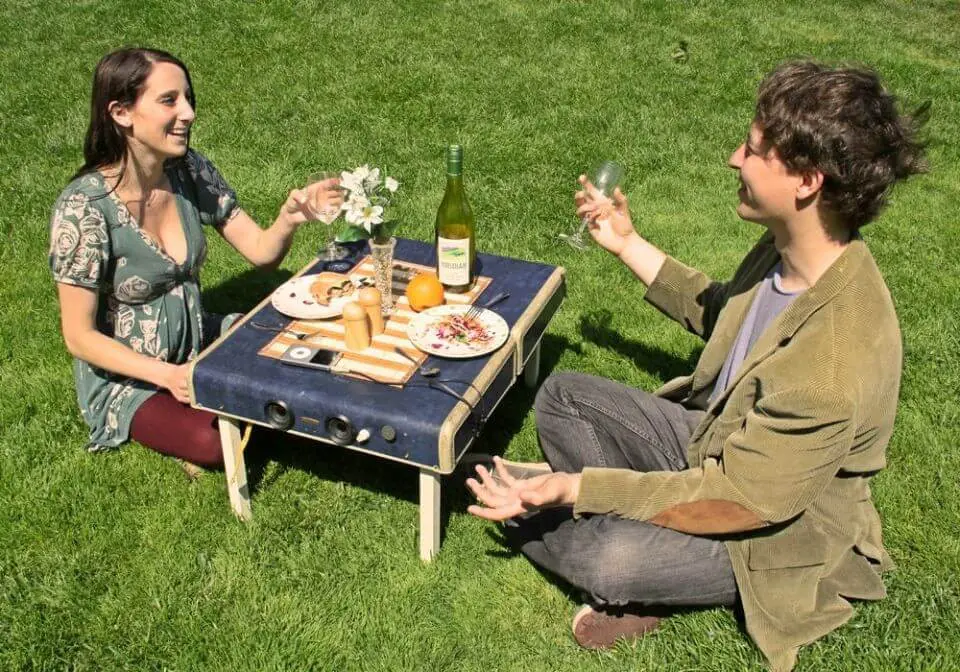
Transform any outdoor adventure into an unforgettable experience with this ingenious DIY suitcase picnic table and speaker system. By upcycling a vintage suitcase, you’ll create a multifaceted companion that not only holds all your essentials but also doubles as a functional table and a speaker system to elevate the ambiance of your gatherings.
To bring this project to life, you’ll need materials like a hard shell suitcase, wooden legs, hinges, a power drill, screws, and some spray paint. With these components, you’ll craft a portable picnic kit that’s equal parts practicality and innovation.
The speaker system operates via a minty boost USB charger, allowing you to connect your favorite tunes from an iPod or similar device. The process of building this Suitcase project is a harmonious blend of craftsmanship and tech, requiring the repurposing of the suitcase, installation of retractable legs, and integration of the speaker system.
This unique DIY project will revolutionize the way you enjoy picnics in the park, making every outing an extraordinary experience.
How to Make a Sleek Picnic Table
Transform your outdoor living area with a bespoke, modern DIY picnic table featuring detached benches. This project combines design elements to create a functional and stylish patio feature. Constructed using 22 Cedar 2x4x8, 2 Cedar 2x6x8, deck screws, and bolts, this 8ft long table can be easily adjusted to accommodate your preferred seating arrangement. The detached benches offer flexible seating options, while the overall design provides a sleek aesthetic that enhances the comfort and appeal of your patio. While this project may present a challenge for beginners, the end result is a durable, personalized piece of furniture that elevates the ambiance of your outdoor space. Dive into DIY carpentry and create a practical yet elegant addition to your patio.
Build an Adult sized Picnic Table
Transform your outdoor space into a vibrant hub of social activity with a sturdy DIY picnic table that fosters connections among friends, family, and community members. Not only does it provide a comfortable spot for adults to supervise children at play, but also encourages spontaneous gatherings and impromptu conversations.
To bring this functional piece to life, you’ll need 2x4x10′ boards, 2x6x8′ boards, 2x6x12′ boards, deck screws, galvanized carriage bolts, washers, and nuts. A basic toolkit consisting of a miter saw, pencil, tape measure, carpenter’s square, safety glasses, drill, screwdriver bit, level, and ratchet or wrench will help you assemble the table with ease.
A step-by-step guide provides precise measurements and cutting instructions, ensuring that the process is both simple and enjoyable. With this must-have picnic table in place, get ready to host countless picnics, conversations, and special moments in the heart of your playspace.
Cool DIY Picnic Table for Kids
Transforming the way children dine and socialize has never been easier or cost-effective than with free picnic table plans that offer versatility and charm. This DIY project is designed to be set up both indoors and outdoors, making it an ideal addition to your living space. What’s more, this kids’ picnic table serves as a unique space for creative pursuits, homework sessions, or simply hanging out. The materials required are straightforward: five 2×4 boards (96 inches), eight 1×6 boards (96 inches), and three 1×2 boards (96 inches). To ensure durability and stability, exterior pocket hole screws will come in handy. By creating a designated space for kids to gather, you’ll be fostering their social skills and potentially inspiring some envy among adults. The term ‘kids’ table’ takes on a whole new meaning when it’s a sought-after spot that invites fun, creativity, and connection. Make your child’s space more exciting and enjoyable with this functional project today!
Make a Pallet Wood Picnic Table
Give new life to an old pallet and transform your child’s playtime with this eco-friendly DIY picnic table project! With only a few basic materials and tools, you can create a charming tabletop perfect for little ones. Start by upcycling 2/3rds of a pallet, some scrap 2x4s, and a couple of new 2x4s to build a delightful picnic table measuring 40 inches long and 21.25 inches wide, making it an ideal addition to any backyard or playroom. The build process is surprisingly simple, requiring only basic woodworking tools, creativity, and a dash of determination. So why not give it a try? With this unique, functional piece, you’ll add a spark of joy to your child’s playtime without breaking the bank.
Square Picnic Table Plan
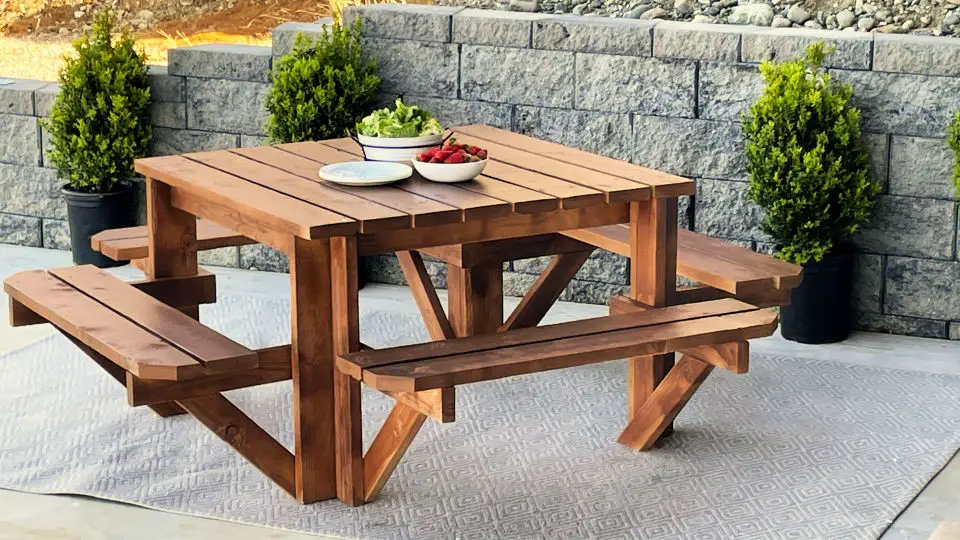
Transform your outdoor space into an inviting oasis by crafting a one-of-a-kind DIY picnic table. This modern take on the classic design boasts comfortable seating for four adults, with potential to accommodate up to eight. The compact footprint makes it perfect for various spaces, from cozy backyards to bustling patios. A video tutorial accompanies the plans, guiding you through the straightforward building process. With just a few essential materials like 2×4 and 2×6 boards, exterior wood screws, and some elbow grease, you can create a beautiful picnic table that will be treasured for years to come.
Conclusion:
Building a homemade picnic table using the 30 free DIY picnic table plans we’ve provided is not only a feasible task but also an incredibly fulfilling one. This comprehensive guide has walked you through every step, from selecting the ideal materials and tools to incorporating personal touches and considering environmental factors. With regular upkeep, your picnic table will stand the test of time, becoming a cherished outdoor hub for meals, gatherings, and making memories that last. Now is the perfect moment to take the first step and turn these plans into reality – start your DIY picnic table project today and bask in the satisfaction of your handiwork!
