With its whimsical charm, crocheting a bird can be an inviting project for crafters of all skill levels. The abundance of free crochet bird patterns – 25 designs to choose from – guarantees that there’s something for everyone. These charming creations can bring a touch of personality to your home decor, make delightful gifts, or even become treasured toys. By breaking down the process into manageable steps, our comprehensive guide simplifies the journey, guiding you through selecting the right materials to finishing touches. From amigurumi birds and birds of paradise to parrots, cardinals, and appliques, our step-by-step tutorial empowers you to master various designs with ease.
Why Crochet Birds?
Crocheting birds offers a unique combination of creativity, relaxation, and personal fulfillment. As you bring these feathered friends to life with yarn, you’ll discover a range of benefits that extend far beyond the finished product. For instance, crafting birds allows you to express your creativity through color and pattern choices, which can translate to improved problem-solving skills and a sense of accomplishment. The repetitive motion of crocheting also has a meditative quality, providing a much-needed stress relief after a long day. Plus, with the option to create unique gifts that showcase your personal touch, you’ll find yourself sharing your creations with loved ones or proudly displaying them in your own home. By choosing sustainable yarns and embracing eco-friendly practices, you can further enhance the positive impact of your hobby. As you grow as a crocheter, you’ll have the opportunity to develop new skills and techniques, connect with like-minded individuals through online communities or local groups, and even create playful toys or decorative pieces that bring joy to others.
How to Crochet a Bird – Step by Step Amigurumi Tutorial
Step into the world of amigurumi crafting with our comprehensive guide on creating a charming bird. Perfect for beginners and seasoned crocheters alike, this tutorial will lead you through each stage of bringing a vibrant, cuddly bird to life using chunky yarn. With endless possibilities in terms of species – from budgies to cockatiels and beyond – let your creativity soar as we embark on this fun and rewarding project together.
Materials Needed
To embark on this delightful crochet project, please gather the following essential materials: A variety of chunky yarns in the colors that inspire you. You’ll also need a crochet hook that’s one size larger than recommended for your yarn type to achieve the perfect amigurumi texture. Additionally, have scissors at the ready for trimming any stray threads. For adding substance to your creation, prepare some stuffing material. A yarn needle will come in handy when sewing together the various parts of your project. If you desire a more realistic and endearing look, consider incorporating safety eyes (or opt for embroidery if that’s your preference).
Getting Started
To bring your amigurumi bird to life, start by crafting a magic circle that seals the center tightly, leaving no hole behind. This foundation is essential for projects like this one. Next, using your chosen color, work in rounds to crochet the bird’s body. Begin with single crochets into the magic circle and gradually increase in each round until you reach the desired width. Once you’ve achieved the correct proportions, work several rounds without increasing to shape the body’s length. Finally, decrease to close the body, leaving a small opening for stuffing. This will allow you to add some gentle padding to give your bird its signature plumpness. Make sure the stuffing is evenly distributed before sealing the opening with additional stitches. The head can be crafted in a similar manner on a smaller scale. Increase, work even, and then decrease to create the desired shape, then attach it to the body using yarn and a yarn needle. For the final touches, crochet small ovals or teardrop shapes for the wings and a fan shape for the tail. Attach these elements to the body where they look most natural. Feel free to experiment with different colors here to give your bird some added personality. To complete the piece, embroider a cute beak and add safety eyes or embroidered eyes to bring out the character. Finally, weave in any loose ends using a yarn needle.
Video Tutorial
While a visual guide can be incredibly helpful in understanding the intricacies of crocheting an amigurumi bird with chunky yarn, combining it with a written guide provides a holistic approach that’s hard to match. The video tutorial offers a step-by-step demonstration of each process, serving as a valuable reference point for those who prefer a more hands-on learning experience. When paired with this written guide, the result is a comprehensive understanding of the crafting process, allowing you to craft a charming and vibrant bird that’s sure to bring joy to anyone who lays eyes on it. As with any creative endeavor, patience and practice are essential for achieving beautiful amigurumi results. Take your time, relax, and enjoy the journey of bringing your crochet bird to life.
Skill Level
When diving into crochet bird patterns, it’s essential to consider your skill level to ensure a seamless and enjoyable crocheting experience. Most patterns can be grouped into three categories: beginner, intermediate, and advanced.
Beginner patterns are perfect for newcomers to crocheting. They typically involve straightforward stitches and techniques, making them easy to follow.
Intermediate patterns may introduce new techniques and more complex stitches, catering to those who have a few projects under their belt and are comfortable with basic crochet stitches.
Advanced patterns are geared towards seasoned crocheters, featuring intricate designs, complex stitches, and requiring a high level of concentration and skill.
It’s crucial to remember that it’s okay to challenge yourself, but also important to enjoy the process. Choose a pattern that aligns with your skill level and gradually work your way up as you gain more confidence and experience.
Variations
When it comes to crochet bird patterns, the possibilities are endless. One of the best things about these designs is that they can be easily customized to reflect your personal style. Here are some ways you can make a crochet bird truly one-of-a-kind: Start by thinking outside the box when it comes to color. You could opt for a realistic bird-like hue or go bold and bright with vibrant colors. Size also plays a key role in customization. Simply adjust the yarn weight and hook size to create birds of varying sizes. For example, thicker yarn and larger hooks will yield bigger birds, while thinner yarn and smaller hooks will result in smaller ones. Embellishments are another great way to add some personality to your bird. Consider adding beads, sequins, or even embroidery to give it unique features. You could embroider the eyes or add sequins to the wings for a touch of sparkle. The key is to remember that the goal is to make your crochet bird uniquely yours. Don’t be afraid to experiment and try something new – after all, that’s what makes handmade crafts so special.
Community
By fostering a community around your crochet bird patterns, you can elevate the crocheting experience from mere hobby to meaningful connection with like-minded individuals. To achieve this, consider implementing the following strategies:
Encourage interactivity by inviting readers to share their stories, tips, and finished projects in the comments section. This will create a supportive environment where users can learn from each other’s experiences.
Host a Crochet Along (CAL) where everyone works on the same pattern simultaneously. This collaborative effort can foster connections among your audience as they share their progress, receive feedback, and gain inspiration from one another.
Establish a dedicated online forum where readers can pose questions, showcase their work, and engage with fellow crocheters. This will provide a platform for users to seek guidance, offer support, and develop meaningful relationships.
By doing so, you’ll transform your blog into a vibrant hub of creativity, inspiration, and connection, where readers come not only for patterns but also for the sense of belonging that comes from being part of a community.
Tips and Tricks for Crocheting a Bird
Before diving into a crochet bird project, it’s essential to grasp the underlying pattern. Take time to study any unique stitches or techniques that might be unfamiliar to you. A thorough understanding of these elements will set the foundation for a successful creation.When selecting yarn, consider how it will impact the overall aesthetic and texture of your avian friend. Cotton yarns can produce a smooth, polished finish, whereas wool or acrylic yarns can add depth and interest.Color choices are also crucial, as they can greatly influence the realism and appeal of your bird. Realistic hues can create a lifelike appearance, while bold, vibrant colors can result in a playful, whimsical design.To achieve a well-proportioned and structurally sound bird, maintaining consistent tension throughout your stitches is vital. This attention to detail will ensure that your finished piece meets your expectations.When stuffing the bird, be mindful of the balance between too much and too little filling material. Excessive stuffing can render the bird stiff and unyielding, while inadequate filling may leave it limp and lacking in dimension.
Care and Maintenance of Your Crocheted Bird
When it comes to maintaining and caring for your crocheted birds, there are a few key steps to keep in mind. For starters, most items can be gently hand washed with a mild detergent, followed by thorough rinsing and pressing out any excess water with a towel. Allow the bird to air dry naturally, rather than exposing it to heat or harsh chemicals. This will help preserve its delicate details and overall shape.
In terms of storage, it’s essential to keep your crocheted birds in a cool, dry place where they won’t be exposed to high humidity or extreme temperatures that could cause damage or warping. A well-ventilated area with moderate temperatures is ideal.
If your bird does get damaged or starts to come apart, don’t worry – most crocheted items can be easily repaired with a bit of matching yarn and a crochet hook. This not only saves you the hassle of replacing the item but also helps extend its lifespan.
Finally, when handling your crocheted birds, it’s crucial to exercise care and caution. Avoid pulling or tugging on the wings or tail, as this can cause the bird’s shape to distort or even come apart entirely. With proper care and attention, however, these delightful creations can provide hours of entertainment and joy for years to come.
FAQs on Crocheting Birds
Blending creative expression with manual dexterity, crafting birds through crochet can be an incredibly fulfilling hobby for many enthusiasts. As you delve into this unique blend of artistry and technical skill, it’s natural to have a few questions arise. In this section, we aim to address some of the most frequently asked queries, providing valuable insights to help both newcomers and seasoned crocheters refine their craft.
What type of yarn is best for crocheting birds?
When crafting a crochet bird, the type of yarn used plays a significant role in determining its appearance and texture. If you’re aiming to create a soft and fluffy avian friend, consider opting for plush or chenille yarns that will impart a gentle, cuddly quality. Conversely, cotton or acrylic yarns would be more suitable for crafting a bird with a stiffer, more structured appearance.
How do I keep my stitches even?
Mastering the art of maintaining even stitches in crochet requires dedication and attention to detail. As you create your bird, strive for a harmonious balance between tension and looseness. If your stitches are too tight, your finished product may feel stiff and lifeless, while stitches that are too loose can result in a loss of shape and definition.
How do I add eyes to my crochet bird?
One approach to bringing your crochet bird’s gaze to life is to consider multiple methods for adding eyes. Embroidery provides a subtle yet effective way to create the appearance of pupils, while safety eyes offer a more literal representation of ocular features. For those looking to take their project to the next level, crocheting separate eye pieces and sewing them onto the bird’s face can result in a strikingly realistic visage.
How do I stuff my crochet bird?
To achieve a lifelike appearance for your crochet bird, ensure that the filling is evenly distributed throughout the project, providing support without compromising the softness. A gentle stuffing process is crucial, particularly in sections with intricate details such as the beak and tail, where excessive filling could lead to distortion. As you work on these areas, take care to maintain a balanced filling pace to preserve the bird’s natural shape while keeping it pliable to the touch.
Can I wash my crochet bird?
While many crocheted bird creations can withstand gentle hand washing, it’s crucial to consult the yarn’s specific washing instructions beforehand. A quick glance at the manufacturer’s guidelines will ensure you’re providing the perfect care for your delicate avian masterpiece.
How long does it take to crochet a bird?
Crocheting a bird’s intricacy can significantly impact the time it takes to complete, as well as an individual’s skill level. Basic designs may require only a few hours of dedication, whereas intricate patterns might necessitate multiple days of meticulous work.
Can I sell the birds I make from these patterns?
When it comes to selling finished products created using a particular pattern, there’s a crucial consideration: the pattern’s copyright ownership. While some designers permit the creation of saleable products based on their designs, others may have restrictions in place. As such, it’s essential to carefully review the terms of use for any pattern you plan to utilize, ensuring you’re aware of and complying with the applicable guidelines.
What do I do if I make a mistake?
When encountering an error in your crochet project, don’t be discouraged – it’s often possible to correct the mistake without having to start over from scratch. One common technique is to ‘frog’ your work, which involves carefully unraveling the stitches until you reach the point of the error. From there, you can re-start crocheting and continue working on your project as if the mistake had never occurred.
How can I make my crochet bird stand upright?
For optimal stability and posture, consider incorporating a weight into the foundation of your crochet bird. A small bean bag or rice pouch can effectively anchor the piece and prevent it from tilting forward, allowing you to create a more lifelike and visually appealing design.
What if I don’t understand a part of the pattern?
When encountering difficulties grasping a pattern’s underlying logic, don’t be afraid to seek assistance. Utilize online platforms like our community forum or the comment section below this very pattern to pose your inquiry. The collective wisdom of fellow learners and experts is merely a click away.
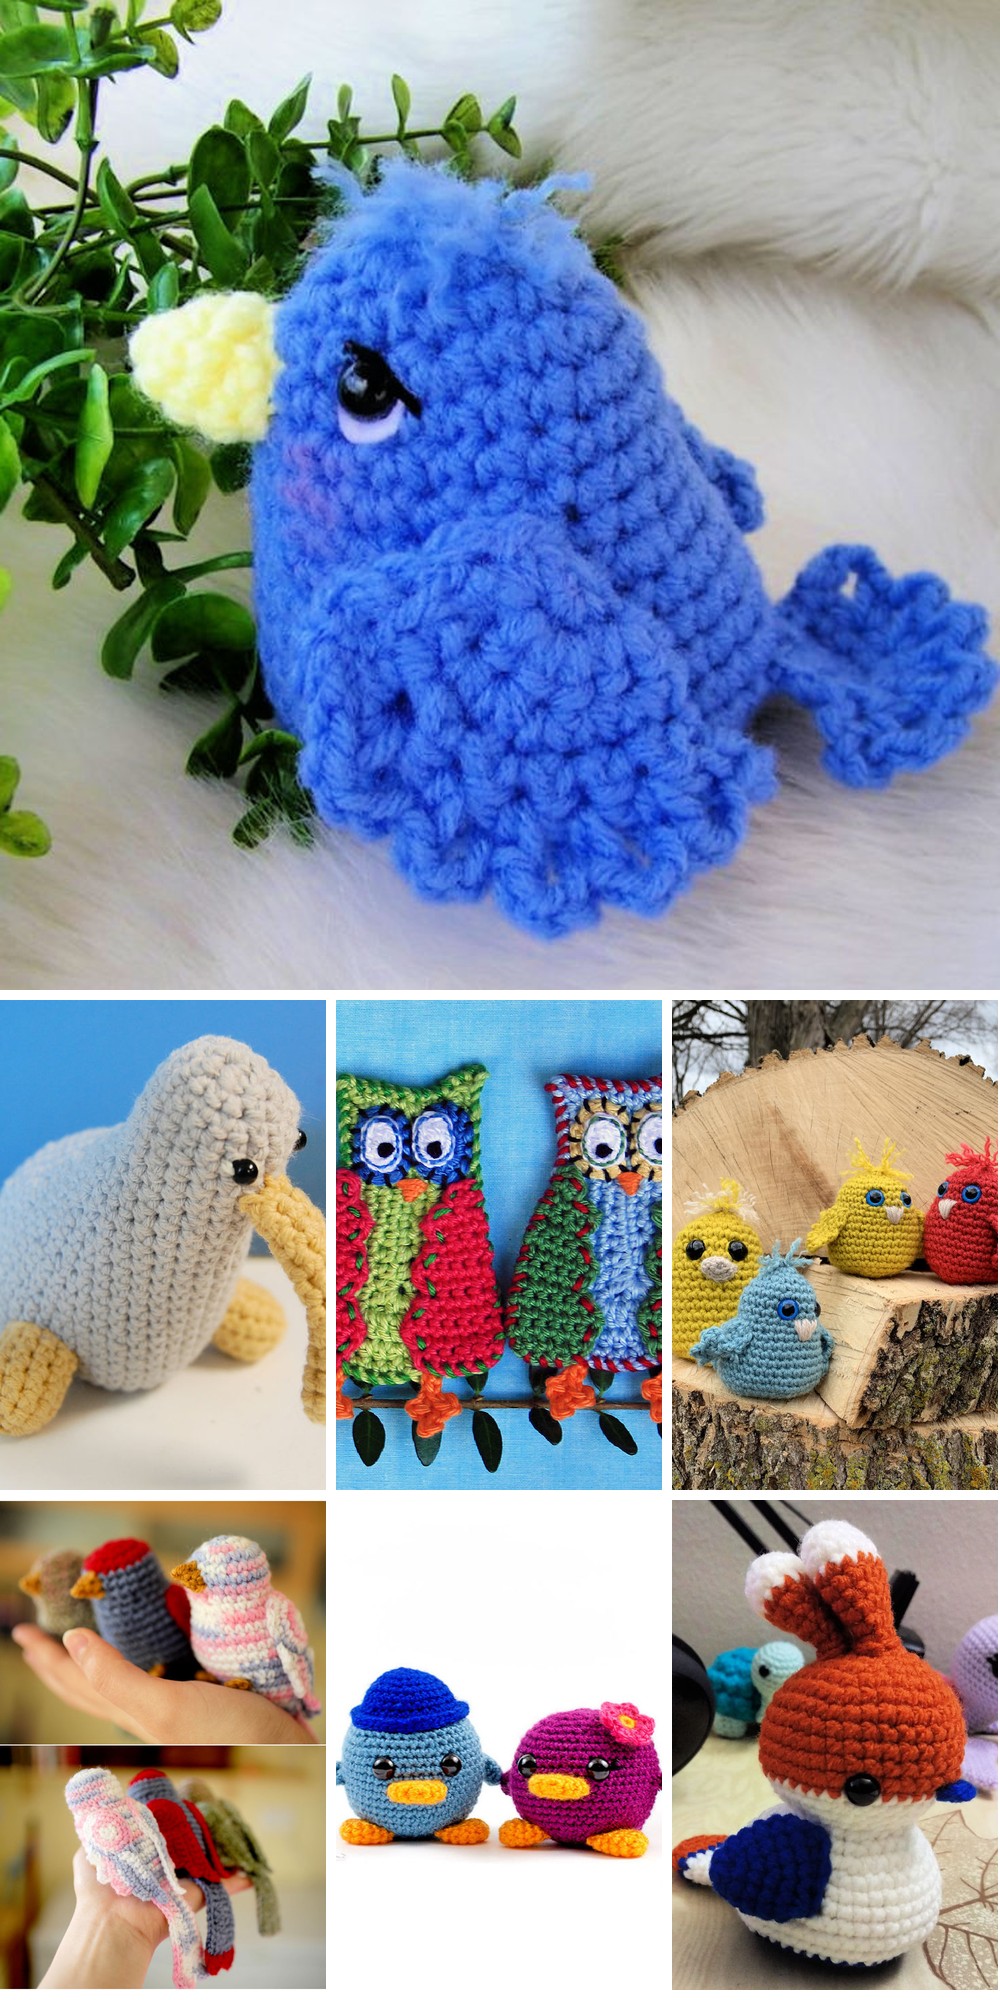
How to Crochet a Bird: 25 Free Crochet Bird Patterns
Discover the art of creating lifelike avian friends with our curated collection of 25 free crochet bird patterns perfect for beginners! Whether you’re drawn to realistic parrot designs or charming amigurumi interpretations, these step-by-step guides, accompanied by photographs, will empower you to bring your own unique crocheted birds to life.
Realistic Crochet Regal The Peacock Pattern
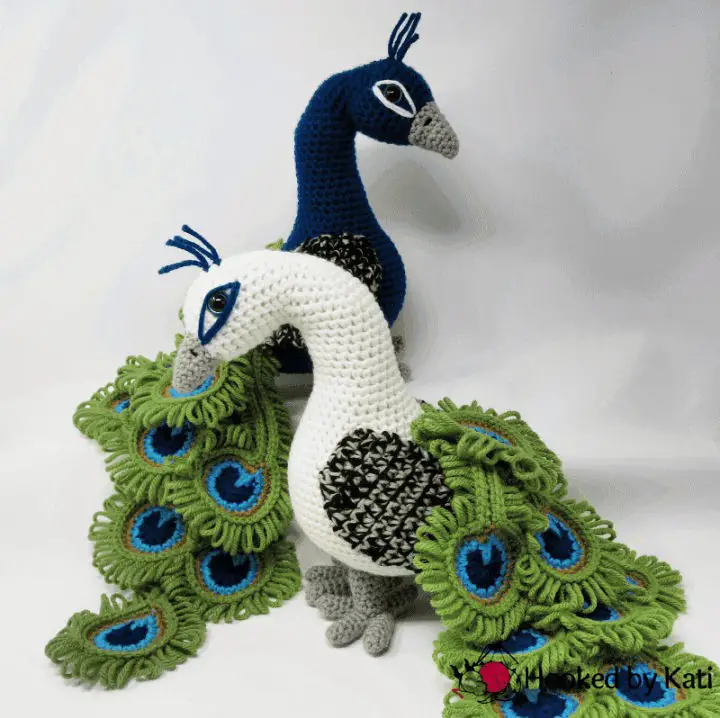
Transform a stunning peacock into a one-of-a-kind masterpiece by mastering the art of crochet! With this comprehensive pattern, you’ll acquire valuable skills to create a majestic stuffed animal that showcases its breathtaking tail. Whether you’re an accomplished plushy artist or just starting out, this design provides everything you need for a successful project. Consider gifting your finished creation to someone special or display two peacocks proudly on your mantle as an elegant addition to any room. To get started, grab red heart super saver solids and red heart with love solids yarns, 15mm colored safety eyes, and polyfil stuffing – and let the creative journey begin!
Beautiful Parrot Pals Crochet Pattern
Embark on a fascinating journey of avian artistry by exploring free crochet bird patterns designed for enthusiasts of all skill levels. The vibrant colors and intricate details will bring your own feathered friends to life, starting with the delightful parrot pals pattern. With just a few simple materials like Red Heart Super Saver Solids yarn, a 4.0mm (G) hook, and a 3.5mm (E) hook, you’ll be crocheting two charming birds standing at approximately 9 inches tall in no time. Feel free to get creative with your color combinations and stitches to craft the perfect pair of companions that will accompany you on your thrilling African adventures.
Free Crochet Lewis the Dodo Pattern

Transform a beloved symbol of extinction into a delightful home decor item with this free crochet pattern for an intermediate amigurumi enthusiast. To bring this charming dodo to life, gather red heart super saver solids, a Furls Odyssey G (4.00 mm) hook, two 15mm colored round-pupil safety eyes, polyfil stuffing, and the necessary assembly supplies. The finished project measures 11 inches tall by 8 inches wide, making it an ideal gift or decorative piece for any room. To ensure success, carefully follow the instructions and secure attachment ends until completion if repositioning is required. Begin your journey today to create a one-of-a-kind Lewis, the dodo bird, with Hooked by Kati.
Free Crochet Red Angry Bird Pattern
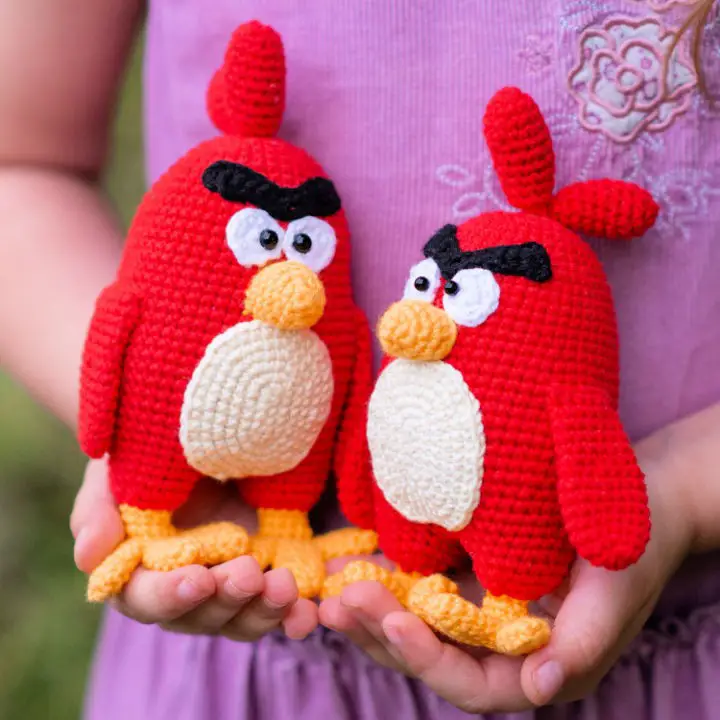
Looking to create an angry bird red with ease? We’ve got you covered with a comprehensive 10-page crochet pattern featuring 40 accompanying photos. Perfect for beginners, this project requires only basic skills, making it an excellent choice for those new to the craft. To get started, you’ll need Gazzal Baby Cotton yarn (an acrylic blend), a 2mm crochet hook, half-beads measuring 0.5mm, and some stuffing material like hollowfiber filling or a similar alternative. Once you have these supplies, you can assemble your creation using a tapestry needle. Simply download our free pattern now and get crafting!
Crochet Ember the Phoenix Pattern
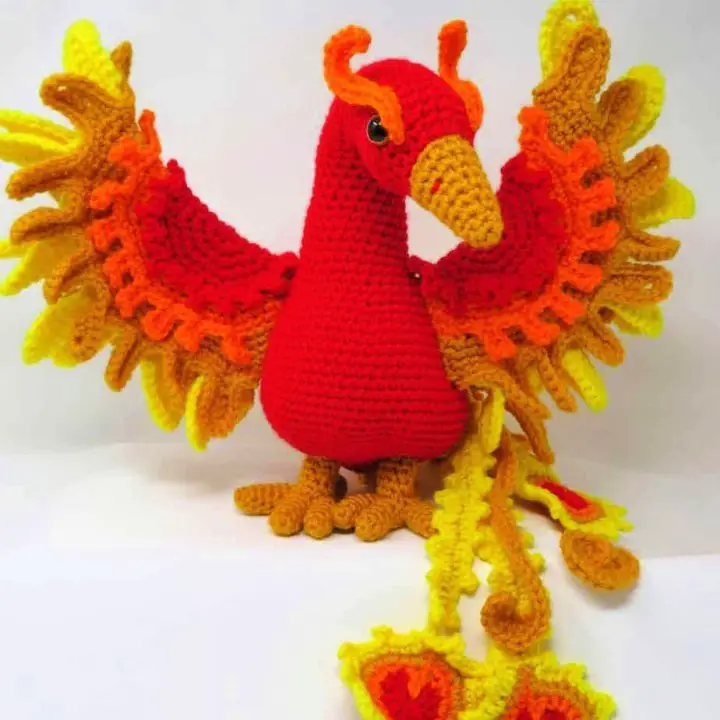
Embroider the magic of rebirth with this stunning free crochet pattern, Ember the Phoenix. By carefully following the step-by-step guide and assembling each piece according to the specified rounds and lengths (small, medium or large), you’ll bring a breathtaking mythical creature to life. When complete, your project will stand tall at 11 inches and span 15 inches wide, with a majestic tail extending 15 inches long – an ideal addition to any living space or thoughtful gift.
How to Crochet Woodland Bird Amigurumi
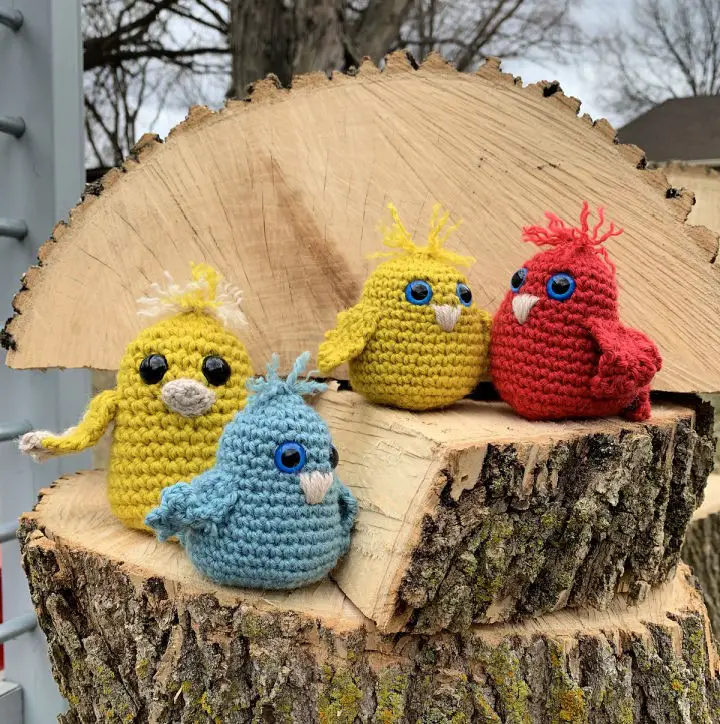
Unleash your creativity and bring a touch of whimsy to your home decor or gift-giving with this free crochet bird pattern. Designed for beginners, this charming amigurumi design requires basic skills such as crocheting in the round, working single and double/triple stitches, increasing and decreasing, and changing colors. When made using the recommended materials, these adorable woodland birds will stand approximately 5 inches tall, making them a delightful addition to your collection of crochet animals.
Crocheted Blue Bird – Free Pattern
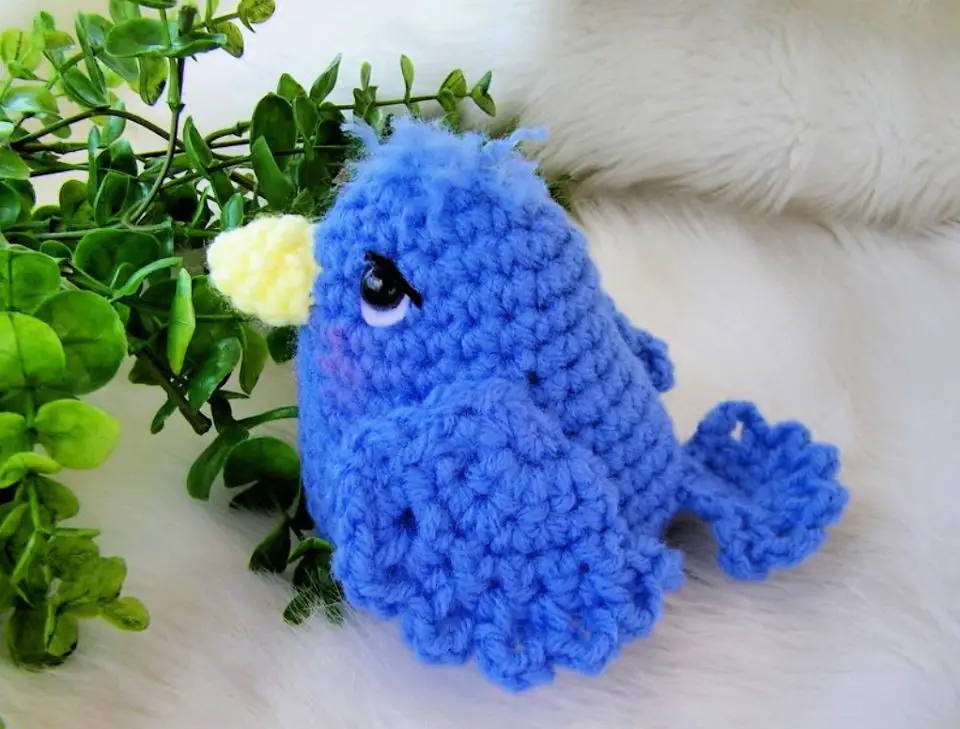
Looking for a charming crochet project that won’t break the bank? You’re in luck! This delightful blue bird pattern is not only adorable, but also free to make. To bring it to life, you’ll need worsted weight yarn, size G and F crochet hooks, some fiberfill stuffing, and a sharp needle. If you want to add an extra pop of color, consider using powder blush for the finishing touches. The finished bird will measure approximately 4 1/2 inches from its beak to tail feathers and stand about 5 inches tall. This sweet project is perfect for anyone who loves birds or crochet – or both! With these simple materials and a little bit of creativity, you can create your very own feathered friend.
Penguin Amigurumi Crochet Pattern
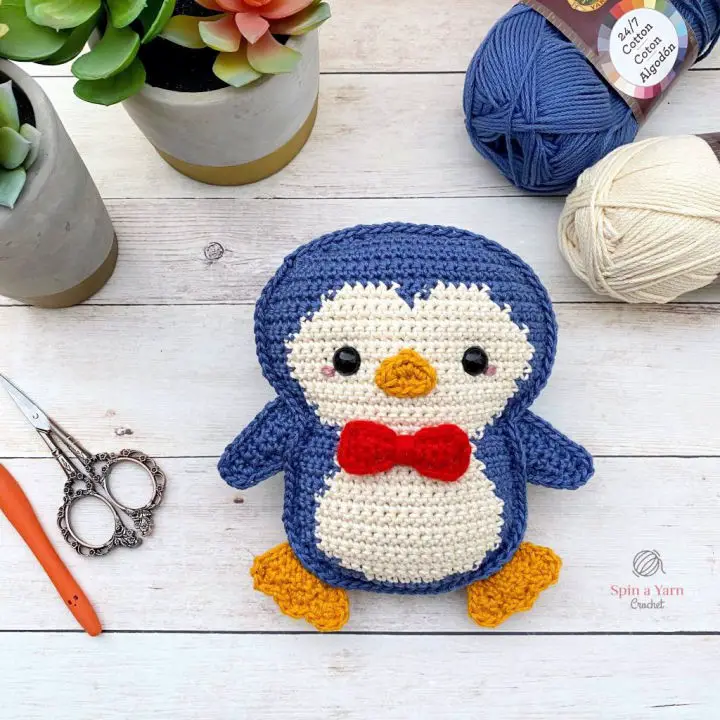
Craft a charming penguin amigurumi, perfect for beginners and seasoned crocheters alike. This free pattern combines traditional crochet with the tapestry (intarsia) technique, adding an element of colorwork to the design. To bring your creation to life, you’ll need Lion Brand 24/7 Cotton Yarn, a 3.25mm hook for the main body, a smaller 2.75mm hook for the bow tie, 12mm safety eyes, stuffing material, and a tapestry needle. Once complete, your penguin amigurumi will measure approximately 18cm (7 inches) from beak to tail. Gather your materials and get ready to create a one-of-a-kind bird with this fun and engaging project.
Free Crochet Stuffed Owl Pattern
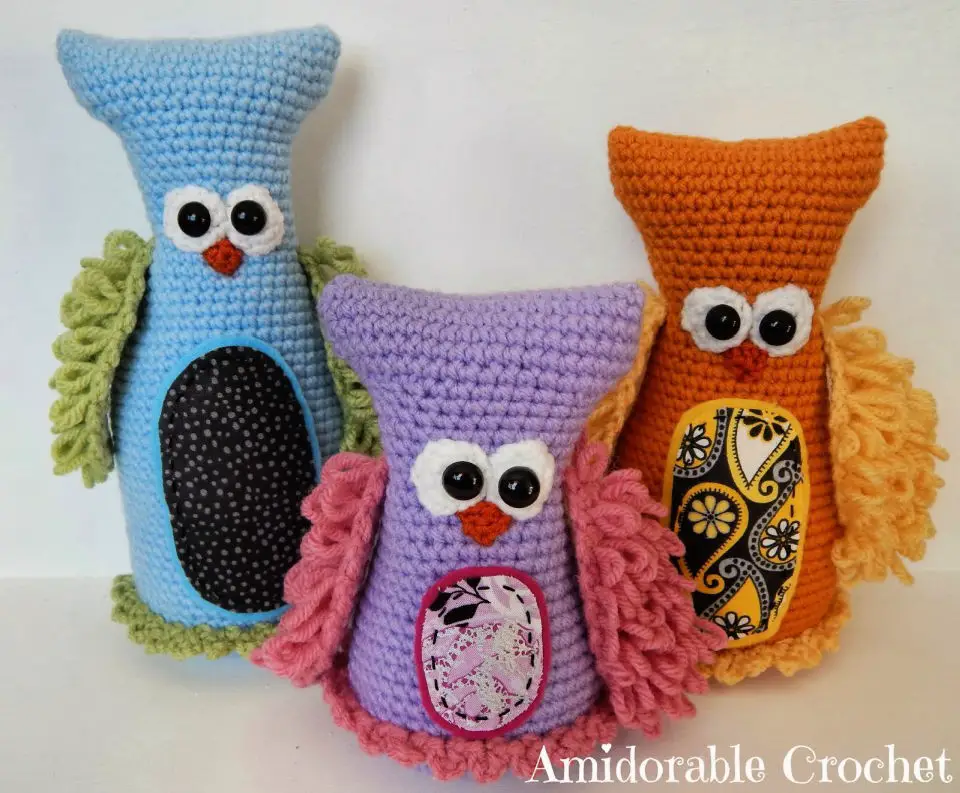
Transform a simple crochet hook and yarn into an endearing orange owl with our step-by-step instructions! To bring this whimsical creature to life, gather your materials: 2.5mm and 3mm crochet hooks, 8mm safety eyes, worsted weight yarn, black embroidery thread, scissors, a needle for weaving in ends, and some stuffing material. Once you have these essentials at hand, follow along as we guide you through the process of creating one charming orange owl, with tips on how to adjust the size if needed.
Beautiful Swan Amigurumi Crochet Pattern

Indulge in the serene elegance of this swan amigurumi free crochet pattern, perfectly suited as a nursery decoration or thoughtful gift for special occasions like baby showers and Mother’s Day. The absence of color work and sewing makes it an ideal quick project for crafty individuals. For an added touch of luxury, you can opt for velvet yarn, which replicates the soft down of a real swan. Alternatively, use any weight or type of yarn to achieve the desired look.
To bring this beautiful design to life, you’ll need a 3.25mm hook, Bernat Velvet in White Sand and Blackbird (small amounts), Loops & Threads Impeccable in Orange Crush (small amounts), Bernat Handicrafter Crochet Thread in Black for the eyes and stuffing, as well as a tapestry needle and stitch marker. Start crocheting now to create this stunning piece!
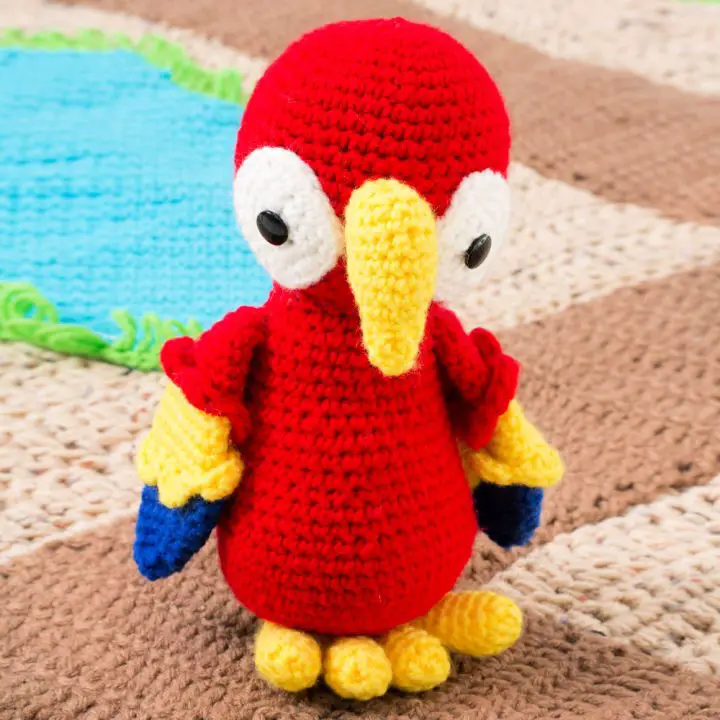
Free Crochet Parrot Bird Amigurumi Pattern
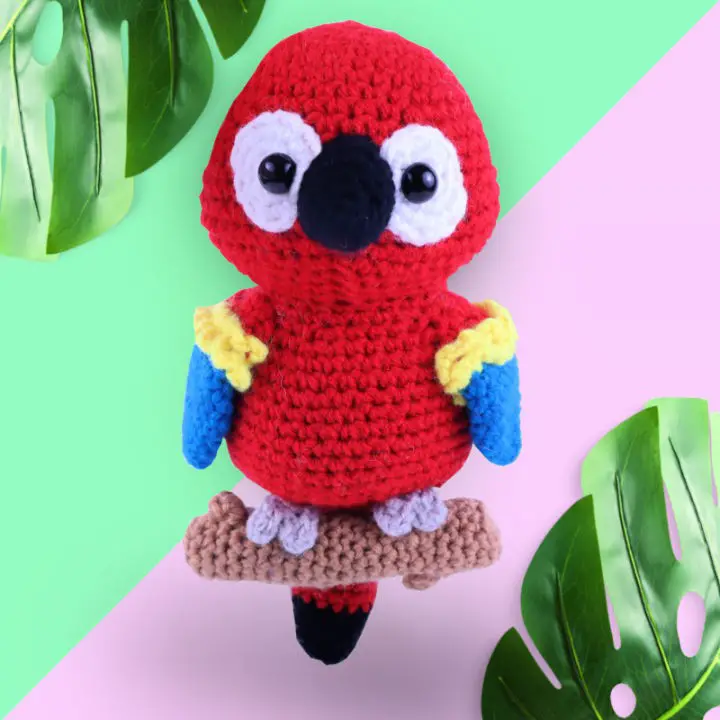
Craft your own vibrant and cheerful crochet parrot amigurumi using just a few simple materials. This project requires 4 medium weight yarns in red, white, black, blue, yellow, and brown, as well as a 4mm crochet hook, polyfil stuffing, 10 mm safety eyes, and metal wire (optional). While the majority of the pattern is straightforward, there’s one key technique to master – creating the feathers on the two wings. Begin by working from the top of the bird’s head, then make your way down to its body and tail before adding eyes, beak, and wings. With these simple steps, you’ll have a delightful little parrot perched in no time!
How to Crochet Rory the Robin – Free Pattern
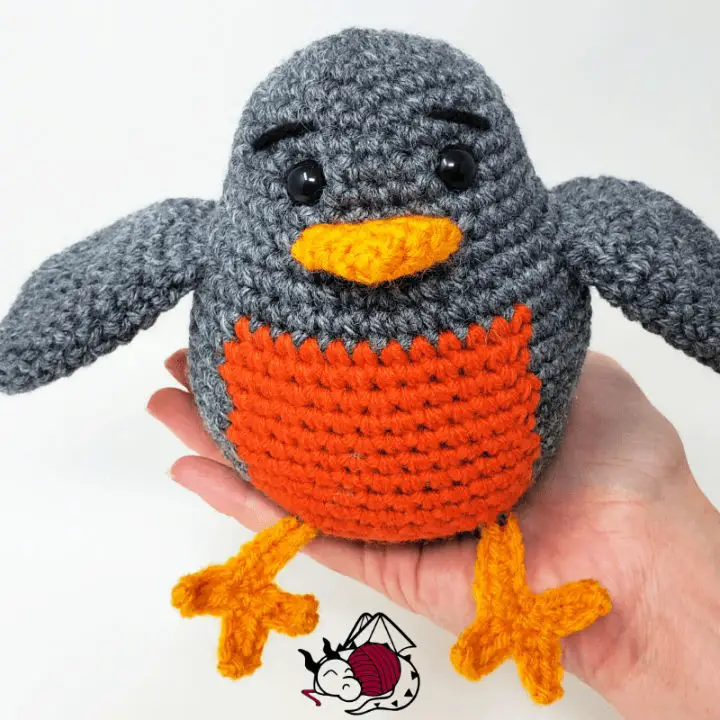
Imagine bringing a lovable robin named Rory to life with a free crochet pattern that’s perfect for snuggling and adventures alike. With just a few simple materials, including Red Heart Super Saver solids yarn, a size F (3.75 mm) hook, two 10mm solid black safety eyes, polyfill stuffing, a tapestry needle, and stitch markers, you can create a 6-inch by 6-inch plush companion that fits comfortably in the palm of your hand. To ensure the best results, simply follow the directions and weave in those pesky ends at the end of assembly to prevent any need for repositioning. Get ready to welcome Rory into your life with this delightful free crochet pattern!
Free Crochet Owl Amigurumi Pattern
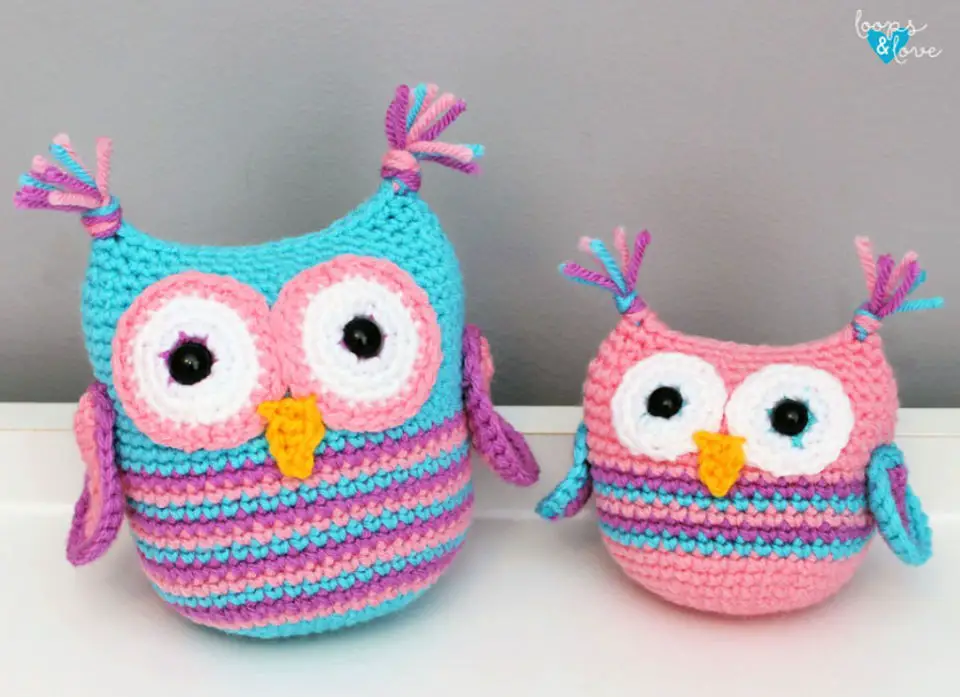
Discover the delight of creating charming crochet bird patterns, including a free owl amigurumi pattern that brings two sizes to life: mini and larger. This comprehensive guide begins with crocheting the body from bottom to top, followed by adding eyes, beak, wings, and ears for a truly adorable finish. To get started, you’ll need red heart soft solids & heathers yarn, a 3.5mm (E4) crochet hook, stuffing material of your choice, and a yarn needle to secure pieces in place. The finished mini owl will measure approximately 3.5 inches wide by 3.5 inches tall, while the larger size will be around 4.25 inches wide by 5 inches tall. Let your creativity soar as you bring these endearing characters to life with this engaging and easy-to-follow pattern.
Crochet Your Own Sparrow – Free Pattern
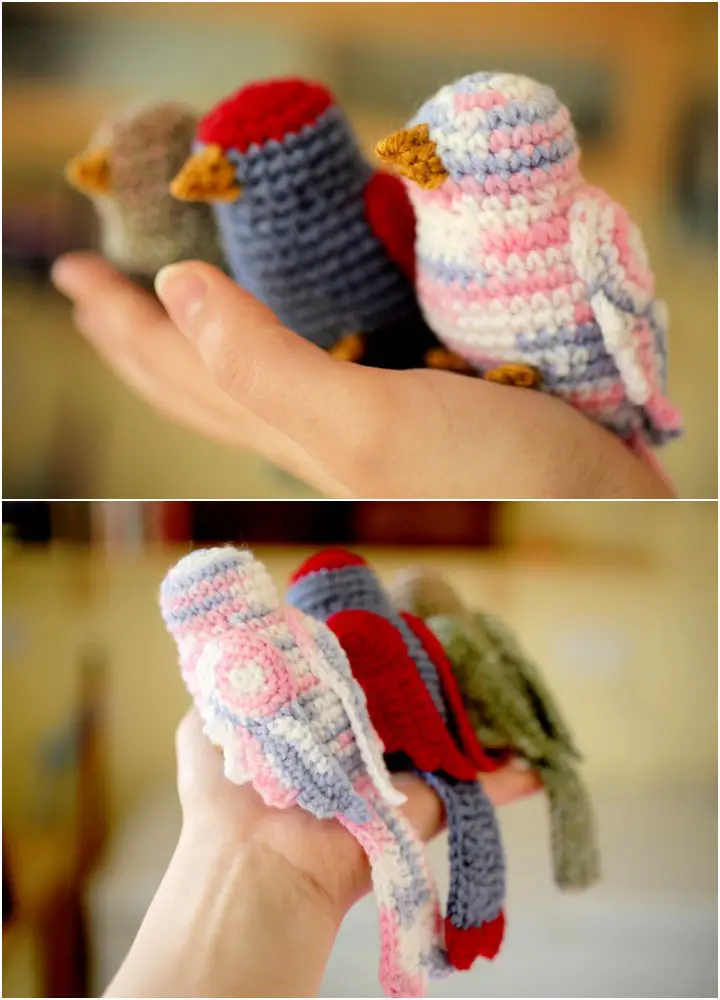
Bring a touch of whimsy into your home by crafting a charming, handmade sparrow using a simple yet effective crochet pattern. With the freedom to choose your favorite colors from double-knit wool, you’ll be able to imbue your little bird with a unique personality. The step-by-step instructions will guide you in achieving precise details for its eyes, beak, feet, and wings, leaving you proud of your handcrafted creation. To bring your sparrow to life, you’ll need a 3.5mm hook or one that can produce a finished product capable of holding fiber fill well, a yarn needle, and the necessary filling material (in addition to the colorful double-knit wool). With these basic materials at the ready, let’s begin! By downloading this free crochet pattern, you’ll be able to welcome a delightful sparrow into your home.
Crochet Your Own Sweet Bird – Free Pattern
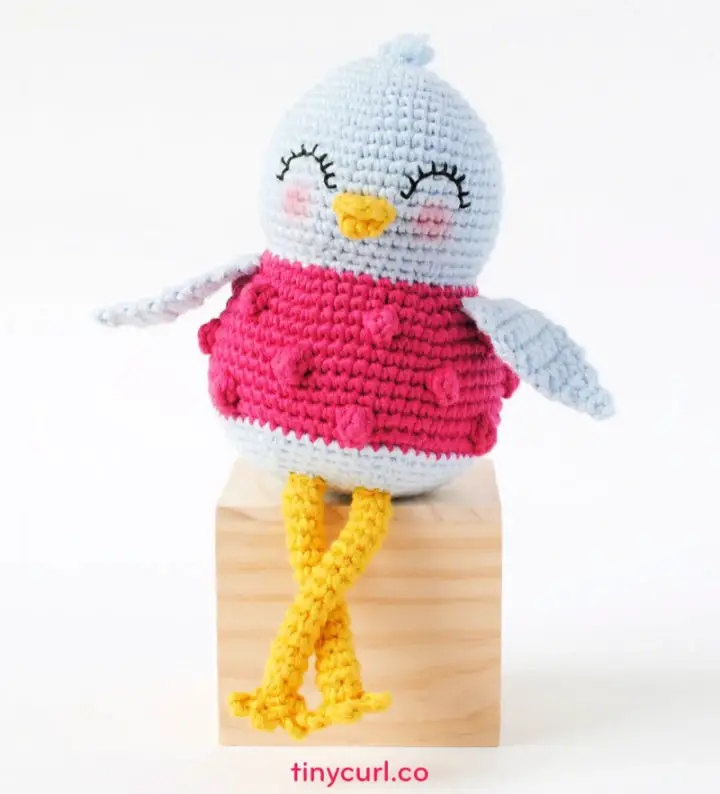
Indulge in the whimsical charm of this one-of-a-kind sweet bird crochet pattern, perfect for accompanying you on your next creative escapade. Standing at 8.5 inches tall when complete, this delightful design boasts a textured sweater, an endearing embroidered face, and a unique presence that’s sure to brighten any space. To bring this feathered friend to life, all you’ll need is DMC natura cotton yarn, a 2.75mm crochet hook, and a dash of imagination. Alternatively, for smaller sizes (7 inches), use lightweight yarn and a 2.25mm hook. Don’t let the opportunity to craft something as sweet as can be slip away – gather your supplies today and get ready to fall in love with this adorable pattern!
Free Crochet Bob and Betty Bird Pattern

Ready to bring some sunshine into your home this Spring? Create a pair of charming little birds using our free crochet Bob and Betty Bird pattern! Measuring 3 inches tall by 4.5 inches wide from wing tip to wing tip, these amigurumi birds are the perfect size for adding a touch of whimsy to any room. And don’t worry if you’re new to crocheting – this pattern is designed to be easy enough for beginners, so even those just starting out can create these adorable birds with ease. So why not get ahead of the game and start crocheting today? With our free Bob and Betty Bird pattern, you’ll be spreading joy in no time!
Easy Applique Bird Crochet Pattern

This endearing crochet appliqué comic owl pattern is a must-have for adding whimsical charm to any project. With detailed instructions, vibrant color photos, and an accompanying crochet chart, you’ll be able to create a 3.4-inch tall little owl with ease. To get started, simply gather Schachenmayr Nomotta Catania Solids yarn and 2.5 mm and 2.0 mm hooks. Before you know it, your adorable comic owl will be complete! Use it to add a touch of personality to clothing, decor, or gifts – the possibilities are endless when you get creative with this unique pattern.
How to Crochet Little Chick Bean Bags
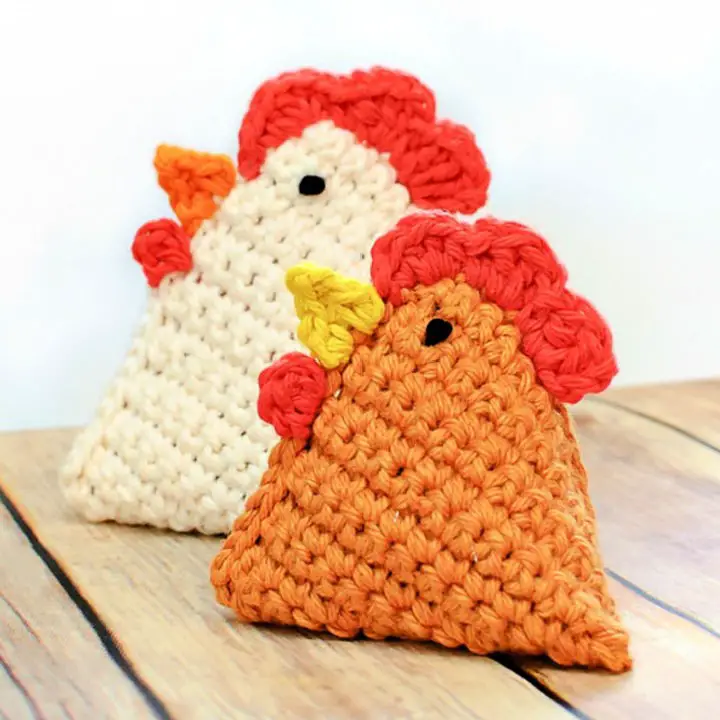
Indulge in a creative journey with free crochet bird patterns, crafting an array of feathered friends. To add a touch of whimsy to your home decor, try your hand at this delightful crochet chicken pattern! This straightforward project requires just three colors of worsted-weight cotton yarn, a small amount of black yarn or thread for the eyes, two sizes of crochet hooks, and dried beans or corn. Additionally, you’ll need fiberfill stuffing, a yarn needle, and scissors to complete the piece. These charming little chickens will make lovely kitchen companions – they’re fun to craft and sure to bring joy!
Easy Crochet Kiwi Pattern
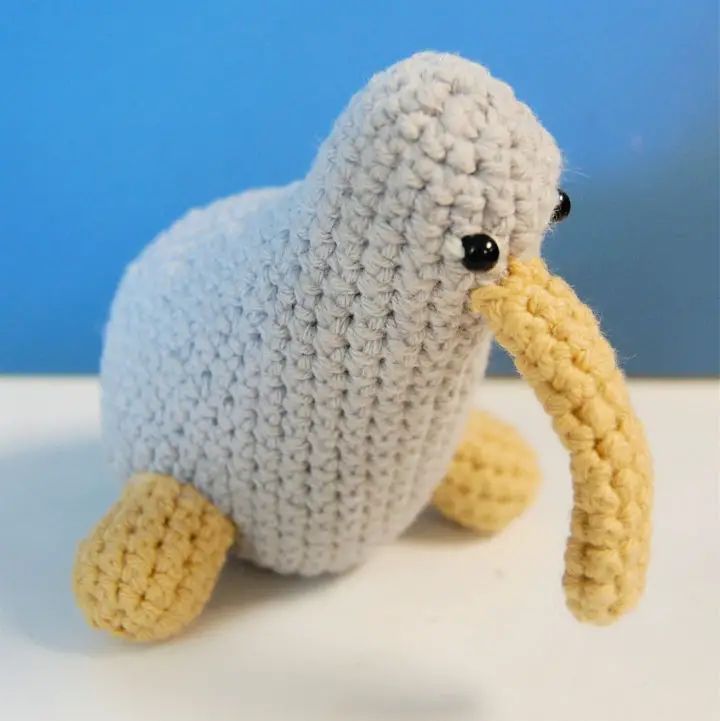
Create a charming kiwi using this simple and free pattern! With just a few basic materials – Lion’s Brand Cotton Ease in Stone & Sand colors, US G-6 hook, tapestry needle, polyester fiber fill, and black beads for the eyes – you can quickly crochet your own adorable kiwi. The best part? No need to worry about gauge, as this pattern includes step-by-step instructions accompanied by detailed photos. Follow along and you’ll be crafting your very own unique kiwi in no time. Start yours today and get creative!
Northern Cardinal Keychain Crochet Pattern
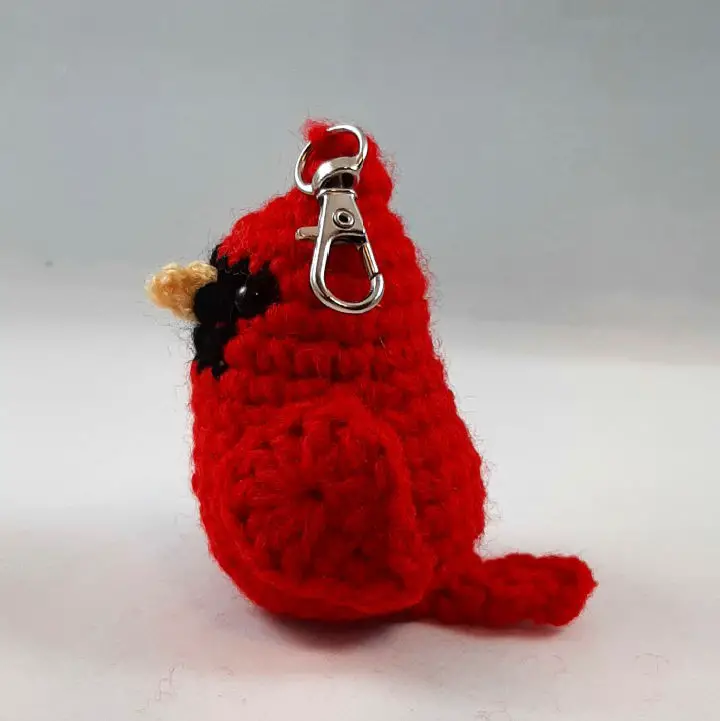
Create a charming free crochet northern cardinal keychain pattern that measures approximately 3.5 inches (~9 cm) in height and 2.75 inches (~7 cm) in width from belly to tail tip, excluding the keychain. The optional keychain attachment is the sole difference between making a keychain or non-keychain version of this adorable bird. To craft this pattern, you’ll need a size E (3.5mm) crochet hook, worsted weight yarn in cherry red, black, and cornmeal colors, stuffing material, two 6mm safety eyes, and an optional keychart for the pattern. With ease, follow this pattern to create your very own good luck charm – a delightful crocheted northern cardinal that’s sure to bring joy.
Free Crochet Cockatiel Pattern

Bring the charm of cockatiels into your home by creating your very own, adorable and fun-free crochet pattern with our step-by-step tutorial! This unique gift is perfect for anyone who adores these sweet birds. With just a few simple stitches, you can craft a beautiful hand-stitched cockatiel that stands at 4 1/4 inches high and 7 1/4 inches long. To get started, you’ll need Red Heart Super Saver Solids yarn and a size E (3.5mm) hook. Share the joy of this free crochet cockatiel pattern with friends and family, or treat yourself to a delightful DIY project today! Chiwaluv
Free Crochet Angry Bird Pattern
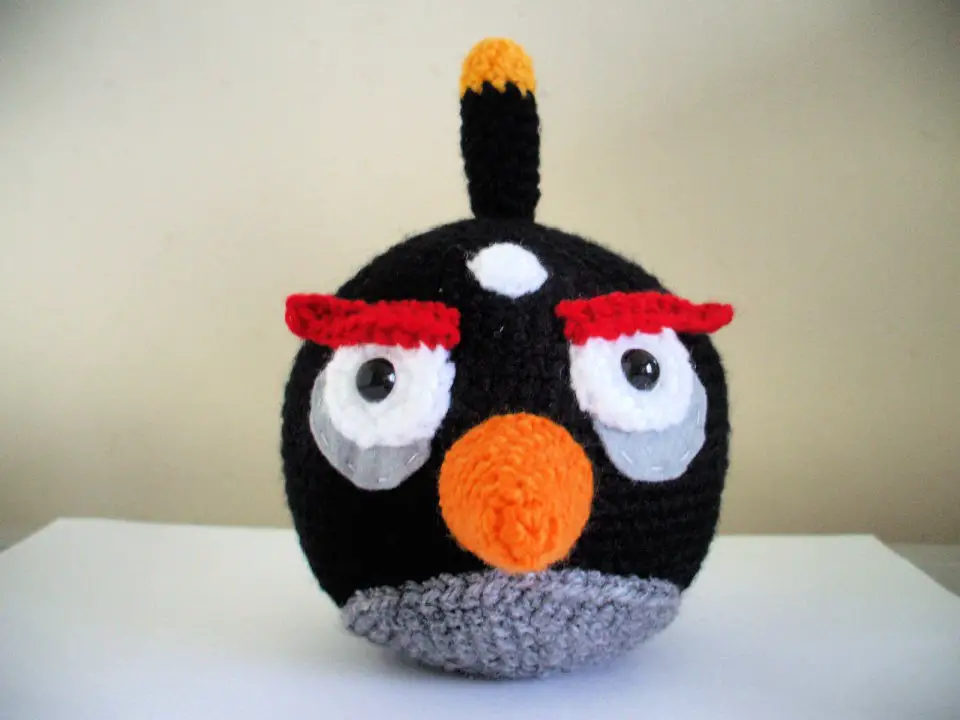
Bring the beloved characters from Angry Birds to life with this accessible crochet pattern. This comprehensive guide will lead you in creating a 6-inch tall Angry Bird, mirroring the ones found in the popular game. To get started, gather your materials: a 4.5mm crochet hook, stuffing, two 10 mm black eyes, a sewing needle, scissors, pins, and yarn (double knitting or light worsted) in four colors – black, yellow, orange-red, and white. Additionally, you’ll need grey felt and cotton for the finishing touches. Follow our clear instructions to craft an endearing addition to your home or a one-of-a-kind gift for any fan of Angry Birds.
Cute Little Bird Crochet Pattern
The Crochet Tulla the Bird pattern is an excellent choice for crafters of all skill levels, offering a delightful project that can be completed in no time. With only two color changes required, you’re free to get creative and produce a charming little bird in any combination of colors! The finished product measures 5 1/2 inches tall and demands minimal materials: a 2.25 mm crochet hook, worsted weight yarn (main, accent, and secondary accent), 12mm safety eyes, a yarn needle, fiberfill, and stitch markers. Embark on an adventure to create your own whimsical bird, watching it spring to life with vibrant colors!
Crochet Amigurumi Rooster Pattern
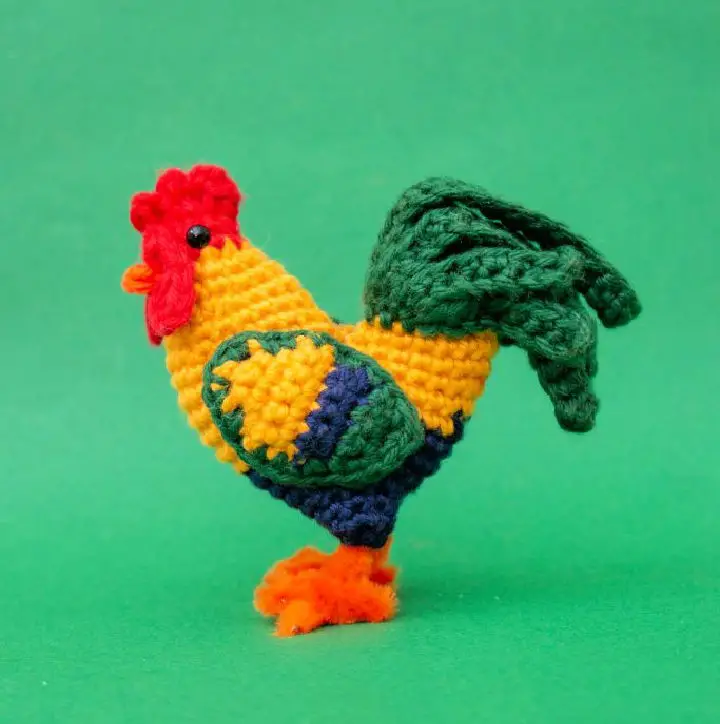
Unleash your creativity and bring a vibrant rooster to life with this delightful amigurumi crochet project. Designed for both beginners and experienced crafters, this unique pattern is brought to you through a helpful video tutorial that guides you every step of the way. To get started, gather your materials: DK/light worsted weight yarn in an assortment of colors – green, blue, yellow, red, and orange; a 2.5mm (size B or C) crochet hook; 4mm safety eyes or black embroidery floss/yarn for a realistic finish; a small amount of fiberfill for stuffing; a 16cm pipe cleaner or craft wire to create the rooster’s distinctive plumage; a yarn needle for weaving in ends; two stitch markers to keep your place; and, of course, a pair of scissors. With these simple materials at hand, you’re ready to begin crafting your very own amigurumi roosters that are sure to bring joy to all who lay eyes on them – grab the free pattern now and start making some happy!
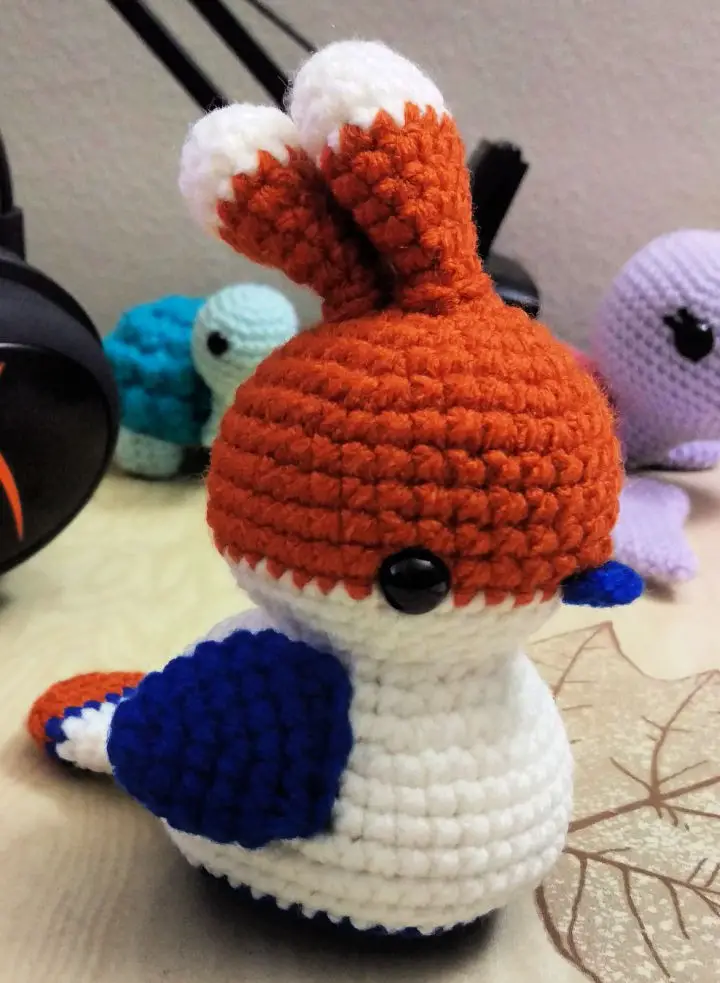
Sweet Spring Birds Crochet Pattern
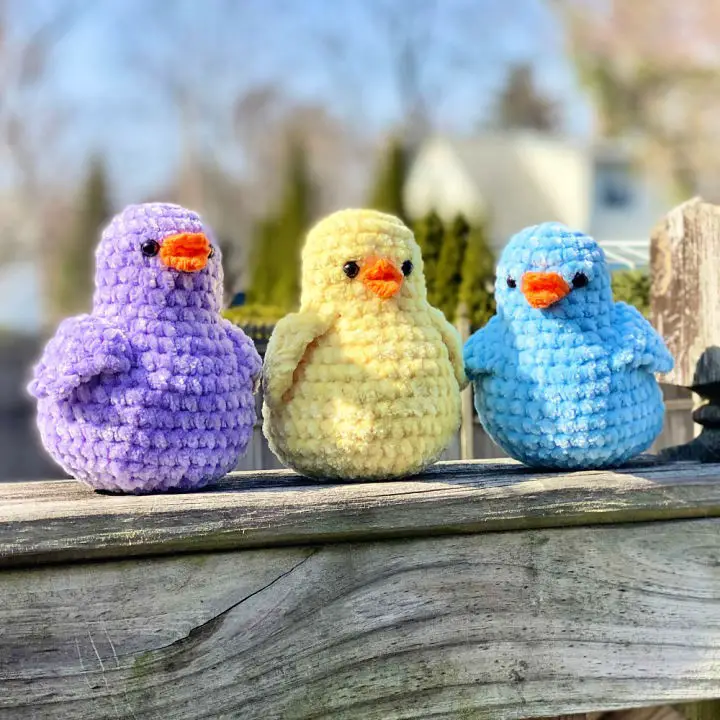
As the seasons change, add a dash of nature’s charm to your crochet collection by exploring free bird patterns. Spring is just around the corner, and what better way to welcome it than with an adorable little bird? This pattern is perfect for Easter baskets, plush toys, or year-round decorations. The straightforward instructions make it easy to create these sweet birds using soft chenille yarn. In just one weekend, kids of all ages can help you craft a flock of delightful birdies. A basic understanding of stitches like chain, single crochet, and working in the round is required, but don’t worry – this pattern’s difficulty level makes it accessible to crocheters of all skill levels.
Conclusion:
As you complete the journey of mastering how to crochet a bird, you’ll be rewarded with a sense of accomplishment and an influx of creative possibilities. The 25 free crochet bird patterns at your disposal empower you to bring these charming creatures to life, regardless of your skill level or experience. By embarking on our comprehensive Amigurumi tutorial, coupled with the valuable insights from our FAQs, every stitch becomes an opportunity to infuse character and personality into your feathered friends. As you explore this enchanting realm of crocheting birds, each stitch is a testament to the joy and warmth that can be brought into your home.
