Elevate your home office, study, or kitchen with a DIY whiteboard that offers a reusable surface for notes, reminders, and creative expression. This affordable and highly customizable project allows you to personalize the size, style, and functionality of your writing surface, making it an ideal solution for anyone in need of a well-organized space. Unlike store-bought options, crafting your own dry erase board is not only practical but also a fun and rewarding DIY endeavor. By following this guide, you’ll learn how to select the perfect frame, add the final touches, and create a uniquely yours writing surface that’s perfect for jotting down to-do lists or allowing kids to unleash their creativity. With its versatility unmatched, making your own dry erase board is an excellent project to consider.
Why Choose DIY Whiteboards?
Creating a DIY whiteboard can be a game-changer for both personal and professional settings. The benefits of this project are numerous and can significantly impact how you organize your life. For instance, by opting for a homemade approach, you can enjoy significant cost savings compared to purchasing a commercial product. With the right materials and some creativity, you can create a whiteboard that not only fits your needs but also reflects your personal style.One of the greatest advantages of DIY whiteboards is their customizability. You have complete control over the size, shape, and design of your board, allowing you to tailor it to your specific requirements. Whether you’re looking for a compact solution or a statement piece, this flexibility makes DIY whiteboards an attractive option.In addition to the practical benefits, creating a DIY whiteboard can also be an eco-friendly endeavor. By repurposing old materials like frames, glass, or metal sheets, you can reduce waste and support a more sustainable lifestyle. This approach not only helps the environment but also adds a layer of satisfaction knowing that your project is making a positive impact.Building a DIY whiteboard can also be a fun and fulfilling experience. It’s an opportunity to engage in a creative activity that produces a tangible result, which can be incredibly rewarding. And when you’re done, you’ll have a useful tool at your disposal that reflects your personality and adds a touch of warmth to any space.In summary, DIY whiteboards offer a unique combination of benefits that make them an attractive option for anyone looking to enhance their organizational capabilities. By embracing creativity, sustainability, and personalization, you can create a project that not only serves its intended purpose but also brings joy and fulfillment.
How to Make a Dry Erase Board
Transforming an old frame into a DIY dry-erase board is a fantastic way to breathe new life into a discarded piece of furniture, combining practicality and aesthetics. This step-by-step guide will have you creating a functional and visually appealing message board in no time, perfect for your home office, kitchen, or dorm room. Let’s embark on this creative journey together!
What You’ll Need
To create a unique and eye-catching DIY decor piece, you’ll need a few basic materials. Start by gathering an old wooden frame with glass, which will provide the base structure for your project. Next, select patterned paper of your choice to add visual interest and texture. You’ll also require scissors or a paper cutter to trim the paper to size, as well as glue or double-sided tape to secure it in place. For added dimension and creativity, consider incorporating dry erase markers to add personalized messages or designs. If you’re feeling extra crafty, you can also incorporate cloth pins and embellishments like flowers to give your piece an extra touch of personality.
Step-by-Step Guide
To create your own unique dry erase board, begin by selecting a wooden frame that suits your space’s aesthetic. If the frame needs a makeover, consider painting it in a color that complements your decor. Make sure the glass surface is clean and intact, as this will be your writing surface.
Next, measure the frame against the patterned paper to determine the size needed to cover its back. Use scissors or a paper cutter for an accurate cut, allowing you to customize the look of your board to match your personal style or the intended recipient’s preferences.
To attach the paper to the frame, flip it over and apply a thin layer of glue or double-sided tape around the edges, close to where the glass sits. Carefully place your cut piece of paper onto the glue, with the patterned side facing down so it shows through the glass. Smooth out any air bubbles or wrinkles.
If you want to add an extra functional touch, consider adding cloth pins to the bottom or sides of the frame for hanging notes, photos, or important reminders. You can also embellish your board with additional features like flowers, stickers, or anything that sparks joy.
Once the glue has dried and your board is assembled, grab a dry erase marker and start jotting down your to-do lists, reminders, or motivational quotes. The glass surface works perfectly with dry erase markers and is easy to wipe clean.
Maintenance
When it comes to maintaining the appearance of your dry erase board, a gentle approach is key. Start by using a soft, dry cloth for daily cleaning, ensuring any stray markers or smudges are quickly removed. For more persistent marks, you can employ a damp cloth infused with a small amount of rubbing alcohol. This subtle combination will effectively wipe away residues without compromising the integrity of your board’s surface.
Video Tutorial
By combining the written guide with the step-by-step video tutorial, ‘How to Make a DIY Dry Erase Board’, you’ll have a comprehensive resource to help you create your own dry erase board from an old frame. The visual component of the video breaks down the process in an easy-to-follow manner, making it simple to replicate at home. This DIY project not only serves as a quick and fulfilling activity but also offers an innovative way to repurpose old frames into functional pieces that bring creativity and organization to any space. Whether you’re crafting for personal use or as a thoughtful gift, this tutorial is sure to inspire and guide you every step of the way.
Frequently Asked Questions about DIY Whiteboards
Embarking on a DIY whiteboard project can be an exhilarating experience, offering a sense of accomplishment as you bring your creative vision to life. To set you on the right path, we’ve compiled a list of frequently asked questions that address the most crucial aspects of this endeavour.
What materials do I need for a DIY whiteboard?
To embark on a DIY whiteboard project, you’ll typically require a few essential components. First and foremost, you’ll need a smooth, flat surface that can accommodate dry erase markers and be easily wiped clean, such as glass, melamine board, or any other material with a glossy finish. This will serve as the foundation for your writing and brainstorming. Next, you’ll need a frame to hold or mount your whiteboard surface in place, allowing you to customize its installation according to your design preferences. Additionally, you’ll require adhesives or mounting tools that are compatible with the materials you’re using and the location where you plan to install your whiteboard. Finally, don’t forget dry erase markers and an eraser, as these will be essential for writing and cleaning your new surface.
Can I make a whiteboard without a glass surface?
While glass is a popular choice for whiteboards due to its smooth and durable surface, other materials like melamine panels, glossy painted wood, or certain types of metal can also be used effectively. The crucial factor in determining the suitability of any material is ensuring it has a smooth and non-porous surface that allows for easy cleaning after use. This is because a smooth surface enables markers to glide smoothly, reducing the likelihood of scratching or leaving behind residue.
How do I hang a DIY whiteboard?
When it comes to hanging your DIY whiteboard, the approach depends on its size, weight, and the type of walls you’re working with. For instance, if your board is lightweight and you have standard wall surfaces, adhesive strips are a viable option. However, for heavier boards or those that require more substantial support, mounting brackets or screws might be necessary. In some cases, you may prefer to forego hanging altogether and opt instead for a standing frame that holds the board upright. Regardless of your chosen method, it’s crucial to ensure your whiteboard is securely mounted to prevent accidents and potential damage.
Can I turn a wall into a whiteboard?
Transforming an entire wall into a writing surface is a creative and functional solution for classrooms, offices, or even home spaces. This can be achieved through the use of specialized paint or large-scale whiteboard panels that seamlessly cover the wall. By applying whiteboard paint directly to a smooth, clean surface, it’s possible to turn any area into a writable space once the paint has dried. As an alternative, large whiteboard panels can be securely mounted to the wall, providing a similar writing experience.
How do I clean a DIY whiteboard?
When it comes to daily cleaning, a soft, dry cloth or a whiteboard eraser are effective at removing most markings from your board. However, for more persistent stains or a deeper clean, you may need to bring in some extra power. A cloth dampened with isopropyl alcohol or a specialized whiteboard cleaner can help get the job done. It’s important to avoid using harsh abrasives or tools that can scratch or damage the surface of your board, as this can lead to long-term problems.
Can I customize the size of my DIY whiteboard?
Creating a custom-sized whiteboard is one of the most significant advantages of making your own. You have the flexibility to design a board that perfectly complements your workspace or personal reminders, whether it’s small enough for everyday use or large enough for brainstorming sessions with colleagues. To achieve this, simply ensure you’ve chosen a smooth, writable surface material and a frame that matches the dimensions you desire. This allows you to build a functional and stylish DIY whiteboard that seamlessly integrates into your environment and enhances its overall aesthetic.
20 DIY Whiteboard Ideas (How to Make a Dry Erase Board)
Discover the thrill of transforming a blank canvas into a functional masterpiece, as we delve into 20 innovative DIY whiteboard projects that empower you to create your unique dry-erase board from scratch. Unlock the secrets to elevating your workspace by diving into these easy-to-follow guides and unlock the full potential of your creative space.
How to Make a Whiteboard at Home

Creating a DIY whiteboard offers a unique opportunity to personalize your workspace and study area. By taking the reins on this project, you can craft a customized board that meets your specific needs and preferences. Instructables provides an invaluable resource for tackling this task, walking you through each step of the process from material selection to frame assembly. With a homemade whiteboard at your disposal, you’ll have the flexibility to choose the ideal size and style for your space, fostering efficient organization and creative expression. Whether you’re jotting down reminders or brainstorming ideas, a DIY whiteboard is an indispensable addition to any room.
Making a Whiteboard Under $30
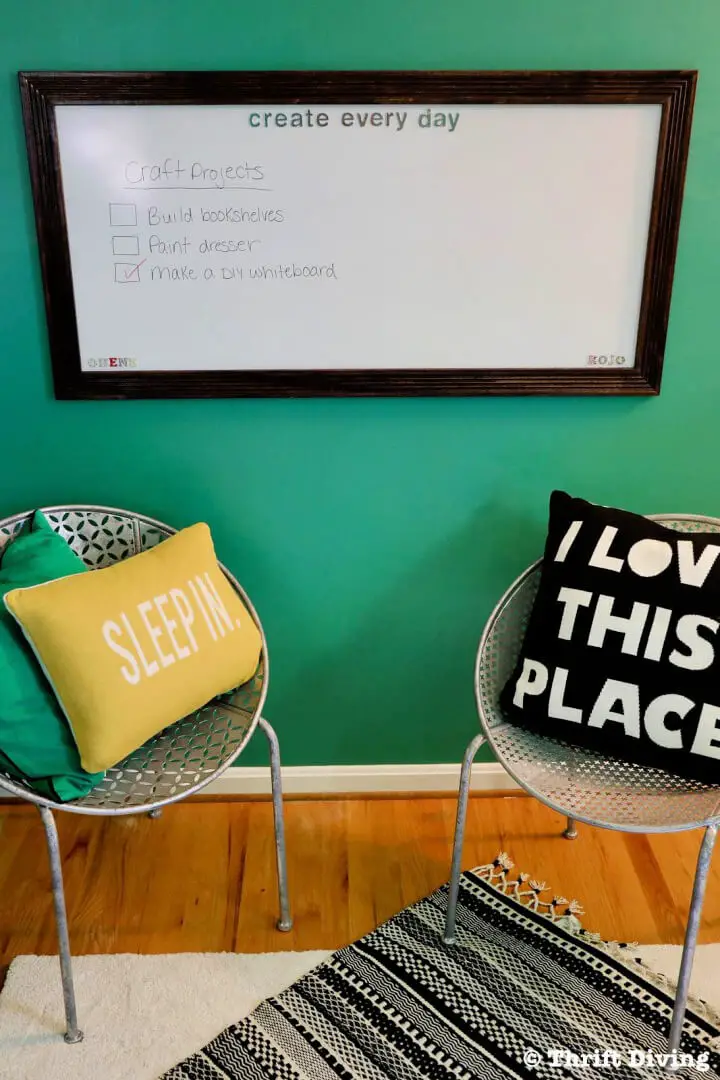
Transform your workspace into a haven of creativity and organization by crafting a custom DIY whiteboard, a budget-friendly project that exudes elegance without breaking the bank. With Thrift Diving’s expert guidance, you’ll learn how to create a stunning 2×4 foot panel using decorative trim and Gorilla Clear Grip adhesive for a seamless fit. The result is a beautifully framed board that not only serves as a functional tool for jotting down notes or teaching, but also adds a touch of sophistication to any room. Follow along with the step-by-step process, which includes precision cutting with a miter saw or box, expert staining techniques, and secure mounting using adhesive and sticky strips. With this project, you’ll have a professional-grade whiteboard tailored to your unique space, without the hefty price tag.
Quick and Easy DIY Whiteboard
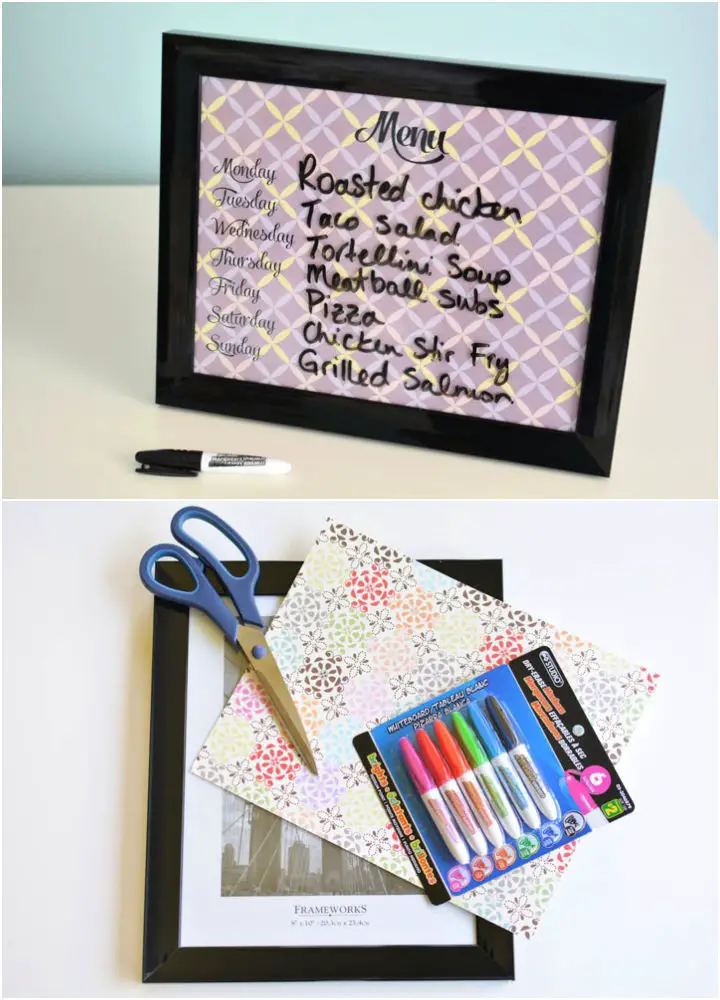
Transform your space with a simple, budget-friendly DIY project from One Little Project. Create reusable whiteboards that combine functionality with personal flair. Perfect for jotting down notes, lists, or meal plans, these easy-to-make boards eliminate the need for unnecessary paper waste. With just a picture frame, scrapbook paper, and dry-erase markers, you can create a unique and eco-friendly solution for daily reminders and doodles. Simply swap out the paper for a fresh look anytime, ensuring your creative expression remains sustainable.
Make a Multipurpose Whiteboard

Wanting to create a rustic and functional DIY whiteboard for your garage or workspace? Look no further than the step-by-step guide offered by DIY For Knuckleheads, which transforms recycled pallet wood and old fencing materials into a multipurpose whiteboard that’s perfect for novice DIYers. Emphasizing sustainability and practicality, this project provides detailed instructions, a comprehensive list of required tools and materials, and helpful tips to ensure a smooth assembly process. With the ability to customize your design, you’ll be able to create a unique space-enhancing addition that’s not only eco-friendly but also stylish.
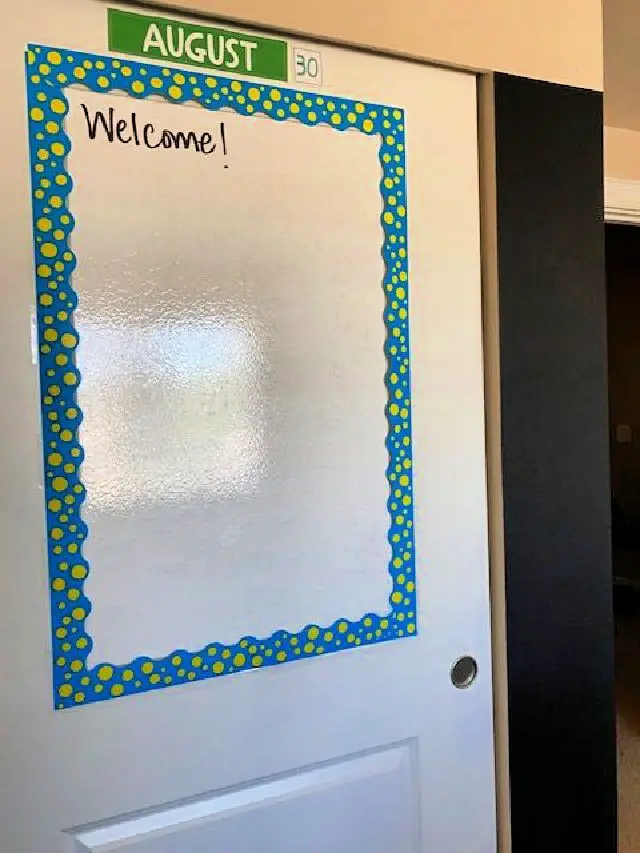
Homemade Pantry Door Whiteboard
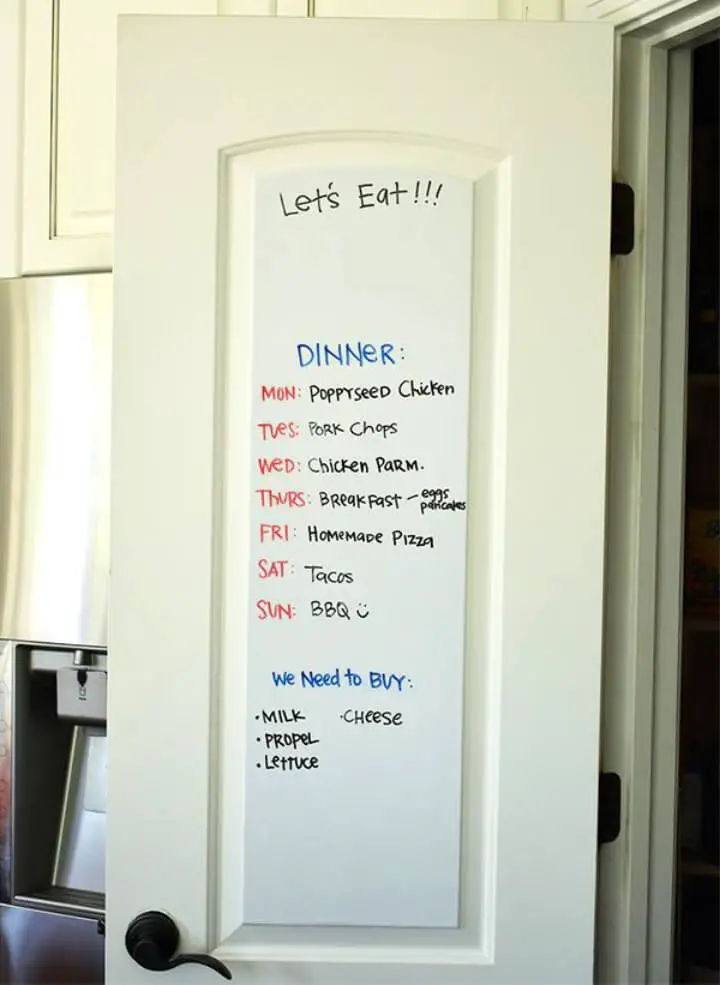
Transforming your kitchen’s pantry door into a functional whiteboard is an innovative DIY project that can greatly enhance your cooking experience. By incorporating Kassa whiteboard contact paper, dry-erase markers, and scissors, you can turn your pantry door into a convenient space for jotting down shopping lists or meal planning. The process is surprisingly straightforward, requiring only five simple steps. Begin by measuring the door panel and cutting the contact paper to size. Ensure the surface is spotless before application, then carefully adhere the paper, smoothing out any bubbles as you work. With this clever kitchen upgrade, you’ll be able to keep your family informed and your pantry organized with ease.
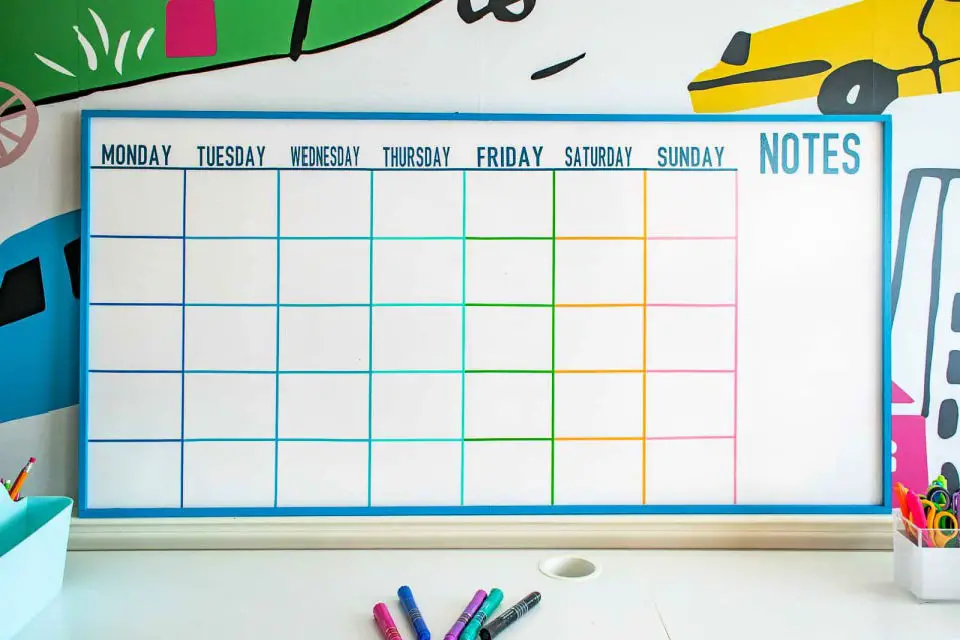
DIY Whiteboard Calendar and Planner
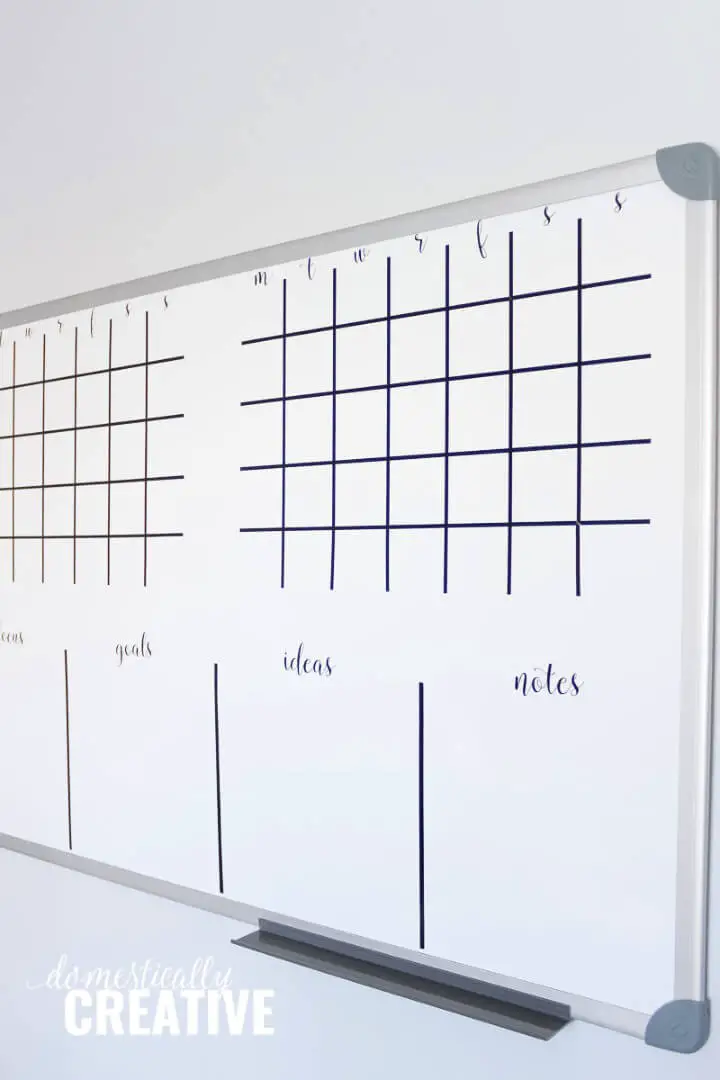
Transform a ordinary dry-erase board into a tailored planning tool for managing editorial content or family activities with Domestically Creative’s step-by-step guide. Discover how to give your whiteboard a personalized touch using either a Silhouette Cameo or Cricut, or even opt for a low-tech approach involving washi tape and alphabet stickers. By making this budget-friendly and fully customizable project, you’ll be able to keep your goals, ideas, and schedules in clear view, stay organized, and feel inspired as you plan out your days with the visual planning tool sitting right by your workspace.
Handmade Wall Mounted Whiteboard

Transforming your workspace with a personalized touch has never been easier than crafting your own DIY whiteboard. With the guidance of Sawdust Girl’s engaging tutorial, you’ll be able to create a one-of-a-kind and functional writing surface that includes a cork strip for note-taking and custom marker holders for added convenience. The project’s ease of execution is attributed to its straightforward instructions, which will have you building a frame from pine boards, attaching a white panelboard, and constructing holders for your markers and eraser in no time. Not only will this DIY venture prove to be budget-friendly, but it also presents an opportunity to express your creativity in a practical way. Whether used for organizing tasks, jotting down ideas, or simply doodling, this unique addition is sure to bring a touch of personality to any office or home space.
How to Build a Giant Whiteboard for $14

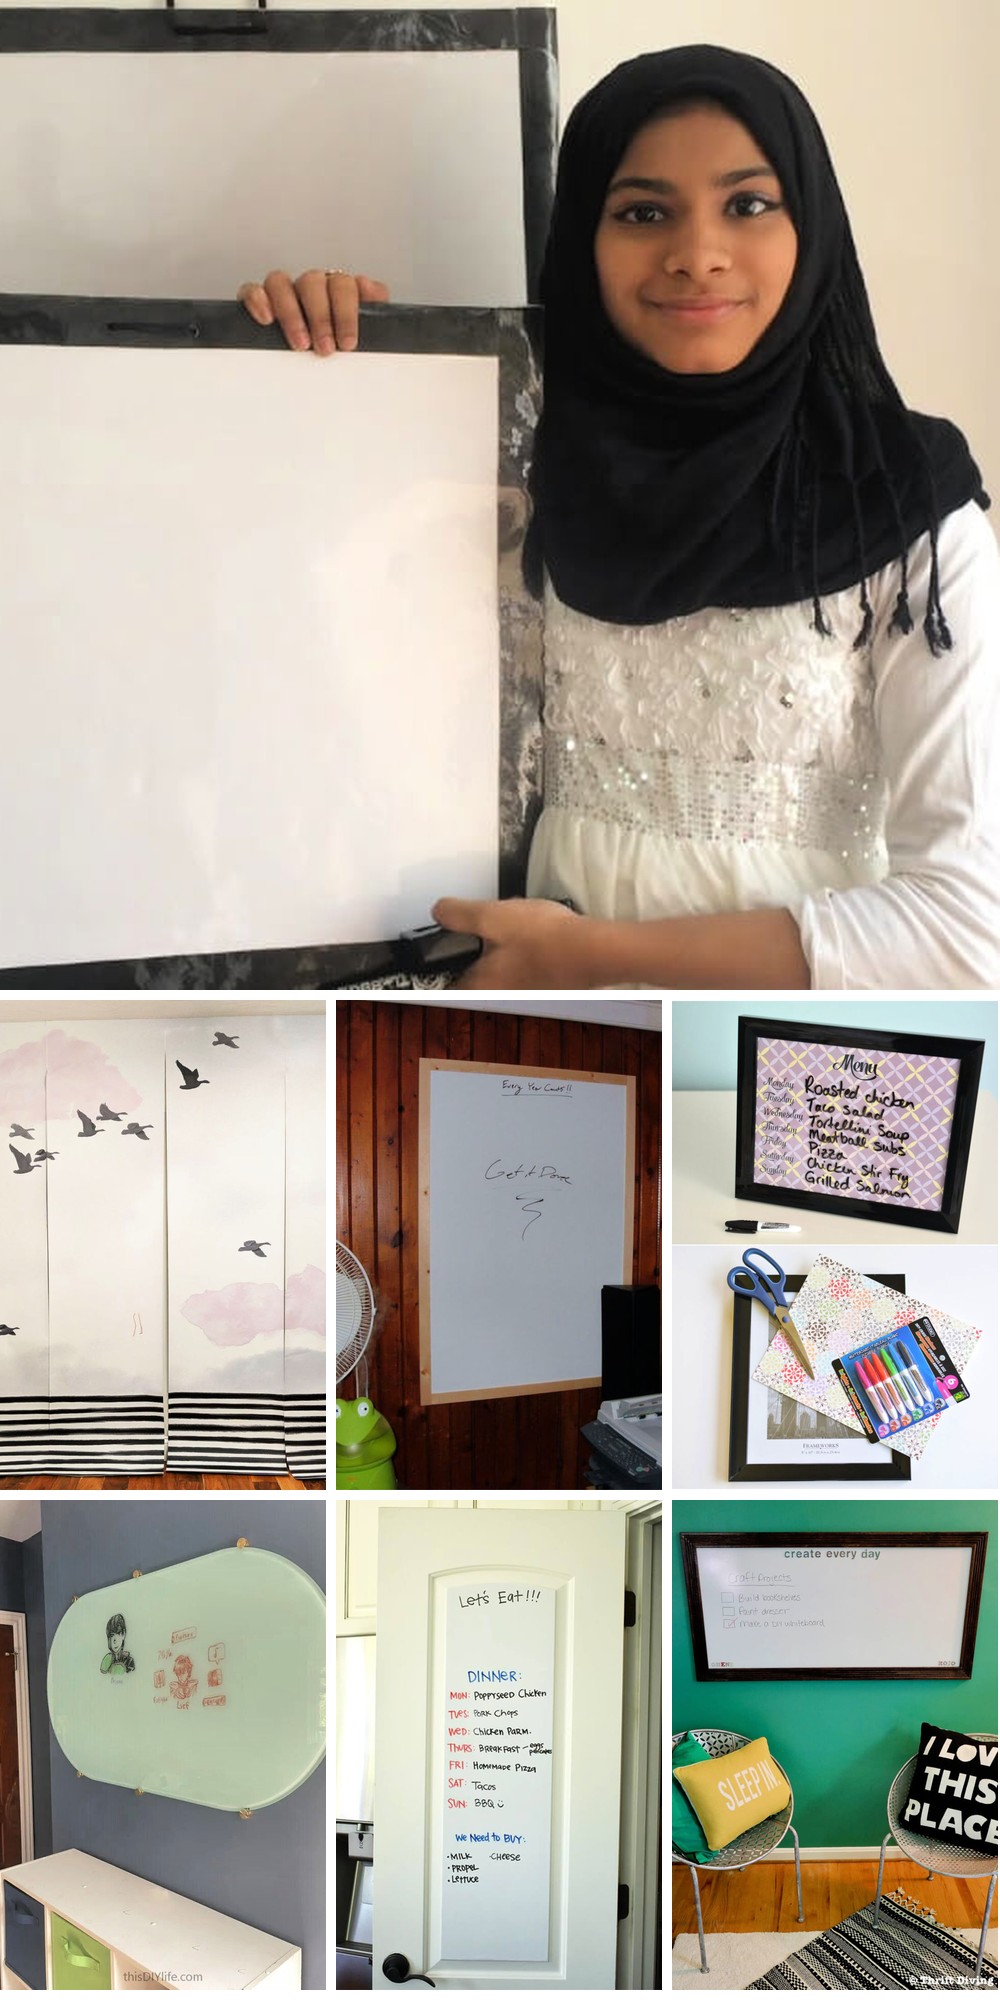
Transform your space into a collaborative haven with this straightforward, budget-friendly DIY tutorial from Crazy Chick DIY. In just an afternoon, you can create a massive whiteboard using a melamine board and simple tools, all for the low cost of $14. This project is perfect for brainstorming sessions, teaching moments, or simply staying organized. Whether you opt for the full-size board or customize it to fit your needs, this DIY endeavor promises to be both fun and rewarding. Ditch pricey whiteboards and hello to limitless creativity and productivity!
Inexpensive DIY Whiteboard From Scratch

Transforming everyday materials into a creative haven is just a few steps away with a fun and functional homemade whiteboard/dry-erase board project. For those who crave a space to let their thoughts flow freely, this DIY endeavor at Instructables provides a straightforward guide to turn simple supplies into an ideal spot for doodling, note-taking or planning. Embrace your inner artist and get started today by crafting your very own handcrafted whiteboard!
Make a Whiteboard Wall for the Home Office
Transform any corner of your home office or study area into a dynamic, highly functional space with an innovative DIY whiteboard wall. This versatile tool is perfect for jotting down daily tasks, brainstorming projects, or assisting with homeschooling efforts. By following a detailed guide from Bloom in the Black, you can turn any blank space into a customized workspace that meets your unique needs and style. Ditch the standard dry erase boards and hello to a creative hub where productivity and innovation thrive.
Unique DIY Classroom Whiteboard Table

Transform your classroom with an innovative DIY whiteboard table that’s easy on the budget and requires minimal effort. Inspired by Sparkling in Second Grade, this project leverages WallPops’ peel-and-stick dry erase wallpaper for a seamless application process. A single roll can cover an average-sized table, turning it into an interactive space where students can engage with learning. To ensure a smooth finish, simply follow some basic application tips, such as using a level and removing any air bubbles that may form. This removable solution not only enhances the learning experience but also preserves school property for years to come. It’s the perfect choice for educators seeking a creative and functional classroom upgrade without breaking the bank.
How to Make a Classroom Whiteboard
Transform any space into a dynamic learning environment without breaking the bank or sacrificing precious time. By using DIY whiteboard paint, you can elevate your home classroom and create an engaging atmosphere perfect for virtual lessons with students. This simple yet effective project allows you to bring a touch of professionalism to your learning setup without undergoing a full-scale renovation. For a comprehensive guide on how to create your own writable surface, visit blikebianca.com. Whether you’re a teacher looking to spice up remote learning or an individual seeking to enhance their personal study space, this DIY solution offers endless possibilities for creative expression and knowledge acquisition.
Build a Whiteboard With Step by Step Instructions
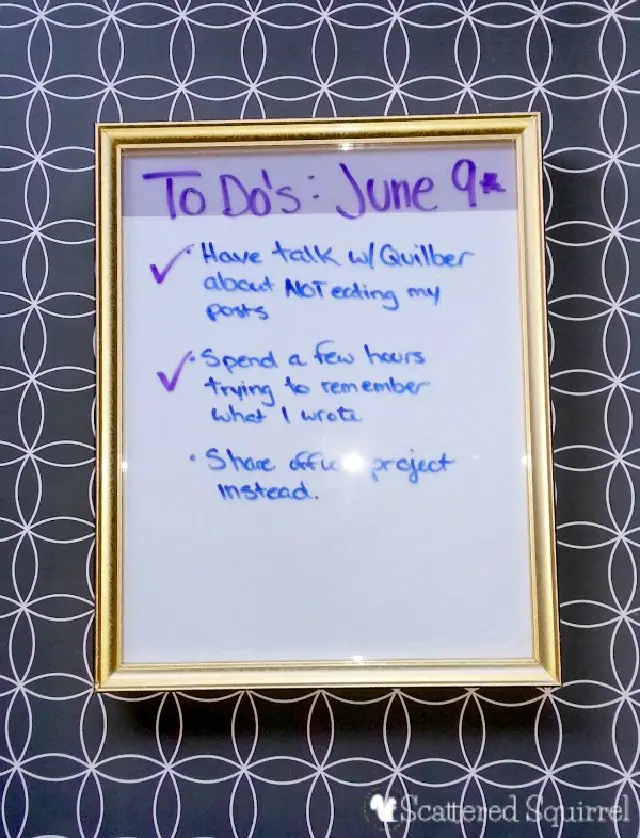
Transform your workspace in just five minutes with an innovative DIY whiteboard project that’s both practical and stylish. This budget-friendly makeover requires only a picture frame, scrapbook paper, and a few simple steps. The result is a functional and visually appealing addition to your office space, perfect for jotting down lists or keeping track of appointments. Whether you’re a renter looking for a temporary solution or simply seeking a creative way to stay organized, this DIY whiteboard project is the perfect answer. By combining functionality with flair, you can elevate your workspace without breaking the bank or committing to a permanent installation.
Make Your Own Whiteboard With Cricut
Creating a custom DIY whiteboard is surprisingly straightforward, with atcharlotteshouse.com providing an in-depth guide to lead you through the process. You’ll embark on a step-by-step journey from choosing the perfect base material to adding the finishing touches with vinyl decals and trim. The end result is a functional and visually appealing organizational tool that’s ideal for back-to-school or home office setups. Not only will this DIY project help you stay organized, but it also offers creative freedom to design a board that perfectly reflects your needs and personal style.
Cheap DIY Glass Whiteboard for Dry Erase
Improve the aesthetic of any space with a DIY glass whiteboard that’s both functional and stylish. In this beginner-friendly guide from Frugal Family Times, we’ll take you through the step-by-step process of selecting the perfect glass, preparing it for use, and hanging it with ease. Say goodbye to traditional dry erase boards and hello to a sleek, modern upgrade that will elevate any room – whether it’s a home office, classroom, or creative studio. This project proves that practicality and beauty can coexist, making it the perfect addition to your space.
How to Build a White Board for Kids

To create a dynamic and educational whiteboard for kids, follow this simple DIY project that can elevate their learning experience at home. Gather basic materials like cardboard, white chart paper, a transparent polythene sheet, scissors, glue, and decorative strips for the border. Then, assemble your board by covering the cardboard with chart paper, securing the edges, adding colorful flair with the strips, and finishing it off with a layer of protection from the transparent sheet for durability. Don’t forget to drill some holes to attach lace for easy hanging. This customizable whiteboard is an ideal tool for kids to practice writing, arithmetic, and more, making learning a fun and interactive experience.
DIY Giant Whiteboard on a Budget
Building a Dry Erase Board Under $20
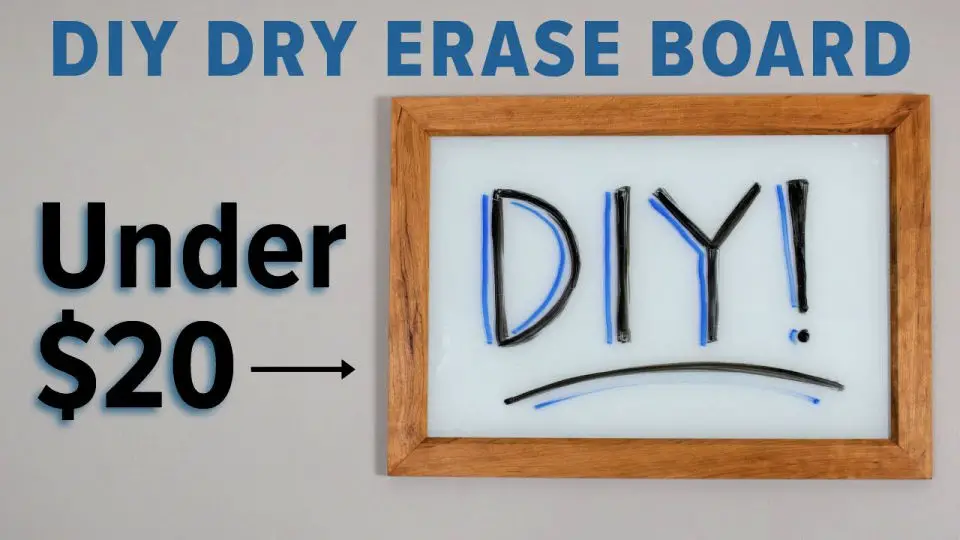
Transform a humble glass pane into an elegant DIY Dry Erase Board for under $20. By combining functionality with refined design, this project yields a bespoke piece that’s perfect for any space. Start by painting the 16×20 glass pane white to ensure clarity, then frame it with a cherry wood border for a touch of sophistication. The result is a stunning writing surface that’s both practical and luxurious. With careful attention to detail, you’ll bring this project to life, elevating your decor while providing a personalized space for creativity to flourish.
DIY Whiteboard Without Transparent Sheet
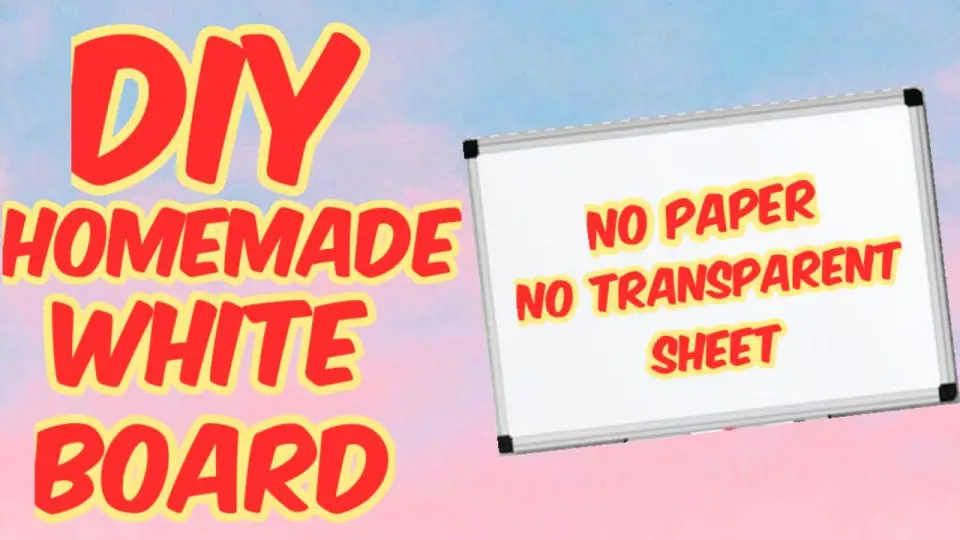
Create your own homemade whiteboard using everyday items without breaking a sweat! This straightforward and visually-guided video takes you by the hand, guiding you through each step of the process until you’re left with a fully functional and handy writing surface, perfect for jotting down notes or unleashing your artistic side. No transparent sheet needed – just click here to start building your own DIY whiteboard today and get ready to unleash your creativity: watch the tutorial.
How to Make a Whiteboard – Step by Step
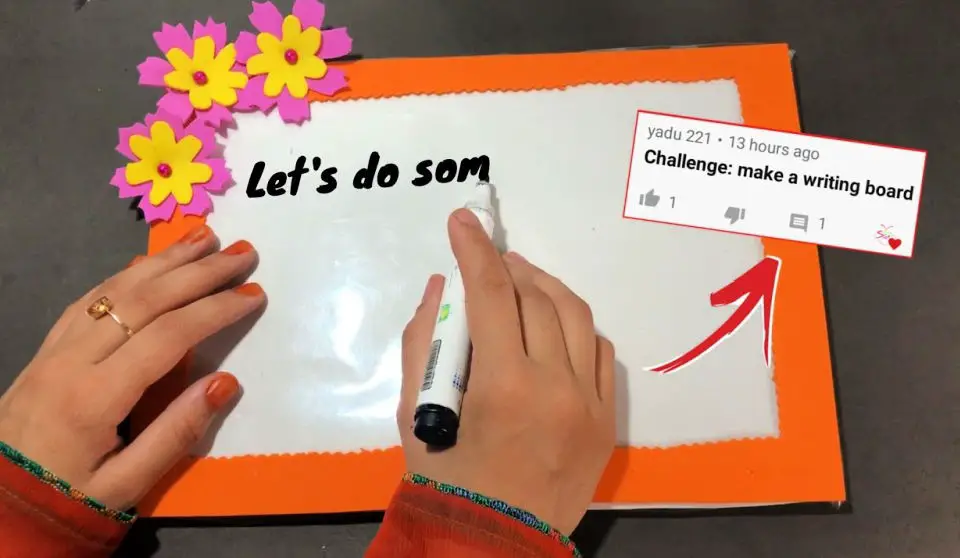
Transform any blank space into a creative haven with Sajal’s Art DIY whiteboard guide! With easy-to-follow instructions, you can turn an ordinary wall into an extraordinary workspace or teaching tool. Whether you’re looking to stay organized, brainstorm new ideas, or simply add some personality to your home, this step-by-step guide is the perfect starting point. By crafting your own whiteboard, you’ll not only enhance your space’s functionality but also unleash your creativity and bring a touch of personal flair to any room.
Frequently Asked Questions
What is a whiteboard?
A versatile tool for creative expression and collaboration, whiteboards offer a unique blend of durability and ease of use. Their smooth, glossy surface allows users to jot down notes, sketch out ideas, or deliver presentations with clarity. The best part? They can be effortlessly cleaned and restarted with just a dry cloth or eraser. As a result, whiteboards have become an indispensable fixture in classrooms, offices, and homes alike, fostering innovative thinking and effective communication.
What are the benefits of using a whiteboard?
Whiteboards have been a staple in collaborative settings for their ability to facilitate innovative thinking and teamwork. By allowing ideas to be visually represented and explored in real-time, they enable individuals to engage in dynamic problem-solving and brainstorming sessions. Furthermore, whiteboards play a significant role in enhancing group dynamics by promoting seamless communication, encouraging active participation, and fostering a sense of community among team members.
How do I make a DIY whiteboard?
To craft a DIY whiteboard, you’ll need a sturdy base material, such as wood or MDF, alongside essential supplies including whiteboard paint, sandpaper, an abrasive cloth, a brush, and either a roller or sponge applicator. As instructed on the packaging, apply the paint and let it dry completely before proceeding to the next step. Finally, use the sandpaper and abrasive cloth in conjunction to achieve a silky-smooth finish, rendering your whiteboard ready for use.
What are some tips for using a whiteboard?
Organizing ideas, sparking creativity, and facilitating learning can all be achieved through the humble whiteboard. To get the most out of this versatile tool, it’s essential to prioritize a few key strategies. Firstly, make sure to write clearly and concisely, as this will help you convey your message effectively. Additionally, establish a routine for cleaning the board regularly to maintain its readability. Before presenting or brainstorming, take the time to plan out your content in advance, ensuring that your ideas flow logically and are easy to follow.
How do I care for my whiteboard?
To maintain the effectiveness and longevity of your whiteboard, it’s crucial to adopt a regular cleaning routine. Start by using a soft cloth and an approved cleaner to gently wipe down the surface. When it comes to markers, invest in those specifically designed for use on whiteboards, as they’re formulated to produce smooth, consistent lines without leaving behind stubborn stains or residue. Don’t forget to store your markers properly when not in use, ideally in a designated container or case, to prevent accidental spills or damage. Finally, take the time to thoroughly erase each mark after use to forestall the buildup of ghosting or staining, which can compromise the board’s readability over time.
What material can be used as a whiteboard?
Whiteboards are often crafted from durable, smooth surfaces like melamine, laminate, or porcelain, making them easy to clean and ideal for marker-friendly writing. While these traditional materials remain popular, other options can also be used, such as glass, metal, vinyl, wood, or even fabric, offering a range of choices for those seeking unique whiteboard designs.
Can I DIY a dry erase board?
Crafting a DIY dry erase board requires some preparation and creativity, but the end result is well worth the effort. By combining materials like a whiteboard, magnetized sheeting, and markers, you can create a functional and customizable writing surface in the comfort of your own home.
How do you make a cheap dry erase board?
Transform an ordinary picture frame into a functional and budget-friendly dry erase board using a few simple materials. Start by cutting a piece of white poster board to fit snugly inside the frame’s dimensions. Next, cover the entire surface with clear contact paper, ensuring a smooth and even finish. This clever hack not only saves you money but also provides a creative solution for jotting down notes or ideas on-the-go.
Conclusion:
By now, you’ve successfully crafted your very own DIY whiteboard, combining the benefits of functionality with personalized flair. From framing to finishing touches, this comprehensive guide has guided you through each step, empowering you to create a truly unique and functional piece that seamlessly integrates into any space. Whether it’s for daily task management, educational purposes, or simply as a creative outlet, your homemade whiteboard is poised to become an indispensable addition to your daily routine. As you bask in the satisfaction of having built something both practical and reflective of your style, we’re excited to share that this project has opened doors to a multitude of possibilities. With 20 innovative DIY whiteboard ideas at your fingertips, the creative potential is limitless. We appreciate your enthusiasm for this project and wish you continued success as you continue to explore the realm of DIY crafting.
