Are you searching for innovative and practical DIY projects suitable for young children? Consider crafting a weighted blanket specifically designed for toddlers. These cozy blankets not only provide comfort but also offer numerous therapeutic benefits, such as improving sleep quality and reducing anxiety. This comprehensive guide will take you through 15 unique DIY weighted blanket ideas that prioritize your child’s comfort and safety. By personalizing your project, you can create something truly special that your toddler will love and benefit from.
We understand that embarking on a DIY project, especially one as specific as a weighted blanket, can be intimidating. That’s why this article is designed to be your go-to resource, providing a thorough step-by-step guide from selecting the ideal materials to adding those final touches. Whether you’re new to sewing, calculating the correct weight, or ensuring even distribution of fillers, we’ve got you covered.
Get ready to bring your project to life and provide the best for your toddler. Continue reading to navigate the intricacies of creating a comforting, personalized blanket that they will treasure.
The Therapeutic Benefits of Weighted Blankets
Weighted blankets have taken the world by storm with their purported ability to bring relief from a variety of conditions. Let’s dive deeper into how these blankets can positively impact your well-being.The key to weighted blankets’ effectiveness lies in deep pressure stimulation (DPS), a therapeutic technique that applies gentle yet firm pressure across the body, much like a warm embrace. This pressure has been shown to calm the nervous system, leading to a range of potential benefits.One of the primary reasons people turn to weighted blankets is for their remarkable ability to reduce stress and anxiety. The pressure from the blanket can help regulate autonomic arousal, which is responsible for physical symptoms of anxiety such as an increased heart rate.In addition to its calming effects, weighted blankets have been shown to improve sleep quality by increasing serotonin production, a hormone associated with relaxation, and melatonin, which regulates sleep. It also helps reduce cortisol, the stress hormone that can disrupt restful sleep.Furthermore, some evidence suggests that weighted blankets may be an effective way to reduce perceived pain, making them particularly beneficial for individuals with chronic pain conditions seeking non-pharmacological methods of management.The sensation of being held or hugged by a weighted blanket can also evoke feelings of security and comfort, which can aid in falling asleep more quickly and enjoying a deeper sleep.While weighted blankets may be beneficial for the general population, they may be especially helpful for individuals with anxiety, autism, ADHD, and insomnia. As with any new therapy or treatment, it’s essential to consult with a healthcare provider to ensure their use is appropriate for your specific needs.
Personalizing Your DIY Weighted Blanket
Creating a custom weighted blanket is an exciting project that allows you to tailor the product to your unique needs and preferences. To ensure maximum comfort and effectiveness, follow these steps to personalize your DIY weighted blanket.First, choose a fabric that suits your touch preference and climate. Soft, durable materials like cotton, fleece, flannel, or microfiber are popular options, while breathable fabrics are ideal for warmer climates and heavier materials are cozy for colder environments. This simple decision can greatly impact the overall feel and functionality of your blanket.Next, consider the weight of your blanket. A general guideline is to aim for a weight that represents about 10% of your body weight. However, it’s essential to consult with a healthcare professional if you’re creating the blanket for a child or someone with health concerns.The filler material is another crucial aspect to personalize. You can opt for poly pellets, glass beads, or even natural materials like rice or beans. Each option provides a distinct feel and weight distribution, so choose what will be most comfortable for you.When it comes to the size of your weighted blanket, ensure it fits your body perfectly – not just your bed. The blanket should cover you from chin to feet without hanging over the edges of your bed, ensuring the weight is distributed evenly on you.Finally, think about the design and pattern of your blanket. Choose colors and patterns that bring you joy and calm, whether it’s a soothing solid color or a vibrant pattern. This personalized touch will make your weighted blanket an even more comforting presence in your life.To take it to the next level, consider sewing a removable cover for your weighted blanket. Not only does this make washing easier, but it also allows you to change the look of your blanket as you wish.By personalizing every aspect of your DIY weighted blanket, you’ll create a truly unique and comforting tool that meets your specific needs. Take your time selecting each element to craft a blanket that will provide comfort and relaxation for years to come.
How to Sew a Weighted Blanket – Step by Step Guide
While weighted blankets are well-known for their calming effects on sensory issues, anxiety, and autism, creating one yourself can be a cost-effective and tailored approach. To get started, follow this step-by-step guide and create a personalized weighted blanket that addresses your unique needs.
Materials Needed
To create your weighted blanket, you’ll need the following essential materials: a sufficient quantity of fleece or minky fabric for both the front and back panels. Additionally, you’ll require plastic poly pellets for added weight, thread that harmonizes with your chosen fabric, and a reliable sewing machine to bring your design to life. A kitchen scale will come in handy when measuring out the perfect amount of pellets, while an optional funnel can streamline the process. To ensure precise placement of the pellets, use chalk or a water-soluble fabric marking pen to mark your fabric. Finally, a piece of cardboard or wrapping paper tube will aid in evenly distributing the pellets throughout your blanket.
Step 1: Calculating Weight and Size
When selecting a blanket, consider the size that will provide optimal coverage for the intended user without excessive material. A general rule of thumb is to aim for a weight that corresponds to 10% of the person’s body weight plus one pound. However, this guideline can be adjusted based on individual preferences and needs to ensure the perfect balance of comfort and practicality.
Step 2: Preparing the Fabric
To begin, align your selected fabrics so that their rights sides are facing each other. Pin along the left and right edges, leaving approximately 2 inches of fabric at either end unattached to create a turning gap later on. Next, sew along the length of the fabrics using a consistent 1/4 inch seam allowance, but be sure to stop about 2 inches shy of the opposite edge.
Step 3: Turning and Top Stitching
To revitalize the appearance of a worn-out blanket, start by turning it right side out. Next, use your fingers to roll and define any seams that may have become indistinct due to the material’s lack of response to ironing, such as fleece or minky. Following this, fold both the top and bottom edges inward to create a crisp crease, before securing them in place with a close-to-the-edge topstitch.
Step 4: Making the Grid
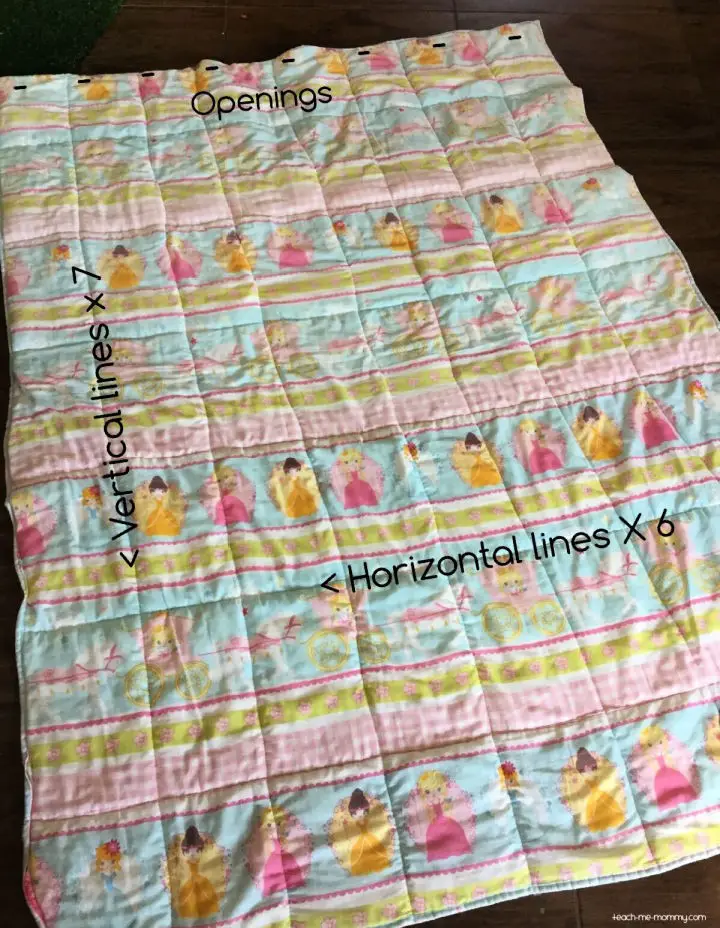
When creating your design, start by marking a grid onto your fabric using chalk or a water-soluble marker. The size and shape of the squares or rectangles can vary, but for optimal weight distribution, aim to keep them between 4 to 6 inches in size. In this guide, we’ll be working with a consistent spacing of 5 inches apart, allowing you to effectively balance the weight and create a visually appealing design.
Step 5: Sewing the Columns
As you begin to sew, focus on creating vertical columns along the marked lines on the blanket. This crucial step sets the stage for the introduction of poly pellets, which will soon be added to create a plush and textured finish.
Step 6: Adding the Weight
To determine the total weight of pellets required, begin by dividing the overall ounces of pellets by the number of pockets you’re working with. A kitchen scale can be a valuable asset in achieving precise measurements. To simplify the process of adding pellets to each section, insert a piece of cardboard or a tube at the opening of each column. This will allow you to accurately measure out the correct amount for each pocket and ensure that the total weight is precisely calculated.
Step 7: Securing the Pockets
When completing the pellet-filled rows, it’s essential to maintain an orderly approach. Begin by sewing across each marked horizontal line to close the pockets, one row at a time. This deliberate pace allows for even weight distribution and prevents accidental bunching. To avoid damaging your sewing needle, carefully guide the pellets away from the stitching line as you work. By adopting this methodical strategy, you’ll ensure a successful outcome while minimizing the risk of mishaps.
Step 8: Final Touches
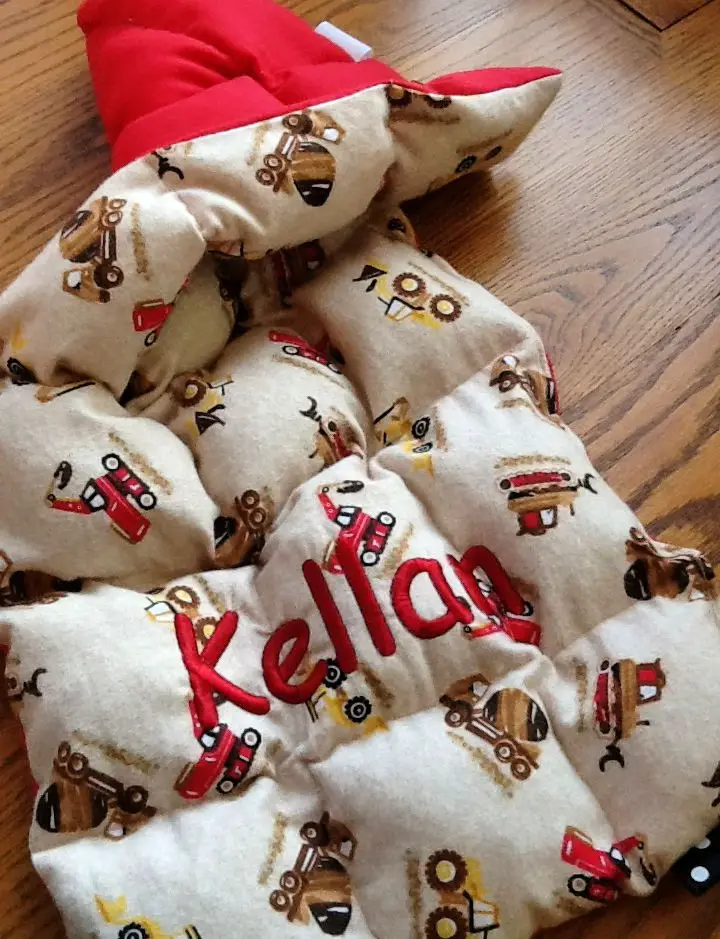
As you complete the filling and sewing process for each pocket, take a moment to bring closure to your blanket’s outer edges. To achieve this, fold the fabric inward at the top and bottom seams, ensuring a precise and even fold. Then, carefully stitch across these folded edges, securing them in place. This final step not only adds a polished finish to your handmade blanket but also reinforces the overall integrity of the fabric.
Video Tutorial
To create a truly personalized weighted blanket, I recommend supplementing this written guide with a step-by-step video tutorial available on YouTube. The visual walkthrough provides an approachable and easily digestible format for the techniques outlined here. By making your own weighted blanket at home, you can tailor the design and materials to suit individual preferences, thereby amplifying the comfort and relaxation benefits of the finished product.
Maintenance and Care for Your DIY Weighted Blanket
To keep your weighted blanket in top condition, follow these guidelines for proper maintenance and care. The key to a long-lasting blanket is striking the right balance between cleaning and preserving its integrity.When it comes to washing, most weighted blankets feature removable covers that can be machine washed. However, the inner weighted portion requires more attention. Check the care label for specific instructions – some fillers like microglass beads or plastic pellets may be washable, while organic materials like rice or beans might not be. When you do need to wash it, opt for a gentle cycle with cold water and a mild detergent. Avoid using bleach or fabric softeners, as these can degrade the materials over time.Drying your weighted blanket is equally important. Air drying is generally the safest option, but if you must use a dryer, choose a low heat setting to prevent damage. Make sure the blanket is completely dry before using it again to prevent mold and mildew growth.Regular inspections are crucial for maintaining your blanket’s integrity. Keep an eye out for signs of wear and tear, such as loose threads or escaping beads – these may indicate it’s time for repair or replacement. By prioritizing regular checks and proper care, you can ensure your weighted blanket remains both safe and long-lasting.
Safety Precautions for Using Weighted Blankets
When incorporating weighted blankets into your relaxation routine, it’s crucial to prioritize safety. To achieve this, consider the appropriate weight of the blanket, which should be approximately 10% of the user’s body weight. This ensures the blanket provides a comfortable and calming experience without being too heavy or overwhelming. Additionally, always supervise children and individuals with mobility issues when using a weighted blanket, ensuring they have the ability to remove it as needed if they feel uncomfortable or need to adjust their position. It’s also essential to avoid covering the head or face with the blanket, as this can pose a risk of suffocation. Furthermore, regular inspections are necessary to identify any damage that could lead to spillage of the weighted material, which may cause a choking hazard. By following these guidelines and prioritizing safety, you can fully appreciate the benefits of your DIY weighted blanket while maintaining its integrity for years to come.
Troubleshooting Common Issues with DIY Weighted Blankets
To avoid any issues with your DIY weighted blanket, be prepared to troubleshoot a few common problems that may arise during its construction or use. One of the most crucial aspects is ensuring even weight distribution. This can be achieved by laying the blanket flat and redistributing the filler material evenly, as an uneven weight can compromise the therapeutic effect. If you notice any loose fillings, inspect the seams for gaps or tears and secure them with a simple stitch to prevent the fillings from shifting or becoming dislodged. To prevent clumping of the fillings, make sure the pockets holding them are evenly spaced and properly sealed. In the unlikely event that clumping does occur, simply massage the blanket to redistribute the fillings. When it comes to washing your DIY weighted blanket, be mindful of its machine washability – if it’s not suitable for machine washing, spot-clean it with a damp cloth and mild detergent. For washable blankets, use a gentle cycle and avoid high heat when drying. In the event of a tear, patch it up with a piece of fabric and some thread that matches your blanket to extend its life and maintain its appearance. Finally, to keep your DIY weighted blanket fresh and clean over time, air it out regularly and consider using a fabric freshener to eliminate any lingering odors. By following these tips, you can ensure your DIY weighted blanket remains functional and cozy for years to come.
FAQs About DIY Weighted Blankets
As you begin creating your own DIY weighted blanket, it’s natural to encounter uncertainty. To help navigate this project, I’ve compiled answers to common questions that will provide valuable insights and guidance throughout the process.
Q: How do I determine the right weight for my blanket?
When it comes to determining the perfect weight for a blanket, a general rule of thumb is that it should be approximately 10% of one’s body weight. This ideal proportion strikes a balance between comfort and practicality, preventing the blanket from being either too light or too heavy.
Q: Can I wash my weighted blanket in a machine?
When it comes to cleaning your weighted blanket with synthetic fillers, such as poly pellets or glass beads, you’re in luck – most of them can be machine washed! Simply use a gentle cycle with cold water and a mild detergent. However, if your weighted blanket features organic fillers, you’ll want to stick to spot cleaning to ensure the delicate materials aren’t damaged. By taking these simple steps, you can keep your weighted blanket clean and cozy for years to come.
Q: What materials can I use for the filler?
When it comes to selecting a filler for your project, you’re spoiled for choice. Options range from synthetic pellets like polyfil to natural materials such as glass beads or even rice or beans. When making your decision, consider two key factors: washability and texture. You want a filler that can withstand repeated cleaning without breaking down, while also providing the desired weight and tactile experience.
Q: How do I ensure even distribution of weight?
To achieve optimal results, it’s essential to create strategically placed compartments within the blanket for storing the filler material. By doing so, you’ll ensure that the filling remains evenly distributed throughout the fabric, thereby eliminating any potential for shifting or bunching.
Q: What fabric is best for a weighted blanket?
When selecting the perfect fabric for your project, consider two key factors: comfort and practicality. For a material that will feel like a warm hug against your skin, opt for soft and breathable fabrics such as cotton, fleece, or minky. These options not only provide a cozy texture but also offer durability and resistance to wear and tear.
Q: Can children use weighted blankets?
When introducing weighted blankets to children, it’s crucial to get the size and weight just right. A blanket that’s too small or too light can negate the benefits of deep pressure stimulation. Meanwhile, one that’s too large or heavy may cause discomfort or even pose a safety risk. To ensure a safe and enjoyable experience, always supervise children when they’re using their weighted blanket.
Q: How do I fix a tear in my weighted blanket?
To mend the tear effectively, replace the damaged section with a matching piece of fabric, ensuring a secure and seamless fix. This will prevent further damage and ensure the filler remains contained within the weighted blanket. As you work through these FAQs, you’ll be well-prepared to craft and maintain a weighted blanket that provides optimal comfort and relaxation. The crucial aspect is tailoring the blanket to your unique needs and preferences for an unparalleled experience.
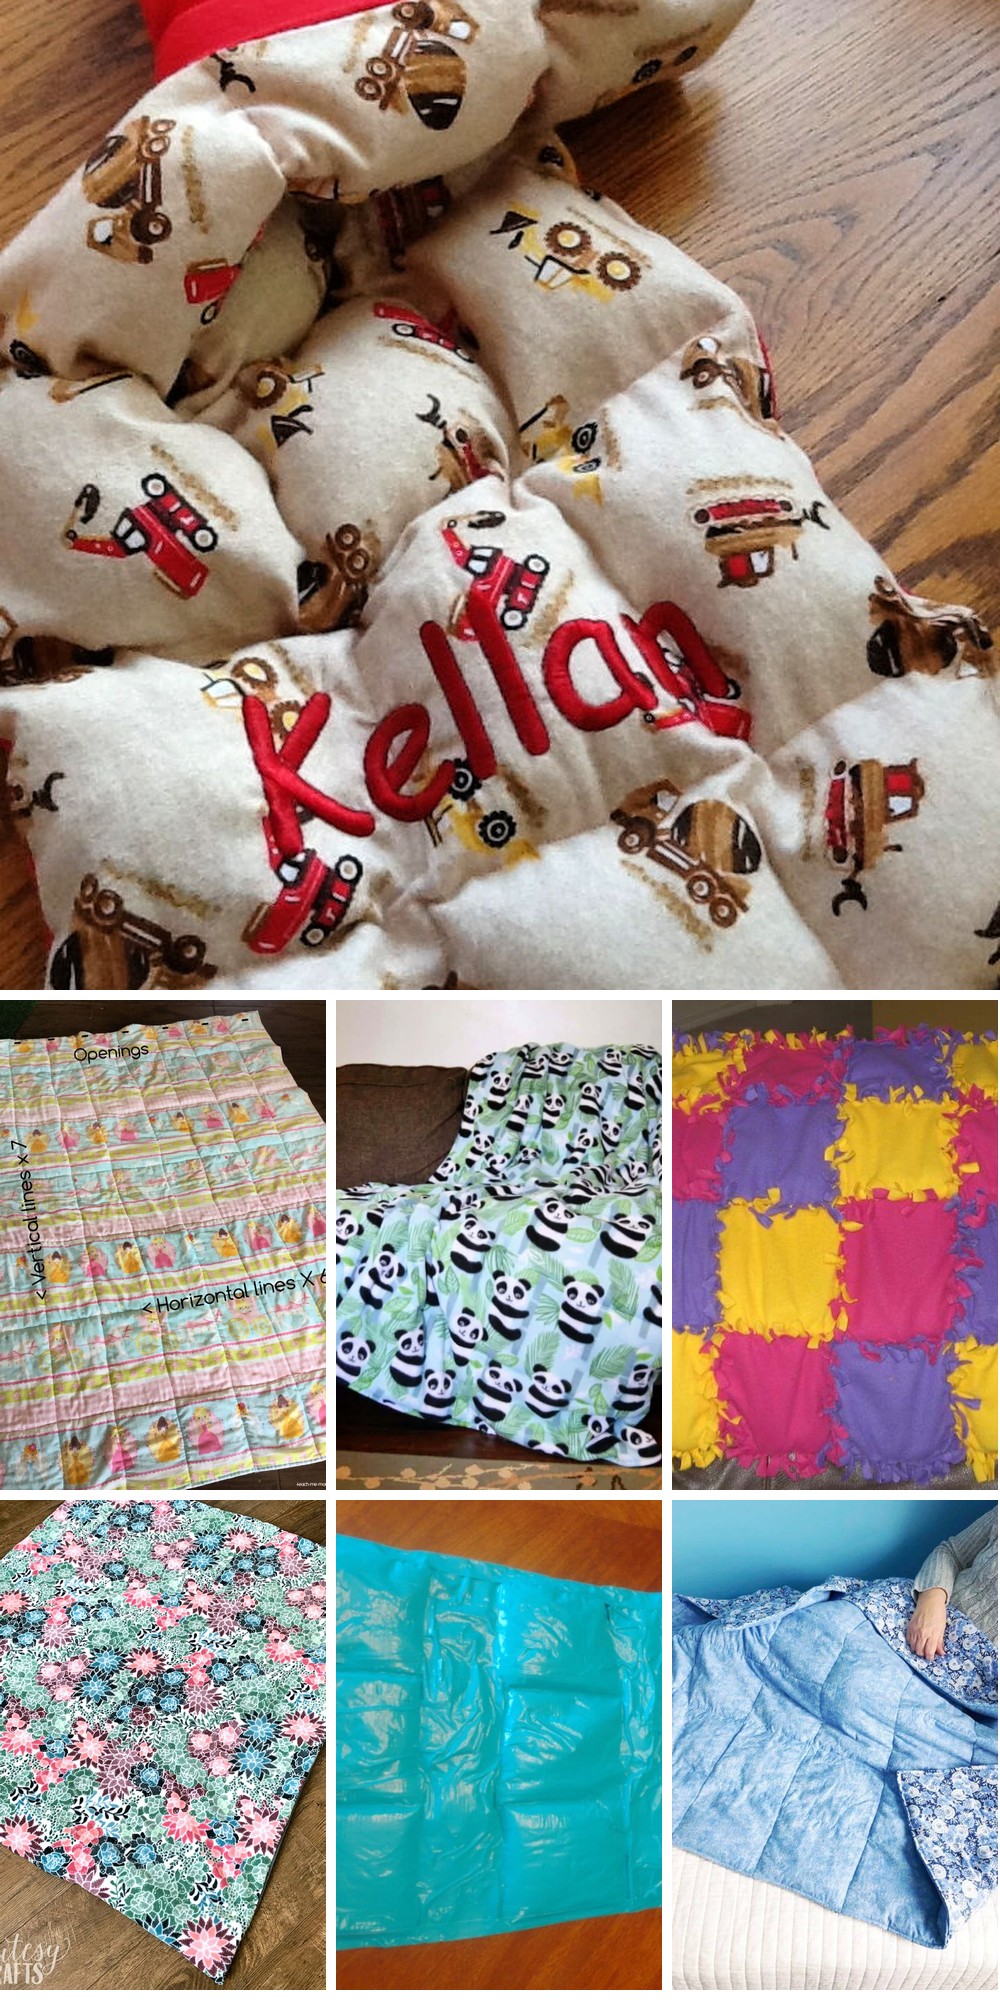
15 DIY Weighted Blanket Ideas
Transform bedtime routines with innovative DIY weighted blanket creations tailored specifically for toddlers, catering to sensory-seeking children and fussy little ones alike. Here are 15 creative ways to craft your own weighted blankets that promote deep relaxation and improved sleep quality.
DIY Weighted Blanket for Anxiety
Crafting a weighted blanket can be a calming experience for individuals grappling with anxiety, offering a therapeutic outlet that yields tangible benefits. A detailed DIY guide from Shrimp Salad Circus provides a comprehensive roadmap for creating a cozy, anxiety-relieving weighted blanket. As you embark on this project, you’ll discover the scientifically-backed advantages of these blankets, including reduced stress hormone levels and improved management of conditions like insomnia and depression.
This tutorial includes an exhaustive supply list, crystal-clear step-by-step instructions, and expert tips for calculating the ideal weight for your blanket. By combining basic sewing skills with a dash of creativity, you can craft a personalized weighted blanket that fosters a sense of serenity and enhances your nighttime sleep experience.
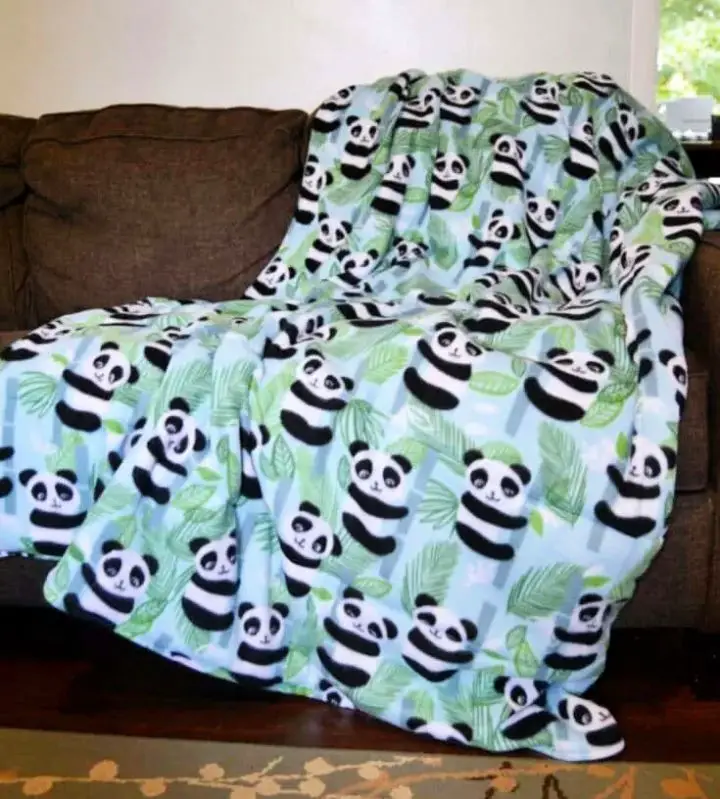
Handmade Weighted Blanket Using Fabric
Embarking on a weighted blanket-making journey at home can be an incredibly fulfilling experience, especially with the expertise of See Kate Sew guiding you along the way. As a sleep-enhancing tool, weighted blankets provide gentle pressure that can significantly improve the quality of your rest. To get started, you’ll need a few essential materials such as fabric, batting, and weighted pellets, in addition to some basic tools like a sewing machine and scissors. The tutorial’s clear instructions and measurements for both small and large blankets allow you to customize the size to suit your needs. For added durability, consider using high-quality fabrics like cotton or flannel. By following the step-by-step guide, you’ll learn how to efficiently cut fabric, assemble layers, and distribute pellets evenly, resulting in a well-made, cozy blanket that’s perfect for personal use or as a thoughtful gift. This DIY project is an excellent way to create something special and soothing, while also providing a sense of accomplishment.
Making Your Own Weighted Blanket
Creating a weighted blanket from scratch can be an engaging DIY endeavor that yields a personalized and cozy outcome. The process involves eight straightforward steps, as outlined by Mary Martha Mama’s comprehensive guide. This tutorial is designed to empower individuals with basic sewing skills to produce a weighted blanket at home, potentially saving money and allowing for customization to suit individual preferences.
The guide provides detailed instructions on selecting the ideal fabric and pellets, as well as executing the final stitches. Notably, it’s crucial to consider the appropriate weight of the blanket, taking into account the intended user. As with any DIY project aimed at therapeutic purposes, consulting a healthcare professional is highly recommended. With dedication and attention to detail, you can craft a comforting weighted blanket that meets your unique needs.
DIY Weighted Blanket With Simple Supplies
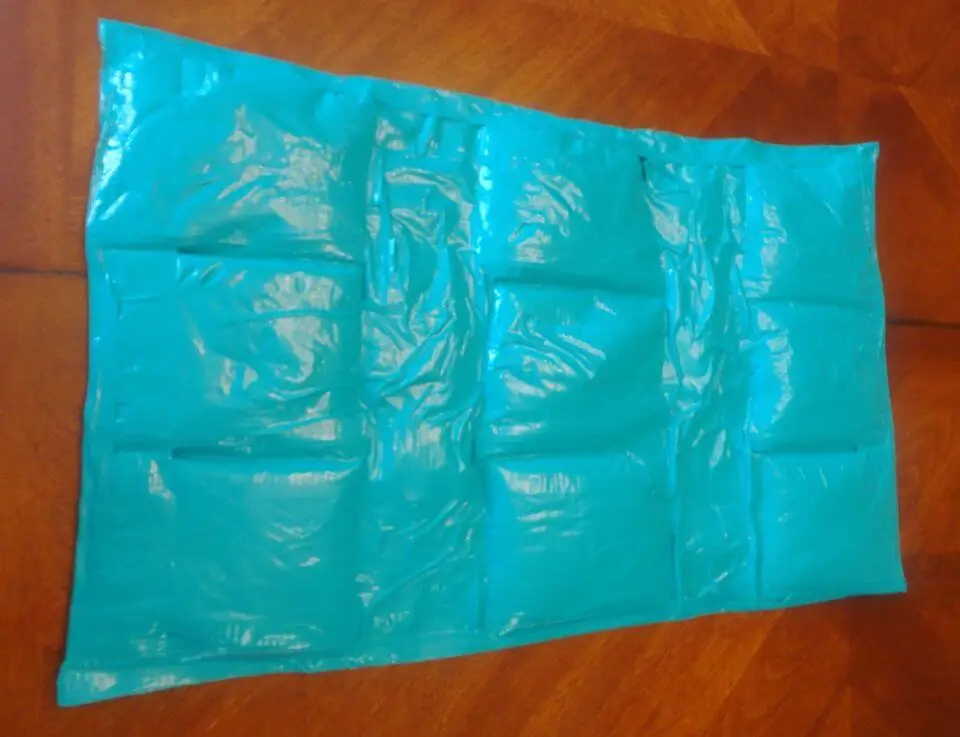
Creating a DIY weighted blanket is a wonderful way to provide comfort and sensory input for children with special needs. One innovative approach is to use everyday household items like duct tape, Ziploc bags, and rice, as demonstrated by Jest_ Tu_Positive. This cost-effective method not only yields a functional product but also allows for customization, making it an excellent project to undertake with your child. The key to ensuring optimal benefits is to tailor the weight of the blanket to approximately 10% of the child’s body weight plus one additional pound. By following simple instructions, you can craft a therapeutic weighted blanket or lap pad that is easy to maintain and enjoy.
How to Sew a Weighted Blanket
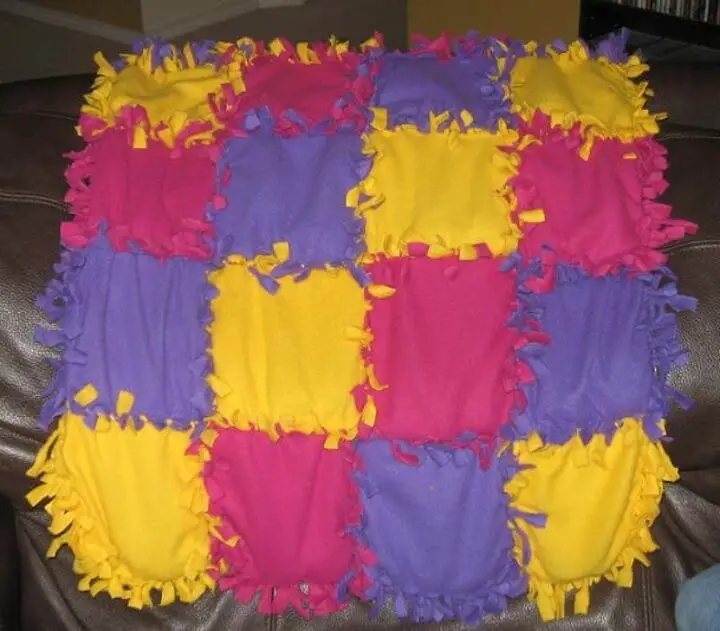
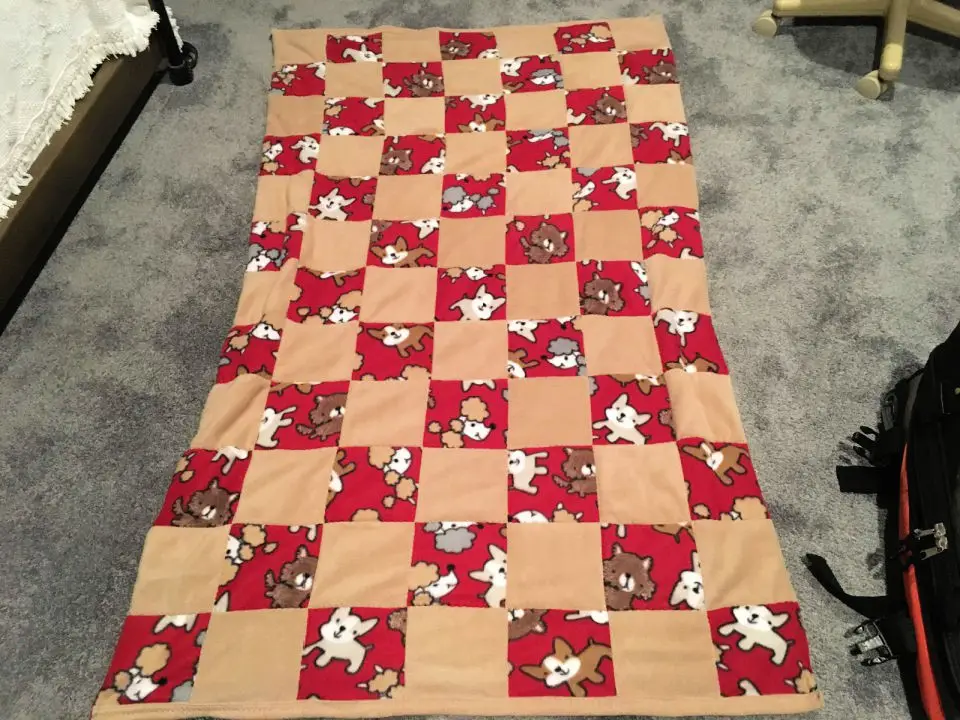
Creating a weighted blanket for your child can be a fulfilling DIY endeavor, especially when faced with the often-high prices of commercial options. At its core, this project requires no advanced sewing skills, making it accessible to anyone looking to create a cozy, therapeutic blanket tailored to their child’s sensory needs. The process involves crafting a patchwork of vibrant fleece pockets, filling them with smooth river stones for added weight, and finally assembling the pieces into a blanket that provides comfort and security for your little one. By following clear, step-by-step instructions, you’ll not only create a personalized weighted blanket but also take pride in knowing you’ve crafted something special with your own hands.
Homemade Washable Weighted Blanket
Create your own personalized and washable weighted blankets with ease, perfect as a thoughtful gift or a comforting addition to your home. With Grandma’s design, you can make durable blankets featuring detachable weighted pockets that can be attached to any sturdy blanket. Each pocket has interior Velcro for secure weight distribution and to prevent slippage. You can customize the weight placement using the 6×10 grid of pockets, providing a soothing weighted sensation. The top flap ensures the snaps are securely fastened, making it practical to remove the weighted bags for easy washing. Simply visit Autis Munder for detailed instructions and start crafting your cozy, customized weighted blanket today.
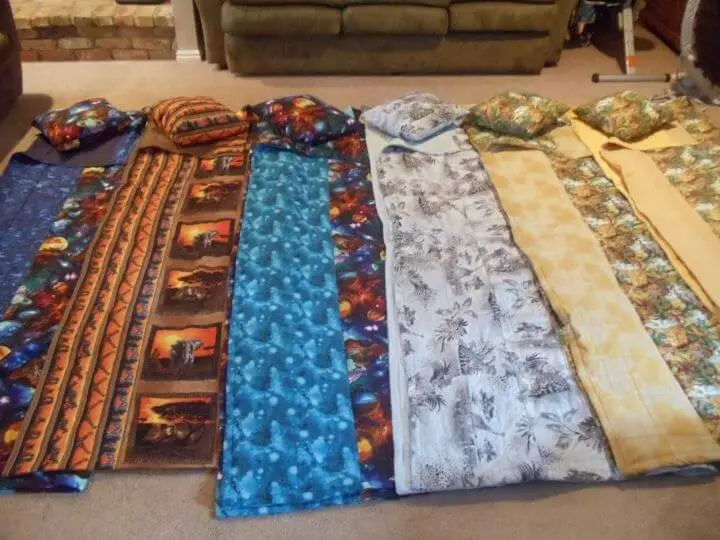
Weighted Throw Size Blanket for Teens
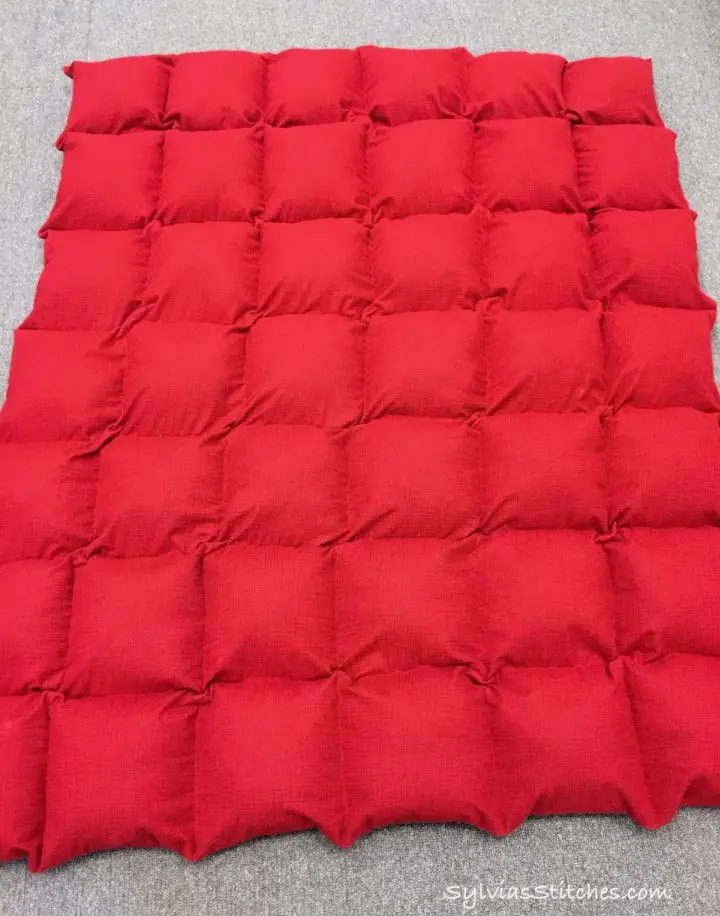
Sylvia’s Stitches offers a comprehensive guide to crafting a weighted throw-sized blanket, perfect for teens and adults seeking comfort and relaxation. The DIY tutorial leads readers through the process with clear instructions, from selecting the ideal fabric and pellets to planning and assembling the finished product. With a focus on creating a comforting item that can benefit individuals with sensory issues or sleep disorders, the guide provides valuable tips on achieving even weight distribution and durable construction. This engaging walkthrough makes it simple to create a personalized gift that can bring a sense of calm and security to its recipient.
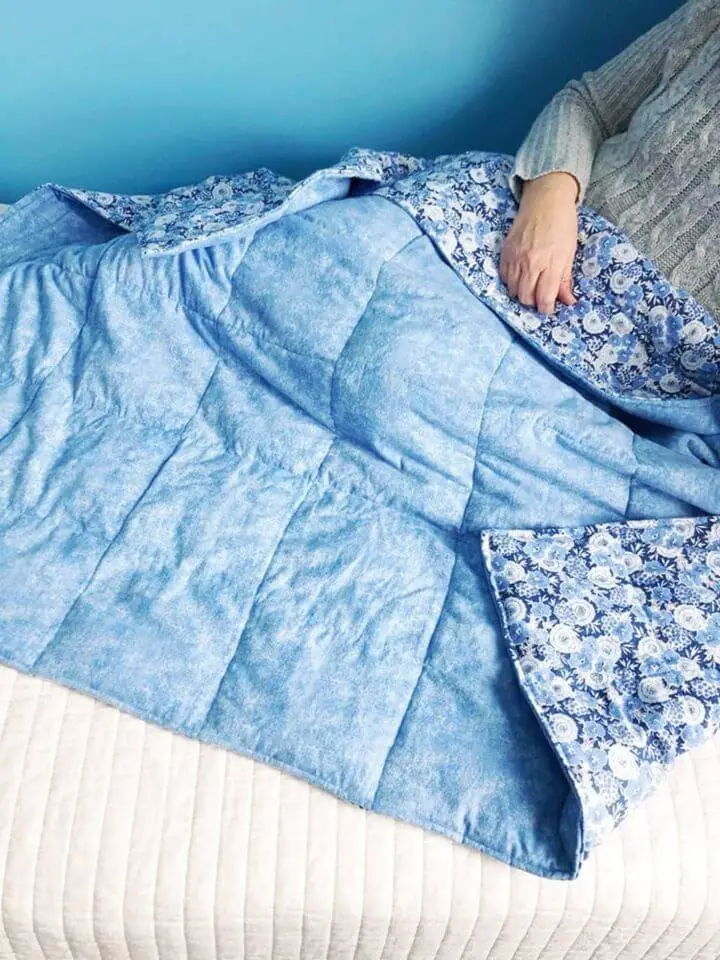
DIY Weighted Blanket Step by Step Instructions
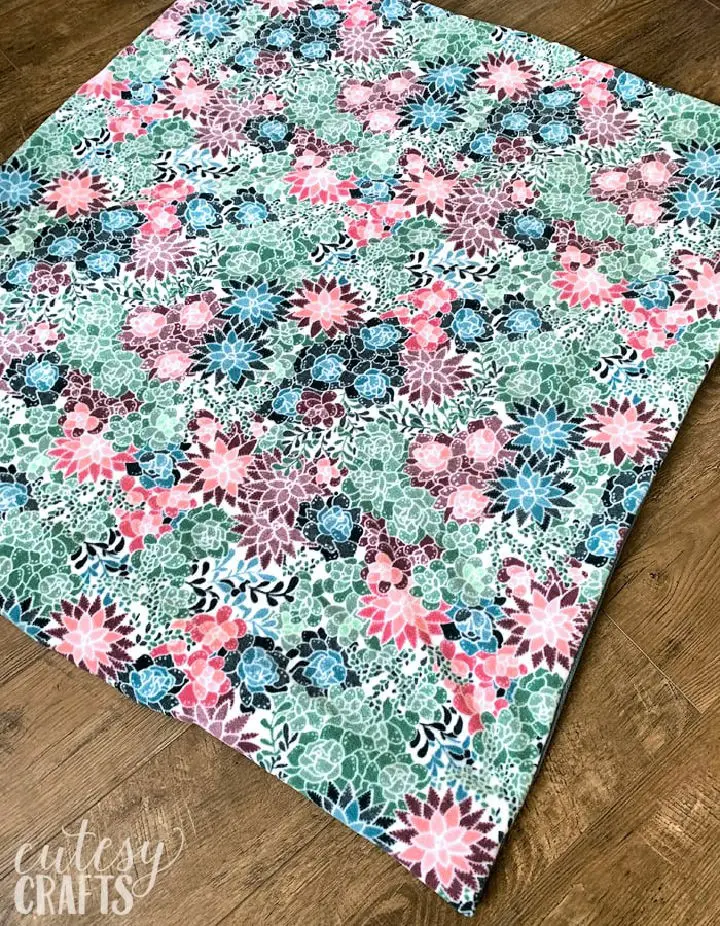
Immerse yourself in the world of DIY weighted blankets with Cutesy Crafts’ comprehensive guide. Designed to soothe individuals struggling with sleep difficulties, anxiety, or sensory sensitivities, these cozy creations can revolutionize your rest and overall well-being. This step-by-step tutorial takes you on a journey from selecting the ideal fabric to calculating the perfect weight, while also providing expert advice on measuring, cutting, and assembling your blanket. To make maintenance a breeze, we’ve included a removable cover for easy washing. By combining materials like quilter’s cotton, fleece, and poly pellets, you can create a personalized weighted blanket that provides just the right amount of pressure. Join us in this rewarding project and experience the transformative power of a handmade weighted blanket.
How to Make a Weighted Blanket

Crafting a weighted blanket with Mosaic Weighted Blankets’ DIY kit is an engaging project that harmoniously blends comfort and creativity. The comprehensive package includes pre-cut fabric, precisely measured plastic pellets, and step-by-step guidance to aid in the construction of a customized, snugly tailored blanket. With various size and weight options available, you can curate your blanket to suit your distinct preferences. This hands-on endeavor demands intermediate sewing skills, yet the end result is a uniquely personalized blanket ideal for cozying up at home. As you select your fabric, thread your needle, and meticulously sew each square together, you’ll experience a sense of accomplishment and warmth that permeates throughout.
DIY Weighted Blanket at Home

Create your own weighted blanket with a cost-effective DIY approach that provides sensory comfort and therapeutic benefits. This simple yet effective method involves using rice and zip-lock bags, making it accessible to anyone seeking stress relief without breaking the bank. The guide shares a step-by-step process for crafting this comforting solution, perfect for individuals with sensory sensitivities, anxiety, PTSD, or depression who can benefit from the calming effects of weighted blankets.
How to Make Your Own Weighted Blanket
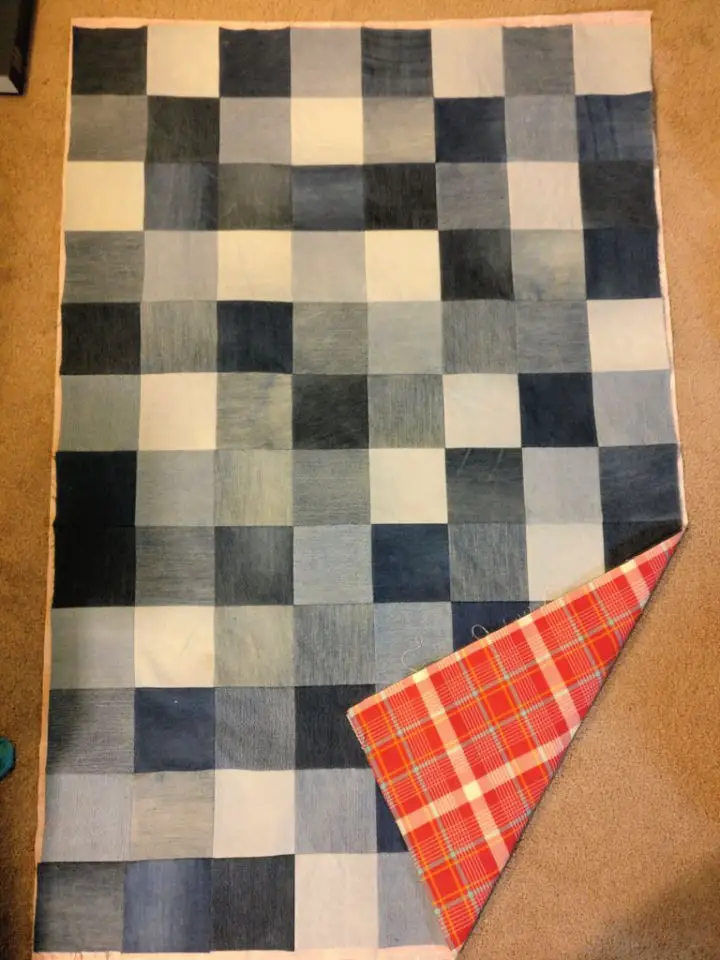
Crafting a weighted blanket can be a deeply satisfying DIY endeavor that allows you to tailor your creation to your unique needs and preferences. One excellent resource is Instructables’ comprehensive guide on building a customized weighted blanket, which has been shown to help alleviate anxiety and support individuals with sensory processing disorders. By following the step-by-step instructions, you’ll learn how to gather materials such as repurposed old jeans and poly pellets, cut fabric to your desired size, sew the pieces together, and fill your quilt with just the right amount of weight. The result is a cozy, therapeutic blanket that not only provides comfort but also offers pressure relief at a fraction of the cost of store-bought options. As you create this thoughtful gift or self-care essential, you’ll enjoy the sense of accomplishment that comes from bringing a project to life.
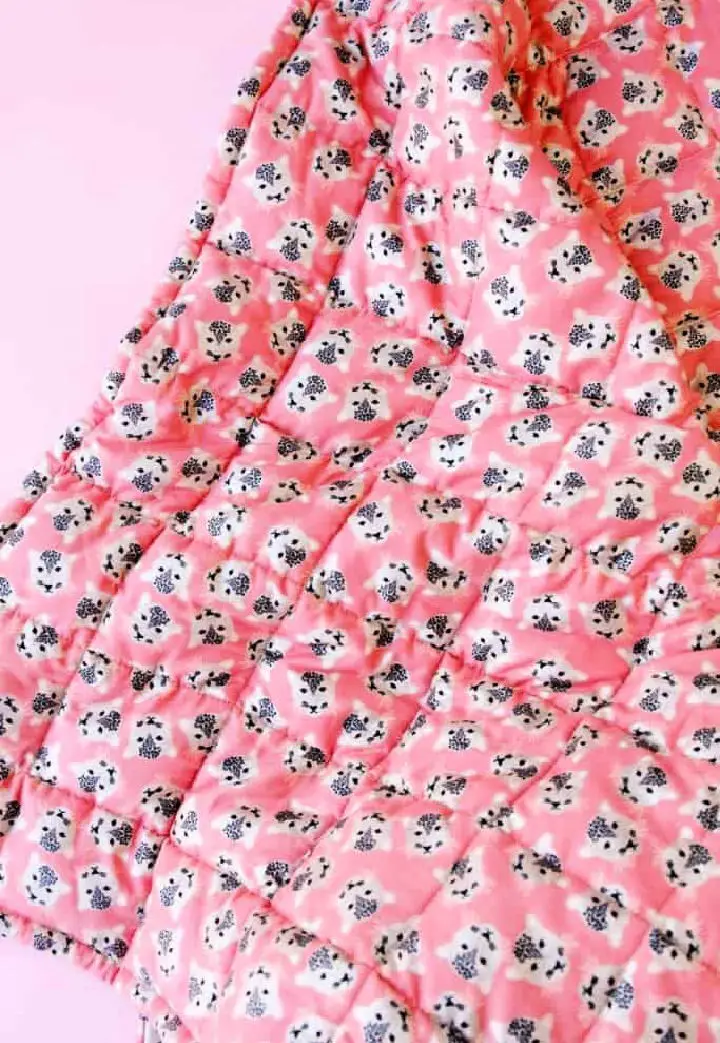
Make a Weighted Blanket on a Budget
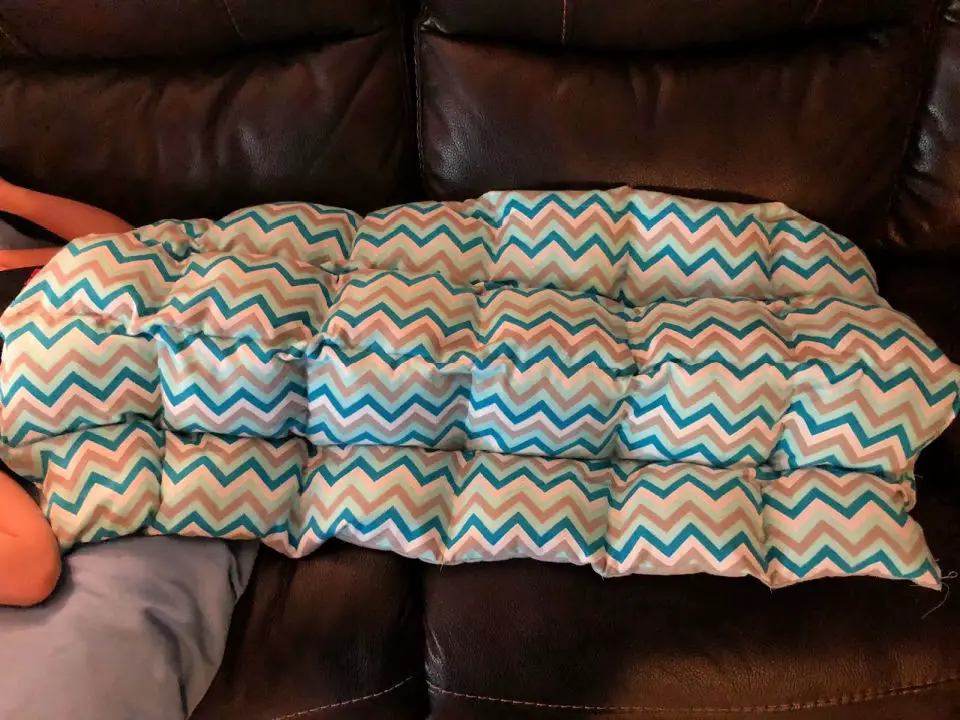
Crafting a weighted blanket is a calming and fulfilling DIY experience that offers numerous benefits for both body and mind. The core concept behind this project revolves around deep pressure stimulation, which provides gentle yet profound pressure that can induce relaxation and enhance sleep quality. To create your own weighted blanket, you’ll need Poly Pellets from Walmart.com, accompanied by soft stuffing materials and two pieces of fabric cut to the desired dimensions. Begin by positioning the fabric pieces with their right sides facing each other and sew the edges together, leaving only the top and bottom open. Next, flip the fabric right side out and draw a horizontal line to mark the middle of the blanket. This is followed by sewing vertical columns and filling each pocket with a calculated amount of Poly Pellets and a consistent handful of stuffing. Once filled, seal the pockets with horizontal rows and repeat the process on the opposite half of the blanket. Finally, secure the open ends with a sturdy double stitch.
Easy DIY Weighted Blanket
Immerse yourself in the creative journey of quilting with a personal touch. Our latest update highlights the completion of a weighted blanket, a project that required dedication but ultimately yielded a sense of accomplishment. For those looking to mix things up and try something new, we offer an alternative project that repurposes leftover pellets: charming animal bean bags that make for thoughtful gifts. Meanwhile, our narrative explores the joy of spontaneous quilting, embracing the freedom to create without rigid patterns or measurements. As Desert Quilting shares its story, it inspires and guides readers in crafting one-of-a-kind quilts that embody resourcefulness and creativity, all while navigating life’s unexpected twists and turns.
How to Do You Make a Sensory Weighted Blanket
As we celebrate Autism Awareness Month, it’s essential to focus on tools that offer comfort and sensory input for children with sensory processing needs, such as those with Autism or Sensory Perception Disorder (SPD). Crafting a customized weighted blanket can be a powerful way to provide this support. This tutorial provides a step-by-step guide to creating a weighted blanket tailored to your child’s unique requirements. By selecting suitable fabrics, determining the ideal weight using plastic pellets, and incorporating sensory elements like ribbons for added stimulation, you’ll create a personalized and calming gift. With clear and methodical instructions, making a weighted blanket is an accessible and cost-effective way to show your child love and care.
DIY Weighted Blanket for Sensory Seeker
Creating a DIY weighted blanket is a clever way to provide comfort for individuals with sensory needs. By transforming a familiar duvet into a customized weighted blanket, you can create an affordable alternative to store-bought options. This step-by-step guide ensures an engaging and practical crafting experience, detailing the materials required and walking you through the process of creating evenly distributed weight pockets. The tutorial is adaptable to different weight preferences, making it suitable for both children and adults. Additionally, helpful hints on sewing and filling techniques are included to make the task manageable and rewarding. With this guide, you’ll be able to create a cozy weighted blanket that provides a hug-like sensation, promoting improved relaxation and sleep.
Conclusion:
As the culmination of our DIY weighted blanket ideas, creating a customized comforter for your little one can be an incredibly fulfilling experience. Not only do you get to indulge in the satisfaction of crafting something both visually appealing and functional, but you also have the opportunity to provide physical and emotional security to your child. By understanding the therapeutic benefits of weighted blankets and mastering the steps involved in sewing a weighted blanket, you’ll be equipped with the essential skills and knowledge needed to complete this project. As always, prioritizing safety precautions when using weighted blankets and familiarizing yourself with maintenance tips will ensure that your handmade creation remains a cozy companion for years to come. The joy of DIY crafting is not just about creating something new, but also about sharing love and care with those around you.
