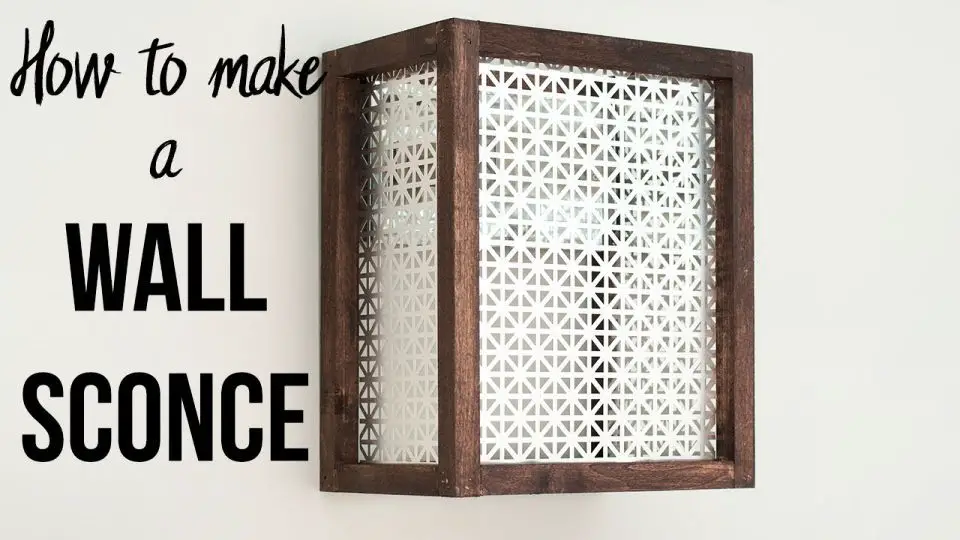
When it comes to personalizing their living spaces, many people turn to DIY projects as a way to infuse their unique style and creativity. One popular endeavor is crafting custom wall sconces that not only provide functional lighting but also serve as a reflection of one’s artistic abilities. The process of creating these handmade fixtures can be a truly rewarding experience, allowing homeowners to tailor the design to fit their individual tastes and preferences, while simultaneously enhancing the ambiance of their home. By breaking down the project into manageable steps, from selecting materials to installation, even those new to DIY endeavors can feel empowered to take on the challenge and reap the satisfaction that comes with creating something both beautiful and functional.
Why Make DIY Wall Sconces?
Discovering the joy of crafting DIY wall sconces can bring a range of benefits and creative possibilities to your space. This cost-effective approach allows you to tap into materials you may already have at home, saving you money and giving you the freedom to personalize your unique lighting solutions.The thrill of creating something with your own hands is undeniable, and making DIY wall sconces is no exception. By tailoring your project to fit your personal style and room ambiance, you’ll be able to create a one-of-a-kind piece that reflects your aesthetic. Whether you’re drawn to rustic, modern, or minimalist designs, the possibilities are endless.The process of crafting DIY wall sconces can also be a fun and engaging activity, whether you’re working alone or with friends and family. As you learn new skills and explore different materials and techniques, you may find yourself inspired to take on more creative projects in the future.Additionally, DIY wall sconces offer an eco-friendly alternative to buying new products. By repurposing materials or using sustainable options, you can make conscious choices that benefit the environment. This blend of affordability, customization, personal achievement, and environmental consideration makes DIY wall sconces a great way to enhance your home’s decor while enjoying the creative journey.
How to Make Wall Sconces
Creating custom wall sconces allows homeowners to infuse their personal style into any room while embarking on a fun and rewarding DIY adventure. This comprehensive guide will walk you through the process of crafting four distinct styles of wall sconces, each boasting its own distinctive aesthetic and level of complexity. Whether you’re just starting out or have a background in DIY projects, there’s an option here that caters to your skillset.
Materials You’ll Need
To start crafting your sconce, you’ll need a range of materials. The specific items required will depend on the design you’ve chosen, but here’s a general list to get you started:
* A sturdy wooden wall bracket to provide support for your lamp.
* Standard light cord to connect your lamp to a power source.
* Basic DIY tools like a drill and bits, as well as a saw for any necessary woodwork.
* Flexible yet durable wire for constructing the lamp’s framework.
* Thin strips of pine board (1 by 2) for adding structure and stability.
* Construction adhesive to secure your materials in place.
* Paint or other finishes if you want to add a decorative touch.
* Copper pipe and a pipe cutter for creating any necessary tubing components.
* A copper cap to complete the look of your lamp’s piping.
* A bowl to shape and form your lampshade, giving it the desired appearance.
* Grommets for adding a professional finish to any seams or connections.
* Gel superglue for bonding materials together securely.
* Tube clamps to hold everything in place while your glue sets. With these materials on hand, you’ll be well-equipped to bring your sconce design to life.
Step-by-Step Guide
Imagine four distinct approaches to creating unique sconces that showcase your creativity while providing a touch of warmth and ambiance to any room. The first, classic wooden bracket option starts by acquiring a wooden wall bracket from a store like IKEA. To prepare the bracket for installation, drill a hole at the top for the light cord if needed, then cut a notch from the hole to the edge to fit the cord neatly. Wrap the remaining cord around the bracket creatively before hanging it on the wall and inserting the light bulb. For a chic and modern look, option two involves cutting a sturdy but bendable wire to desired length, wrapping it around the base of the light cord and securing it with glue or tape. Bend the wire into a shape that will attach to a wooden block on the wall, then drill holes in the block to insert and secure the wire ends with construction adhesive. Once dry, paint the block and mount it on the wall before adding the light bulb. The third option is perfect for those who prefer a no-screw, battery-powered design. Start by cutting a triangle from a piece of wood for the sconce face, then cut a smaller triangle and a rectangle to layer behind the first, leaving space for a battery pack. Glue the pieces together, leaving room to insert and secure the battery pack with velcro, before wrapping string lights around the frame and securing the end with glue or a tie. Finally, attach a wall-friendly hook to the back of the sconce for easy hanging. For a touch of elegance, option four involves cutting pieces of copper pipe to create the sconce frame, then threading a light cord through the pipes. Drill holes in a copper cap and bowl (used as a lampshade) to fit grommets, assemble the pipes with gel superglue, and attach the cap and bowl before securing the sconce to the wall with tube clamps.
Video Tutorial
While the video tutorial from The Sorry Girls on YouTube provides an excellent visual guide to creating your own wall sconces, this written guide offers a more comprehensive and step-by-step approach. By combining both resources, you’ll gain a deeper understanding of each process, making it easier to craft beautiful, personalized pieces that fit your unique style. From classic wooden designs to modern copper elegance, or even renter-friendly battery options, there’s a DIY sconce solution tailored to your preferences. With these steps in mind, get ready to elevate your space without breaking the bank and enjoy the satisfaction of creating something truly special.
FAQ: DIY Wall Sconce Ideas
Get instant solutions to your most pressing queries about crafting DIY wall sconces, and unlock the secrets to creating stunning lighting fixtures that illuminate your space with ease.
What materials do I need to start a DIY wall sconce project?
To embark on a DIY wall sconce project, you’ll typically require a solid foundation of materials. This includes the following essential components: wooden wall brackets to serve as the base structure, standard light cords for illumination, and a set of basic tools like drills and drill bits, saws, and wire (a flexible yet sturdy variety is recommended). Additional materials include pine boards (1 by 2 inches) for crafting the lampshade’s outer casing, construction adhesive for securing components in place, paint (optional) for adding a touch of color or texture to your design. For the sconce’s metal accents, you’ll need copper pipes and pipe cutters to shape the desired features, as well as copper caps to complete the look. Finally, don’t forget the bowl for crafting the lampshade itself, grommets to provide a secure attachment point, and gel superglue to ensure all components stay firmly in place. To keep everything organized, consider using tube clamps to hold your materials steady while you work.
Can I make a wall sconce without electrical skills?
Innovative DIY wall sconce projects often employ battery-powered lighting solutions, such as LED candles and puck lights, which conveniently sidestep the requirement for complex wiring or electrical expertise, making it accessible to a broader range of enthusiasts.
How can I make my DIY sconce eco-friendly?
When creating an eco-friendly DIY sconce, it’s essential to consider the environmental impact of your design. To achieve this, think outside the box by using repurposed or recycled materials in your project. You can also opt for sustainable materials like bamboo or recycled metal, which offer a reduced carbon footprint compared to traditional materials. Additionally, LED lights are an excellent choice due to their energy efficiency and longer lifespan, reducing the need for frequent replacements and minimizing waste. By incorporating these eco-friendly elements, you’ll not only create a unique and functional sconce but also contribute to a more sustainable future.
What is the best way to mount a DIY wall sconce?
When it comes to installing a DIY wall sconce, the approach depends largely on the fixture’s weight and dimensions. For lighter options, adhesive strips or tabs can provide a secure hold. However, heavier sconces typically necessitate more substantial support, such as mounting brackets anchored into wall studs.
Can I customize the light intensity of my DIY sconce?
To tailor the brightness of your lighting scheme, consider the following options: By incorporating dimmable LED lights or bulbs into your design, you can effortlessly adjust the intensity. Alternatively, if you’re comfortable with basic wiring, you can integrate a dimmer switch into your setup. Additionally, experiment with varying the distance between the light source and the sconce’s surface to subtly soften the glow, achieving a more nuanced ambiance.
How can I ensure my DIY wall sconce is safe to use?
When it comes to ensuring the safety of your lighting setup, there are several key precautions to take. For starters, avoid placing flammable materials near light sources as this can lead to a heightened risk of fire. Additionally, make sure that any battery-operated lights are properly secured to prevent overheating and potential electrical failures. If you’re working with electrical components, it’s always best to consult with a professional or refer to established safety guidelines to minimize the risk of injury or damage.
What is a cost-effective way to make a DIY wall sconce?
Transforming a DIY wall sconce into an affordable and eco-friendly project is achievable through creative repurposing, strategic sourcing, and energy-efficient lighting. To get started, consider reusing materials you already have on hand, such as old pallets, crates, or cardboard tubes. If you need to purchase supplies, explore dollar stores and thrift shops for affordable alternatives to traditional materials. Furthermore, opt for battery-powered lights to eliminate the need for expensive electrical components and reduce your overall project costs.
How can I add a personal touch to my DIY sconce?
To elevate your DIY sconce project, consider infusing it with your personal style by selecting colors and materials that harmonize with the rest of your decor. You can also customize the look by adding unique decorations, such as family photos or meaningful keepsakes. Furthermore, you can create a theme that resonates with your interests or hobbies, making your DIY sconce a true reflection of your personality.
This FAQ section aims to provide guidance on creating your own DIY wall sconces, covering essential topics like materials, safety, customization options, and eco-friendly practices. Whether you’re just starting out in the world of crafting or have years of experience with DIY projects, there’s always room for creativity and self-expression when it comes to designing a one-of-a-kind home lighting fixture.
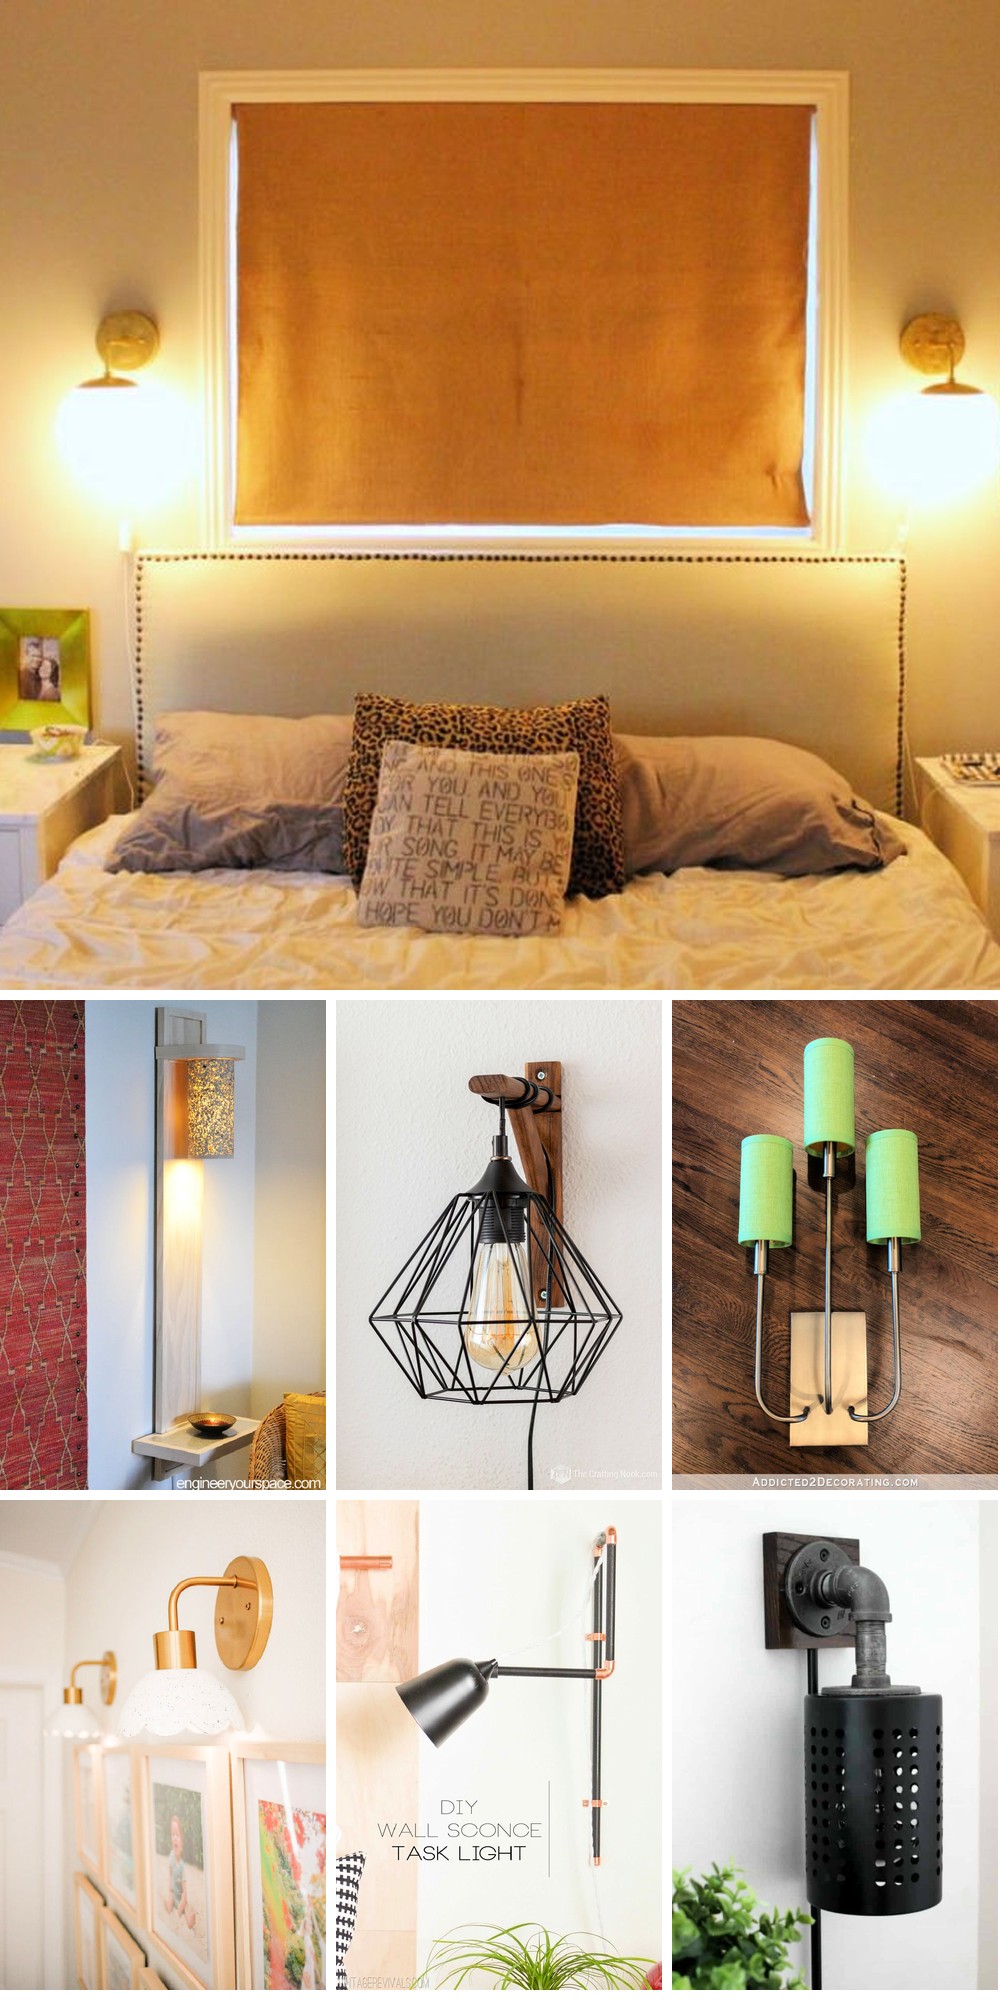
15 DIY Wall Sconce Ideas (How to Make Wall Sconces)
Transform your living space with a touch of creativity! Explore 15 innovative DIY wall sconce projects that can elevate the ambiance of any room, from cozy corners to grandiose great rooms. With these stylish and practical solutions, you’ll be able to craft the perfect lighting scheme for your home, tailored to your unique taste and style.
Sconce With a Shelf Made With Hand Tools
Transform the ambiance of any room with a charming DIY wall lamp/sconce featuring a convenient shelf. Handcrafted using only basic tools, this project offers an accessible way to infuse rustic charm into your home decor. Beyond providing warmth and coziness, this sconce also doubles as a thoughtful spot for showcasing cherished mementos or decorative items. To ensure a seamless DIY experience, simply refer to the detailed instructions available on Instructables. Perfect for those looking for a fun and creative home project that adds both functional and aesthetic value.
Rustic DIY Wall Sconce Light
Elevate your living space with the warmth and character of rustic charm by creating your own DIY wall sconce light. This budget-friendly project is surprisingly easy to accomplish, requiring only a few basic supplies that may already be at your disposal.
With step-by-step guidance from The Crafting Nook, you can confidently bring this idea to life and transform your room’s ambiance while freeing up valuable space on surfaces like nightstands. Whether it’s for the bedroom or another cozy corner of your home, this DIY endeavor is sure to yield a satisfying result that brings a new level of charm to your living space.
Wireless Clay Wall Sconce Light For $25
Transform your space with a stunning DIY wireless clay wall sconce light for under $25. By combining Sculpey’s white granite clay with a few simple supplies and some creative flair, you can create high-end looking lighting fixtures that add a touch of elegance to any room – from hallways to bedrooms – without the hefty price tag. With this project, you can elevate your home decor without breaking the bank. For a comprehensive step-by-step guide on crafting these beautiful lights, head to Mikyla Creates.
DIY Dollar Tree Wall Sconce
Elevate your home decor without breaking the bank! By repurposing Dollar Tree items, you can create sophisticated wall sconces that exude elegance and charm. This straightforward guide walks you through each step of the process, from gathering materials to adding the final touches – all without requiring specialized tools or electrical expertise. The end result is a functional and stylish addition to any room, perfect for injecting a touch of sophistication into your living space. For the complete tutorial, visit Sincerely Miss J.
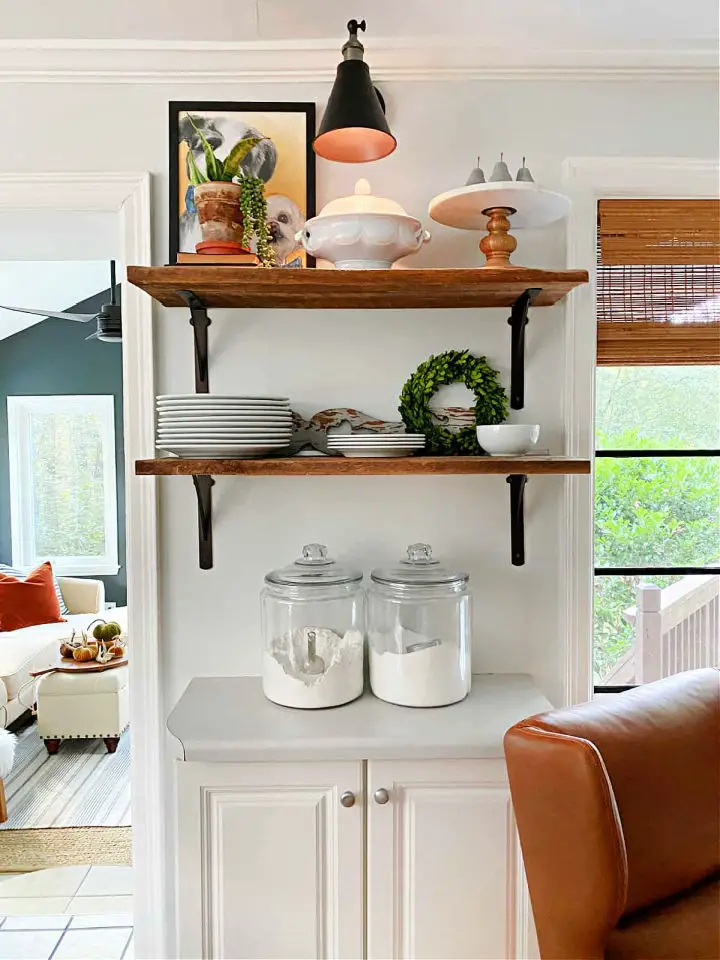
Wall Sconce Task Lights & A Target Update
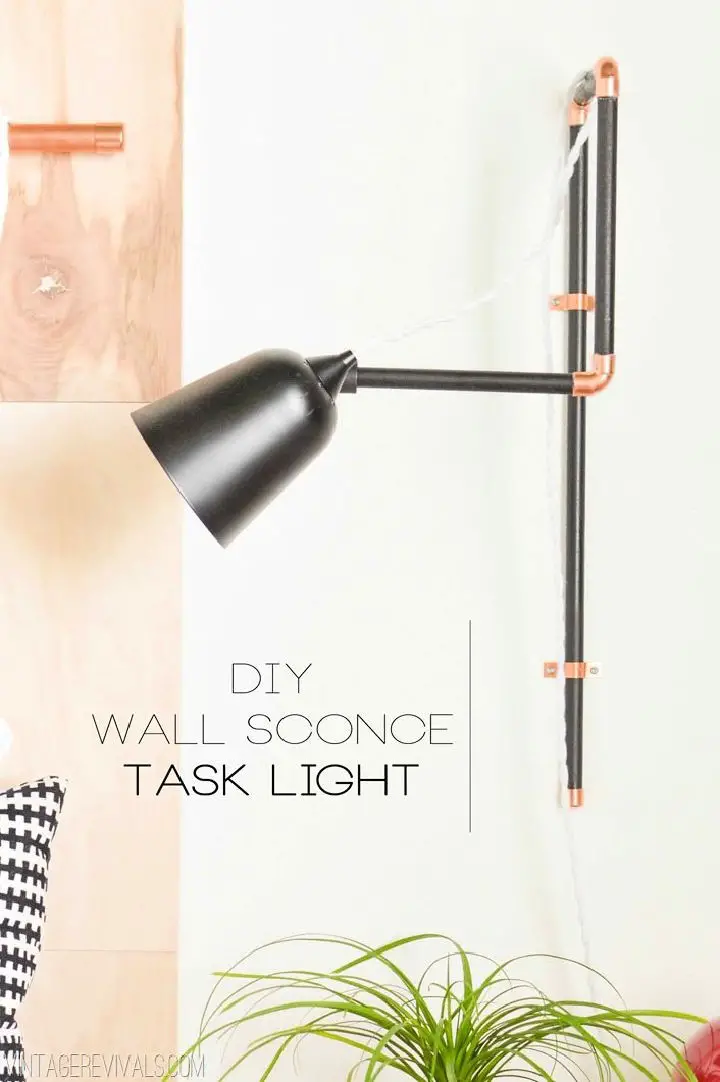
Transform your living space without breaking the bank by creating your own unique DIY wall sconces using affordable materials from Target. Start by revamping plain stick lights into stylish task lights by adding a fresh coat of paint and updating the cord with a stylish cloth coil. For an added touch of sophistication, incorporate wooden dowels and copper fittings to give your space a chic ambiance. This budget-friendly project can be completed for just $23, making it easy on the wallet and big on impact. Not only will you gain a personalized lighting solution, but you’ll also discover how a collaboration between Target and [insert partner] highlights the power of community support and creative potential.
Easy and Quick DIY Wall Sconce
Embark on a creative journey by crafting your own wall sconce. This comprehensive tutorial, inspired by Anika’s DIY Life, offers a straightforward approach to creating an eye-catching decorative piece for your home. Whether you’re a seasoned crafter or a DIY newcomer, this guide provides a clear framework to ensure a successful outcome. As you follow along, discover the satisfaction of bringing your personal touch to your space.
How to Make a DIY Wireless Wall Sconce
Transform your space with effortless elegance by harnessing the power of DIY Wireless Wall Sconces. This innovative solution leverages battery-operated puck lights, making it an ideal choice for homes where wiring is a challenge or not feasible. With just a few simple components – including a light socket adapter, a sconce of your preference, caulk or glue, and a puck light – you can create a warm and inviting ambiance without the complexity of electrical installations. Perfect for adding a touch of style and functionality to any room, this DIY Wireless Wall Sconce guide is an easy and effective way to upgrade your lighting without the hassle of wires.
Build Wood Wall Sconces
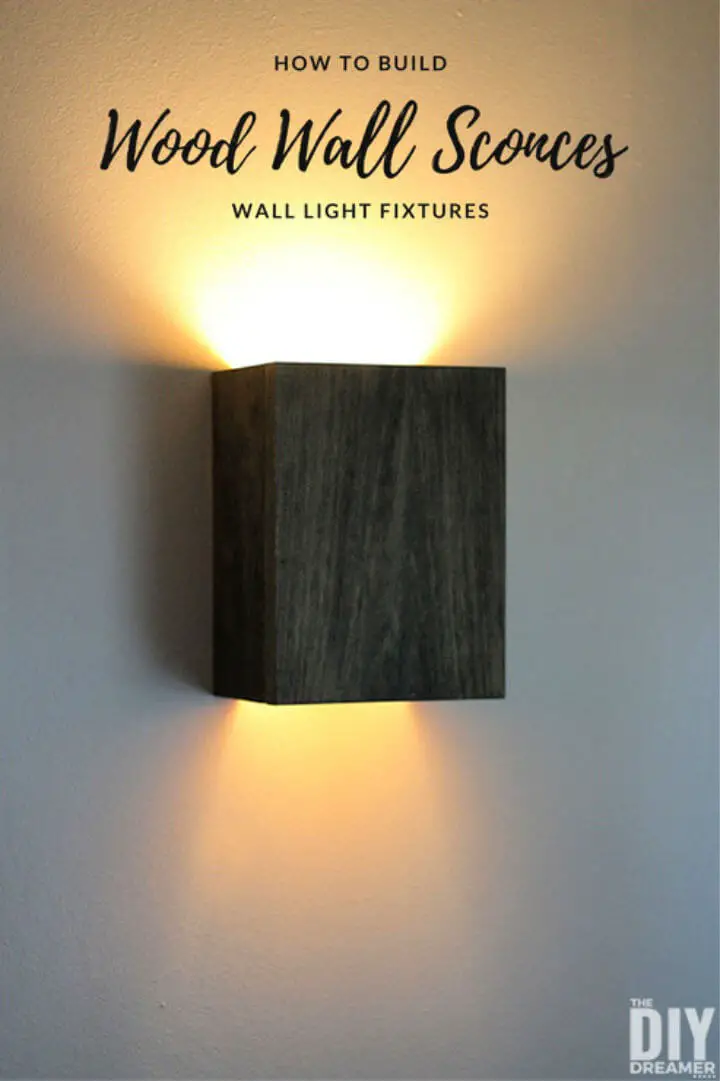
Elevate your living space by crafting stunning wood wall sconces with our comprehensive DIY guide. This budget-friendly tutorial takes you step-by-step through the process of selecting the perfect wood and stain, assembling the fixtures, and mounting them in place. With this easy-to-follow guide, anyone can create beautiful, functional light fixtures that add a warm and inviting ambiance to any room. The sense of accomplishment from making something truly unique is unparalleled, and the results are sure to leave you feeling proud. Start your DIY project today and illuminate your home with custom wood wall sconces that reflect your personal style.
Wall Sconce Shades from Cardboard Mailing Tubes
Transforming the ambiance of your home with DIY flair is just a creative project away! By repurposing cardboard mailing tubes into innovative wall sconce shades, you can turn ordinary materials into extraordinary lighting solutions. The result is a unique and elegant way to add warmth and character to any room. To bring this vision to life, simply follow the step-by-step guide on how to create tailored, fabric-covered shades that ensure a perfect fit for slender, chic wall sconces. Get detailed instructions at Addicted 2 Decorating and start enhancing your home’s ambiance today.
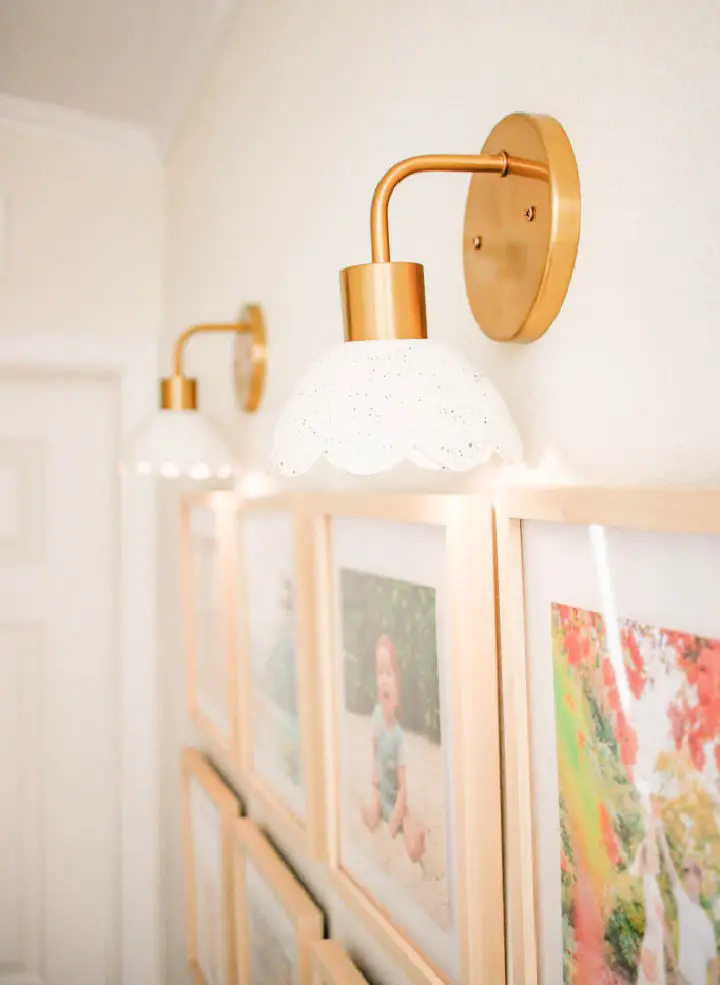
DIY Globe Brass Wall Sconce
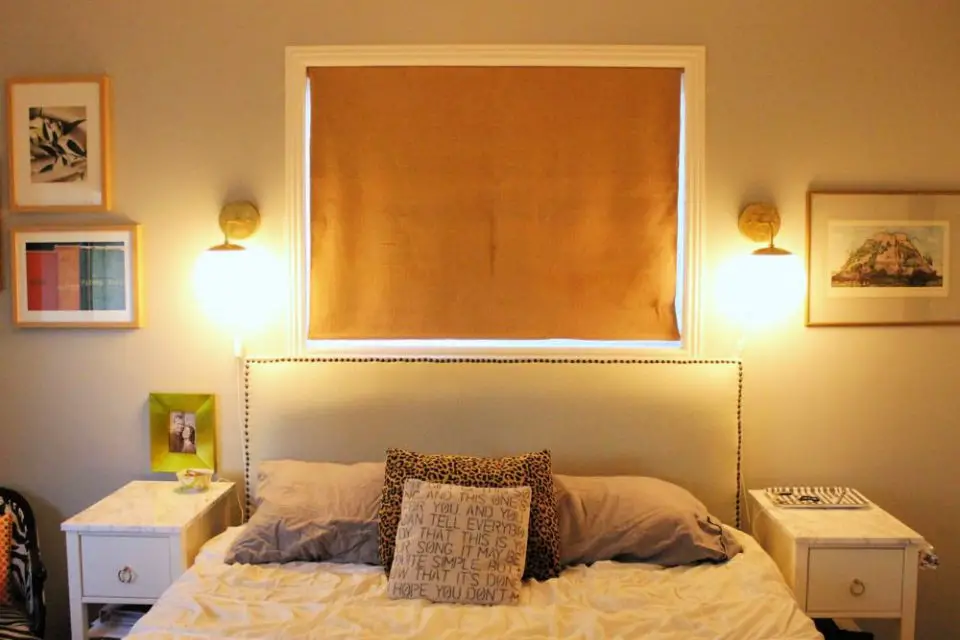
Elevate the ambiance of your home with a DIY Globe Brass Wall Sconce that effortlessly combines aesthetics and practicality. This innovative lighting solution not only liberates nightstand real estate but also infuses any room with a sophisticated, modern flair. Whether you’re looking to illuminate the living room or bedroom, our straightforward, step-by-step guide will walk you through the process of crafting a stunning, one-of-a-kind fixture. To get started, head over to Homedit for a comprehensive rundown of materials and instructions required to bring this intermediate DIY project to life.
DIY Wall Sconces from Scrap Wood
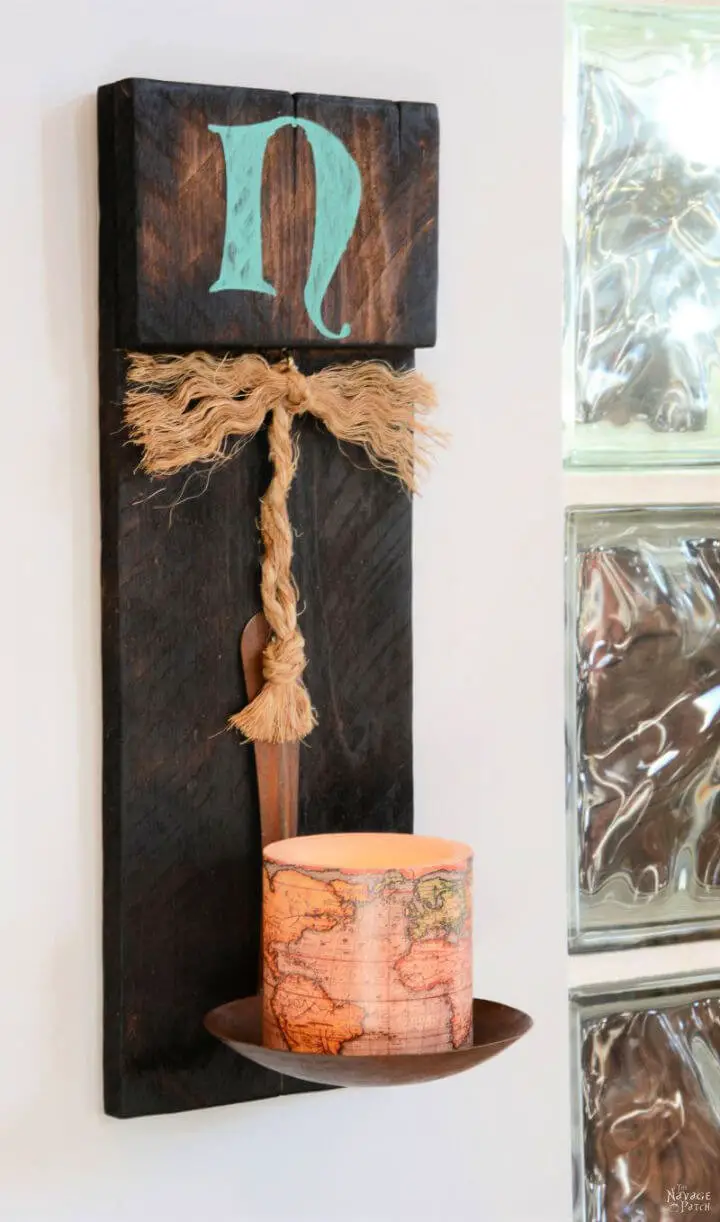
Transform your living space with the magic of upcycling scrap wood into captivating DIY wall sconces. Perfect for creating a warm and inviting ambiance, these rustic masterpieces can be powered by battery-operated LED candles, seamlessly blending sustainability with cozy charm.
Embark on a creative journey to turn discarded materials into stunning decorative pieces, guided by the expert tutorial at The Navage Patch. With minimal tools and a dash of ingenuity, you’ll craft sconces that not only illuminate but also captivate, making them ideal for seasonal decor or year-round warmth. Start your project today and add a touch of handcrafted elegance to your home.
Discover the secrets to creating over 25 enchanting DIY chandelier designs that will elevate your living space with effortless ease.
DIY Wall Lamp Sconce
Transform your space with a unique DIY touch! Discover how to create a captivating wall lamp (sconce) through a step-by-step tutorial from Instructables. This comprehensive guide is designed for individuals seeking to infuse their home decor with a personalized charm, perfect for illuminating a study, bedroom, or living area. With this engaging and informative resource, you’ll be inspired to bring your vision to life and elevate your space today.
DIY Wall Industrial Sconce
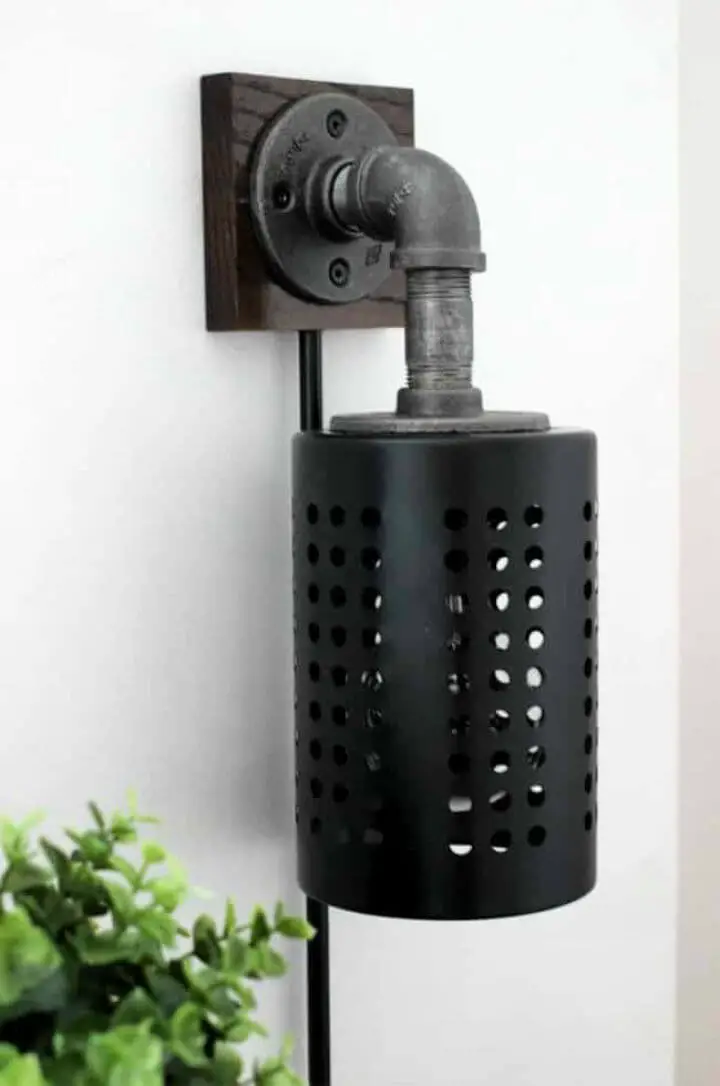
Transform your living space into a modern haven by creating your own DIY industrial sconces. A perfect blend of simplicity and elegance, these handmade lighting fixtures can be easily crafted using thrifted lamps and minimal materials, offering a budget-friendly alternative to mass-produced options. Not only do they add a touch of character, but they also provide a unique way to illuminate any room in your home. For a step-by-step guide on how to bring this project to life, visit Lindi and Russ. Start your DIY adventure today and brighten up your space with an industrial charm that’s all your own.
DIY Sconces to Have Light Without Power

Transform any room with a radiant glow without the hassle of complex electrical work. According to Nesting With Grace’s clever ‘Magic Light Trick,’ you can repurpose wall sconces into warm and inviting light sources using simple, battery-powered hockey puck lights. This ingenious hack is perfect for creating a cozy atmosphere, requiring no wiring or extensive DIY expertise. Simply follow these easy-to-follow steps to effortlessly illuminate your space, recreating the warmth of a crackling fire without the need for actual flames.
Rustic Wall Sconce from Reclaimed Wood
Transform your living space or RV into a cozy retreat by creating DIY Rustic Wall Sconces with reclaimed cypress wood. This easy-to-follow guide takes less than 30 minutes to complete, making it perfect for adding rustic charm to your walls. Not only are these sconces beautiful, but they’re also budget-friendly, costing you nothing. For a detailed step-by-step tutorial, visit Mountain Modern Life and get inspired to tackle that long-anticipated project. With these unique, handmade pieces, you can add a personal touch to your home or RV. Consider combining this project with other creative endeavors, like crafting a Mason Jar Chandelier or making a DIY Solar Light for your garden.
Conclusion
As we wrap up our exploration of 15 DIY wall sconce ideas, I hope you’ve gained inspiration to bring your own creative vision to life. By embracing these customizable solutions, you’re not only illuminating a room but also imbuing it with a distinctive character that reflects your unique style and adds warmth to your space. Each step in the DIY process – from material selection to final installation – represents an opportunity to make your home a true reflection of yourself. As you embark on this creative journey, keep this guide close at hand and savor the experience of crafting a living space that’s truly one-of-a-kind.
