With a DIY umbrella stand, you’re not only creating a practical solution but also exercising your creative freedom. By taking on this project, you’ll have the unique opportunity to personalize every aspect, from selecting materials to crafting a design that perfectly suits your style and needs. This comprehensive guide will be by your side throughout the process, offering expert guidance and encouragement as you bring your vision to life. The sense of accomplishment that comes with building something with your own hands is unparalleled, and our easy-to-follow instructions ensure that the journey is just as enjoyable as the outcome.
In this tutorial, we’ll delve into the world of DIY umbrella stands by building a side table that’s both functional and visually appealing. This project is perfect for those who crave a harmonious blend of form and function. Using basic materials and tools, we’ll walk you through every step, from preparing the boards to adding the finishing touches. Whether you’re lounging poolside on a sunny day or enjoying a cozy evening on your balcony with friends, this new umbrella stand side table will become an indispensable companion.
Why Choose DIY Umbrella Stands?
While building an umbrella stand may seem like a trivial task, taking on the project yourself can have far-reaching benefits that extend beyond just saving money. By choosing to go the DIY route, you’ll be able to create a unique piece that reflects your personal style while also developing new skills and promoting sustainability.
One of the most significant advantages of making your own umbrella stand is the ability to tailor it to your specific needs and preferences. With the freedom to choose the size, shape, color, and design, you can ensure that your finished product perfectly complements your decor or outdoor space.
Another benefit of DIY projects is their eco-friendly nature. By repurposing materials or upcycling items you already own, you’ll be reducing waste and contributing to a more sustainable future. This not only benefits the environment but also adds a unique story to your finished piece.
In addition to these practical advantages, making your own umbrella stand can also be a great way to develop new skills or hone existing ones. Whether you’re a seasoned DIY enthusiast or just starting out, taking on a project like this will challenge you and help you grow as a crafter.
Finally, there’s the sense of accomplishment that comes from completing a project with your own hands. There’s something special about using or displaying something you’ve crafted yourself, knowing the effort and creativity that went into it.
In summary, opting for a DIY umbrella stand is not just a cost-effective way to create a functional piece, but also an opportunity to express your personal style, develop new skills, promote sustainability, and experience a sense of pride and accomplishment. With these benefits in mind, it’s clear why many choose the DIY route for their home and garden needs.
How to Build an Umbrella Stand Side Table
Crafting a multi-functional and aesthetically pleasing umbrella stand side table is a fantastic way to elevate your outdoor area’s functionality and visual appeal. Not only does it provide a sophisticated design, but it also incorporates a holder for an umbrella and a discreet compartment for chilling drinks. To create your own, simply follow this comprehensive step-by-step guide.
Materials and Tools Needed
To build a durable outdoor storage bench, you’ll need the following essential tools and materials: six pieces of 1×6 pressure-treated boards for the frame, two pieces of 2×2 pressure-treated boards for the legs, and a router with a chamfer bit to add a smooth finish. Additionally, you’ll require a saw to cut the wood to the desired length, a drill with a hole saw attachment or jigsaw to create precise holes, and a pocket hole jig to join the frame pieces together. For assembly, you’ll need suitable screws for pressure-treated wood, two hinges to facilitate opening and closing of the lid, PVC pipe to create the umbrella stand, and various drill bits to make pilot holes. Finally, consider adding a knob or finger hole to the lid for easy operation, as well as an optional finish that’s compatible with pressure-treated wood.
Instructions
To begin building your hidden compartment coffee table, start by preparing the boards. Use a chamfer bit to bevel the edges of all the boards except one, which will later become the lid. Ensure the edges are smooth and even for accurate assembly. Next, cut the boards to the required lengths – 18 inches or 19.5 inches – using a stop block on your saw for consistency. The longer boards will need their corners clipped at 45 degrees to meet the beveled edges seamlessly. Shorter boards require two pocket holes drilled at each end, with one of the lid pieces also receiving this treatment.
Prepare the longer boards for assembly by clipping their corners at 45 degrees. For the shorter boards, drill two pocket holes at each end. One of the lid pieces should be treated similarly. You’ll first assemble the four levels of the table using pocket hole screws on the ends of the shorter boards. As you lay the levels on their side, align the 2x2s along the interior corners, setting them three-quarters of an inch from the top edge to create a space for the inset lid and form feet at the base for moisture drainage.
To add the table top, attach the outer pieces of the lid to the frame using two hinges. Ensure there’s slight spacing to prevent the boards from binding when opened. For the umbrella hole, use a jigsaw or hole saw to cut a hole through the center board of the tabletop, sized to fit the PVC pipe. Repeat this for another board at the base to support the pipe.
Inside the table, attach shelf pieces at an appropriate height to accommodate drink containers and ice. The lowest board should be aligned to support the umbrella’s PVC pipe. Drill a hole at the base of the pipe for water drainage and near the top for a thumb screw to secure the umbrella. Finally, insert the PVC pipe into the base, tilt the table to guide the pipe under the lid, and then through the top opening. Install knobs or finger holes on the lid for easy access.
Before the Finish
When working with pressure-treated wood, it’s essential to let it fully dry out before applying any finish or sealant. This crucial step not only preserves the wood’s natural grain pattern but also boosts its overall durability and aesthetic appeal. By giving the wood sufficient time to dry completely, you’ll be able to achieve a professional-looking finish that highlights the wood’s unique characteristics.
Video Tutorial
To complement our comprehensive guide on building an umbrella stand side table, we’ve created a step-by-step video tutorial that provides a visual perspective on the assembly process. This informative video is designed to be easy to follow and understand, ensuring you have all the necessary guidance to complete the project successfully. By watching this video alongside our detailed guide, you’ll gain a deeper understanding of the techniques involved, making it easier for you to bring your vision to life. With this multifunctional outdoor side table, you’ll not only add style to any outdoor space but also provide a functional and practical addition that enhances its overall ambiance.
DIY Umbrella Stand FAQs
With a DIY umbrella stand project, creativity meets practicality. To embark on this journey, it’s essential to tackle the frequently asked questions that can make or break the outcome. By addressing these queries, you’ll be well-prepared to bring your vision to life and savor the satisfaction of a job well done.
What materials do I need for a DIY umbrella stand?
To create either a simple or a more elaborate stand for your umbrella, you’ll need to gather the necessary materials. For a basic stand, you’ll require a PVC pipe, a planter or bucket, concrete, water, and some fundamental tools like a drill, mixing spoon or stick. If you’re aiming for an umbrella stand side table with a bit of flair, you’ll need to add pressure-treated boards, screws, a saw, drill, router equipped with a chamfer bit, PVC pipe, as well as optional finishes to enhance the appearance.
How do I choose the right size for my umbrella stand?
When selecting an umbrella stand, consider the size and weight of your umbrella as well as its pole diameter and height. Aim to choose a stand with a PVC pipe or holder that’s slightly larger than the umbrella pole to ensure a secure fit. The stability of the stand is also crucial, especially for larger umbrellas. A heavier stand can provide more balance for bigger umbrellas, so look for one that weighs at least 50 pounds if your umbrella exceeds 9 feet in width.
Can I make a portable umbrella stand?
To create a portable umbrella stand, consider incorporating casters into the base or crafting it from a lightweight yet sturdy material. However, do not compromise on stability; ensure your design provides sufficient weight and support to securely hold the umbrella in place.
How do I ensure my DIY umbrella stand is weather-resistant?
When building an outdoor structure, it’s essential to select materials that can withstand the elements. Opt for weather-resistant options like pressure-treated wood, PVC pipes, and outdoor-specific paints or sealants. Additionally, be sure to apply a durable finish to any wood surfaces to safeguard them against moisture damage and UV degradation.
Can I customize my DIY umbrella stand?
One of the most significant benefits of creating a DIY umbrella stand is the unparalleled ability to tailor it to your unique style and preferences. You can freely express yourself through the color and finish, opting to paint or stain the stand to seamlessly blend with your outdoor décor. Furthermore, you have the creative liberty to choose a design that harmonizes with your space and meets your specific needs, whether it’s a straightforward stand or a multi-functional side table that serves multiple purposes.
What are the environmental benefits of making my own umbrella stand?
By adopting eco-conscious approaches, such as repurposing or upcycling, you significantly decrease waste and mitigate the ecological footprint of your project. Moreover, opting for sustainable or recycled materials further enhances the environmentally friendly nature of your endeavor.
How can I make my umbrella stand more stable?
To enhance the overall stability of your stand, consider implementing two key strategies: augmenting its weight and expanding its footprint. The first involves incorporating heavy materials, such as concrete, into the foundation or placing dense objects within a hollow base to increase the stand’s overall heft. This added weight can provide a substantial boost in terms of resistance to tipping. Additionally, widening the base of your stand can prove equally effective in mitigating the effects of strong winds and other external factors that might cause instability. By thoughtfully incorporating these design elements, you can create a more robust and dependable structure that is better equipped to withstand various environmental conditions.
Is it cheaper to make my own umbrella stand?
While it’s true that many DIY projects can indeed be more budget-friendly, this is particularly evident when it comes to repurposing materials or utilizing items already in your possession. The added benefit of avoiding the often substantial markup on commercial products only serves to further emphasize the value of taking on such initiatives.
How do I care for my DIY umbrella stand?
To ensure your umbrella stand remains functional and visually appealing, incorporate regular cleaning into your routine. Use a gentle wipe or hose down the surface to remove dirt and grime, preventing stubborn stains from setting in. Additionally, schedule annual maintenance to inspect for any damage, such as chips in the paint or loose screws, and address these issues promptly. This may also involve reapplying sealant as needed to maintain its integrity and overall appearance. By prioritizing these tasks, you’ll be well on your way to creating a sturdy and stylish umbrella stand that meets your unique needs and preferences.
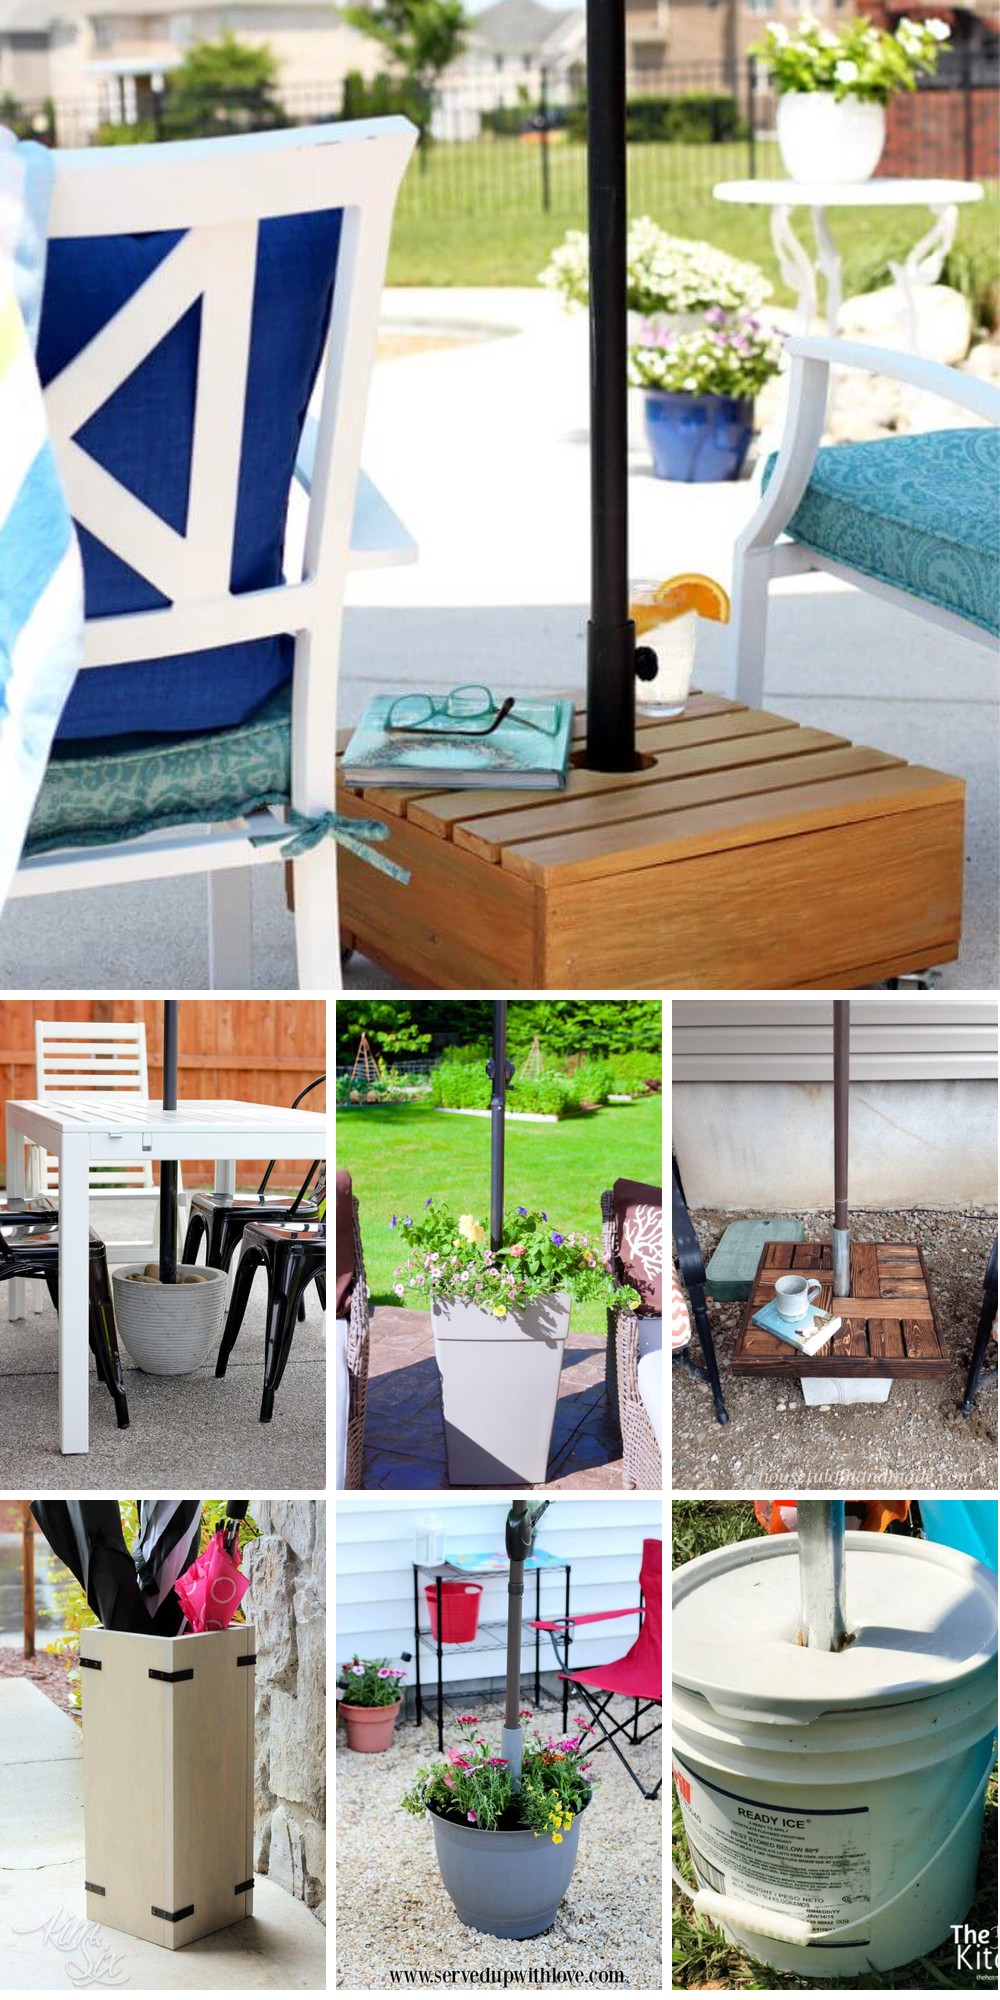
15 DIY Umbrella Stand Ideas (HomemadeUmbrella Base)
Transform your outdoor space into a stylish sanctuary by crafting your own unique umbrella stands. Ditch the ordinary and explore 15 innovative DIY projects that will add both flair and functionality to your patio, porch, or deck.
How to Make a Rolling Umbrella Stand
Transform your backyard into an oasis with a DIY Rolling Umbrella Base, crafted from discarded wood planks and boasting a clever upcycle that’s both budget-friendly and functional. This comprehensive guide, courtesy of Confessions of a Serial Do-it-Yourselfer, will walk you through the creation of a sturdy mobile base that seamlessly integrates your umbrella while allowing for effortless repositioning to track the sun’s trajectory. With a clear, step-by-step process and expert tips, you’ll be empowered to construct a multi-purpose piece that doubles as a side table, ensuring optimal comfort during those long, sunny days. Ditch expensive store-bought options and get inspired by tackling this practical project.
DIY Patio Umbrella Base Without Concrete
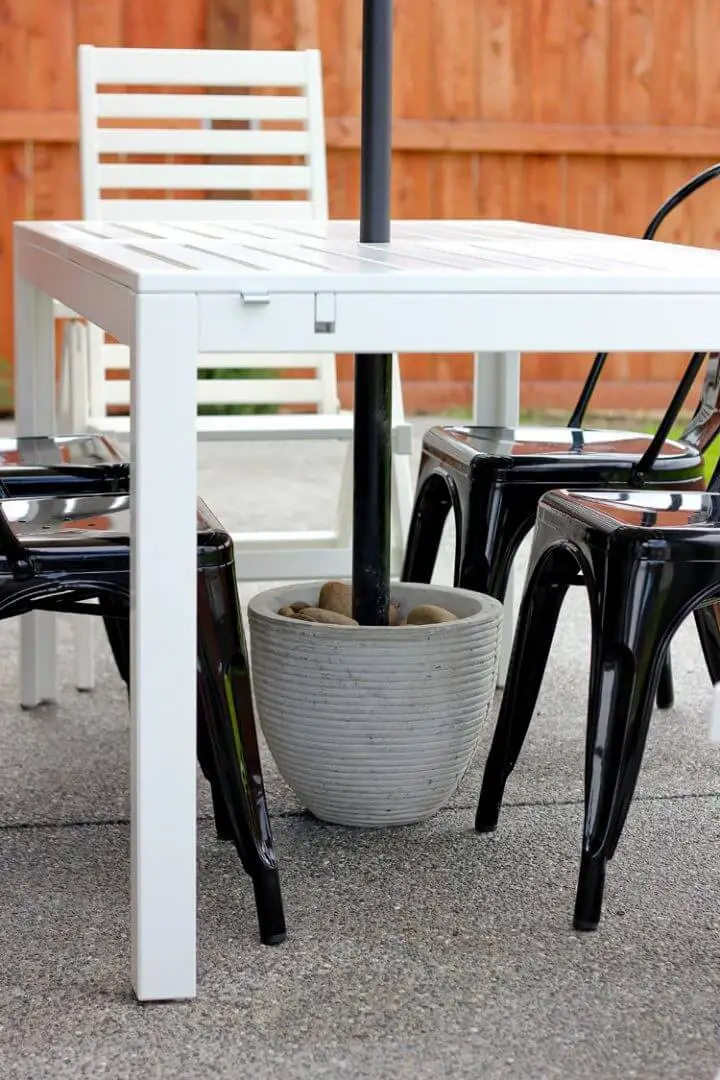
Create a sturdy patio umbrella stand without breaking the bank! With just a few simple materials, you can build a reliable and long-lasting base for under $20. Start by gathering a concrete planter, PVC pipe, and quick-set concrete – no mixing required. Simply add water, let it set, and voilà! You’ll have a durable stand that can withstand even the windiest conditions. To get started, just follow these easy steps: prep your work area, gather your materials, and assemble your stand. And to give it that extra touch of personality, customize with rocks or plants for a beautiful finishing touch. With this DIY project, you’ll be enjoying your backyard oasis in no time!
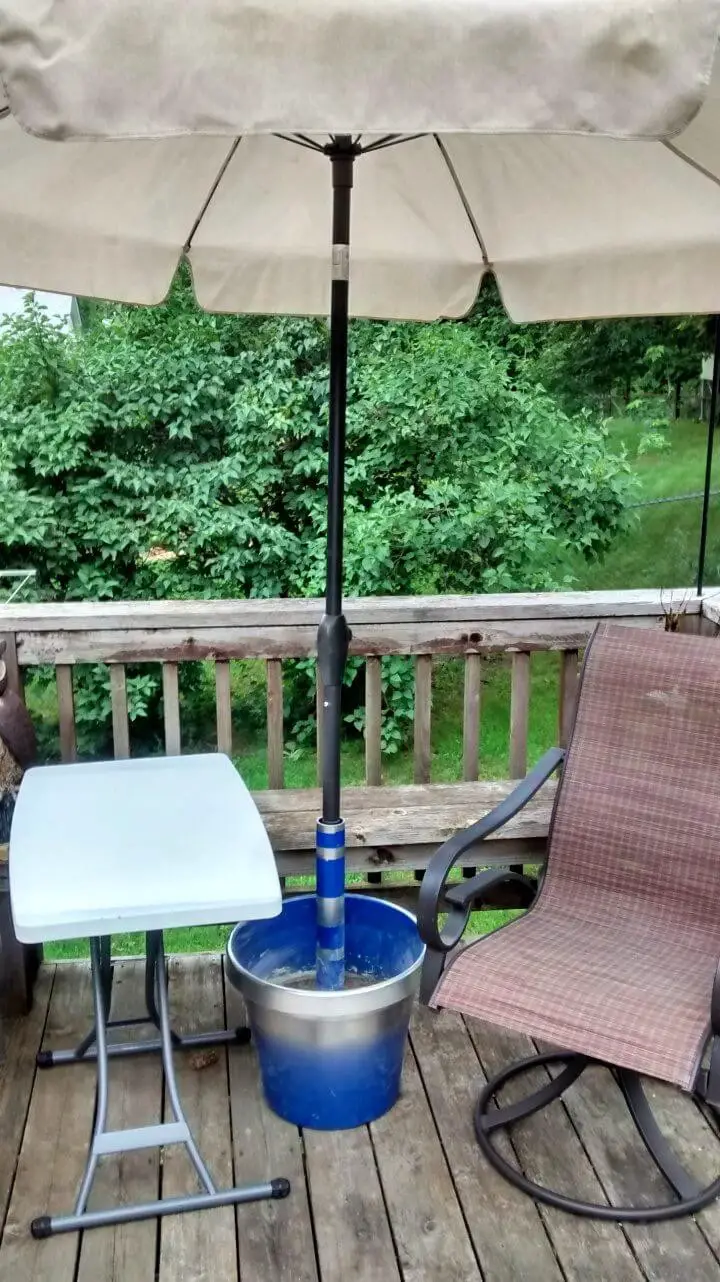
Making a Rolling Planter Umbrella Stand
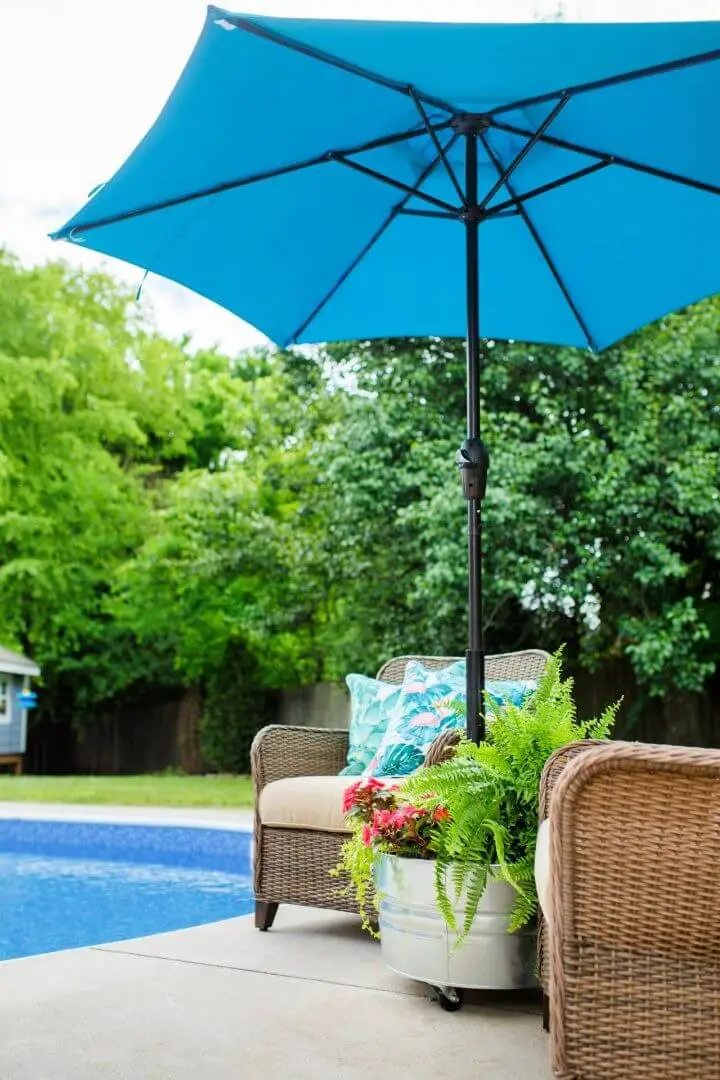
Transform your outdoor space into an oasis by crafting a DIY rolling umbrella stand planter. This ingenious creation harmonizes shade with lush greenery, adding a touch of elegance to any setting. Begin by attaching casters to the base of a galvanized bucket, allowing for effortless relocation as needed. Next, ensure proper drainage by installing holes in the bucket’s bottom, keeping your plants thriving and healthy. To create a visually appealing focal point, attach a painted PVC pipe matching your umbrella’s hue using quick-setting cement within a smaller bucket. Finally, place the setup inside the larger bucket filled with soil, allowing you to adorn it with vibrant flowers or fragrant herbs. This clever planter is perfect for creating a poolside ambiance and serving refreshments, as the setup can be easily moved to follow the sun’s path. For a step-by-step guide on how to bring this creative project to life, consult HGTV for inspiration.
Homemade Umbrella Stand from One Board
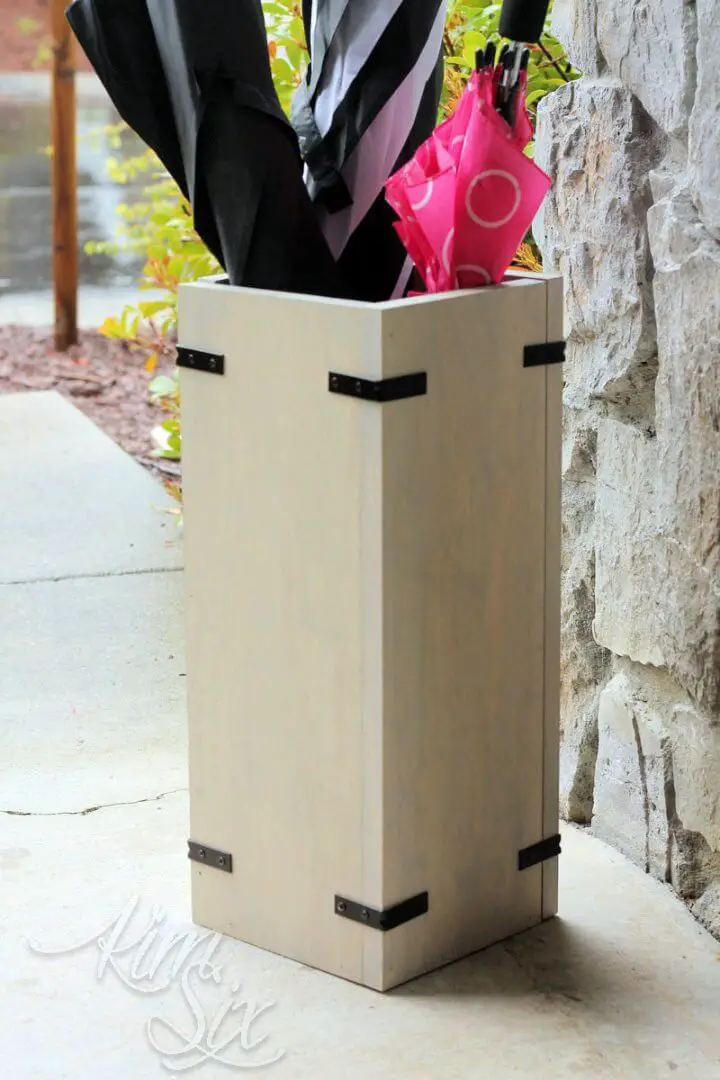
Transform rainy days into opportunities with a clever DIY Umbrella Stand, inspired by The Kim Six Fix. This uncomplicated project turns a single board into a stylish and useful home accessory, perfect for keeping wet umbrellas at bay while maintaining a tidy and dry interior. With minimal materials required, including a board, corner braces, and basic tools such as a nail gun, saw, and drill, you can easily create a custom stand that suits your decor. Add a waterproof seal, a water-catching tray at the bottom, and follow clear assembly instructions to build an attractive and practical umbrella stand that’s perfect for any DIY enthusiast.
How to Make a Planter Umbrella Stand
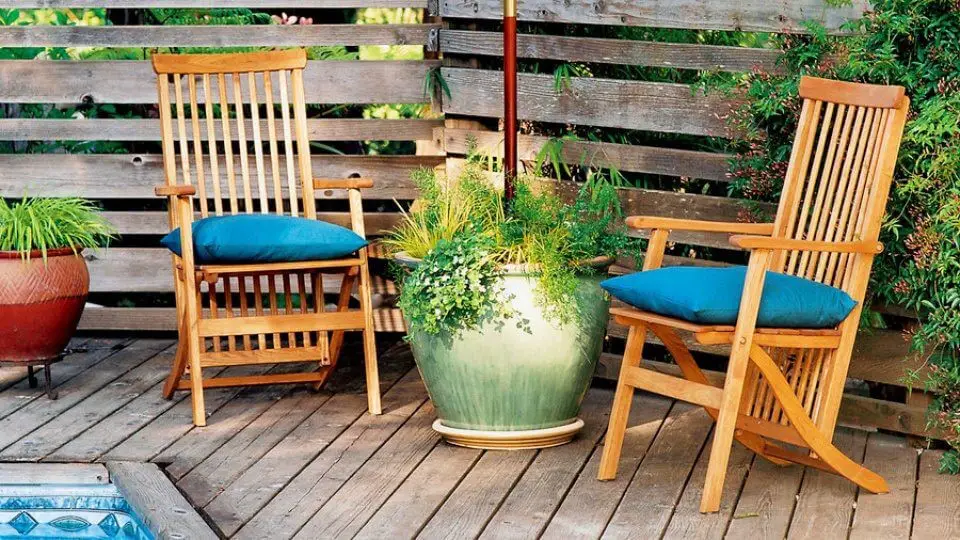
Transform your outdoor space into a harmonious blend of functionality and aesthetics by incorporating the Planter Umbrella Stand concept, recently featured in Sunset Magazine. This innovative DIY project enables you to position your umbrella amidst lush greenery, simultaneously providing shade and visual appeal for your garden or patio. By following Sunset’s step-by-step guide, you’ll discover how to effortlessly merge an umbrella into a planter, creating a stunning centerpiece that seamlessly integrates form and function. With this easy-to-follow guide, you’ll be empowered to elevate your outdoor living area with a touch of natural charm while staying cool under the sun.
DIY Wooden Umbrella Stand
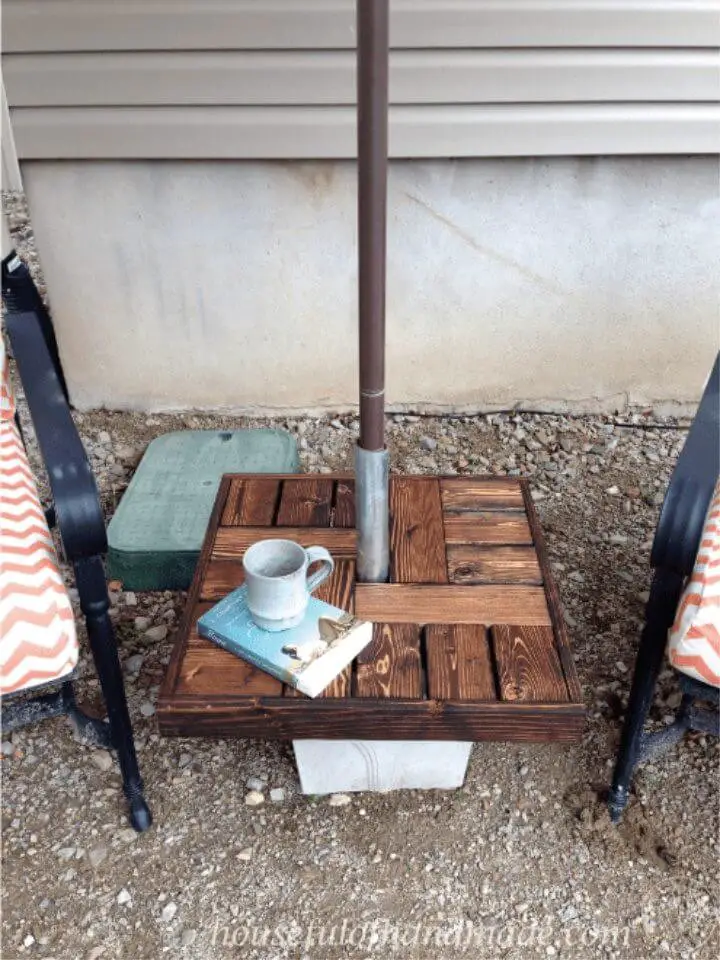
Transform your outdoor seating area into a functional and stylish oasis by crafting a DIY umbrella stand side table with Houseful of Handmade’s simple guide. This innovative project upcycles a planter and wood pieces into a sturdy and visually appealing table, providing shade and convenience for your patio decor. The process begins by mixing and pouring cement to create a solid base, followed by the construction of a wooden table top that adds a practical touch to your outdoor living space. With step-by-step instructions and a comprehensive list of materials and tools, this budget-friendly weekend project is perfect for anyone looking to enhance their summer setup. Whether you’re reading a book or sipping coffee outdoors, this umbrella stand table is sure to become a favorite spot in your home.
Make Your Own Umbrella Planter Stand

Create a functional and visually appealing umbrella planter stand with this straightforward DIY tutorial from Dandelions & Dates. The design prioritizes durability, making it an excellent addition to any garden or outdoor setting. To get started, gather the necessary materials: a planter, concrete, PVC pipe, and basic tools. Follow the simple steps outlined below to mix and set the concrete, then personalize your creation with your preferred plant selection. This project is perfect for anyone looking to elevate their outdoor space and bask in the warmth of those sunny days.
DIY Lighted Indoor Umbrella Stand

Transforming a humble PVC pipe into an extraordinary DIY lighted umbrella stand is now within reach with Curbly’s step-by-step guide. By infusing the project with LED lights, you’ll create a captivating centerpiece for your home’s entryway that shines bright on rainy days and beyond. With a focus on fabric selection, cutting, and assembly, this unique piece will not only serve as a practical umbrella holder but also elevate your decor with its one-of-a-kind charm. As the lights softly glow, your guests will appreciate the thoughtful touch of having a designated spot for their umbrellas while being impressed by your handcrafted creation. Let your creativity shine and start crafting this illuminated accessory today!
Easy DIY Umbrella Stand Side Table
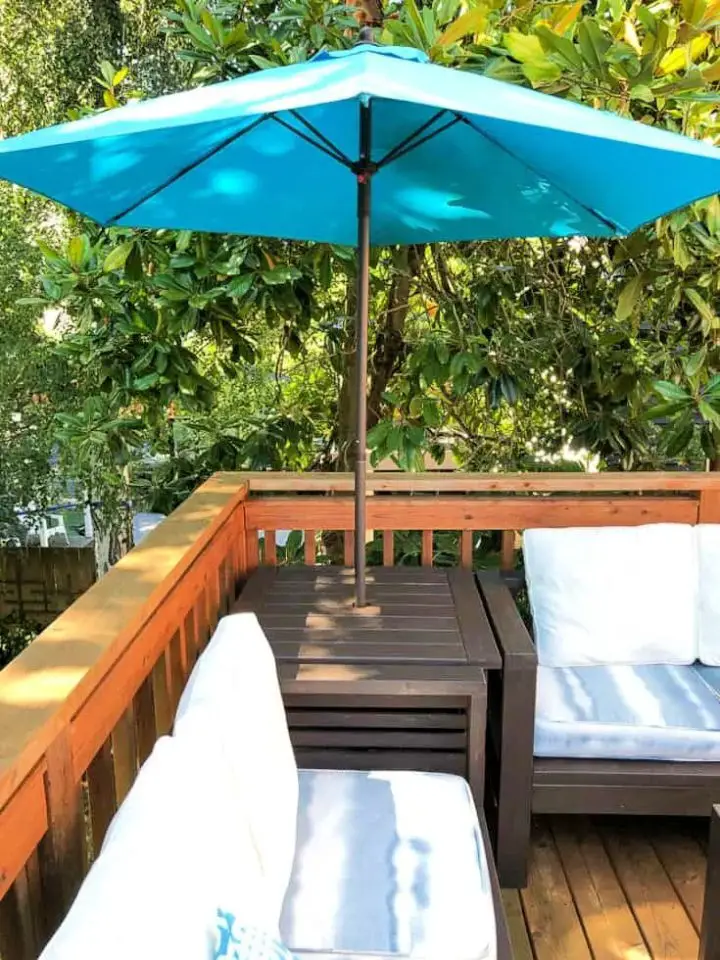
Transform your outdoor space into an inviting oasis by combining the benefits of shade and storage using Vineta Jackson’s DIY Umbrella Stand Side Table guide from The Handyman’s Daughter. This multifaceted project, crafted from sturdy cedar, not only provides a cozy retreat from the sun but also enhances your outdoor décor with its sleek design. As a bonus, it offers ample space for storing deck accessories, making it an ideal addition to any DIY enthusiast’s outdoor living area. With step-by-step instructions that make the process a breeze, you can easily build this functional and stylish piece of furniture, featuring a cleverly concealed umbrella base and a hinged tabletop for effortless access. Whether you’re looking to upgrade your patio or create a cozy spot in your backyard, this DIY project promises both form and function.
DIY Patio Umbrella Stand (Hide the Ugly)
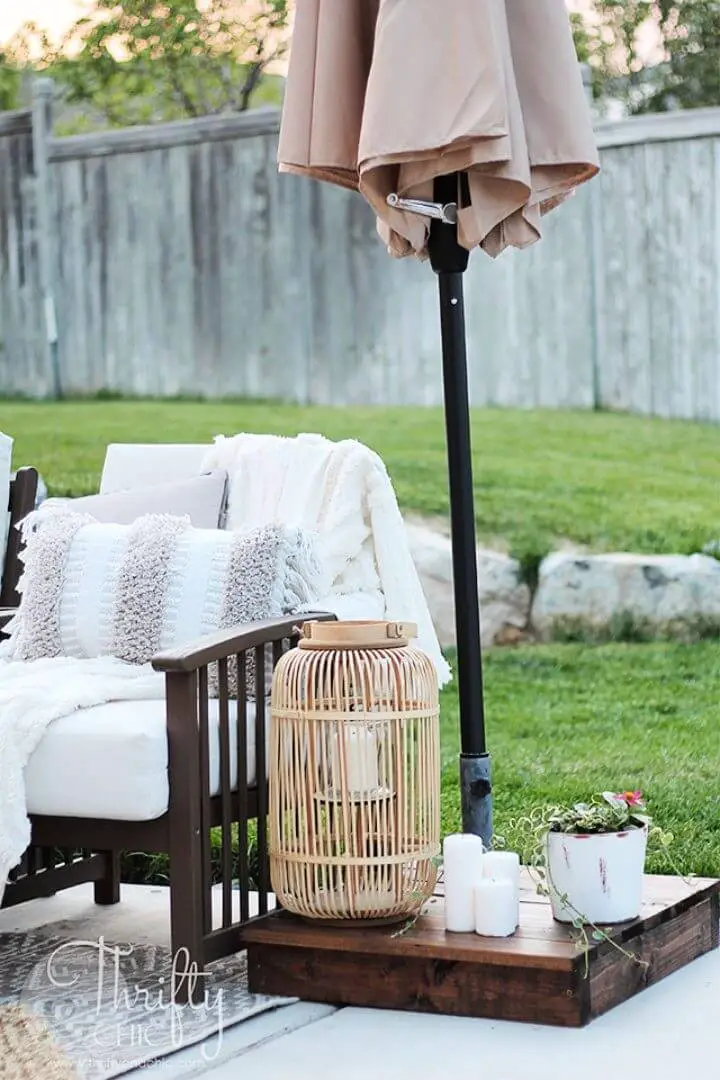
Transforming your patio into a sophisticated oasis is just a 10-minute woodworking project away with Thrifty and Chic’s DIY Patio Umbrella Stand guide. By concealing your stand within a stylish wooden box, you’ll not only eliminate unsightly outdoor stands but also create a platform for adding decorative flair to your patio. Follow Alicia as she walks you through measuring, cutting, and assembling the materials needed to craft this chic enclosure. Add a touch of luxury with a dark walnut stain finish, perfect for DIY enthusiasts looking to upgrade their outdoor space’s aesthetic while providing a practical solution for those windy days.
DIY Umbrella Stand Using Bucket
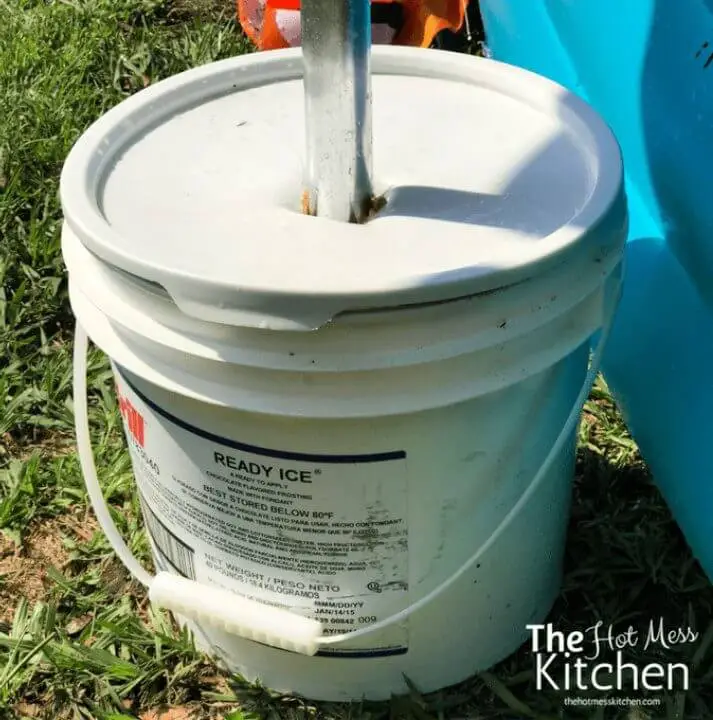
Transforming a humble 5-gallon bucket into a reliable umbrella stand is an ingenious way to ensure consistent shading wherever you go. With the Hot Mess Kitchen’s concise guide, you can complete this DIY project in just 10 minutes using materials readily available at home. The transformation process involves combining the bucket with play sand and bricks, yielding a sturdy and portable shelter perfect for outdoor gatherings. This adaptable stand isn’t limited to backyard use; it’s also suitable for beach trips or picnics. To further customize your umbrella stand, simply swap out the sand for concrete for a more permanent solution. With these straightforward steps, you’ll be enjoying carefree shading on sunny days in no time.
Easy DIY Umbrella Stand and Planter
With the DIY Umbrella Stand & Planter guide from Served Up With Love, transforming your outdoor space into a stylish haven is just a few materials away. By combining a large flower pot, PVC pipe, and other essentials, you can create a dual-purpose stand that not only securely holds your umbrella but also adds a touch of greenery to the area. This project is an excellent way to spruce up your patio or garden, offering a fun and rewarding DIY experience that yields a practical and visually appealing addition to your home.
How to Build an Umbrella Stand Side Table
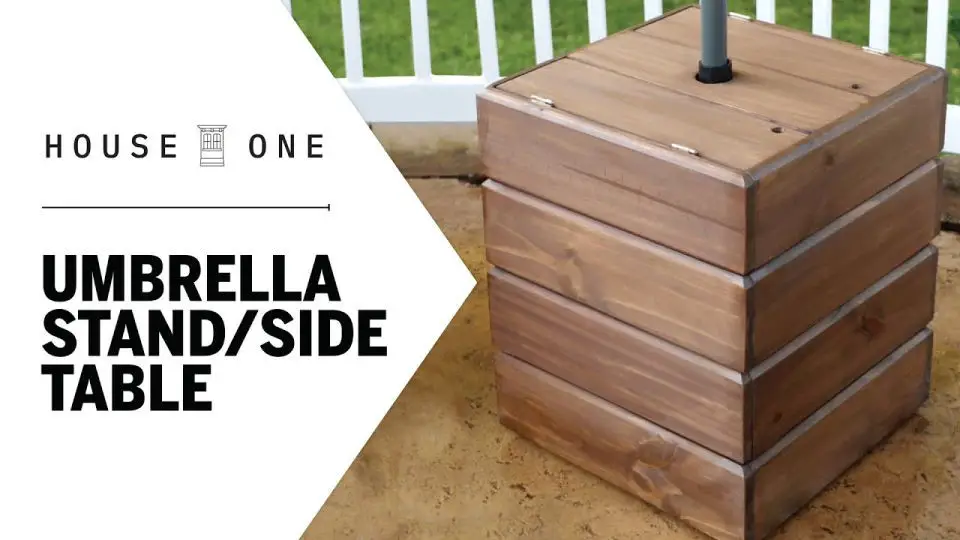
Transform your outdoor oasis into a haven of functionality and charm by creating a versatile umbrella stand side table that seamlessly combines form and function. This DIY endeavor requires attention to detail and precision, as you work with pressure-treated 1×6 and 2×2 boards to craft a sturdy, continuous board-effect table with an integrated umbrella holder and concealed beverage compartment. The assembly process involves carefully cutting, chamfering, and joining the pieces using pocket hole screws for a flawless finish. To add a personal touch, create a custom-sized hole for your umbrella and top it off with a weather-resistant coating. This innovative table is perfect for warm days, keeping drinks cool while providing shade – making it an indispensable addition to any patio or garden.
Planter Umbrella Stand for Backyard
Transform your patio or deck into a charming oasis with a DIY Planter Umbrella Stand from H2OBungalow. This clever project combines functionality and aesthetics, securing umbrellas on breezy days while adding a touch of greenery to the space. With just an hour’s effort, you can create a sturdy stand using a large planter, 5-gallon bucket, PVC pipe, Quickcrete, and basic tools. Simply follow the straightforward steps to assemble a durable and attractive base that doubles as a planter, then fill it with your favorite plants for a delightful finishing touch. This reliable addition to your outdoor living space is sure to impress, providing both form and function.
Cheap DIY Umbrella Stand on Budget
To create a budget-friendly and sturdy umbrella stand, consider transforming a plastic pot and PVC pipe into a functional piece for your patio. The tutorial is straightforward and engaging, making it perfect for DIY enthusiasts looking to enhance their outdoor space. By adding a personal touch with paint and flowers, you can turn this project into both a practical solution and an attractive addition. This cost-effective approach eliminates the need to break the bank, while still delivering a charming finish.
Conclusion:
In conclusion, the art of crafting your own 15 DIY umbrella stand ideas is not only a way to infuse your personal touch into your surroundings but also a forward-thinking approach towards sustainability and creativity. Our comprehensive guide has walked you through the fundamental steps from selection to construction, providing you with a holistic understanding of how to create an umbrella stand that truly stands out. As you progress through this DIY project, not only will you be honing your skills, but you’ll also be creating a one-of-a-kind piece that seamlessly blends form and function. Whether it’s for your garden, patio, or indoors, the finished product is sure to spark meaningful conversations and elevate your outdoor living space to new heights.
