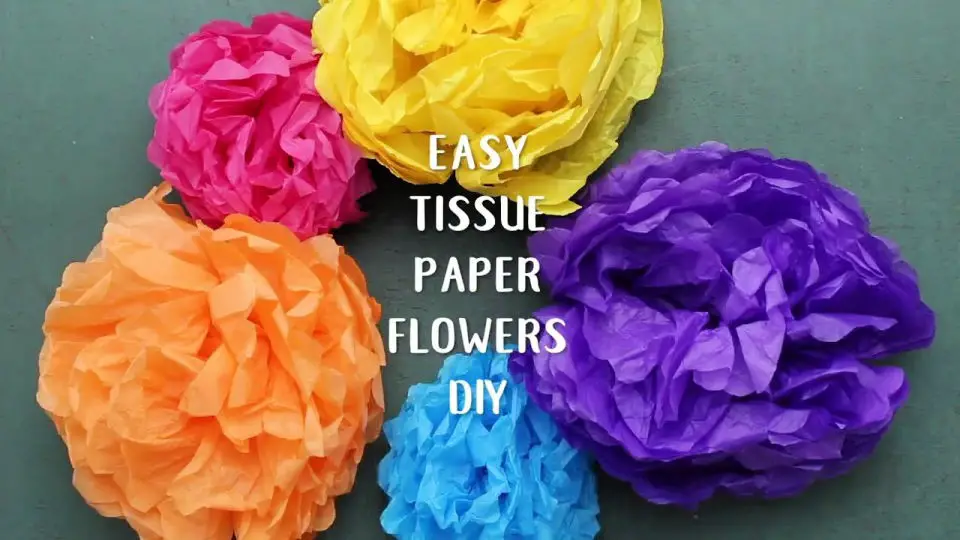
Transforming ordinary tissue paper into extraordinary DIY flowers is now within reach, thanks to this comprehensive beginner’s guide. Perfect for crafters of all skill levels, our step-by-step tutorial will walk you through the process of creating 25 unique and colorful bloom designs. With a focus on ease and accessibility, we’ve broken down the art of making tissue paper flowers into manageable techniques and materials. From selecting the ideal tissue paper to adding those final flourishes that bring your flower to life, each section is carefully designed to help you achieve stunning results. By mastering the basics, you’ll not only produce breathtaking decorations but also experience a sense of accomplishment and fulfillment. Let’s begin our journey into the world of DIY tissue paper flowers, where creativity and self-expression await.
How to Make Tissue Paper Flowers – Step by Step
Transform your space with vibrant, handmade tissue paper flowers that add a touch of elegance to any room or event setting. Whether you’re a seasoned crafty enthusiast or just starting out, this easy-to-follow step-by-step guide is designed for all skill levels, making it accessible and enjoyable for everyone. Dive into the world of DIY paper crafts and unleash your creativity with these stunning and unique decorations.
Materials Required:
When it comes to crafting, having the right materials can make all the difference. One such essential item is a combination of colored tissue paper, measuring 10 centimeters by 32 centimeters in dimension. This versatile material offers endless opportunities for creativity and self-expression. Additionally, craft wire provides an excellent means of binding and shaping your creations, while colored bond paper or printer paper can be used to add a touch of elegance and sophistication.
Step 1: Prepare Your Tissue Paper
To begin, divide your colored tissue paper into rectangular strips measuring 10 centimeters wide by 32 centimeters long. The precise dimensions are essential for crafting the ideal spherical form of your floral creation.
Step 2: Stack and Fold
To create your tissue paper flower, start by stacking multiple layers of cut tissue paper on top of one another. The key to achieving a lush appearance is to build up a sufficient number of layers. Once your stack is established, work the tissue paper back and forth using accordion folds, gradually reducing its overall length until you have a compact strip.
Step 3: Secure with Craft Wire
To create the foundation of your tissue paper flower, start by wrapping a length of craft wire tightly around the central axis of your accordion-folded tissue paper. This not only secures the folds in place but also serves as the stem of your bloom, providing a sturdy base for the subsequent layers of petal construction.
Step 4: Trim the Edges (Optional)
To give your DIY flower a more lifelike appearance, consider refining the edges of the folded tissue paper. A gentle curve or pointed tip can be achieved by carefully trimming the excess material. While not essential, this step does contribute to a more polished finish.
Step 5: Fan Out the Folds
To create the layered flower effect, delicately unfold each sheet of tissue paper, carefully fanning them outwards to form individual petals. As you work your way around the flower, gently tease apart each layer, taking care not to tear or crease the paper. With patience and precision, gradually build up the layers, ultimately forming a stunning, rounded bloom that showcases the intricate details of the tissue paper.
Step 6: Add Finishing Touches
As you’ve successfully crafted a stunning tissue paper flower, why not take it to the next level by adding some extra flair? Use colored bond paper or printer paper to cut out leaves that can be attached to your flower using craft wire. To give your bloom an even more realistic appearance, consider layering multiple layers of tissue for added density or mixing and matching different colors to create a truly vibrant display. The possibilities are endless when it comes to customizing the size, color, and style of your flowers to perfectly complement your decor.
Video Tutorial
The accompanying video tutorial, ‘How To Make Round Tissue Paper Flowers,’ offers a hands-on, step-by-step approach that complements the written guide perfectly. By combining both formats, you’ll gain a deeper understanding of the instructions through a visually engaging and easy-to-follow presentation.
Troubleshooting Tips for DIY Tissue Paper Flowers
When crafting with tissue paper flowers, it’s not uncommon to encounter a few setbacks. But don’t worry, we’ve got you covered! Here are some expert troubleshooting tips to help you overcome common issues and create breathtaking blooms: One of the most frustrating problems is when the tissue paper tears easily. The good news is that small tears won’t be noticeable once your flower is fluffed out. For larger tears, simply apply a small piece of clear tape on the backside to mend it. Be gentle with your tissue paper, as it’s delicate and can tear if handled roughly.Another common issue is when flowers don’t look full or lush. To achieve that desired fullness, use multiple layers of tissue paper and make sure each layer is fluffed out individually, starting from the top layer and working your way down. This will give your flower a more dimensional appearance.If you’re having trouble shaping petals, try gently curling them with a pencil or using scissors to create unique patterns on their edges. Practice your technique on scrap pieces first to get it just right.Sometimes, flowers can look flat and lifeless. To add dimensionality, ensure the center of your flower is securely in place so that when you pull the layers apart, they stand up and give a more realistic appearance. You can also pinch the base of each petal to add even more depth.Finally, if colors bleed when glue is applied, try using a glue stick instead of liquid glue or opt for double-sided tape altogether. Use just the right amount of adhesive to avoid any discoloration.Remember, crafting is all about expressing your creativity and personality. Embrace any imperfections as part of your unique design. With these troubleshooting tips, you’ll be able to overcome common challenges and create stunning tissue paper flowers that will brighten up any room or occasion.
Design Ideas for DIY Tissue Paper Flowers
Tissue paper flowers are a versatile and creative way to add color and personality to any space or event. With their delicate appearance and ability to be customized, they can be used in a variety of design ideas and themes. Here’s a look at some inspiration for your next project: For everyday decor, vibrant centerpieces made from multicolored tissue paper flowers can brighten up any room. Alternatively, create a stunning wall installation by attaching the flowers to canvas or directly onto the wall in a pattern or shape. You could also make festive garlands for doorways, mantels, or party backdrops by stringing together the flowers. For special occasions like weddings and birthdays, tissue paper flowers can be used as bouquets, boutonnieres, centerpieces, and even venue decorations. They’re a budget-friendly and lasting alternative to real flowers. You could match the colors of the flowers to the theme of the party for a cohesive look or opt for soft pastel shades to create a welcoming atmosphere. Seasonal celebrations like spring, autumn, and winter can be enhanced by using tissue paper flowers in colors that reflect the current season. For example, bright, pastel- colored flowers symbolize new beginnings in the spring while warm, earthy tones evoke the fall palette. Cultural events like festivals and ceremonies can incorporate tissue paper flowers into costumes or floats, while traditional colors and arrangements can be used to honor cultural heritage and practices. In educational settings, tissue paper flowers can be used as a teaching tool for color theory classes, where students can learn about color combinations and contrasts by making flowers in various hues. They can also be used in art projects to encourage creativity and experimentation with different petal shapes and arrangements. By using these design ideas, you can add charm and personality to any occasion or home decor while having fun with the creative process.
Sustainability Practices for DIY Tissue Paper Flowers
As you create your DIY tissue paper flowers, consider the environmental impact of your materials and processes. To minimize waste and promote sustainability, follow these eco-friendly practices: When selecting tissue paper, choose products made from recycled or sustainably sourced materials, such as those certified by FSC (Forest Stewardship Council) or bearing recycled content labels. Reuse tissue paper from gifts or packaging to reduce waste and give new life to materials that would otherwise be discarded. After your flowers have served their purpose, recycle the tissue paper if accepted by your local recycling program. Opt for non-toxic, water-based adhesives instead of petroleum-based alternatives, which are better for the environment and safer for you to handle. When coloring your tissue paper, choose natural dyes made from fruits, vegetables, or plants, as they are biodegradable and less harmful to the environment. Share your knowledge about sustainability with your readers, encouraging them to make eco-friendly choices and inspiring them to think about the environmental impact of their crafts. Finally, when shipping or selling your tissue paper flowers, use recyclable or compostable packaging materials, avoiding plastic in favor of cardboard, paper, or other biodegradable options. By adopting these sustainable practices, you can enjoy the art of making tissue paper flowers while also contributing to a more environmentally conscious future.
Advanced Techniques for DIY Tissue Paper Flowers
To take your tissue paper flower-making skills to the next level, try incorporating these advanced techniques into your craft. Start by experimenting with ombré effects by layering tissue paper in varying shades of the same color, then folding and cutting to create a gradient effect. Next, get creative with intricate petal shapes by cutting the edges of your tissue paper into patterns like scallops, points, or fringes. Use sharp scissors for precision and experiment with different patterns to find your favorite.To add an extra touch of magic to your flowers, incorporate small LED lights by securing them at the center before fluffing out the petals. Make sure to use battery-operated LEDs for safety and ease. For more durable and adjustable stems, try using floral wire and wrapping it with floral tape for a realistic look and better grip.Finally, give your flowers a lifelike scent by adding a few drops of essential oil to the center. Choose scents that match the type of flower you’re making for an authentic touch. By mastering these advanced techniques, you’ll be able to create impressive tissue paper flowers that are sure to impress. Just remember to be patient and practice makes perfect – enjoy the process and have fun crafting!
Cultural Significance of Flowers
Floral traditions and rituals transcend cultures, symbolizing love, respect, and remembrance. When creating DIY tissue paper flowers, consider infusing them with cultural significance by exploring the symbolic meanings behind different blooms. Start by delving into traditional flowers from various cultures, such as the lotus in Indian culture, cherry blossoms in Japan, or roses in Middle Eastern traditions. Next, examine color symbolism – red often represents love and passion, while white can symbolize purity or mourning. Finally, create tissue paper flowers tailored to specific cultural events like Dia de los Muertos, Chinese New Year, or Diwali. By understanding the rich cultural heritage behind flowers, you’ll not only craft beautiful creations but also imbue them with deeper meaning.
Educational Activities with Tissue Paper Flowers
While traditional methods of teaching may not always be engaging or effective, incorporating creative activities like tissue paper flower-making can bring learning to life. This craft offers a unique opportunity to develop various skills and concepts in children. Here are some ways to utilize this activity for educational purposes:
By mixing and matching tissue paper to create flowers, students can explore color theory, discussing the emotions evoked by different colors and their symbolic meanings across cultures.
Furthermore, the process of folding, cutting, and fluffing the tissue paper helps develop fine motor skills, hand-eye coordination, and dexterity. This activity also teaches children the importance of following instructions step-by-step, fostering attention to detail and process-oriented thinking.
Tissue paper flower-making can also be used to educate students about different cultures and their floral symbols. By incorporating this craft into lessons, you can provide a hands-on approach to learning about the world and its many wonders.
Moreover, allowing children to choose their own colors and designs for their tissue paper flowers encourages artistic expression, individuality, and confidence in their creative choices. This activity offers a fun and interactive way to learn various skills and concepts while producing a beautiful final product. By integrating this craft into educational activities, you can provide students with a unique learning experience that they will cherish.
Maintenance and Preservation of Tissue Paper Flowers
To extend the life of your exquisite tissue paper flowers, it’s essential to adopt some simple yet effective maintenance and preservation habits. Here’s how you can keep them looking fresh and vibrant:Firstly, maintain a dry environment for your flowers. This will prevent them from wilting or losing their shape due to moisture exposure. Store them in an area that is shielded from humidity.Another crucial step is to minimize direct sunlight exposure. Prolonged UV rays can cause the colors to fade over time, reducing the overall aesthetic appeal of your flowers. Instead, place them in a shaded area where they’ll be protected from the sun’s intense rays.Finally, regular dusting will help maintain the texture and appearance of your tissue paper flowers. Use a soft brush or a cool setting hairdryer to gently remove any dust particles that may have accumulated on the petals.By following these simple tips, you can enjoy the beauty of your tissue paper flowers for years to come, bringing elegance and sophistication to any space or occasion.
Frequently Asked Questions About DIY Tissue Paper Flowers
As you embark on the charming craft of creating tissue paper flowers, you may encounter several queries along the way. This delightful hobby not only brings a pop of color and joy to any occasion but also requires a few fundamental understandings. Let’s take a look at some frequently asked questions that might arise as you delve into this creative endeavor.
What type of tissue paper is best for making flowers?
When crafting blooms from tissue paper, it’s essential to select a product that strikes the perfect balance between durability and malleability. Aim for sheets with a medium thickness that can withstand gentle manipulation without tearing or becoming unwieldy.
How many layers of tissue paper do I need for each flower?
To achieve the desired level of volume and texture, it’s recommended to begin by layering six to eight sheets of tissue paper around each flower. This foundation of gentle curves and soft folds sets the stage for a lush and full appearance that will bring your creation to life.
Can I mix different colors of tissue paper in one flower?
When it comes to creating visually striking designs, combining colors is an excellent way to achieve stunning results. Experiment with layering different hues or blending multiple colors within a single layer to produce a truly one-of-a-kind aesthetic.
How do I make my tissue paper flowers look more realistic?
To create an incredibly lifelike floral arrangement, start by incorporating a diverse range of petal shapes and sizes to mimic nature’s subtlety. Then, elevate your design game by thoughtfully adding nuanced details such as textured edges or delicate veins. To achieve this, simply fold or crease the petals with gentle precision, allowing the subtle imperfections to bring your arrangement to life.
What can I use to secure the center of the flower?
When it comes to securing the delicate petals and layers of your homemade flower, you’ll want to rely on a few trusty materials. Consider using floral wire, pipe cleaners, or even twist ties to keep everything in place. Opt for something that provides a snug hold, as this will help maintain the integrity of your flower’s design.
How do I prevent the tissue paper from tearing when I fluff the petals?
When working with delicate flower petals, it’s essential to handle them with care and finesse. To avoid damaging the fragile material, gently manipulate the petals as if they were a fragile piece of silk. If, despite your best efforts, the paper does tear, don’t panic – simply apply a small strip of clear tape from the reverse side to seamlessly mend the damage.
Can tissue paper flowers be used outdoors?
When it comes to showcasing your tissue paper flowers, they’re perfectly suited for calm, serene outdoor settings on dry days. However, their delicate nature means they’re not designed to withstand harsh weather conditions or strong gusts of wind. As such, it’s essential to consider the forecast before deciding to display them outside, as even a slight drizzle or overcast skies could compromise their structure and appearance.
How long do tissue paper flowers last?
When it comes to the longevity of tissue paper flowers, proper storage and handling play a crucial role in preserving their beauty. To ensure they remain vibrant and intact for a longer period, it’s essential to keep them away from any moisture and direct sunlight exposure. This simple step can significantly reduce the risk of fading, damage, and discoloration.
Can I make different types of flowers with tissue paper?
Unleash your creativity and discover the boundless possibilities of flower crafting! By modifying the petal shapes and arrangement techniques, you can create a stunning array of blooms that are uniquely yours. Feel free to experiment and explore different design approaches to uncover your favorite floral creations.
Is it possible to add scent to tissue paper flowers?
Though ephemeral in their ability to retain scents, tissue paper flowers can still be infused with a temporary fragrance. A light spritzing with a floral-scented perfume or the addition of a few drops of essential oil can effectively imbue these delicate creations with a subtle aroma, allowing you to experience the essence of your arrangement for a short time.
How can I make my tissue paper flowers stand up?
When creating elaborate flower arrangements, securing individual blooms to a sturdy stem is crucial for maintaining their upright posture. A simple yet effective solution involves attaching each flower to a floral wire or skewer. To add a professional touch, wrap the stem with floral tape, ensuring a seamless finish. By keeping these fundamental principles in mind, you’ll be well-equipped to craft stunning tissue paper flowers that can instantly elevate any setting or celebration. As with any creative pursuit, the key to success lies not only in mastering the techniques but also in embracing the process and allowing your imagination to unfold. With this mindset, you’ll be free to explore the vast possibilities of flower crafting, yielding truly breathtaking results.
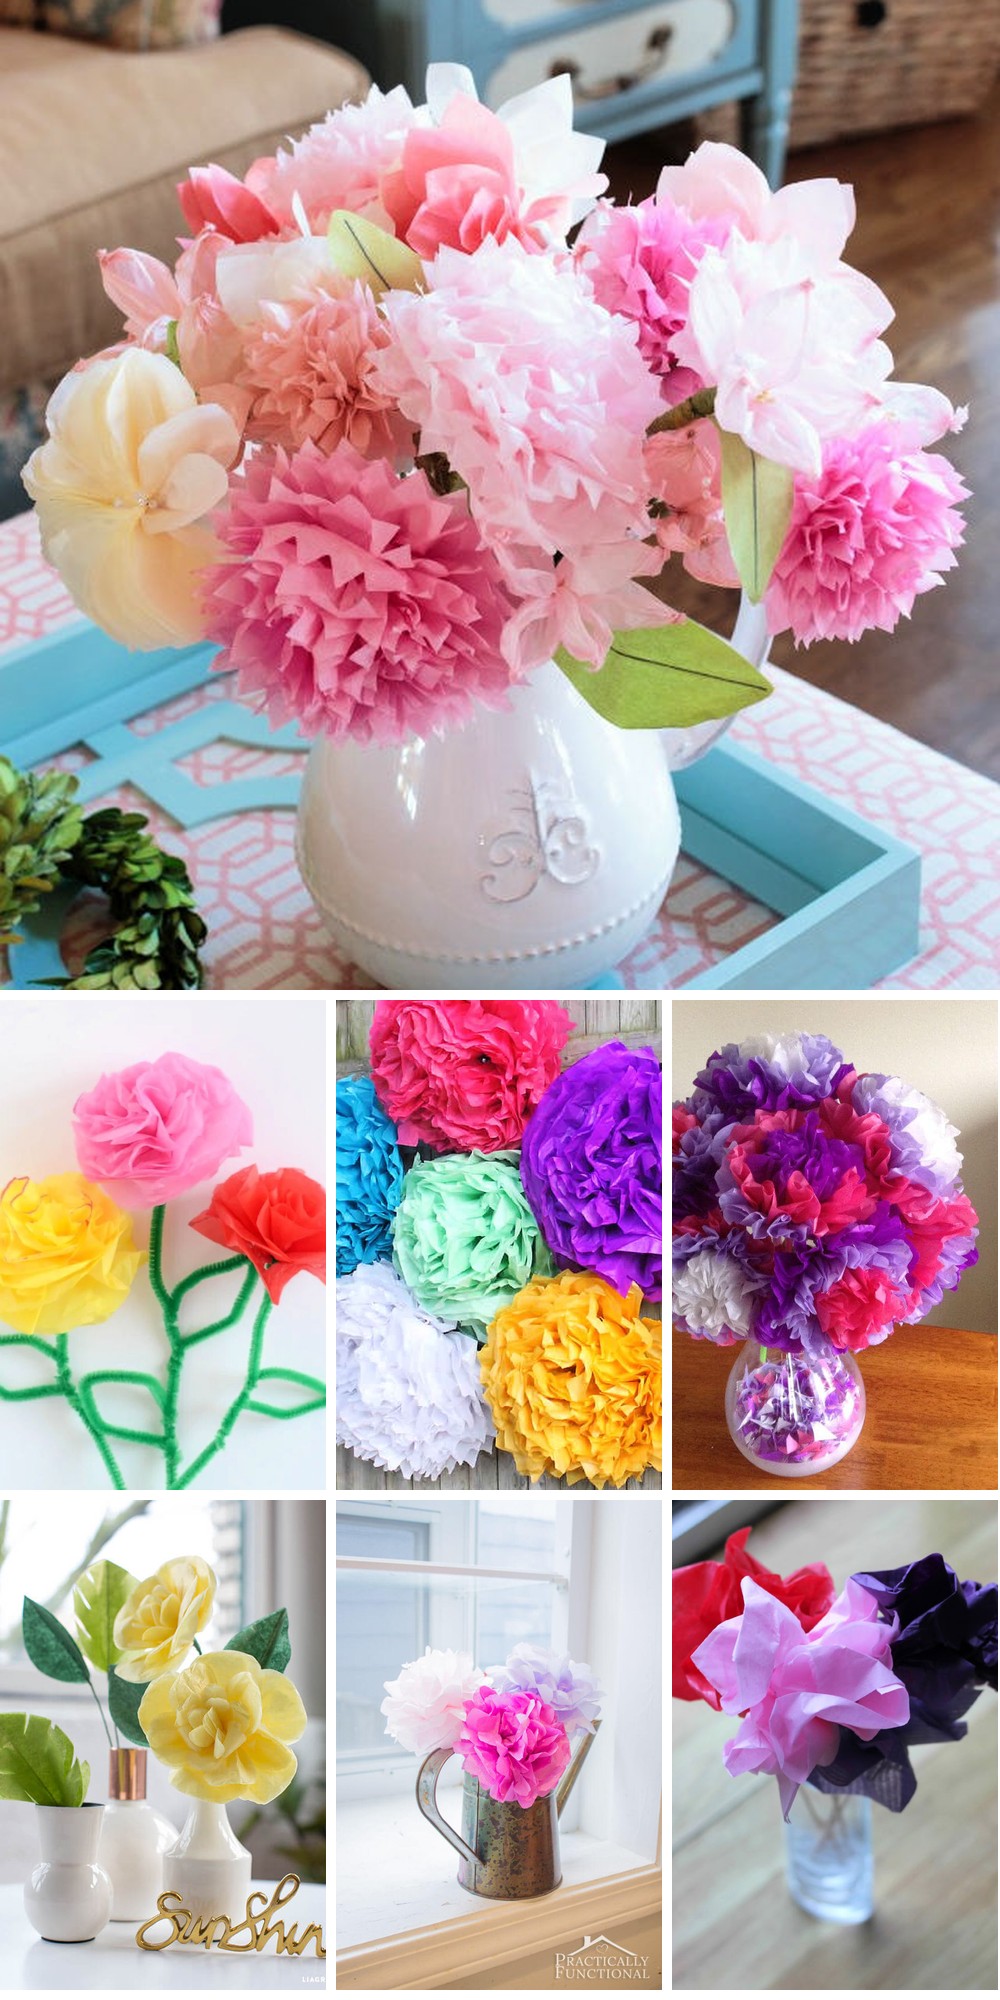
25 Tissue Paper Flowers for Beginners
Master the art of crafting exquisite tissue paper flowers with this comprehensive collection of 25 step-by-step guides, perfect for beginners looking to add a touch of elegance and whimsy to their creative projects.
How to Make a Tissue Paper Flower
Transforming the art of making tissue paper flowers from a daunting task to an enjoyable experience is what The Crafted Life has achieved with their simplified method. By introducing the Martha Stewart pom-pom flower kit, Rachel Mae Smith has made it possible for anyone to create vibrant and eye-catching floral accents in just 15 minutes per flower. With pre-perforated lines and included materials, crafting beautiful tissue paper flowers becomes an effortless process that requires minimal effort and time investment. Whether you’re looking to add a pop of color to your home or create stunning decorations for fall parties, this method is sure to elevate your decor without breaking a sweat.
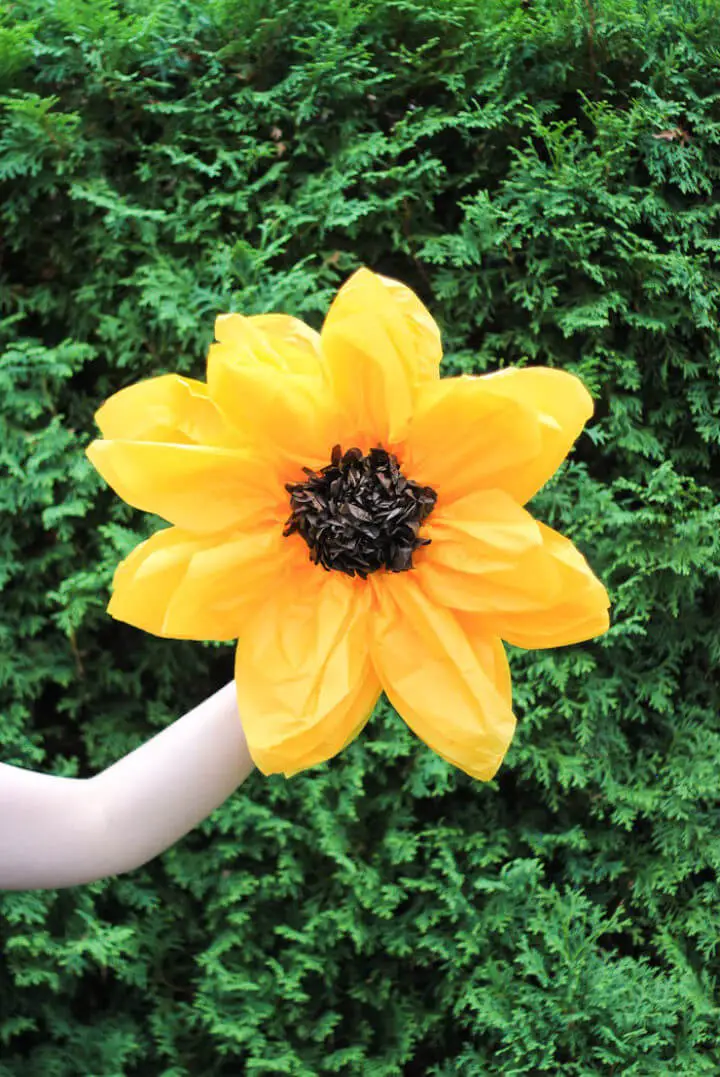
DIY Tissue Paper Cajun Hibiscus Flower
For those seeking a creative outlet that’s both visually striking and rewarding, the Tissue Paper Cajun Hibiscus Flower project on Lia Griffith’s website presents an engaging challenge. By transforming tissue paper into a vibrant representation of the beloved Cajun hibiscus flower, craft enthusiasts can create a unique decoration or thoughtful gift. The step-by-step instructions are clear and accessible, allowing even novice crafters to achieve a stunning result that adds a pop of color to any space.
Simple Oversized Tissue Paper Flower
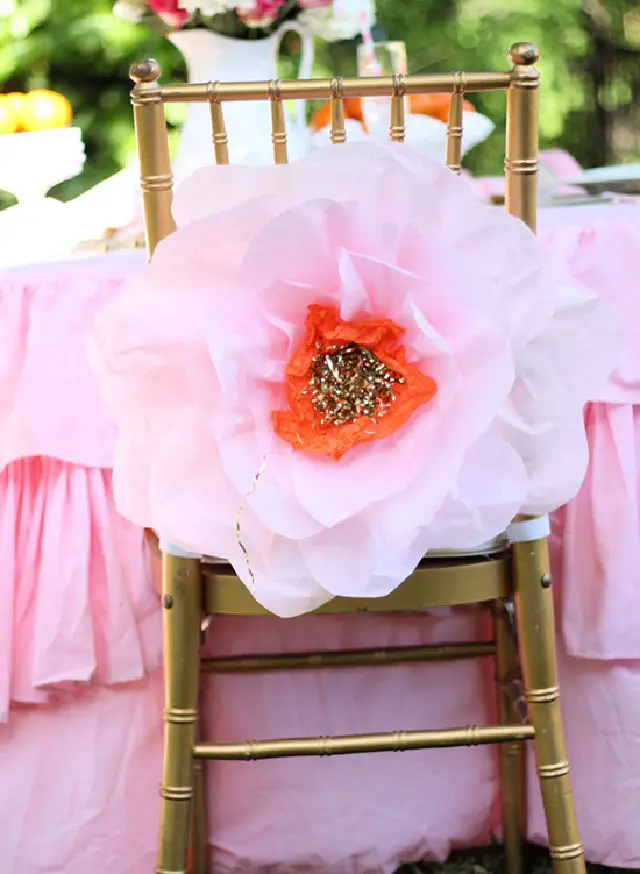
Crafting oversized tissue paper flowers is an accessible and budget-friendly way to infuse any gathering with vibrant flair. By following Rebekah Dempsey’s comprehensive DIY guide on A Blissful Nest, you’ll uncover a straightforward process for creating show-stopping decorations that will undoubtedly captivate your audience. With just a few essential materials – colored tissue paper, a glue gun, and fundamental tools – you’ll be well on your way to crafting breathtaking blooms that exude drama and charm. This intuitive tutorial ensures that anyone can successfully create these oversized flowers, making them an ideal project for events or personal creative expression. As you delve into the clear, step-by-step instructions, you’ll revel in the sense of accomplishment that comes from crafting your own stunning party decor.
Making Your Own Tissue Paper Flower
Indulge your child’s creativity by crafting vibrant crepe paper flowers together! With the help of Easy Peasy Creative Ideas’ straightforward tutorial, you can effortlessly create these charming decorations that will instantly brighten up any room. The best part? This activity requires minimal materials – just crepe paper, scissors, bamboo skewers, and a few household items. As you work on this project, your child will develop their hand-eye coordination and creativity while having a blast. Imagine the delight of watching these flowers bloom in a vase or adding a whimsical touch to gifts and party decor. Make some time for this delightful craft today and bring a splash of color into your world!
DIY Tissue Paper Ice Cream Cone Flower

Bring summer’s playful charm indoors with whimsical tissue paper ice cream cone flowers. This delightful DIY project from Hello, Wonderful is perfect for elevating your home decor or creating a one-of-a-kind gift. To get started, gather vibrant tissue paper, brown construction paper, scissors, pencil, twine, and adhesive. Then, create fluffy tissue blooms, craft paper cones that resemble the real thing, and combine them to form an adorable faux ice cream treat. This easy-to-follow process is accessible to crafters of all skill levels, adding a sweet touch without the risk of melting away. Simply enjoy the creative process and infuse your day with a scoop of imagination!
How to Make a Tissue Paper Flower
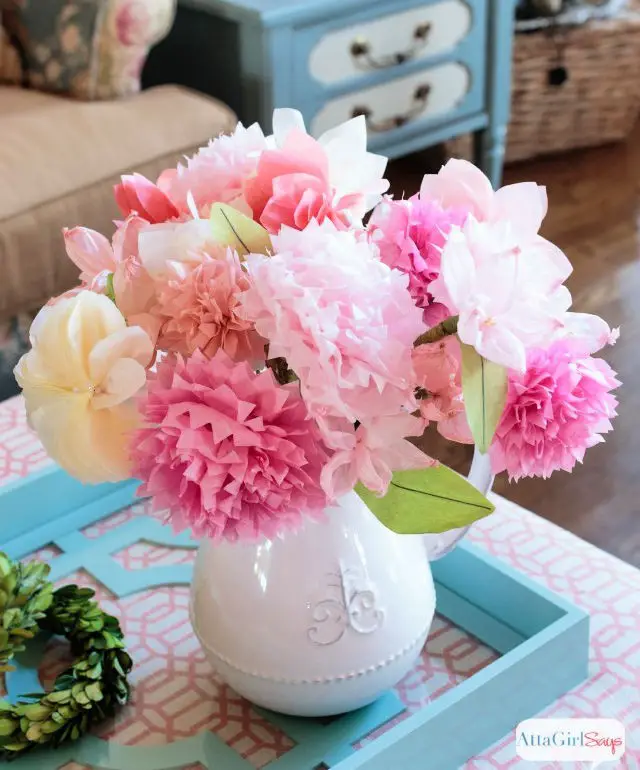
Bring a touch of handmade elegance to your space by crafting delicate tissue paper flowers. Atta Girl Says provides a comprehensive guide that walks you through the process of creating various blooms, from dogwood-type petals to dainty peonies and statement dahlias. With simple steps and a short list of necessary supplies like tissue paper, scissors, and floral wire, you can create long-lasting arrangements that will add a pop of color and a dash of handmade charm to any room. Perfect for home decor, special events, or as thoughtful gifts, these flowers are sure to brighten up your surroundings and bring a smile to those who receive them.
Spring Tissue Paper Fringe Flower
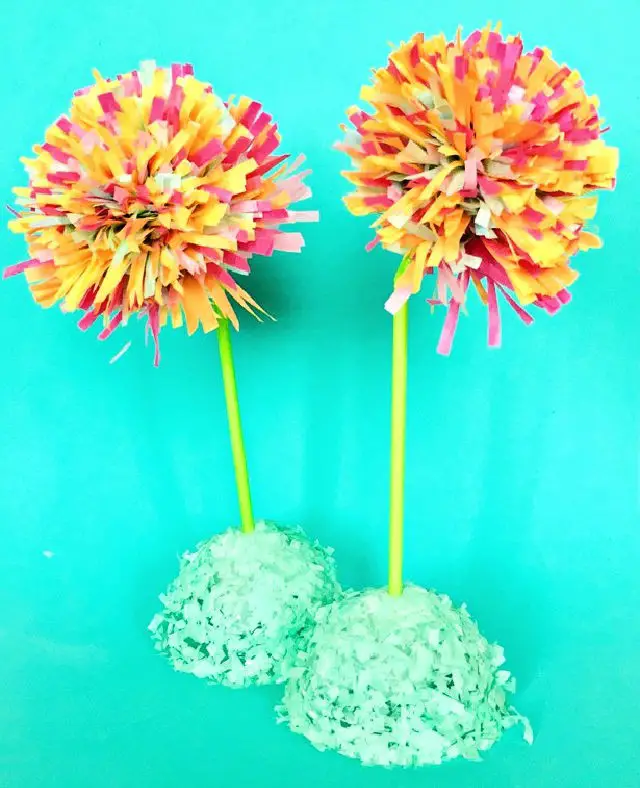
Transform ordinary plastic dome lids from your favorite Frappuccinos into vibrant spring flowers using everyday materials. A simple and engaging guide by Hello, Wonderful will help you create colorful blooms that can brighten up any space. Begin by attaching a styrofoam ball to the lid, then cut and fringe tissue paper in your desired hues. Wrap the paper around a straw, secure it with a simple knot, and finally add a stick for support. These handmade flowers are perfect for gifting or using as decorations for events like school plays. As you craft these flowers, you’ll be embracing the spirit of spring and adding a touch of creativity to your day.
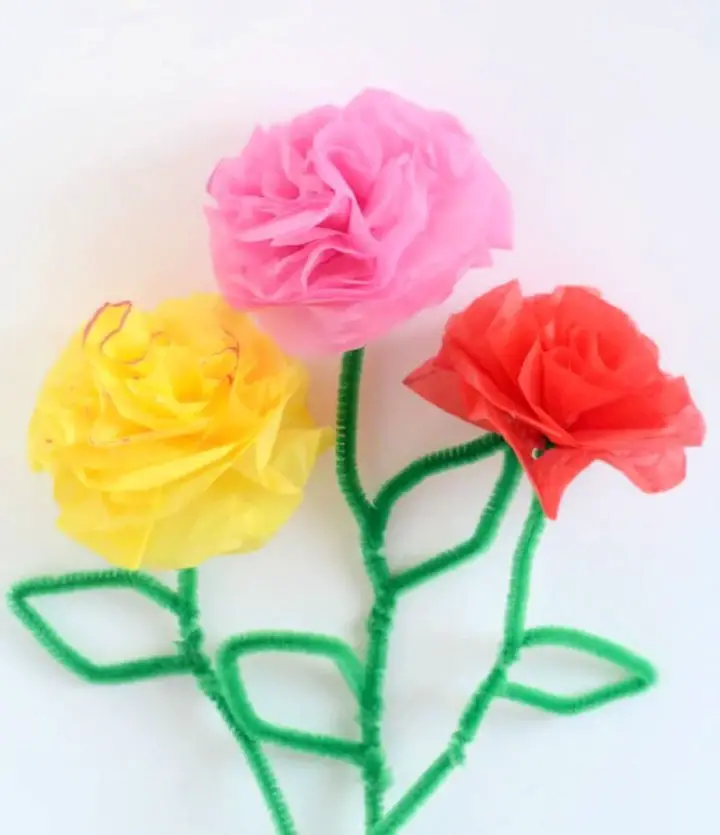
Giant DIY Tissue Paper Flower
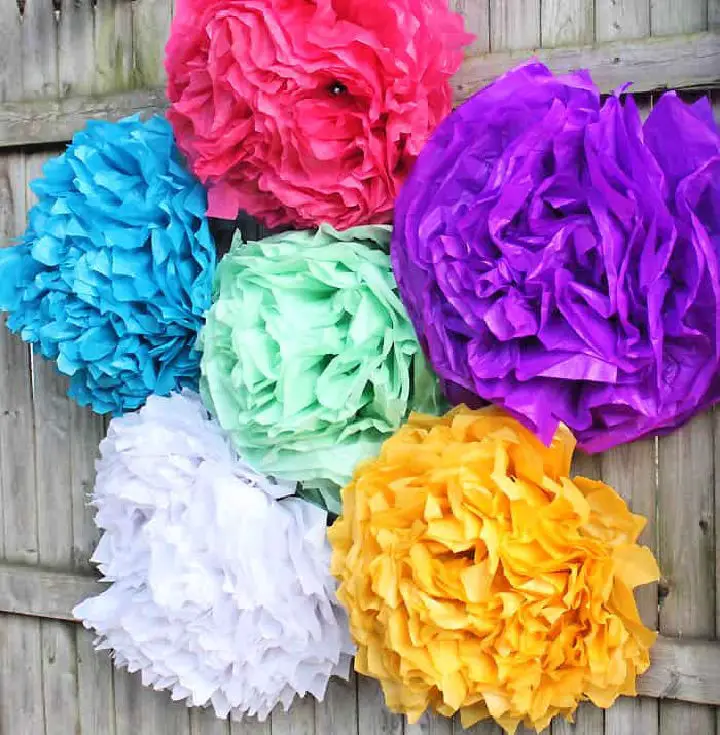
Gina Michele’s DIY Giant Tissue Paper Flowers tutorial brings a burst of creativity to party decorations, offering a vibrant and budget-friendly alternative to traditional décor. By following her straightforward process using accessible materials like tissue paper and pipe cleaners, crafty enthusiasts can create show-stopping arrangements that add a unique touch to any celebration. Whether you’re looking to elevate the ambiance of your backyard bash or infuse your event with personality, Gina Michele’s guide provides an engaging and helpful resource for making eye-catching flower arrangements that are as delightful as they are DIY-friendly.
Make a Flower From Tissue Paper
Unleash your creativity and bring a pop of color into any space with the delightful art of crafting tissue paper flowers! With Whole Heartily’s comprehensive guide, you’ll be amazed at how easily you can create stunning blooms that will captivate anyone. Whether you’re looking to add a personal touch to decorations or share this cultural significance with little ones like Zoey, this project is an excellent way to combine fun and learning. Simply gather your tissue paper, scissors, green pipe cleaners, and get ready to bloom!
DIY Colored Tissue Paper Flower at Home
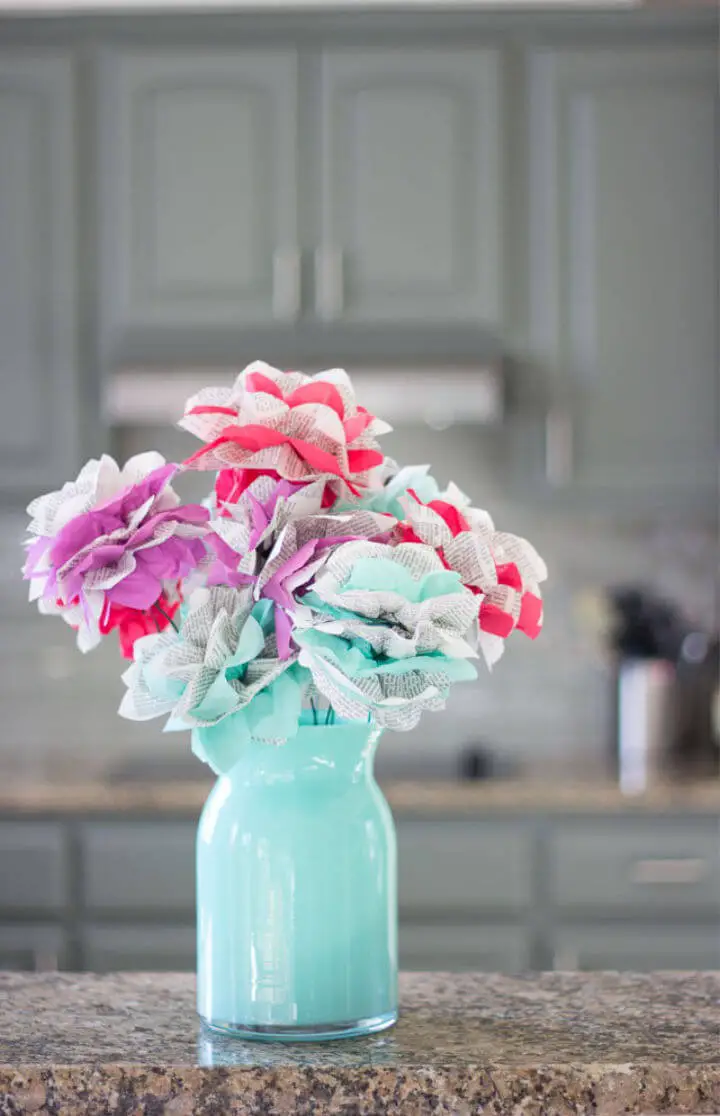
Transforming old encyclopedia volumes into vibrant floral decorations can add a touch of elegance to any room. Design Improvised’s guide on crafting encyclopedia flowers is a great way to breathe new life into neglected books and create unique home decor. With just a few simple supplies, including tissue paper, floral wire, and an old encyclopedia, you’ll learn how to meticulously cut, fold, and shape these pages into delicate blooms. This engaging and easy-to-follow tutorial is perfect for anyone who loves upcycling and crafting. Simply grab an old book, and start making your own bouquet of everlasting paper flowers that will remain a beautiful addition to your space.
Quick and Easy Tissue Paper Flower

Unleash the creativity in you and your little ones by crafting vibrant tissue paper flowers together! With this step-by-step guide from Parrot Street Book Club, you’ll be amazed at how easily you can create stunning blooms that not only brighten up any room but also make for a thoughtful gift. The process is simple: just fold, cut, and fluff layers of tissue paper to shape them into gorgeous flowers. As you work through this project, you’ll be inspired by the thought-provoking book ‘How to Bee’ by Bren MacDibble – a perfect tie-in that encourages kids aged 8 and above to think creatively about their own roles in the world. Don’t be afraid to experiment with different colors and petal shapes to make each flower truly one-of-a-kind. Let your imagination bloom as you craft these beautiful paper creations together!
How to Make Your Own Tissue Paper Flower
Learn the art of crafting enchanting paper flowers through our comprehensive guide on DIY Crafts. Starting with simple cuts and layers of craft paper and tissue, you’ll embark on a creative journey that transforms materials into breathtaking blooms. The process begins by cutting the paper into rectangles, which are then stacked to create an accordion-like shape. A pipe cleaner at the center serves as a secure anchor, allowing you to delicately manipulate the petals by pulling the layers apart. For added dimension and character, apply optional touches of glue for defining petal edges. Voila! You’ll have a one-of-a-kind handmade paper flower perfect for embellishing cards, gifts, or home decor. With crystal-clear instructions and an emphasis on creative expression, DIY Crafts empowers you to infuse your projects with a personal touch.
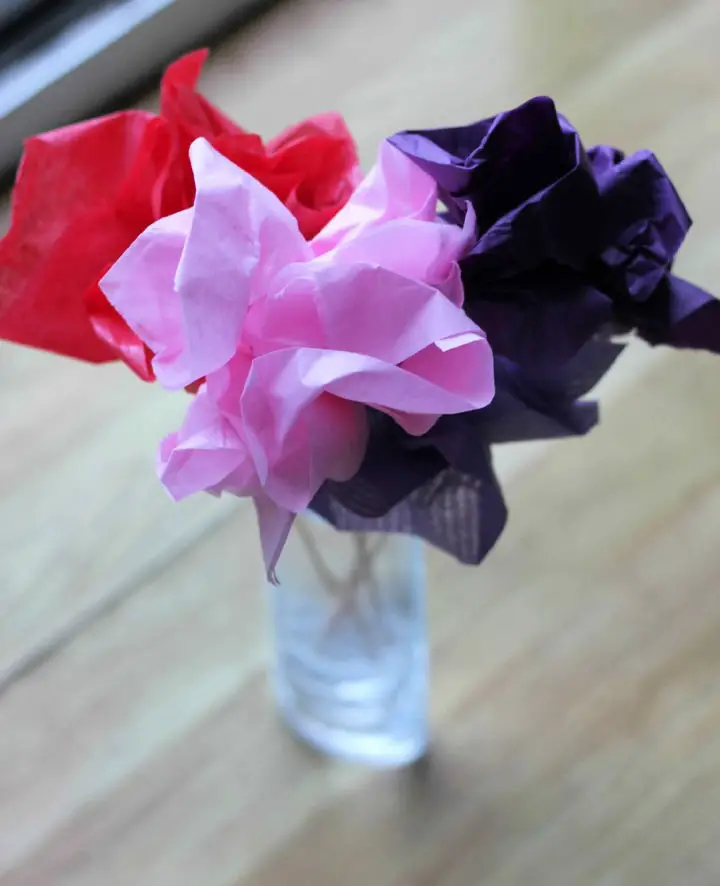
Inexpensive DIY Tissue Paper Flower
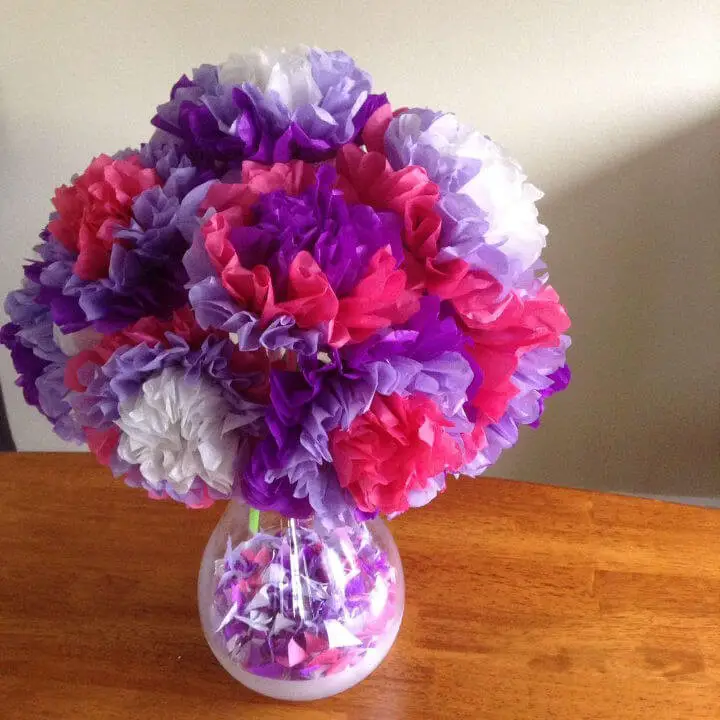
With Valentine’s Day just around the corner, why not create a unique and personalized gift with a handmade bouquet of tissue paper flowers? Using Instructables’ step-by-step guide, you can craft your own stunning blooms that will outlast any bouquet of real flowers. Not only is this DIY project cost-effective, but it also allows you to customize each flower to your liking, making it the perfect way to add a personal touch to any gift or decoration. All you need to get started is some tissue paper, pipe cleaners or wire, scissors, and an optional vase with ribbon for presentation. By following the simple instructions – which involve stacking and folding the paper accordion-style, securing it with pipe cleaners, cutting the ends to create petals, and fluffing each layer to bring your flower to life – you’ll be able to arrange a vibrant display that will brighten up any room. With a little patience and creativity, you can create a truly unforgettable gift or decoration that will be cherished for years to come.
Tissue Paper Cosmos Flower Ideas
Lia Griffith’s guide on making tissue paper cosmos flowers is an exemplary DIY activity for anyone looking to add a touch of handmade elegance to their space. This cost-effective and engaging craft involves scoring and curling techniques for petals and text weight paper leaves, mimicking the natural beauty of cosmos flowers. With its step-by-step approach, this tutorial is perfect for crafting everlasting blooms that are both aesthetically pleasing and fulfilling to create. Whether used as home decor or event decorations, these flowers offer a creative outlet that’s easy on the budget yet rich in charm. For access to the full tutorial and more crafting resources, consider joining Lia Griffith’s community.
DIY Tissue Paper Flower for Kids
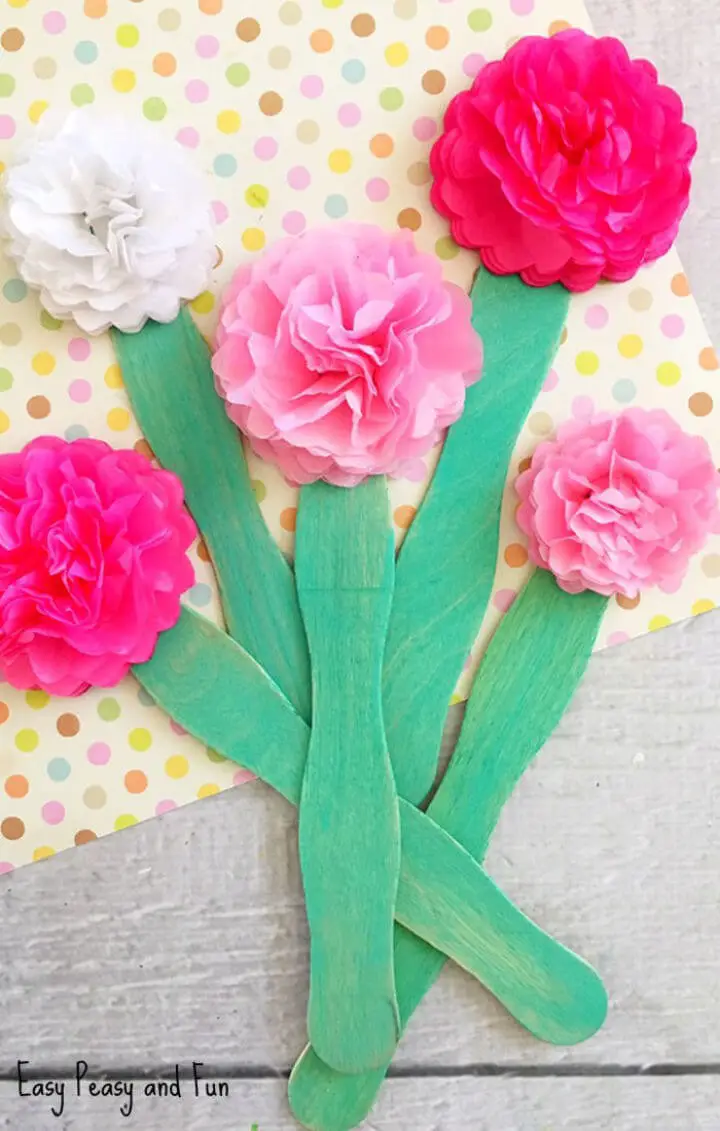
Transform any space or occasion with a vibrant and charming tissue paper flower bouquet, courtesy of Easy Peasy and Fun’s engaging tutorial. This delightful DIY project requires stacking and shaping layers of colorful tissue paper around a painted craft stick, effortlessly creating captivating flowers. Perfect for kids and adults alike, this craft is ideal for adding a personal touch to your décor or making a thoughtful gift for special occasions like Mother’s Day.
With simple step-by-step instructions and accessible materials such as tissue paper, scalloped circle cookie cutters, and craft paint, anyone can master the art of crafting unique and cheerful blooms. Experience the joy of creating something special and brightening up any room with this delightful bouquet!
How to Do You Make Tissue Paper Flower
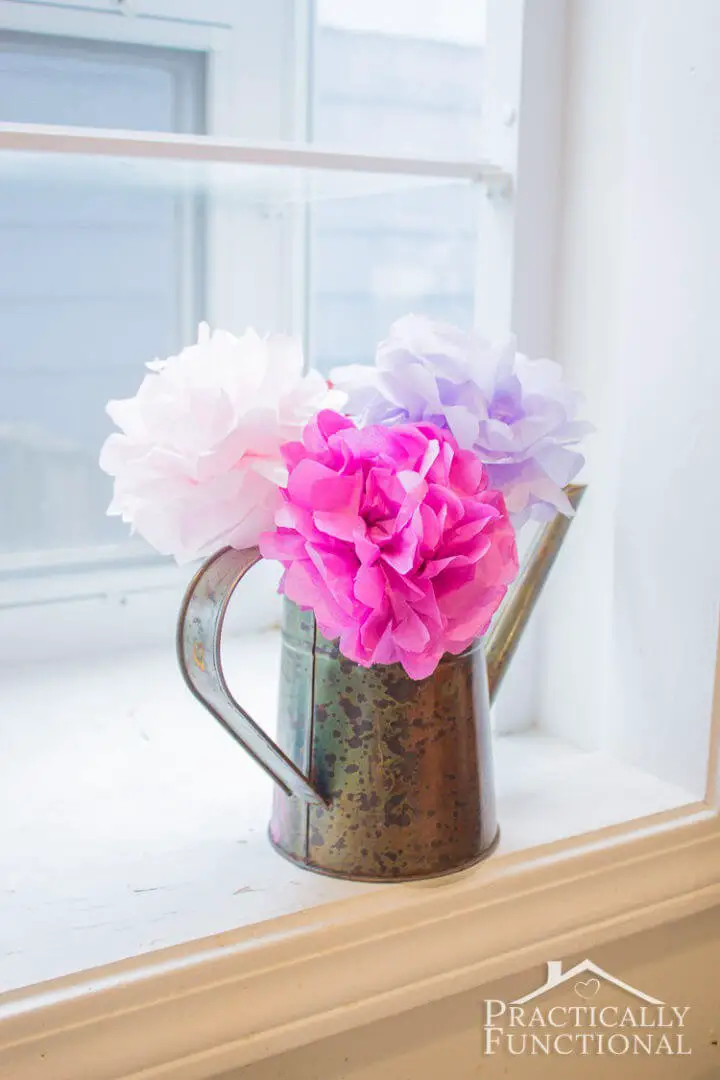
Give your space a pop of color with handcrafted tissue paper flowers! This delightful craft is perfect for adding a splash of vibrancy to any occasion, and the best part? It’s cost-effective and stays fresh all year round. With Practically Functional’s easy-to-follow tutorial, you can transform simple tissue paper into stunning blooms using just a few materials like floral wire, scissors, and either floral stems or straws. Say goodbye to wilted flowers and hello to a bouquet of beautiful, long-lasting paper creations that are sure to brighten up your home. Whether you’re celebrating Valentine’s Day or simply embracing the season, these DIY tissue paper flowers are the perfect way to add a cheerful touch to your décor.
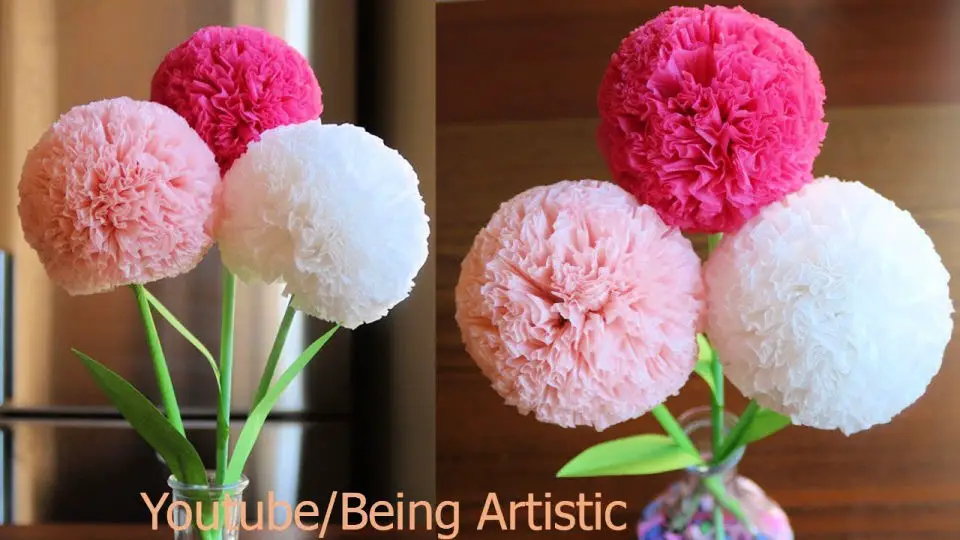
Homemade Tissue Paper Flower
Discover the art of crafting vibrant tissue paper flowers that instantly elevate any room’s ambiance! By following the comprehensive tutorial from the Happy Wish Company, courtesy of Project Nursery, you’ll master each step with ease. Whether you’re preparing for a spring celebration or simply want to add a pop of color to your home decor, this DIY endeavor requires only basic materials like scalloped-edged tissue paper, floral wire, and optional fabric or paper leaves.
Unleash your creativity by folding, fluffing, and arranging your handmade blooms into stunning displays that reflect your personal style. With the freedom to tailor the colors to match any theme, this charming project is sure to bring a touch of handmade sophistication to your next gathering or add a cheerful splash to everyday spaces.
DIY Tissue Paper Flower for Bracelet
Transform ordinary tissue paper into extraordinary jewelry with Buggy and Buddy’s charming flower bracelet craft. This accessible project is perfect for little hands, requiring minimal materials: colorful tissue paper, scissors, a single hole punch, pipe cleaners, and optional beads. As kids stack, cut, and thread the tissue paper to create their unique flower designs, they’ll develop fine motor skills and unleash their creativity. The finished product is not only a beautiful piece of wearable art but also a thoughtful gift for special occasions like Mother’s Day or Cinco de Mayo. With this craft, you can create vibrant, festive accessories that will brighten anyone’s day.
Make Your Own Tissue Paper Flower
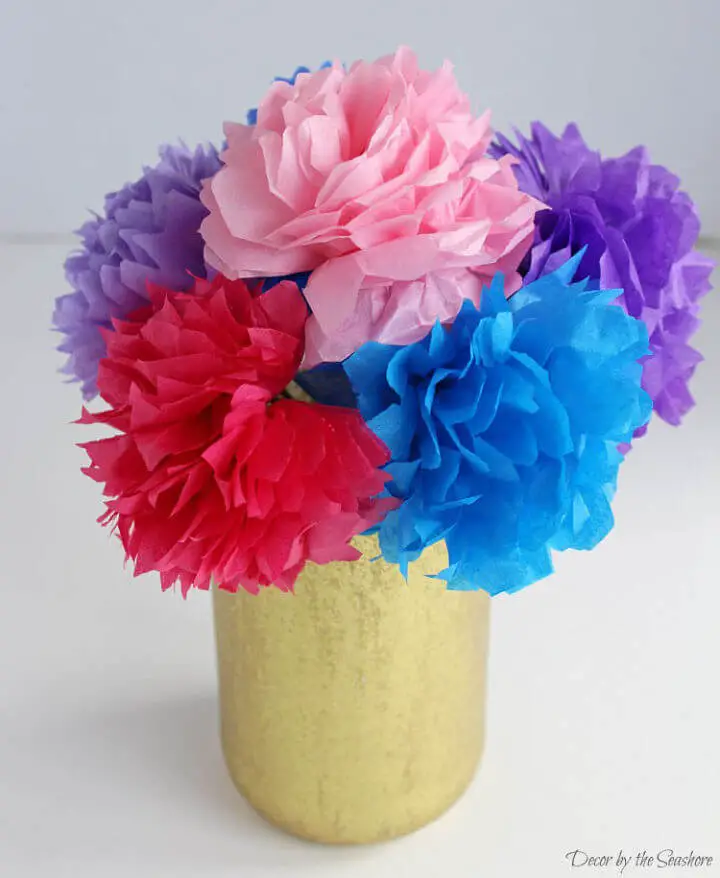
Add a pop of color and whimsy to your space by crafting DIY tissue paper flowers, a budget-friendly and simple project that’s perfect for any occasion. With a clear tutorial from Decor by the Seashore, you’ll be guided through the process of transforming plain tissue paper into stunning blossoms that can elevate any room or event. Not only will you learn the basics of paper flower crafting, but also discover creative ways to repurpose household items and make your project even more special. Whether you’re looking to add a personal touch to your home decor or create unique centerpieces for a wedding or party, these delightful handmade accents are sure to bring joy and elegance to any setting.
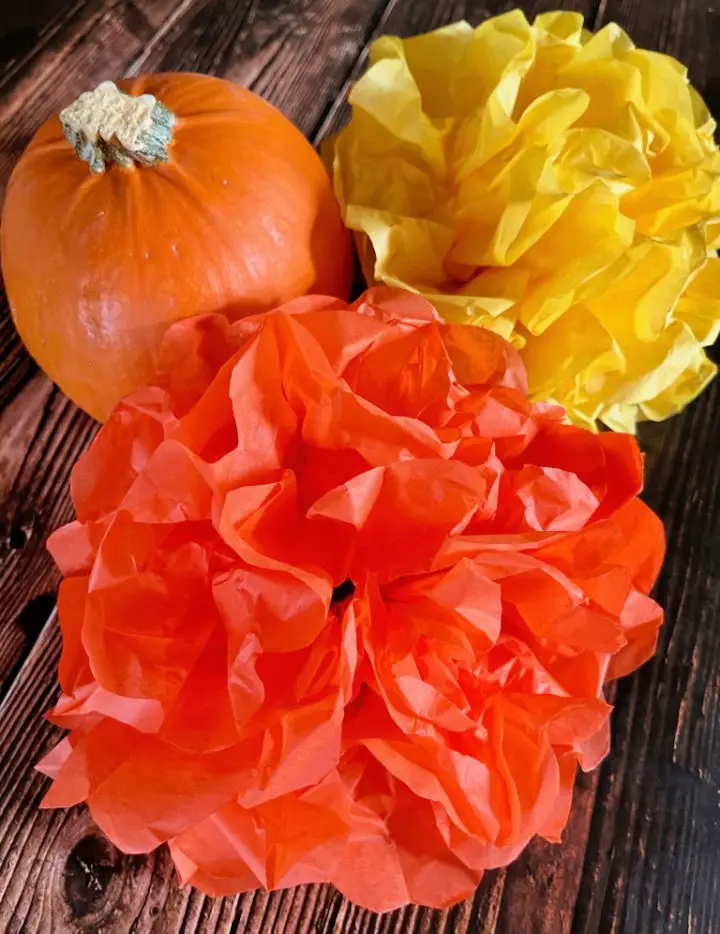
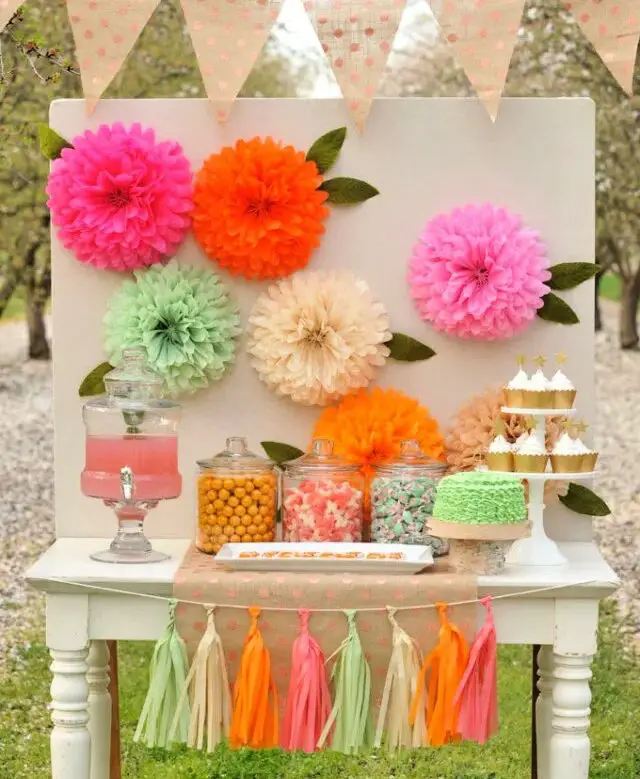
DIY Tissue Paper Flower – Step by Step Instructions
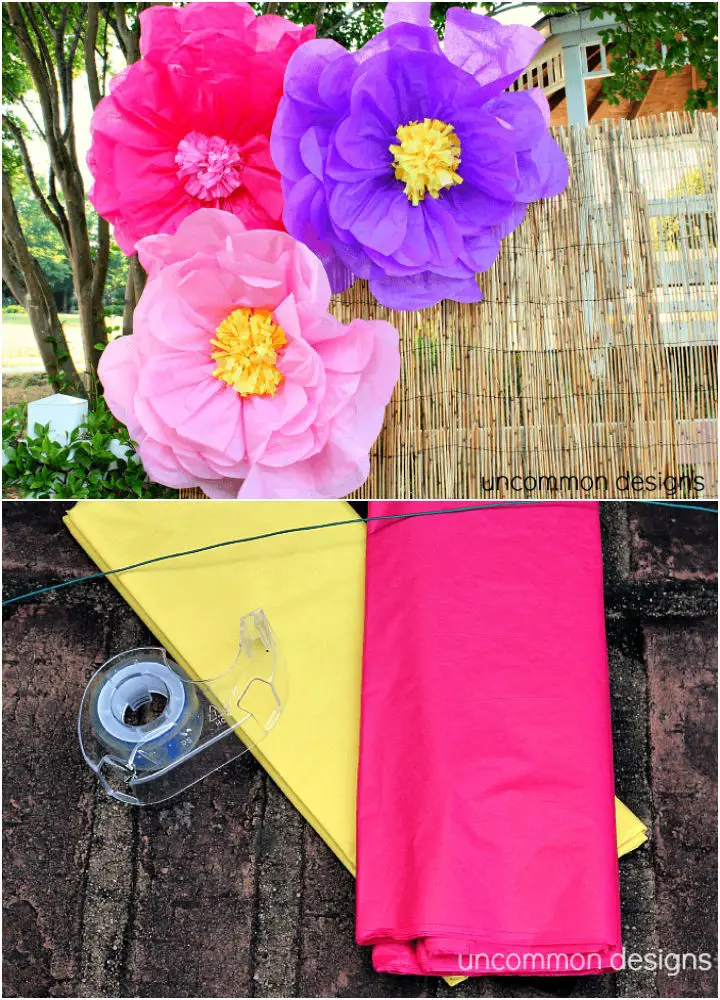
Transform ordinary celebrations into extraordinary ones by creating stunning oversized tissue paper flowers using Uncommon Designs’ extensive guide. This interactive tutorial takes you on a step-by-step journey, equipping you with the essential details to craft breathtaking decorations for any occasion. With only tissue paper, floral wire, and a few household essentials at your disposal, you’ll master the art of crafting these show-stopping blooms that can be effortlessly customized in an array of vibrant color combinations. Not only do these giant flowers provide a cost-effective solution for party decor, but they’re also reusable with proper care. Whether elevating a special event or adding a touch of whimsy to your home, these tissue paper masterpieces are sure to leave a lasting impression.
Make a Snowdrop Tissue Paper Flower
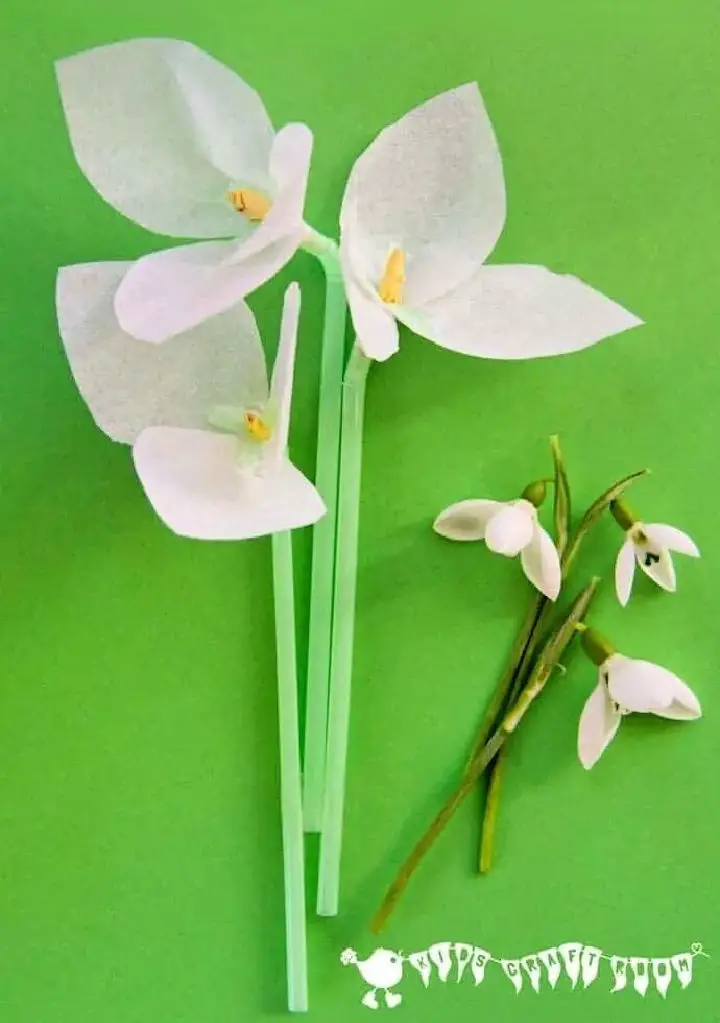
Capture the essence of spring with this enchanting Snowdrop Tissue Paper Flowers craft from Kids Craft Room. This delightful project is perfect for kids to explore their creativity while learning about the anatomy of flowers. With just a few simple materials like green bendy straws, white and yellow tissue paper, sticky tape, and scissors, families can create these charming snowdrops together. As children work through this engaging activity, they’ll develop their problem-solving skills, hand-eye coordination, and fine motor abilities. The end result is not only a beautiful addition to your home decor but also a sense of pride and accomplishment that will last long after the craft session is over.
Handmade Tissue Paper Flower
Learn the art of creating stunning tissue paper flowers with The Imagination Tree’s step-by-step guide. This versatile craft is perfect for various occasions, such as Mother’s Day or Spring celebrations, allowing you to add a pop of color and personality to your home. Not only do these flowers provide a creative outlet, but they also serve as a fun educational activity for children, promoting the development of motor skills and creativity. With just tissue paper, tape, and skewers, anyone can learn to make these simple yet beautiful flowers, which can be customized with various embellishments to create unique arrangements that brighten up any space.
Making Flower Out of Tissue Paper
With just a few simple materials and some basic shaping techniques, you can create vibrant and colorful tissue paper flowers that add a personal touch to any space or occasion. According to Momma Lew’s expert guidance, all you need to get started are sheets of tissue paper, scissors, pipe cleaners, a marker, and a cup for tracing out the flower’s center. Simply layer the tissue paper, shape it around the pipe cleaner stem, and voilà! You’ve got a beautiful blossoms that can be used to enhance party decorations, add a personal touch to gift wrapping, or even serve as lasting mementos for special events.
DIY Round Flower With Tissue Paper
Transform ordinary tissue paper into extraordinary round flowers with this DIY guide. This paper craft tutorial is designed to help you create stunning floral decorations that can instantly elevate any room or occasion. With just a few simple materials like colored tissue paper, craft wire, and bond paper, you’ll be well on your way to crafting beautiful blooms that exude elegance and charm. As you follow our step-by-step instructions, you’ll discover the joy of turning plain paper into intricate, eye-catching creations that are sure to impress.
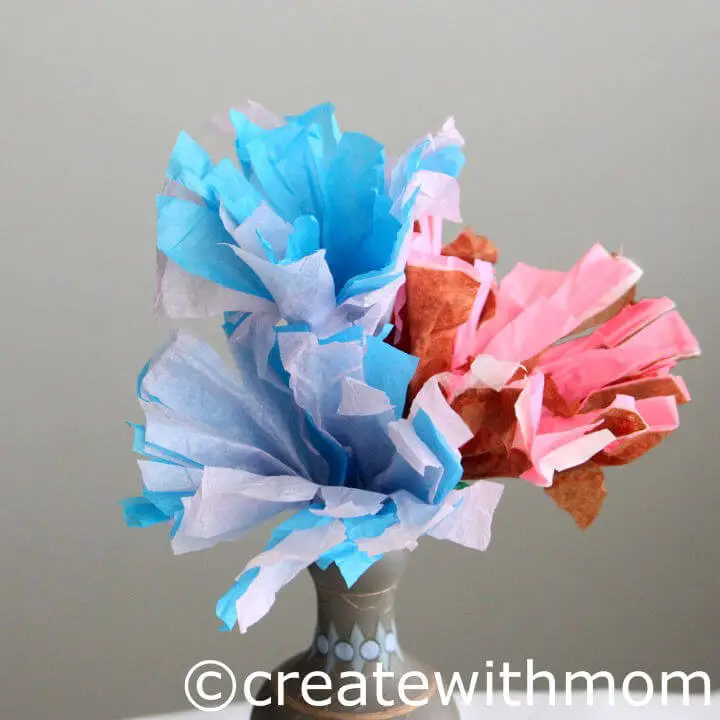
Easy Tissue Paper Flowers With Pipe Cleaners
Transform your space into a vibrant oasis with Nana’s easy-to-follow tutorial on making stunning tissue paper flowers! With just a few simple folds, cuts, and twists using tissue paper and pipe cleaners, these charming blooms come to life, ready to brighten up any celebration or serve as lovely home decor. Whether you’re looking for a unique gift or a way to add a pop of color to your surroundings, Nana’s complete guide ensures that anyone can join in on the fun and create something truly beautiful. And the best part? These tissue paper flowers are not only a joy to make but also an affordable way to add a personal touch to any occasion.
Conclusion:
As you bring to life the 25 vibrant tissue paper flowers, you’ll discover a world where creativity and skill-building converge. This comprehensive guide not only provides a step-by-step journey from selecting materials to adding finishing touches but also unlocks endless design possibilities. By embracing sustainable practices, you’ll not only beautify your surroundings but also contribute to the well-being of our planet. With this ultimate collection, transforming simple sheets into stunning flowers is an achievable reality for anyone. So, take the first step and start crafting – and remember, happiness is just a flower away!
