Transforming your space with handmade elegance, making DIY teacup candles at home is an art form that combines historical significance with timeless appeal. Without the need for specialized skills or equipment, craft unique candles that blend perfectly with any room’s décor. Whether you’re seeking a personalized decor piece or a thoughtful gift, these candles allow you to infuse your personal style and sentiment into each creation.
A crucial aspect of candle-making is selecting the right wax and scent combination to achieve the desired burn time and aroma throw. This guide delves deep into the intricacies of this process, covering eco-friendly waxes and their impact on candle performance. As we embark on this DIY journey together, you’ll learn how to prepare your teacups, master various techniques, and bring your creative ideas to life with step-by-step instructions and expert tips. Continue reading to discover a world of possibilities and elevate your home decor or gift-giving game.
Historical and Cultural Significance of Teacups and Candles
Candle-making and the use of teacups are two practices deeply rooted in history, their significance extending far beyond mere craft or tableware. For centuries, these activities have been intertwined with human culture, evoking notions of warmth, communal bonding, and timeless tradition.
The Journey of Candle-Making
The art of candle-making has a rich history that dates back thousands of years. In ancient China, during the Qin Dynasty around 221 BCE, evidence suggests that candle-making was already an established craft. Meanwhile, in Europe, early candles were crafted from tallow and beeswax, while in India, they were made by boiling cinnamon. Over time, the process of candle-making evolved significantly, with the introduction of molds in the 19th century playing a key role in the mass production and widespread adoption of candles.
Teacups: A Symbol of Elegance and Hospitality
In the realm of social rituals, teacups occupy a unique position. The Ming Dynasty’s introduction of handled teacups revolutionized the tea-drinking experience, leaving a lasting impact on European tea culture – particularly in Britain where it evolved into an esteemed tradition. As a symbol of refinement and femininity, teacups have long been associated with elegance and relaxation, beckoning guests to unwind and savor a warm cup of tea within a cozy atmosphere.
The Confluence of Traditions
The fusion of candle-making traditions and teacup craftsmanship yields a harmonious blend of elegance and cultural significance. As functional lighting sources and decorative pieces, teacup candles transcend their practical purposes, embodying the essence of hospitality and the art of living. They become vessels for sharing stories and memories, reflecting the evolution of human civilization. In recognizing the histories behind teacups and candles, we gain appreciation for the craftsmanship that goes into creating these unique pieces, celebrating heritage and infusing our lives with beauty.
Choosing the Right Wax for Your Teacup Candles
When it comes to crafting teacup candles, the choice of wax is a vital consideration. Not only does it affect the candle’s burn time and fragrance release, but it also has a significant bearing on its eco-friendliness. The right type of wax can make all the difference in creating a sustainable and high-quality candle that meets your needs.
Eco-Friendly Waxes: A Sustainable Choice
When it comes to candle-making, many eco-conscious crafters opt for environmentally friendly waxes like soy, beeswax, and coconut wax. These sustainable options are not only biodegradable but also produce less soot than traditional paraffin wax when burned. By selecting these waxes, you can enjoy the warm ambiance of your candles while minimizing their environmental impact – a healthier choice for both your home and the planet.
Burn Time and Scent Throw
The choice of wax is a crucial factor in determining the longevity and aromatic performance of your candle. Natural waxes, such as soy wax, exhibit distinct characteristics that set them apart from paraffin-based candles. Notably, they burn at a slower and cooler pace, which translates to a longer-lasting candle experience. Furthermore, natural waxes have an innate ability to retain fragrances effectively, ensuring a consistent and pleasant scent throughout the burning process.
The Impact on Candle Performance
The foundation of any successful candle is its wax. This crucial component not only sustains the flame but also impacts the overall performance and character of the candle. A high-quality wax can make all the difference, guaranteeing a consistent burn and a potent scent throw that fills the air. Take coconut wax, for instance, which is renowned for its exceptional scent distribution capabilities. When used in teacup candles, it effortlessly fills the room with a rich aroma, creating an inviting ambiance.
Making an Informed Decision
As you select wax for your teacup candles, it’s essential to consider both the environmental implications and the performance attributes of each option. Your decision will have a direct impact on the quality of your finished products, as well as reflect your commitment to sustainability. By taking the time to understand the unique characteristics and benefits of different waxes, you can craft teacup candles that not only delight the senses but also prioritize eco-friendliness.
How to Make DIY Tea Cup Candles at Home
Transforming ordinary tea cups into extraordinary candle holders is an inviting way to infuse any space with refinement and personality. This creative endeavor is particularly well-suited for individuals seeking to breathe new life into vintage tea cups or simply indulge in a soothing crafting experience. To guarantee a stress-free and successful DIY adventure, follow this step-by-step guide, carefully crafted to empower you to create your own unique tea cup candles.
What You’ll Need:
When crafting your unique tea light, you’ll need a few basic materials. Start with some vintage or heat-safe tea cups to serve as the foundation of your candle. Next, gather soy wax flakes – or your preferred type of wax – that will provide the base for your melted wax. You’ll also require candle wicks with metal tabs to ensure a smooth and even burn. To melt the wax, you’ll need a hot glue gun or a more low-tech option like a double boiler or a heat-safe bowl placed over a pot of boiling water. A stirring spoon will come in handy for mixing and blending your melted wax. If you want to add some color or scent to your candle, consider using crayons or candle dye, as well as fragrance oils. For any trimming or shaping needs, keep a pair of scissors on hand. Finally, have some Popsicle sticks or skewers ready for any decorative touches you may want to add, along with some tape for securing any additional embellishments. With these materials at the ready, you’re all set to start crafting your one-of-a-kind tea light.
Step-by-Step Guide:
To craft a unique tea cup candle, begin by thoroughly cleaning and drying each tea cup to ensure they are free of dust and debris. Next, secure the wick to the bottom of each cup using a hot glue gun, which will prevent it from shifting during the melting process.
Melt the soy wax flakes in a heat-safe bowl set atop a pot filled with simmering water. Stir the mixture occasionally to prevent lumps from forming and ensure the wax melts evenly.
To customize your candle, you can add color by incorporating crayon pieces or candle dye into the melted wax. If desired, also introduce fragrance, but be cautious not to overheat the wax, as this can diminish the scent’s potency.
Before pouring the melted wax into the tea cups, ensure they are at a comfortable temperature. This will prevent the wax from setting too quickly and reduce the risk of cracking. Pour the wax carefully, leaving a small gap at the top.
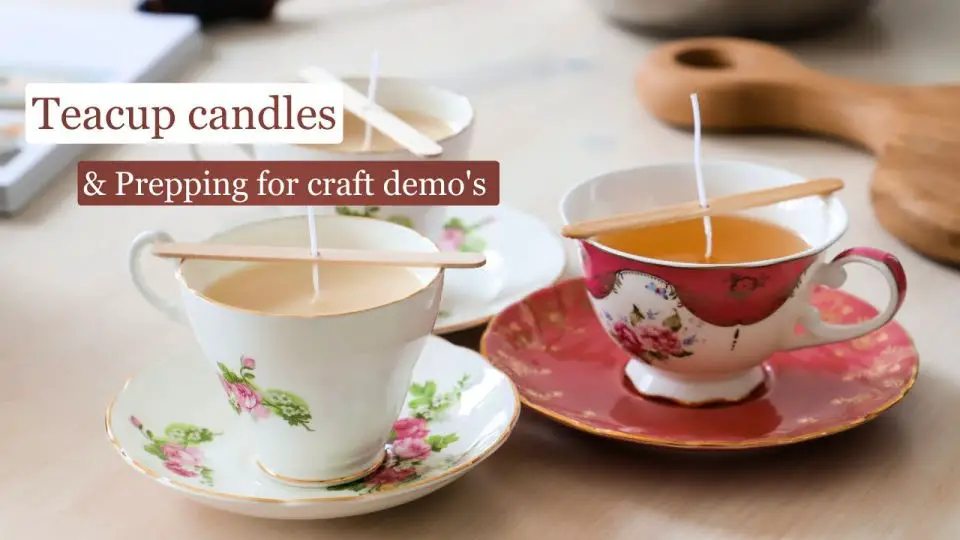
Once you’ve poured the wax, straighten and secure the wick by wrapping its end around a popsicle stick or skewer positioned across the top of the cup. This will keep the wick centered as the wax cools and hardens.
Allow the wax to cool and set for several hours or overnight. Once hardened, trim the wick to about half an inch above the surface of the wax. Finally, remove any excess wax residue from the tea cups with a gentle wipe.
Taking Care of Your Candle
When it comes to enjoying the ambiance of a candle, it’s essential to ensure you’re using it safely and responsibly. This means placing your candle on a heat-resistant surface while it’s burning to prevent any potential damage or fires. Additionally, it’s crucial not to burn your candle for more than 4 hours at a time, as this can cause the wax to melt unevenly and potentially lead to a messy clean-up. Furthermore, keep your candle in a safe location that is out of reach from drafts, pets, and children. This will help prevent accidents and ensure you can fully appreciate the warmth and ambiance that candles have to offer.
Video Tutorial
For those looking for a hands-on approach to creating their own DIY tea cup candles, this YouTube video offers an engaging step-by-step tutorial that perfectly complements the written guide provided here. By following along with the visual journey, crafters can easily replicate each stage of the candle-making process with clarity and ease. The art of crafting tea cup candles transcends mere project-making; it’s a thoughtful way to revive vintage china, craft unique gifts, or simply bask in the warm glow they bring.
Creative Customization Ideas for Teacup Candles
Transforming your teacup candles into one-of-a-kind masterpieces is as simple as adding a personal touch. By incorporating your own creative flair, you can turn these ordinary candles into extraordinary works of art that truly reflect your personality. To get started, consider the following ideas:
Choose Your Color Palette
When it comes to adding color to your handmade candles, consider selecting hues that harmonize with the design of your teacups. To do this, you can get creative and use old crayons to add a pop of color to the wax or opt for more vibrant options like candle dyes. By matching the wax color to the pattern on your teacup, you’ll create a visually appealing combination that brings a touch of elegance to any setting.
Scent Selection
Transforming a space into a haven of tranquility is as simple as incorporating scented candles. To take it to the next level, infuse your wax with essential oils or fragrance oils, carefully selecting scents that harmonize with the current season. For instance, warm cinnamon notes can evoke the cozy atmosphere of fall, while floral essences can bring a touch of springtime freshness into your home.
Decorative Elements
Elevate your candle’s aesthetic appeal by incorporating decorative elements like dried flowers, cinnamon sticks, or coffee beans. Not only do these embellishments add a touch of elegance, they can also amplify the fragrance as the candle burns, creating a multisensory experience.
Personalized Accents
Elevate the gift-giving experience by using a durable gold or silver Sharpie to etch meaningful messages, intricate designs, or personalized symbols onto the teacup. This thoughtful touch transforms the candle into a one-of-a-kind present ideal for commemorating milestone events, birthdays, or anniversaries.
Wicks with a Twist
As you experiment with different wick types, such as wood wicks that crackle and pop as they burn, you’ll find that the subtle sounds they produce add an extra layer of visual appeal to your candle. By embracing these customization options, you can transform teacup candles into a unique blend of functionality and self-expression, elevating them from mere objects to miniature works of art.
Essential Safety Tips for DIY Teacup Candle Making
As you embark on the creative journey of crafting teacup candles, prioritizing safety is crucial. To guarantee a risk-free and delightful experience, heed these essential safety guidelines:
Prepare Your Workspace
Optimize your workspace by selecting a well-ventilated area free from distractions. Create an efficient work environment by arranging your tools and materials in a way that promotes seamless collaboration, allowing you to focus on the task at hand.
Wear Protective Gear
When engaging in activities that involve heat, sparks, or other potential hazards, it’s essential to prioritize your safety. This includes donning protective gear such as safety goggles to shield your eyes from any stray splashes. Additionally, ensure you’re wearing flame-resistant clothing like long pants and closed-toe shoes to prevent injuries from hot wax drips or other debris. Furthermore, consider using heat-resistant gloves or potholders when handling hot equipment to prevent accidental burns.
Use the Right Equipment
When melting wax, it’s essential to employ a double boiler method to ensure consistent and controlled heat distribution. This technique prevents hotspots that can cause the wax to overheat or burn. If using a stovetop, maintain a moderate temperature to prevent the wax from getting too hot, too fast. Alternatively, consider utilizing an electric wax melter for added convenience and precision.
Keep Children and Pets at a Safe Distance
When it comes to creating candles, safety should be top of mind. To minimize the risk of accidents, make sure to keep children and pets at a distance from your workspace. This simple precaution can help prevent potential disasters and ensure a smooth, enjoyable experience for everyone involved.
Maintain a Tidy Space
When it comes to maintaining a safe and efficient workspace, one crucial aspect to focus on is keeping the environment free from potential fire hazards. One simple yet effective way to achieve this is by ensuring that all flammable materials are kept at a safe distance from heat sources such as stoves, ovens, or equipment heaters.
Never Leave Your Workspace Unattended
To ensure a high-quality final product, it’s essential to remain engaged throughout the entire candle-making process. However, if you need to step away for any reason, make sure to completely extinguish any heat sources before doing so.
Have a Fire Extinguisher Handy
When dealing with a potential blaze, it’s crucial to prioritize safety above all else. In this context, using a fire extinguisher is essential, as pouring water on the flames could inadvertently spread them further. By taking these vital precautions, you’ll be able to engage in activities like crafting teacup candles without compromising your own well-being or that of those around you.
Troubleshooting Common Issues in Candle-Making
When engaging in the soothing hobby of candle-making, it’s not uncommon to run into obstacles that can impact the final product. Fortunately, being aware of these common pitfalls can help you troubleshoot and overcome them. For instance, issues with melting points, uneven burning, or poor color retention can arise, but by understanding their causes and implementing simple fixes, you can maintain the high quality and aesthetic appeal your candles deserve.
Candle Tunneling
When burning candles, it’s not uncommon for tunneling to occur. This phenomenon is characterized by the center of the candle melting and burning while leaving an unmelted ring of wax around the edges. To avoid this issue altogether, aim to make the first burn last long enough for the entire top layer of wax to melt completely. If you do find yourself dealing with tunneling, don’t worry – it’s easily fixable. Simply use a heat gun to carefully melt the top layer of wax back into place, ensuring an even and consistent burn.
Wick Problems
A well-burning candle relies heavily on the wick’s optimal dimensions. If the flame is undersized due to a short or slender wick, it’s likely that the opposite issue exists if the flame is excessively large – in this case, the wick may be too long or bulky. To achieve a consistent burn, it’s essential to trim your wick to approximately one-quarter inch before each lighting, and select the appropriate wick size based on the wax type and candle dimensions.
Sinkholes
When it comes to working with wax, one common issue that can arise is the formation of sinkholes. These occur when the wax cools too rapidly or is introduced at an excessively high temperature. In order to rectify this problem, a heat gun can be used to reheat the surface until the wax flows and fills the void left by the sinkhole. To avoid these imperfections altogether, it’s essential to pour the wax at a lower temperature and permit it to cool gradually.
Flickering and Popping
To troubleshoot a flickering or popping flame, it’s essential to consider two primary culprits: an excessively long wick or unwanted air currents in the surrounding environment. A simple yet effective solution is to trim the wick to the recommended length for optimal performance. Additionally, placing your candle at a safe distance from any drafts or breezes can help eliminate this issue and ensure a smooth, consistent burn.
Scent Issues
When a candle’s unlit aroma is impressive but its scent dwindles to almost nothing while burning, it’s often due to the fragrance oil or its concentration. It’s crucial to use high-quality oils and the right amount for the specific wax type you’re working with. By tackling these common candle-making challenges, you can enhance the quality and performance of your DIY teacup candles, ensuring a more satisfying experience for yourself and others who enjoy them.
Sustainability and Ethical Sourcing in Candle Making
Sustainability and ethical sourcing aren’t just trendy phrases in the world of candle making – they’re crucial components that can have a profound effect on the environment and all its living creatures. In fact, these principles are vital to ensuring a brighter future for our planet.
Understanding Sustainability in Candle Making
In the realm of candle crafting, sustainability takes center stage as makers opt for eco-friendly materials and practices that minimize environmental impact. This approach prioritizes the use of renewable waxes such as soy, beeswax, or coconut wax, which are not only biodegradable but also burn with minimal soot production, ensuring a cleaner and healthier burning experience.
The Importance of Ethical Sourcing
In the realm of candle making, ethical sourcing plays a crucial role in ensuring that the materials utilized are acquired in a manner that not only respects the environment but also safeguards the rights of workers. This approach necessitates a transparent supply chain and adherence to fair trade principles.
Benefits of Eco-Friendly Practices
By embracing eco-friendly candle-making practices, artisans not only promote sustainable agriculture but also contribute to the vitality of local economies. Furthermore, many environmentally aware candle makers opt for recycled or biodegradable packaging materials, thereby minimizing their ecological footprint and reducing waste altogether.
Making Informed Choices
As a candle maker, you possess the authority to make eco-conscious decisions that resonate with your dedication to environmental stewardship. By opting for natural ingredients and recyclable packaging, you not only craft stunning, high-quality candles but also foster a healthier planet. This synergy between sustainability and quality enables you to create products that are not only safe and enjoyable for consumers but also contribute to the overall well-being of our environment, yielding a win-win situation for all parties involved.
FAQs About DIY Teacup Candles
Crafting personalized teacup candles can be an incredibly fulfilling experience, offering a unique blend of creativity and relaxation. As you embark on this journey, it’s natural to encounter a few questions along the way. Here, we’ll provide insightful answers to common queries that may arise during the process, ensuring your homemade candles meet your expectations.
What type of wax is best for teacup candles?
When it comes to creating teacup candles, soy wax stands out as the preferred choice due to its eco-friendly profile, clean-burning properties, and slower combustion rate compared to paraffin wax. As a result, your candle will boast an extended lifespan while minimizing soot emissions.
How much wax do I need for one teacup candle?
When measuring out the required amount of wax for your candle-making project, start by filling a teacup with water and weighing it. This will give you a baseline weight that can be used to calculate the correct amount of wax needed. Keep in mind that wax and water have different densities, so adding a small buffer to ensure you have enough is a good idea. A general rule of thumb is to use approximately twice as much wax as the volume of the cup, taking into account any extra for overflow or uneven melting.
Can I use old crayons to color my candles?
To infuse vibrant hues into melted wax, you can indeed repurpose old crayons. However, ensure a thorough removal of any accompanying paper before introducing the crayon fragments into the molten mixture as it’s being heated.
How do I secure the wick to the bottom of the teacup?
For a sturdy and long-lasting candle, start by securing the metal wick base to the bottom center of the teacup using a small amount of hot glue or adhesive. Apply gentle pressure to ensure the base is firmly in place, taking care not to apply too much force that might damage the ceramic material.
What can I use to scent my teacup candles?
To imbue your candles with a captivating aroma, you can utilize either essential oils or fragrance oils. Simply integrate the chosen oil into the melted wax, thoroughly stirring it in before pouring the scented mixture into the desired mold.
How do I prevent my candle from tunneling?
When crafting a candle, it’s crucial to allow the initial melting process to complete, allowing the uppermost layer of wax to fully dissolve. This initial phase, often referred to as ‘burning in,’ enables the formation of a chemical memory within the candle that helps regulate its burn rate and promotes even combustion in subsequent uses.
What should I do if my candle has a sinkhole?
When a sinkhole appears on the surface of your wax creation after it has cooled, you can employ a heat gun to meticulously re-melt the affected area. As the wax melts, you can then use this opportunity to add more molten wax and fill in the depression, effectively repairing the damage.
How long should I let my candle cool before using it?
After pouring the melted wax into the candle mold, allow it to cool and harden completely. This process can take several hours, so be patient! To guarantee a smooth first burn and prevent any potential problems, it’s recommended to wait at least 24 hours before lighting your candle for the first time. This allows the wax to set properly, ensuring a stable and even flame.
Can I reuse teacups that have had candles in them before?
Reusing teacups for new candles is a great way to give old items a new life. To do so, thoroughly clean the cup to ensure it’s free of any residual wax or wick fragments from previous uses. This will prevent any potential contamination and allow you to create a high-quality candle with minimal mess.
How do I clean wax spills from my workspace?
When dealing with spills of wax, it’s best to let them cool and harden completely before attempting to remove the residue. This approach helps prevent scratches on surrounding surfaces. Once hardened, you can safely scrape off the excess wax using a plastic tool or similar material. For any stubborn residue that remains, a soft cloth soaked in warm water with a mild soap solution is an effective cleaning method.
What’s the best way to extinguish a teacup candle?
When it’s time to put out your candle, employ a snuffer or softly blow out the flame, taking care not to disturb the wax. A more significant mistake would be to douse the flame with water, as this can lead to hot wax splashing everywhere. By committing these basic guidelines to memory, you’ll create stunning teacup candles that are sure to impress. As with any creative pursuit, having patience and paying attention to detail are essential qualities for achieving success.
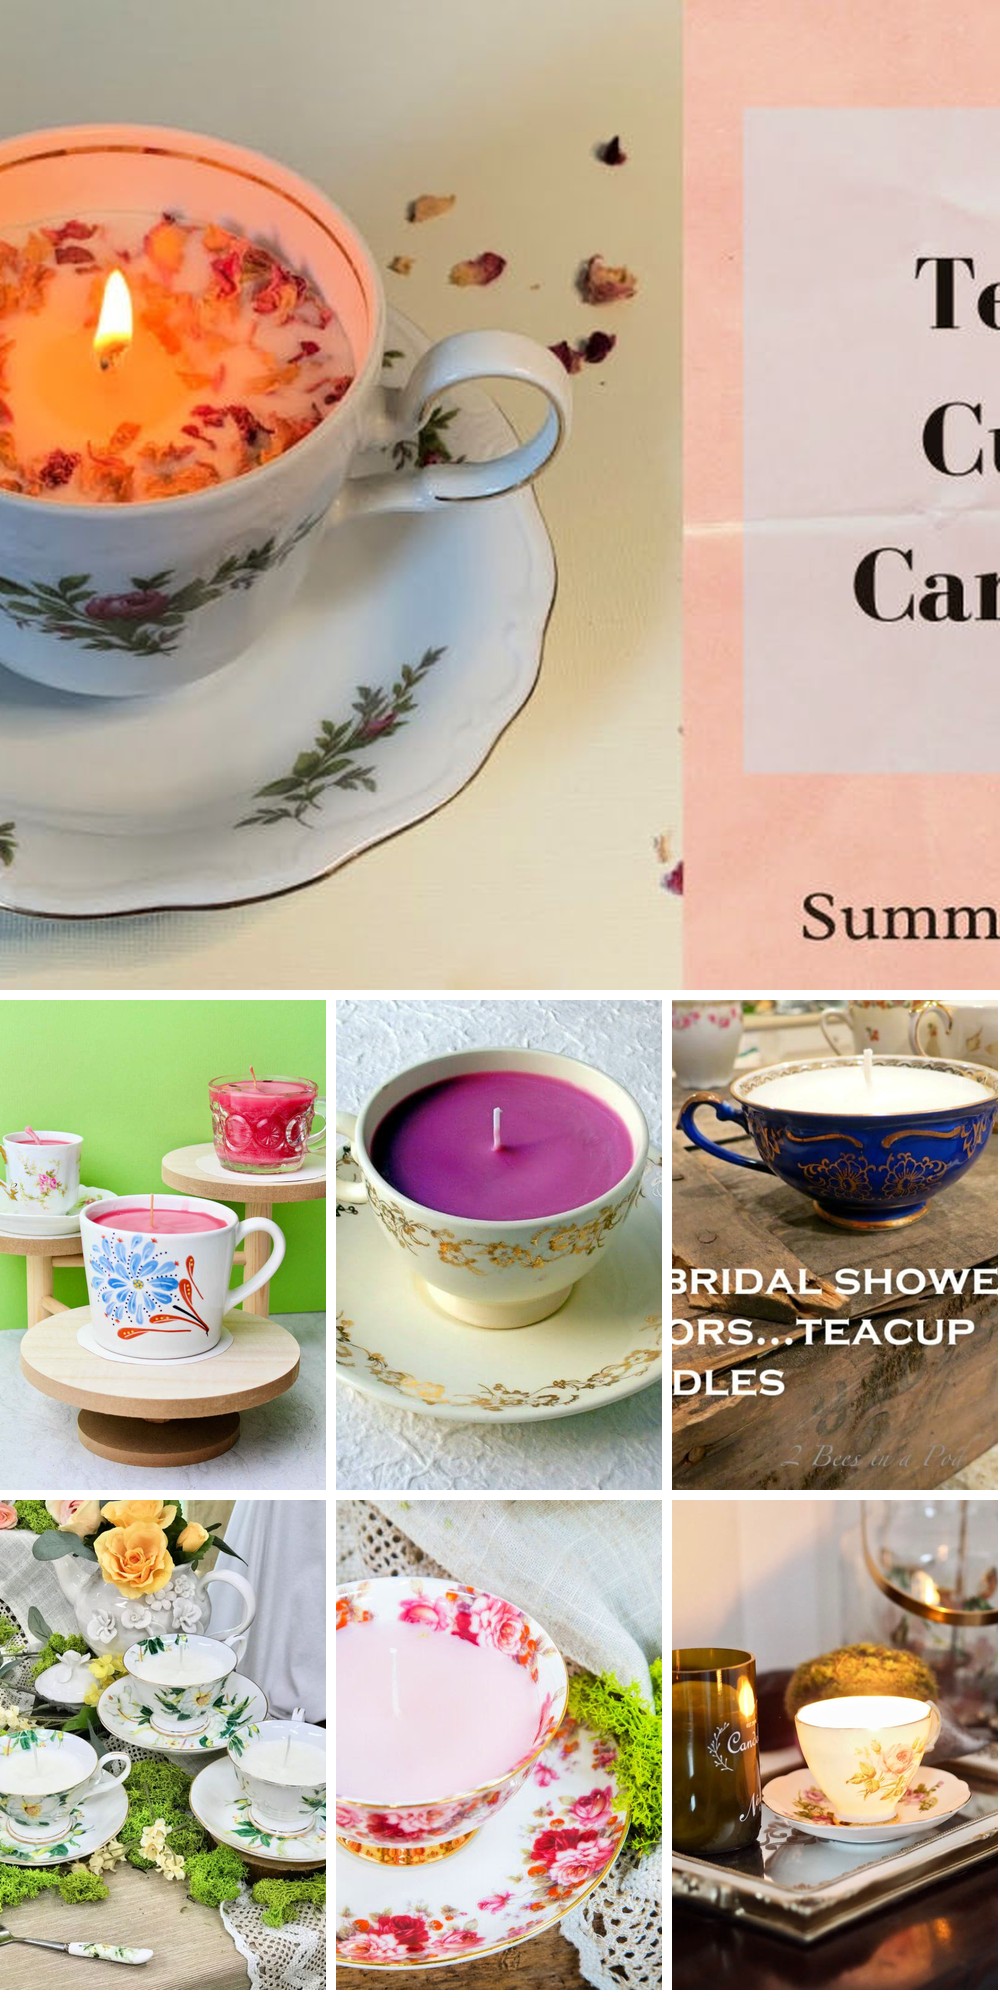
25 DIY Teacup Candles You Can Make at Home
Transform your living space into a warm and inviting oasis by creating stunning DIY teacup candles in the comfort of your own home. To get you started, we’ve curated a collection of 25 innovative tutorials that will guide you through every step of the process, from selecting the perfect tea cups to adding your personal touch with unique fragrance blends.
Homemade Tea Cup Candles
Want to breathe new life into thrift store teacups? One creative way is to transform them into stunning DIY candles, ideal for gifting or adding a touch of elegance to your home decor. This project not only rescues old teacups from the thrift shop fate but also invites you to participate in a straightforward and enjoyable candle-making process.
To get started, you’ll need just a few simple supplies: candle wax, wicks, an optional fragrance, and some old crayons for adding color to the melted wax. The entire process, from securing the wick to the teacup to allowing the wax to harden, should take around 30 minutes plus any additional time it takes for the wax to fully dry.
This unique crafting project offers a budget-friendly and satisfying way to create thoughtful gifts or decorative pieces for your home. So why not dip into the world of DIY and discover the joy of repurposing old teacups into beautiful candles? The result is sure to be nothing short of delightful.
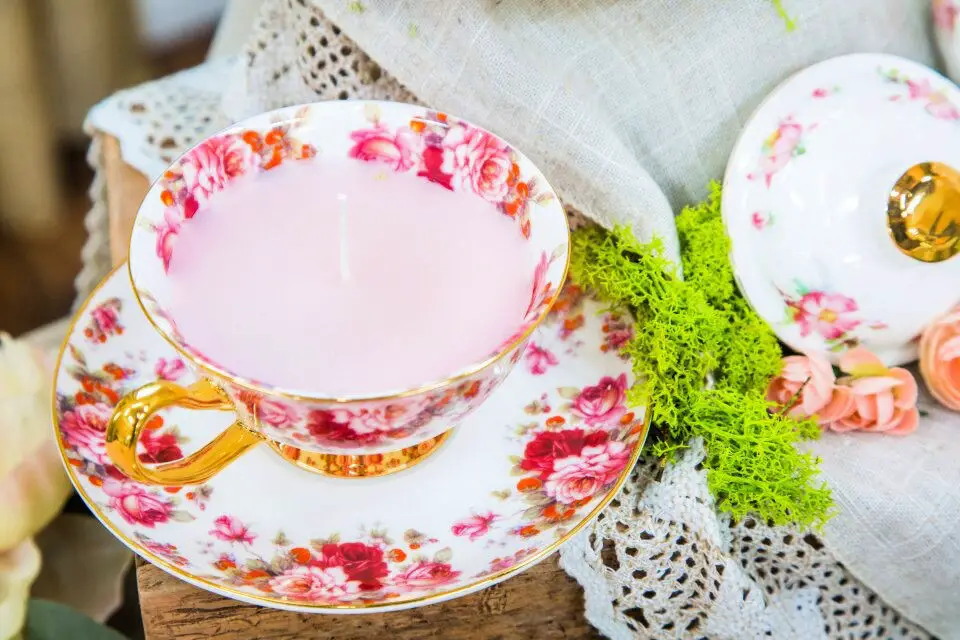
How to Make Vintage Style Teacup Candle
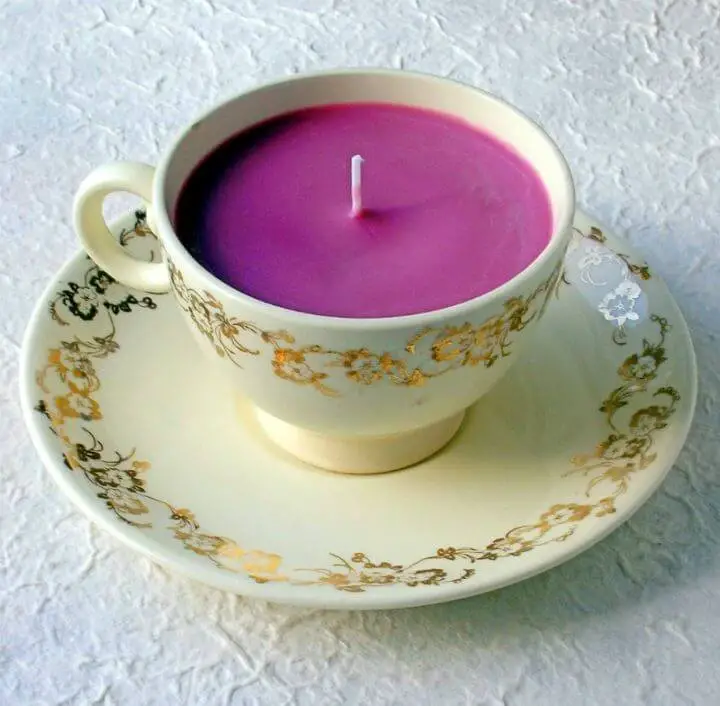
Step into the captivating realm of DIY crafting with this enchanting Teacup Candles project! For those who delight in candle-making, this innovative idea transforms ordinary teacups into unique decorative pieces. By harnessing soy wax’s eco-friendly properties and slower burn rate, you’ll create a one-of-a-kind piece that not only adds charm to your home decor but also serves as a thoughtful gift for vintage enthusiasts or party props. Simply combine thrift store teacups with a metal jug, wax pellets, fragrance oil, and super-concentrated colorant to craft these captivating creations.
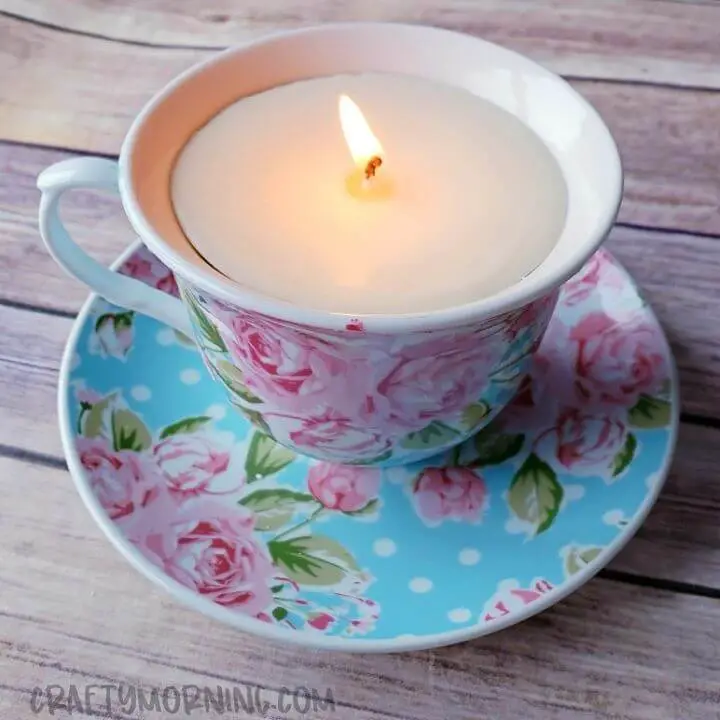
DIY Teacup Candles for Mother’s Day Gift
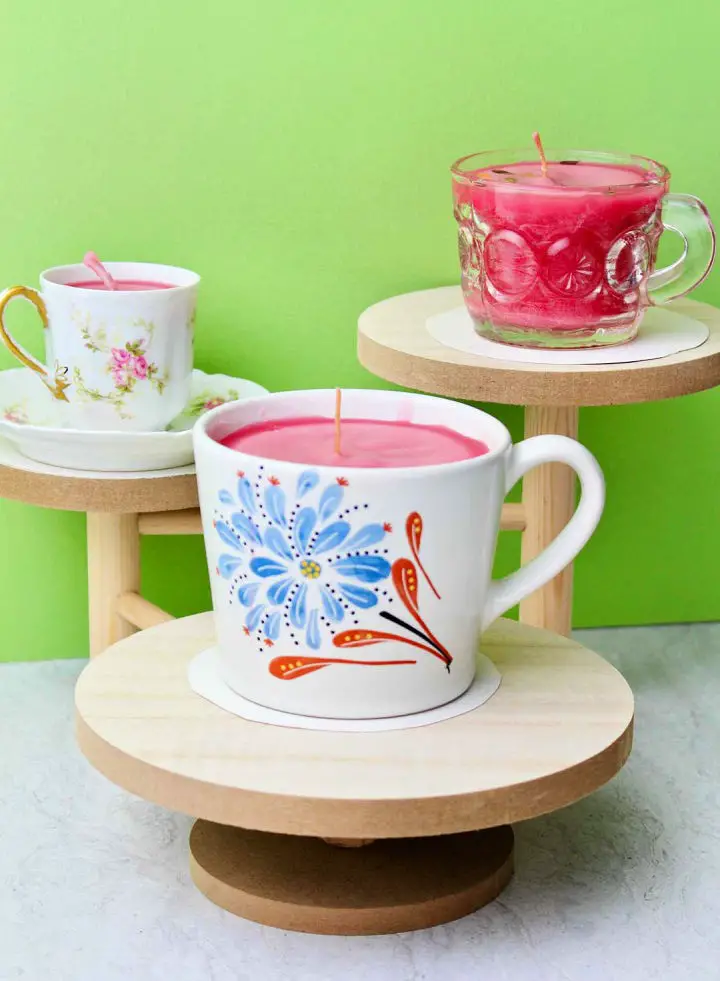
Transform ordinary tea cups into extraordinary gifts by crafting DIY candles that exude warmth and personality. Whether you’re celebrating Mother’s Day or another special occasion, this charming project is a thoughtful way to show appreciation for someone special. Start by selecting your favorite teacup or glass punch cup, then melt wax in a double boiler to create the perfect foundation for your candle. Don’t forget to prepare your wick and add a dash of personality with optional coloring and scents. As you work on this project, you’ll not only be creating something beautiful, but also upcycling household items and making memories that will last long after the candle is gone.
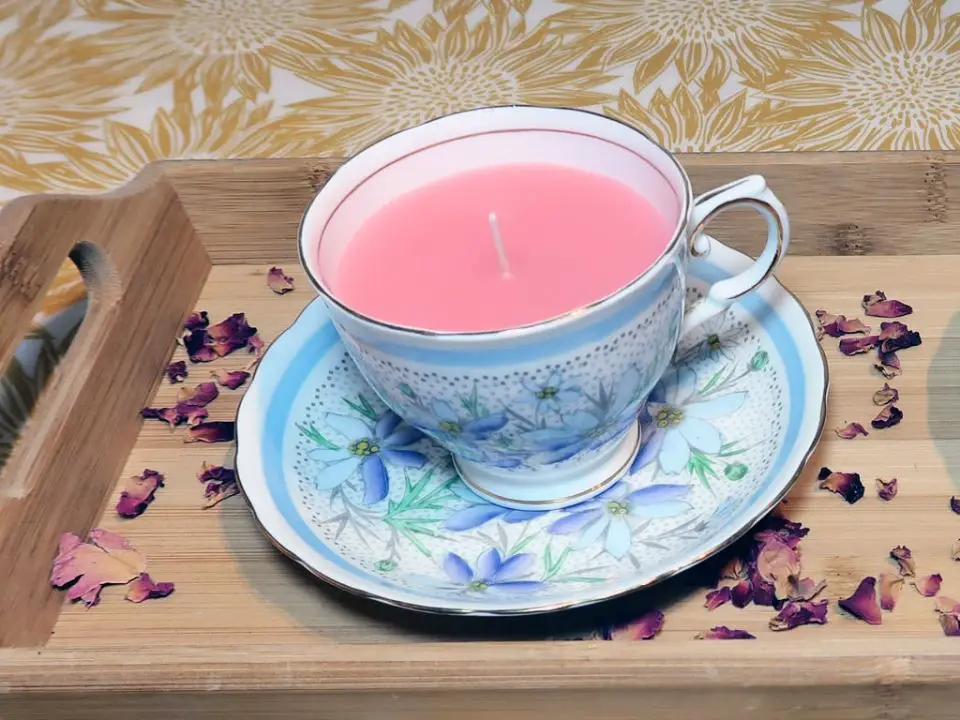
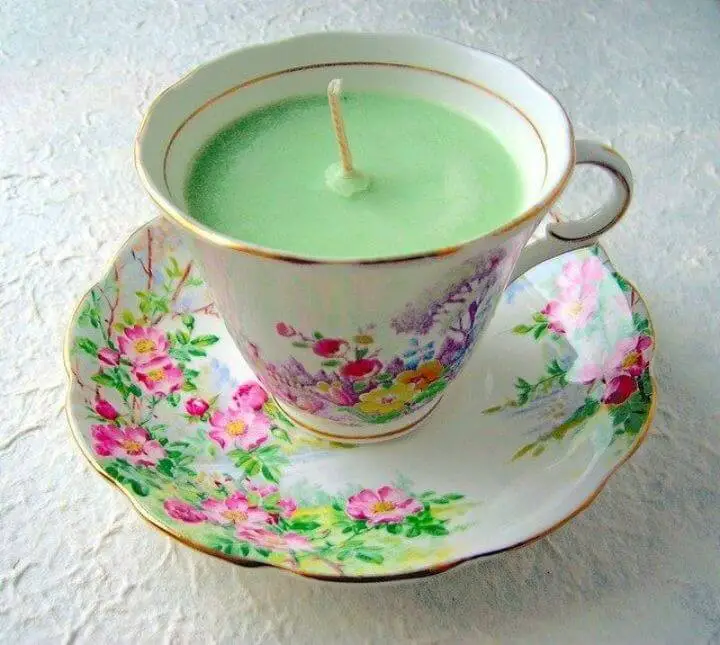
How to Make Tea Cup Candles at Home
Transport yourself to the opulence of royal weddings by infusing your home with the enchanting ambiance of DIY teacup candles. This delightful crafting project enables you to create exquisite, princess-inspired candles within vintage teacups. Combining candle wax flakes, wicks, and optional fragrance oils for a lingering aroma, this project offers an immersive and engaging creative experience. As you follow our step-by-step guide, prioritize caution and attention to detail to ensure a successful outcome. Remember to limit the burning time of these container candles and select suitable oils for scenting purposes. The secrets to mastering this tea cup candle-making process lie in patience and precision. Allow yourself to be swept away by the magic of crafting your own regal, mood-enhancing teacup candles!
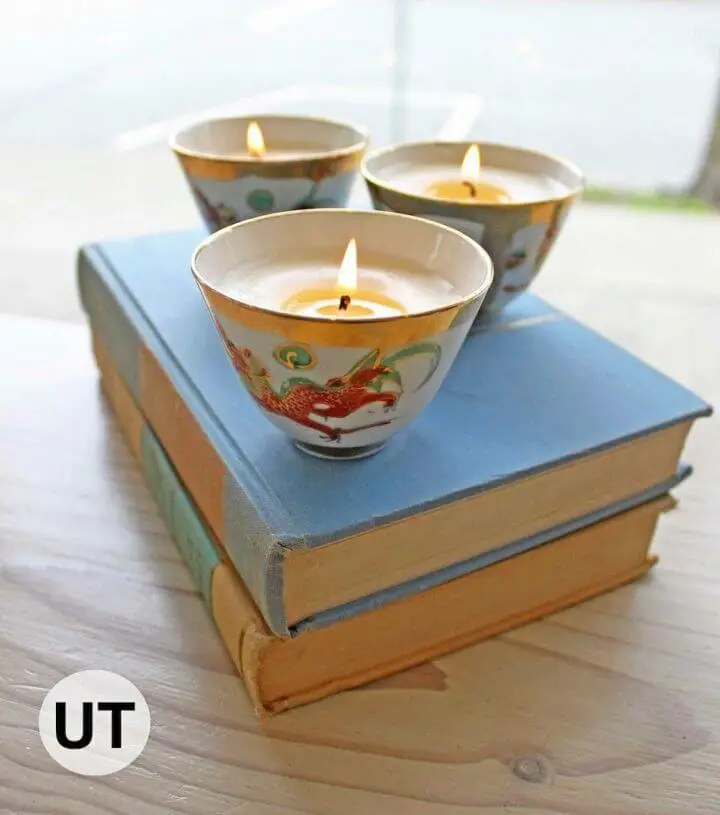
DIY Wood Wick Teacup Candles

Elevate your next event with the enchanting charm of DIY teacup candles. Whether you’re planning a whimsical bridal shower, a Mother’s Day celebration, or a quaint tea party, these one-of-a-kind candles will transport your guests to a world of wonder and nostalgia.
Inspired by the beloved characters Mrs. Potts and Chip from Beauty and the Beast, these wood-wick candles feature a warm crackle reminiscent of a cozy fireside. To create this magical effect, you’ll need a few simple supplies: mismatched teacups and saucers, wooden candle wicks, candle wax, powdered candle dye, and essential oils for fragrance.
Not only can these unique candles serve as party favors or prizes for shower games, but they also make captivating additions to any gathering. With this straightforward guide, you’ll be able to craft a set of beautiful teacup candles that will leave your guests in awe. So why wait? Start creating today and get ready to captivate everyone at your next celebration!
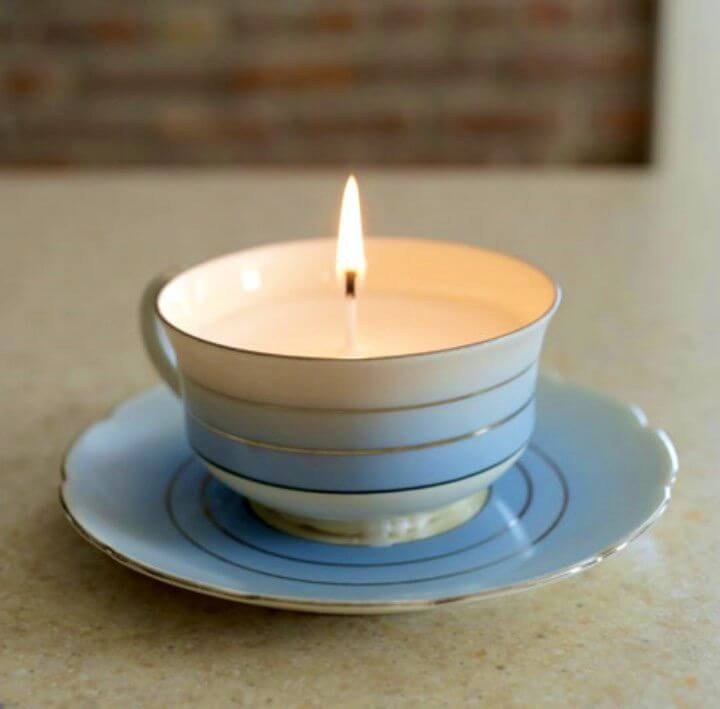
Make Your Own Teacup Candle
Transform your home into a cozy haven by crafting eco-friendly candles using vintage containers and soy wax. This engaging DIY project combines creativity and sustainability, making it an ideal activity for bonding with loved ones. As you melt the wax, pour it into unique containers, and add your favorite fragrances, you’ll discover the joy of creating something truly personalized. With clear step-by-step instructions, you can easily craft candles that not only brighten your space but also fill it with a calming ambiance. Imagine the delight of walking into a room filled with the warm glow and inviting aroma of your very own handmade candles – it’s the perfect way to add a touch of personality to any setting.
Turn Ordinary Tea Cups Into Candles
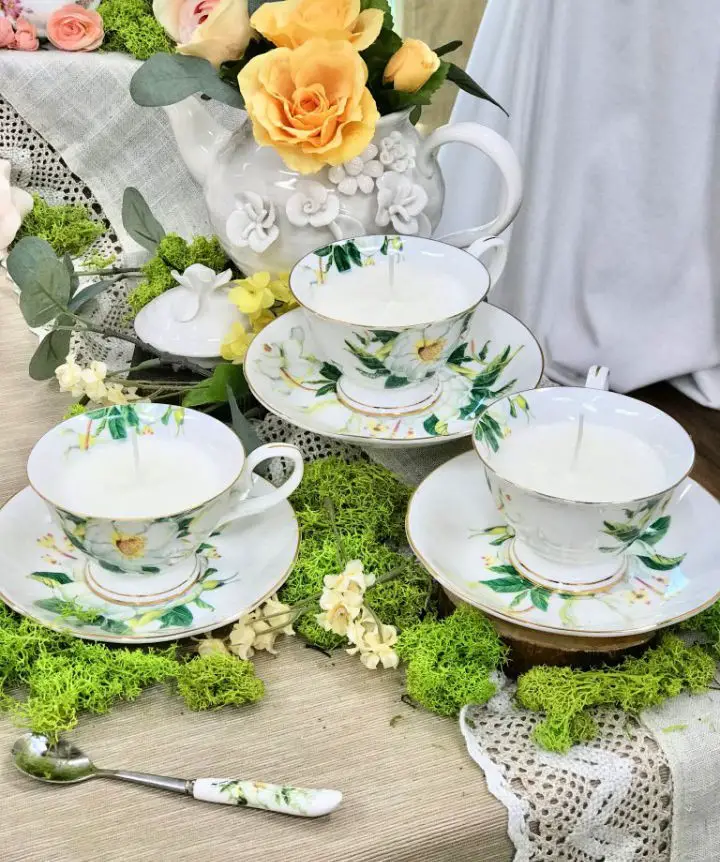
Transform plain tea cups into charming custom-scented candles that exude a personal touch to your home décor. By combining vintage tea cups, candle wax flakes, and popsicle sticks, you can create one-of-a-kind candle creations that invite relaxation and conversation. Follow simple, step-by-step guidelines to measure and melt the wax accurately, secure wicks safely, and infuse your chosen fragrance and coloring. This hands-on project emphasizes meticulous attention to detail, including scent-to-wax ratios and safety precautions. The end result is a warm ambiance and a sense of fulfillment. Perfect for DIY enthusiasts, candle-makers, or those seeking distinctive home decor solutions.
DIY Teacup Candles for Lighting on Roof
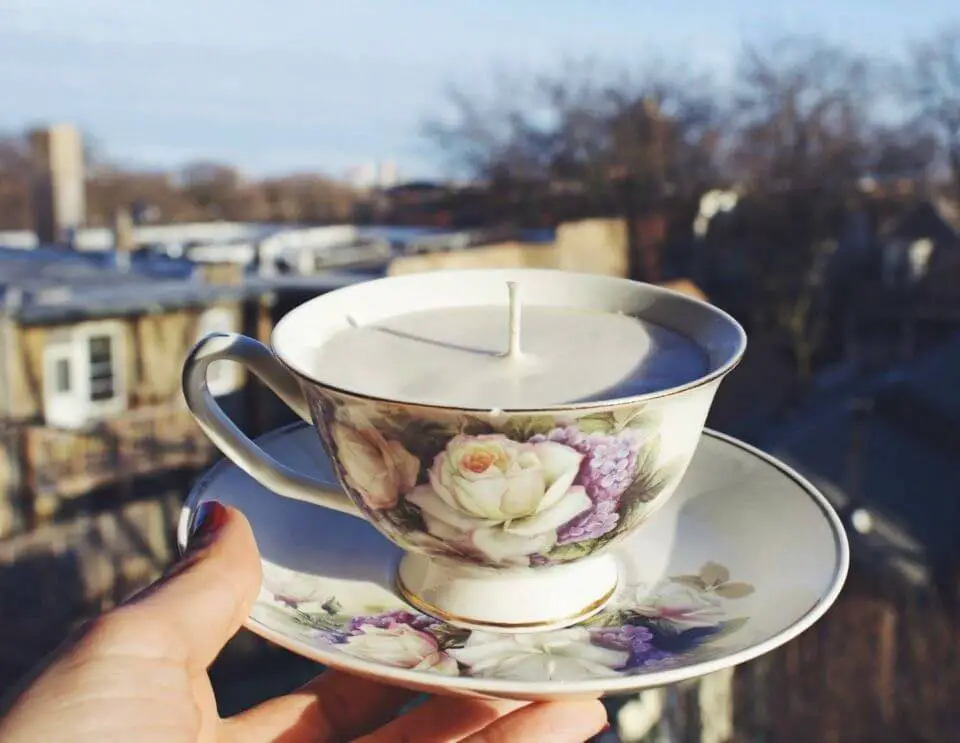
Transform your home or gift-giving with a delightful DIY teacup candle project! This fun and straightforward endeavor takes ordinary teacups and transforms them into charming, functional candles. To create this whimsical item in the comfort of your own kitchen, you’ll need a clean teacup, a wick, and wax chips. The key to a balanced burn lies in a well-centered wick, while a clothespin or skewers can provide stability during the process. As the melted wax solidifies, ensure a cool environment speeds up the formation of the candle’s body. Finally, trim the wick to complete your masterpiece. These endearing, handmade teacup candles infuse any space with a warm sense of nostalgia and coziness.
Caramel Latte Tea Cup Candle
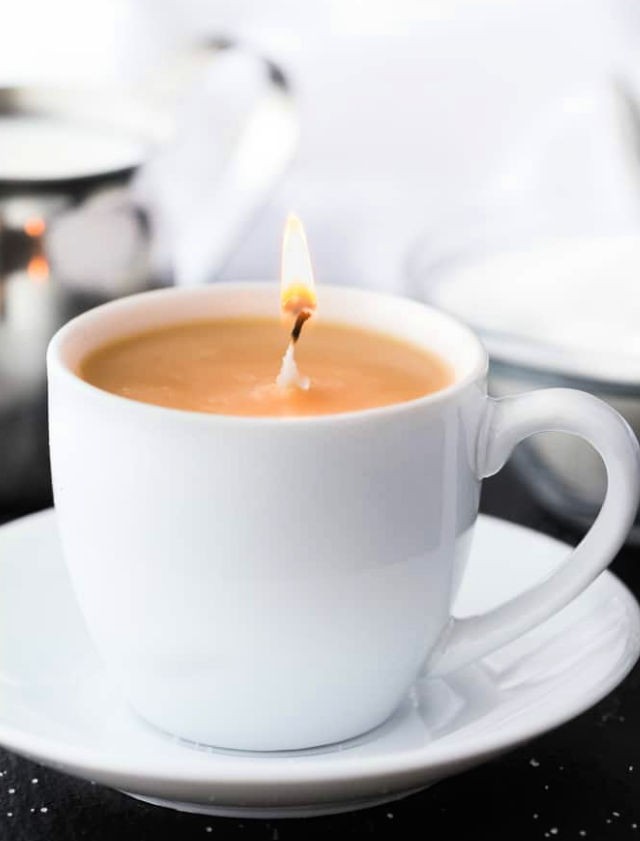
Transform your space with the alluring scent of a DIY caramel latte teacup candle. This charming project requires minimal time and effort, making it an excellent gift for coffee aficionados. To get started, gather the following essential materials: soy wax flakes, caramel liquid dye, caramel Latte fragrance oil, a candle wick, and wax adhesive. Additionally, you’ll need a teacup of your choice to serve as the base for this delightful creation.
The process is straightforward, involving three primary steps:
Firstly, melt the soy wax flakes until they reach a smooth, consistent consistency.
Secondly, add the caramel liquid dye and caramel Latte fragrance oil to the melted wax, stirring well to combine.
Finally, carefully pour the concoction into your chosen teacup, taking care not to overflow.
As the candle burns, the pleasant aroma of caramel latte will waft through the air, making this unique creation a lovely addition to any room. The simplicity of the technique belies its impressive result – a thoughtful and fragrant gift that’s sure to delight anyone on your list.
DIY Earl Grey Tea Cup Candle
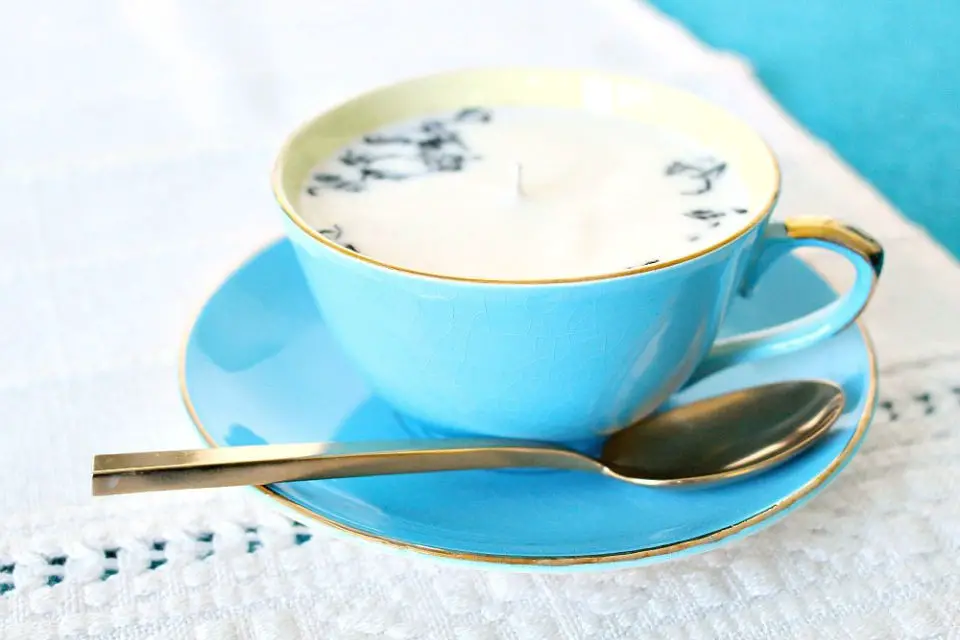
Indulge in the soothing process of transforming vintage tea cups into one-of-a-kind DIY Earl Grey tea cup candles. This project reinvigorates the charm of yesteryear, elevating humble tea cups into elegant home decor pieces that double as functional candle holders. The journey begins with a medley of accessible materials: soy wax flakes, wicks, bergamot essential oil, and of course, a vintage teacup. As you work your magic, the sweet aroma of Earl Grey tea leaves wafts through the air, infusing the creation with an unmistakable essence. By embracing this tactile activity, you’ll discover a calming respite from the world’s chaos, as the gentle warmth of creativity and the soothing scent of Earl Grey mingle to transport you to a tranquil state.
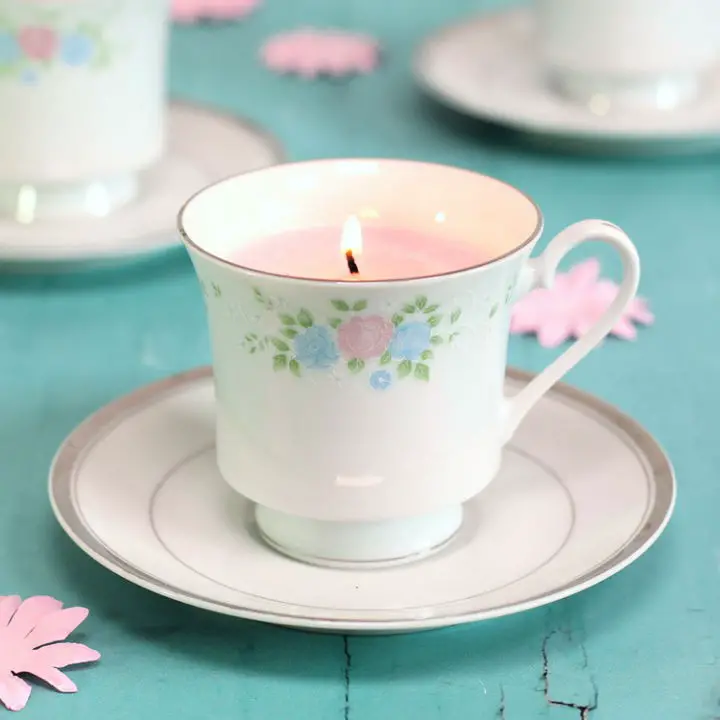
Easy DIY Teacup Candle
Give your treasured china teacups a fresh lease on life by transforming them into stunning DIY candles. This creative endeavor not only breathes new purpose into your cherished collection but also adds an elegant ambiance to any room when lit.
By repurposing old china cups, choosing from a variety of waxes (soy, paraffin, or beeswax), selecting the perfect wick and essential oils for your personal fragrance preference, and using a double boiler to melt the wax, you can craft these exquisite candles right in the comfort of your own home.
This project not only serves as a unique way to upcycle china but also makes for a thoughtful, custom-made gift. As you bask in the soft, comforting glow of your teacup candles, you’ll appreciate the beauty of giving new life to something old and special.
Soy Teacup Candle Tutorial for Beginners
Indulge in the warmth of nostalgia with handmade soy candles infused with the soft glow of vintage elegance. Transforming thrift store teacups into unique candles makes for an exceptional gift-giving experience, whether it’s for Mother’s Day, birthdays, or simply to express gratitude.
Embrace your creative side by repurposing everyday supplies like soy wax flakes, candle wicks, and essential oils to craft a beautiful, aromatic candle. This process involves securing the wick within the teacup, melting and pouring the wax, and adding your preferred fragrance.
Unleash your creativity by selecting a meaningful teacup and pairing it with a personalized scent that resonates with the recipient’s tastes. From the calming essence of lavender to the invigorating zest of citrus, create a bespoke candle that not only delights the senses but also serves as a charming decorative piece.
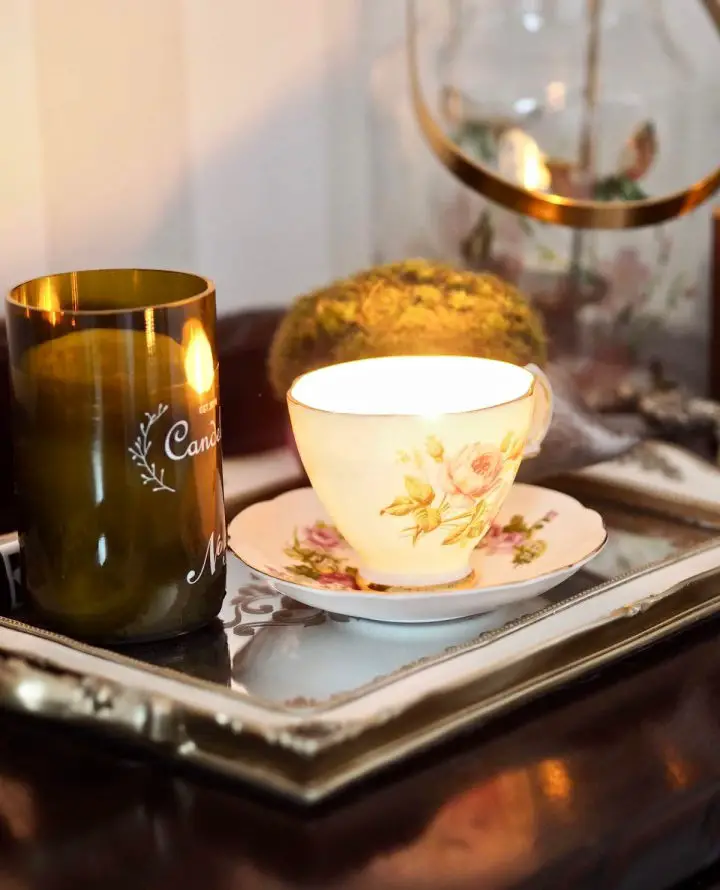
How to Make Vintage Teacup Candles

Step into the world of DIY crafting with Vintage Teacup Candles, a project that seamlessly blends nostalgia and warmth into your home decor. With an impressive array of benefits including affordability and simplicity, this endeavour only requires a few basic supplies like vintage teacups, eco-friendly candle wax flakes, wooden kabob skewer sticks, and everyday household items such as a stove and scissors. The process unfolds with three distinct stages: first, creating the wooden wick supports for each teacup; secondly, melting the wax flakes into a smooth, consistent consistency; and finally, carefully pouring the molten wax into the teacups before allowing it to cool and solidify into a fully-formed candle. As you complete this DIY project, you’ll be rewarded with the unique experience of lighting these self-crafted candles that radiate warmth and vintage charm. Beyond illuminating your home, these candles can also serve as exquisite, personalized gifts or wonderful additions to special events like bridal showers, infusing a touch of vintage flair into any occasion. And at just $40, this DIY project offers an unparalleled value proposition, allowing you to add character to your space without sacrificing your wallet.
How to Make Teacup Candles
Transform vintage or simple teacups into exquisite candle holders that exude charm and sophistication. The process is remarkably straightforward, requiring soy candle wax flakes, candle wicks, wooden skewers, a pouring pot, tape, and optional additions of candle dye or essential oils. By following a step-by-step guide that involves boiling, simmering, stirring, and pouring the wax, you’ll be able to create a one-of-a-kind teacup candle for each cup. Simply fill each teacup to the brim with carefully scented and colored wax, allow it to harden, and then trim the wick to perfection. The end result is an aesthetically pleasing and uniquely charming teacup candle that brings a touch of elegance to any decor.
DIY Candle in a Tea Cup
Transform a vintage tea cup into a stunning candle holder with this easy and budget-friendly DIY project. This unique creation makes for a thoughtful personalized gift or a beautiful decorative element for your home. To get started, secure the wick within the teacup using a pencil or skewer. Next, melt your chosen candle on a warmer and carefully pour the melted wax into the teacup, ensuring the wick remains centered. Allow it to cool and solidify before trimming the wick. This charming DIY teacup candle is the perfect way to upcycle old candles and vintage tea cups, showcasing your creativity and innovative spirit.
Make Teacup Candles for a Gift
Transform thrifted teacups and old candles into unique, personalized creations by crafting DIY teacup candles. This budget-friendly project combines upcycling with creativity, making it an excellent way to spend a relaxing afternoon. By repurposing vintage teacups and reusing wax, you’ll not only create charming gifts but also contribute to reducing waste. When lit, the candles emit a warm, comforting glow and inviting aroma, instantly enhancing any space’s ambiance. This heartwarming project is perfect for making meaningful presents on any occasion, and the joy of gifting a handmade item truly can’t be beat.
Repurposed Teacup Candle
Transform your space with vintage charm by creating DIY teacup candles! This unique project turns thrift store finds into stunning decorative pieces that not only add warmth but also infuse character into your surroundings. To get started, select a teacup and saucer set that speaks to you from a variety of designs available. Next, gather the necessary materials, including candle wax flakes, wicks, and optional scents or colors. With basic tools like chopsticks, tape, scissors, and a double boiler at your disposal, mastering this craft is easier than you think. Simply set up your wick, melt and scent the wax to your liking, pour it into the teacup, and let it cool until firm. The result is a beautiful, handmade candle that makes for a thoughtful gift with a personalized touch. Create a warm and inviting ambiance in your home with these easy-to-make teacup candles.
Make Candles Using Teacups
Transform vintage teacups into stunning home décor with a unique DIY project: making teacup candles using soy wax. Not only are these eco-friendly due to the renewable nature of soybeans, but they also emit a clean, soft burn that effortlessly elevates any room’s ambiance.
To get started, gather your materials: vintage teacups, soy wax, a double boiler (or a smaller pot inside a larger one), candle wicks, wick supports, and essential oils for a pleasant fragrance. As you work on this project, you’ll not only be creating functional candles but also enjoying an affordable and enjoyable DIY experience. Consider sharing your handmade teacup candles as thoughtful gifts or adding them to your living space for a touch of personalized charm.
DIY Teacup Candle for the Party
Delve into the world of DIY candle crafting by creating teacup candles that are perfect for elevating any tea party or making unique handmade gifts. Contrary to popular notion, candle making is a fun and accessible process that fosters creativity and bonding. All you need to get started is a candle-making kit and some thrifted teacups. The kit provides everything necessary to create your first set of homemade candles. Simply melt soy flakes, add color and scent, then pour the mixture into teacups and watch it transform into a beautiful spring green. In case of any accidental spills, Liquid Dawn Soap makes quick work of cleanup. Allow your creativity and space to be illuminated by these charming teacup candles.
Homemade Stress Relief Teacup Candles

Let the warmth and tranquility of handmade DIY teacup candles envelop you this holiday season. By combining thrifted teacups, soy wax flakes, wax dye, essential oils, pre-waxed wicks and clips, and common kitchen tools, you can create a soothing blend of lemongrass and lavender that doubles as a stress-reliever and a delicate decor piece. The gentle glow of these candles adds relaxation to your bath time routine and elegance to any tea table. Not only are they a perfect way to unwind and de-stress, but they also make thoughtful and unique gifts for friends and family. As the aroma of lemongrass and lavender fills the air, it’s as if you’re sharing a piece of yourself with loved ones. With some patience and creativity, start making your own teacup candles today and embark on a stress-free holiday season.
Teacup Candles Bridal Shower Favors
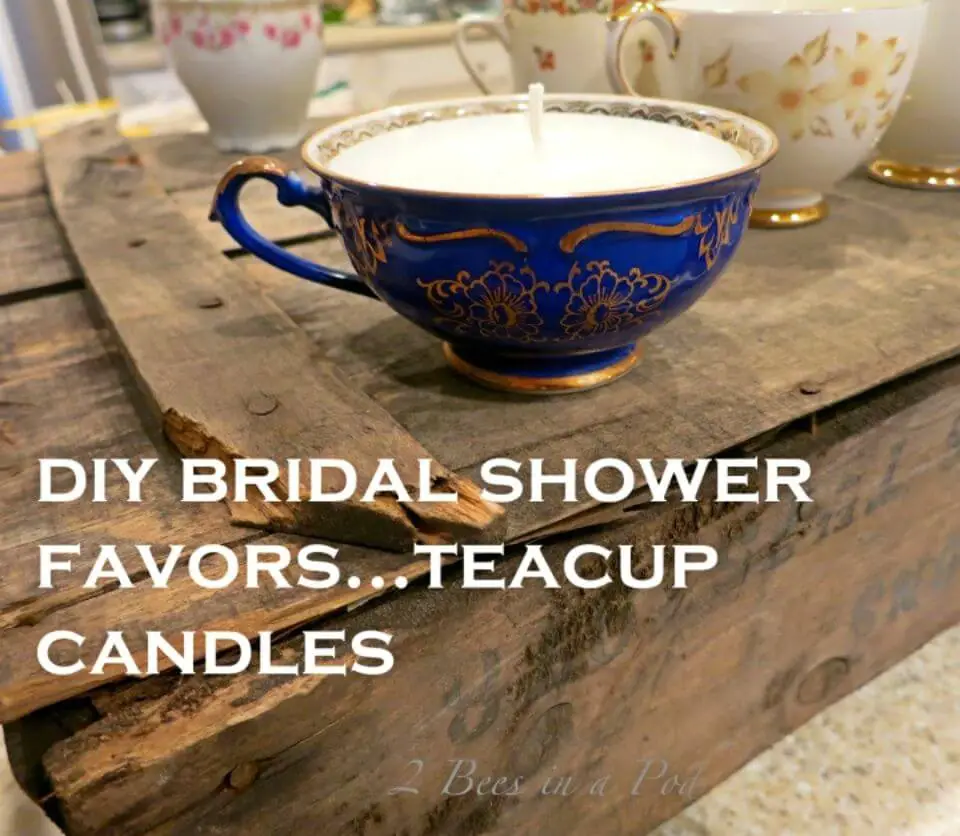
Create one-of-a-kind, vintage-inspired party favors by crafting DIY teacup candles that will delight your guests. To get started, gather thrifted teacups, candlewick, weights, and wax. With these simple materials, you can craft personalized keepsakes that become treasured mementos.The process is straightforward: anchor a piece of candlewick in each teacup using weights and cocktail stirrers, then carefully pour melted wax around it. Allow the wax to dry completely, and your unique teacup candles will be ready to illuminate any celebration! These thoughtful favors double as stunning decorative items, adding a touch of vintage elegance to your events.
Do It Yourself Teacup Candles
Transforming thrift store finds or household items into unique décor pieces can be a delightful experience. This DIY project promises success, even for those who have faced disappointment in previous craft endeavors. By repurposing and remodeling a candle into a teacup with just a few materials like a double-boiler, liquid candle scent, wooden dowels, and patience, you can create striking décor pieces that add a charming touch to your home. To ensure success, make sure the cup is heat-safe and crack-free. This activity is an excellent way to express creativity and makes for a wonderful pastime. With personalized, fragrant teacup candles, you can brighten up your spaces and take a break from the mundane.
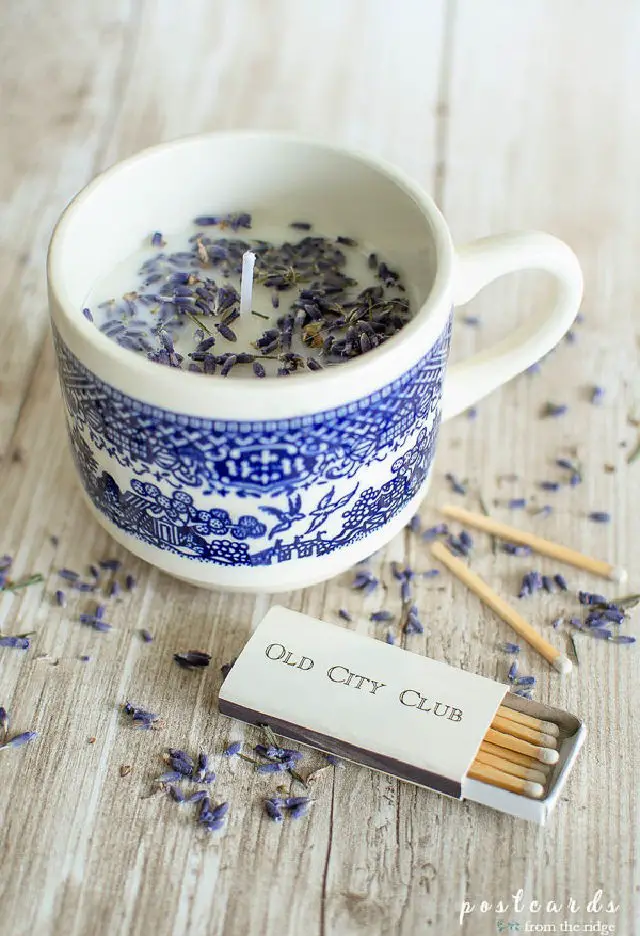
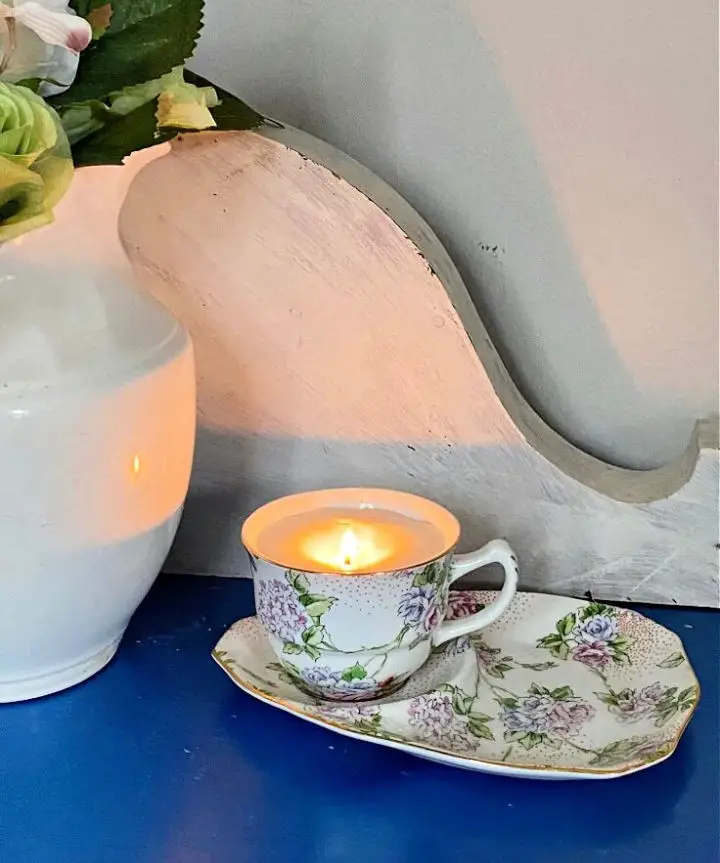
Making Tea Cup Candles With Rose Petals
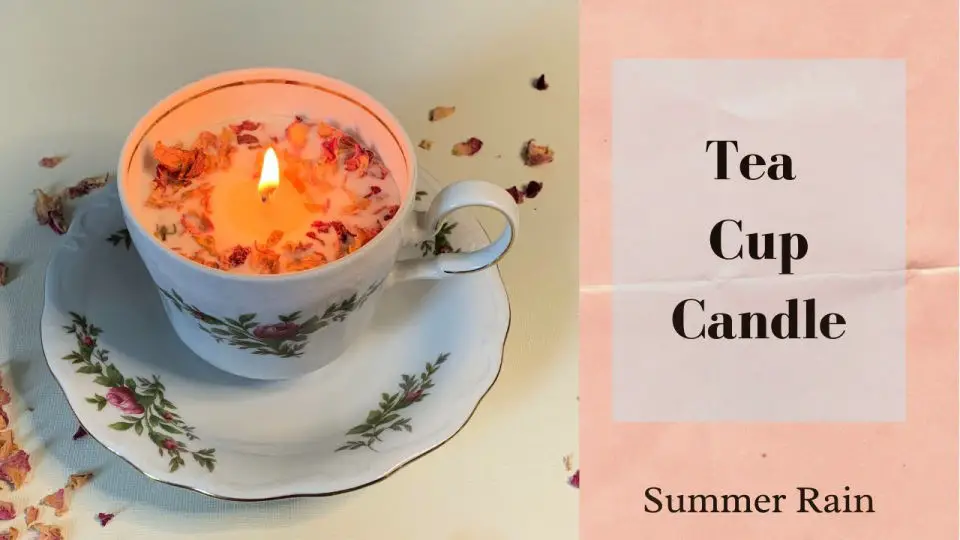
Imagine being enveloped in a cozy atmosphere, where the soft glow of teacup candles and the delicate fragrance of rose petals create a sense of serenity. This delightful DIY project transforms simple teacups into radiant decorative pieces that exude vintage charm and can be used as unique gifts. As you embark on this hands-on venture, you’ll need a few basic materials like a pouring pot, thermometer, hot glue gun, and ingredients such as soy wax, Love and Sunshine fragrance oil, a candle wick, and rose petals. The process is remarkably straightforward; simply determine the wax quantity, secure the wick, and finish by sprinkling a touch of rose petals on top. As you light your newly crafted teacup candle, its gentle flame will fill the space with warmth and an air of sophistication, making it perfect for any setting.
How to Make Your Own Teacup Candles
Step into the world of creative self-expression as you embark on a thrilling DIY adventure that transforms ordinary objects into extraordinary works of art. This captivating journey begins with the art of making soy wax teacup candles, where you’ll combine soy wax flakes, teacups, a thermometer, and essential oils to create beautiful, functional home accents. The process unfolds like this: first, melt the soy wax to release its natural fragrance; next, infuse it with the essence of your preferred scents; finally, shape it into a stunning centerpiece that adds warmth and ambiance to any room.As you’re immersed in this tactile experience, you’ll also discover how to breathe new life into discarded china plates by transforming them into striking clocks. This innovative DIY project requires only a few simple materials and tools, yet yields a one-of-a-kind decorative piece that adds a personal touch to your home’s décor. As the digital world recedes, your creativity ignites, and you start crafting a more beautiful, personalized space that reflects your unique style and flair.
Easy Way to Make a Teacup Candle
Transform your living space with the warmth and sophistication of vintage teacups paired with the soft glow of candles. This DIY project allows you to upcycle and personalize your area or create a meaningful gift by merging the elegance of antique teaware with the ambiance of scented candles.
Utilize a candle-making kit and select vintage teacups to craft unique, aromatic pieces that can be tailored to individual preferences by adding a few drops of your preferred essential oil for a pleasant fragrance. This project is perfect for various occasions, such as bridal showers or holiday gifts, and adds an affordable and creative touch to your home decor.
Whether you’re looking to create a warm atmosphere or gift something special, this teacup candle-making project is sure to delight.
Conclusion:

The art of crafting 25 DIY teacup candles at home is a harmonious blend of creativity, tradition, and sustainability. The union of elegant teacups and warm candlelight creates an atmosphere of refinement and comfort in any setting. With this guide, you’ve gained valuable insights into selecting eco-friendly waxes, the significance of the candle-making process, and how to infuse your creations with personal touches. Moreover, we’ve emphasized crucial safety guidelines to ensure a seamless and enjoyable crafting experience. By embracing these principles and indulging in the joy of candle-making, you’ll be empowered to transform ordinary teacups into extraordinary, fragrant, and eco-conscious decor pieces that illuminate your home with a warm glow and a dash of creativity.
