For precise and accurate cuts in your woodworking projects, a DIY table saw sled is an invaluable tool. To help you achieve professional-grade results without breaking the bank, we’ve curated 25 free and easy-to-follow plans that cater to diverse needs and skill levels. Whether you’re looking for precision-cut designs or versatile options with specialty features, our collection has something for everyone. But before you start building, it’s essential to troubleshoot common issues like inaccurate cuts, binding sleds, and rough bottoms. Our comprehensive guide also covers sustainable construction practices, maintenance tips, and frequently asked questions to ensure you get the most out of your table saw sled. By following these plans and learning from our expertise, you’ll be able to create your own precision tools for smoother operations and more accurate cuts. Join us as we explore the world of DIY sled construction, maintenance, and troubleshooting, and let’s take your woodworking skills to the next level today!
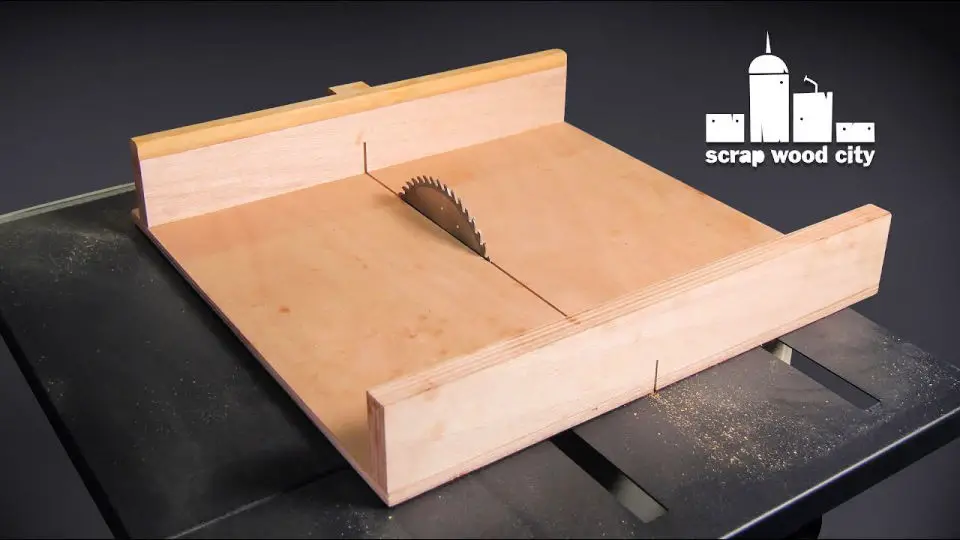
How to Build a Simple Table Saw Sled with FREE Plans
Discover the ease of creating a fundamental table saw sled by following these straightforward steps and utilizing the complimentary blueprints provided, allowing you to unlock new possibilities in your woodworking endeavors.
Materials and Tools Needed
To build a sled, you’ll need a range of materials and tools. Start with the base, which will be made from half-inch plywood. The fences that guide your wood will be constructed from three-quarter inch plywood, while the runners that allow the sled to glide smoothly over the workbench will be crafted from hardwood. To bring everything together, you’ll also need some basic woodworking supplies like wood glue and clamps. For fastening the pieces in place, you’ll require screws – specifically number 6, five-eighths inch ones. At this point, you can start to see the sled taking shape. To help you achieve the desired curves and cuts, you’ll need access to a variety of power tools, including a miter saw, table saw, router, and jigsaw. For more precise measurements, keep handy a set of calipers, as well as a carpenter’s square and feeler gauge. Finally, be prepared to smooth out any rough edges with some sandpaper and make any necessary adjustments with a drill. To add an extra layer of precision to your project, consider investing in a Kreg mini track and some Woodcraft supplies for creating a stop block.
Steps to Build Your Table Saw Sled
Preparing the Sled Base and Fences
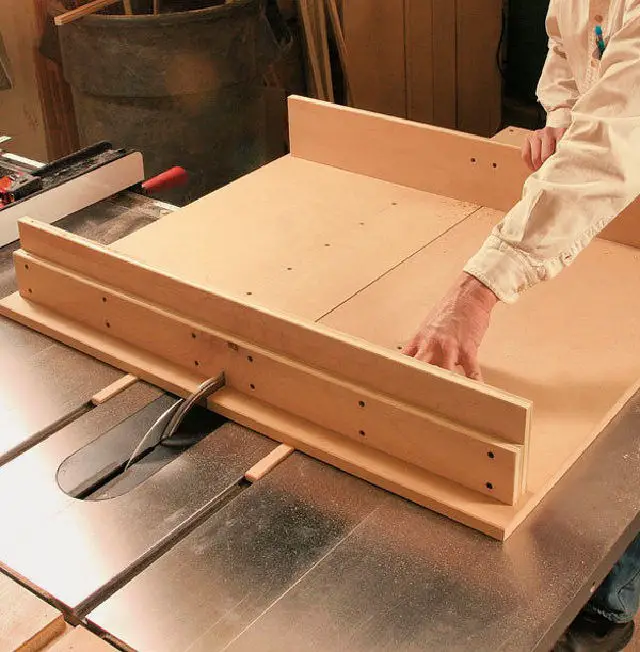
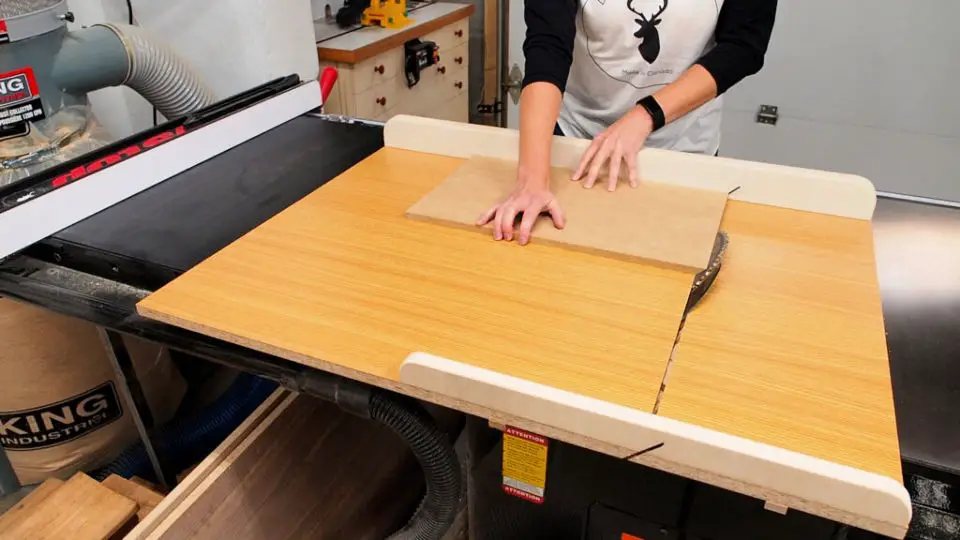
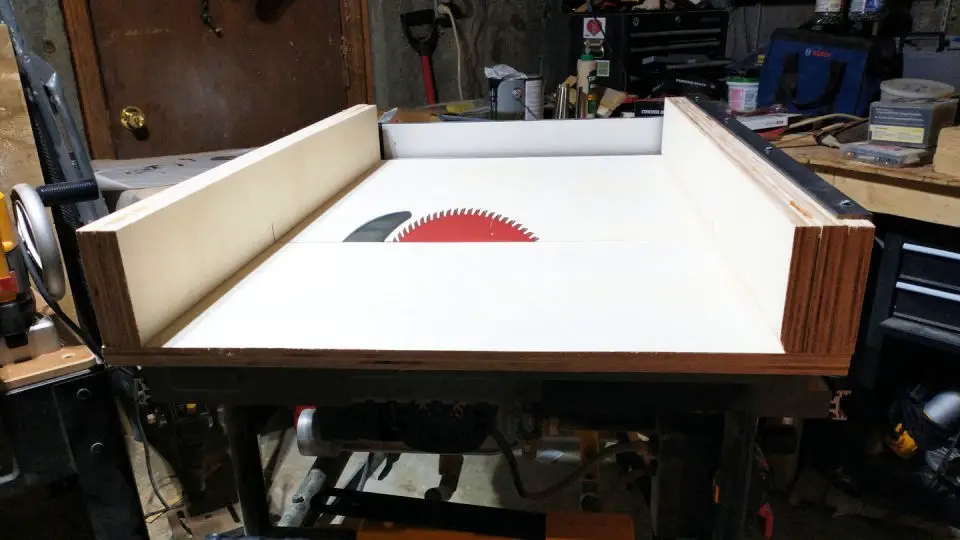
To begin building your sled base, start by cutting a 36×24 inch piece of half-inch plywood. This size offers a good balance between capacity and manageability. For the fences, use 3/4 inch plywood and double it to create sturdy barriers. To ensure straightness and avoid bowing, glue two strips of plywood together for each fence. Once prepared, attach the fences to the sled base using a strong adhesive and screws.
Next, focus on shaping and attaching the runners. These should fit snugly in your table saw’s miter slots, so craft them from hardwood for added durability. Adjust the thickness and width of the runners to accommodate your saw’s specifications, then secure them to the sled base using glue and screws.
Assembling the Sled
Once you’ve prepared the base of your sled, it’s time to bring the entire structure together. Start by attaching the front and back fences using screws. To guarantee accurate cuts, make sure the back fence is precisely aligned with the cut line on your sled. This attention to detail will pay off in the long run. Next, focus on adding a handhold to the end of your sled for improved handling. Use a combination of a Forstner bit and jigsaw to create two comfortable grips that will make it easier to maneuver your sled. As you assemble all the components, double-check that everything is securely fastened in place. The runners, in particular, should be designed to allow smooth movement without any unnecessary play or resistance.
Integrating the Stop Block
To get started with your Kreg Mini Track, first embed the track into the back fence, leaving some space around the blade cut line to ensure zero clearance. Begin by creating a slot for the track using a router, then securely fasten it in place. Once the track is set up, focus on crafting a stop block that fits snugly within the track. This crucial component will enable you to make precise and repeatable cuts, just like the video tutorial instructs.
Squaring the Fence
To achieve a seamless back fence, utilize the five-cut method to refine the squareness of the final product. By employing this technique, you’ll ensure that each cut is both precise and consistent throughout its entire length, resulting in a smooth and even finish.
Adding Safety Features
When setting up your sled for use, take an essential precautionary measure by installing a safety block that covers the blade’s exit point. This simple step significantly reduces the risk of accidental contact between your hands and the blade, ensuring a safer and more controlled cutting experience.
Finishing Touches
To complete the wooden project, it’s essential to ensure that every edge and surface is smooth and free from any splinters or rough patches. This can be achieved by thoroughly sanding each area. Once you’ve done this, consider applying a finish of your choice to provide an added layer of protection for the wood.
Video Tutorial
To take your understanding of building a table saw sled to the next level, I highly recommend pairing this written guide with a step-by-step video tutorial. FixThisBuildThat’s YouTube video provides a dynamic visual guide that not only complements the techniques discussed here but also offers an engaging and easy-to-follow format.
Design Variations for Your DIY Table Saw Sled
Building a DIY table saw sled requires a tailored approach, as one size does not accommodate all projects. The ideal design depends on the type of projects you undertake and the specific requirements they pose. For instance, if precision is crucial, you may need a sled designed to minimize variability in your cuts. Alternatively, if versatility is key, a multi-purpose sled can help you tackle various tasks. Similarly, certain types of cuts may require specialized features. Here, we’ll delve into diverse design variations that enable you to customize your sled according to your woodworking needs and preferences.
Precision-Cut Sled
The Miter Saw’s design boasts several key features that make it an indispensable tool in any woodworking enthusiast’s arsenal. The adjustable fence allows for minute adjustments to the cutting angle, granting you precise control over your cuts. Accurate measurement scales, clearly marked and easy to read, eliminate the need for constant re-measuring, freeing you up to focus on the task at hand. Additionally, the saw’s hold downs or clamps securely fasten your workpiece in place, minimizing the risk of kickback and ensuring a safe working environment. These features combine to make the Miter Saw an ideal choice for intricate projects where precision is paramount.
Versatile Sled
The versatility of this woodworking sled is one of its standout features. Its interchangeable inserts allow for seamless switching between various materials, ensuring that you can work on any project without worrying about damaging the sled itself. Additionally, the integrated T-tracks provide a flexible platform for attaching jigs and accessories, giving you the freedom to try out new techniques and ideas.One of the most practical aspects of this design is its foldable nature. This feature not only saves valuable storage space when the sled is not in use, but also makes it easy to transport or store in tight quarters. With a range of projects and materials at your fingertips, you’re encouraged to experiment with new woodworking techniques, fostering creativity and innovation.
Specialty-Cut Sled
The most notable features of this sled include its wide base, which is designed to accommodate larger workpieces when making dado cuts. Additionally, the miter slots ensure that angled cuts are both consistent and precise. Furthermore, a built-in dust collection system keeps your workspace clean and unobstructed, allowing you to focus on the task at hand.This sled is specifically tailored for specific cuts like dados, rabbets, or miters, making it an essential tool for any woodworker looking to enhance efficiency and safety when tackling specialized woodworking tasks.
Troubleshooting Common Issues with Your DIY Table Saw Sled
When the DIY table saw sled fails to deliver, it’s natural to feel frustrated. However, many of these issues can be resolved with straightforward fixes. To get your project back on track, this section will walk you through troubleshooting common problems that may arise.
Inaccurate Cuts
When it comes to making precise cuts, one common issue that can lead to inaccuracies is an improperly positioned or secured fence. To rectify this, start by verifying that your fence is square to the blade and make any necessary adjustments. Additionally, take a moment to check if your miter bars are securely fastened. Loose miter bars can cause the fence to wobble, resulting in uneven cuts. By tightening these bars, you’ll be able to achieve a more stable and accurate cutting experience.
Sled Binding
When it comes to getting your sled to glide effortlessly, you’ll want to tackle two key issues: friction and alignment. Start by applying a coat of paste wax to the runners, which will significantly reduce the amount of drag they experience as they move along the snow. Next, make sure the runners are properly aligned with the miter slots, ensuring that there’s no unevenness or wobbling that could throw off your sled’s performance. By addressing these two factors, you’ll be able to get a smooth ride and enjoy the thrill of sledding to its fullest.
Rough Bottoms
When you’re working with wood, it’s common to encounter issues with rough or chipped cuts. To overcome this problem, there are a few simple solutions you can try. First, consider using a zero clearance insert. This type of insert is designed to support the wood fibers as they’re being cut, helping to reduce tear-out and promote smoother cuts. Another potential culprit behind rough cuts is a dull blade. If your saw blade is worn out or failing to provide a clean cut, it’s likely to cause chipping or tearing at the bottom of your cuts. To resolve this issue, you can either replace the blade with a new one or take the time to sharpen the existing one.
Sustainability in DIY Table Saw Sled Construction
Crafting a table saw sled that is both eco-friendly and socially responsible can have a profound impact on multiple fronts. Not only does it contribute to a more sustainable future, but it also reflects positively on one’s personal values and sense of community.
Material Selection
When it comes to incorporating eco-friendly materials into your project, a great place to start is by considering the type of wood you use. One option is to opt for recycled wood, such as reclaimed lumber or plywood, which reduces waste and conserves natural resources. Additionally, look for wood from certified sustainable sources, where forests are managed responsibly to maintain their health and biodiversity. This not only helps to minimize the environmental impact of your project but also supports responsible forestry practices.
End-of-Life
When it comes time to repurpose an old sled, consider giving back to your community by donating it to local schools or community workshops. Alternatively, disassemble the sled and reuse its components in another project or recycle the materials to minimize waste.
Maintenance Tips for Your DIY Table Saw Sled
Maintaining your DIY table saw sled is vital for its continued performance and safety. To keep it in top shape, follow these essential maintenance tips: Ensure the sled’s surface remains clean and free from debris by wiping it down with a cloth after each use. Regularly inspect the sled’s fence for any signs of wear or damage, and make repairs as needed to prevent inaccuracies. Keep the sled’s rails well-lubricated to reduce friction and prevent sticking. Perform routine cleaning of the saw blade and surrounding area to prevent dust buildup. Finally, store your sled in a dry, secure location when not in use to prevent damage from moisture or unauthorized access.
Regular Cleaning
To ensure optimal performance and longevity, it’s essential to maintain your sled after each use. Start by removing any accumulated sawdust from the surface and runners using a soft brush or cloth. This simple step will help prevent damage caused by abrasive particles and keep your sled running smoothly. Next, take a dry cloth and wipe down the entire sled to remove any dirt, debris, or moisture that may have accumulated during use. By consistently cleaning your sled, you’ll be able to enjoy a faster, more reliable ride with reduced risk of wear and tear.
Periodic Checks
During monthly inspections, thoroughly examine the sled and its components to identify any signs of wear, damage, or malfunction. A crucial aspect of this process is checking for wear on the sled itself as well as the runners. Additionally, take the time to tighten all screws and bolts to guarantee a secure and reliable operation. This regular maintenance not only helps prevent potential issues but also ensures the continued performance and longevity of your equipment.
Blade Care
To ensure optimal cutting performance, it’s essential to maintain a well-maintained saw blade. This can be achieved by following two simple steps. Firstly, make sure the blade is free from debris and residue, which can impair its sharpness and lead to rust formation. Regularly cleaning the blade will prevent these issues and keep your saw in top condition. Additionally, it’s crucial to sharpen or replace the blade when necessary. A dull blade can cause poor cutting performance and potentially damage the surrounding material. By implementing these practices, you’ll be able to achieve precise cuts with ease.
Storage
To ensure your sled remains in top condition, consider storing it in a dry area when not in use. This will help prevent warping and rust from developing. In addition to the dry environment, apply a cover to shield it from dust and any lingering moisture that may be present.
FAQs About DIY Table Saw Sleds
When embarking on a DIY table saw sled project, various queries often arise. To alleviate uncertainty and ensure a seamless experience, we’ve compiled answers to some of the most commonly asked questions, providing guidance on both construction and usage.
What is a table saw sled used for?
When it comes to maximizing the accuracy and security of your table saw operations, a table saw sled is an indispensable accessory. This woodworking tool excels at facilitating precise crosscuts, manageable small-piece cuts, and speedy repetitive cuts, thereby streamlining your overall workflow.
How do I ensure my sled is square to the blade?
When preparing your sled for optimal performance, start by verifying its alignment with the blade using a trusted square tool. Adjust the fence accordingly and then secure it in place. To confirm the adjustments are accurate, perform test cuts on a piece of scrap wood before proceeding with actual cutting.
What materials are best for building a sled?
When it comes to building a sled, plywood is a top pick among enthusiasts due to its exceptional stability and resilience. To take your project to the next level, consider incorporating hardwood into the design, specifically for the runners and fence, as this will greatly contribute to the overall durability and performance of your sled.
Can I make angled cuts with a sled?
For precision and accuracy, you can modify the fence to achieve angled cuts, or opt for a specialized sled designed exclusively for miter cuts. This flexibility allows for more control over the cutting process, ensuring a high degree of accuracy and quality in your finished projects.
How do I prevent the sled from wobbling?
To guarantee optimal performance, it is crucial that the runners slide smoothly into the miter slots without any hindrances. One effective way to achieve this is by applying a thin layer of paste wax to the runners themselves. This simple step can significantly reduce the friction between the runners and the miter slots, allowing for a seamless and efficient woodworking experience.
What safety precautions should I take when using a sled?
When working with blades, it’s crucial to prioritize personal safety above all else. To achieve this, implement a strict no-touch policy when handling the blade, utilizing hold-down clamps to firmly grasp your workpiece in place, and don’t forget to protect your eyes by wearing appropriate safety goggles at all times.
How often should I maintain my sled?
To maintain the optimal performance of your equipment, it’s essential to follow a regular maintenance routine. This should include a swift cleaning process after each use, as well as a more in-depth inspection once a month. During this time, pay close attention to signs of wear and ensure all parts are properly aligned. By taking these simple steps, you’ll be able to identify any potential issues early on and make the necessary adjustments to keep your equipment running smoothly.
Can I use a sled for dado cuts?
When building a sled for dado blade use, it’s essential to consider the width of the base in relation to the workpiece and the cut. A wider base allows you to securely support the material as you make your cuts, ensuring accuracy and precision.
How do I store my sled when not in use?
When storing your sled, it’s essential to choose a dry and flat surface that prevents warping. Additionally, consider covering it to safeguard against the accumulation of dust and moisture, ultimately preserving its condition for future use.
What can I do if my sled starts to stick during use?
To preserve the integrity of your sled’s performance, begin by thoroughly cleaning the entire unit. This includes removing any dirt or debris from the runners, where you’ll also apply a new coat of paste wax to ensure smooth gliding. Additionally, inspect the miter slots for any obstructions and carefully clean them out to guarantee precise alignment.
25 Free DIY Table Saw Sled Plans
Elevate your woodworking experience by gaining access to a comprehensive collection of 25 free DIY table saw sled plans. These meticulously crafted designs, accompanied by step-by-step guidance and downloadable templates, empower you to construct your very own precision-guided cutting system. Unlock the secrets to achieving flawless cuts and take your projects to the next level.
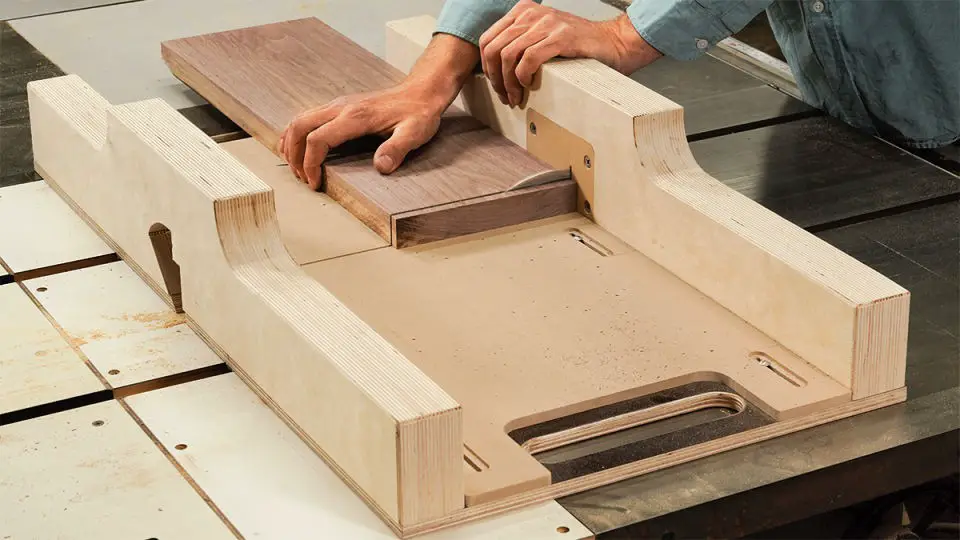
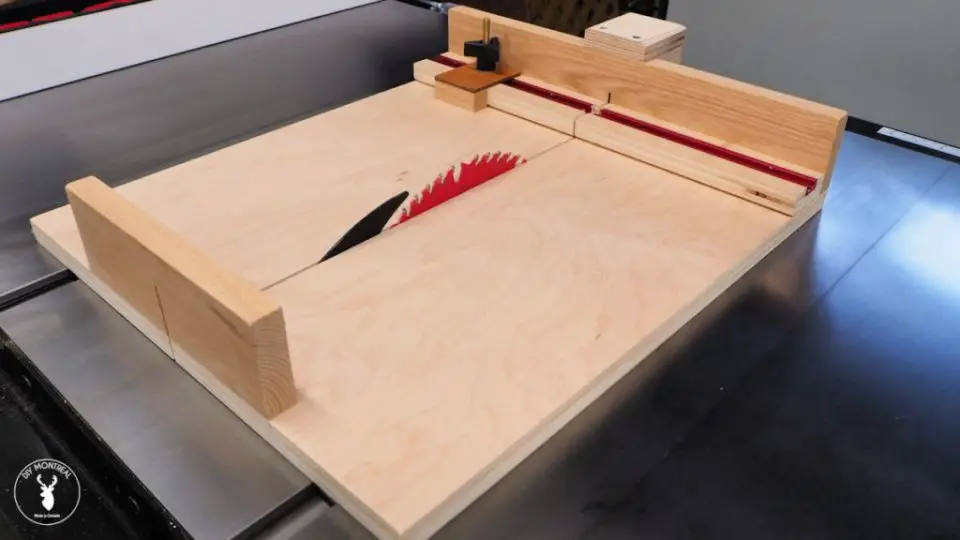
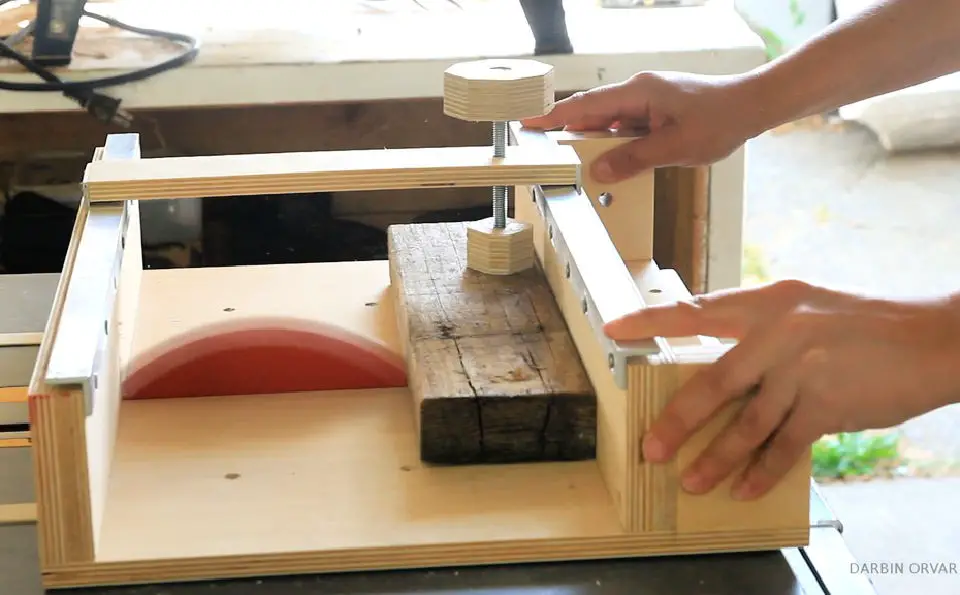
DIY Mini Table Saw Sled
To elevate their DIY projects, woodworkers can rely on a homemade mini table saw sled as an indispensable tool. Constructed from sturdy Baltic birch plywood, this precision-cutting device boasts a 32-inch long and 2-1/2 inch wide fence featuring a 3/4 inch by 3/16 inch channel for a stop block. The assembly process is straightforward, involving the gluing of the inner fence and finger saver block onto the base, followed by the outer fence components. A plywood block secures the stop block bolt, preventing rotation. Maple runners ensure a precise fit in miter slots, while a framing square against the table saw fence can be used to square the sled. A storage slot in the inner fence accommodates the stop block, and adding a measuring tape streamlines block location depending on blade thickness. For a step-by-step guide, consult the instructional video. This reliable and versatile table saw sled empowers woodworkers to achieve greater accuracy in their projects.
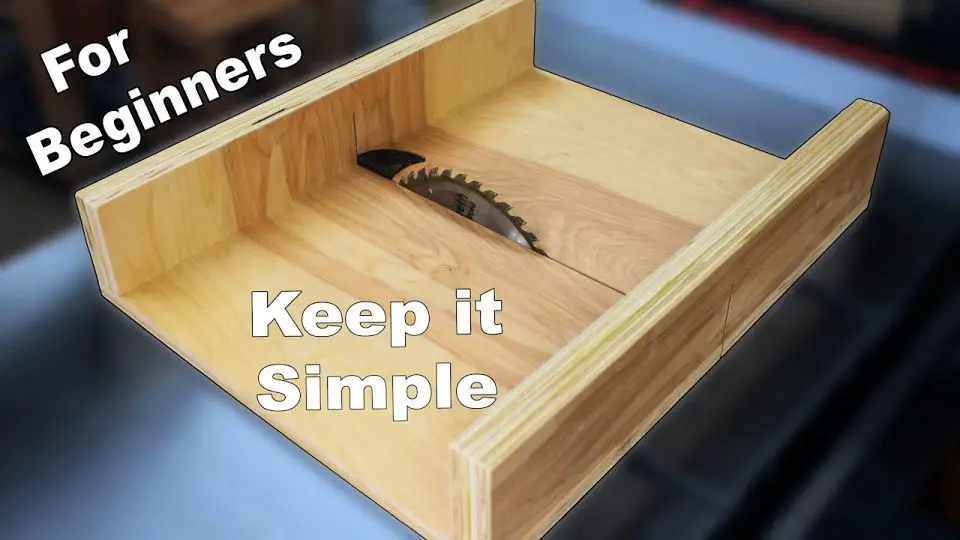
How to Build Wood Table Saw Sled
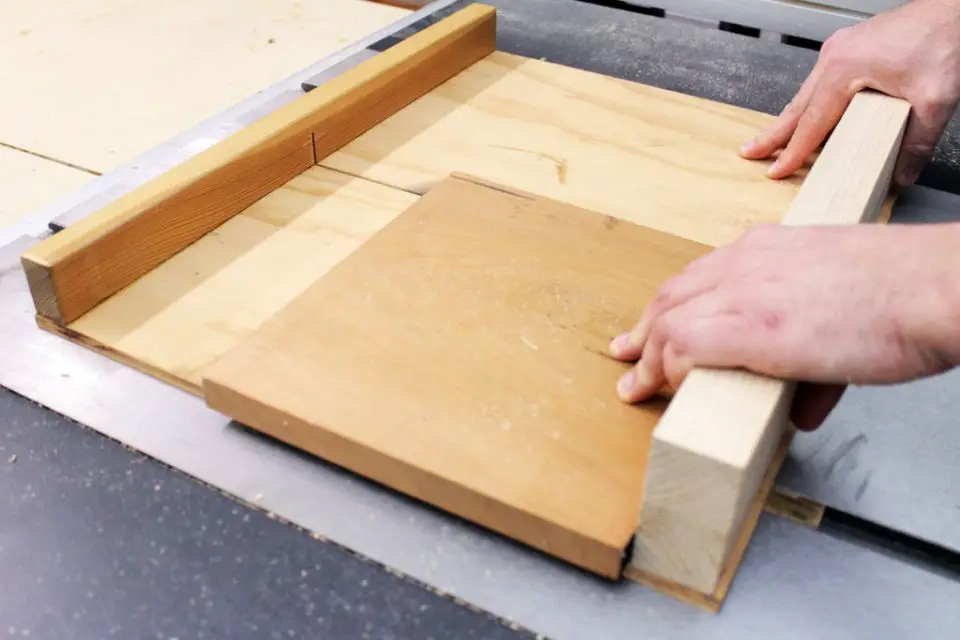
Crafting an accurate and safe crosscutting experience with a simple yet elegant table saw sled requires minimal materials, making it an accessible DIY project for beginners. With just plywood, wood glue, and straight hardwood scraps at your disposal, you can create a precise cutting tool that will elevate your woodworking skills and safeguard your fingers. By utilizing calipers and a tri-square, you’ll be able to ensure exact measurements and perfectly aligned cuts. Whether you’re new to table saws or seeking a hassle-free solution, this easy-to-make sled is designed to improve your cutting game and yield professional-level results.
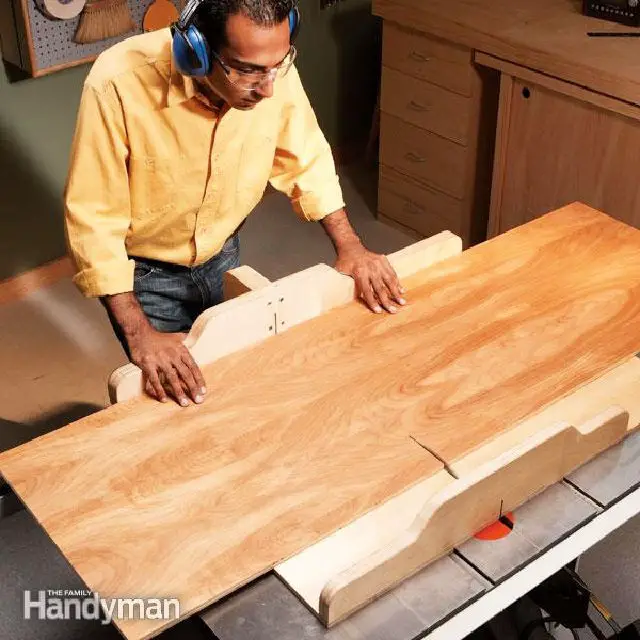
Build Your Own Table Saw Crosscut Sled
Transform your woodworking experience with these comprehensive DIY table saw sled plans designed for precision cutting and enhanced safety. By creating a custom-built crosscut sled, you’ll be able to achieve accurate, repeatable, and safe cuts on the table saw, minimizing the risk of accidents. This beginner-friendly project requires minimal expertise, making it accessible to woodworkers of all skill levels. The straightforward design can be constructed using common tools and materials, including 3/4-inch Baltic Birch Plywood, 3/4-inch MDF, 36- and 18-inch T-tracks, and thick CA glue. Follow the step-by-step instructions from installing the T-tracks to attaching the T-track to the fence to create a reliable and durable crosscut sled that will elevate your woodworking projects for years to come. With an estimated time investment of just half a day and a cost range of $100 to $200, you can achieve professional-grade results without breaking the bank.
Building a Table Saw Crosscut Sled
Discover a new level of precision in your woodworking projects with this game-changing DIY crosscut sled. Designed to minimize setup time and maximize accuracy, this innovative tool features a two-layered base and sliding panels that allow for effortless zero-clearance kerf refreshing, accommodating various blade configurations – whether angled or square. The replaceable insert plate on the front fence adds an extra layer of convenience, eliminating worries about splintery blowouts and imprecise cuts. This sled is engineered to provide unmatched accuracy and crisp edges for dadoes, miters, and crosscuts, making it a must-have addition to any woodworker’s arsenal. Constructed from durable G10 or phenolic plywood, this sled is built to last – whether you’re a seasoned expert or just starting out, join the ranks of woodworking enthusiasts who have revolutionized their crosscutting technique with this reliable and durable design.
How to Build Your Own Mini Table Saw Sled
Elevate your woodworking game by building a DIY mini sled for your table saw. This space-saving solution provides easy access to make precise cuts on smaller parts. Constructed with 3/4-inch plywood and a T-Track Kit, the sturdy sled is designed to fit seamlessly with your table saw. A step-by-step guide will walk you through cutting the lumber, creating the slot for the T-Track, assembling the sled fence, joining the fence to the base, installing threaded inserts, and more. To further enhance your experience, helpful tips and suggestions are included. For a visual guide, watch the accompanying video demonstration, and get ready to take your woodworking skills to the next level.
How to Make a Crosscut Sled for Table Saw
Transform your workshop by creating a DIY table crosscut saw sled using our curated plans. This reliable tool ensures accurate and consistent cuts, taking the guesswork out of your woodworking projects. To get started, gather the necessary materials: a 50x50cm 1cm thick plywood sheet or alternative base, two runner boards, two front and back fences, wood screws, wood glue, and basic tools like a drill with bits, a table saw, and a screwdriver. By following our step-by-step guide, you’ll construct a sturdy sled that enhances your woodworking capabilities and guarantees precise cuts every time you use your table saw.
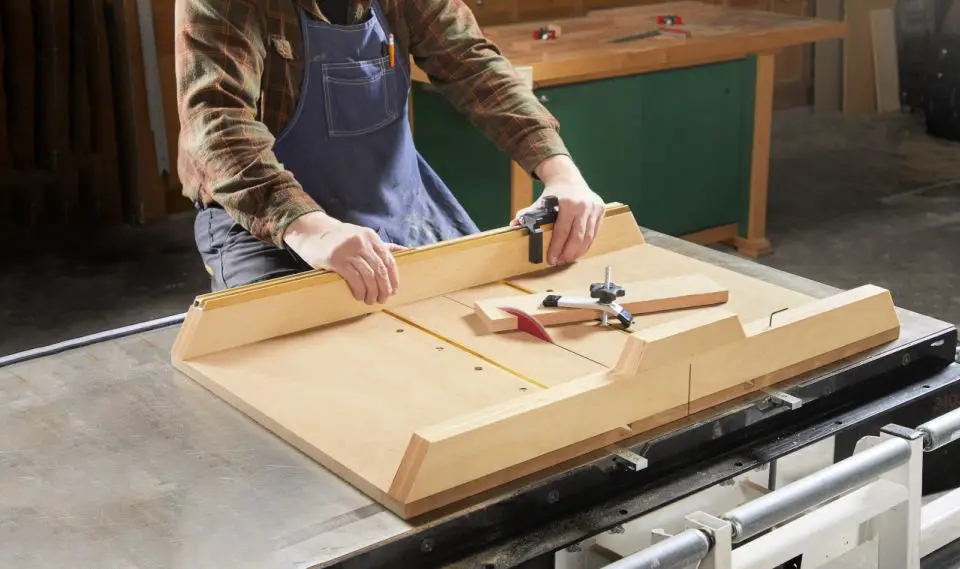
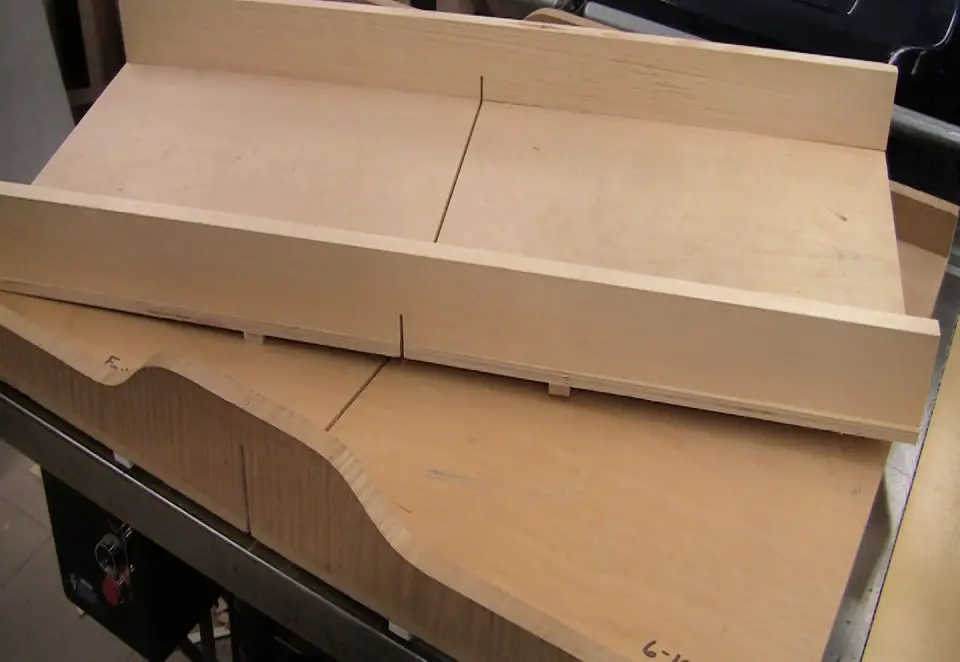
Make an Ultra Square Crosscut Sled
For woodworkers seeking to elevate their projects with precision and ease, the DIY ultra square crosscut sled is an indispensable tool. This straightforward yet robust design enhances safety, accuracy, and repeatability in various woodworking endeavors. By opting for a crosscut sled over a miter gauge, crafters can enjoy improved board support, precise cuts, and the ability to utilize stop blocks with confidence. The comprehensive guide provides step-by-step instructions for assembling the jig, including recommendations for selecting suitable materials such as plywood and hardwood for the runners. Additionally, the 5 Cut Method is carefully explained, offering a formula for achieving consistently accurate square cuts when using the crosscut sled. By incorporating this versatile jig into their workflow, woodworkers can expect a significant upgrade in their overall accuracy and precision.
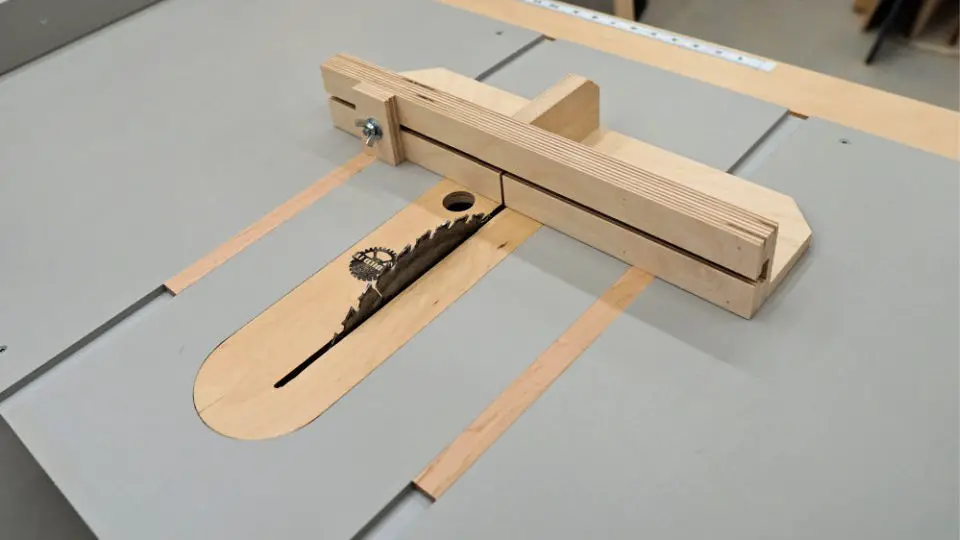
Making Your Own Small Parts Crosscut Sled
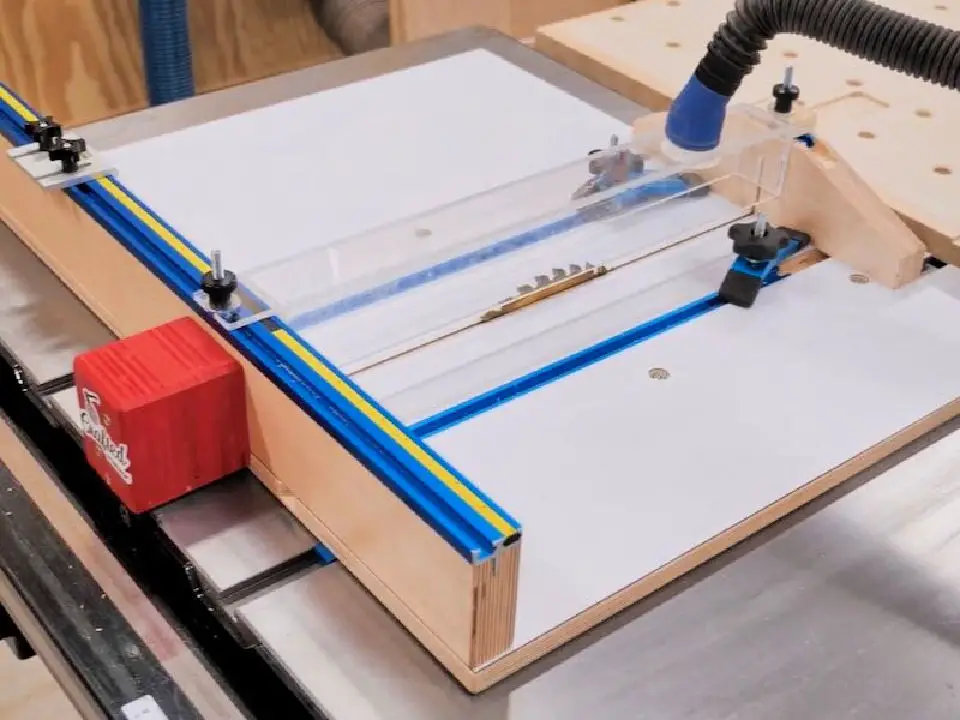
To create a versatile and precise DIY crosscut sled, follow these detailed instructions. The small-parts sled is ideal for cutting small pieces and making miter cuts with ease. To build this project, you’ll need a polyethylene runner, T-track, closet bolts, star knobs, washers, screws, paste wax, and Krazy Glue. The base of the sled is constructed from 1/4 inch maple plywood, while the front fence features a vertical hardwood back bridge and a horizontal plywood fence with an integrated T-track that allows for a simple stop block to ride along. The design ensures the sled remains square to the blade. A miter attachment, comprising 1/4 inch and 3/8 inch plywood, rounds out the build. Follow the step-by-step guide to construct your compact crosscut sled, perfect for accurate and efficient woodworking projects.
DIY Table Saw Sled With Adjustable Zero Clearance
Discover the art of woodworking with a comprehensive guide on DIY table saw sled plans that cater to both beginners and experienced craftsmen. This in-depth guide will walk you through the process of building and utilizing a DIY table saw sled, complete with replaceable and adjustable zero clearance features. Designed to fit seamlessly onto a portable workbench, this versatile sled can accommodate both bench-top table saws and router tables. By following the detailed specifications and plans, you’ll gain insight into the essential materials and supplies needed, including sturdy trailer floor plywood and adaptable aluminum profile fences. The step-by-step instructions cover everything from installing inserts for precision cuts to utilizing T-track profiles for secure workpiece holding, as well as exploring advanced techniques such as making rabbets and box joints. Whether a seasoned woodworking enthusiast or just starting out, this table saw sled offers a safe and accurate means of achieving precise crosscuts and other woodworking tasks with ease.
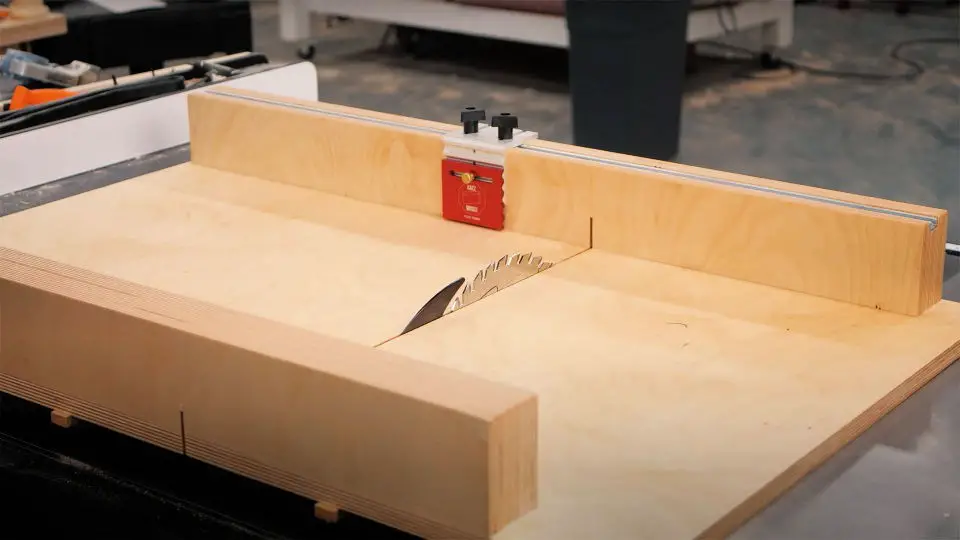
Build a Tablesaw Crosscut Sled
Transform your table saw’s versatility by crafting a custom DIY crosscut sled. This comprehensive guide details the construction of a cabinet-style table saw sled, adaptable to various sizes. The secret to a smooth-gliding and accurate sled lies in creating separate base halves, joined by front and back fences. To achieve optimal performance, use birch plywood for runners and fence components, while the base can be fabricated from regular medium-density fiberboard (MDF) or water-resistant MDF for on-site usage. This project features step-by-step instructions, covering runner marking to fence attachment and guard creation. Additionally, Medex – a durable water-resistant MDF option – is explored, further elevating your woodworking safety and precision with this crosscut sled.
How to Make a Table Saw Crosscut Sled
Creating a DIY table saw crosscut sled is an accessible project that can elevate the precision and accuracy of your woodworking endeavors. This ingenious jig enables safe and repeatable crosscuts on a table saw, while also allowing for dados to be made with ease. Its compact design takes up minimal space and leverages your existing miter gauge, making it straightforward to transport and store. To further enhance functionality, the sled comes equipped with a hinged dust guard that safeguards against sawdust. A comprehensive set of instructions is provided for construction, ensuring a smooth and stress-free building experience.
With just basic materials such as plywood, scrap wood, hinges, self-centering bits, and essential tools like a table saw, miter saw, and drill, you can bring this practical woodworking accessory to life. By incorporating this DIY crosscut sled into your projects, you’ll be able to take your woodworking skills to the next level.
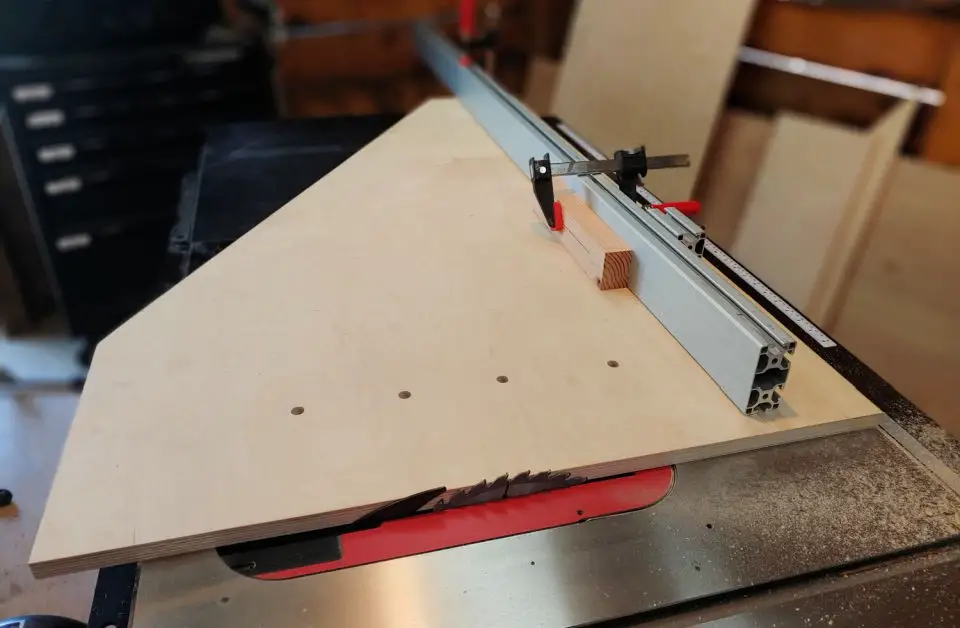
Free 45 Degree Table Saw Sled Plan
Create precise cuts with a 45-degree crosscut DIY table saw sled by following this comprehensive guide. Rather than using traditional 3/4-inch plywood, we’ll explore the benefits of substituting laminated particleboard, a lighter and more accessible alternative. This approach offers its own set of advantages and disadvantages, which will be examined in detail. Step-by-step instructions will walk you through constructing the sled’s runners, attaching them to the base, and adding back and front fences. The result is a durable and effective tool that enables smooth, accurate bevel cuts, making it an indispensable asset for any woodworking enthusiast.
Table Saw Crosscut Sled Project
Every woodworker’s arsenal is incomplete without a DIY crosscut sled for their table saw. This ingenious and straightforward-to-assemble device enables precise, repeatable cuts, guaranteeing professional-grade results with each use. By using just a few materials such as plywood, screws, and scrap wood, you can construct your crosscut sled in a matter of hours.
This comprehensive guide provides step-by-step instructions, including valuable tips for squaring and flattening the fence, fitting the runners, and testing accuracy. By employing this versatile tool, you’ll be able to achieve cleaner, more controlled cuts than those possible with a miter saw, making it an absolute necessity for any woodworking project.
To ensure your safety while working with power tools, always follow proper safety precautions and wear the necessary protective gear. By integrating this indispensable device into your workflow, you’ll be able to elevate your woodworking capabilities and reap its numerous benefits.
Make Your Own Basic Table Saw Sled
Transform your DIY woodworking experience by creating custom table saw sleds that yield precise cross and miter cuts with ease. With minimal materials, including 1/2- or 3/4-inch plywood, particle board, MDF, glue, and a few hours of your time, you can craft a versatile sled for various applications. The secret lies in the clever design that incorporates the table saw’s miter gauge slots and features a fence angled at either 90 or 45 degrees to the blade, ensuring accurate square or miter cuts. Whether you’re tackling crosscuts, 45-degree miter cuts, or other woodworking projects, these custom-made sleds will revolutionize your workflow, allowing you to achieve flawless results with confidence.
How to Do Table Saw Crosscut Sled in Three Minute
Master the art of precise cutting with these comprehensive DIY table saw sled plans, designed specifically for woodworkers seeking to elevate their skills. In just three minutes, you can transform your table saw into a precision cutting machine, rivaling professional-grade tools. This game-changing DIY project yields a custom-made crosscut sled that eliminates friction and ensures stability, making it an indispensable addition to any woodworking shop. By incorporating various fixtures, you’ll achieve accurate miters and perfectly sized dados, taking your projects to the next level. With this expert guide, you’ll learn to craft a crosscut sled using 1/2″ Baltic Birch plywood, scrap maple for runners, and white pine for additional components. Follow the step-by-step instructions in the accompanying video to create a reliable and tailored crosscut sled that meets your saw’s specific needs and project requirements. By incorporating this versatile tool into your workshop arsenal, you’ll significantly improve your woodworking accuracy and efficiency.
DIY Cross Cut Sled for a Table Saw
Make a DIY crosscut sled for your table saw and become the envy of fellow woodworkers! This project is designed to be adaptable to different table saw sizes and models, featuring an expandable clamp system on aluminum tracks. To build it, you’ll need 1/2-inch Baltic Birch plywood and 1/8-inch angled aluminum tracks. The guide provides step-by-step instructions for cutting the wood pieces to ensure a precise fit. You’ll also learn which hardware is necessary, including screws and bolts. With this functional and customizable crosscut sled, you’ll be able to enhance your woodworking skills and tackle projects with confidence.
Homemade Rockler Table Saw Crosscut Sled
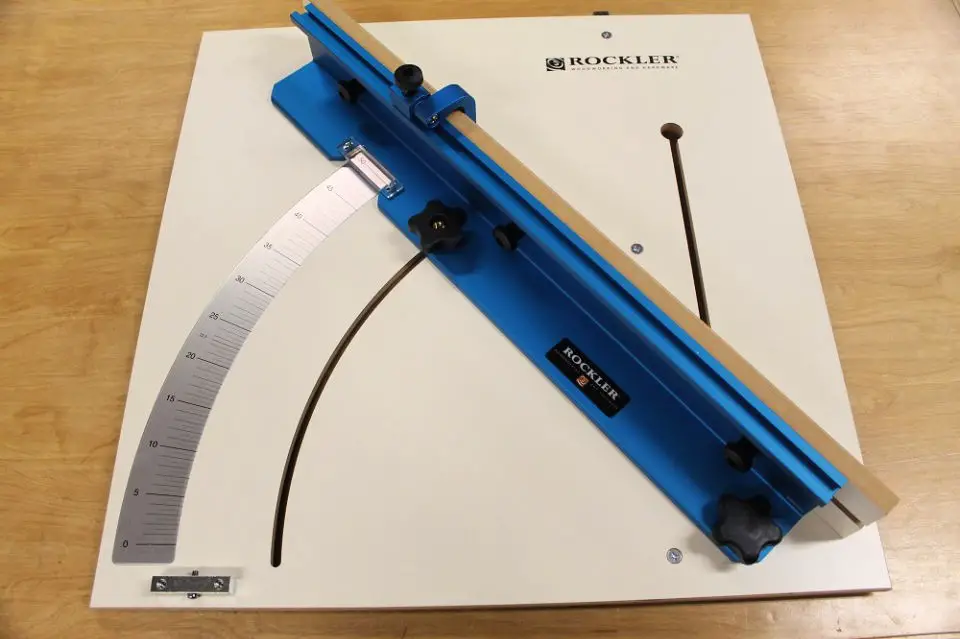
Elevate the capabilities of your table saw with this innovative DIY rockler table saw crosscut sled, designed to boost versatility and safety. This beginner-friendly woodworking accessory boasts adjustable features, including a miter fence that accommodates angles up to 50 degrees, a flip stop for effortless repeated cuts, and a workpiece hold-down clamp ensuring secure positioning.The sturdy aluminum fence guarantees precise cutting, while the steel runner and melamine-covered MDF platform provide unparalleled durability and stability. By employing this sled, you’ll prevent hazardous kickbacks by keeping your workpiece firmly in place and square to the blade. Moreover, the adjustable miter fence allows for customized angled cuts, making it an indispensable tool for various woodworking endeavors.For even more impressive results, consider pairing this crosscut sled with Rockler’s drop-off platform, which offers enhanced support and cleaner cuts. This easy-to-set-up-and-use accessory is a must-have for any woodworker seeking to achieve accurate and repeatable cuts, streamlining their workflow and enhancing overall performance.
Ultimate DIY Sliding Table Saw Sled
If you’re looking to take your DIY woodworking projects to the next level, building an ultimate table saw sled is a must-try. This precision-crafted guide will walk you through the process of creating a custom sled that replicates the smoothness and accuracy of a sliding table saw. With its long fence and adjustable work stop, this sled is perfect for making repeatable cuts on small furniture frame members like shoji and door parts. The flip-away work stop also allows for quick trimming of stock before achieving the exact length, making it an indispensable tool in your woodworking arsenal. By combining stability, squareness, and adaptability to common Western table saws, this sled is inspired by Japanese sliding table saws and designed to help you achieve precise cuts on tenon shoulders. With this ultimate table saw sled, you’ll be able to elevate your woodworking projects and take them to new heights.
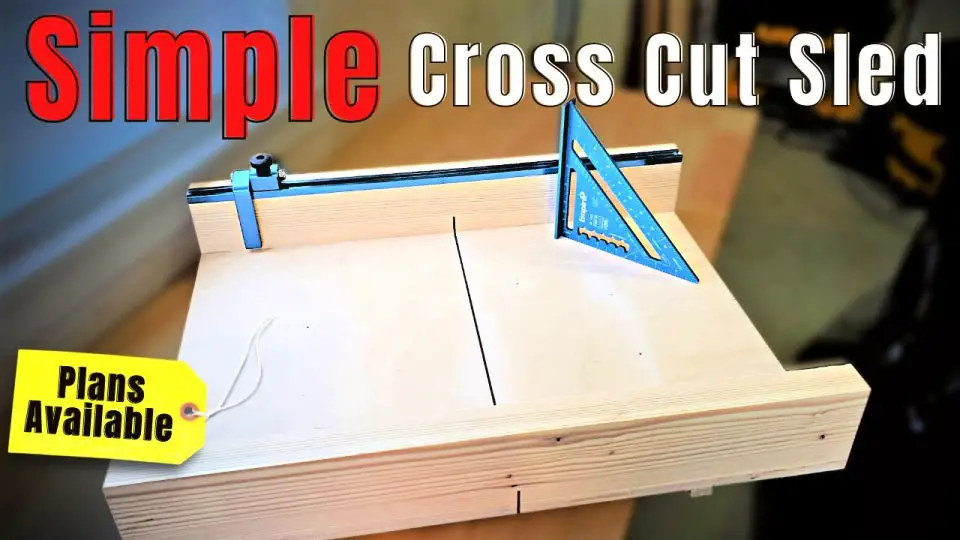
Simple DIY Table Saw Cross Cut Sled

Upgrading your home workshop’s capabilities is as simple as building a DIY table saw crosscut sled. This ingenious jig empowers woodworkers to make accurate cuts on various stock pieces, be it long, small, or wide. Whether you’re crafting intricate joinery projects or requiring precise cuts for box joints or dados, the crosscut sled proves an invaluable addition to any workshop arsenal.
This comprehensive guide will lead you through a step-by-step process of constructing your custom crosscut sled using plywood, t-tracks, and clamps. With detailed instructions and helpful tips, you’ll be able to create a customized solution that suits your unique needs. By incorporating this essential tool into your woodworking routine, you’ll unlock the potential for precise cuts and elevate your skills.
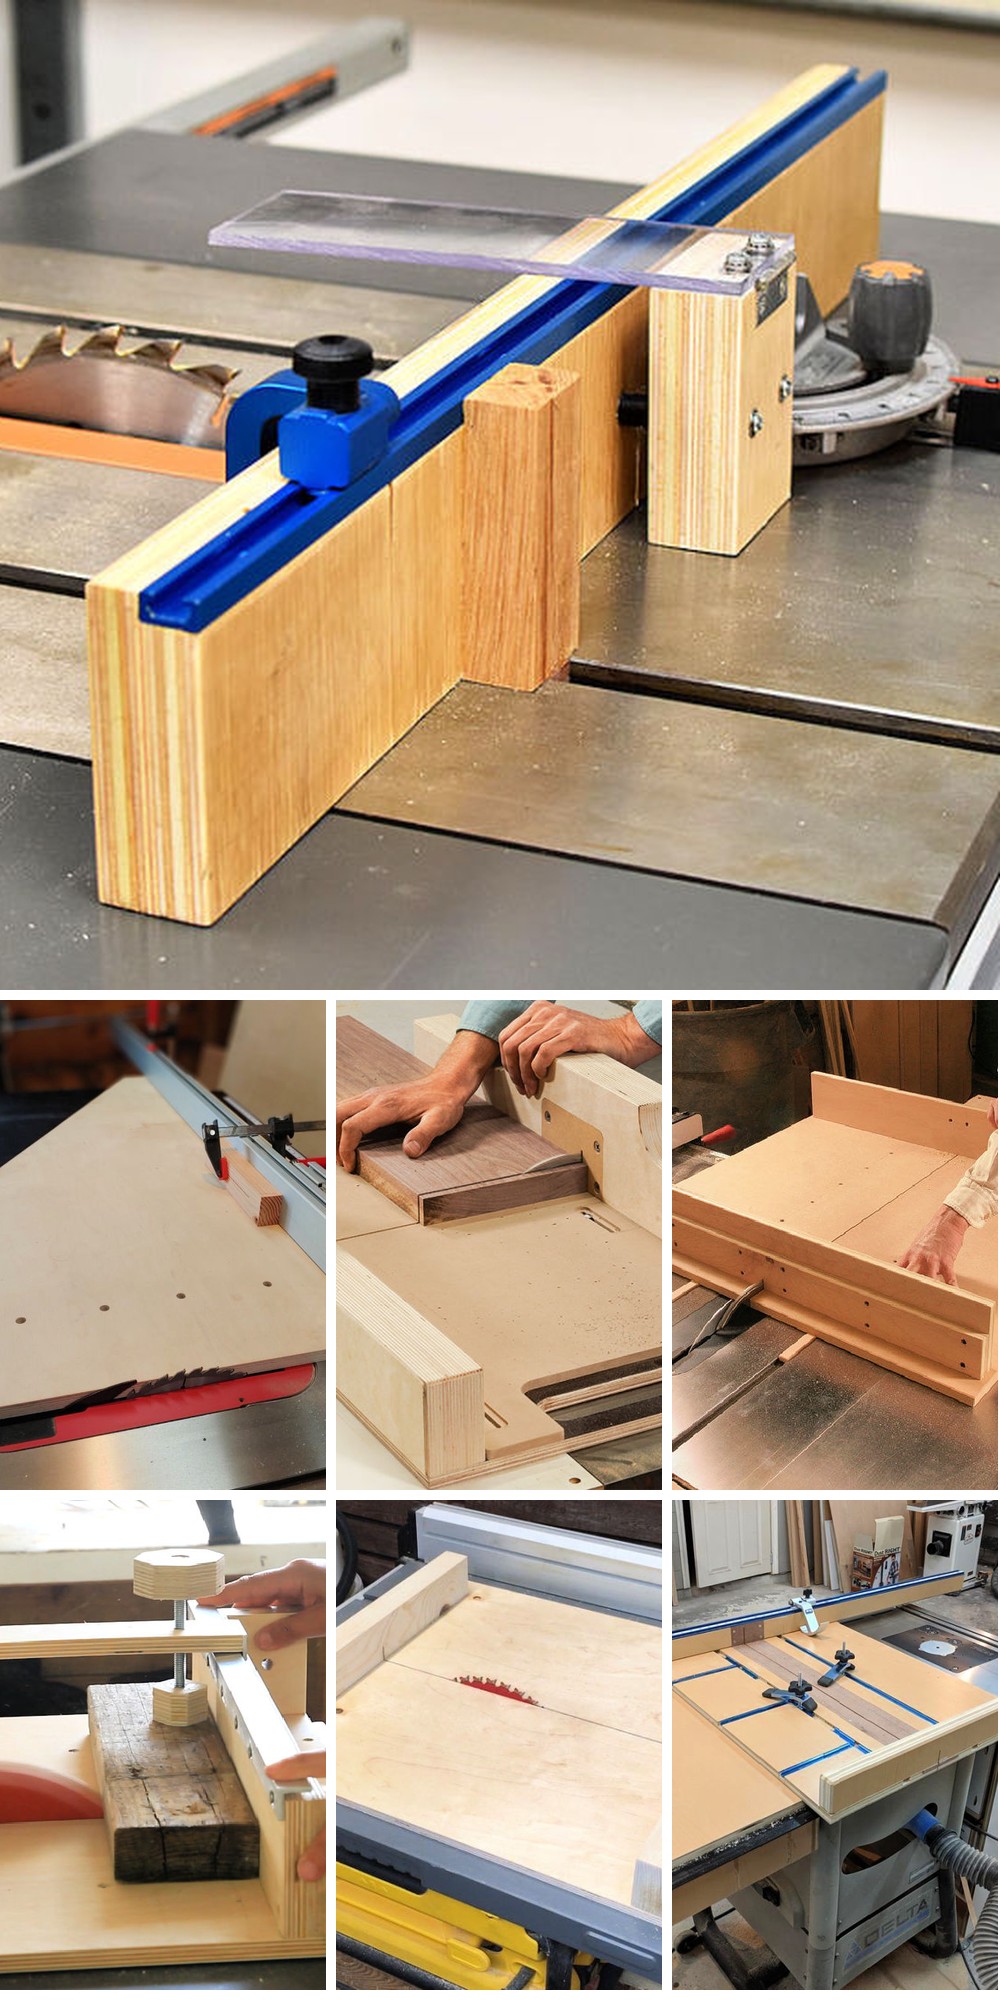
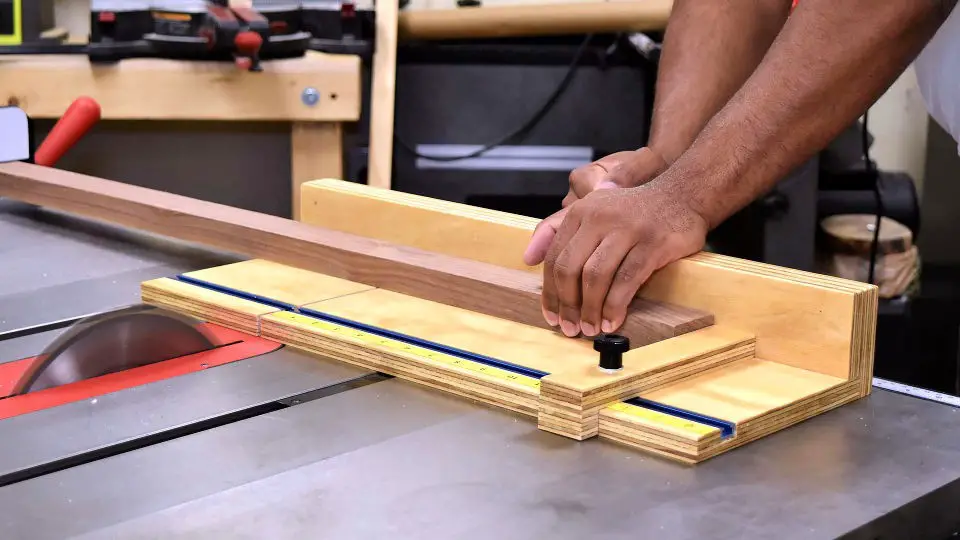
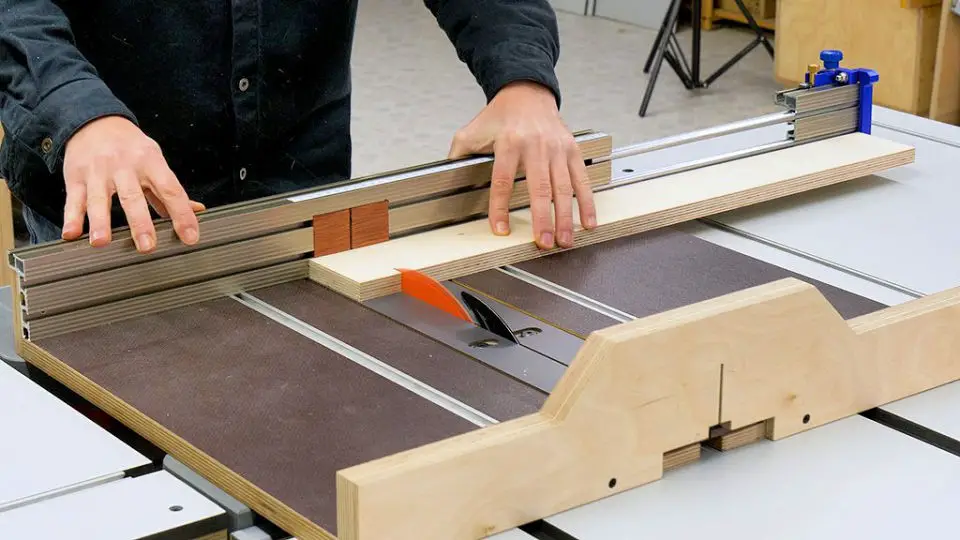
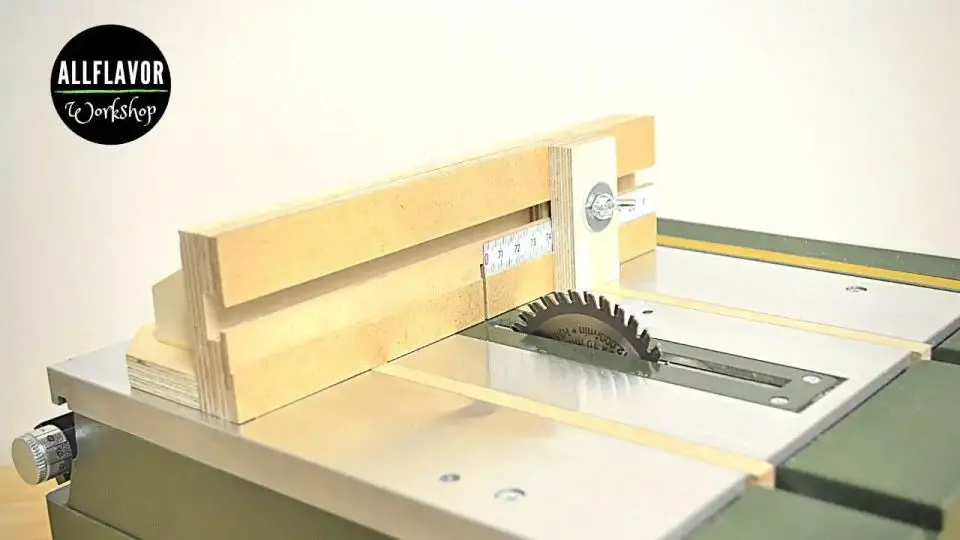
DIY Table Saw Kreg Precision Trak Cross Cut Sled
Transform your workshop experience with a user-friendly DIY table saw sled plan that ensures optimal performance and lasting durability. For precise cuts every time, build a Kreg precision track crosscut sled using less than half a sheet of 3/4 inch plywood. This simple yet effective sled features a built-in stop block for easy usability and consistent cuts.
To get started, break down your sheet goods to create the sled’s cut list. Then, attach the back fence for support and align the miter tracks to the sled. Next, attach the front fence, raise the blade through the sled, and secure the back support.
To square the sled, use the five-cut method and add a stop track for added precision. Finally, attach the front support and blade guard, and wax the base for smooth operation. With this crosscut sled, you’ll consistently achieve accurate cuts.
DIY Mini Sled for a Mini Table Saw
Transforming your mini table saw into a versatile power tool is now possible with the DIY mini sled project! By building this simple yet effective accessory, you’ll gain a significant advantage in terms of precision, speed, and safety. The benefits of using a table saw sled are multifaceted: it allows for more accurate cuts, simplifies repetitive operations, and minimizes the risk of accidents. This beginner-friendly woodworking endeavor requires just plywood as the primary material, making it an accessible addition to your workshop arsenal. By following the step-by-step instructions in our accompanying video guide, you’ll be able to construct a mini crosscut sled that will revolutionize your model making, toy crafting, and small architecture prototype endeavors. With this dependable tool at your disposal, you can confidently tackle various projects that demand precise cuts, from intricate designs to complex structures.
Handmade Table Saw Cross Cut Sled
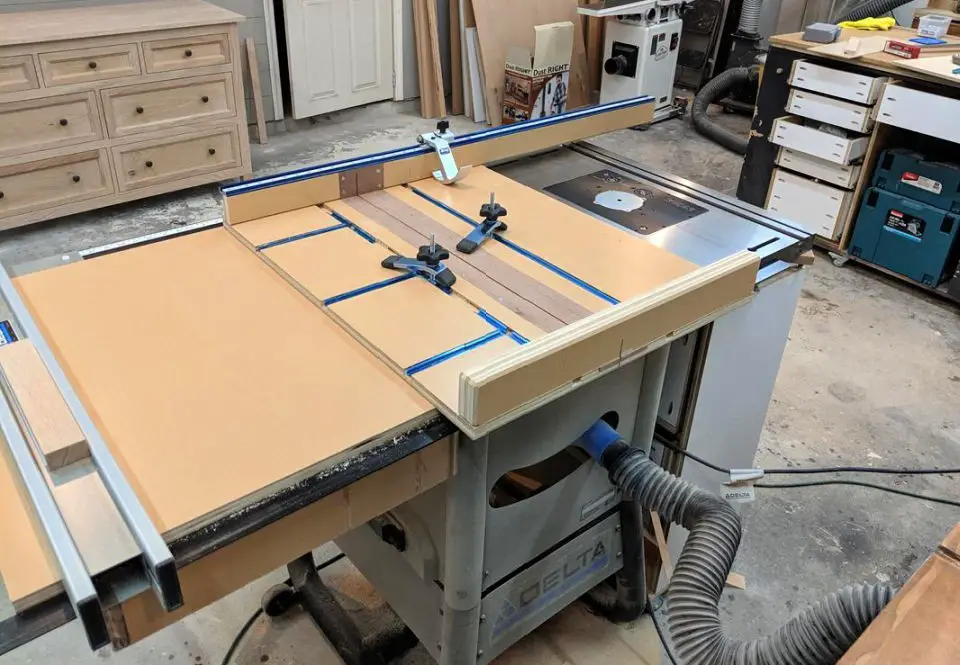
Elevate your woodworking expertise by crafting a DIY table saw crosscut sled, a comprehensive project that covers the construction of a custom sled featuring a T-track stop block, hold downs, and a precision-designed dust collection hood. This step-by-step guide takes you through the process of gathering required materials, including plywood, glue, laminate, aluminum miter bars, and T-track accessories, to ultimately create a safe and efficient tool for cutting long parts to precise lengths on your table saw.
DIY Table Saw Crosscut Sled Using Plywood
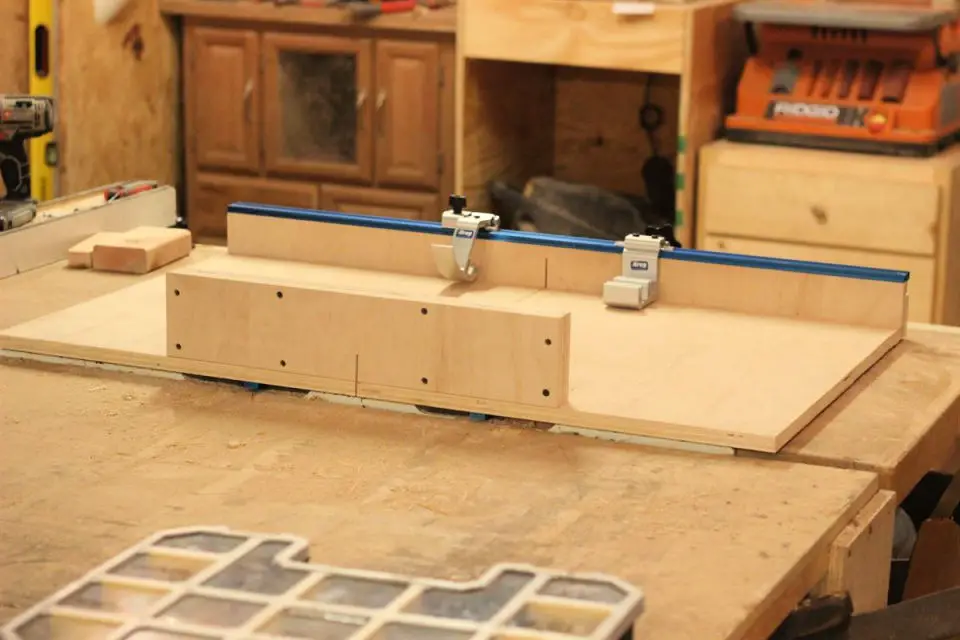
Transform your woodworking experience with a customizable and precise DIY crosscut sled, designed to seamlessly integrate with your table saw. The combination of Kreg Top Trak, Extension fence, and T-Track technology allows for endless customization options, ensuring a perfect fit for any project. A comprehensive instruction guide takes you through the build process, while a detailed cut list provides vital dimensions for selecting the ideal plywood or MDF materials. With its exceptional precision and alignment capabilities, this crosscut sled guarantees accurate cuts every time. Built to last with sturdy construction and high-quality materials, this indispensable tool is a must-have addition to any woodworker’s arsenal.
DIY Table Saw Crosscut Sled for Beginners
Unleash the full potential of your woodshop by transforming your table saw into a precision powerhouse with a DIY crosscut sled. This beginner-friendly project is designed to eliminate limitations and open up a world of possibilities, allowing you to tackle complex projects with ease and accuracy. By constructing this simple yet effective jig, you’ll gain the confidence to take on any woodworking challenge that comes your way. With a focus on precision and smooth cuts, this free table saw sled plan ensures professional-grade results, even for beginners. Whether you’re looking to expand your skillset or simply streamline your workflow, this indispensable addition to your workshop is sure to elevate your woodworking experience.
Building Your Own Cross-Cut Sled for Table Saw
Say goodbye to the frustration of uneven cuts – now you can effortlessly achieve precise results with a DIY table saw crosscut sled! This straightforward tutorial will guide you through the process of crafting a practical, user-friendly cut sled for your table saw. By following along, you’ll learn how to create a design that prioritizes safety and usability, making it an invaluable addition to any woodworking project. With step-by-step instructions and clear demonstrations, this video tutorial ensures a seamless construction experience, allowing you to enhance your woodworking skills and achieve flawless cuts with ease.
Table Saw Cross Cut Sled Design
Imagine having a DIY table saw crosscut sled design that effortlessly slices through even the most stubborn lumber, allowing you to create precise and safe crosscuts with ease. This comprehensive guide takes you by the hand, providing step-by-step instructions on how to construct a functional and efficient sled using a Powertec t-track and t-track stop. By incorporating these accessories, you’ll be able to achieve accurate and repeatable shorter cuts, ensuring that every square result is nothing short of perfection. As a woodworker, this must-have addition will not only improve the quality of your projects but also enhance safety on your DeWalt DWE7491 table saw.
Conclusion:

These 25 free DIY table saw sled plans present a diverse range of design options for your woodworking projects. Spanning precision-cut sleds to troubleshooting common issues and sustainable construction methods, the comprehensive guide provides everything you need to create a versatile and reliable table saw sled that meets all your woodworking requirements. Moreover, maintenance tips and frequently asked questions are included, ensuring you’re fully prepared to tackle any project with confidence.
