Installing a DIY sliding door can be an effective way to give your home a fresh makeover without breaking the bank. Our comprehensive guide provides 25 straightforward DIY sliding door ideas that you can tackle at home, complete with step-by-step tutorials. Whether you’re looking to customize the design, troubleshoot common issues or incorporate modern technology, we’ve got you covered. You’ll learn how to select materials wisely, achieve perfect paint jobs, and add creative handles and decorative details. We also cover maintaining your DIY sliding door, including budgeting tips, eco-friendly material options, and more. If you have questions, our FAQ section addresses common concerns like the necessary materials, ensuring smooth operation, installation for those who aren’t handy, security measures, and much more.
How To Make Sliding Door – Step by Step Guide
Discover the art of crafting a sliding door through this comprehensive, step-by-step tutorial. With each careful step, you’ll be guided in creating a functional and stylish sliding door that will elevate your home’s interior design.
Materials and Tools Needed:
For a successful wooden project, you’ll need to gather the right materials. A sturdy wood like hard maple or your choice of wood is essential for durability and quality. In addition to the wood, you’ll also require some specialized tools. A caulk tube filled with plastic bearings will keep everything running smoothly. You can choose to use ¾ inch Baltic birch plywood for added stability and support. To give your project a professional finish, consider using water-based polyurethane. When it comes to cutting and shaping the wood, you’ll need a jigsaw, drill, and drill bits. A router table is also important for precise cuts and edges. If you want to achieve a high-gloss finish, a belt sander will come in handy. To complete your project, don’t forget essential components like straight cutting router bits, screws, and wood glue (if needed). Finally, make sure you have a measuring tape on hand to ensure accurate measurements throughout the process.
Step by Step Instructions
Step 1: Preparing the Door
Before embarking on the DIY project, start by preparing your wooden door for staining. This involves ensuring the surface is smooth and even, either by sanding down an existing door or selecting high-quality wood that suits your room’s décor. For this particular project, opt for a natural finish and seal it with water-based polyurethane to harmonize with the surrounding aesthetic.
Step 2: Making the Wheels
To craft the wheels, select a suitable plastic material for the bearings. An empty caulking tube proves effective due to its lubricated surface, allowing the wheels to spin smoothly. This consideration is crucial for maintaining their free rotation.
Next, determine the wheel size by taking into account your door’s dimensions and the track’s design. Begin by drilling a central hole in the plywood that will serve as the bearing’s housing. If necessary, ream out the hole slightly to ensure a precise fit.
Cut out the circular wheel shapes using a jigsaw, then refine their roundness with a belt sander for a smooth finish. This step is vital for creating a seamless transition between the wheel and the track.
To further enhance the wheels’ functionality, use a router table to round over their edges, removing any sharp corners that may hinder their performance.
Step 3: Constructing the Track
When building a sliding barn door, it’s crucial to select a robust wood type, such as hard maple, for the track. The track’s length should be roughly twice the width of your door to allow for effortless opening and closing. To accommodate this, carve a groove within the track that is wide enough for the wheels to fit snugly and roll smoothly. This process may require several passes to achieve the desired depth. Once complete, smooth out the track with sandpaper to eliminate any splinters or rough edges that could impede the door’s movement.
Step 4: Making the Hangers
Eliminate the excess wood from the 3/4 inch Baltic birch plywood that forms the base of the wheels. Opt for a straightforward design or get creative and personalize it according to your taste. Once you’ve drilled holes to accommodate the wheels, make sure they rotate smoothly. To add a touch of elegance, consider leaving the wood in its natural state or applying a clear protective coating.
Step 5: Assembling the Hardware
To complete the sliding door installation, begin by securing the wheels to the hangers, guaranteeing a smooth and unrestricted movement. Next, attach the track above the doorframe, ensuring its levelness and secure fastening. Subsequently, hang the door by attaching the hangers to the top edge, distributing them evenly and screwing them securely into place. Finally, test the door’s operation, verifying its smooth gliding along the track, making any necessary adjustments for optimal performance.
Step 6: Final Touches
To secure the door’s trajectory, consider installing stops at both ends of the track. This simple solution involves attaching angled wooden pieces using glue or screws. Alternatively, you can add a guiding mechanism at the bottom of the door to maintain its alignment and prevent unwanted sway.
Video Tutorial
To further enhance your comprehension of creating wooden barn door hardware, we recommend accompanying this written guide with our step-by-step video tutorial. This visual companion provides a comprehensive overview of the techniques involved, allowing you to gain a more nuanced understanding of the process by combining both written and visual learning methods.
Design Customization Ideas for Your DIY Sliding Door
Transforming a sliding door into a reflection of your unique personality can be an incredibly fulfilling DIY endeavor. To infuse your creative flair, consider the following ways to breathe new life into this often-overlooked feature.
Choose Your Materials Wisely
When it comes to choosing the perfect material for your walls, you’re spoiled for choice. For a classic and warm aesthetic, wood is an excellent option. Not only can it be painted or stained to match any decor, but it also adds a natural touch to the room. Glass panels, on the other hand, bring a sense of openness and brightness, thanks to their frosted or clear finishes. If you’re looking for something more industrial-chic or modern, metal frames are an excellent choice, offering a sleek and sophisticated look that’s sure to impress.
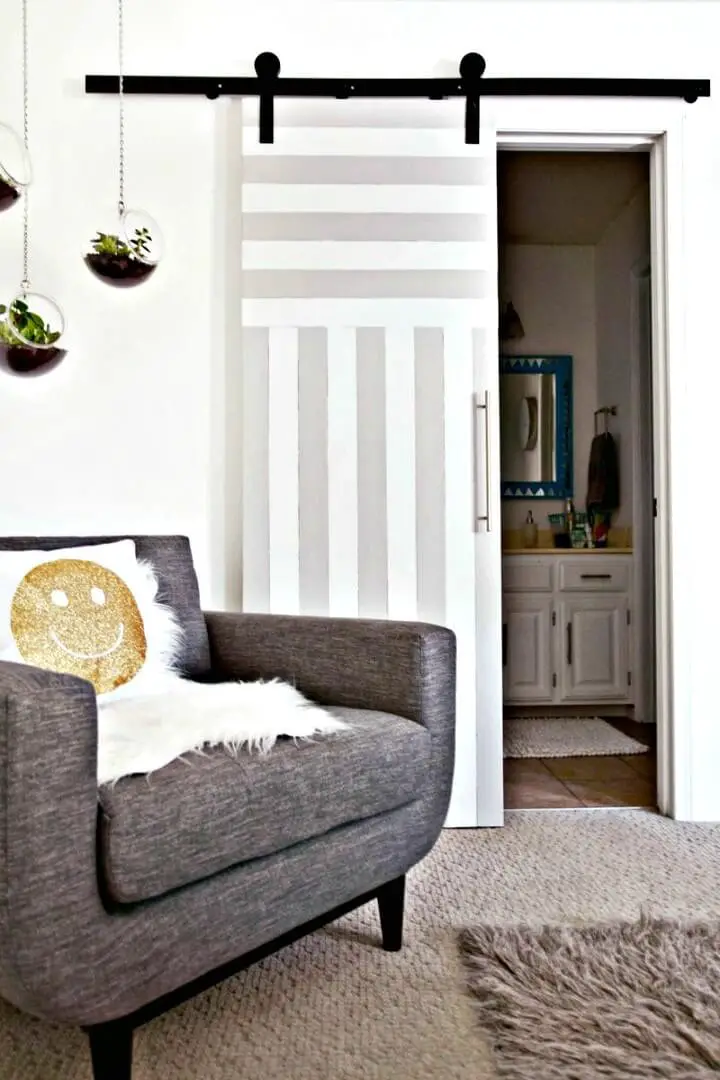
Paint It Perfect
Elevate your entryway’s aesthetic with a bold and eye-catching door that makes a statement. Consider painting it a vibrant color like fiery red or radiant blue to create a striking first impression. For a more understated approach, opt for soft pastel shades or neutral tones that exude calmness and serenity. Alternatively, inject visual interest by incorporating patterns such as stripes, geometric shapes, or stenciled designs that add depth and texture to the space.
Get Creative with Handles
When it comes to adding a personal touch to your home’s doors, there are plenty of options to suit every style and budget. For those looking to add a touch of nostalgia, scouring flea markets for vintage knobs can be a great way to find one-of-a-kind door handles that tell a story. Alternatively, hardware stores often carry a range of modern pulls in various designs, from sleek and minimalist to bold and decorative. And for the DIY-minded, repurposing items like leather straps or metal pipes can be a fun and creative way to create custom door handles that reflect your personality.
Add Decorative Details
To add a personal touch to your home decor, consider exploring creative ways to enhance glass and wood surfaces. One option is to utilize etching cream to permanently apply frosted designs onto glass panels, giving them a unique and subtle charm. For those with experience working with tools, wood carving can be used to create intricate patterns on wooden doors, adding an air of sophistication to the entryway. Alternatively, decals offer a temporary and versatile solution that can be easily swapped out as your style evolves.
Incorporate Technology
For homeowners seeking enhanced security and streamlined daily routines, two innovative solutions stand out: smart locks and automatic openers. The former offers advanced locking mechanisms that can be controlled remotely via mobile apps, granting users unparalleled control over their property’s access points. This not only increases the sense of security but also allows for keyless entry and exit, perfect for those with busy lives or those who want to grant temporary access to guests or service providers. On the other hand, automatic openers provide hands-free operation, eliminating the need for constant manual manipulation of doors and gates. This feature is particularly useful for homeowners who prioritize accessibility, those living in areas with high humidity or heavy rainfall, or anyone seeking a touchless experience. By integrating these technologies into their daily lives, individuals can enjoy greater peace of mind, increased convenience, and a more streamlined overall lifestyle.
Troubleshooting Common Issues with DIY Sliding Doors
While encountering difficulties with your DIY sliding door can be an exasperating experience, the good news is that many of these issues have straightforward solutions. This guide aims to walk you through some of the most common problems and provide practical fixes to get your sliding door up and running smoothly once again.
Door Stuck or Not Sliding Smoothly
When it comes to maintaining your tracks, start by giving them a thorough once-over to ensure there’s no debris or dirt accumulation. Regular cleaning is crucial to prevent any issues that might arise from neglect. Additionally, lubricate the rollers using a silicone-based lubricant to keep everything running smoothly and efficiently. Finally, don’t forget to adjust the rollers as needed – they may require tightening or loosening to function optimally.
Noisy Operation
To optimize the performance of your equipment, it’s essential to address three common issues that can affect its overall efficiency. Firstly, tighten loose components such as screws and bolts that may have become loose over time due to wear and tear or exposure to harsh environmental conditions. This simple step can help prevent vibrations and rattling sounds from disrupting the smooth operation of your machinery.
Secondly, replace worn-out rollers that can cause a grinding noise as they move along tracks or guides. Worn rollers can lead to premature wear on other components and reduce the overall lifespan of your equipment. By replacing them with new ones, you’ll ensure a smoother and quieter operation.
Finally, consider using dampening materials such as rubber strips or gaskets to absorb vibrations and reduce noise emissions. These materials can be inserted between moving parts or used to line machinery frames, effectively muffling the sounds that might otherwise disturb your work environment.
Maintenance and Care Tips for Your DIY Sliding Door
To ensure your sliding door remains functional and durable for years to come, it’s essential to perform regular maintenance tasks. This not only keeps the door operating smoothly but also prevents potential issues from arising. To get you started, here are some simple care tips:
Regular Cleaning
When it comes to maintaining the appearance of clean glass panels, one simple yet effective method is to employ a vinegar-based solution. This gentle yet potent formula allows you to achieve a streak-free shine that will leave your panes looking like new. Furthermore, taking the time to regularly wipe down tracks and other crevices where dust and grime tend to accumulate can go a long way in preventing the buildup of stubborn impurities.
Periodic Checks
When inspecting the hardware, it’s crucial to assess any visible signs of wear or damage that may have occurred due to normal usage or potentially faulty installation. This visual examination will help identify potential issues before they escalate into more serious problems. In addition to hardware inspection, it’s also vital to verify that door alignment is accurate and free from misalignment, as even slight discrepancies can lead to premature wear and tear over time.
Seasonal Adjustments
To ensure the integrity of your home’s thermal envelope, it’s essential to identify and address any weather stripping vulnerabilities. This can be achieved by inspecting the various entry points where air may be seeping in or out. One area that often goes unchecked is around doors, particularly those with drafty seals or worn-out weatherstripping. By replacing old or damaged strips with new ones, you can effectively seal gaps and maintain a consistent indoor temperature. This simple yet crucial step will not only reduce energy bills but also contribute to an overall more comfortable living space.
Cost Analysis and Budgeting for Your DIY Sliding Door
Before diving into a DIY sliding door project, it’s essential to establish a realistic financial framework. To create a cost-effective strategy, consider the following essential factors:
Firstly, assess the materials needed for the project, including the frame, rollers, tracks, and any additional decorative elements.
Next, calculate the labor costs involved in completing each stage of the project, from preparation to installation.
Finally, don’t forget to factor in any potential tools or equipment required to complete the job efficiently.
By taking a thorough approach to budgeting, you’ll be able to plan and execute your DIY sliding door project with confidence.
Material Costs
When it comes to selecting door materials, cost is a crucial factor. Wooden doors, for instance, can range from affordable to luxurious, depending on the type of wood used. Glass doors offer a sleek and modern aesthetic, but may require a higher upfront investment. Metal doors, on the other hand, provide durability and security at a relatively lower price point. By considering your budget, you can choose a door material that suits your needs without breaking the bank. Similarly, hardware such as rollers, tracks, and handles are essential components of a functional door system. With some research and patience, it’s possible to source these items at an affordable price, ensuring your door installation is both stylish and budget-friendly.
Labor Savings
For a cost-effective solution, consider taking on the DIY installation challenge. By handling the task yourself, you’ll avoid labor costs that can add up quickly. To get started, take advantage of the numerous free online tutorials available. These resources will walk you through each step of the process, empowering you to tackle the project with confidence.
Budget Tips
To create a stunning DIY sliding door without overspending, it’s essential to approach your project with a mix of creativity and financial prudence. Start by comparing prices for materials and tools to ensure you’re getting the best deals. Additionally, think outside the box and consider reusing or recycling materials to cut costs even further. By taking these steps, you’ll be well on your way to crafting a gorgeous DIY sliding door that fits within your budget.
Sustainability and Eco-Friendly Materials
Integrating eco-friendly materials into your DIY sliding door venture yields a dual benefit – it’s both environmentally conscious and budget-friendly. By opting for sustainable components, you’ll reduce waste and minimize your project’s carbon footprint.
Eco-Friendly Materials
When it comes to building and construction, sustainability is key. One way to achieve this is by opting for eco-friendly alternatives to traditional materials. Bamboo, for instance, offers a remarkable alternative to wood. Its unique properties make it an excellent choice for constructing buildings that not only minimize environmental impact but also provide exceptional strength and durability. On the other hand, recycled glass is another sustainable option that requires significantly less energy compared to producing new glass. By repurposing existing materials, reclaimed metal also gives them a second life, reducing waste and preserving natural resources. These innovative approaches demonstrate that sustainability and functionality can coexist in harmony.
Environmental Benefits
By adopting sustainable practices, individuals and businesses alike can make a significant impact on the environment. One crucial step towards a more eco-friendly lifestyle is reducing waste. This can be achieved through the use of recycled materials, which not only minimize landfill contributions but also conserve natural resources. Moreover, utilizing energy-efficient solutions by incorporating insulation made from environmentally responsible materials can lead to substantial savings on energy bills. By making these simple yet effective changes, we can collectively work towards a more sustainable future.
FAQs About DIY Sliding Doors
As you embark on a DIY sliding door project, it’s natural to have some doubts. To alleviate any uncertainty and ensure a successful outcome, we’ve compiled a comprehensive FAQ section to walk you through every step of the process. Whether you’re a seasoned DIY enthusiast or a newcomer to home improvement projects, this section aims to provide valuable insights and address common questions that arise when tackling such a project.
What materials do I need for a DIY sliding door?
To get started with creating your sliding door, you’ll first need to gather the necessary materials. This includes the actual door material itself, which could be wood, glass, or another material of your choice. Additionally, you’ll require a track system that will allow the door to slide smoothly back and forth, as well as rollers to support its movement. Finally, you won’t forget handles to provide easy access and control over the door’s operation.
Next, make sure you have all the right tools for the job. A drill will come in handy for any screwing or drilling required during installation. A screwdriver is also essential for making any necessary adjustments or tightening loose screws. A level will help ensure that your track system and door are properly aligned to prevent any awkward tilting or sticking. A tape measure will aid in measuring out the space where you’ll be installing the sliding door, while a saw may be needed if you’re looking to make any custom cuts in your material. With all these elements in place, you’ll be well on your way to successfully installing and enjoying your new sliding door.
How do I ensure my sliding door slides smoothly?
For optimal performance, it’s essential to prioritize proper installation and regular maintenance of your tracks and rollers. To start, ensure that the tracks are level and free from any debris or obstructions. This will prevent any potential issues or misalignments that could impact the overall functionality. In addition to a thorough setup, routine lubrication with a high-quality silicone-based product is also crucial. By keeping the track and roller surfaces well-lubricated, you’ll be able to reduce friction, minimize wear and tear, and extend the lifespan of your equipment.
Can I install a sliding door if I’m not very handy?
With the right guidance, installing a sliding door is a feasible task. To get started, leverage a wealth of instructional resources available online, including tutorials, videos, and comprehensive step-by-step guides. These tools can provide invaluable support as you embark on this DIY project.
How can I make my sliding door more secure?
To enhance the security of your sliding door, consider investing in a high-quality lock that’s designed to withstand potential forced entry attempts. Additionally, you may want to install a security bar that prevents the door from being opened from the outside, thereby limiting an intruder’s access and providing an extra layer of protection for your home.
What are some common mistakes to avoid?
When working with precision-critical tasks like installing track systems and doors, it’s crucial to double-check every measurement before making any cuts or drills. Don’t risk errors that can compromise the integrity of your project by overlooking seemingly minor details. Additionally, be sure to meticulously follow the manufacturer’s guidelines for installation, as they have been carefully crafted to ensure a smooth and successful outcome.
How do I choose the right size door?
When it comes to measuring for a new door, there are a few key factors to consider. First, take note of the size of the opening itself – this will give you a baseline measurement for your new door. Next, think about overlap: aim to have the door cover the opening by a few inches on each side, not just sitting flush with the frame. This not only provides a sense of security and privacy but also helps to block out any drafts or sounds that might otherwise seep in.
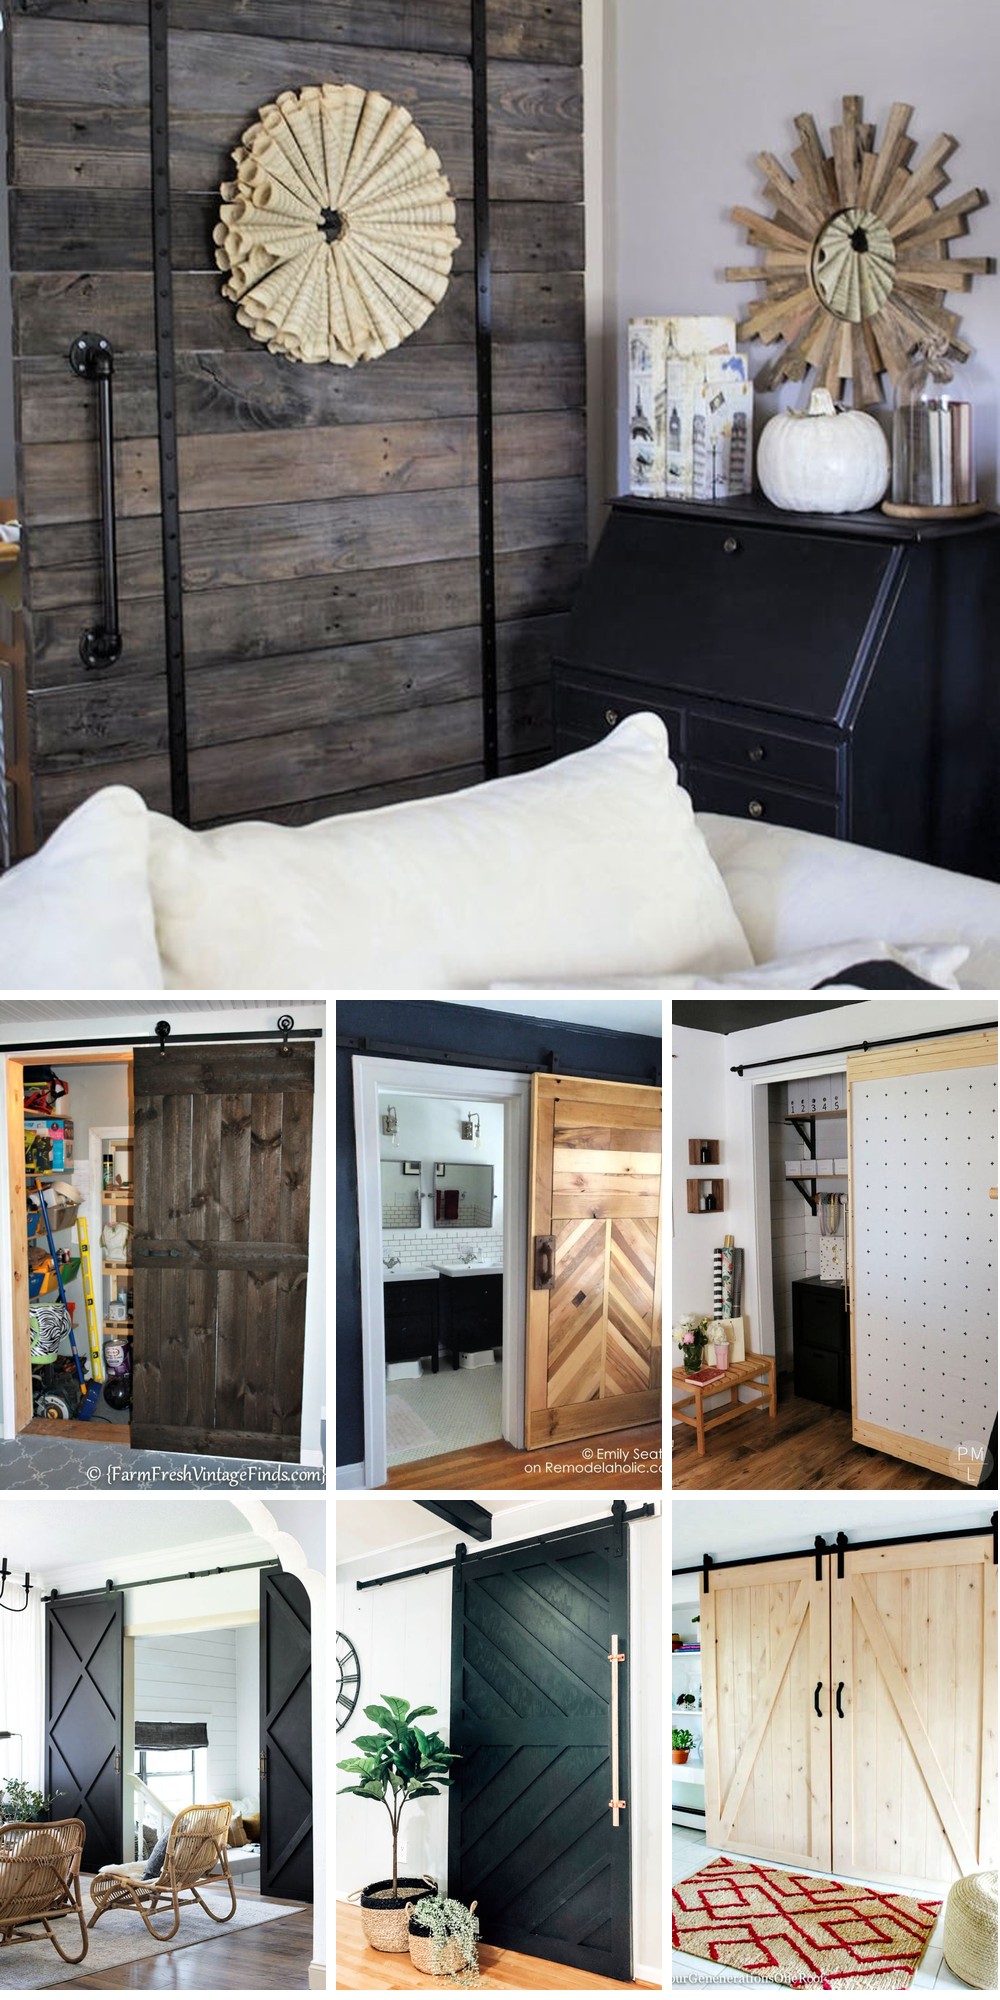
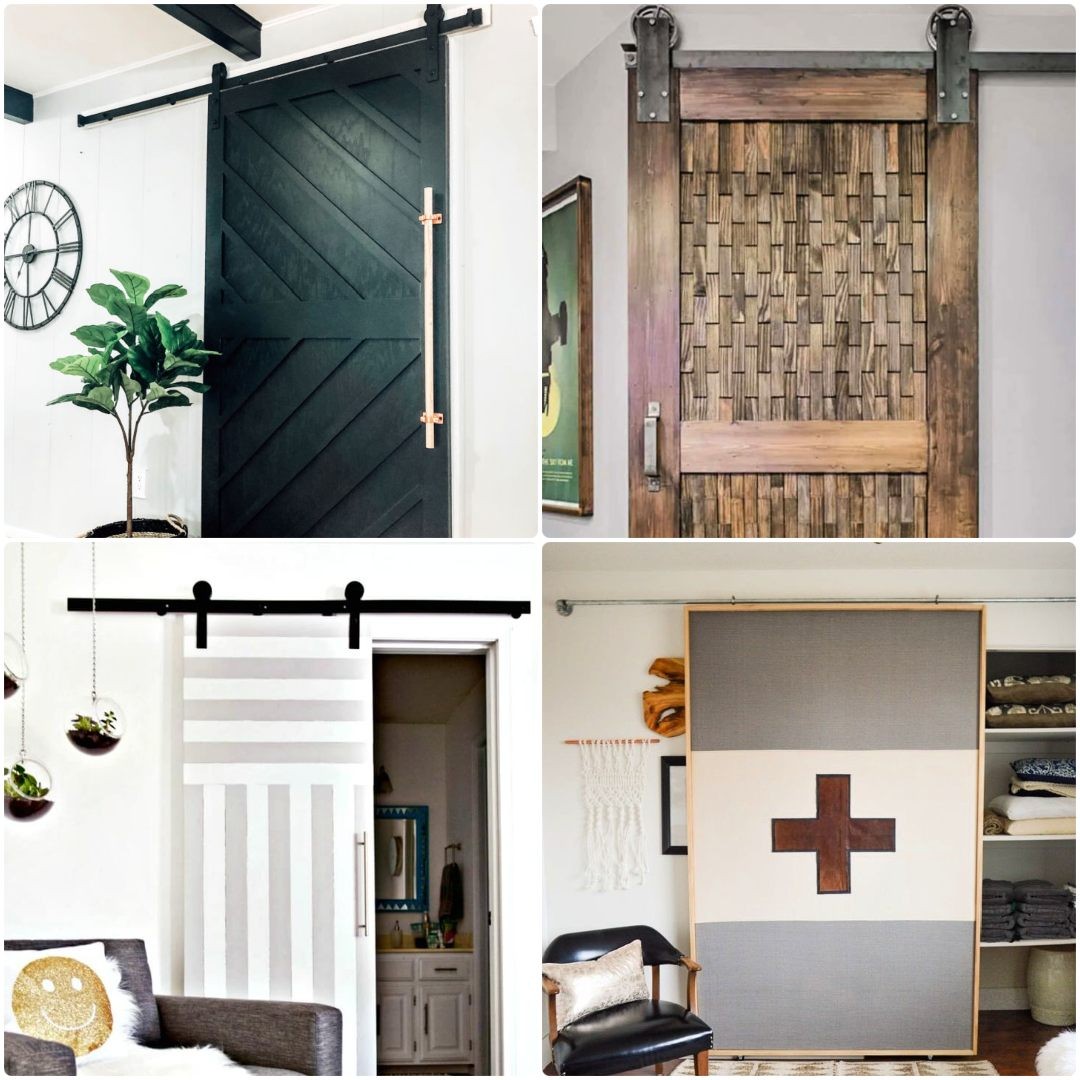
25 Easy DIY Sliding Door Ideas
Transform your living space with effortless style by incorporating clever DIY sliding door ideas into your home projects. Explore a diverse range of inspirations, from rustic barn doors to sleek modern designs, and unlock the perfect solution for your unique space.
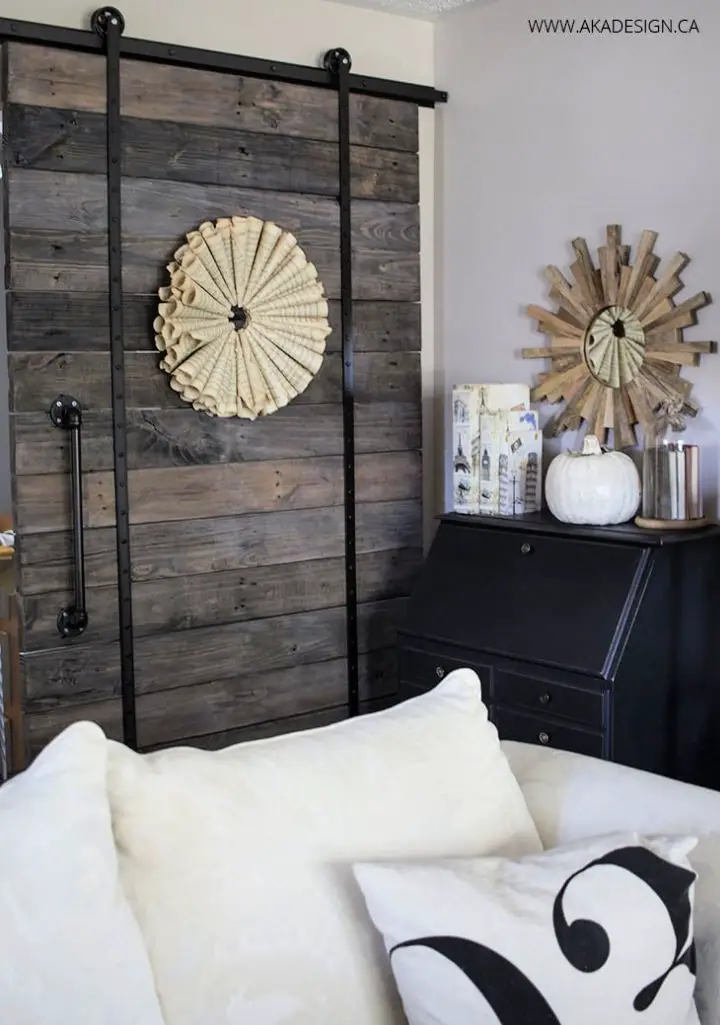
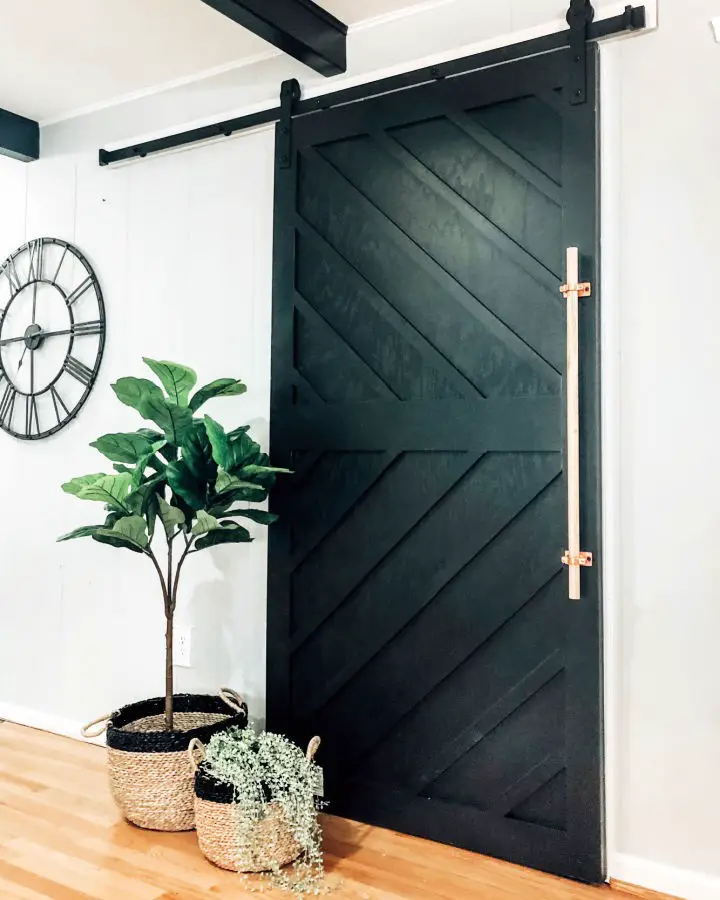
DIY Sliding Barn Door for Under $200
Elevate the ambiance of your living space with a DIY sliding barn door, a stylish and budget-friendly solution that can modernize any room. This oversized piece of art will become the focal point of the room, adding a touch of farmhouse charm without breaking the bank.
Priced under $200 for all necessary materials, this project offers incredible value. Not only do you get to create a unique and functional door, but you’ll also have enough budget remaining to accessorize or tackle other home improvement projects.
To ensure a seamless installation process, take precise measurements before starting the project. Then, follow our easy step-by-step guide on how to install and craft beautiful handmade doors that perfectly match your personal style.
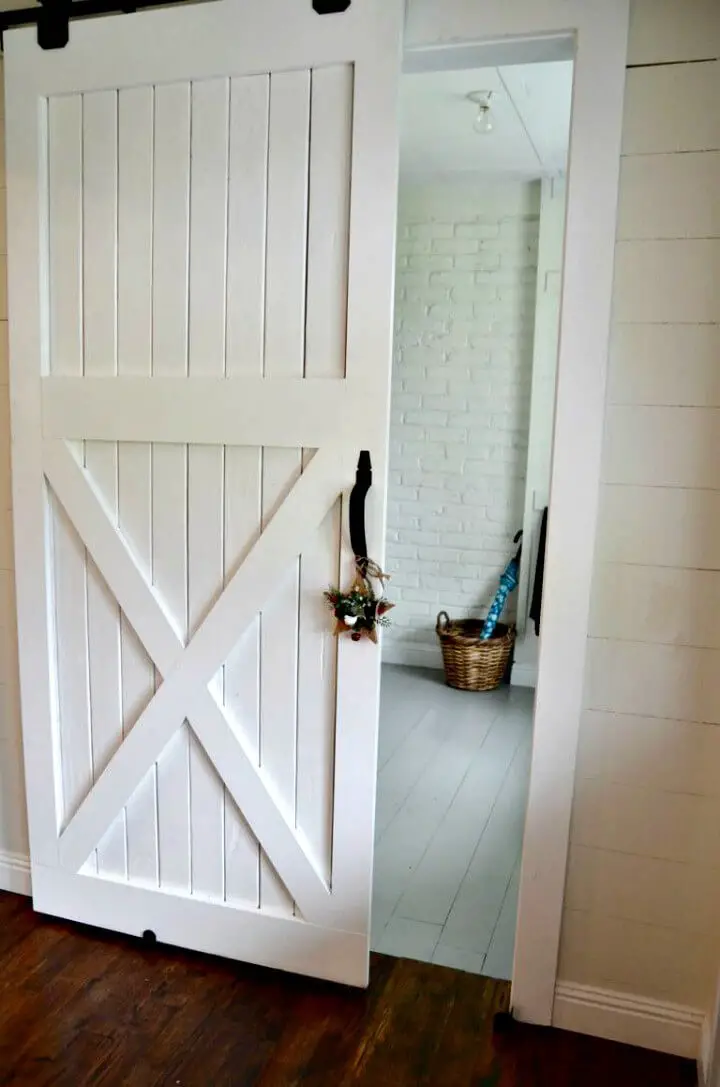
Beginner Friendly Wooden Sliding X Doors
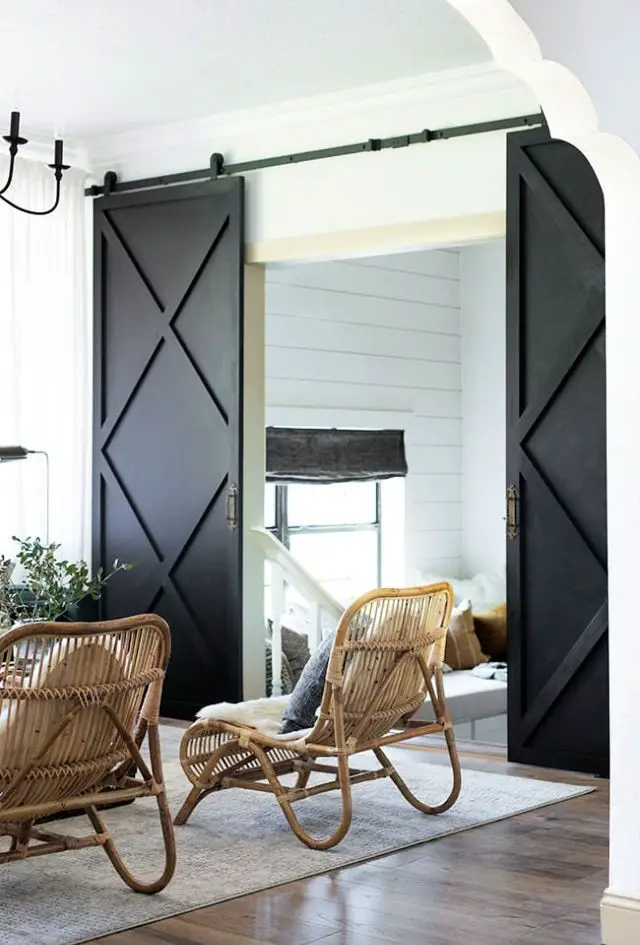
Transforming your home’s entrance doesn’t have to break the bank or require extensive expertise. A DIY wooden sliding X-door can be a creative and accessible solution for bridging the gap between your living room and downstairs bonus room. With just basic tools, 1x3s, plywood, and some weekend downtime at your disposal, you can craft a custom X-style sliding door from scratch or give an existing plain door a stylish makeover. This beginner-friendly project is designed to infuse character and charm into your space with minimal fuss.
How to Build a Sliding Barn Door
Create something truly special and visually stunning with your own hands – a sliding barn door that exudes elegance and sophistication. This easy-to-execute project is sure to bring out the DIY enthusiast in you, adding a touch of refinement to any room. The best part? It’s incredibly lightweight, making it a breeze to construct. With minimal materials and tools readily available at most hardware stores, you can create this fantastic addition to your home for a fraction of the cost of traditional options. So why not challenge yourself with a fun DIY project? Start building your very own sliding barn door today!
DIY Lightweight Sliding Barn Door

Imagine effortlessly transforming your space with a cutting-edge DIY lightweight sliding barn door solution. This game-changing innovation offers the perfect blend of style and practicality for those seeking a hassle-free way to customize their home. Unlike traditional barn doors, this innovative design is crafted from a special lightweight material that minimizes the effort required to move it around.
One of the most exciting aspects of this revolutionary product is its versatility. With an array of creative fabrics and colors at your disposal, you can effortlessly match your door’s aesthetic to your unique style and decor preferences. And the best part? Installation is a breeze – simply follow the provided instructions, and voilà! Your custom sliding barn door will be up and running in no time. Whether you’re looking for something sleek and modern or rustic and classic, this innovative new product has got you covered.
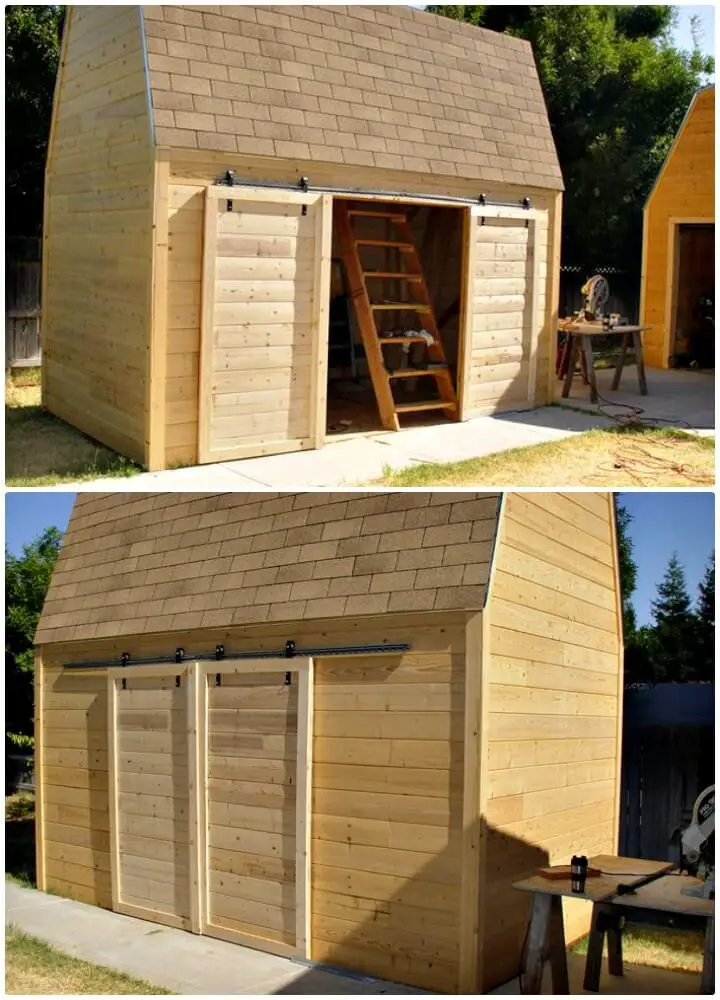
How to Install Double-Sliding Barn Doors
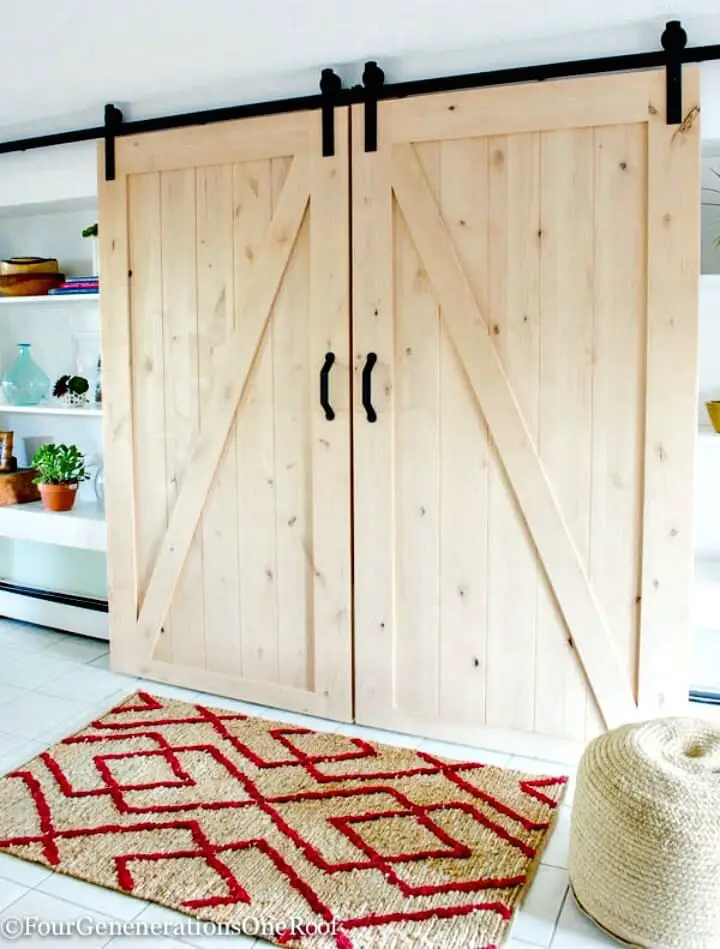
Elevate your home’s ambiance by crafting DIY double-sliding barn doors that exude rustic charm. This unique design element will leave a lasting impression on guests, with its warm natural wood tones perfectly complementing any kitchen or living space. With straightforward instructions, you can create modern and stylish sliding barn doors for your pantry or storage area in no time. These handmade masterpieces will be the crowning touch to complete any room’s décor. This comprehensive kit contains everything needed to build a fully functional door set that glides effortlessly on smooth stainless steel tracks. Unleash your creativity by experimenting with various sizes, finishes, colors, and more! Incorporate these iconic farmhouse staples into your home today – it will be well worth the effort when proudly displayed in all their glory.
How to Make a Rustic Barn Door
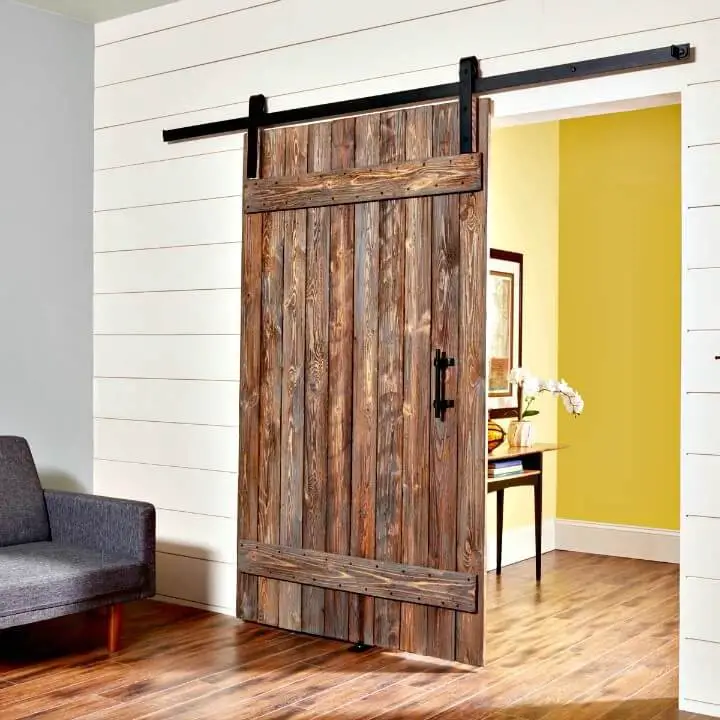
Transform your home with a unique DIY rustic barn door, saving both time and money. This intermediate-level project is ideal for those looking to test their skills and create a stunning piece that will last for years to come. By using low-cost lumber, you can complete the entire project within just a few days, all while enjoying the satisfaction of making something truly special. Start your creative journey today and turn your space into one you’ll be proud to call home.
Modern DIY 4 Panel Sliding Barn Door Under $50
Imagine transforming every room in your house into an elegant oasis, minus the hefty price tag. These cutting-edge doors are designed to be both functional and stylish, perfect for use as dividers or statement pieces. And at just $50, it’s an affordable investment that won’t compromise on quality. The innovative design features four panels that slide together with seamless precision, accompanied by easy-to-follow installation instructions. With this modern DIY 4-panel sliding barn door, you can bring luxury living to any space without sacrificing style. Start creating unforgettable interiors today.
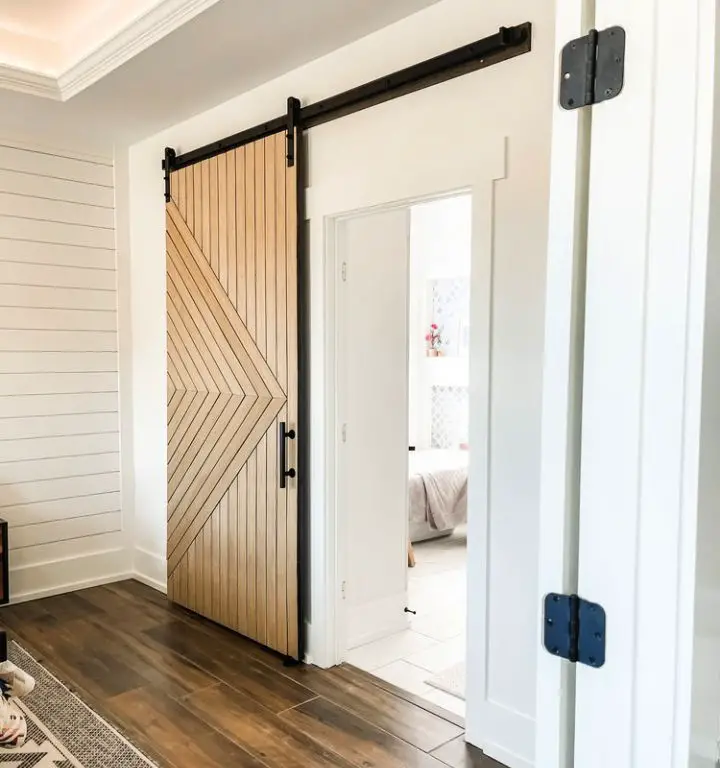
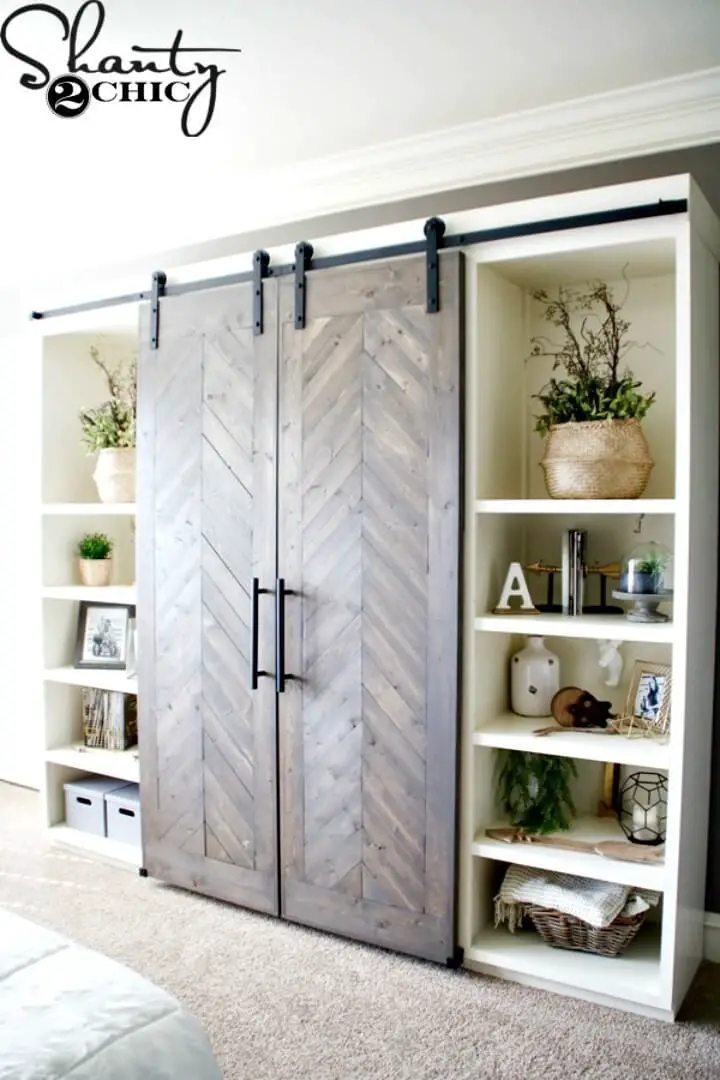
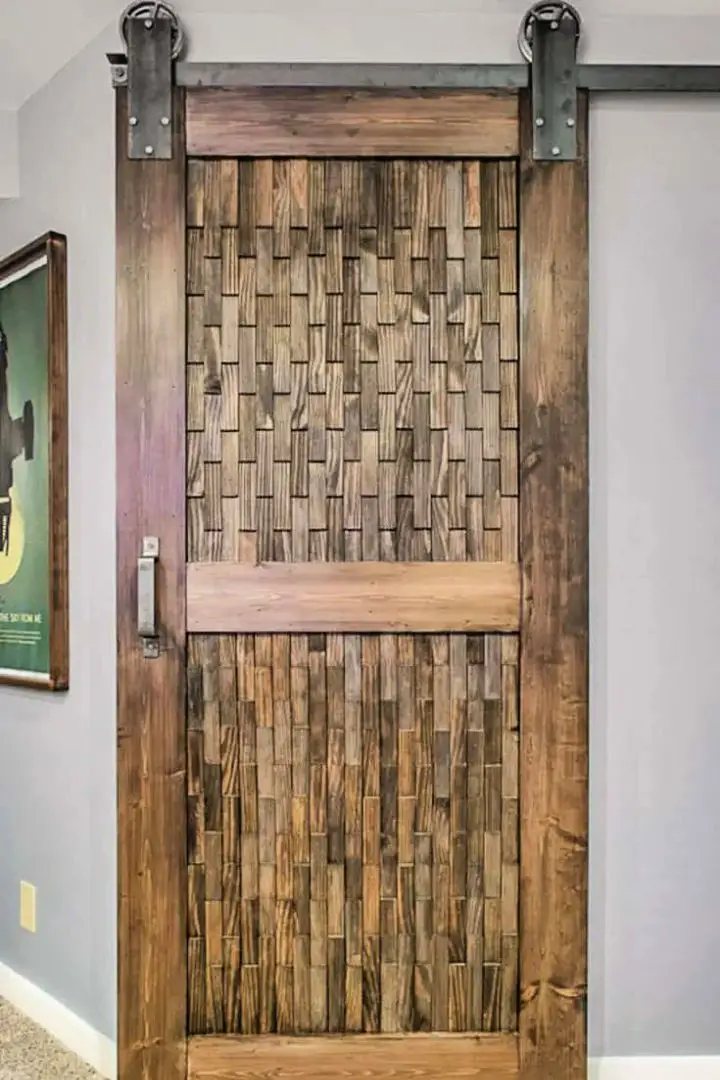
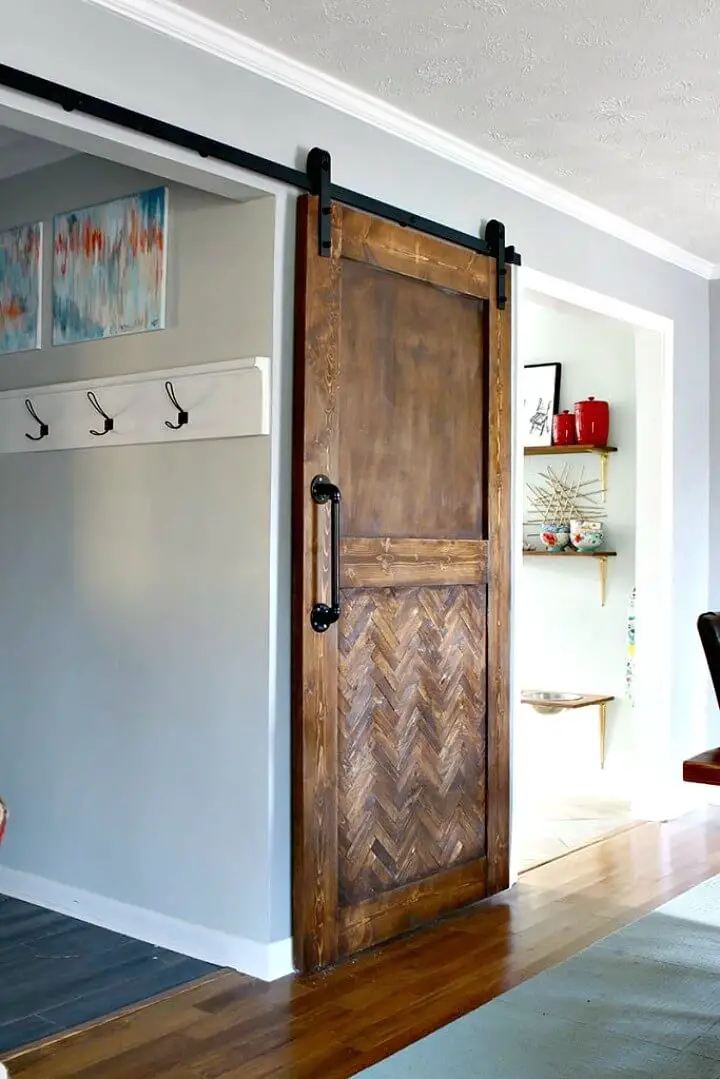
Build a Wooden Chevron Barn Sliding Door
Elevate the ambiance of your home with a unique, handcrafted wooden chevron barn door featuring an intricate herringbone pattern. This DIY project is accessible to even novice woodworkers, requiring only basic carpentry skills and a few essential tools. The result is a stunning custom piece that adds character and charm to any room, allowing you to take pride in your creation. Whether using reclaimed or fresh lumber, this sliding door plan ensures a beautiful transformation with minimal effort. Get ready to be impressed by the end result and download today’s plans to start building!
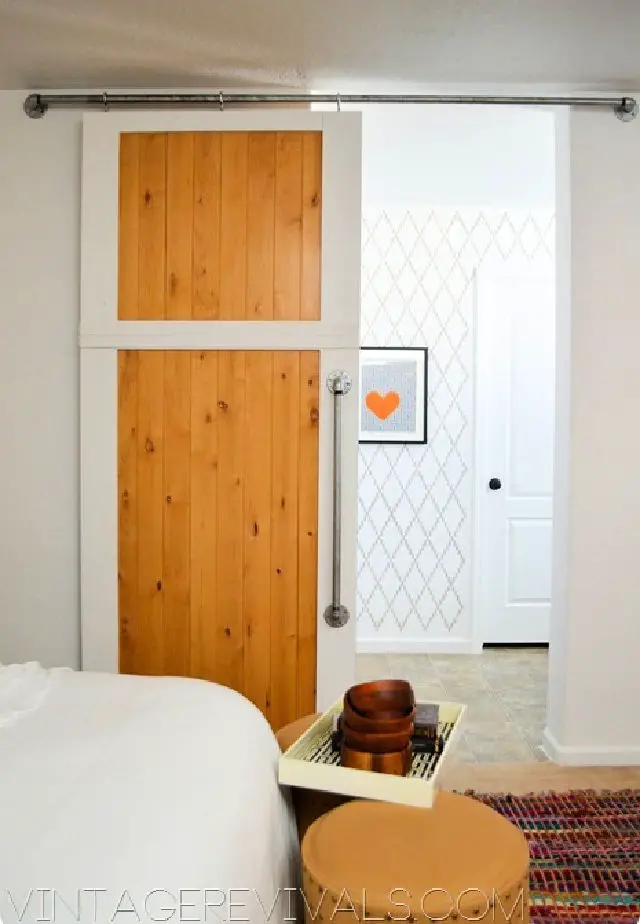
Handmade Sliding Door With Plumbing Pipe
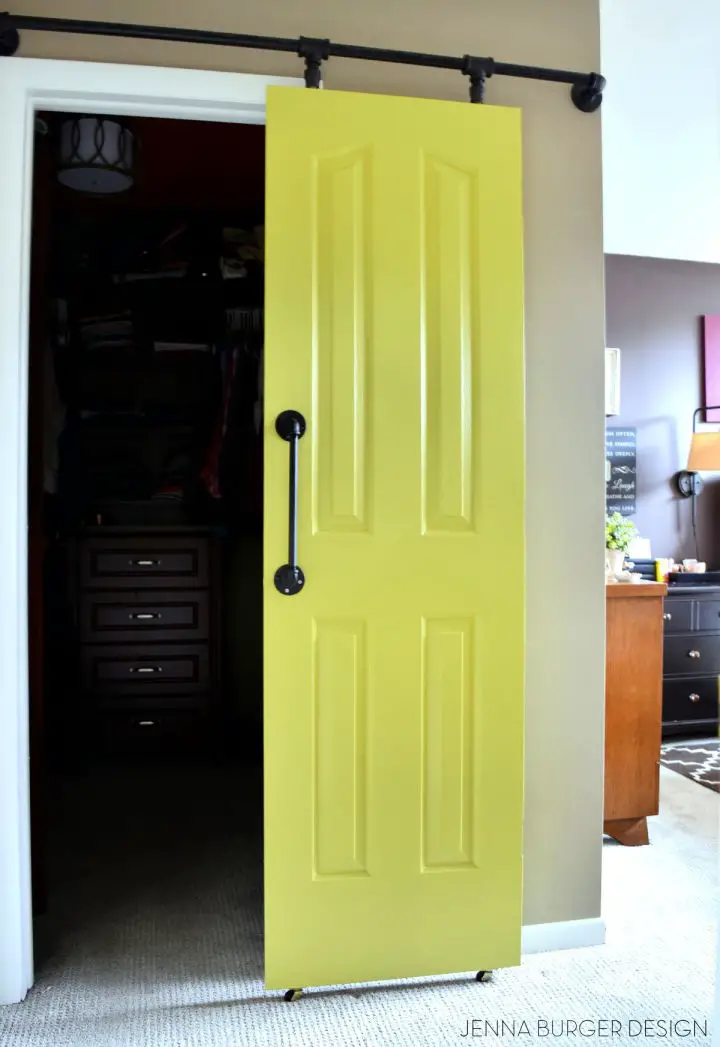
Elevate your space with a creative twist by incorporating a sliding door crafted from plumbing pipes. This budget-friendly yet striking solution streamlines the experience, eliminating any kinks that may have arisen from previous DIY endeavors.
By injecting a pop of color or pattern, you can revitalize any area while optimizing storage capacity. Moreover, this type of installation is an accessible and achievable do-it-yourself project. The transformation it brought to this master closet was nothing short of remarkable, with the addition of a plumbing pipe sliding door proving the perfect solution.
Inexpensive DIY Wooden Barn Sliding Door
Transform any room into a cozy haven with this budget-friendly DIY wooden barn sliding door. The rustic charm of an old-fashioned barn is now within reach, without breaking the bank. This durable and inviting door is not only easy on the eyes but also effortless to install, making it a perfect DIY project for those who value simplicity and practicality. With its unbeatable price tag, you can bring the warmth and character of a wooden barn into your living space, making it the perfect choice for those looking to add a touch of rustic elegance to their home.
How to Make a Sliding Door – Step by Step
If you’re longing for the sleek, sliding door aesthetic without sacrificing your wall’s integrity, fear not. With a simple DIY approach, you can achieve that modern look without breaking the bank or dedicating an excessive amount of time to installation. The beauty lies in its accessibility – anyone can do it! This straightforward yet stylish solution offers a convenient means of acquiring the desired appearance at a fraction of the cost. By embracing this innovative product, you’ll not only enhance your space’s visual appeal but also introduce added functionality and practicality, making it an ideal choice for busy households where every square meter counts. With this clever solution, bid adieu to the frustrations associated with doors that swing open in the wrong direction or occupy too much valuable space – instead, create a welcoming atmosphere that impresses your guests.
Gorgeous DIY Sliding Barn Door
Transform the look of your shed with a unique and functional sliding door, crafted from a repurposed skateboard. This innovative design is surprisingly easy to assemble and can be seamlessly integrated into any room. Not only will it add a touch of modern style, but it’s also an affordable and practical solution for upgrading your home. With basic skills and tools, you can create this stunning piece in no time, perfect for impressing family and friends. Don’t wait – start making your own DIY sliding barn door today and experience the incredible transformation at an unbeatable price!
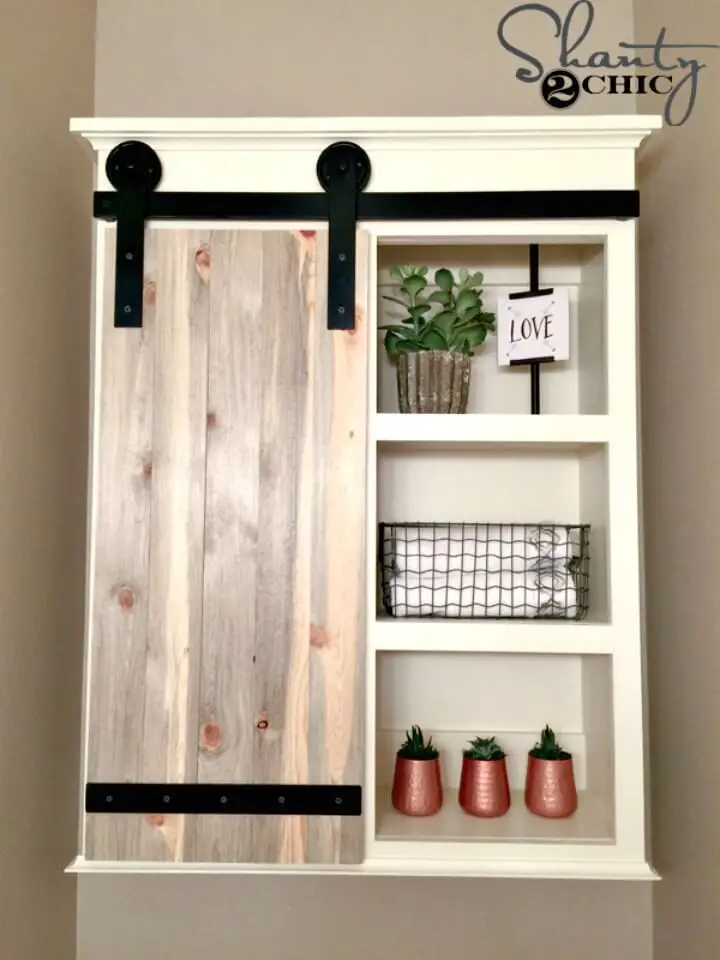
Free Sliding Barn Door Console Woodworking Plans

For those seeking a rustic touch without breaking the bank, this intermediate-level project offers an ideal solution. The sliding barn door design of this console table is sure to impress in any room, whether it’s the living room or bedroom. And the best part? You can bring this beautiful piece of furniture to life with minimal investment and simple tools. Just head to your local hardware store for wood panels, doors, and basic materials like screws and hinges, and you’ll be well on your way. The detailed plans are readily available online, making it easy to follow along as you work through each step of the process. So why not seize the opportunity to create a one-of-a-kind DIY masterpiece? With the guidance of this easy-to-follow tutorial, you can start building today and enjoy the fruits of your labor for years to come.
Homemade Fabric Sliding Door
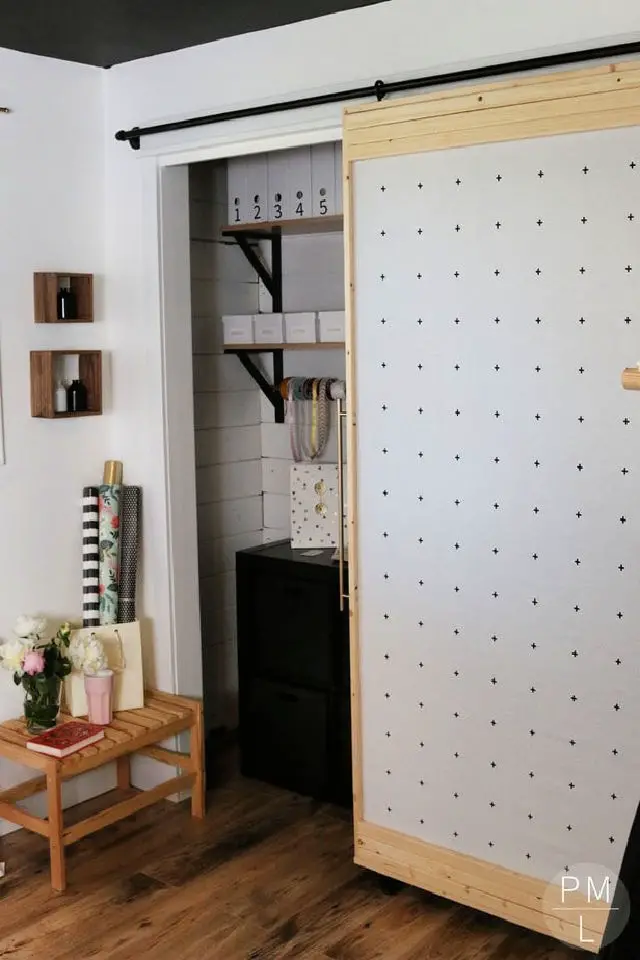
Transforming your living space just got a whole lot more creative – and budget-friendly! With DIY fabric sliding doors, you can give any room a unique makeover without breaking the bank. This ingenious solution is perfect for kids’ playrooms or formal living rooms alike, with an impressive cost of under $100. Plus, by using your preferred fabric, you’ll save even more. The best part? This project lets your imagination run wild, allowing you to add a personal touch to your home decor. With its simplicity and versatility, this DIY door is sure to become the talk of the town. So why not get started today and turn your space into a masterpiece that reflects your personality?
How to Build a Wooden Sliding Barn Door
Transforming a room with rustic charm is as effortless as crafting your own handcrafted barn door. With basic tools and woodworking skills, you can create functional and beautiful DIY wooden sliding barn doors that exude personality and style. This innovative solution provides privacy or separates rooms without the need for extensive renovations or construction work, making it an ideal choice for those on a budget. The best part? These space-saving doors not only add character to your modern home but also save you money compared to other costly projects.
Turn Old Pallet Wood Into Sliding Barn Door
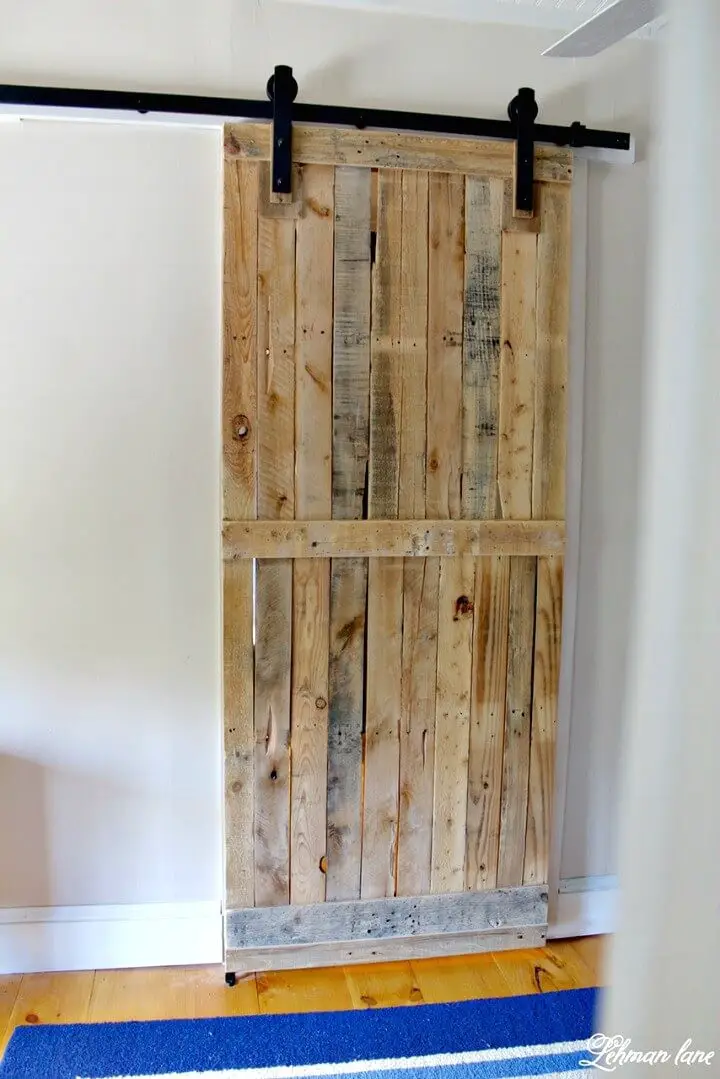
Transform your home’s entryway with a unique DIY project that combines rustic charm with modern functionality. By upcycling old pallet wood, you can create a stunning sliding barn door that not only adds character but also saves space. Start by gathering the necessary materials, including reclaimed pallets, hinges, screws, and paint or stain to finish the look. Then, let your creativity shine as you transform the planks into something truly special. The end result is a stylish and practical entrance solution that will amaze everyone who enters your home.
Building a Sliding Barn Door for Media Console
Transform your space with a rustic farmhouse-style media console that doubles as an old-fashioned bookcase when not in use. This budget-friendly project is perfect for those who want to add a touch of uniqueness without breaking the bank. By attaching sliding barn doors to the frame, you can create a stunning focal point in your master bedroom or any other room. With minimal tools and supplies required, this DIY endeavor is ideal for those looking to upgrade their decor with ease.
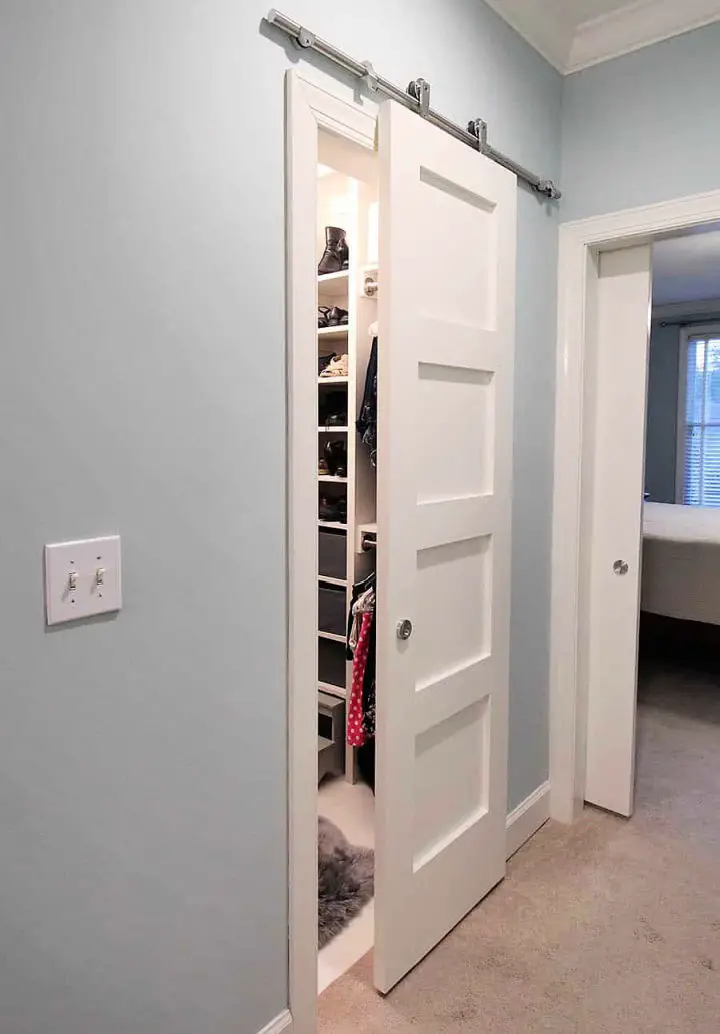
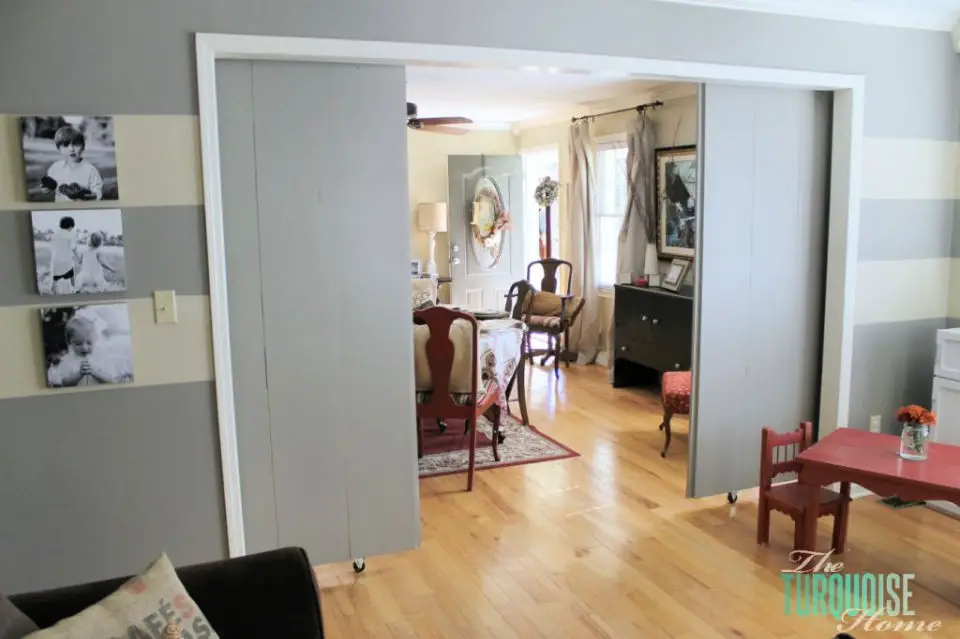
DIY Sliding Door Solution for Small Spaces
Imagine a space where functionality meets style, all without sacrificing precious square footage. Enter the perfect DIY sliding door solution for small spaces – a game-changer that brings a touch of elegance to any room. Priced at just $80, this innovative design not only opens up new possibilities but also proves that affordable can be beautiful. With its ease of installation and chic aesthetic, this sliding door option is the key to unlocking the full potential of your smaller living spaces. No longer will limited square footage hold you back from achieving your dream look – make this sliding door solution for small spaces a reality today!
Build Your Own a Sliding Barn Door
Bring a dash of personality to your home’s entrance with a one-of-a-kind DIY sliding barn door that exudes rustic charm. This sturdy, substantial door is designed to make a statement without compromising on style or security, making it an ideal addition to any mud room or entryway. The best part? It can be customized to fit seamlessly into your space’s unique aesthetic.
Say goodbye to size limitations and hello to endless possibilities – with our easy-to-follow instructions, comprehensive materials list, and array of customization options, you’ll be well on your way to creating a show-stopping DIY sliding barn door that will leave a lasting impression. So why settle for ordinary when you can have extraordinary? Start building your dream entrance today and get ready to make a lasting impression!
Build a Sliding Barn Door With Plywood
Transform any space into a creative haven with this one-of-a-kind, functional design. To get started, simply follow these easy steps: begin by cutting a plywood sheet to size, then add trim boards to give it a polished touch. Next, apply some gentle force to overcome the slight friction holding it in place. With these straightforward features, you can easily achieve a modern, rustic, or uniquely stylish look over the weekend! For an added touch of sophistication, incorporate decorative elements like layered wood shims for an elegant finish, or leave it au naturel for a more rustic charm that brings character to any room. This innovative DIY sliding barn door made from plywood is ready to elevate your home decor – and all you need is a Saturday afternoon!
Make a Sliding Barn Door for Bathroom Cabinet
Transform your bathroom’s storage into a charming focal point by creating a DIY sliding barn door for your cabinets. This clever addition takes mere minutes to install, requiring minimal effort but yielding maximum impact.
The open shelving design invites display of decorative items and keeps essentials like extra hand towels or toilet paper within easy reach. Meanwhile, the hidden storage area provides a discreet space for storing those necessary yet aesthetically undesirable bathroom items.
Not only will this project elevate your bathroom’s visual appeal, but it’ll also simplify tidying up processes. To get started on this straightforward DIY endeavor, head to our website for step-by-step instructions and free printable plans. Once complete, you’ll enjoy the perfect blend of open shelving and storage in your newly enhanced bathroom.
Lovely DIY Sliding Herringbone Barn Door
Bring rustic charm to your home with this stunning DIY sliding herringbone barn door, expertly blending warmth and style. Its surprisingly simple construction makes it accessible to anyone, eliminating the need for costly contractors and saving time and energy in the process. With a few easy steps, you can effortlessly bring the country chic look of a herringbone barn door into your space, adding a unique touch that’s sure to impress.
Faux Stained Glass Sliding Barn Door
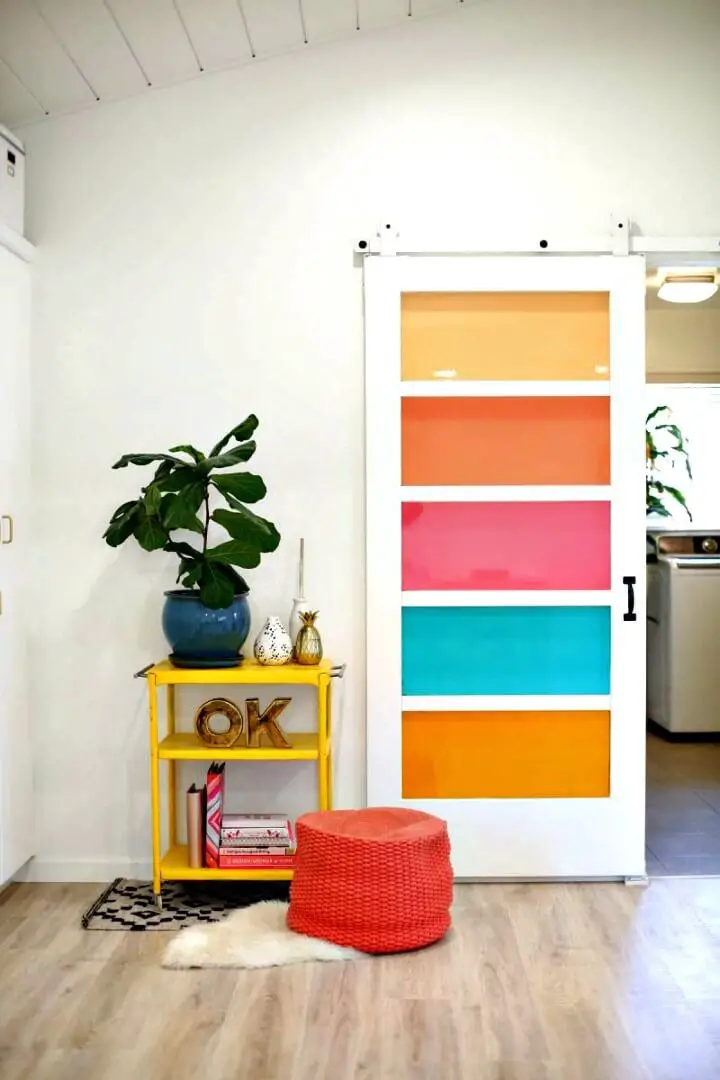
Transform your space with this vibrant DIY faux stained glass sliding barn door project, perfect for showcasing your unique style and adding a touch of artistry to your home. This creative endeavor is accessible to anyone, regardless of experience level, thanks to straightforward instructions that guide you every step of the way.
The key to success lies in the easy-to-work-with faux stained glass material, which can be cut into shape and attached to any existing door frame or sliding barn door system. What’s more, this eco-friendly option is non-toxic and damage-free, ensuring your family’s and pets’ safety while you create something truly special.
With endless design possibilities at your fingertips, even the most novice crafters will feel like pros as they bring their custom vision to life. Make a statement with your home today by installing this stunning faux stained glass sliding barn door – a project that’s both easy and impactful!
Make a Sliding Barn Door for Less Than 20 Bucks
Transform any interior space into a rustic retreat without breaking the bank by creating a DIY sliding barn door for under $20. Sliding barn doors are a design staple that can instantly elevate a room’s aesthetic. If you’re on the hunt for an affordable solution that still exudes style, this DIY project is the perfect answer. By spending less than twenty bucks, you’ll not only achieve a beautiful feature piece but also showcase your creative skills by building something from scratch. Share your handmade pride with family and friends as they marvel at your stylish sliding barn door – just be prepared to share the secret of its humble origins: ‘I made it myself’!
Latest DIY Sliding Barn Door Design
Transforming your home’s character without breaking the bank? The modern sliding barn door design is here to revolutionize your space. Handcrafted to perfection, this unique piece of furniture brings rustic charm to any room in your home. What’s more, you’ll be spoiled for choice with endless customization options – from sleek and modern to cozy and vintage. And the best part? This incredible value comes at an unbeatable price point: under $75! Whether you’re looking to elevate your living room or create a warm welcome for guests in a bedroom, this DIY sliding barn door is the perfect solution. So why wait? Get creative, have fun, and bring your unique vision to life with this affordable and adaptable design.
Conclusion:
As we conclude this exhaustive guide to 25 simple DIY sliding door projects, it’s clear that we’ve covered all the essential aspects of creating your bespoke sliding door. From discussing the necessary materials and tools to providing step-by-step instructions, design customization options, troubleshooting common obstacles, maintenance guidance, and eco-friendly alternatives, you now possess the knowledge and confidence to successfully execute your DIY sliding door project.
