Creating a unique and personalized wooden sign is an excellent way to showcase your creativity while adding a touch of warmth to your home or office decor. This comprehensive guide is designed to provide a step-by-step walkthrough, ensuring that you have all the necessary information to start from scratch. With these 35 easy DIY wood signs, you’ll be able to transform a piece of wood into a stunning work of art that reflects your style and message. By following our simple and straightforward approach, you’ll learn how to select the right materials, apply the best finishes, and add the perfect touches to make your sign truly stand out. Whether you’re a seasoned DIY enthusiast or just starting out, we’ve got you covered with our comprehensive guide. So, if you’re ready to unleash your creativity and create something special, keep reading for a detailed walkthrough that will take you through each phase of the project.
Why Make DIY Wood Signs?
When it comes to creating personalized decor, making your own DIY wood signs is a project that offers numerous benefits. Not only can you save money compared to buying pre-made designs, but you’ll also have the opportunity to add a unique touch to your home that reflects your personal style.One of the most significant advantages of DIY wood signs is their versatility. Whether you’re going for a rustic farmhouse vibe or a modern minimalist aesthetic, these signs can be customized to fit seamlessly into any decor scheme. You can choose from a range of sizes, shapes, colors, and finishes to create a piece that perfectly complements your home’s unique character.Beyond the aesthetic appeal, making DIY wood signs is also an excellent way to build new skills or improve existing ones. From painting to woodworking, each project presents an opportunity to learn and refine your crafting abilities.Additionally, handmade wood signs make for thoughtful and one-of-a-kind gifts. Imagine presenting a loved one with a beautifully crafted sign that reflects their personal style or interests – it’s a gift that will be cherished for years to come.Perhaps most importantly, the process of creating something by hand offers a chance to unwind and find mindfulness in the present moment. Seeing your finished sign displayed proudly in your home can be a constant reminder of your creativity, hard work, and ability to create something truly unique.
How to Make a Wooden Sign – Step by Step
Creating a beautiful wooden sign without the aid of stencils or cut machines may seem like an insurmountable challenge, but it’s surprisingly within reach. With just a few essential supplies and a step-by-step guide, even the most novice crafters can produce stunning results. This method is remarkably versatile, allowing you to create unique pieces for your own home or start a handmade business with ease.
Supplies You’ll Need:
When it comes to creating a unique wooden art piece, having the right materials is crucial. You’ll need a base material such as smooth plywood or solid wood – you can even repurpose scraps or opt for affordable options. To transfer your design onto the wood, graphite paper is essential. Once you’ve got your design in place, choose between paint and chalk markers depending on the finish you desire. For printing out your design, you’ll need a regular computer and printer. If you’re looking to add some color to your background, opt for house paint over craft tubes for a more professional finish. To get started with priming your markers, have a scrap piece of cardboard handy. Before you begin, make sure the wood is properly prepped with sandpaper. Finally, secure your graphite paper and design in place using tape.
Step 1: Print Your Design
When it comes to creating a wooden sign, the first step is to select and print the design that best suits your vision. This can be done by browsing through various font options online or exploring unique designs available on platforms like Etsy. To ensure a flawless execution, make sure to print your chosen design in a size that perfectly complements the dimensions of your wood piece.
Step 2: Prepare Your Wood
First, ensure that your wooden pieces are trimmed to the precise dimensions you desire. Next, take some time to gently sand down any rough edges or imperfections, leaving a smooth surface behind. Once this is done, apply a coat of paint in the hue of your choice and allow it to fully dry before proceeding.
Step 3: Transfer the Design
Begin by placing the graphite paper, graphite side facing downwards, onto the wooden surface. Next, position your printed design on top of the graphite paper and secure it using tape to ensure it remains in place. To transfer the design onto the wood, use a pencil to carefully trace around its edges, taking care not to smudge or move the design while doing so.
Step 4: Paint the Design
Begin by priming your paint markers on a piece of cardboard to get the paint flowing smoothly. As you start outlining and filling in your design, maintain a steady pace and work slowly to achieve clean, precise lines. This initial investment of time will pay off as you achieve the desired level of detail and visual impact.
Step 5: Add Details and Finishes
Once the main design has been brought to life, it’s time to focus on adding those finer details that truly make your sign shine. This might include incorporating textures, patterns, or other visual elements that enhance its overall aesthetic appeal. Additionally, if you’re feeling crafty, now is also an excellent opportunity to add a custom frame using scrap wood or other materials, effectively setting your sign apart and giving it a professional finish.
Cleaning Up
After completing the sign, permit the ink to fully dry before handling or displaying it. If you employed graphite paper during the creation process, use a soft, dry cloth to carefully remove any excess graphite residue.
Maintenance
When properly cared for, wood signs are capable of enduring for many years. If you’ve employed chalk markers in your sign creation process and desire to modify or refresh your design at a later time, the likelihood of erasure and redesign depends on the specific permanence characteristics of the used marker. The potential to easily alter or remove the original design exists if the chosen marker exhibits moderate to high erasability properties.
Video Tutorial
By combining a helpful video tutorial with a written guide, you’ll gain a comprehensive understanding of how to create a wood sign without the need for stencils or cut machines. This approach not only provides a visual demonstration of each step but also allows for a deeper comprehension of the process. Whether you’re crafting as a hobby or looking to start a side business, this budget-friendly method offers an accessible way to produce custom wood signs. With patience and creativity, you’ll be able to create professional-looking signs that rival those made by professionals.
FAQs on DIY Wood Signs
Embarking on a DIY wood sign-making adventure can be an exhilarating experience, and with the right guidance, you’ll be well on your way to creating unique and personalized pieces for your home or as gifts. To ensure a smooth start, we’ve compiled answers to some of the most common questions that will help you navigate the process step by step.
What type of wood is best for making DIY wood signs?
When it comes to crafting DIY wood signs, the ideal material is often a matter of personal preference. Smooth plywood and solid pine woods are popular choices due to their ease of working and painting. Yet, for those seeking a more rugged appearance, reclaimed wood or pallet wood can be excellent alternatives. These options can add a charming rustic touch to your sign.
Can I make a wood sign without any power tools?
While it may seem daunting to create a wood sign without relying on power tools, there are indeed ways to do so. For smaller, more straightforward projects, you can opt for pre-cut wooden pieces and devote your attention to the design aspect, utilizing paint, stencils, or markers as desired. To achieve a smooth finish, you can manually use sandpaper to address any rough edges.
How do I transfer a design onto the wood?
To replicate designs onto wooden surfaces, two common methods are available. The first approach utilizes graphite paper, which is placed graphite-side down on the wood. A printed design is then positioned atop the paper, and a pencil is used to trace over it, effectively transferring the design onto the wood. Alternatively, one can employ a shading technique by covering the back of the printed design with light pencil marks. Next, carefully tracing over these markings transfers the graphite directly onto the wood, allowing for a precise replication of the original design.
What kind of paint should I use for my wood sign?
When it comes to crafting DIY wood signs, acrylic paint is an excellent choice thanks to its rapid drying time and flexibility. However, for a more resilient finish that can withstand exposure to the elements, you may want to consider using outdoor or furniture paint, especially if your sign will be placed in an area where it will be exposed to rain, sun, or snow.
How can I seal and protect my wood sign?
When it comes to safeguarding your wood sign, particularly if it’s destined for outdoor use, applying a clear sealant is an essential step. Polyurethane or water-based options can effectively shield against moisture and UV rays. To achieve maximum protection, it’s crucial to apply at least two coats, adhering to the product’s drying time guidelines between applications.
Can I erase and redo the design if I make a mistake?
When working on a DIY project, mistakes are an inevitable part of the process. Fortunately, there are ways to correct errors made with chalk markers or pencils. For instance, if you make a mistake while using these tools, you can easily erase it with a damp cloth or eraser. On the other hand, paint mishaps require a bit more patience. Once the paint has dried completely, you can cover up the area with your background color and then redo your design once that layer is also dry.
Are DIY wood signs a good gift idea?
A thoughtful and unique gift option is a handmade wood sign, suitable for various milestones such as housewarming celebrations, wedding presents, birthday surprises, or holiday gatherings. The opportunity to personalize the sign with a meaningful quote, name, or date amplifies its sentimental value, ensuring it will be cherished by the recipient.
How can I add a frame to my wood sign?
When it comes to adding a frame to your wooden sign, you can achieve a professional look by cutting strips of wood to the desired width and length. Simply attach these strips around the perimeter of your sign using wood glue and small nails or a staple gun. To complete the look, stain or paint the frame to match or contrast with your sign’s color scheme. With this simple technique, you can elevate the overall appearance of your DIY wooden sign. Whether you’re creating a personalized piece for your own space or crafting a meaningful gift, the possibilities are truly endless when it comes to unleashing your creativity.
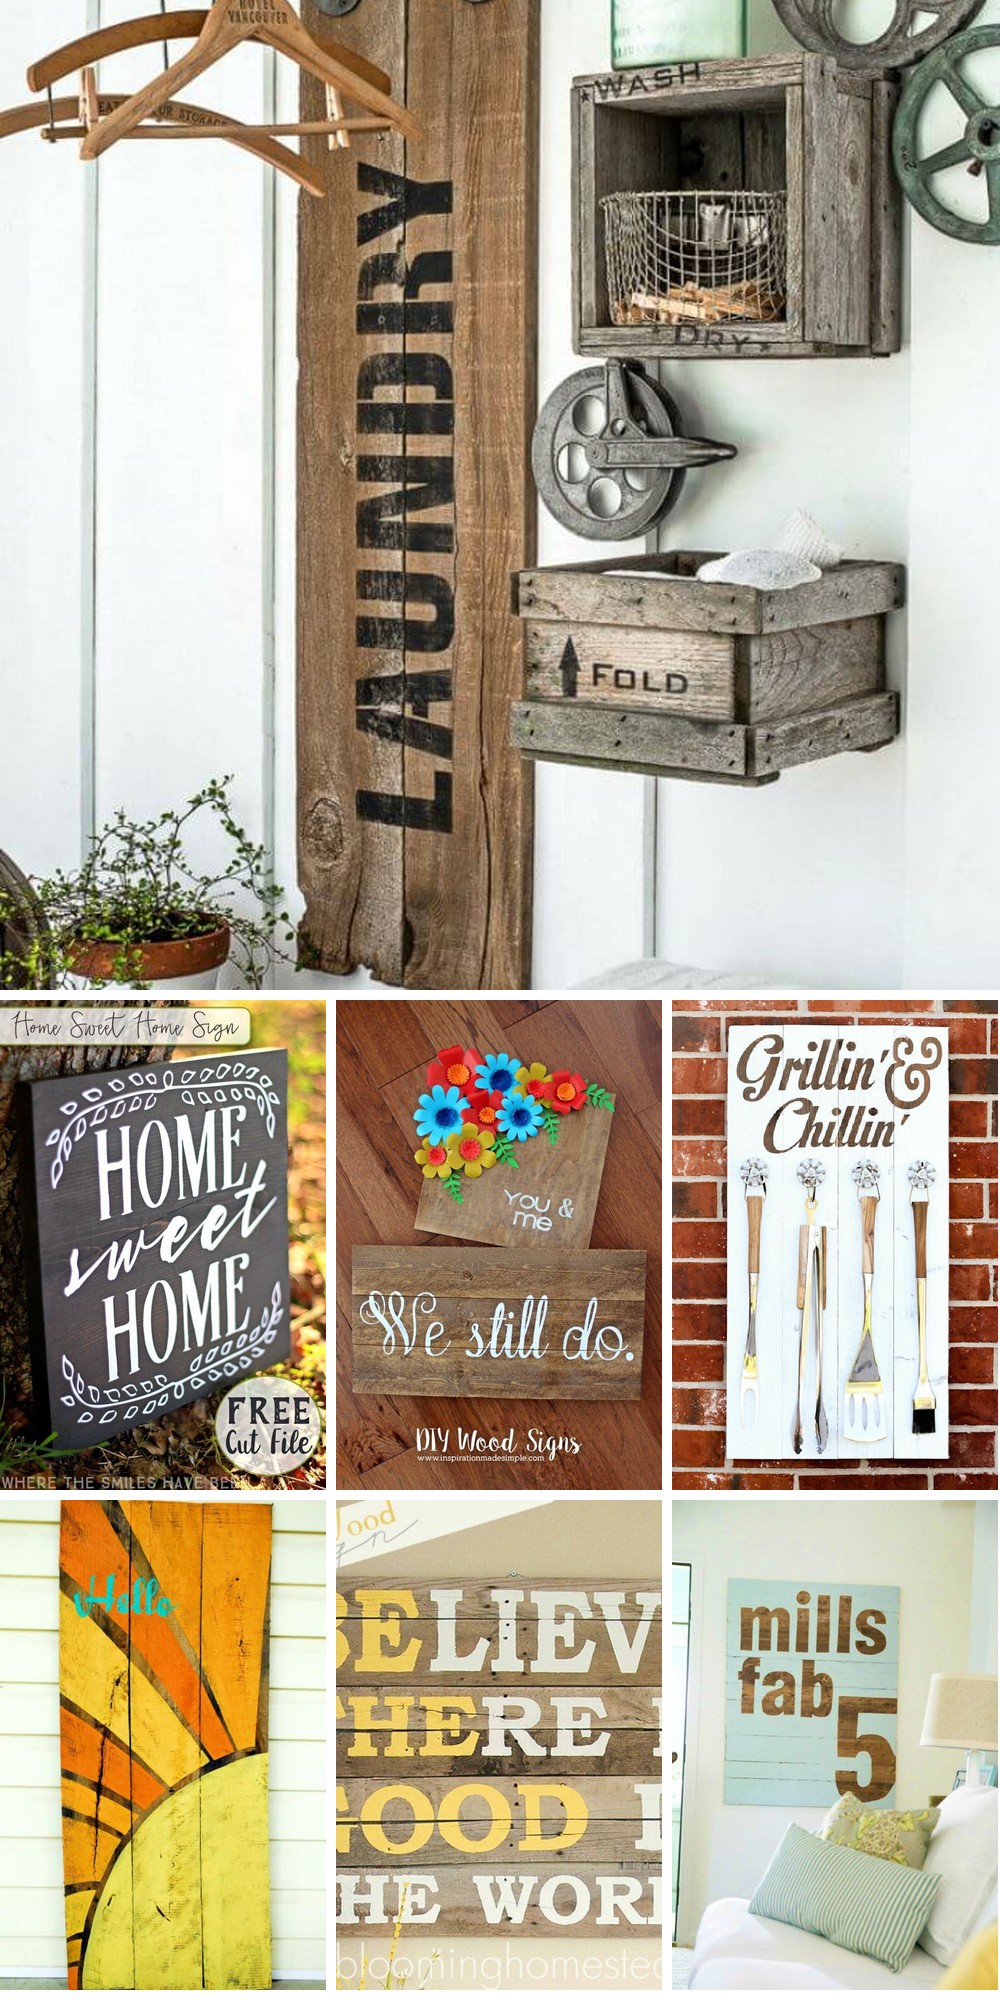
35 DIY Wood Signs (How to Make a Wooden Sign)
Discover the art of crafting one-of-a-kind wooden signs that reflect your personal style and make thoughtful gifts for friends and family. With 35 creative DIY wood sign ideas, you’ll be inspired to unleash your creativity and bring a touch of rustic charm to any room.
DIY Hand Lettering Wood Sign

Transform your living space with a personalized touch by crafting DIY wood signs. The process is surprisingly straightforward, allowing you to infuse unique charm into any room. Whether you’re looking to create cozy kitchen signs, whimsical names for workshops or children’s rooms, the possibilities are limitless. All you require is plywood, paint, and basic tools to bring your creative vision to life. With a step-by-step guide from Love & Renovations, making your own DIY wood signs becomes an achievable endeavor. Let your imagination run wild and dive into this rewarding project!
DIY Plywood Sign
Elevate your space’s personality by crafting personalized decor that tells a story! At MyLove2Make, we’ll walk you through the process of creating unique signs using everyday materials from around your home, making it accessible to anyone eager to add a personal touch. The beauty lies in its simplicity – with minimal equipment and basic supplies, you can transform scraps of wood or pallets into stunning works of art without breaking out the big guns. Master versatile techniques like stencil use and pencil transfer, ensuring an engaging project that caters to all skill levels. Let your creativity shine and get crafting!
How to Make Rustic Wood Sign

Transform your home’s ambiance by creating a one-of-a-kind rustic wood sign using everyday materials and simple techniques. Our step-by-step guide at The Simply Organized Home takes the guesswork out of this budget-friendly project, allowing you to add a touch of unique character to any room. With no need for specialized tools, this DIY endeavor is accessible to everyone, empowering you to bring your favorite quotes and phrases to life on your walls.
DIY Wood Chalkboard Style Sign
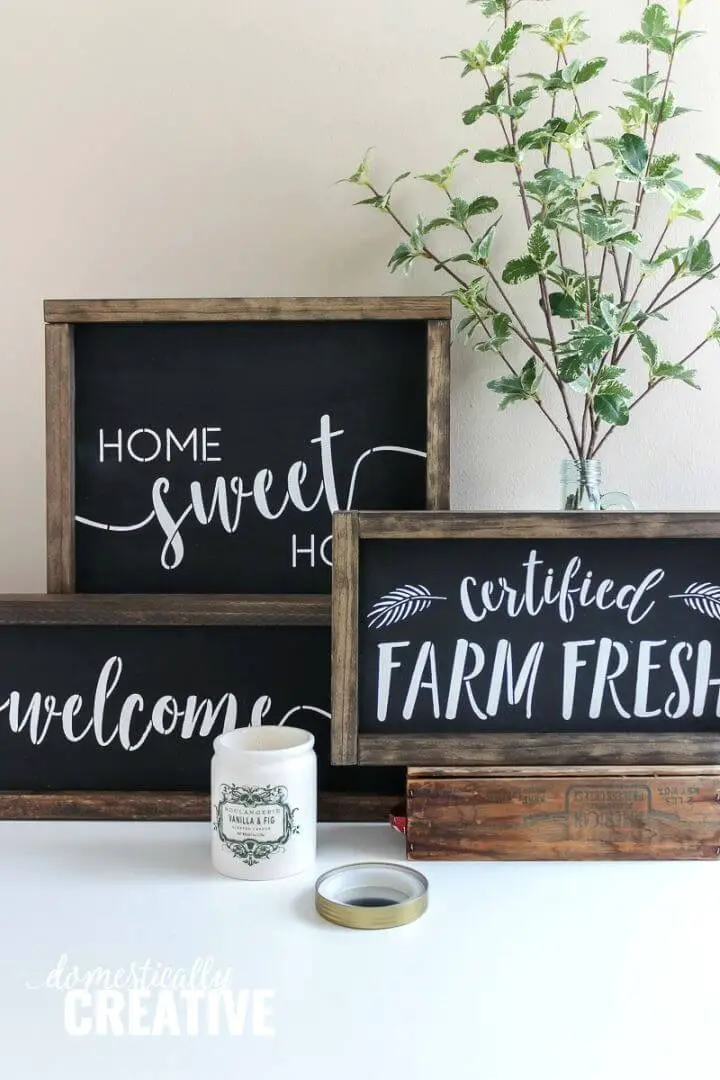
Transform your space with a touch of rustic charm by creating a DIY Farmhouse Chalkboard Style Sign. This straightforward guide takes you through the process, using accessible materials and tools. From choosing plywood or pine boards to applying a beautiful stain, each step is designed to be easy to follow and produce stunning results. Let the warmth of farmhouse decor envelop your home with this delightful project.
DIY Salvaged Junk Wood Clock With Farmhouse Sign
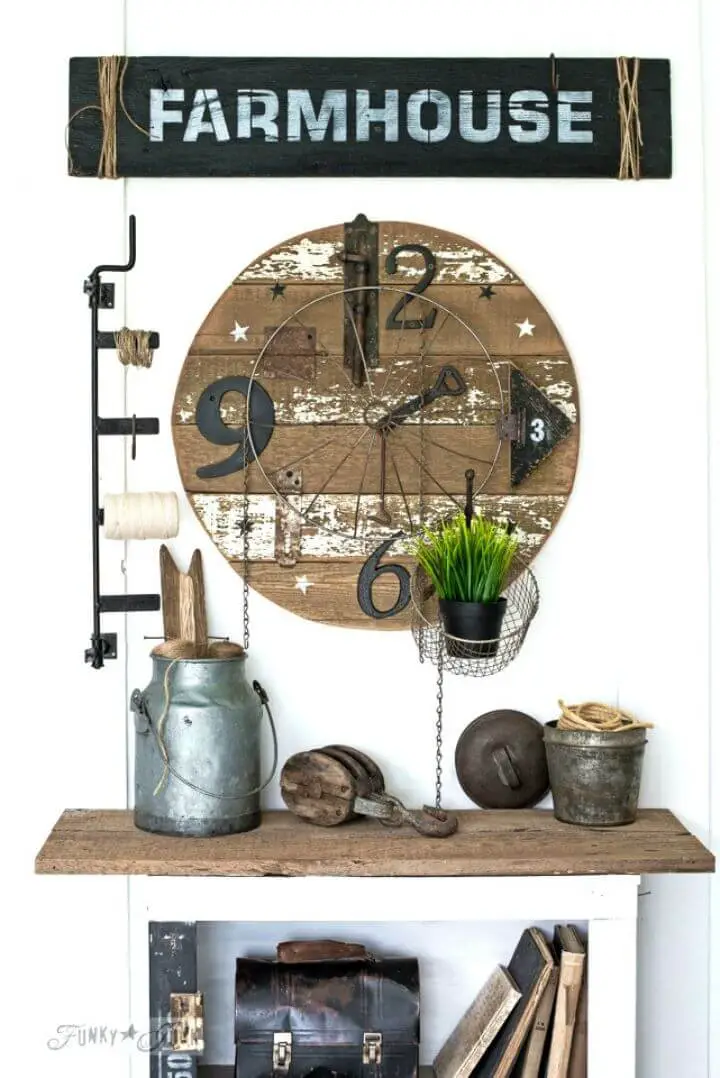
Transform your home with the rustic allure of a faux farmhouse clock, sans clock kit! Perfect for fans of the farmhouse aesthetic, this DIY project combines reclaimed wood and imagination to create a stylish yet practical piece. With minimal tools and materials, you’ll upcycle a wire flower basket and miscellaneous items into a one-of-a-kind decor piece that embodies the essence of cozy farmhouse living. For a step-by-step guide and expert tips, visit Funky Junk Interiors. Ready to infuse your space with rustic charm? Begin today!
Homemade Acrylic and Wood Fall Sign
Transform your home’s ambiance this autumn with a charming DIY fall sign project from Lydi Out Loud. This easy-to-follow tutorial is perfect for creating a cozy atmosphere around your fireplace or any snug corner of your abode. By combining unfinished wood letters and Americana Decor Texture, you’ll craft a stylish piece that adds warmth to your space. The step-by-step process involves applying texture and arranging the wooden letters on an acrylic frame, ensuring a delightful addition to your fall decorating. With simplicity in execution comes a rewarding outcome, making this project perfect for crafting a unique autumnal flair.
How to Make Homemade Wood Signs
Transform your home with the warmth and character of DIY wood signs. With the guidance of creative expert Kim from Inspiration Made Simple, you can craft stunning wooden decor that reflects your personal style. From colorful flower signs to inspire your bedroom’s design to thoughtful quotes for a couple’s retreat, these projects are perfect for adding a unique touch to any room. To get started, gather basic supplies like wood plaques, paint, and a Cricut machine for precision cutting. Even beginners can achieve remarkable results by following Kim’s easy-to-follow instructions. As you bring your creative vision to life, you’ll be able to make your living space truly one-of-a-kind.
Garden Sign Crate Entry Table on a Wall
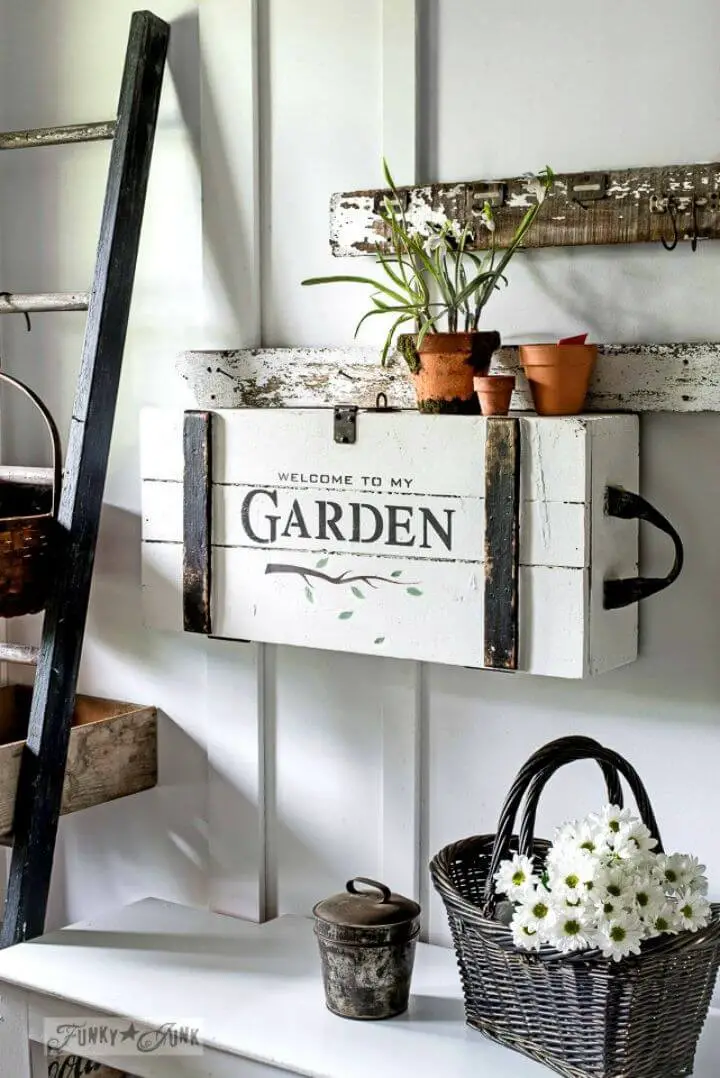
Elevate your entryway’s ambiance by transforming it into a tranquil retreat inspired by nature, courtesy of Funky Junk Interiors’ ingenious wall-mounted desk project. This creative reuse of an old crate not only optimizes space but also injects a hint of rustic charm, making it a perfect choice for those seeking a harmonious blend of form and function. As the seasons change, this unique piece invites you to welcome summer’s warmth into your home with its clever combination of practicality and charm. For more inspiration on how to revamp your entryway with character and functionality, explore step-by-step guides and innovative ideas that will take your space from ordinary to extraordinary.
DIY Slatted Summer Wood Sign
Transform any room into a radiant oasis with a DIY Slatted Summer Sign that exudes warmth and personality. This engaging project is surprisingly easy to execute, requiring just a few basic materials like wooden slats, DecoArt Americana multi-surface paints, foam brushes, and a vinyl stencil. The end result is a one-of-a-kind decor piece that harmoniously integrates with other summer-themed crafts, perfect for enthusiasts seeking to infuse their space with the essence of the season.
Make a Wood Sign with Calligraphy Quote

Immerse yourself in a creative odyssey as Angela Marie Made’s comprehensive tutorial guides you through crafting a bespoke DIY wood sign. This meticulous step-by-step process enables you to bring your unique vision to life, incorporating captivating calligraphy quotes that add a personal touch to any setting. Two distinct techniques for transferring your chosen design onto wood are revealed – with or without the aid of a vinyl cutting machine. Furthermore, discover the most suitable materials and tools required to achieve flawless results, ensuring your wooden sign becomes a stunning addition. Whether you’re decorating your workspace or gifting a thoughtful handmade treasure, this tutorial has everything you need to get started. For the complete guide and a complimentary printable of the design, visit Angela Marie Made.
DIY Home Is Where the Heart Is Sign
Transform your living space with a dash of warmth and personality using our comprehensive DIY guide at Lolly Jane. We’ll show you how to create a unique ‘Home is Where the Heart is’ sign by repurposing wood shims and reclaimed shingles, perfect for DIY enthusiasts of all skill levels. This project infuses any room with emotion and character, elevating the ordinary to something truly extraordinary. Follow our step-by-step instructions and embark on a creative journey that will bring your home’s walls to life.
Handmade Love Hand and Foot Print Sign
Create a heartfelt keepsake by crafting a DIY love hand and foot print sign that captures the tender moments shared between loved ones. This simple yet meaningful project allows you to personalize a unique token of appreciation, gratitude, or love. Perfect for honoring cherished relationships or treasured memories, this craft involves using hands and footprints to spell out ‘love’ on a wooden sign, creating a lasting reminder of your affection.
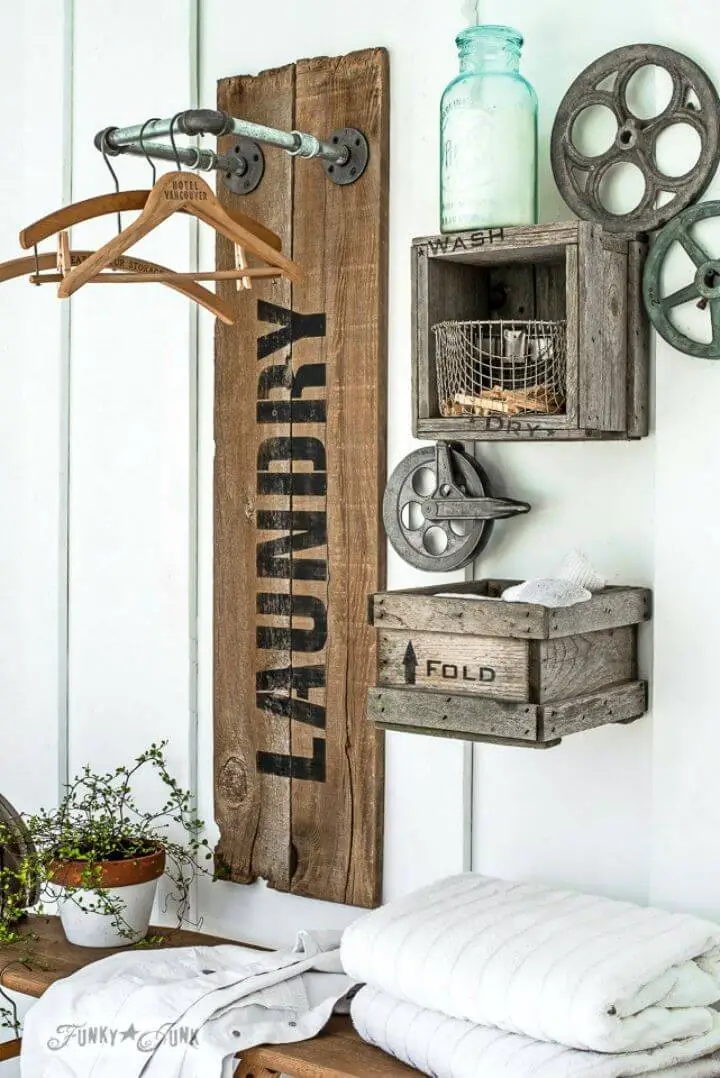
Reclaimed Wood and Pipe Laundry Sign
Transform your laundry room or any small space into a charming oasis by repurposing reclaimed wood and industrial pipes to create an eco-friendly sign hanging station. This DIY project expertly blends rustic charm with industrial flair, making it perfect for tight spaces.
Using stencils, Fusion Mineral Paint, and basic hand tools, you can upcycle these materials into a functional and stylish addition to your home. The best part? This adaptable project is not limited to laundry rooms – it’s ideal for any space where you want to add a vintage touch. So why not start making now and enjoy the unique combination of functionality and personal style that this DIY project has to offer?
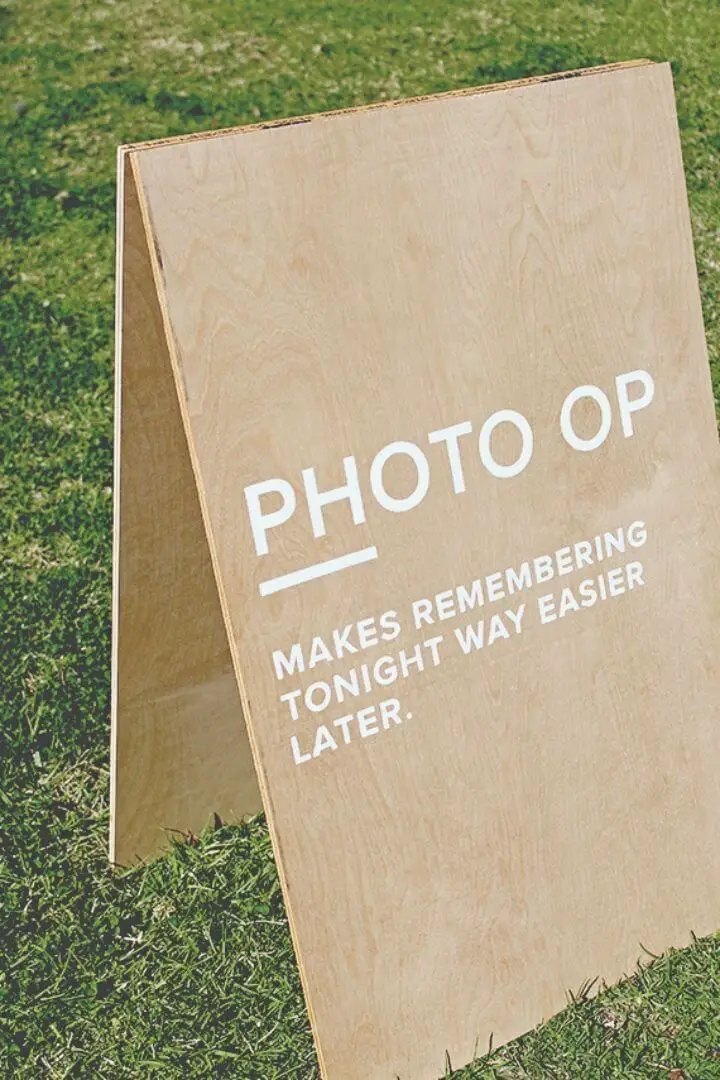
Easy DIY Fall Gallery Wall
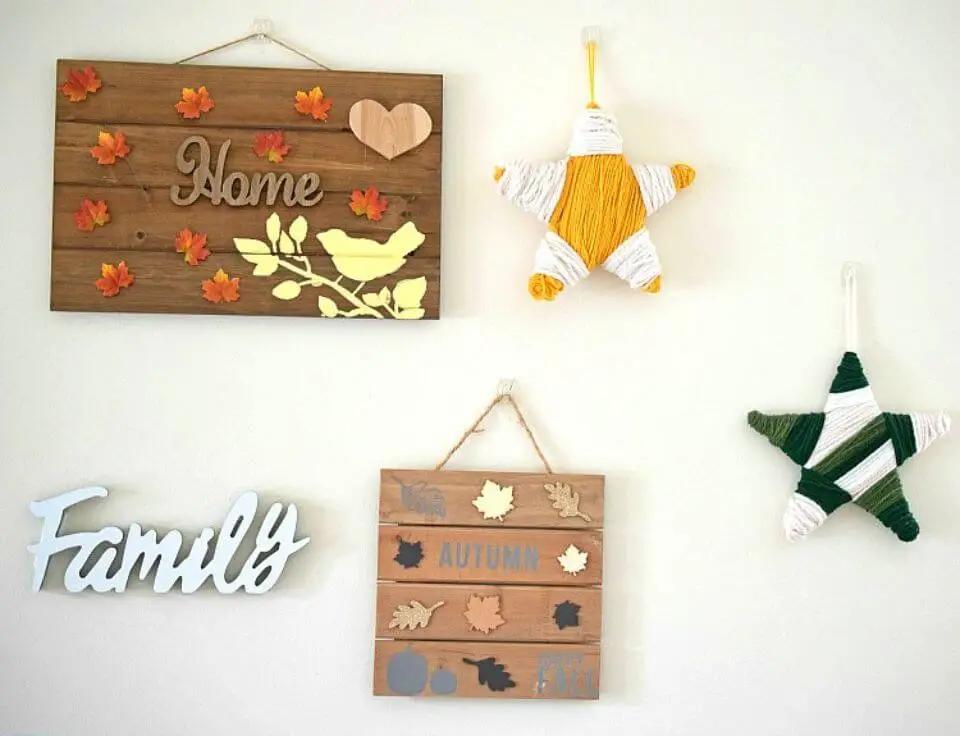
Transform your living room into a haven of autumnal charm with a captivating DIY fall gallery wall that celebrates the season’s splendor. This delightful creation, born from a spontaneous Target shopping trip, showcases affordable treasures like a wooden sign, a ‘Family’ cutout, and mesmerizing fall-themed stickers. What sets this project apart is its simplicity – requiring minimal supplies and a dash of creativity. The beauty lies in proving that you don’t need to break the bank or invest hours to infuse your space with a seasonal touch. For a step-by-step guide on crafting this lovely decor, along with other DIY inspiration, visit momhomeguide.com.
How to Make Large Wood Sign
Transform your space with a stunning DIY large wood sign, crafted with ease through this step-by-step tutorial. Perfect for personalizing your home, this comprehensive guide walks you through creating a charming ‘Gather’ sign, ideal for your front porch or kitchen. With video guidance, detailed photos, and a list of required materials at hand, every aspect of the process is carefully considered to ensure a fun and fulfilling DIY experience. For additional inspiration and a complete guide, visit Christina Maria Blog. This tutorial serves as the perfect starting point for adding warmth and personality to your home or crafting a unique gift.
Cute DIY Home Sweet Home Sign
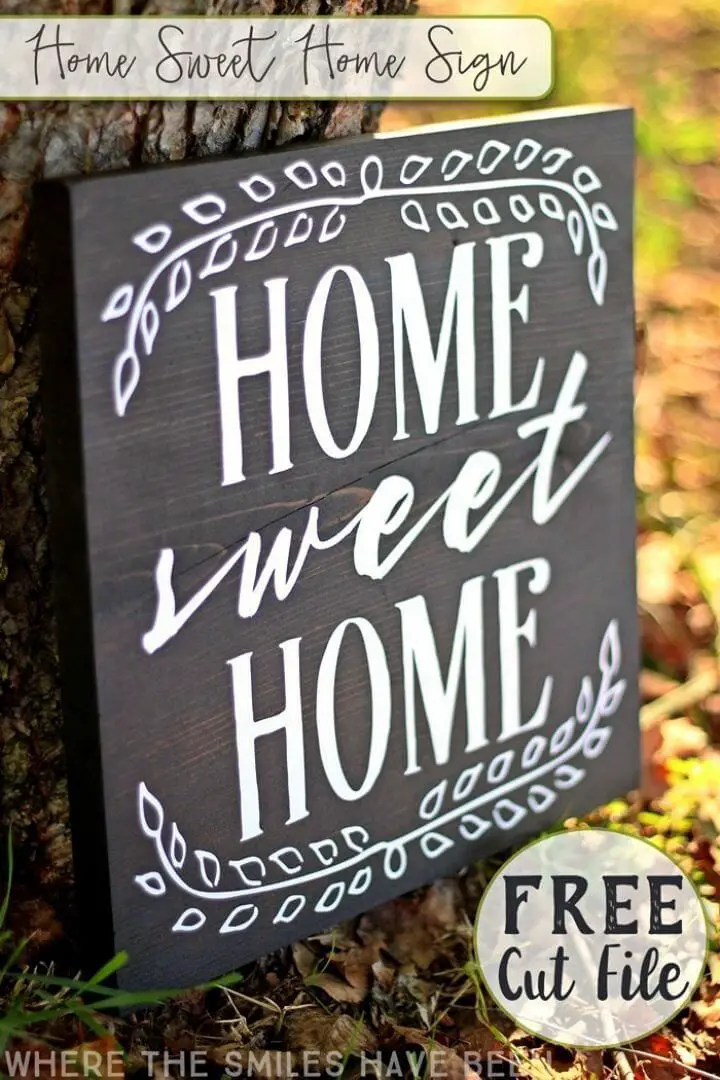
Transform your interior decor or create a thoughtful housewarming gift with a delightful ‘Home Sweet Home’ sign, accompanied by a complimentary cut file for instant download. This straightforward DIY project packs a big punch, effortlessly adding warmth and personality to any room. Using basic materials such as white vinyl and a wooden board, you can craft a stunning sign that embodies the essence of home. Feel free to customize your creation with paint or stain, allowing it to perfectly reflect your unique style. For step-by-step guidance and access to the free cut file, visit Where The Smiles Have Been. Get creative!
Make Your Own Pallet Wood Sign
Embark on your next creative adventure by crafting a unique Pallet Wood Sign using straightforward materials like pallet posts, paint, cardstock, and fundamental tools. This DIY project transforms reclaimed wood into a customized piece of art for your living space. As you navigate the process from sourcing pallets to finalizing your design with paint, you’ll gain valuable insights and learn essential safety tips when working with old wood. For a comprehensive guide on creating stencils using a Silhouette Cameo, explore our previous article. Ready to leave your mark with more innovative DIY sign projects?
DIY Grill Set Holder and Sign
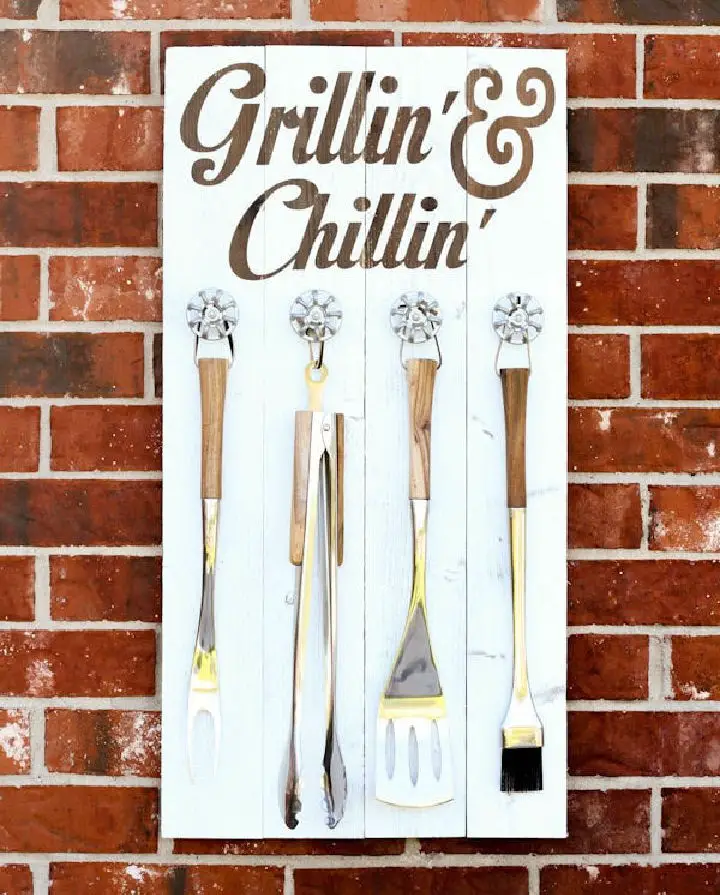
Elevate your outdoor cooking experience with a one-of-a-kind patio grill set holder, designed by the innovative duo behind Let’s DIY It All. Kritsyn Merkley’s creative vision brings together simplicity and functionality in this DIY project, ideal for summer grilling seasons. By combining wood, paint, and knobs, they’ve crafted a versatile holder that not only stores essential grill tools but also adds a personalized touch to your outdoor space. Whether you’re looking for a thoughtful Father’s Day gift or a practical upgrade to your patio setup, this Grill Set Holder is a must-try project for any DIY enthusiast seeking to transform their outdoor cooking space.
Inspirational Farmhouse Wood Signs
Transform your home into a warm and inviting sanctuary by creating DIY Farmhouse Wood Signs that radiate inspiration and warmth. This step-by-step guide combines the precision of a cutting machine with the beauty of enchanting lettering fonts to produce heartfelt, rustic decor that exudes joyous sentiment. With minimal materials and easy-to-follow instructions, you’ll be empowered to infuse your daily surroundings with gentle reminders of happiness and gratitude, perfect for any room in your home.
Cute House DIY Wood Sign
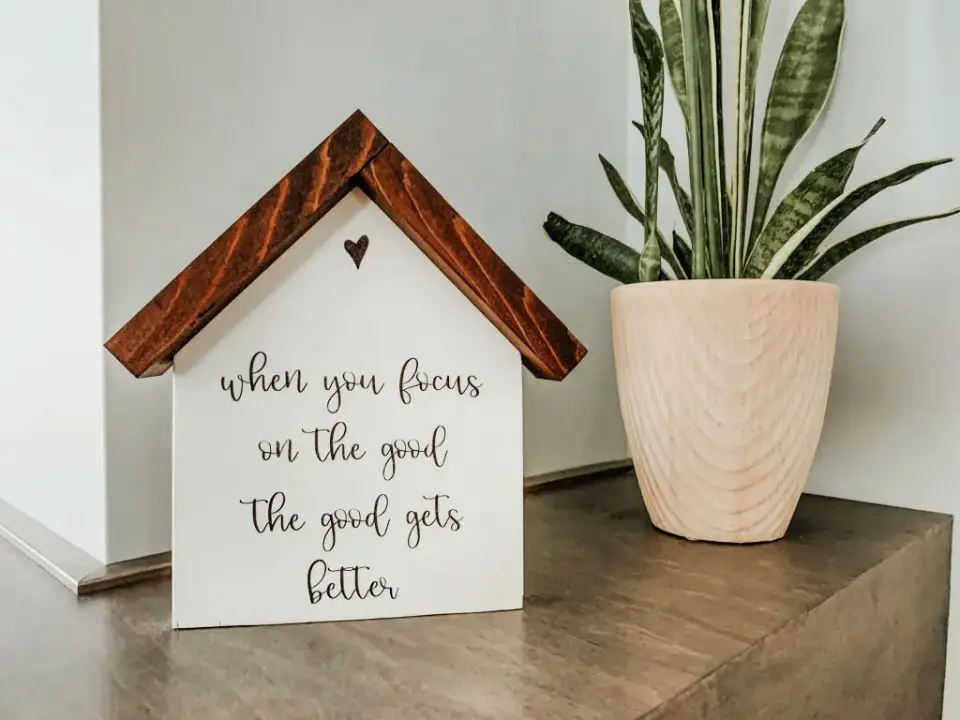
Bring out your inner artisan by crafting a unique DIY wood sign that adds a personal touch to your home decor. This comprehensive tutorial from AllyBeth Design Co is designed for beginners and experts alike, breaking down each step into manageable tasks. From cutting and shaping the wood to adding decorative flourishes, this project guide provides clear instructions on how to create charming miniature houses. With options for painting, staining, or using innovative ink transfer techniques for custom designs, you’ll have everything you need to succeed. So why not take a creative break and transform your space with a delightful homemade sign?
How to Make Wood Signs

Transform your home decor into a masterpiece of modernity and sentiment by creating personalized wood signs with Taryn Whiteaker Designs. This DIY project is an artful blend of simplicity and creativity, perfect for any room in the house. By selecting the right typography and scale, you can craft signs that not only add visual appeal to your space but also hold a special meaning. With just a few simple materials like plywood, paint, and the Cricut machine, this project is sure to provide a fun and fulfilling crafting experience. As you bring these unique pieces into your living space, get ready to elevate your decor and create a sense of warmth and personality.
Homemade Wooden Wedding Signs
Transform your wedding decor with bespoke DIY wooden wedding signs that not only save you money but also showcase your artistic flair. These personalized signs are perfect for providing directions to guests or adding a touch of elegance to your special day. With our step-by-step guide at WishWishWish, you’ll learn how to select the ideal wood, design, and paint your own unique signage without breaking the bank. No need for costly custom orders when you can create meaningful and one-of-a-kind signs that reflect your personal style.
Cheap DIY Painted Wood Sign

Embark on a creative journey by crafting your own unique DIY painted wood sign with our comprehensive guide. Let A Piece Of Rainbow be your trusted companion as you explore the rustic charm of using pallet wood. Follow step-by-step instructions from LZ, an experienced DIY expert with a passion for sharing knowledge. From sourcing materials to adding the finishing touches, this tutorial covers every aspect of creating a beautiful painted wood sign that reflects your personal style and adds a touch of warmth to your home’s décor.
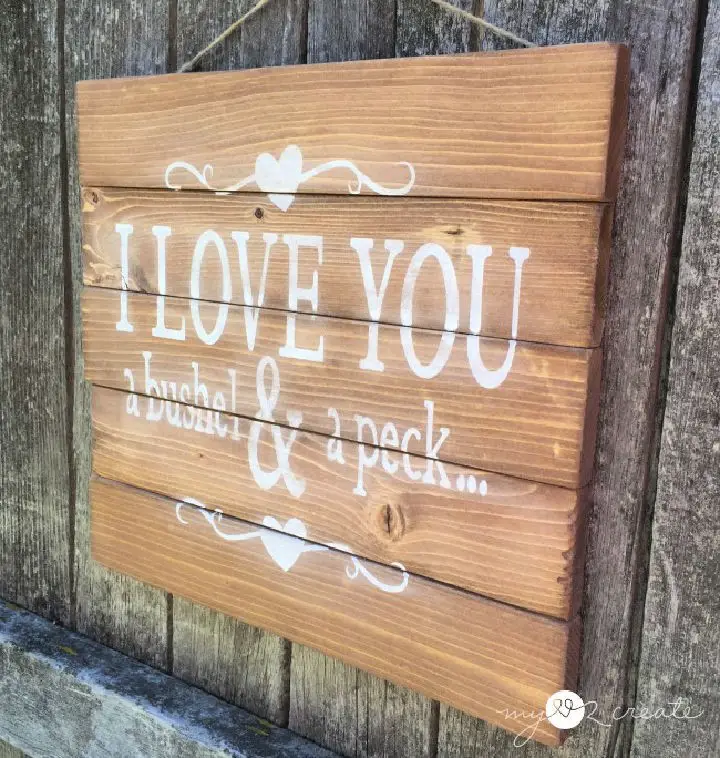
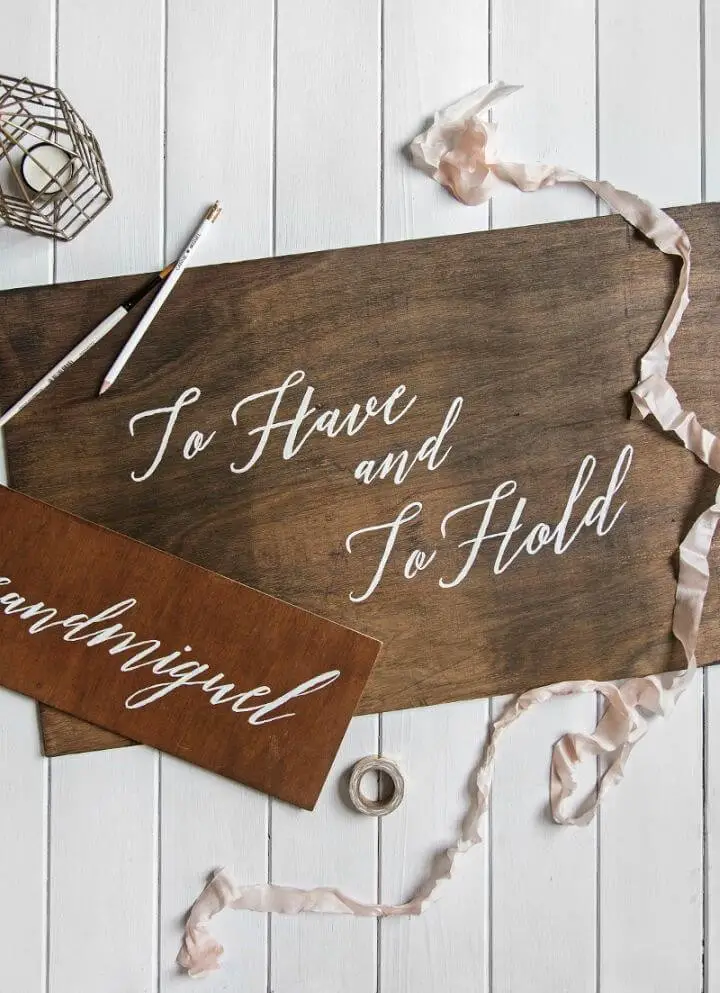
Adorable Wood Wedding Signs
When it comes to DIY wood signs for your special day, you can’t go wrong by getting creative and putting your own personal touch on things. Not only does crafting your own wood signs allow you to inject your personality into the celebration, but they also become lasting keepsakes that will be cherished for years to come.
To get started, begin with sanding down plywood to create a smooth base. From there, select a font that truly reflects your style – whether it’s Proxima Nova or something entirely unique – and print out the phrases you’d like to feature on your signs.
Next, use transfer paper to trace your designs onto the wood, preparing them for a coat of enamel paint. With careful application, you’ll be left with a beautifully polished finish that perfectly complements your wedding decor. For even more inspiration and guidance on how to bring these handmade signs into your big day, check out Almost Makes Perfect for a step-by-step guide.
Super Market Soil Sifter Magnetic Board
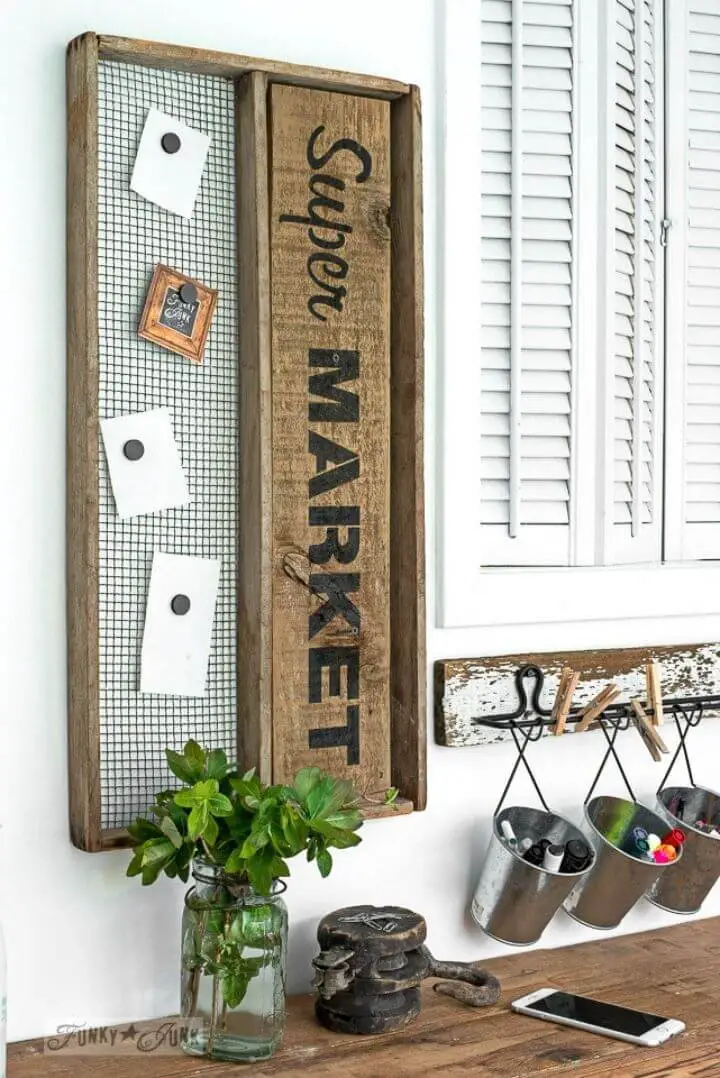
Transforming vintage finds into functional home decor is an art form that requires creativity and imagination. One such example is the repurposing of an antique soil sifter into a magnetic grocery list board, seamlessly combining rustic charm with practicality. This innovative project adds character to your kitchen space while providing a convenient place to jot down essential shopping items. By merging old with new, you can create a unique blend of functionality and vintage flair that elevates the ambiance of your home. For a comprehensive guide on how to bring this creative transformation to life, follow this link.
DIY Wood Plank Gather Sign
Transform your home decor with a delightful DIY wood plank gather sign, suitable for any season. This rustic and adaptable piece infuses warmth and an inviting atmosphere into any room. By using a vinyl stencil and paint, you can personalize this beautiful creation to reflect your unique style. Whether placed on a mantle or hung on the wall, it serves as a heartwarming reminder of the joy of sharing moments with loved ones. Start creating this easy yet impactful project by visiting Purely Katie today.
DIY Hello Sunshine Wall Sign
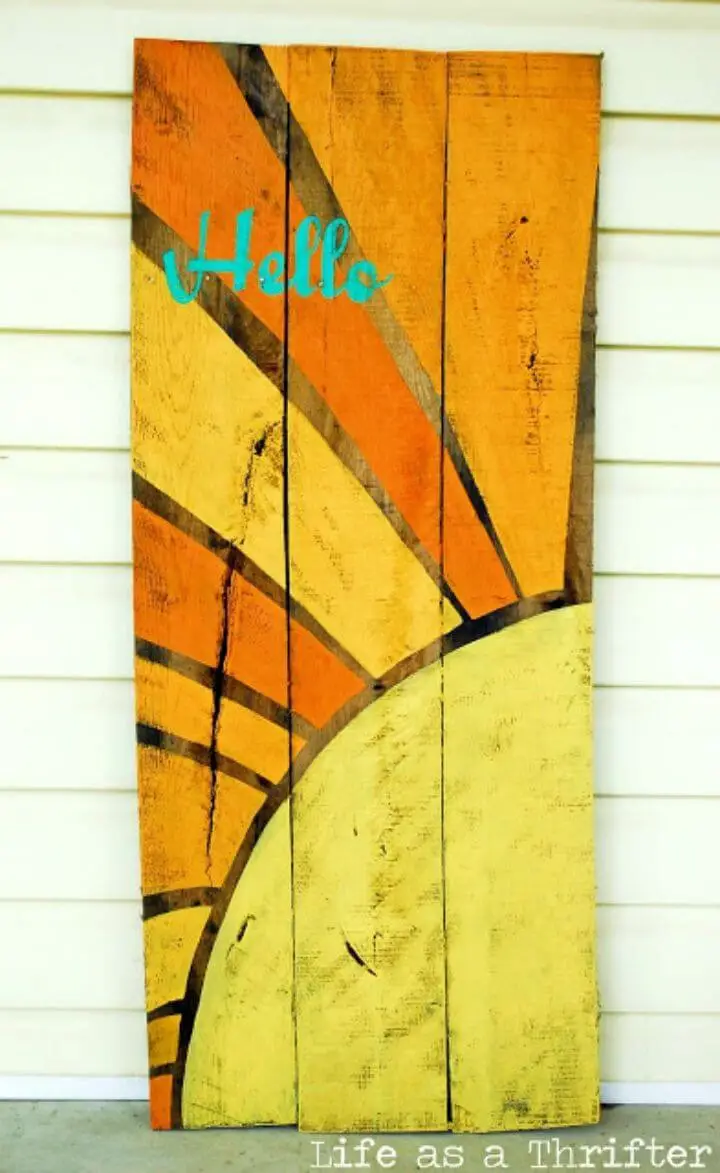
Transform a humble pallet into a radiant sunburst for your porch with this easy DIY project. Start by sketching out a freehand design of the sun, then get creative with leftover paints to achieve the perfect shades. Once you’ve got your colors, grab your brush and paint away! Add a personal touch with stenciled words and finish it off with some gentle sanding for that rustic charm. Before you know it, you’ll be brightening up your outdoor space with this sunny masterpiece.
DIY Pallet Anchor Sign for Our Deck
Turn your deck into an ocean-inspired haven with this charming DIY anchor pallet sign! By following The Happy Housie’s step-by-step guide, you’ll create a striking ombré backdrop that seamlessly blends navy and ocean air blue hues. This visually appealing design sets the tone for the crisp white anchor centerpiece, perfectly positioned at the forefront of your outdoor space. To add a touch of rustic charm, incorporate sisal rope borders to bring an element of organic texture to the piece. Whether you’re lounging lakeside or seeking to enhance any outdoor area with a hint of the sea, this DIY project is sure to be the showstopper on your deck. Are you ready to bring your own coastal creation to life?
Reclaimed Wood Love Rope Sign
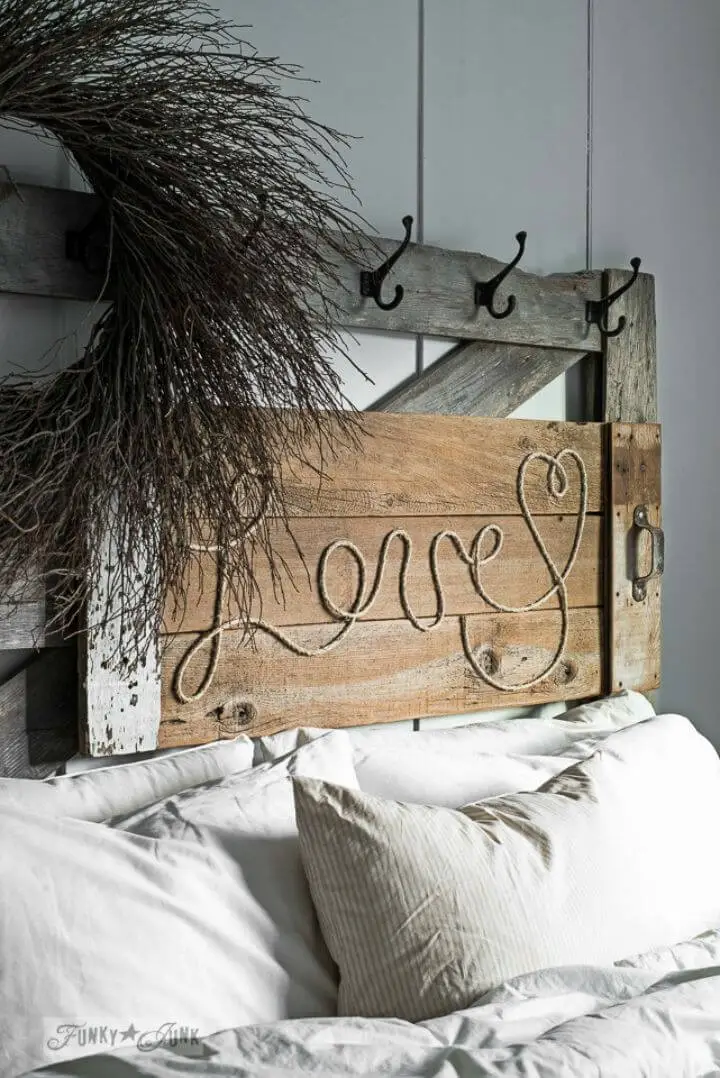
Transform ordinary materials like reclaimed wood and rope twine into an extraordinary declaration of love with this imaginative Love rope sign. Perfect for Valentine’s Day or as a heartfelt gift, this project offers endless customization possibilities. Simply choose from various suggested sayings, invent your own special message, or let the recipient’s personality shine through. The rustic charm and personalized touch make it ideal for home decoration or a thoughtful present. For a step-by-step guide on creating this romantic token of affection, visit Funky Junk Interiors.
Easy to Make Fab 5 Sign

Transform your living space with a dash of personality by crafting a one-of-a-kind Fab 5 sign. At The Handmade Home, you’ll discover the simplicity and satisfaction that comes from bringing this creative project to life. The journey begins with selecting the ideal planks, which can be effortlessly achieved with the help of home improvement stores or by repurposing what’s already at your disposal. A printer becomes a valuable tool in transferring your chosen phrase to wood, adding an extra layer of customization and whimsy. As you navigate this DIY endeavor from start to finish, you’ll not only showcase your creativity but also imbue your decor with a unique, personalized touch that makes a house truly feel like home.
Make a Large Wooden Sign at Home
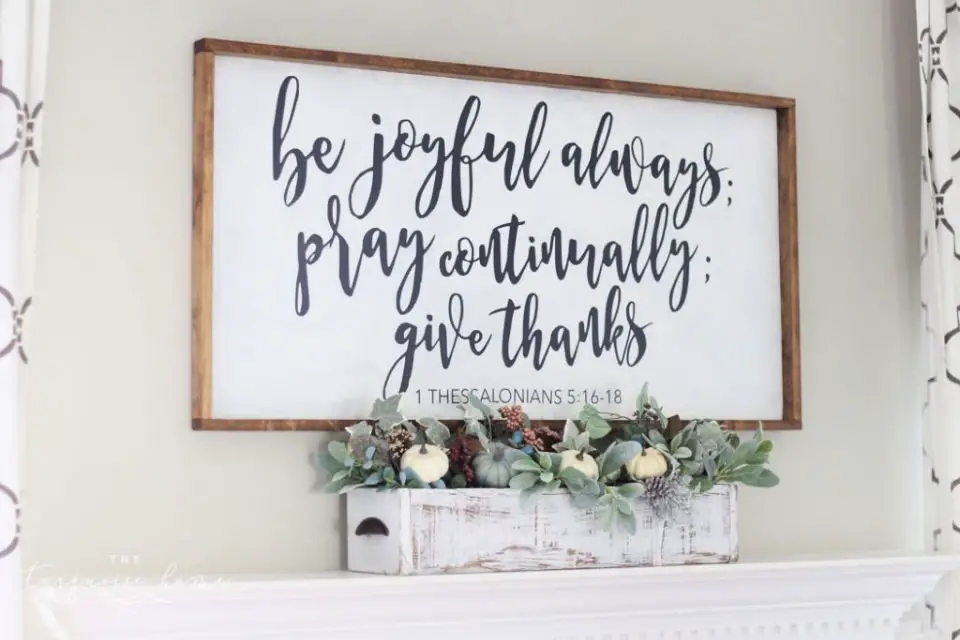
Bring a touch of personality to your home decor by creating a stunning wooden sign that’s uniquely yours. As a DIY enthusiast, you’ll love this easy-to-follow guide from The Turquoise Home. With its step-by-step tutorial, you can craft a handmade wooden statement piece that reflects your personal style and adds warmth to any room. Whether you’re inspired to paint a meaningful quote or a cherished message, this project will show you how to make a beautiful sign without breaking the bank. Start crafting today and give your living space a one-of-a-kind flair!
How to Make Coffee Crate Lid Sign
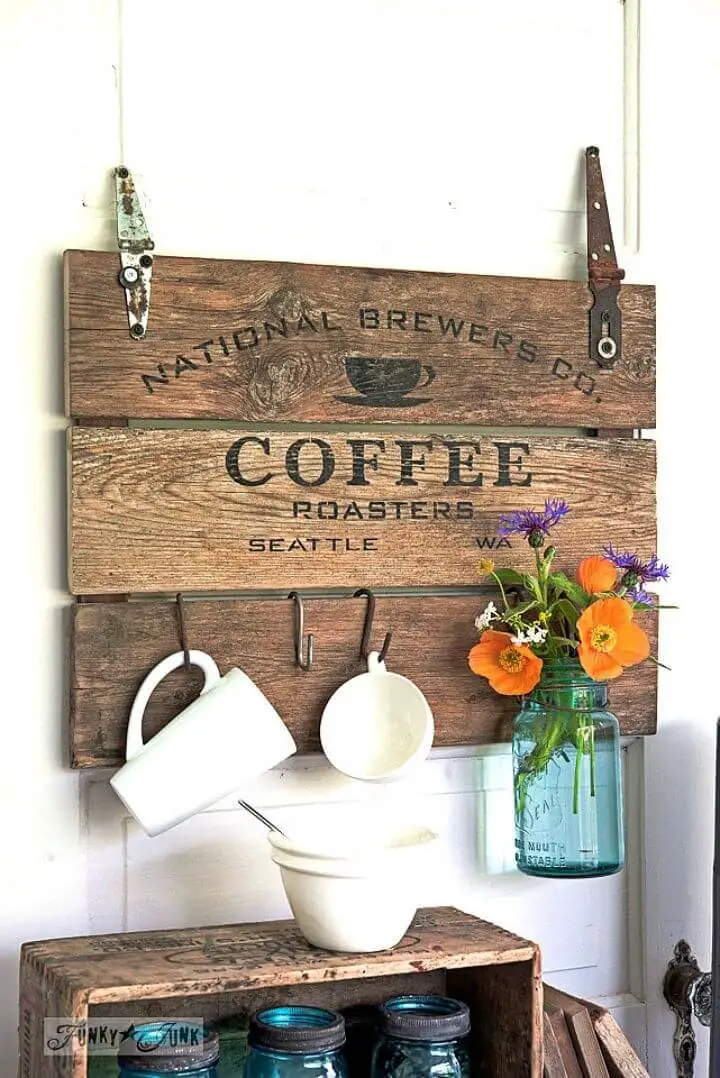
Transform your coffee corner into a cozy haven by upcycling an ordinary reclaimed wood crate lid sign into a functional and stylish piece with Funky Junk Interiors’ DIY tutorial. This rustic coffee station is crafted using just three fence planks, S-hooks, and thoughtful hinge and hardware placements to create a one-of-a-kind home decor accent that celebrates sustainability and uniqueness. With this easy-to-follow project, you’ll be brewing up a charming atmosphere in no time.
Rustic Fall Wood Sign
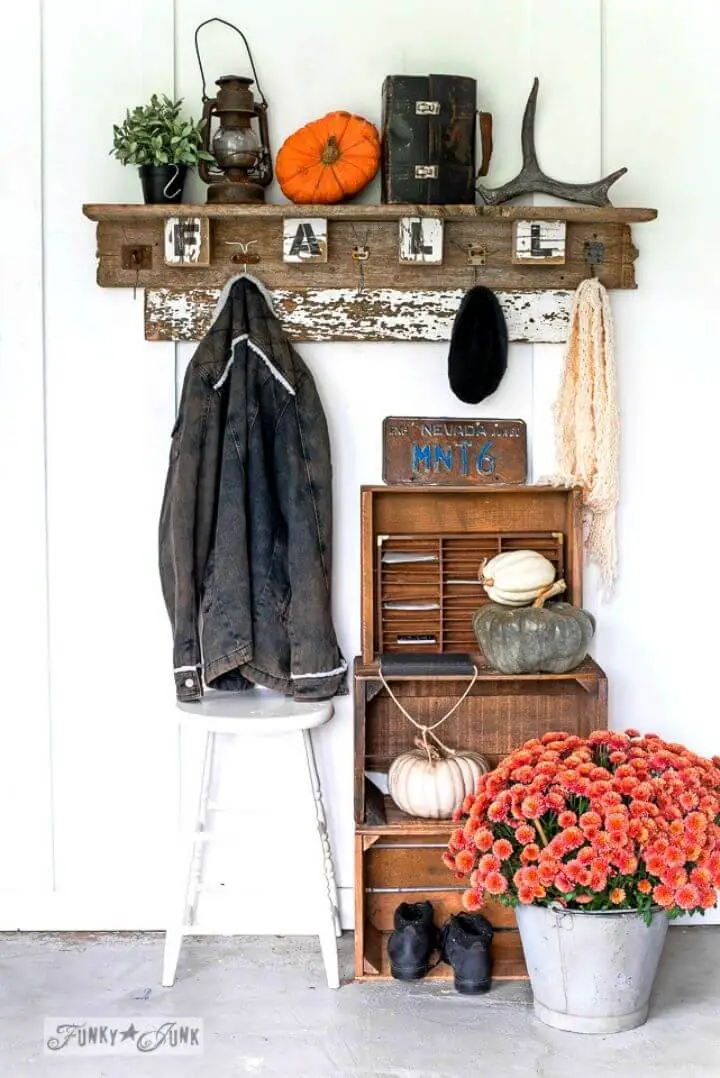
Transform your entryway with a seasonal twist by creating a versatile FALL FARM reclaimed wood coat hook shelf that can be easily adapted for any time of year. To achieve this unique look, combine reclaimed wood, hanger hooks, and an APPLE FARM stencil to inject autumnal charm into the space. This DIY project is designed to be adaptable – simply rotate the stenciled blocks to give your entryway a fresh, seasonal vibe year-round. Not only does it provide a functional coat rack or display area, but it also adds a touch of whimsy and practicality to your home’s décor.
DIY Pretty and Rustic USA Wood Sign
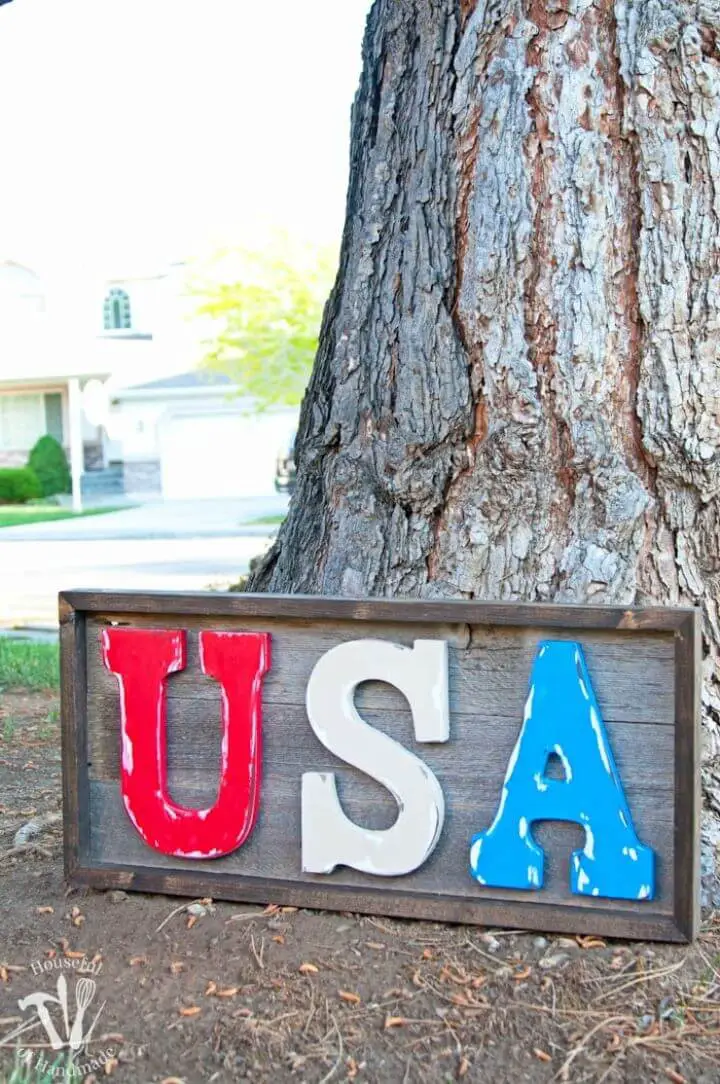
Transform your patriotic decor with a touch of elegance! To add a unique charm to your space, create a stunning DIY rustic USA wood sign that exudes warmth and character. This easy-to-make project is perfect for a summer-themed mantle, requiring minimal tools and materials, making it an affordable and enjoyable DIY experience. By following the step-by-step guide at Houseful of Handmade, you’ll be able to craft a piece that celebrates the spirit of the USA in rustic style, adding a wow factor to your decor.
Easy DIY Wood Sign – How to Make a Custom Stencil
Crafting personalized wood signs without breaking the bank? It’s easier than you think! With this comprehensive guide, you’ll learn how to create custom stencils by hand, choosing the perfect wood, cutting it to size, and preparing the surface for a stunning stain. But that’s not all – our step-by-step approach also covers designing, printing, and cutting out your stencil with ease, guaranteeing a professional-looking finish. All you need is some simple tools and a dash of creativity to paint and assemble your very own unique wood sign. So why wait? Start bringing your custom piece to life today!
Conclusion
As we’ve explored the world of DIY wood signs, it’s become clear that this creative pursuit offers an ideal blend of self-expression and practical application. By mastering the art of crafting your own 35 unique wooden creations, you’ll not only possess a personalized decor piece but also develop skills that can be applied to future projects. The process itself is just as rewarding as the final product, allowing for a sense of accomplishment with each step from design transfer to painting and finishing touches. Whether seeking a thoughtful gift or wanting to add a personal touch to your home, making DIY wood signs is an excellent project to undertake. And remember, the true beauty lies not only in the end result but also in the journey itself.
