Why Choose DIY Shiplap Walls?
When it comes to giving your space a unique touch without breaking the bank, DIY shiplap walls are an excellent choice. Here’s why: By opting for a DIY approach, you can save money on materials by using alternatives like plywood, which still delivers a stylish result. The best part? You get to dictate the final look, allowing you to tailor the width, color, and finish of your shiplap to perfectly align with your design vision.Beyond the cost savings, the DIY route also offers an unparalleled sense of fulfillment that comes from seeing your project come together step by step. It’s a truly rewarding experience, especially when the end result is a beautifully transformed space that reflects your personal style.One of the most appealing aspects of DIY shiplap walls is their versatility. Whether you’re looking to add some visual interest to a wall, ceiling, or even use it as an accent piece, this design element can be adapted to fit almost any room or decor scheme. From coastal chic to country charm and everything in between, shiplap’s adaptability makes it an excellent choice for homeowners seeking to add some personality to their space.And let’s not forget the added benefit of skill-building that comes with taking on a DIY project like this. As you navigate the process from measurement to installation, you’ll be honing your DIY skills and gaining confidence in your ability to tackle future home improvement projects.
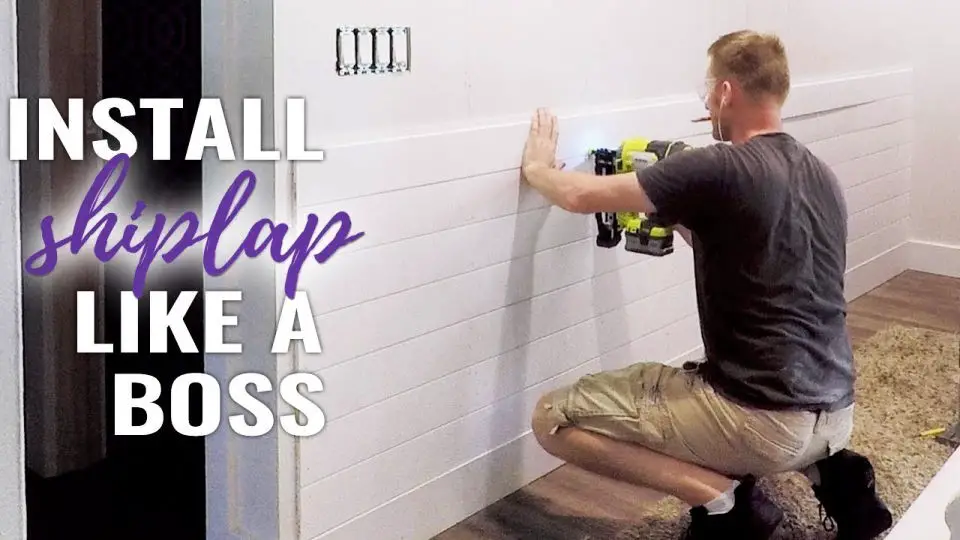
DIY Shiplap Wall Tutorial: How to Plank Your Walls the Inexpensive Way!
Shiplap walls can infuse any room with timeless charm and warmth, all without denting the bank account. For those eager to revamp their space with this affordable touch, we’ve distilled the process into a straightforward, step-by-step guide. Perfect for beginners, this DIY project is sure to breathe new life into your walls without putting a strain on your wallet.
What You’ll Need
To get started on your DIY plywood paneling project, you’ll need the following materials: four 8-foot sheets of quarter-inch plywood, which can be obtained from stores like Lowe’s or Home Depot for around $15 each. The store will also be able to cut the plywood into strips for you. For trimming these strips to the correct length, a saw is essential. A pneumatic nail gun and nails, specifically an 18-gauge or 16-gauge, will allow you to secure your panels in place. A level is crucial for ensuring that your boards remain straight throughout the process. To create even gaps between the boards, nickels can be used as spacers. Once the panels are installed, spackling compound and a putty knife will come in handy for covering nail holes. An electric sander will save you time and effort by efficiently smoothing out any rough edges. Caulking is also necessary to finish off the seams and provide a smooth finish. Finally, paint can be used to add a pop of color and match your chosen decor. While not essential, having an optional stud finder, jigsaw or skill saw, and arboreal drill bits on hand will allow you to tackle more complex cuts if needed.
Installation Steps
To ensure a successful shiplap installation, start by preparing your plywood boards for use. Sand any rough edges to avoid splinters and potential difficulties during the installation process. An electric sander like the Black & Decker mouse hand sander can simplify this task. Next, mark the studs along your wall using a stud finder. This ensures that your shiplap will be securely attached and minimizes the risk of errors.Begin the installation process at the bottom of the wall and work your way up. Measure the length of the first board and cut it accordingly. Use your level to ensure the board is perfectly straight, as floors and walls can be uneven. This step is crucial, as any imperfections will be magnified by the time you reach the top of the wall.As you install each board, place spacers (nickels) on top of the previous one, followed by the next board. Secure each piece with a nail gun into the marked studs. Measure and cut each piece to ensure a perfect fit before moving on to the next one.When you reach areas like windows or outlets, measure, mark, and cut the boards to fit using a jigsaw or skill saw if necessary. Verify your work periodically by checking the level to ensure everything remains straight and even.Once all the boards are in place, apply spackle to cover nail holes and caulk the seams for a smooth finish. Allow the spackle to dry before lightly sanding it. Finally, apply your chosen paint color using a short handle brush to complete the installation.
Tips for Success
Before commencing the installation, take a proactive approach by pre-painting the wall with a color that closely matches the hue of your chosen shiplap. This precautionary measure effectively conceals any potential gaps between boards and ensures a seamless finish.
To achieve optimal results, regularly inspect your boards to guarantee their level alignment. A slight miscalculation could result in an unappealing slanted appearance.
For added customization, feel free to adjust the width of your shiplap strips to suit your personal taste preferences. The accompanying video tutorial serves as a guide, showcasing a thickness of approximately 7.8 inches for a more substantial aesthetic.
Video Tutorial
To bring your DIY shiplap wall project to life, I recommend combining it with a step-by-step visual guide. This YouTube video tutorial provides a clear and easy-to-follow demonstration of each technique, making it an excellent complement to this written guide. By following the instructions and watching the video, you’ll gain the confidence and skills needed to successfully add shiplap to your walls. With patience and the right tools, you can transform any room – whether it’s your living room, bathroom, or bedroom – into a cozy and inviting space that reflects your personal style.
FAQs on DIY Shiplap Walls
When embarking on a DIY shiplap wall project, it’s natural to have concerns and uncertainties. To alleviate these doubts, this guide aims to address some of the most frequently asked questions, providing a clear and comprehensive overview for a successful outcome.
What materials do I need for a DIY shiplap wall?
To embark on a DIY shiplap wall project, you’ll need to gather the following essential materials: plywood sheets or pre-cut planks, construction adhesive for securing the panels, finishing nails for added stability, wood filler to cover any imperfections, sandpaper for a smooth finish, and paint and primer for that final touch. Additionally, you’ll require various tools, including a saw for cutting the material, a level to ensure accurate placement, a sander for smoothing out the surface, and a paintbrush or roller for applying the finishing coat.
Can I install shiplap directly over drywall?
For a seamless installation, you can indeed place shiplap planks directly over drywall. However, it’s crucial to guarantee a smooth and pristine surface prior to installation. To achieve this, apply construction adhesive and secure the planks with nails, thereby ensuring optimal stability and preventing any potential warping or shifting.
How do I cut the plywood for shiplap?
When it comes to cutting plywood for shiplap, start by measuring the height or width of the wall that will be receiving the installation. Use this measurement to mark the corresponding size on the plywood sheet. From there, use a circular saw or table saw to carefully cut the plywood into strips of your desired width. Make sure to maintain precise control over the cutting tool to ensure accurate and clean cuts.
What’s the best way to paint shiplap?
When it comes to painting shiplap, there are a few essential steps to follow to ensure a smooth and durable finish. First, fill any nail holes with wood filler, allowing it to dry completely before moving on to the next step. Next, sand the filled areas until they’re perfectly smooth, removing any excess filler that may have accumulated during the drying process. Once the surface is smooth, apply a primer specifically designed for the type of wood you’re working with. Allow the primer to dry completely before diving into the painting process. For optimal results, opt for a semi-gloss or satin finish paint and use either a brush or roller to achieve even coverage. By following these steps, you’ll be able to create a beautiful and long-lasting finish on your shiplap.
How do I handle outlets and switches on a shiplap wall?
To seamlessly integrate outlets and switches into your shiplap installation, follow these steps: First, ensure the power is disconnected at the circuit breaker to guarantee a safe working environment. Next, remove any existing outlet or switch covers to access the area. Then, carefully install the shiplap around the outlet or switch, trimming the planks as needed to achieve a snug fit. If necessary, utilize an electrical box extender to extend the outlet or switch itself. Finally, reattach the cover, taking care that it aligns flush with the new shiplap surface.
Can I install shiplap in a bathroom?
When considering the installation of shiplap in a bathroom, it’s crucial to prioritize durability by opting for a moisture-resistant wood or applying a water-repellent sealant. This will ensure the material withstands the humid environment and potential water exposure, preserving its integrity and preventing damage.
How can I achieve a gap between shiplap planks?
Achieving uniform gaps between ship lap planks requires some strategic planning. A clever solution is to incorporate a small spacer, such as a nickel or a set of spacers specifically designed for this purpose, during the installation process. As you nail each plank into place, position the spacer between them to ensure consistent spacing throughout the entire installation.
What’s the best way to cut costs on a DIY shiplap project?
When it comes to DIY shiplap projects, being mindful of your budget is crucial. To achieve this without sacrificing quality, consider the following cost-effective strategies: Opt for more affordable alternatives like plywood over traditional wood planks. By taking on the tasks yourself, you’ll not only save on labor costs but also gain a sense of accomplishment from completing the project. Furthermore, scouring online marketplaces and local second-hand stores can yield significant savings on materials and tools alike. With these budget-friendly approaches in place, you’ll be well on your way to a successful DIY shiplap project that fits comfortably within your means.
How do I acclimate shiplap planks before installation?
To prepare shiplap planks for installation, it’s essential to acclimate them to the room’s temperature and humidity levels first. Start by bringing the wood into the room where it will be installed and leave it there for at least 48 hours. This crucial step helps prevent future expansion or contraction of the wood once it’s in place, ensuring a smooth and successful installation process. By taking this extra time to acclimate the planks, you’ll not only avoid potential issues but also set yourself up for success in achieving professional-looking results that will elevate the beauty of your home and provide a sense of accomplishment from completing a project with your own hands.
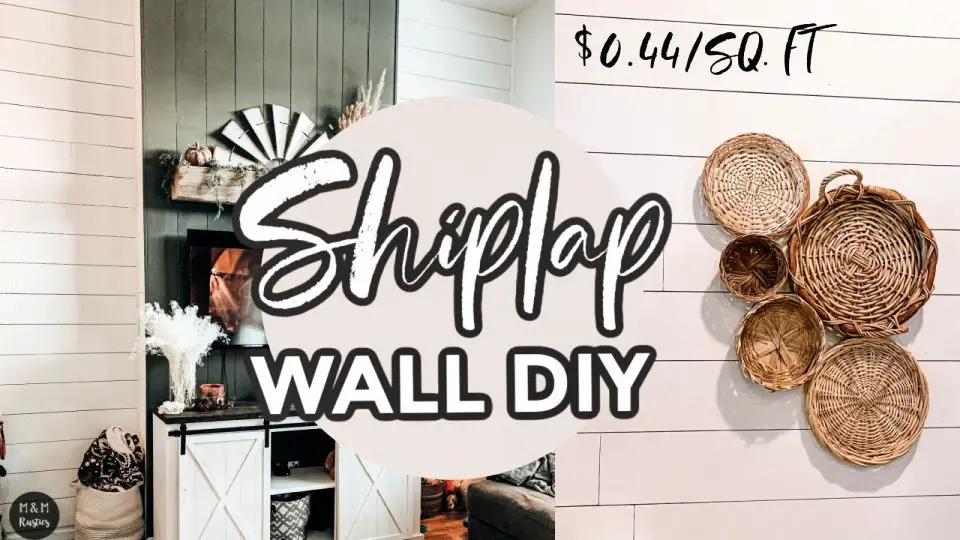
25 Cheap DIY Shiplap Wall Ideas (How to Make Shiplap)
Transform your space with the charm of rustic elegance, sans breaking the bank. Explore 25 clever and affordable DIY shiplap wall ideas that will have you embracing a warm, inviting atmosphere in no time. Find out the secrets to creating a stunning shiplap look without the hassle.
Cheap DIY Shiplap Walls
Elevate your wall game with a modern spin! Our step-by-step guide on creating affordable shiplap walls takes you from concept to completion, guaranteeing a chic and authentic finish without breaking the bank. By substituting traditional shiplap with budget-friendly plywood strips, we show you how to achieve a stylish solution without sacrificing quality or your wallet. Plus, learn valuable pre-installation hacks like painting your walls for effortless board alignment and the ideal cut dimensions for a professional look. Click here to explore our innovative DIY approach: Driven by Decor.
How to Make Shiplap Wall
Elevate your space without breaking the bank by following our straightforward DIY Shiplap Wall guide. Perfect for those looking to give their home decor a modern refresh, our step-by-step tutorial on Christene Holder Home provides a clear path to creating a stunning textured look using affordable materials like plywood and paint. Ditch pricey options and achieve a clean, visually appealing design that adds depth and personality to any room. Begin your DIY adventure today and be amazed by the transformative power of a shiplap wall treatment in your home.
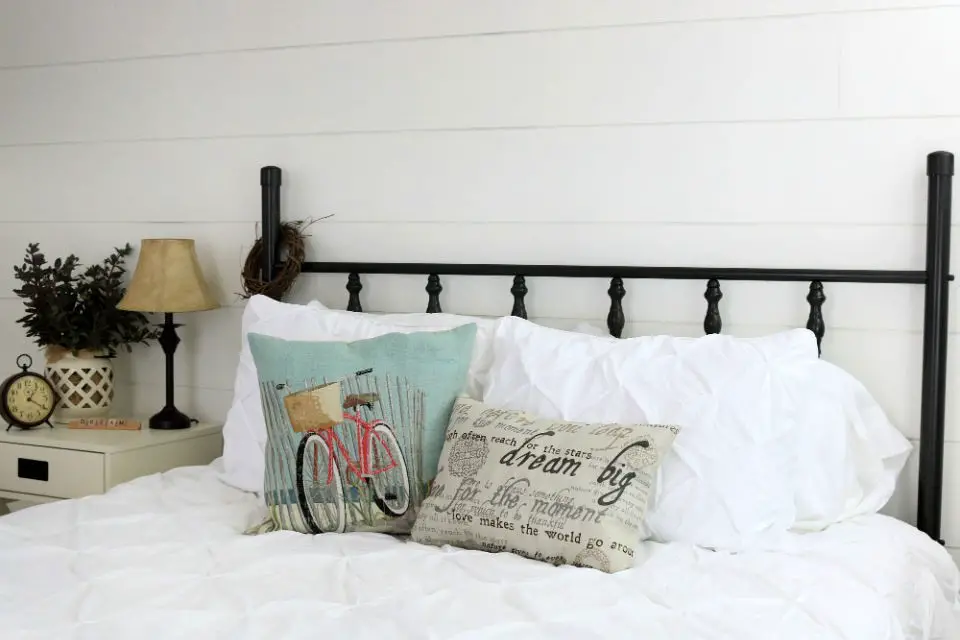
Make Your Own Shiplap Wall
Transform any room into a cozy haven by crafting your own rustic shiplap wall. This comprehensive guide simplifies the process, making it accessible to DIY enthusiasts of all skill levels. By following a step-by-step tutorial, you’ll learn how to select the perfect materials, prepare your walls for installation, measure and cut with precision, and achieve flawless results. Plus, discover expert tips on finishing touches that take your project from great to exceptional. Embrace the modern coastal or farmhouse aesthetic and give your space a unique charm with ease.
Make Cheap Shiplap Wall
Bring a touch of rustic charm to your living space without overspending! At HomeMadeLovely.com, we’ve crafted a straightforward guide that walks you through the process of creating a stunning shiplap wall from start to finish. From budget-friendly plywood sourcing to the final coat of paint, our step-by-step tutorial has got you covered every step of the way. With this DIY project, you’ll be able to add warmth and texture to your room, making it perfect for cozying up during the holiday season or any time of year.
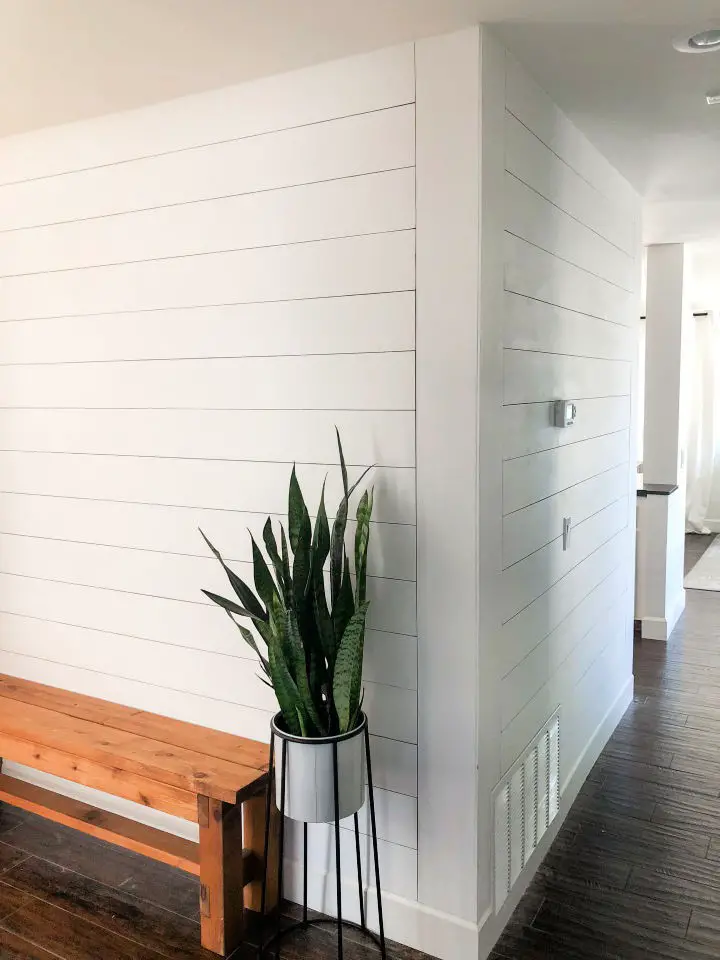
Homemade Vertical Shiplap Wall

Transforming a space with a touch of sophistication has never been easier or more budget-friendly. To create a modern focal point in any room, consider constructing a vertical shiplap wall using real boards or affordable plywood options. This DIY guide provides clear, step-by-step instructions for building a floor-to-ceiling accent wall that exudes elegance without putting a dent in your wallet. Even better, the tutorial offers valuable tips on how to utilize budget-friendly materials to tackle larger projects with confidence. By following this straightforward and stunning project, you’ll be able to elevate the charm of your home without breaking the bank. For the complete tutorial, visit Angela Marie Made today and embark on your next exciting home improvement adventure.
Shiplap Wall – Step by Step
Bring warmth and coziness to any room with an easy DIY shiplap wall project that’s both cost-effective and engaging. This straightforward tutorial provides a detailed supply list and step-by-step guidance, making it simple for you to create a stunning feature wall that adds a timeless and chic touch to your home. By following this budget-friendly process, you can transform any space into a warm and inviting oasis, perfect for relaxing and enjoying with family and friends.
Easy and Affordable Modern Shiplap
Transform your living space into a sleek, modern retreat without denting your wallet! By following this step-by-step guide to creating an affordable DIY modern shiplap project, you’ll be able to elevate the style of any room without breaking the bank. With sanded plywood providing a smooth, modern aesthetic, this tutorial is perfect for DIY enthusiasts looking to give their home a fresh new look without sacrificing budget. Get ready to learn the ins and outs of this cost-effective project, including tips on materials, costs, and personal insights from Kristy By The Sea.
Shiplap Wall With Ripped Plywood
Embrace the rustic charm of a beautifully crafted Shiplap Wall in the comfort of your own space! In this comprehensive guide, City Girl Meets Farm Boy takes you by the hand and walks you through every step of the DIY process. From preparation to finishing touches, discover expert tips for creating a stunning Shiplap Wall that’s accessible even for solo DIY enthusiasts. Learn how to locate studs, achieve the perfect spacing between boards, and add the final coat of paint to reveal your masterpiece. Get the complete lowdown on tools, materials, and techniques required to bring this timeless style to your own home.
DIY Shiplap Wall for Under $40
Elevate your living space with a charming DIY Shipllap Wall that won’t break the bank! This budget-friendly project is ideal for adding a touch of rustic charm to any room, and thanks to Hoosier Homemade’s comprehensive guide, you’ll be able to create this farmhouse-inspired masterpiece for under $40. Follow along as we walk you through every step of the process, from gathering your supplies to installing the final piece, and discover how easy it is to transform your space without sacrificing style or breaking the bank.
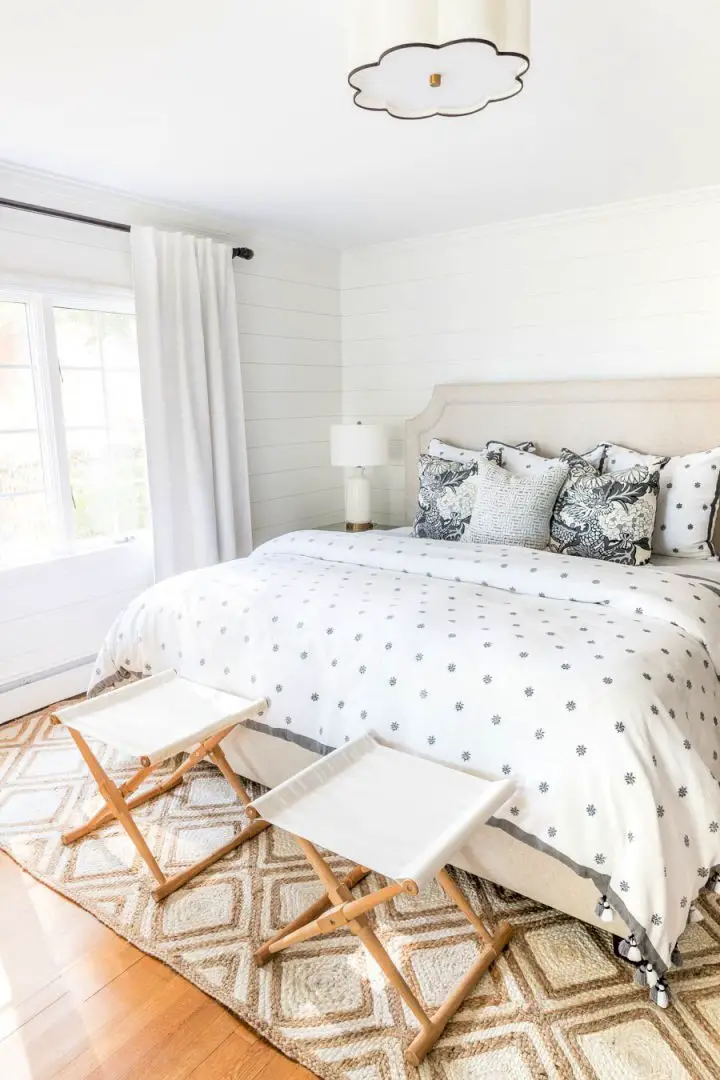
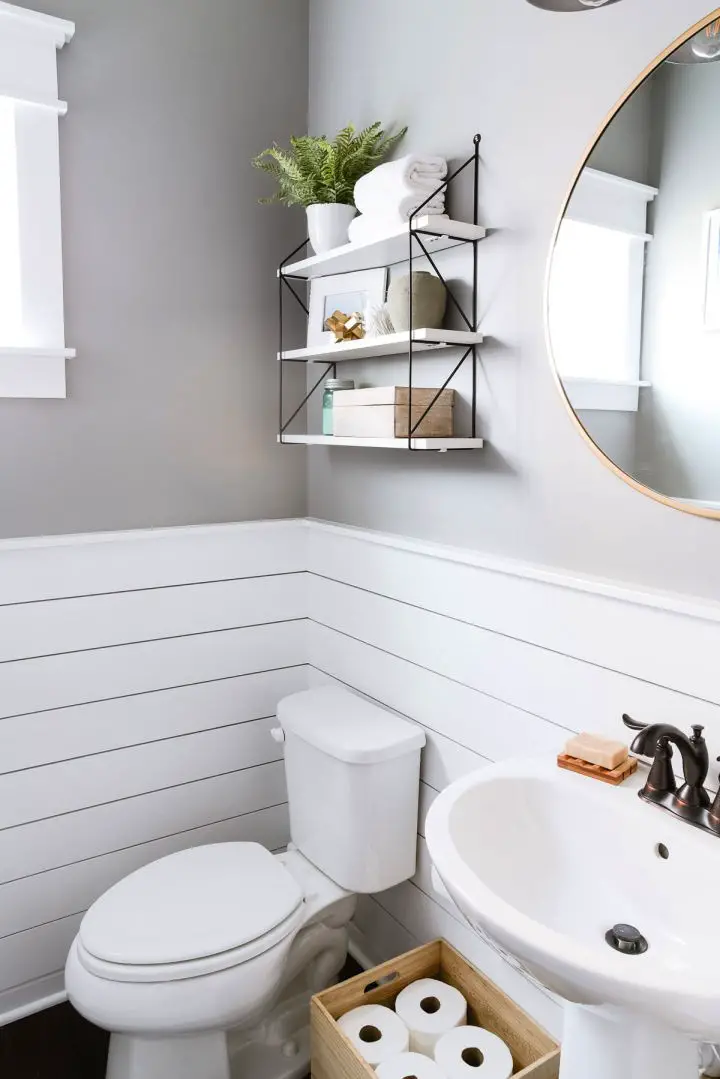
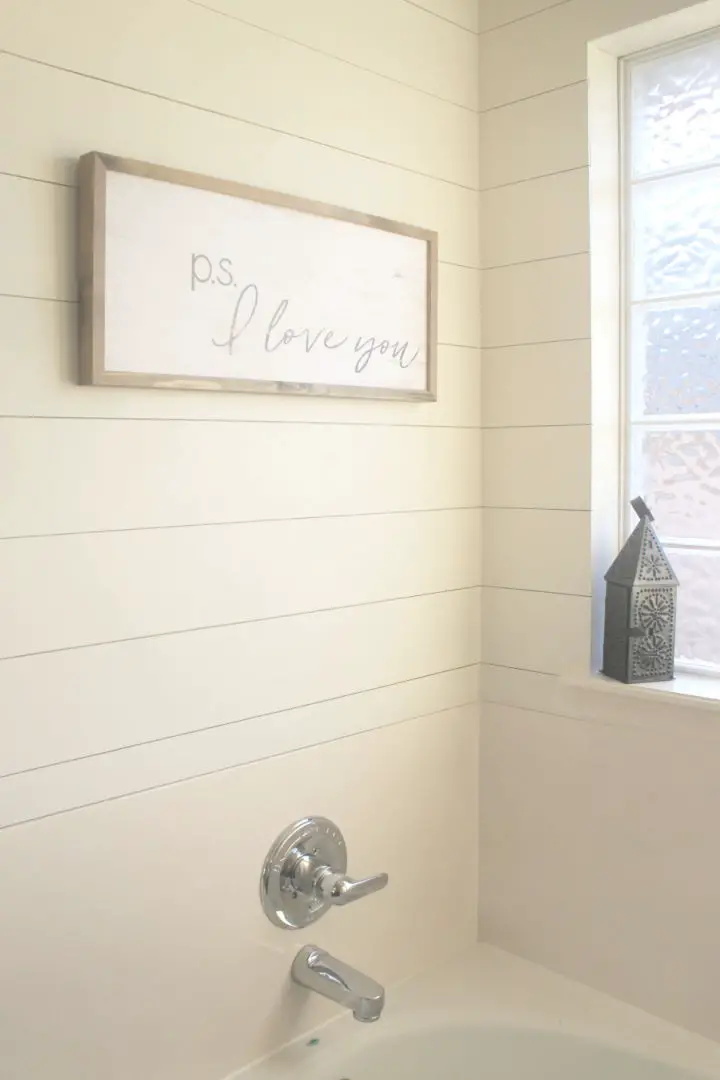
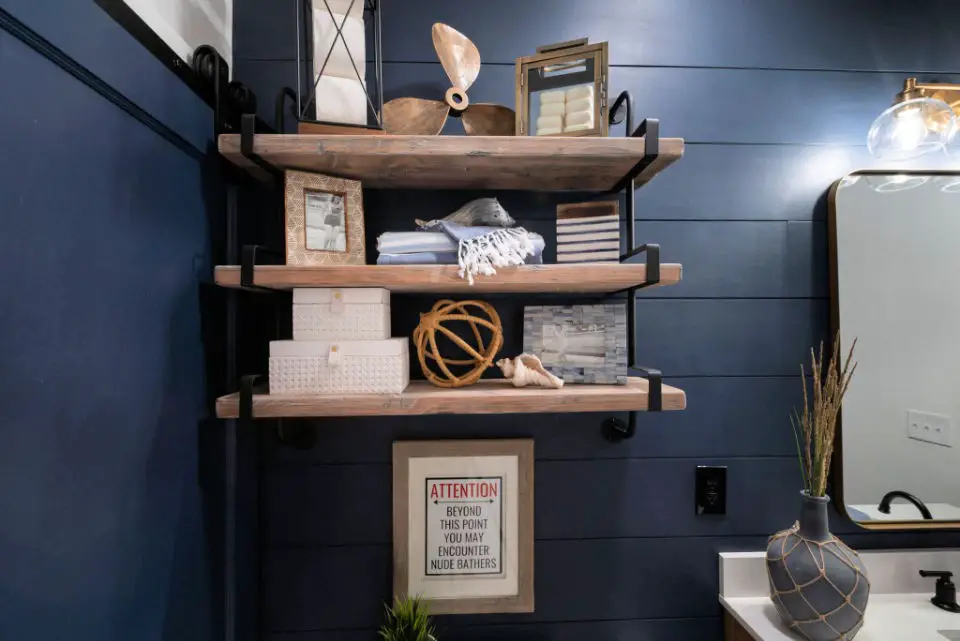
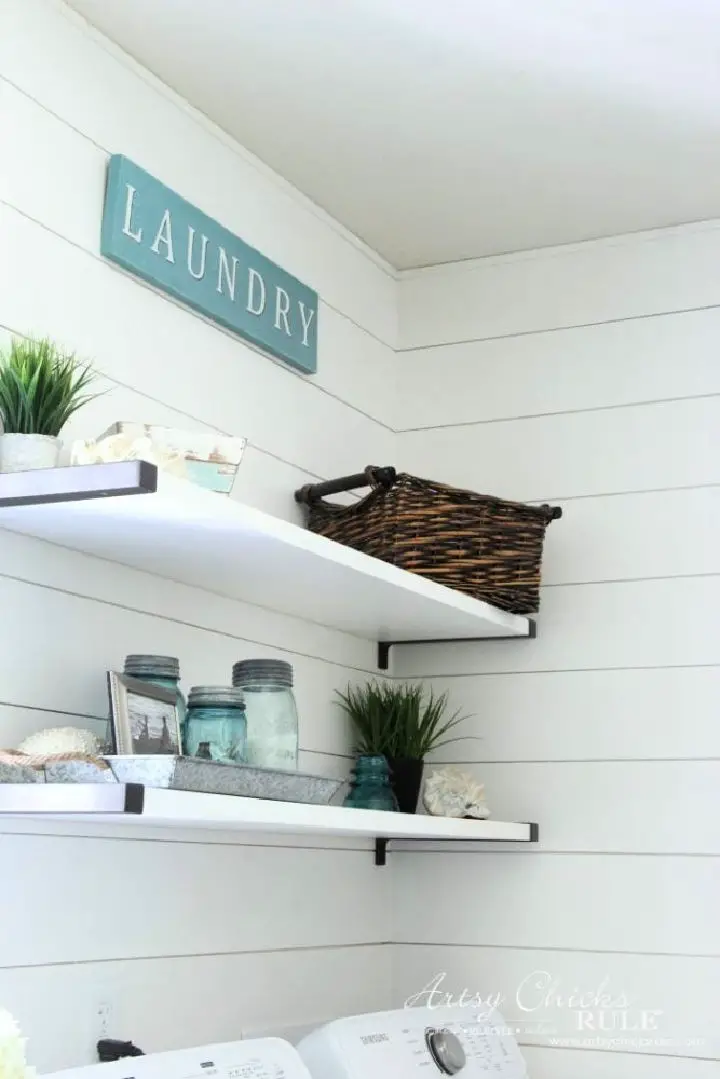
Simple Shiplap in the Bathroom
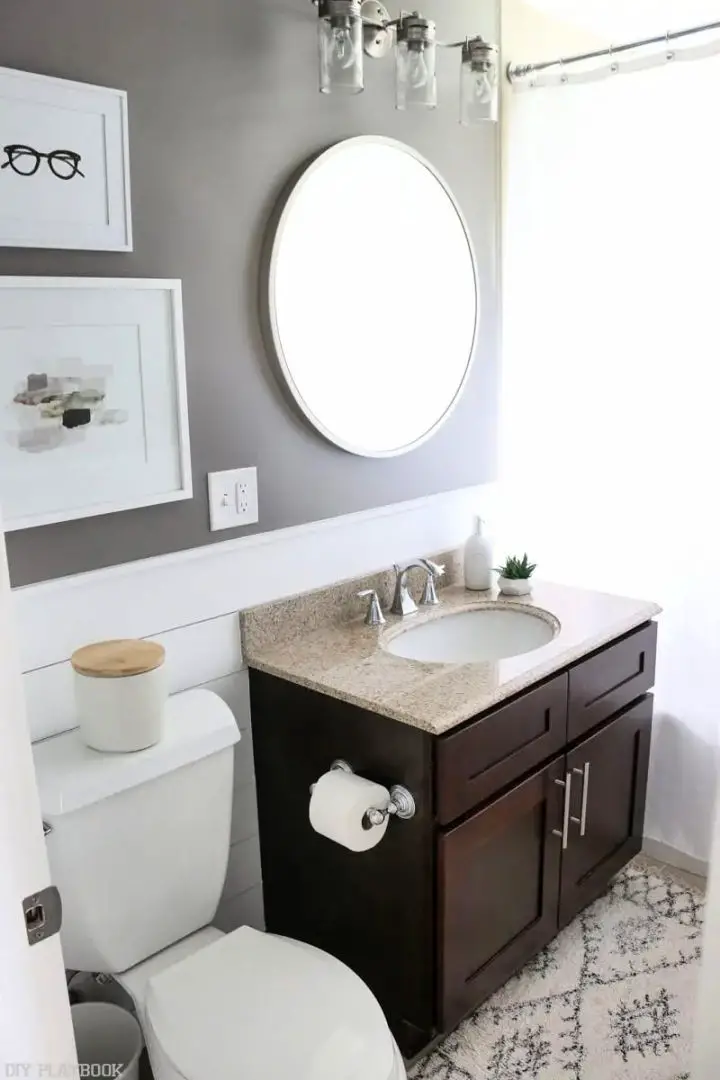
Bring rustic charm to your bathroom with our comprehensive DIY guide at The DIY Playbook. This step-by-step tutorial shows you how to create a cozy, textured space reminiscent of coastal or farmhouse styles. With our friendly budget-friendly approach, you’ll learn how to choose the right materials, from plywood selection to painting techniques. Whether you’re an experienced DIYer or just starting out, this project promises a stunning transformation that will bring your shiplap vision to life. Follow along and discover the perfect upgrade for your bathroom.
Shiplap Wall With Detail Instructions
Transform your space with effortless style and a dash of creativity by installing a shiplap accent wall that won’t break the bank. This straightforward DIY project, inspired by Nesting With Grace, teaches you how to add a unique touch to any room – whether it’s a small statement piece or a show-stopping focal point. The tutorial takes you through each step, from sourcing affordable wood planks at Lowe’s to applying the final coat of paint. Perfect for DIY enthusiasts looking to elevate their home decor without sacrificing their budget.
Shiplap Wall Tutorial
Elevate any room in your home with the rustic charm of a DIY shiplap wall, courtesy of Classy Clutter’s comprehensive guide. With its straightforward instructions and accessible steps, this project is perfect for those with basic woodworking skills or willing to learn. From selecting the ideal MDF strips to securely fastening them in place, our tutorial walks you through each stage, providing confidence and ease throughout the process. By following our simple yet effective shiplap installation guide, you can add a unique touch of modern flair to your space, making it truly one-of-a-kind. So, get ready to unleash your inner DIY enthusiast and transform your home with this timeless decor solution!
Making Quick Shiplap Wall
Add a touch of rustic charm to your space with a DIY shiplap wall that’s surprisingly easy on the wallet. This comprehensive guide will walk you through a straightforward, step-by-step process to create a stunning shiplap accent that adds depth and character to any room. You’ll learn how to choose the right materials, expertly cut your shiplap, and bring your project to life like a seasoned pro. Perfect for anyone looking to elevate their space without sacrificing style or breaking the bank.
DIY Shiplap Wall
Elevate the ambiance of any room with a rustic touch by creating a shiplap wall through a simple and cost-effective DIY project. Our comprehensive guide will walk you through every step of the process, from selecting materials to cutting and installing boards, ensuring your project reaches its full potential. Additionally, we’ll cover essential details such as outlet placement to achieve a professional-looking finish. For a detailed tutorial, visit 2TheSunnySide and embark on your DIY journey.
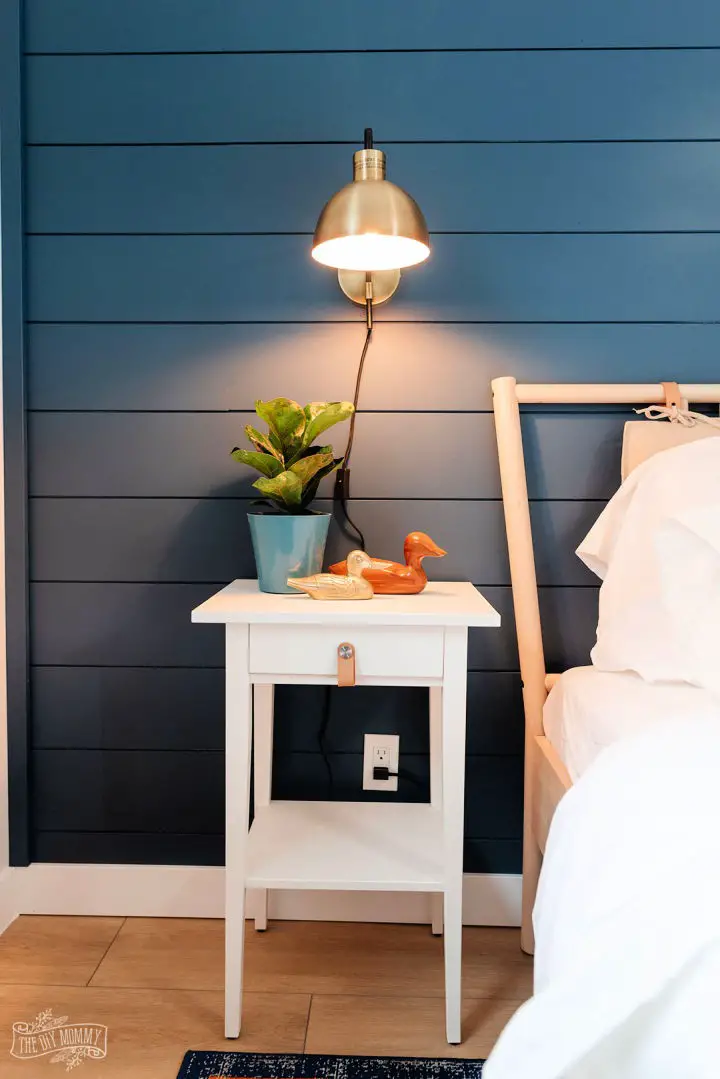
Vertical Shiplap Wall at Home
Transform your space with a stylish vertical shiplap wall that’s not only visually appealing but also functional. Hydrangea Treehouse shares their experience of creating a multifunctional home office by adding a sleek vertical shiplap paneling. The comprehensive guide includes a detailed cost breakdown, step-by-step instructions, and valuable tips for tackling common challenges like power outlets and door frames. This DIY project not only enhances the aesthetic of your room but also conceals unwanted wall textures, making it an ideal solution for updating offices, guest bedrooms, or craft rooms. Plus, learn how to select the perfect paint color and sheen for a flawless finish that complements your newly revamped space.
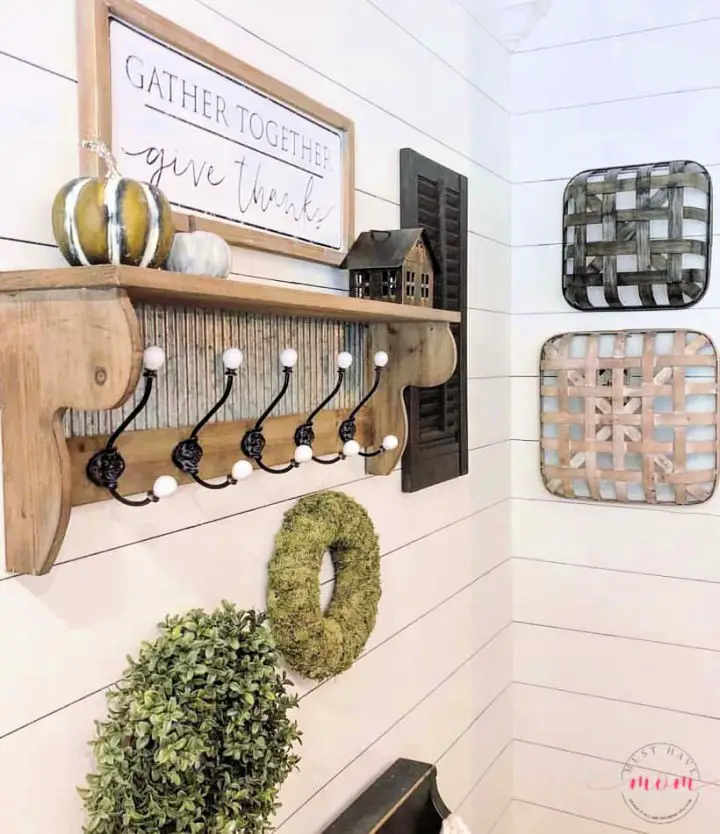
Handmade Shiplap Feature Wall

Transform the ambiance of any room with a rustic, do-it-yourself shiplap feature wall that effortlessly adds a touch of farmhouse charm. At Olive Grey Avenue, we’re here to guide you through every step of this straightforward process, from choosing the ideal boards to the final touches of painting. Perfect for upgrading your breakfast nook or injecting character into any corner of your home.
Embark on a journey of self-satisfaction and refreshing change as you bring natural, airy beauty to your living space. Whether you’re embarking on your first DIY adventure or seeking to enhance the ambiance of your existing decor, this shiplap wall tutorial serves as your trusted resource for a transformative weekend project.
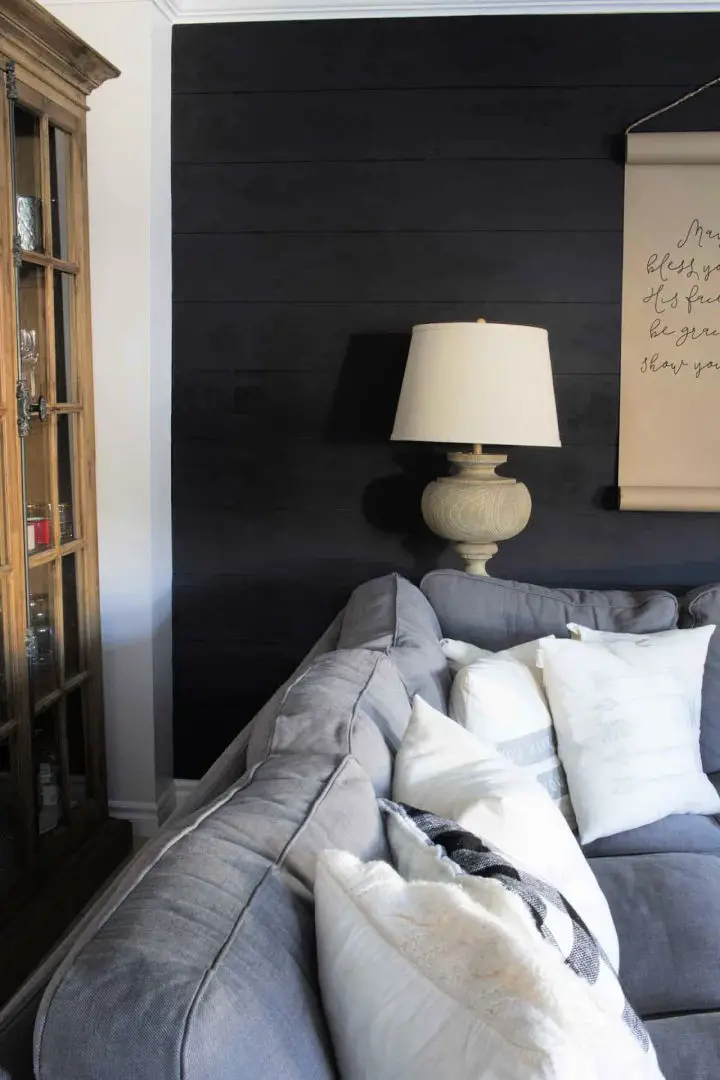
DIY Black Shiplap Wall Under $50
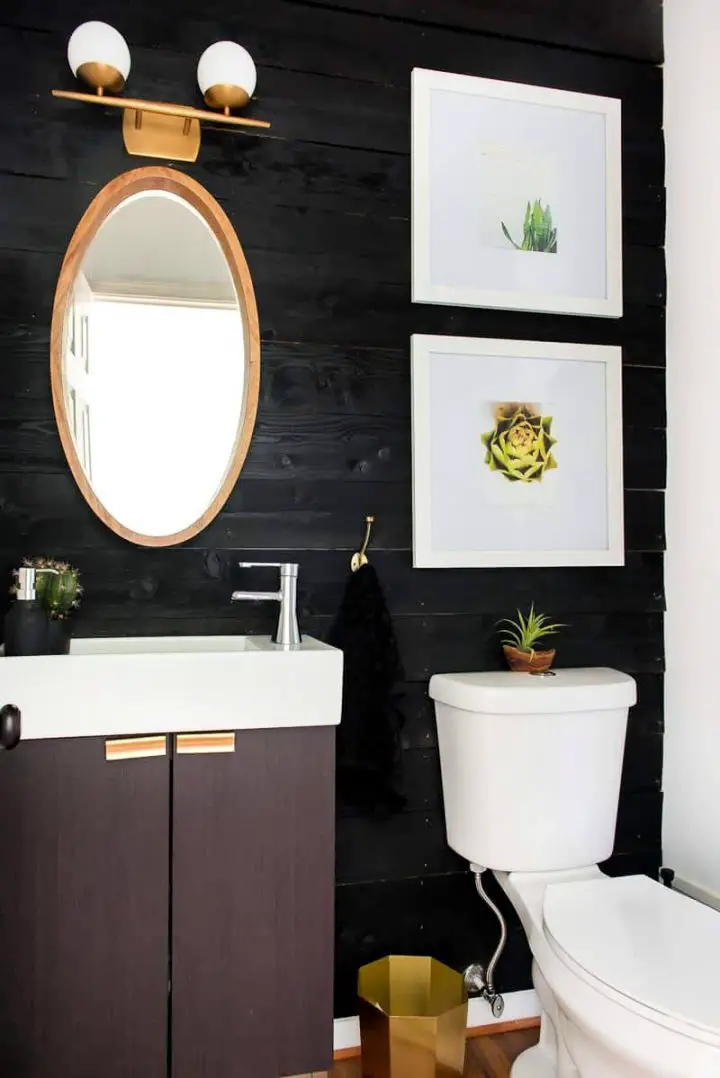
Transform a dull space into an elegant focal point without breaking the bank by creating a striking DIY black shiplap wall. This budget-friendly project can be completed for under $50, making it accessible to anyone looking to add a touch of sophistication to their home.
With step-by-step instructions and all the necessary materials available at Place of My Taste, you can easily revamp your powder room or accentuate any wall with this stunning feature. Whether you’re a seasoned DIY enthusiast or just starting out, this guide makes it easy to achieve impressive results without sacrificing style or budget.
Making Vertical Shiplap
Elevate your game room’s ambiance by crafting a unique vertical shiplap accent wall. Our step-by-step guide takes you on a journey from material selection to finishing touches, imparting valuable tips on preparation, installation, and painting techniques for a polished look. This DIY project infuses texture and personality into the space, making it perfect for enthusiasts of hands-on renovation. Explore the comprehensive tutorial at Love & Renovations to witness the remarkable transformation unfold.
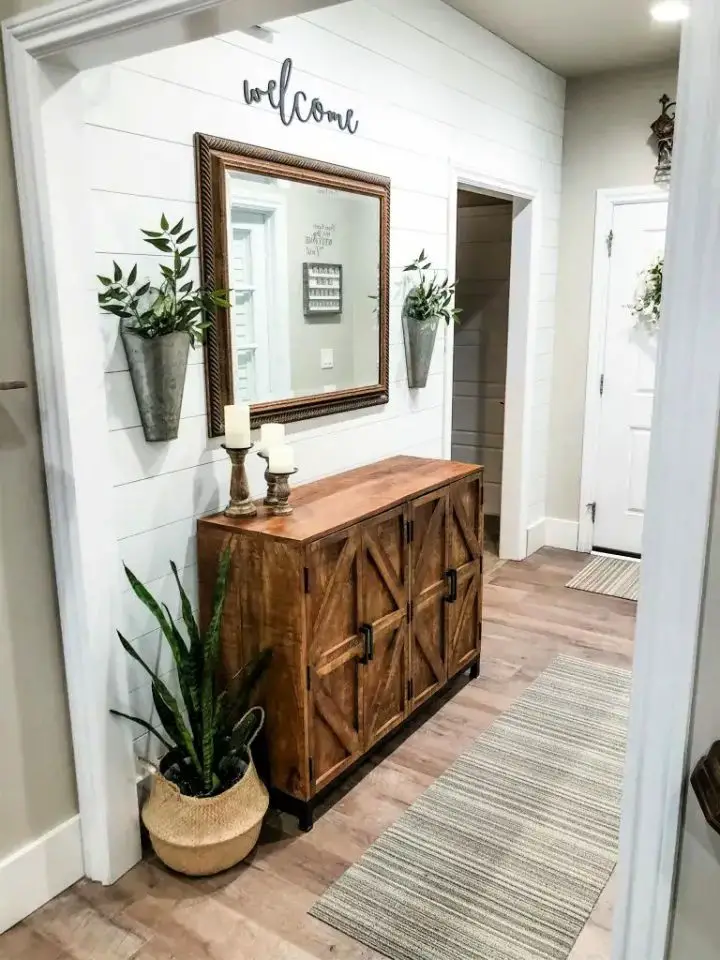
Homemade Accent Wall With Shiplap
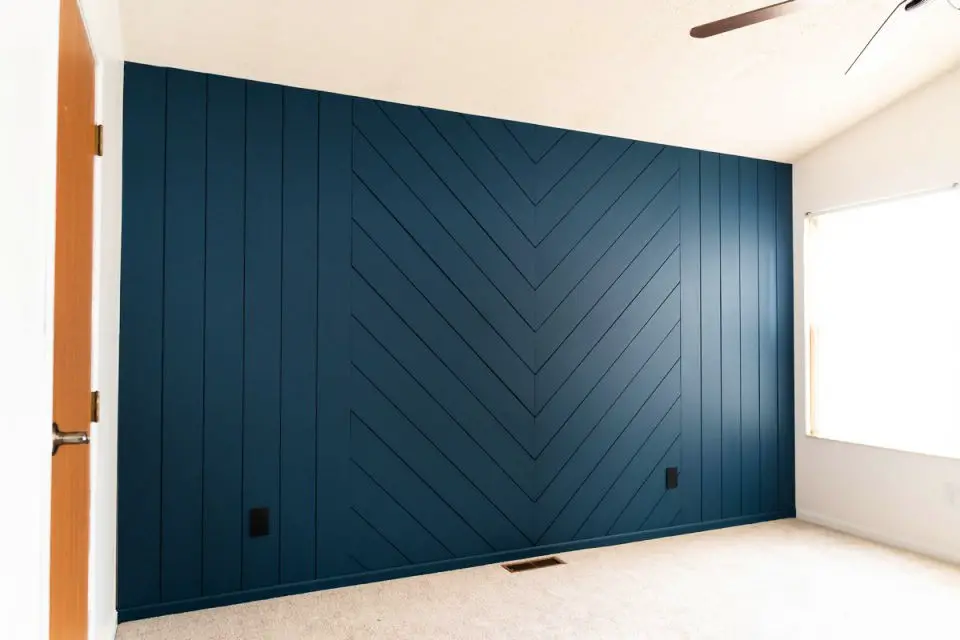
Elevate your space with a unique DIY shiplap accent wall by following The Nomad Studio’s comprehensive guide. This step-by-step tutorial takes you through the process of adding a distinctive chevron or vertical pattern to create a cozy and professional atmosphere in your master bedroom, living room, or any area that needs a refresh. With a focus on framing, materials, tools, and finishing touches, you’ll gain the expertise to craft your own statement wall and bring a touch of personality to your home. Get ready to unleash your creativity and transform your space with this DIY project.
Cheap DIY Faux Shiplap
Elevate your home’s style without breaking the bank by transforming it with a chic faux shiplap look, courtesy of ArtsyChicksRule. Our easy DIY guide walks you through every step, from selecting the ideal plank size to achieving a flawless finish. Learn how to prep and paint your walls like a pro, and master the perfect spacing technique for that authentic shiplap appearance. Whether you’re going for modern coastal charm or just want to refresh your space, our comprehensive tutorial has got you covered.
Making Your Own Plank Wall

Transform your home’s ambiance with the rustic charm of a DIY plank wall, affectionately known as faux shiplap. This budget-friendly project is deceptively easy to execute, requiring minimal investment and just a few weekend hours. With an estimated cost under $100, you can create a show-stopping feature wall that exudes vintage sophistication. For a comprehensive walkthrough of the process, including essential tools and materials, visit Caligirl in a Southern World.
DIY Sharpie Shiplap Wall
Transform your space with the charm of farmhouse style using a clever DIY Sharpie Shiplap Wall project. This budget-friendly solution offers a sought-after look without the cost or commitment of traditional installations. Perfect for updating living areas or adding a unique touch to bedrooms, this simple yet stunning project requires only basic supplies and a bit of creativity. By following the easy steps outlined below, you can create your own faux shiplap wall and bring an affordable farmhouse flair to your home.
Easy Shiplap Half Wall
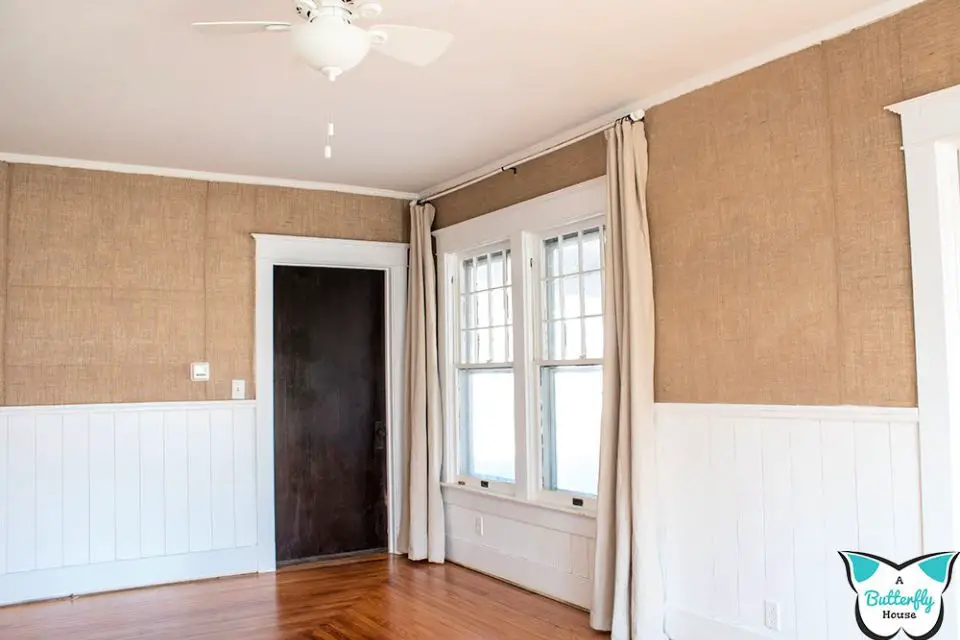
Elevate the ambiance of your living space by incorporating a touch of sophistication through a DIY shiplap half wall project. This comprehensive guide from A Butterfly House takes you on a step-by-step journey, covering every aspect from material selection to the final painted finish. Learn how vertical shiplap can effortlessly transform the aesthetic of your room, imbuing it with character and charm. Perfect for DIY enthusiasts seeking to add personality to their homes, this tutorial empowers you to bring your interior design vision to life.
Shiplap Wall Installation
Transform your DIY project with confidence by mastering the installation of shiplap on your wall. Our comprehensive guide will walk you through the process from start to finish, providing expert tips and techniques for preparing materials, nailing, and minimizing waste. Discover how to accurately mark stud locations, optimize nail usage, and skillfully cut around outlets for a seamless, professional-looking result. Whether you’re aiming for a rustic, cozy ambiance or a sleek, modern aesthetic, our step-by-step instructions will empower you to achieve the look that suits your style.
Cheap and Easy DIY Shiplap Wall
Unlock the secret to creating a stunning shiplap wall in your home without breaking the bank. In this comprehensive guide, you’ll learn how to transform your space using underlayment plywood at an affordable cost of just 43 cents per square foot. The tutorial covers everything from cutting and sanding wide planks for a less busy look to installing them with Loctite and brad nails, ensuring a secure fit and staggered planks for a professional finish. You’ll also discover expert tips on managing tricky areas and achieving a seamless shiplap look through proper painting techniques. Start your DIY project today and enjoy the cozy, textured addition that shiplap brings to your home.
Conclusion:
Ultimately, crafting a stylish DIY shiplap wall on a budget is a rewarding experience that offers endless possibilities to elevate the aesthetic of your home without incurring significant costs. From selecting materials to adding the finishing touches, this process allows you to put your personal touch on every aspect. As we’ve explored throughout this article, creating a shiplap wall requires careful planning, precise execution, and attention to detail – but the end result is well worth the effort. With 25 affordable DIY shiplap wall ideas at your disposal, you’re now equipped with the knowledge and inspiration to transform any room into a warm and inviting space that reflects your unique style.
