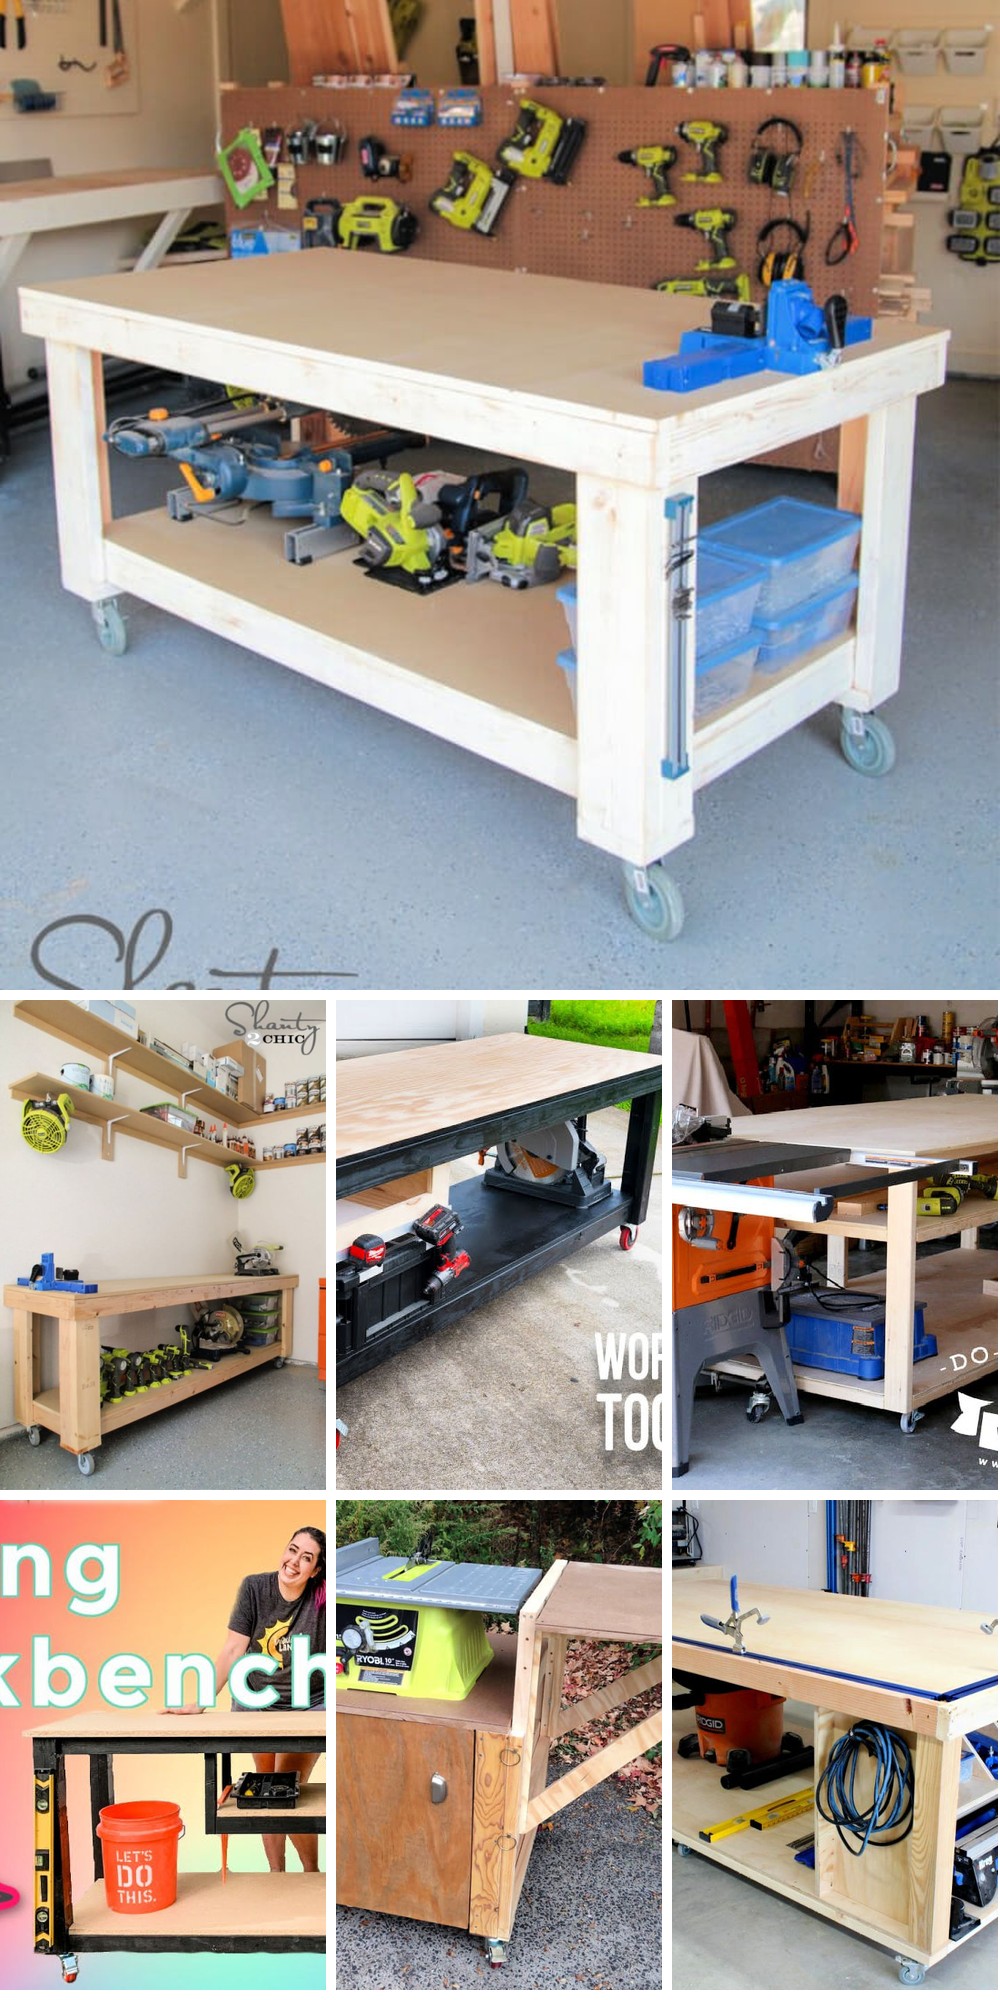
Transforming your workspace into an efficient mobile station is now possible with a rolling workbench. Our comprehensive guide features 25 free DIY plans, providing step-by-step instructions to help you build a customized workbench that meets your needs. From selecting the ideal materials and tools to adding the finishing touches, our advice is designed to be easy to follow and helpful. Not only does building a rolling workbench offer practical benefits, but it also provides a sense of accomplishment. With our detailed guide, you can ensure your workbench is both durable and versatile, accommodating specific features like flip-tops or caster wheels. By following our instructions, you’ll be able to boost productivity and creativity in your workspace.
Why Build Your Own Rolling Workbench?
When it comes to building a DIY rolling workbench, the rewards far outweigh the effort required. Not only does this project offer significant cost savings compared to purchasing a pre-made one, but it also presents an opportunity to get creative with customization options that cater to your unique needs and preferences. With a mobile workbench, you can effortlessly optimize your workspace for various projects, making the most of the space available to you. Moreover, the process of building your own workbench serves as a valuable learning experience, allowing you to develop or refine important woodworking skills such as planning, measuring, and assembling. Perhaps most importantly, the sense of accomplishment that comes from creating something functional with your own hands is unparalleled, providing a lasting source of personal satisfaction.
How to Build a Rolling Workbench
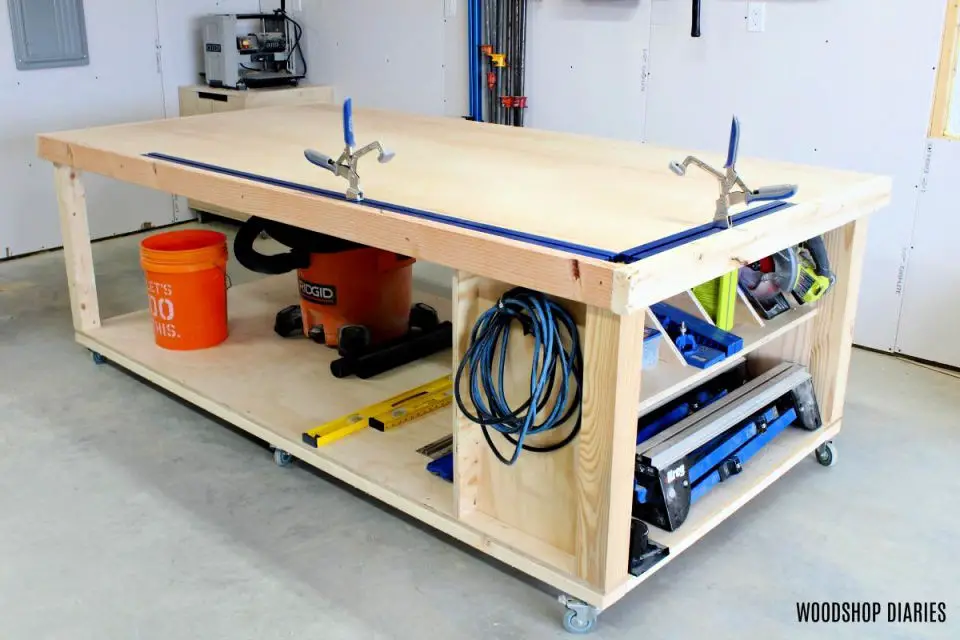
Constructing a mobile workbench with drawers doesn’t have to be an overwhelming task. By following a straightforward approach, you can create a reliable and efficient workspace that meets your specific needs. Drawing inspiration from Shara of Woodshop Diaries, this process involves breaking down the project into manageable steps. With the right guidance, you’ll be able to assemble a functional workbench that provides ample storage for your tools.
Gather Your Materials and Tools
Before commencing the project, it’s essential to gather all the required materials and tools. A comprehensive list includes 2×4 lumber, 1/2 inch plywood, caster wheels, screws, drawer slides, as well as fundamental woodworking equipment such as a saw, drill, and sander. Double-check the video’s description for a detailed materials list to ensure you have everything in order before beginning the construction process.
Cutting the Frame
To determine the optimal height for your workbench, first consider the desired height of the workspace itself. Next, factor in the height of the casters you’ll be using – adding these two measurements together will give you the required length for your legs. For example, if you’re aiming for a 36-inch tall workbench with 5-inch casters, you’ll need to cut your 2x4s down to 31 inches to achieve the perfect fit. Once you have all your pieces prepared, it’s time to start assembling. Begin by sanding each piece smooth to avoid any potential splinters or rough edges that might hinder the building process. With your components ready, proceed to pair up the cut legs, applying glue and screwing them together to form a sturdy foundation for your workbench. By following these steps, you’ll be well on your way to creating a functional and reliable workspace that meets your specific needs.
Designing the Workbench
When setting up your workbench, it’s essential to plan your design beforehand to avoid costly mistakes. A planning tool like Make by Me is an excellent resource to help you visualize and make changes before cutting more pieces. This step-by-step approach ensures that every component fits together seamlessly, saving you time and frustration in the long run.The next step is to focus on assembling the frame using 2x4s. To achieve a sturdy structure, connect each piece with pocket holes and screws. A key consideration at this stage is the orientation of the top and bottom horizontal pieces. The tops should be installed vertically, allowing for ample drawer space below. This attention to detail will pay off as you continue to build your workbench.
Adding Caster Wheels
To secure the caster wheels, flip the frame over and attach them at each corner. Ensure a robust hold by using washers and screws. By doing so, you’ll prevent any potential wobbling or detachment that might compromise the overall stability of your setup.
Prepping and Installing Plywood
To bring your project to life, begin by carefully cutting the plywood into the necessary pieces for the sides, drawers, and top sections, following your initial design plans. Once you have all the required components ready, shift your focus to assembling the drawer framing. This involves attaching the side panels and a central support using pocket screws, ensuring a sturdy foundation for the drawers. Don’t forget to add plywood strips along the bottom of the frame, which will later serve as a mounting point for the drawer slides.
Building and Installing Drawers
To get your drawers ready for installation, start by preparing the slides. This involves installing the drawer slides onto the designated sections of your workbench that are meant for drawers. Next, focus on assembling the drawer boxes themselves. You’ll need to create four identical boxes using plywood as the primary material. To do this, attach quarter-inch plywood at the bottom of each box using a combination of glue and staples. Once you’ve got your boxes built, it’s time to install the drawers. Begin by attaching the drawer slides to the boxes, then carefully slide them into their respective slots within the workbench.
Final Touches
To elevate the overall aesthetic and functionality of your piece, consider adding drawer fronts that seamlessly integrate with the existing design. Additionally, incorporate a mid-level shelf to provide ample storage space. To ensure a precise fit, carefully notch out the corners where the shelf meets the surrounding cabinetry. Next, install straightforward drawer pulls that allow for effortless access. By incorporating these thoughtful touches, you’ll be able to effortlessly open and close your drawers while maintaining a cohesive visual appeal.
Add a Flip-Top (Optional)
For added versatility, consider installing a piano hinge on one edge of your flip-top design. This will enable the top to swing open and shut seamlessly, providing easy access to any storage space or feature you’ve incorporated within.
Video Tutorial
While a detailed video tutorial can be incredibly helpful in breaking down the steps involved in building a mobile workbench, it’s equally important to have a written guide to refer back to. That’s why we recommend combining the two by watching our YouTube video and following along with this step-by-step guide. The visual perspective offered by the video will provide an engaging way to learn the project’s various stages, while this text-based guide will offer the precision and clarity needed to ensure a successful build. With patience and attention to detail, anyone – whether a novice or experienced DIYer – can create a mobile workbench that meets their unique crafting needs.
FAQs on DIY Rolling Workbench Plans
As you embark on building a DIY rolling workbench, several queries may arise. To provide clarity and ease the process, I’ll address some of the most frequently asked questions, serving as a roadmap for your project.
What materials do I need to build a rolling workbench?
Typically, to build your DIY project, you’ll need to gather the following essentials: the framework and surface materials, such as 2x4s or plywood; fastening tools, including screws and/or nails; mobility-enhancing caster wheels; a means of smoothing out rough edges, like sandpaper or a sander; and a variety of fundamental tools, like a saw, drill, tape measure, and level. The specific materials required may differ depending on the design you’re aiming to achieve, but these basics will provide a solid foundation for your project.
How do I choose the right caster wheels?
When choosing caster wheels for your workbench, it’s essential to consider several factors that will ensure optimal performance and safety. First and foremost, think about the weight capacity of the casters. They should be able to support the combined weight of the workbench itself, as well as any tools or materials you’ll be using. A heavy-duty caster with a high load rating can provide the necessary stability and prevent accidents from occurring.Next, consider the locking mechanism on your chosen casters. This feature is crucial for keeping your workbench in place when you’re actively working on it, preventing unwanted movement or drift. Look for casters that offer a reliable locking system to keep everything secure and under control.Finally, don’t forget about the size of the caster wheels themselves. Larger wheels can be beneficial when dealing with uneven surfaces or rough terrain, as they tend to handle these situations better. However, it’s important to note that larger wheels may also increase the overall height of your workbench, which could impact its ergonomic design and usability.By taking these factors into account, you’ll be able to select caster wheels that meet your specific needs and provide a solid foundation for your workbench.
Can I customize the size of my rolling workbench?
When it comes to designing a custom workbench, one of the most significant advantages is the flexibility to tailor the size to suit your specific requirements. By modifying the dimensions according to the space available and the type of projects you typically work on, you can ensure that your workbench provides ample room for your tools and materials. This adaptability is particularly valuable when working with a variety of material sizes, as it allows you to efficiently manage your workspace and reduce clutter.
What is the ideal height for a rolling workbench?
When it comes to determining the perfect workbench height, a key consideration is personal comfort and the specific tasks you’ll be performing. A widely accepted guideline suggests aligning the work surface with the natural resting position of your arm – namely, the distance from the floor to your wrist when your arm is relaxed by your side.
How do I ensure my rolling workbench is stable?
When it comes to constructing a stable piece of furniture, there are several key factors to keep in mind. One crucial consideration is the quality and type of materials used. Opting for sturdy materials and employing tried-and-true joinery techniques can make all the difference in ensuring that your creation stands the test of time. Additionally, attention to detail is vital when it comes to the legs – making sure they are evenly spaced will help prevent any wobbling or instability. Furthermore, selecting high-quality locking caster wheels can provide added stability and peace of mind. Finally, taking the time to add braces or supports to the frame where necessary can provide an extra layer of security, giving you the confidence that your piece is well-equipped to withstand whatever demands are placed upon it.
Can I add storage to my rolling workbench?
When it comes to designing a rolling workbench, incorporating storage solutions is a crucial aspect to consider. Many pre-existing plans offer customization options, such as drawers, shelves, or cabinets, which cater to the specific needs of users. Take stock of the tools and materials you intend to store on your workbench and tailor your design accordingly, ensuring that your workspace remains organized and efficient.
How do I maintain my rolling workbench?
To ensure your DIY rolling workbench remains functional and efficient, incorporate these essential maintenance tasks into your routine. Start by conducting a thorough inspection of the workbench’s components, tightening any loose screws or bolts that may have developed over time. Next, devote some attention to keeping the work surface clean and free from debris, which can hinder productivity and compromise the overall appearance of the workspace. Additionally, don’t forget to lubricate the caster wheels as needed to maintain smooth movement and prevent them from becoming stuck or difficult to maneuver. Finally, consider applying a durable finish to protect the work surface from wear and tear, or plan to replace it when necessary to keep your project running smoothly.
25 Free DIY Rolling Workbench Plans (How to Build)
Transform your workspace with 25 comprehensive, no-cost DIY rolling workbench plans. Each plan is accompanied by straightforward, easy-to-follow guidance, empowering you to bring your ideal workspace to life from scratch.
DIY 2×4 Workbench Using Simple Tools and Lumber
Are you ready to embark on your first woodworking adventure? Start strong with Anika’s DIY Life, offering beginner-friendly 2×4 workbench plans designed specifically for novice woodworkers like yourself. This comprehensive guide demystifies the process of building a sturdy workbench using basic tools, perfect for those just starting out. But what sets this project apart is its versatility – as you gain confidence in your skills, you can easily transform it into an assembly table or miter saw stand. By following the step-by-step plans, you’ll be well on your way to crafting a workbench that’s both robust and adaptable, providing a solid foundation for all your future projects.
Mobile Workbench With Storage Shelf
Upgrade your workspace with efficiency and style by turning your DIY Mobile Workbench with Storage Shelf into an adaptable assembly table, outfeed table, and storage solution. This versatile project is perfect for enthusiasts looking to boost productivity in their shop. With clear instructions guiding you from building the frame to adding a handy storage cubby, you’ll have everything you need to get started on your next project.
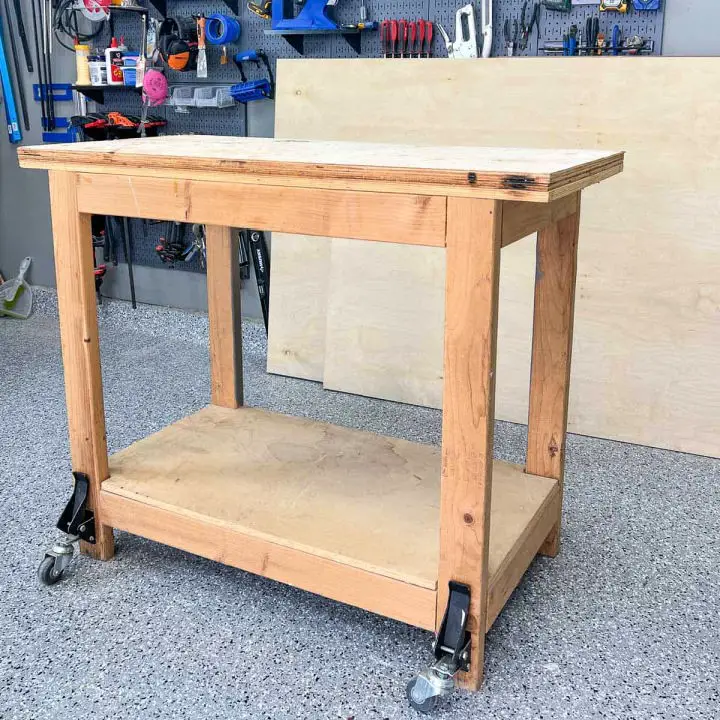
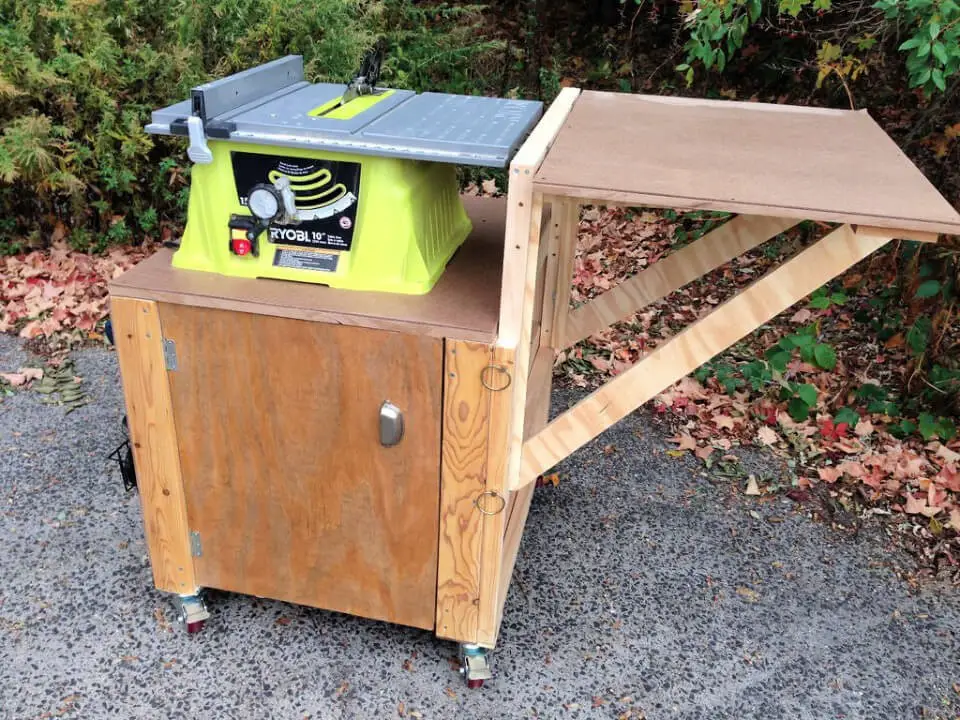
DIY Rolling Work Bench From Table
Turn an ordinary table into a highly versatile DIY rolling workbench with the help of H2OBungalow’s straightforward guide. Learn how to breathe new life into a discarded roadside find, transforming it into a movable workspace that boasts shelving and a drop-leaf extension for maximum flexibility. This tutorial is specifically designed for DIY enthusiasts seeking a mobile solution for their projects, providing step-by-step instructions on how to create your own rolling work table from an old table. By following these simple steps, you can turn something old into something new and incredibly functional, perfect for anyone looking to maximize their workspace with minimal hassle.
Roll Away Workbench With Miter Saw Stand
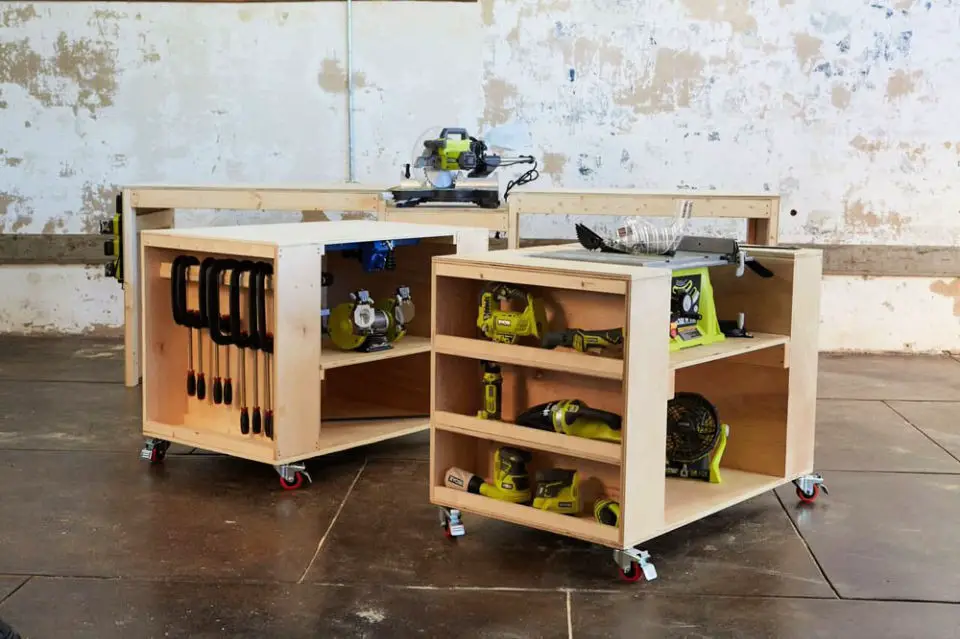
Improve the functionality of your workshop with the Ultimate Roll Away Workbench and Miter Saw Stand. This innovative solution seamlessly integrates a miter saw stand with customizable roll-away carts, allowing you to efficiently store all your valuable tools within easy reach.
The step-by-step plans make it simple to build this workbench, creating a tidy and versatile workspace that can be quickly cleaned up after each project. Perfect for maximizing garage space, this DIY build is more than just a project – it’s a transformation that will revolutionize your woodworking experience.
Ultimate DIY Garage Workbench
Transforming chaos into order in your garage can be achieved by building the ultimate DIY garage workbench with free plans. This comprehensive guide empowers you to create a multifunctional workspace that not only organizes your tools but also provides a sturdy table for your projects. With precise instructions on size and materials, you’ll have everything you need to maximize your workspace. Start building today and discover the joy of having a workbench that’s both functional and visually stunning.
How to Make a Workbench With Drawers
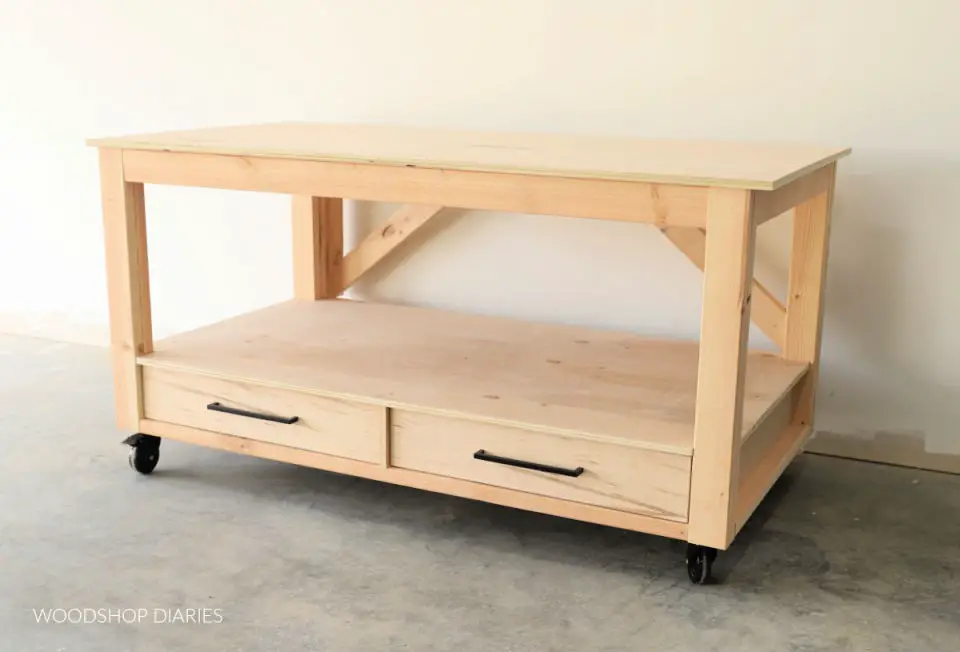
Transform your workshop into a highly functional space with a DIY Workbench featuring drawers, perfect for various settings. This medium-sized, mobile workbench strikes an ideal balance between ample work surface area and storage capacity.
Its flip-open top and spacious drawers make it an excellent choice for maintaining tool organization and accessibility. The project’s straightforward instructions ensure a successful weekend endeavor for anyone seeking to elevate their workspace.
The versatility of this DIY Workbench lies in its adaptability – you can opt for the flip-top design or choose not to include it, depending on your specific needs. This practical solution will significantly enhance your creative projects’ efficiency and convenience.
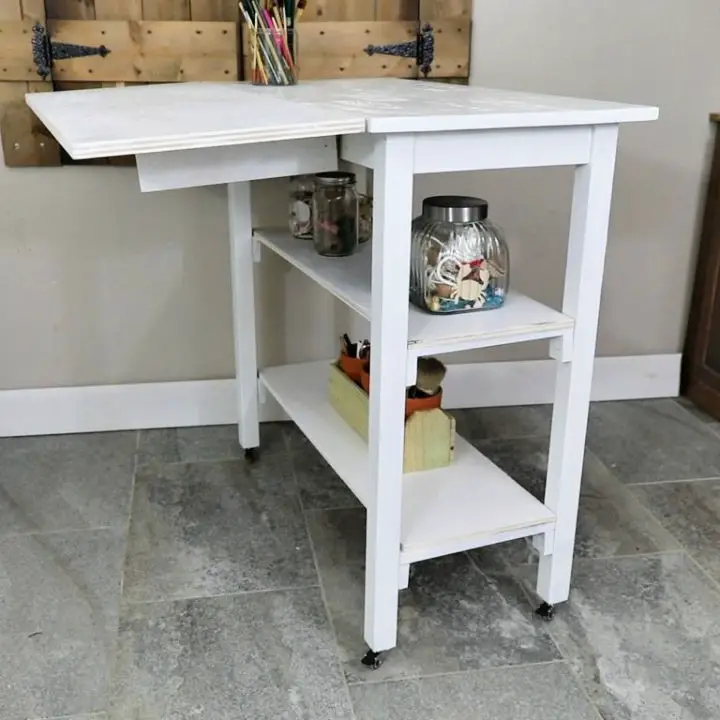
DIY Mobile Workbench at Home
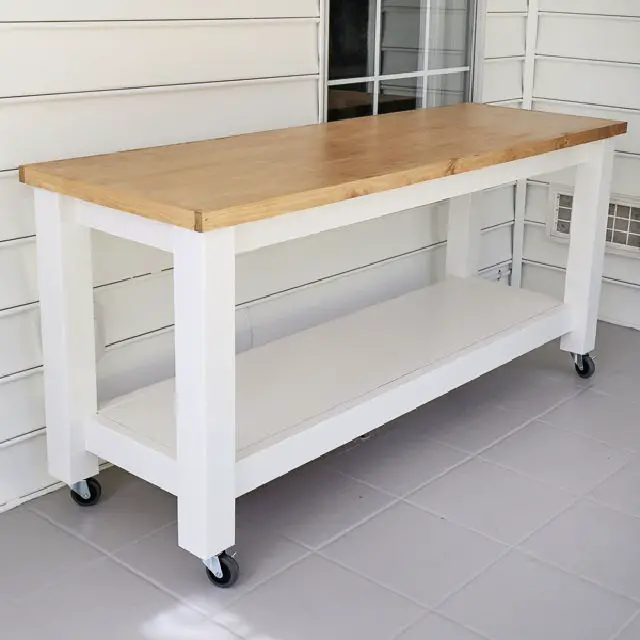
Transform your workspace into an organized and adaptable haven by building a versatile, rolling mobile workbench with Angela Marie Made’s comprehensive DIY guide. This budget-friendly project is perfect for tight spaces, allowing you to create a functional and visually appealing area that doubles as a chic kitchen island if desired. With easy-to-follow plans and a step-by-step process, you’ll craft a durable workbench that elevates your workshop experience while ensuring efficient use of space.
Simple DIY Rolling Workbench
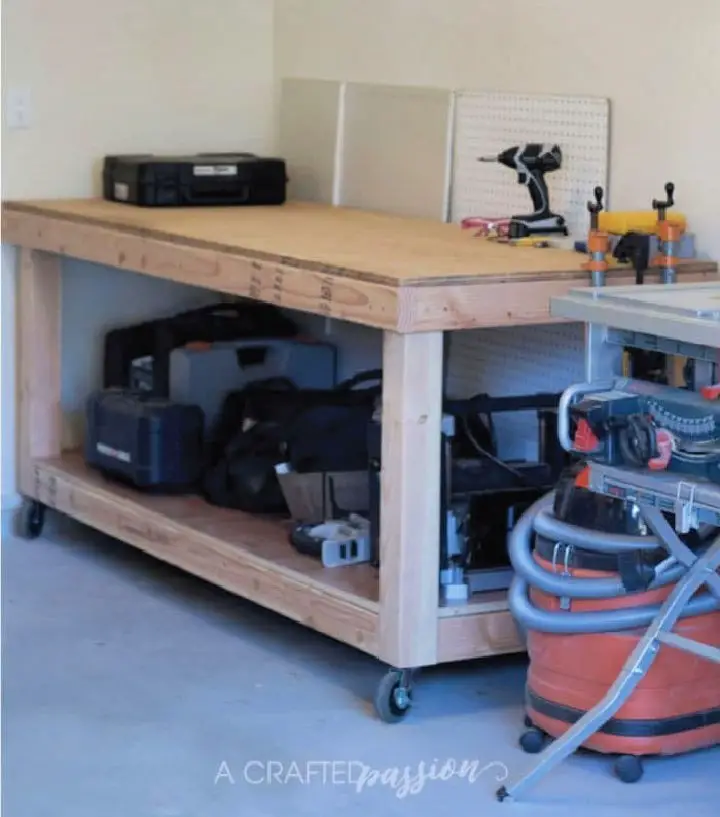
Transform your garage workspace with a DIY rolling workbench that’s easy to build, boosts storage, and sparks creativity. At Crafted Passion, we’re excited to share this detailed guide that will help you create a sturdy and mobile workbench on a budget. With just a few straightforward materials – including swivel casters and plywood – and step-by-step instructions, you’ll be able to turn your garage into a more functional and inspiring space for DIY projects.
How to Build a Rolling Workbench
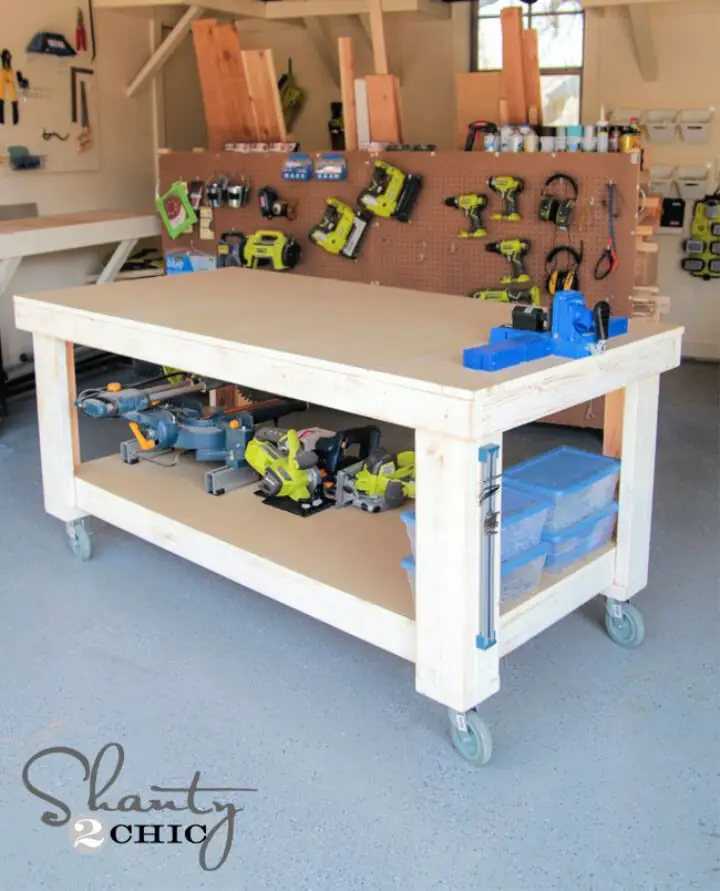
Kickstart the new year by giving your workshop a fresh makeover! Transform your creative space into a customizable haven by tackling this straightforward DIY workbench project. Say goodbye to cluttered garage floors and hello to a sturdy, adaptable area perfect for storage, crafting, or as the epicenter of all your DIY endeavors. To make it even more accessible, Shanty-2-Chic offers complimentary plans that guide you through the process. With the added bonus of locking rubber casters for effortless mobility, this build becomes an indispensable asset in your toolkit. Start building today and watch your workbench become the cornerstone of countless projects to come.
Free Wood Workbench Plan
Imagine starting a DIY project without the hassle of setting up an elaborate workspace. The Easy Build Workbench by Kreg Tool makes this a reality, offering a sturdy and sleek design that can be easily customized to fit your specific needs. With its modular system, you can create a workbench that perfectly suits your workflow. What’s more, the comprehensive instructions provided by Kreg Tool guide you through every step of the process, from drilling pocket holes to assembling frames. This versatile workbench is not only optimized for performance but also mobile with the addition of casters, allowing you to effortlessly move it around your workspace. Start building your ideal work area today and unlock a world of DIY possibilities.
Ultimate DIY Mobile Workbench
Transform your workspace limitations with the ultimate mobile workbench, a revolutionary solution for those struggling with confined workshop or garage spaces. This ingenious design boasts an adjustable top that securely holds bench-top power tools, as well as abundant internal storage courtesy of shelves, drawers, and a pegboard. Moreover, its sturdy structure on wheels enables effortless mobility, allowing you to effortlessly reconfigure your workspace according to your needs. Built for adaptability, the guide presents various material and tool alternatives, empowering you to create with ease, no matter what resources you have at hand. By employing this Ultimate Mobile Workbench, even the most ambitious projects become achievable, seamlessly transforming any space into a productive work area.
Build Your Own Rolling Workbench
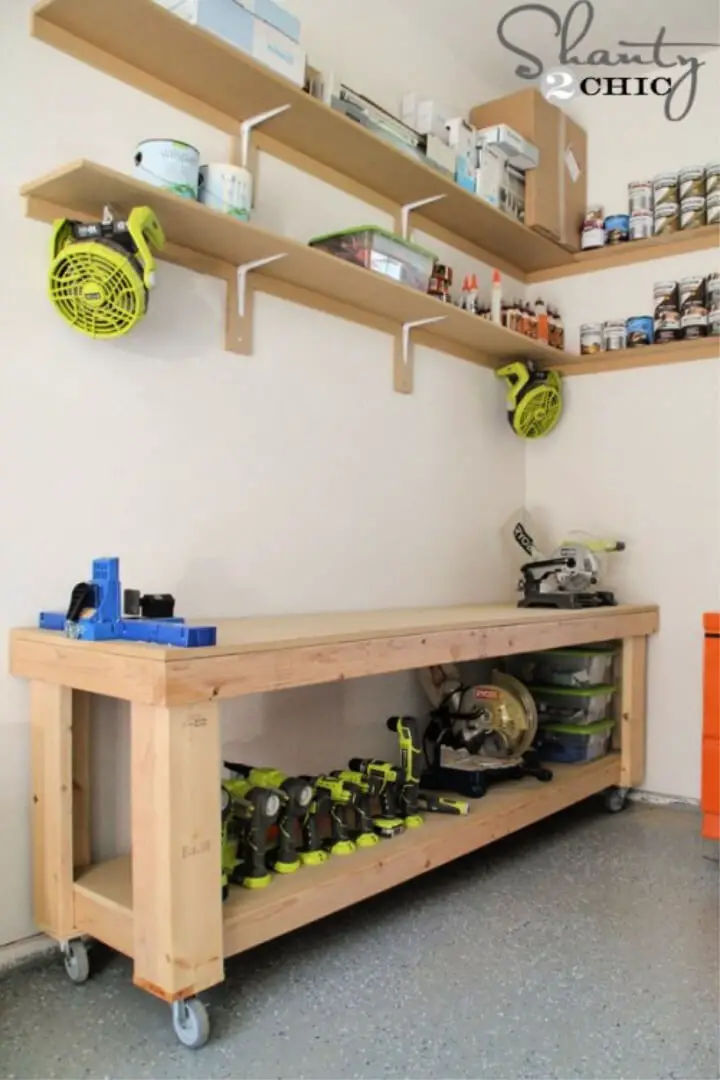
With the right resources, taking on a DIY project can be a breeze. That’s why we’ve gathered free workbench plans specifically designed for small spaces. Priced affordably at around $100, including casters, this versatile workbench is an intelligent addition to any workshop. Its assembly process is made easy with comprehensive step-by-step instructions, ensuring that even those with limited experience can successfully complete the project. The inclusion of locking casters adds mobility and customization options allow you to incorporate essential tools, making it a space-efficient and productivity-enhancing solution. For more information and to access the free plans, visit Shanty-2-Chic. Start building your perfect workbench today and take your DIY experience to the next level.
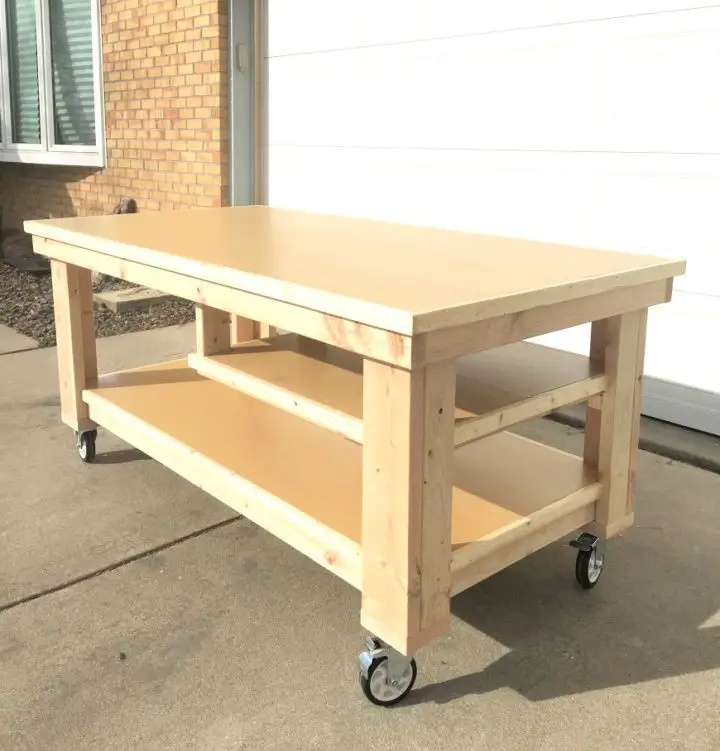
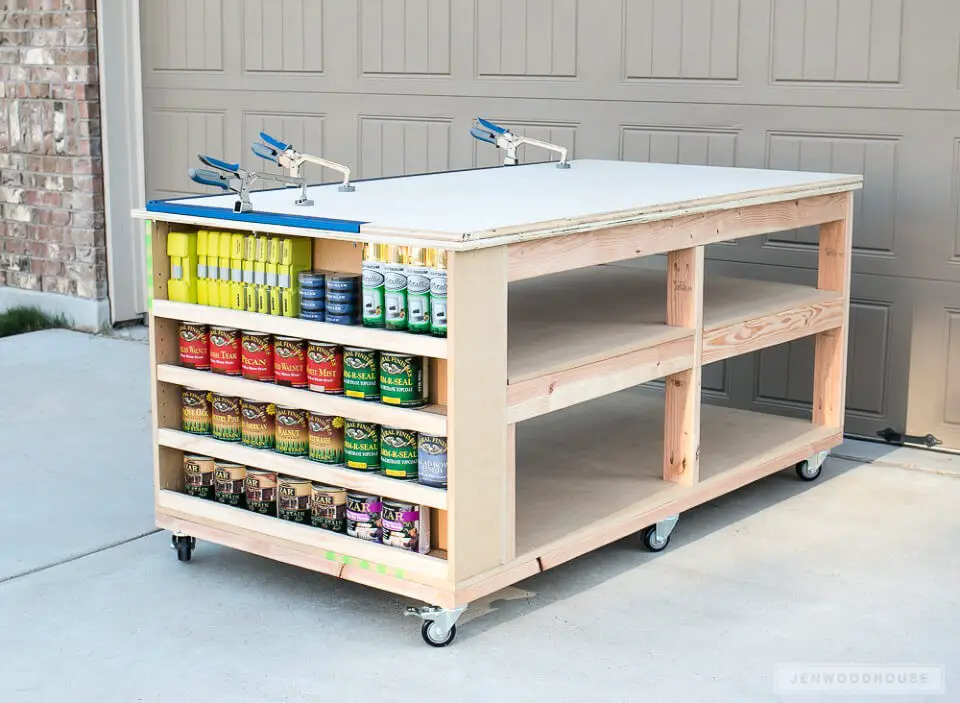
DIY 4×8 Workbench and Outfeed Table
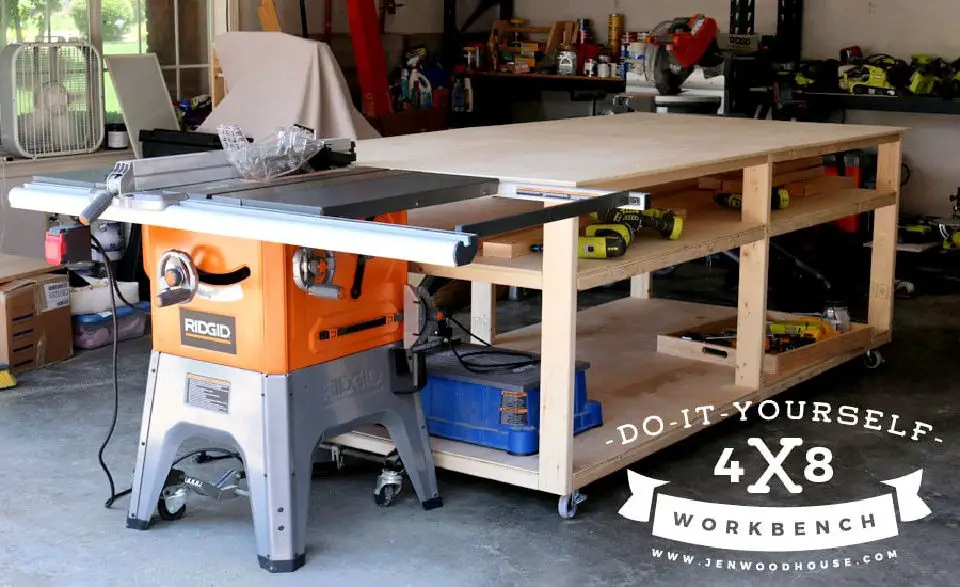
Elevate your workshop experience with this comprehensive DIY workbench, ideal for tackling projects of all sizes. The expansive 4×8 feet surface area allows you to accommodate a full sheet of plywood, making it perfect for extensive projects. This versatile workbench also features a thoughtful shallow shelf for storing tools within easy reach, without compromising on workspace clarity. Magnetic strips ensure screws and tools remain secure, while the locking swivel casters provide effortless mobility and stability. For a step-by-step guide to creating your own workspace superstar, head over to Jen Woodhouse and start building today.
Making Your Own Rolling Workbench
Elevate your DIY experience with this comprehensive guide to creating a simple yet effective workbench. A must-have resource for crafty individuals and DIY enthusiasts, the guide delivers clear instructions, making it accessible to anyone looking to upgrade their workspace. Whether you’re a seasoned pro or just starting out, this straightforward blueprint enables you to construct a sturdy and practical workbench, empowering you to tackle projects with ease and precision.
DIY Portable Workbench With Storage
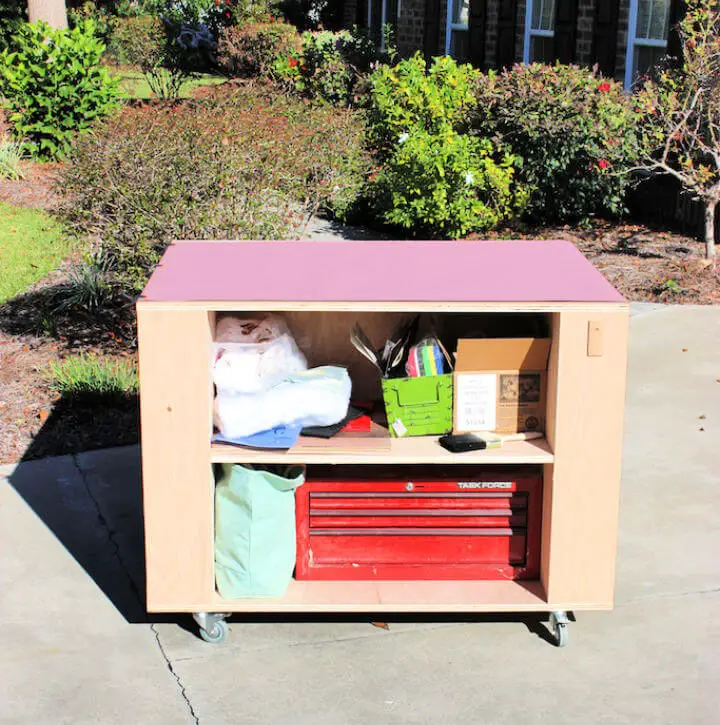
Transform your DIY experience by creating a portable workbench that seamlessly integrates ample storage solutions. This innovative design combines durability with space-saving ingenuity, making it perfect for cluttered garages and weekend projects that never seem to end. For a comprehensive guide on how to build this versatile workbench and access free plans, head to Rogue Engineer. With a mobile workspace at your disposal, you’ll be able to manage every project with ease, from woodworking to staining and beyond.
Make a Rolling Workbench With Cabinets
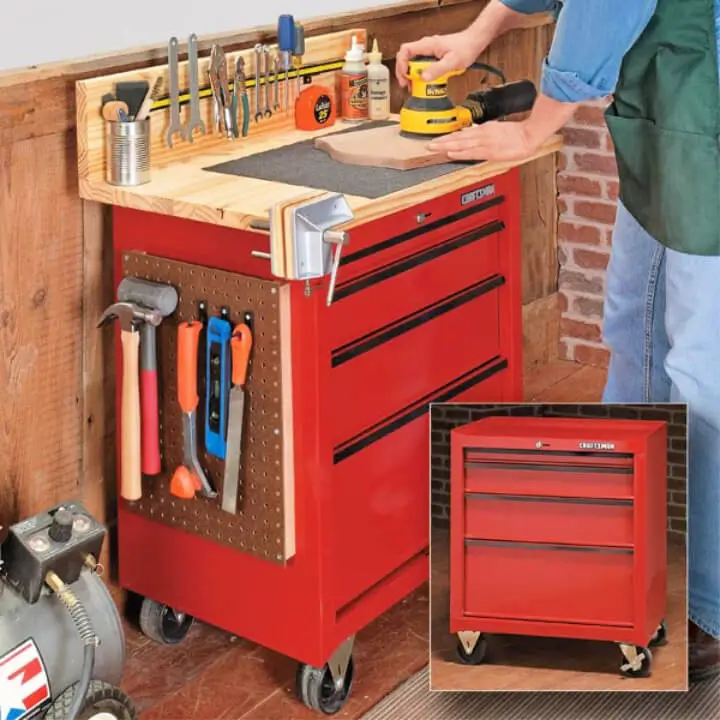
Transform your woodworking space with an innovative tool cabinet makeover that’s easy to achieve. Unleash the potential of a standard rolling tool cabinet by turning it into a multi-functional workbench extension in your workshop. The possibilities are endless, from adding a sturdy solid pine top to create a larger workspace to incorporating clever storage solutions like bins and pegboards for streamlined tool management. To further boost convenience, consider installing a magnetic tool bar and a mounted power strip, keeping essential tools and power outlets within easy reach. Discover the step-by-step guide to this game-changing upgrade at Woodsmith.
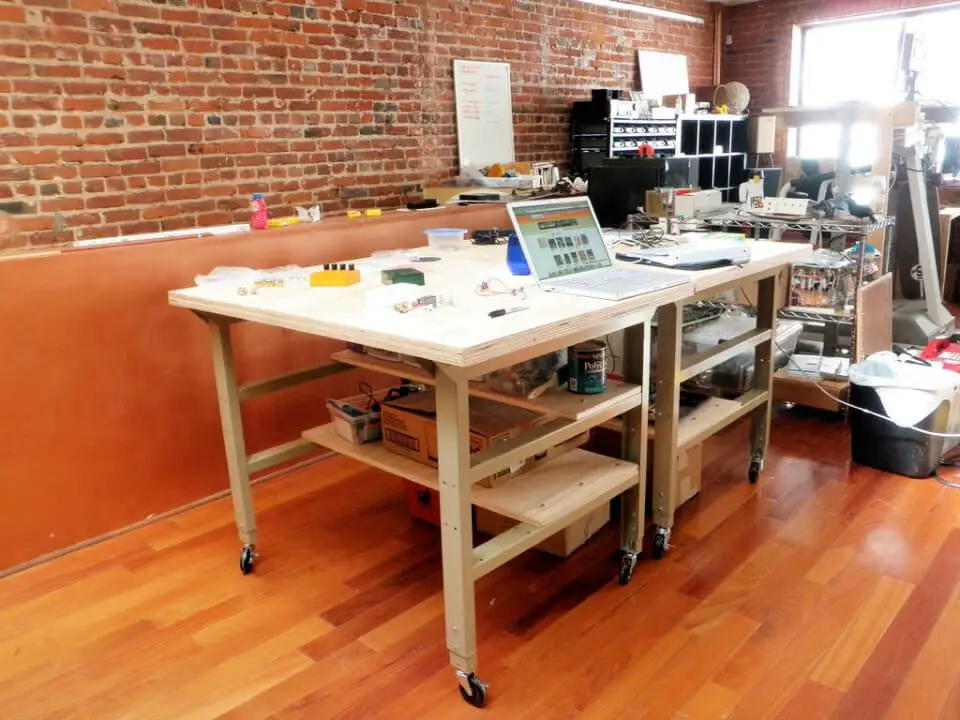
Mobile and Modular Rolling Workbench

Transform your workshop with a DIY mobile and modular workbench designed to prioritize flexibility. This innovative workspace seamlessly combines portability, scalability, and modularity, making it an ideal solution for handling large materials and accommodating various tools and projects. With comprehensive plans and assembly guidance, this project simplifies the process of setting up a versatile working space that optimizes any garage or workshop. By streamlining storage and mobility, you’ll have your tools at your fingertips for your next project, ensuring maximum productivity.
Wooden Rolling Workbench Design
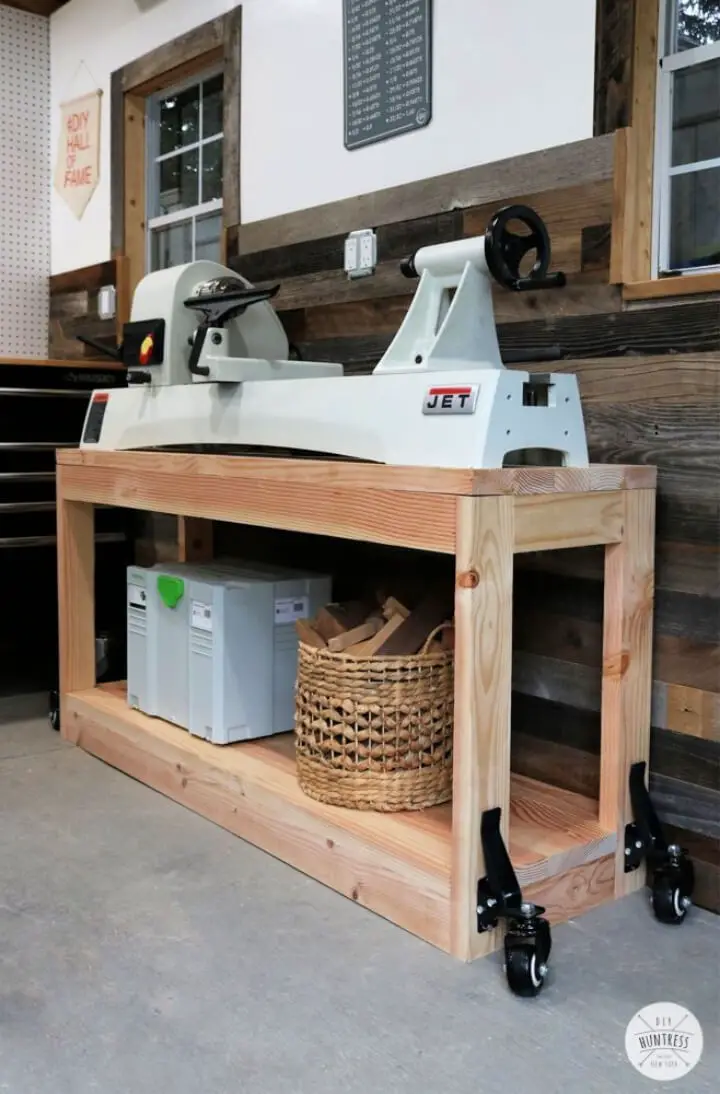
Give your workspace a smart makeover with a budget-friendly DIY rolling workbench. This ingenious project is designed to maximize even the smallest of workshop areas, offering unparalleled mobility and cost-effectiveness. With a materials list and step-by-step instructions at your disposal, you can create this versatile addition for under $50 in lumber. For a comprehensive guide and printable plans, head to DIY Huntress.
DIY Rolling Workbench on a Budget
Want to create a personalized workbench without going over budget? For DIY enthusiasts looking to optimize their workspace, a well-crafted workbench can be a game-changer. By following a simple step-by-step guide at Instructables, you’ll gain the skills and confidence to build a sturdy and reliable work surface that’s perfect for your garage, workshop, or any project space. With this practical guide, you’ll learn how to construct something durable and functional, making your DIY tasks easier and more organized from day one.
How to Make a Rolling Workbench
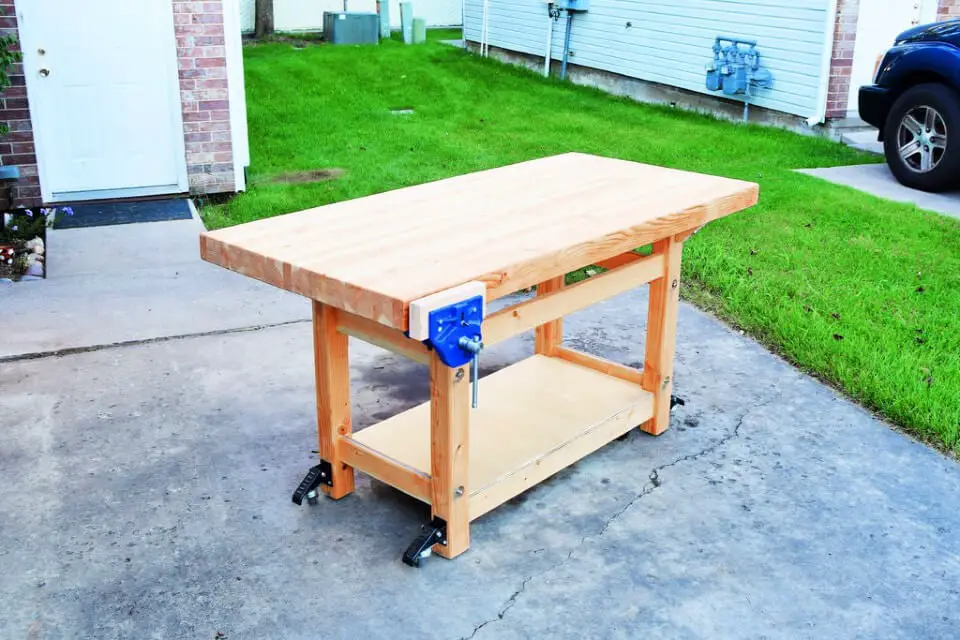
Transform your workspace into a haven of productivity and creativity with the ultimate DIY project from Instructables. The ‘Perfect Workbench’ is more than just a functional surface – it’s a meticulously designed and assembled masterpiece that combines durability, versatility, and aesthetics. With this comprehensive guide, you’ll learn how to select the ideal materials, assemble with precision, and create a workspace that’s not only easily movable but also budget-friendly. Whether you’re a seasoned DIY enthusiast or a novice looking to upgrade your garage or shop, this project is sure to inspire and delight. Follow along as we delve into the world of DIY and bring this ambitious project to life.
DIY Rolling Workbench With Shelves
Ready to transform your workspace into a well-organized hub for productivity? Building a DIY mobile workbench with shelves is the perfect solution! By following a step-by-step guide at jenwoodhouse.com, you can create a sturdy and efficient work surface that not only streamlines your workflow but also provides ample storage for all your crafting essentials. From sourcing the right materials to tackling each stage of construction, this comprehensive guide ensures that every aspect of your DIY project is handled with ease. With a mobile workbench, you’ll be able to tackle tasks anywhere in your shop, and with shelves to keep everything organized, you’ll never have to dig through cluttered spaces again.
Multipurpose Workbench From 2 by 4 and Plywood
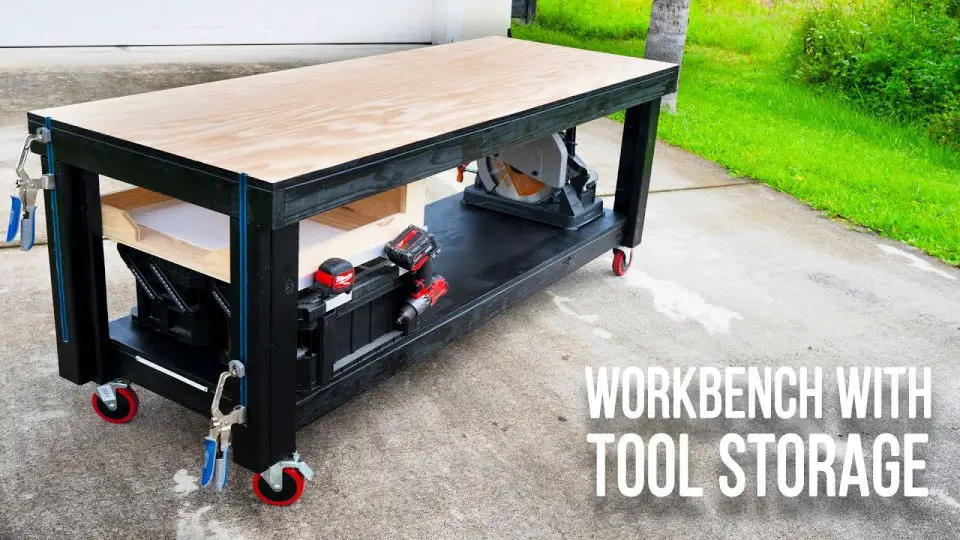
Embark on a woodworking adventure with a comprehensive guide to crafting a practical DIY workbench. This step-by-step tutorial is designed for beginners, providing a clear roadmap to constructing a functional workspace that meets their unique needs. By exploring topics such as selecting the optimal lumber and leveraging pocket hole joinery to assemble the frame, enthusiasts can confidently tackle each stage of the build process. The design’s emphasis on mobility with caster wheels and tool storage adds an extra layer of efficiency and organization, making it an ideal solution for those seeking a customized workspace.
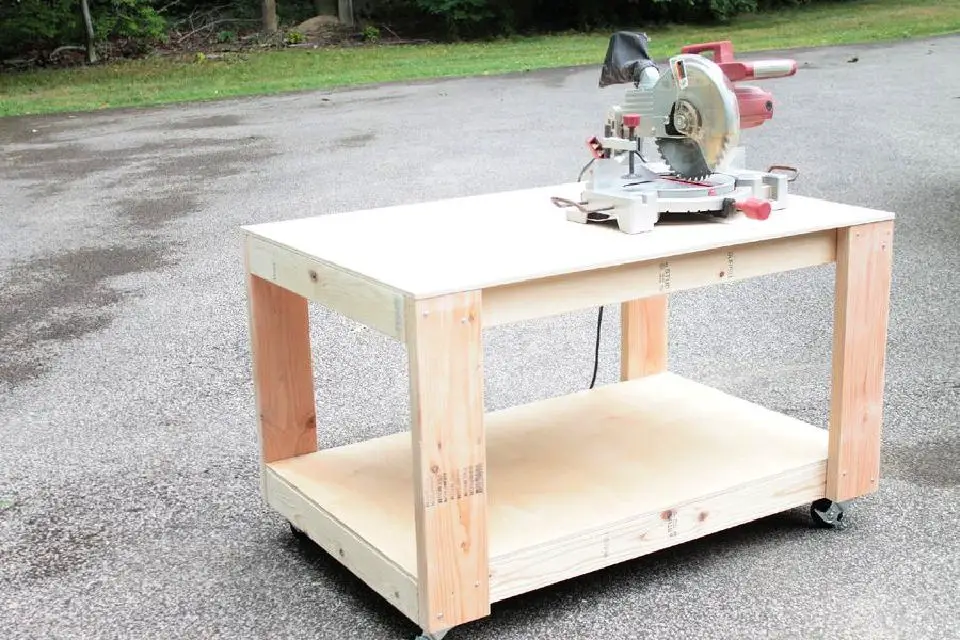
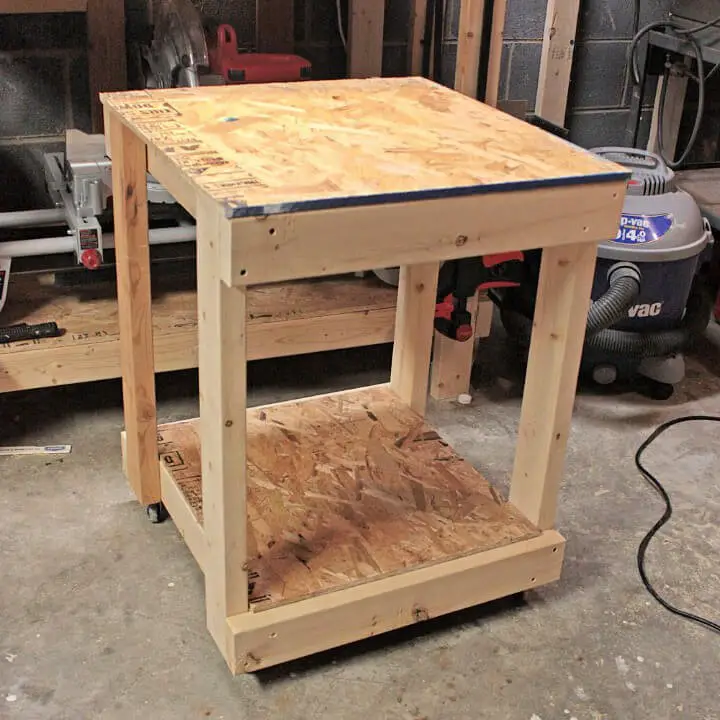
DIY Rolling Workbench for Under $75
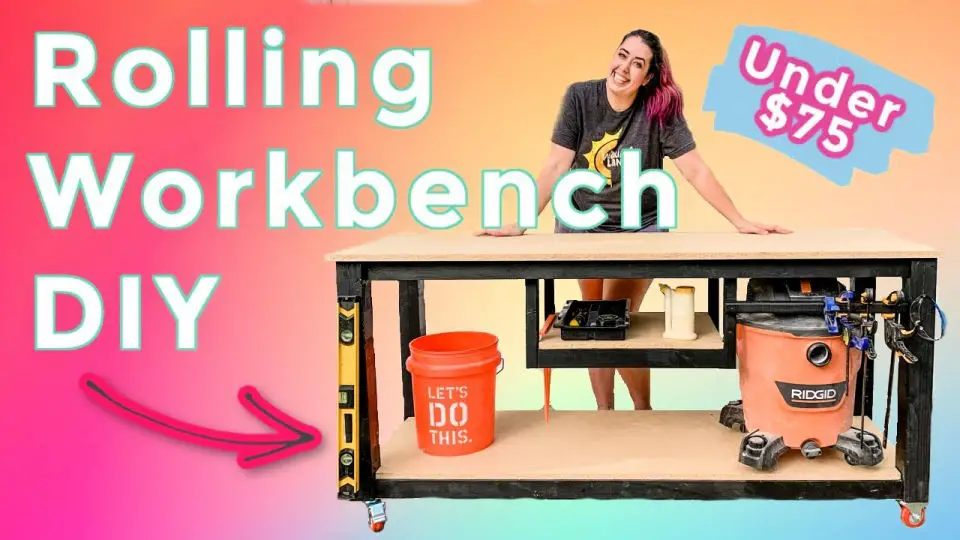
If you’re looking to build a rolling workbench on a budget, you’re in luck. With this comprehensive guide, you can create one for under $75. Designed for DIY enthusiasts seeking a practical and cost-effective solution for their workspace, the tutorial takes you through each step with clarity. From constructing the legs to attaching the wheels and shelves, you’ll have a complete understanding of the process. For added visual guidance and step-by-step instructions, be sure to check out the accompanying tutorial. This project is perfect for those aiming to enhance their work area efficiently without breaking the bank.
Free Rolling Workbench Plan
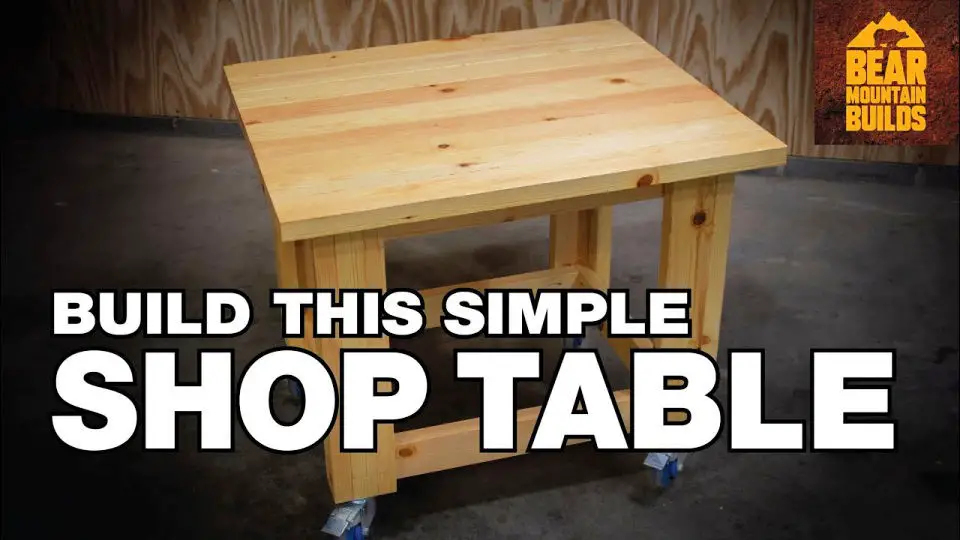
Embark on a stress-free DIY adventure with the BearMountainBuilds rolling workbench tutorial. This comprehensive guide simplifies the process of constructing a sturdy, versatile, and highly functional workspace using a minimal amount of materials. One of the standout features is the use of pocket screws for effortless assembly, resulting in a sleek finish that conceals any visible fasteners. The addition of lockable, rotating wheels adds unparalleled mobility, making it perfect for cramped spaces. With detailed plans included, building this robust addition to your workshop has never been more accessible. This project is equally suitable for DIY newcomers and seasoned craftsmen alike, promising a fulfilling experience.
Easy DIY Rolling Workbench for Beginners
Immerse yourself in the world of DIY woodworking by crafting a functional rolling workbench that will revolutionize your garage or workspace setup. The comprehensive guide provided here takes you through every step of the process, covering all the essential tools and materials required to bring this project to life.
This beginner-friendly build offers an ideal solution for organizing your tools and tackling various projects with ease. By combining straightforward construction techniques with a sturdy design, it enables you to create a mobile workbench that adapts to your needs. With this approachable project, you’ll be able to enjoy a clutter-free and efficient workspace in no time.
Conclusion
In summary, our exploration of 25 free DIY rolling workbench plans presents a thorough guide for anyone seeking to elevate their workspace with a versatile and mobile solution. By following the necessary steps from material selection to finishing touches, this guide empowers individuals to construct a rolling workbench that not only caters to their unique needs but also streamlines their projects. Whether it’s incorporating storage options or tailoring the size, your new rolling workbench will serve as a testament to your handiwork and a crucial tool in your DIY pursuits. So, gather your tools and let’s embark on building a workspace that keeps pace with you.
