With a little practice, crafting a ribbon bow can be a breeze. Our comprehensive guide, ‘DIY Ribbon Bow: 15 Easy Ways to Make a Stunning Ribbon Bow’, is designed to help crafters of all skill levels achieve professional-looking results. From simple yet charming home decor accents to more elaborate designs for fashion accessories, event decorations, and gift-giving, we’ve curated a range of project ideas, tool recommendations, and step-by-step instructions to ensure your creations turn out beautifully. We also address common challenges and share advanced techniques to help you take your bow-making skills to the next level. Moreover, we emphasize the importance of sustainable materials and practices in crafting. Whether you’re a seasoned crafter or just starting out, our guide is packed with valuable tips and tricks to get you started on creating stunning ribbon bows that will make a lasting impression.
Project Ideas: Creative Uses for Ribbon Bows
Ribbon bows, often associated with the art of gift wrapping, have a versatile nature that allows them to be effortlessly incorporated into various aspects of daily life. Beyond their traditional use, these charming adornments can add a touch of elegance and whimsy to numerous projects, events, and everyday moments.
Home Decor
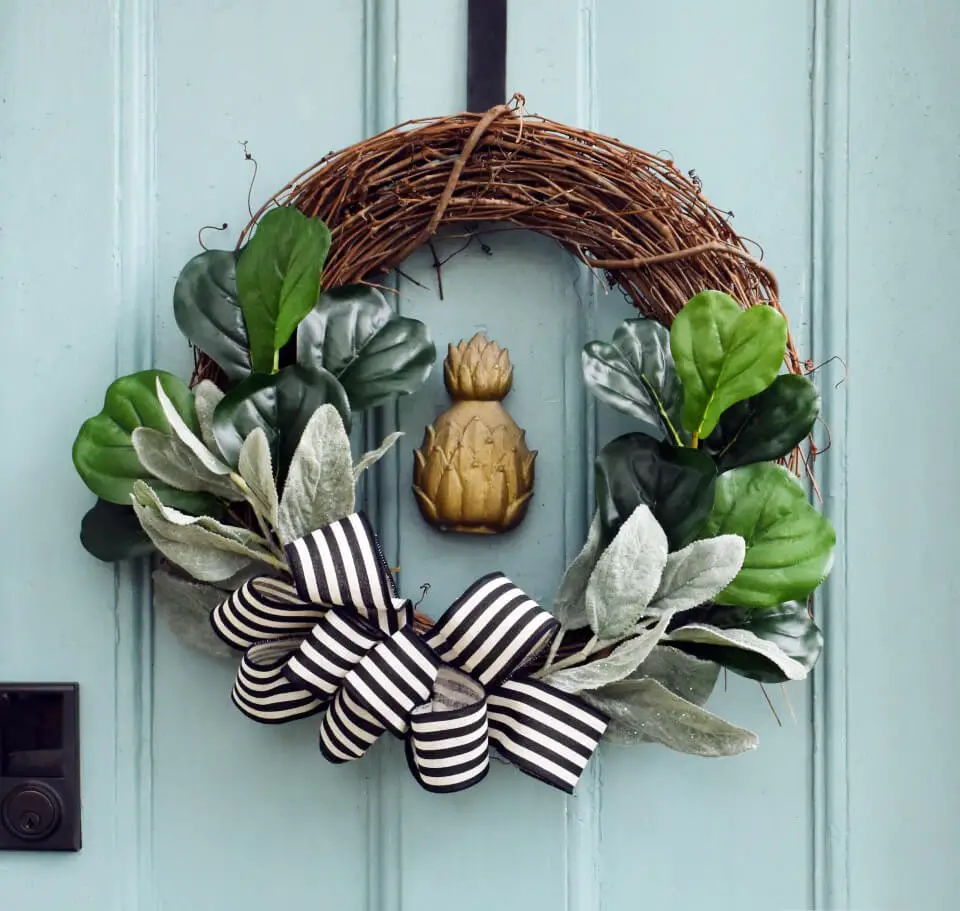
Transforming your space with effortless flair, consider incorporating curtain tiebacks featuring opulent ribbon bows. These luxurious accents not only bring sophistication but also allow for seamless seasonal updates. Elsewhere, elevate a humble wreath by adorning it with vibrant ribbon bows, effortlessly revamping your front door for any occasion.
Fashion Accessories
When it comes to crafting adorable and stylish accessories, two popular options are hair bows and brooches. Hair bows can be made for children, with the option to attach them to hair clips, headbands, or elastics. For adults, they can be used as a chic way to add some flair to an outfit. Taking it a step further, these ribbon bows can also be transformed into brooches by adding a pin backing, making them perfect for accessorizing jackets, bags, and other clothing items.
Event Decorations
Adorn chairs and tables alike by adding an elegant touch with ribbon bows. For a wedding or party, select ribbon hues that harmonize with the theme to create a visually appealing atmosphere. This thoughtful detail can instantly elevate the ambiance of any gathering, making it perfect for special occasions like dinner parties or holiday celebrations.
Gift Giving
Elevate your gifting game by incorporating personalized touches that resonate with the recipient’s personality or passions. One creative way to do this is by crafting bespoke ribbon bows that add a unique twist to traditional gift wrapping. For instance, create a bow that reflects the recipient’s favorite hobby or interest, making it a truly thoughtful and memorable present.
Beyond gifts themselves, consider embellishing bottles of fine wine, gourmet olive oil, or other special liquids with decorative ribbon bows. This thoughtful touch can turn a simple hostess gift into something truly extraordinary.
The beauty of these DIY projects lies in their flexibility – experiment with different colors, sizes, and textures to create one-of-a-kind masterpieces that reflect your personal style.
Tool Recommendations for Crafting Ribbon Bows
When it comes to creating stunning ribbon bows, having the right tools at your fingertips can make all the difference. While investing in a few essential items may seem daunting, trust us – it’s worth the investment. In this guide, we’ll walk you through the must-have tools for crafting ribbon bows, sharing expert tips on how to choose and care for them so that you can focus on the fun part: creating!
Essential Tools
To achieve professional-looking bows, it’s essential to have the right tools at your disposal. Start by investing in a reliable pair of scissors that features sharp blades and a comfortable grip, ideal for cleanly cutting through ribbons. Additionally, consider incorporating wire cutters into your arsenal, particularly if you’re working with wired ribbon or floral wire that requires trimming to the correct length. Moreover, an accurate ruler or flexible measuring tape is crucial for ensuring precise measurements, thereby allowing you to create even bows. These fundamental tools will help elevate your bow-making skills and produce stunning results.
Selecting Quality Tools
When it comes to selecting crafting tools, consider two key factors: durability and comfort. Durable materials ensure that your tools will withstand the rigors of frequent use, just like stainless steel scissors or wire cutters that can handle even the toughest projects. On the other hand, a tool’s comfort factor is crucial, especially if you plan on crafting for extended periods. Look for ergonomic designs that fit comfortably in your hand and reduce fatigue, allowing you to focus on bringing your creative vision to life.
Maintaining Your Tools
To ensure that your ribbon crafting experience is seamless and enjoyable, it’s crucial to maintain the cleanliness and sharpness of your scissors and wire cutters. Start by wiping down your tools after each use to prevent adhesive buildup from ribbon tapes. This simple habit will save you time and frustration in the long run. Additionally, regularly sharpening your scissors is vital to achieving a clean cut and preventing fraying. A dull blade can easily ruin an otherwise beautiful ribbon bow project. By investing time and effort into caring for these essential tools, you’ll gain the confidence and skills needed to tackle even the most intricate designs with ease.
How to Make a Ribbon Bow: A Simple DIY Guide
With the rise of handmade crafts, creating a satin ribbon bow has become a popular and accessible DIY project. Whether you’re looking to elevate a gift, add a touch of sophistication to your decor, or simply enjoy a fun and easy craft, this step-by-step guide will help you achieve a beautiful and elegant decorative bow. By following Julia DIY’s method, we’ll break down the process into manageable steps, making it easy for anyone to get started and enjoy the creative journey.
What You Will Need:
To craft a stunning satin ribbon embellishment, you’ll need three essential components: a length of satin ribbon measuring around 50 centimeters in length and 2 centimeters in width, a good pair of scissors, and your own skilled hands. With these tools at the ready, you’re poised to create a beautiful addition to any outfit or gift.
Step-by-Step Instructions:
To create a stunning satin ribbon bow, start by cutting a 50cm length of ribbon to the desired width, approximately 2cm for optimal results. Begin by laying the ribbon flat and positioning two fingers (index and middle) on top, leaving a small gap between them. Next, loop the ribbon over and beneath your fingers, creating the initial loop of the bow. Bring the end of the ribbon up through the gap between your fingers, forming a knot-like shape that will serve as the center of the bow. Carefully slide the partially formed bow off your fingers, tightening the center by gently pulling on both loops to define the final appearance of the bow. Trim any excess ribbon or adjust the tails to achieve evenness, and notch the ends for a decorative touch if desired. Finally, fluff the loops apart to achieve the perfect shape. With these easy steps, you’ll have a beautiful satin ribbon bow complete.
Video Tutorial
For those who require an additional learning tool or prefer a more hands-on approach, we recommend consulting Julia DIY’s YouTube tutorial, ‘How to Make a Simple Bow from Satin Ribbon’. This video-based guide provides a step-by-step demonstration of the bow-making process, making it an ideal resource for visual learners. By following along with this tutorial, crafters can easily and enjoyably create bows from satin ribbon.
Troubleshooting Common Issues with Ribbon Bows
Crafting ribbon bows can be a delightful experience, but it’s not uncommon to encounter some common hurdles along the way. Fortunately, many of these issues are readily solvable with a dash of creativity and a pinch of practice. To help you overcome these obstacles and achieve your desired bow-making goals, this guide will walk you through the most frequent challenges and offer practical solutions to get you back on track.
Uneven Loops
To achieve a harmonious bow design, it’s essential to address uneven loops that can disrupt the overall balance. A simple yet effective solution is to gently manipulate the loops until they’re perfectly symmetrical. This can be achieved by carefully tugging on each loop with your fingers, adjusting their tightness to ensure they’re identical in size and shape.
Fraying Edges
To minimize the likelihood of ribbon edges fraying after being cut, it’s essential to use scissors specifically designed for cutting fabric. These sharp tools will help prevent the ribbon from unraveling prematurely. If you do encounter fraying, a gentle singeing process using a flame can be an effective solution. However, it’s crucial to exercise caution during this step to avoid burning the ribbon entirely. As an alternative, you can apply a clear coat of nail polish or a fray-stopping liquid to seal the edges and prevent further damage.
Slipping Knots
When it comes to keeping bows securely in place, one common issue is a tendency for them to come undone. To combat this problem, consider implementing two simple solutions: first, take an extra loop when tying your bow to create a more stable foundation; secondly, use a small piece of double-sided tape or a glue dot beneath the knot to provide an added anchor point, ensuring your bow stays tied and secure.
Flattened Bows
To restore a limp bow that’s lost its shape, try using steam to revive it. Set your iron to the recommended temperature for the ribbon material and lightly mist the bow with steam. Gently use your fingertips to fluff out the loops and coax them back into their original shape.
Color Bleeding
When working with ribbons, it’s essential to consider their colorfastness. A simple test involves applying a small amount of water to the ribbon before starting your project. If the ribbon bleeds or changes color, look for alternatives that are water-resistant or designed to maintain their hue. This will ensure that your finished bows always appear professional and visually appealing. Consistency is key when crafting, so don’t be discouraged if it takes a few attempts to get the desired result – with practice, you’ll quickly develop the skills needed to create stunning ribbons.
Advanced Techniques for Ribbon Bow Crafting
For those who’ve already grasped the fundamentals of ribbon bow making and are eager to take their skills to the next level, mastering advanced techniques can be a game-changer. By exploring these sophisticated methods, you can add an extra layer of complexity and visual appeal to your creations. Some ways to do this include…
Layered Bows
To add depth and visual appeal to your bows, consider creating multi-layered designs. Begin by crafting a base bow using your preferred method, then build upon it by adding additional layers of smaller bows. Vary the widths and patterns of the ribbons used in each layer to create a visually striking effect.
Floral Bows
Infuse your bows with a touch of nature by incorporating artificial foliage, such as leaves, stems, or even realistic-looking flowers. Secure these elements at the center or along the edges of the bow to harmonize their textures and hues with the ribbon’s own unique characteristics.
Mixed Textures
Combine the elegance of smooth satin ribbons with the rugged charm of burlap or lace to create a one-of-a-kind bow. By layering different textures, you can add depth and visual interest to your project. This innovative technique is particularly well-suited for rustic-themed crafts, where a touch of sophistication meets a dash of whimsy.
Bow Variations
Experiment with diverse bow designs, including the timeless classic, playful pom-poms, and elegant rosettes. These unique styles not only add a touch of personality to your creations but also offer versatility in their applications.
Embellishments
Infuse your bows with an extra layer of sophistication by incorporating embellishments such as beads, sequins, or rhinestones. Secure them to the ribbon using a combination of sewing and gluing techniques. With practice, you can master advanced methods that elevate your ribbon projects, allowing for limitless creative possibilities. As you experiment and combine different elements, get ready to unleash your inner artisan and create truly one-of-a-kind designs.
Sustainability Tips for Ribbon Crafting
With the importance of environmental consciousness at an all-time high, even seemingly small decisions like those made during craft projects can collectively make a profound difference. As we strive for sustainability, it’s essential to be mindful of our actions and their potential impact on the planet. The following eco-friendly ribbon crafting tips serve as a starting point for making environmentally conscious choices that add up to a significant positive influence.
Choose Eco-Friendly Materials
When it comes to choosing ribbons for your packaging needs, consider opting for eco-friendly options that prioritize sustainability. One way to do this is by selecting ribbons made from natural fibers like cotton, silk, or linen, which are biodegradable and have a reduced environmental impact. Another option is to look for ribbons created from recycled materials, such as recycled polyester, which helps to reduce waste and conserve resources in the production process.
Reuse and Repurpose
When it comes to working with ribbons, don’t overlook the value of saving scraps for future projects. Even seemingly insignificant pieces can be repurposed as accentuating elements or embellishments, adding a creative twist to your endeavors. Furthermore, consider giving old fabric and clothing a second life by transforming them into ribbons. Not only does this approach foster sustainability by recycling materials, but it also lends an air of authenticity to your crafts, making each piece truly one-of-a-kind.
Responsible Disposal
When it comes to disposing of ribbons that are no longer reusable, consider the following eco-friendly options. For synthetic ribbons, check if they can be recycled along with other plastics. This helps divert waste from landfills and conserves natural resources. On the other hand, natural fiber ribbons can often be composted, a process that breaks them down into nutrient-rich soil that can benefit your garden or houseplants. Be sure to consult the specific guidelines for composting in your area to ensure you’re following best practices.
Educate and Share
As you share your passion for sustainable ribbon crafting with others, consider spreading awareness about eco-friendly practices. This can be as simple as sharing your creative process on social media or participating in online forums where crafty individuals gather. By doing so, you’ll not only inspire others to adopt environmentally conscious habits but also contribute to a broader movement towards sustainability.When it comes to gifting your handmade crafts, take the opportunity to educate the recipient about the sustainable materials used and encourage them to repurpose or recycle their new treasure. This approach not only promotes the value of your craft but also fosters a sense of responsibility for reducing waste. By incorporating these principles into your ribbon crafting journey, you’ll not only create stunning projects but also play a part in preserving our planet’s natural resources.
FAQs About Ribbon Bows
Unlock the secrets of creating stunning ribbon bows with our comprehensive guide. From an overview of different types and sizes to expert tips on crafting perfect bows, we’ve got you covered. Find the answers to your most pressing questions right here.
What types of ribbons are best for making bows?
When it comes to crafting stunning bows, the right type of ribbon is crucial. While satin and grosgrain ribbons offer a versatile canvas for various projects, they can be finicky when it comes to maintaining their shape. On the other hand, wired ribbons are ideal for more intricate designs as they hold their form remarkably well, allowing for greater creative freedom.
How do I prevent my ribbon from fraying?
When it comes to preserving the integrity of your ribbons, there are several techniques you can employ to prevent fraying and extend their lifespan. One effective method is to cut the ribbon at an angle, as this helps to reduce the likelihood of the fibers unraveling. Alternatively, you can use pinking shears, which are specifically designed to leave a zigzag edge that prevents fraying from occurring in the first place. For an added layer of protection, you can also seal the edges with a light touch of flame or clear nail polish, further minimizing the risk of fraying and ensuring your ribbons remain in top condition for as long as possible.
Can I wash ribbon bows?
When it comes to cleaning ribbon bows, it’s essential to consider their material composition. While some types of bows can withstand a gentle wash, others may require more delicate handling. Look out for specific care labels or guidelines provided by the manufacturer, as cotton and polyester-based bows are generally more amenable to being washed.
How do I make a bow with multiple loops?
Begin by creating a series of loops that form the foundation of your bow. Hold each loop in place with a small amount of wire or thread, ensuring they are securely fastened. Next, gently fluff out each loop to create volume and texture. Once you’ve achieved the desired fullness, arrange the loops into a cohesive shape, forming a multi-looped bow that is both visually appealing and structurally sound.
What’s the best way to attach a bow to a gift or project?
When it comes to securing bows to different surfaces, three primary methods can be employed to achieve a strong and lasting bond. Double-sided tape, glue dots, or a hot glue gun are all viable options, each with its own advantages and suitability for specific materials.
How can I make my bows look professional?
To achieve optimal loop presentation, it’s crucial to maintain consistency in terms of loop size, tail trimming, and ribbon quality. One key factor is ensuring that each loop has an even shape, which can be achieved through repeated practice and experimentation. Additionally, it’s vital to cut the tails at a uniform length to create a harmonious visual effect. Finally, investing in high-quality ribbon can make all the difference in the overall aesthetic appeal of your loops. By focusing on these key elements and continually refining your techniques, you’ll be able to produce results that meet your high standards.
Are there eco-friendly ribbon options?
When it comes to eco-friendly ribbon options, consider seeking out products made from natural fibers such as cotton, silk, or linen. Alternatively, look for ribbons created from recycled materials, a sustainable choice that reduces waste and supports environmentally responsible manufacturing practices.
How do I store my ribbon bows to keep them in shape?
When storing ribbon bows, it’s essential to maintain a consistent environment that prevents degradation and damage. Opt for a location with a cool temperature and low humidity levels, shielding them from direct sunlight exposure. Additionally, utilize a sturdy base such as cardboard or a spool to prevent crushing and creasing, ensuring your ribbon bows remain intact and ready for future use.
Can I make ribbon bows without sewing or gluing?
When it comes to crafting no-sew bows, there are a couple of clever workarounds. For one, you can employ the use of clips or pins to secure the loops in place, ensuring your bow stays put without any need for sewing. Alternatively, you can opt for ribbons featuring wire edges that can be twisted and shaped to create the desired bow form.
How do I choose the right size ribbon for my project?
When embarking on a crafting project, it’s essential to consider the scope of your endeavor. Larger projects, such as intricate wreaths, may necessitate broader ribbons or supplies, whereas smaller creations, like hair accessories, can thrive with more delicate materials. This flexibility is what makes crafting so alluring – the freedom to experiment and adapt techniques to suit one’s unique style and vision.
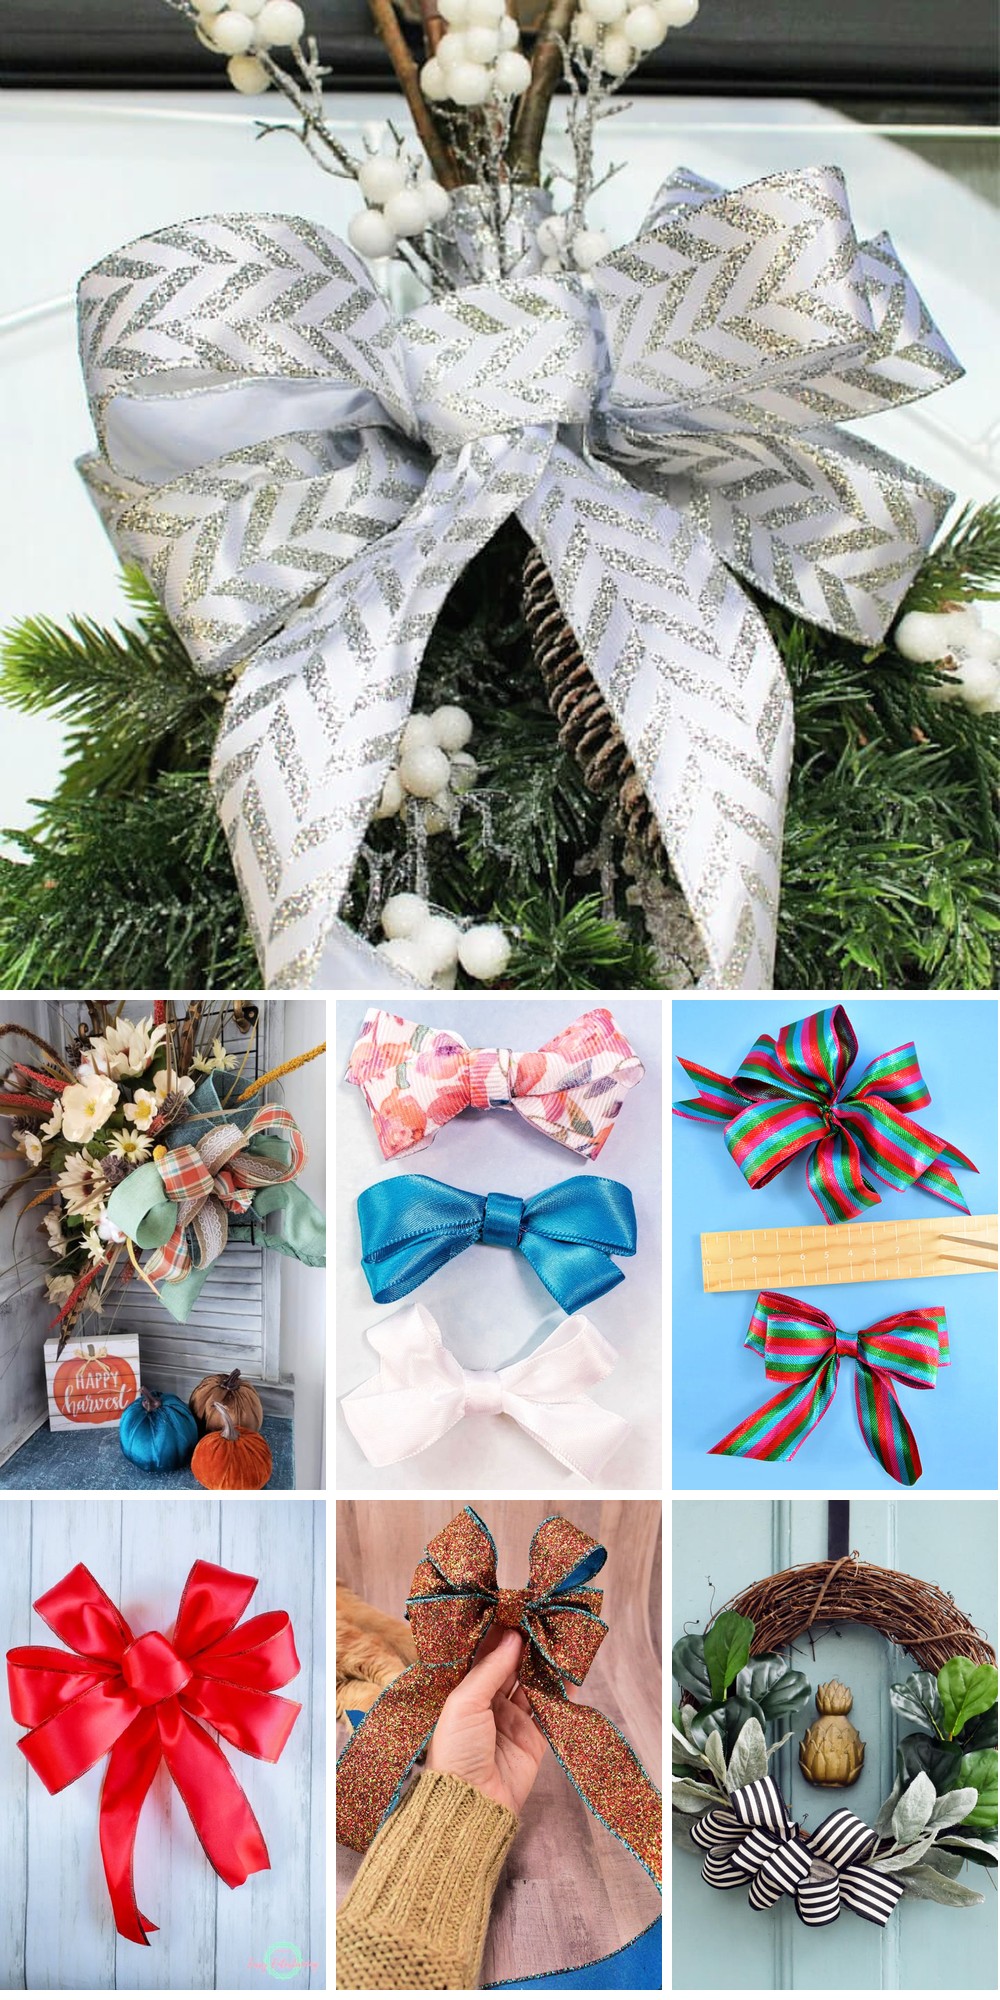
15 Easy Ways to Make a Bow with Ribbon
Discover the art of crafting stunning ribbon bows with 15 straightforward DIY guides. Ideal for embellishing gifts, enhancing craft projects, and elevating your creative expression.
How to Make a Ribbon Bow

Crafting ribbon bows is an excellent way to elevate any gift or accessory, and Treasurie’s step-by-step tutorial makes it accessible to all skill levels. With just a few basic supplies like grosgrain ribbon, a needle, thread, scissors, and an optional glue gun, you can create beautiful, elegant bows that add a personal touch to your projects. The tutorial simplifies the process by breaking it down into manageable steps, from securing the overlapping ribbon ends to stitching through the center and finishing with a neat center wrap. Whether you’re looking to personalize gift bags or customize hair clips, mastering the art of ribbon bow making is both a valuable and enjoyable craft pursuit.
Make Your Own Hair Bow for Beginners
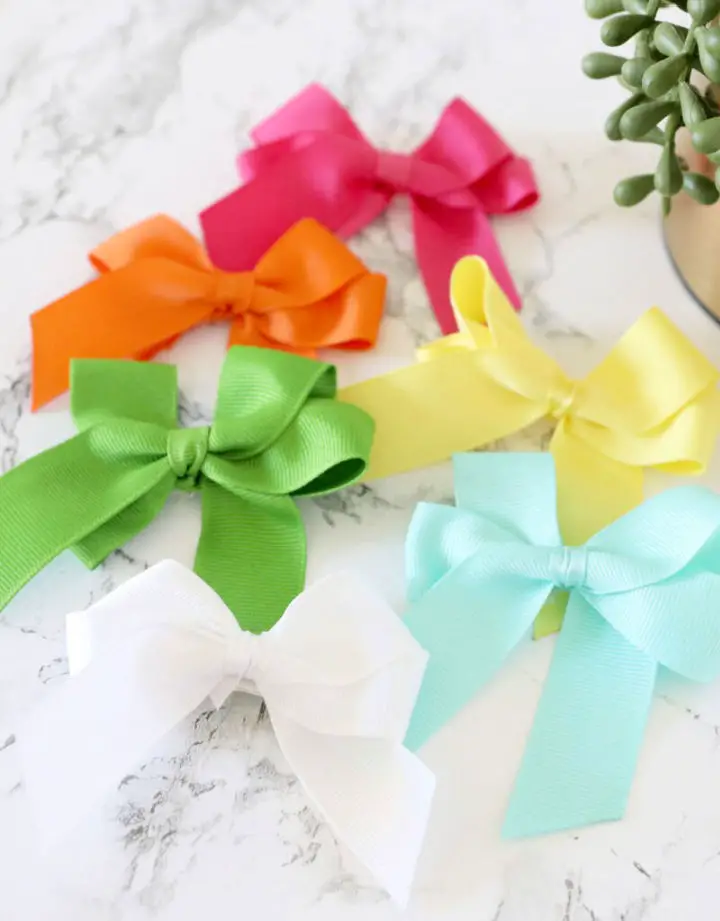
Crafting personal hair accessories can be a delightful way to add a touch of individuality to any hairstyle. Somewhat Simple’s Stephanie Dulgarian shares a comprehensive and engaging step-by-step guide that breaks down the bow-making process into manageable steps. With just a few simple supplies, including ribbon, scissors, wire, and a glue gun, you’ll be able to create adorable bows that perfectly complement any outfit. This tutorial is ideal for those who enjoy hands-on activities and value personalized accessories. Each step is supported by helpful visuals, ensuring your crafting experience is both enjoyable and successful. Whether you’re creating bows for everyday wear or special occasions, this guide will provide valuable insights for producing beautiful, handmade hair adornments that reflect your unique style.
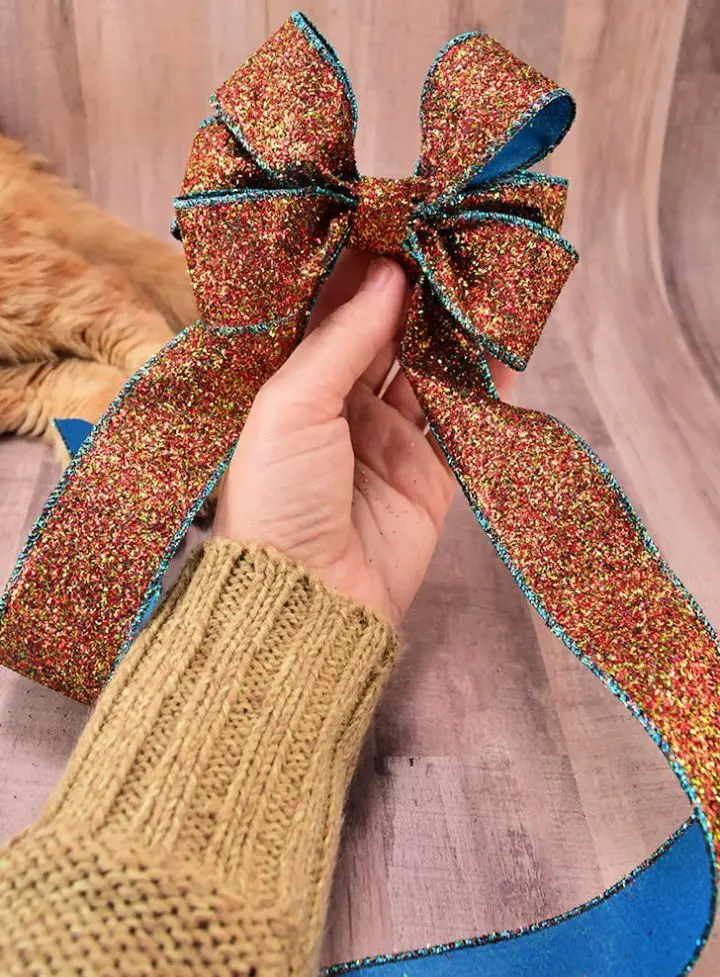
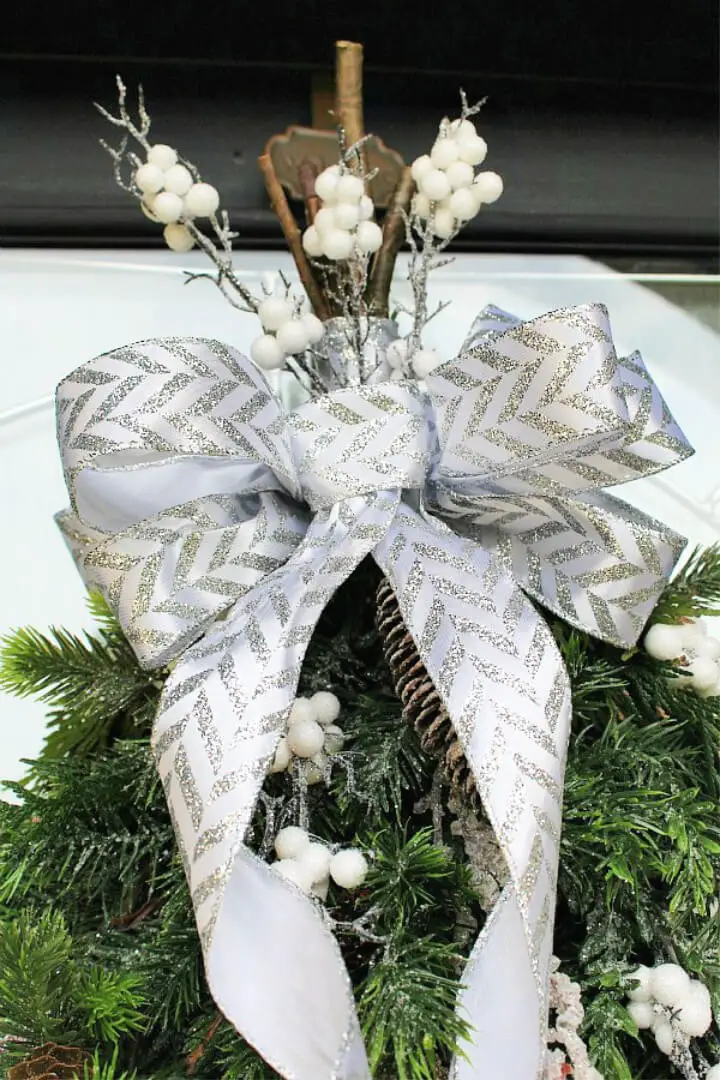
Easy DIY Bow With Wired Ribbon
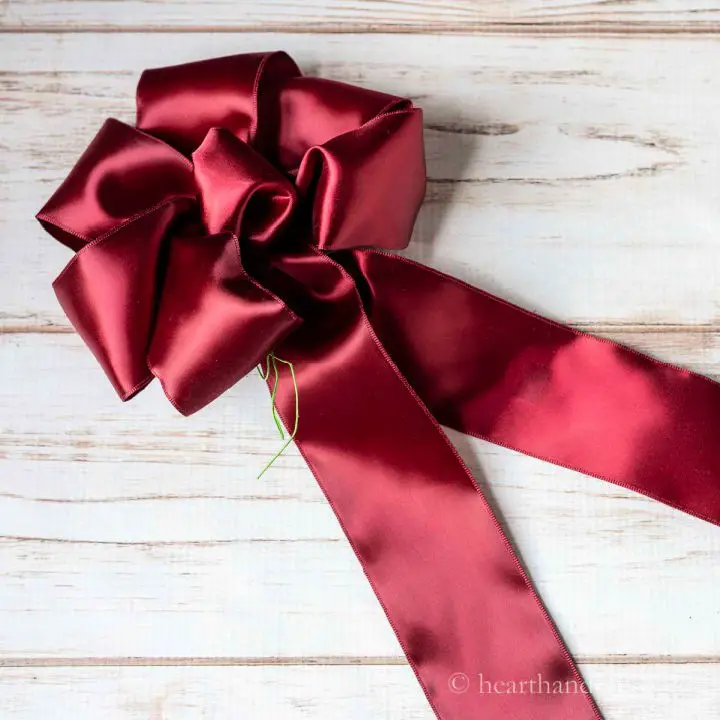
Crafting a bow with wired ribbon can instantly elevate the aesthetic of your home decor, transform gifts into unique keepsakes, or add a personal touch to wreaths. By following Hearth and Vine’s comprehensive guide, you’ll learn how to create stunning bows that perfectly capture the essence of any occasion. With straightforward instructions and a minimal list of essential supplies, you’ll be able to craft beautiful bows with ease. The tutorial also offers valuable insights on working with different types of ribbon to achieve distinct styles, ensuring your creations will be a breathtaking addition to your festive decorations or thoughtful presents. By embracing this creative process, you can infuse your holiday season or any celebratory event with the special charm that only handmade bows can provide.
How to Make a Bow With a Wooden Bow Maker
Crafting perfect bows has never been more accessible or affordable, thanks to the innovative approach shared by Dream a Little Bigger. For under $3, you can create a homemade bow maker that will revolutionize your gift wrapping and decoration game. With a simple list of materials, including wood, thin dowels, and optional vinyl for markings, you’ll be able to produce bows in any size you desire. This DIY project not only saves you money but also allows for complete customization, empowering you to take your bow-making skills to the next level.
DIY Double Layered Bow for Wreath
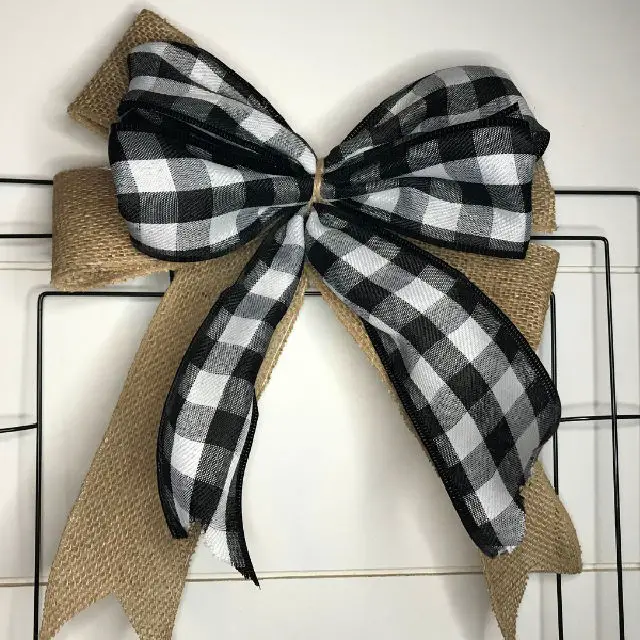
Crafting a charming double-layered bow for your wreaths is a straightforward process that yields professional-looking results with minimal effort. Simply Crafty Life’s tutorial makes it easy to create this unique embellishment using basic supplies like twine, scissors, wired ribbon, and a ruler or craft mat. The step-by-step guide helps you build a sturdy burlap base and add an attractive buffalo plaid top layer, which are then securely tied together with twine. This technique is perfect for those seeking to add a personal touch to their wreaths, making the process enjoyable and ensuring your finished product stands out with a handmade flourish.
Making a Ribbon Bow
Transforming ribbon bow-making into a seamless process, Dream a Little Bigger presents a step-by-step guide that demystifies the art of creating stunning ribbons for any event. By providing crystal-clear directions on selecting the ideal ribbon and expertly crafting loops and tails using hot glue guns and wooden clothespins, this comprehensive tutorial empowers you to bid farewell to frustrating crafts sessions and hello to effortless, show-stopping bows in mere minutes. As you delve into this engaging and informative guide, your decorating skills will flourish with newfound ease and confidence.
DIY Bow Using a Bow Maker

Crafting with a bow maker is an accessible yet rewarding experience. The straightforward guide from Jordan’s Easy Entertaining empowers individuals to transform ribbon into stunning bows for enhancing their home decor or elevating gift presentations. With a minimal investment in supplies such as a bow maker, pipe cleaners, wired ribbon, and scissors, one can assemble a bow within three minutes. For added visual guidance, refer to the accompanying video featuring clear step-by-step instructions. This DIY endeavor is ideal for special occasions like holidays, allowing individuals to infuse their decorations with a personal touch of sophistication. By starting your bow-making journey today, you’ll discover how effortlessly you can transform your home decor and gift-giving endeavors.
No Sew DIY Ribbon Bow
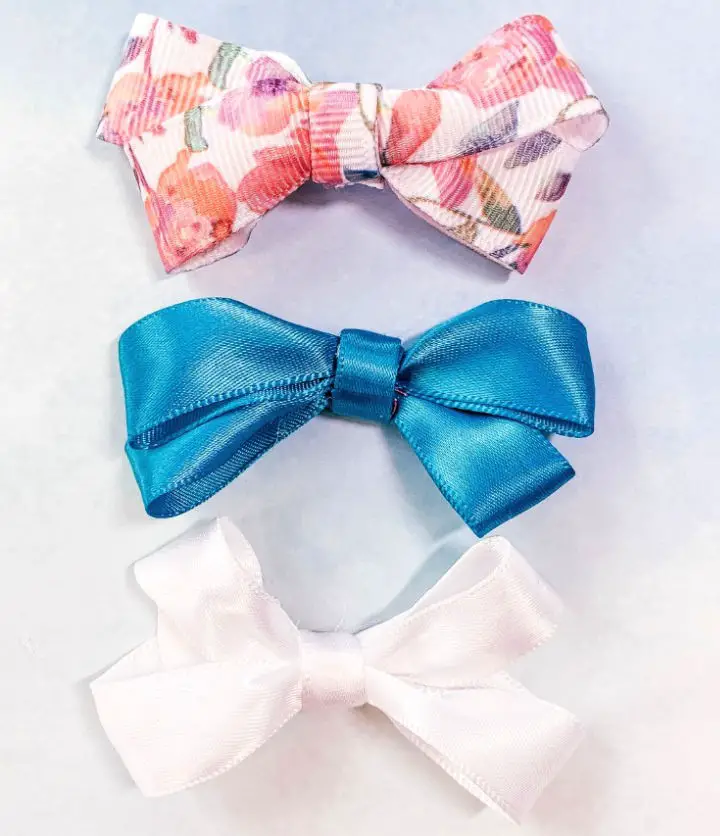
Collaborating with JOANN, we’re excited to share a step-by-step guide on how to create adorable no-sew ribbon bows with ease. With just a few simple supplies like ribbon, hot glue gun, scissors, fray check, thread, and alligator clips, you can craft charming hair accessories perfect for any occasion. From adding a personal touch to gifts to outfitting the little ones in your life with cute handmade bows, this tutorial makes it easy and fun to do. By following our simple and engaging guide, you’ll be able to create a variety of ribbon styles available at JOANN, giving you endless creative possibilities.
Make Your Own Bow With Ribbon
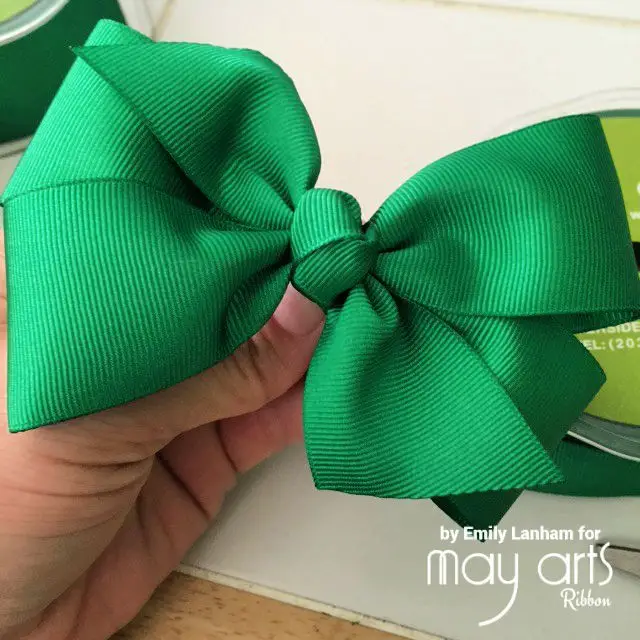
Crafting the perfect bow is an enjoyable activity that brings a personal touch to gifts, hair accessories, and decorations. May Arts Ribbon provides a comprehensive guide that caters to crafters of all skill levels, making it easy to create beautiful bows with their high-quality grosgrain ribbon. The soft, supple, and durable material not only simplifies the bow-tying process but also ensures a professional-looking finish. With basic tools like ribbon, thread, scissors, and a lighter, anyone can follow this engaging tutorial to produce charming bows. To achieve the best results, it’s essential to measure accurately, fold carefully, and secure your creation with hot glue. Whether you’re a seasoned crafter or just starting out, this guide will inspire you to create lovely bows for any occasion.
Making a Double Bow With Ribbon
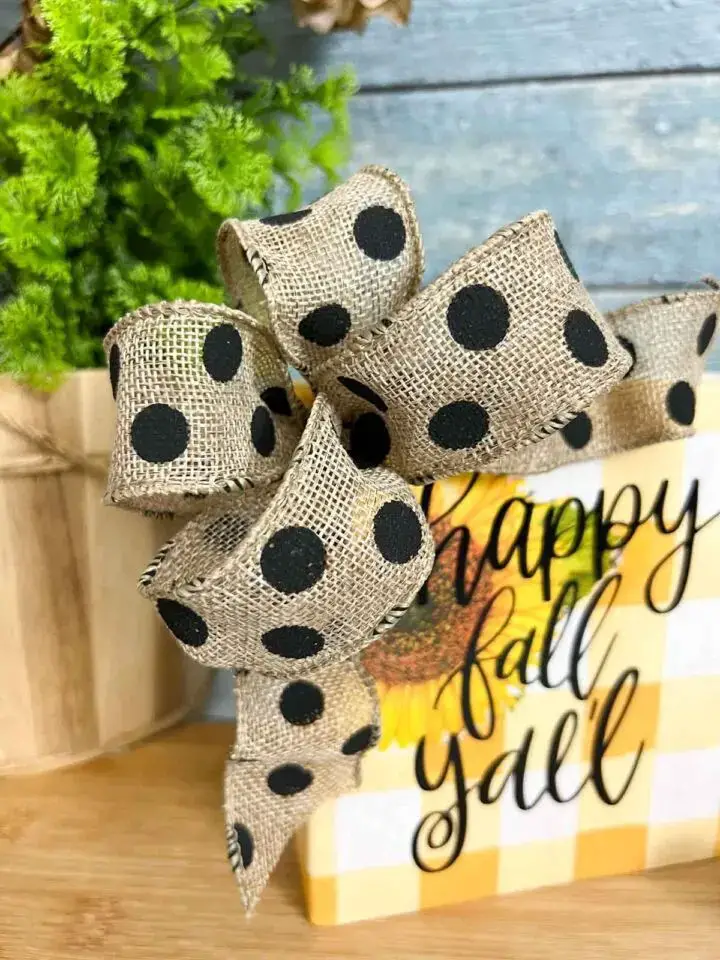
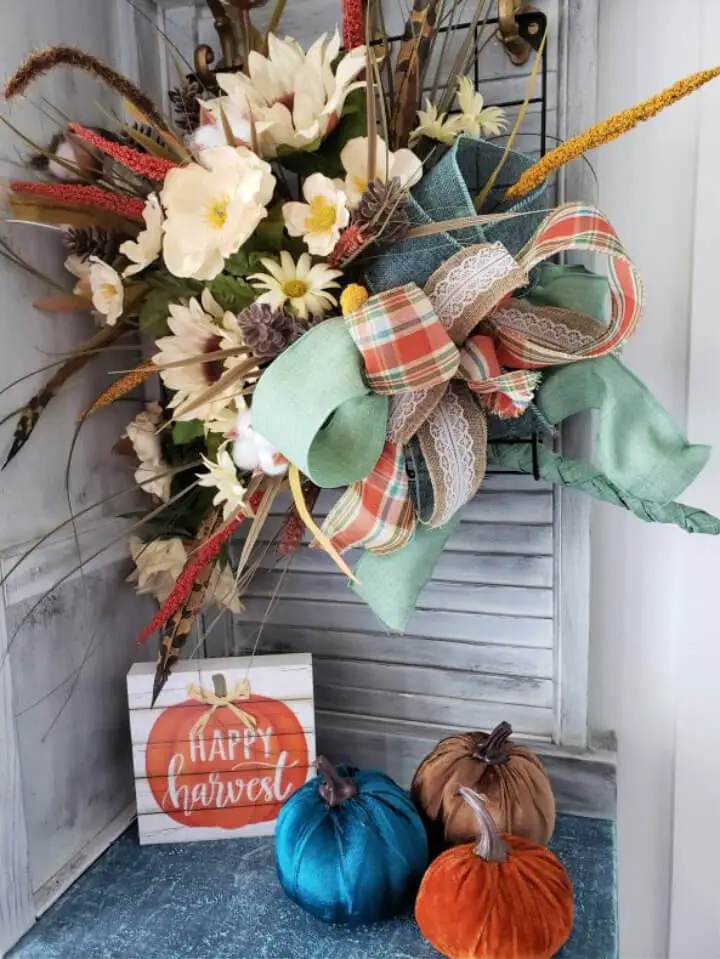
Crafting a double bow with ribbon adds an undeniable charm to wreaths, crafts, and various projects, infusing them with an air of sophistication. With the guidance from Sustain My Craft Habit, creating these elegant bows becomes an achievable task for anyone willing to put in the effort. By following the simple, step-by-step instructions and utilizing a minimal list of materials – wide ribbon and floral wire being the key components – you’ll be able to craft a stunning double bow that elevates your project from ordinary to extraordinary.
Whether you’re looking to add a festive touch to seasonal decorations like a ‘Happy Fall Y’all’ sign or seeking to create personalized home decor pieces, mastering the art of making a double bow unlocks a realm of creative possibilities. By incorporating this versatile embellishment into your DIY endeavors and thoughtful gifts, you’ll be able to express yourself in a unique and meaningful way.
DIY Bow Using Double Sided Ribbon
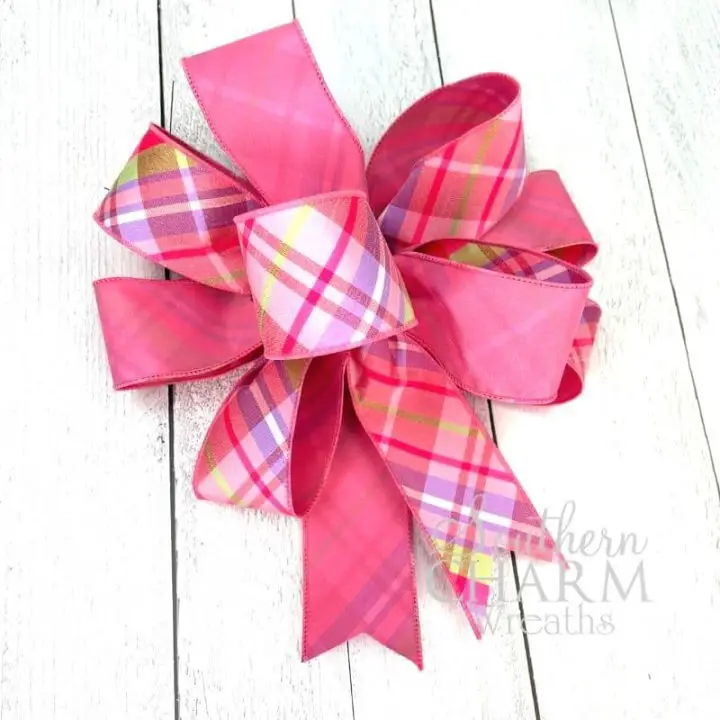
Transforming your crafting projects with a touch of sophistication is just a bow away. Mastering the art of creating stunning bows using double- sided ribbon is an essential skill that can elevate any gift, decoration, or wreath to new heights. With Southern Charm Wreaths’ comprehensive guide, you’ll be able to follow a clear, step-by-step process and learn how to create beautiful bows with ease. The tutorial is not only simple to follow but also versatile, allowing you to showcase the beauty of double-sided ribbon in your projects. To add an extra layer of professionalism, the guide also provides valuable tips on securing your creation with florist wire, ensuring a sturdy finish that will leave a lasting impression.
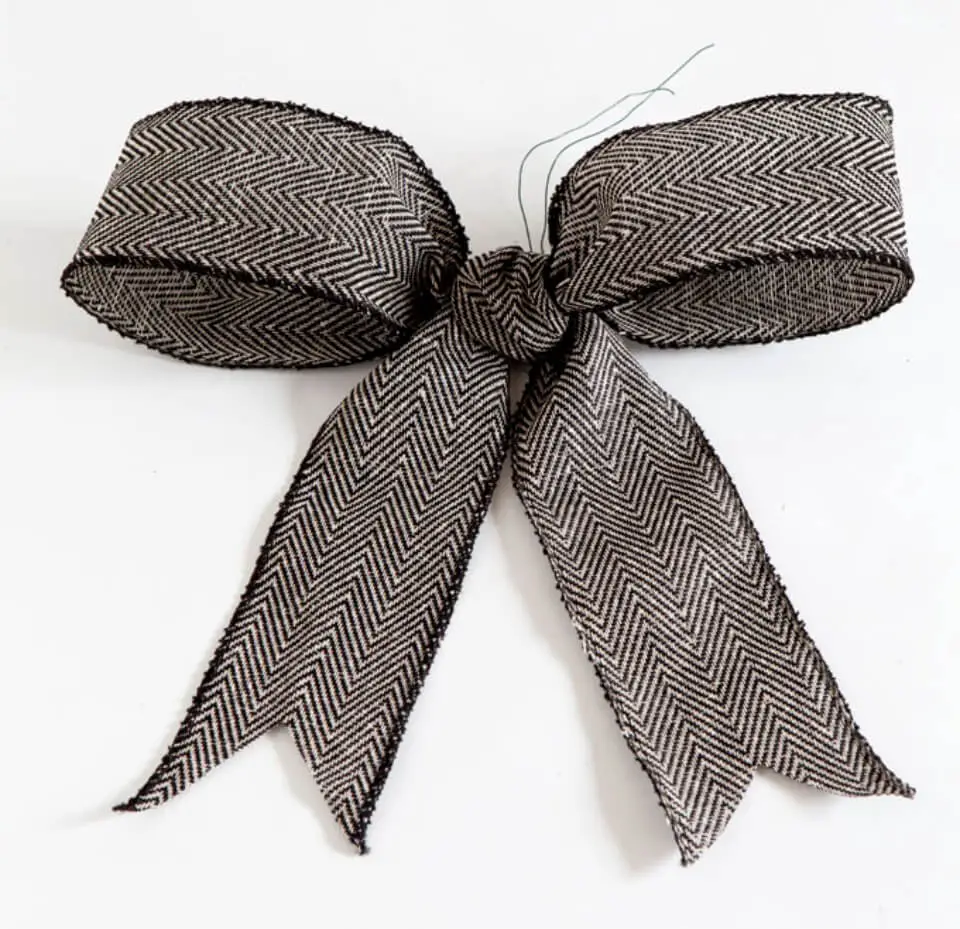
How to Make a Bow Out of Ribbon
Transforming a beautiful bow out of ribbon has never been easier with Clean and Scentsible’s comprehensive guide. This step-by-step tutorial breaks down the process into manageable components, allowing you to create stunning bows for wreaths, craft projects, or gift wrapping. To get started, gather your basic materials: ribbon – wired options are ideal due to their flexibility – pipe cleaners matching your ribbon’s hue, a reliable adhesive such as a hot glue gun, and scissors. Begin by crafting a small central loop, then gradually form larger loops on either side, ensuring each twist showcases the ribbon’s design. Secure the bow with a pipe cleaner, fluff it to perfection, and add a ribbon tail for an elegant finish. With this method, you’ll be able to craft professional-looking bows that can elevate various projects and leave you feeling proud of your newfound skill.
Simple DIY Ribbon Bow
Crafting a stunning ribbon bow can elevate any wreath, gift, or home decor item from ordinary to extraordinary. With the right guidance, you can master the art of creating classic and multi-loop ribbon bows that will leave your creations looking like they were designed by a professional. In this tutorial series, we’ll walk you through the simple process of selecting the perfect ribbon, cutting it to size, and shaping it into a beautiful bow. Whether you’re looking to add a personal touch to a special occasion or simply want to take your crafting skills to the next level, learning how to make your own ribbon bows is an essential skill that will open up a world of creative possibilities.
Making a Wreath Bow Out of Ribbon
Transforming your door decor with interchangeable ribbon bows offers a creative way to refresh your exterior space without the hassle of storing multiple wreaths. By following Design Fixation’s straightforward guide on crafting adaptable bows, you can effortlessly swap out designs to match different seasons and occasions. With just a few essential materials like wide, wired ribbon, alligator clips, and wire, you can create a stunning bow that adds a unique touch to your home. This practical approach ensures your decorations remain stylishly seasonal with minimal effort required. Perfect for busy individuals or those with limited storage space, this DIY project is both an enjoyable and functional activity.
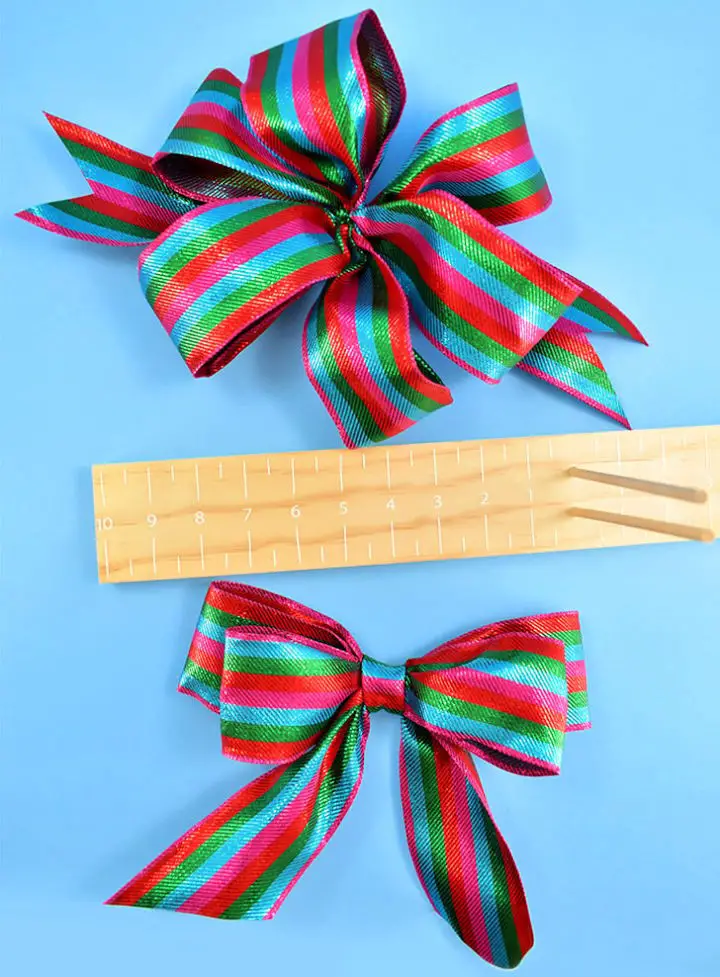
DIY Multi Ribbon Bow
Creating multi-ribbon bows is an essential skill for DIY enthusiasts looking to elevate their home decor and gift-wrapping game. By following a straightforward guide, complete with visual aids, from Mama Dares to DIY, you can master the art of crafting these charming accents that add a touch of elegance to any wreath or package. With a minimal investment in basic supplies like wire cutters, pipe cleaners, coordinating ribbons, scissors, and a ruler, you can create stunning bows that bring a personalized and festive flair to your home.
What’s the easiest way to make a bow? With ribbon, of course!
To create a stunning ribbon bow, follow this easy-to-follow guide: Start by cutting an 18-inch piece of ribbon and folding it in half, ensuring the ends are even. Next, cross the right end over the left, then repeat the process with the left end crossing over the right. Tuck the top of the left end under the crossed strands to begin shaping the bow. Hold the folded ribbon firmly and pull tight to form a neat knot. Voilà! You now have a beautiful bow that can be used to elevate gifts, packages, or even hair accessories. With a little practice, you’ll be crafting elegant bows in no time.
Conclusion:
Mastering the art of making ribbon bows is a game-changer for adding a touch of sophistication and individuality to any project. Whether you’re looking to elevate your home decor, accessorize your outfit, create stunning event decorations, or add a thoughtful touch to your gift-giving, this skill will prove invaluable. The DIY guide we provided earlier showcased 15 easy ways to make a bow with ribbon, offering a range of techniques from beginner-friendly to more advanced, ensuring you have the skills to craft beautiful bows. With expert advice on selecting the right tools, overcoming common challenges, and adopting eco-friendly practices, you’re now empowered to take on any ribbon bow project with confidence. We invite you to explore the limitless possibilities by experimenting with different styles, materials, and embellishments, discovering new ways to make your projects truly special.
