Creating a personalized DIY recipe box is a rewarding experience that allows you to combine functionality with sentimental value. By choosing the perfect wood and applying a finish that reflects your personal style, each step in the process becomes an opportunity to infuse the box with meaning. Whether you opt for a traditional design featuring mitered edges or experiment with more modern materials like poplar and finger joints, the possibilities are endless and can be tailored to suit your skill level and aesthetic preferences.By exploring 15 DIY recipe box plans, you’ll gain access to a wealth of guidance on materials, tools, and construction techniques. This ensures that anyone with an interest in making their own box can do so successfully, whether it’s as a heartfelt keepsake or a thoughtful gift for a loved one. Ready to turn your idea into a reality? Let’s dive into the world of DIY recipe boxes and discover how to select the right materials, tools, and techniques to bring your project to life.
Why Make a DIY Recipe Box?
While crafting a DIY recipe box may seem like a straightforward task, it holds a wealth of benefits that extend far beyond its practical purpose. This homemade treasure allows you to infuse your unique personality into its design, making it a reflection of your kitchen’s aesthetic or the tastes of someone special if it’s being made as a gift. By doing so, you’re not only creating a functional storage solution but also cultivating a sense of nostalgia and connection to past generations through the recipes stored within.
Furthermore, having a physical recipe box provides a welcome respite from the digital chaos that often dominates our lives. With a simple and accessible design, your recipes are always at your fingertips, eliminating the need for flour-encrusted screens and scrolling through endless lists.
Beyond its practical uses, the DIY recipe box project also offers an opportunity to unwind and reduce stress. Engaging in woodworking or crafting activities has been shown to have a calming effect, making it an excellent way to relax while creating something beautiful and functional.
Finally, this handmade treasure makes for a thoughtful and personal gift for any occasion that celebrates love, food, and connection – whether it’s a wedding, housewarming, or simply a token of appreciation for the special people in your life.
Material Selection and Alternatives
When crafting your DIY recipe box, selecting materials that balance durability and aesthetic appeal is crucial. To ensure a long-lasting and visually appealing project, consider the following options.
Wood: A popular choice for recipe boxes due to its classic look and sturdiness. Opt for hardwoods like oak or maple for added longevity. Alternatively, softwoods like pine can provide a more affordable and workable solution.
Cardboard: For a budget-friendly option, cardboard is a lightweight and customizable material. Reinforce the corners with tape or additional layers to increase durability.
Metal: A metal box offers a sleek, modern appearance. Choose aluminum or stainless steel for a rust-resistant and long-lasting option. Alternatively, look for durable plastic containers that mimic the metal look.
Upcycled Materials: Consider repurposing old wooden boxes or sturdy containers to create an eco-friendly and uniquely personalized recipe box.
Decorative Elements: Personalize your box with paint, fabric, or decorative paper. If you plan to store the box in the kitchen, use non-toxic, food-safe paint.
Liners: Line the interior with parchment paper or felt to protect your recipes from scratches and spills.
Ultimately, the material you choose should reflect your personal style and the functionality you need. Whether you opt for a traditional wooden box or an upcycled creation, your recipe box will be a cherished addition to your kitchen. Embrace simplicity and have fun with the process!
Personalization Techniques
Transforming your DIY recipe box into a one-of-a-kind masterpiece is an excellent way to infuse it with your personality. To do so, try combining different creative techniques to give your box a unique flair. Here are some effective methods for customization:Start by adding a pop of color with acrylic paints and geometric patterns, floral designs, or even a motivational quote on the lid. For a more eclectic look, decoupage cutouts from magazines, wrapping paper, or fabric onto the box using layers of decoupage glue. Then, seal it all with another layer for a durable finish.If you’re feeling adventurous, try wood burning to add a rustic touch. Use a pyrography tool to etch designs or words into the wood, and don’t be discouraged if it takes some practice – start on scrap pieces first to get comfortable with the technique.For a more polished look, use stencils to create professional-look designs. Secure the stencil onto the box and dab paint over it, then remove the stencil to reveal a crisp design. Finally, add embellishments such as knobs, handles, or feet to give your box both functionality and style. Choose embellishments that complement the box’s overall aesthetic.By experimenting with these techniques, you can create a recipe box that not only reflects your personal taste but also becomes a conversation piece in your kitchen.
Organizational Tips
To maximize the benefits of having an organized recipe box, consider implementing the following strategies: Start by creating categories for different types of recipes using cardboard or thick paper dividers, such as ‘Desserts’, ‘Main Courses’, or ‘Vegetarian’. Take it a step further by labeling each divider clearly, either by hand or with printed labels. For an added touch of visual appeal, assign a unique color to each category and use colored paper for the dividers or stickers on the recipe cards. Additionally, arrange recipes alphabetically within each category to make them easily accessible when you need them. It’s also a good idea to create a separate section for your favorite recipes so they’re always at hand. By implementing these simple yet effective organizational techniques, you’ll be able to quickly locate the perfect recipe and enjoy cooking even more.
How to a Wooden Recipe Box
Crafting a DIY wooden recipe box can be an engaging woodworking experience, yielding unique and personalized storage solutions for treasured recipes. With the right tools and a bit of patience, you can create bespoke boxes that not only keep your favorite dishes organized but also become conversation pieces in your kitchen or thoughtful gifts for fellow food enthusiasts. This guide will lead you through three distinct project ideas that showcase various hardwoods, joinery techniques, and decorative accents, making it an accessible and enjoyable endeavor for both seasoned woodworkers and beginners alike.
Choosing Your Materials
When it comes to selecting hardwoods for this project, three distinct types will be utilized. Mahogany is chosen for the mitered-edged box, while Oak is selected for the box featuring half-lap joints. Meanwhile, Poplar is designated for the finger-jointed box. To achieve a cohesive look and ensure proper assembly, all boards will be planned down to a uniform thickness of half an inch, with a focus on smoothness and consistency.
Tools and Equipment
To get the most out of your woodworking projects, it’s essential to have a well-stocked arsenal of tools at your disposal. Among these essentials are several saws that will allow you to cut and shape your wood with precision and ease. A table saw is ideal for making straight cuts in larger pieces of wood, while a miter saw excels at making precise angled cuts. When it comes to flattening and smoothing out the surface of your wood, a planer and jointer are must-haves. For more intricate cuts and shaping, a crosscut sled can be used to create detailed joints like finger joints. If you need to make curved cuts or cut through thicker material, a band saw or jigsaw will come in handy. Holding everything together securely requires a set of clamps that will keep your pieces aligned during the assembly process. Once your project is coming together, a router table can be used to add decorative elements and a sander will help remove any imperfections from the surface. Finally, having a utility knife on hand for tasks like cutting thin strips or making small adjustments is crucial, while craft adhesive and water-based polyurethane finish provide the necessary bonding and protection to bring your project to life.
Step by Step Guide
When crafting a wooden box, the choice of joint style can make all the difference in its structural integrity and aesthetic appeal. Let’s explore three different approaches to building a wooden box using mahogany, oak, and poplar woods.The first approach involves cutting mahogany boards with mitered edges, which require a 45-degree angle cut on your table saw. Assemble the box by gluing the edges together and securing them with rubber bands or a band clamp until dry. Finally, sand the box smooth and apply a water-based polyurethane finish.The second approach uses oak boards and half-lap joints to create a sturdy and attractive box. Start by cutting the boards to size, then adjust your table saw blade to cut half-lap joints at the ends of the front and back panels. Assemble the box by gluing and clamping the panels together, ensuring they’re perfectly square. Add the top and bottom panels, allowing them to dry before sanding and applying a finish of your choice.The third approach employs poplar boards and finger joints for a unique and charming wooden box. Begin by cutting the boards to size, then use a finger joint jig on your table saw to cut the joints. Test fit the joints before gluing, ensuring a snug fit. Assemble the box by applying glue to the finger joints and clamping the assembly together. Insert the top and bottom panels before the glue dries, then sand the box smooth and finish with polyurethane for durability and shine.
Accenting Your Boxes
To elevate the aesthetic appeal of mahogany and oak boxes, consider incorporating splines or inlays as decorative accents that add depth and visual interest. For a more personalized touch, adorn the lids with intricately carved handles or cleverly integrate a slot for holding recipe cards in use, allowing users to easily jot down notes and measurements while cooking. Furthermore, ensure a seamless finish by applying felt to the bottom of each box, not only adding a touch of elegance but also providing protection against scratches and scuffs on your countertops.
Video Tutorial
By watching our YouTube video tutorial on building three types of recipe card boxes, you’ll gain a comprehensive understanding of each technique. The visual insights provided by the video complement this written guide perfectly, making it easy to learn and engaging to follow along. With these steps as your foundation, you can add your personal touches to create unique and functional recipe card boxes that will be treasured for years to come. Whichever style you choose – the refined elegance of mitered joints, the classic charm of half-laps, or the intricate detail of finger joints – your craftsmanship will shine through in these practical yet beautiful kitchen accessories.
Preservation Methods
To safeguard your treasured recipe collection for years to come, consider employing the following preservation techniques: Laminating is an excellent method to protect your recipe cards from kitchen mishaps and spills, allowing for easy cleaning. For new recipes, opt for acid-free paper to prevent yellowing or deterioration over time. An alternative to laminating, plastic sleeves can also provide a safe and clean storage solution. Moreover, create digital backups of your recipes by scanning them or taking clear photos, and store them digitally for added security. It’s essential to handle your recipe cards with care, ensuring they remain free from stains and splashes. By adopting these methods, you’ll be able to preserve your collection of recipes, keeping it intact and legible for future generations.
Digital Integration
Transforming your DIY recipe box into a seamless fusion of physical and digital elements can revolutionize its functionality and convenience. Here’s how to harmoniously merge the tactile charm of a physical box with the power of online tools:
Recipe Management Platforms: Leverage apps to organize, access, and manage recipes across devices. Look for features such as shopping lists, meal planning, and sharing capabilities.
Cloud Storage Services: Upload scans or photos of your recipes to cloud storage services, ensuring a secure backup and effortless accessibility from anywhere.
QR Code Integration: Generate QR codes for each recipe, affixing them to the corresponding card. Scanning the code with a smartphone can link to additional information, videos, or tutorials.
Social Media Platforms: Establish a unique hashtag for your recipe box project and encourage others to share their creations online, fostering a community and facilitating seamless recipe exchange.
Blog Integration: If you have a blog, embed a digital version of your recipe box, allowing readers to browse recipes and print their favorites.
By embracing these digital integration strategies, you’ll transform your recipe box into an even more valuable resource for yourself and others. Keep it user-friendly, and relish the delightful blend of traditional and modern!
Sustainability Focus
Crafting an eco-friendly recipe box is a thoughtful way to merge your passion for cooking with a commitment to sustainability. To create such a box, consider the following environmentally conscious approaches: By opting for sustainable materials like bamboo or recycled wood, you’re reducing the demand on virgin resources and minimizing waste. Additionally, repurpose items you already have, like an old wooden box or tin can, to give your project a unique character. When it comes to finishes, natural options such as beeswax or plant-based oils are not only safer for you but also better for the planet than synthetic varnishes. To minimize waste further, measure carefully and use scraps for smaller parts of the project or future crafts. Instead of printing new recipes, maintain a digital collection that you can access from your kitchen devices. Finally, decorate your box with natural elements like twine or dried flowers to create a unique and biodegradable design. By focusing on sustainability, you’re not only creating a functional recipe box but also telling a story about environmental responsibility. Enjoy crafting your eco-conscious project!
FAQs On DIY Recipe Box
Embarking on a DIY recipe box project can be an enjoyable and fulfilling endeavor. To ensure a smooth experience, here are some commonly asked questions that provide valuable insights to navigate the process.
What materials do I need to make a DIY recipe box?
To create a recipe box, you’ll need to gather the right materials. The type of project you’re making will determine what materials are required. For instance, if you’re crafting a wooden recipe box, you’ll typically need: hardwood options like mahogany, oak, or poplar; sandpaper for smoothing out the wood; wood glue for assembly; and a finish such as water-based polyurethane to protect and enhance the appearance of the wood. Additionally, you’ll require some basic tools, including a saw, clamps, and router. If you’re opting for a simpler, upcycled approach, you might repurpose a shoebox or wine crate, along with decorative paper or wallpaper, Mod Podge or craft adhesive, and paint and brushes to add color and personality.
How do I choose the right size for my recipe box?
When selecting a recipe box, consider the size of the cards you’ll be storing. Common dimensions include 3×5 inches and 4×6 inches. To ensure effortless organization and flexibility, opt for a box that’s slightly larger than your largest recipe card. This will provide ample space for easy retrieval and accommodate potential dividers, if desired.
Can I make a recipe box without woodworking tools?
While traditional woodworking techniques are required for crafting a wooden recipe box from scratch, there’s no need for specialized tools when upcycling everyday containers. Shoeboxes, wine crates, and tin boxes can be transformed into unique recipe storage solutions through creative decoration methods like paper mache, fabric wrapping, or paint application. This approach not only saves time but also opens the door to DIY enthusiasts without extensive woodworking experience, offering a fun and accessible way to get creative with their kitchen storage.
What is the best way to organize recipes in my DIY box?
There are various approaches to organizing recipes, allowing you to tailor your system to suit your personal preferences and cooking habits. Some popular methods include arranging recipes alphabetically, categorizing them by meal type (such as breakfast, lunch, or dinner), and grouping them by cuisine, whether that’s Italian, Mexican, or Indian-inspired dishes. Another approach is to organize recipes around specific occasions, such as holiday gatherings, parties, or special events. To make navigating your recipe collection even easier, consider incorporating dividers or tabs to separate categories and provide quick access to the recipes you need.
How can I personalize my DIY recipe box?
Transforming your recipe box into a personalized treasure can be achieved through various creative approaches. One option is to imbue it with unique, hand-crafted details such as wood-burned initials or intricate designs that reflect your individuality. Alternatively, you can add decorative flair by applying paper or fabric that harmonizes with your kitchen’s aesthetic. For a pop of personality, consider painting the box with vibrant colors that mirror your style or the recipient’s. Finally, incorporating a treasured photo or nameplate can make the box an even more meaningful possession. The key to successful personalization lies in infusing the box with elements that authentically represent you or the intended recipient.
What finish should I use on a wooden recipe box?
When it comes to finishing wooden recipe boxes, a water-based polyurethane coating is the ideal choice. This type of finish not only offers superior durability against moisture and wear, but also preserves the natural charm of the wood, allowing its unique character to shine through.
Can I make a recipe box as a gift?
A thoughtful and personalized gift for various occasions is a handmade recipe box that holds sentimental value. It’s perfect for weddings, housewarmings, Mother’s Day, or other significant events. You can make it even more special by including a few of your go-to recipes to help the recipient get started with their own cooking journey.
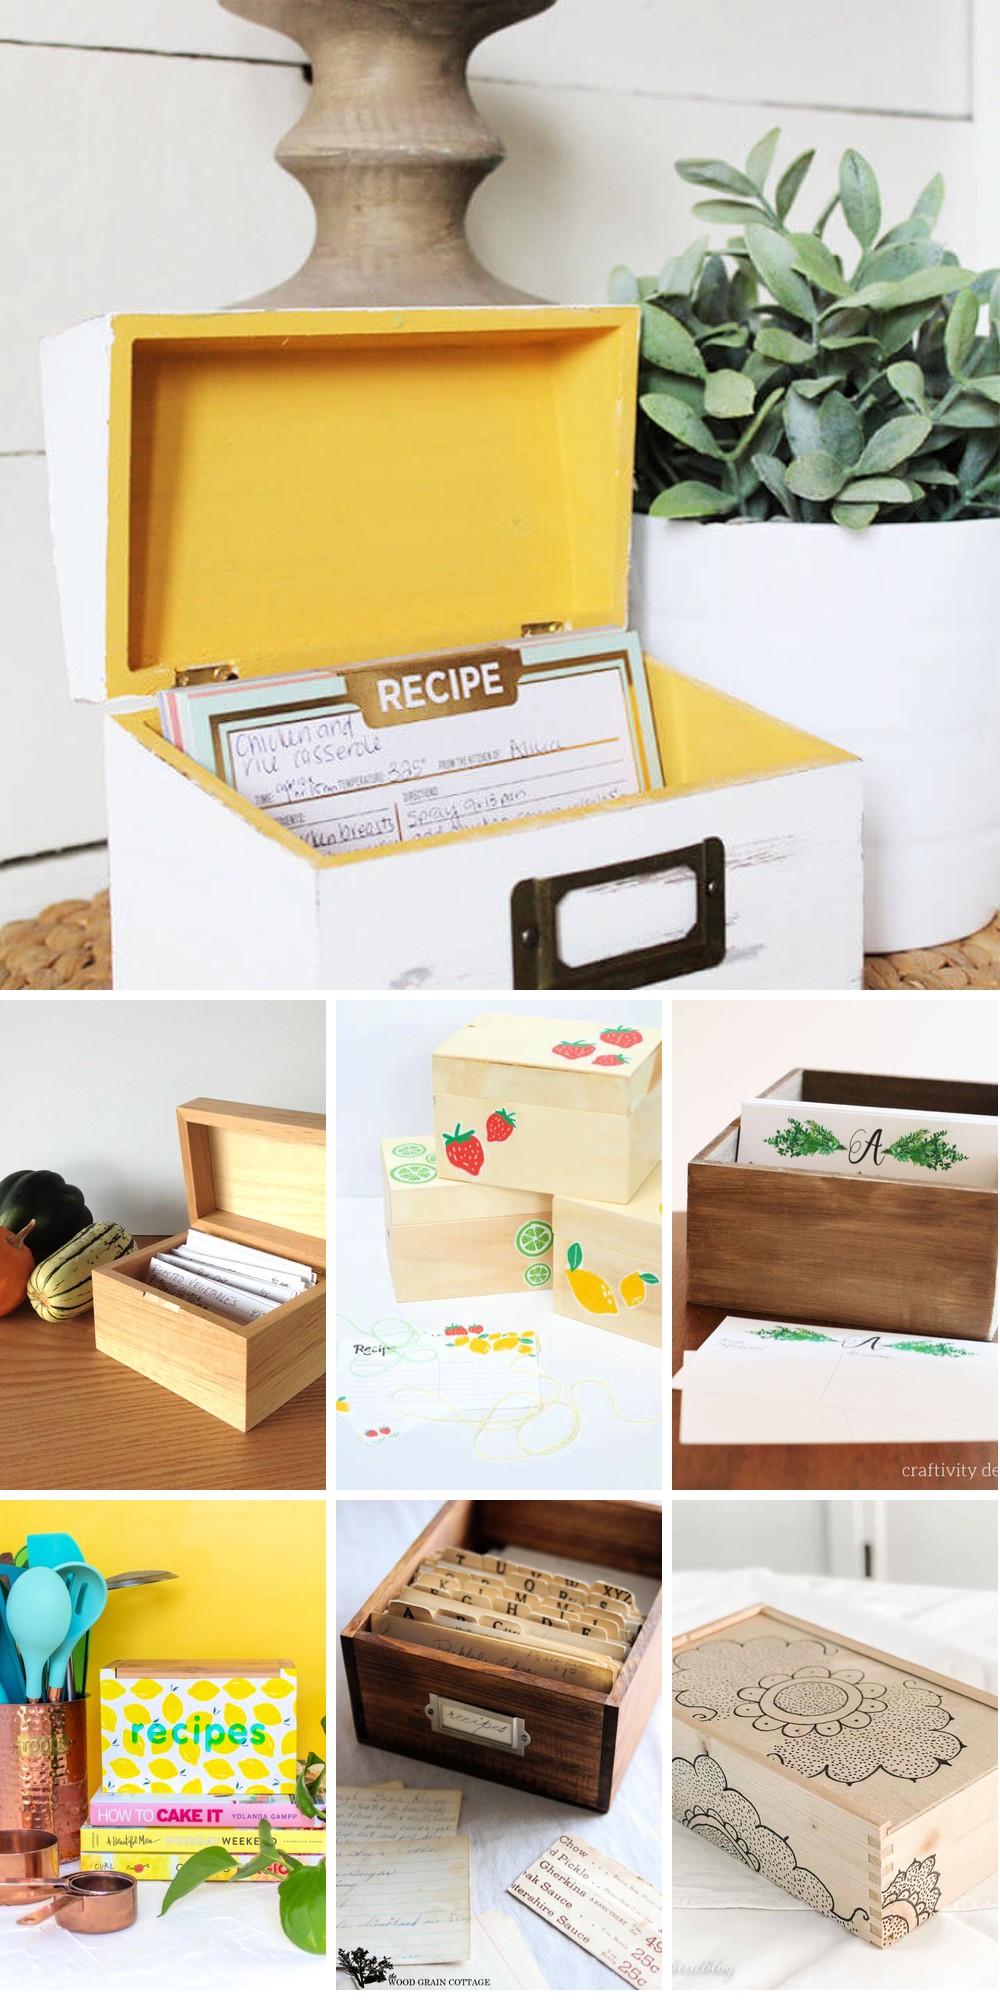
15 DIY Recipe Box Ideas and Plans (Make a Recipe Box)
Transform your cooking routine with 15 unique DIY recipe box ideas, each accompanied by a simple tutorial to help you create a customized recipe organizer that reflects your personal style. From rustic wooden creations to modern acrylic designs, get ready to elevate the way you plan and prepare meals.
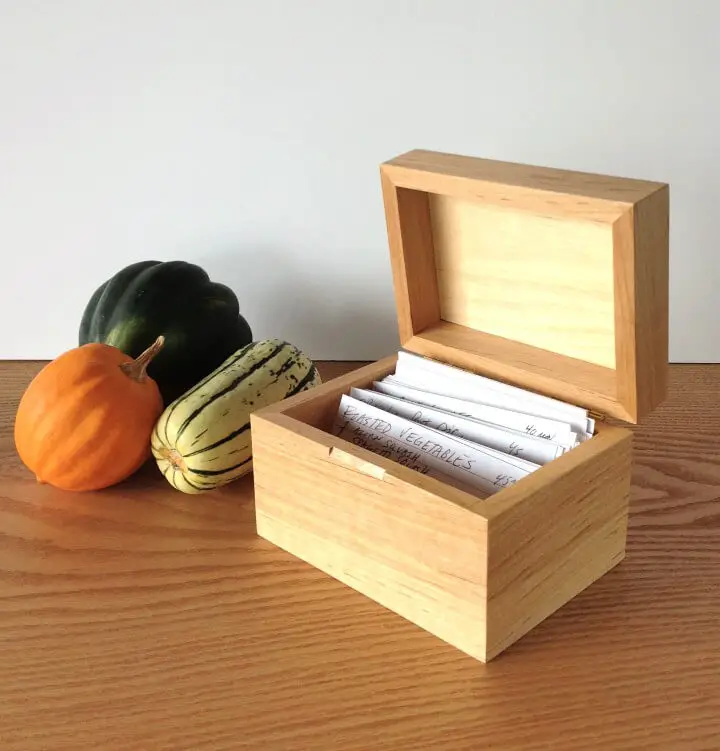
Easy DIY Wooden Recipe Box

Bring warmth and nostalgia to your kitchen with a homemade DIY recipe box that honors your love for cooking and family heritage. This thoughtful project is a wonderful way to preserve cherished memories and treasured recipes, passing them down through generations. Made from readily available materials like cedar tongue and groove or pine, and finished with a rich stain, this beautiful box will become a treasure trove of culinary memories. Perfect for storing handwritten recipes that have been passed down through family lines, it adds a personal touch to your home’s heart. For a comprehensive guide on creating this meaningful piece, visit The Wood Grain Cottage.
Homemade Recipe Box From a Shoebox
Turn a humble shoebox into a beautiful and functional DIY recipe box with this step-by-step guide from Sweet Tea & Saving Grace. This project is perfect for those with limited kitchen space, as it not only keeps your favorite recipes organized but also adds a touch of elegance to your home. The process begins with measuring and cutting the necessary materials, followed by covering the box with attractive paper and creating dividers to keep your go-to recipes easily accessible without cluttering your countertop. By following this easy guide, you’ll be able to create an invaluable kitchen companion that will make cooking and baking a breeze.
How to Build a Wooden Recipe Box
Transform your cherished recipes with a personal and practical gift idea: a beautifully crafted recipe box. With WWGOA’s step-by-step instructions, you can turn leftover wood scraps into a unique and elegant storage solution. Add a touch of personality with a hand-carved thumb tab, perfect for storing 3” x 5” index cards. This adaptable project allows you to customize the size to fit your needs, making it an ideal holiday gift or timeless kitchen addition. From grooving the wood to the final sanding, this comprehensive guide will walk you through every step to create a thoughtful and functional piece that will be treasured for years to come.
DIY Recipe Box With Free Printable Recipe Cards
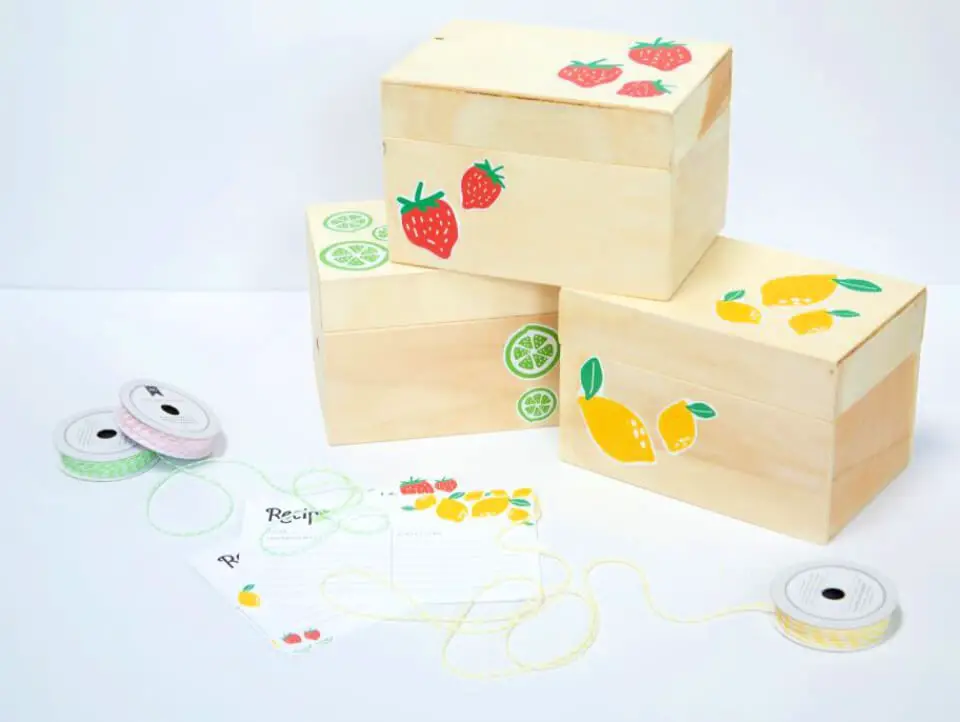
For the culinary enthusiasts who also appreciate DIY projects, creating a personalized recipe box with printable recipe cards can be a delightful way to organize and store their favorite dishes or share them as a thoughtful gift. By using Mod Podge, a versatile adhesive, you can enhance your box with decorative elements that will remain intact without tears or bubbles. The smooth application process ensures a flawless finish, and after drying, your beautifully decorated box is ready to safeguard your treasured recipes. To get started, follow the step-by-step guide at Fun365 for a seamless and enjoyable experience.
Make a Recipe Box Gift for Mom’s Day
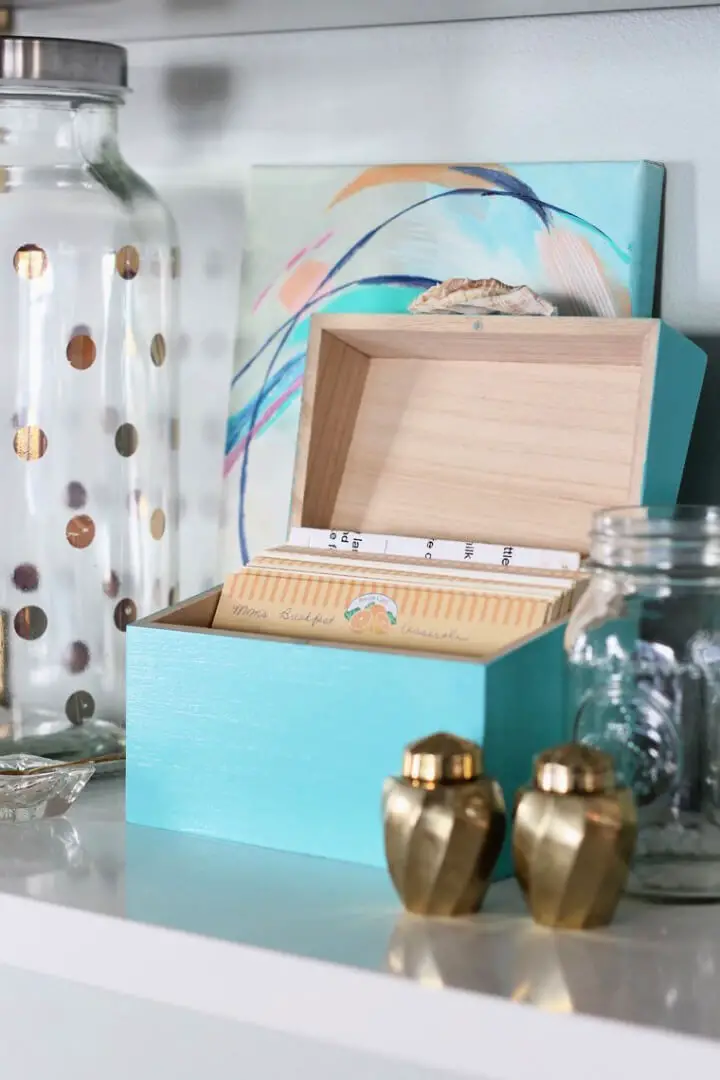
Elevate your kitchen organization with a delightful DIY Recipe Box that not only declutters your space but also adds a personal touch to your home. This creative project is perfect for preserving your favorite recipes, as well as those you’re eager to try. By crafting this charming solution yourself, you’ll gain a sense of accomplishment and pride in your ability to create something unique and functional. The process is surprisingly straightforward, thanks to Simple Stylings’ step-by-step guide, which includes expert tips on adding decorations like shell ornaments and achieving a smooth, durable finish. With your DIY Recipe Box complete, you’ll be able to keep your cherished recipes neatly organized and easily accessible, making meal planning and preparation a breeze.
Handmade Vintage Recipe Box
Transform a humble box into a treasured repository of family culinary traditions by crafting a DIY Vintage Recipe Box. This project is not just about storing recipes; it’s an opportunity to create a legacy that transcends time. Begin by staining the box walnut, then paint the interior vintage yellow for a warm and inviting tone. Add a distressed finish using petroleum jelly before painting the exterior white. Elevate the design with vintage-inspired embellishments like a label holder and handle for effortless access. As you work on this project, remember that it’s not just about preserving recipes – it’s about keeping memories alive for generations to come.
Build a Monogrammed Wood Recipe Box
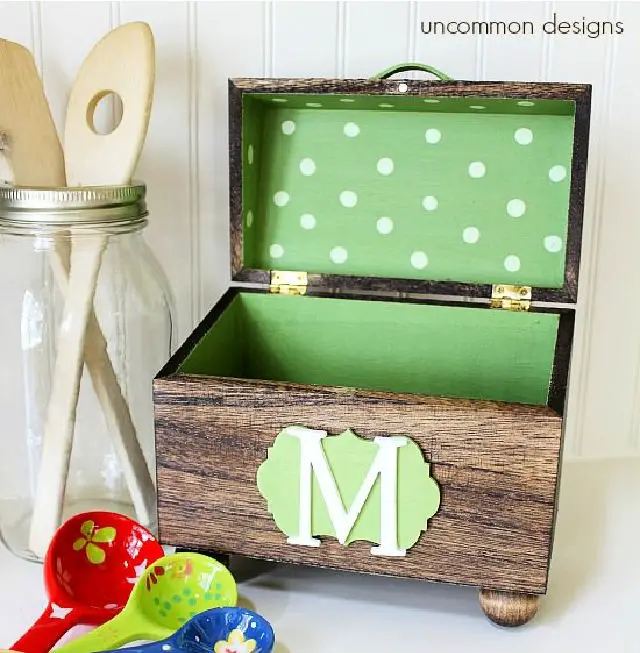
Unleash your creativity by crafting a one-of-a-kind, monogrammed recipe box that’s both a functional treasure trove for your cherished handwritten recipes and a thoughtful gift for loved ones. With a simple tutorial from Uncommon Designs, you’ll be guided through the process of creating a personalized masterpiece that combines rich colors and finishes to reflect your unique style or the personality of the recipient.
Unique DIY Luxe Leather Recipe Box
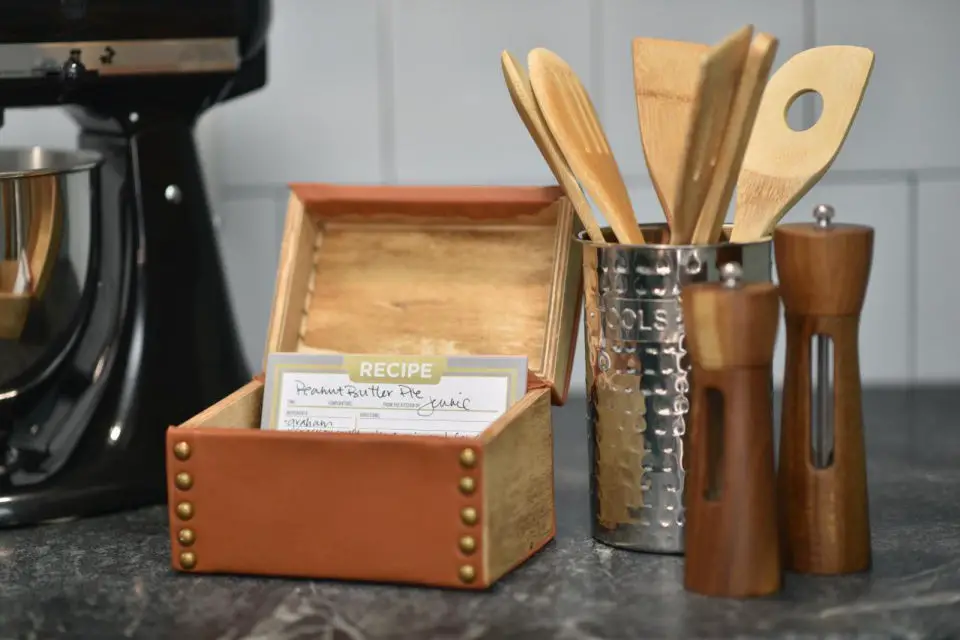
Transform your kitchen with a bespoke leather-wrapped recipe box, designed to safeguard your treasured family recipes. Ditch cluttered cookbooks and opt for a sleek, space-conscious solution that adds a touch of sophistication to any countertop. This comprehensive guide will walk you through preparing, staining, and wrapping the box in supple leather, guaranteeing a polished finish. With easy-to-follow steps for measuring, cutting, and attaching the leather, you’ll be amazed at how effortlessly you can create this stunning piece.
Personalized Recipe Box With Recipe Cards
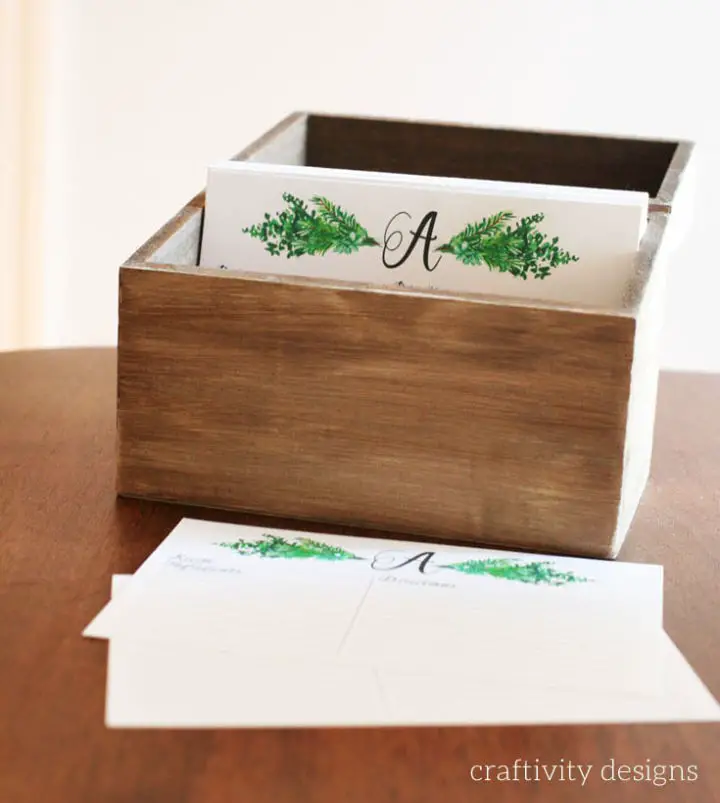
Transforming gift-giving into an intimate experience, create a one-of-a-kind recipe box and matching cards with a DIY approach. This step-by-step guide yields a beautifully crafted, wood-burned recipe box that serves as a thoughtful wedding or shower present. As the warmth of personalization seeps in, this handmade piece transcends mere gifting, becoming a treasured keepsake cherished for years to come. Embark on a creative journey and bestow a gift that harmonizes function with heartfelt sentiment, perfect for those who value kitchen nostalgia and unique decorative elements.
How to Make a Mod Podge Recipe Box
Take your crafting skills to the next level with a charming Mod Podge recipe box project inspired by the creative genius of Handmade Charlotte. Start by transforming an ordinary thrift-store find into an extraordinary storage solution that adds a splash of color and personality to your kitchen or makes a thoughtful hostess gift. To create this unique piece, you’ll need just a few basic supplies: Mod Podge, a vintage tin recipe box, and some tissue paper in a pattern that matches your favorite tea towel design. With simple, step-by-step instructions, you can easily add a personal touch to this delightful project. For the complete tutorial, visit Handmade Charlotte and get ready to elevate your crafting game.
DIY Recipe Box for Mother’s Day
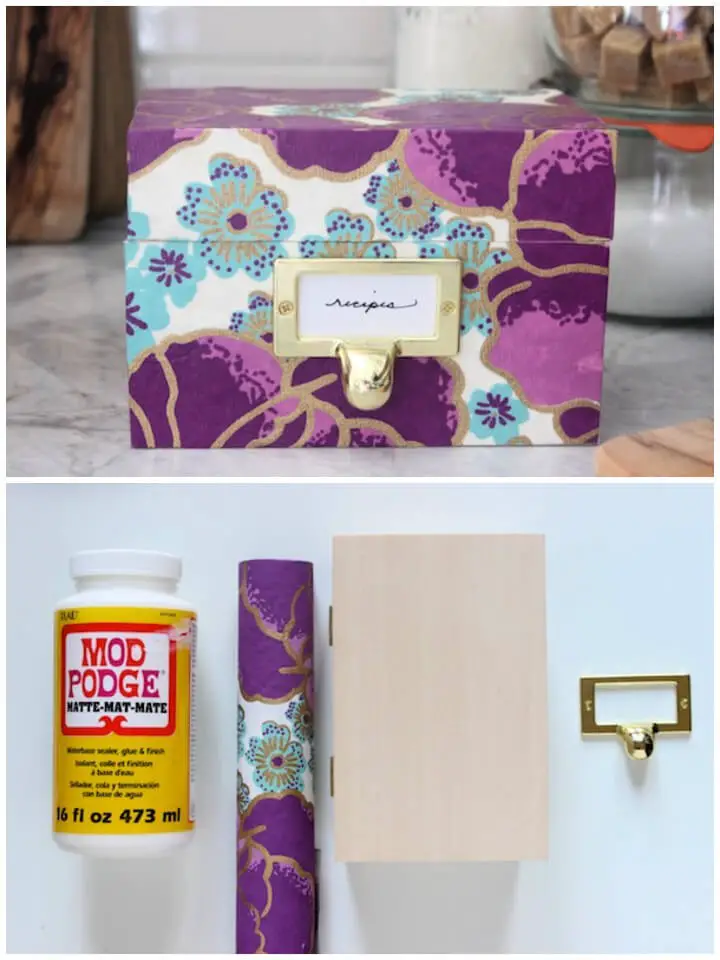
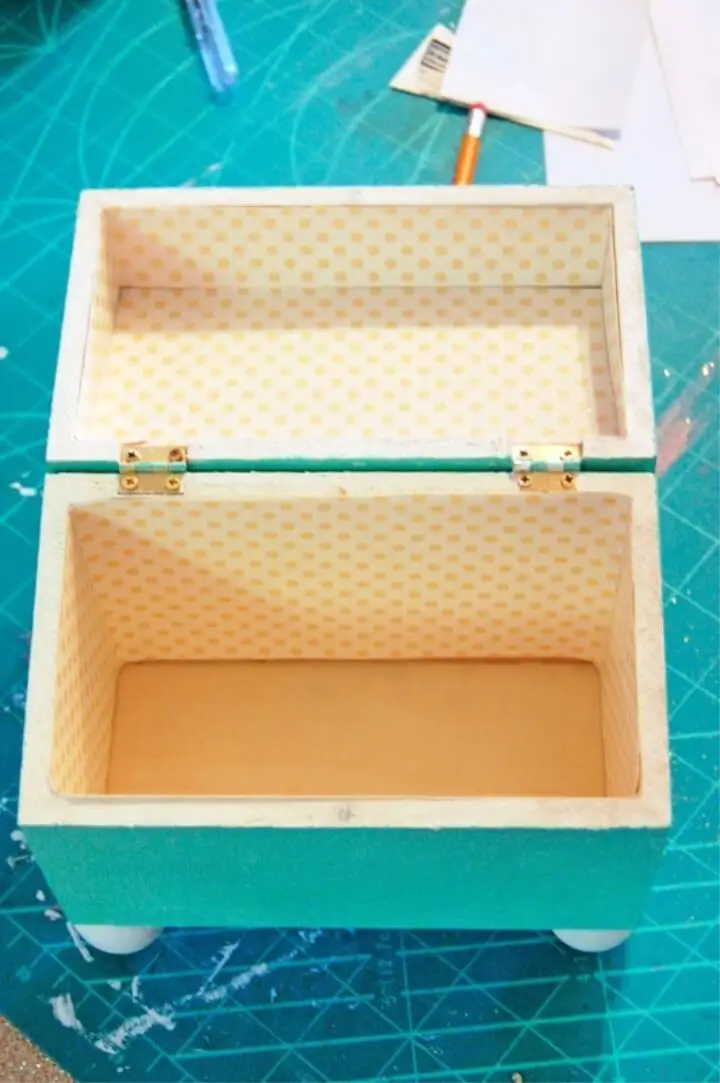
Turn Mother’s Day into a sentimental celebration by crafting a personalized recipe box using a straightforward DIY tutorial. This decoupage project transforms an ordinary box into a treasured keepsake, ideal for storing beloved recipes or cherished memories. To get started, gather materials like an unfinished wooden box, decorative paper, and decoupage glue. Follow the simple steps: cut the paper to fit the box, apply it with glue, and add elegant hardware details. For a detailed guide on how to bring your vision to life, visit Oh So Beautiful Paper for inspiration.
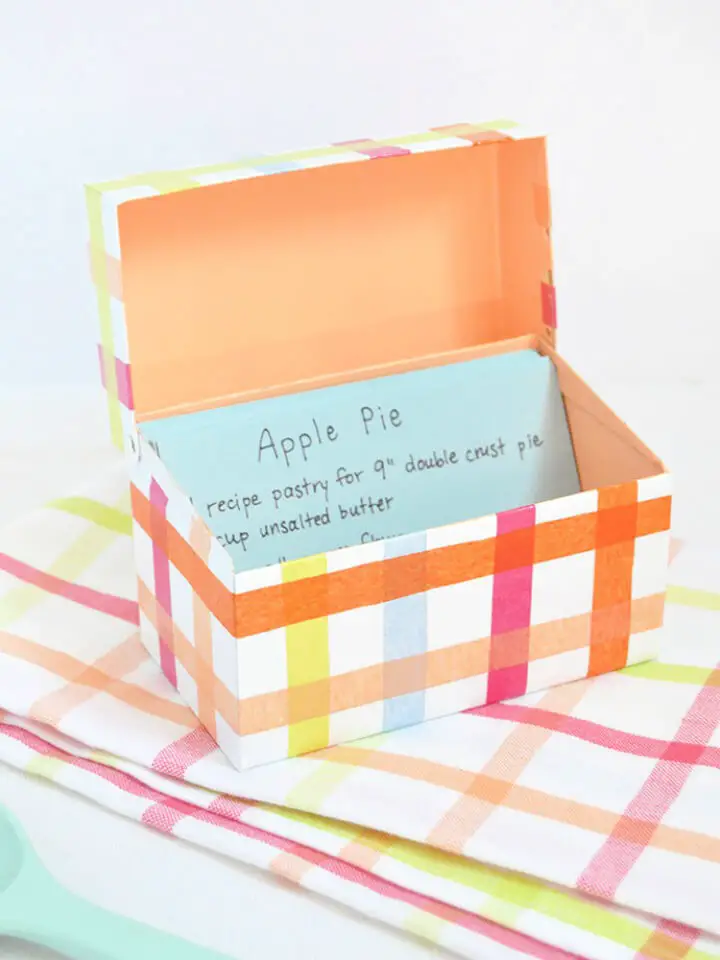
Making a Vintage Recipe Card Box

Transform your kitchen into a charming culinary haven by upcycling an ordinary recipe card box into a vintage-inspired treasure trove. This DIY project cleverly utilizes plaid pickle wash to achieve a beautiful whitewashed finish, eliminating the need for time-consuming sanding and painting. Perfect for those who adore the distressed wood look but prefer a more straightforward approach. The addition of a decorative knob adds a personal touch, making this box a delightful addition to any kitchen space. For a detailed, step-by-step guide on how to recreate this unique piece, visit Nally Studios.
Easy DIY Recipe Box Using a Wine Crate

Transform an old wine crate into a unique recipe storage box by following Marianne Songbird’s step-by-step guide! If you’re looking for a creative way to organize your treasured family recipes, this DIY project is a great starting point. With minimal effort, you can upcycle the crate into a charming container that safeguards your handwritten or cutout recipes while adding a touch of rustic elegance to your kitchen. For more inspiration and complete instructions on how to transform your wine crate into a functional recipe box, visit Songbird. Start crafting your personalized recipe storage today and keep your favorite dishes at your fingertips in style.
Handmade Recipe Box for a Hostess Gift
Transform any new home with a unique DIY recipe box, an endearing hostess gift that reflects your personal touch. By choosing customizable patterns and colors, you can infuse this handmade treasure with your distinct style, making it a cherished keepsake. This thoughtful gift is perfect for sharing beloved recipes and welcoming friends or loved ones into their new spaces. With minimal materials and a dash of creativity, craft a present that exudes warmth and nostalgia.
Cool Recipe Box Makeover With Wallpaper
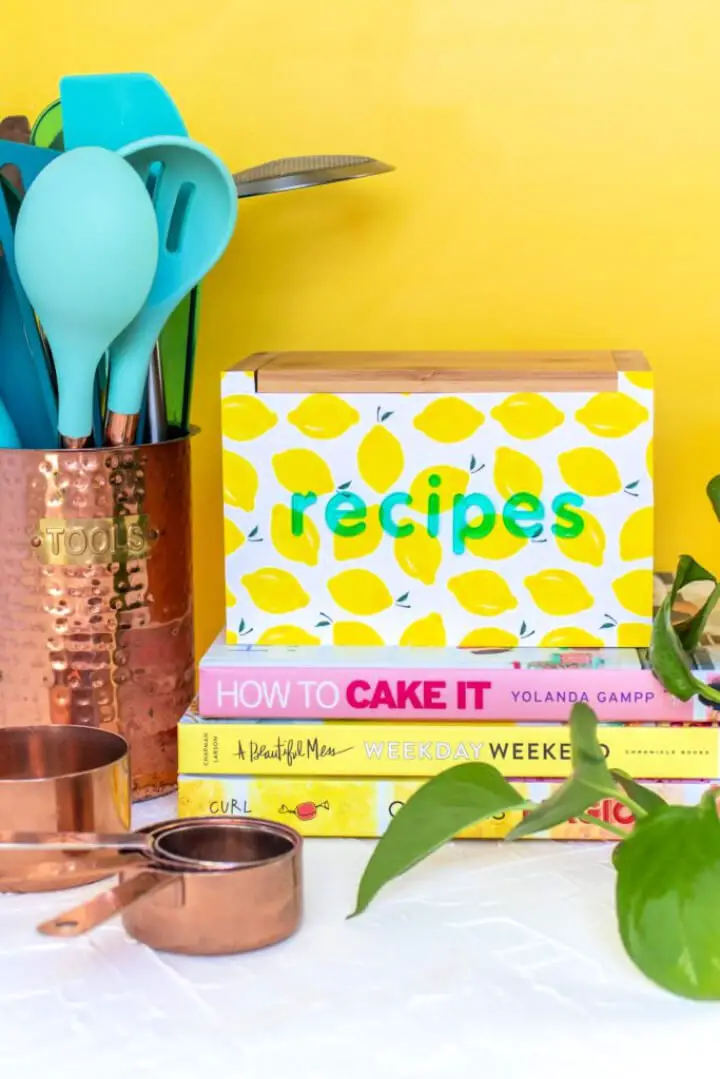
Elevate your recipe storage with a dash of creativity! Club Crafted offers a comprehensive guide on transforming your recipe box into a stunning, personalized space using removable wallpaper. This DIY project is perfect for anyone seeking to add a touch of elegance and whimsy to their kitchen, while keeping their favorite recipes organized and easily accessible. By selecting a pattern that resonates with you – such as the bright and cheerful lemon print featured in the tutorial – you’ll be able to inject your unique style into your recipe collection’s home. Get ready to unleash your inner culinary artist and create a one-of-a-kind space that reflects your personality!
Conclusion:
Combining functionality with creativity, crafting your own DIY recipe box is an excellent way to make something truly unique. Each step of the process, from selecting materials to adding the finishing touches, presents an opportunity to infuse your project with personal flair. Whether you opt for a sturdy mahogany box with mitered edges, a rustic oak box with half-lap joints, or a lightweight poplar box with finger joints, your homemade recipe box will serve as both a practical kitchen accessory and a testament to your skill and imagination. With the guidance of our DIY wooden recipe box tutorials and the inspiration provided by our 15 creative ideas and plans, you’re well on your way to creating a beautiful, personalized storage solution for your treasured recipes or perhaps, a heartfelt gift for someone special.
