Elevate your home theater experience by creating a DIY projector screen that’s both budget-friendly and tailored to your preferences. In this in-depth guide, we’ll delve into 25 unique DIY projector screen projects that are easy to execute and cost-effective. From selecting the ideal material and determining the perfect size to framing it with style and enhancing the viewing experience, we’ve covered all the essential details. Learn how to troubleshoot common issues, maintain your screen, and address frequently asked questions, ensuring a seamless movie night experience.
How to Make a Projector Screen – Step by Step Guide
Transform your home theater or presentation space into an immersive experience by crafting your own projector screen. Follow along as we break down the process into manageable, straightforward steps.
Materials and Tools Needed
Before commencing your project, ensure you have all the essential materials and tools at your disposal. These include lumber for the frame, which will depend on the desired screen size. You’ll also need a Kreg Jig or mini Kreg Jig for joining wood pieces together securely. In addition to these fundamental components, make sure you have the following: screws (1 and 1/4 inch pocket screws are recommended), center supports, one piece of 1×4 lumber for the cleat, a table saw set at a 45-degree angle for precision cutting, wood glue for reinforcing joints, a drill with countersink bits for effortless screw installation, a level to guarantee precise placement, and Forstner bit and smaller drill bits for various drilling tasks. Furthermore, you’ll require Carl’s flexi white screen material, staples, and a staple gun for attaching the fabric to the frame. Finally, don’t forget 3-inch black felt tape for adding a border to your finished product. To complete the project, you’ll also need a speed square and exacto knife for mitering corners with precision.
Step-by-Step Guide
Building the Frame
To begin building your frame, start by measuring and cutting your lumber to the required dimensions. If you’re following along with the video tutorial, the outer dimensions of the frame will be approximately 124.5 inches by 76.625 inches. Once you have your pieces cut, it’s time to bring them together. Using your Kreg Jig, drill pocket holes at each end of the frame pieces and then join them using screws. Make sure to ensure the corners are square as you assemble the frame, and consider employing a right-angle clamp for added precision.
Next, add center supports to enhance the stability of your frame. Measure out equal distances from the inside edge and install these supports in place using screws.
Preparing and Hanging the Cleat
To create a sturdy foundation for your frame, start by preparing the cleat. Cut a 1×4 piece of wood at a 45-degree angle along its entire length. This angled surface will provide a secure mounting point for the frame on your wall. Once you have the cleat ready, locate the studs in your wall and position the cleat so that it spans multiple studs, ensuring maximum support. Next, use a Forstner bit to create countersinks in the cleat, then secure it to the wall with screws, double-checking that it is level and firmly in place.
Attaching the Frame to the Cleat
To complete the installation, begin by attaching the frame to the wall-mounted cleat. Apply a small amount of wood glue to the cleat and secure it with screws, ensuring a snug fit against the wall. It’s essential that the frame is properly aligned and secured to prevent any shifting or damage over time. To confirm the frame is level, perform a quick visual check and make any necessary adjustments. If your wall is uneven, consider adding L&T brackets for added stability and peace of mind.
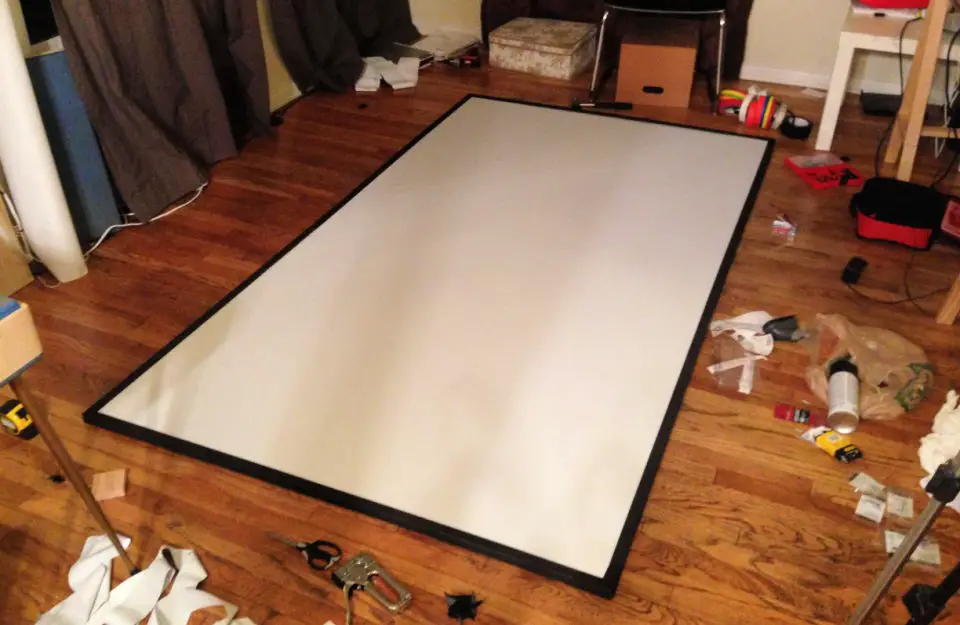
Stretching the Screen Material
To begin the screen material installation process, start by rolling out the fabric over the frame, commencing at one edge. Ensure a secure fit by stapling the material in place as you work your way across to the opposite side. As you progress, maintain even tension and avoid wrinkles. If desired, enlist the aid of a partner to assist with corners for an optimal fit.
Moving around the frame, continue stapling while keeping the material taut and smooth. With each staple, check that the fabric remains wrinkle-free and evenly distributed. When you reach the corners, take extra care to ensure a precise fold and secure it with staples for a professional finish.
Once the majority of the material is in place, trim any excess fabric and carefully fold the corners to create a seamless edge. Finally, staple the folded edges to complete the installation and achieve a smooth, tightly fitted surface.
Adding a Border
To add a finishing touch to your project, incorporate 3-inch black felt tape along the borders by applying it neatly. For a seamless integration, cut the tape’s corners at a 45-degree angle, ensuring a professional-looking finish that complements the overall appearance.
Video Tutorial
To supplement the written instructions that follow, I recommend watching the accompanying video tutorial on building and hanging a projector screen available on DIY with Rick’s YouTube channel. This multimedia approach allows you to visually absorb each step, simplifying complex processes and making them accessible to anyone, regardless of their level of expertise.
Customization Options for Your DIY Projector Screen
Creating a DIY projector screen offers unparalleled customization options, allowing you to craft a solution that perfectly suits your unique requirements and tastes. To unlock the full potential of this creative endeavor, consider the following approaches to making your projector screen truly one-of-a-kind:
Choose the Right Material
When it comes to creating a crisp and clean image, three options stand out: Blackout Cloth, Spandex, and Painted Walls. The former is an affordable and easy-to-work-with solution that provides a smooth, distraction-free surface. Spandex, on the other hand, offers a unique stretching ability that creates a seamless, frameless design perfect for those who want to minimize visual obstructions. For a more permanent solution, consider painting a wall with special projection paint, which allows you to achieve a high-quality image without worrying about future maintenance or adjustments.
Pick the Perfect Size
When it comes to setting up your home theater, the screen size is crucial. It’s essential to measure your space carefully to ensure the screen fits comfortably and leaves sufficient room for speakers, soundbars, and other equipment. This will allow for an immersive viewing experience without any obstructions.In addition to considering the physical dimensions of your screen, you’ll also want to think about the aspect ratio. You have two primary options: 16:9 (widescreen) or 4:3 (standard). The choice between these two ultimately depends on what type of content you plan on watching most frequently. If you’re a fan of movies and TV shows that are primarily shot in widescreen format, a 16:9 screen may be the way to go. On the other hand, if you prefer classic films or older TV shows with a more traditional aspect ratio, a 4:3 screen could be the better choice.
Frame It Your Way
When it comes to displaying your large-screen material, you have several options to consider. For a traditional and sturdy approach, a wooden frame is a great choice. This style is perfect for a fixed screen setup and provides a classic look that’s hard to beat.On the other hand, if you’re looking for something lightweight and portable, PVC pipes might be just what you need. These pipes are ideal for outdoor movie nights or any situation where you want to easily move your material from one location to another.For a more modern and minimalist approach, consider attaching your material directly to the wall using no frame at all. This style is perfect for creating a clean and sleek look that’s sure to draw attention. Whatever your needs may be, there’s an option here that’s sure to meet them.
Enhance the Viewing Experience
To elevate the overall aesthetic, consider introducing several design elements that not only enhance visual appeal but also contribute to a more comfortable viewing experience. Firstly, surround the display with a black felt border, which will significantly improve contrast while imparting a professional touch. Additionally, incorporate LED strips behind the screen, strategically placed to reduce eye strain and add a warm ambiance. These thoughtful details can make a substantial difference in how your digital canvas is perceived.
Make It Portable
To maximize desk space, consider implementing a roll-up mechanism that allows your screen to retract when not in use. This will keep your workspace organized and clutter-free. Additionally, if you plan to transport your screen or use it in different environments, designing a custom carry bag can be a thoughtful touch. The bag can provide protection and make it easier to move the screen around.
Troubleshooting Common Issues with DIY Projector Screens
As you venture into creating your own DIY projector screen, it’s only natural that some unforeseen challenges may arise. Fortunately, being prepared with a basic understanding of common pitfalls can help you navigate these hurdles and ensure a smooth project outcome. For instance, have you considered the importance of proper material selection? A critical aspect to consider is the type of fabric or surface you’ll be using as your screen’s base. Make sure it’s light-absorbing and has minimal reflection properties to prevent image distortion. If you’re experiencing issues with blurry images or poor contrast, it might be due to a subpar screen material.
Wrinkles or Waves
When assembling the screen material, it’s essential to ensure an even distribution of the fabric. To achieve this, take your time and align the material carefully as you mount it. If, despite your best efforts, wrinkles do appear, don’t worry – there are ways to address them. One approach is to use a low heat setting on your iron to gently smooth out the fabric. Alternatively, you can try using a hairdryer to relax the fibers and eliminate any creases.
Image Quality
To guarantee an optimal viewing experience, consider two crucial factors when setting up your projector: brightness and sharpness. Firstly, it’s essential to ensure the projector’s brightness level aligns with the ambient light in the room. This will prevent the image from being washed out or too dim. Next, focus on the projector’s sharpness by adjusting its settings and making sure the screen is properly stretched to minimize any distortion. By striking a balance between these two elements, you’ll be able to enjoy a crystal-clear image that immerses you in the content.
Frame Stability
To ensure a sturdy and stable structure, consider reinforcing any weak points in the frame’s design. This can be achieved by adding angle brackets or supplementary support at vulnerable corners. Furthermore, it is crucial to secure the frame firmly to the wall or build a robust base that prevents the entire assembly from tipping over. This multi-faceted approach will guarantee a rock-solid foundation for your project.
Maintenance and Care for Your DIY Projector Screen
For optimal performance and longevity, it’s essential to maintain your DIY projector screen regularly. Here’s a rundown of key steps to ensure your screen remains in pristine condition.
Cleaning
To maintain the surface’s integrity, it is essential to adopt a regular cleaning routine that includes both dusting and spot cleaning techniques. Start by using a microfiber cloth to gently sweep away any loose particles and debris, taking care not to apply too much pressure that might scratch the surface. For more stubborn stains, employ a damp cloth with mild soap, being mindful to avoid harsh chemicals or abrasive materials that could damage the surface. By incorporating these simple yet effective cleaning methods into your daily routine, you can ensure that your surface remains clean and well-maintained for years to come.
Storage
When it comes to maintaining your screens, there are specific steps you can take to ensure they remain in top condition. For roll-up screens, it’s essential to store them in a dry place, shielded from direct sunlight that can cause fading over time. This simple step can go a long way in preserving the integrity and appearance of your screen. In contrast, fixed screens require a different approach. To keep them looking their best, make sure to regularly dust the frame and check for any loose fittings or attachments. By taking these precautions, you’ll be able to identify and address any potential issues before they become major problems.
FAQs for DIY Projector Screens
As you embark on creating your own DIY projector screen, it’s natural to have some questions. To alleviate any uncertainty and ensure a successful project, we’ve compiled a comprehensive FAQ section that addresses common queries and provides valuable insights.
What is the best material for a DIY projector screen?
When it comes to setting up a home cinema, one of the most important decisions you’ll make is what type of projection surface to use. Two popular options are blackout cloth and projection screen paint. Blackout cloth is an affordable solution that provides excellent image quality. Not only does it block out any unwanted light, but it also helps to improve the overall contrast ratio of your images. On the other hand, projection screen paint can turn any smooth wall into a screen, giving you the flexibility to create a home cinema setup almost anywhere. This option is great for renters or those who prefer not to commit to a dedicated screen.
How big should my projector screen be?
When considering a screen size, it’s essential to think about the physical space where it will be placed. You want to ensure that the screen fits comfortably within the room, leaving enough space for seating and speakers. Additionally, the ideal screen size also depends on the viewing distance, or how far away from the screen you’ll typically sit. This is important because a screen that’s too small can lead to eye strain, while one that’s too large can create an overwhelming experience.
Can I use regular wall paint for my projector screen?
When it comes to achieving high-quality projections, it’s essential to utilize specialized paints that are designed with this application in mind. These paints have been formulated to produce vibrant and precise images, setting them apart from general-purpose paints.
How can I make my screen portable?
When it comes to mobility, consider incorporating innovative designs that cater to ease of transportation. A clever solution could be the implementation of a roll-up mechanism or a foldable frame that allows for effortless movement and storage.
Do I need a frame for my projector screen?
A frame’s primary advantages include offering a sturdy, level platform and enhancing visual appeal. Moreover, it allows you to create a seamless connection between the screen material and its surroundings. On the other hand, opting out of a frame provides the flexibility to directly attach the screen material to the wall, resulting in a minimalist setup that eliminates the need for additional structure.
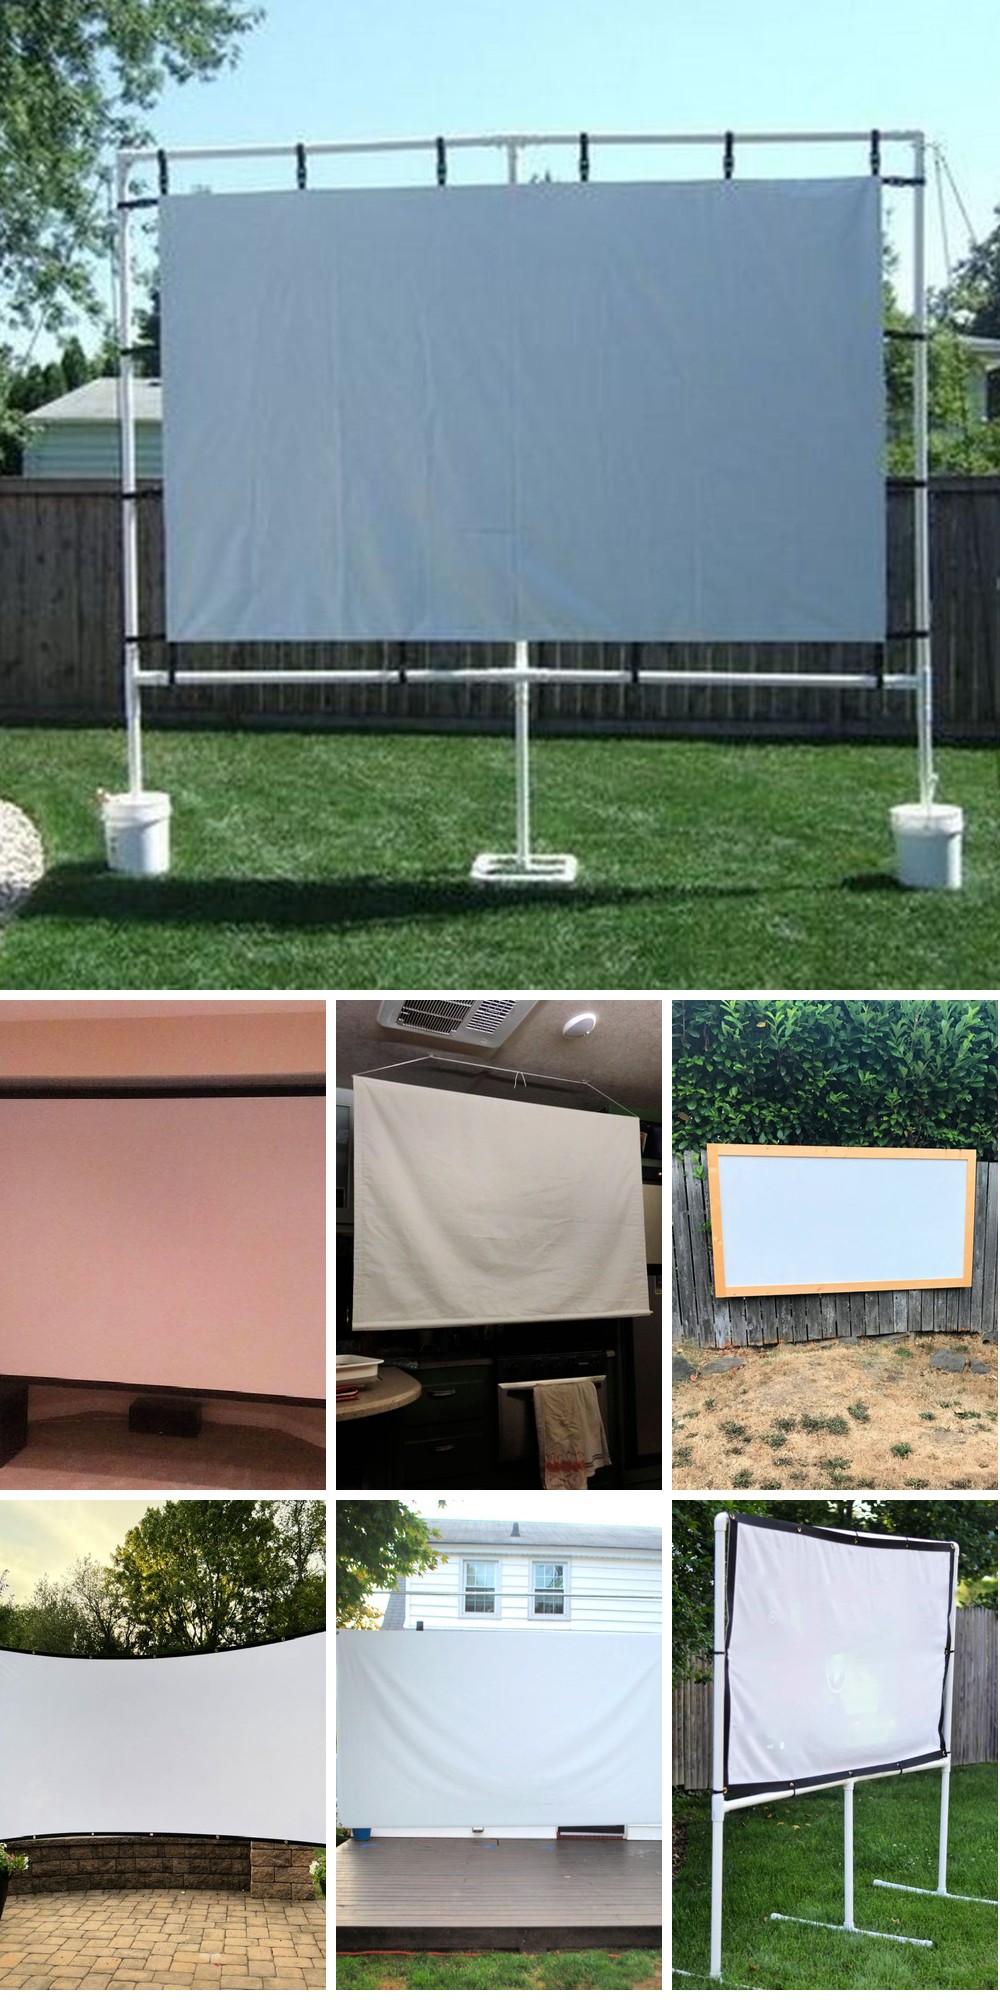
25 Homemade DIY Projector Screen Ideas
Transform your home theater into a cinematic experience without breaking the bank by exploring 25 innovative DIY projector screen ideas. From repurposing everyday objects to crafting unique materials, get inspired by these budget-friendly solutions that will elevate your viewing pleasure.
DIY Outdoor Movie Screen
Transform your backyard into an intimate movie theater for a memorable night with loved ones. Dispelling the notion that setting up an outdoor movie screen is a daunting task, we’ll show you how to achieve this with just around $50 in total. This weekend project requires minimal materials and is surprisingly quick to execute. Say goodbye to tedious setup processes and hello to cozy nights under the stars. Grab your supplies and get ready to bring your favorite films to life in the great outdoors!
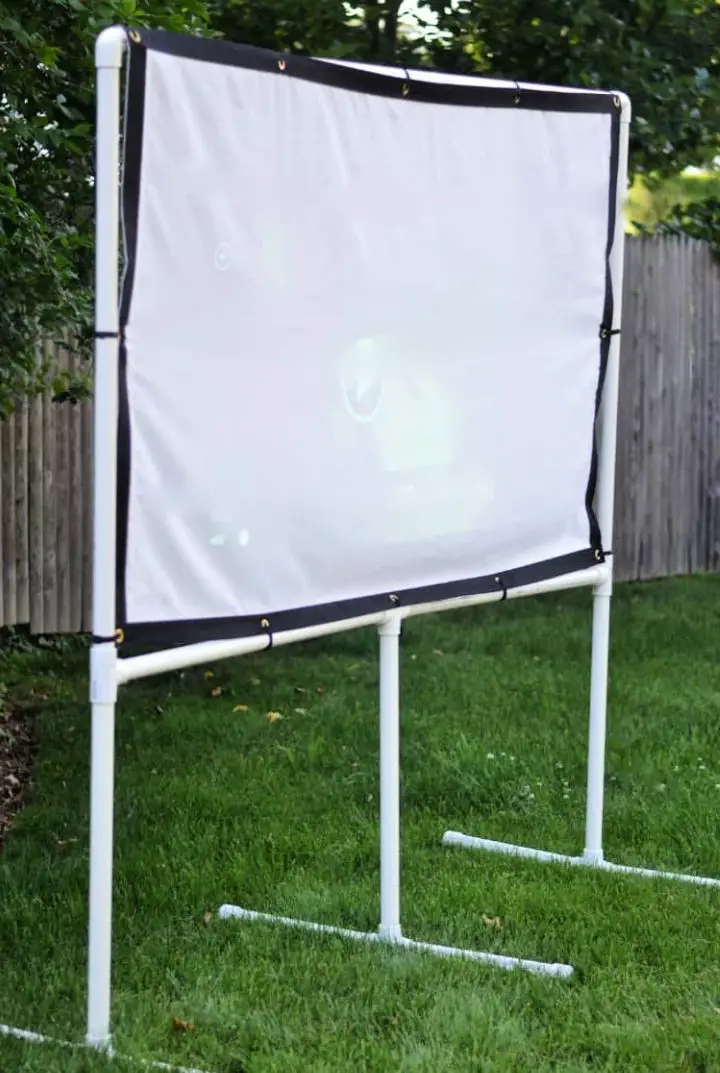
Portable PVC Projector Screen Tutorial
Transform your movie nights into an unforgettable experience with this innovative DIY portable PVC projector screen. Requiring no glue and crafted from basic materials, you can assemble your very own screen in mere minutes, effortlessly disassembling and transporting it to anywhere. Ideal for small projectors used both indoors and outdoors, this PVC construction is so straightforward that anyone can build it, allowing you to enjoy life-size movies wherever the adventure takes you!
Easy DIY Outdoor Movie Screen
Transform your backyard into a cinematic haven with this DIY outdoor movie screen that’s perfect for family bonding and creating lasting memories. The secure design allows you to hang it on various outdoor surfaces, including decks, patios, sheds, and pergolas, making it easy to set up and take down as needed. With minimal tools and supplies, you can create an unforgettable evening of entertainment, whether you’re looking to keep the kids engaged or enjoy quality time outside with loved ones. Simply follow these steps to bring the magic of the movies under the stars to your own backyard.
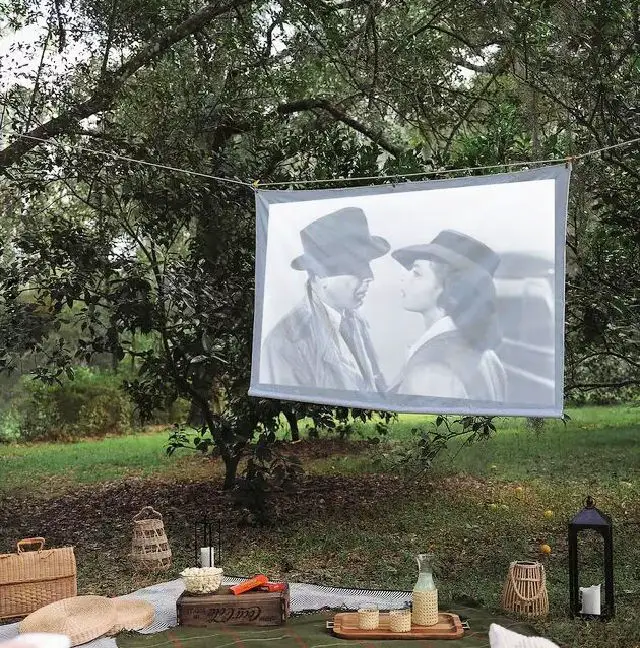
Homemade Backyard Movie Screen
Create a magical outdoor cinema experience in your own backyard with this easy DIY project. What’s more, it makes for a thoughtful and affordable Father’s Day gift that can be whipped up in just a few hours for under $50. This fun summer activity is perfect for the whole family to enjoy together – kids, parents, and even grandparents. As you set up your very own backyard movie screen, get ready to make some unforgettable memories!
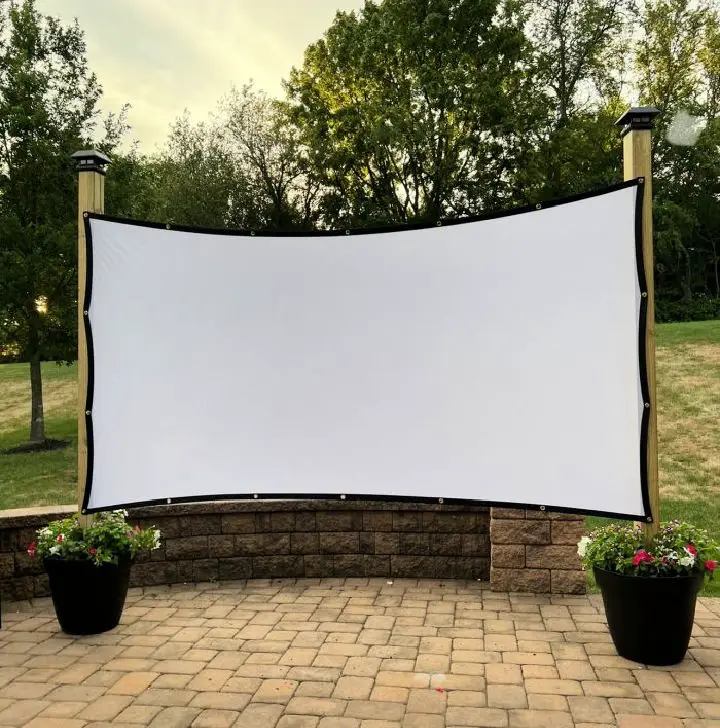
DIY Outdoor Movie Screen and Stand
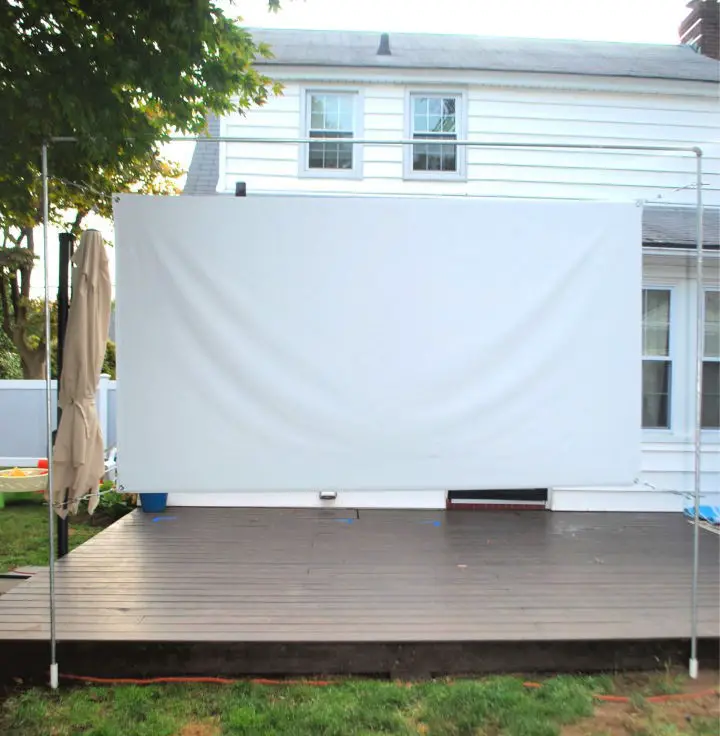
Transform your backyard into an entertainment hub this summer by building a DIY outdoor movie screen and stand. With its durable materials and easy assembly process, even the most novice DIY enthusiasts can create an immersive cinematic experience for family and friends. The best part? It’s perfect for little ones to enjoy as well! Just imagine snuggling up under cozy blankets with hot cocoa in hand while watching classic or new releases on a warm summer evening.
How to Do Outdoor Movie Screen
Transform your backyard into a cinematic haven without breaking the bank! With a few simple materials and tools, you can create an unforgettable outdoor movie screen that will become the epicenter of fun for friends and family alike. To get started, gather the following essentials: a sheet of plywood, a pine board, Behr silicone paint in silver screen shades, brad nails, a brad nailer, and painting supplies. You’ll also need some basic tools like a Ryobi saw, ruler, and pencil. With these humble components, you can craft an outdoor movie screen that will elevate your summer gatherings to new heights.
How to Make a Projector Screen
Looking to create an affordable and straightforward DIY projector screen? You’re in luck! With just $10 and a few hours, you can transform your home into the perfect movie theater. The beauty of this project lies in its simplicity – assembly is remarkably quick and effortless. Once complete, the screen rolls up neatly for storage, ensuring it’s always ready for the next movie night or presentation. And as an added bonus, the durability of a homemade projector screen means it will last a lifetime.
Makeshift Projector Screen Idea
For an affordable movie night experience without breaking the bank, consider crafting your own DIY projector screen. This adaptable solution can be used indoors or outdoors, requiring only basic materials and no sewing expertise. The best part? It’s incredibly easy to create – just 30 bucks in materials and a few minutes of your time. Plus, it’s portable, making it perfect for camping trips, vacations, or even a romantic picnic under the stars. Not only will you be impressed with the results, but others will likely ask where they can get one too! So why not give it a try today?
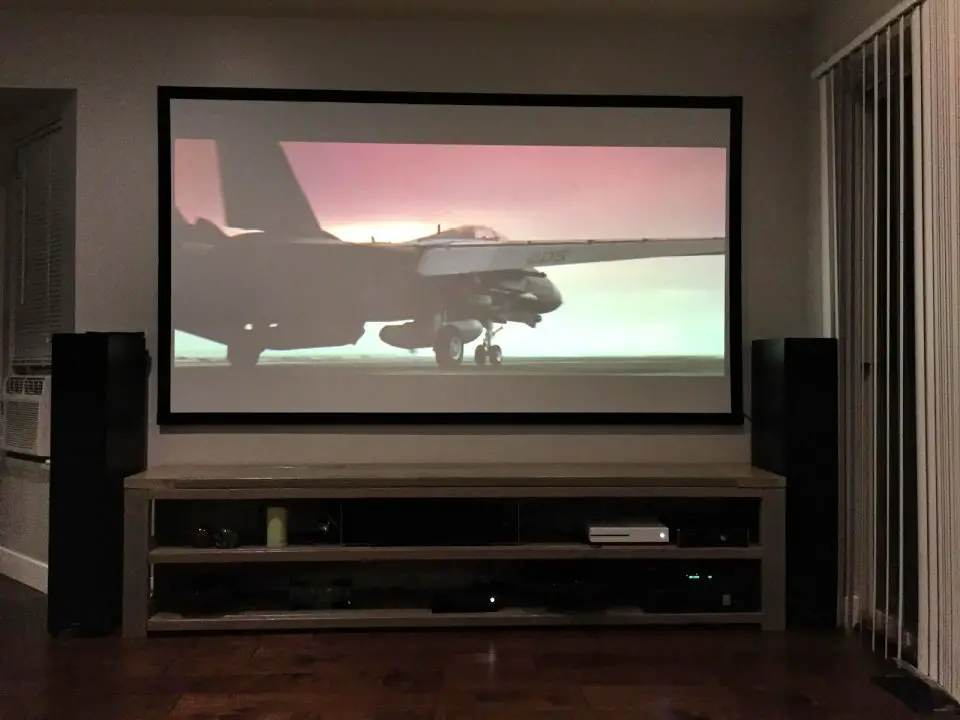
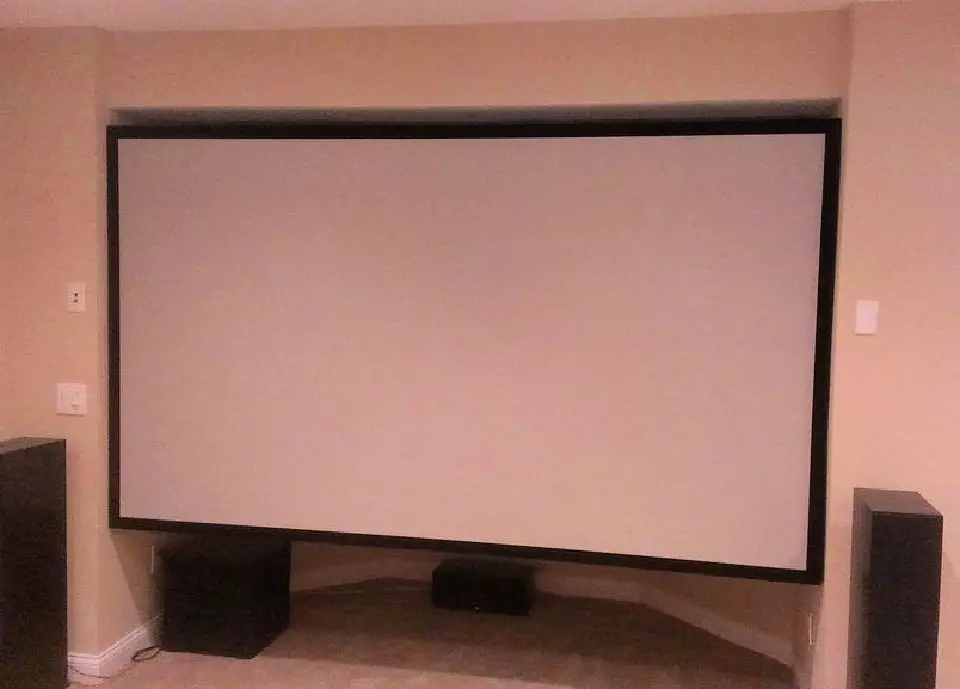
Building a Projector Screen
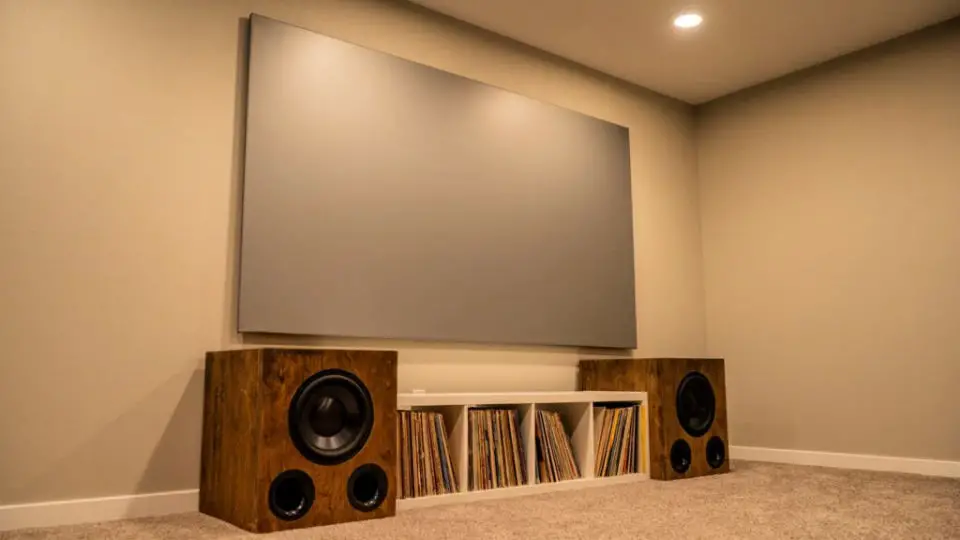
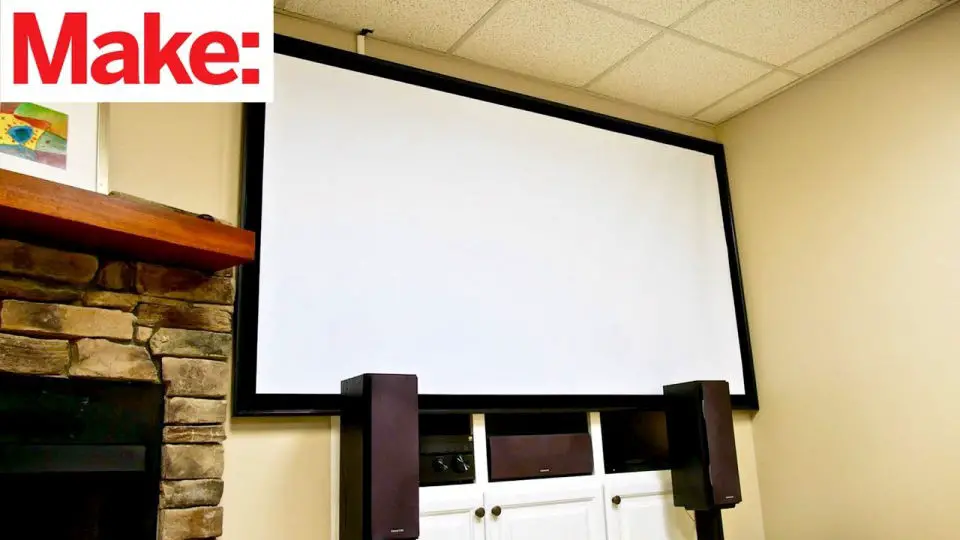
Transform your movie nights into an immersive experience with this exceptional projector screen. By incorporating Ambient Light Rejecting (ALR) technology, it effortlessly blocks external light interference, ensuring a distraction-free viewing experience for your favorite films or video games.Built to last, this fixed-frame projector screen boasts a sturdy wooden frame and durable aluminum surface, making it the perfect addition to any home theater setup. With its smooth finish and user-friendly installation process, you can enjoy an optimal viewing experience without breaking a sweat or denting your wallet.Whether you’re a film enthusiast, gamer, or simply looking to elevate your entertainment space, this projector screen is the ultimate game-changer. It’s time to take your movie nights to the next level – set up your private theater today and discover a world of cinematic bliss!
Portable DIY Projector Screen With Epson Projector
Imagine being able to set up a movie theater in your own backyard, effortlessly hosting large groups of family and friends for an unforgettable night under the stars. With a portable DIY projector screen and Epson projector, you can create an immersive cinematic experience without sacrificing space or breaking the bank.
This innovative product is designed with convenience in mind, allowing you to easily store it during the winter months, making it a practical choice compared to traditional screens that consume a significant amount of space. Plus, by opting for this DIY projector screen, you’ll save a substantial amount of money compared to hiring a real projector screen for outdoor parties.
Say goodbye to compromising on quality and hello to an unparalleled movie experience. Order today and start hosting memorable movie nights with ease!
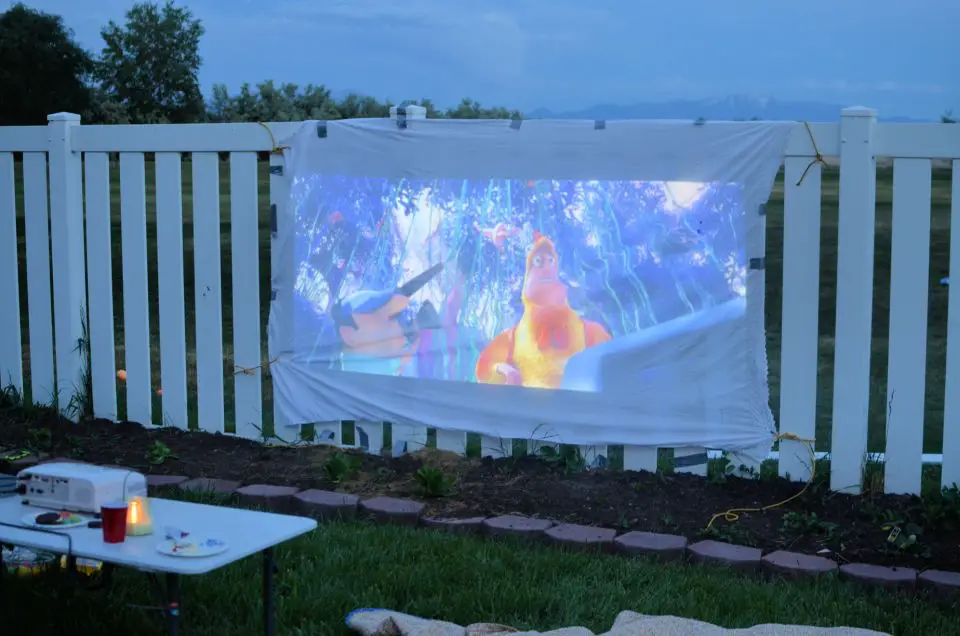
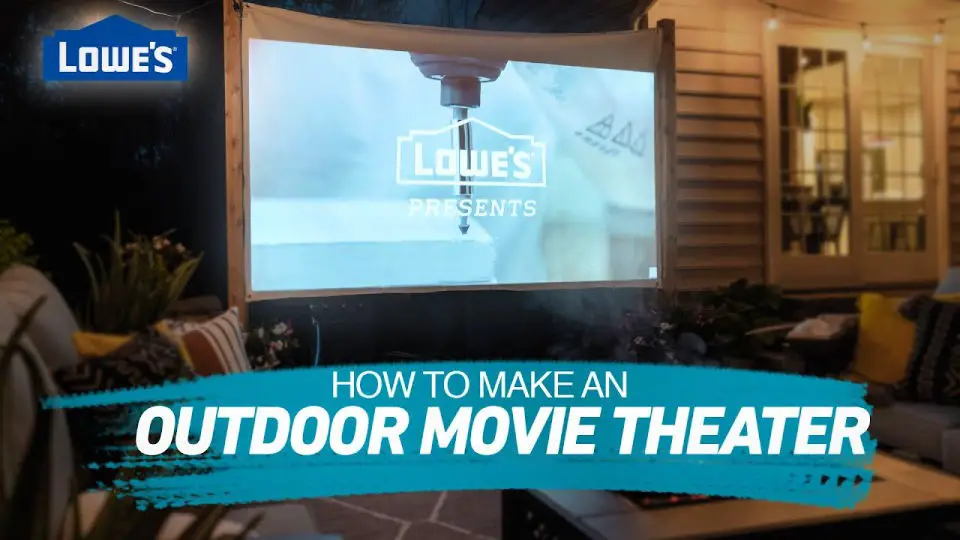
Making an Outdoor Movie Theater and Projection Screen
Transform your summer BBQ into an unforgettable movie night without breaking the bank. In under an hour, you can create a DIY projection screen that will be the talk of the party. By repurposing basic supplies like PVC pipe, black fabric, white paint, and wood screws from your local hardware store, you’ll have everything you need to bring the magic of the movies to your backyard. Add your personal touch of creativity and get ready for a night filled with friends, family, and laughter that you’ll always treasure.
Simple DIY Outdoor Movie Screen
Create a magical outdoor movie night experience with this simple yet creative project. Without breaking the bank, you can set up an affordable and easily stored DIY movie screen that will be a hit year after year. All you need is a basic white sheet or tarp and some minimal supplies to get started. Follow our straightforward guide to transform your backyard into a cozy haven where friends and family can gather to enjoy their favorite films under the stars.
How to Build an Outdoor Movie Screen
Immerse yourself in a cinematic experience from the comfort of your own backyard. This innovative outdoor movie screen is designed for effortless assembly and offers an unparalleled level of entertainment for family gatherings, video game nights, or special events. With its adaptable size, you can tailor it to fit any space in your yard, ensuring an unforgettable movie night that rivals the big screen! The exceptional picture quality and crystal-clear sound ensure everyone remains captivated from a distance, making this DIY project an ideal way to create lasting memories with loved ones.
How to Make and Hang a Projector Screen
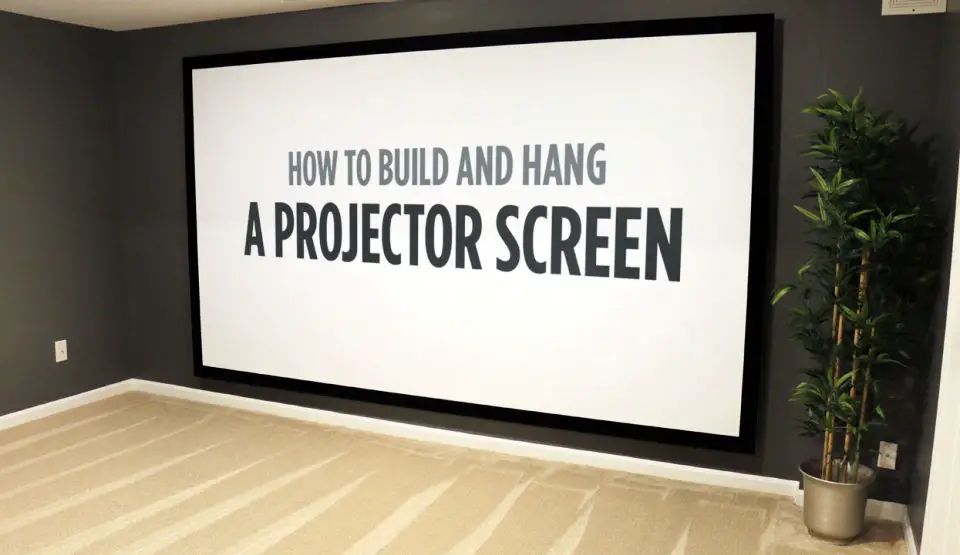
Are you ready to unleash your creativity? Crafting a projector screen is an enjoyable and surprisingly straightforward process that can be completed with minimal supplies. This comprehensive step-by-step guide will walk you through the creation and installation of your very own DIY projection screen, perfect for those cozy movie nights with friends or family. Whether you’re a novice looking for a budget-friendly solution or an experienced DIY enthusiast seeking the ideal size and shape, this straightforward tutorial has got you covered. From selecting the right materials to measuring and constructing the frame, as well as securing it safely on any wall – by the end of this guide, you’ll be all set to start enjoying movies from your brand-new projector screen.
DIY Outdoor Movie Projector Screen

Transform any outdoor space into an ultimate entertainment zone for the whole family by creating a unique projector screen using just a few simple steps and no special tools or materials required. Whether you’re looking for a fun activity to enjoy with your kids or want to host a movie night at home, this DIY project is perfect for turning your backyard or patio into a cozy cinema experience.
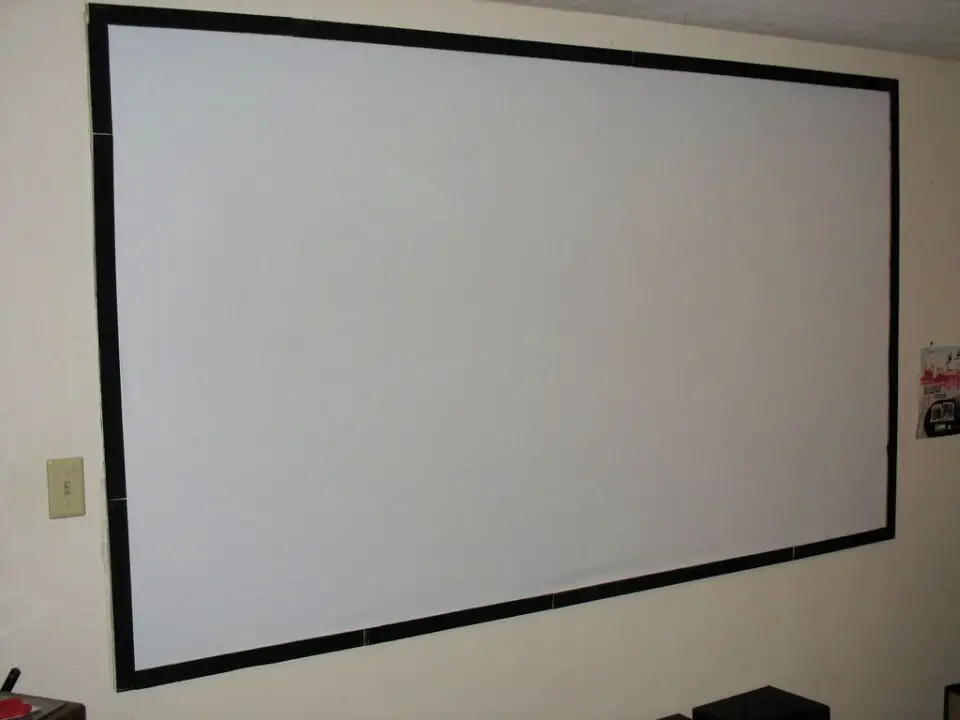
Handmade Wall Mount Projector Screen
Transform any room into a cinematic haven with this innovative DIY wall mounts projector screen project. With minimal materials and basic tools, you can create an impressive custom projector screen that’s not only functional but also visually stunning. The best part? It’s surprisingly easy to make! Just gather some PVC pipe, fabric, glue, screws, and basic equipment like a drill and saw, and you’re ready to start building. As the project takes shape, you’ll be proud of your handiwork, knowing that you’ve created something truly unique and special. So why not get creative and craft an unforgettable display? Start with these simple supplies today and embark on this rewarding DIY adventure!
Make Your Own Black Projector Screen at Home
Looking to elevate your home theater game without breaking the bank? Consider crafting a DIY black projector screen for an affordable and impressive upgrade. This simple yet effective project requires minimal effort and easily accessible materials from most hardware stores, all while yielding exceptional projection quality at an unbeatable price point under $30! The matte black surface optimizes contrast levels, ensuring crystal-clear visuals that will leave you wanting more. Moreover, the increased viewing angle enables a larger group to enjoy the cinematic experience without sacrificing image clarity. Imagine the thrill of your next movie night amplified by this clever DIY solution!
How to Make a Projector Screen
Want to bring the thrill of the cinema into your own home without breaking the bank? A DIY projector screen is the answer. With a few simple materials and some basic know-how, you can create a high-quality screen that will transport you to a world of cinematic wonder. Our step-by-step guide takes you through every stage of construction, from measuring out the dimensions to mounting it securely on your wall or ceiling. And the best part? You’ll be saving money by opting for a homemade solution rather than investing in an expensive commercial one. So why settle for anything less? Get creative and build an amazing DIY projector screen today that will elevate your movie nights to new heights!
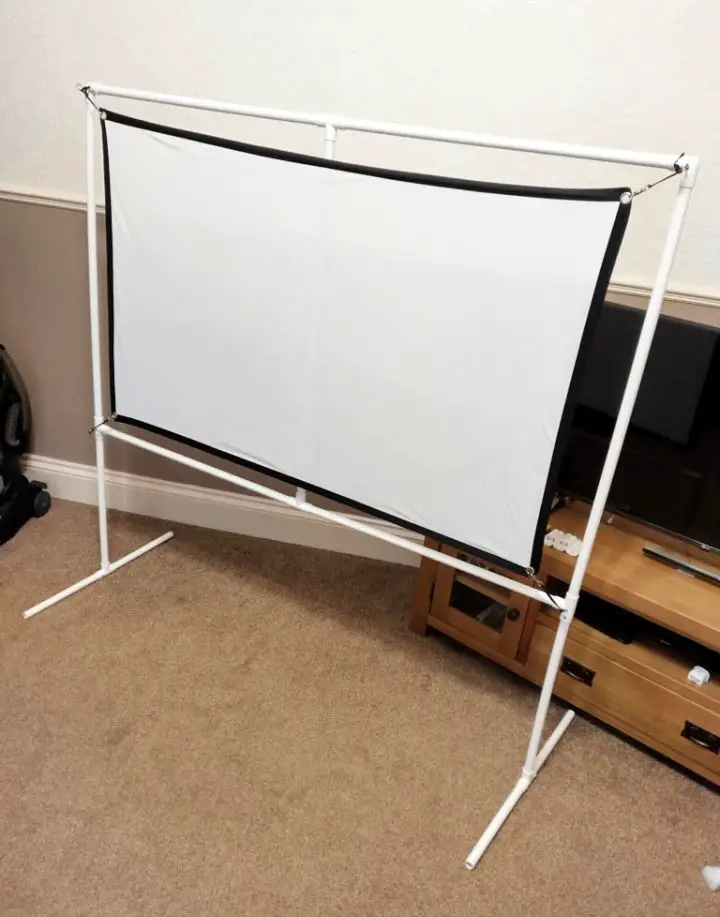
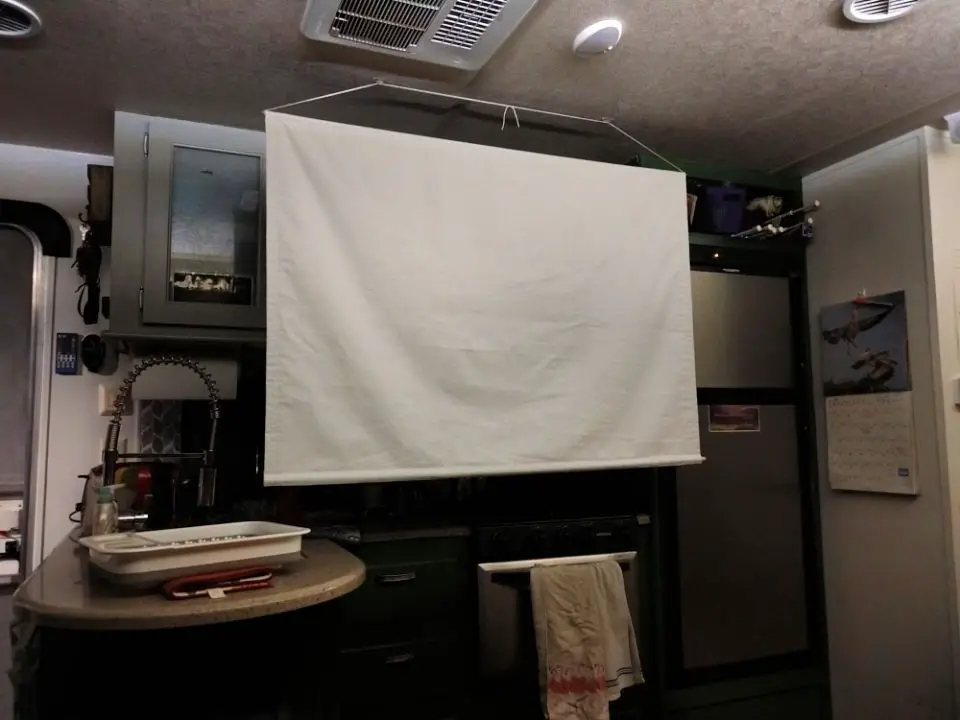
DIY Roll-Up Projector Screen for Less Than $20
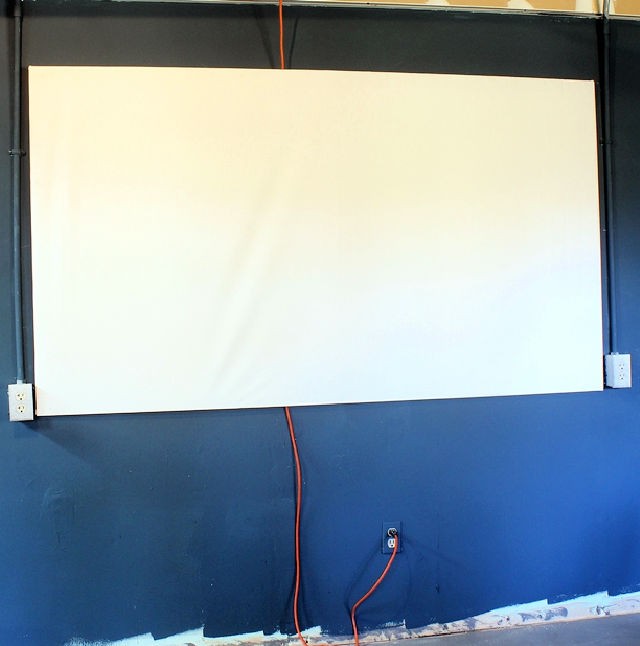
Transform your living space into a cozy movie theater with a DIY roll-up projector screen for under $20. This budget-friendly solution is perfect for kids who are avid gamers and TV enthusiasts alike. With basic materials and straightforward instructions, even the most inexperienced crafter can create this lightweight screen in no time. Simply gather PVC pipe or wood dowels, white canvas material, strong craft glue, scissors, and essential tools like a drill and saw if using wood dowels. These materials are readily available at local hardware stores or online marketplaces, ensuring that you have everything you need to complete the project without breaking the bank. Start creating your projector screen today, whether indoors or under the stars in your backyard.
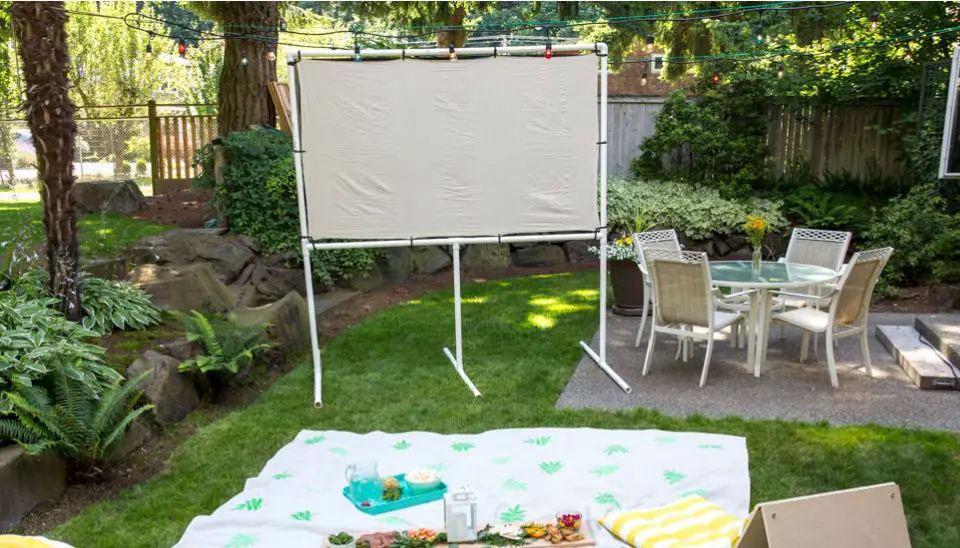
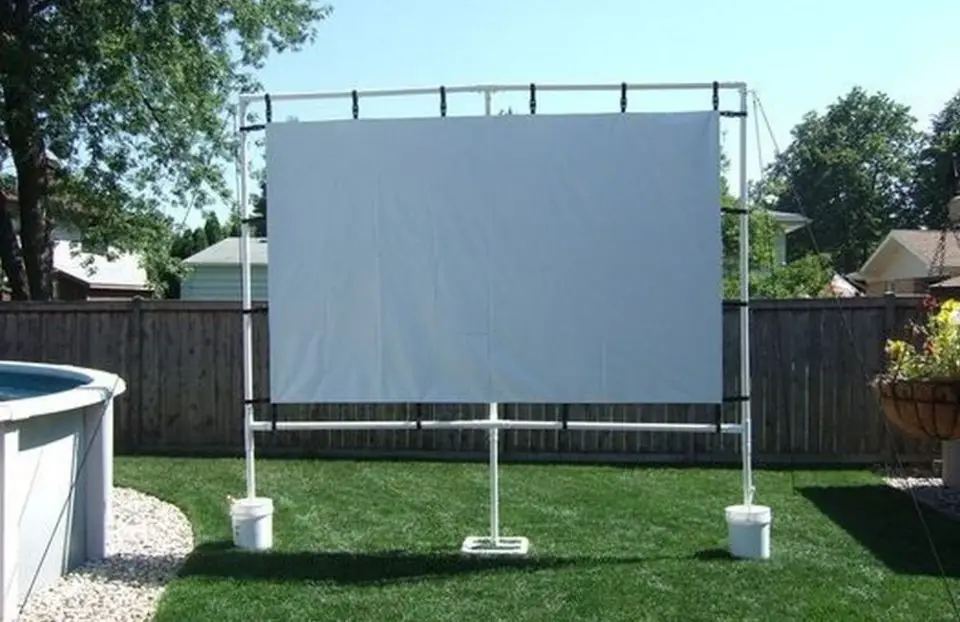
Inexpensive DIY Collapsible Projector Screen Frame
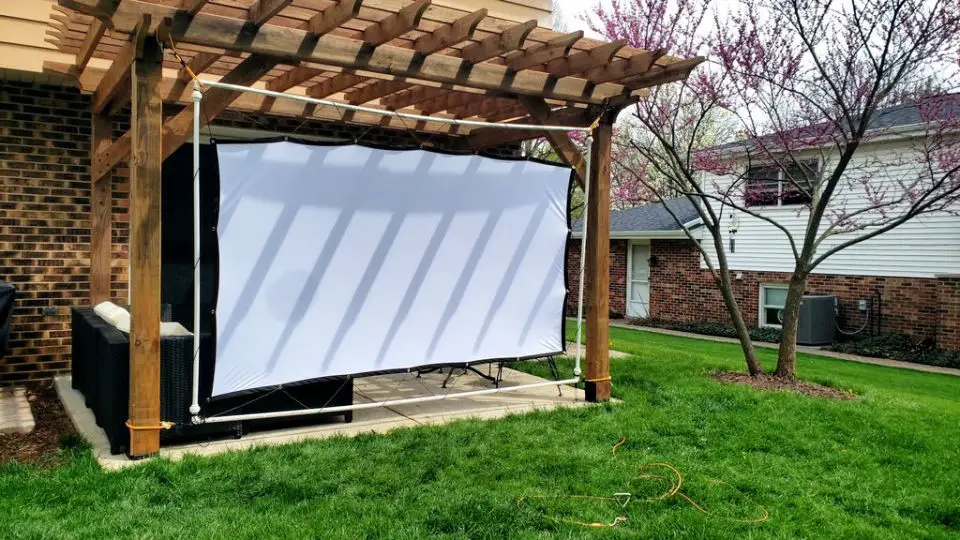
Transforming your backyard into a cozy outdoor cinema is now more accessible than ever. Create a unique movie experience with a DIY collapsible projector screen frame that’s surprisingly affordable. This clever contraption uses 3/4″ PVC plumbing parts, which can be easily assembled to create the perfect pergola-mounted screen. Not only does it require minimal effort, but it also won’t put a dent in your wallet. With this Inexpensive DIY collapsible projector screen frame, you can turn ordinary summer nights into extraordinary memories by hosting an outdoor movie night with friends and family. Enjoy the thrill of the big screen under the stars, accompanied by delicious snacks, crunchy popcorn, and endless laughter.
Make Your Own Projector Screen
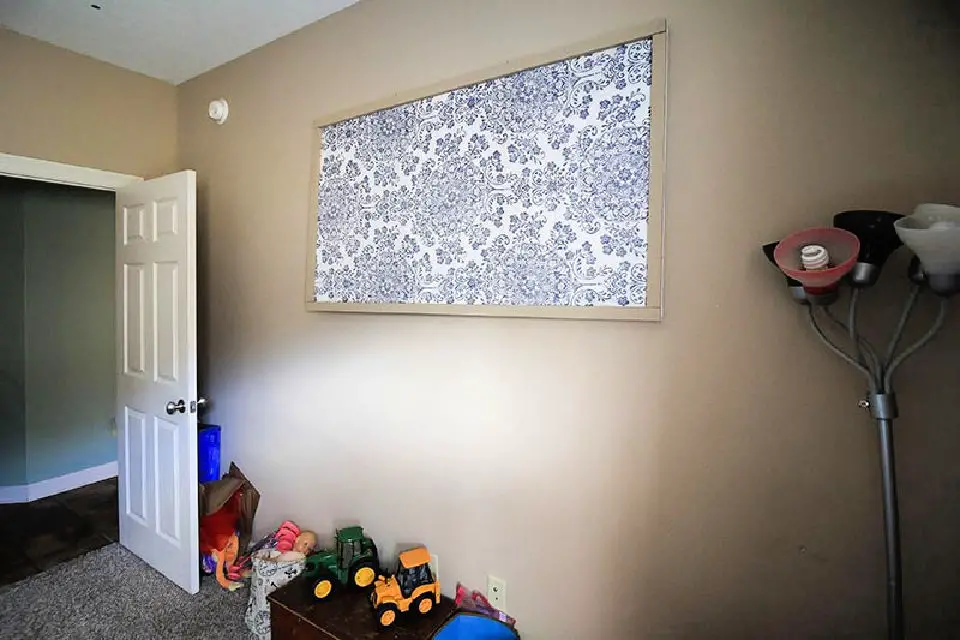
In just a couple of hours and with minimal materials, you can create an impressive double-sided projection screen that transforms any spare room into a cozy movie night haven or an exciting game night setup. With its ease and affordability, this DIY project is sure to delight everyone involved. Imagine snuggling up to watch your favorite sports games, blockbuster movies, or classic cartoons on your very own custom-made screen – it’s an experience you won’t forget. From gathering the necessary supplies around the house to assembling the screen in mere minutes, this project is surprisingly quick and straightforward. So why wait? Take out two hours of your day and get creative with your DIY projector screen today!
Build Your Own 100″ Projector Screen
Transform any movie night into a cinematic experience without breaking the bank by setting up a high-quality viewing setup with this versatile projector screen. Perfect for film enthusiasts looking to recreate the authentic atmosphere of a movie theater from the comfort of their own home, this DIY guide makes it easy to assemble and install your projector in no time. Enjoy your favorite films in vibrant colors and crisp resolution, free from the constraints of expensive ticket prices or leaving your living room. Plus, its durable construction ensures long-lasting performance without putting a strain on your wallet. Get ready for an unforgettable experience with our reliable 100″ projection screen that delivers stunning visuals and an immersive atmosphere.
Easy to Make Projector Screen
Transform your home theater experience without breaking the bank by creating a DIY projector screen. By leveraging simple framing techniques, you can design and build a customized viewing area that will leave your friends in awe. This cost-effective approach eliminates the need for expensive ready-made solutions, allowing you to get creative with the look of your screen while still enjoying professional-quality projection visuals.
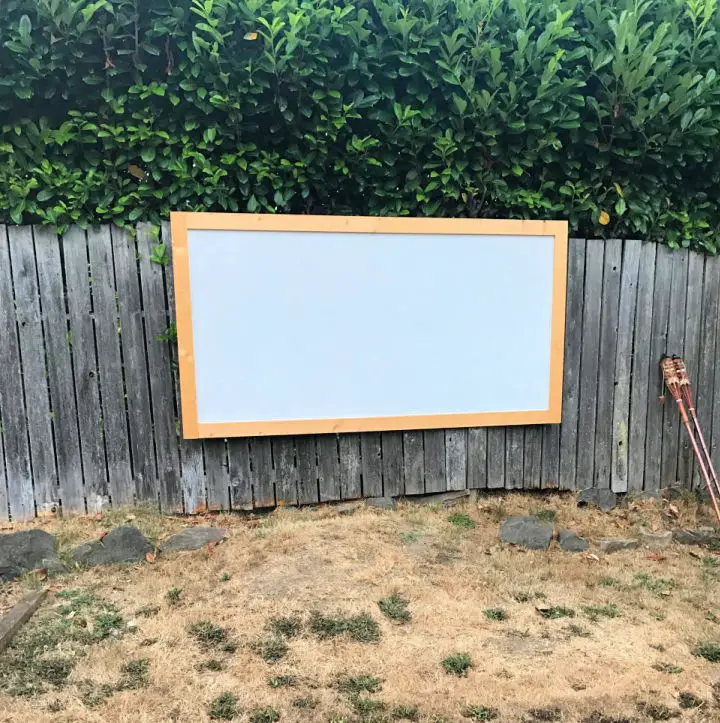
How to Build a Projector Screen for Under $30
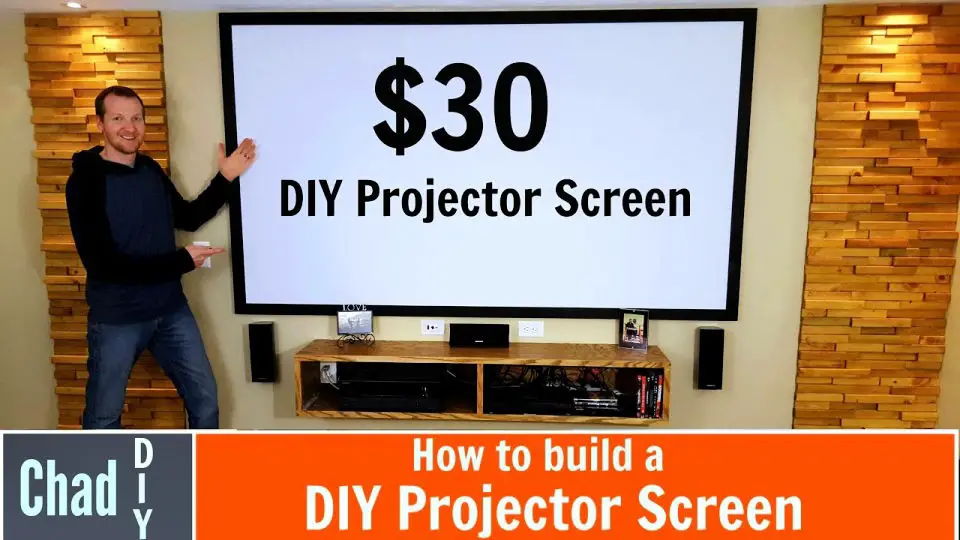
Transform your home theater setup into a cinematic experience like no other with this affordable projector screen, all for under $30. Built around a sturdy wood frame and high-quality blackout cloth, this innovative DIY creation not only looks impressive but also delivers crystal-clear visuals of your favorite films. With its ease of assembly and unbeatable price point, you can now enjoy the same level of quality found in professional movie theaters from the comfort of your own home, without breaking the bank.
How to Make an Outdoor Movie Screen
Transform your backyard into a cozy cinematic haven with this DIY outdoor movie screen! No longer must you compromise on quality time with loved ones, stuck in the constraints of an indoor theater experience. With this handmade masterpiece, you can transport your family to a world of wonder and excitement from the comfort of your own lawn chairs. And when the movie’s over, get creative – use the same screen as a planter or add some warm lighting for a unique ambiance. Bring the magic of the movies to life in your very own backyard this summer with a one-of-a-kind outdoor movie screen.
Conclusion:

Ultimately, crafting a DIY projector screen offers unparalleled opportunities for personalization and budget-friendly solutions. By carefully choosing materials, ensuring precise sizing, and incorporating thoughtful enhancements, you can transform your viewing experience. With the added benefits of troubleshooting tips and regular maintenance, your homemade screen will provide countless hours of entertainment. Drawing inspiration from the 25 unique DIY projector screen ideas presented in this article, start your creative journey today.
