As parents, we’re always on the lookout for ways to ignite our children’s imagination and creativity during their daily play. One simple yet effective way to do this is by creating a DIY play kitchen that can provide hours of imaginative play and learning experiences. Not only do these play kitchens nurture their creative expression but also play a vital role in their overall development. From fostering social skills to enhancing motor abilities, the benefits are extensive and varied.
While building a play kitchen may seem like a daunting task at first, with the right guidance on safety, materials, and step-by-step instructions, it becomes an achievable and rewarding project for you and your child. Furthermore, understanding the educational benefits and incorporating elements that promote creativity, communication, and life skills can significantly enhance the value of a play kitchen in your child’s growth.
Are you excited to transform simple materials into a wonderful play area for your little ones? Let’s dive into the heart of these creative projects and discover how to make your child’s playtime both fun and beneficial.
Safety and Materials Guide for DIY Play Kitchens
When embarking on a DIY play kitchen project with your child, it’s essential to prioritize safety while selecting materials and designing the structure. Here are some crucial considerations to ensure a safe and enjoyable experience:For the main structure, opt for solid wood or high-quality plywood, avoiding treated woods that may contain harmful chemicals. When it comes to paint, choose water-based, non-toxic options with child-safe certifications. For adhesives, select non-toxic, solvent-free glues, preferably water-based.In terms of tools and hardware, ensure all screws and fasteners are securely tightened and inaccessible to children. Use safety hinges on doors to prevent pinched fingers, and opt for smooth, rounded knobs and handles instead of sharp-edged ones.To avoid hazards, be mindful of small parts that could pose a choking risk. Ensure any buttons or beads used as stove knobs are firmly attached. Sand down any sharp edges or corners to prevent cuts and scrapes. Finally, make sure the play kitchen is stable and won’t tip over easily; consider anchoring it to a wall if necessary.In addition to prioritizing safety, consider sustainability by repurposing or upcycling materials for parts of the kitchen. Old furniture or kitchenware can be transformed into play kitchen elements. Look for sustainably sourced wood and eco-friendly paints and finishes to minimize your environmental impact.By balancing creativity with caution, you’ll create a safe and enjoyable play kitchen that will provide hours of fun for your child.
Educational Benefits of Play Kitchens
Play kitchens offer a unique opportunity for children to develop essential skills, going beyond mere playtime. In fact, these interactive sets have a profound impact on a young mind’s cognitive and motor abilities. By engaging with play kitchens, kids can refine their imaginative thinking, problem-solving prowess, and fine-tune their dexterity as they manipulate various props and tools. This immersive experience enables children to explore different roles and scenarios, fostering creativity, social skills, and emotional intelligence. As they navigate the world of pretend play, youngsters build confidence in their abilities, develop a sense of responsibility, and cultivate a deeper understanding of cause-and-effect relationships.
Fostering Creativity and Imagination
The innate desire for children to imitate grown-ups is a well-documented phenomenon, and a play kitchen provides the perfect conduit for this natural inclination. By allowing kids to create their own miniature culinary experiences, parents can nurture their child’s creativity and foster a sense of imagination, as they explore and experiment with various roles within their make-believe world.
Enhancing Language and Communication
When children immerse themselves in imaginative play, a natural byproduct is the expansion of their linguistic repertoire and enhancement of their ability to convey thoughts and ideas. As they engage with pretend scenarios involving cooking and culinary pursuits, they are exposed to a wealth of new words and phrases that further accelerate their language development.
Developing Social Skills
While traditional toys can spark imagination and creativity, play kitchens offer a unique opportunity for young minds to develop essential social skills. By engaging in role-playing scenarios, kids are able to mimic real-life situations, fostering an understanding of cooperation, sharing, and empathy – all crucial components of building strong relationships with others.
Teaching Life Skills
Children’s play is often overlooked as a means of learning, but it has the power to impart crucial life skills in a manner that’s both enjoyable and practical. By engaging in everyday tasks like cooking, cleaning, and organizing, young minds develop essential abilities while having a blast. The process allows them to internalize valuable lessons that can be applied beyond their childhood years, making it an invaluable aspect of their overall development.
Boosting Motor Skills
Developing young children’s fine motor skills is essential for their overall development, particularly when it comes to tasks that require precision and dexterity. One effective way to do this is by engaging them in play with small utensils and pretend food items. This type of activity helps refine their grasp, manipulation, and coordination, all of which are vital for activities such as writing, drawing, and other detailed tasks.
Encouraging Numeracy and Cognitive Development
By introducing culinary activities to your child’s daily routine, such as counting food items, measuring ingredients, and following recipes, you can significantly boost their numeracy and cognitive skills. Moreover, incorporating a play kitchen into your child’s playtime offers a multifaceted educational tool that supports their comprehensive development. To maximize the learning potential of this activity, ensure that it remains engaging and tailored to your child’s age and interests, thereby fostering a deeper understanding of various mathematical concepts.
How to Make a Cardboard Kitchen for Kids
Fostering creativity and bonding with kids has never been easier than building a cardboard kitchen together. By following this step-by-step guide, you’ll learn how to craft a unique and engaging DIY kitchen set using readily available cardboard materials. This project is inspired by the innovative ideas of Salih Art And Tech, making it an exciting activity for children to enjoy.
Materials You Need
A comprehensive crafting kit can be assembled with a variety of essential tools and materials. For instance, large cardboard boxes provide an ideal base for creative projects. To cut and shape the box, you’ll need a reliable ruler, pencil, and marker. A box cutter or scissors are also necessary to make precise cuts. For added durability and structural integrity, hot glue guns and glue sticks can be employed. When it comes to adding a pop of color, paint in your preferred hues can be used to transform the box. Finally, additional decorations such as stickers, fabric, and other embellishments can be used to further customize the project.
Step-by-Step Instructions
To create an engaging cardboard kitchen for kids, follow this simple DIY guide:
Gathering Materials: Collect large cardboard boxes to use as the foundation of your kitchen. You’ll need enough material to build various components like a fridge, oven, cupboard, and drawers.
Designing the Kitchen: Use a pencil and ruler to sketch out the dimensions of each component on the cardboard. Consider the height and size appropriate for your child.
Assembling the Components:
Cutting Out Shapes: Carefully cut out the shapes using a box cutter or strong scissors. Always cut on a safe surface, keeping your hands away from the blade’s path.
Building the Base: Start with the base of your kitchen set – usually the cupboard or oven. Use hot glue to piece together the sides, bottom, and top, ensuring it’s sturdy. Then, assemble other components like the fridge, drawers, and any additional storage you wish to add.
Adding Finishing Touches:
Painting: Once assembled, paint your kitchen set in colors your child loves. This might require a couple of coats for a vibrant finish.
Hardware and Features: For knobs and handles, use cut-out cardboard pieces or real hardware. Painted cardboard pieces can make good imitation switches and oven dials. Add decorations like stickers, fabric curtains, or other personal touches to make the kitchen unique.
Final Preparations:
Installing Functional Elements: If you’re adding any functional elements like lights or a magnetic lock, install these once the paint has dried.
Allowing it to Dry Completely: Before letting your child play with the kitchen set, ensure everything is thoroughly dry and securely glued.
Safety Tips
When working with potentially hazardous materials such as box cutters and hot glue guns, it’s crucial to prioritize safety above all else. To minimize risks, take a moment to thoroughly inspect the cardboard you’re using, ensuring that there are no sharp edges or other potential hazards. Additionally, make it a habit to regularly inspect your kitchen setup for any signs of wear and tear, taking prompt action to address any issues that may arise.
Enjoy and Play
As you bring your child into the world of imaginative play in the kitchen, witness their creative juices flow freely. The kitchen becomes a dynamic canvas where their imagination knows no bounds, unfolding into vibrant tales and adventures.
Video Tutorial
Watch Salih Art And Tech’s YouTube tutorial on how to create a DIY cardboard kitchen for kids. This comprehensive guide offers a hands-on approach by showcasing each step in a video format, making it easier to understand and replicate the process. The tutorial pairs perfectly with this written guide, providing a visual representation of the techniques discussed. By following along, you can make memories and have fun with your kids while creating a special cardboard kitchen. Take inspiration from Salih’s creative project for his daughter and start building today!
Customization Ideas for Your DIY Play Kitchen
To elevate a standard DIY play kitchen into an unparalleled play experience, it’s essential to infuse it with personal touches that reflect your child’s unique interests and personality. By incorporating thoughtful details and creative flourishes, you can transform the space into a one-of-a-kind haven for imaginative play.
Choose a Theme
When crafting a bedroom for your child, begin by identifying a theme that aligns with their unique interests. This could be a rustic farmhouse setting, a sleek and modern design, or even an enchanting fairy-tale cottage atmosphere. A theme serves as a guiding force in selecting colors, patterns, and accessories, helping to create a cohesive and inviting space that reflects your child’s personality.
Color It Beautiful
When it comes to customizing your space, paint plays a vital role in setting the tone and atmosphere. From vibrant and cheerful hues to softer, more subdued tones, you can choose from an array of colors that align with your desired theme. To ensure a safe and enjoyable experience for all occupants – especially children – opt for non-toxic, child-safe paint alternatives.
Get Creative with Backsplashes
Transforming the look of your kitchen with a whimsical backsplash is an exciting prospect. One way to achieve this is by leveraging adhesive tiles, statement wallpaper, or even bespoke hand-painted art pieces that can serve as a visual anchor and draw attention.
Add Functional Elements
Integrating functional design elements, such as hooks for hanging utensils or a compact shelf for storing spices and ingredients, can have a significant impact on the overall aesthetic of your kitchen while also fostering a sense of organization and structure. By incorporating these features, you’ll not only create a visually appealing space but also promote good habits like keeping frequently used items within easy reach.
Personalize with Accessories
To further enhance the setup, consider incorporating small-scale cooking accessories such as tiny pots, pans, and kitchen tools. These can be sourced from toy stores or creatively repurposed from everyday objects found around the house.
Interactive Features
To elevate the interactivity of your content, incorporate sensory-stimulating elements that encourage user engagement. Consider incorporating moving parts such as rotating dials or sliding panels, or auditory cues like chimes or sound effects. For instance, you could design a interactive experience with a door that swings open, or a button that makes a satisfying click when pressed.
Incorporate Educational Aspects
To create a play kitchen that doubles as an effective learning tool, incorporate elements that promote cognitive development. This can be achieved by incorporating props that mirror real-life scenarios, such as a clock for teaching time concepts, a menu board for practicing writing skills, or play money for developing math skills. By focusing on these details, you can design a play kitchen that not only sparks creativity but also provides a valuable learning experience. When designing the play kitchen, prioritize simplicity, safety, and imagination-fostering capabilities to ensure it meets your child’s unique needs.
Troubleshooting Common Issues in DIY Play Kitchens
As you embark on building your very own DIY play kitchen, it’s only natural to encounter a few snags and setbacks. To ensure that your creative endeavor stays on track, we’ve compiled a list of the most common issues that may arise during the construction process, along with some expertly curated tips and tricks for overcoming them. With these troubleshooting techniques at your disposal, you’ll be well-equipped to tackle any unexpected challenges that come your way, resulting in a play kitchen that’s both functional and fantastically fun.
Loose Parts and Fixtures
As time passes, the small but crucial components that hold your kitchen together can begin to show signs of wear and tear. Screws and hinges, in particular, may start to loosen, causing doors to sag or parts of the cabinetry to wobble precariously. Fortunately, there are simple solutions to address these issues. For instance, regular tightening of loose screws can work wonders, ensuring that everything remains securely in place. Additionally, applying wood glue during the initial assembly process can help fortify joints and prevent them from coming undone over time. And if a door’s hinges have seen better days, replacing them with sturdy new ones can restore its smooth operation. By taking proactive steps to maintain and repair these often-overlooked components, you can keep your kitchen functioning smoothly for years to come.
Peeling or Chipped Paint
When a well-loved play kitchen displays signs of wear, such as peeling or chipped paint, don’t worry – it’s an easy fix! The first step is to gently sand the affected area to smooth out any rough edges. Next, apply a fresh coat of non-toxic, child-safe paint to restore its former glory. For those pesky minor scratches and chips, keep a small touch-up kit on hand for quick repairs. With these simple solutions, your play kitchen can look like new again.
Sticking Drawers or Doors
When it comes to playing, stuck drawers and doors can be a major frustration for young children. To help overcome this issue, there are a few simple solutions worth trying. For instance, applying a silicone-based lubricant to the drawer tracks can work wonders in keeping things running smoothly. In some cases, the problem may be due to warping or swelling of the wood caused by changes in humidity. If this is the case, a quick sanding down of the affected edges should help to adjust the fit and get everything moving freely once more.
Adhesive Failure
When self-adhesive tiles or wallpaper begin to peel away from surfaces, it’s essential to address the issue promptly to maintain the integrity of your DIY play kitchen. Two effective solutions include reapplying adhesive by thoroughly cleaning the surface and applying a strong new bond. Alternatively, you could consider swapping out materials for more durable options like laminates or painted designs. By prioritizing regular maintenance and addressing any problems as they arise, you’ll be able to keep your play kitchen in top condition, ensuring hours of imaginative play for your child without worrying about safety concerns.
Budget-Friendly Tips for DIY Play Kitchens
Creating a DIY play kitchen that won’t put a dent in your wallet is entirely possible. By leveraging imagination and practicality, you can construct a charming play area without sacrificing quality or style. To get started, consider the following thrifty approaches:
Use Recycled Materials
As you go about your daily routine, take note of the various household items that can be given new life by being repurposed. Consider, for instance, old furniture pieces such as cabinets, tables, and shelves. These can be cleverly transformed into a creative play structure, like a kitchen setup, perfect for sparking imaginative play in children.
Shop Secondhand
When on the hunt for eco-friendly finds, consider scouring local thrift stores, participating in neighborhood garage sales, or browsing online marketplaces like eBay or Craigslist for gently used kitchenware and furniture. These hidden gems can be transformed through upcycling techniques to breathe new life into your space.
Simplify the Design
By stripping away unnecessary complexity, you can achieve a more streamlined and cost-effective design. Concentrate on the fundamental elements that matter most, such as a functional cooking station, a reliable sink, and ample storage solutions.
DIY Accessories
Upcycling handcrafted items like miniature food and home decor pieces from repurposed fabric or felt is not only an engaging creative pursuit, but also a practical way to reduce expenses. By transforming scraps into unique items, individuals can develop their crafting skills while saving precious resources.
Collaborate on the Project
Consider enlisting the help of those closest to you by involving friends and family in various aspects of the building process. Not only can they provide valuable resources, such as donating materials, but also share their unique skill sets that may come in handy during construction. By collaborating with loved ones, you’ll not only save time and money, but also strengthen your relationships through shared experiences.
Be Resourceful with Tools
Embracing resourcefulness, consider borrowing tools you don’t have rather than investing in new ones. Many communities boast tool libraries or rental options, allowing you to tap into shared resources without breaking the bank.
By adopting this mindset, you can craft a charming and functional play kitchen that fosters imaginative play without putting a strain on your finances. The key is to create a space for creative expression, not a replica of a high-end commercial kitchen. Instead, focus on keeping things fun, safe, and budget-friendly.
Maintenance and Upkeep for DIY Play Kitchens
To keep your DIY play kitchen in top condition, it’s essential to perform regular maintenance and upkeep. This involves daily cleaning, deep cleaning, sanitizing, inspecting for wear and tear, updating and replacing parts, and organizing and storing the play kitchen.
Cleaning and Sanitizing: Start by wiping down surfaces with a damp cloth to remove crumbs and spills on a daily basis. For deeper cleaning, mix a mild soap with water once a week to thoroughly clean all areas. To sanitize the play kitchen without using harsh chemicals, use a vinegar and water solution.
Checking for Wear and Tear: Regularly inspect the play kitchen for any loose parts, sharp edges, or chipped paint that could pose a risk. Tighten any screws or fasteners to prevent wobbling or parts coming off. If the paint is chipping, touch it up with the same non-toxic paint used initially.
Updating and Replacing Parts: As your child grows, consider replacing worn-out accessories like pots, pans, and utensils periodically. You can also upgrade features to keep the kitchen interesting and engaging for your child.
Organizing and Storage: Teach your child the importance of putting away accessories after use by leading by example. Store the play kitchen in a dry area to prevent warping or mold from developing. By following these simple steps, you can ensure that the play kitchen remains a beloved and safe fixture in your child’s playtime for years to come.
Advanced Features for DIY Play Kitchens
When it comes to elevating your DIY play kitchen from a basic play space to an immersive and educational environment, there are several ways to do so. By incorporating cutting-edge features, you can create an interactive hub that fosters creativity, imagination, and learning. To get started, consider adding some advanced elements such as clicking knobs that mimic the sound of real appliances, electronic stovetop lights that simulate a cooking experience, or even a working clock to teach time-telling skills. You could also introduce a cash register with play money to educate your child about basic math and financial management. For a more sensory-rich experience, add panels with varying textures, like faux fur or sandpaper, to stimulate touch, or incorporate sound chips that produce kitchen-related noises such as boiling water or a timer bell. If you really want to push the boundaries, consider adding realistic features like running water in the sink or a light-up oven that activates when the door is opened. Finally, ensure your creation is both sturdy and safe for your child’s use by using non-toxic materials and robust construction methods.
Frequently Asked Questions About DIY Play Kitchens
Embarking on a DIY play kitchen project can be an exhilarating experience. To ensure a smooth journey, let’s address some frequently asked questions upfront. For instance, have you ever wondered where to begin or what materials to use? This comprehensive guide aims to provide clarity and confidence as you bring your creative vision to life.
What materials do I need to build a DIY play kitchen?
To embark on this creative endeavor, you’ll require a solid foundation of essential supplies. This includes plywood, paint, screws, and a selection of handy tools like saws, drills, and sandpaper. For those looking to stretch their budget further, consider repurposing materials from your local recycling centers – a clever way to give new life to old items while keeping costs in check.
How can I ensure the play kitchen is safe for my child?
When it comes to crafting a safe and welcoming environment for children, the materials you use can make all the difference. Ensure that any materials or paints you choose are non-toxic and child-safe. Additionally, take the time to properly prepare each surface by sanding down any rough edges and double-checking that all screws are tightened securely, leaving no room for accidents or injuries.
Can I make a play kitchen that’s durable and long-lasting?
While durability is often a concern when it comes to children’s toys, a well-built play kitchen can easily endure the test of time. The key to its longevity lies not only in the quality of materials used but also the sturdiness of construction techniques employed.
What are some budget-friendly tips for building a play kitchen?
Opt for repurposed or pre-owned items as the foundation for your creative project, embracing a philosophy of reuse over replace. This approach not only reduces waste but also fosters innovation by encouraging you to think creatively about reimagining existing materials. Furthermore, simplifying your design and opting for eco-friendly solutions can significantly minimize your expenses.
How can I customize the play kitchen for my child?
Elevate your kitchen’s ambiance by selecting a distinctive theme that reflects your personal style. Vibrant hues can instantly revitalize the space, while a stunning backsplash adds depth and visual interest. To further personalize the area, incorporate thoughtfully chosen accessories that reveal your character, thereby transforming the kitchen into a true reflection of your unique taste.
Are there any educational benefits to having a play kitchen?
The versatility of play kitchens extends beyond mere entertainment, as they can contribute to a child’s overall development in multiple areas. For instance, imaginative play facilitated by these toys can foster creative thinking, improve communication through language development, and even enhance social skills. Furthermore, the hands-on nature of play kitchens enables children to learn essential life skills, such as cooking and meal preparation, which can translate to real-life situations. Moreover, motor skills are developed through the manipulation of play food and utensils, while cognitive development is encouraged by problem-solving and critical thinking exercises.
How do I maintain and clean the play kitchen?
To maintain a clean and healthy environment, establish a routine that involves wiping down surfaces on a regular basis. For more thorough cleaning, opt for gentle soap-based products. When it comes to sanitizing, turn to non-toxic solutions that are effective without harming the environment.
What should I do if parts of the play kitchen become loose or damaged?
To maintain your kitchen’s optimal functionality and aesthetic appeal, make it a habit to conduct regular inspections, focusing on areas prone to wear and tear. Start by addressing any loose screws or fittings, ensuring they’re securely tightened to prevent damage or injury. Additionally, take the opportunity to touch up paint or other finishes as needed, preserving the overall appearance of your kitchen.
Can I add advanced features to a DIY play kitchen?
To take your home decor to the next level, consider incorporating innovative features that invite interaction. Think about installing clicking knobs, LED lighting, or even adding running water elements. These thoughtful additions can create an immersive atmosphere that engages visitors and adds a unique touch to your space.
Where can I find inspiration and plans for building a DIY play kitchen?
In addition to traditional cookbooks, numerous digital platforms like blogs and video-sharing sites provide valuable resources for those seeking inspiration and guidance on building imaginative play kitchens. A vast array of step-by-step tutorials, innovative concepts, and creative ideas are readily available online.
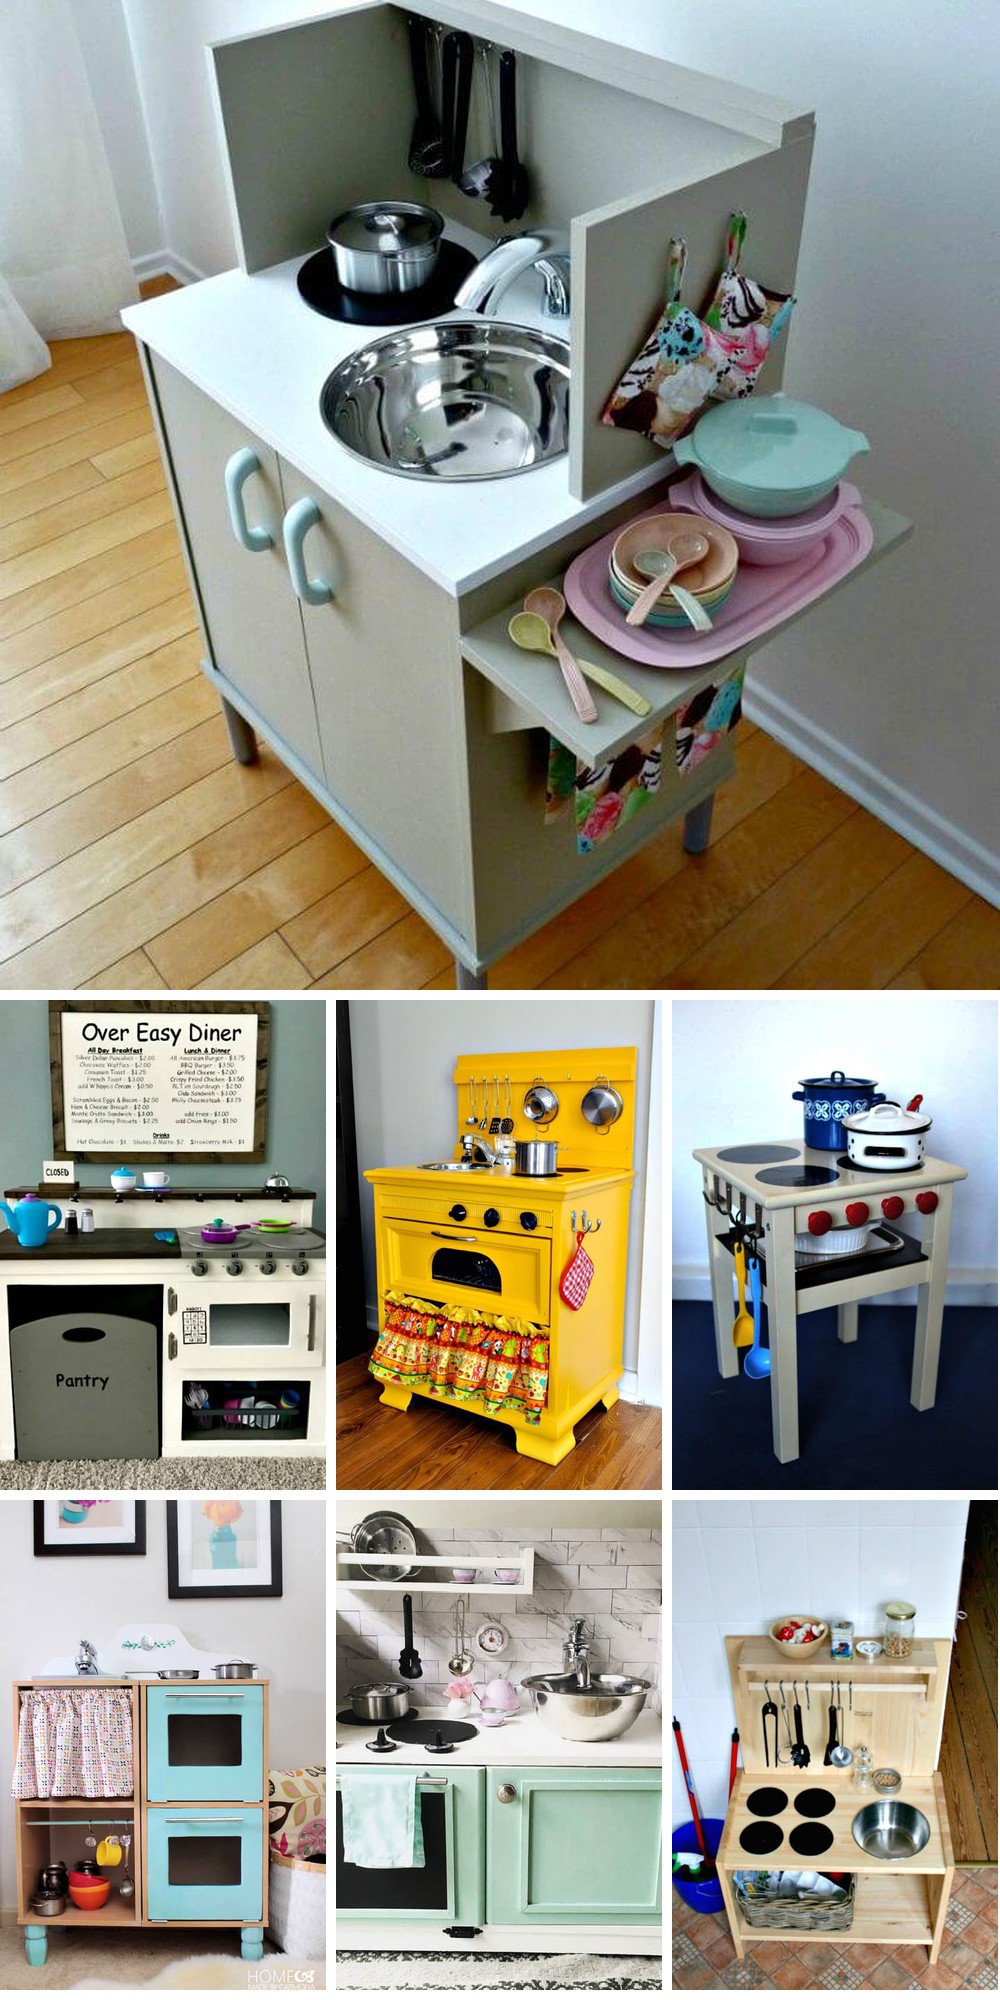
25 Unique DIY Play Kitchen Ideas Your Kids Will Love
Unleash your creativity and turn everyday objects into an extraordinary playground for your little ones with these 25 ingenious DIY play kitchen ideas. Watch as your children’s imaginations run wild, crafting countless scenarios and stories in their very own creation – a one-of-a-kind play space born from ordinary materials.
Cute DIY Play Kitchen With Back Wall
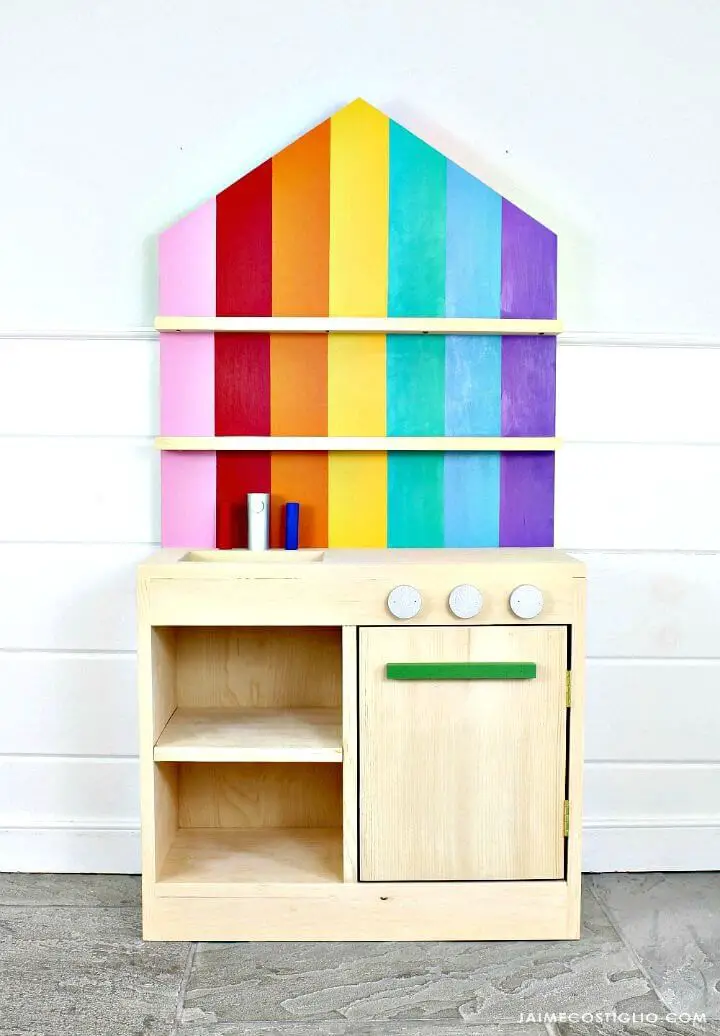
Transform a playful DIY Play Kitchen tailored for young children’s delight by following Ana White’s comprehensive guide. The step-by-step instructions, diagrams, and shopping lists provide a seamless and entertaining build process. From carefully choosing the ideal wood cuts to skillfully assembling the kitchen with functional knobs and hinges, this beginner-friendly project simplifies the creation of a charming play space where imaginative minds can flourish.
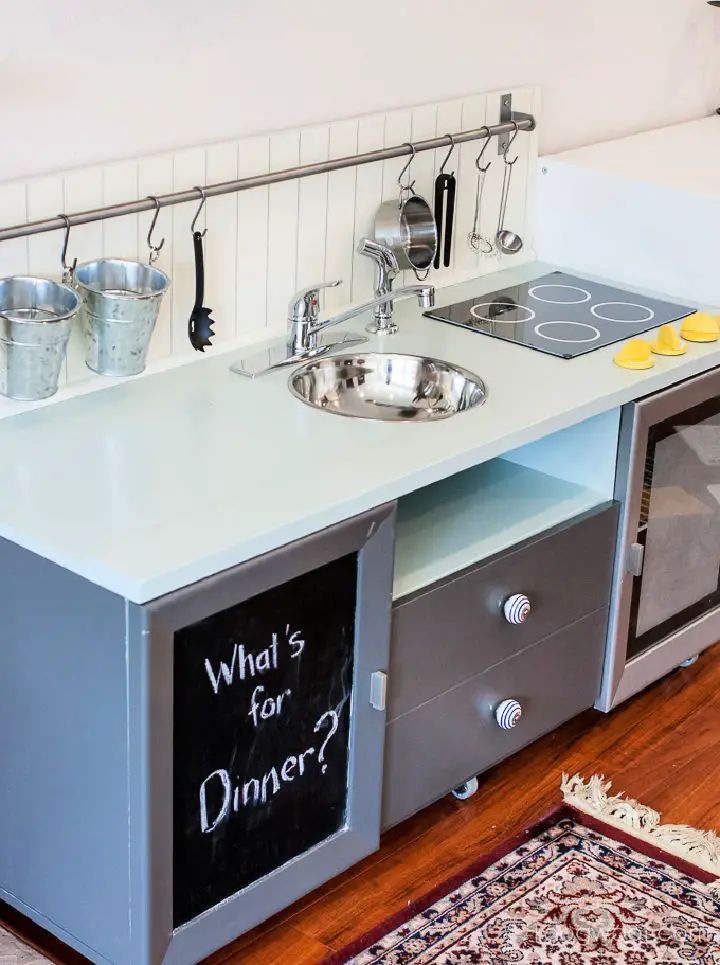
How to Make a Play Kitchen
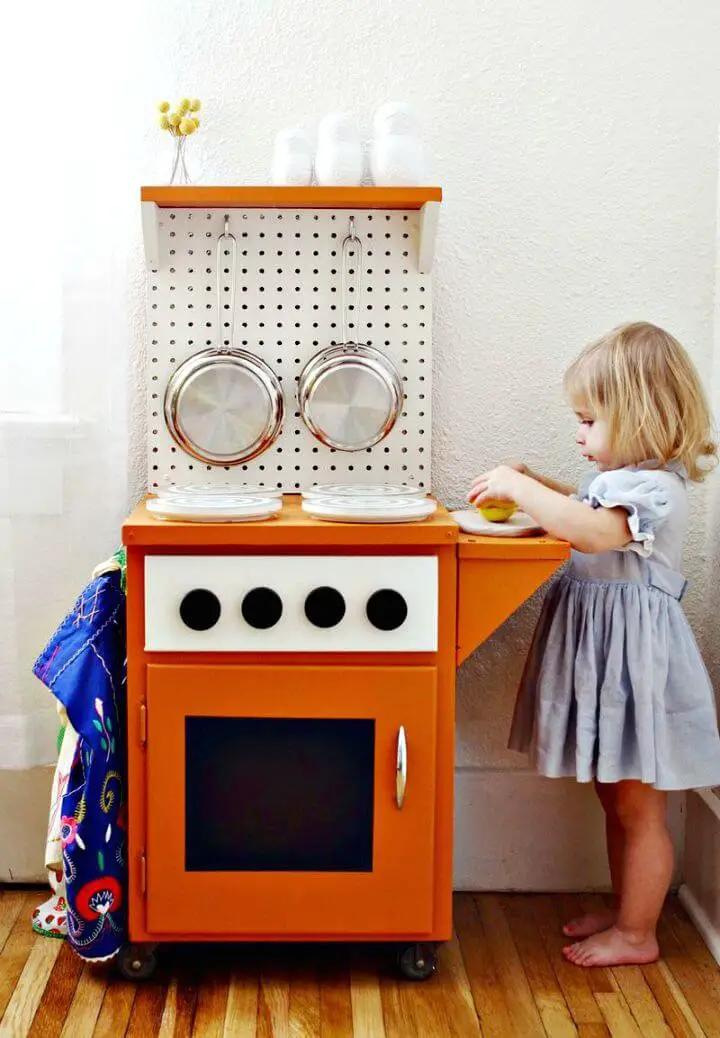
Transform playtime with a vibrant DIY kitchenette that fosters culinary creativity in little ones! Our step-by-step guide at A Beautiful Mess makes crafting a functional and sturdy play kitchen an enjoyable experience. The project’s highlights include a rolling cabinet base, playful details like chalkboard paint ‘oven’ controls, and wooden ‘burners.’ Not only does this creation look delightful, but it also withstands the wear-and-tear of kids at play. Perfect for gifting or adding to your child’s play area, bring this imaginative kitchenette to life with our easy-to-follow instructions today.
DIY Kid’s Kitchen Playset
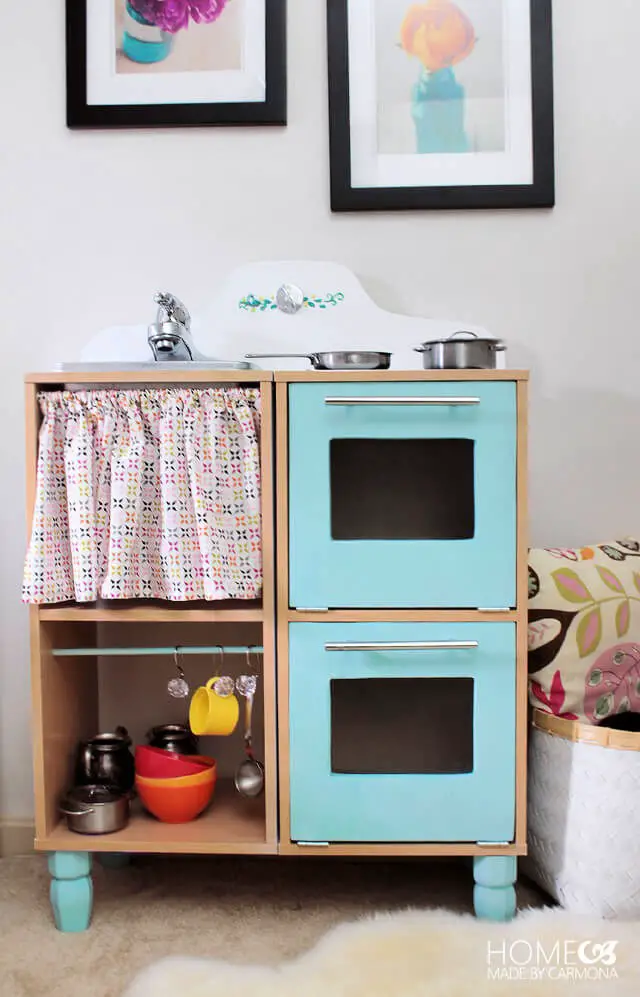
Transform the space where your little one’s culinary dreams unfold by crafting a DIY Kitchen Playset using basic materials from around the house. This budget-friendly guide will walk you through the process of converting cube bookshelves into a whimsical kitchen wonderland, rivaling high-end store versions. With just a few simple items like a plastic container for the sink, an old faucet, and a dash of creativity, unleash your inner chef’s passion for cooking and baking. The end result will boast a realistic sink, snug oven doors, and even a charming curtain divider, all complemented by a stovetop and adorable knobs. This project promises hours of imaginative play and endless culinary adventures for your aspiring chef-in-training.
Outdoor Play Kitchen From an Old Shelf
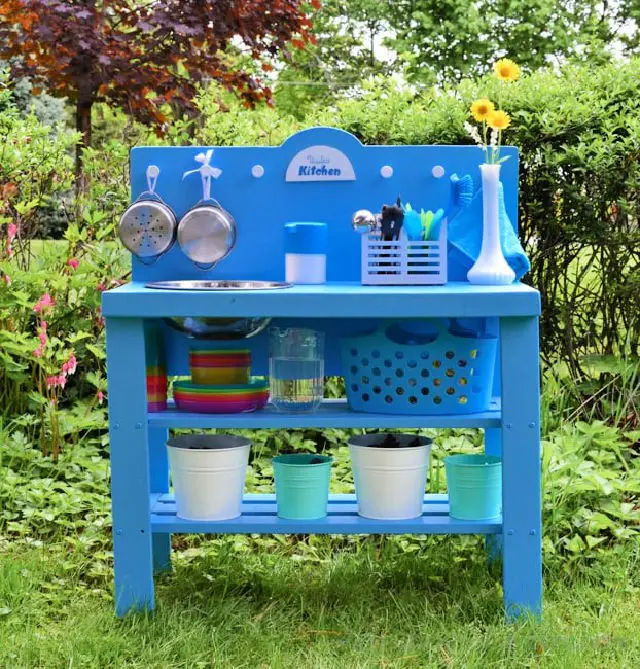
Turn an old shelf into a whimsical outdoor play kitchen that sparks creativity and excitement. With Adventure in a Box, you’ll discover how to create a budget-friendly play area that fosters imagination and role-playing without the stress. By repurposing everyday items like thrift store finds and upcycled materials, this project is ideal for nurturing little chefs and encouraging them to explore their culinary creativity. Add playful touches like knobs for hanging pots and pans, or even incorporate natural elements like rocks and sticks to bring the play kitchen to life. This delightful DIY project is perfect for those endless summer days at home, providing a unique way to engage your little ones in outdoor adventures.
Making a Play Kitchen from a Cabinet
For the young at heart, there’s no better way to spark imagination than through creative DIY projects. Transforming a cabinet into a charming homemade play kitchen is an excellent place to start. This engaging guide from Young House Love provides a simple and fun solution for crafty parents eager to surprise their little ones.
Bring the joy of cooking to life with real-features like functioning oven knobs, a light-up oven, and even a stylish faucet – all without breaking the bank. Perfect for imaginative play, this tutorial is designed to bring smiles to kids’ faces. So why not roll up your sleeves and start building a play kitchen that’s sure to be a hit?
Simple DIY Wooden Play Kitchen
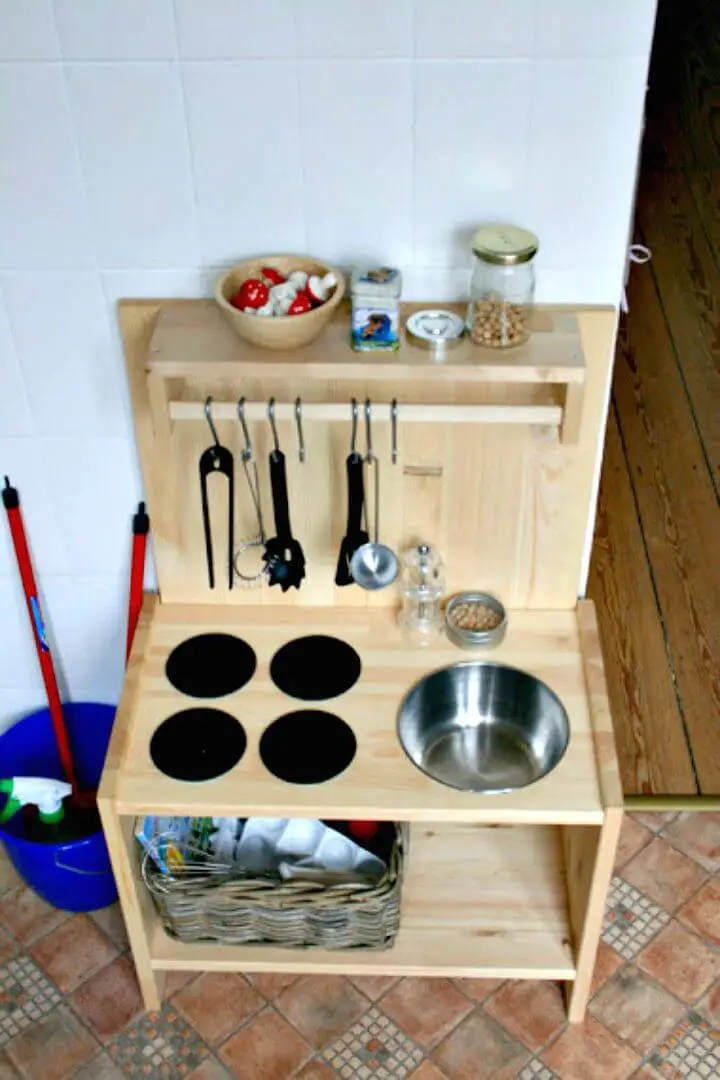
Transforming ordinary materials into extraordinary play spaces for children is a hallmark of DIY projects. This enchanting wooden playkitchen, crafted with IKEA pieces, is a masterclass in creativity and style. With an affordable price tag under €30 ($43), this project is accessible to anyone looking to spark imagination and joy in their little ones. The result is a minimalist yet charming kitchen that celebrates the beauty of simplicity and the thrill of creation.
How to Make a Blue Play Kitchen
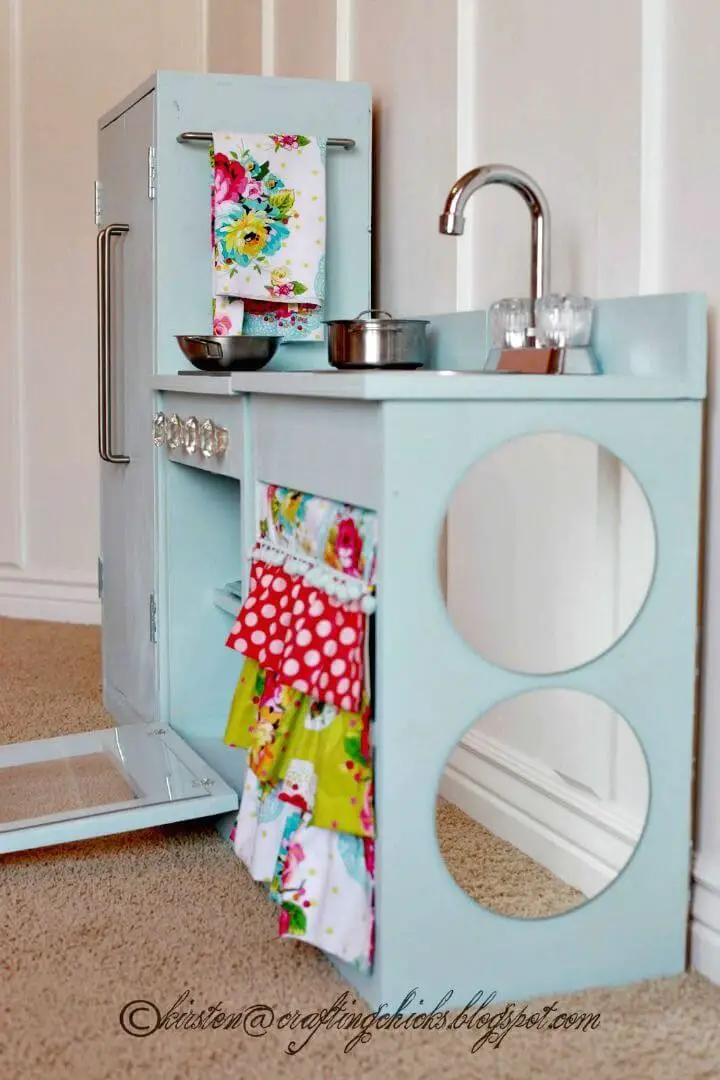
Step into a world where imagination meets craftsmanship with the DIY Blue Play Kitchen project. This meticulously crafted guide shows that creating your child’s dream kitchen is not only achievable but also incredibly fulfilling. From selecting the perfect materials to adding personal touches with accessories, every step is carefully outlined to ensure success. With a clear breakdown of tools, materials, and assembly instructions, this guide serves as the foundation for building a treasured family heirloom. Suitable for busy parents, this project’s flexible pace allows you to work at your own speed, resulting in a unique blend of durability and charm that will foster endless imaginative play.
IKEA Play Kitchen Makeover
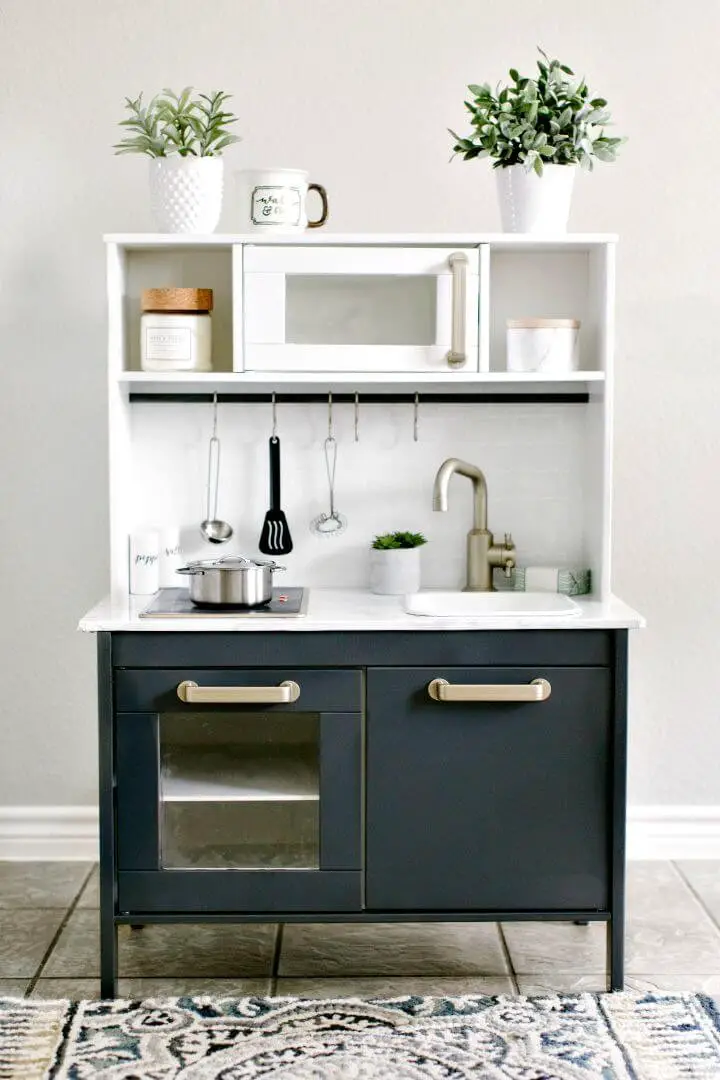
Transforming playtime with a creative and engaging DIY project is a great way to spend quality time with your child. One fun and simple idea is to give an Ikea Duktig Play Kitchen a makeover that brings endless design possibilities to life. This affordable and versatile playset can be customized to reflect your little one’s unique personality, whether you choose a vibrant color scheme or add a unique backsplash option. With detailed steps and handy tips, you’ll enjoy the process of creating this special play area that will provide hours of imaginative play for your child.
Vintage Entertainment Center Turned Play Kitchen
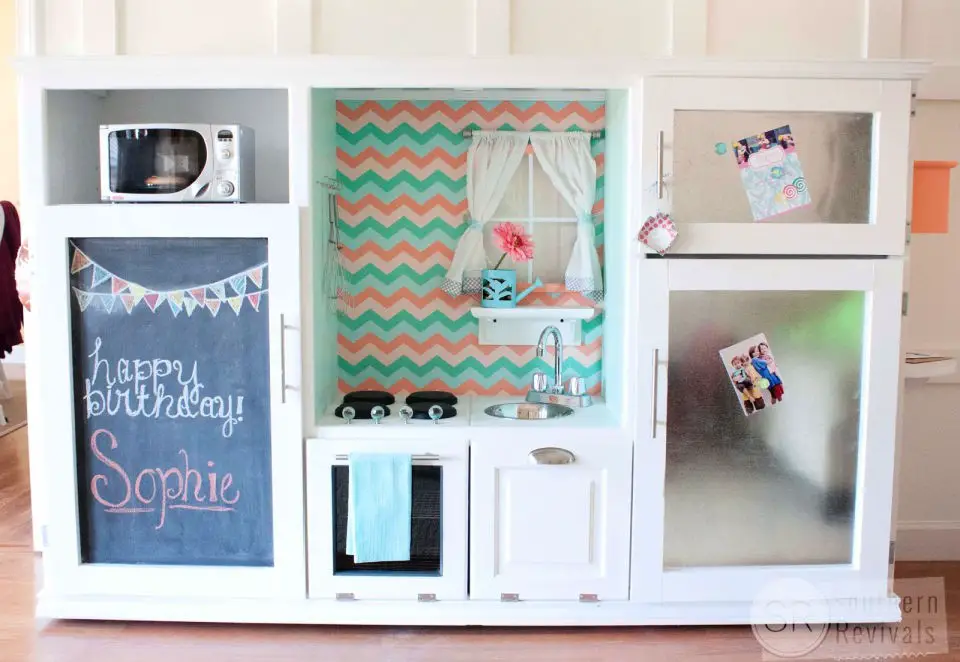
Transform an old entertainment center into a whimsical play kitchen using the creative DIY guide from Southern Revivals. The project was inspired by a one-of-a-kind find at TJ Maxx and a vibrant color palette from Hobby Lobby. To add a charming touch, DecoArt’s Chalky Finish Paint is used to create a unique effect. This comprehensive guide covers every step, from crafting a fridge with magnetic doors to installing a working light for that perfect finishing detail. Perfect as a birthday gift for a special child, this resource is filled with practical tips, clever tricks, and thrift store finds to create an enchanting kitchen space.
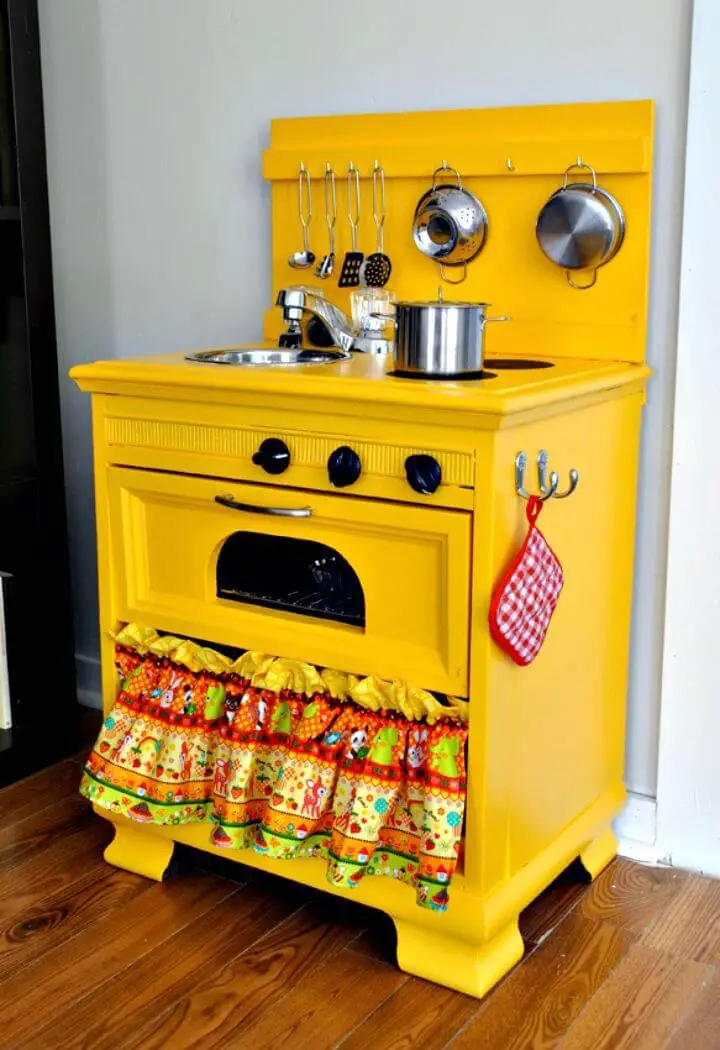
DIY Children’s Stove With Oven
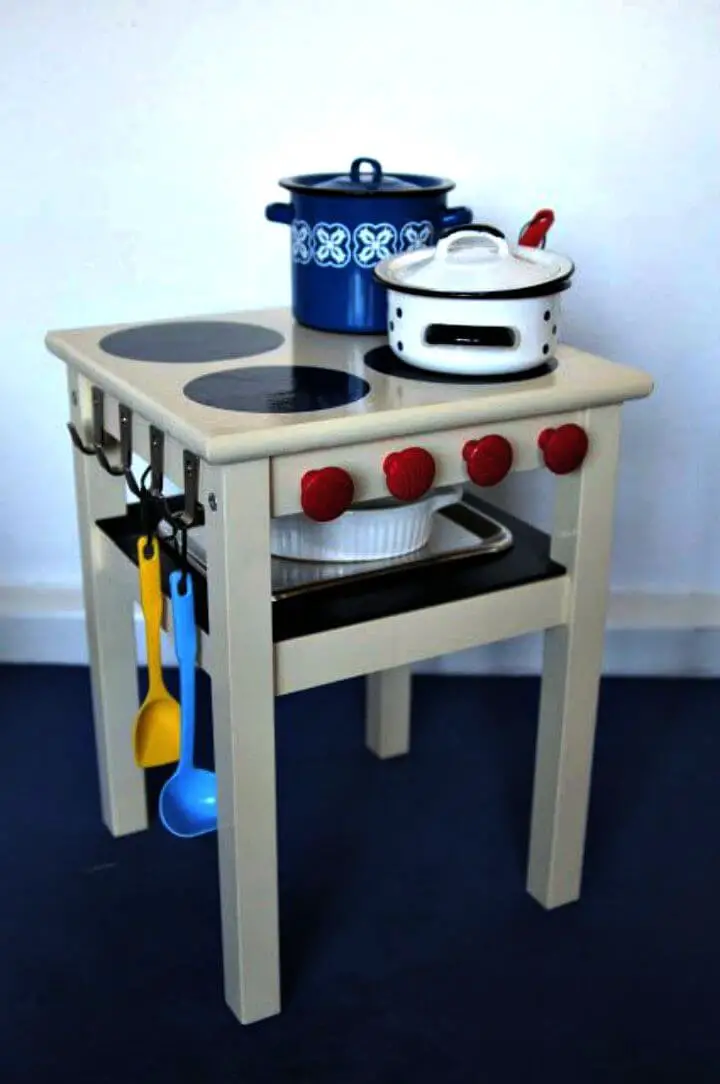
Unleash your child’s creativity with a whimsical DIY children’s stove that doubles as an oven, inspired by the innovative minds at IKEA Hackers. By repurposing an ODDVAR stool and combining it with BLECKA hooks, wooden knobs, and a splash of paint, you can bring this delightful play area to life. Follow a straightforward process: assemble the components, add a dash of color and personality, and watch your little chef’s imagination ignite. This charming DIY project is perfect for nurturing young culinary skills and providing endless hours of fun. For step-by-step instructions, visit IKEA Hackers and get ready to spark your child’s creativity!
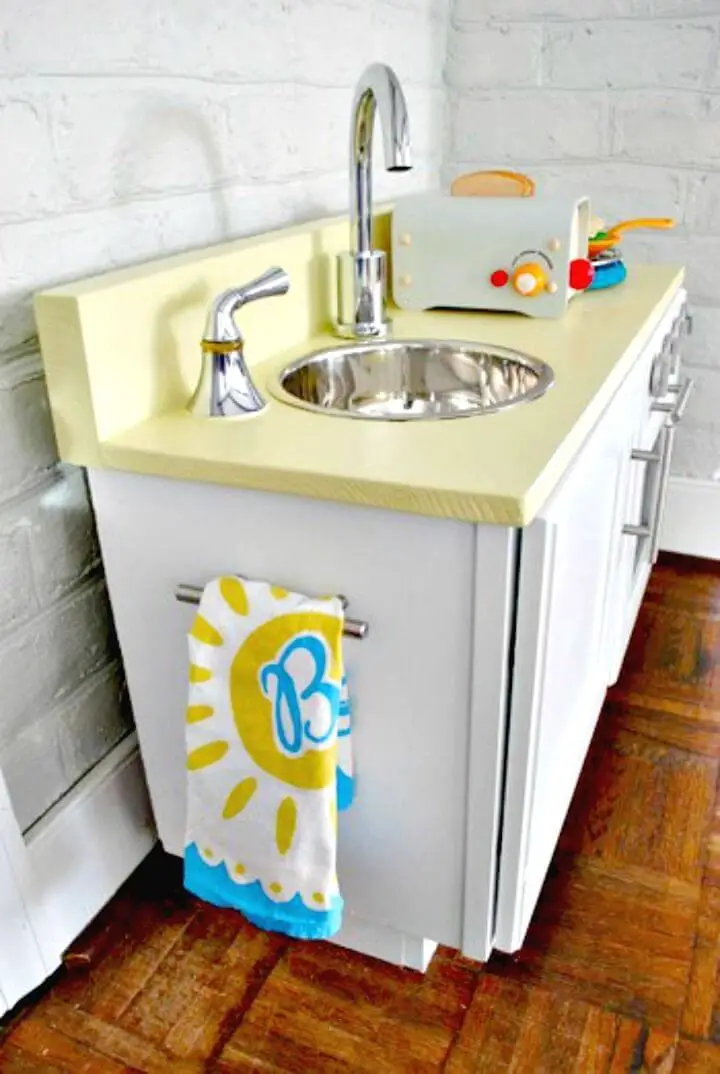
How To Build a Play Kitchen
Transforming a humble microwave stand into an enchanting DIY play kitchen is now within your reach. Inspired by the creative visionaries at Dans le Lakehouse, this comprehensive guide takes you on a journey of discovery, from sourcing the perfect faucet to meticulously painting the ‘quartz’ countertop. With step-by-step practical advice and a detailed breakdown of costs, this tutorial is ideal for anyone seeking to craft a personalized play space that reflects their child’s unique personality. Moreover, learn how to elevate the design with vintage finds and DIY details, imbuing it with an extra layer of magic.
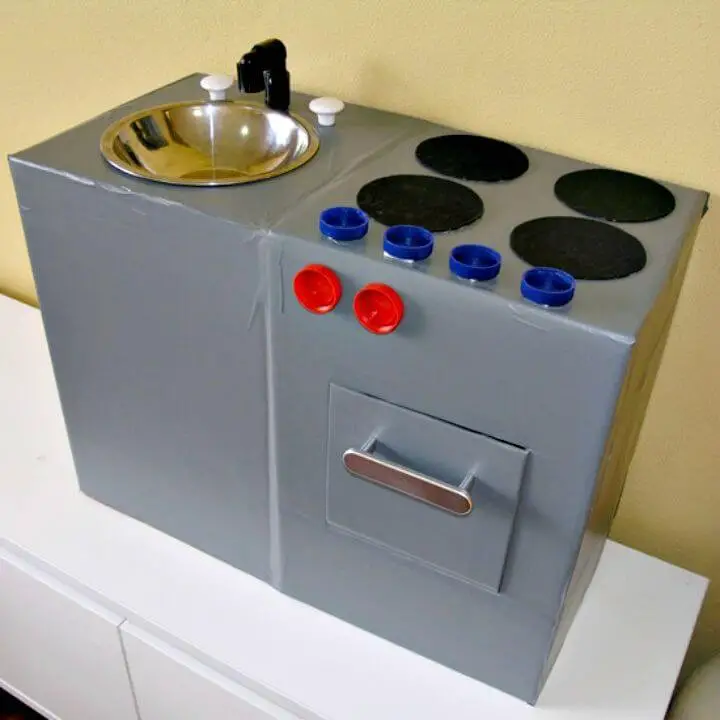
Pack-n-Go Kids Play Stove
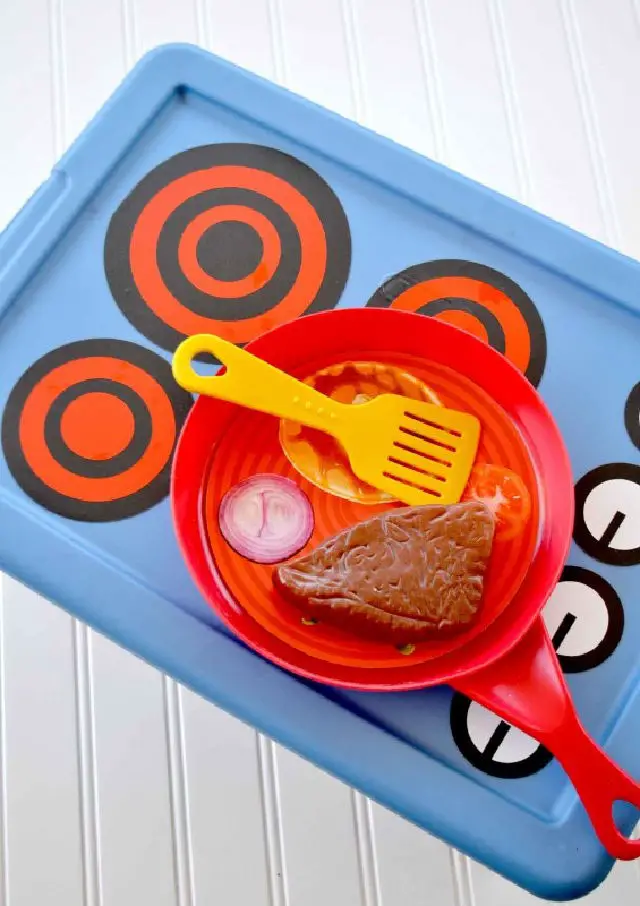
Embrace the joy of creativity on-the-go with the Pack- n-Go Kids Play Stove DIY. This innovative play stove is not only a breeze to create but also an affordable option for parents. Perfect for keeping little chefs engaged, it’s a versatile toy that can be taken anywhere – whether it’s a playdate, trip, or just a fun activity at home. Made from simple materials like a Sterilite container and vinyl, the portable stove is lightweight enough for kids to carry with ease. For a comprehensive guide on crafting this whimsical toy, visit Pinkcakeplate.com and get ready to unleash your child’s imagination!
Play Kitchen in a Box Sewing Tutorial
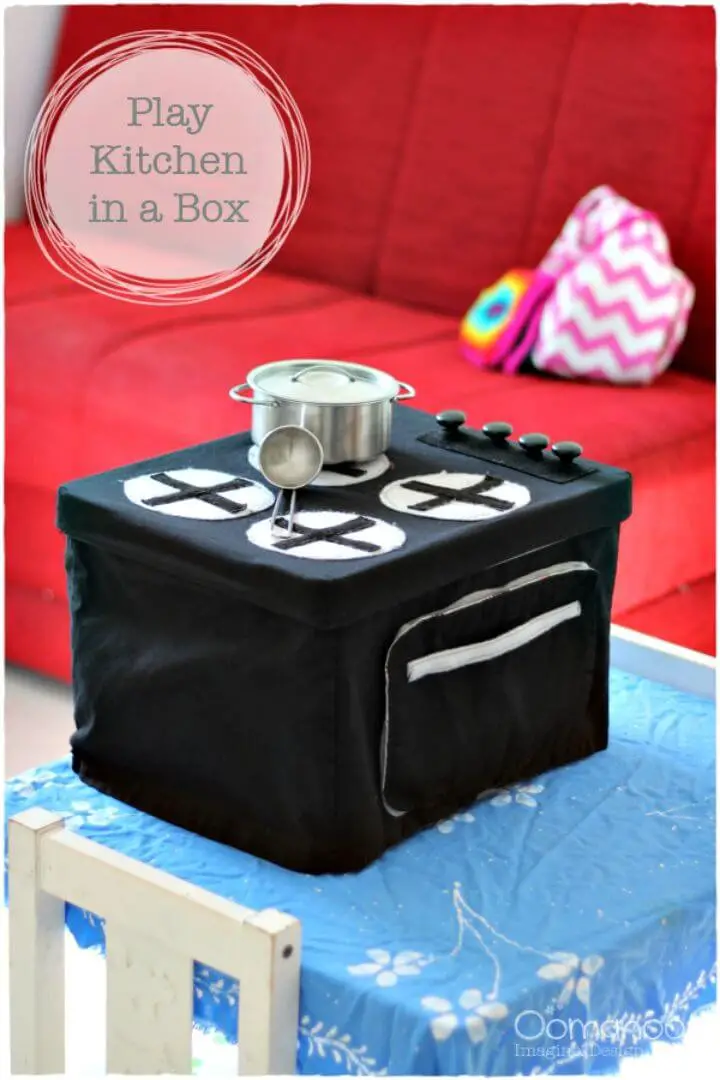
Unleash your creativity and transform a fabric-covered box into an innovative, space-saving play kitchen with our comprehensive sewing tutorial. This Oomanoot guide is specifically designed for those with limited space, providing a portable and versatile play area that can be easily stored away when not in use. With step-by-step instructions, you’ll be able to create a washable and functional play kitchen complete with a stove, oven, and accessories that tuck neatly away after each imaginative cooking adventure. Whether you’re planning an indoor picnic or nurturing young chefs-to-be, this DIY project promises a fun and rewarding experience.
Make a Play Kitchen From a $10 Piece of Furniture

Turn an ordinary $10 thrift store find into an extraordinary play kitchen with ease. This comprehensive guide takes you through the creative process, starting with a simple piece of furniture like an old entertainment center. You’ll learn how to make structural adjustments, prime and paint the surface, and add charming details such as a faucet and stove burners. Every step is meticulously outlined, making it perfect for crafty parents looking to create a one-of-a-kind play area on a budget. Not only will this project save you money, but you’ll also have the freedom to personalize every aspect of the kitchen to your heart’s desire. For a detailed, step-by-step guide, visit At Home With Ashley and let your imagination run wild as you bring your creative vision to life.
DIY Play Kitchen for Under $90
Unlock the world of DIY creativity and build a bespoke play kitchen on a budget! One family’s innovative approach to upcycling a TV stand and combining it with household items resulted in a stunning play space for their curious toddler, all for under $90. The best part? This project is packed with practical tips, from selecting the perfect base to adding personal touches like a hand-drawn backsplash and custom-painted knobs. Get ready to be inspired by this unique DIY journey that’s sure to spark your child’s imagination. For a comprehensive guide on how to create this one-of-a-kind play kitchen, visit 1 Dog Woof for step-by-step instructions.
Build Your Own Play Kitchen Stove
Transform a DIY project into an unforgettable gift for your little one by crafting a one-of-a-kind homemade play kitchen sink and stove. This creative endeavour from Ana White is a fantastic way to nurture imagination and creativity, perfect for parents seeking to create something special with their own hands. What’s more, this project requires only basic building skills and off-the-shelf materials, making it an accessible and stress-free experience. Take the plunge and customize your play kitchen to match your interior or your child’s favorite colors, and watch as playtime becomes a truly unique and immersive experience.
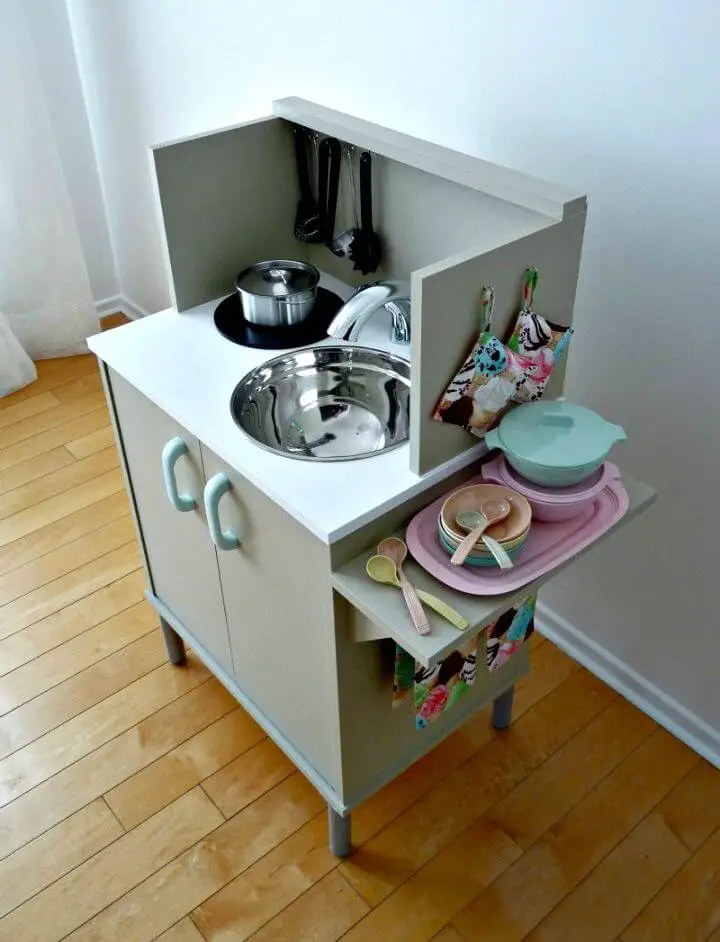
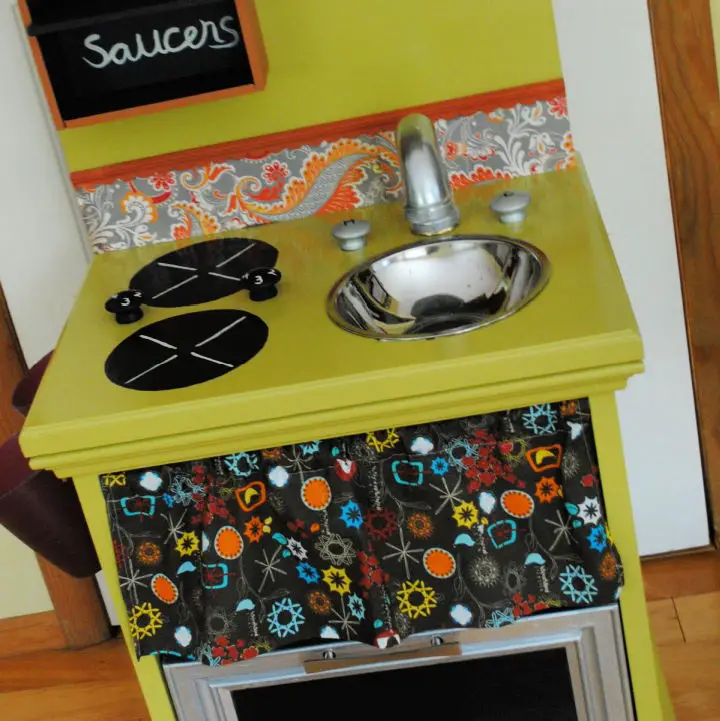
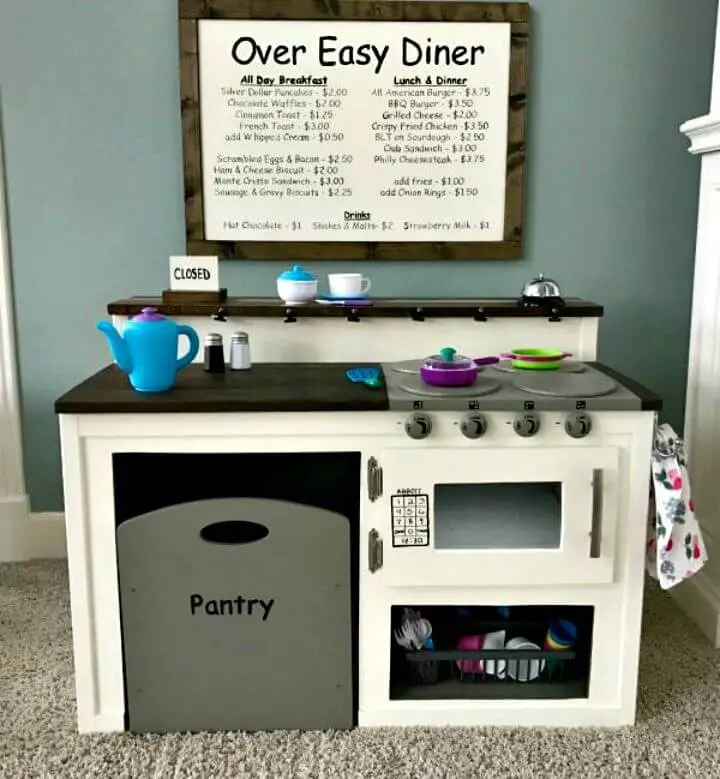
Awesome Play Kitchen Reveal
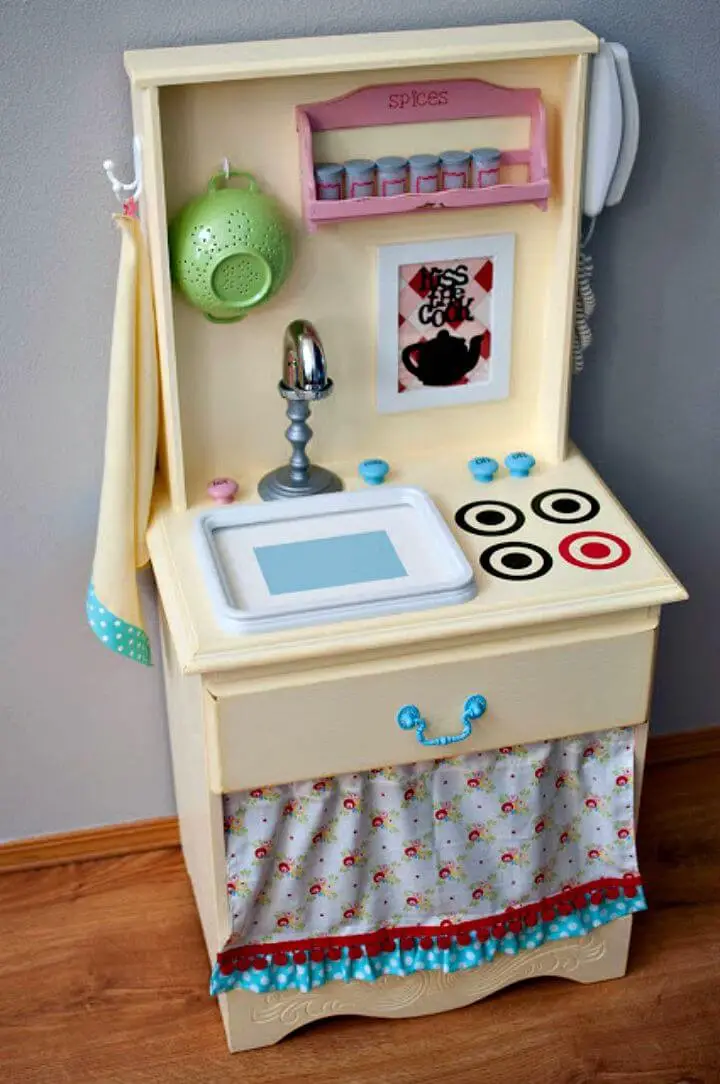
At Little Gray Table, a discarded nightstand is reborn as a vibrant play kitchen, its transformation a testament to the power of creative repurposing. Every step of this DIY project is infused with joy – from the meticulous sanding process to the careful application of paint. The attention to detail is evident in the crafting of unique features like a picture frame-turned-sink and DIY spice racks. The finished product boasts vintage-inspired colors and thoughtful touches, including a menu chalkboard that encourages little chefs to get creative. This play kitchen is more than just a fun addition to any room; it’s an inspiration for imaginative play and a reminder of the magic that can be achieved when old items are given new life with love and creativity.
DIY “Manly” Play Kitchen
Bring imagination to life by crafting a one-of-a-kind play kitchen using Malm nightstands as the foundation, inspired by IKEA Hackers. This comprehensive guide takes you on a step-by-step journey to create a bespoke culinary haven that any child will love. Overcoming obstacles like cramped workspaces and finding the perfect tile backsplash didn’t faze the determination to build a unique cooking space. From a functional dog bowl sink to custom-painted knobs, this project harmoniously blends creativity with practicality, making it an ideal gift for parents seeking a personalized play area that sparks their child’s culinary curiosity.
DIY Kids Kitchen for Under $10
Transform your home into a culinary haven for kids without blowing your budget! With a little creativity, you can build a DIY Kids’ Kitchen using everyday items, all for under $10. Childhood101 shares practical tips to turn household objects into a functional play kitchen. From upcycling furniture handles to crafting innovative sink and tap solutions, these resourceful ideas are perfect for parents seeking an affordable and fun play space for their little chef.
Make Your Own Play Kitchen
Transform an old nightstand into a whimsical DIY play kitchen with minimal effort and maximum creativity. For the budding crafter, this project is not only budget-friendly but also a fulfilling way to craft a one-of-a-kind play space for your little ones. Begin by scouring local thrift stores or online marketplaces for a vintage nightstand, a decorative bowl for the sink, and a faucet that adds a touch of realism. With a total investment of approximately $70 and around 7-8 hours of enjoyable hands-on work, you can create a personalized kitchen that’s both charming and cost-effective compared to purchasing one from a store. For added inspiration and more creative ideas, explore this helpful resource for DIY enthusiasts.
How to Make a Play Cooker

Unleash the creativity and bring joy to your little one’s playtime by transforming a ordinary cupboard into a unique play kitchen through a series of simple steps. With just a few common materials and a dash of imagination, you can turn an otherwise plain space into a delightful haven for imaginative play. Whether it’s a thoughtful gift or a charming addition to their play area, this DIY project is sure to delight. Discover how to add functional details like knobs and shelves, as well as a touch of whimsy with paint and accessories. For more inspiration and detailed guidance, visit our Kid Play Do page for all the instructions you need to make this engaging project your next DIY adventure.
Homemade Child’s Play Kitchen
Imagine transforming a humble nightstand into a whimsical play kitchen for your child, brimming with creativity and joy. With this expert DIY guide, you’ll embark on an empowering journey to craft a one-of-a-kind play area that fosters imagination and wonder. From the gentle art of sanding to the vibrant world of painting and the delightful addition of playful details, learn how to breathe new life into a simple piece of furniture, imbuing it with love and personal significance. Perfect for parents seeking to create a heartfelt gift for their little ones, this DIY adventure promises to ignite a sense of possibility and excitement in your child’s playtime.
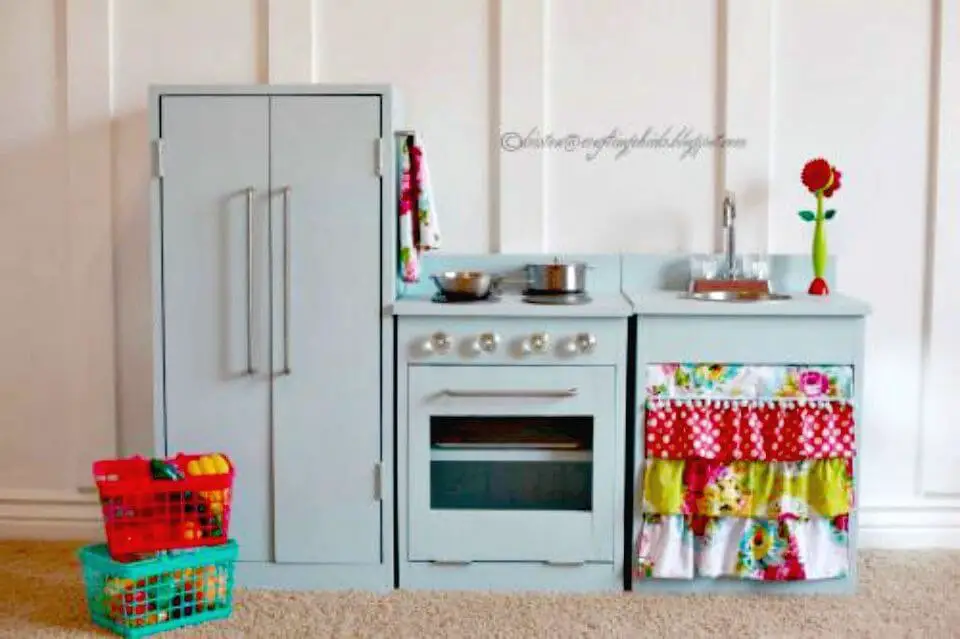
DIY Farmhouse Style Play Kitchen
Transform your little ones’ playtime with an imaginative and budget-friendly DIY project! Construct a charming Kids White Play Kitchen with a farmhouse twist, all within a $50 budget. This guide takes you by the hand, sharing easy-to-follow instructions to create a playful space that will spark joy and ignite creativity in your child’s imagination.
Make a Play Kitchen Out Of An Old Entertainment Center

Revamp an outdated entertainment center into an enchanting play kitchen for your young one with this innovative DIY endeavor. Rekindle the magic of upcycling by following step-by-step instructions and cultivating creativity to craft a whimsical kitchen that’s as much fun to build as it is for kids to play with. As you embark on this heartwarming project, discover how to choose the perfect paint hue, add captivating details like a simulated granite countertop and a functioning light fixture, and bring your imagination to life. With elbow grease and a dash of creativity, transform an old space into a new haven that sparks joy for years to come.
How to Build a Play Kitchen
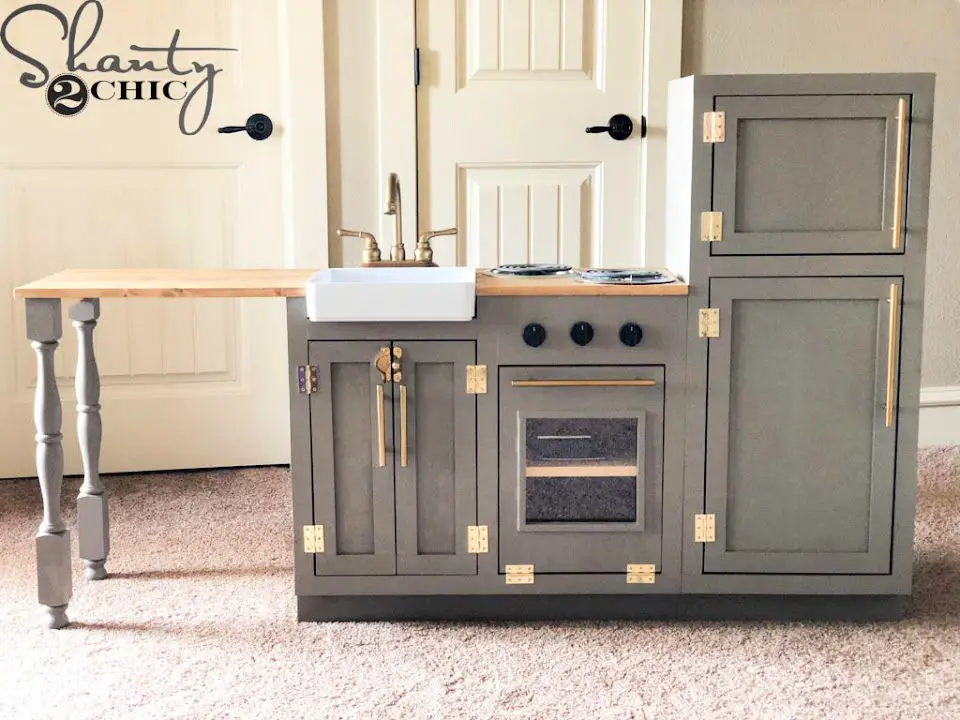
Embark on a creative adventure and design a one-of-a-kind DIY Play Kitchen that evolves alongside your child’s growth. Perfect for kids who have outgrown conventional options, this play kitchen is an ode to childhood creativity, boasting a realistic farmhouse sink, operational stove burners, and a peninsula for added excitement. With easily accessible, free printable plans at Shanty 2 Chic, you’ll be empowered to craft a modern kitchen-inspired play space that not only mirrors your child’s proportions but also sparks their imagination with authentic elements.
Conclusion:
In conclusion, our journey through 25 unique DIY play kitchen ideas has not only been an entertaining and engaging experience but also a valuable way to cultivate creativity, imagination, and fundamental life skills in children. From the careful consideration of materials and safety aspects to the numerous educational benefits like language development and social skills, each element of building a DIY play kitchen presents a distinct opportunity for growth and learning. By taking on projects like crafting a cardboard kitchen or incorporating educational elements, parents and guardians can create a personalized play space that is both secure and enriching. The key to a successful DIY play kitchen lies in embracing creativity, making thoughtful customizations, and adhering to safety guidelines to guarantee a fun and secure play environment. With these principles in mind, get inspired, be resourceful, and create a treasured play kitchen that will bring your kids countless hours of imaginative play.
