Crafting a DIY plant stand is an empowering project that not only adds a personal touch to your home decor but also enhances the beauty of your living space. Our comprehensive guide offers 15 free DIY plans and ideas, tailored to various skill levels, ensuring that anyone can find a suitable project to work on. By providing detailed instructions and creative inspiration, we aim to help you create the perfect stand for your green friends. With an array of designs and complexities, making a DIY wooden indoor plant stand is an adventure waiting to happen. From listing essential materials and tools to guiding you through each step with ease, our tutorial is designed to equip you with practical knowledge and hands-on expertise. As we explore these free projects together, get ready to elevate both your crafting skills and your indoor garden.
Why Build Your Own Plant Stand?
Creating a DIY plant stand offers a multitude of benefits that can be enjoyed indoors or outdoors. At its core, this endeavour provides a cost-effective solution to displaying plants, as materials are often readily available or inexpensive. The customization options are virtually endless, allowing you to tailor the height, width, and colour of your plant stand to perfectly complement your decor and spatial requirements.In addition to saving money and achieving a tailored look, building a DIY plant stand offers an excellent opportunity for skill-building. Whether you’re a novice or an experienced crafter, this project provides a chance to hone your woodworking or crafting skills, including basic tool usage and refined techniques.Beyond the practical benefits, there’s a sense of satisfaction that comes from creating something with your own hands. Watching your plants thrive on a stand you built adds a personal touch and pride to your space. Furthermore, opting for sustainable resources and repurposing materials can make your DIY plant stand an eco-friendly choice, reducing waste and minimizing the environmental impact associated with mass-produced products.Finally, handmade plant stands make thoughtful and unique gifts for friends and family who appreciate the beauty of greenery in their homes. In essence, building a DIY plant stand is not just a project – it’s a rewarding journey that enhances your space, skills, and well-being.
Design Customization for Your DIY Plant Stand
When crafting a DIY plant stand, the focus extends beyond mere functionality. It’s an chance to infuse your personality into the design and bring a one-of-a-kind aesthetic to your home decor. To encourage customization, consider these creative ideas that can elevate your project:
Choose Your Material Wisely
The choice of material for your plant stand plays a significant role in determining its overall aesthetic. You can opt for wood to create a cozy, organic ambiance, perfect for those who appreciate a natural look. Alternatively, metal stands out as a great option for those seeking a modern or industrial edge. If versatility is key, plastic offers a wide range of colors and styles to suit various tastes.
Play with Colors
Infuse your plant stand with a pop of personality by adding a splash of color. Opt for a bold and vibrant hue or a soft pastel shade to give it a fresh new look. Painting is a great way to achieve this, allowing you to express your creativity and transform the stand’s appearance. Alternatively, consider staining wood for a more understated effect that still showcases the natural grain’s beauty.
Add Patterns or Textures
Elevate the visual appeal of your plant stand by incorporating patterns or textures. This can be achieved through creative and simple methods such as using stencils to apply designs, adding textured elements like burlap or fabric, or even experimenting with different materials to create unique combinations.
Incorporate Artistic Elements
Transform your plant stand into a masterpiece by unleashing your artistic side. Consider it a blank slate, just waiting for your creative touch. You can bring your imagination to life with hand-painted illustrations, decoupage, or even mosaic tiles. Let your creativity flow and turn your plant stand into a stunning piece of art that doubles as a functional and beautiful addition to any room.
Think About the Shape
Consider deviating from traditional rectangular plant stands and opt for unique shapes that add visual interest. Curved or angular legs can bring a touch of whimsy to your space, while adjustable tier options allow you to create a display that suits both the size of your plants and the available floor space.
Personalize with Accessories
While larger features like the plant stand’s shape and material may capture attention first, it’s often the subtle accessories that tie everything together. Knobs, hooks, and decorative brackets can inject personality into your design, transforming a straightforward piece into a unique reflection of your style.
Consider the Environment
When envisioning your plant stand’s final destination, consider the environment it will inhabit. If it’s destined for outdoor use, opt for materials and finishes that can withstand the elements’ rigors. Conversely, when placing it indoors, take cues from the room’s decor and select a design that harmonizes with its aesthetic. As you craft your DIY project, remember that personalization is key. Embrace experimentation and express your creative flair by making your plant stand both a haven for your plants and a reflection of your unique style.
DIY Wooden Indoor Plant Stand
Crafting a wooden indoor plant stand offers a charming way to showcase your houseplants. With minimal tools and fundamental woodworking expertise, this project is accessible to DIY enthusiasts of all levels. To bring your vision to life, follow this step-by-step guide and create a stylish and practical plant stand that will elevate the ambiance of any room.
Materials and Tools Needed
To build the wooden frame, you’ll need a combination of small wood blocks, larger crosspieces, and some essential tools. Start by gathering your materials: two centimeter by two centimeter wooden blocks for the legs, three centimeter by three centimeter wooden pieces for the crosspieces, a miter saw to make precise cuts, a metal file to smooth out any rough edges, a pencil and measuring tape to ensure accurate measurements, a drill with assorted bits to create holes, dowel pieces that are 2.5 centimeters long to provide structural support, wood glue like Gorilla Glue to bond the pieces together, a hammer to tap things into place, and clamps to apply even pressure as the glue dries. Finally, consider applying a clear varnish to protect your handiwork and give it a professional finish.
Steps to Make a Plant Stand
Begin by preparing the legs of your plant stand. Cut four wooden blocks, each measuring 30cm in length, using a miter saw. Ensure the edges are square and smooth by filing them with a metal file. Next, focus on building the cross sections that will form the base of your plant stand. Cut two pieces of wood to 17.5cm in length, then mark and cut a 2.5cm gap in the center of each piece. This will create a space for the dowels to fit snugly. Mark the center of both ends on the longer sides of these cross sections, then mark outwards by 1cm on either side. These marks indicate where you’ll drill holes for the dowels. The diameter of these holes should be slightly larger than the dowel width, which is 2.5cm in this case. Use a drill to create the dowel holes in both the cross pieces and the legs. To ensure a secure connection between the legs and the cross sections, form triangular ends on the legs by marking and cutting out small triangles. Assemble the cross sections by applying wood glue to the gaps and joining them together. Wipe away any excess glue and let it dry according to the product instructions. Once the glue has dried, attach the legs to the cross sections by drilling holes 12cm from the bottom of each leg, inserting dowels coated in wood glue, and tapping them gently into place with a hammer. Allow the glue to dry before final assembly, during which you’ll connect the legs to the cross sections using clamps to hold the structure in place while it dries. Finally, apply a clear varnish to your plant stand to protect the wood and highlight its natural beauty.
Video Tutorial
To enhance your DIY wooden indoor plant stand-making experience, we recommend watching our step-by-step video tutorial on YouTube. This visual guide seamlessly complements the written instructions provided below, offering valuable visual cues that simplify the woodworking process. As an added resource for visual learners and those seeking extra clarity on specific steps, this video tutorial is an excellent accompaniment to our written guide. By combining both resources, you’ll gain a deeper understanding of the craftsmanship involved in building your DIY wooden plant stand. Remember, attention to detail and precision in measuring and cutting are crucial in ensuring a balanced and sturdy final product. With patience and practice, you can create a unique and personalized indoor gardening space that reflects your style.
Maintenance Tips for Your DIY Plant Stand
To sustain the aesthetic appeal and functionality of your DIY plant stand, it’s essential to regularly maintain it. By following these simple tips, you can keep your plant stand looking its best and continue to showcase your plants with pride.
Start by dusting your plant stand every week using a soft cloth or duster. This will prevent dirt and debris from accumulating and making the wood appear dull or discolored. For more thorough cleaning, mix a mild soap with warm water and gently scrub any stubborn stains or grime. Rinse the soap off with clean water and dry the stand thoroughly to prevent water spots.
In addition to cleaning your plant stand, make sure to also inspect it for any signs of damage or wear. Check for loose joints or screws that may need tightening, and replace any damaged or worn-out parts to keep the stand sturdy and safe.
Regular Cleaning
To keep your plant stand in top condition, it’s crucial to regularly clean away the dust and dirt that tends to accumulate on its surface. A soft cloth or brush is ideal for this task, as they can gently sweep away any debris without scratching the material. If you’re working with a wooden stand, you may need to take a slightly different approach. In this case, a mild soap and water solution can be used to remove any stubborn dirt, but be sure to dry the stand thoroughly afterwards to prevent any damage from excess moisture.
Protecting the Material
When considering how to safeguard your plant stand, consider the material it’s made of. If it’s wood, for instance, applying a coat of sealant or varnish can provide a barrier against moisture. On the other hand, if your stand is metal, taking measures to prevent rust from forming will be crucial.
Checking for Stability
As the plant stand ages, it’s not uncommon for the joints and screws to lose their tightness. To maintain stability and safety, it’s crucial to perform regular checks and adjustments to keep everything securely in place.
Refreshing the Look
Give your plant stand a revitalizing touch by reapplying a coat of paint or stain. Not only will this breathe new life into its worn appearance, but it will also provide an added layer of defense against future wear and tear.
Avoiding Over-Watering
To ensure the longevity of your DIY plant stand, take care not to over-water your plants. Excess moisture can cause damage, particularly if the stand is made of wood. A simple solution is to place trays or saucers under the plants to catch any overflow. By adopting these easy maintenance habits, you’ll be able to enjoy your plant stand as a charming display for your plants for years to come.
Sustainability Practices in DIY Projects
Integrating eco-friendly elements into your DIY endeavors not only benefits the planet, but also elevates the appeal of your handmade items. When it comes to crafting a DIY plant stand, consider these methods to infuse your project with sustainability: Firstly, opt for reclaimed or repurposed materials, such as old pallets, crates, or cardboard tubes. This approach reduces waste and gives new life to discarded items. Next, select eco-friendly adhesives and paints that are non-toxic and biodegradable. These alternatives not only minimize the environmental impact but also ensure a safer working experience. Additionally, consider upcycling materials like glass bottles, metal cans, or bamboo skewers to add texture and visual interest to your plant stand design.
Use Eco-Friendly Materials
When it comes to selecting materials for your project, prioritize sustainability by opting for sustainably sourced or recycled options. For wood-based components, consider FSC-certified woods that meet rigorous standards for responsible forestry practices. Similarly, when it comes to paints, choose eco-friendly formulas that boast low levels of volatile organic compounds (VOCs). By making these mindful choices, you’ll be contributing to a more environmentally conscious construction process.
Repurpose and Upcycle
Prior to procuring fresh supplies, explore the potential for reimagining items already at your disposal. Discarded pieces of furniture, wooden scraps, or metal remnants can be revitalized into a one-of-a-kind plant stand, showcasing creativity and reducing waste in the process.
Minimize Waste
When embarking on a project, it’s essential to plan meticulously to reduce the likelihood of unnecessary offcuts and waste. By doing so, you’ll not only save resources but also contribute positively to your community. Consider repurposing any leftover materials for smaller projects or, better still, donate them to local schools or community centers where they can be used for creative activities, inspiring future generations.
DIY Tools and Equipment
When it comes to acquiring tools or equipment, think outside the box by exploring alternative options rather than making a purchase outright. Consider tapping into your social network by borrowing from friends or acquaintances, or look into rental services as a viable alternative. This approach not only reduces demand for new products but also minimizes the environmental impact associated with extracting and processing raw materials, manufacturing, and transportation – all of which contribute to a significant strain on natural resources.
Educate and Inspire
As you complete your sustainable DIY plant stand project, consider sharing it with others who share your passion for eco-friendly living. By doing so, you can empower your community to adopt environmentally conscious habits, sparking a chain reaction of positive change.
Integrate sustainable practices into your DIY endeavors to make a tangible impact on the environment while also creating functional and aesthetically pleasing items that showcase your creativity.
Troubleshooting Common Issues in DIY Plant Stand Projects
While building a DIY plant stand can be an exciting and rewarding experience, it’s not uncommon to run into a few roadblocks along the way. Fortunately, with some planning and problem-solving skills, you can overcome these common issues and end up with a beautiful and functional piece of furniture for your plants. For instance, if you’re finding that your plant stand is wobbly or unstable, take a step back and assess whether the base is too narrow, the legs are uneven, or the entire structure needs to be reworked. Perhaps the materials you’ve chosen just don’t have the right combination of strength and stability. In this case, consider switching out the wood for something like metal or carbon fiber, which tend to be more durable and less prone to warping. Alternatively, you could try adding a wider base plate or using some clever joinery to stabilize the structure. If your plant stand is looking a bit bare or lacking in style, think about adding some decorative elements – this could be anything from carved wooden details to colorful paint jobs or even some judiciously placed greenery. The key is to find a balance between form and function that works for you and your plants.
Stabilizing the Structure
To ensure a sturdy foundation for your plants, inspect the structure’s integrity by examining each joint and connection. If any screws are loose, take the time to tighten them firmly. Additionally, identify areas where the stand may be vulnerable to collapse and reinforce them with supplementary brackets or supports to prevent damage.
Repairing Broken Legs
When dealing with a stand constructed from softer woods, a fractured leg is not an uncommon problem. Fortunately, there are two viable solutions to consider: complete replacement of the leg or employing a combination of wood glue and clamping pressure to effect a durable repair. The latter approach requires applying the adhesive and then securing the leg in place using a clamp until the glue has fully dried.
Dealing with Wood Splitting
When it comes to wood splitting, one of the primary culprits is using screws that are too large or driving them in without first taking the time to pre-drill a hole. To avoid this issue altogether, make sure you’re selecting the correct screw size for your project and always take the extra step of pre-drilling before driving those screws home. But what if splitting does occur? In such cases, a simple application of wood filler can be used to repair any cracks that have formed, effectively restoring the integrity of the wood.
Ensuring Even Weight Distribution
To prevent an unstable plant stand from toppling over, it’s crucial to consider the weight distribution of your containers. A simple solution is to position heavier pots on lower shelves and lighter ones on upper levels, ensuring a balanced arrangement that prevents any one side from becoming too heavy. If possible, centering the pots will further enhance stability, allowing you to proudly display your plants without worrying about accidents.
Safety Precautions for DIY Projects
When embarking on DIY endeavors, safety should be the unwavering cornerstone. To ensure a hassle-free experience, it’s essential to adopt a meticulous approach and consider the following crucial safeguards: Always assess the workspace for potential hazards, such as tripping hazards or electrical risks. Wear appropriate personal protective equipment (PPE) like gloves, goggles, and a dust mask. Keep long hair tied back and avoid loose clothing that could get caught in moving parts or tools. Be mindful of your surroundings and keep children and pets away from the work area.
Personal Protective Equipment (PPE)
When engaging in activities that pose a risk to your physical well-being, it’s essential to prioritize personal protective equipment (PPE). This includes safety glasses, gloves, and ear protection, which can safeguard you against potential hazards like splinters, airborne particles, and loud noise exposure. By adopting this precautionary measure, you’ll be better equipped to mitigate the likelihood of injuries.
Proper Tool Maintenance
To minimize the risk of accidents, it’s crucial to keep your tools in top shape at all times. A single dull blade or damaged piece of equipment can have disastrous consequences. As such, a regular inspection and maintenance routine is essential to guarantee that your tools are safe to use. By doing so, you’ll not only prevent accidents but also ensure optimal performance from your tools.
Workspace Organization
Maintaining a well-organized workspace is crucial for avoiding accidents and ensuring a safe working environment. The absence of clutter and tripping hazards reduces the likelihood of unexpected incidents. This can be achieved by storing tools and materials neatly and tidily, both when they’re being used and not in use, thereby minimizing any potential risks.
Fire Safety
When engaging in activities that involve flammable materials or open flames, it’s crucial to be mindful of potential fire hazards. To mitigate this risk, ensure you have a reliable fire extinguisher nearby and take the time to familiarize yourself with its proper usage. This proactive approach can help prevent devastating consequences.
Avoid Working Alone
When tackling a DIY project, consider enlisting the help of a friend, colleague, or family member. Having someone nearby can be a lifesaver in case of an unexpected emergency, allowing them to provide assistance or call for professional help if needed. By having a trusted individual by your side, you’ll not only reduce the risk of accidents but also gain a sense of security and confidence that can make all the difference in achieving a successful DIY outcome.
FAQs on DIY Plant Stand
With DIY projects, there’s nothing quite like the sense of accomplishment that comes from bringing an idea to life. Building your own plant stand is no exception. To ensure a successful outcome, it’s essential to address common concerns and misconceptions upfront. Here, we’ll tackle frequently asked questions to provide a clear roadmap for turning your vision into reality.
What materials do I need to build a DIY plant stand?
When it comes to crafting unique plant stands, the type of material you choose will depend on your personal style and the overall aesthetic you’re aiming for. Wooden plant stands, for instance, typically require a few basic materials, including wooden blocks or planks, screws or nails, wood glue, and possibly some additional finishing touches like stain or paint to bring out the natural beauty of the wood. On the other hand, copper or metal stands demand a slightly different set of tools, such as copper pipes or metal rods, pipe cutters, and potentially some epoxy or soldering equipment for assembly. Meanwhile, upcycled stands often rely on materials you might already have lying around the house, like old ladders, crates, or other sturdy items that can be repurposed to create a one-of-a-kind piece.
What tools are essential for making a plant stand?
A well-stocked workshop requires a range of tools to tackle various projects efficiently. Some essential items include a miter saw or hand saw, perfect for cutting wood or metal to precise lengths. A drill is also crucial for creating holes for screws or dowels in wooden stands, allowing for secure and sturdy constructions. Additionally, having a reliable measuring tape and pencil on hand ensures accurate measurements and markings. For delicate assemblies, a hammer or rubber mallet can be used to avoid damaging components. And, if you’re working with copper or metal piping, a specialized pipe cutter is a must-have.
Can I build a plant stand if I’m a beginner?
For novice DIY enthusiasts, many plant stand projects cater specifically to their needs, utilizing uncomplicated materials and fundamental tools. By commencing with a rudimentary design, individuals can build their self-assurance and technical prowess.
How do I protect my DIY plant stand from water damage?
When it comes to protecting your furniture from the elements, whether indoors or outdoors, the right preparation is key. For indoor stands, you can rely on waterproof sealants or varnishes to shield wood surfaces from spills and splashes. Metal stands, meanwhile, require rust-proofing measures, such as applying a rust inhibitor, to prevent corrosion. In contrast, outdoor stands demand materials that are inherently resistant to decay, like cedar or redwood, which can be paired with an exterior-grade finish to fend off moisture and sunlight’s damaging effects.
How can I customize my plant stand?
When it comes to customizing your shelving unit, consider starting with the basics. Choose a color or finish that harmonizes with your existing decor. This will ensure a seamless integration into your space. Next, think about adjusting the dimensions of the shelving unit to accommodate your unique needs. You may need to modify the height, width, or number of shelves to fit your specific plant collection or to suit the layout of your room. Finally, consider adding some decorative elements to give your shelving unit a personalized touch. This could include lattice work, carving, or decorative brackets that add visual interest and create a one-of-a-kind piece.
Is it cheaper to build a plant stand than to buy one?
While it’s true that building your own plant stand can be more cost-effective, especially when using recycled or leftover materials, there’s another advantage to consider: customization. By taking the DIY approach, you can tailor the size and style of your plant stand to perfectly suit your needs, which might not be easily achievable with mass-produced products on the market.
How do I ensure my plant stand is stable?
To ensure a stable and secure cooking experience, it’s crucial to focus on three key aspects of your pot rack design. Firstly, guarantee that all connections are solidified using screws, nails or glue, whichever method is most suitable for the materials involved. This attention to detail will prevent any unwanted accidents from occurring. Secondly, consider the overall balance of your stand, ensuring its base is substantial and the center of gravity remains low. This precautionary measure is particularly important for taller stands that may be prone to tipping. Finally, distribute the weight evenly across your stand’s multiple levels, placing heavier pots on lower shelves and lighter ones towards the top. By following these guidelines, you’ll create a pot rack that not only looks aesthetically pleasing but also provides a reliable foundation for your cooking endeavors.
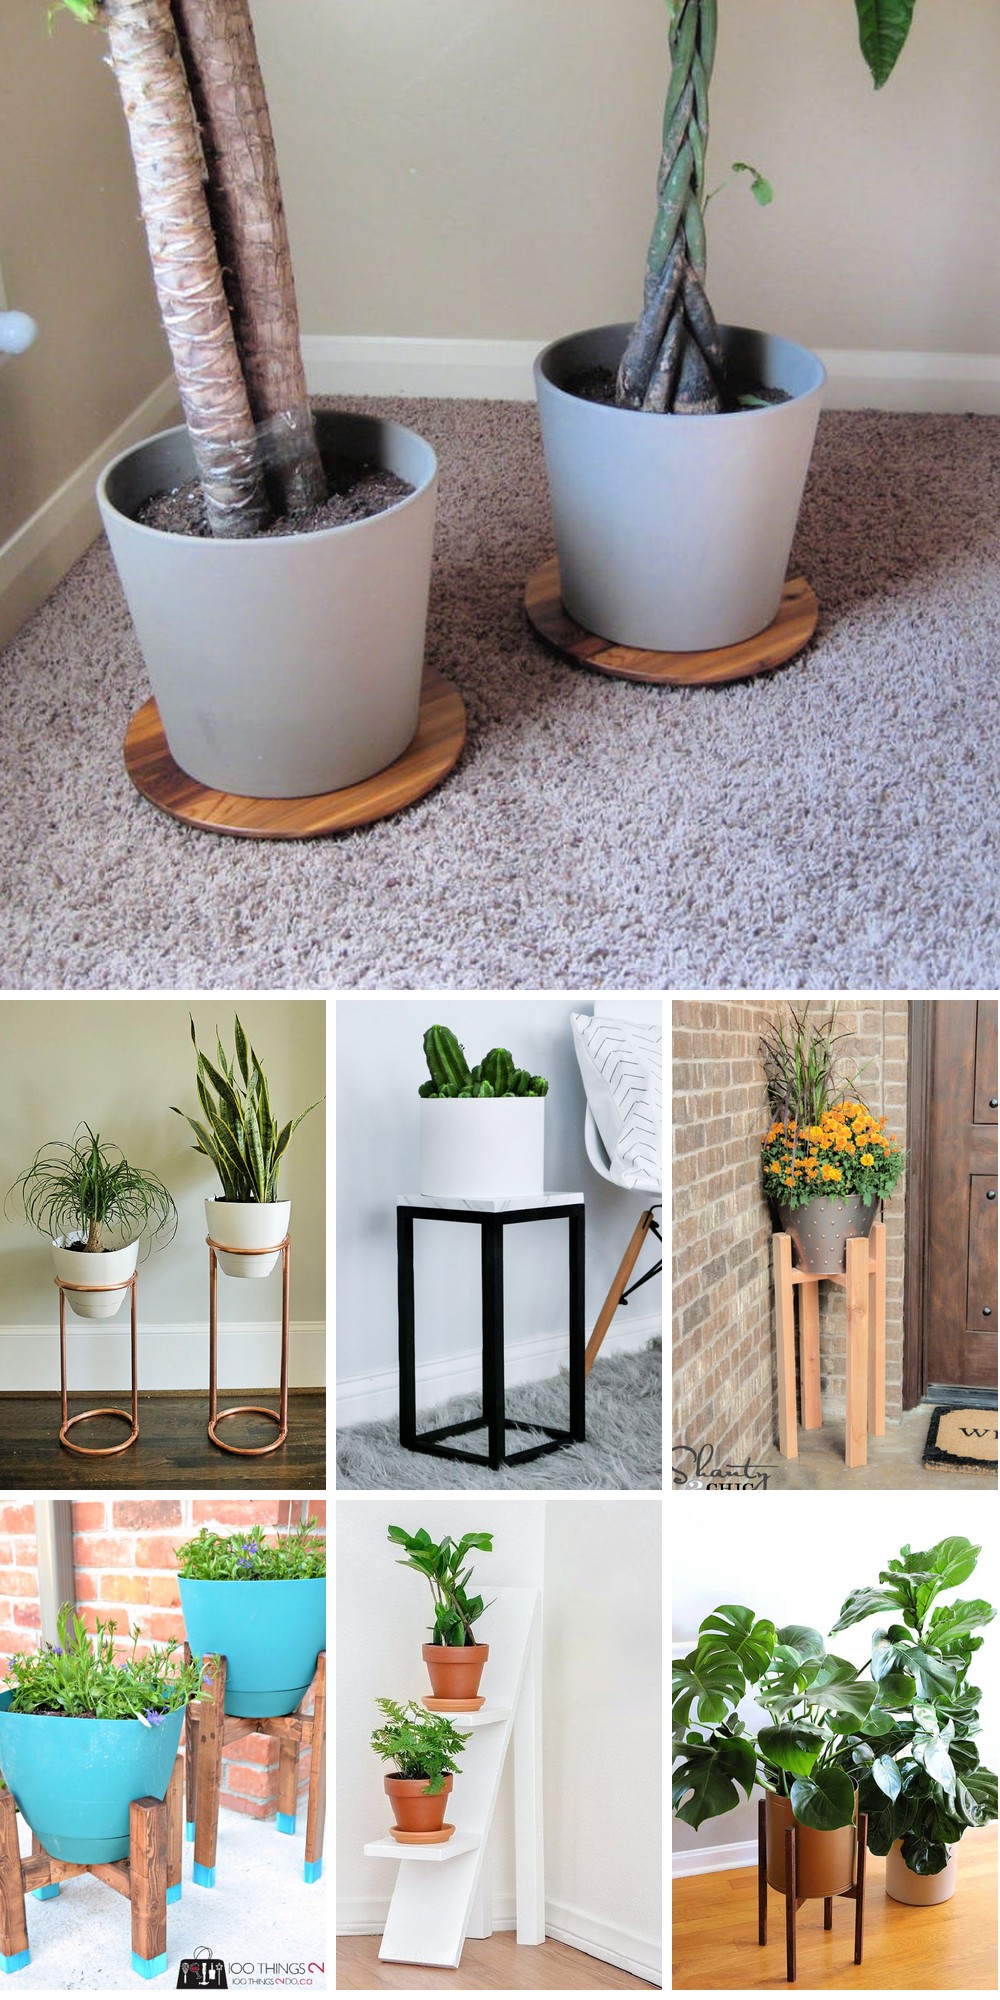
15 Free DIY Plant Stand Plans and Ideas (How to Build)
Enhance your home’s ambiance by creating unique plant stands without breaking the bank. With 15 free DIY plant stand plans and ideas, you can unleash your creativity and turn your indoor or outdoor spaces into a lush oasis.
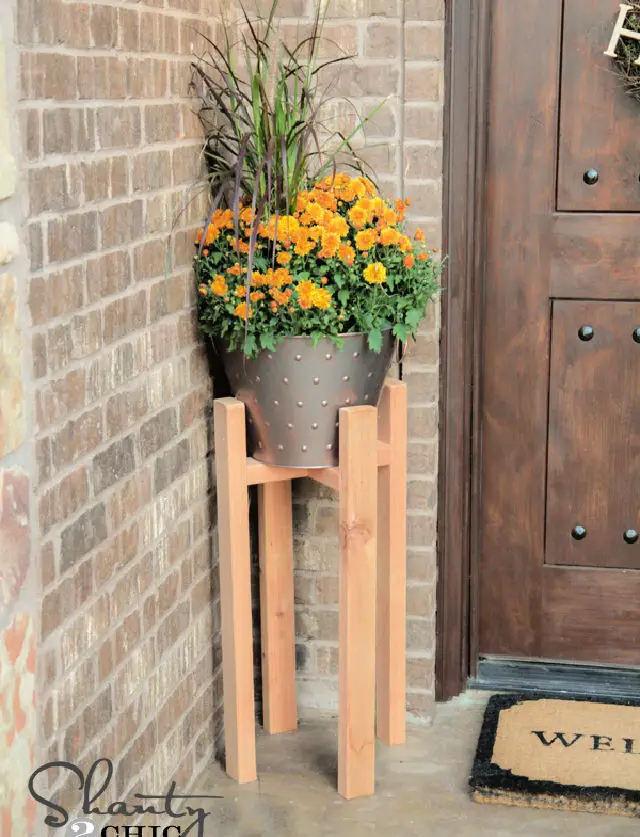
Building a Cedar Outdoor Plant Stand
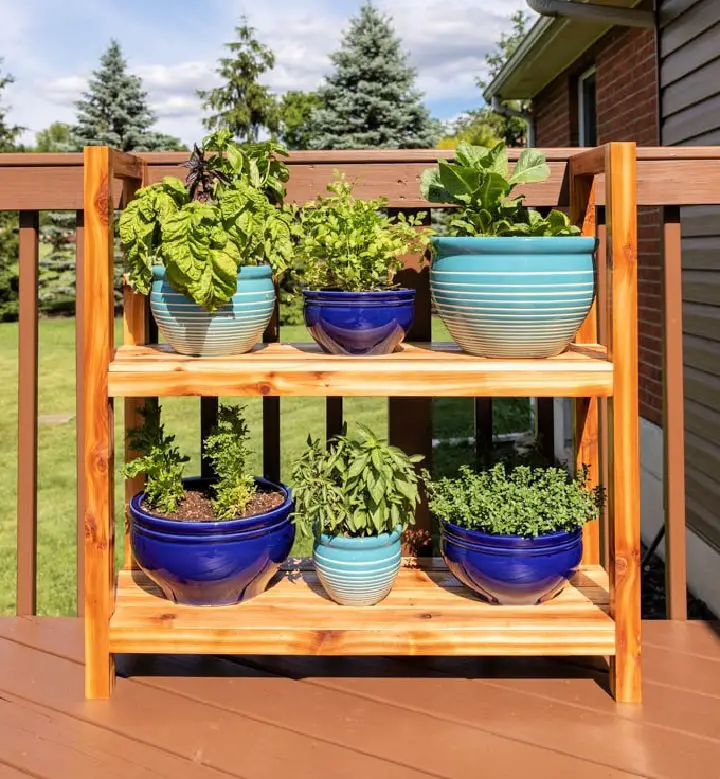
Transform your outdoor space with a unique, handmade cedar plant stand crafted from just one fence post and some pickets. This budget-friendly DIY project won’t break the bank, with materials costing under $40. Ideal for showcasing herb gardens or other potted plants, this elevated planter keeps containers off the ground while adding a touch of charm and functionality to your deck. To ensure durability and beauty, our step-by-step guide provides essential tips on using outdoor screws, finishing with UV protectant oil, and more. Get started today and enjoy a fresh, organized outdoor look that’s sure to impress.
How to Build a Plant Stand
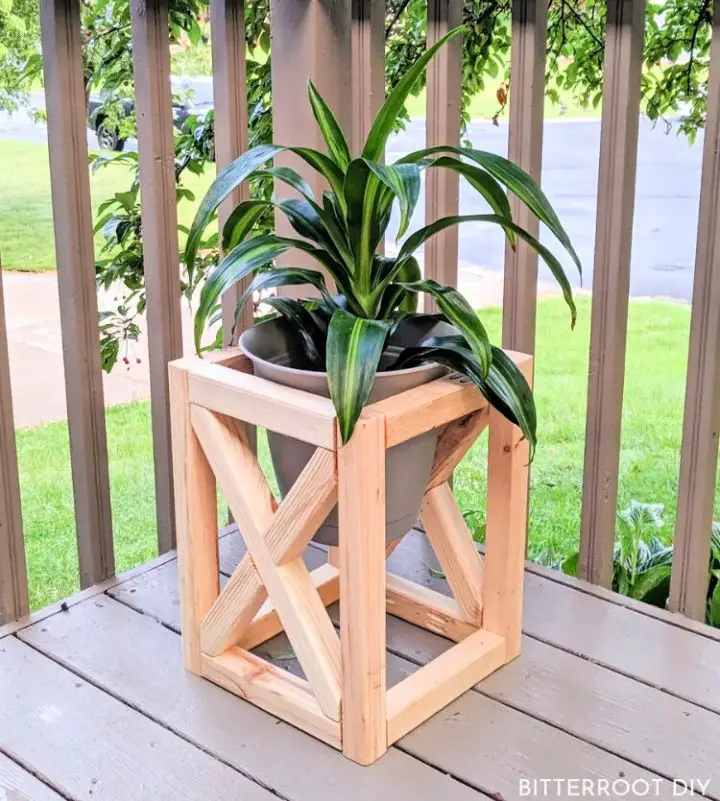
Transform your space by crafting a custom DIY plant stand that harmoniously merges form and function. This versatile project is suitable for both indoor and outdoor settings, accommodating 10-inch planter pots with ease. With step-by-step instructions and basic tools such as a miter saw, drill, and brad nailer, this beginner-friendly project invites you to unleash your creativity on a leisurely afternoon, showcasing your plants in a stylish and natural way.
Homemade Wooden Plant Stand
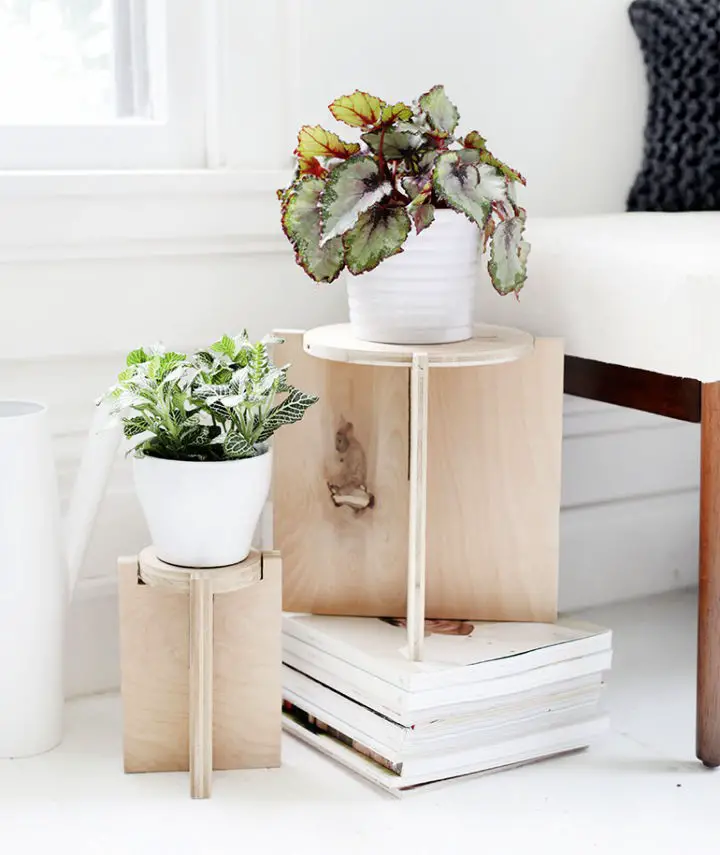
Transform your indoor space with the warmth and charm of DIY plant stands. By crafting your own wooden plant stand using plywood, basic tools, and creativity, you can add a unique touch to your living area while showcasing your beloved plants. This straightforward guide from The Merrythought provides an easy-to-follow method for creating stylish stands that seamlessly blend with any decor. Whether you’re looking to elevate your indoor garden or simply bring a piece of nature indoors, these adorable wooden plant stands are the perfect DIY project to get started today.
DIY Plant Stand Step by Step Instructions
Transform your home decor with a unique flourish by crafting a customized plant stand. Amber from Elk Island Rustics leads you through an accessible and inspiring DIY process. Unleash your creativity as you experiment with various finishing touches, including staining and distressed techniques. Whether you choose to showcase vibrant greenery or sleek faux plants, these handmade stands are sure to elevate any room’s ambiance. Ready to embark on a rewarding DIY adventure? Join Amber in this creative journey and share your finished masterpiece using #EIRplantstand. Let’s collaborate on crafting something truly special.
Building Your Own Plant Stand
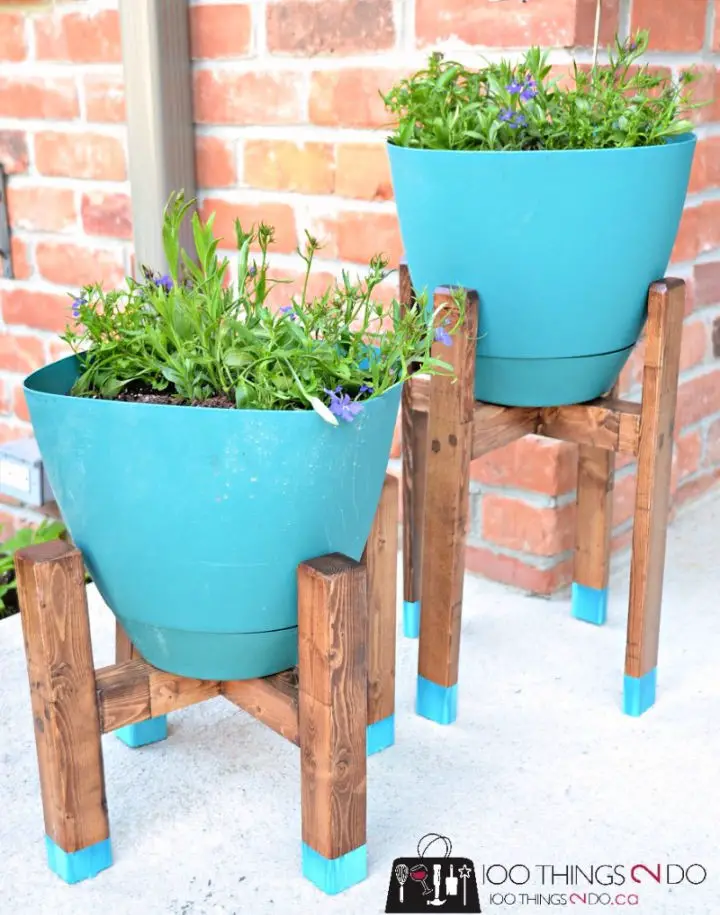
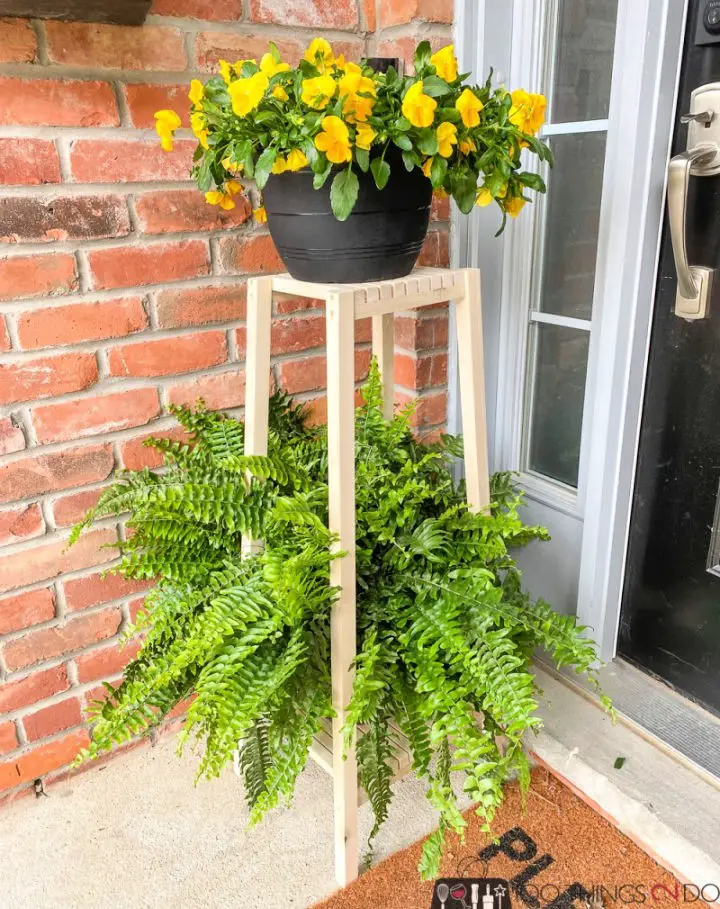
Transform your garden or indoor space by crafting charming DIY plant stands that add height and visual appeal to your greenery. This accessible project is ideal for both seasoned crafters and those new to DIY endeavors, as it requires minimal materials and basic tools. With the flexibility to accommodate pots of various sizes, you can customize these stands to suit your unique style. By combining scrap wood with a little creativity, you’ll be able to create a one-of-a-kind display for your plants that will undoubtedly become a stunning focal point in any room. For a comprehensive guide that makes this project as easy as possible to follow, visit 100 Things 2 Do and get ready to elevate your plant display into a breathtaking masterpiece.
Easy DIY Low Plant Stand
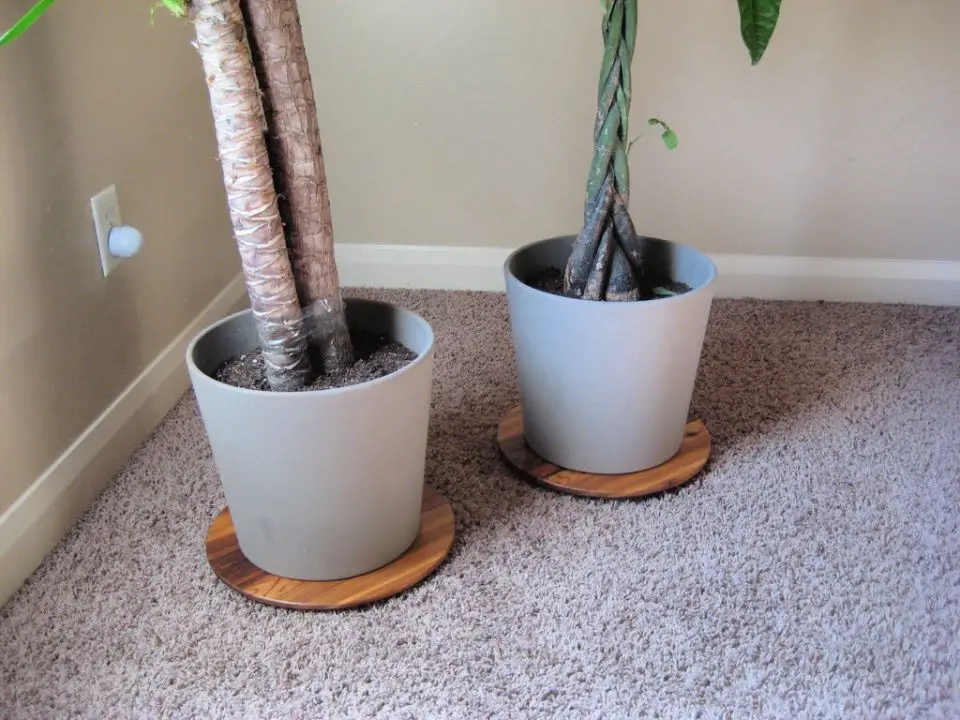
Transform your indoor space with a unique DIY Low Plant Stand that combines functionality with style. Designed to showcase your plants while keeping them elevated and off the ground, this versatile project is perfect for those who want to add a touch of sophistication to their home decor. With its ease of construction and customizability to fit any room, this plant stand is an ideal solution for indoor garden enthusiasts looking to take their greenery game to the next level.
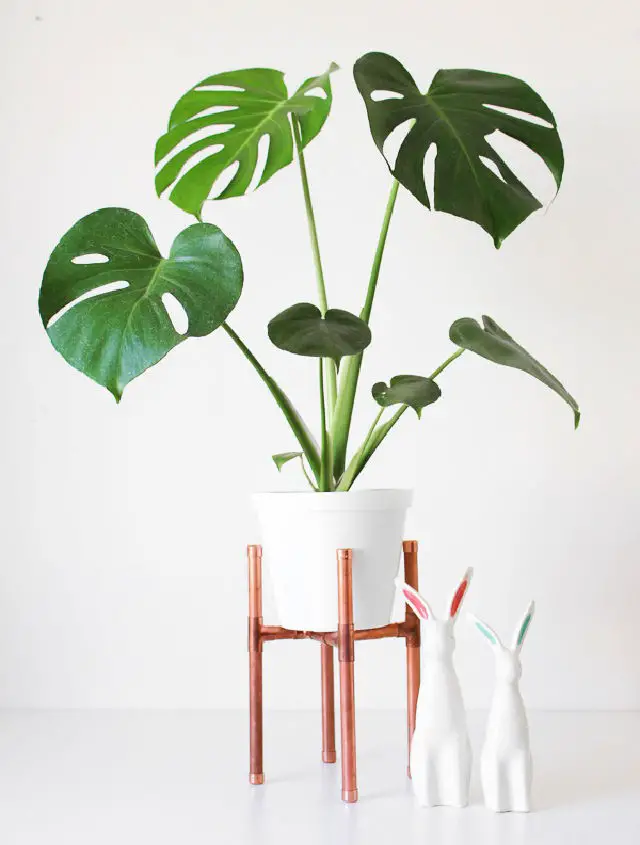
Make a Copper Round Plant Stand
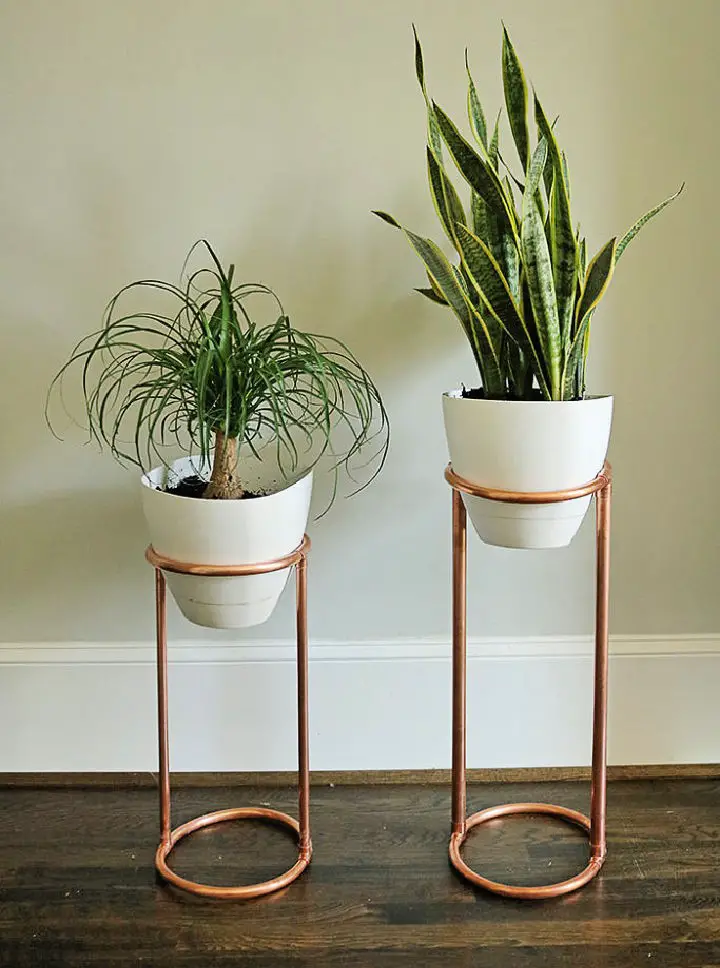
Transform your home garden into a stunning oasis with ease and affordability by opting for DIY plant stand plans. One such project is the chic Copper Round Plant Stand, a perfect showcase for indoor greenery. With this straightforward guide from Darling Darleen, you can simplify the way you display your plants in about 30 minutes, excluding drying time for glue. To create this modern, mid-century style stand, all you need are copper pipes, a coil, and basic tools. This clever DIY project enables you to add an air of sophistication to your living space without breaking the bank, making it an ideal choice for anyone seeking to elevate their home with a touch of elegance.
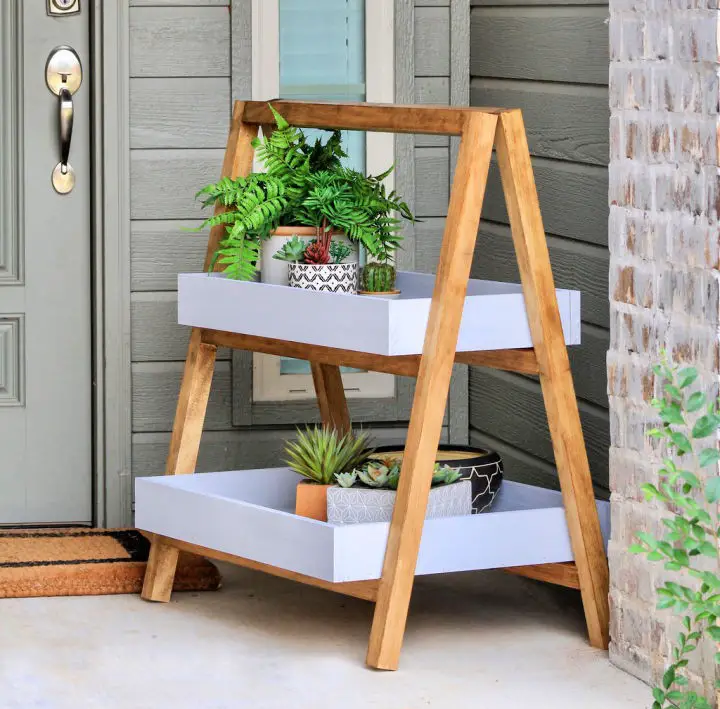
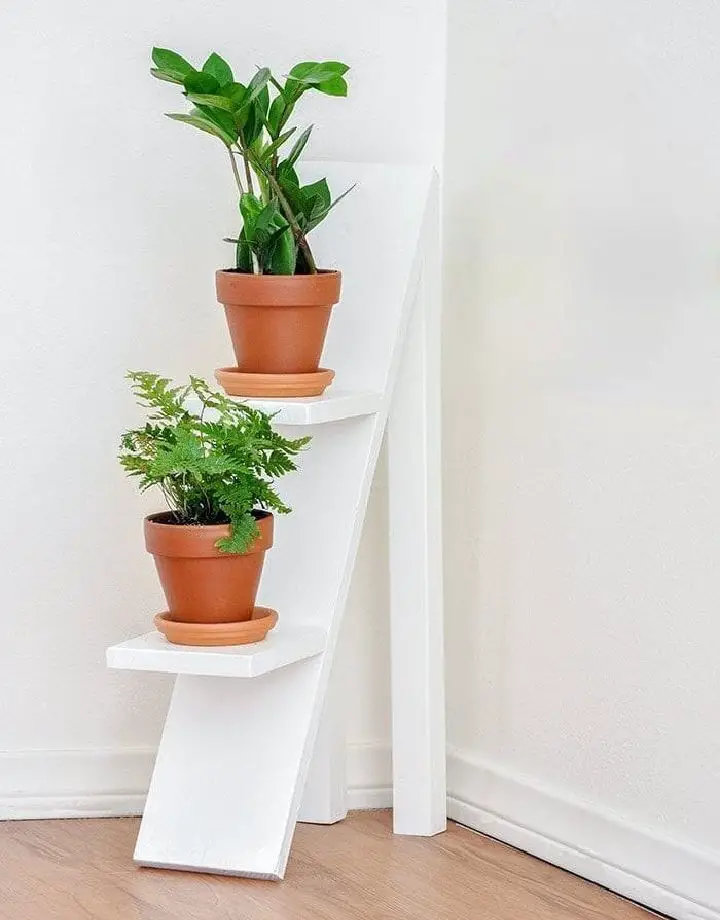
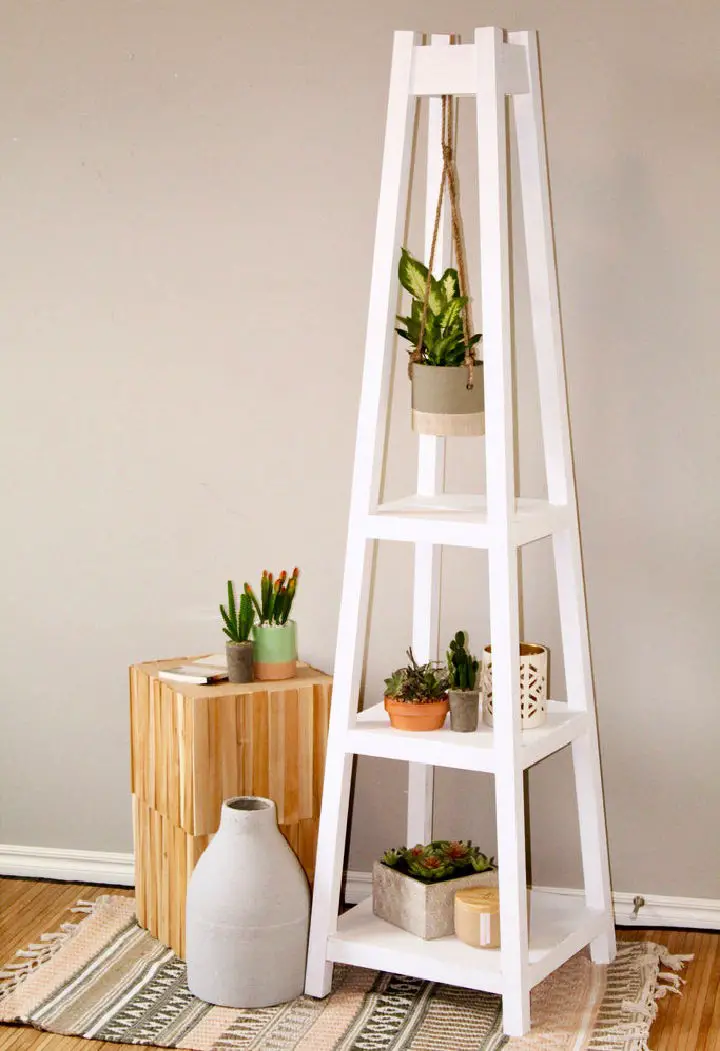
DIY A Frame Ladder Plant Stand
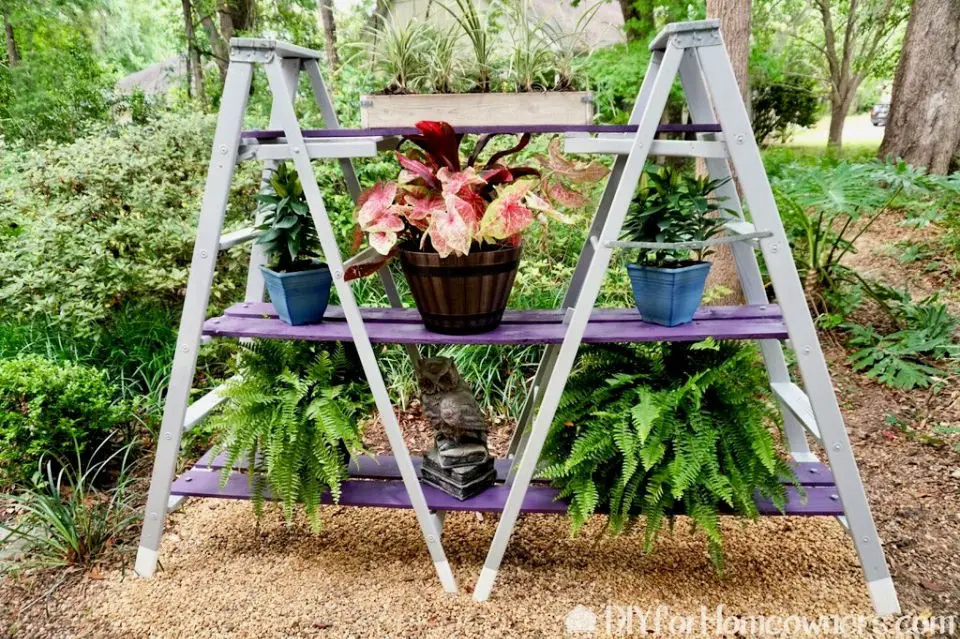
Discover the joy of upcycling with this comprehensive DIY A-Frame Ladder Plant Stand guide. Whether you’re looking to revamp your indoor or outdoor garden, this easy-to-follow tutorial provides a stress-free approach to creating a showstopping plant display. By breaking down the process into manageable steps, this guide empowers you to transform your space and showcase your prized plants in a unique and captivating way.
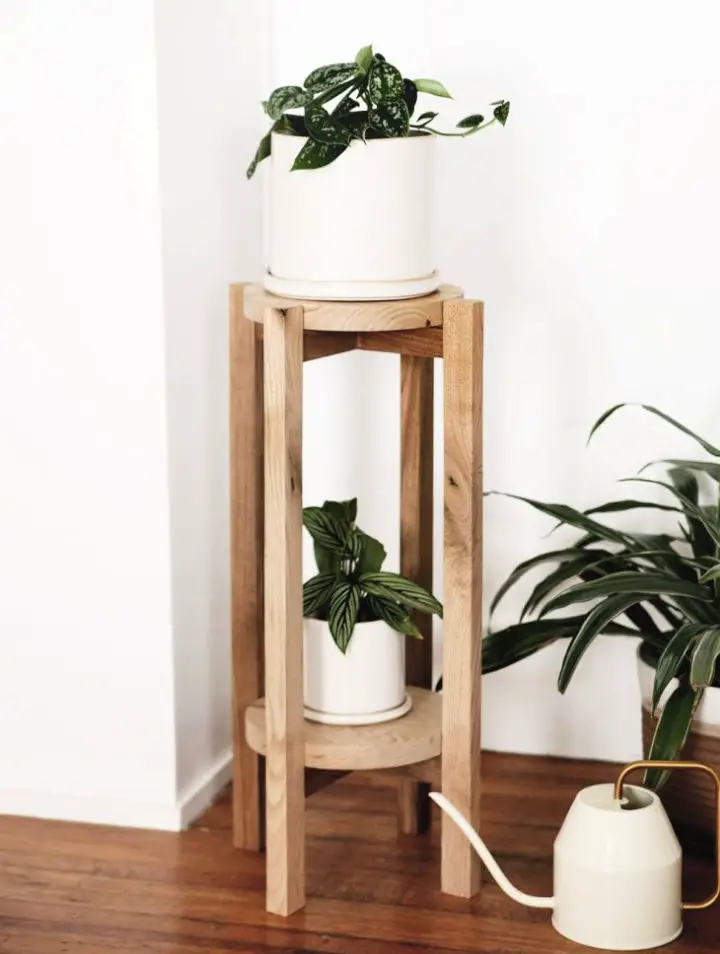
Simple DIY Wooden Plant Stand
Discover the joy of creating a one-of-a-kind Wooden Plant Stand that brings the outdoors in, with our comprehensive guide. By following these easy-to-follow instructions, you’ll be able to craft a sturdy and visually appealing plant stand from scratch, regardless of your skill level or desired material – pine for affordability, oak for elegance, or any other wood type that suits your style. With a clear materials list and step-by-step guidance, this DIY project is perfect for those looking to add a personal touch to their home while showcasing their unique sense of style.
Making Your Own Plant Stand
Transform your home with the charm of handmade DIY plant stands that effortlessly bring greenery into your modern farmhouse oasis. This comprehensive guide takes you through a simple yet stylish process of building an elegant stand using minimal resources – mostly scraps from your garage. With just a few essential materials, including 1x2s, wood glue, and a nail gun, you’ll craft a plant stand that perfectly complements your indoor garden. Perfect for enthusiasts seeking to elevate their living space, this project delivers both functionality and style with an easy-to-follow step-by-step process.
DIY Plant Stand With Details Instructions
Transform your living space with our DIY Plant Stand plans, designed for all skill levels and budgets. With materials costing less than $10, this project is both accessible and adaptable to any pot size or style. Our step-by-step instructions guide you through each stage, from preparation to assembly, making the process seamless and enjoyable. This budget-friendly yet highly rewarding DIY endeavor allows you to effortlessly elevate your home decor while staying within your means.
How to Make a Flower Pot Stand
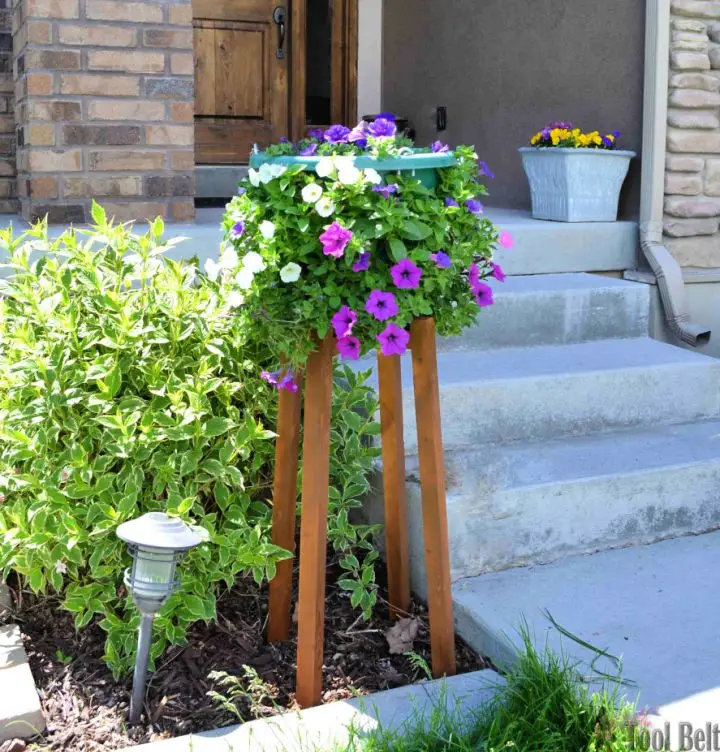
Transform your outdoor area into a haven of beauty and functionality by crafting a DIY flower pot stand from Tool Belt. This straightforward project requires only basic tools and materials, yet yields impressive results – elevating your flower pots to 30 inches off the ground, perfect for showcasing cascading blooms. The comprehensive guide includes a detailed cut list and step-by-step instructions, making it easy to follow along. Not only will this practical stand add charm to any porch or patio, but its affordability and customizability also make it an excellent choice for enhancing your garden’s aesthetic appeal.
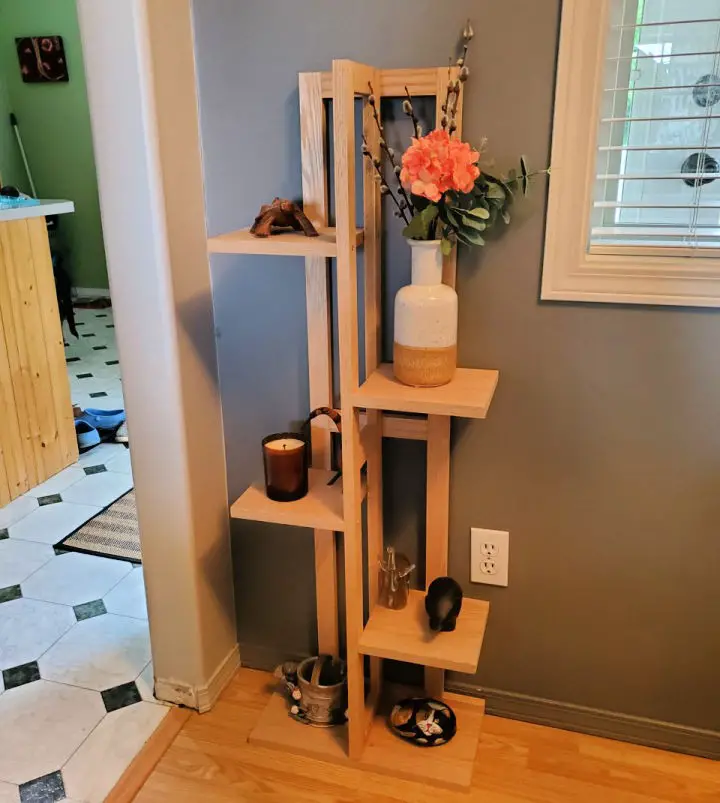
DIY Tiered Plant Stand From Scrap Wood
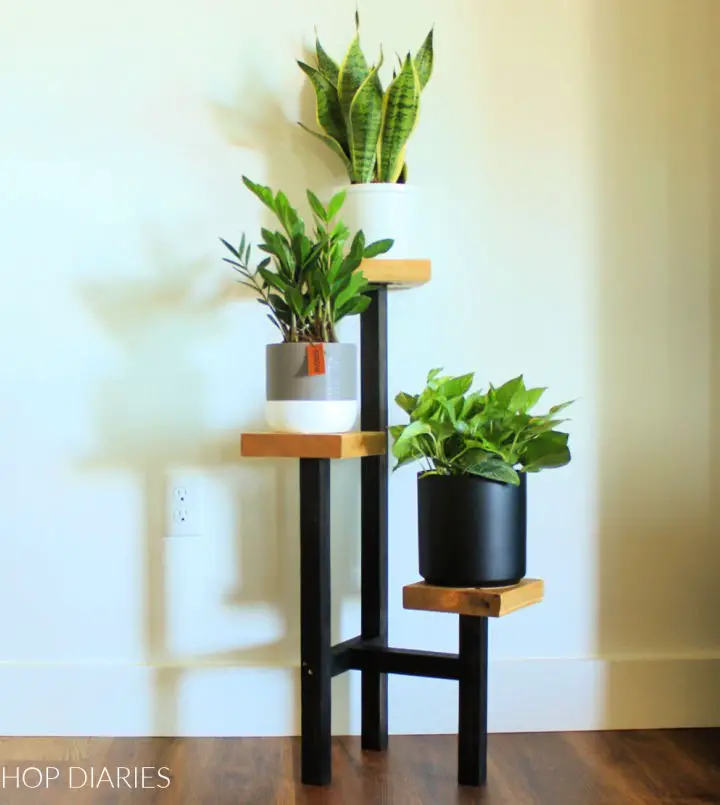
Elevate your home decor with a charming DIY tiered plant stand crafted from leftover lumber. This space-saving design optimizes light and minimizes clutter in small spaces. With its quick and easy build process using scraps, this project is perfect for giving new life to your decor. For a detailed guide on how to create this stand, including customizable options for size and additional tiers, visit Woodshop Diaries. Whether placed by a sunny window or nestled into your cozy reading nook, this plant stand adds a stylish touch while showcasing your prized plant collection.
Making a Plant Stand Out of Wood
Add a touch of rustic charm to any room with our wooden plant stand plans, designed for effortless elegance. This DIY project is perfect for plant enthusiasts seeking to infuse their space with vintage flair. With a straightforward video guide, you’ll be amazed at how easily you can craft a versatile stand capable of showcasing one or two plants, depending on your preference. Gather the necessary materials, including wood, a saw, drill, and screws, then get creative and bring this dual-purpose piece to life.
Modern DIY A Frame Plant Stand
Transform your living space into a stylish oasis with a unique DIY project from Handmade Haven. This Modern A-Frame Plant Stand tutorial will show you how to create a stunning centerpiece for showcasing indoor greenery or adding a touch of modern flair to your outdoor areas. By following each step, from constructing the A-frame structure to building planter boxes, and learning expert tips on painting or staining for a durable finish, you’ll be able to elevate any room with this captivating DIY project. Whether you’re looking to enhance your entryway or revamp your patio, this Modern A-Frame Plant Stand promises to be a standout addition.
Free Tiered Plant Stand Plan
Transform your home’s greenery with a DIY tiered plant stand that’s not only budget-friendly, but also adaptable to fit your space seamlessly. By following the straightforward build instructions from 100things2do.ca, you’ll be on your way to crafting a one-of-a-kind piece that showcases your plants in all their glory. Whether you’re looking to elevate indoor or outdoor spaces, this project allows for year-round botanical arrangements or even serves as a thoughtful gift for Mother’s Day. Prepare to add a new dimension of visual interest and height to your plant displays!
Build Your Own Plant Stand
Elevate your plant display with a charming DIY tiered plant stand, crafted from leftover materials. This project is perfect for showcasing your greenery in both indoor and outdoor spaces. By transforming scrap wood into a unique piece of decor, you’ll not only be giving unused pieces a new life but also adding a personalized touch to your home. Whether you’re a seasoned gardener or just starting out, this creative and sustainable DIY project is an ideal way to showcase your plants. Simply follow the easy steps outlined in Anika’s DIY Life guide and build a beautiful plant stand for your favorite flora.
Pottery Barn Planter and Plant Stand
To give your plants the ultimate home makeover, follow these comprehensive wood plant stand plans. By repurposing everyday items like old stoneware crocks and cedar 2x4s, you can create a one-of-a-kind planter and stand that’s both durable and stylish. Whether you’re looking to elevate your indoor space or add some curb appeal to your outdoor deck, this DIY guide has got you covered. With precise measurements, expert painting tips, and customizable design options, you’ll be empowered to transform your plant stand into a true masterpiece. Perfect for DIY enthusiasts seeking to bring a touch of sophistication to their surroundings.
Raised Copper Pot Plant Stand Ideas
Transform your indoor space with a touch of elegance using this DIY Raised Copper Pot Plant Stand tutorial from Pure Sweet Joy. This innovative stand not only adds visual interest to your plants but also provides a convenient way to showcase them. With minimal materials, including 15mm Copper Pipe, Copper Tees, pipe caps, a pipe cutter, and Epoxy, you can effortlessly create a stunning display for your potted plant. Follow the simple steps to cut, assemble, and secure the stand, resulting in an impressive home for your greenery that will elevate your home décor without much effort.
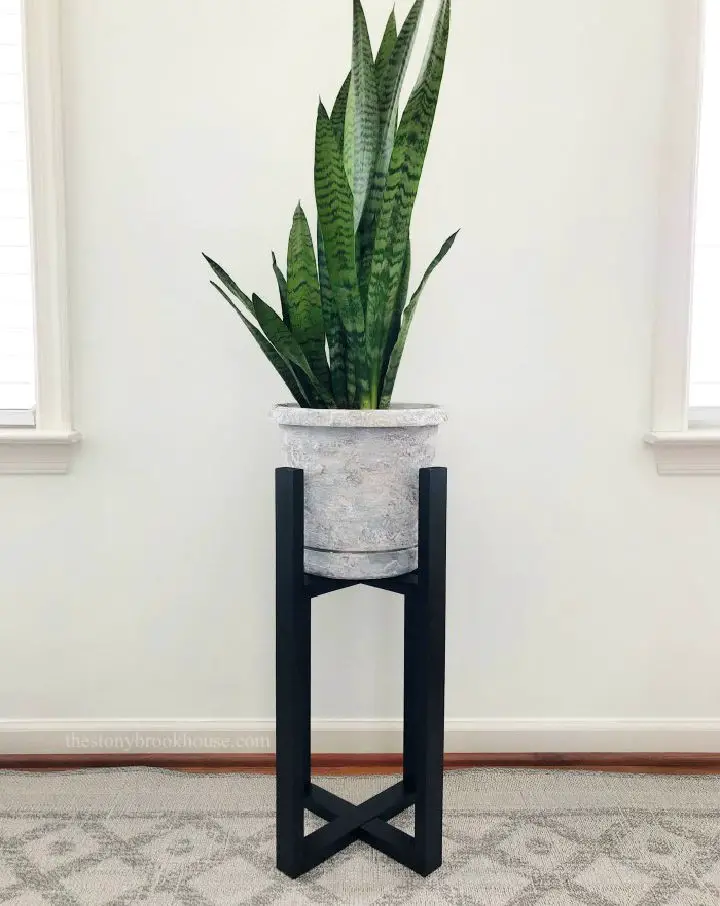
Affordable Cedar Wood Plant Stand
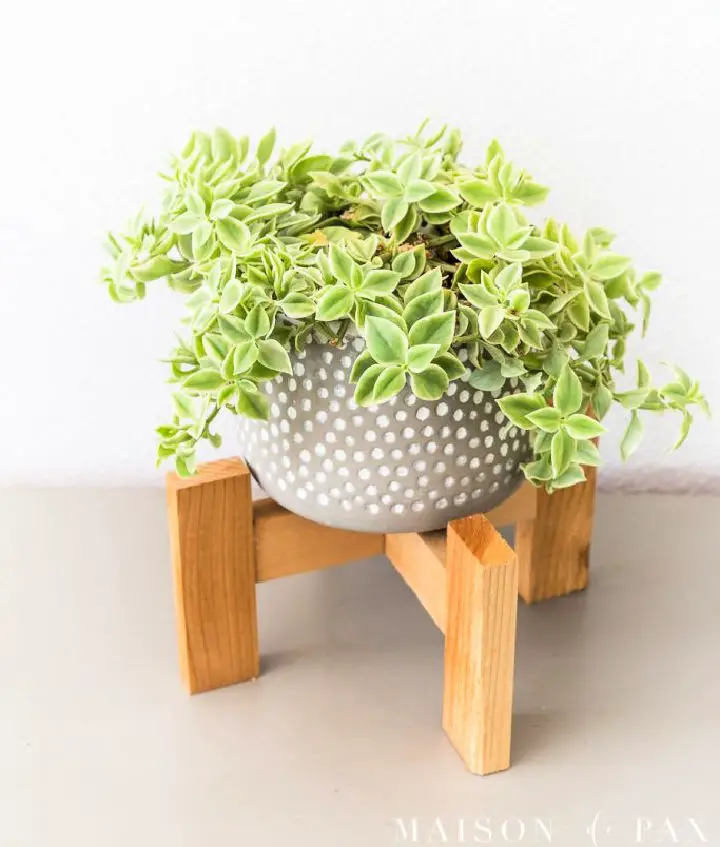
Transform any indoor or outdoor space into a stunning oasis by creating your own cedar wood plant stands using this straightforward DIY guide from Maison de Pax. Drawing inspiration from high-end mid-century modern designs, these budget-friendly stands add a touch of elegance and vertical flair to your plant collection. With an impressive total cost of just $4 per stand, cedar’s natural resistance to rot ensures that your creations will withstand the elements while keeping your plants thriving. Whether you’re looking to elevate your outdoor space or accentuate your interior decor, this comprehensive guide provides step-by-step instructions to craft your own unique and stylish plant stands using simple tools and materials. Get ready to take your plant display to the next level!
Colorful Stacked Book Plant Stand
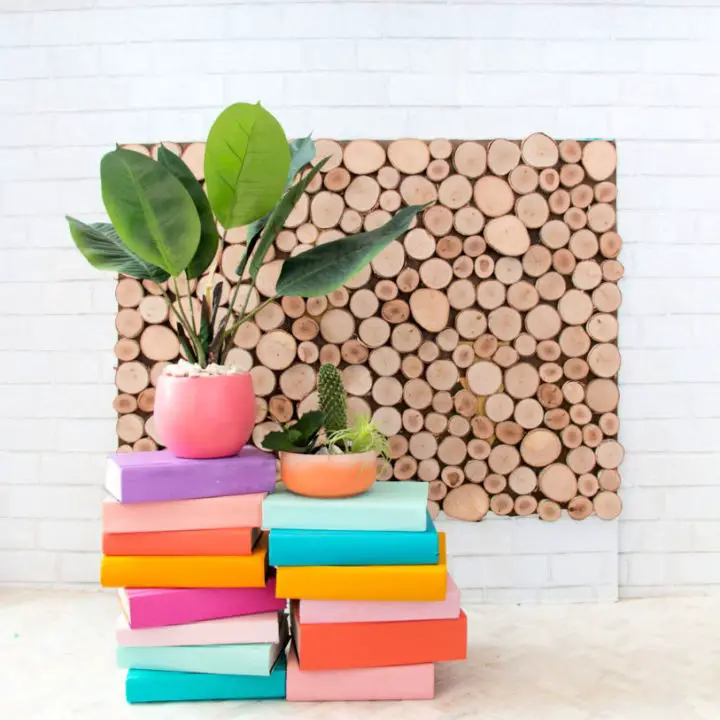
Transform the look and feel of your outdoor space by creating a one-of-a-kind plant stand using DIY techniques. This project, which involves repurposing thrifted hardcover books, acrylic craft paint, and strong adhesive, is surprisingly easy to execute yet yields impressive results. With minimal materials required, you can create a colorful stacked book plant stand that showcases your favorite plants in a unique and whimsical way. Inspired by the creative minds at A Kailo Chic Life, this DIY project is perfect for adding a pop of color and creativity to any room.
Modern DIY Marble Plant Stand
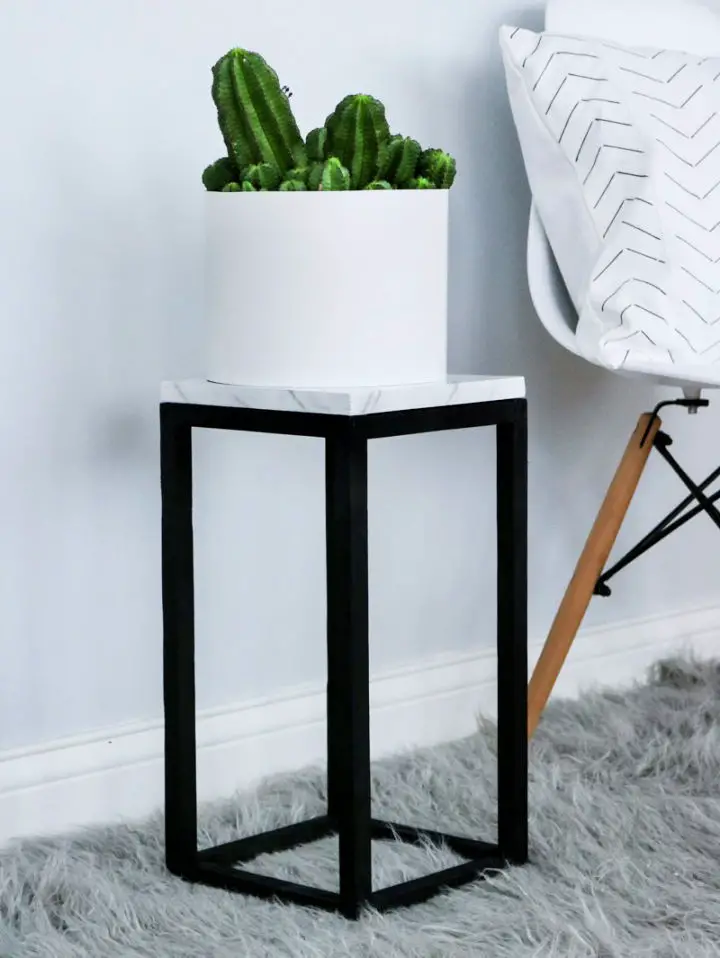
Take your indoor greenery to the next level by infusing it with a modern touch through a DIY plant stand featuring an effortless faux marble effect. This straightforward project combines creativity and simplicity, allowing you to create a sleek frame and a stunning marble top using household items such as acrylic paint and a sponge. By following these easy steps, you’ll be able to achieve a sophisticated look that’s surprisingly accessible. Give your plants the perfect perch in any room with this stylish update that’s sure to elevate your indoor space.
How to Make Your Own Plant Stand
Transform your green space into a charming oasis with a one-of-a-kind DIY plant stand that showcases your creativity and adds a touch of elegance to your home décor. This engaging project from Handmade Haven will guide you through the process of woodworking, making it an enjoyable adventure for those who appreciate the finer details in life. It’s not just about building a stand for your plants – it’s an opportunity to explore new DIY techniques and turn simple materials into a stunning display for your botanical wonders.
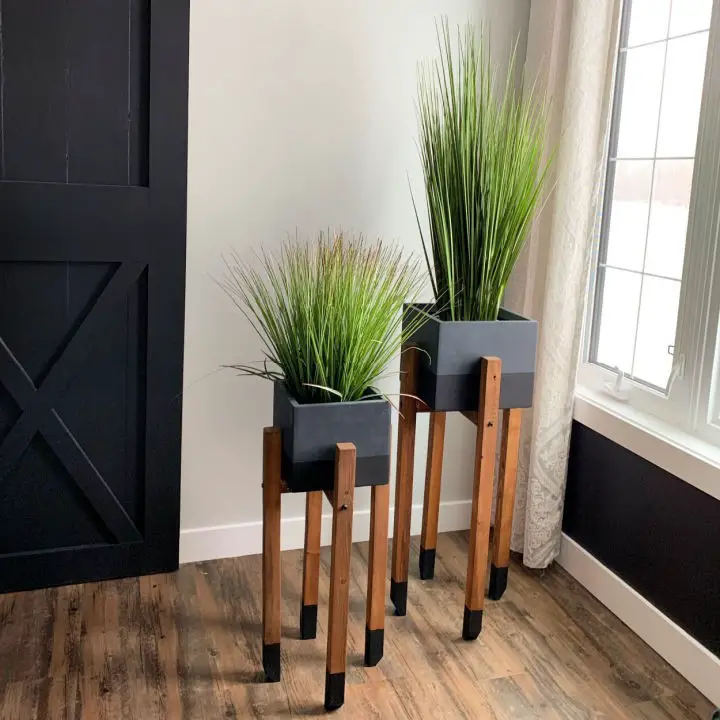
DIY Mid-Century Plant Stand at Home
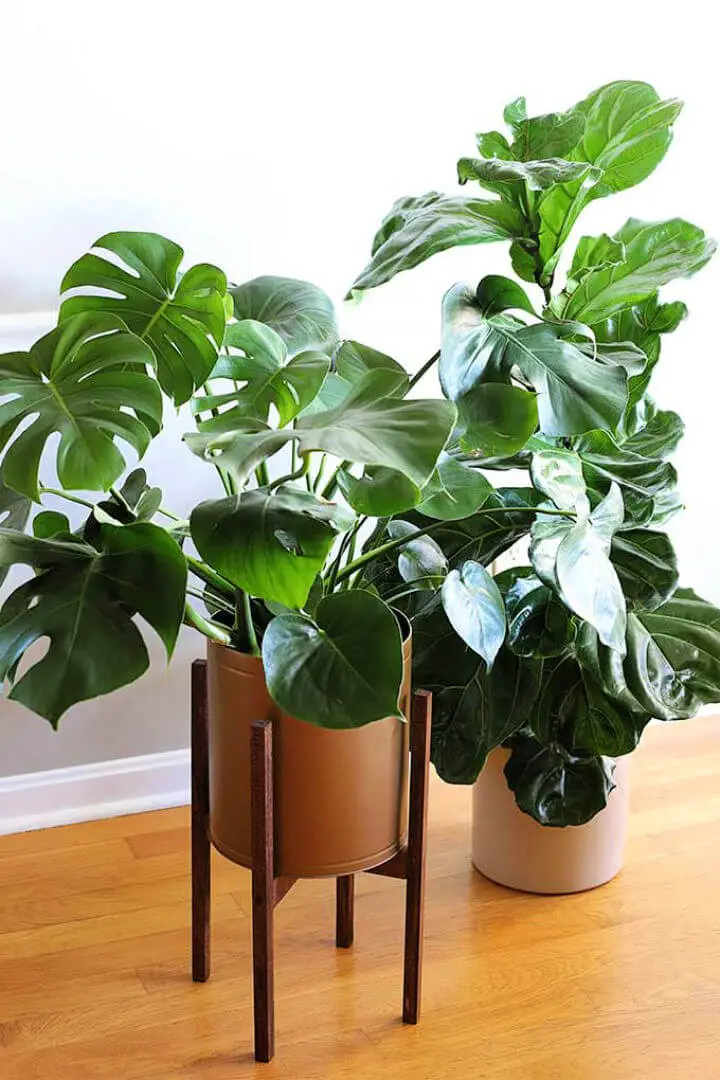
Transform your indoor space with a touch of vintage flair by crafting a Mid-Century Plant Stand that doubles as a creative solution to organize and display your plants beautifully. This DIY project from House of Hawthornes is surprisingly straightforward, requiring only basic woodworking tools and materials to bring a high-end look without the hefty price tag. Perfect for blending modern and vintage styles, this charming stand elevates your indoor garden with a classic mid-century design that’s sure to impress. Give your green friends the stylish display they deserve and bring a piece of thrift store charm into your home.
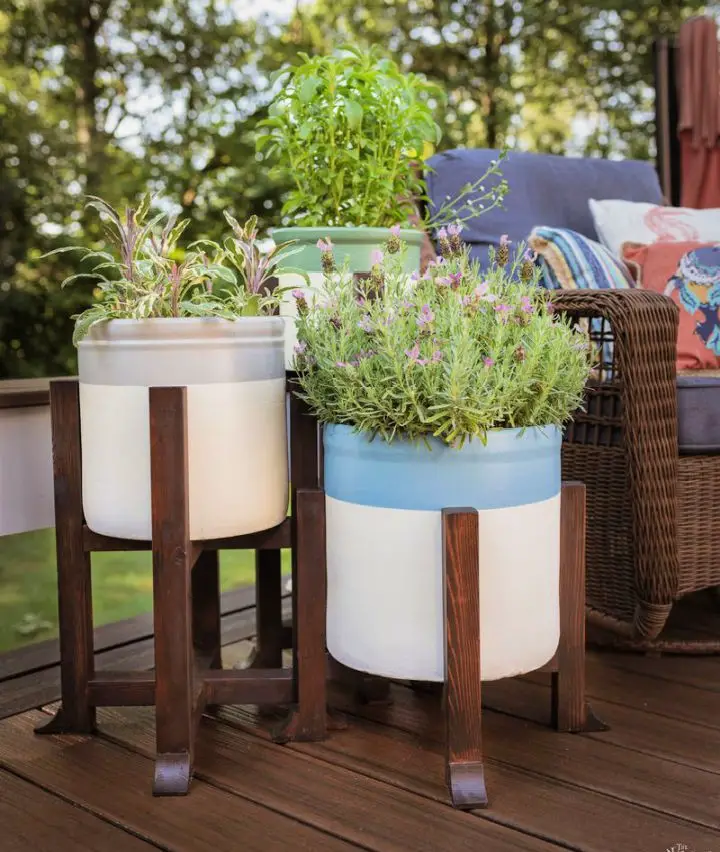
Mid-Century Modern Plant Stand Design
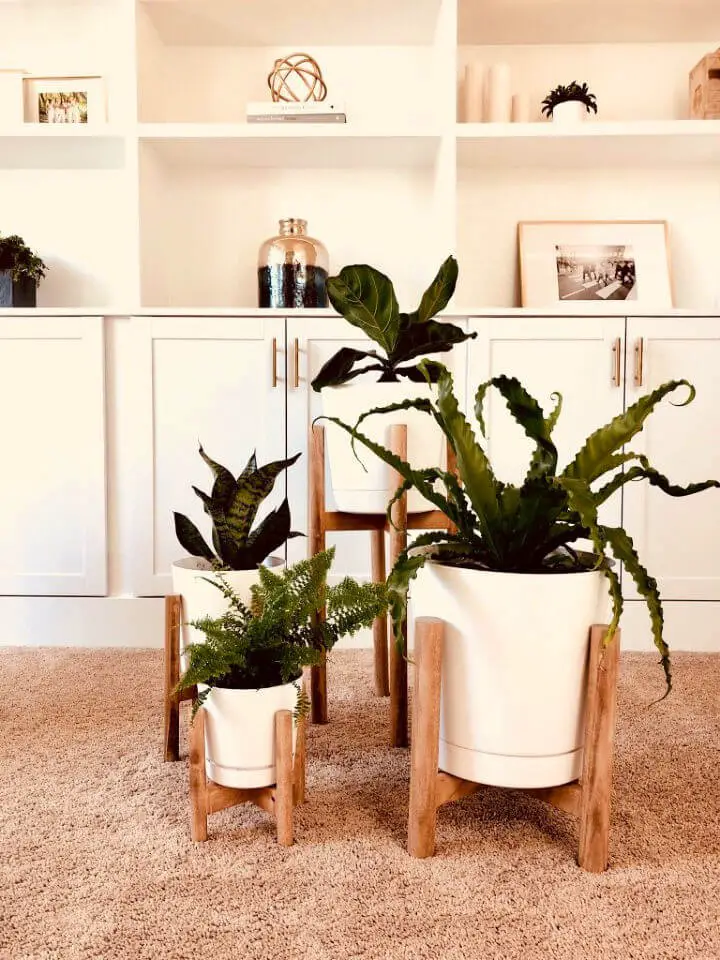
Transform your home decor without breaking the bank by crafting chic Mid Century Modern Plant Stands using budget-friendly DIY methods. With Paul Tran’s expert guidance, you can create these stylish stands for under $15, a fraction of the cost of store-bought versions which can range from $100 to over $200. To help you achieve professional-looking results, every step of the process is thoroughly detailed, from selecting the perfect pot size to adding the finishing touches. Whether you’re looking to elevate your living room, bedroom or office space, these elegant stands are sure to add a touch of sophistication and style without straining your budget.
Conclusion:
As you bring this DIY adventure to a close, it’s clear that our collection of 15 free DIY plant stand plans and ideas has empowered you with the skills and confidence to create a one-of-a-kind piece that perfectly captures the essence of your home decor. By seamlessly integrating the instructions, materials, and tools presented throughout, you’ve successfully crafted a functional and visually stunning plant stand that not only enhances your indoor space but also reflects your personal style. The comprehensive FAQs section has further solidified your understanding of the process, ensuring that any questions or concerns are addressed and your DIY project is nothing short of remarkable. As you bask in the satisfaction of having built your very own wooden indoor plant stand, remember that it’s not just a functional piece – it’s also a testament to your creativity and resourcefulness. The journey may be over, but the joy and pride of showcasing your handiwork will linger on.
