Transforming your surroundings with vibrant colors and whimsical charm, DIY pinwheels are an exciting creative outlet for all ages. Explore 30 delightful and easy-to-make pinwheel designs to infuse any event or garden with joy and personality. These mesmerizing spinning wonders aren’t limited to just kids; they can be a source of artistic expression for anyone looking to add a dash of magic to their indoor or outdoor spaces. Ranging from simple, quick projects requiring minimal materials to more intricate creations that challenge your crafting skills, making pinwheels offers boundless possibilities for customization and fun. This comprehensive guide equips you with everything you need to start your next craft project, including an overview of the history and science behind pinwheels, step-by-step instructions on creating a paper windmill suitable for kids, and diverse ideas for personalizing each DIY pinwheel to make it distinctly yours. Whether you’re gathering materials, mastering folding techniques, or addressing common issues, we’ve got you covered. Let’s embark on a creative journey that yields not only an enjoyable crafting experience but also a kaleidoscope of colors and energy that transforms any setting.
The Fascinating World of Pinwheels: History and Science
Pinwheels are often perceived as whimsical decorations that bring joy to outdoor spaces, but their history is far more intriguing. With roots dating back to ancient China and the Sasanian Empire, these early wind-catching devices evolved into the pinwheel we know today. In America, pinwheels gained traction as weather vanes and children’s playthings during the Great Depression era. The simplicity of these spinning contraptions belies their significance in our collective past.
The science behind a pinwheel’s rotation is straightforward yet remarkable. As wind pushes against its blades, it converts the force into a spinning motion, exemplifying how wind energy can be transformed into mechanical energy. This fundamental principle highlights the potential for harnessing renewable energy sources. Every time you witness a pinwheel twirling in the breeze, it’s not merely an amusing toy or decorative accent – it’s a testament to human ingenuity in capturing the essence of the wind, as well as a connection to our past and a symbol of the possibilities of sustainable energy.
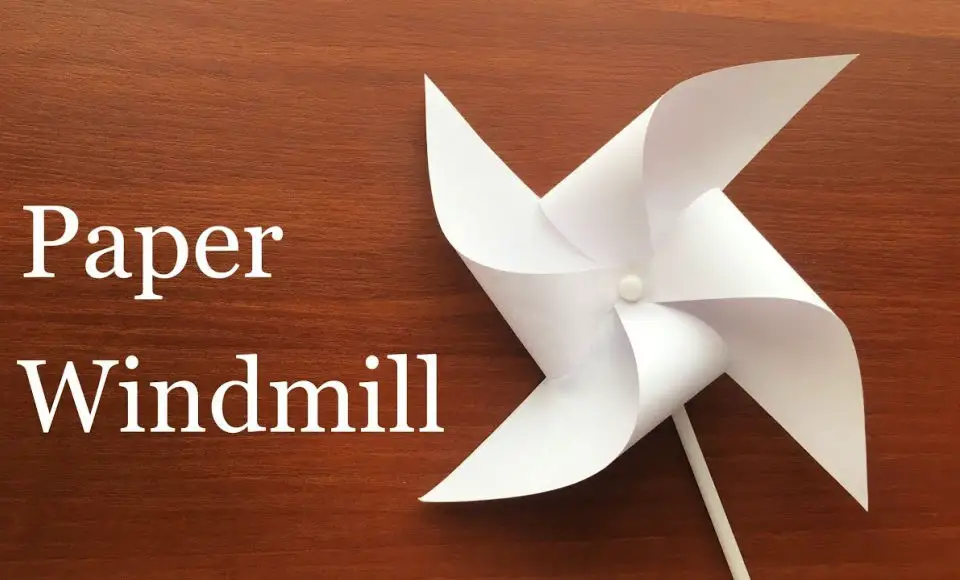
How to Make a Paper Windmill for Kids
Creating a paper windmill is an enjoyable and accessible craft that’s ideal for children and those who still possess a childlike sense of wonder. This activity not only encourages creativity but also yields a whimsical item that can bring a splash of color and dynamism to any room. To guide you through the process, follow these straightforward steps and ensure you have all the necessary materials and tools before commencing. Once you’ve got everything in order, you’ll be well on your way to crafting your very own paper windmill (pinwheel).
Materials Needed:
To create the materials needed for this project, you will require a few simple items. Specifically, you’ll need two square pieces of paper measuring 12 centimeters by 21 centimeters each, as well as one additional piece of paper measuring 21 centimeters by 15 centimeters. Additionally, you’ll need a small piece of paper that is only 5 centimeters by 2 centimeters in size. To hold everything together, you will also require a single craft pin.
Tools Required:
Step 1: Prepare Your Paper
Begin by selecting two square-shaped pieces of paper, which will serve as the foundation for your windmill. To add an extra layer of visual appeal, opt for vibrant or patterned paper that complements your creative vision.
Step 2: Cut and Fold
To create the iconic windmill design, begin by cutting a diagonal line from each corner of each square piece, stopping approximately 3 centimeters from the central axis. This will result in four triangular flaps at each corner. Next, gently fold each flap inward, toward the center of the square, allowing them to interlock and form the characteristic pinwheel shape that resembles windmill blades. As you fold each corner, be mindful not to crease or tear the paper, as this can affect the overall appearance of your finished design.
Step 3: Assemble the Windmill
As you fold each corner towards the center of the windmill design, take a moment to carefully position the craft pin at the very heart of the structure. It’s essential that this pin passes through all layers of the folded material, as it will serve as the foundation for your handiwork. This precise step showcases your crafting prowess, allowing the blades to rotate freely while maintaining the overall shape and integrity of the windmill.
Step 4: Final Touches
To complete your miniature windmill, gather the remaining pieces of paper – a 21cm x 15cm sheet for the body and a smaller 5cm x 2cm piece as a supporting element. First, roll the larger sheet into a cylindrical shape and secure it with adhesive, creating the handle for your windmill. Next, attach the smaller piece to one end of the tube, forming a stopper that will prevent the pin from dislodging while still allowing the blades to spin smoothly.
Step 5: Let Your Windmill Spin
As the final step in building your paper windmill, it’s now time to put your creation to the test. With gentle blowing or a few laps around the room while holding the windmill, watch as the blades spin into action. Your very own playful paper pinwheel is now ready to bring joy and whimsy to any setting!
Safety Tip:
When handling the craft pin, it’s essential to exercise caution. The pin is sharp and requires careful use, especially when working with young children who may not have the same level of dexterity or understanding of potential hazards. As a result, it’s recommended that adults supervise children when they’re using the craft pin to ensure their safety.
Video Tutorial
If you’re looking for a hands-on approach to making a paper windmill, I recommend checking out the video tutorial by Colors Paper on YouTube. The visual demonstration perfectly complements the written guide, providing an engaging and easy-to-follow walkthrough of the crafting process.
The synergy between the video’s detailed instructions and this written guide ensures that creating your paper windmill is a smooth and enjoyable experience. Beyond just being a fun activity, crafting a paper windmill offers a unique opportunity to express your creativity and bring joy to yourself or others. Whether you’re a seasoned crafter looking for a new challenge or trying this with kids for the first time, the sense of accomplishment that comes from seeing your paper windmill take shape is truly unmatched.
Customization Ideas for Your DIY Pinwheels
Transforming plain spaces into vibrant oases with DIY pinwheels is an excellent way to infuse a personal touch. With minimal materials and an open mind, you can create custom pinwheels that complement any theme or occasion. Here’s how: Start by selecting colors that harmonize with your event or decor. Bold hues are perfect for festive occasions, while pastel shades or neutral tones can add subtlety to more understated settings.Next, play with patterns to create visually striking designs. Stripes, polka dots, and floral prints can all contribute to a unique and captivating look. To really make your pinwheels stand out, incorporate sparkly elements like glitter, sequins, or metallic paper – the way they catch the light as they spin is truly magical.Take it up a notch by personalizing your pinwheels with initials, messages, or special quotes using letter stickers or hand-drawn letters. You can also add a touch of nature by laminating pressed flowers or leaves onto the paper for an organic and eye-catching design.For added texture and interest, incorporate embellishments like ribbons, buttons, or beads around the pinwheel’s center or along its edges. Don’t be afraid to experiment with size either – smaller pinwheels can make a statement indoors, while larger ones can dominate your garden.And finally, don’t limit yourself to traditional paper materials. Explore fabric, felt, or even upcycled plastic sheets to create one-of-a-kind pinwheels that reflect your personality and style. The key to any successful DIY project is embracing creativity and having fun – let your imagination run wild and watch your spaces come alive!
Safety Tips for Crafting DIY Pinwheels
To ensure a safe and enjoyable DIY pinwheel crafting experience, particularly when involving children, it’s essential to prioritize caution from the outset. Here are some vital guidelines to keep in mind: First and foremost, select materials that are gentle on young hands and eyes, opting for child-friendly scissors and alternatives to sharp objects or small parts that could pose a choking hazard. When kids are involved, always maintain close supervision throughout the project, guiding them through each step and handling any potentially hazardous tasks yourself. Next, strive to keep your workspace organized and clutter-free, as this will help prevent accidents and make it easier to locate and utilize your crafting tools. Furthermore, educate children on the proper usage of their newly crafted pinwheels, emphasizing that they are not toys intended for rough play or throwing. Finally, thoroughly test each finished pinwheel to guarantee its components are securely attached and functioning smoothly, thereby identifying any potential issues before they become a problem.
Troubleshooting Common Issues with DIY Pinwheels
When creating DIY pinwheels, it’s not uncommon to encounter minor setbacks. However, with some troubleshooting and adjustments, you’ll be spinning smoothly in no time. Here are some common problems that may arise and their solutions:If your pinwheel isn’t spinning, the culprit might be a tightly wound pin. Try loosening it slightly to allow for more movement. Additionally, ensure the pinwheel is balanced and none of the blades are bent or obstructed.When using thin paper, you may encounter tearing issues. To prevent this, opt for thicker paper or cardstock instead. If you’re stuck with thin paper, reinforce the areas where you insert the pin by applying tape or using a button as a buffer between the paper and the pin.A wobbly pinwheel can be frustrating to deal with. Check that the center of your pinwheel is precisely in the middle of the paper and all cuts are symmetrical. Furthermore, ensure the pin is inserted straight and not at an angle.Difficulty inserting the pin? Use a thumbtack to pre-punch the holes beforehand. This will make it easier to insert the pin without bending the paper.If your pinwheel is too loose and failing to hold its shape, you may need to secure the pin more firmly. Try using a small bead or piece of straw on the backside to keep the pin from sliding out.Finally, if the wind isn’t catching, don’t worry! Pinwheels rely on gentle breeze to spin. If there’s not enough wind, try moving to a more open area or gently blow on the pinwheel to get it started.By addressing these common issues, you’ll be able to fully enjoy your DIY pinwheels. Remember that patience and a little troubleshooting can go a long way in crafting.
Environmental Considerations for DIY Pinwheel Projects
As you embark on your DIY pinwheel adventure, remember to prioritize eco-friendliness by selecting materials and methods that minimize environmental impact. Here are some ways to make your project a green success: First, opt for sustainable materials like recycled paper or biodegradable alternatives. If you must use plastic, choose recycled options or consider bioplastics derived from renewable sources. Next, plan your design with efficiency in mind, minimizing waste and offcuts. Save scraps for future projects or repurpose them creatively. When it comes to adhesives, prioritize non-toxic and environmentally friendly options, avoiding hot glue guns that release harmful fumes. Your pinwheel project can also serve as a teachable moment about wind energy, which is critical for sustainable power generation. Take the opportunity to educate yourself and others on the importance of renewable energy sources. Before buying new materials, get creative and upcycle items you already have at home – old magazines, gift wraps, or fabric scraps can all be transformed into beautiful pinwheels. For decorations, consider using natural elements like leaves or petals, or seek out eco-friendly glitter made from eucalyptus trees instead of plastic. Finally, share your eco-friendly pinwheel-making expertise with your community by hosting a workshop or creating an online tutorial. By adopting these environmentally conscious approaches, you can enjoy the satisfaction of a DIY project while taking small steps towards a more sustainable future.
FAQs About DIY Pinwheels
Immerse yourself in the world of DIY pinwheels with a detailed FAQ that covers all aspects of creating breathtaking designs from the comfort of your own home. Packed with valuable tips and techniques, this guide is perfect for those looking to take their pinwheel-making skills to the next level.
What materials do I need to make a DIY pinwheel?
To create a fundamental DIY pinwheel, gather the following essential items: plain paper, a pin or paper clip, a pencil with an eraser, and a pair of scissors. For added flair, consider incorporating decorative elements such as vibrant markers, stickers, or a pinch of glitter to make your pinwheel truly one-of-a-kind.
How do I choose the right paper for my pinwheel?
While any paper type can be used for making spinning tops, certain characteristics make some more suitable than others. Cardstock, being a thicker and heavier material, is often preferred due to its ability to withstand wind conditions and ease of handling. In contrast, lighter papers can produce faster spins when the same technique is applied.
Can I make a pinwheel without using pins?
When looking for a safe and effective way to hold together your craft project, consider using a paper fastener or a pipe cleaner as a suitable substitute for traditional pins. This approach is particularly useful when working with children, ensuring their safety and creative expression.
How can I make my pinwheel spin faster?
To optimize your pinwheel’s performance, first ensure the pin is neither too loose nor too tight. A balanced pinwheel is crucial for optimal spinning. To achieve this balance, try using lighter paper and removing any obstructions that might hinder its rotation. By doing so, you’ll be able to enjoy a faster-spinning pinwheel.
Is it possible to make a waterproof pinwheel?
A creative alternative to traditional materials, laminated paper or thin plastic sheets can be used to create a waterproof pinwheel. This innovative approach provides an added layer of durability and protection against the elements.
How can I fix a pinwheel that won’t spin?
Before you start using your hair clippers, it’s crucial to ensure they’re properly maintained and adjusted for optimal performance. Take a few moments to inspect the pin and blades, making sure the former isn’t too tight and the latter aren’t bent or touching each other. If necessary, take the time to make any adjustments that will allow the blades to move freely. This simple step can significantly impact the quality of your cuts and overall user experience.
What are some creative ways to decorate my pinwheel?
Transform your pinwheel into a vibrant masterpiece by exploring various customization options. Take it to the next level by applying creative techniques such as painting, adding patterns with markers, incorporating stickers, using colored tape, and even attaching small, lightweight embellishments like sequins to give it a unique visual appeal.
How do I attach the pinwheel to a stick?
For a secure attachment, insert the pin into the core of a pencil eraser, or opt for an alternative anchor like a straw or thin wooden rod.
Can I make a pinwheel out of fabric?
Fabric pinwheels can be achieved, although they might necessitate the use of a more rigid backing material to ensure retention of their shape. Furthermore, you’ll need to utilize either a sewing pin or an alternative fastening mechanism.
How can I make my pinwheel more durable?
To extend the lifespan of your pinwheel, consider implementing a trifecta of durability-boosting techniques. Firstly, opt for thicker paper stock to provide an added layer of protection against wear and tear. Next, reinforce the center of the pinwheel with tape, creating a sturdy anchor point that can withstand the gentle breeze. Finally, laminate the entire design, sealing it within a protective barrier that shields it from the elements.
What’s the best way to display my pinwheel outdoors?
To bring your DIY pinwheel to life, simply plant the wooden dowel into the ground or place it in a pot. Ensure the pinwheel is situated in an area where it can freely rotate in response to the wind’s gentle whispers. By following these helpful FAQs, you’ll be well-equipped to create stunning and practical DIY pinwheels that will add a touch of whimsy to any outdoor space.
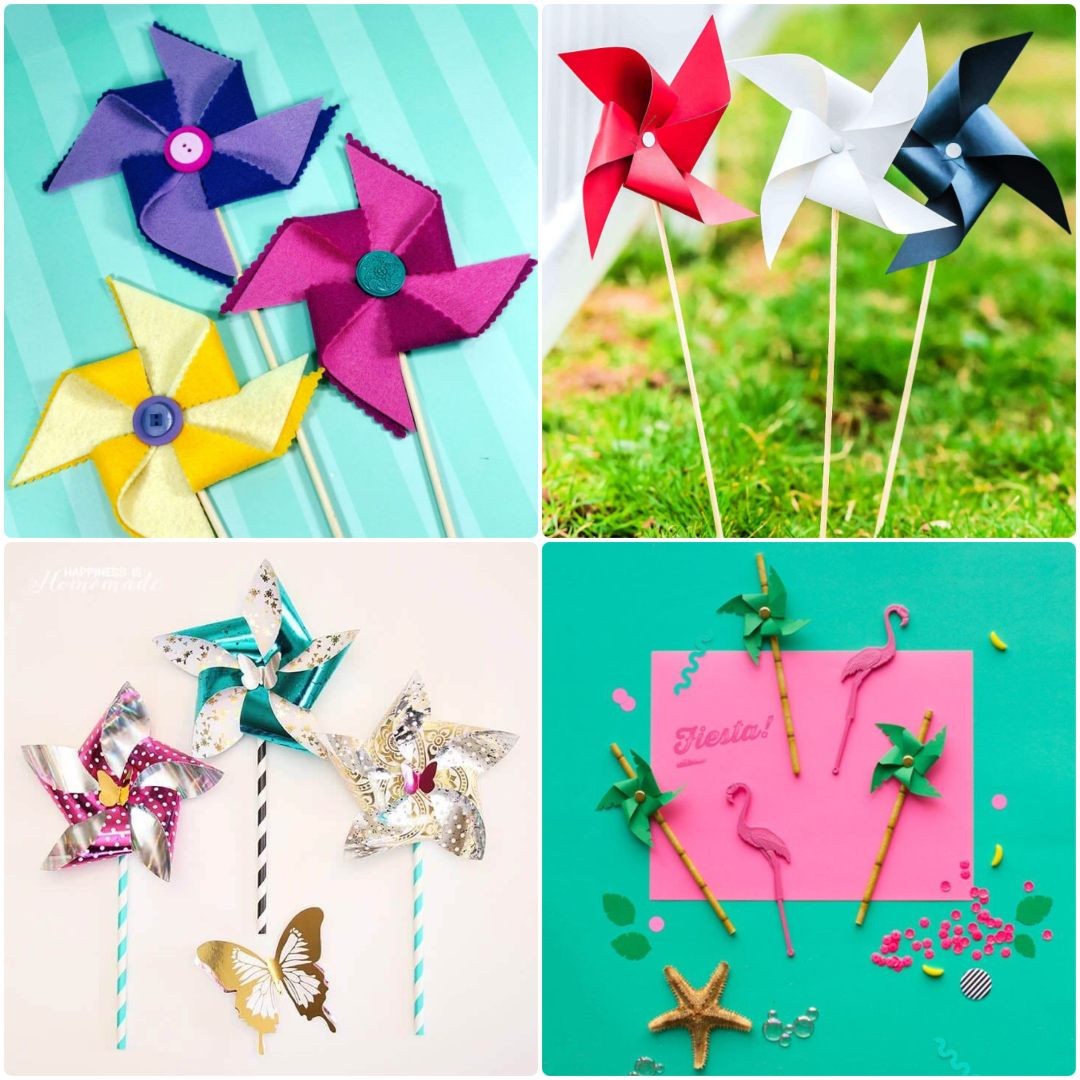
30 DIY Pinwheel Ideas That Are Fun to Make
Discover the joy of crafting with 30 delightful DIY pinwheel ideas that can be easily whipped up in the comfort of your own home. Let your imagination run wild as you create vibrant, one-of-a-kind pinwheels that are sure to bring a smile to anyone’s face.
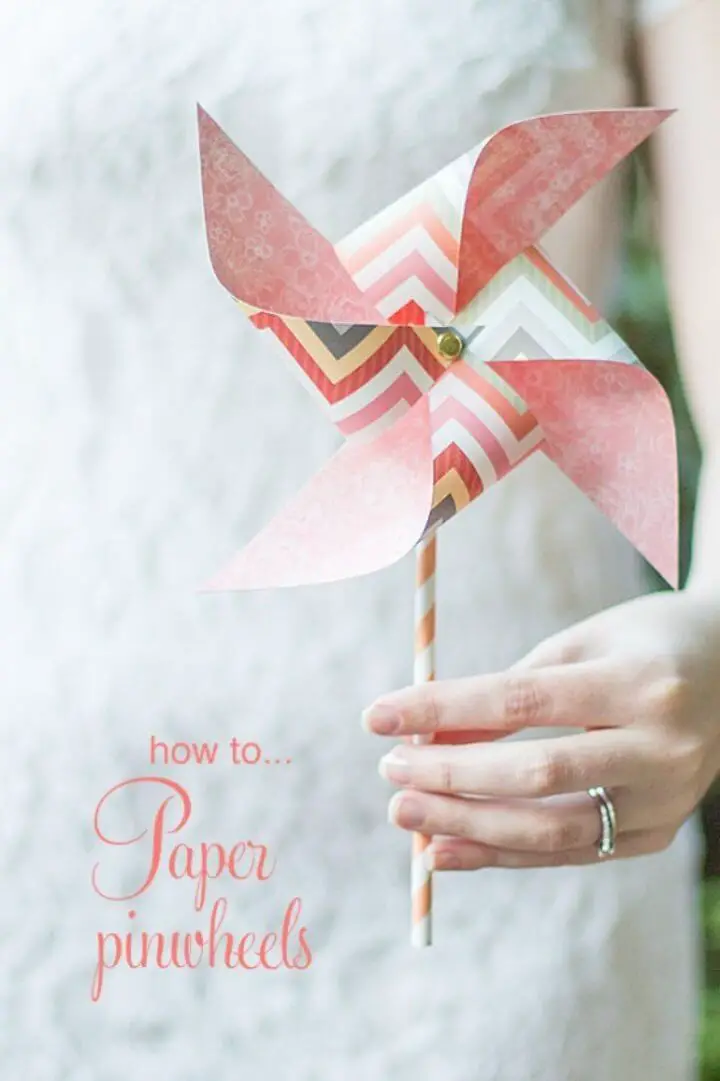
How to Make Paper Pinwheels
Step into the realm of effortless summer crafting with this comprehensive DIY pinwheel tutorial. This charming project requires just a few everyday household supplies, including 6-inch square papers, wooden skewers, small beads, a hot glue gun, sewing pins, a thumb tack, needle-nose pliers, and scissors. With these simple materials, you’ll create a beautiful, spinning pinwheel that’s perfect for kids to enjoy at parties or barbecues without worrying about it falling apart. The result is a vibrant, whirling marvel that adds a pop of color to any gathering. So, what are you waiting for? Let’s get started and transform a humble piece of paper into an captivating, spinning sensation today!
Pretty DIY Giant Flower Pinwheel
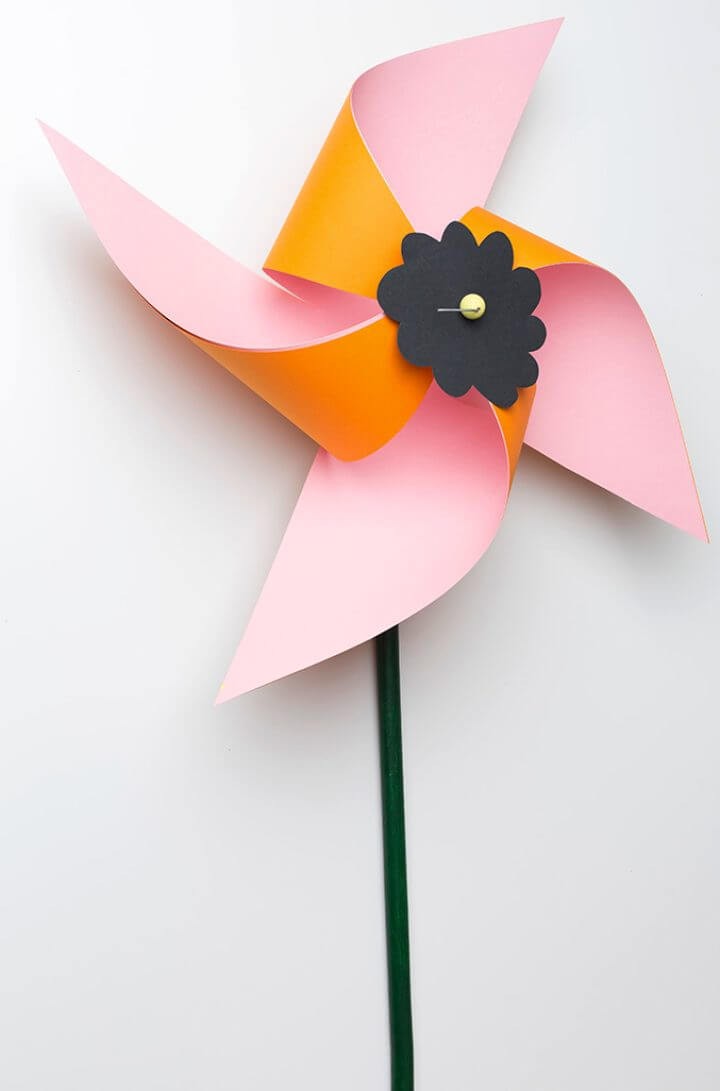
Transform your outdoor space into a vibrant haven with this stunning floral pinwheel DIY project. To bring this colorful creation to life, you’ll need a few basic crafting supplies, including poster board, scissors, a hole punch, and acrylic paints. Additionally, you’ll require a 3/4” dowel, wooden beads, wire cutters, heavy wire, a drill with a drill bit, and a pencil. Once you have all the necessary materials, follow the step-by-step assembly guide to craft this mesmerizing, rotating beauty that’s sure to captivate everyone’s attention. Not only will this pinwheel add a touch of whimsy and color to your garden, but it also provides an engaging hobby for your free time. The best part? This project is incredibly easy to customize with your choice of paint colors, allowing you to let your creativity shine and elevate the charm of your outdoor space.
Free Printable Pinwheel Template
Add a playful touch to your summer decor by creating DIY paper pinwheels that are both easy to make and entertaining for kids. These whimsical creations can be used to spruce up your porch or window box, making them perfect for outdoor gatherings like block parties or barbecues.
To create these delightful pinwheels, you’ll need just a few simple materials: colored paper, bamboo skewers, thumbtacks, small beads, and a template. With an easy-to-follow process that can be completed in under five minutes, even the most novice crafters can produce stunning results. For those with access to cutting machines like Cricut or other similar tools, a free SVG file is available for seamless creation.
What makes these pinwheels truly special is their versatility in design. By selecting different colors and patterns, you can create unique pieces that fit any festive occasion – from the 4th of July to birthday celebrations. So why wait? Start crafting today and add a fun, spin-worthy piece to your summer scenery!
Homemade Felt Pinwheels
Elevate your party decor with the whimsical charm of DIY felt pinwheels. By combining Lia Griffith’s Wool Blend Felt in Vanilla and Ocean Blue hues, you can create a unique and vibrant touch that adds personality to any gathering. The crafting process is surprisingly simple, allowing for easy customization with one or two layers depending on your desired aesthetic. The addition of Pinking Shears creates a distinctive zigzag pattern, further enhancing the overall appeal. To ensure durability and facilitate multiple uses, consider adding a skewer and button to each pinwheel. With these adorable, eco-friendly decorations, you can brighten up any celebration and enjoy the satisfaction of having crafted them yourself.
DIY Decorative Felt Pinwheels
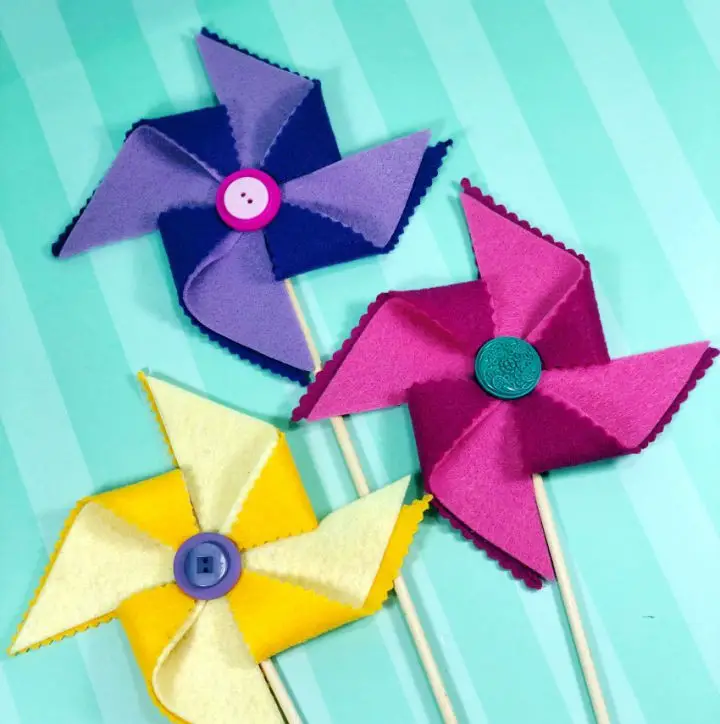
Add a dash of whimsy to any occasion with these delightful DIY decorative felt pinwheels. Not only do they inject a splash of color into your space, but they’re also an entertaining activity to share with kids. With just a few simple supplies, including craft felt sheets, wooden dowels, a hot glue gun, scissors, pinking shears, buttons, a ruler, wire cutters, and a permanent fine point marker, you can create a vibrant collection of pinwheels in about 30 minutes. The crafting process involves cutting the felt into squares, marking an ‘X’ at the center, layering the design to create visual interest, and attaching it to a wooden dowel using hot glue. These classic summer symbols bring joy and a pop of color any time of year, making them perfect for flower pots or as whimsical decor. The creative possibilities are endless! With these adorable felt pinwheels, you can add a touch of sunshine to your next craft day.
Make Your Own Pinwheels
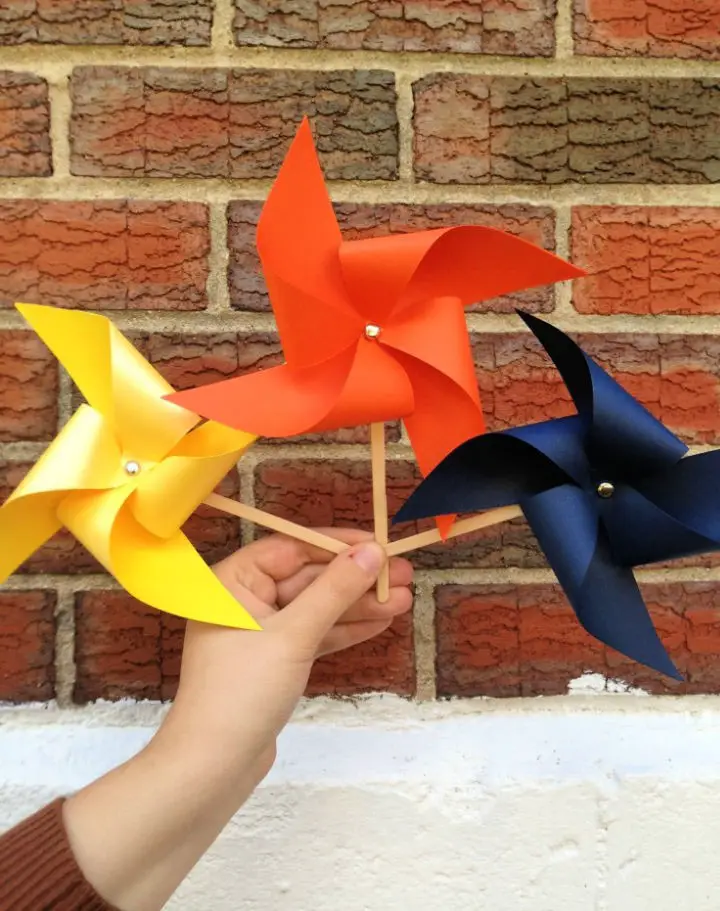
Step into the whimsical world of DIY crafts with a delightful project that’s sure to bring back fond memories: creating homemade pinwheels! This endearing endeavor is perfect for infusing any space with a touch of playfulness and joy. To get started, you’ll need just a few simple supplies: cardstock, popsicle sticks, hot glue, brads or buttons, and a pair of scissors. The process itself is effortless and enjoyable, making it an ideal activity for crafty enthusiasts of all skill levels. As you bring your pinwheels to life, imagine the endless possibilities – from mini bouquets in mason jars to festive centerpieces or charming garden ornaments. With a little creativity, the only limit is your imagination. So, gather your materials and start spinning your own tale with these delightful DIY pinwheels!
Adorable Paper Pinwheel Craft
Bring out your child’s creative genius by crafting vibrant DIY paper pinwheels that add a pop of color and whimsy to any occasion. With minimal materials, including decorative paper, unsharpened pencils, push pins, scissors, ruler, and white glue, the whole family can join in on the fun. Simply cut the paper into a square and then diagonally into triangles, apply a small amount of glue and fold the design, before securing it to an unsharpened pencil with a thumbtack. The result is not only visually appealing but also offers the excitement of watching your handiwork spin in the wind. Let your imagination run wild by experimenting with different colors and paper designs to add even more thrill to this delightful craft.
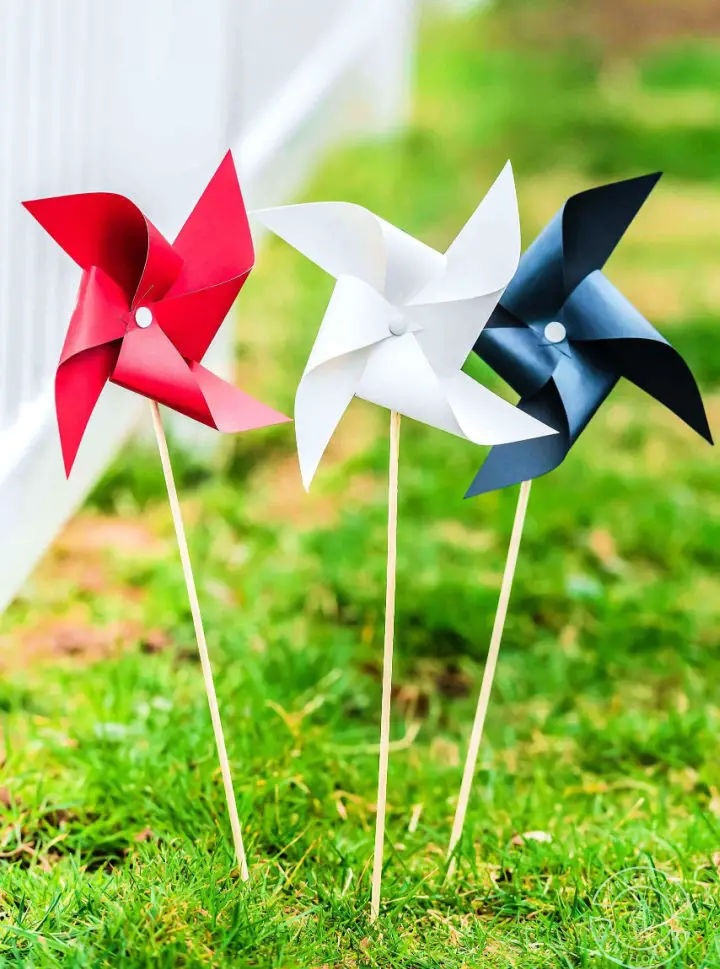
DIY Fourth of July Paper Pinwheels
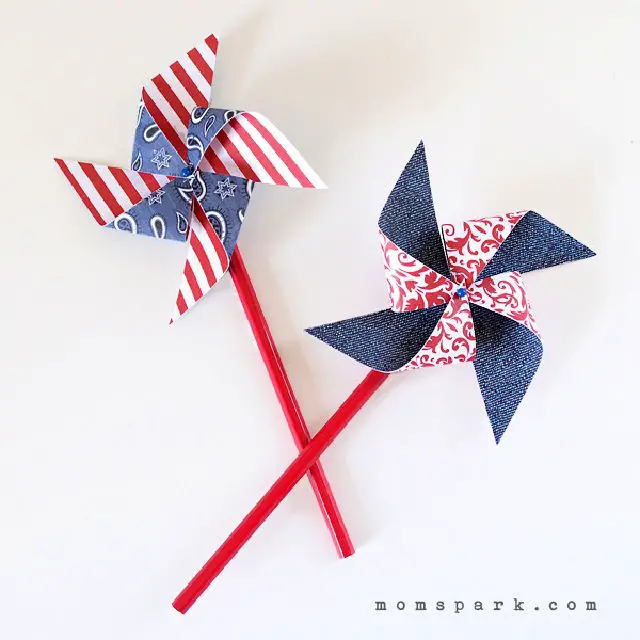
Transform ordinary paper into delightful spinning decorations with this simple DIY paper pinwheel project. With just a few everyday materials, including two pieces of colorful paper, spray adhesive, a pushpin, and a pencil, you’re all set to create your own unique spinners. These charming decorations can be used as a creative addition to your flower bed or as an imaginative centerpiece in jars and vases. The best part? This project is not only budget-friendly but also quick to complete. Experiment with different types of paper to make a variety of pinwheels, perfect for livening up any space or event. Plus, this activity makes for a fun and engaging way to spend time with kids – enjoy the wind-powered fun!
Homemade Giant Outdoor Pinwheels
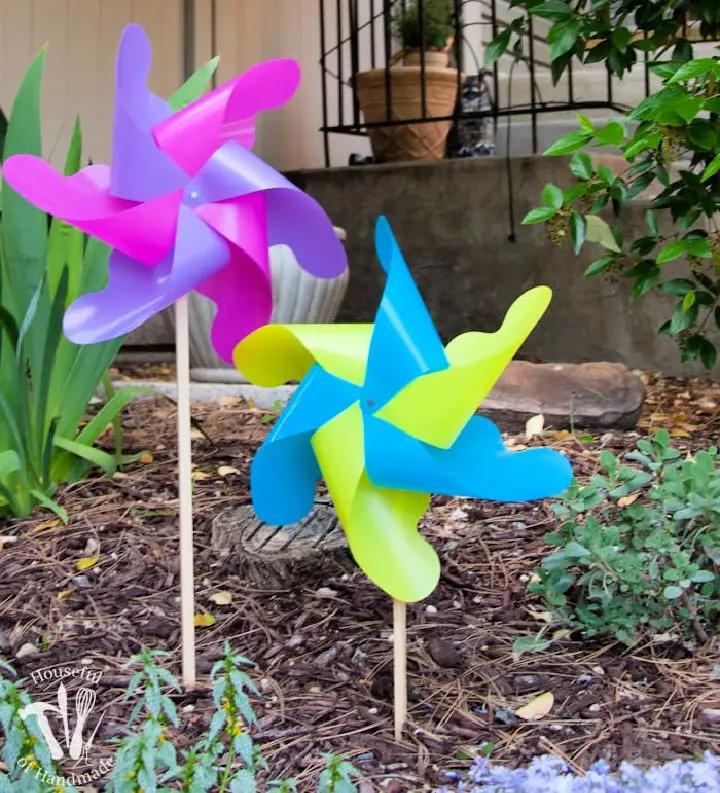
As the promise of spring arrives, bring vibrant energy to your outdoor space with DIY giant pinwheels. These whimsical creations are perfect for adding a pop of color to your garden before the flowers bloom. By repurposing affordable materials like colored plastic binder dividers and other supplies such as hot glue guns, nails, smoothie straws, and square dowels, you can craft these eye-catching decorations that will delight both kids and adults. The process is straightforward, making it accessible for all skill levels. Once assembled, the pinwheels come to life with a mesmerizing wind-driven display, inviting interaction and playful moments in your garden. By crafting these giant pinwheels, you’ll infuse your outdoor space with the artistic spirit of spring, creating a fun and engaging atmosphere that’s sure to bring joy to all who experience it.
DIY Mini Pinwheels Bouquet
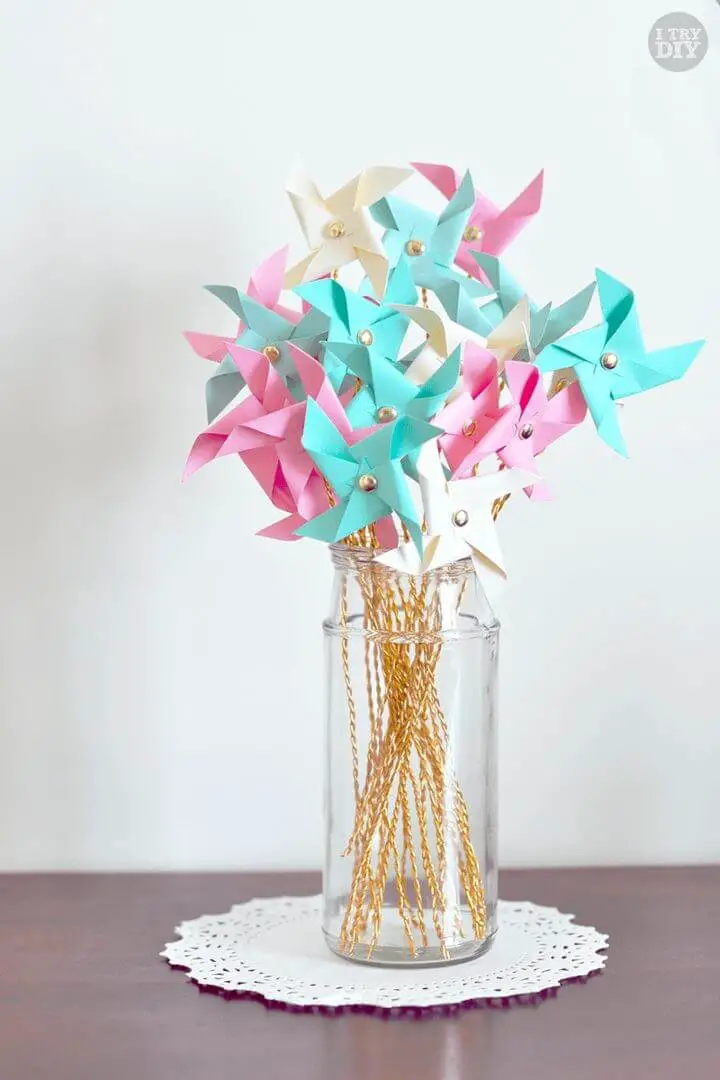
Transform your space with an endearing DIY mini pinwheel bouquet, a timeless decorative element that effortlessly outshines traditional floral arrangements. This creative project requires only basic materials: a medley of mint green and blush pink cardstock, round fasteners, and wire.
Begin by crafting 2.5-inch cardstock squares, carefully cutting diagonal lines to form triangular sections. Each corner is then folded inwards and securely fastened using the round fasteners.
The twisted wire serves as the stem, crafted into varying lengths to create a visually striking vase display. This unique and delightful bouquet not only adds a touch of whimsy to your decor but also doubles as a fantastic conversation starter for your guests. Ditch the fleeting charm of conventional floral arrangements and opt instead for this perpetual pinwheel bouquet that’s sure to captivate.
DIY Giant Rainbow Pinwheels
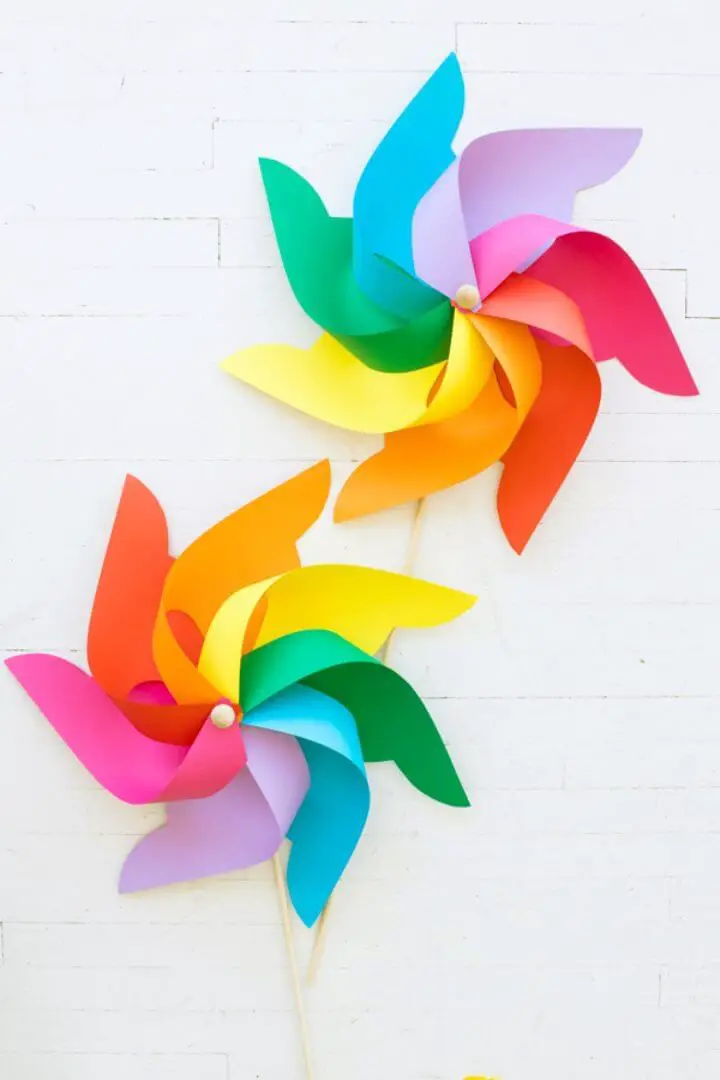
Relive the whimsy of your childhood with this DIY giant pinwheel creation! Add vibrant pops of color and infectious excitement to any celebration, gift, or spontaneous adventure with these mesmerizing spinning marvels. This craft project brings together a medley of materials, including Canson Colorline paper in a kaleidoscope of hues, pencils, rulers, scissors, a hot glue gun, and dowels of varying sizes. The step-by-step guide takes you on a journey from crafting the pinwheel’s blade template to assembling it onto its sturdy dowel core. Each finished pinwheel is a colorful whirlwind of nostalgia-inducing delight, reminiscent of the spinning wonders that captivated your imagination as a child. This project is an eclectic and captivating addition to your home decor, ready to infuse your space with spinning joy!
Make Your Own Paper Pinwheel at Home
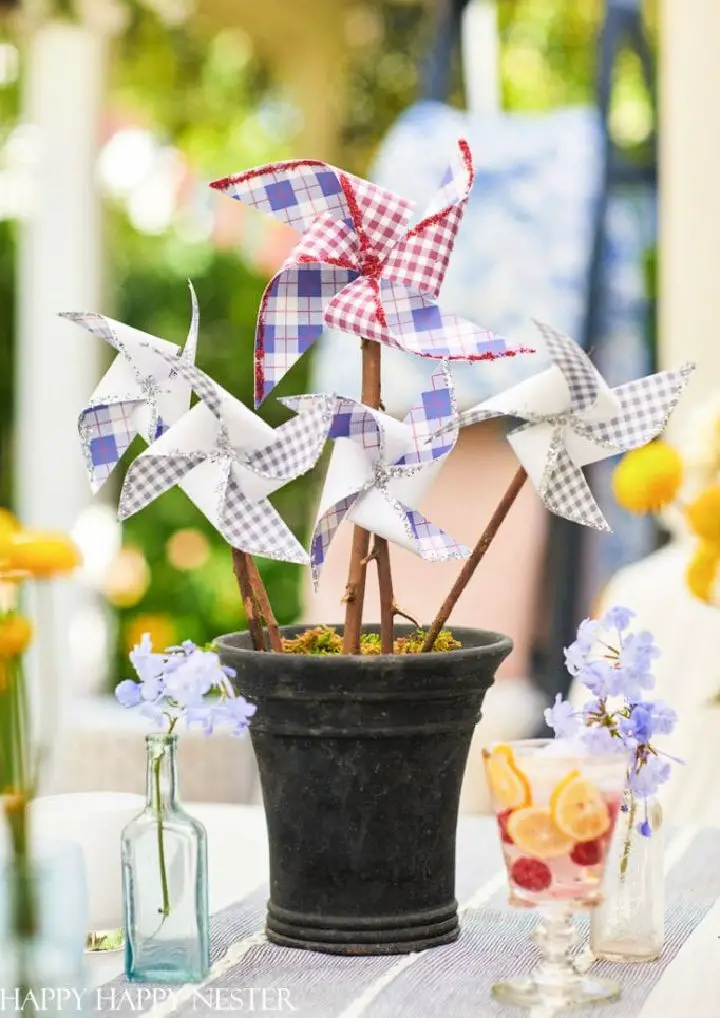
Transform your 4th of July celebration into a nostalgic wonderland with these delightful DIY paper pinwheels! As you create them, you’ll be reminded of carefree childhood days spent playing in the sun. These charming pinwheels are incredibly versatile and can instantly elevate a rustic gardening pot or vase, imbuing your decor with a festive touch.To craft these whimsical creations, gather white cardstock or scrapbooking paper, a digital pattern, scissors, glitter, small branches, small finishing nails, and a hammer. Begin by cutting the paper into squares, then create four diagonals to serve as guides. Pin the corners together at the center, adding a pinch of sparkle with some glitter for extra flair. Finally, secure the pinwheel to a branch using a nail.What’s even more delightful is that these pinwheels are not only easy on the wallet but also an affordable way to get creative. Simply repurpose rustic branches from your garden or yard to add a touch of natural charm to your project. Not only will you have a fun and engaging craft experience, but you’ll also bring a cheerful atmosphere to your celebration, making it an unforgettable 4th of July!
Free Printable Pinwheels for Patriotic Holidays
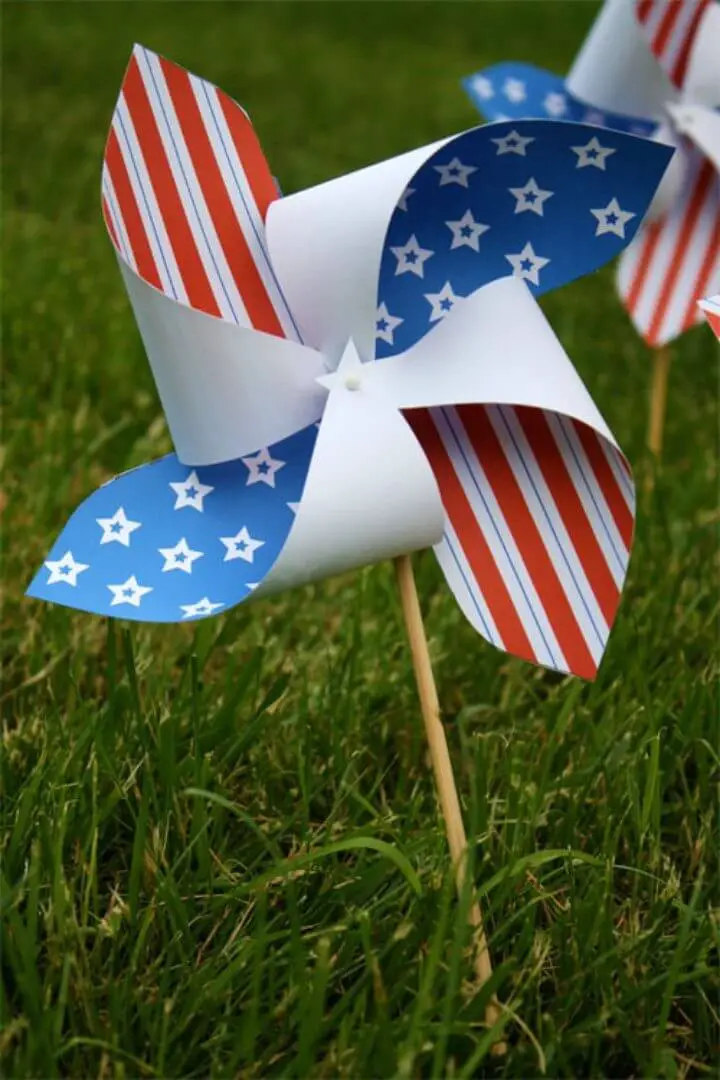
As you celebrate America’s birthday, bring a pop of patriotism to your summer gatherings by crafting a unique pinwheel ornament. This colorful decoration, made from white cardstock and enhanced with vibrant print, radiates American pride and adds a festive touch to any setting. To create this charming addition to your Fourth of July festivities, simply combine a printable PDF, scissors, a pin, and a pony bead for optimal spinning action. You can also amplify the fun by attaching your pinwheel to a pencil or dowel rod, allowing you to whirl it freely as you celebrate the spirit of independence.
Make Paper Pinwheels With Kids
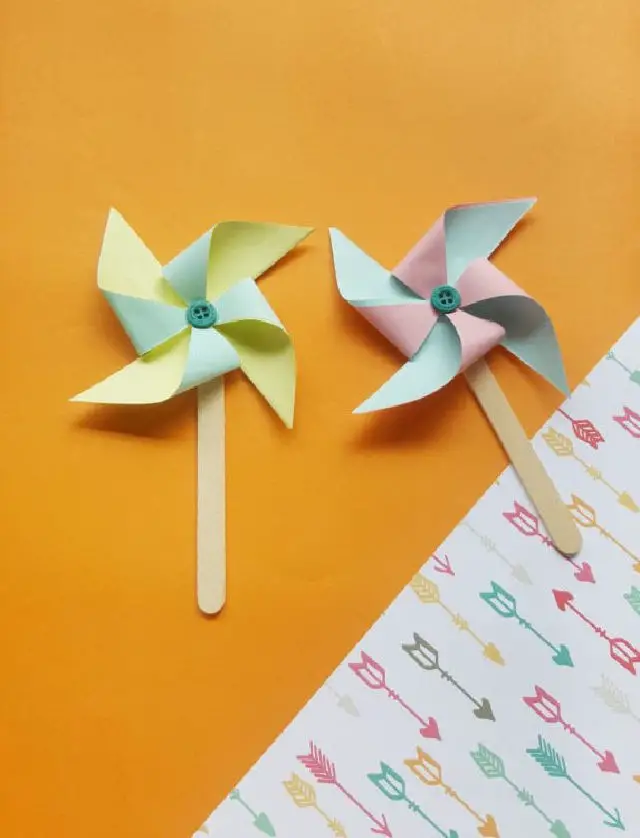
Transform ordinary moments into extraordinary experiences by sharing a delightful DIY project with your little ones – creating paper pinwheels! With just four everyday supplies, including colorful paper, scissors, white glue, and popsicle sticks, you can easily bring this activity to life. And the best part? You might already have these essentials at home, eliminating the need for an extra trip. This delightful project begins by combining two square papers with glue, folding, cutting, and shaping them into a whimsical pinwheel. As each corner is secured in the center with glue, it takes on a charming 3D form that can be spun for added fun. To add an extra pop of color, simply attach a button to the center and secure the pinwheel to a popsicle stick. Beyond being a captivating craft, this project has the power to become a playful toy for your kids! By dedicating quality time to this activity, you’ll not only be fostering their creativity but also creating lasting memories with the smiles on their faces as they spin their handmade paper pinwheels.
How to Make Watermelon Pinwheel
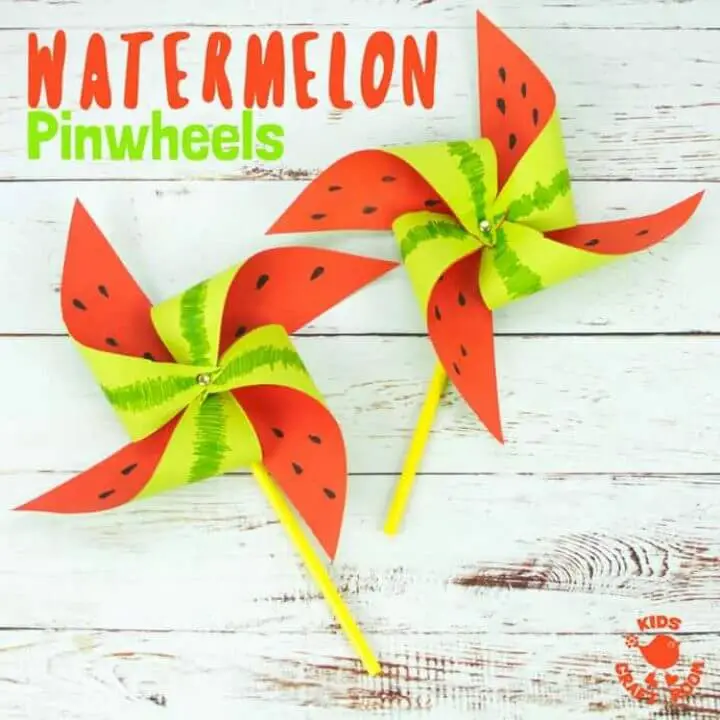
Bring the sunshine indoors with this delightful DIY watermelon pinwheel craft, a perfect way to inject some fun into your kids’ summer days. This interactive project combines creativity and playfulness, making it an excellent activity for young minds. With just a few simple materials like red and green craft paper, glue sticks, black and green Sharpie pens, scissors, a jumbo straw, a hole puncher, and a split pin/paper fastener, kids can let their imagination run wild as they construct these vibrant pinwheels. Not only do they make for a playful toy, but they also add a pop of color to your summer party decor. As an added bonus, this craft encourages creativity, allowing children to experiment with different fruity designs and patterns.
How to Make Daisy Pinwheels
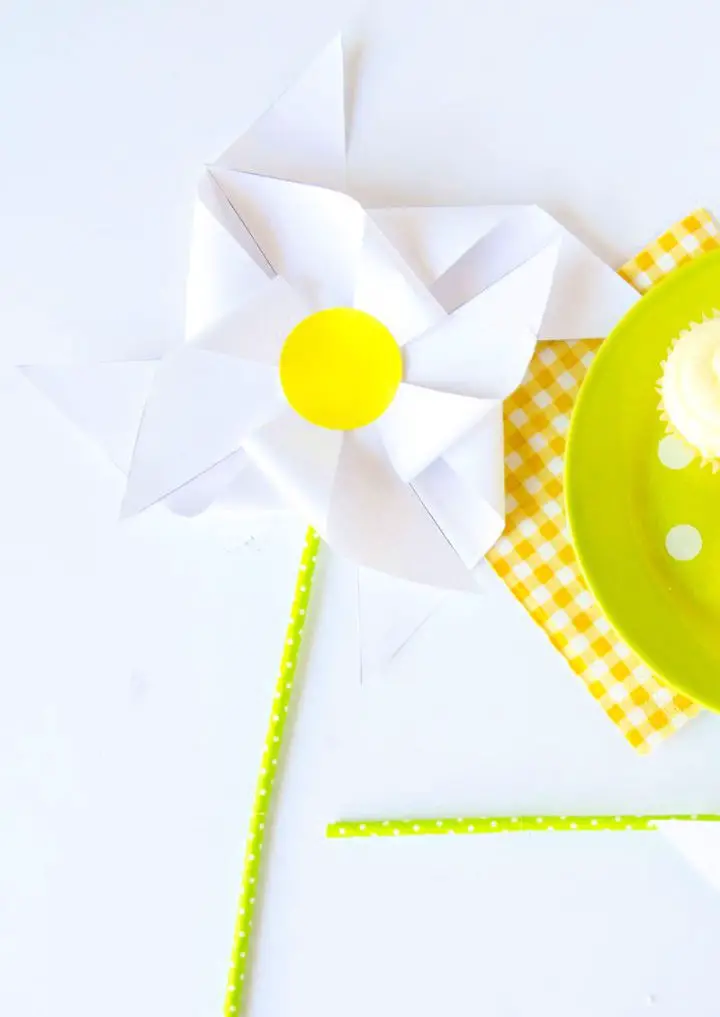
Discover the simple joy of crafting with the whimsical charm of daisies! Using just a few basic supplies, including a downloadable template, white cardstock, scissors, hot glue, and green party straws, you can effortlessly create these stunning DIY daisy pinwheels. Whether as a show-stopping centerpiece for your next gathering or a fun and creative activity to enjoy during the warmer months, these delightful pinwheels are sure to bring a touch of sunshine into any space. By simply downloading the template, assembling the pieces, and attaching your daisy pinwheel to a party straw, you can transform your surroundings with the vibrant colors and playful spirit of these lovely creations.
4th of July Patriotic Pinwheels for Cricut
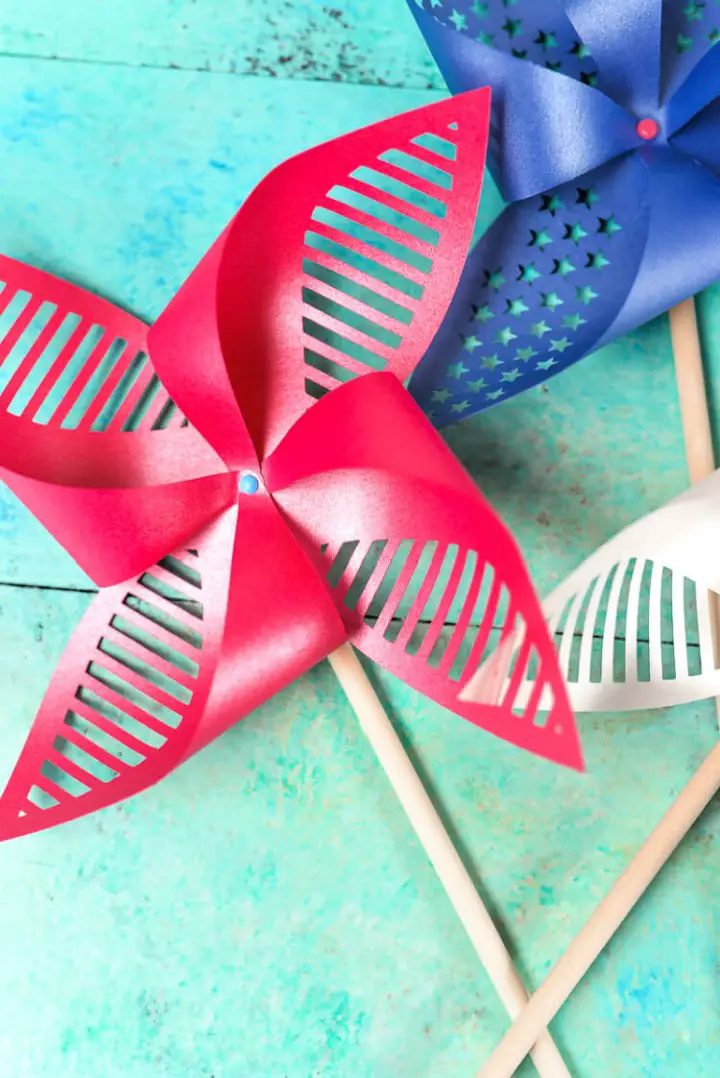
Elevate your Fourth of July celebrations with these show-stopping DIY patriotic pinwheels, sure to be the star attraction at any summer gathering. Designed for seamless cutting using your Cricut or other cutting machines, these vibrant creations are an effortless way to add a pop of color and whimsy to your event.
Crafted from a palette of red, white, and blue paper with intricate cut-outs, these pinwheels boast a star-spangled charm that’s impossible to ignore. Use them as a striking centerpiece or line your driveway for a warm welcome that will leave a lasting impression.
Assemble these delightful pieces in no time using small brads, wooden dowels, and a hot glue gun. While they won’t actually spin, their decorative appeal is undeniable. Get ready to give your Fourth of July party a creative and festive twist with these captivating patriotic pinwheels!
DIY Paper Pinwheels and Candy Centerpiece
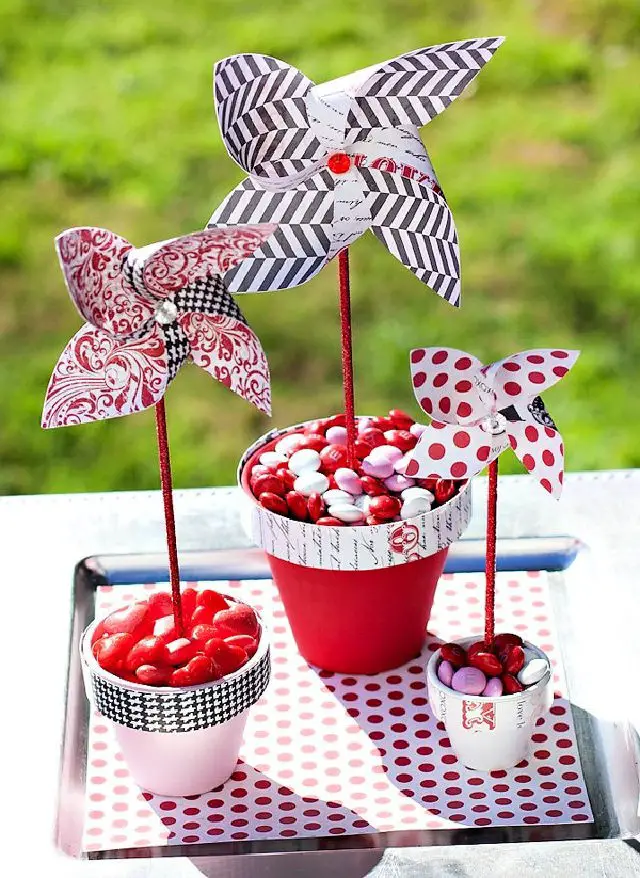
Transform any celebration with a playful DIY ‘pinwheel party trio’ project that effortlessly adapts to themes like Valentine’s Day, birthdays, baby showers, bridal showers, or weddings. The fun begins by selecting colors and patterns that harmonize with your event’s aesthetic.The Cricut Mini simplifies the process, replacing manual paper cutting with precision cuts. Assembled using diamond diamante pins and earring backs, the pinwheels are then elevated with hot-glued bamboo skewers dusted in fine red glitter. Paired with mini terra cotta pots painted and filled with styrofoam and candy, the pinwheels morph into striking arrangements that shine as centerpieces or thoughtful party favors.
Simple and Easy DIY Pinwheel
Bring a whimsical touch to your party decor with these easy-to-make DIY pinwheel props. Using the Sizzix Big Shot, Pinwheel, Starburst dies, and vibrant patterned papers, you can create playful and eye-catching decorations in just a few simple steps. Layer your chosen papers, roll them through the Big Shot, fold into a pinwheel shape, and attach to a wooden dowel using a small nail. For an added touch, incorporate an eyelet for spinning and decorate with washi tape for extra flair. This budget-friendly project is perfect for enhancing any party atmosphere and adding a pop of color to your space.
Amazing DIY Leaf Pinwheels
Transform the natural world into a canvas for your creativity by crafting DIY leaf pinwheels that exude organic charm. Though they may not spin, their unique appeal lies in their delicate beauty. Gather large leaves, scissors, press studs, sticks, a hot glue gun, and nature’s treasures like glittering glass bottles to decorate.
Start by cutting the leaves into square shapes with equal sides. Then, carefully cut out each corner and fold it towards the center, securing it with a press stud. Attach your leaf pinwheel to a stick using a hot glue gun, and you’ll have a lovely piece of nature-inspired art.
Use these pinwheels to embellish gifts, cards, or bottles of homemade nature’s glitter. Remember that nature offers endless creative possibilities. Why not take on this challenge and see what wonders you can create with the natural world today?
Mini Pinwheel Cupcake Toppers Tutorial
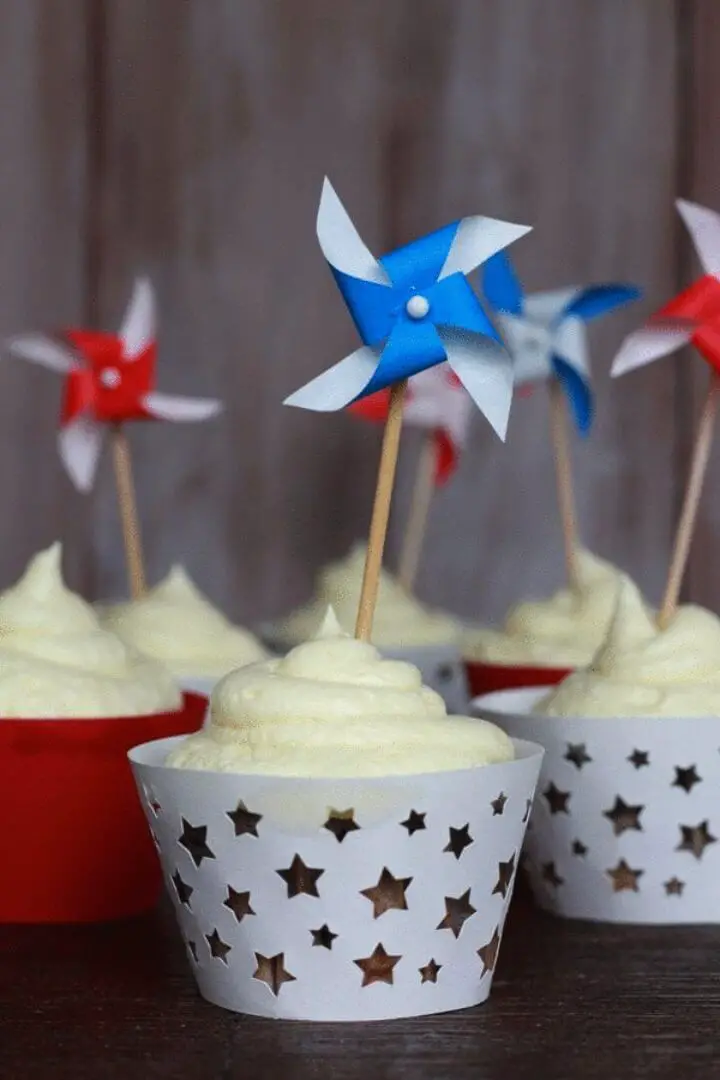
Bring excitement to your celebrations by crafting DIY mini pinwheels that can be used as cupcake toppers or cocktail skewers. These charming creations are surprisingly easy to make using paper cut into 4 cm squares, scissors, miniature push pins, small beads, and bamboo skewers. Perfect for Fourth of July festivities, they can elevate your summer treats by adding a pop of color and whimsy. Whether used to decorate cupcakes, other desserts, or cocktails, these mini pinwheels are sure to delight. Just be sure to keep them dry! With simple step-by-step instructions, you’ll be able to create these delightful miniatures and experience the joy of personalizing your celebrations.
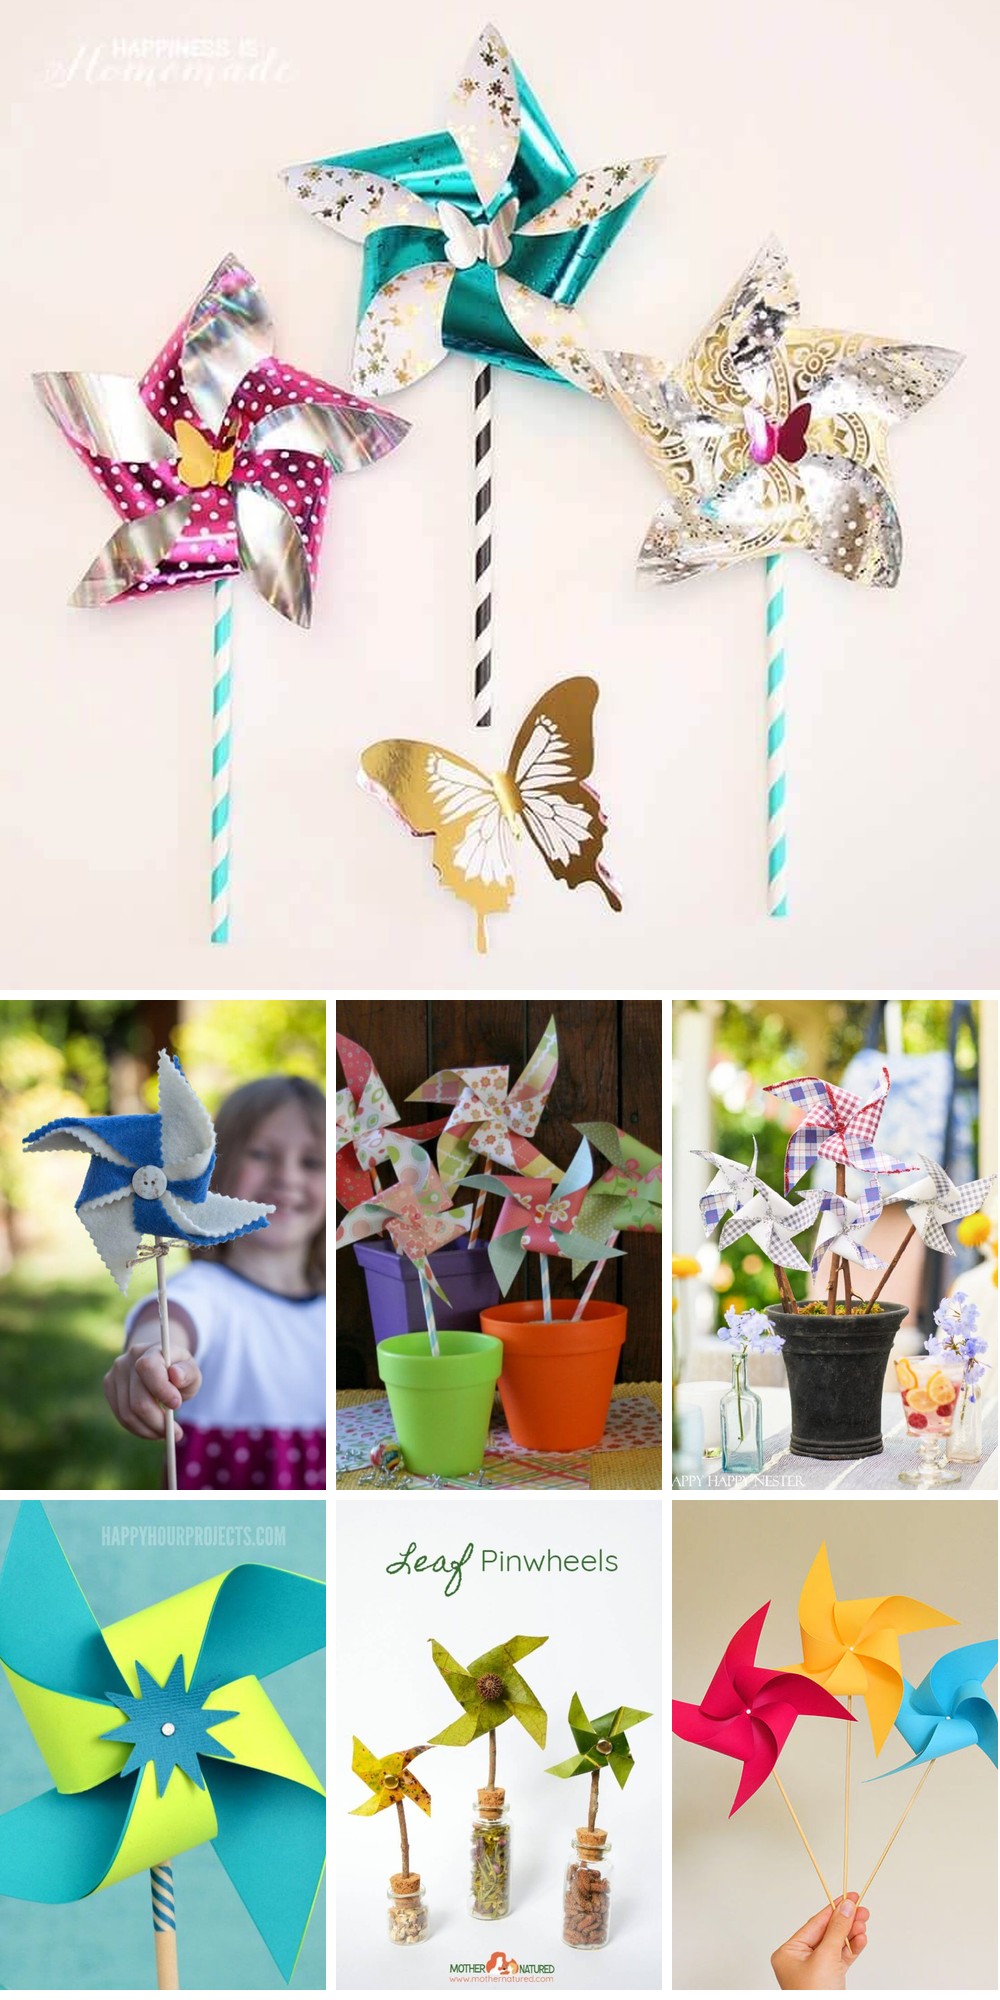
DIY Metallic Foil Pinwheels
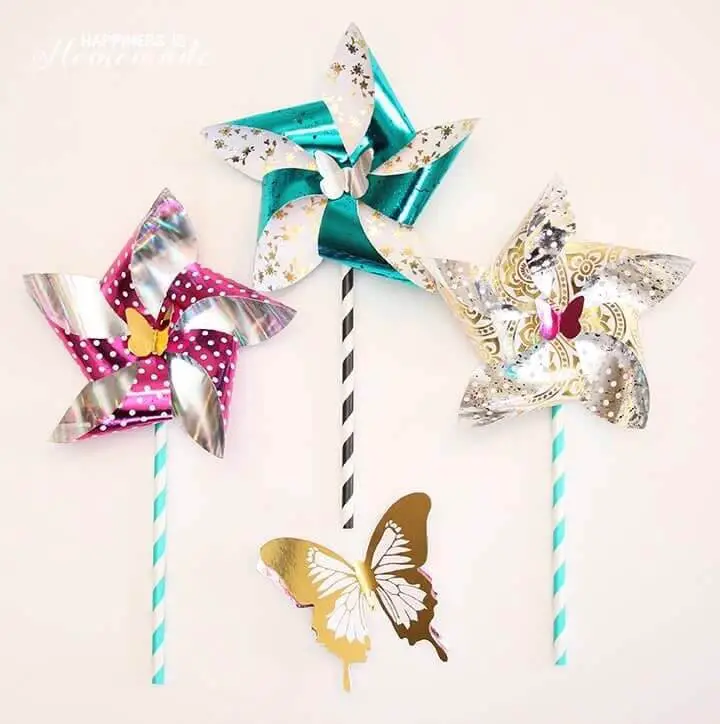
Embrace the art of crafting DIY metallic foil pinwheels and infuse your garden with a dash of whimsy. These delightful creations can be used as unique party favors or unexpected gifts, bringing joy to all who behold them. The innovative process involves applying Minc’s reactive foils to various paper crafts, resulting in stunning, eye-catching pinwheels that shimmer in the light.To create these captivating pieces, you’ll need a laser printer, Minc reactive foils, a pinwheel template, and a few other crafting tools at your disposal. The step-by-step process begins with printing the template, followed by selecting your desired foil color and applying it using the Minc. Assemble the pinwheels, add a touch of elegance with a small foil butterfly, and watch as your bright creations come to life. Join Heidi Kundin in this creative journey and bring these radiant pinwheels into being, spreading happiness and delight along the way.
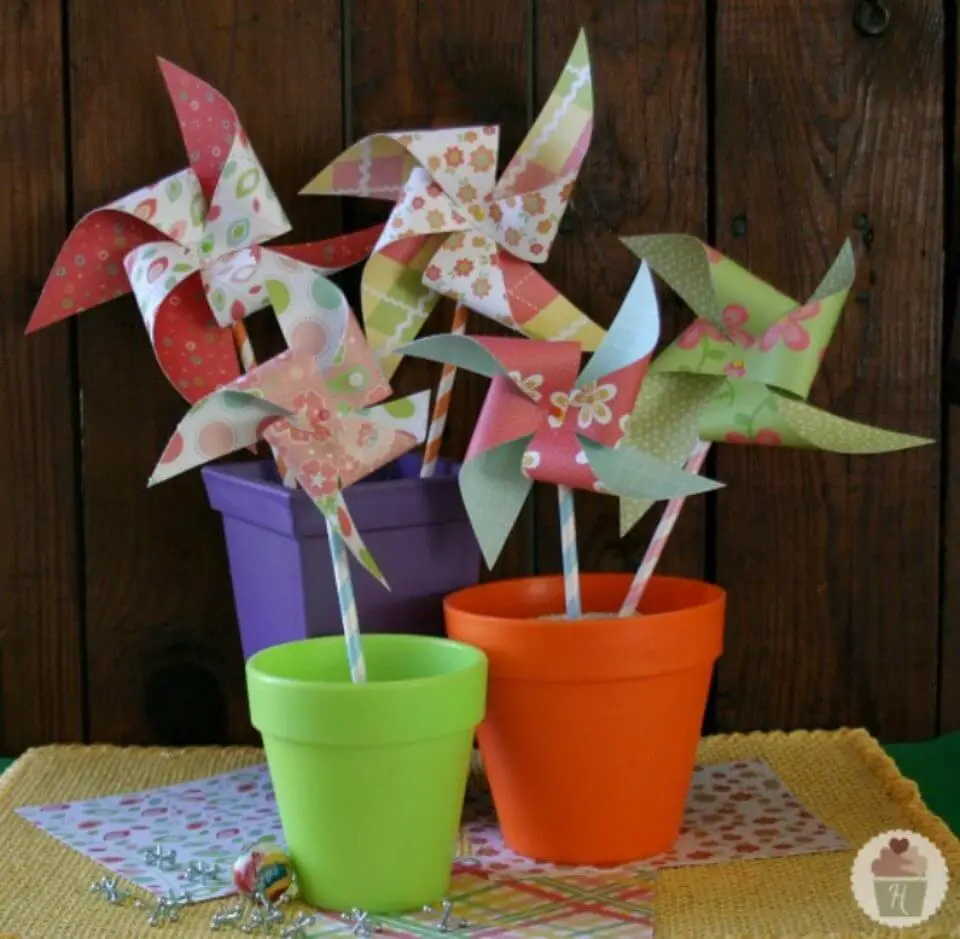
How to Make Paper Pinwheels for Kids
Elevate any celebration by infusing it with the charm of DIY creativity. This straightforward guide empowers you to craft captivating pinwheel centerpieces that bring a touch of whimsy to your decor. With a minimal investment in materials like trays, mason jars, rice, flowers, and scrapbook paper, you’ll create a stunning centerpiece that effortlessly blends elements of garden, farmhouse, and vintage styles. Not only do these DIY pinwheels make for an enchanting display, but they can also serve as delightful party favors for kids to cherish. The best part? These centerpieces are reusable, allowing you to reuse them in various settings and derive lasting value from their vibrancy. Whether it’s a baby blessing, birthday, or casual gathering, these pinwheels will add a unique and memorable touch, making your event truly unforgettable.
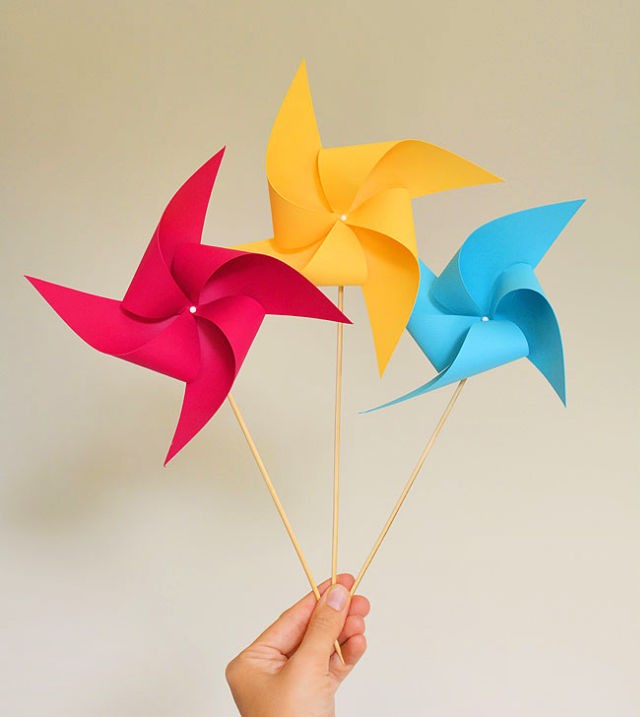
Colorful DIY Paper Pinwheels
Transport yourself to the world of vibrant summer crafts with DIY paper pinwheels that are as easy to make as they are fun and whimsical. This nostalgic craft is simple, versatile, and sure to bring back fond childhood memories. Use them to create a charming garland by stringing them on twine for your backyard barbecue or pool party, or cluster them in a vase for a vibrant centerpiece. You can also transform them into cake toppers or gift bows, adding a pop of color to your summer festivities.
These pinwheels are surprisingly easy to make using double-sided scrapbook paper, scissors, a small hole punch, decorative brads, and paper straws. Simply choose scrapbook paper with coordinating designs on each side, cut squares of varying sizes, and follow the straightforward assembly process. The result is beautiful, twirling pinwheels perfect for all your summer celebrations.
Bring a touch of whimsy to your summer days with this delightful craft that’s sure to delight both kids and adults alike.
How to Make Pinwheels Using Paper
Experience the joy of DIY crafting with an innovative project that’s as charming as it is easy: making colorful paper pinwheels! These delightful decorations can be used as an alternative to bouquets for bridesmaids or as a fun giveaway for wedding guests. The process begins by cutting double-sided scrapbooking paper into squares, then drawing diagonal lines to create triangular shapes and punching holes at specific points. The key challenge lies in aligning the punched corners and threading a split pin onto a straw. With a ‘T’ shaped split pin, the pinwheels can spin freely, adding a dynamic touch. Add a splash of color and creativity to your special occasions with these paper pinwheels.
Easy DIY Vintage Book Page Pinwheel
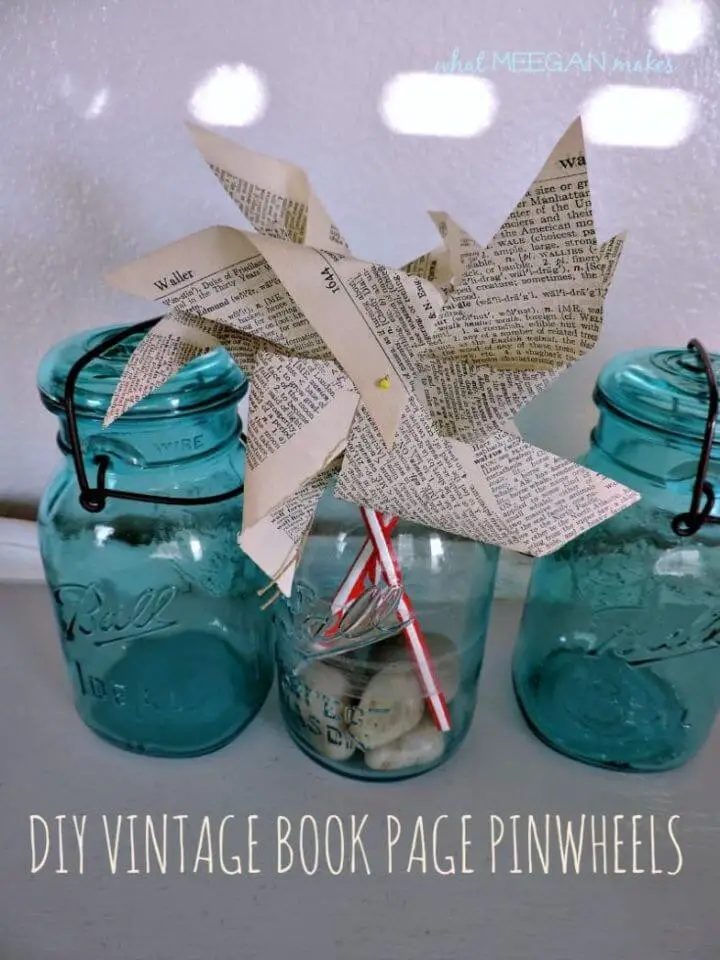
Transform your summer into a whimsical wonderland by creating an enchanting DIY vintage book page pinwheel with your kids! This delightful activity is perfect for bonding with grandkids or friends, making the most of the sunny months. With just a few simple materials – vintage book pages, pencils, and straight pins – you can create a nostalgic masterpiece that will spin its way into your heart.
Each pinwheel is carefully crafted from a 4×4 inch square cut from a vintage dictionary, resulting in a charmingly authentic spinning sensation. Not only do these whimsical creations bring joy to the making process, but they also add a delightful touch to any summer gathering.
Feel free to make as many as your heart desires! Smaller pinwheels tend to hold their shape better due to the aged pages, allowing for a more precise spin. Savor the memories and enjoy today’s fun summer activity with your loved ones.
Handmade Neon Chalk Pinwheels
Bring out your child’s inner artist with the vibrant and engaging neon chalk pinwheel craft! This fun project combines non-toxic Fun Chalk markers with black cardstock to create one-of-a-kind artwork. Kids will love watching their designs come to life as they transform a simple piece of paper into a colorful spin. With just a few everyday crafting supplies, including paper straws, buttons, pipe cleaners, scissors, and a glue gun, you can follow easy steps to cut, fold, and assemble the pinwheel. Punch holes in strategic spots to secure the corners and center with a large button and pipe cleaner. This accessible guide offers a joyful and engaging experience, yielding a delightful visual treat that celebrates creativity, skill, and artistry. As your child completes this DIY project, they’ll feel a sense of pride and accomplishment.
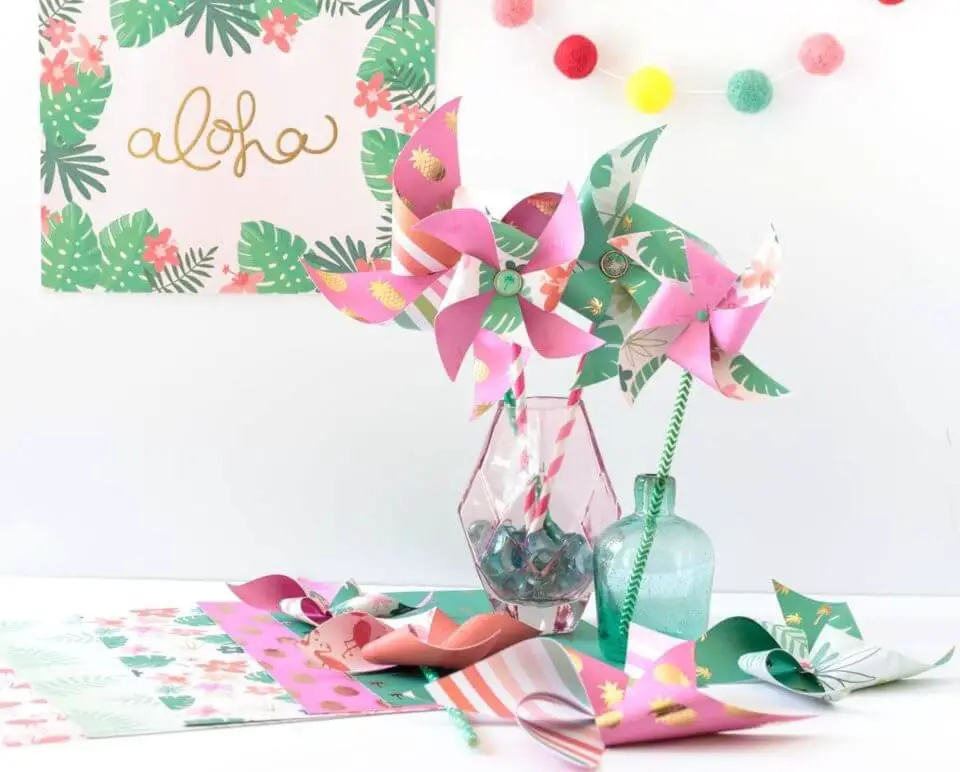
Palm Tree Pinwheel Straws
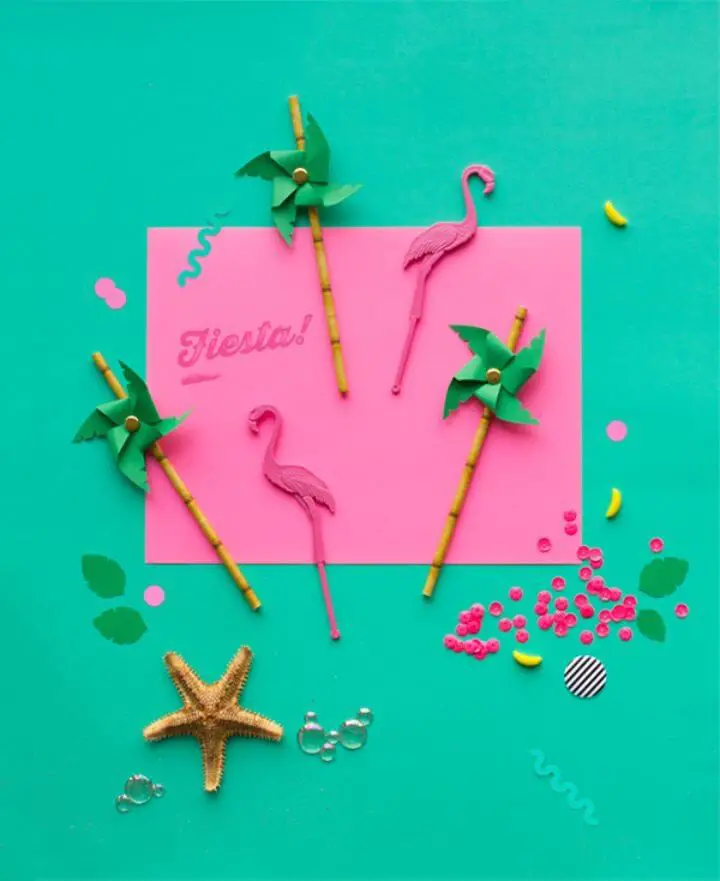
Add a touch of tropical flair to your next celebration by crafting DIY palm tree pinwheels that will transport your guests to a beachside paradise. With just a few simple materials – including a palm tree pinwheel template, green cardstock, bamboo paper straws, and basic crafting tools – you can transform any gathering into a vibrant fiesta with a unique and playful twist. Simply download the template, cut out the shapes, fold and assemble the pinwheels, and you’ll have a collection of whimsical decorations that will add a dash of tropical charm to your drink offerings or use them as standalone decorations to bring an instant splash of fun to your party décor.
Make Your Own Pinwheel
Unleash your creativity and bring the wind to life with a vibrant DIY pinwheel! This delightful decoration, crafted from humble materials like scrapbook paper, scissors, and metal brads, offers a fun and thrifty project for all. Even if your paper isn’t double-sided, a clever spray adhesive hack allows you to enjoy a pattern on both sides. Simply cut squares, draw diagonal lines, make precise cuts and holes, and assemble with a sturdy metal brad. Once complete, display them proudly on a striped straw or string them together as a garland. This step-by-step guide makes crafting a pinwheel an enjoyable, rapid, and budget-friendly experience.
Easy Pinwheel Project for Children
Unleash your inner creator by following this straightforward guide to crafting a DIY pinwheel that whisks away worries. With mere essentials like paper, a pin, and a pencil, you’ll transform these humble materials into an enchanting whirligig that’s perfect for enlivening a garden soiree or serving as a delightful hands-on science adventure for youngsters. As you effortlessly navigate the crafting process, your colorful paper pinwheel will soon be spinning in the breeze, a testament to the boundless power of creativity. So, gather your supplies and inject some whimsy into your day with this captivating paper craft activity.
Conclusion:
As our journey through 30 unique DIY pinwheel ideas comes to a close, it’s clear that crafting your own pinwheels is an incredibly rewarding experience. From carefully selecting materials to adding personal touches that make each creation truly one-of-a-kind, the project offers a wonderful opportunity to connect with your creative side and get hands-on.With our tips on safety precautions, eco-friendly practices, and troubleshooting common issues fresh in mind, you’re now well-prepared to embark on your own pinwheel-making adventure. As you dive into this fun and engaging DIY activity, remember to let your imagination be the guide, and don’t be afraid to experiment and try new things – it’s all part of the creative process.
