Why Make a DIY Photo Collage?
A DIY photo collage is more than a creative outlet; it’s an opportunity to preserve memories, personalize spaces, gift thoughtfully, and even experience therapeutic benefits. Every photo tells a story, and by grouping these stories, you can create a powerful visual narrative of cherished moments. This meaningful activity encourages creativity, family bonding, and relaxation. Without breaking the bank, you can transform your space with basic supplies and show off your personality through unique, handmade designs. The value of a DIY photo collage lies in both its finished product and the process itself, as every choice and moment spent making it adds to its significance.
How to Make a Photo Collage – Step by Step
Transforming cherished moments into a stunning visual narrative is just as effortless as it sounds, thanks to the simplicity of creating a personalized photo collage. By embracing this straightforward step-by-step approach, inspired by the creative endeavors of Rachel and Veronika, you’ll be well on your way to crafting an unforgettable keepsake that showcases your most treasured memories.
What You’ll Need:
When it comes to preparing for your creative project, don’t underestimate the importance of having the right tools at your disposal. Start by selecting a canvas that suits your needs, whether you prefer a larger or smaller surface area. Next, opt for Mod Podge in its glossy form, as this will provide a high-quality finish. To ensure smooth application, make sure to have foam brushes on hand. For the actual collage process, gather a diverse range of picture sizes, from large to small. When it’s time to cut, use scissors with caution and consider investing in a paper trimmer for added ease. While you’re working away, feel free to invite some company – whether that’s a friend or just some soothing background music like Taylor Swift’s ‘Shake It Off’. And don’t forget to provide a comfortable seating arrangement, such as chairs, to keep you and your companions happy and focused throughout the process.
Step-by-Step Guide:
Create Your Masterpiece: A Step-by-Step Guide to Making a Photo CollageFind yourself in a cozy and inspiring workspace, surrounded by the tools you’ll need for your creative project. Let the sound of soothing music set the tone for your artistic endeavor.To begin, lay out your photographs on the canvas, taking the time to envision your desired arrangement. Consider a central, larger image with smaller ones surrounding it. Once you’re satisfied with the layout, capture a photo of it as a reference point. This will ensure that your final product stays true to your original vision.Next, carefully cut out each photograph, focusing on composition rather than precise trimming. If possible, utilize a paper trimmer for more accurate cuts, especially when dealing with straight edges.Now, apply a thin layer of Mod Podge to the canvas where you’ll be placing your first photo. Gently place the image onto the wet adhesive and smooth out any wrinkles or bubbles that may have formed. Repeat this process for each photograph, referring back to your initial layout as needed. Allow the Mod Podge under each photo to dry completely before moving forward.Finally, apply a generous top coat over all the photos and the entire canvas surface. This will seal in your collage and give it a glossy finish. Be gentle when applying the top coat to avoid smearing any ink from the printed photographs. Once complete, allow the collage to dry entirely.
Clean Up:
As you finalize the details on your art project and allow it to dry completely, consider taking a moment to tidy up your creative space and organize your materials. The fresh start will help you maintain a sense of calmness and clarity as you prepare for your next artistic endeavor.
Video Tutorial
If you’re looking for a more hands-on approach, I recommend checking out the step-by-step video tutorial on making a DIY photo collage featuring Rachel and Veronika. This visual guide not only complements the written instructions but also provides an immersive experience that deepens your understanding of the process.
In addition to being a fun and creative outlet, creating a DIY photo collage allows you to craft a personalized piece of art that celebrates cherished memories. As you bring your ideas to life, you’ll discover the joy and satisfaction that comes from transforming your favorite moments into a beautiful work of art.
FAQs on Making a DIY Photo Collage
Creating a do-it-yourself photo collage is an excellent way to showcase your treasured moments in a unique and personalized manner. To guide you through the process, here’s a collection of answers to commonly asked questions that will help you embark on your creative journey.
What materials do I need for a DIY photo collage?
To create a simple DIY photo collage, you’ll need to gather a few essential materials. Start by selecting a base canvas or foam core board as the foundation of your project. Next, obtain Mod Podge – specifically, the glossy type is recommended for its smooth finish. You’ll also require foam brushes for applying the adhesive. The photos themselves will come in various sizes, which you can then cut to size using scissors or a paper trimmer. For added flair, consider incorporating decorative elements like stickers, washi tape, or paint to embellish your collage.
How do I choose photos for my collage?
When it comes to selecting photos for your collage, there are several key factors to keep in mind. To start, you’ll want to think about the overall theme of your piece. Will it be a family affair, showcasing memories from a special event or vacation? Or perhaps it will focus on a particular aspect of your life, such as hobbies or milestones? Having a clear idea of what story you’re trying to tell will help guide your photo selection process.Next, consider the visual elements that will tie everything together. A consistent color scheme can be a powerful tool in creating cohesion and drawing the viewer’s eye through the piece. Think about the dominant colors that appear in your photos and use those as a starting point for your collage.Of course, variety is also important when it comes to selecting photos. Aim to include a mix of close-up shots, landscapes, and candid moments to keep things interesting and prevent the collage from feeling too one-dimensional. You might also consider playing with different orientations – some landscape, some portrait – to add visual interest and create a sense of movement.Finally, think about the size and placement of each photo within the collage. Will you have any larger-than-life images that serve as focal points, or will everything be relatively uniform in scale? This can help guide your decisions about which photos to use and how to arrange them for maximum impact.
How can I arrange my photos on the canvas?
To create a visually appealing arrangement of your photos, follow these simple steps. Begin by setting up your canvas or base on a flat surface. Next, place your photos on the canvas without adhering them, experimenting with different layouts to find one that you like. You might choose a central photo surrounded by others, or opt for a more random, patchwork pattern. Once you’re satisfied with the arrangement, take a photo of it with your phone or camera as a reference. Finally, start adhering your photos from the center outwards or from one corner, working your way outward according to your chosen layout.
Can I make a photo collage without a canvas?
For a unique and creative way to display your photos, consider turning them into a direct wall installation using removable adhesive squares or colorful washi tape. Alternatively, you can opt for a larger poster board or create a digital collage that can be printed as a single, cohesive image.
How do I protect my photo collage?
Once you’ve finished assembling your collage, take the time to thoroughly seal it with a liberal application of Mod Podge, ensuring that each photo is securely fastened in place. This not only locks in their position but also yields a high-gloss finish that adds an extra layer of protection against damage or fading. After applying the top coat, allow it to dry completely before considering your collage ready for display or hanging.
What if I don’t want to use Mod Podge?
For those who don’t want to rely on Mod Podge, there are other methods to explore for creating a temporary collage. Double-sided tape can provide a secure yet removable bond between your materials, while photo corners offer an easy way to attach items without damaging the surface. Alternatively, digital collages eliminate the need for any physical adhesives altogether, allowing you to create a unique piece of art using software or mobile apps.
Can I make a photo collage with digital tools?
Creating digital photo collages has never been easier thanks to the numerous online tools and apps available at our fingertips. These virtual platforms offer an array of templates, filters, and embellishments that enable users to design their ideal collage without the need for physical materials. Once you’re pleased with your digital masterpiece, you can effortlessly print it out and display it for all to see.
How can I make my photo collage unique?
When it comes to personalizing your collage, there’s no one-size-fits-all approach. Instead, think outside the box (or frame) and incorporate non-traditional elements like ticket stubs, handwritten notes, or fabric pieces to give your piece a unique touch.
Another way to add some personality is by mixing things up visually – combine black and white photos with pops of color for a striking contrast. And why stop there? Take it up a notch by adding decorative flourishes like paint, glitter, or stickers after the photos are in place.
Lastly, don’t be afraid to think creatively about shape – forget the traditional rectangle or square and experiment with hearts, circles, or other unconventional forms that reflect your personality.
Can making a photo collage be a group activity?
Creating a collaborative photo collage can be an enjoyable experience for groups of any size, from families to friends or couples. This activity allows individuals to relive cherished moments while fostering creativity and bonding through the shared process. The end result is a unique, personalized piece that beautifully captures the essence of the group’s collective experiences and visual style.
While making a DIY photo collage, it’s crucial to prioritize having fun and celebrating memories in a creative manner.
25 Photo Collage Ideas (Collage Examples to DIY)
Create breathtaking photo collages from the comfort of your own home by exploring 25 innovative and visually appealing ideas. Our comprehensive guide will walk you through a simple step-by-step process, empowering you to craft stunning masterpieces that showcase your favorite memories.
How to Make a Gallery Wall Photo Collage
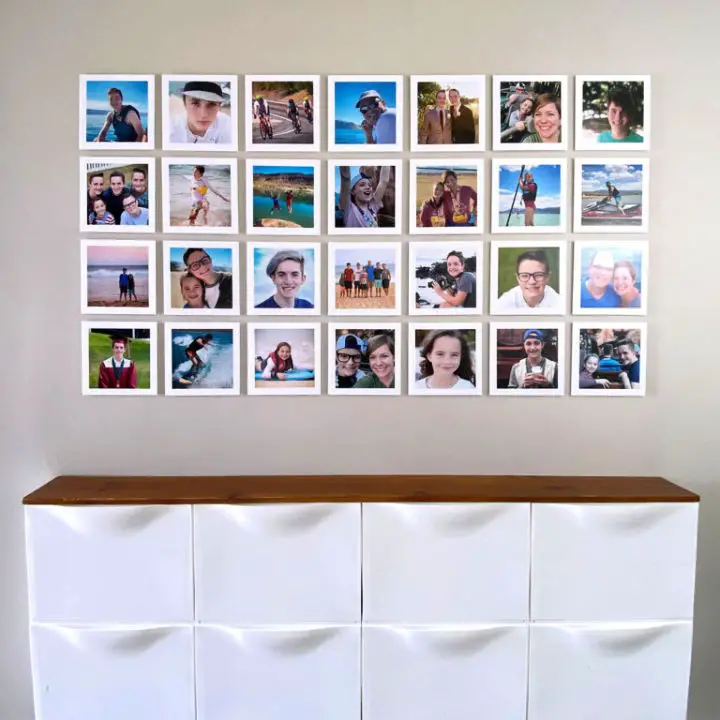
Transform your home’s ambiance with a visually striking yet budget-conscious DIY gallery wall. Say goodbye to expensive framing and tedious hanging, and hello to the warmth and personality of a custom photo collage. By leveraging foam core board’s affordability and sleek aesthetic, you can create a one-of-a-kind display that instantly adds character to any room. With just a few essential supplies and a dash of creativity, this innovative project is perfect for crafty enthusiasts eager to invest some time and effort for a remarkable payoff. For a comprehensive guide featuring supply lists, cutting techniques, and step-by-step instructions, visit itsalwaysautumn.com.
Easy DIY Photo Collage on a Budget
Transform your living space with a one-of-a-kind DIY photo collage that exudes personality without breaking the bank! By combining mod podge, cherished photos, and a foam core board, you can create a unique piece of artwork that’s perfect for cozying up in your favorite room or dorm. And the best part? It’s ridiculously easy to make – just set aside an evening at home and follow our simple steps. No fancy artistic skills required! For more inspiration and expert tips, head over to Mod Podge Rocks Blog to explore a wealth of creative ideas.
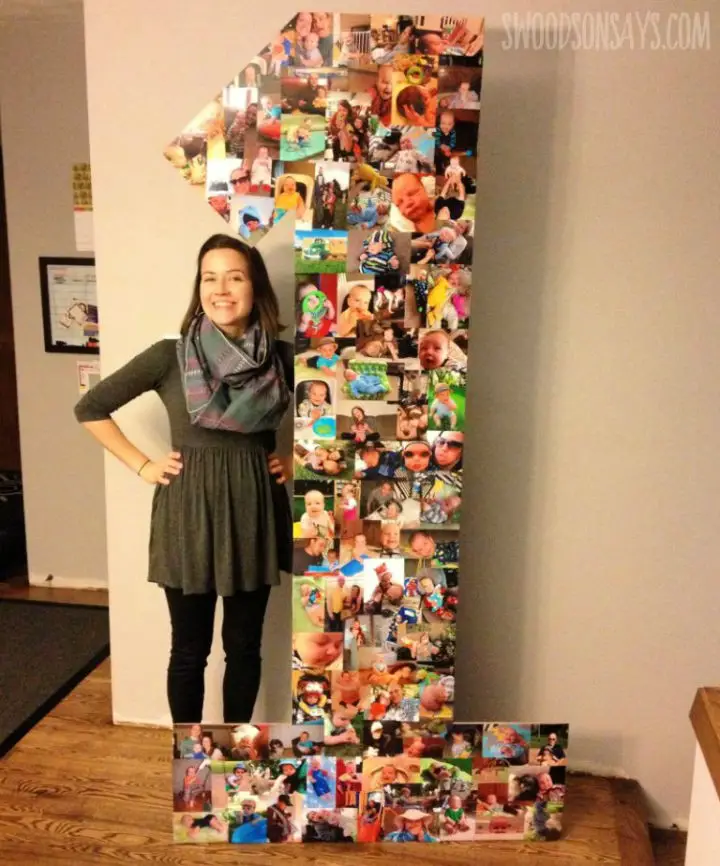
Giant Number Photo Collage With Square Prints
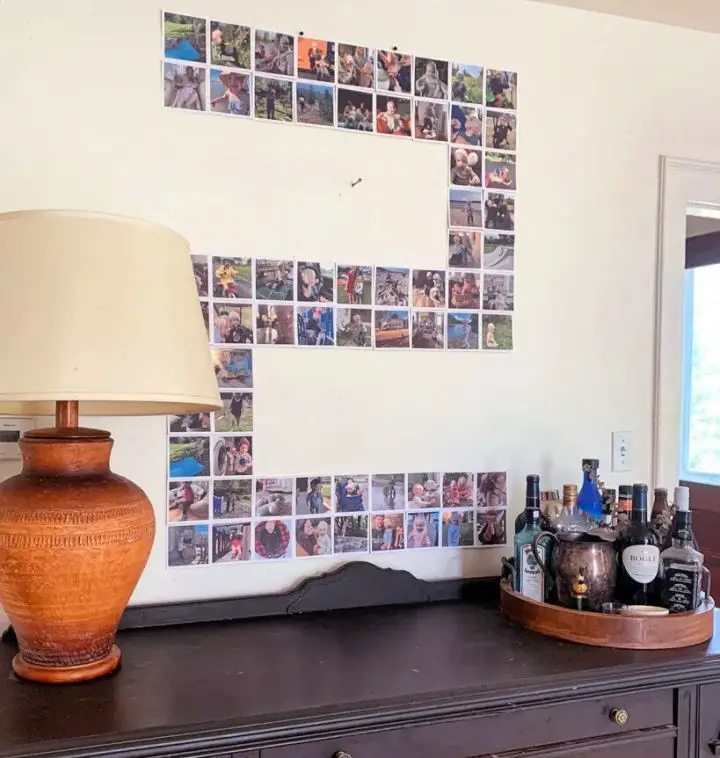
Elevate your cherished memories into a breathtaking visual display with a DIY giant number photo collage. This project is ideal for celebrating birthdays, anniversaries, and other special occasions, as it brings your digital snapshots to life using square prints arranged in a seamless creation.
This easy and affordable project requires only a few simple materials: square prints, removable mounting squares, and a dash of creativity. By following our step-by-step guide at Angie’s Roost, you’ll learn how to select, arrange, and hang your photos for a captivating wall collage that tells your unique story.
As you create this meaningful artwork, you’ll be able to capture the essence of years gone by and watch it grow with you.
Homemade Travel Photo Collage
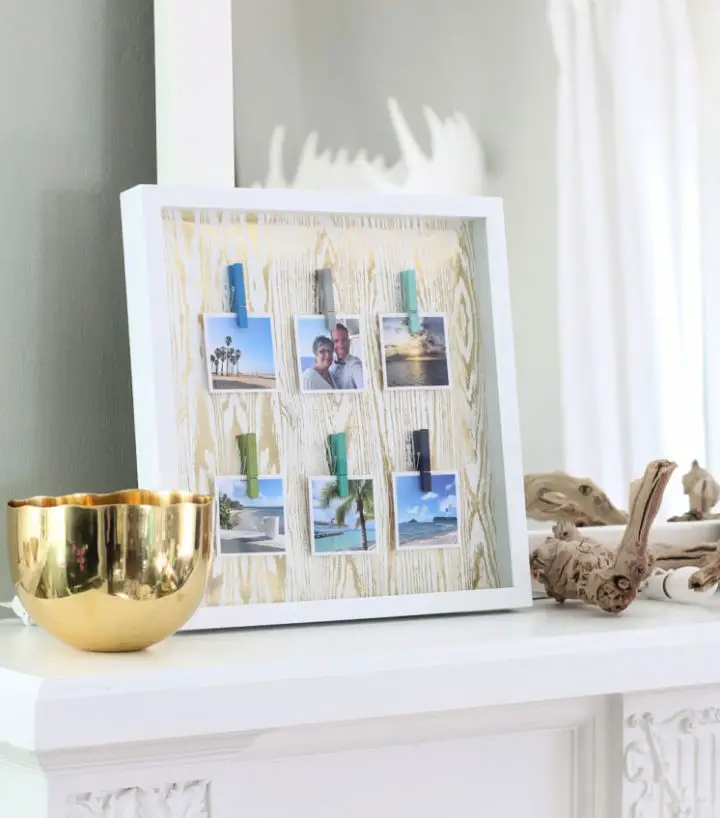
Bring your travel memories to life with a unique DIY photo collage! By combining everyday materials like shadow boxes, vibrant papers, mini clothespins, and cherished photos, you can create personalized artwork that will keep your adventures alive. With step-by-step guides for various display styles, from modern shadow box arrangements to geometric patterns, anyone can showcase their travels in a creative way. Head to Inspired by Charm for a detailed walkthrough and inspiration galore. Convert your digital memories into tangible keepsakes and relive the magic of your trips!
Make a Sewn Photo Collage

Transform ordinary photographs into an extraordinary keepsake by creating a sewn photo collage. This DIY project allows you to personalize your space with cherished memories, without requiring any specialized equipment or skills. Simply gather your favorite photos, along with some paper for planning, tape, a sewing machine, and thread. Then, follow the easy-to-follow steps from arranging your photos to sewing and removing the backing paper. For a comprehensive guide on making your own photo quilt, visit Arts, Crafts, and Cats. Once you’ve got the basics down, grab your sewing kit and let your creativity shine by crafting a unique piece that reflects your personal style.
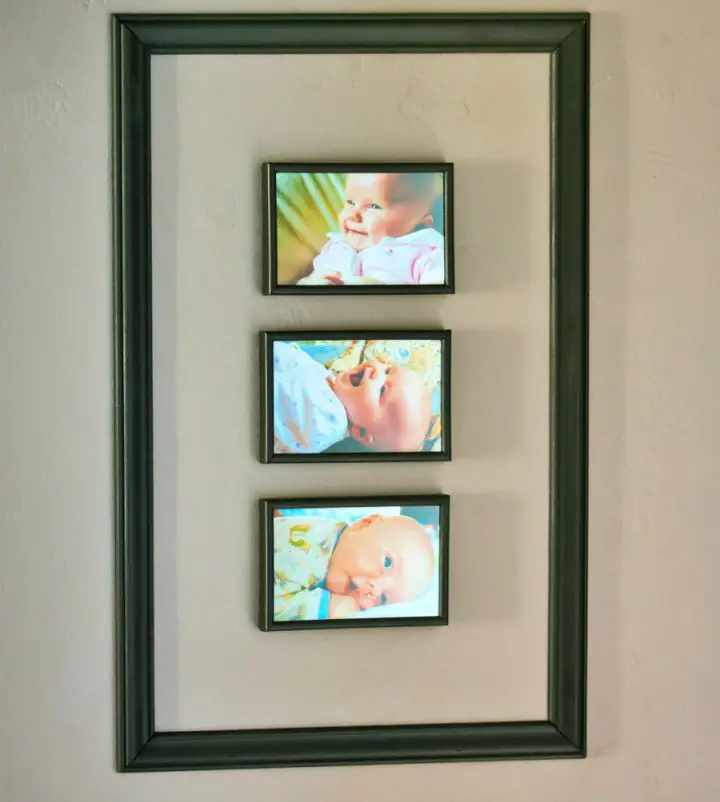
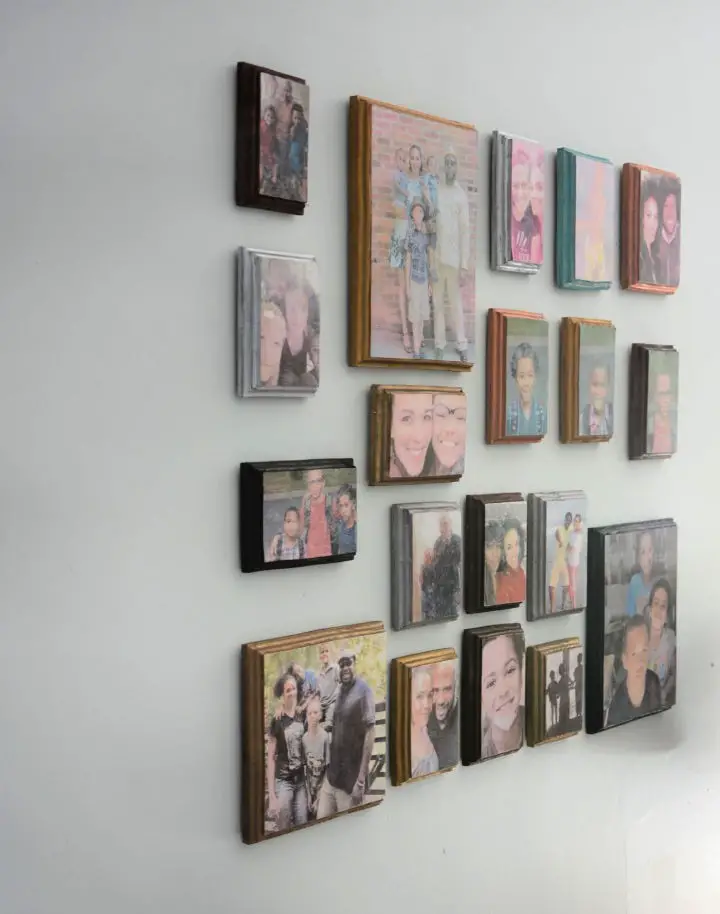
DIY Planked Photo Collage at Home

Create a captivating DIY planked photo collage with a rustic twist. This project is ideal for displaying treasured moments, such as newborn photos, in a unique and personalized way. With materials costing around $15 per unit, you can customize your collage to suit your preferred color palette and layout preferences. To bring this idea to life, start by cutting 1x3s to the desired size, then use wood glue to assemble the planks. For added durability, secure the assembly with scrap plywood. Finish off the look by applying espresso and white paint for a distressed effect. Take it up a notch by adding a frame around each photo, giving your collage an extra layer of uniqueness. This DIY project is not only easy on the wallet but also deeply personal, allowing you to bring your most cherished memories to life. For a comprehensive guide on how to achieve this look, check out Simply Beautiful by Angela.
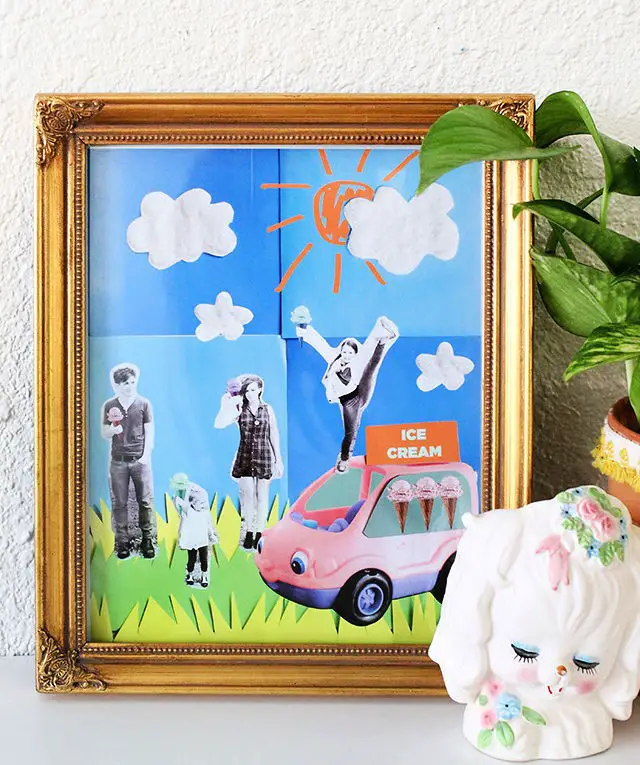
Handmade Baby Photo Collage Frame
Transform cherished baby memories into a beautiful DIY photo collage frame inspired by the endearing film ‘Storks.’ This cost-effective project from Simple Practical Beautiful allows you to create a personalized piece of decor that radiates joy and warmth, perfect for showcasing your little ones’ most unforgettable moments. With a few simple steps, you can craft a one-of-a-kind frame that will be the centerpiece of any room, keeping those precious memories front and center for all to enjoy.
Rainbow Photo Collage With Instax Square
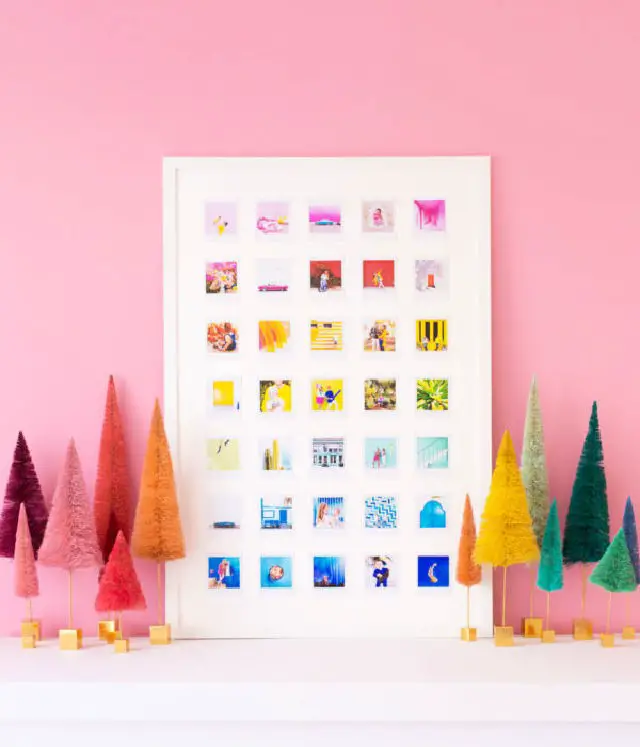
Embark on a creative adventure by crafting a vibrant rainbow photo collage, a perfect project for DIY enthusiasts. By combining the FUJIFILM Instax SQUARE SQ10 Camera and SHARE SP-3 SQ Printer, you’ll bring your colorful visions to life in just 1.5-2 hours. The end result is a stunning 24×36″ photo collage that showcases the entire spectrum of colors, making it an ideal personal keepsake or thoughtful gift. As you assemble this masterpiece, you’ll be capturing moments from throughout the year, creating a unique and personalized record of your experiences. Dive into the world of DIY and discover how to bring this creative journey to life, one Instax square at a time.
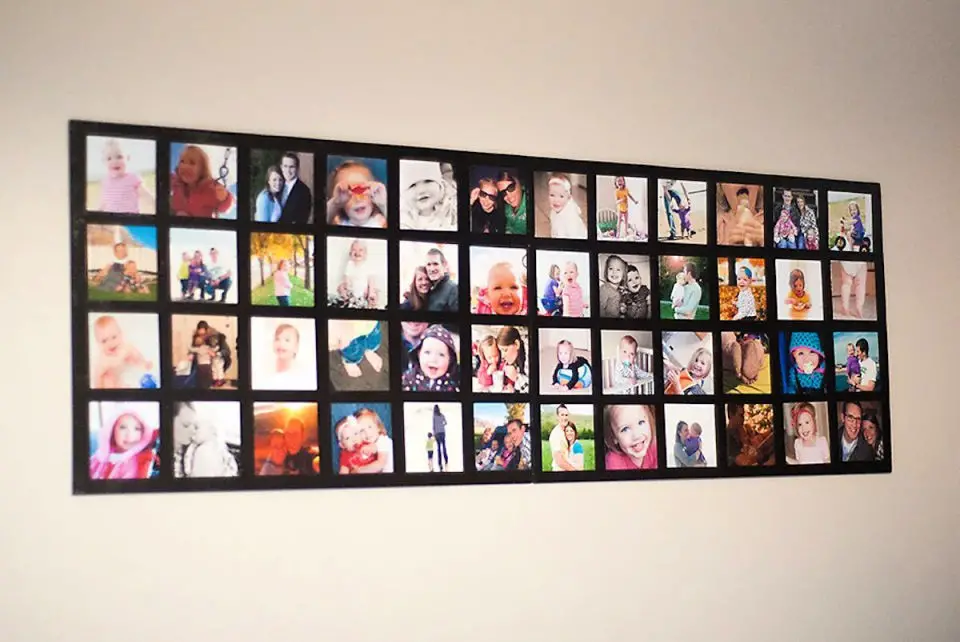
DIY Poster Board Photo Collage
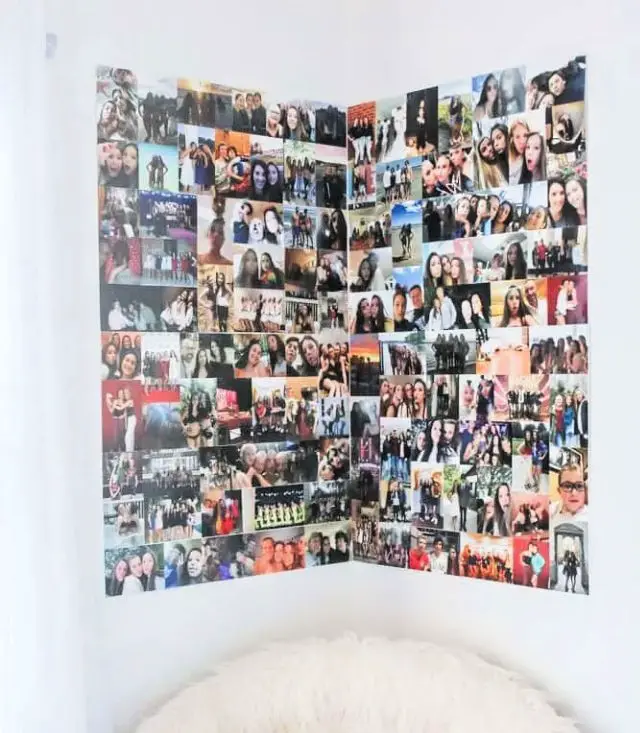
Transforming your space into a personalized haven can be achieved with a DIY poster board photo collage, ideal for teen bedrooms or college dorms. This creative project allows you to display cherished memories without damaging walls, making it an excellent alternative to traditional wall decor. With just a few simple supplies like heavyweight poster board, double-sided tape, and your favorite photos, you can create a unique piece that reflects your personality.
To hang your masterpiece, use Command strips for a damage-free setup that not only customizes your space but also keeps your walls intact. This fun and affordable project is perfect for anyone eager to add a personal touch to their room, making it an excellent activity for both kids and adults alike.
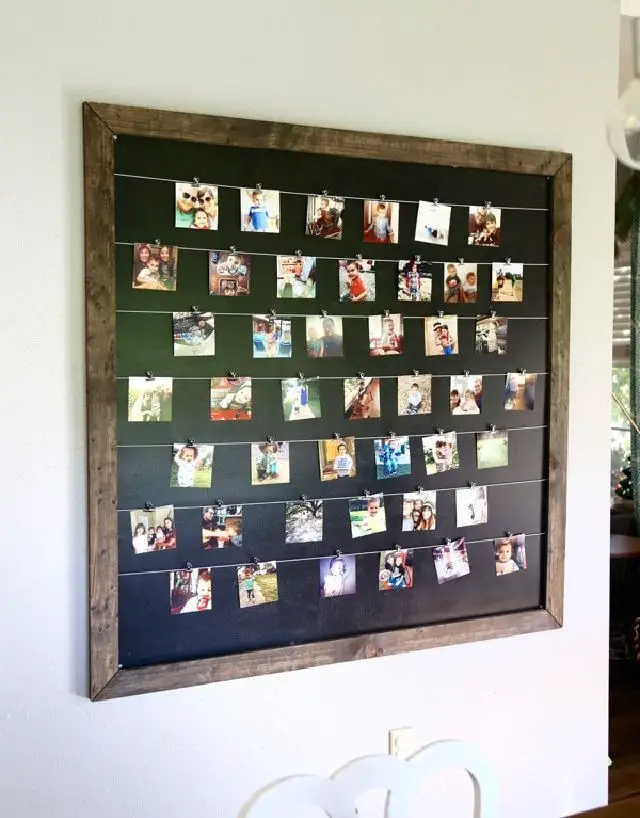
Photo Collage Memory Board Ideas
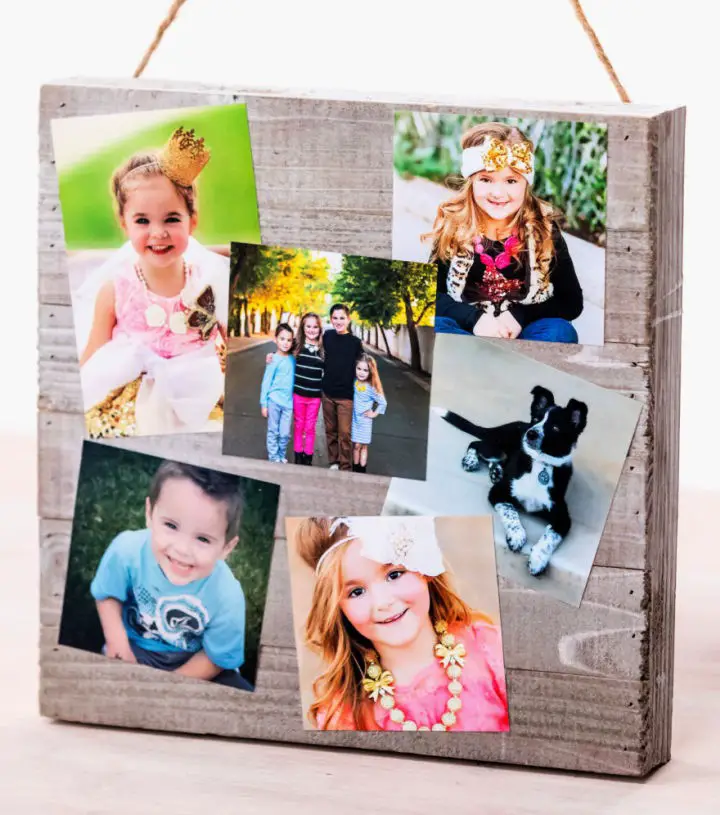
Transform ordinary moments into extraordinary keepsakes by creating a personalized DIY photo collage memory board. As a thoughtful gift or treasured memento, this project is an exercise in creativity and nostalgia. Begin with a rustic wood board that embodies the essence of current home decor trends, and add a year label to create a poignant annual tradition. To make it even more special, incorporate Mod Podge or a similar craft glue/sealant for a unique texture and finish. By combining your cherished photos with a few simple craft supplies, you’ll be able to relive fond memories and share them with loved ones. For a comprehensive guide, visit MakeItGrateful and unlock the secrets of this heartwarming project.
Simple DIY Photo Collage on Wood
Turn empty walls into a treasured gallery of memories by creating an innovative DIY photo collage on wood. If you’ve accumulated countless digital photos but lack personal touches, this project offers a creative solution. It’s an opportunity to bring your favorite moments to life using scrap wood and photo transfer medium. The journey from digital clutter to a heartwarming display is well worth the effort, even if it’s your first attempt. For a step-by-step guide on crafting this unique piece, visit Thrift Diving. Let your love story unfold on your walls!
Making a Hanging Picture Collage
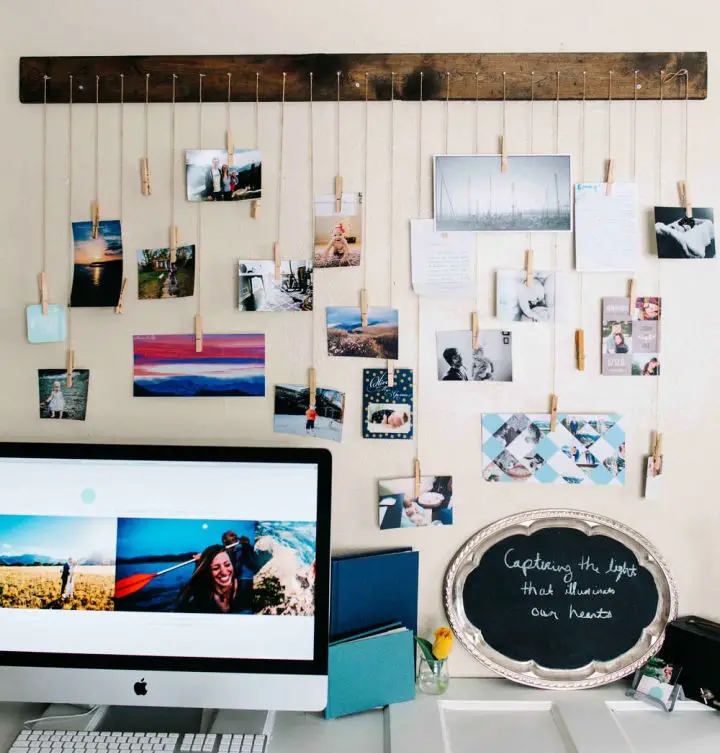
Transforming cherished memories into a creative display is just a DIY hanging picture collage away! By repurposing twine, clothespins, and a spare 2×4, you can create an engaging wall showcase that not only keeps photos out of reach from little hands but also allows for effortless updates. This budget-friendly solution is perfect for those seeking to add a personal touch to their space without sacrificing style or breaking the bank. For a step-by-step guide on bringing this unique photo collage to life, head over to Celebrate Again and get creative!
Make an Exploded Photo Collage
Unlock the creative potential within by turning cherished moments into a stunning visual representation with an exploded photo collage. Whether you’re looking to add a personal touch to your living space or simply want to celebrate special memories, this guide offers a straightforward and enjoyable journey from start to finish. By following these simple steps, you’ll transform your favorite photos into a captivating art piece that brings your memories to vivid life.
Make Your Own Family Photo Collage
Transform cherished family memories into a stunning work of art with a DIY photo collage project that’s accessible to all ages. With just a few simple materials – including family photos, patterned scrap paper, glue, and poster board – you can create a unique piece of personalized art that adds warmth and personality to any room in your home. The best part? This creative activity is as easy as it is enjoyable, with no artistic experience necessary. And for those who want to take their project to the next level, adding digital enhancements in Photoshop can be a fun and rewarding way to further customize and refine your design.
DIY Photo Banner – Step by Step Instructions
Create a cherished keepsake by crafting a personalized photo banner with a step-by-step DIY guide at Hello Little Home. This unique decor element is perfect for any occasion, from birthdays and anniversaries to everyday spaces. With this tutorial, you’ll learn how to curate, prepare, and display your favorite memories in a beautifully crafted banner that celebrates life’s special moments. Whether you’re seeking a meaningful way to commemorate a milestone or simply want to add a touch of warmth to your home, this DIY project provides the essential instructions from photo selection to final assembly. Join the creative journey and transform your celebrations with a heartwarming piece of personalized decor.
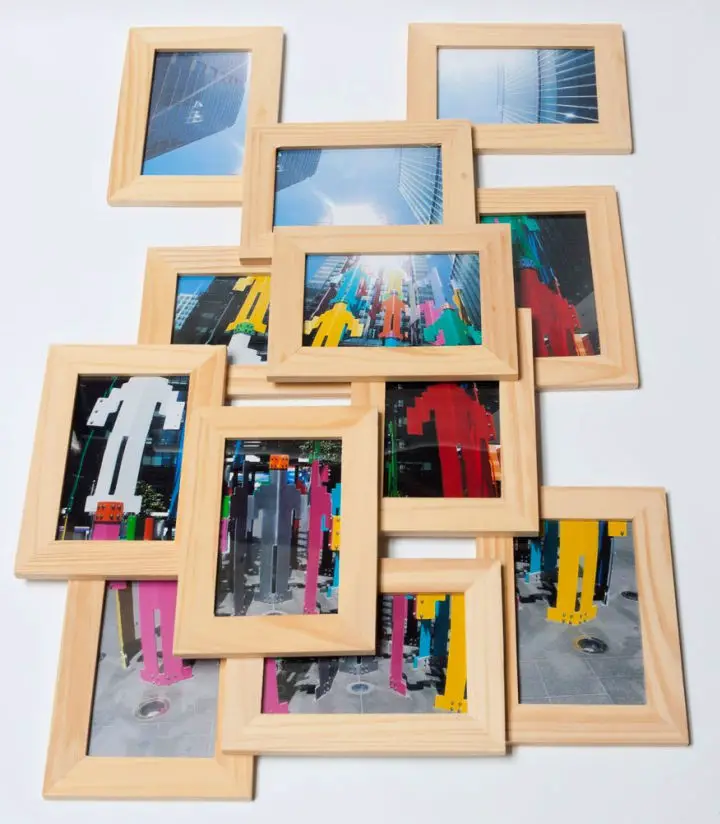
Best DIY Chicken Wire Photo Frame
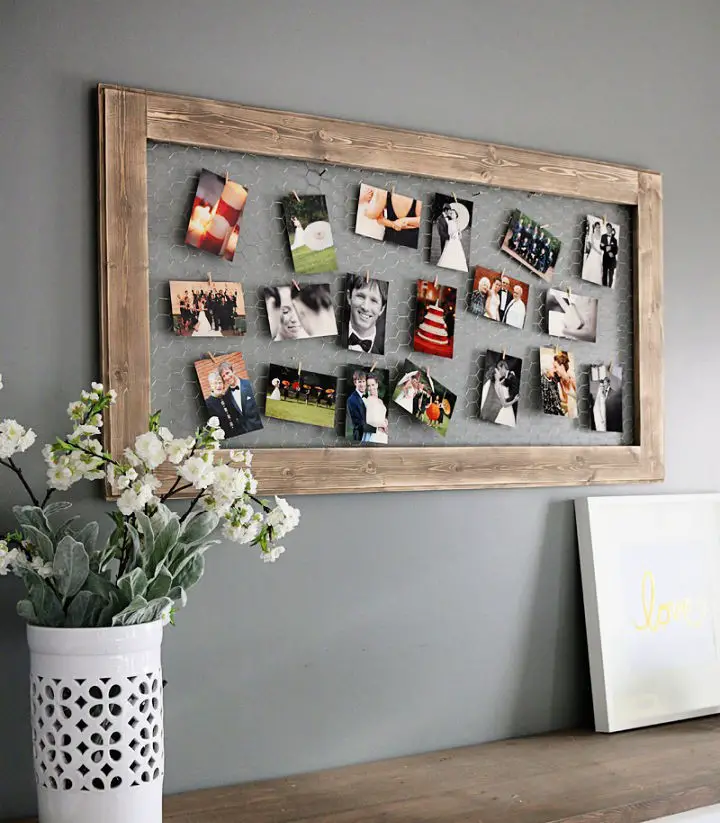
Transforming your home into a treasured space is just a DIY project away! A homemade chicken wire photo frame is the perfect way to infuse warmth and personality into any room. This creative endeavor, expertly detailed on Bower Power, takes you through the process of crafting a one-of-a-kind display for showcasing cherished memories.
By combining simple materials like 1x4s and chicken wire with your own personal touch – think staining, attaching photos with tiny clothespins, and adding that special je ne sais quoi – this project promises to bring joy and warmth to any space. Whether you’re looking to highlight special occasions or everyday moments, this engaging DIY project is sure to become a beloved focal point in your home.
How to Make Your Own Photo Display
Transform cherished family memories into a stunning focal point that celebrates your loved ones. Bring your favorite Instagram snapshots and treasured moments to life through a creative DIY photo display project, crafted from simple steps and materials. This customizable masterpiece elevates any space with personal touches, bridging the gap between digital galleries and physical representations of joyful experiences. Ideal for anyone seeking to fill their living area with warmth and nostalgia, this DIY guide ensures your most precious memories are always on display.
Mod Podge Photo Collage Clipboard for Him
Looking for a thoughtful and one-of-a-kind gift for him? Consider creating a personalized mod podge photo collage clipboard that celebrates cherished memories in a creative way. This DIY project is perfect for Father’s Day, birthdays, or simply to express gratitude, allowing you to customize a gift with photos that reflect his interests – whether it’s cars, adventures, or family moments. With a step-by-step guide available at Crafts by Amanda, making this unique and practical keepsake is easier than ever.
Make a Heart Photo Collage Display
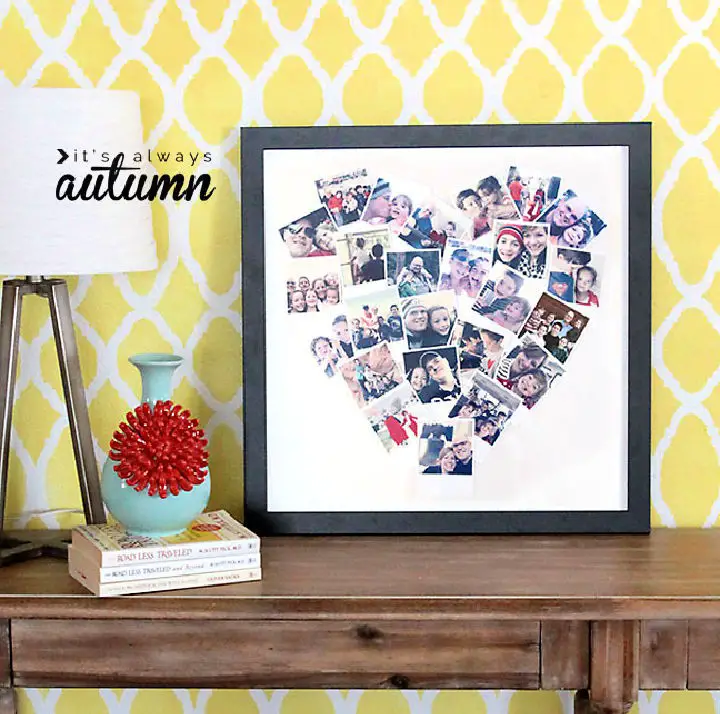
Transform cherished moments and unleash your creativity with a DIY heart-shaped photo collage! This delightful project brings together your favorite Polaroid and Instagram snapshots, creating a beautiful display of memories. The key to unifying the diverse colors lies in applying a consistent filter or Photoshop action to all your photos. For a vintage vibe, consider using 3×4 ‘Polaroid’ prints, and keep costs down by opting for affordable framing options. Start with a white poster board as the backdrop for your carefully taped heart collage, which can be completed in about half an hour. This lovely photo craft makes for a thoughtful gift or a charming addition to your own space.
How to Make Photo Collage Letters

Create a heartwarming way to display cherished memories with personalized photo collage letters. This step-by-step guide will walk you through crafting bespoke decorations using large paper mache letters, Mod Podge, and your treasured photographs. Perfect for enhancing the ambiance of family rooms or special events, this creative project allows you to infuse personal touches into your space. To get started, gather the necessary materials – paper mache letters, Mod Podge, craft paint, and a collection of cherished photos – and let your creativity shine. This meaningful project is ideal for anyone seeking to add a unique and sentimental element to their decor.
DIY String Light Photo Frame
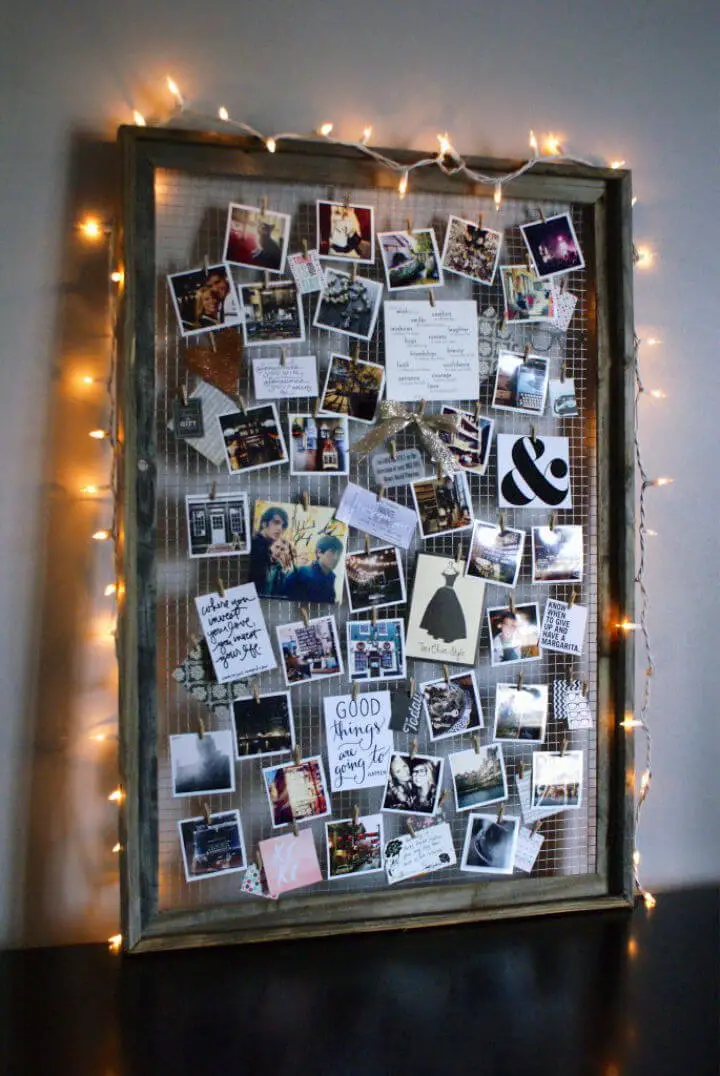
Transform your surroundings by creating a one-of-a-kind DIY mood board with The Anastasia Co.’s intuitive crafting process. By repurposing everyday materials like frames, wire, and mini clothespins, you’ll turn clutter into a curated showcase of meaningful images, quotes, and treasured keepsakes. This adaptable project is perfect for preserving vacation memories, showcasing art prints, or highlighting inspirational quotes, serving as a constant source of motivation. As an added bonus, your mood board will also serve as a stylish organizer for your jewelry, allowing you to curate a space that’s uniquely yours.
How to Make a Hula Hoop Photo Frame
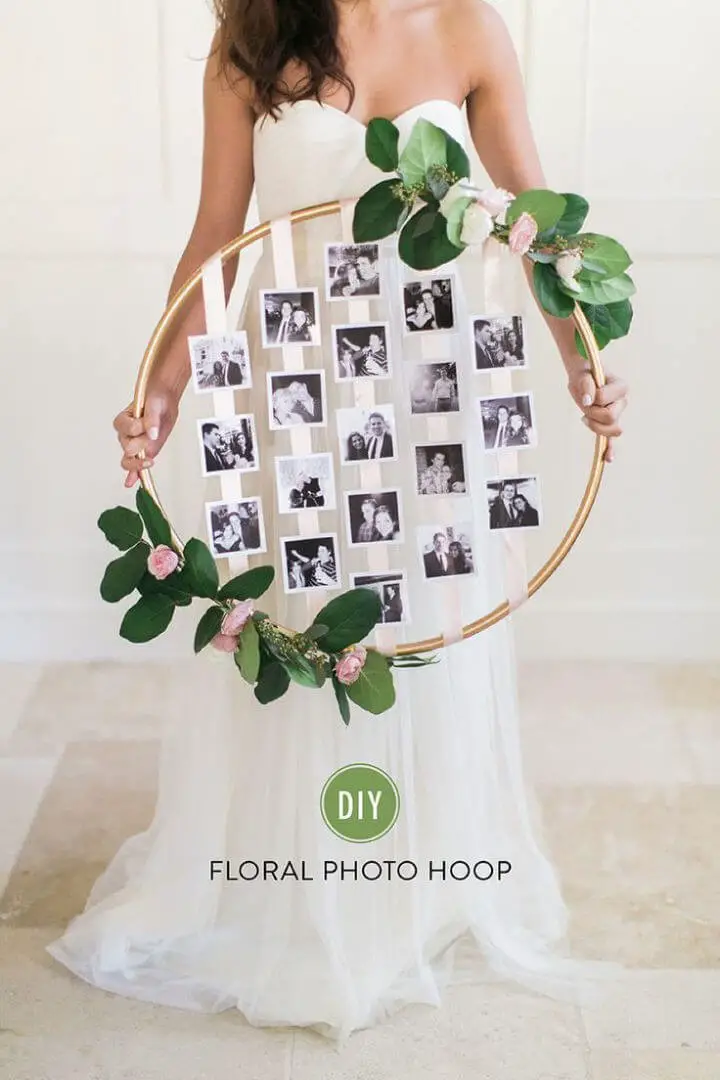
Breathe new life into cherished memories by transforming a simple hula hoop into a stunning display of photos surrounded by fresh flowers. Drawing inspiration from SMP Living and the talented Ruth Eileen photography, this DIY floral photo hoop guide is perfect for weddings, anniversaries, or adding a personalized touch to your decor. To create this one-of-a-kind piece, gather essentials like gold spray paint and satin ribbon, then get crafting to make it uniquely yours. For a step-by-step guide on how to bring this project to life, visit Style Me Pretty.
Creative Photo Collage for Birthday Party
Transform your next celebration into an unforgettable experience by crafting a DIY creative photo collage that’s as unique as it is meaningful. This budget-friendly project requires minimal materials and effort, yet yields a stunning display of memories that will be cherished for years to come.
Inspired by the creative genius at Swoodson Says, you can turn a simple piece of cardboard into a captivating visual story featuring up to 90 precious moments. Whether it’s a milestone birthday or a special occasion, this project proves that great style and personal touches don’t have to break the bank.
Easy DIY Instagram Photos Wall Art
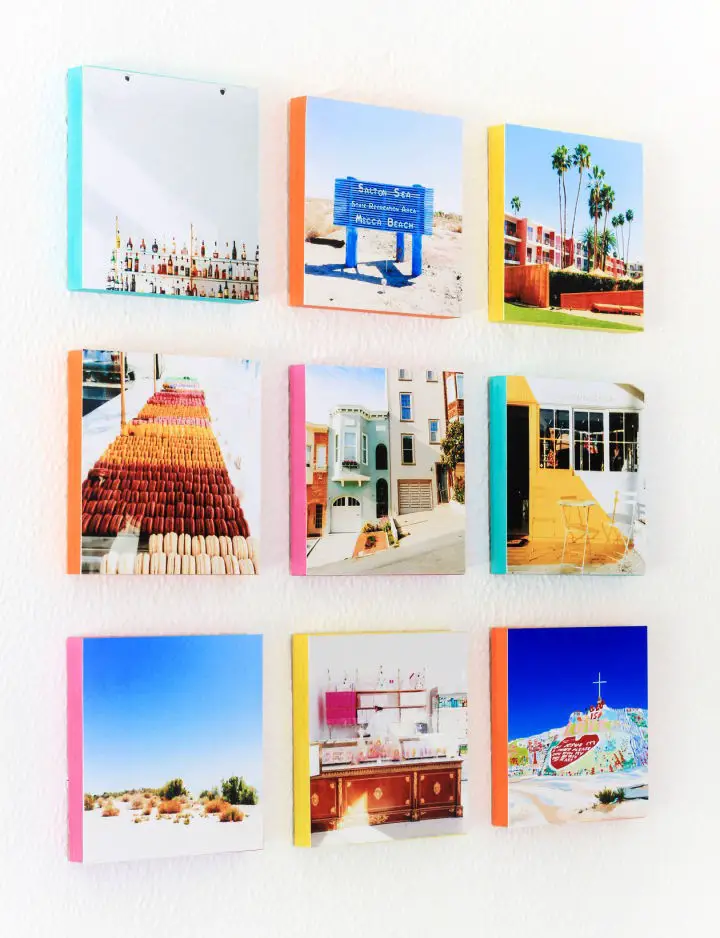
Bring your Instagram memories to life by transforming them into a unique and stylish display. In just 30 minutes and with an investment of under $30, you can add a personal touch to your space. To get started, gather your supplies: 4×4 photos, wooden blocks, paint, decoupage, brushes, and velcro strips. With this DIY project, you’ll be able to create a grid or collage of your favorite snapshots, offering a fresh take on traditional framing. Ready to bring your photo exhibit to life? Look no further than The Crafted Life for the complete guide.
How to Do You Make a Photo Collage Quilt

Transforming treasured moments into comforting mementos is a deeply satisfying experience, thanks in part to the Polkadot Chair’s concise tutorial on creating personalized photo quilts. This accessible guide helps you transform cherished memories into a cozy keepsake that can be cherished for years to come.
With this mini tutorial, you’ll gain the skills to seamlessly integrate personalized photo blocks into a quilt, combining 9-inch fabric squares with your most precious images. You’ll also learn essential tips on printing photos onto fabric and ensuring their durability, even after repeated washing.
Whether you’re looking to add a vintage touch or customize fabric colors to match a special occasion, this comprehensive guide empowers you to craft a one-of-a-kind quilt that encapsulates warmth, nostalgia, and the love you share with others.
Conclusion:
As we wrap up our exploration of 25 creative photo collage ideas and the detailed guide to help you turn these concepts into reality, I hope you’re feeling motivated to start your own DIY project. From discovering the ideal photos to learning how to preserve and protect your finished piece, we’ve covered all the essential elements to create a personalized and meaningful photo collage that showcases your cherished memories in a unique way. This endeavor not only allows you to beautifully display your treasured moments but also provides an innovative means to add a personal touch to your living space. So, gather your materials, let your imagination run wild, and get ready to craft a truly one-of-a-kind photo collage that eloquently captures the essence of your most memorable experiences.
